You must be logged in to rate content!
7 minute(s) of a 362 minute read
8-9-2015
Thought I'd do something that was pretty straight forward......not really
I got the two pull knobs that had new wires attached to them, the two inserts that were rechromed and the cable housing that I cleaned up and sprayed black.
I used the same blocks of wood that I used for the pivot rod and put the black cable housing in it. I then got the two inserts and put the over the cable housings and using a rubber mallet tapped them in place. Once done I got the pull knob wire and after running it through my gloves laced with grease I inserted it in the housing all the way through. Once done I repeated for the other assembly and then installed them in the car. I'll tighten everything up on the carburettor a bit later on.
Cheers
Ian


8/25/15
Did some work on the electricals the other day.
As my light switch was non existent, I bought an old one from the States which came with a nice chrome knob.
Connected the wires and installed it in the dash.
Also got an ignition switch ( again, mine was beyond repair ) and using a 1934 Dodge door lock escutcheon and a rubber grommet I was able to get a finished product that looks authentic. I had to make a plate that sat behind the dash so now once that part of the electrics is sorted should be ready to install. Incidently the guy who had the car before me cut off the original ignition switch bracket which I tried to remount but after the car was painted was too late once I found out where it went.
One of the pitfalls I guess of not being able to disassemble the car myself.
Anyhow, a bit more progress !


Dropped into the plater and picked these guys up. Looking a lot better than when I started......and the big holes are gone !


9/5/15
More progress.....
Painted the cover supports that go over the front bumper irons and a bracket I made up to house the flasher cam and a relay.
Found a good use for my wife's rose bushes !!!
Also got the internals of the rear tail lights sorted out. Couldn't get the internal back in at first so then I put the ending in my vice and gently squeezed them and moved the tail light housing along a bit at a time. End result was they went in and no damage to the chrome housing.
Next I might tackle the instrument panel and see how that goes.
Cheers
Ian


9/12/15
More progress,
Thought I'd tackle one of the rear tail lights today. As there wasn't any earth I made up a cable that I attached under the rear guard which is hidden. Soldered the wires and used heat shrink to protect the joins. Using the new screws mounted the housing and then reinserted a reflective lens that I modified from an outdoor spotlight previously. Overall happy with the result, so I might try the other side next.
Tomorrow, I'm off to an American Motoring Show at Flemington Racecourse ( where they hold the Melbourne Cup horse race ) and weather is suppose to be exceptional so looking forward to that.
Cheers
Ian


9/16/15
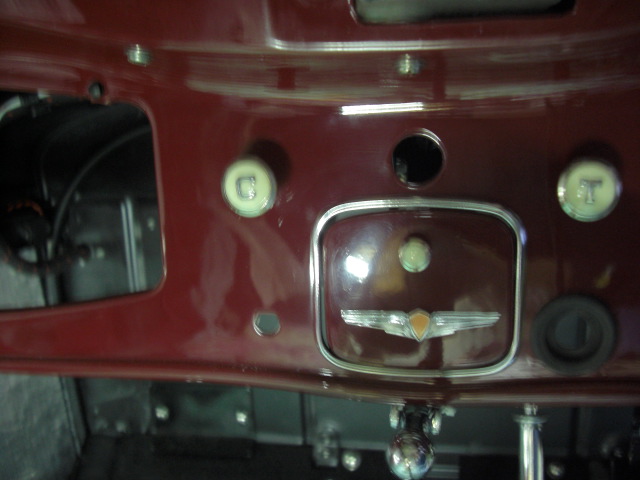
Spend a few hours today having a go at fitting the instrument panel. When I started I thought I may have had to have done this before the choke and throttle cable went in but getting it on its side and between the cables and steering column I was able to gently push it in place and it fitted first go. Tightened the screws and removed the low adhesion tape and another job done ! Finally something that didn't have to be modified, bent, scraped or drilled out.


9/18/15
A bit more work done. I tackled the other side rear tail light housing and the fit was better than the other side I did previously. I also wired up the dome light wire and instrument panel wire. Next I'll do the ignition switch etc, then I'll move on the the horn wiring. I may not install the actual horn trumpets until I get the car back from the upholsterer.
Cheers
Ian


Great build what a beauty! Fun family picture BTW
Posted by Diggymart on 1/31/19 @ 4:17:12 PM