You must be logged in to rate content!
11 minute(s) of a 362 minute read
3-30-2014
Hey all,
Continued on today and dismantles the sun visors and all its components. I'll get all the gunge off them and hand sand each piece and then replated.
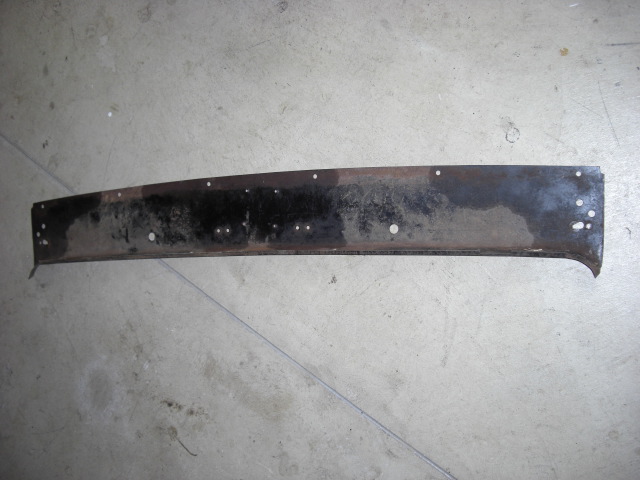
I also put some shots of my damaged Cowl Vent handle and had metal fatigue. I had 2 little plates made up the shape I needed and when together should give it the strength it needs so pretty happy with the result.
Cheers
Ian


Oh yeah, also ran the speedo cable I had made 12 years ago....Fitted perfectly and the grease in it hasn't budged !!!


4/5/14
Hi all,
The Dodge Plate sure looks a lot better once done, thanks for the resto idea.
I cleaned up the side parts that sit beside the toe board that the side upholstery panels sit in. This isn't a dodgey paint job but rather the rust pitting once there were blasted. They are still in reasonable condition so decided to keep and use them.
Also finished the front floor timber panel. When I did a trial fit it was slightly out so if I widen two of the holes it should sit properly. I attached weather proof felt around the outsides and because there is a bigger gap on the long side I used some left over bonnet cord which actually looks really good once in.
I also posted a few photos of the pedal arrangement for the RHD cars. In the last photo you can just see the rod where the top of the accelerator pedal joins to.
Cheers
Ian


4/6/14
Okey Dokey another update.
Finished the floor, toe board and the two upholstery panel side parts and installed all of them today. Its actually nice to be able to move around inside the car without falling through the holes.
I am missing one small metal thread only because when I was doing it up I dropped it and it slid into a totally inaccessible spot so I'll have to get a few more tomorrow.
Other than that another job off the list.
Cheers
Ian


4/17/14
Still plodding along.
Picked up the garnish moldings from the blaster and he's done a great job again. Dropped them into my painter and will shoot a grey acrylic primer on them then off to the woodgrain guy.
Also been filing back the sun visor brackets to get them ready for plating. Fiddly job this one. Still sanding back the front windscreen frame. They are getting there but slow process to get them pitting free !
Cheers
Ian


4/21/14
Hey all.
Made up two new pieces of wood that sit under the seat supports. One of mine was missing and the other had a crack in it so I used a piece of good ole Aussie Hardwood.
Sorted out the seat runners that I cleaned up and painted. Stripped back and etch primed the rear seat hinges and stay. Painted the hinges black and installed in the car to get them off the shelf.
Cheers
Ian


4/30/14
Hey all,
Cleaned up the horn workings. A resident electronic genius at work tested them and replaced Capacitors on both of them. A few more bits to clean up on the horns and the body can be reassembled.
Also mounted a steering column cover plate ( I think its in right ), then the rubber grommet, checked the dimmer switch and cleaned that up too. I kept dropping screws between the body frame and the inner cowl so instead of using my daughters skinny fingers I made up a rubber block that fitted nicely in the gap.
Cheers
Ian


5/3/14
You know I struggled with that collar for ages trying to work it out. If I put it up the other way around there is a big gap between the two pedals. Hopefully someone on the forum will have a clear pic for us. I tried the rubber steering shaft thing under it and it didn't sit down at all. I'll email Ken Sobel and see if he can shoot me a photo. I agree with you, it just doesn't look right. If I get a photo I'll post it here.
My seat runners had the remains of black paint on them and a bit of rust. I just cleaned them up and painted them which I thought was how they came but perhaps being under the seat they didn't bother.
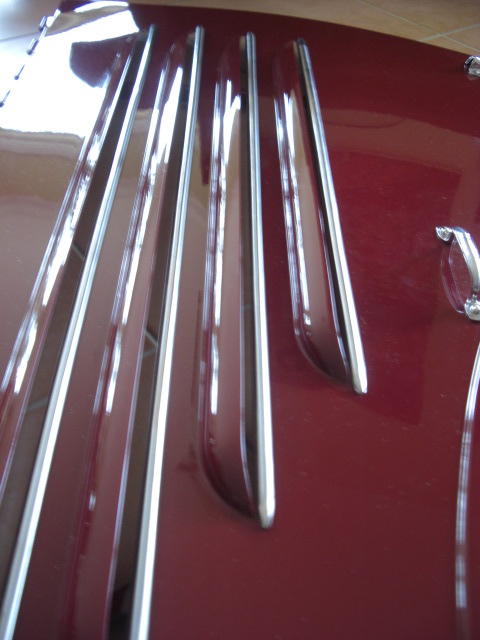
I've also started to fit my finished pieces to the bonnet sides. The stainless steel vent trim pieces are tricky to get in place. I'm having a few problems with the other side as two of the mounting clips are missing and I'm trying to make two and get them in place without completely stuffing the trim piece up. I also picked up the garnish mouldings from the painter so now its off to the wood grain guy. My windscreen guy dropped in the other day. I couldn't find any rear 1/4 wind out window rubbers. The originals were vulcanised to a metal fram. One side of mine appeared to be brass and the other steel. The steel side had rusted and the rubber completely perished. The guy who made my new glass took both away ( nervous about doing that as I can't replace them ) and said he made up a wooden frame and coated it with beeswax. He then injected Polyeurathane into it let sit for 5 days. He pulled the mould apart and cleaned it up as good as he could and the result is in the pictures. The one on the left is the original. Considering that I didn't have anything on the right one to start with it came out pretty darn good. I just hope the window fits. He said if I wanted to he could come back and "adjust" it if need be. I'm just happy to have it back. I've been looking on the internet for these and they are either rotten or are on good cars so happy with that one !
Cheers
Ian


5/5/14
Not really a Dodge but thought you might be interested.
When I dropped into the painter he was working on this 1928 Rolls Royce. Have a look at the bolts on the diff. The front spring are also covered in this material and the grease pumped into them.
This was stripped and made into a ute for the war then given back to the owner with the ute body still on it. After 3 other owners it made its way back to the original family ( just by chance ) and there it will stay.
Also note the horn. I originally didn't have horns for my Dodge and bought 2 from different vendors at a Swap Meet. Look familiar ??? The owner of the Rolls is going to have a look at them but one has an identical mounting bracket as that on the Rolls.


Great build what a beauty! Fun family picture BTW
Posted by Diggymart on 1/31/19 @ 4:17:12 PM