You must be logged in to rate content!
8 minute(s) of a 362 minute read
9-11-2013
Take two....I hope this gets posted this time but I'm getting these Dodgey messages each time I go into a posting on the forum.....hmmmm wait and see.
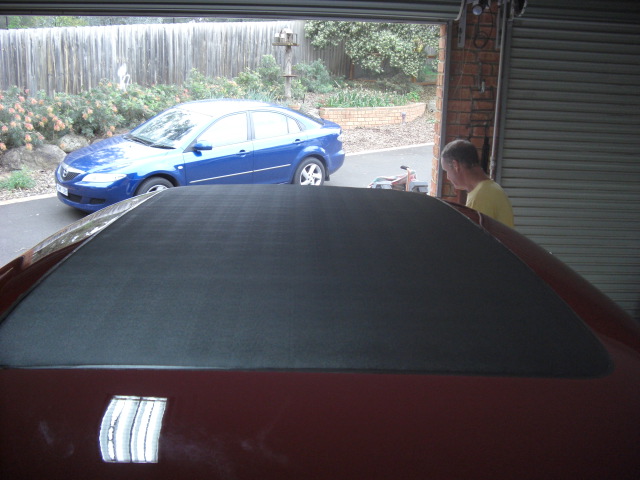
Anyhow, I've inserted the roof in the opening and the following hopefully will explain how I did it without completely stuffing it up !
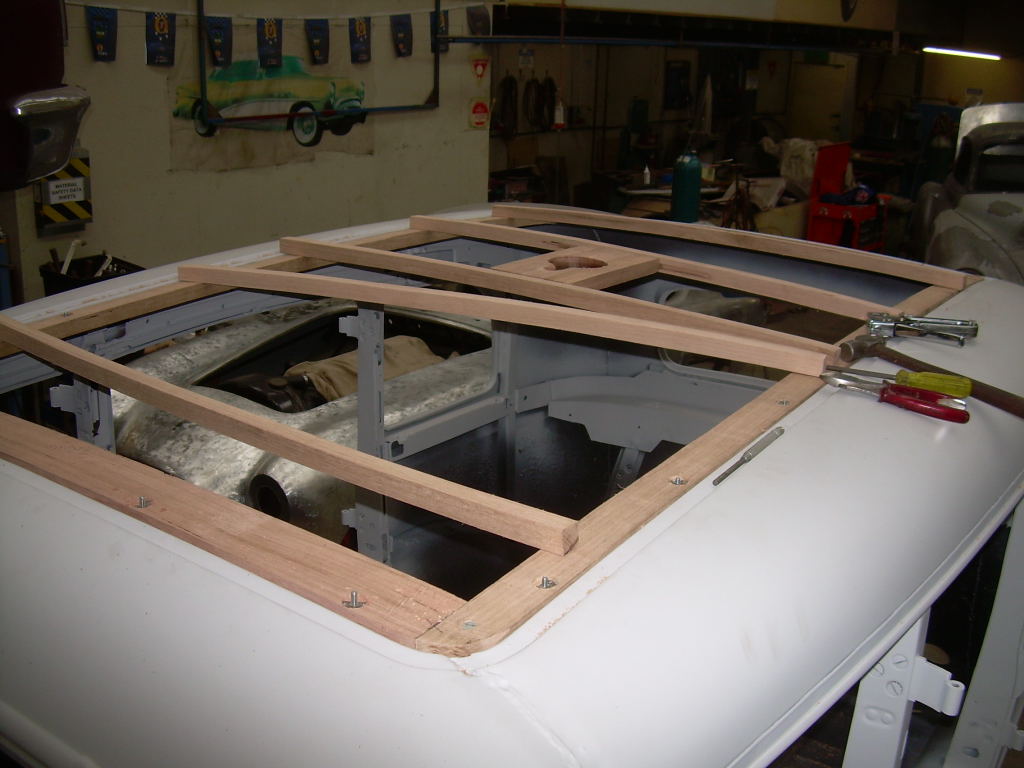
When I bought the car there were only 3 timber bows left of which 2 were broken. I spoke the the guy who did my body work and he set about making a new insert for me.
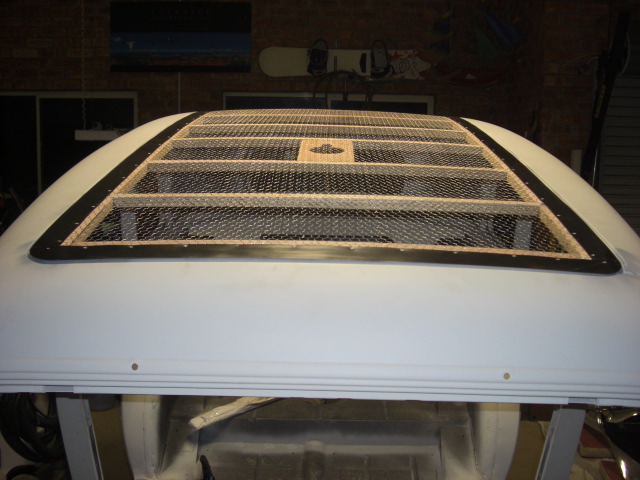
Did an absolutely fantastic job. Once completed I took to the upholsterer and he covered it with a cloth, foam and then the black finishing material. To check I set it in the roof opening and then removed and made a few minor adjustments as one part was sitting a fraction too high.
Ian


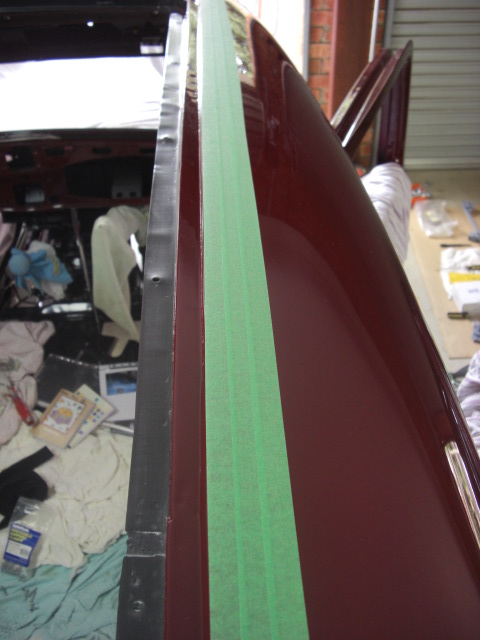
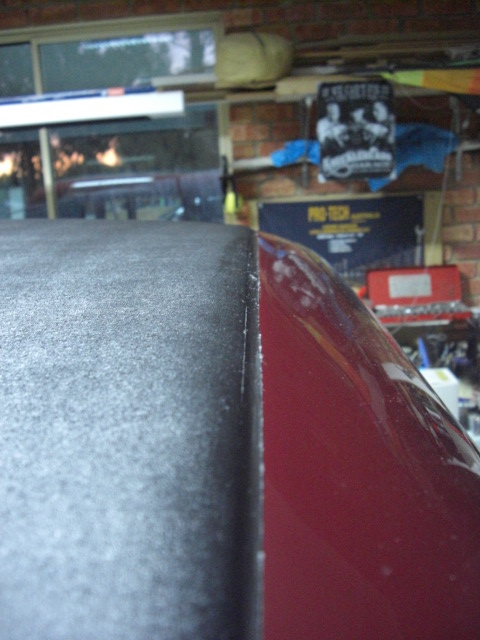
Ok, so now the roof insert fits, I removed it from the car and ran three lines of green ( low stick ) masking tape along both the roof insert and the opening in the body. Once this was done and we ( my brother and I ) were happy with the result I ran three runs of Butyl Mastic ( like liquid Dum Dum ) along the three ridges in the roof opening. This was to give it a chance of having a three layer protection from getting any leaks. Once this was completed we made sure the screw ( metal thread ) holes aligned up. WE put the metalthreads on the holes and hand tightened them until it started to exert some force on them. We started from one side and tightened them until we got around to the opposite side and all screws were tight. There is always one that doesn't want to go in !!!
Ian


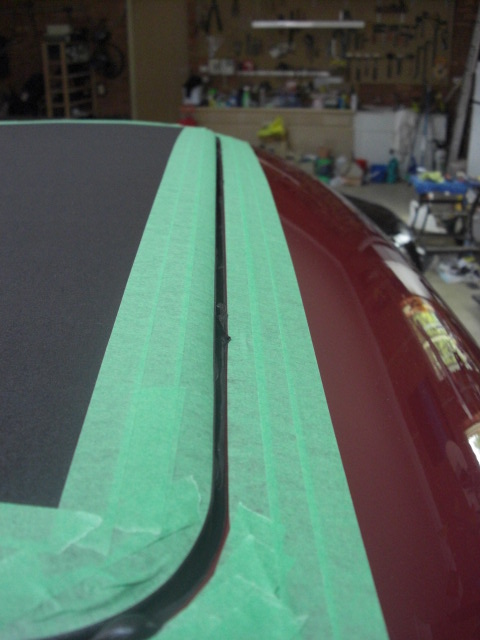


To fill in any gaps that still may exist, I applied another run if Butyl Mastic and flattened it down with a cloth with some Kerosene on it. It was then a continuous job of getting the excess Butyl Mastic off the area. This stuff sticks like poo to a blanket ! blah.
Anywho, once we got the excess removed the masking tape was removed slowly after a hour or so as the skin had started to form. These was a few imperfections that needed attention so a bit more gentle wiping I was able to get that sorted out. When finished I left it for two days and then I had to find something that was softer than a cloth but was still had enough that didn't fall apart. I rembered my daughters use these pads for removing makeup. Armed with a few of these I again put some kerosene on them and very gently wiped any excess away. A bit of the cotton came off but this will clean off once completely dry. I think it came up looking ok and I really dont want to do this again !
Cheers
Ian


9/12/13
Hi guys and thanks for the comments, much appreciated.
The green tape only ran around the rim of both the insert and the opening and not wrapped over the edge. This made for a better line to work to. If I was doing this again I would have put less Mastic on the second time around as the bulk of this had to be removed. When I wiped the excess off I tried to get back to a little of the painted surface along side the masking tape. This way I knew that was where I had to stop wiping. Pulling the tape off required two people. One to pull it off ( almost on an angle back on itself ) so it didn't lift any mastic that was caught up, and the other to hold the tape off the roof coz this stuff gets everywhere.
I used a local brand...Selleys D-Mastic ( pic attached )
I also made a little template for a heat shield for the fuel pump. My fuel pump has 3 "posts" so I gave this to my metal guy and he made it up from stainless. I polished it up and it fitted without adjustment...that has to be a first.
I've also started on the bonnet lacing.
Tip of the day....
IF YOU ARE RESTORING A CAR, FIT THE BONNET LACING TO THE RADIATOR SURROUND BEFORE THE RADIATOR GOES IN AND YOU BOLT EVERYTHING UP. I think I'm becoming a contorsionist !
Cheers
Ian


9/16/13
This is what I was looking for.This is a moulding used for the Chrysler brands ( could be for other years too but not sure ). Unfortunately as I didn't pull my car apart and there was not much left of the roof, once I had the roof made this moulding was too big to fit so I had no choice but to use the Butyl Mastic method. This would have provided a cleaner edge.
This is the web address of the supplier and I've tried to take a few shots of the moulding. They still have stock of it
http://www.scottsoldautorubber.com.au/
Ian


Great build what a beauty! Fun family picture BTW
Posted by Diggymart on 1/31/19 @ 4:17:12 PM