You must be logged in to rate content!
9 minute(s) of a 362 minute read
7-1-2013
I've often wondered if I should have started a thread under "Our restoration projects " or stick to the casual update.
After 10 odd years and countless distractions the Dodge if finally getting there.
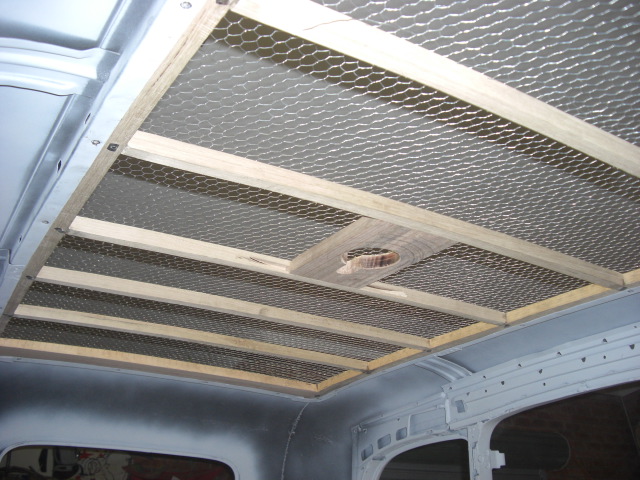
I've just had the roof insert rebuilt and on Thursday she's going to the painter so I'm looking forward to that day !
A few pics are attached.
Cheers
Ian


Hi guys,
Ross - Don't laugh but my kids make a similar comment about a chicken coop ( we have chooks at home ). Click on my name next to my post and it will take you to my album and you'll see the pick of when it was on the trailer when I bought it. ( well one of the trailers anyway ).
MikeC5 - Bob is correct - Burlap or some sort of felt then leatherette. What I'm aiming to do is insert micro speakers inside the roof where you wont even know they will be there as they will be hidden by the roof lining, and run some wires back to a hidden USB plug. I can then plug my ipod into it and listen to some nice music while I'm working on her.
Sealing the insert once the material has covered it will be an interesting exercise. 3M Stripcalk or Bostic 5651 Butyl Mastic is what I have been recommended to use. A lot of the Australian 34's ( correct me if I'm wrong ) have a metal dress trim that sits on top of the roof to hold the inseert in place and seals the gap between the body and insert. Mine ( being an American Import ) had just the insert and once covered you apply the calking compound inside the roof channel, sit the insert into it then from inside the car you screw the insert down and this seals the insert to the body. I've attached a few pics one of a roof like mine and the other of ( dare I say it ) a 34 Ford with a dress trim. I couldn't find any pics of a 34 Dodge Aussie body roof.


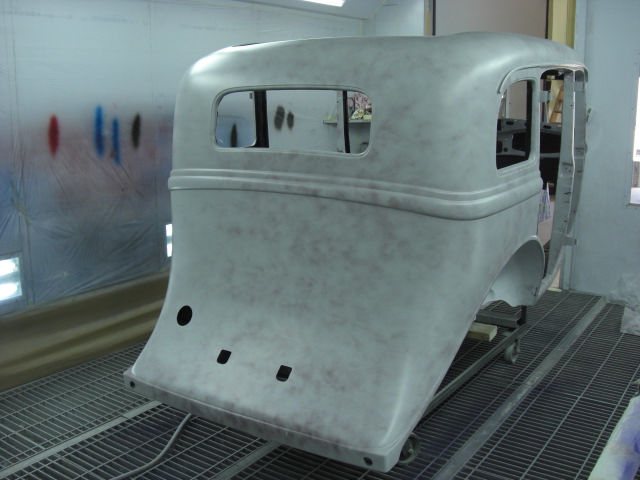
Your right about the heavier guage steel and the quality of the metal. When I hand stripped back the doors, all four had no rust whatsoever in them. There was a bit in the rear wheel arches and the base of the front cowl but apart from that not a huge amount. Most of the damage on my car was the rear "dove tail". This was caused by some prawn years ago reversing into anything they could find. I dont know if you can make the damage out in the photo but the rear section from one side to the other had to be remade. It came up pretty good and has either been steel repaired or lead wiped.....no bog !
7/2/12
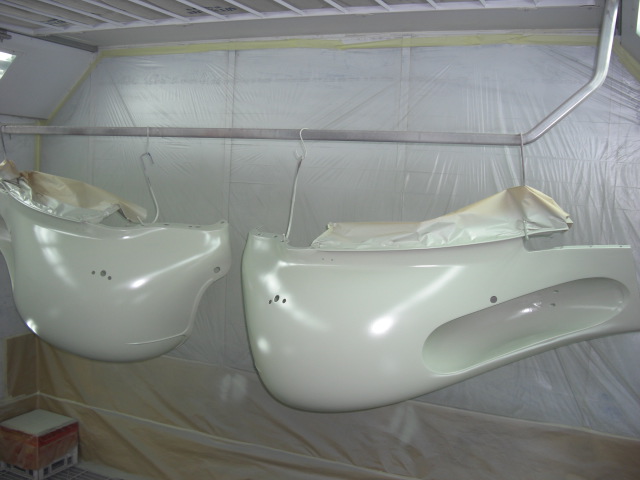
Finally the Dodge is loaded up and off to "Dave" the painter. If you check under "our restoration projects" and look at the posts by OLDCAR you'll see he also refers to Dave the painter. Hopefully my job will turn out the same quality as Bernies. Interesting I also own a 1998 Chrysler Voyager ( Dodge Caravan I think for my friends in the States ). Once I took the seats out I fitted in the entire Dodge - 4 doors, 4 guards, 4 bonnet pieces, front cowl, 2 valance panels, steering tude, glove box, cowl vent, 6 rims, luggage rack, 4 spare wheel covers, tail light brackets and a box of sundry other parts. No bad packing if I say so myself. I even took a few shots.
I've also attached a shot of the new bonnet hinge and panels to check alignment. All that is required is to trim the hingge to the correct length.
Also people have wondered why its taken me 10+ years to get this far with my restoration. Buying a business and running it for 11 years ( with my wife and we are still married ! ), raising 3 children ( two still at college ), having a stroke and losing 2 years of savings and now finally landscaping my front yard ( see attached pics ) monetary wise does drain the funds a bit and I still have to juggle my time between family, friends, house and Dodge. After my stroke ( about 95% better now ) I don't have the ability to do the fine repair work so I try and get done what I can't do myslef but still try and do as much as I can. So there ya go the life and times of a restorer. I guess there are a lot of us out there in the same situation. My philiosphy is if I restore an old car I'm restoring a little piece of history and hopefully the original builders would be proud of my efforts.
I'll keep posting pics once she's painted.
Cheers
Ian


7/26/12
Hi guys,
Just a quick update,
The Dodge is being prepped for painting and is looking good.
Dave is doing a great job so far and am looking forward to the end result.
I'll post pics as thing progress.
Cheers
Ian


Hi Guys,
The original colour was Empire Maroon and there were different options available i.e. black guards, body colour on the wheels or black wheels etc... even the stripe could have either been Packard Ivory or Silver Bronze. I am going for a Maroon but perhaps a little richer ( almost like a Red Wine in a glass ). The guards will be black and I'm tossing up with the stripe. I've seen Dodges with pinstriping above and below the the main line through the body and I've seen them with the entire main line painted which does look smart I must admit. Heres a few pics to show you what I mean. The first is a Richards Body and the car is in South Australia. See the wide stripe. The second is Ken Sobels car in the USA and he has the pinstriping. I'm still thinking about the pin striping whether if it detracts from the natural curves of the body or enhances it. A single stripe as in the first two pics is clean and neat and on a darker colour car may be enough.


9/1/12
Just a bit of an update. The radiator surround has been painted as well as the steering tube. The interior has also been painted with a sound deadening paint. Next week he'll rub back the body again and get it ready for base coats.


The first large hole at the front under the instrument panel has the metal toe board and this is joined to a wooden floor insert. The second hole ( on its own ) is covered in by a second floor board. I've attached a picture of the original floor board and I'm currently working on a new one. It does have a cut out for the battery but no and a set of holes on each side there the front seatmounts to. This is the original floor insert. There is also one more piece but thats at the rear of the car for a "shelf" behind the rear seat.

Great build what a beauty! Fun family picture BTW
Posted by Diggymart on 1/31/19 @ 4:17:12 PM