You must be logged in to rate content!
7 minute(s) of a 362 minute read
4-28-2013
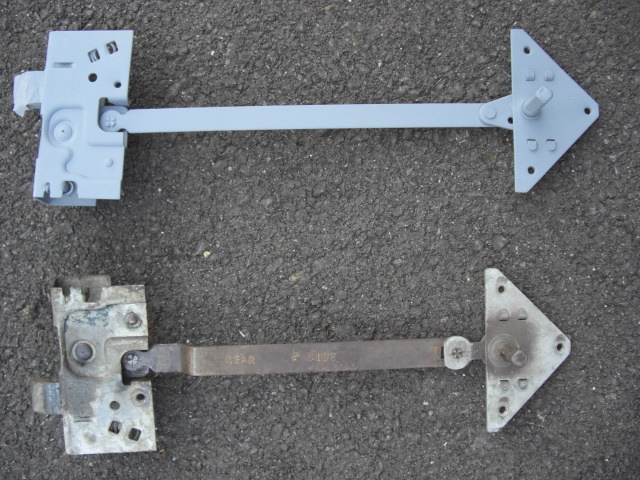
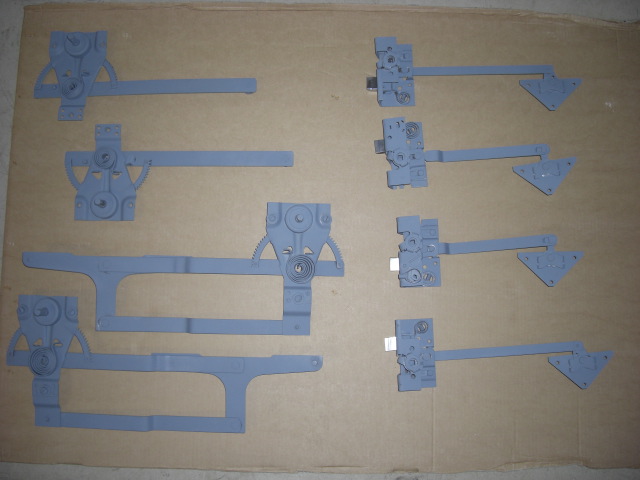
Cleaned up the door plates and started on the window winder mechanisms. I thought that cleaning all the muck off them I could see any damage and potentially reapir any broken parts that I could see. I also check the operation of each component. So far so good and they all have been in good working order. There was one sign of a welded repair but looks to be good.
Cheers
Ian


5/6/13
All finished the door lock and window winder mechanisms. Just received a little box of those hard to get metal threads etc... from the Restoration Supply Company. Very prompt and fast service as a lot of they're bits are difficult to get in Australia. Postage only took about 4 days too ! I pulled the front windows out from under the bench too so I'm starting to clean those up as well. They will need replating so I'll have to strip them down.Spoke to Tony ( in Aus ) and he's given me a contact to get the glass remade. All I have to do is work out how to get the glass out of the existing channels without having a coronary !!
Ian


5/6/13
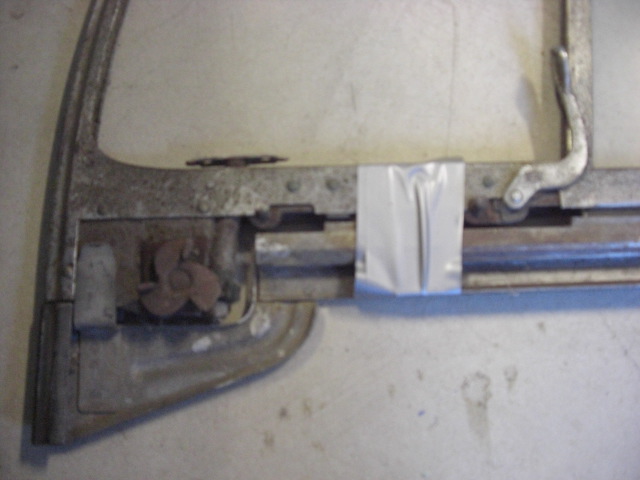
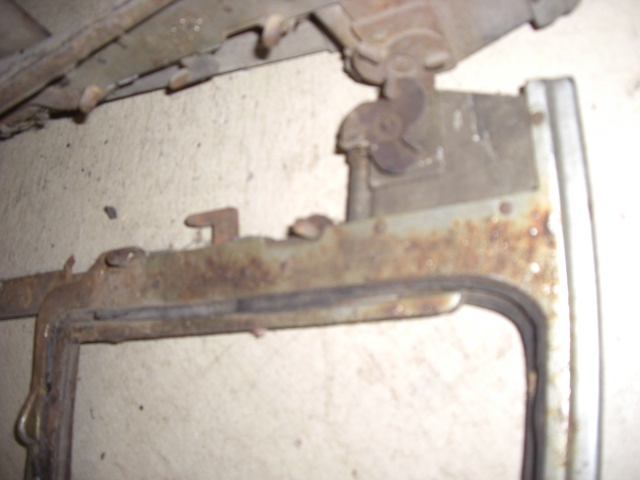
Definitely plated. I have a second pair ( very rusty ) that I could potentially use for spares and both sets were plated. The whole frame gets plated except for the lower part in the third and fourth picture ( held together by the duct tape ). I've attached a few closeup and you can see the rust in the first photo. The last photo you can see the two spare upper frames and the complete frame with the lower carrier.
Cheers
Ian


5/9/13
Hi everyone,
Just finished cleaning up one of the side windows frame assemblies. There is a top and bottom assembly. The bottom one has the main window glass in it.
I've attached three photos which show the movememt of the main lever. When the lever is moved forwards at catch lockes the top and bottom window frames in place so the whole thing can be lowered. When the lever is moved back, only the main window can be lowered. This enables the 1/4 vent window to remain open.
The mechanism has two safety catches in place so no damage to the window will occur.
First, the 1/4 vent window must be closed. When closed ( see the fourth picture ) this little spring loaded catch pushes down and releases the first safety catch.
Second, the main window has to be wound up. In the fifth photo, you will see a square piece of metal sticking up on the lower frame. When the window is wound all the way up, this metal tag pushes another spring loaded catch and releases the second safety catch. This then enables the whole frame ( window and 1/4 vent window to be lowered as one piece ).
At the other end of the window frame is a thumb tab. I guess this was used in case the mechanism became stiff and this would give a little extra force to move the main lever.
Anyhow just thought I'd share what I found.
Cheers
Ian


5/11/13
Got up enough courage to stamp the serial number on a ID Plate I bought from the US, which turned out ok. So I mounted it on the door pillar. Also stamped the Body Number on its tag and mounted that too.
Finally worked out how to mount the accelerator linkage. Being a right hand drive the linkage attaches under the right side toe board support.
Another few small things off the list.
Cheers
Ian


5/28/13
I'm still working away on bits and pieces. The first pic shows the extreme inside rear of the car and the two luggage rack supports poking through the body. Question is did they have some sort of grommet. I would assume they would have but am not 100% sure. If anyone has some pics it would be helpful.
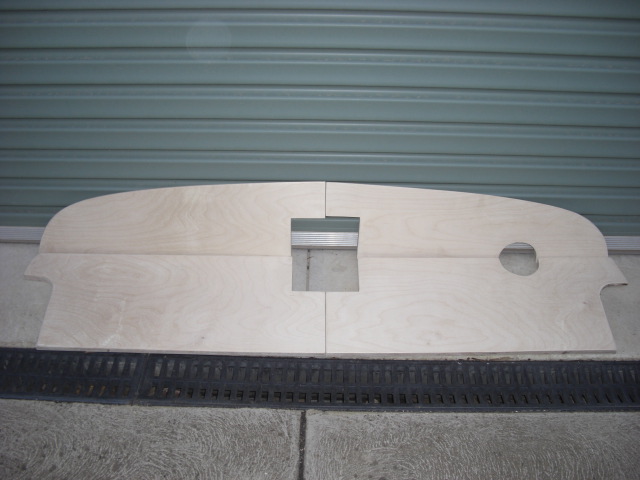
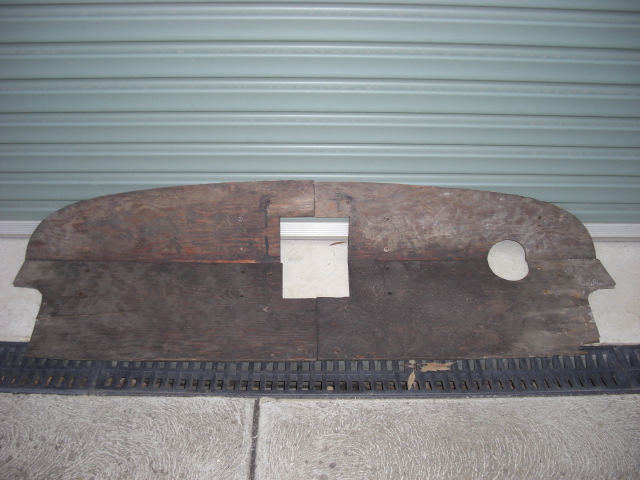
I've also started on the wooden boot space pieces. You can see the hole on the right where the fuel filler passes under and I guess the square hole in the middle is an inspection hole. I have a metal plate that covers this. Next have to finish the wood, coat the bottom and varnish the top and finally install it. I may put some sound deadening material down first.
Cheers
Ian

Great build what a beauty! Fun family picture BTW
Posted by Diggymart on 1/31/19 @ 4:17:12 PM