You must be logged in to rate content!
10 minute(s) of a 377 minute read
2-2-2010
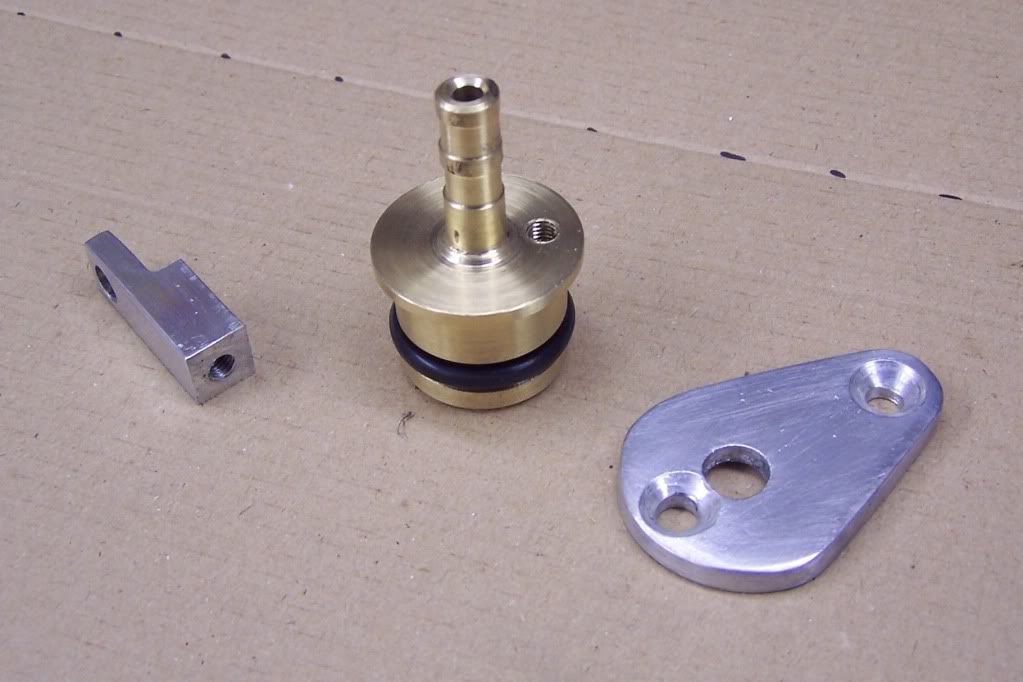
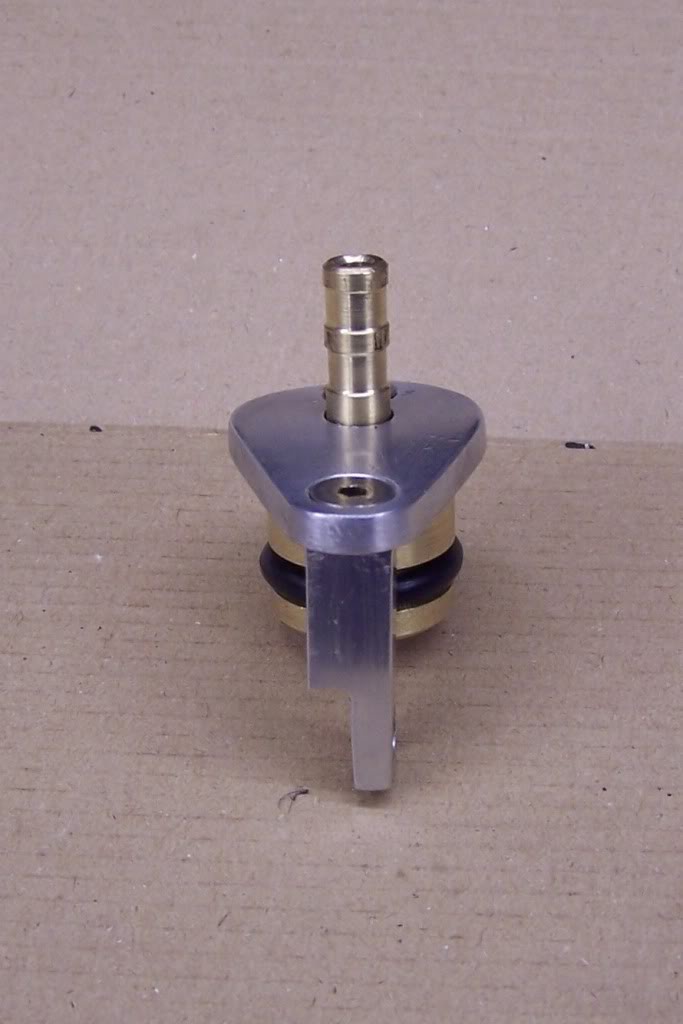
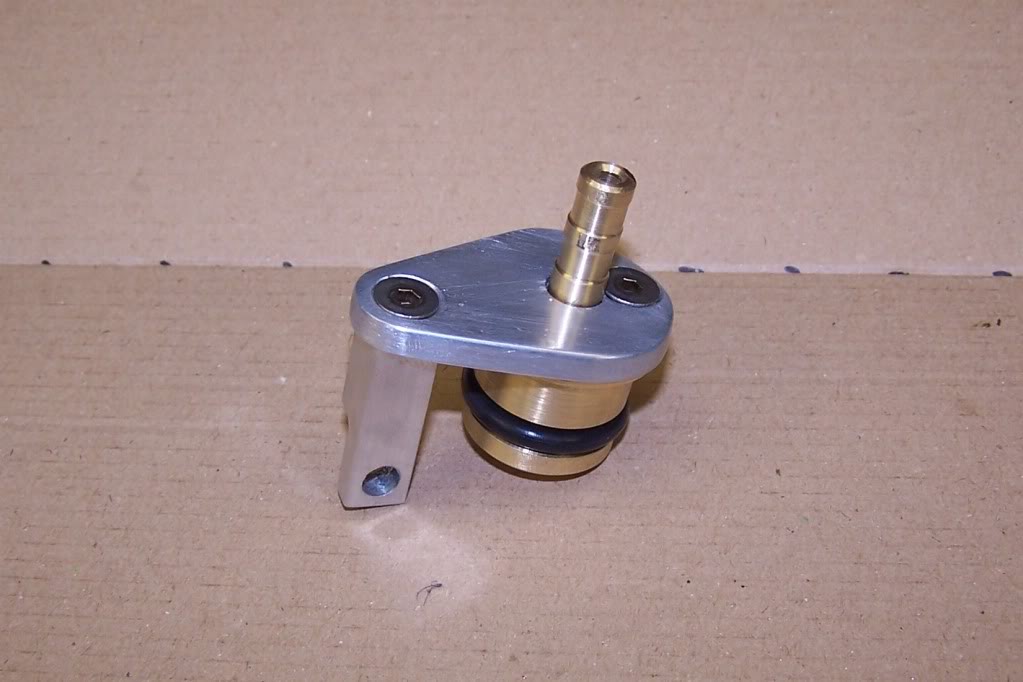
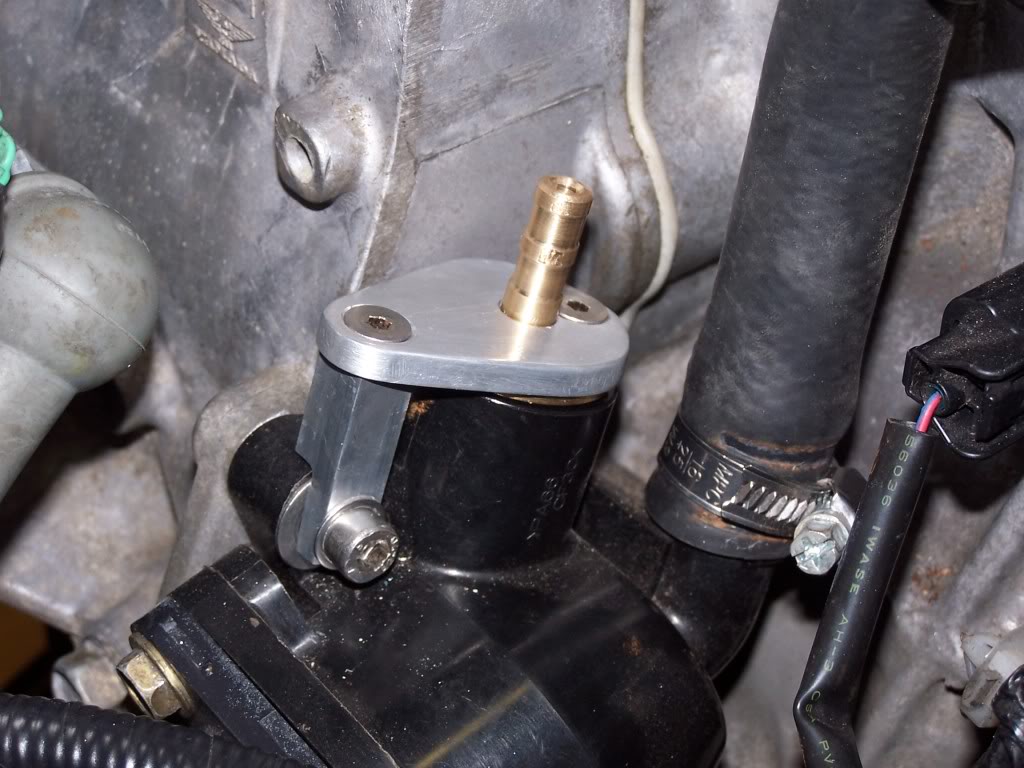
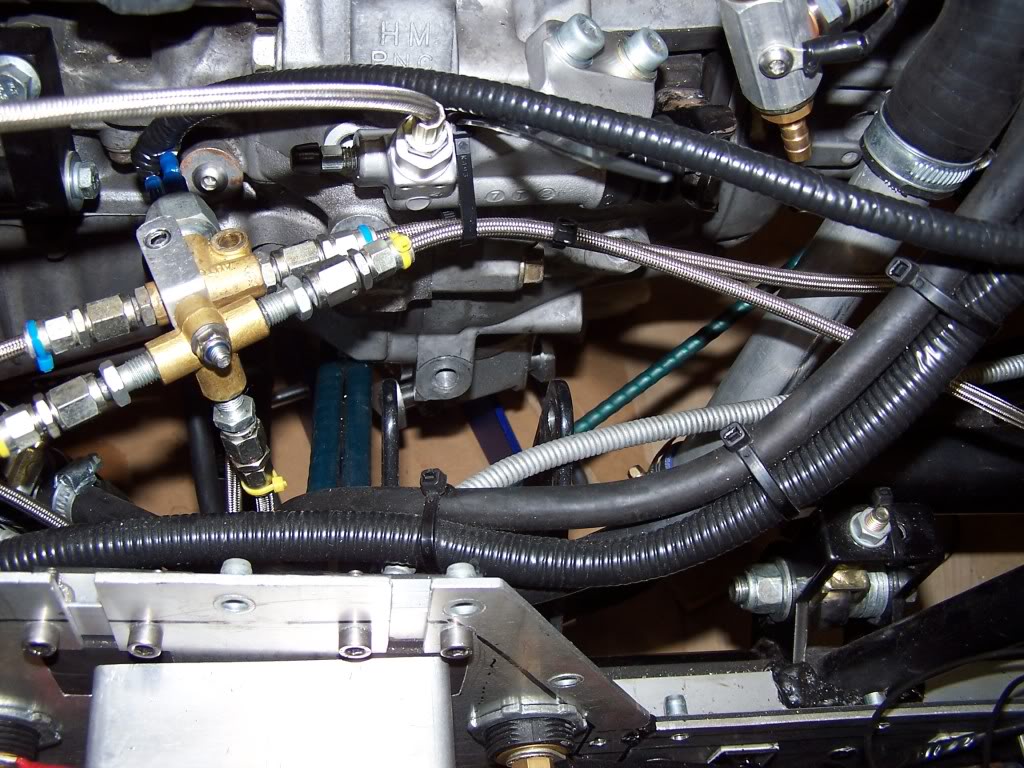
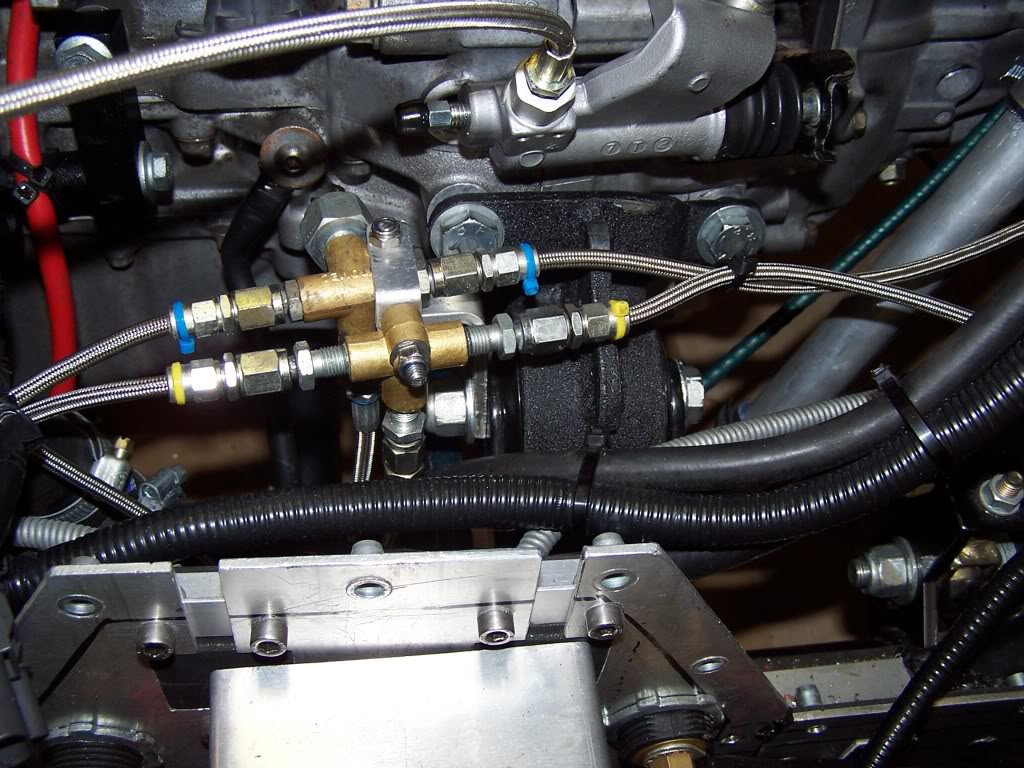
Coolant Filler/Bung:
Tonight saw me fettle the fitting for the filler/bung. All done by hand tools (minus the drill if you dont count that as a hand tool).
I have been searching the tinterweb and have found a few different solutions for this problem, none of them offering the filler option but a couple of companies that sell bungs with different ways of fixing them into place. My first choice would have been from k-tuned - CLICK ME FOR K-TUNED BUNG, the second was Rcrew Racing - CLICK ME FOR RCREW BUNG, SCROLL DOWN THE PAGE A LITTLE.
Both options were good, I particularly liked the K-tuned because it didnt rely on drillng through the thermostat housing, so that is the path I have chosen...........even if a little sideways in my attack.
I will let the pictures do the talking, because I could go on for hours........................... 

Lets hope I am doing it right, else we'll both be buggered......ha ha.......
There has been much learnt along the way with this, some of it might not pan out as planned but most should. I try to do as much research as possible before making a decision, the problem with the internet is there are too many self claimed experts that dont know sh!t............. I would like to take this oportunity to say that I do not think of myself as an expert in any way, I am just sharing my journey with the good people of the forum.
Lets see what tomorrow brings 
2-3-2010
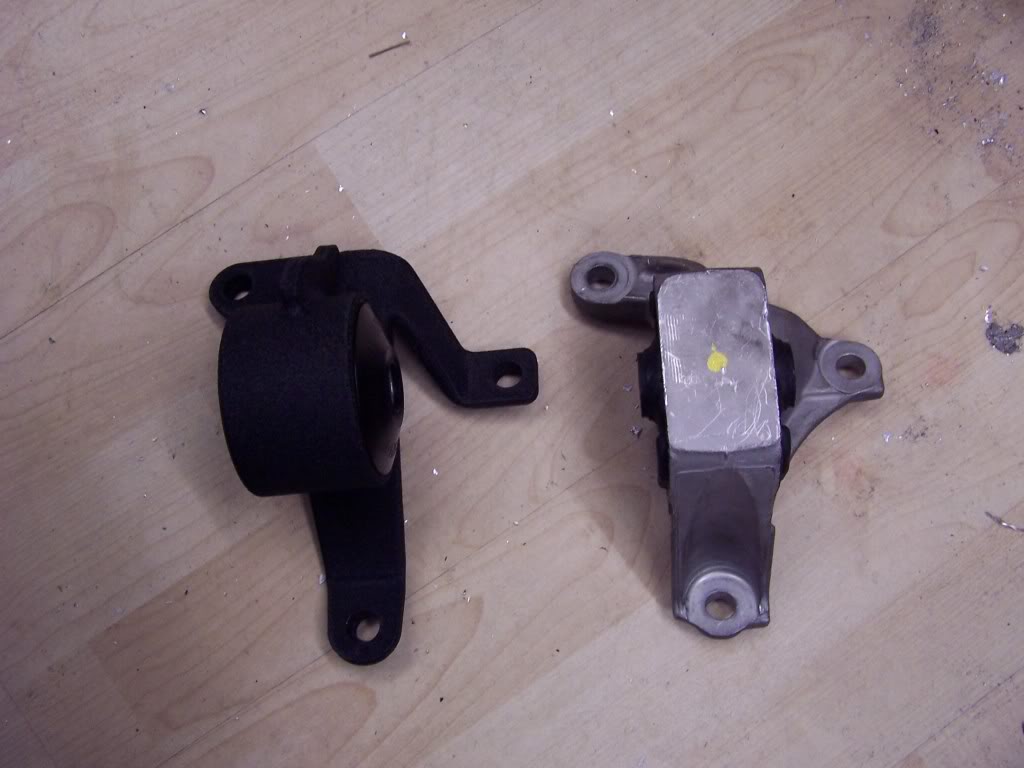
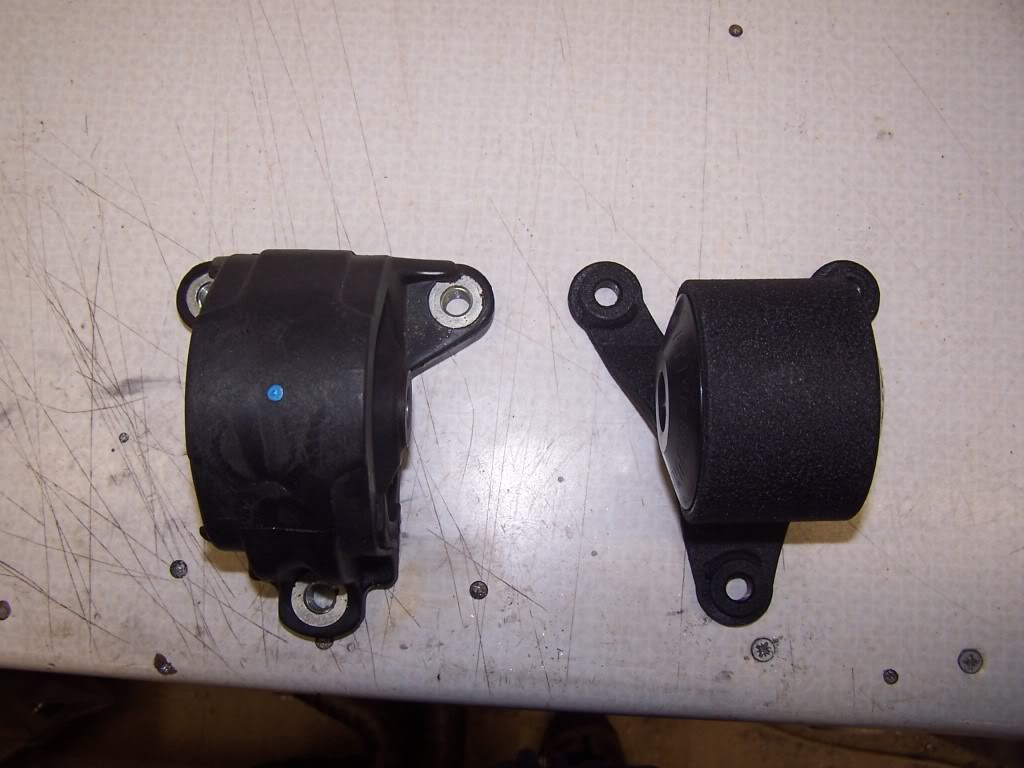
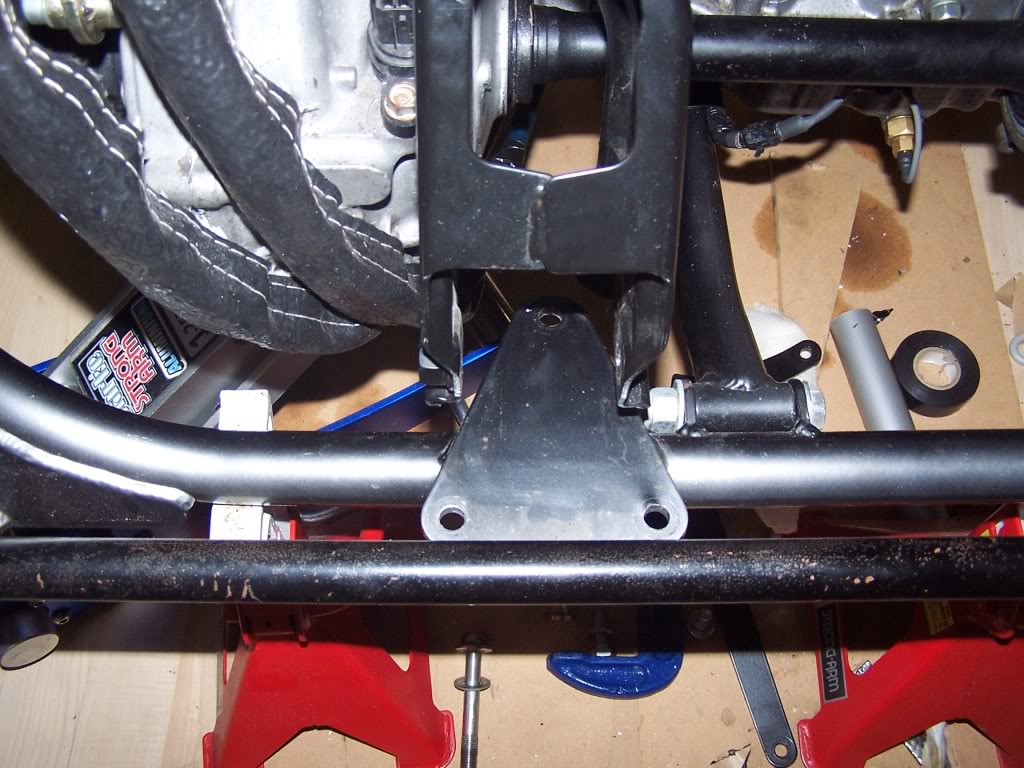
FRONT ENGINE MOUNT (What a *illegitimate person*.......)
Tonight took me three hours to replace the front engine mount with the new Innovative mount, reason being - the new mount was an F-ing mile out when it came to lining up the holes, not only that but the mount is about 4mm wider than the old one and the old one was an interference fit.
First time in and I get the two top holes lined up and the bolt through the middle of the mount (with lots of smacking with a nylon head hammer because its so chuffin tight) to find that the bottom hole isnt wide enough for the bolt to go through because the monkey that fabbed them didnt weld the collar in the right place. So out it came (with a crow bar and a lot of swearing), hole drilled out allow bolt.
Second time in and I get the the two top holes lined up and the bolt through the middle of the mount (this time with a bit of silicone lubricant and minimal smacking) to find that the bottom holes is an effing mile out. So I try swinging on it with a bar but it wont budge so out it came again to ahve the hole made considerably wider, more of a rectanlge with radiused ends.
Third time in and got the two top holes lined up, couldnt get the bottom one so undid the two top ones, lined up the bottom ones, re-lined up the two top one and then couldnt get the middle hole lined up for ages, lifted the jack under the engine, gave it a few whacks, swore at it, gave it another whack and eventually got the thread started on the housing, once a few threads through it got the same hammer treatment.
Everything tightened up and its good to go, tomorrow night will see me try and swap out the rear mount, should be fun.
Any how enough of me rrrrranting on.......... I took a few snaps tonight, two of the new an old to show the difference, one of the hole where the mount lives and another of the mount in place, enjoy: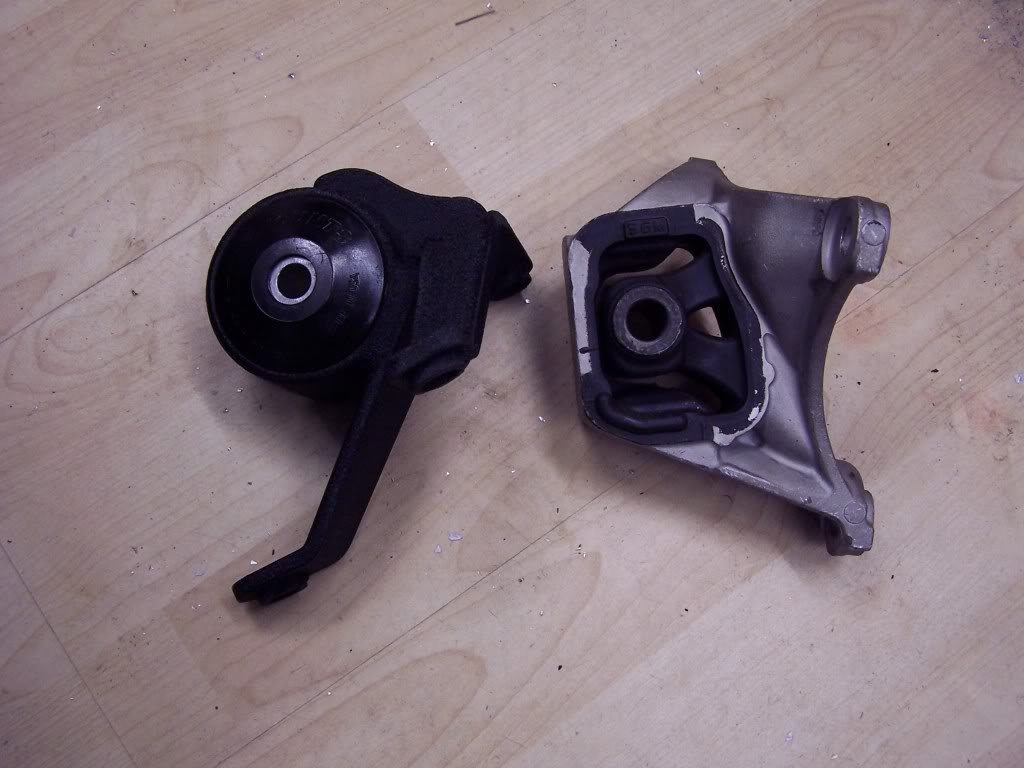
2-10-2010
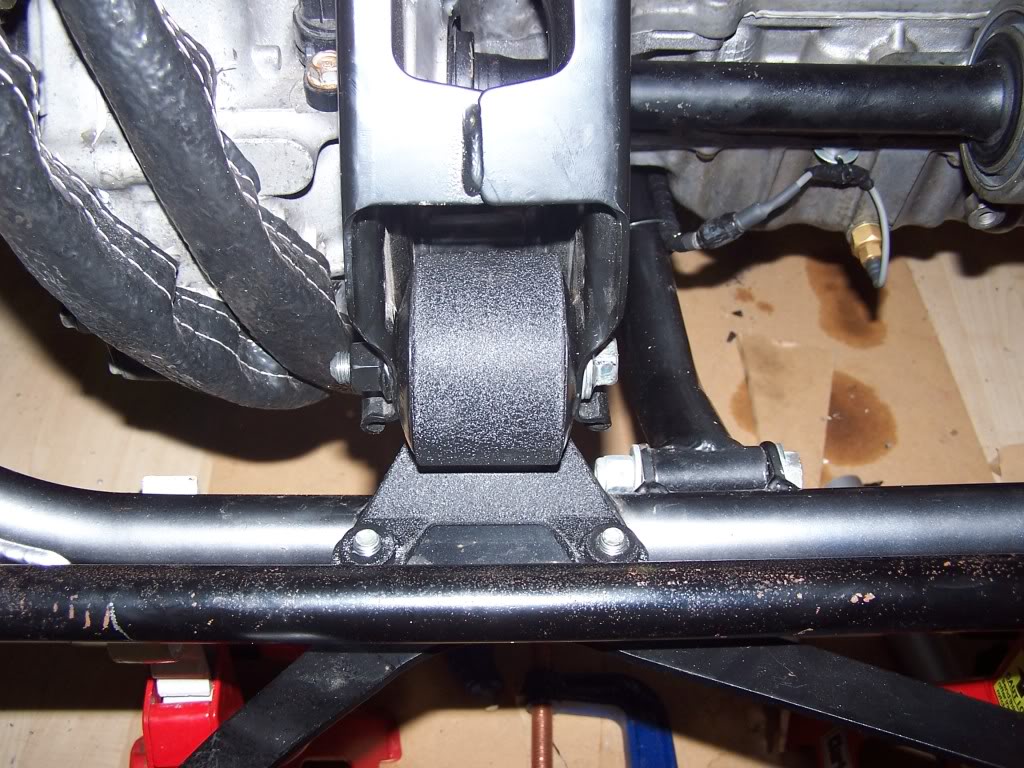
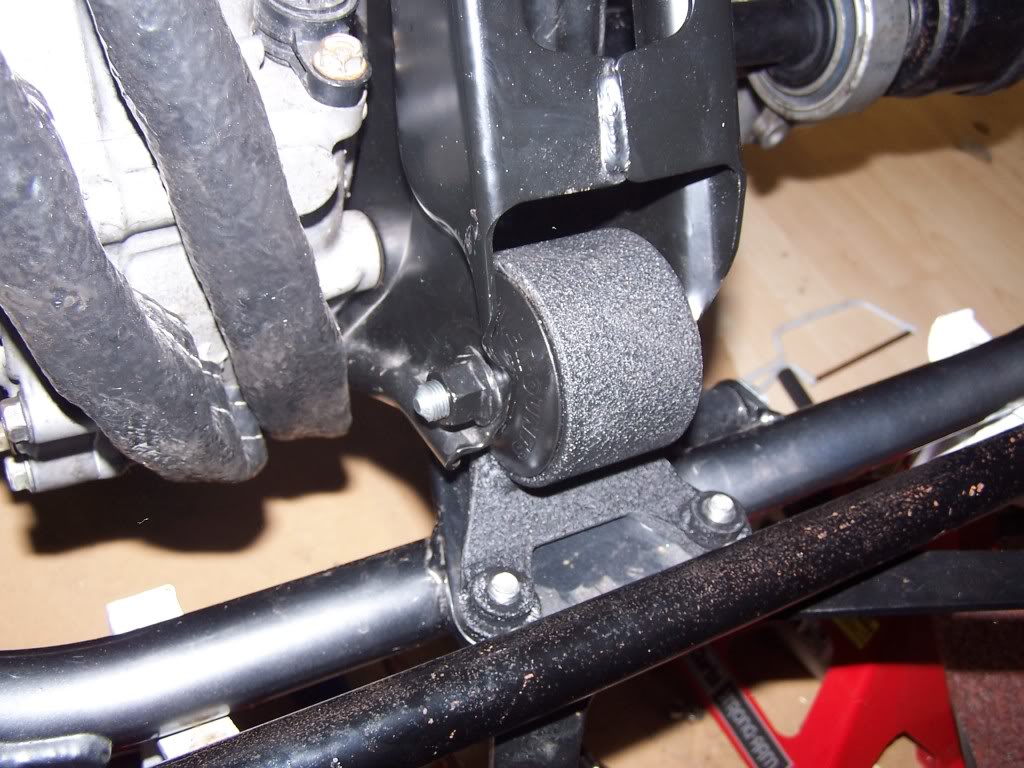
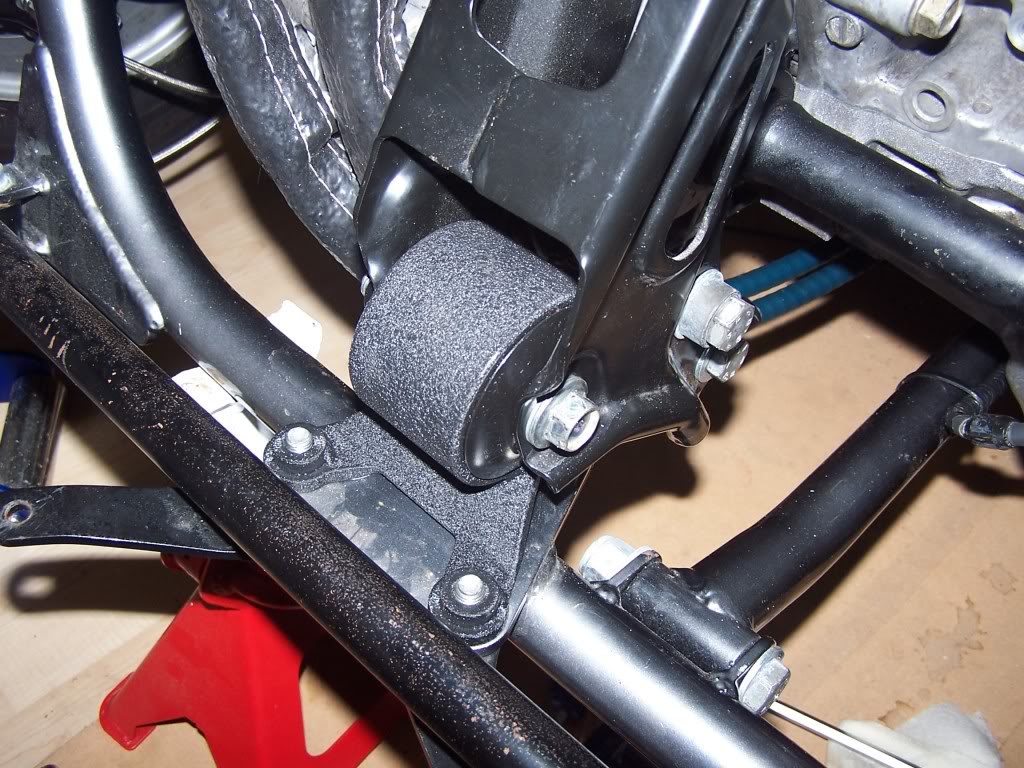
Rear Engine Mount:
Not as much as pain in the arse as the fwd mount but it was still telling trying to get the holes lined up, due mostly to the fact that the mounting plate on the frame didnt line up with the engine (3rd photo), not as much of a problem when your only dealing with normal mounts as they have lots of play in them.
Anyhoo, its in now, a few snaps to keep em happy: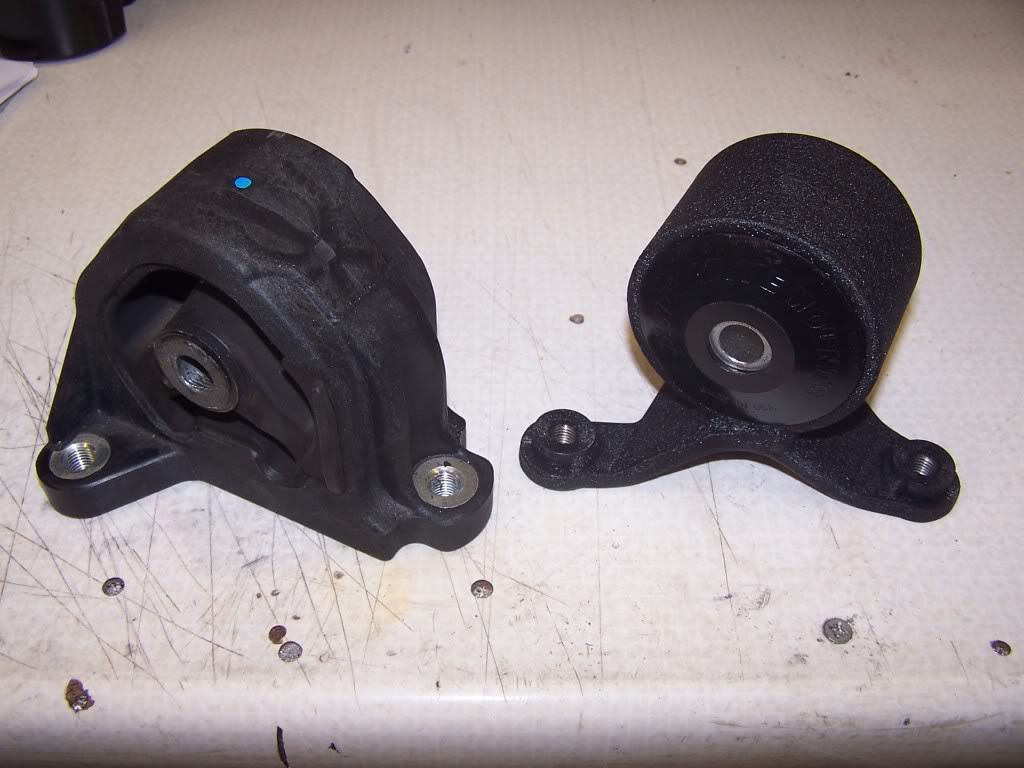
Brake Bias Controller:
I had a few issues along the way with the fittings of the controller were it met the balance bar, so sent it of to Z's and they sent me back the right bit, only on its return the piping that holds the cable had been replaced with blue (was black - ideal), so rather than being a perpetual pain in the arse I thought I would sort it later, well later is now and I have sorted it. The beauty of heatshrink:
Was Blue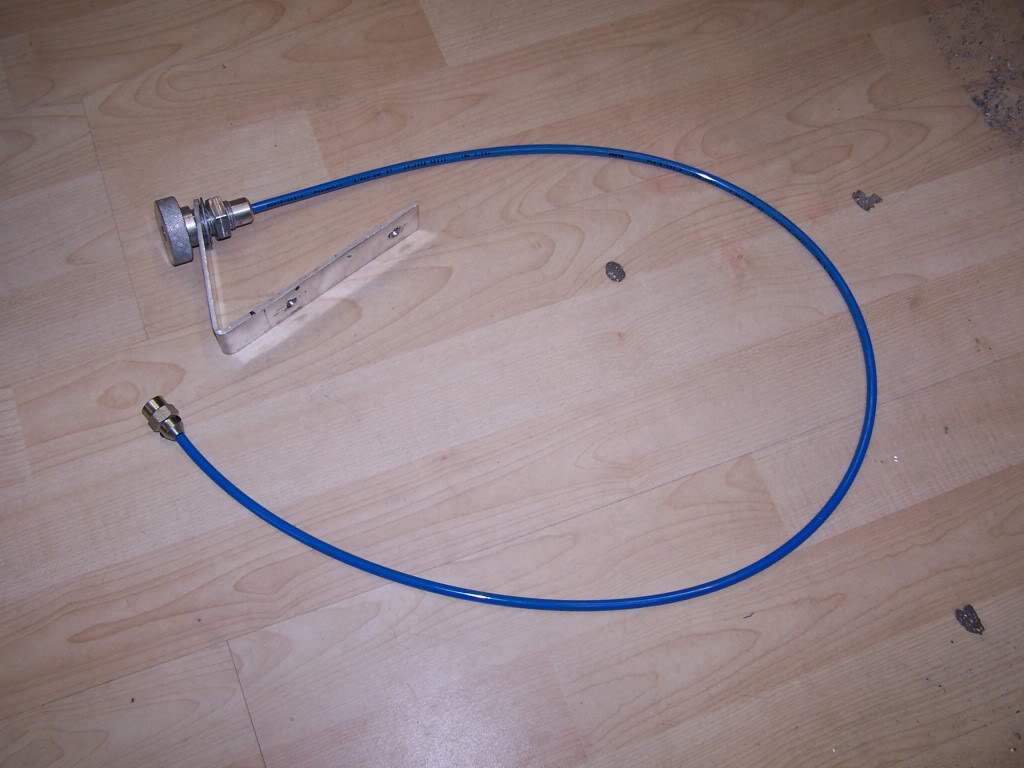
Now its black - again.....in a roundabout way......: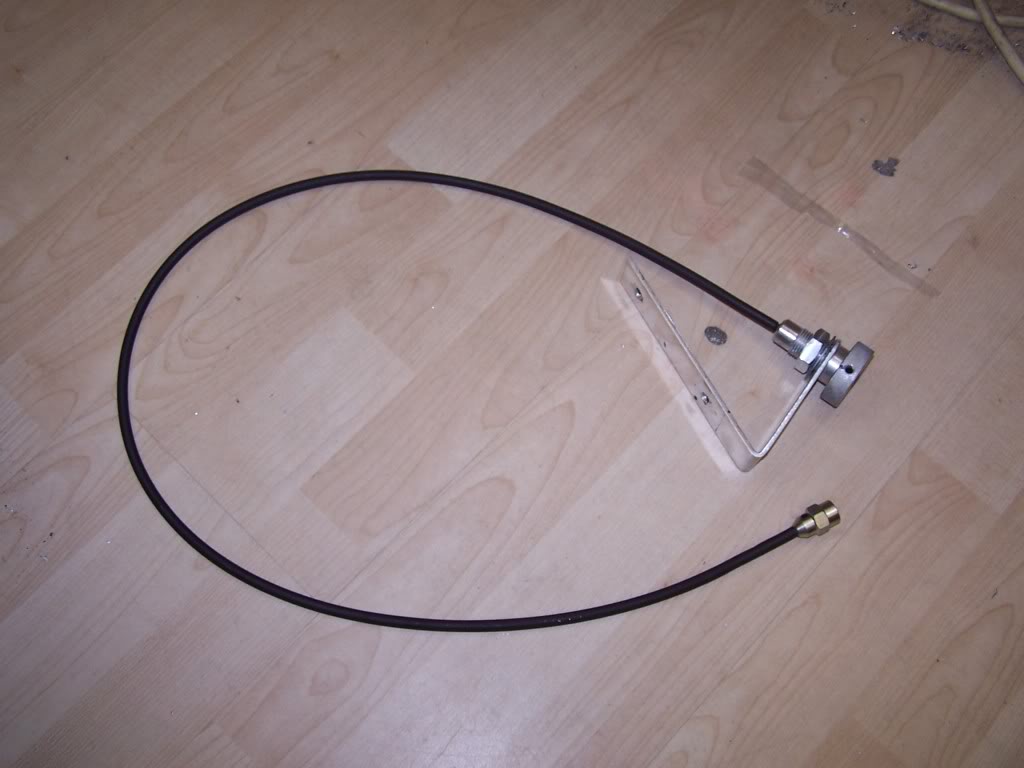
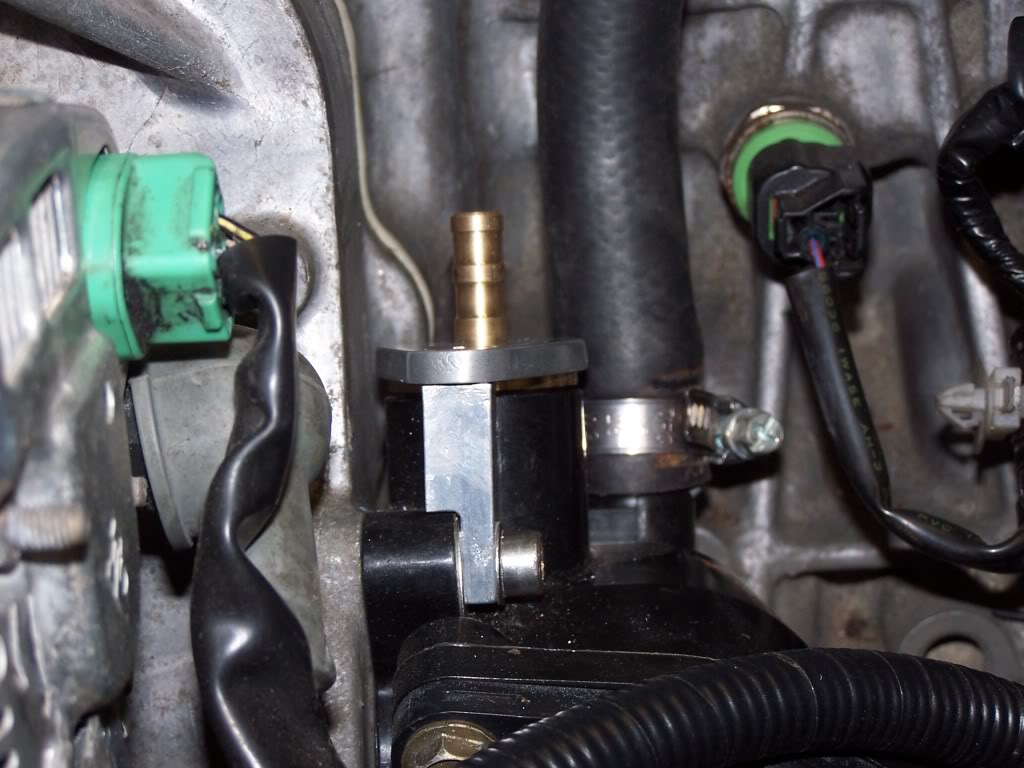
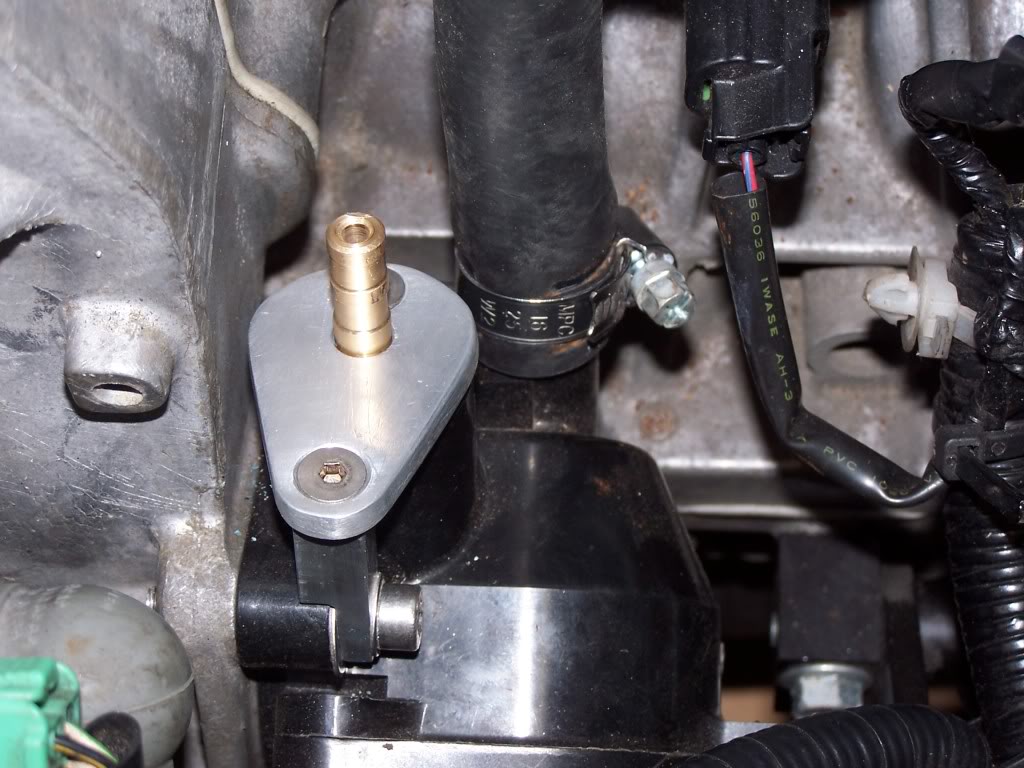
Coolant line delete:
What can I say, my smart little fix as shown earlier in the thread ended up fouling on the bottom of the intake manifold (fine if you havent got a Jackson Racing Supercharger on it). So I had to resort to drilling out the housing and bolting it into place as I simply didnt have any room or the mental energy to fix it any other way. I do hope the O-ring hasnt split (the last two did due to the new hole in the side), cant tell until the system is under pressure.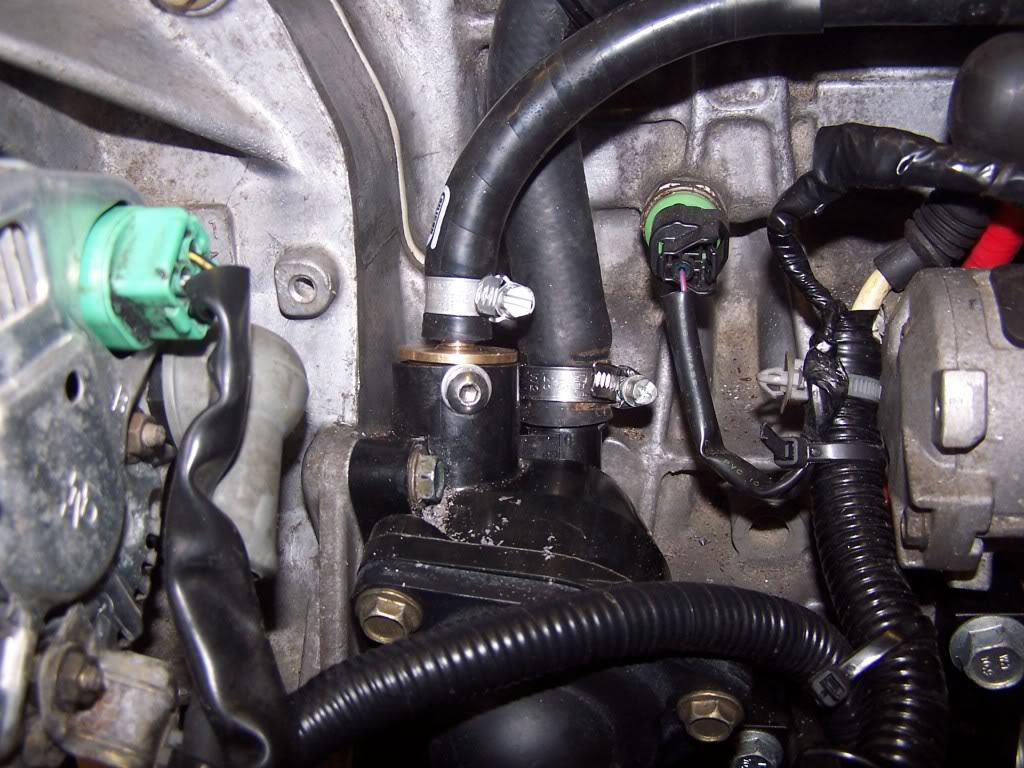
Coolant line delete:
Whilst I had the charger off I took the time to delete some other smaller coolant pipes, namely the two that lead to and from the throttle body, I have drilled out the two holes and tapped them out to 10mm, so if ever they were needed again they could easily be retro fitted.
These few photos only show the lower of the two pipes, the top one is drilled and tapped I am awaiting a 10mm grub screw to put in it:
First photo shows pipe mid hacking off: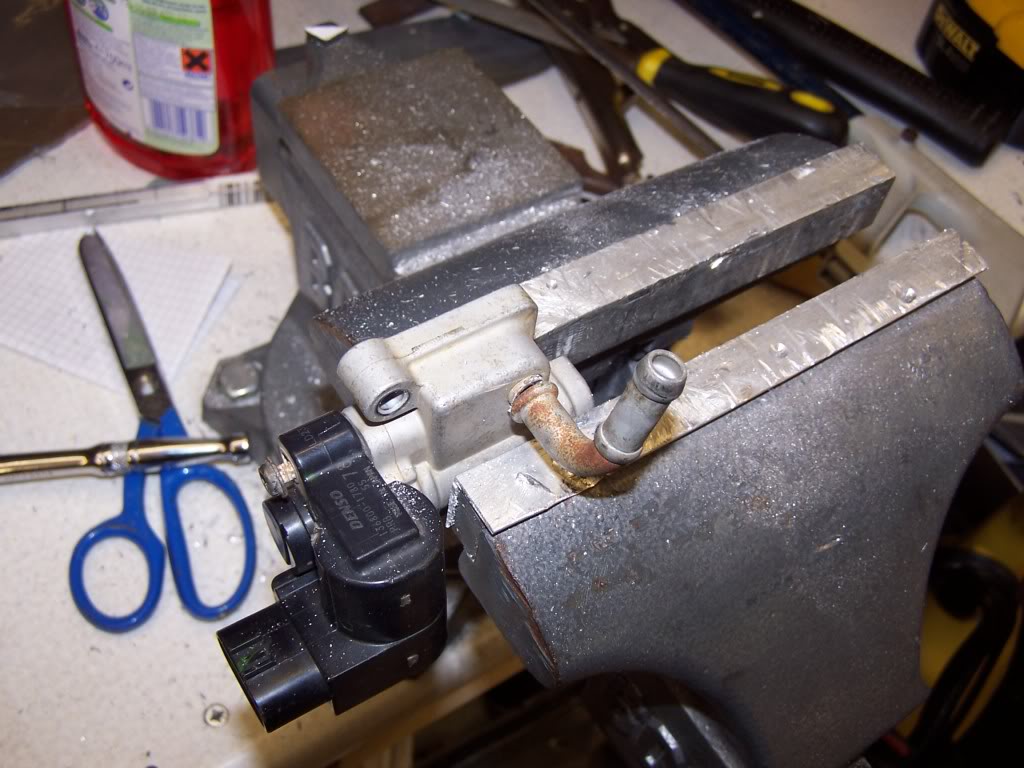
Second shows cut down bolt in place: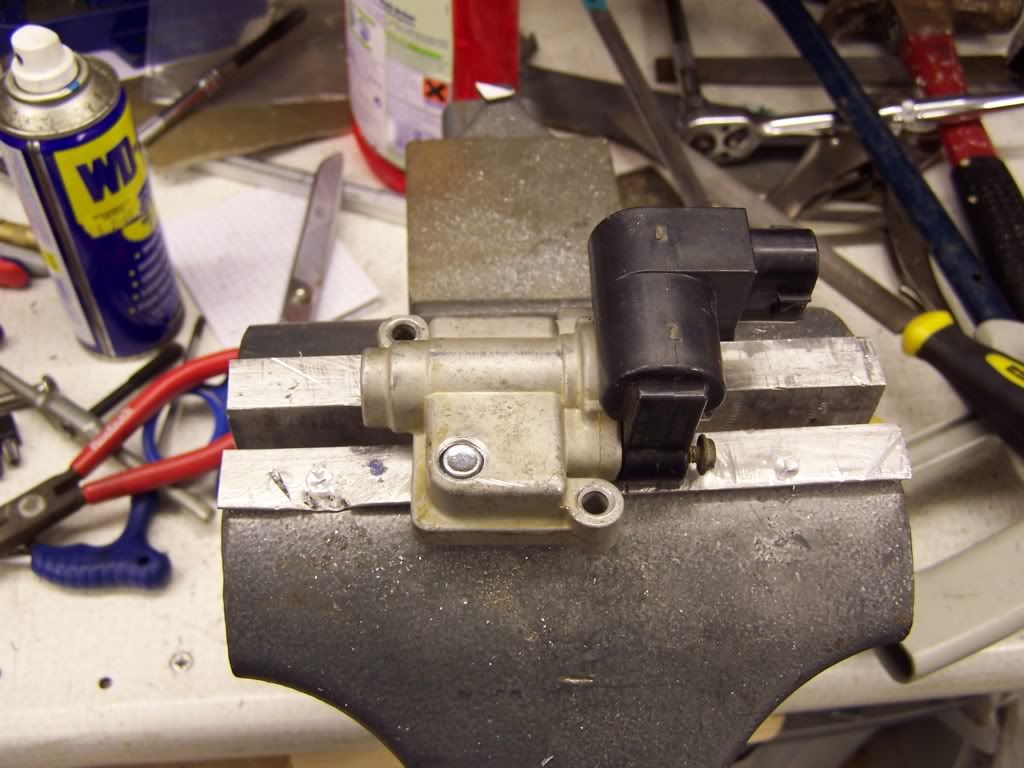
Third shows how I managed to get the cut off end of the bolt into the hole, good old slot cut into the bolt and a flat headed screwdriver, finally a bit of loctite: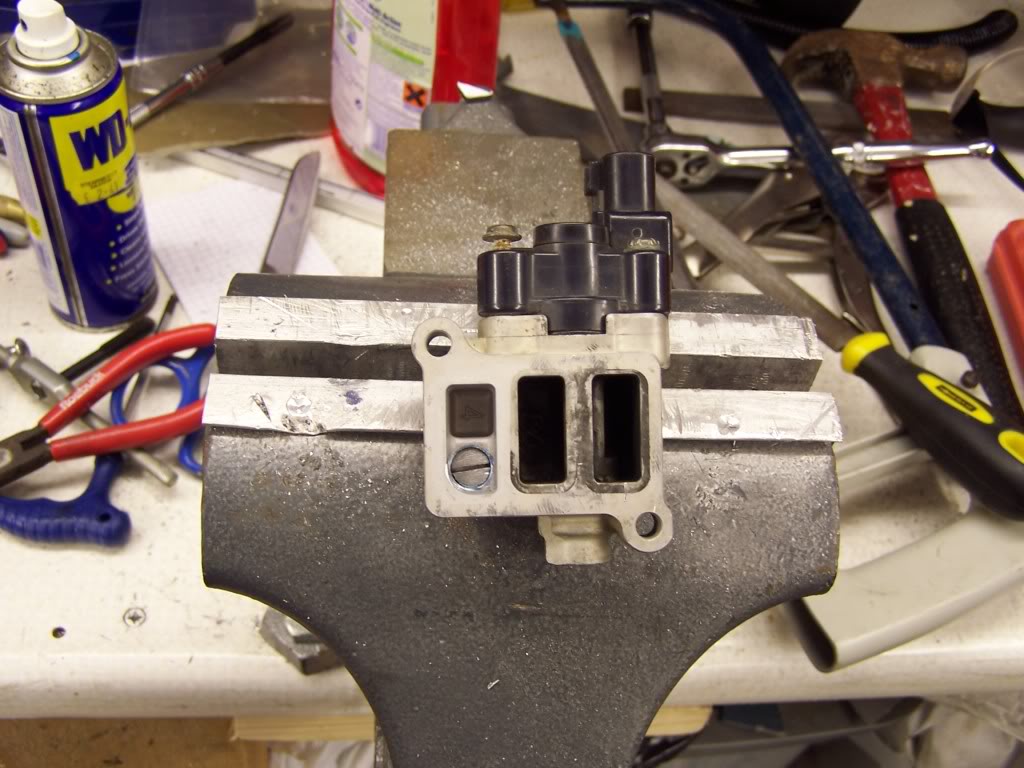
Tonight I managed to get the Supercharger back into position, I even figured out haw to get the aux belt on on my own (normally have to have someone holding the autotensioner off for me, fix = long lever and cable ties).
As I strike one thing off the list one or two more go on it - will it ever end??????????
3-5-2010
Upper Seat Mount - Required for Kirkey Seats (as advised on their website Kirkey Installation Page)
Again I will let the pictures do the talking:

Side Fills to cover inside of Scoops:
put together a set side fills, using the old hook in from the original rear cards and then my own fitting on the bottom edge, note no bolts used in the construciton of these, just dual lock (industrial velcro). Some befores, one of the O/S infill before it went in then some of the infills in place....enjoy.......if thats what gets you off??!!??.....:
Befores: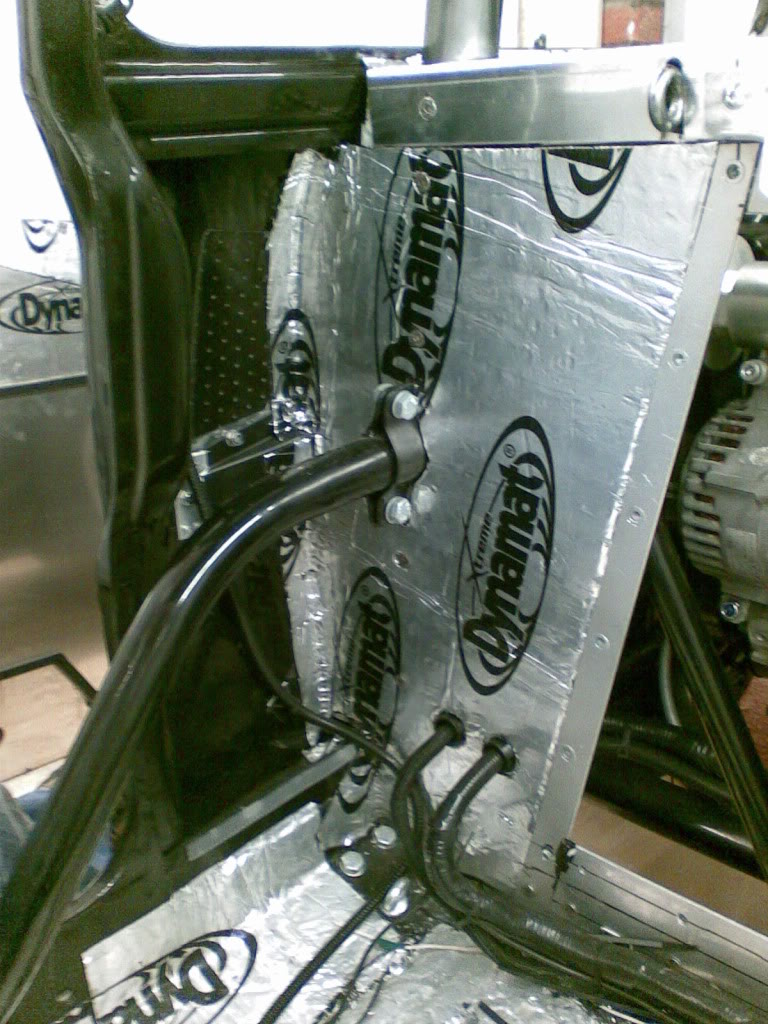

One of the infill off: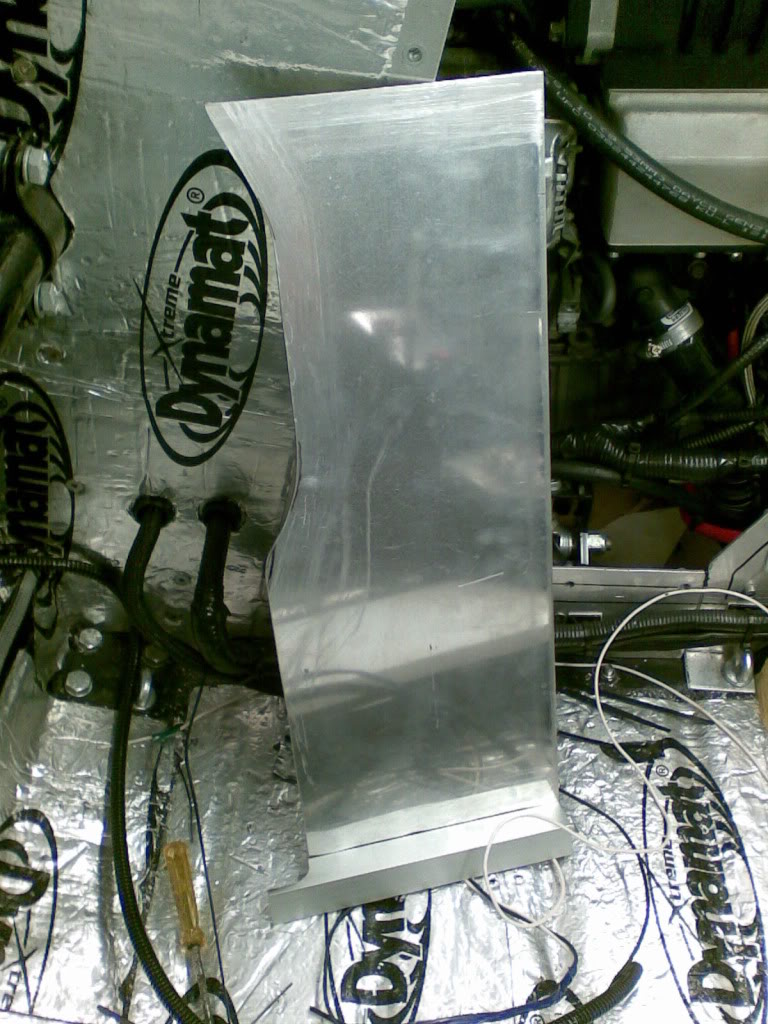
And of them in place: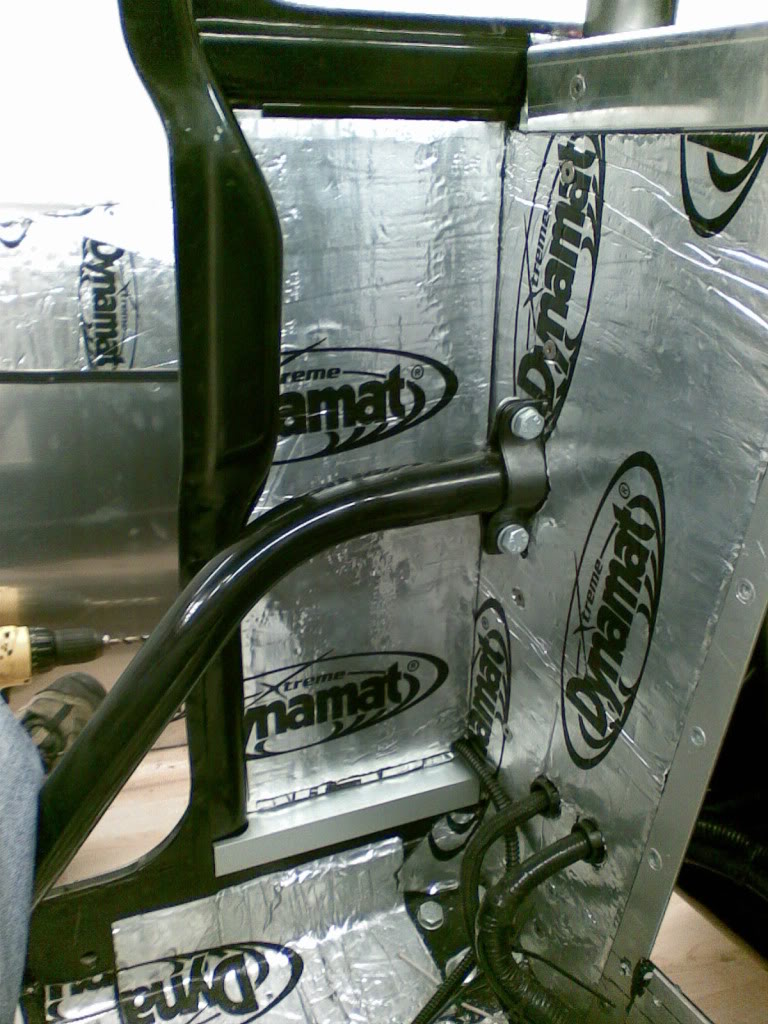
Wow this is amazing build!
Posted by Diggymart on 2/3/20 @ 4:10:14 AM