You must be logged in to rate content!
15 minute(s) of a 58 minute read
11-10-2011
Does anyone still read this stuff ? if so here's a top-up................................
Looking back over the last few months i don't seem to have done to much to this project, I blame visiting Mini shows and generally getting out and about, now that autumns here, lets hope for some more "shed time" its difficult to remember in what sequence i have done each part on this build but i will try to get things in the right order
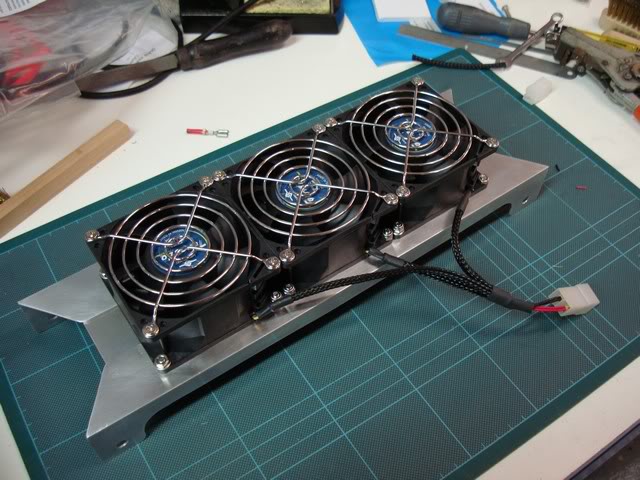
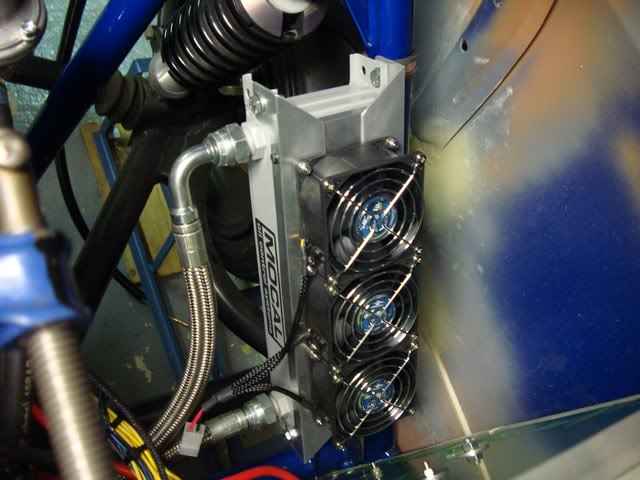
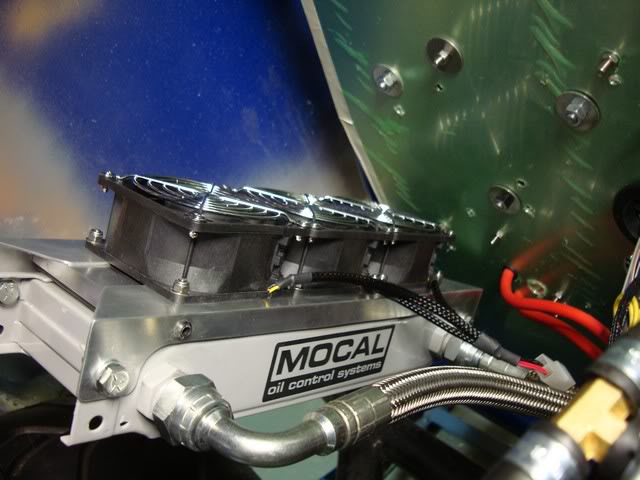
I produced a bracket to mount my three fans onto the oil cooler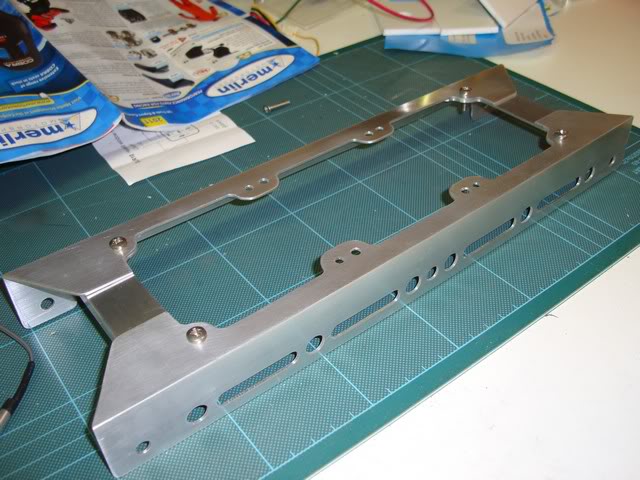
.
.
.
.
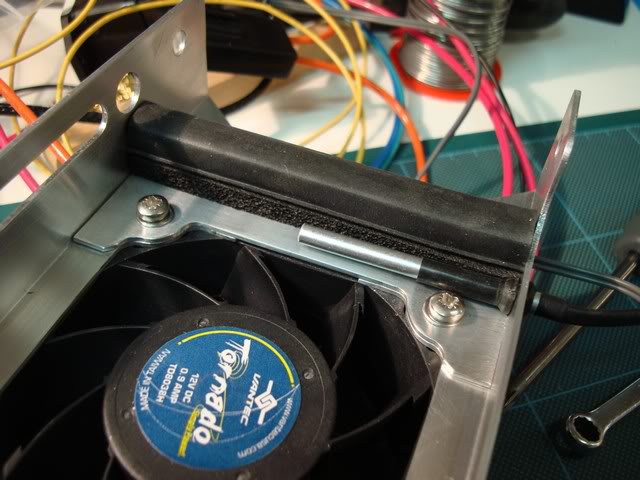
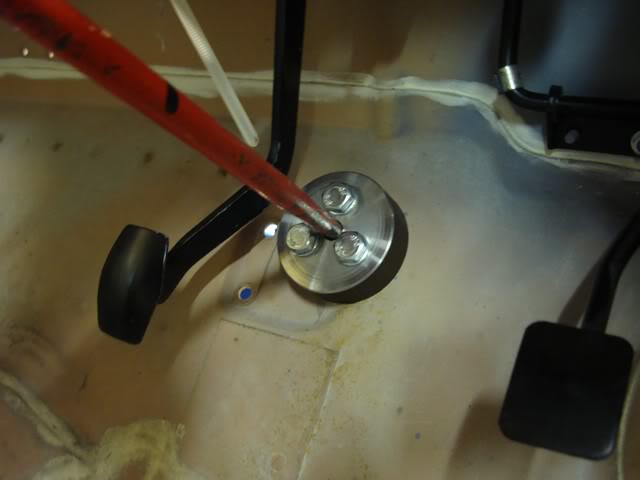
These are now to be controlled by a adjustable fan controller the sensor can be seen here
I think this is the point where i got thoroughly pished off with the wiring, especially the electric reverse  i decided to do something "mechanical"
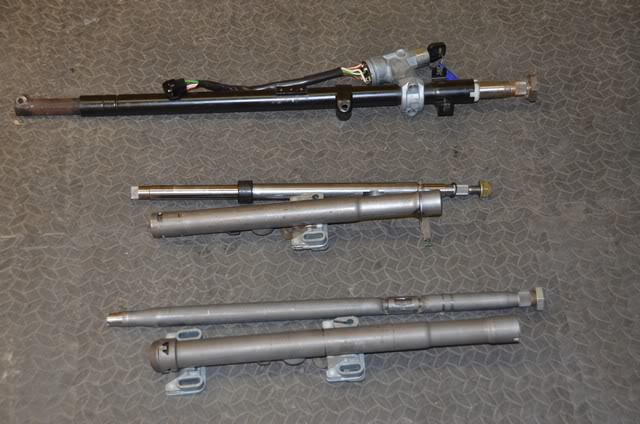
At this stage I am thinking that I may try to avoid IVA if I can, but where I can I am building in certain things that would mean major re-work if ever the vehicle was presented for test, one of those is the steering column, I had read somewhere that the Metro column would provide a good starting point and fit the Mini rack, so off to the local car breakers  , i could see that the spline on the bottom of the column that i found was way different to the spline on the Mini rack, also the steering wheel spline was different , but the column did feature a rather nice splined sliding section and some useful looking universal joints so i bought it anyway. I also visited a scrapyard and removed the column from a Metro complete with steering wheel and switches cowl etc (no ignition key though ) got the whole lot for a much better price,but again it was clear that the steering rack spline was different it was now clear that this would not be a straight forward job and some engineering would be required.
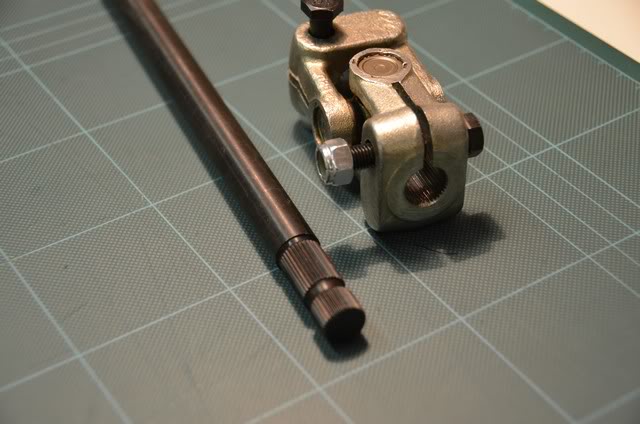
With careful measurement and counting it was concluded the the Mini rack spline is 9/16 x 32 another trip to the breaker i returned with a universal joint that seemed to be correct but when offered to the rack it didn't fit so i gave in and decided to buy new parts from Carbuilder solutions, they have several universal joints listed with the 9/16 x 32 spline, when the parts arrived it was very disappointing to find the joints didn't /seem/ to fit the rack, close but not what i would have expected.
.
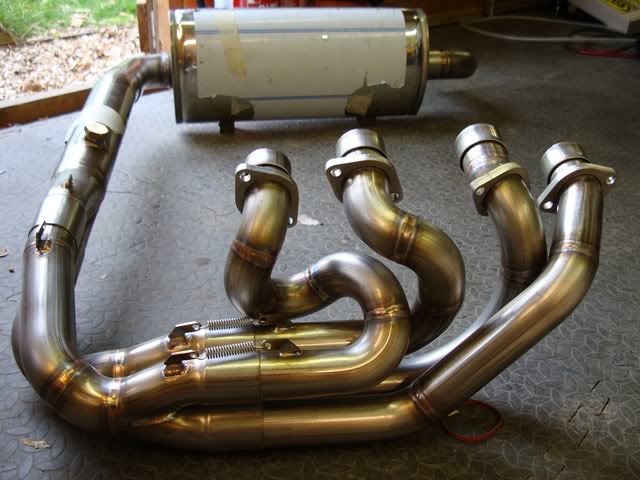
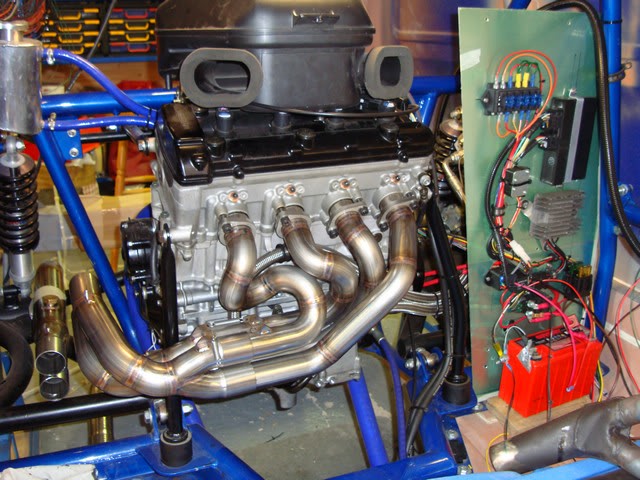
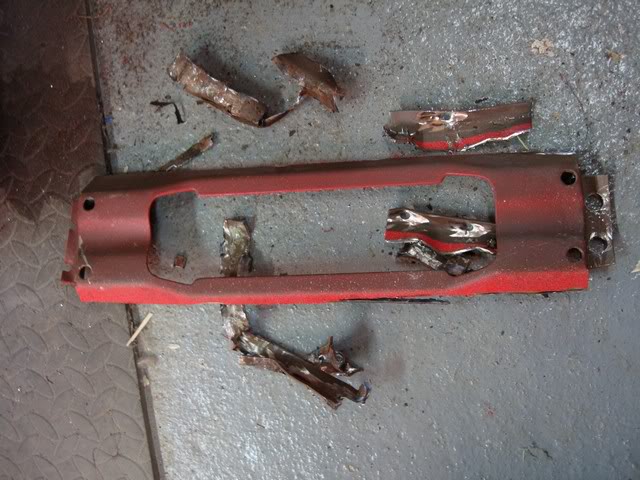
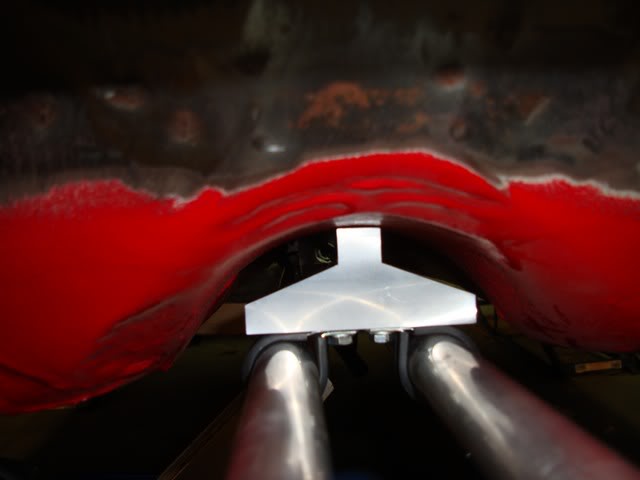
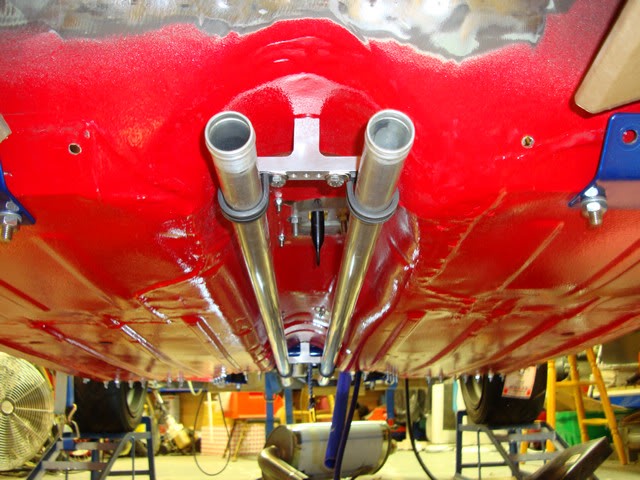
About the same time my 4-2-1 exhaust arrived from Z-cars, a lovely piece of work  however despite being assured when i ordered it that it would fit my older frame it didn't
.
.
.
.
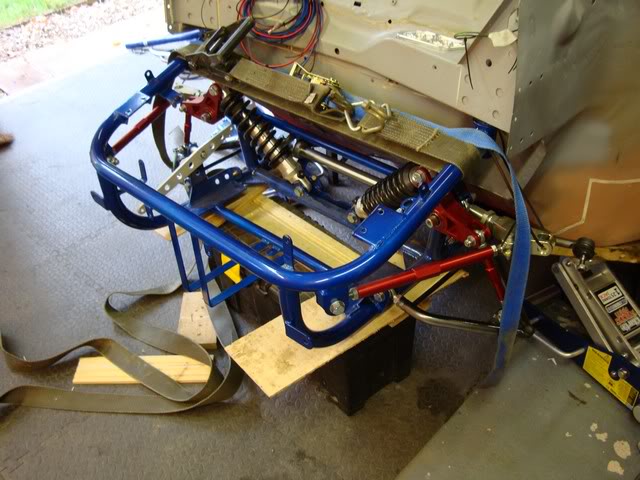
It was now clear that i would not be running my engine for a little time yet so i decided to do something different and remove the standard Mini front subframe and fit my Z-Cars version, this would allow me to investigate the steering rack spline problem and then work on finalizing stuff on the front end.
With the subframe removed i was able to remove the rack and could now see that the 9/16 x 32 spline was indeed correct wedging a chisel in the split of the universal joint had the universal joint sliding on perfectly, it turns out the Minisport (brand new) rack had a slightly oversize spline the Minispares sportspack rack i have now bought is perfect..........
Fitting the front subframe was without too many surprises the tower bolts would not line up and the subframe had to be helped into position with a large ratchet strap , this procedure is well documented here on TMF.
.
.
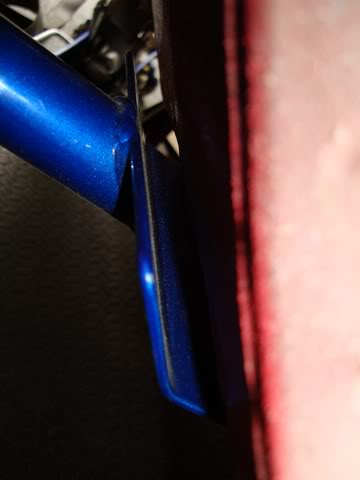
Another thing i was expecting was the gap between the lower subframe mounts and the shell, spacers were made up and fitted.
.
.
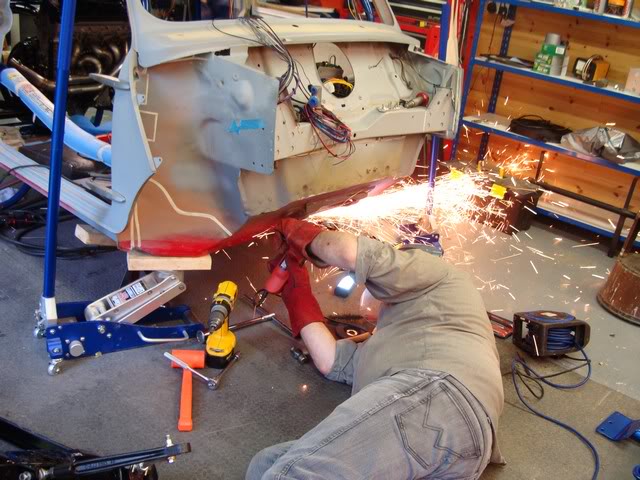
Some fat bloke cutting the old rack mount from the shell
.
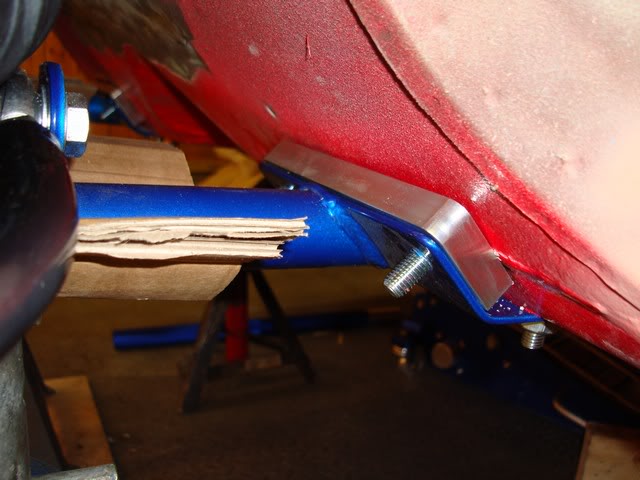
The sportspack rack mounted on the Z-Cars subframe, showing the tapered stainless steel washers we made up because the thread was too short on the u bolts, this is a dry build and the excess u bolt thread will be removed and the rack secured with nyloc nuts when the time comes.
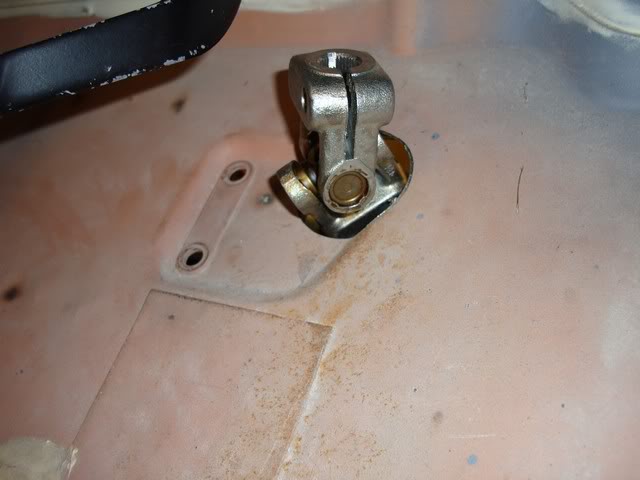
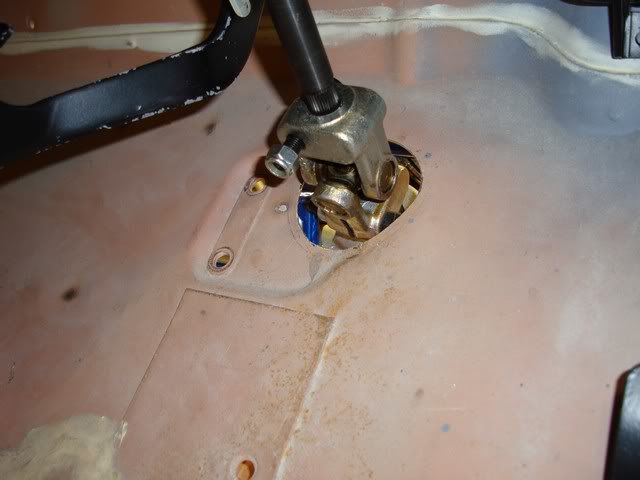
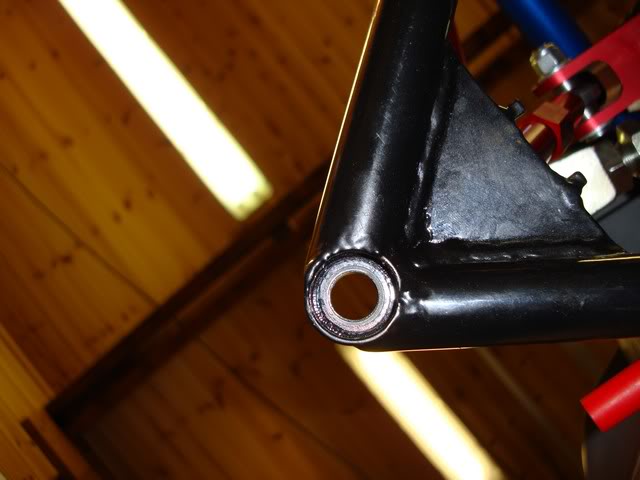
With my new sportspack rack now mounted to the Z-Cars front subframe i could now see where the hole would have to be cut in the floor for the universal joint
.
I was aiming to keep the hole as small as possible, a 50mm hole would allow the joint to fit but not rotate freely as the pinch bolt was catching on the pressing in the shell
.
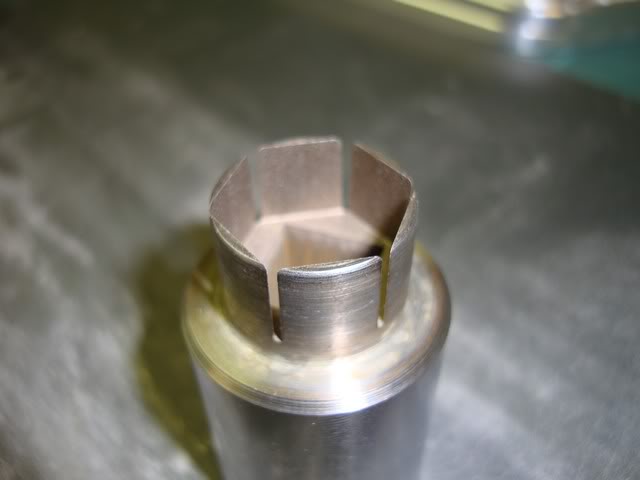
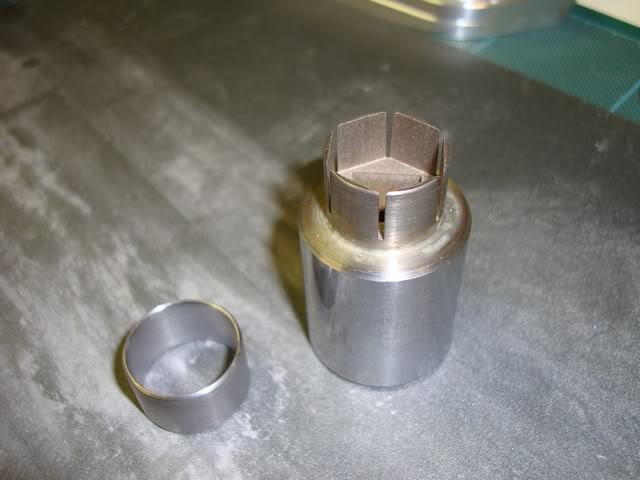
We made this tool in an effort to form the floor to allow the joint to rotate, it didn't work and i ended up cutting a bigger hole.
.
.
Something else to deal with was the throttle lever, i have seen these bent to make them line up, i have used a different solution, an angled bush.
.
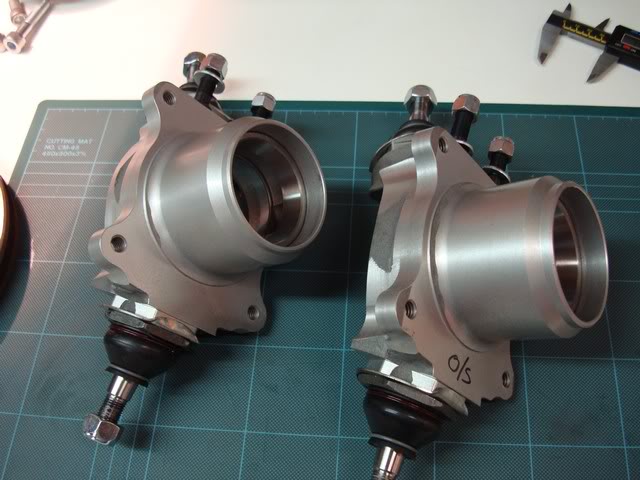
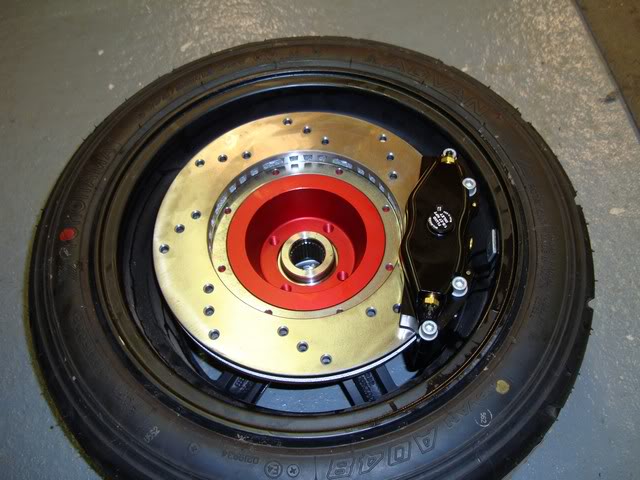
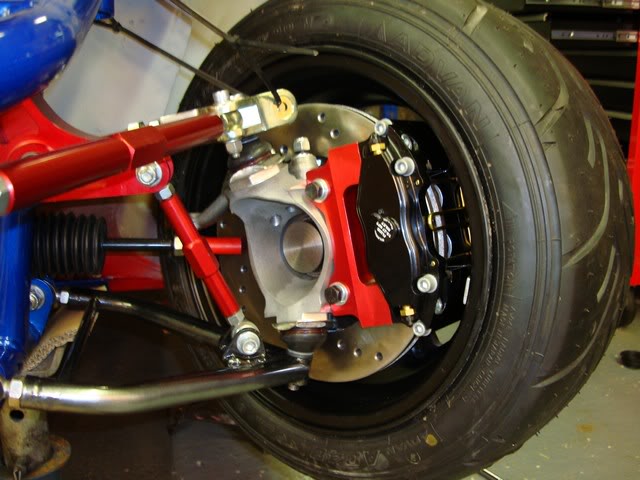
In a moment of madness i treated myself to a pair of KAD aluminium front uprights, very nicely made items that just needed a little machining to make the Z-Cars caliper brackets fit better.
.
.
Machining also required to the caliper brackets to fit the KAD uprights
.
.
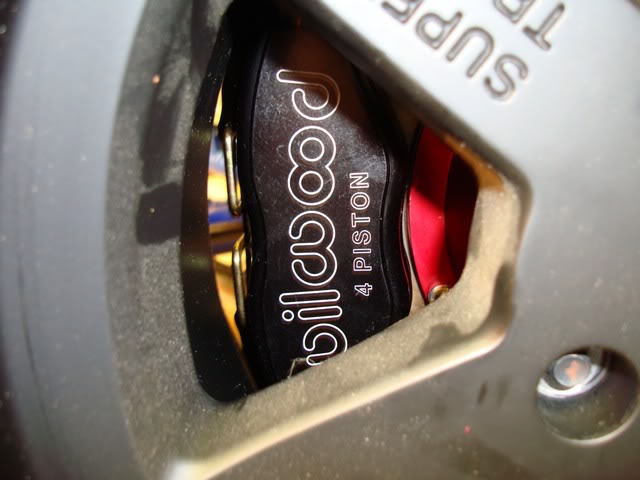
I also had to modify the caliper brackets to fit the Willwood caliper properly.
As the KAD caliper is not handed this leaves two spare tapped holes that i thought would be the ideal mounting point for the sensor for the Stack dash. (this item is unfinished, the holes are too small)
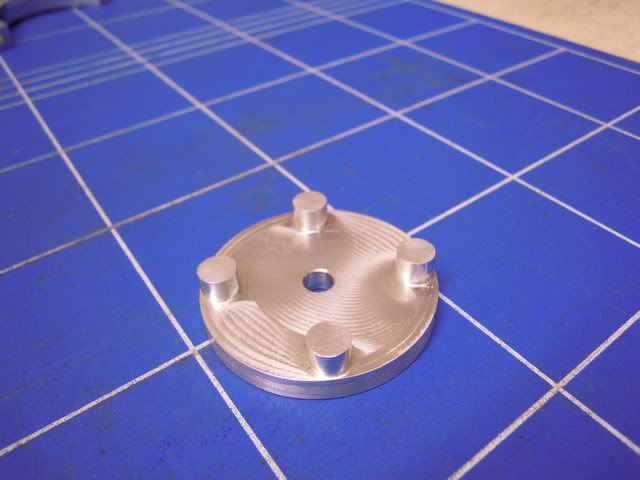
Also made a button with four lugs.
While we were about it i thought i would have a custom throttle lever the little lug at the top is for a extra spring.
Idea pinched from DSN but is is a different design .
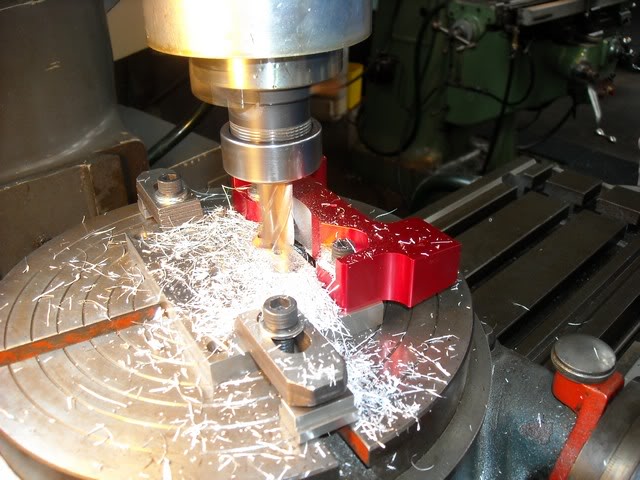
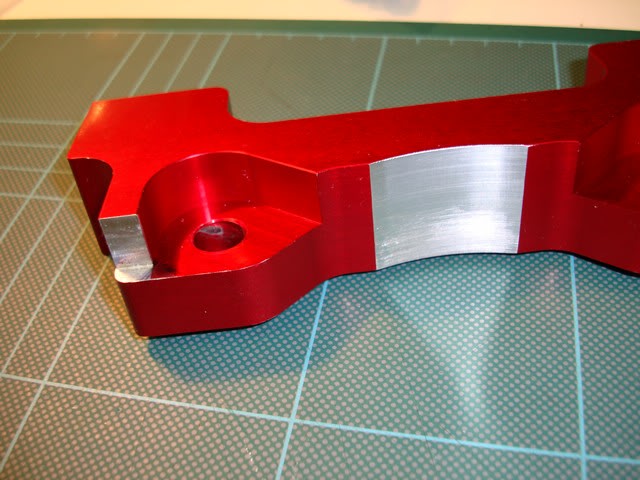
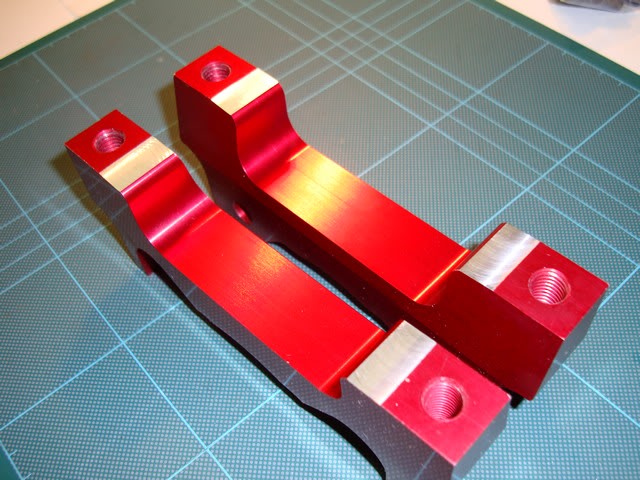
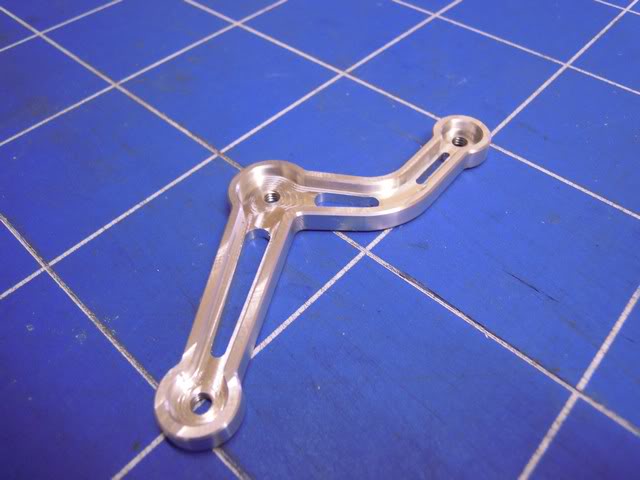
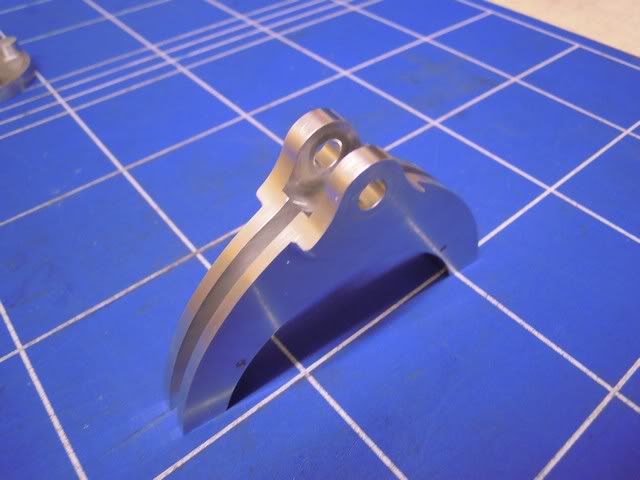
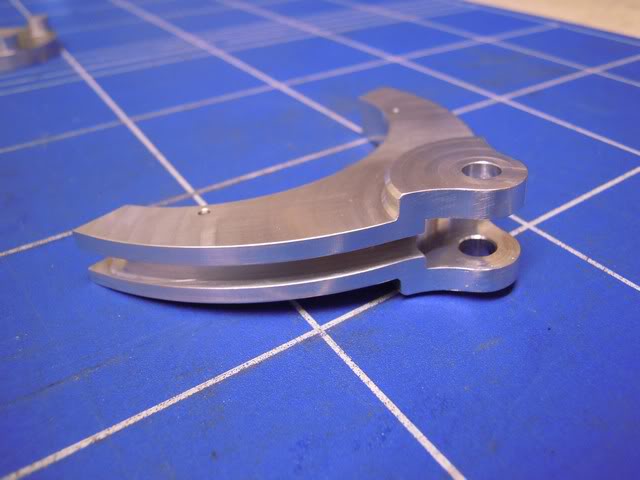
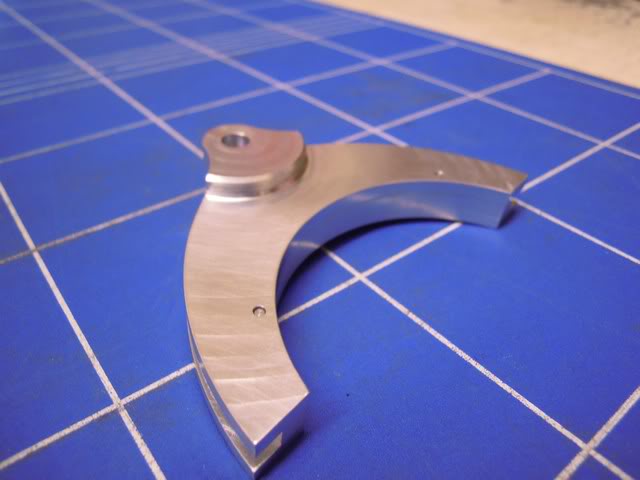
While we were playing around i thought it would be nice to have a custom handbrake quadrant
.
.
.
Cheers for your help with the machining Bri 
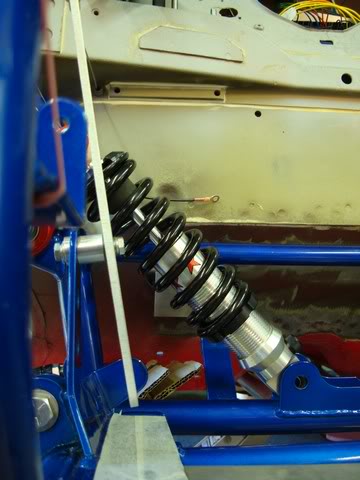
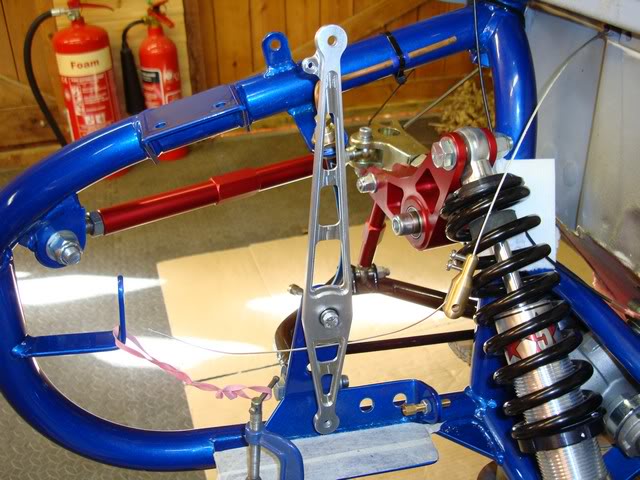
With the van now sat a little higher it has allowed my gut to fit under the shell better and i have been messing around trying to figure out he best routes for all the pipework that has to go from front to rear these brackets were made for the coolant pipes.
Mk 1 pipe brackets
Mk2 pipe brackets
The KAD front upright uses the Metro ball joints these are secured with a Nyloc nut, unfortunately these are larger than the Mini nuts, this causes a problem with getting a socket to fit in the top arm and particularly the bottom arm, i bought a socket from Halfords and we tried to turn it down, unfortunately this did not work so we have made a special socket this is a close fit in the lower arm and on the nut and hopefully will work, a sleeve was also made to adapt the socket to fit the top arm, fingers crossed this will work........
.
.
.
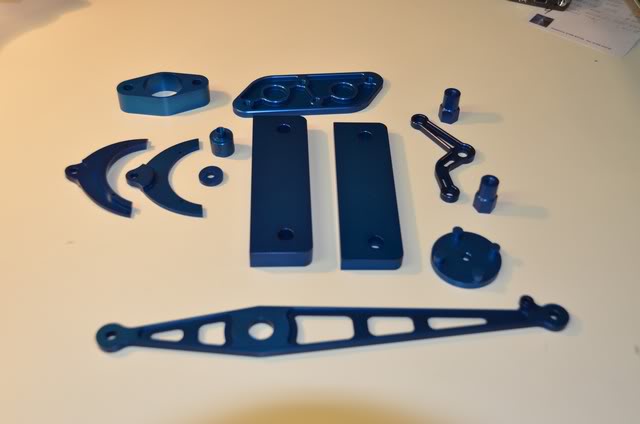
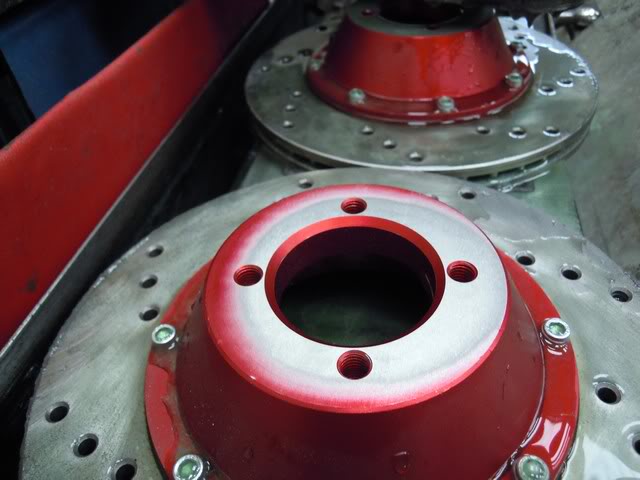
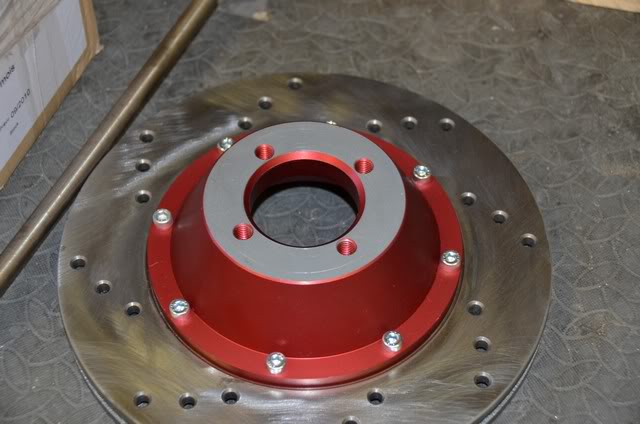
I have been lucky enough to be able to get all my custom CNC machined parts anodised for a very good price (thanks Steve )
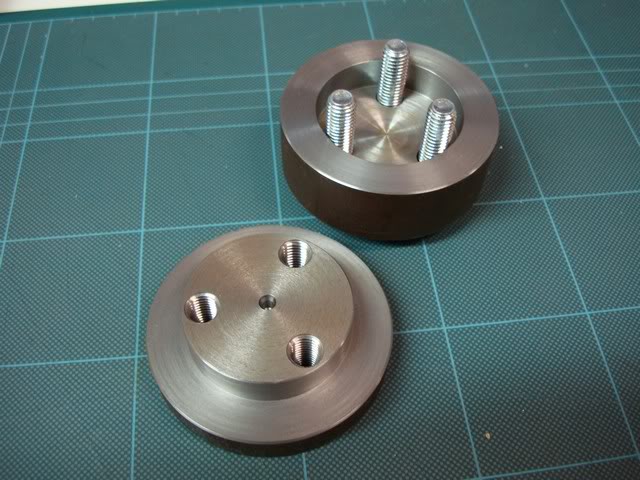
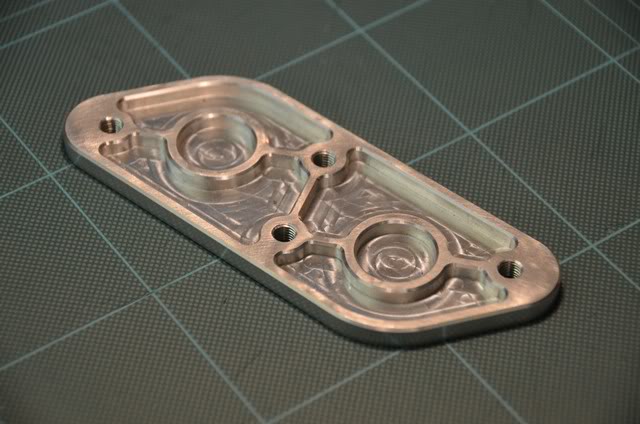
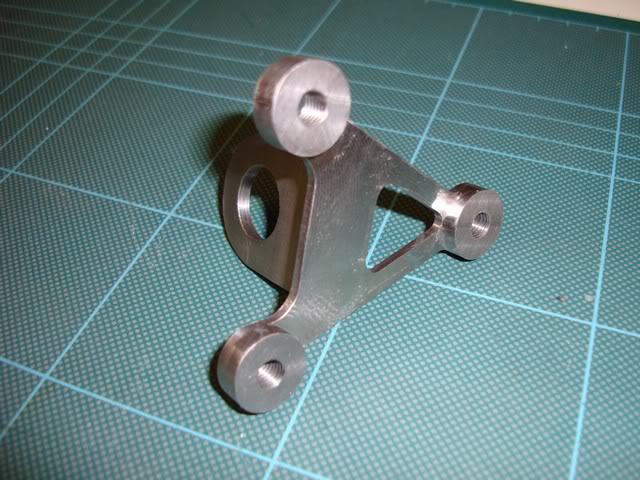
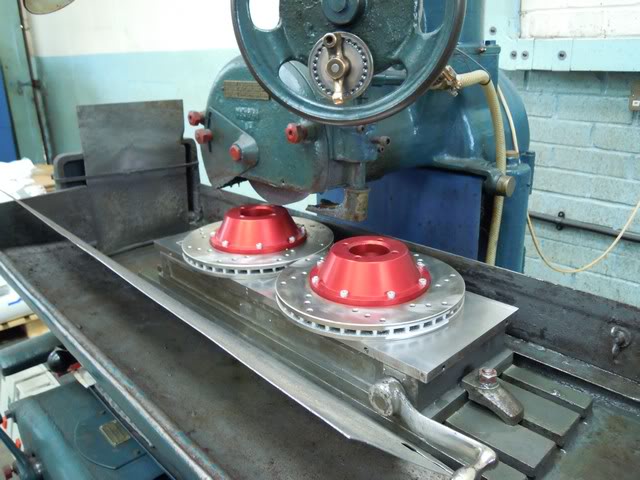
At work we like to machine things out of solid so we started with this
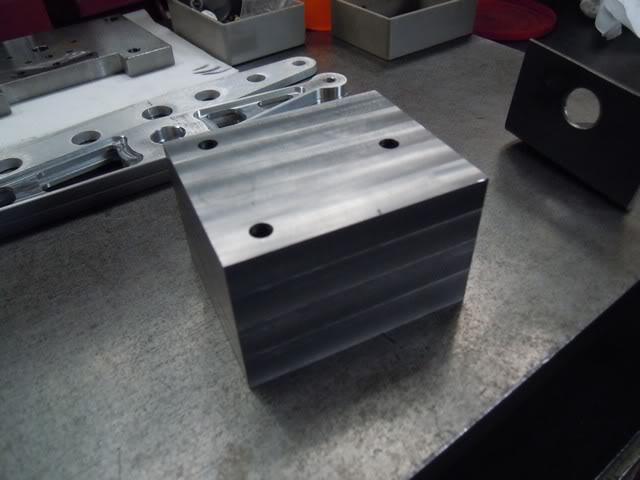
and ended up with this


I was not happy with the way the drive flanges were fitting to the dics bells it was found the the mounting face of the bells were slightly conical, we ground these faces parallel with the disc face, still not fitted as the drive flanges themselves also need a little "adjustment"
I also have a problem where the upright fouls the inside of one of the brake bells, we are going to have to measure all these parts and work out what need to be done..............
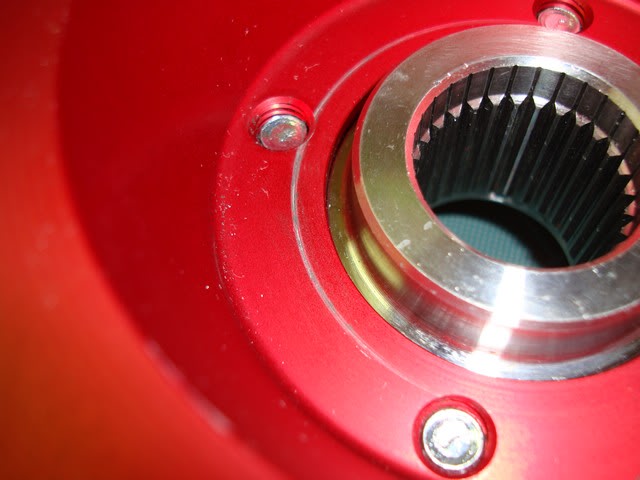
The "axles" that were once CV joints also need a bit of machining "to make them right" as the bearing does not sit properly against the shoulder
Because of all these ill fitting parts i have been unable to properly build up the front end but the loose assembly i have managed shows that i might need a 3 mm spacer for the caliper to clear the wheel, this has brought another problem, a 3mm spacer means that there is not full thread in the wheel nut:-( the next readily available stud has too short a thread length and requires me to fit a 10mm spacer when i am able to build these parts up properly i will investigate the possibility of machining the caliper brackets to move the caliper towards the wheel axis to eliminate the spacer altogether.
In order to reduce the rather severe looking left hand side drive-shaft angle i seem to have i intend to lower the engine, i have found some engine mounts that are just the same as the standard ones just 15mm thinner, this will mean some reworking of the chain tensioner.
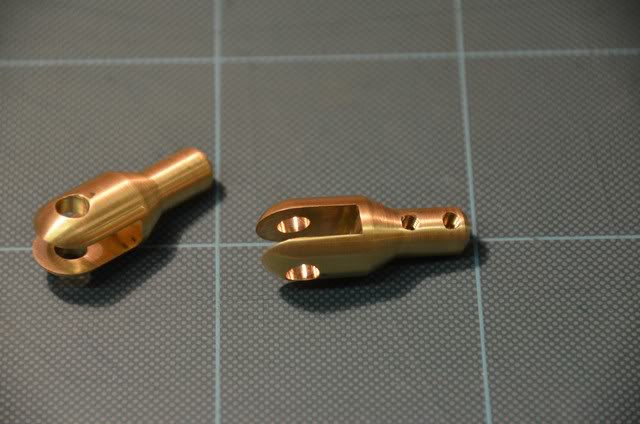
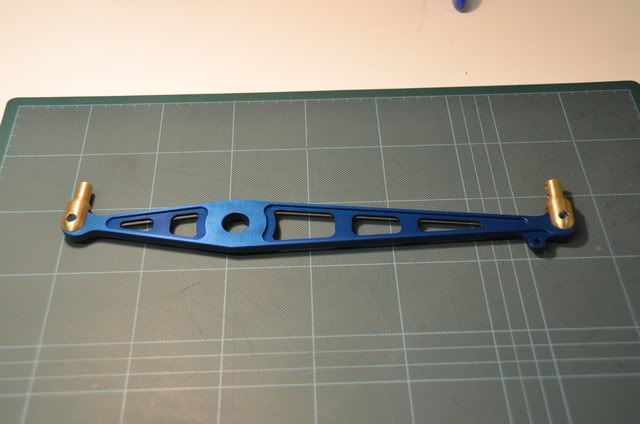
Some custom throttle cable ends, the brass is a bit heavy but the right material for the job
Doesn't bring it right up to date but i think that's enough for now as i have had enough of dealing with photobucket a very slow broadband connection and children who think they have some god given right to use as much bandwidth as possible

This thing is insane!
Posted by MPower on 10/12/20 @ 1:54:15 PM