You must be logged in to rate content!
12 minute(s) of a 668 minute read
9-13-2014
4everjeepin, thanks for the compliments. The activity has slowed greatly as compared to when doing the Willy's frame work.
On the Chevy I'm down to the fine details and I've really had to low my speed to get everything to fit and look cosmetically correct.
It has taken me nearly 2 weeks just getting all the brake lines just how I want them to be.
I am still taking pictures and posting, along with building, it shows the need to slow and have patience.
Also I hate to post with out pictures, not that I don't mind answering questions and such, I've checked on other threads and would go a full page without pics or progress just posts like " I looked at my truck today". I like to see action, thus I post pic after pic.
I do see the hits going up and up and I do appreciate the activity and hope people are still gaining knowledge and information during the quiet times of this thread.
Thanks everybody. Jim
9-14-2014
Absolutely a huge thanks.
I know what pictures mean to me when I'm trying to learn or figure stuff out, I'm so pleased my efforts have raised your confidence and abilities, I can't hope for anything better with what we've all done with this build thread.
I say "we've all" because it has been everybody's input through the creating of this build thread that has helped add to and shape this thread over time.
Jim
9-16-2014
"Bought and paid for by me", yup, that sums it up. Nobody is gonna tell you what you can and can't do with it, perfect mind set, a great beginning to something you may have for, well, let's say the next 30 years.
Class is back in session, I have more pics.
A short time ago I showed the rebuilding of the front brake caliper. Pretty straight forward stuff. Piston fits inside a bore and there is a seal to keep the fluid within.
As we can all imagine, the piston is depressed into the bore to allow the brake pad, being nearly 1/2" thick new, will slowly move out from the bore to make up the loss of brake pad material over time.
Great design, easy to understand. But actually there is another brake pad on the other side that does not have a piston behind it to push on it. Nor is there a piston in a bore that is going to make up the space when the brake pad wears away. Let's gets the idea of the floating caliper out into the open.
In this design the caliper is not mounted solidly to the mounting bracket, the caliper is allowed to float. It is mounted in a way that it can slide back and forth on pins and rubber o'rings.
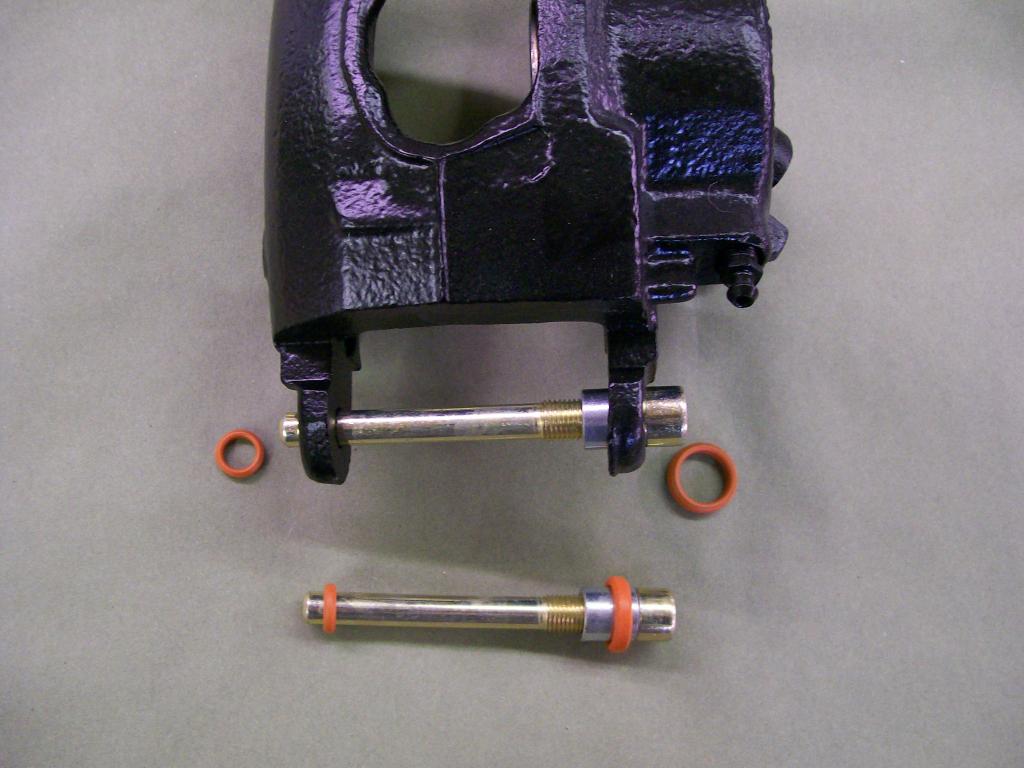
As the fluid pushes on the piston it is also pushing on the caliper housing on the backside of the piston. The pad is stopped once it contacts the rotor. all the force is now equalized by the caliper housing pulling the opposite brake pad and making contact with the other side of the brake rotor.
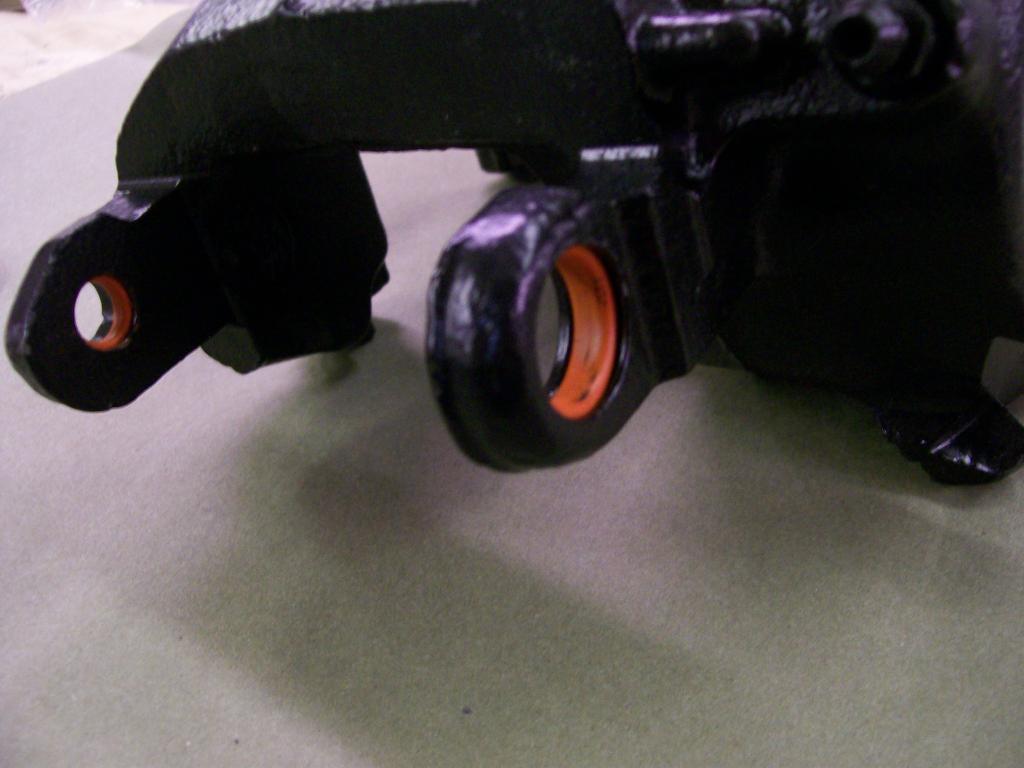
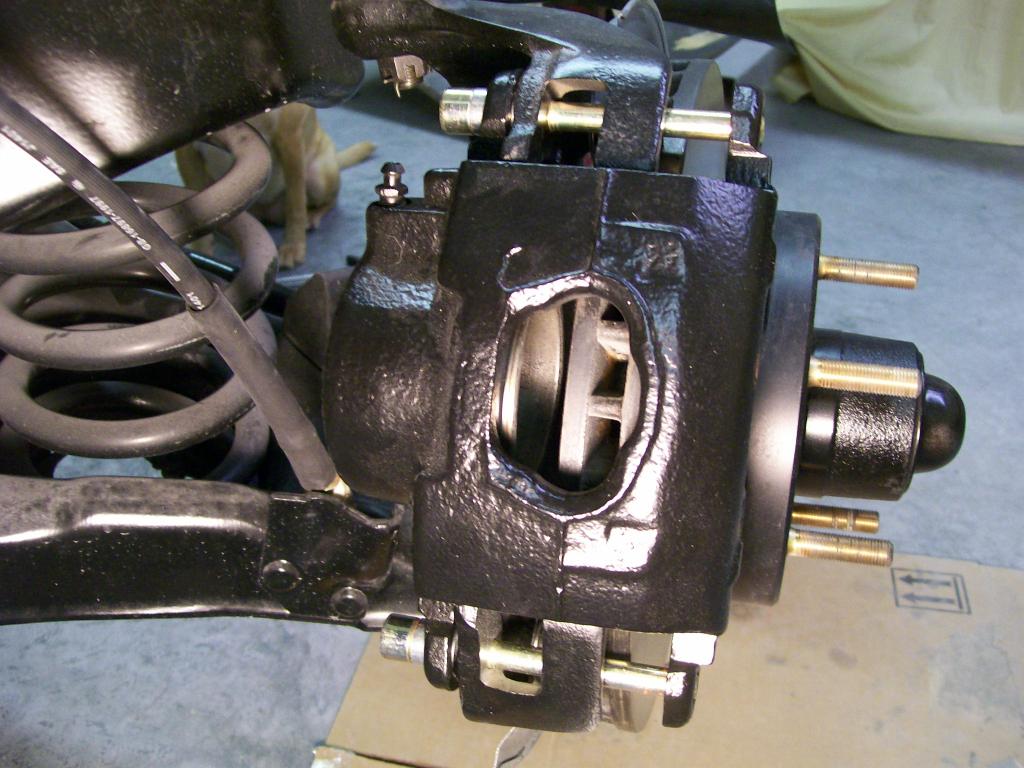
We have one piston doing all the work. Here is the caliper without brake pads in one position, then showing the floating concept with the caliper moved to the other side. Notice how the caliper has slid considerably on the mounting bolts/pins.
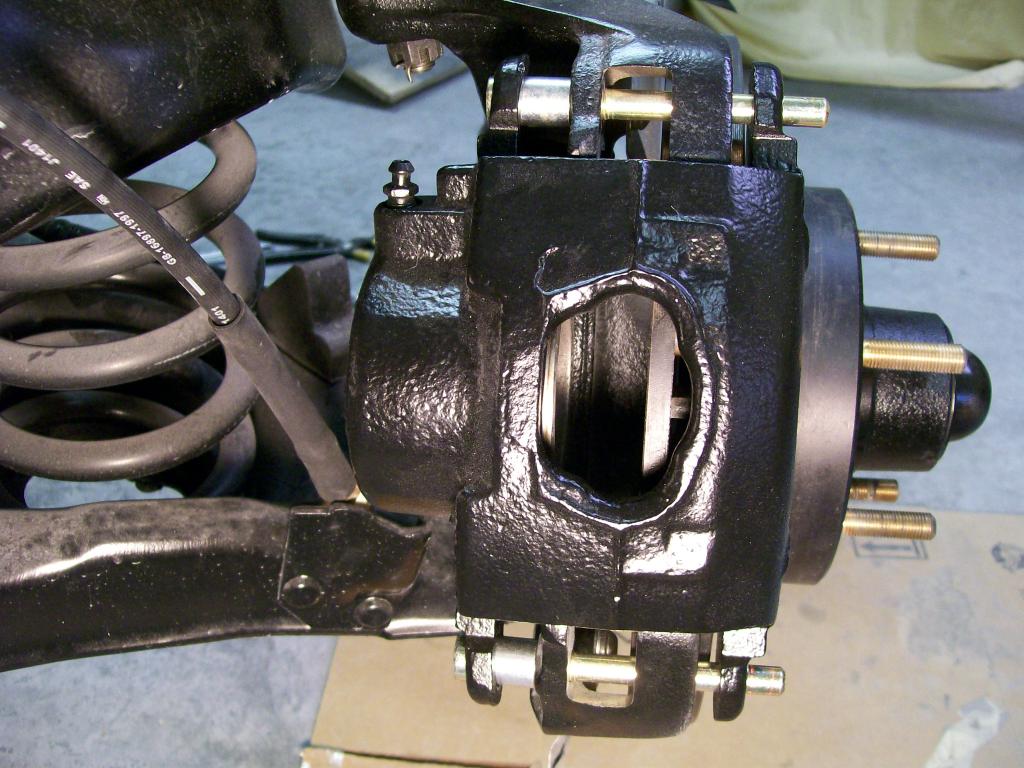
And another set from a different angle. In the space between the caliper and the rotor you can imagine a brake pad in there.
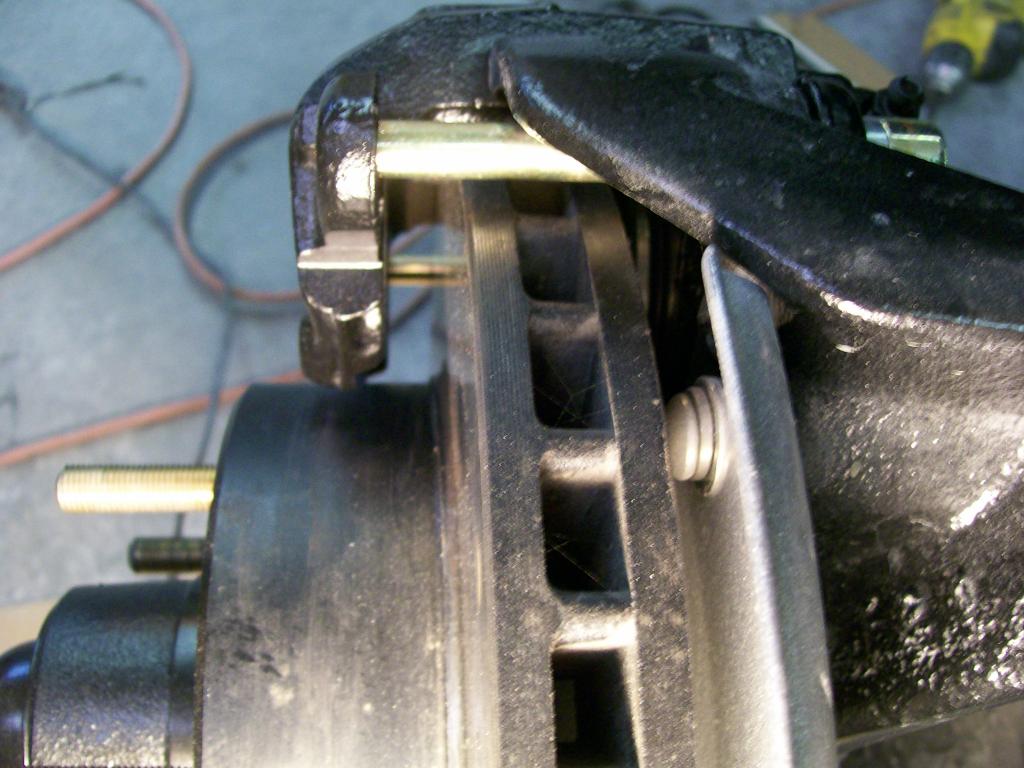
Here you can see how the caliper would move to make up for the brake pad wearing away.
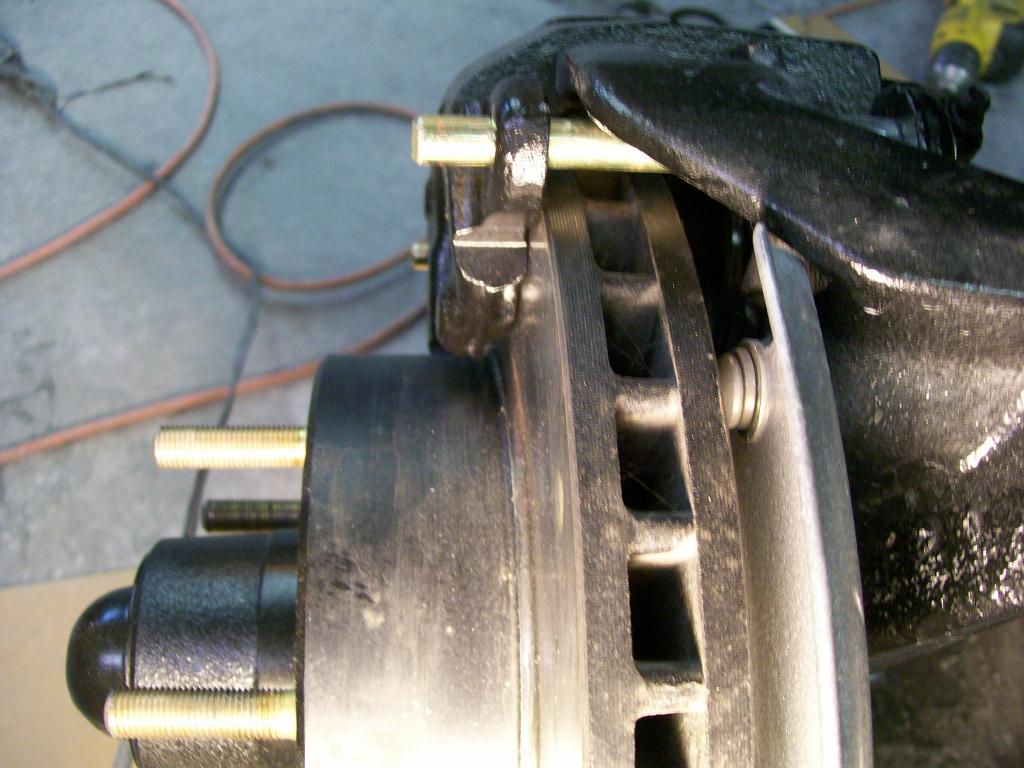
Good stuff.... One issue I see is where people will get new pads, and try to install them. But before they tried to remount the caliper they didn't push the silver metal bushing back in the caliper mount to recenter the caliper and they say the pads are to thick.
Now, with a caliper that has pistons on both sides, meaning pistons behind both brake pads, does it need to be a floating caliper, or can it be mounted solidly?
Of course, different vehicles, different mountings. Now that the idea of a floating caliper is in your head, next time you change brake pads don't just physically change the pads and say "done". Take the time to understand how the mounting system that you are working on works, figure it out, then when you say "done", you got a lot more out of it than just changing parts.
I had to learn all this 33 years ago, I changed a dirt bike over to a four wheeler, all I had were salvage yard and swap meet odds and ends. I ended up with a Harley Davidson front caliper and a home made rotor on a home made bracket being powered by a homemade foot master cylinder.
My point is, understand as many designs of everything you can, you'd be amazed of what you'll come up with by using old scraps of parts because you understood the function of all the parts someday.
I didn't think I'd get an answer, thanks for checking in LA-Sahara.
Yes, a caliper that has pistons on both sides can and normally is mounted solidly. The bolts clamp the caliper directly to the mounting plate.
In the case of the pictured caliper, the one piston and the force in front and behind it is doing all the work, pushing the one brake pad and pulling the caliper due to it's floating design, to work the other brake pad.
In the case of a multi-piston caliper, where pistons are on both sides, with all things being equal the caliper does not have to move to compensate for brake pad wear. The pistons on both sides with move outward equally as the pads wear, meaning the caliper can be solidly mounted, the pistons now take care of what the floating design did for the single piston caliper.
This multi-piston caliper can be a pain at times to work on. In the single piston caliper, get a c clamp and push the piston back in it's bore. (only make sure there is space in the master cylinder for the returning brake fluid).
In the multi-piston caliper, as you push back the piston(s) on one side, the other side wants to pop out from the inner brake fluid pressure.
Alrighty, just one more aspect of one of the vehicle's systems broken down and some of the mysteries spilled out into the open.


9-27-2014
Ok, I've been gone for a while, I want to give a big thanks to everybody who posted the multi piston calipers.
My 65 corvette also has 4 piston calipers, no floating caliper mounts, they mount solidly to the mounting brackets, those early 60's engineers were some hard working guys back in the muscle car days.
Hopefully some of you have learned something about brake calipers and the reason for the different mounting systems and how they have their ways of making up for brake pad wear.
Sometimes, like the case of changing brake pads, it's easy to go for the "how fast can I get this done" idea. For me it's all about taking the time to understand how the parts all work together. The knowledge gained which turns into confidence is well worth the time taken.
Hopefully I'll have a new batch of pics soon, yes, finally some exterior body getting painted. I'm part of the way through the process with no big problems yet.
I've come to the realization that this truck will not be done before winter. My goal now is to get the cab and front clip painted. With these painted I can spend the winter installing the wiring, interior, drive train, ect. Basically, I won't spend the winter doing nothing while waiting for warm weather to return.
Once again, thanks everybody for keeping this thread moving forward, even in my absence, with good manners and information pertaining to the present subject.
9-28-2014
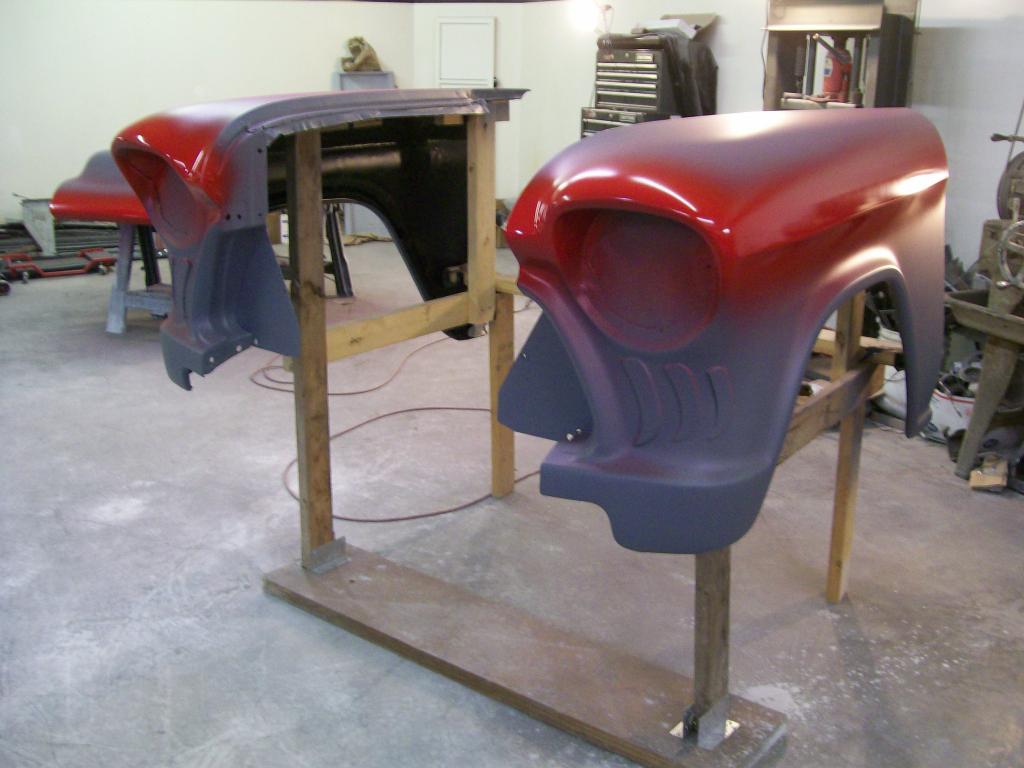
Finally got some exterior paint done. It took me 3 days with final sanding, masking, cleaning and prepping.
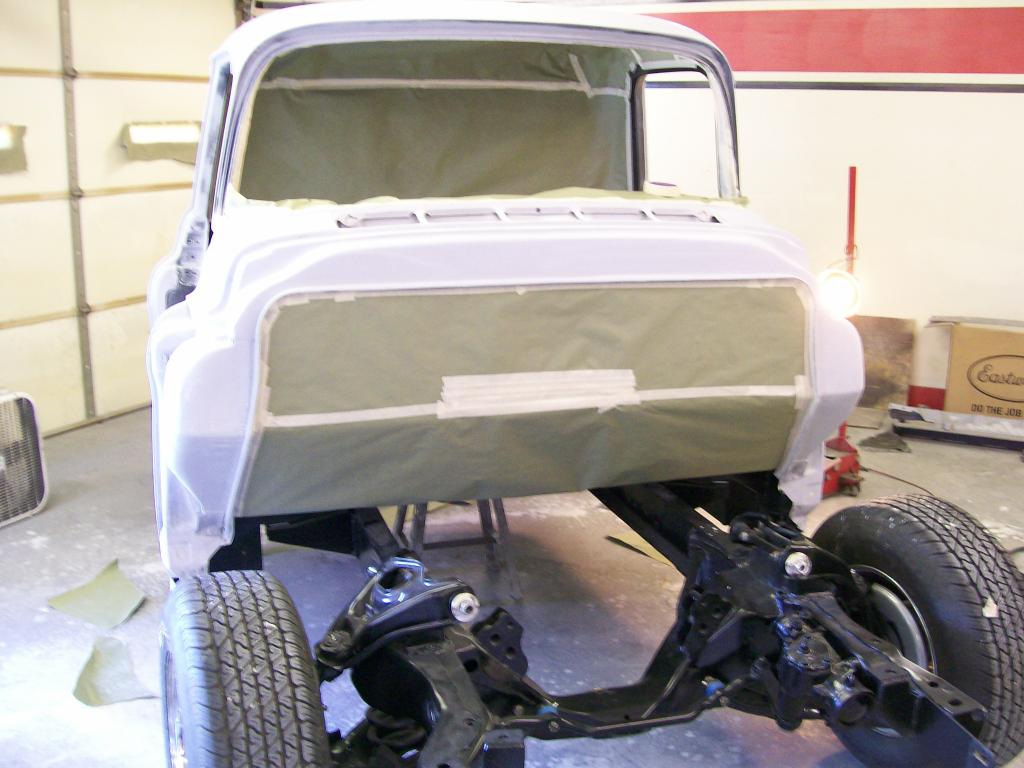
Once all prepped I applied 1 coat of sealer. For me, by spraying a coat of sealer which is a personal option. Once I spray the sealer it's go time and a great way to practice in what order you're gonna spray all the parts.
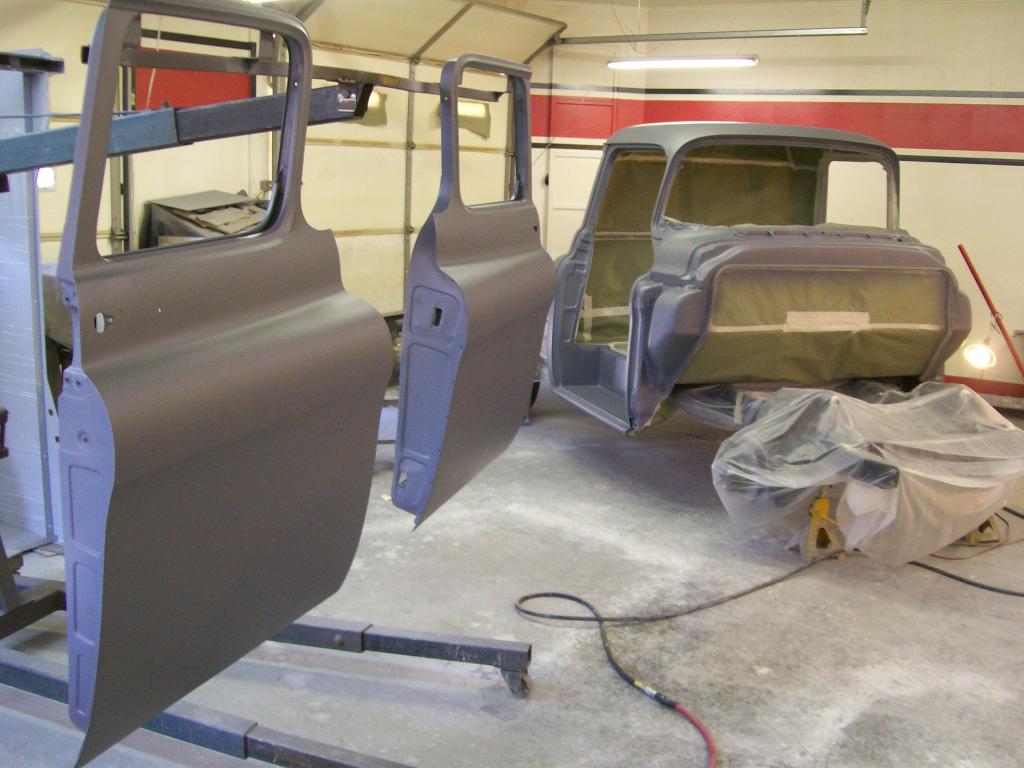
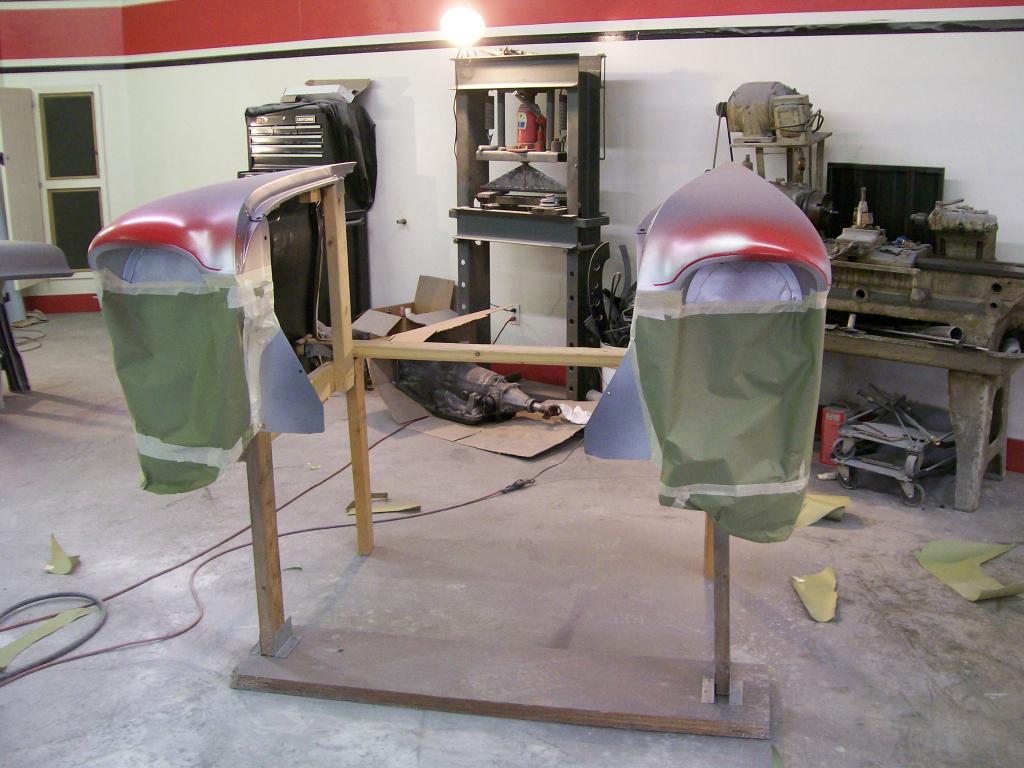
Once the sealer dried I sprayed red where I am going to split the two tone paint.
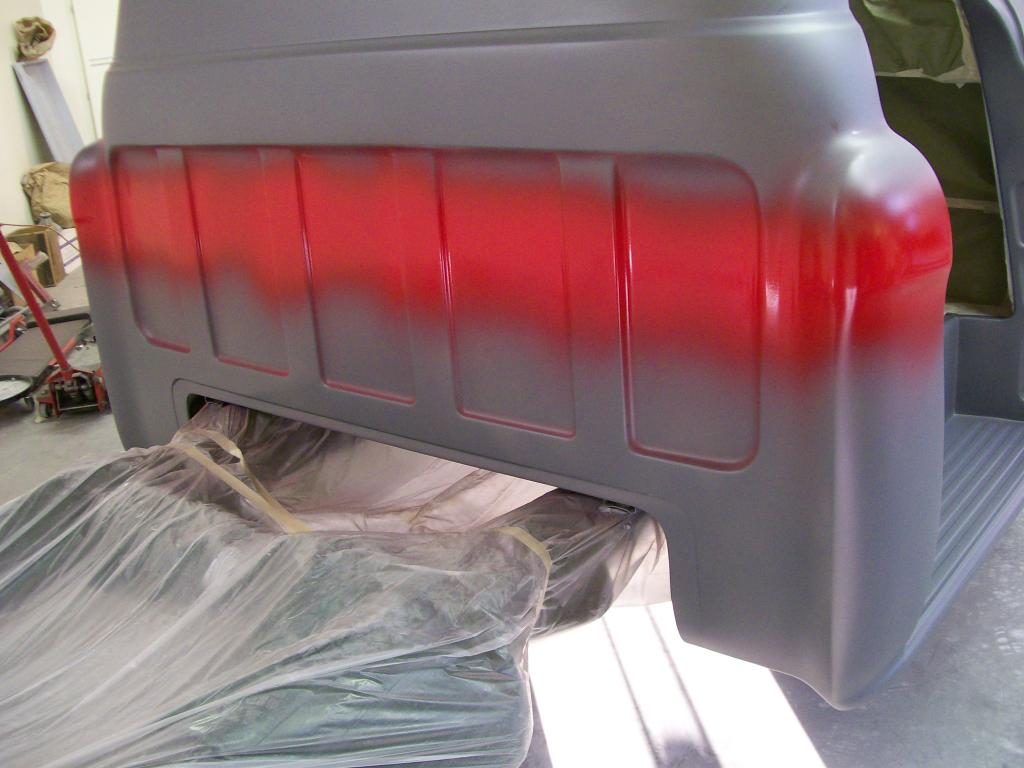
I have choices, I can spray all the jams and assemble the truck, then paint. For me it's not an option, too many colors making too much over spray in the door jam and not very clean lines between colors.
So.... I assemble the truck very carefully.
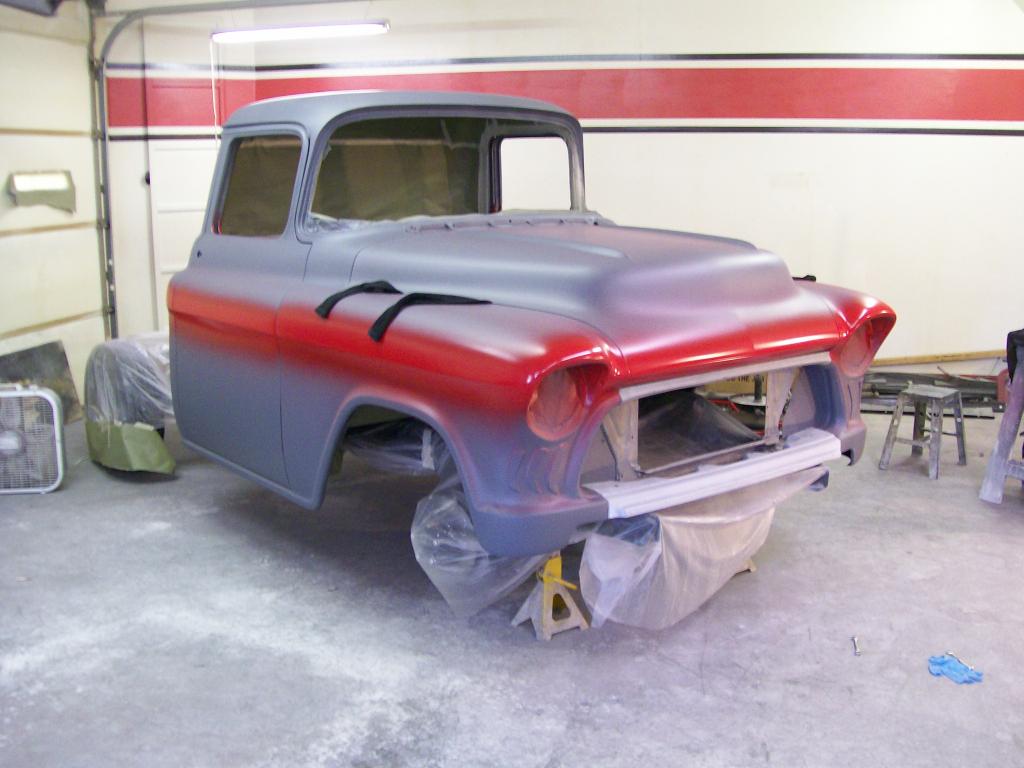
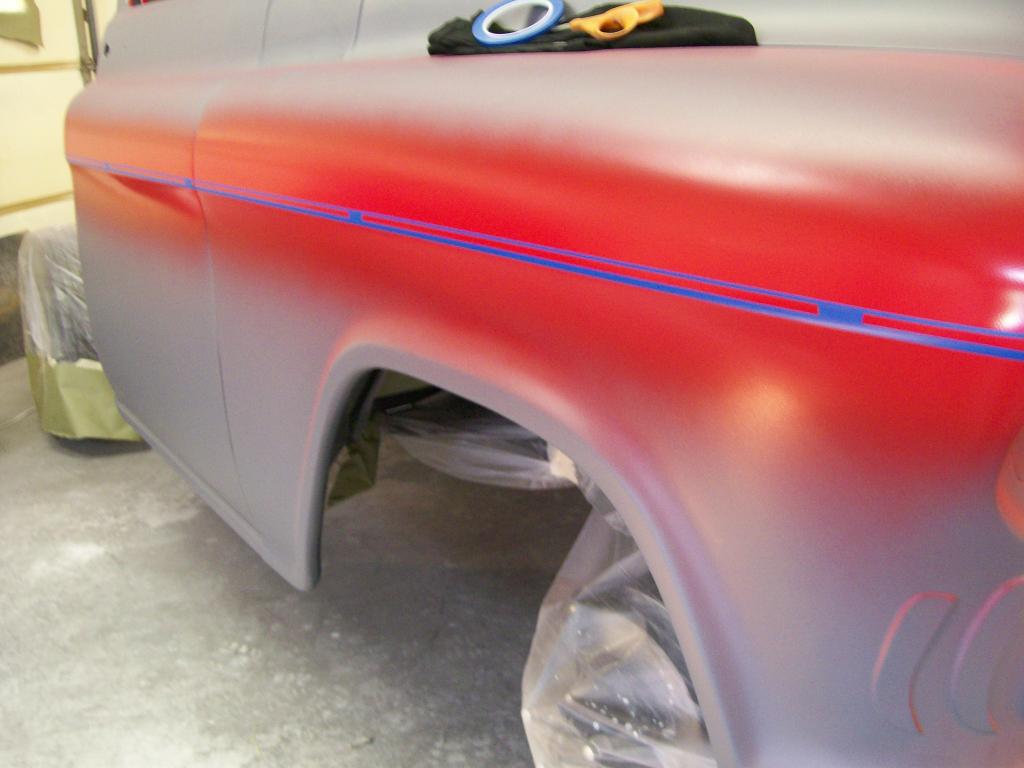
Once I align the doors and fenders and hood I lay down 1/4" tape to seperate the black and silver. This tape will cover the red as I paint the other colors.
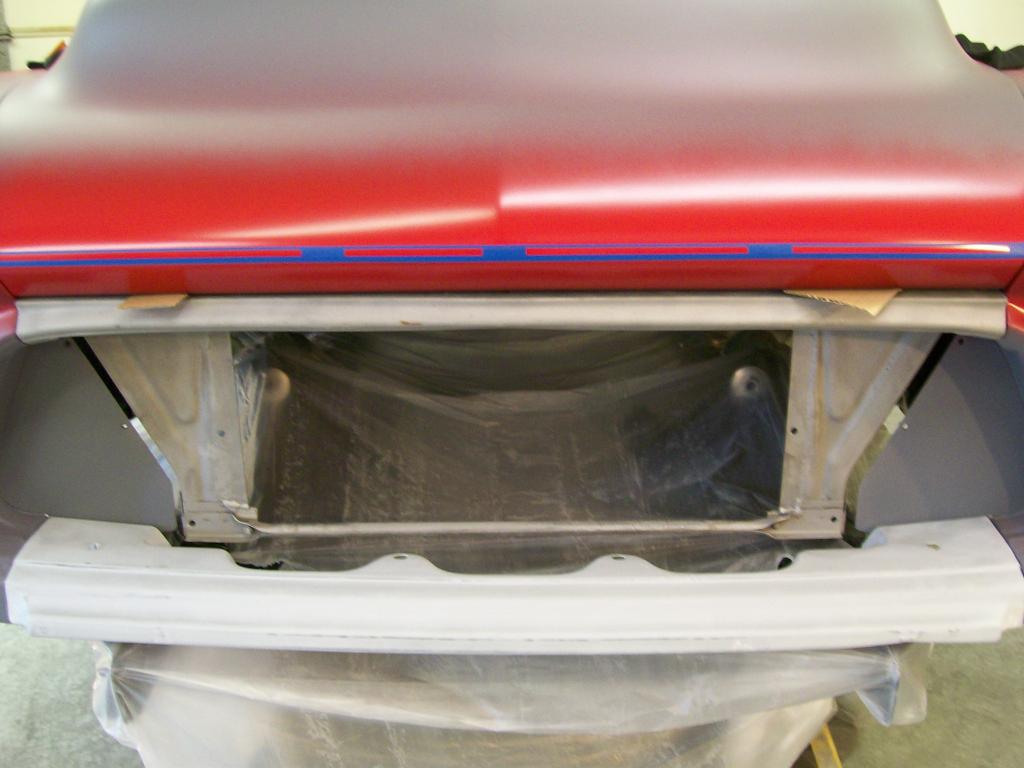
What??? Extra tape, yes. I wanted a 1/8" red line above the 1/4" line for a decorative look. The small pieces you see between them are 1/4" pieces, they are giving me the exact spacing I want. I will remove them before paint.
Once the pinstripe taping is done I sprayed silver paint.
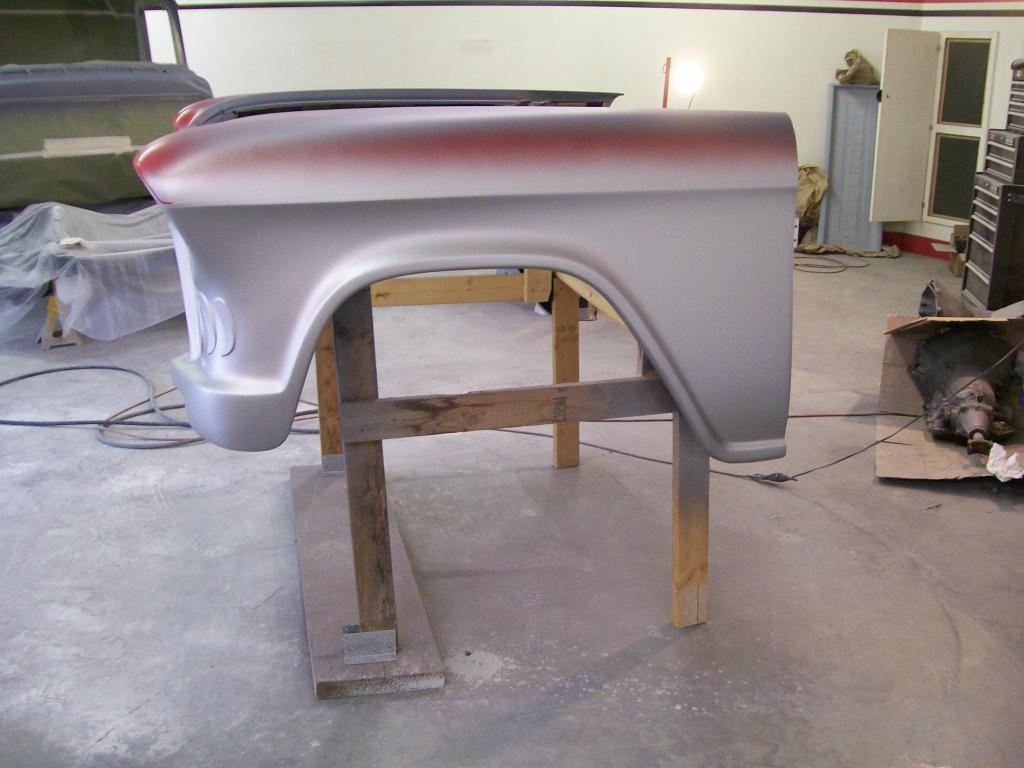
Notice the red pinstripe showing. I had the stripe going up over the headlight. As I thought about it I just wasn't good with it. It looks good on the Batmobile but it will break up the aggressive look of the black that I'm looking for when done. So I cut the line, removed the tape, and sanded the tape edge. It'll be covered with black later.
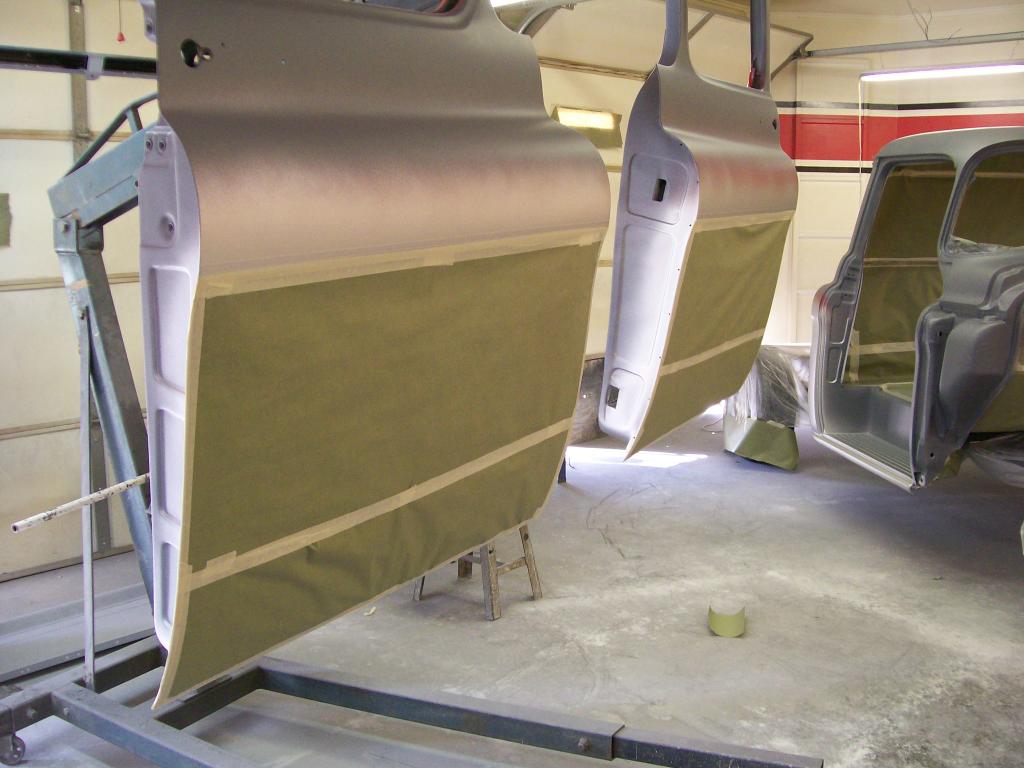
Once the silver dried I taped and papered from the 1/4" line and down. Being very careful to cover and tape so no black will over spray on it later.
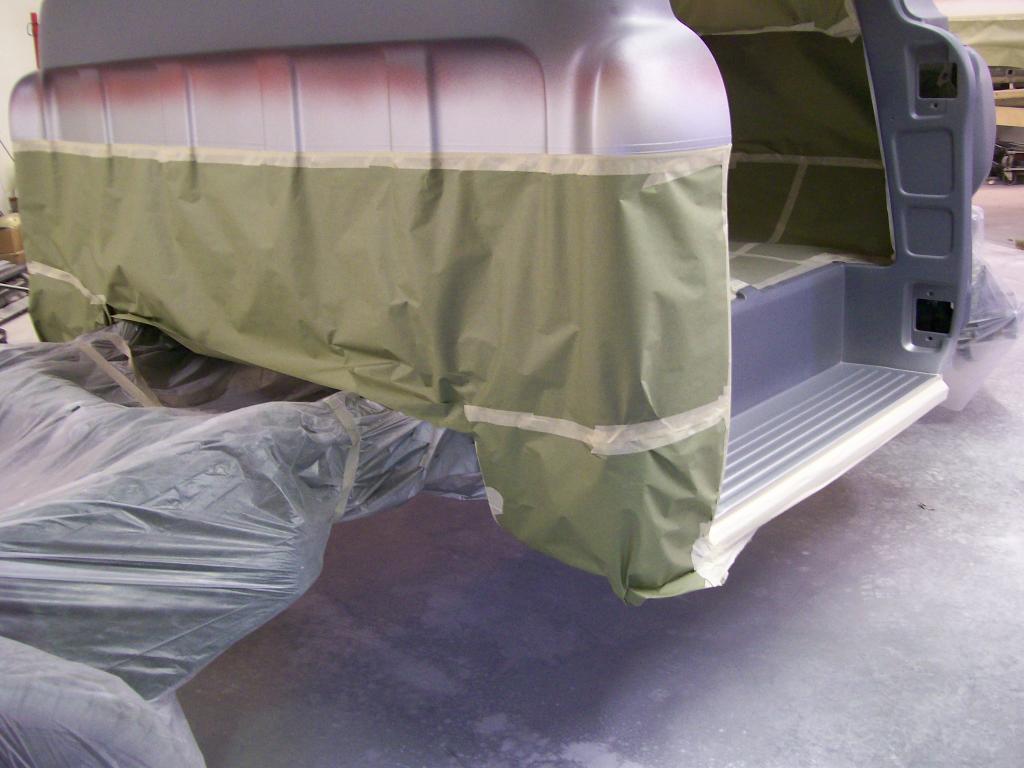
I'll stop there. Next set of pics I'll start getting to the black.
