You must be logged in to rate content!
12 minute(s) of a 668 minute read
1-1-2014
Hey everybody, Happy new year.
Just a simple update..... The 57 Chevy truck project has slowed a bit, working extra hours at work and in the cold takes the energy out of me.
I have struggled with one aspect of the truck having to do with rear end gearing. I know I want to have great low end for burn outs and such, yet, like all of us I want to do 65 miles an hour with out over revving the engine. I want to stick with the automatic, yet I'm not interested in a modern overdrive transmission....
I've done a ton of studying and have made a decision and have ordered the Gear Vendors overdrive. Without great detail, it has way more versatility than going to a modern overdrive. I will keep the turbo 350 and do 65 at a reasonable RPM, even after I gear the truck to a 3.73 from what is now a 3.08, my overdrive end result as a 2.91 for the highway.
It also gives the option of creating a 6 speed automatic on the fun side. This overdrive can be engaged while in first, second and third gear creating a 6 speed close ratio transmission.
More details on that when it arrives.
The Willys is still working for living, getting me through the snow and ice this year and also hauling wood.
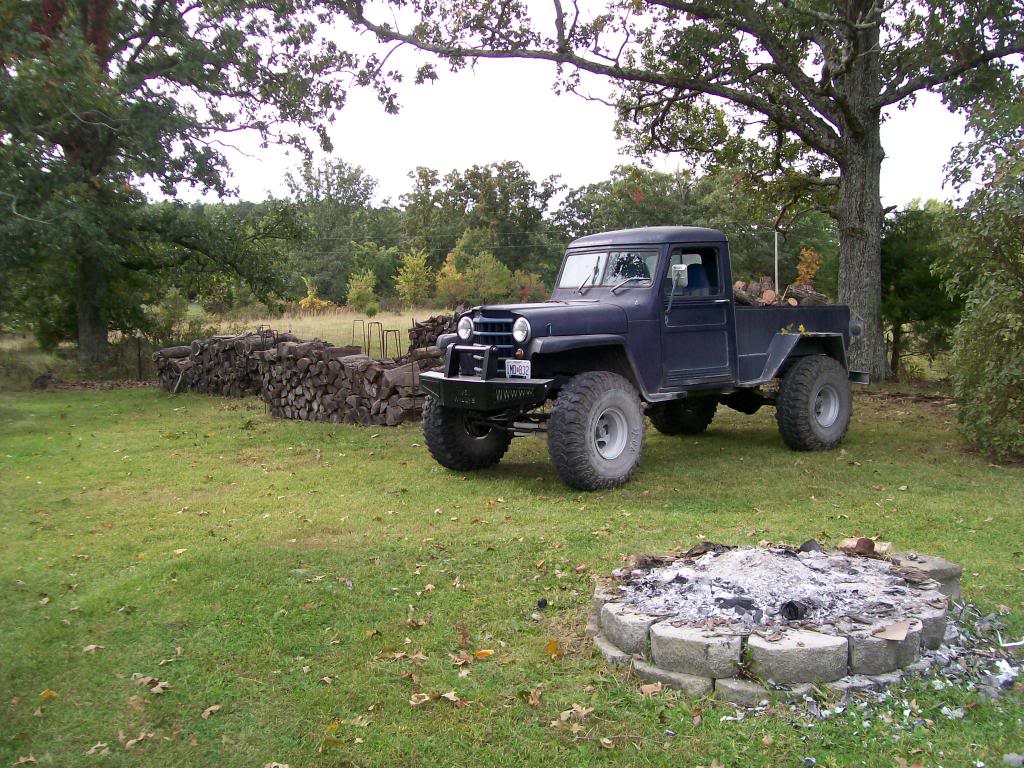
Now that the holidays are over I hope to get to getting back in the shop and feeling good about getting something done again.
Jim
1-3-2014
Hey Mike, great idea to get rid of the all original and get working on a workable fun driver. Not that I have anything against an original vehicle, it's just you spend more time listening for odd sounds and watching the gauges than actually sitting back and enjoying the drive.
As for getting the old stuff dirty... hmmmm. My Willys is and has been for nearly 30 years been my work truck, I think I get more credit for hauling wood and driving during the ice and snow that treating it like a museum piece. However, I do keep it out of the bad weather and bad conditions when not in use to preserve it as long as I can.
With that being said, the 57 Chevy will never see ice, snow or bad weather. But I do plan on road trips and enjoying when I can.
As for driving an old classic, you'll get used to it, only in it's special way, get used to thumbs ups and people waving at you. Remember, you're driving a piece of American history.
I've been driving the Willys since 1985 and also a 65 Corvette since 1983, unlike buying a new vehicle which slips between the cracks in a year or two, these old classics become more unique as every year passes by.
As Harold_Ray mentioned, I'm waiting for parts right now, not much progress, feel free to post a few pics of yours if you'd like to.
Jim
1-5-2014
Thanks J-Quad, we have a large snow fall happening right now. Since I'm not doing much in the shop I have the thermostat set at 45 degrees. I usually leave the Willys in an outbuilding but I've moved it to the shop since it will be 10 below tonight and I need it to get me to work tomorrow......I do pamper it when I can.
mikec4193, I took a look at your build, I take it they salt the roads up in your neck of the woods. That's some frame work going on there. I certainly look forward to keeping an eye on your build thread.
1-7-2014
Walkenvol, you are correct, the flap disc does change it's shape as you use it.
In the photos listed above in each one the final grind was with a brand new disc, as you mentioned an old one would be difficult to manage a clean edge cut.
I mention also that for the finished cut, it is the brand new exposed grit that does the work. What I mean is, with the high speed of the 4 1/2" grinder I apply very little pressure as I allow the disc to level the surface without pushing the disc onto the material being finalized. As I'm doing the final grind I can watch the material level off so to speak by watching a light reflection on the surface. The new grit leaves a different swirl mark than the previous rough cut where I did apply pressure to get the material ready for the final cut, this different swirl mark tells me when I have leveled the material surface.
As for the flap disc being economical.......not at all. But, I was a serious 7" air grinder guy before and I still use it to level rough stuff. With the 7" grinder there was going to be a need to fill, prime, sandblast ect to get rid of the grind mark left behind, the flap disc basically removes a step for the extra cost.
However, when it comes to something flat and has many edges, such as the side fender emblem.
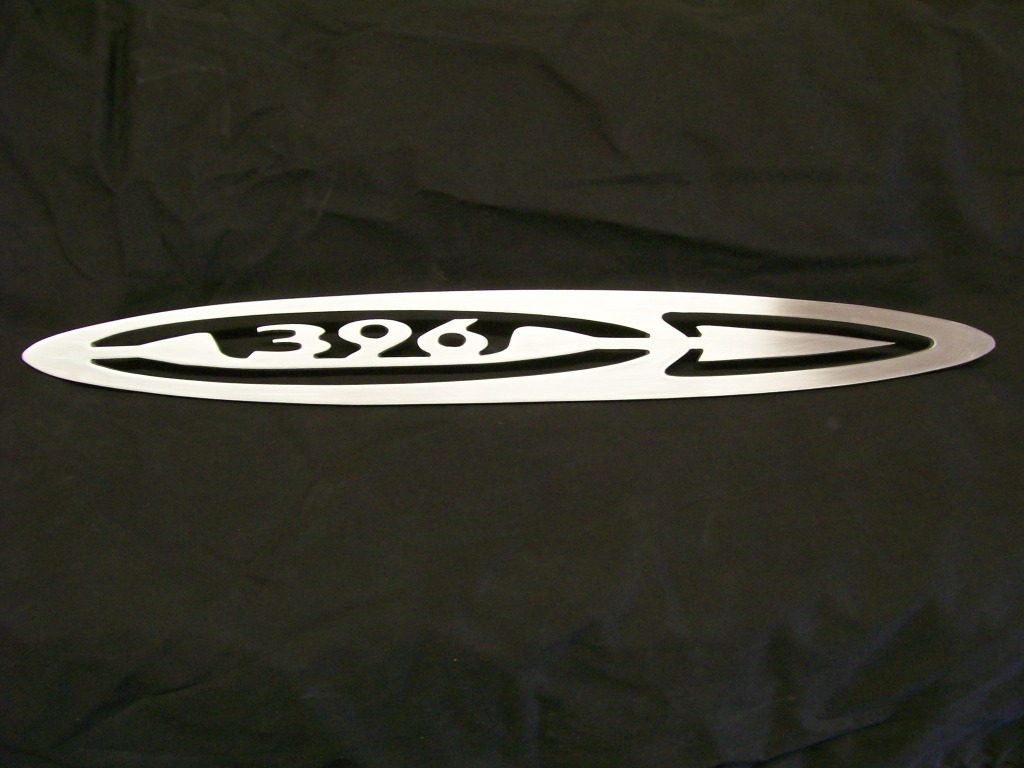
The flap disc would fail miserably. If I used the flap disc across the face of this emblem the disc would grind the 9 for instance and leave a clean edge, but immediately the disc would dig right into the 6, and ugly uneven surface would be left behind and after the polishing there would be wavy spots all over the place.
Now is the time for a belt sander, I have a bench sander where I can run the emblem over the belt, what I have found better is a hand held belt sander. I weld the threaded studs to the emblem, then drill a wood 2x4 to match the studs, mount the 2x4 in the vise, holes up, then drop the emblem, studs falling into the drilled holes. Now the emblem stays in place, I use a 120 grit belt and sand till the surface is clean and flat.
Walkenvol, you are correct, the belt sander certainly has a place in my shop, it just hasn't made it into the spotlight yet.
Thanks for checking in..Jim
1-10-2014
Finally I can start moving forward on the 57 Chevy. I've been in the disassemble stage but I came to a stop about a month ago. I've been struggling with what gear ratio in the rear end, something for the highway, or something for low end.
I also feared that if I did't make the decision now and I want to do something later I'm gonna have to make some changes like crossmember modifications, or changing up the exhaust system.
I googled turbo 350 overdrive and found the Gear Vendors site. After reading their stuff I then found every thing I could read about test drives, installation, strength, ect, then decided to order one.
Here I am, 2 weeks later and I have the overdrive in my shop. The overdrive mounting consists of a mounting adapter and the overdrive unit.
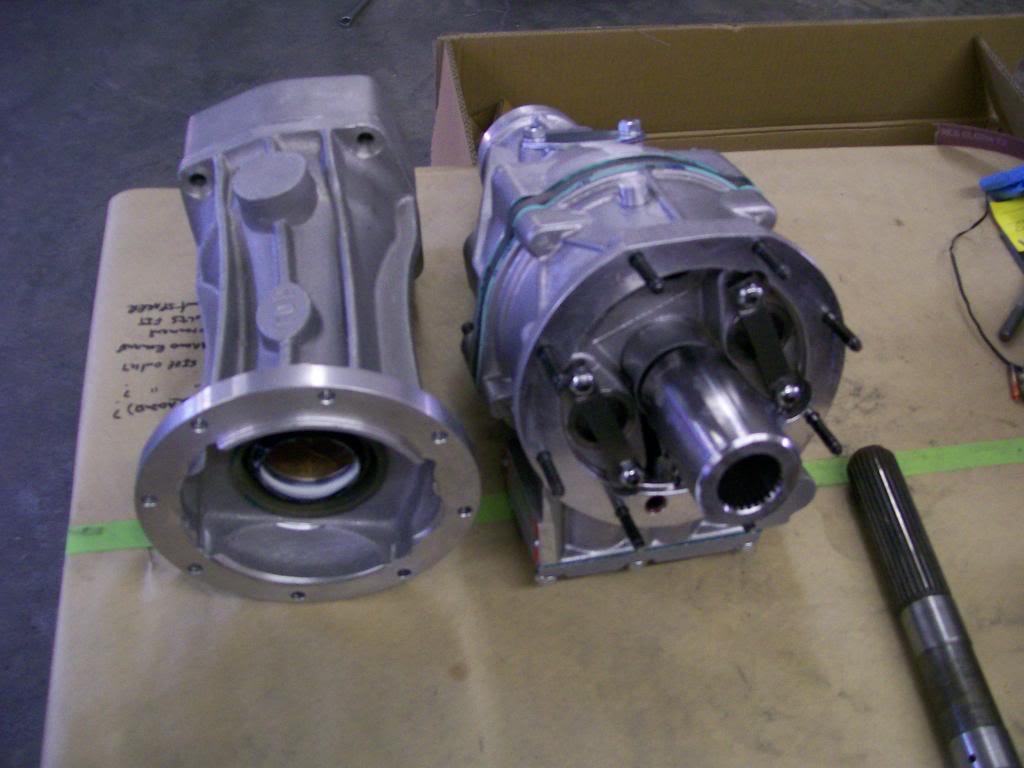
The mounting adapter is one of the longer ones, you can get a shorter set-up, my problem is that I have the "X" pipe to deal with. My X pipe has to cross in front of the overdrive because I need to have the space for the mufflers before the exhaust goes to exit through the bed steps.
First step is to remove the original tail housing, then install the mounting adapter. The trans has a short shaft in it now, the tail shaft in the picture is a longer replacement I got, I will install it later to work with the longer mounting adapter.
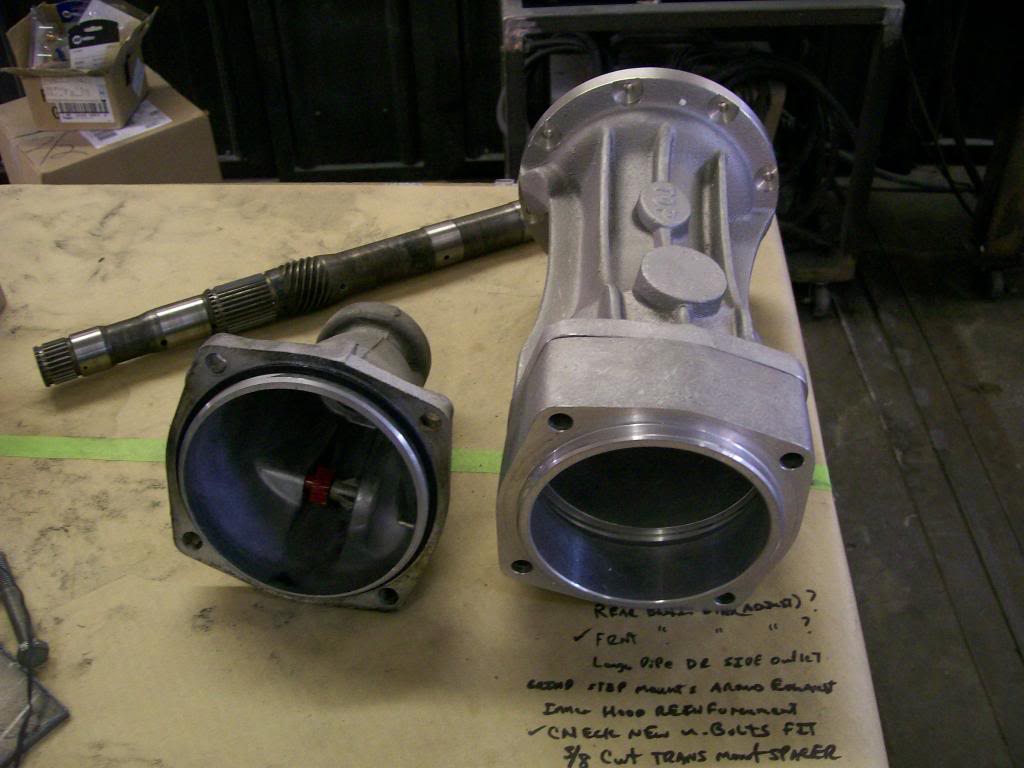
A look at the original tail housing removed.
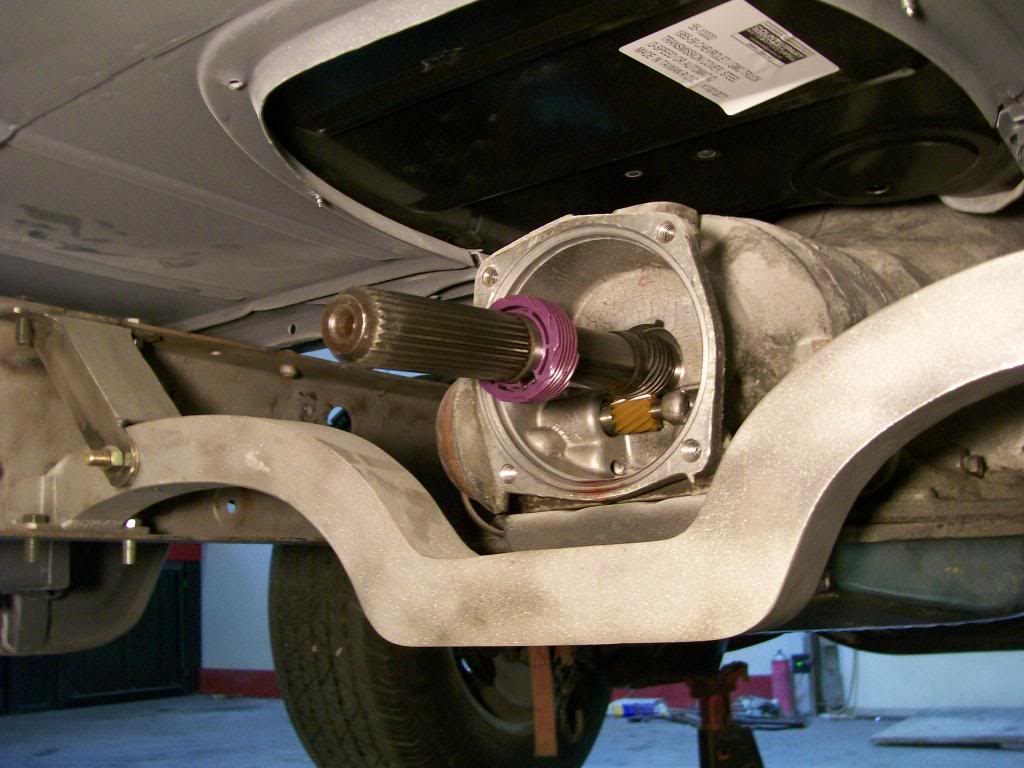
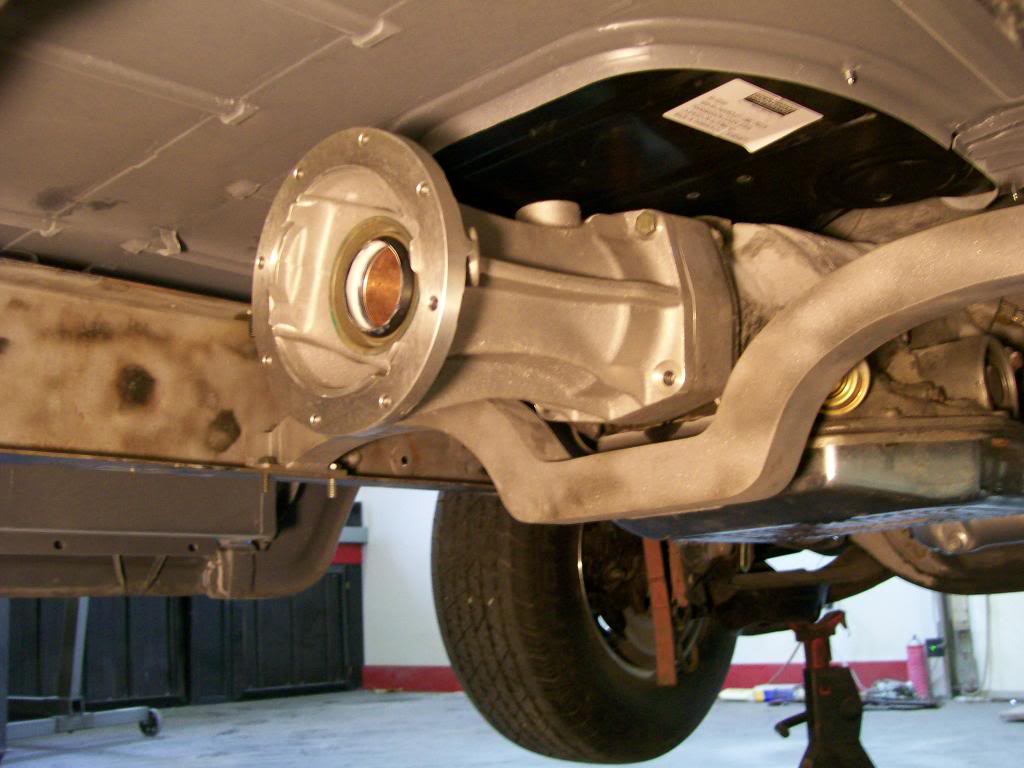
And with the new adapter in place. If I had the longer tail shaft in place it would be seen at the rear opening. What I do like about the design is although I have to cut apart my exhaust to make it fit, the adapter has a nice place for the X pipe to cross under it.
1-12-2014
Thanks lovett86, there been too many times I finish a project and think "I wish I would have". Must be why this truck is getting so many goodies, I always want to end with "I'm glad I did".
One thing I had to get used to is the overall length once it's all together.
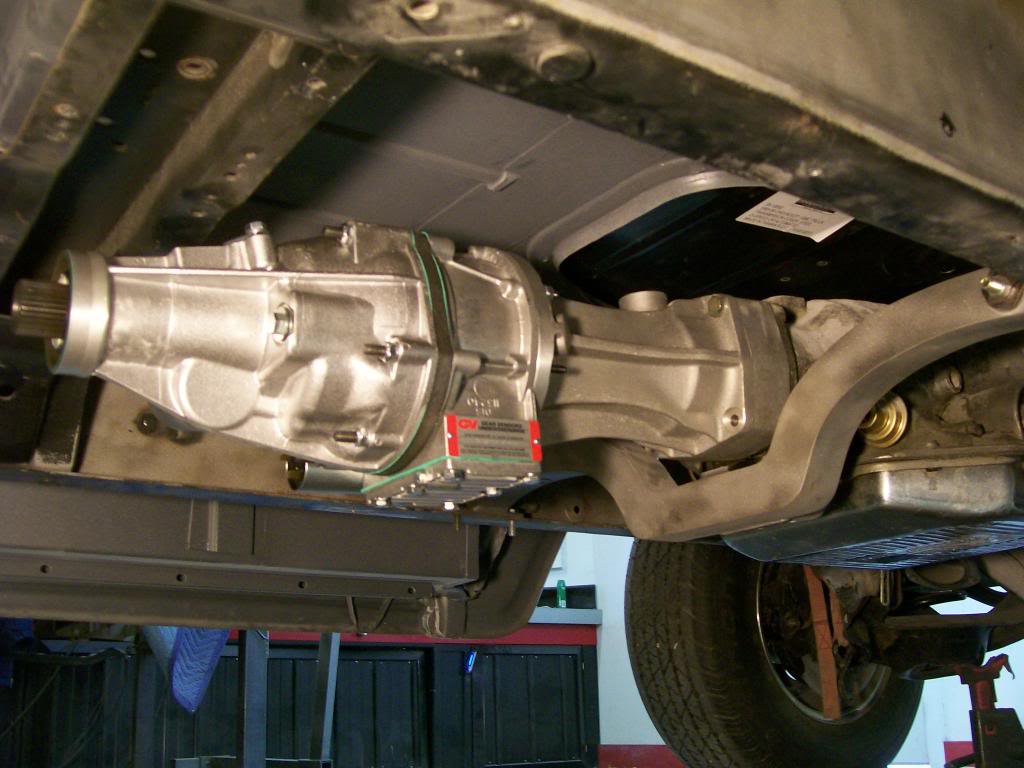
As I was doing my measuring to decide which length of adapter, my concern was exactly where was my X pipe going to cross and will the over drive interfere somewhere with the exhaust. Flashback to the exhaust.
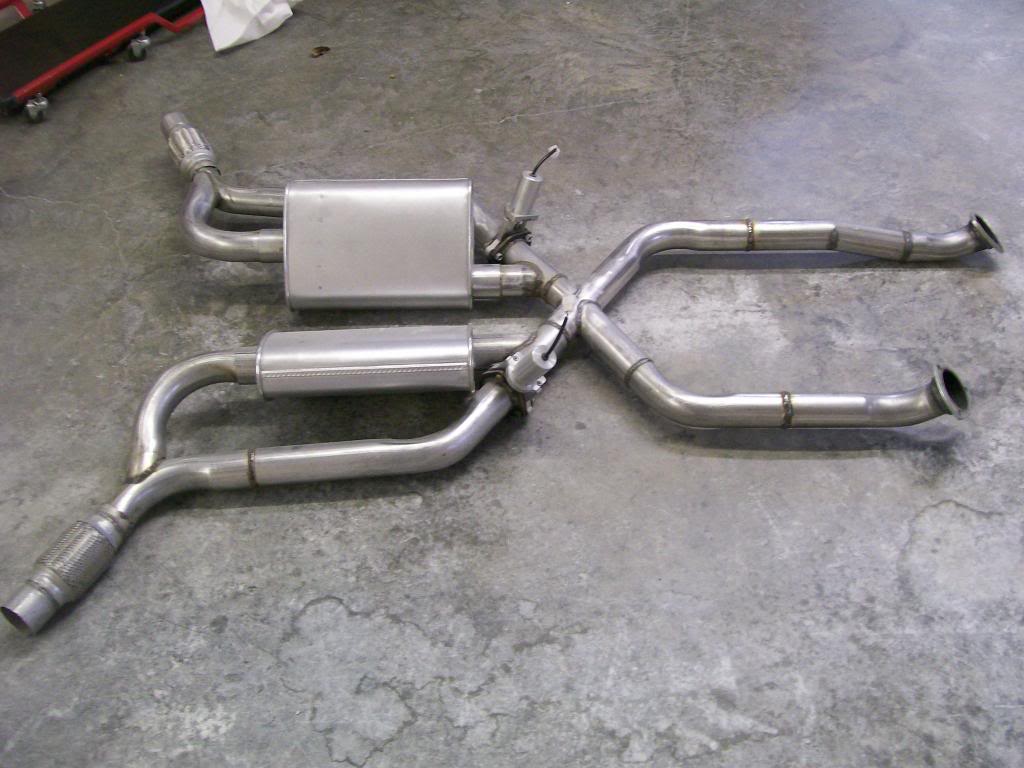
Ok, I was seriously thinking ahead, or so I thought, when I built the exhaust. I figured not to put the X directly where if the tailshaft ever dripped trans fluid it wouldn't land on the X and create a fire hazard. Also, I put the X far enough back as to where I could remove the trans without messing with the exhaust, so much for thinking ahead, it's a new ball game now.
With the over drive in place I put the exhaust in place, well I tried any way. The X runs right into the small oil sump of the over drive. Time to cut up some of the exhaust to make it fit.
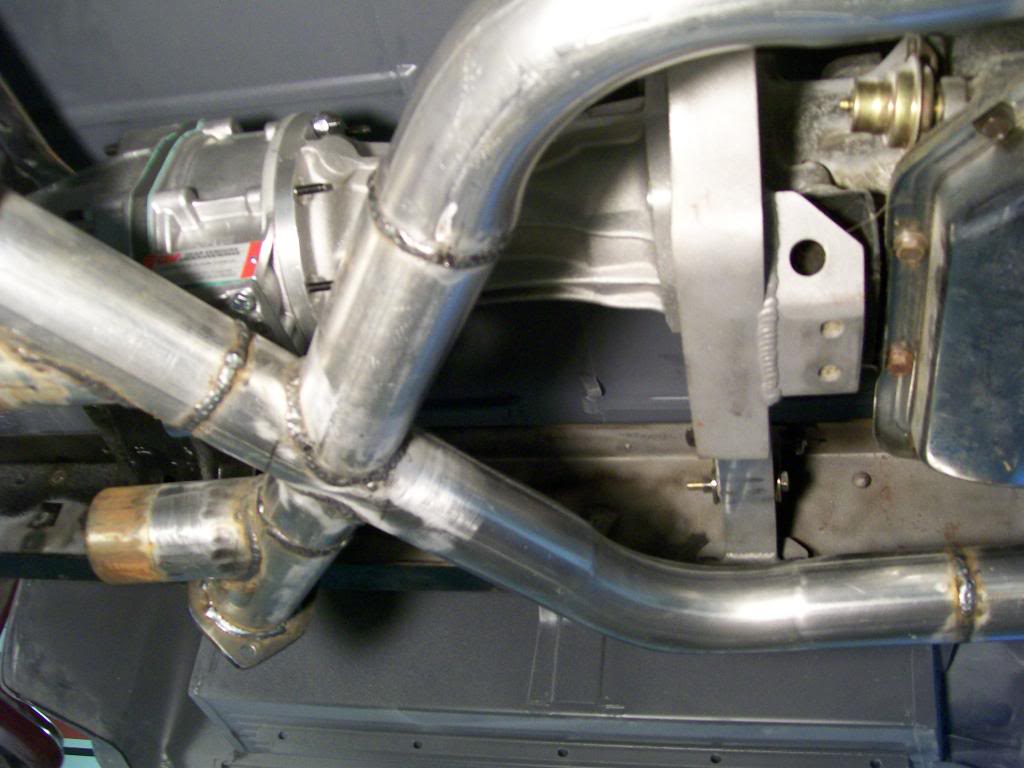
Looking at the above picture I can see the X area can move forward 3 inches before it will interfere with the cross member, I shall start by removing 3 inches and moving the X forward.
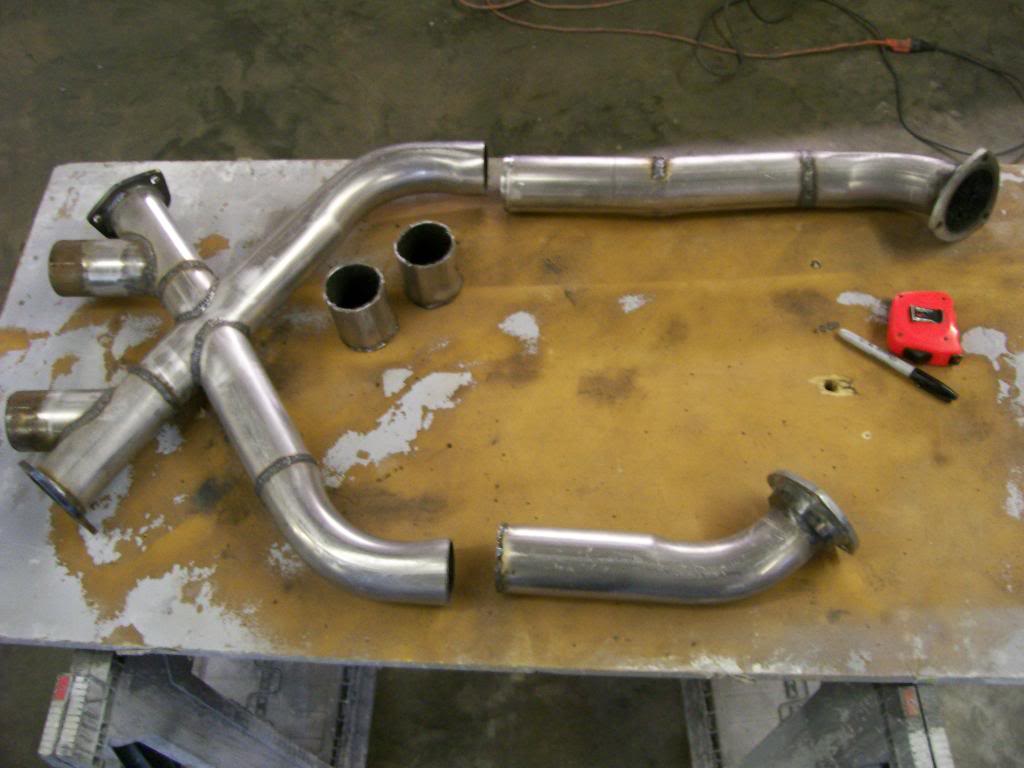
This is a good start, more to follow.
1-14-2014
Let's get this exhaust system working together with the over drive unit.
After removing 3" from the front pipes the X being moved back 3" now centered nicely within the space provided by the longer over drive adapter.
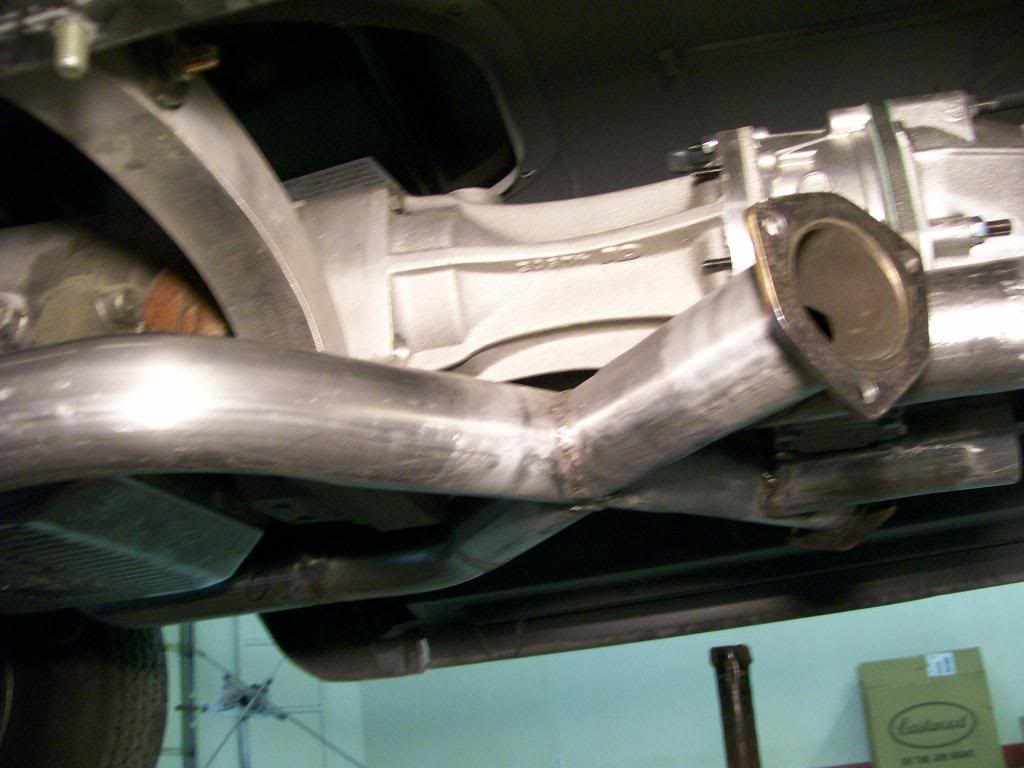
Life lesson, during the couple years of this thread I've opened up a rear axle, alternator, carbs, transmission, engine and a starter. The knowledge and learning about the mechanicals of all these items makes fabrication so much easier. Not being able to to chose a different over drive adapter than the one that matches the tailshaft already in the trans would have forced me to think within the box so to speak. Doing a measurment and realizing the longer adapter would work great I turned to e-bay and for $29.00 I ordered a longer tail shaft, bam, problem solved. Knowledge is power, knowledge keeps you from being stuck in a box, knowledge gives you the ability to be for creative for less money and that's the biggy right there, creativity, without it there is no fabrication.
Back to the build.... .... Once the front area was fixed I had to split the pipes that bypassed the mufflers. I ended up with a gap and a slight angle. I could cut a short piece to fill the gap but I'd end up with an unsightly angle, it's not gonna happen.
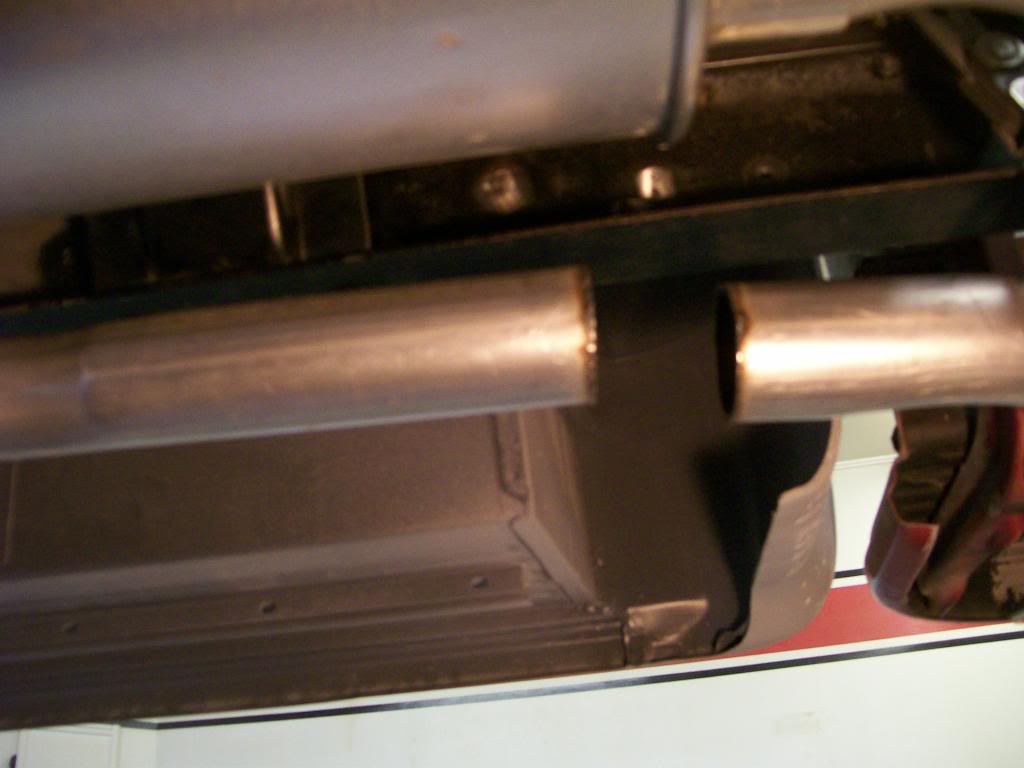
I could recut a new 3 bolt flange and have another piece of pipe bent to replace the whole section, or, remove the whole straight section.
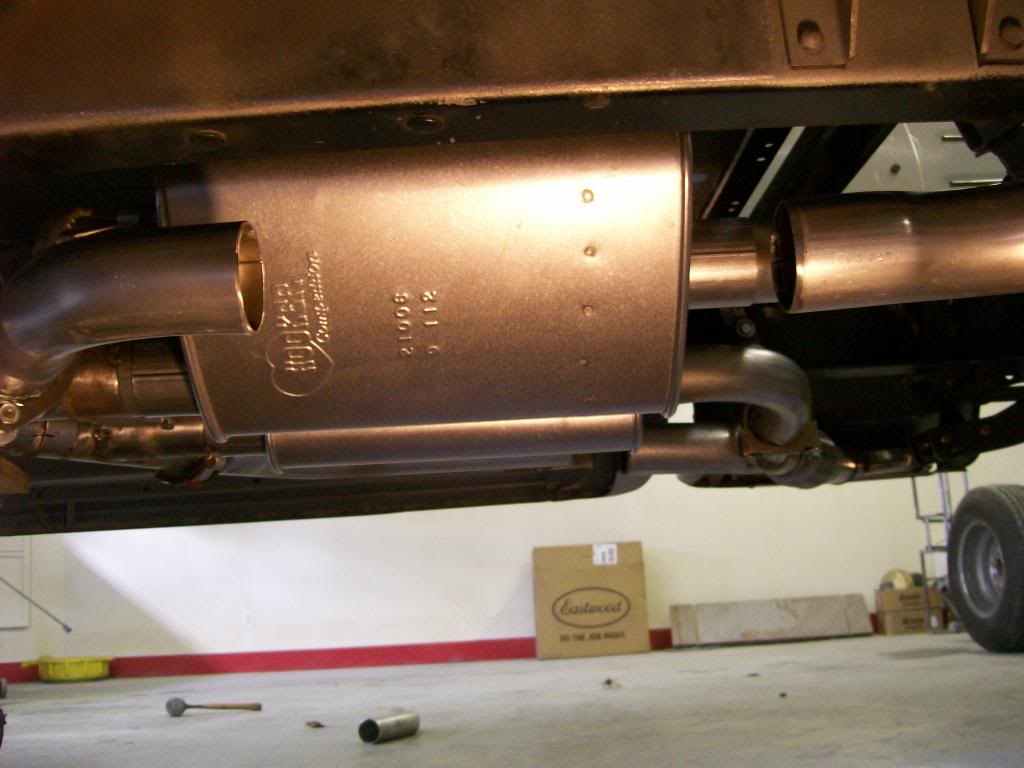
Now I can fill the gap and end up with far less angle.
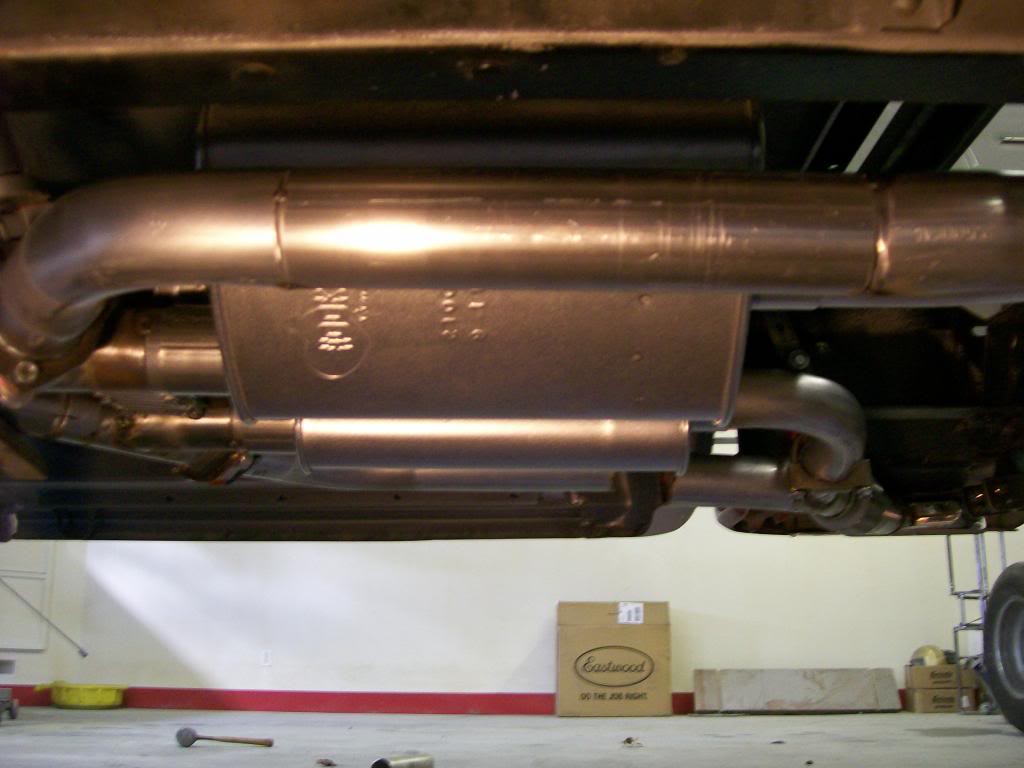
Once I do a full weld and clean up the weld bead this repair should be nearly invisible.
