You must be logged in to rate content!
11 minute(s) of a 668 minute read
9-26-2012
LA-Sahara, sorry for the confusion. The Willys is still around and filling it's purpose as a truck. The inside is nothing fancy, and you have to remember assembled it way back in 1985. I'll snap a pic or two of the inside of the Willys in the next set of pics I take.
Thanks Saul32, It's one of my favorites too.
eyeJeep, slower than dial up. It takes me forever to go through the pages to find somthing in the thread, awesome patience you have.
Inspiration, there's that word again. I can't ask for more than to inspire someone to rekindle and old fire, or to start a new project. I wanted to say it takes a spark to start a fire but I think Bruce Springsteen beat me to it.
The last picture I posted showed a nice smooth surface. I mentioned using the grinder again. Here is what it looked like before the grinding.
A different view of the cover. It's serving the purpose but it's just too big/wide. After this I'm taking the cut off wheel to it.
9-27-2012
Yeah, I hate to admit it, but dial up is still alive and......... well it's working.

I've wondered how many have passed by this thread due to the 1950 Willys title. On the other hand, Jeepforums did a good job of spreading the news.
On the steering column cover I was happy with about 50 percent of it. The facng was ok, I just wasn't pleased with how it stayed flat, then came to an end, so I took the sharpie, drew some lines and did some cutting.
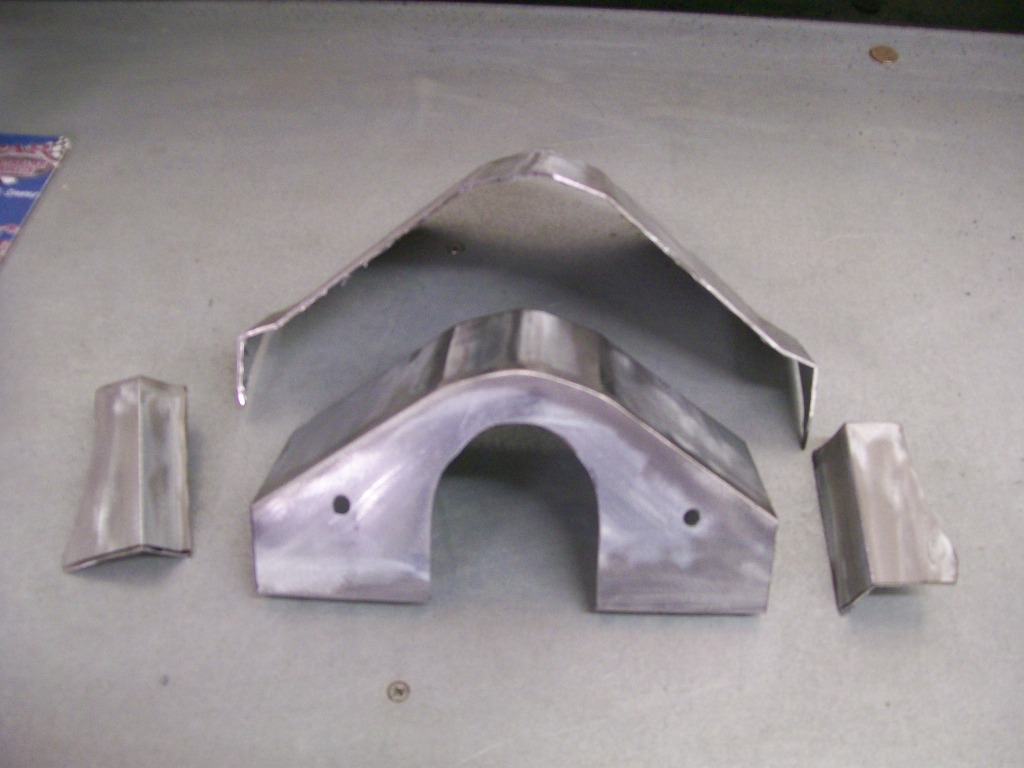
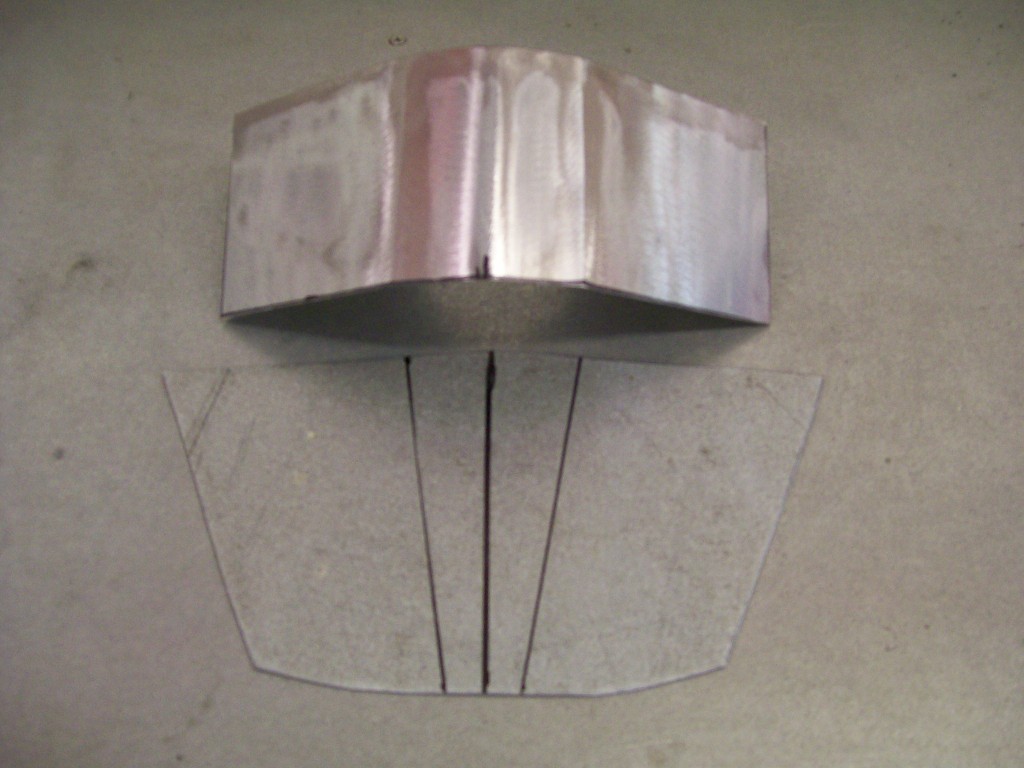
I drew a new plan on some sheet metal. With this plan the cover will come to more of a point. I have to bend the new plate at the marked lines, then weld this new piece to the old cover.
I suppose the focus of these pictures is how being able to weld and grind opens up the ability to create then re-create.
9-30-2012
Luke95, if you're saying you took the time to read through this thread while being sick or injured, you're the second one to mention that. Eighty pages of fabrication, I can't think of a better way to spend some quiet time.
jth0033, thank you, I know there many better fabricators than I. I think by showing the steps from start to finish has such a depth than just showing the final product.
mklmjdrake, I thinking you're looking at the tires on the Willys at the beginning of this thread. They were huge, if they were still being made I'd have bought a new set.
lclark2074, the cover is big, bigger than I wanted. Well. let me back that up, beep, beep, beep. I had the original idea that even with it's large size, it would somehow blend in to it's surroundings, but it didn't. I think having it be such an opposing color causes it to stand out, also, if it was painted the color of rest of the interior it would blend into it's surroundings better.
This would be one of those items I'm referring to when I mention my inability to be an artist. I can make most of what I can imagine, it's the imagination that I get hung up on sometimes. I knew I wanted to cover the underside of the steering column, it's difficult for me to come up with a cosmetically appealing look.
With this cover, I like the face, the part that is facing the driver, it's getting the underside to flow that I struggle with. It was big, and it stayed big.....too big.
In my frustration, I hacked off the rear section in the last pics, now I had no choice but to redesign.
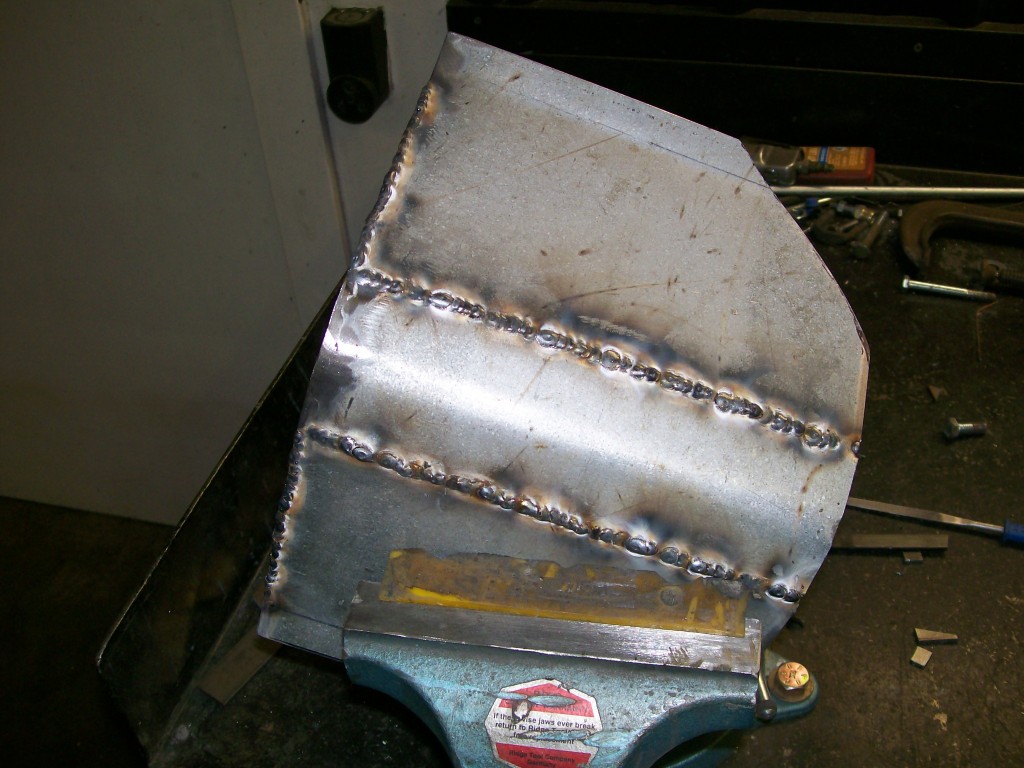
With the new plate cut, I put 3 bends into the plate. Now it comes more to more of a point than it did before. This will help get rid of the large look that it had before. I like to post these welding pics, why?... because nobody shows these pics, it's at this stage that a beginner can lose confidence that they are not moving forward and lose motivation. It's not pretty.
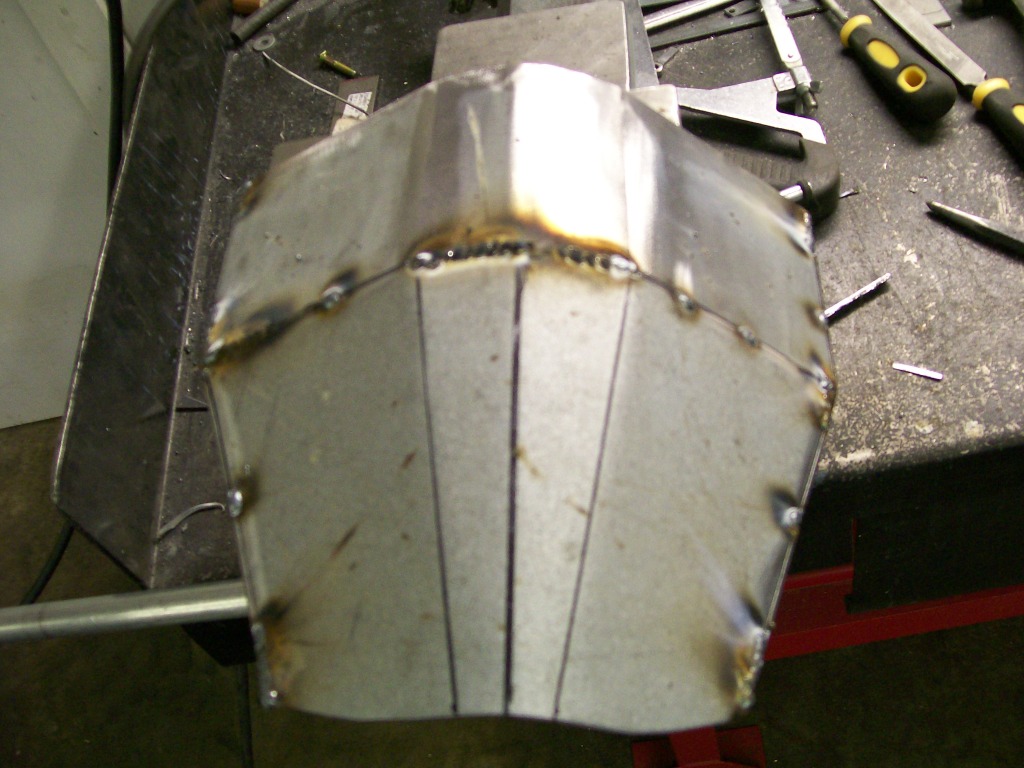
In the case of sheet metal, get it attached, and get it filled, let the grinding make it look good when done.
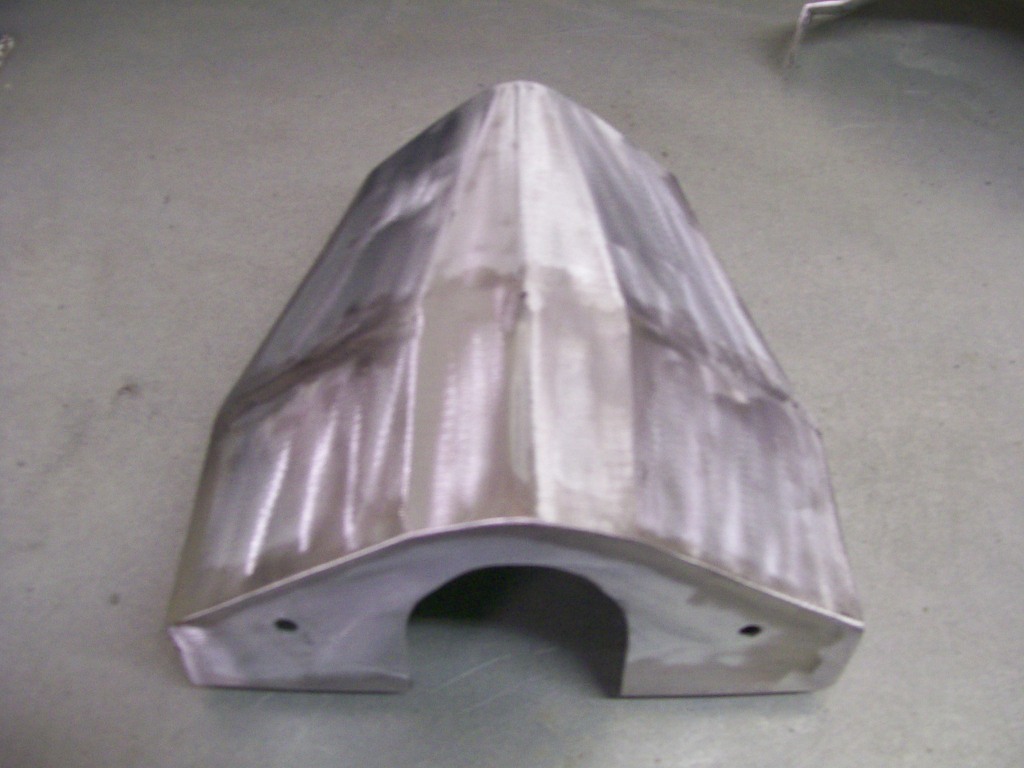
In the picture above, I got rid of the bulk. It's the best I could do. I sat in the drivers seat for a long, long time coming up with this solution. It still looks large, but it's the best I could do to cover the mounting bracket, and go back far enough to cover the wire connectors further down the column. As I mentioned, once it is painted to match, it'll blend in much better.
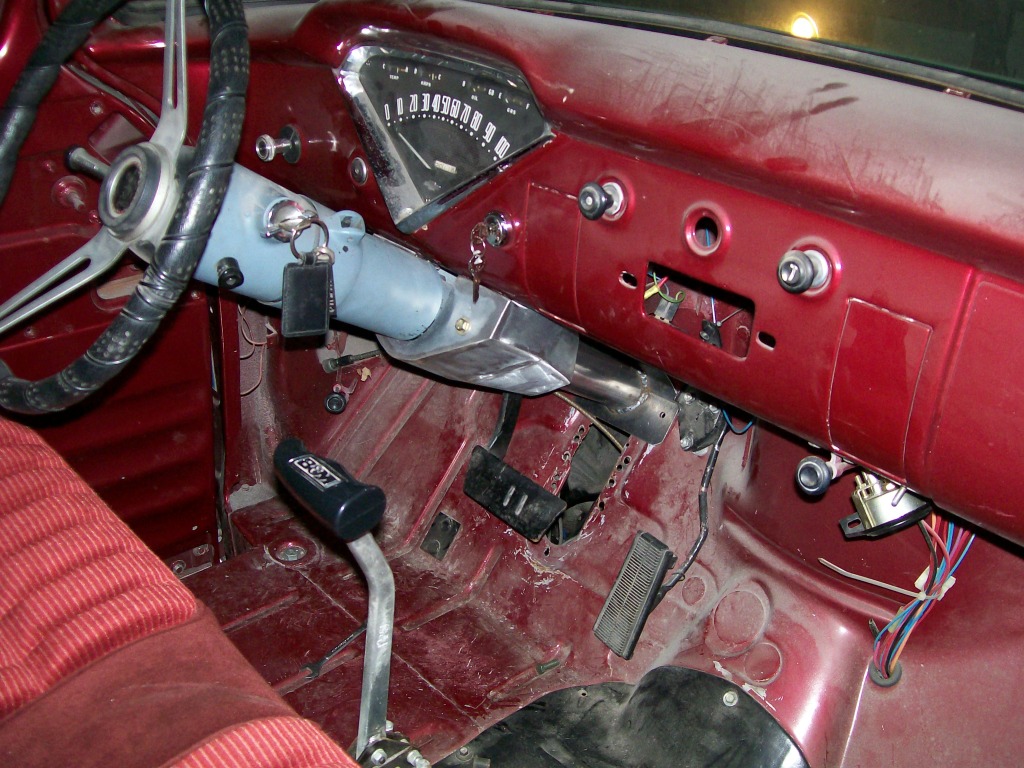
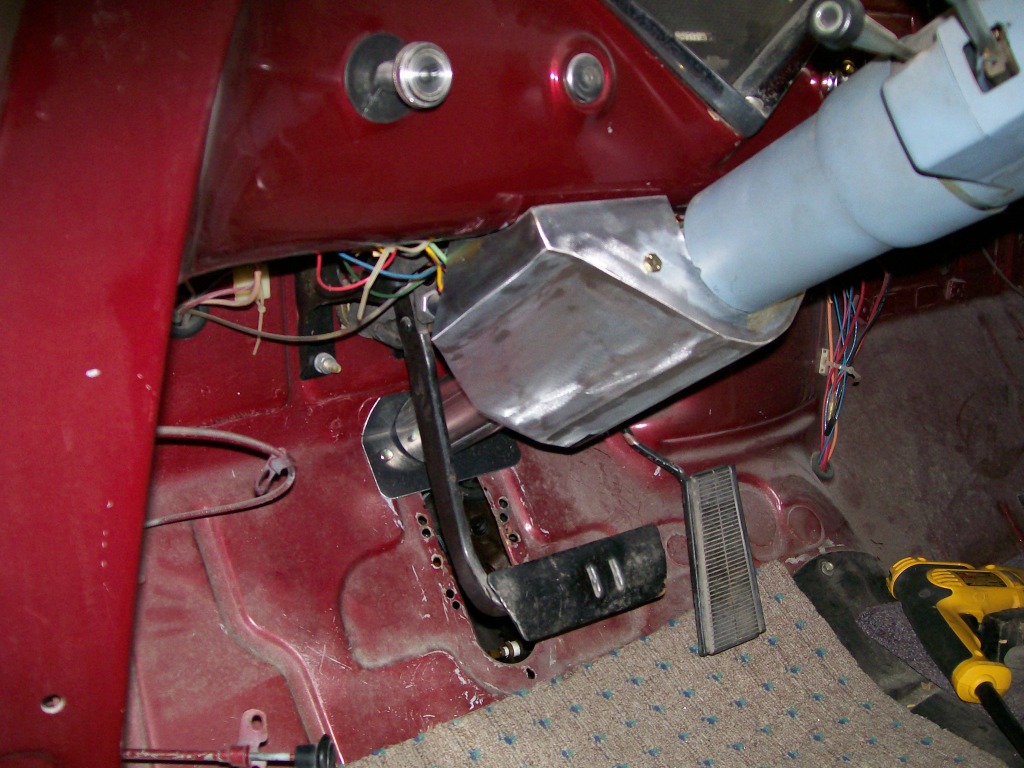
You can see two ingnition switches, , I'm going back to the one on the dash, the one on the column will be removed and smoothed over when done.
10-3-2012
 Hey everybody, thanks for the replies.
My computer has had it's issues lately, so let's get caught up here for a moment.
I'm so pleased to be the one to inspire, or to at least rattle a few cages to get people working and fabricating.
Keep in mind, the Willys is gonna gather firewood soon and it has to be ready for what whatever winter brings us around here, so it stays as a working truck for a while yet.
The 57 Chevy still needs alot of finalizing on many areas so we'll see more work being done there.
I do have an engine that I just tore down for a friend. It has issues, but that's a good thing, I'll have a lot of pictures of what you don't want to find in your engine.
It's a 318 Chrysler, looks like someone has worked on it before. Personally I don't like working on engines or transmissions that have been worked on before I get to it. Without getting any deeper, the pictures will explain later.
I believe the engine tear down will help answer some questions or at least open your minds as to what's inside if you've never messed with an engine before. That'll be in the next week or so.
4everjeepin, In my past I've just used regular body filler for the frame pits. The key is to get the pits clean down to the metal. I use the sandblaster, absolutly the best rust remover, cleaner and leaves the perfect surface for body filler to adhere to. As long as your pits are not rusted all the way through, you should be fine. I think the flexing shouldn't be bother since your only leaving specks of filler when done.
Time to up-load some pictures........
Jeff88, it wouldn't be the same without the "obligatory dial up joke".
4everjeepin, yes, it is easy to impress with what you know. I try my best to display a humbled attitude during this thread. I always know that someone knows more than I do, I have no problem with that. My main focus here is to expose many different aspects of building and fabricating, this way many can be introduced to something they may never have seen. Thanks for checking in.
spyder6, I agree.....
Finishing on the steering column....
Much of the reason for showing the cover in the last couple posts was to show once again what can be done with a piece of sheet metal. A little imagination, a little bending, alot of patience and some welding and grinding.
It's about what you're willing to settle with, it's about being willing to bring completion to a project. It's about not liking the look and being willing to hack and cut, or even throwing away and starting over to get the end product.
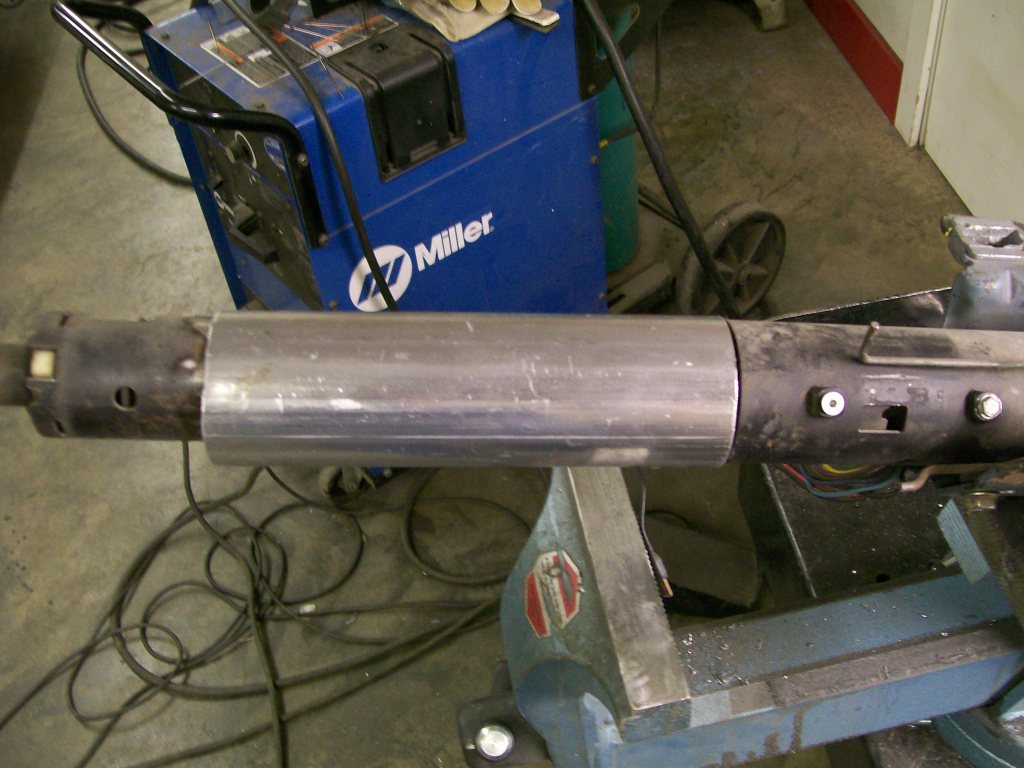
Now that the hanging bracket and the wiring is covered I have one more area to clean up. Further down the column there is an area that will look bad if I don't do something.
The ugly tube above has a provision for a neutral and back-up light swith. I wont be using them so I want to cover the whole area. I found a piece of exhaust pipe that fits well. I'll center it on the column tube, then grind it to match the floor board and weld it in place. I think one of the last pics shows more of this tube cover. It'll paint perfect and give a clean look when done. Problem solved.