You must be logged in to rate content!
11 minute(s) of a 668 minute read
7-25-2012
I'll go with the whispering eye, although I have to look and see what it means.
Both of the last two pics certainly has a mysterious look.
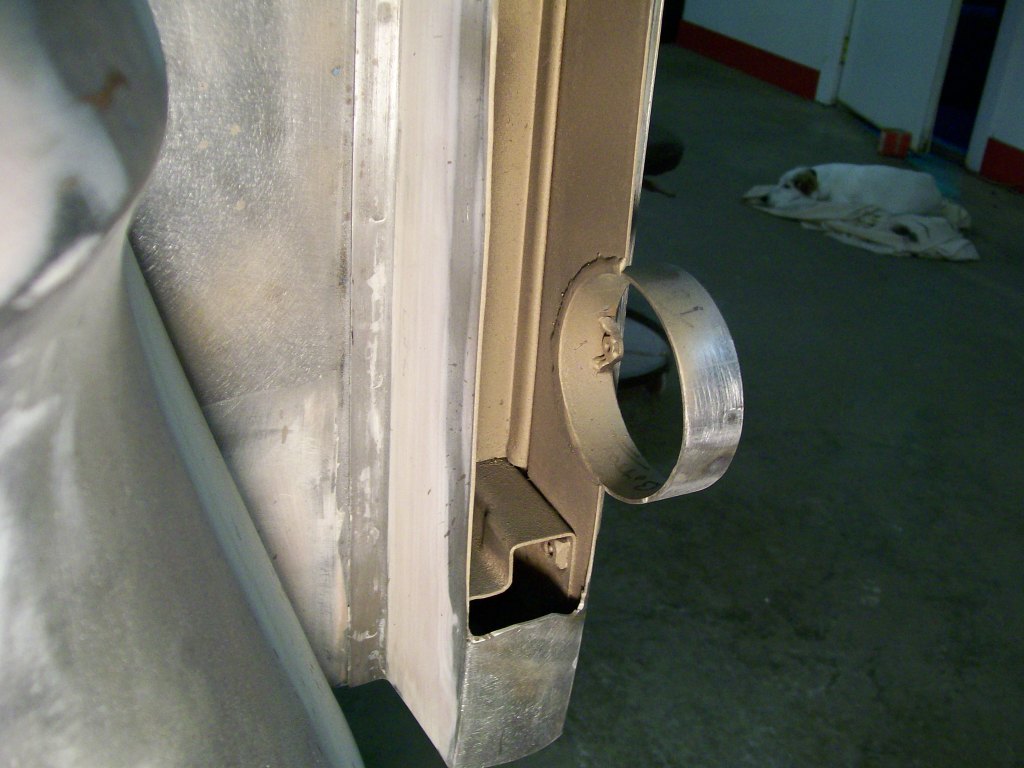
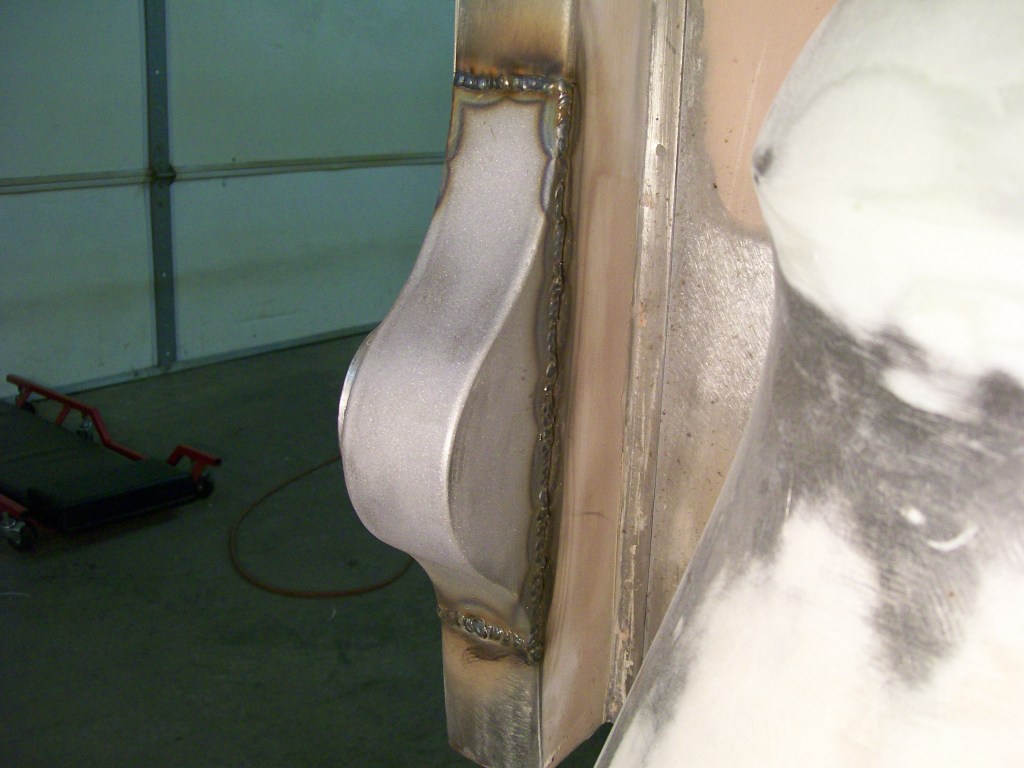
Now to cut the location for these "eyes". I used a drill bit to cut the circular part of the opening. Now for the straight cuts I used the 4 1/2" grinder with a cut off wheel. Once the cut off wheel did it's job, I used a 40 grit flap disc to clean up the edges.
A look from a different angle, and a pretty good fit.
At this time I get a little nervous about my decisions. It's a good size hunk of steel hanging off there, and I've never seen anybody else do this.
The more I look at it, and when I walk in the shop and get a first glance, I appprove.
7-26-2012
Yes, you've said a mouthful on that last sentence. That is a thought I have carried for the last couple months.
It has been a change of mindset from the Willys to the Chevy. Just the idea of a step for convienence is proof of that. On the Willys I built a step so I can use the bed. In the case of the Chevy, I just bought a new rear bumper, it has a flat spot built into it as a step. The first thing I thought was...." I'll never use that step".
awesomejack... Good call.
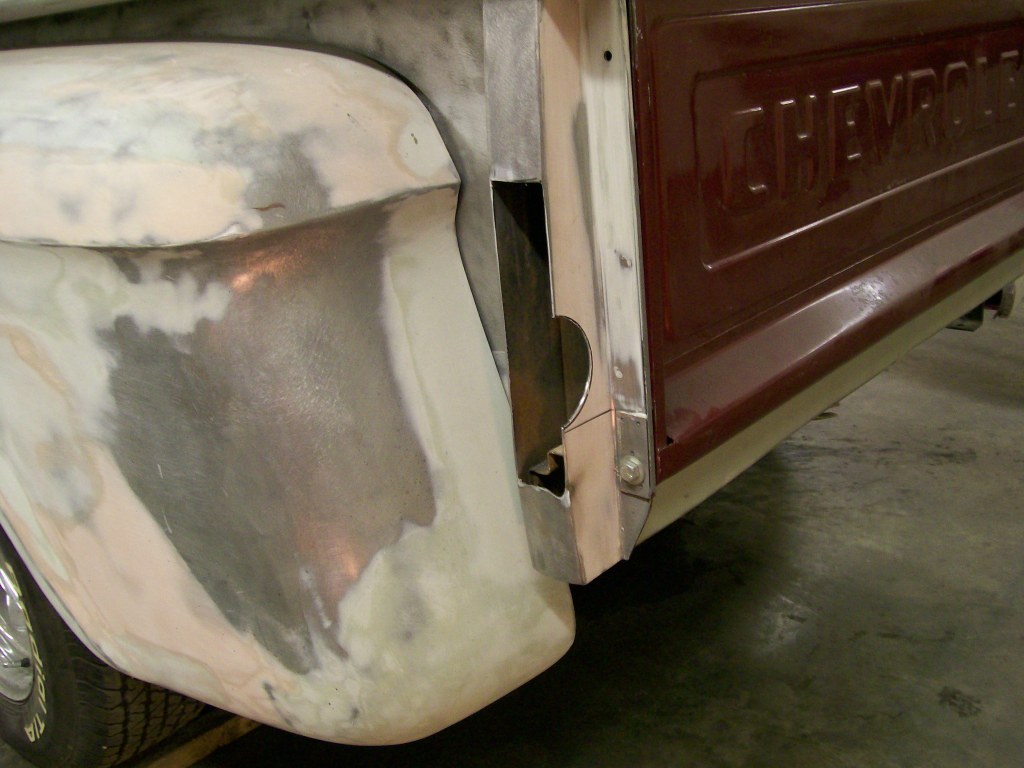
As I was getting the light housings fitted and ready for welding, the new rear bumper showed up.
When I started working on this truck I never paid much attention to how the stock rear bumper fit on these trucks.
Back in the 80's when this truck was assembled, a bumper off a Chevy elcamino was installed. The idea was to get rid on the original taillights and their brackets. The elcamino bumper had the taillights within the bumper, problem solved.
I wanted to go back to the original bumper, so by blending the taillights into the bed, I feel I've fulfilled dad's quest to get rid of the taillight brackets and I can go back to the original bumper.
I ordered the stock bumper mounting hardware along with the bumper. Yikes, the bumper sits way too far back and too low for my liking. Looks like I'll be cutting up the brand new bumper brackets now.
")
I covered the bumper with 2" masking tape, sure enough if I didn't, I'd scratch the chrome.
7-27-2012
awesomejack, yes, as soon as I did a test fit I headed to the house and went to Google images. Sure enough, that's the stock fit..
I'll be cutting and welding soon.
Viper723, I remember that episode. I was impressed with the patience he had when he shaped the ends to match the fenders.
In my case I'm just gonna raise and move the bumper forward. By doing this the front and rear bumpers will be similar with how they come around and meet the fenders.
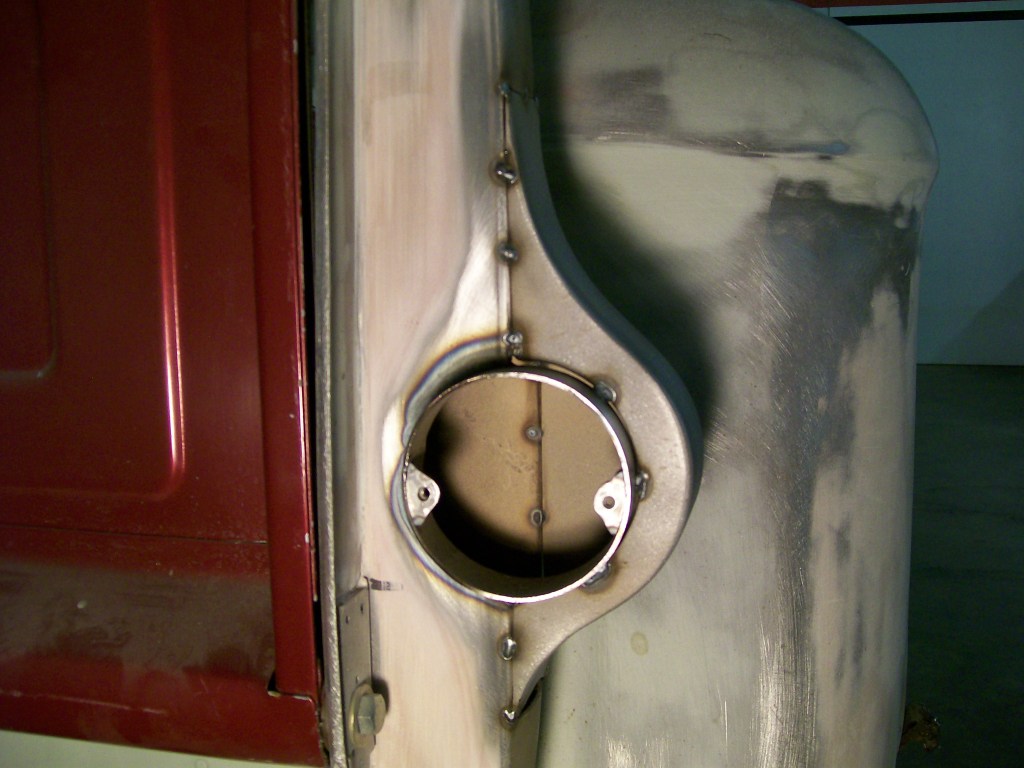
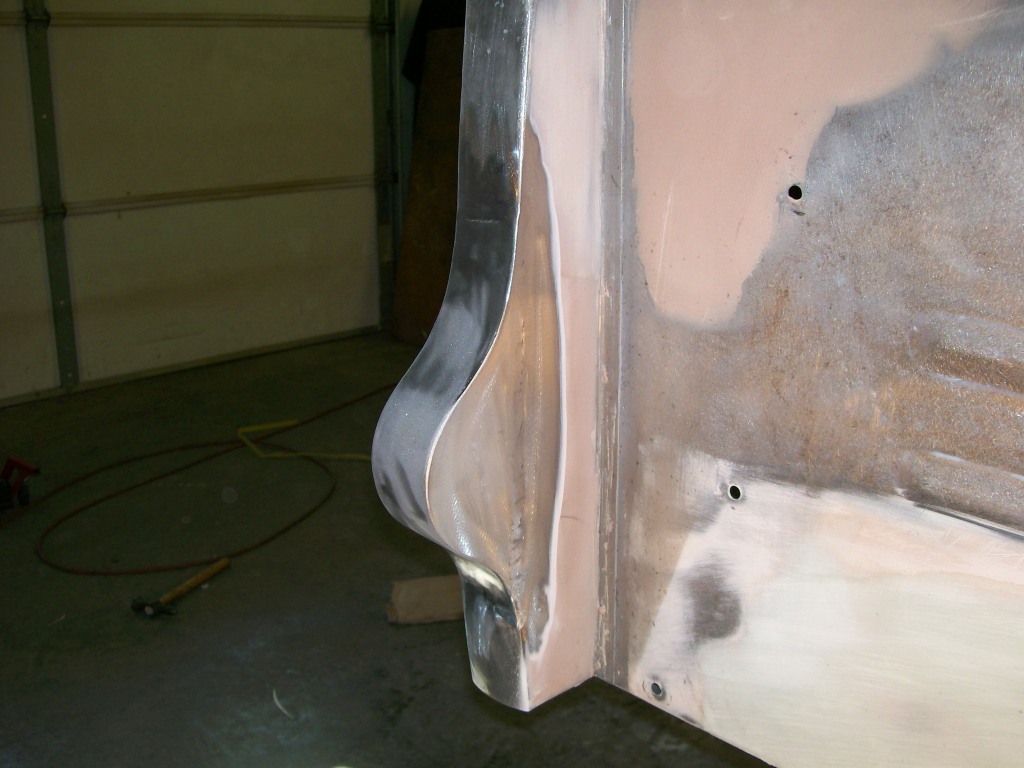
On the light housings I gave them a quick sandblasting to remove a slag residue from the welding. I do this when I can, this way I can spray a protective coating and feel sure it will stick well. Otherwise, moisture can cause premature rusting later.
Going back about 8 months ago I sprayed a weldable primer on some of the frame before assembly. Same here, the copper color is a weldable primer. Now I at least have some kind of coating.
Same primer in the bed cavity. Notice I welded the ring to the bed and not to the housing first. I'll explain later.
7-29-2012
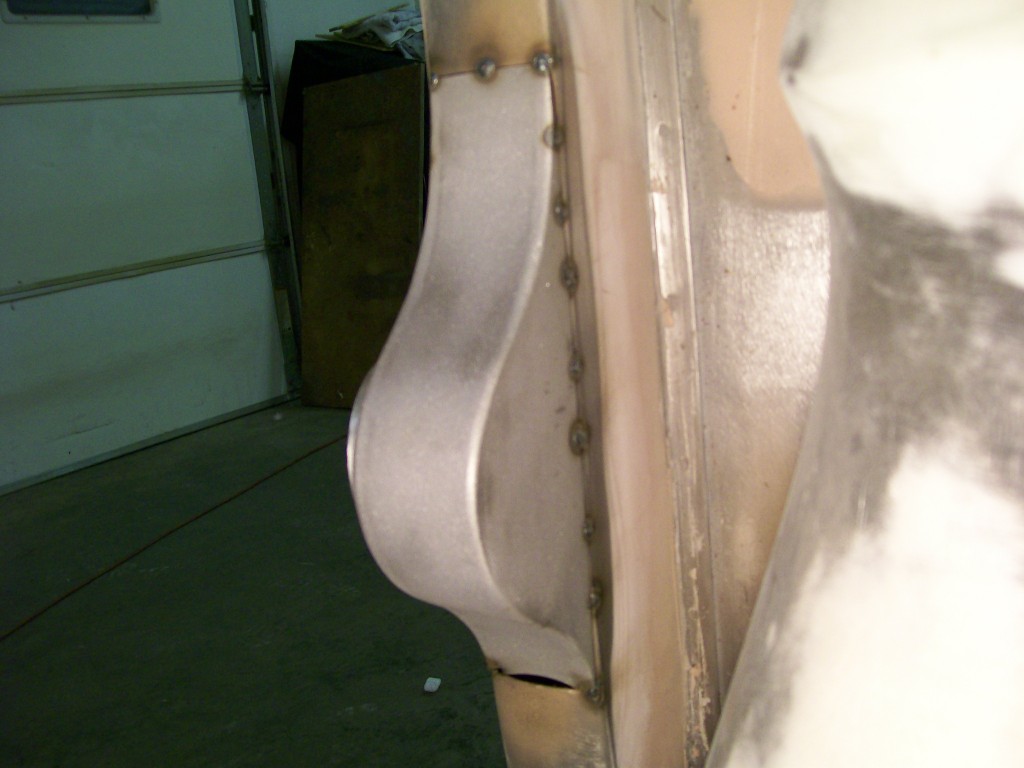
With this next picture I'm gonna the reason I welded the circular part to the bed instead of to the hand made housing.
There is a piece of sheet metal that sticks out about 1 1/2" next to the tailgate opening. With this metal sticking out, I have no good way to get a good weld around the circular part. The nozzle of the welder just won't fit. if I tried to weld I'd get a bad weld, then I'd have a terrible time cleaning up the mess I made trying to weld this area. With it pre-welded to the bed, now I just have to use my finger, and with a little body filler and smooth the area later.
Always try to think ahead, the time you save, and the frustration later, will help get you through the long term projects.
I've mentioned tack welding before, and with sheet metal, it's more important. The thin sheet metal will try to move and warp if you do one continuous weld. I usually tack about every inch. By tacking every inch now, it's a good marker for when I finish weld later, just weld from tack to tack, then move to a different spot and weld from tack to tack again. Keep moving around to even out the heat trail.
7-30-2012
This next picture shows the idea of moving around while welding. The welds are around 1 inch long, or shall I say, the length of the spot/stitch welds are around 1 inch.
It is very tempting to continue welding past the 1 inch mark, much further than that and things will start warping and changing shape.
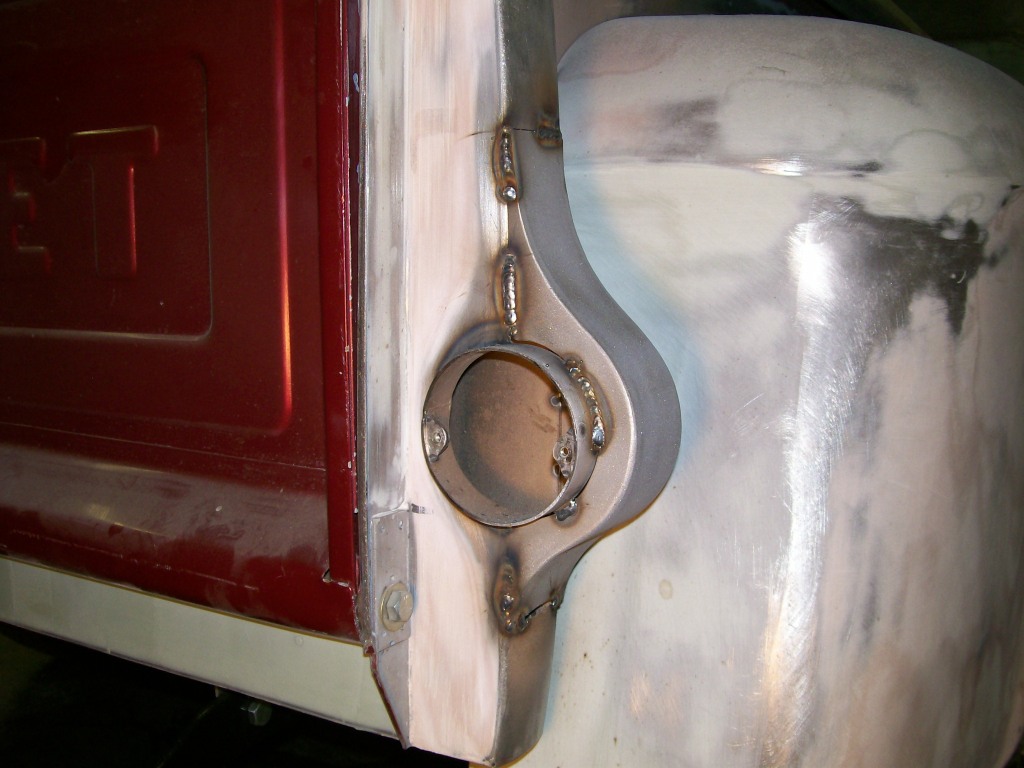
All the welding is done. One thing about welding sheet metal is the weld does not look pretty. I'm not schooled, but I believe one problem is when welding, there is a gas shield that is blown across the weld while welding, this creates a clean air environment. Once the welding stops, the gas is stopped, now immediatly the metal cools and draws in the impurities in the air. Then we weld again and repeat the procedure again, over and over.
Just focus on getting good penetration, the dirty look of the weld will be ground away later. As long a the weld has the penetration, that's all that will be used anyway.
7-31-2012
Thanks Viper723, I remember my first attempt at sheet metal welding many years ago, I have to agree, it can look worse.
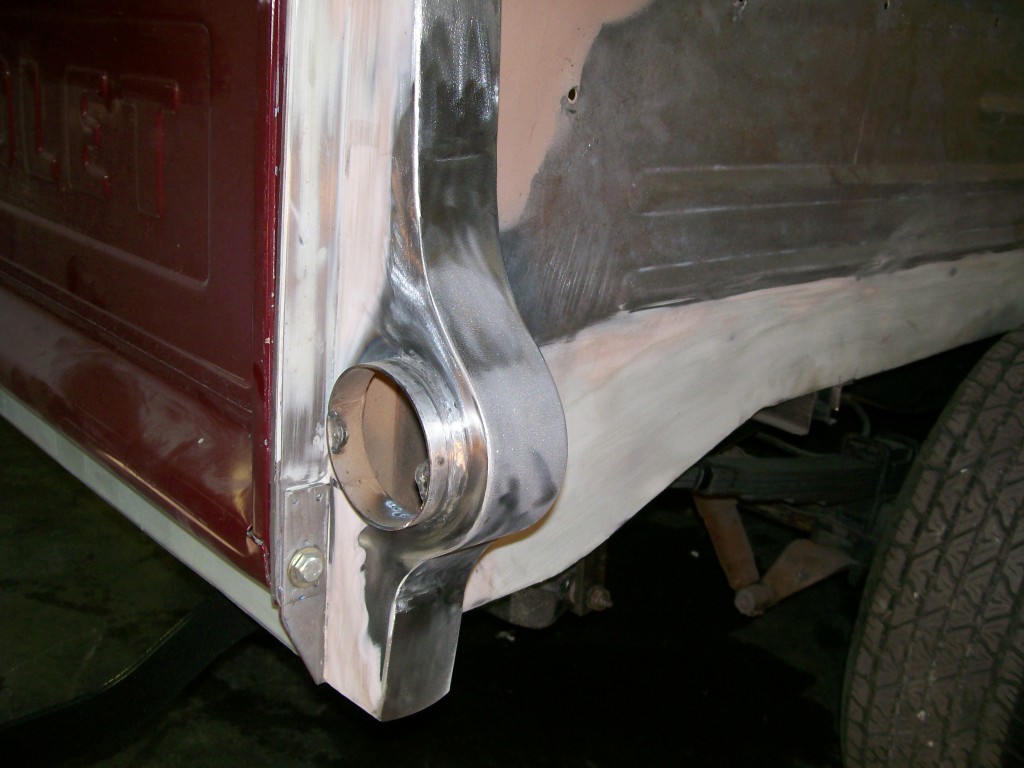
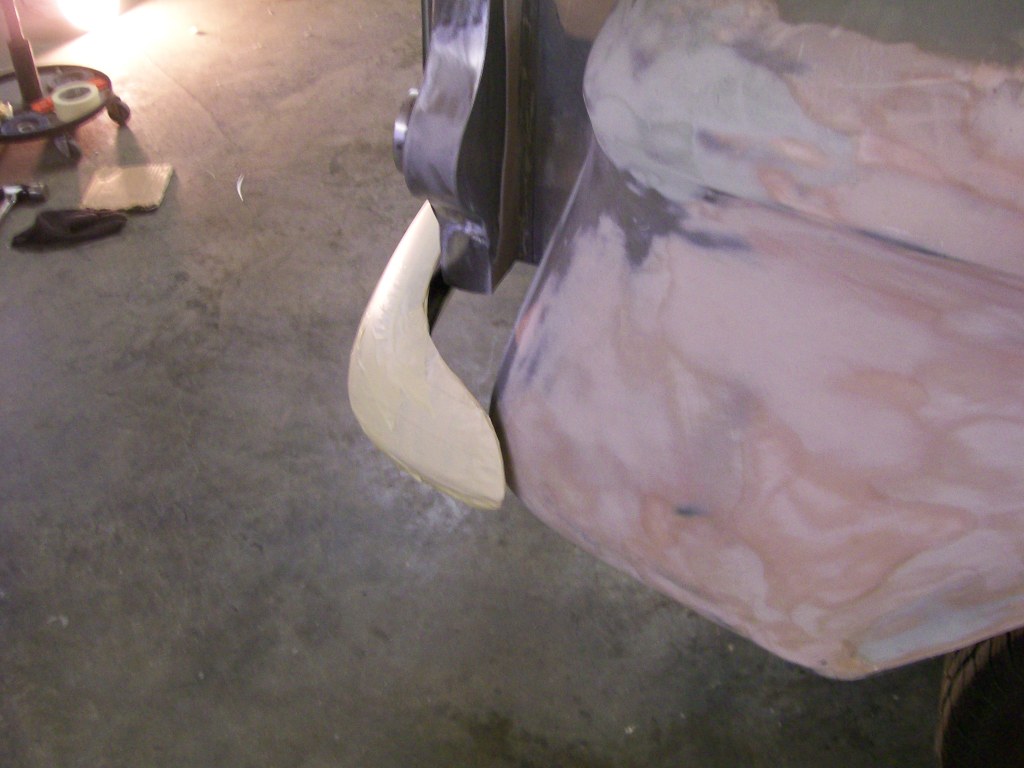
Here's the end result. It shouldn't take much more than a thin layer of body filler to smooth the edges.
Another angle.
8-1-2012
stealthjk, I like it too. Thanks.
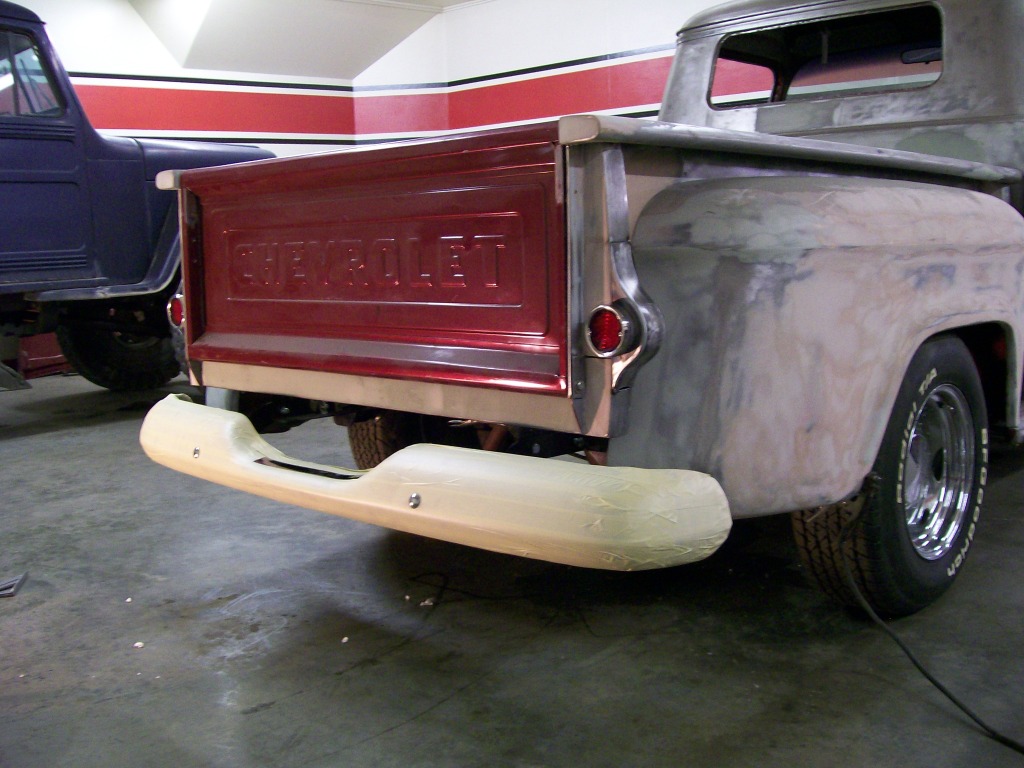
With both the passenger and drivers side taillights welded and finished, I finally get to move to the rear bumper.
One thing I have learned over the years is to fight the desire to move from one project to another. For example, once I had the taillight housings and they fit, I wanted to move to the rear bumper. What I found happens when we move around without finishing stuff first is there are small details we forget about when we get back to the project we left earlier. Then comes time to prime and paint, this is not the time you want to find some details that were overlooked.
Drivers side looking good.
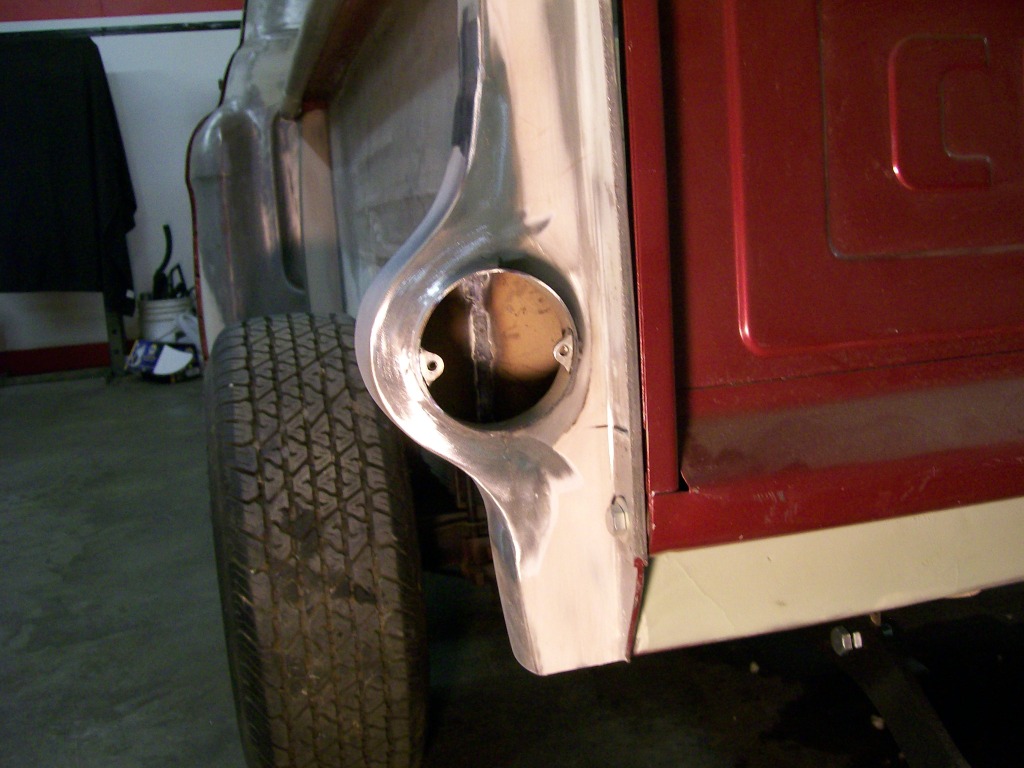
Both sides looking good.

8-2-2012
Thanks Showtime3492, I was really happy with the fit when done also. Years ago, close would have been good enough for me. I've learned that to skip a step now will lead to more work later.
Wow, I just never knew how far the bumper was away from the body on these old Chevys.
I have two issues to deal with. First, get the bumper closer to the body. Second, as far as I know, there isn't a filler panel to hide the gap between the bumper and back of the bed. Plus I want to have the license plate fit also.
A view from below, look at the gap.

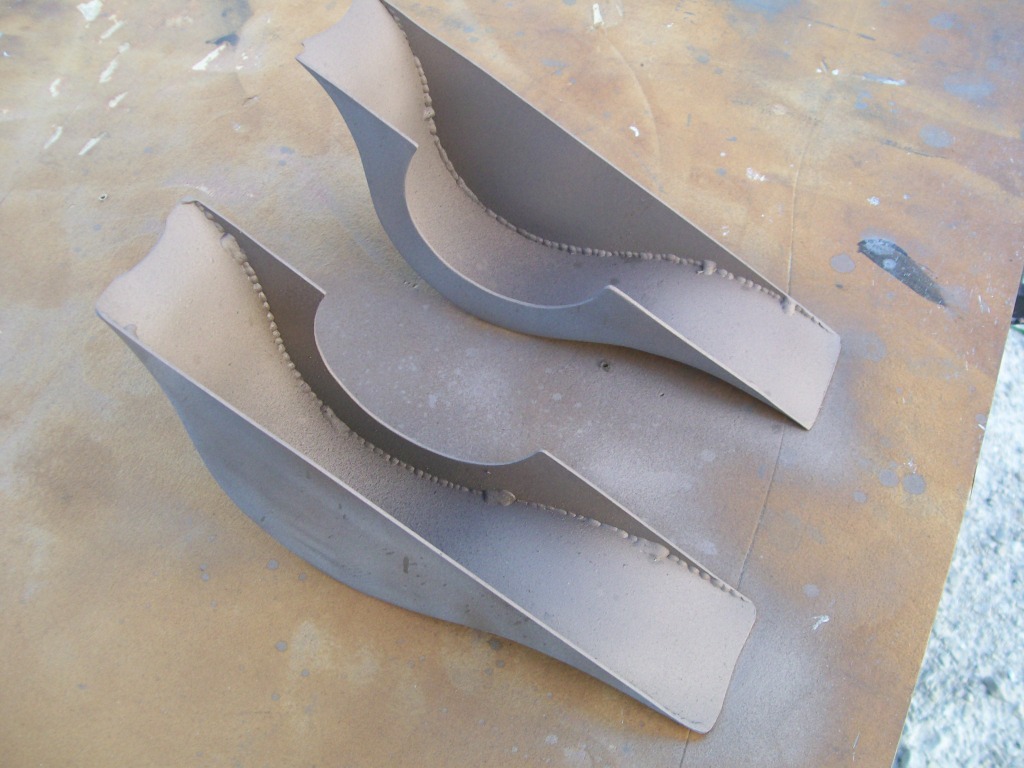
I did a quick cut of the brackets and moved the bumper forward.
I got ahead of myself when I cut the brackets. Although I moved it forward, I moved it too close. I didn't leave space to fit a filler panel. oops
Oh well, it's a learning process.