You must be logged in to rate content!
13 minute(s) of a 668 minute read
7-9-2012
We finally got some rain, along with the rain we got thunder and lightning, since it takes close to an hour to download pictures, I had to wait till the weather permitted. OK, back to the up-dates.
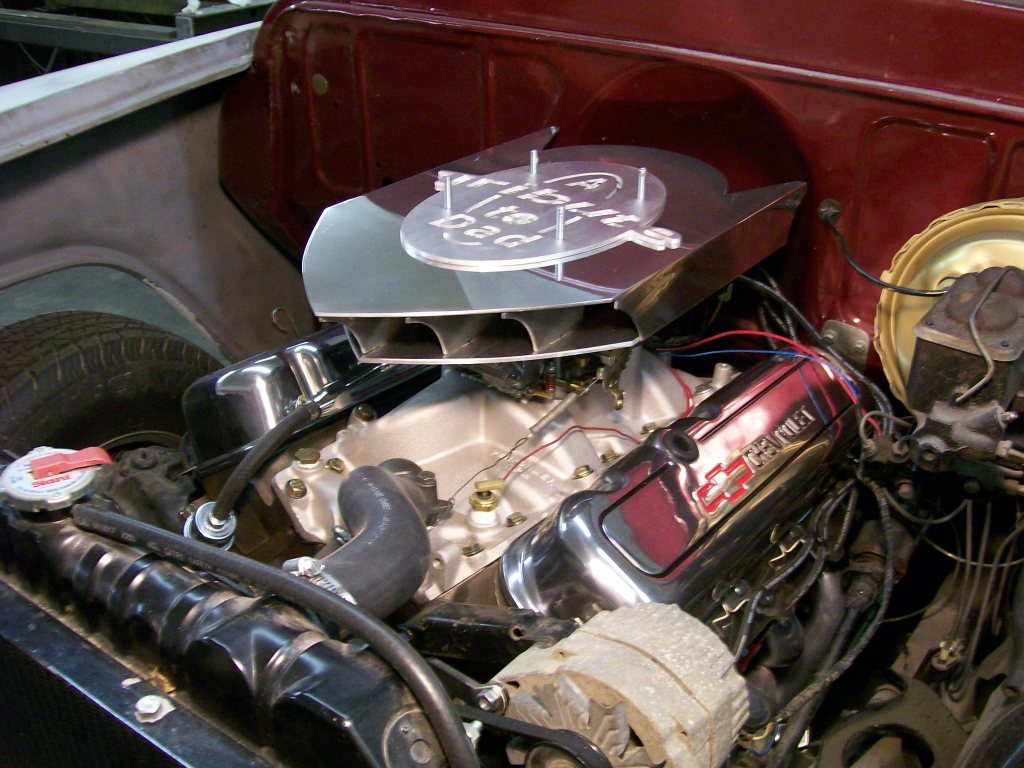
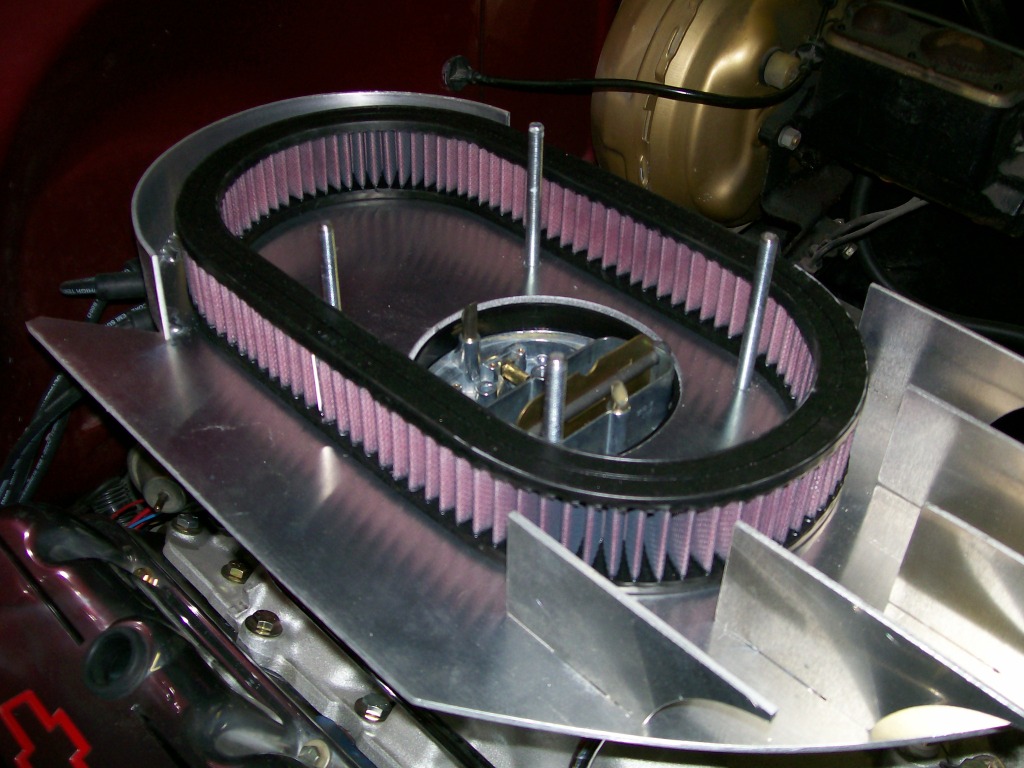
One area that I had to think about was the rounded rear section of the housing. Since it was to the rear I figured it wouldn't be seen, but once I did a pre-assembly here, I just had to cover the exposed air filter element.
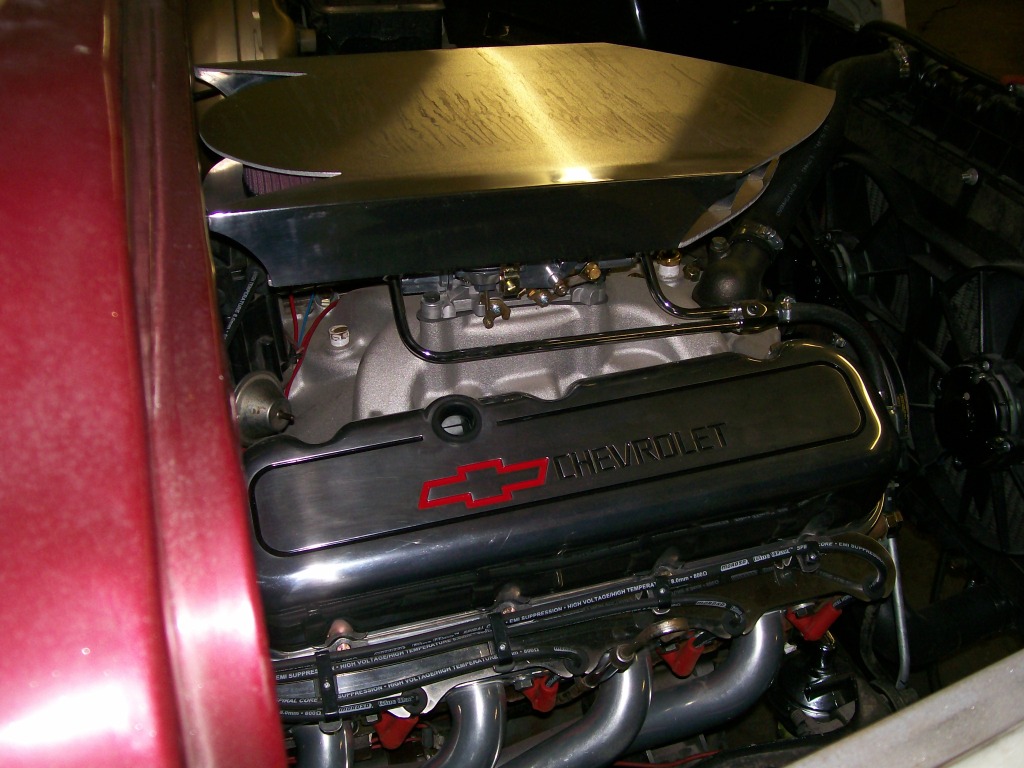
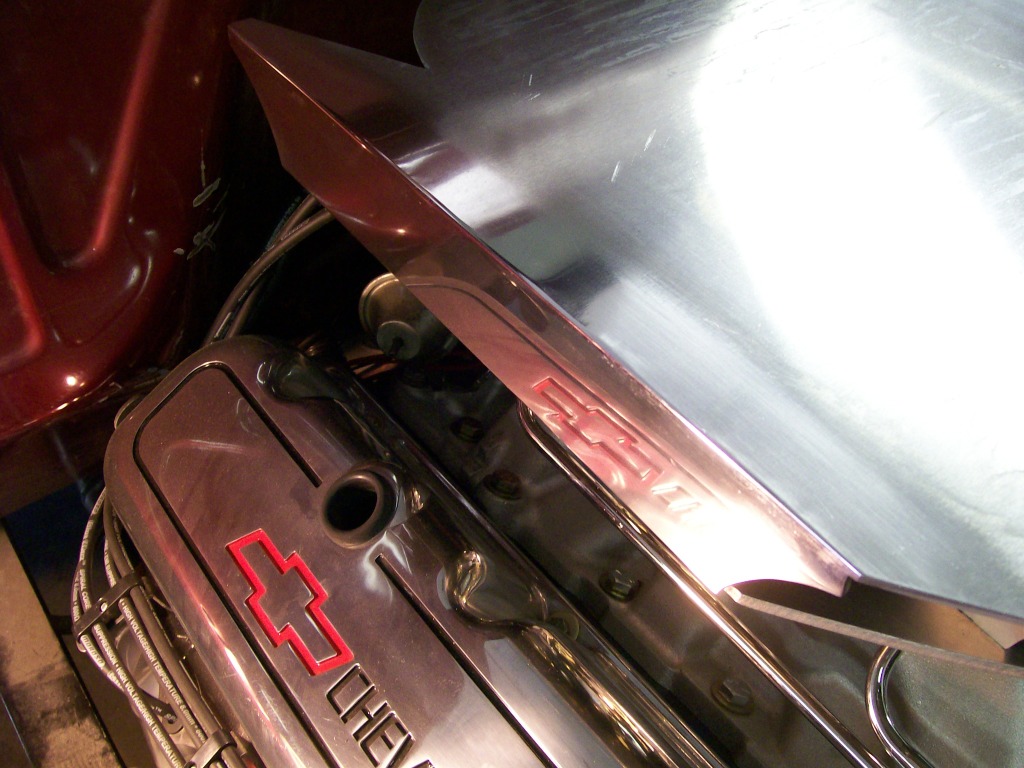
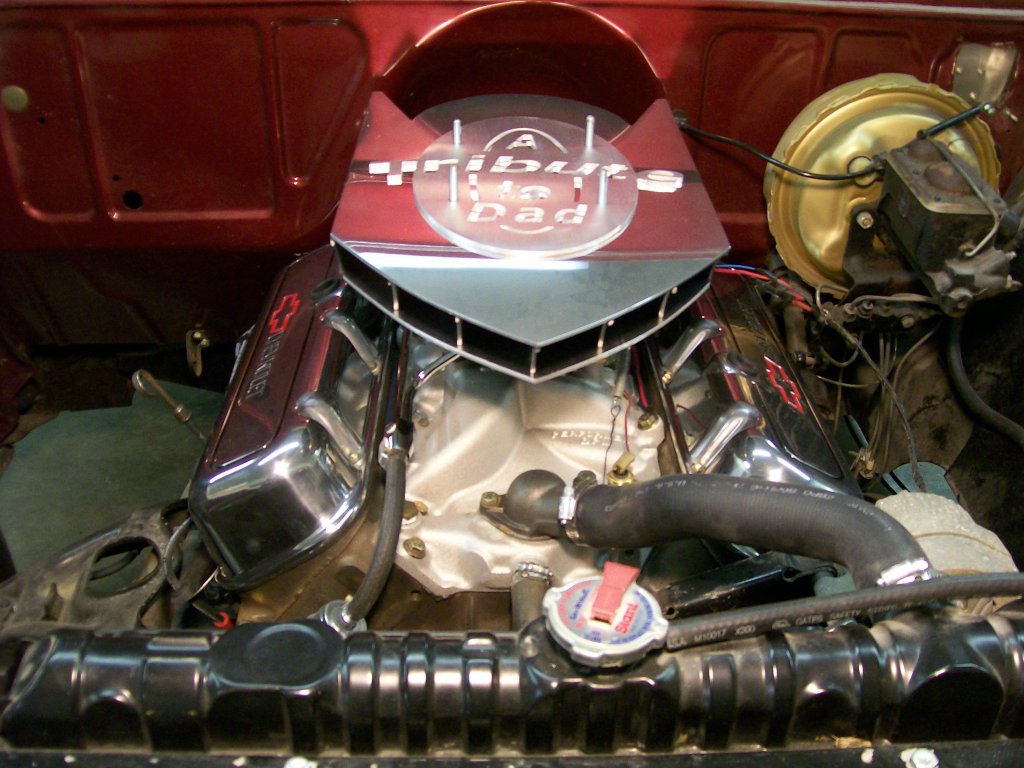
I see the reflection of the Chevy bow tie from the valve cover, looks like I'm moving in the right direction.
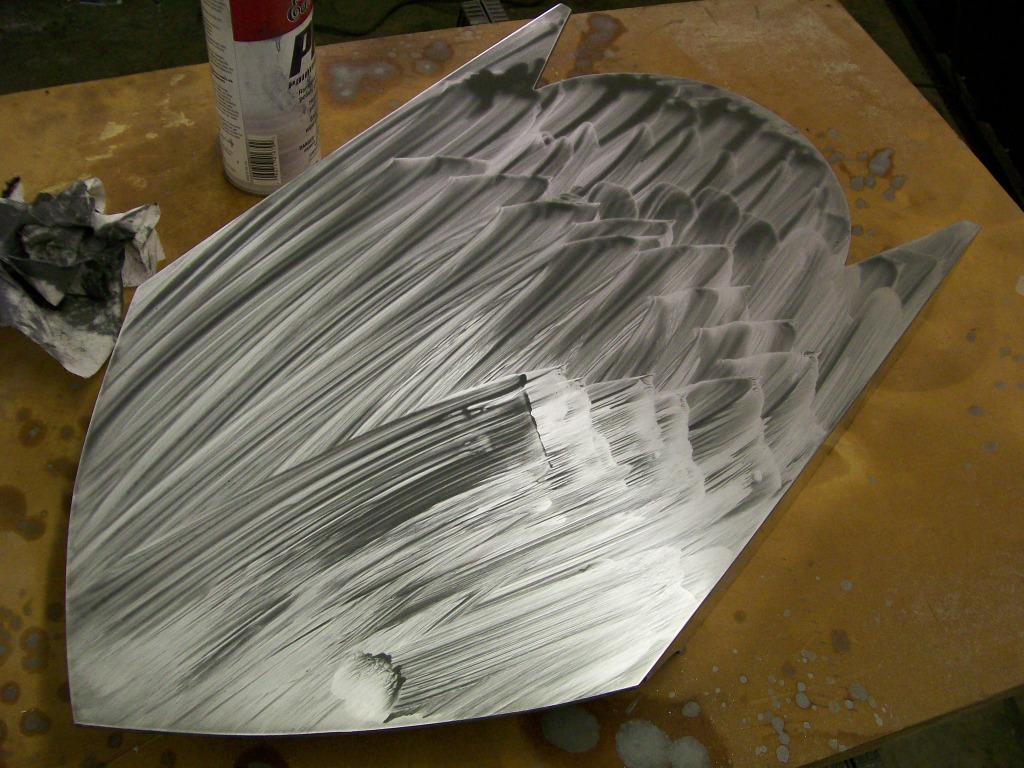
Looking at the picture above, the aluminum had a manufacturing surface that had to be wet sanded before I could start to polish it.
Large flat surfaces are the worst, this is the time when you gotta do what you gotta do to get the end result.
Problem with aluminum is once get the finish I want, it's still very sensative to water drops, finger prints, ect. I'm gonna start looking to see if there is a clear that is made specially for polished aluminum. That would save alot of hassle down the road.
7-10-2012
I'll have to look into that stuff, too. As soon as I saw you polishing up this air intake, I thought to myself "I bet he's got something up his sleeve to clear it/seal it with..." I just had to copy you on whatever you do there, because I've got some old-school finned aluminum Edelbrock valve covers on my SBC in my Jeep...whoever had them before me did a not-so-hot job on them with doing a home-brewed wrinkle finish black paint job...needless to say, I cleaned that all off, polished them out again, but they get cloudy/corrosion on them when it's humid for a period of time.
Anyway, I'm going to see what your end results are here, and I just might have to take the time and patience to polish up these valve covers again and then coat them with whatevr you use here.
And by the way....not going to lose me anytime soon with this stuff...not unless you tell me I'm not welcome anymore here...but even then I'll still be watching. This is some great stuff you're posting here, and the fact that you take the time to show step-by-step how you're going about every project, just so you could maybe help one other person that might be doing something like what you are...that's dedication. I love the dedication you have to this community, the dedication you have to restoring/modifying these trucks...and besides that, there is a good deal of jealousy with the two trucks you are working on with us all watching -- I've been in love with Willys trucks since the first time I saw one, and the same goes for any Chevy truck in the mid-late 50s. I've got one in the family (a 58 Apache) that I hope to get my hands on...that is if my aunt ever lets it go.
Anyway, I think I've gone on long enough...but thanks for the amazingwork/detail you show here.
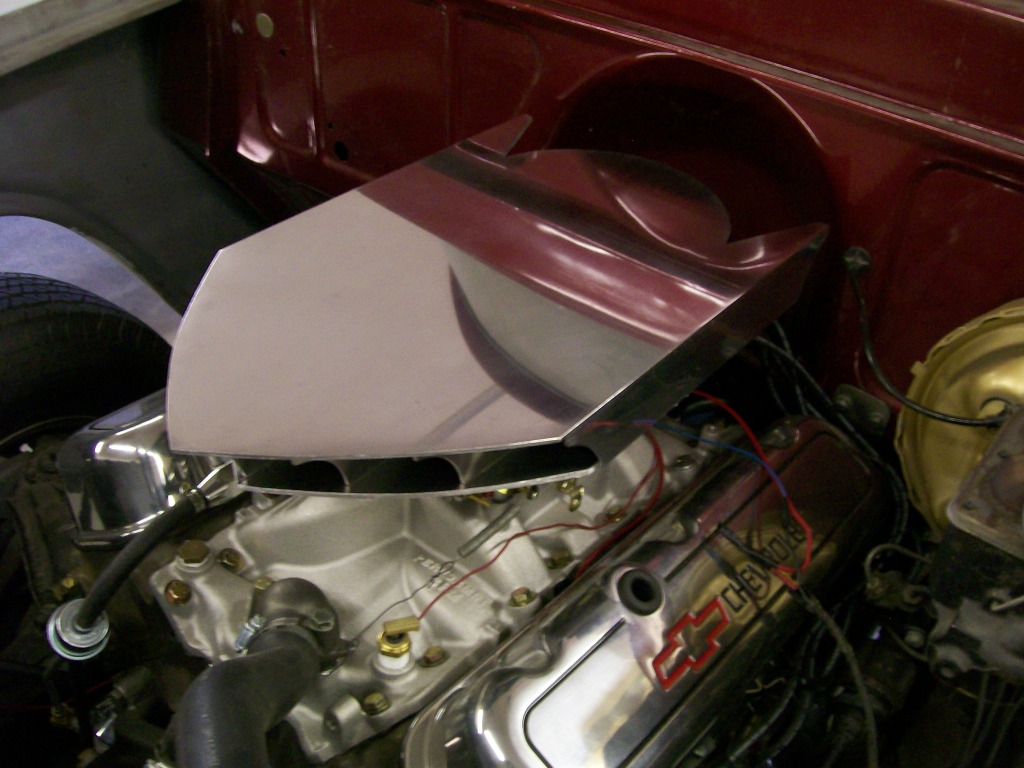
Finally this filter housing is coming together. If I had to do it again I'd probably go a little narrower, but for my first effort, I'm happy.
As I've mentioned before along this build thread, it's yet one more challenge that's been accomplished. From this point forward I'll not only accept the challenge of making my own filter housing, I might try to be even more artistic/creative with the next one.
After some buffing on the top cover, it's starting to shine but I still have a couple steps before the polishing is done.
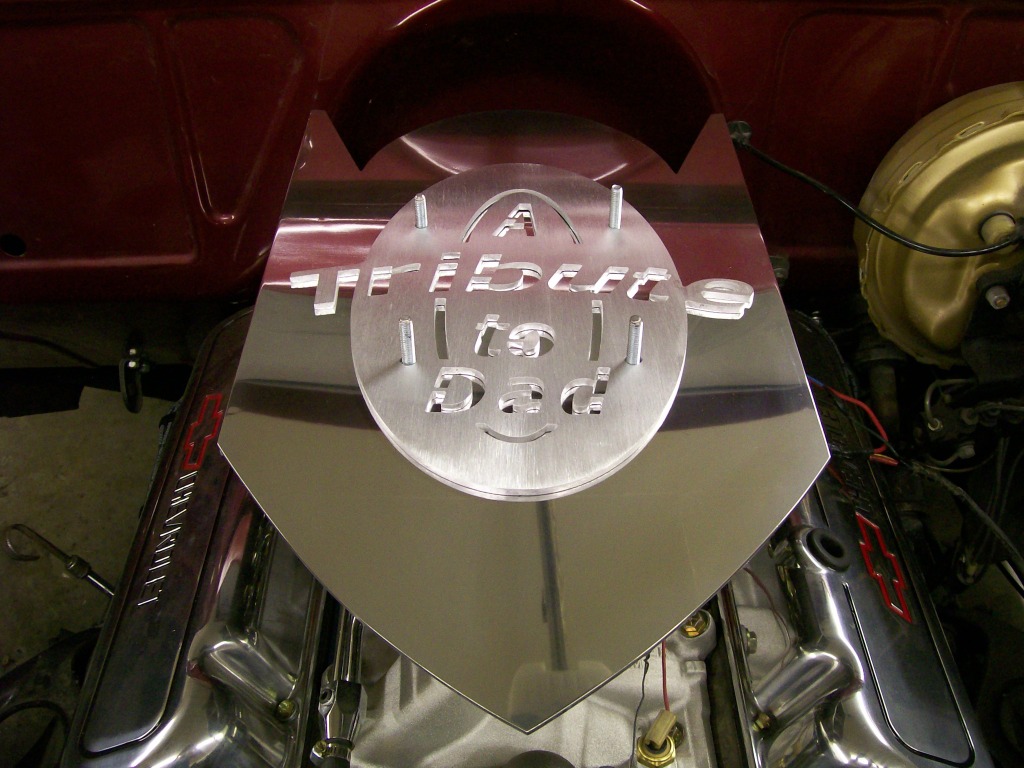
Most of you know the story of how I got this Chevy, for those just catching up, this build is a memorial to my Dad who passed away as we were rebuilding it for him to enjoy.
I've felt I need to address the memorial issue somewhere along this project. I decided that with the large flat area on the air filter I would use this space for the memoral message.
I'm not very good at freehand artistry and I went through a couple ideas and words. Finally I was having lunch with some friends and one mentioned the word "Tribute". I came home and looked up the definition. The word tribute was perfect, so tribute was gonna be the focus.

7-11-2012
Buffing, buffing, buffing, it gets old real qiuck, but it's worth it. Now to keep the gloss that I've worked for. Hopefully in the next week I'll get and spray the Por glisten clear on this polished aluminum. In the past, I've sprayed regular painting clear on aluminum with good results, with this next productbeing made for the purpose, I'm looking forward to it.
In real time, as of tonight, I got a 3/4" spacer that fits between the filterhousing base and the circular mounting flange in the carb. With the flat base of the filter housing, it's been hitting the float adjusting screws before it reaches and rests on the circular filter flange of the carb.
I found air filter risers in the Jegs catalog. I got one that is 3/4", perfect, it fit between the filter base and the carb. It raised the filter base about 1/2" above the float adjusting scews, problem solved.
Next I added a 1/2" spacer between the carb and the intake manifold. I plan on installing a simple nitrous system that uses a 1/2" plate. By installing a plate now, I'm already sizing up for nitrous system later.
I mention these changes now because the filter is higher than in these pictures. The inch of overall rise helps the filter housing look more dimentionally correct. In other words, I like like it sitting higher.
Here we go............
Oh, one more thing, I am working on a plan for the mounting studs. When done, I'll probably add a couple more mounting holes as dummys. Then probably use counter sunk screws when done.
7-12-2012
Scooter402, yes it took some time to get the near chrome finish. I ended up using a paste that is used to scratch the old paint finish so the next coating will bond to it. This paste, being very aggressive, works great for buffing after the 2000 grit wet sanding. After that, buff with a fine polish, then hand rub with mothers aluminum polish.
I totally agree with the contrast of the brushed tribute plate to the polished finish of the housing, they work well together.
Jeff88, I like the front also. It was a difficult task trying to finish the rear of the housing in a way that it was even close to the good looks of the front.

axxxgijoexxxa, thanks for checking in, it's always encouraging to hear from people following the thread.
I'm gonna change/focus on another area. My goal is to get this 1957 Chevy truck running and driveable before winter time. I'm not concerned about final paint, but I do want to get all the truck in epoxy primer. Once primed and assembled, and running, I will register and license it. I believe the last time it was street legal licensed was back in 1986. Once I get a couple miles on it and work out any mechanical bugs, I can tear it down for final paint.
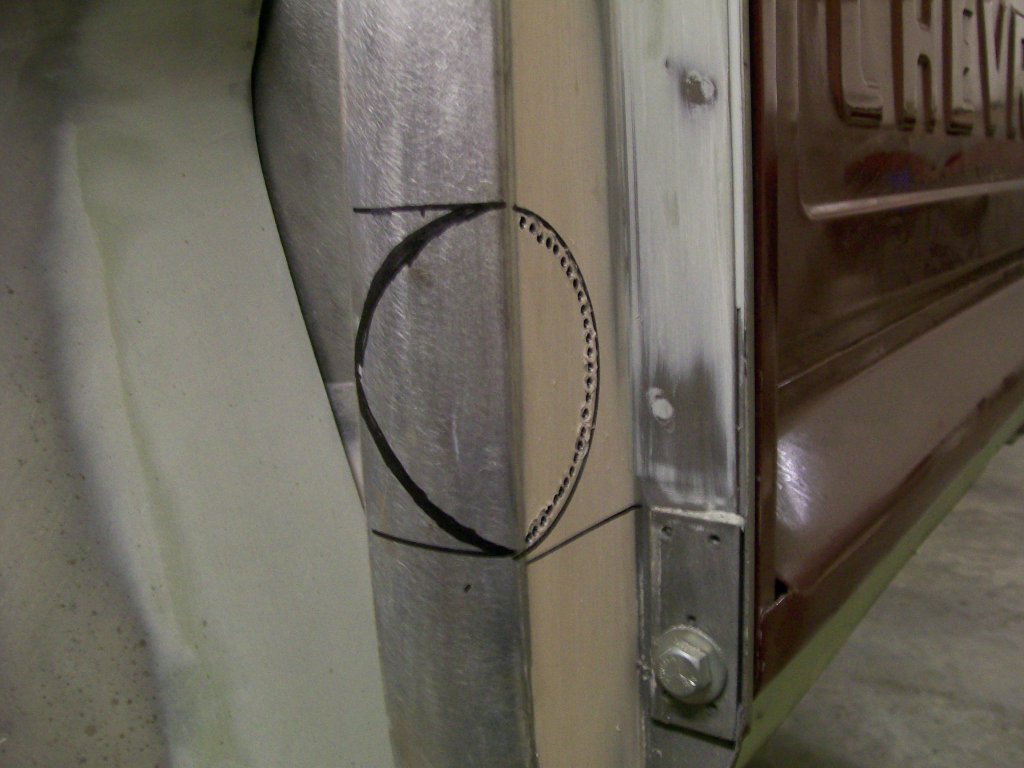
With the engine pretty well done, I have a few areas on the body I want to take care of. One place being the tail lights. Trying to fulfill my dad's wish list for this truck, he wanted to clean up the tailgate area of the truck. We've all seen the hooks and chains on these old trucks. He also wanted to get rid of the brackets that hold the taillights, basically, get rid of all the hanging pieces.
I put a 1/8" drill bit in the drill and removed a small section of the bed bracing.
7-13-2012
The valve covers are polished aluminum. Me and most any chrome aftermarket parts seperated many, many years ago. I've yet to figure how an item from a stock vehicle, whether it be a bumper to wheel accents, lasts for years and years. But when I buy an aftermarket parts, I'm lucky to get a couple years before the chrome starts to pit and corrode. Hmmmmm, go figure.
Anymore, I stay with stainless and aluminum.
Taking a moment to look back at the air filter. I mentioned how the base was resting on the float adjusting screws while I was building it. I mentioned an air filter riser from Jegs. The perfect answer to my problem of getting the base to rest, or to seal to the air filter mount on the carb. Here you can see the black ring that worked to solve my problem.
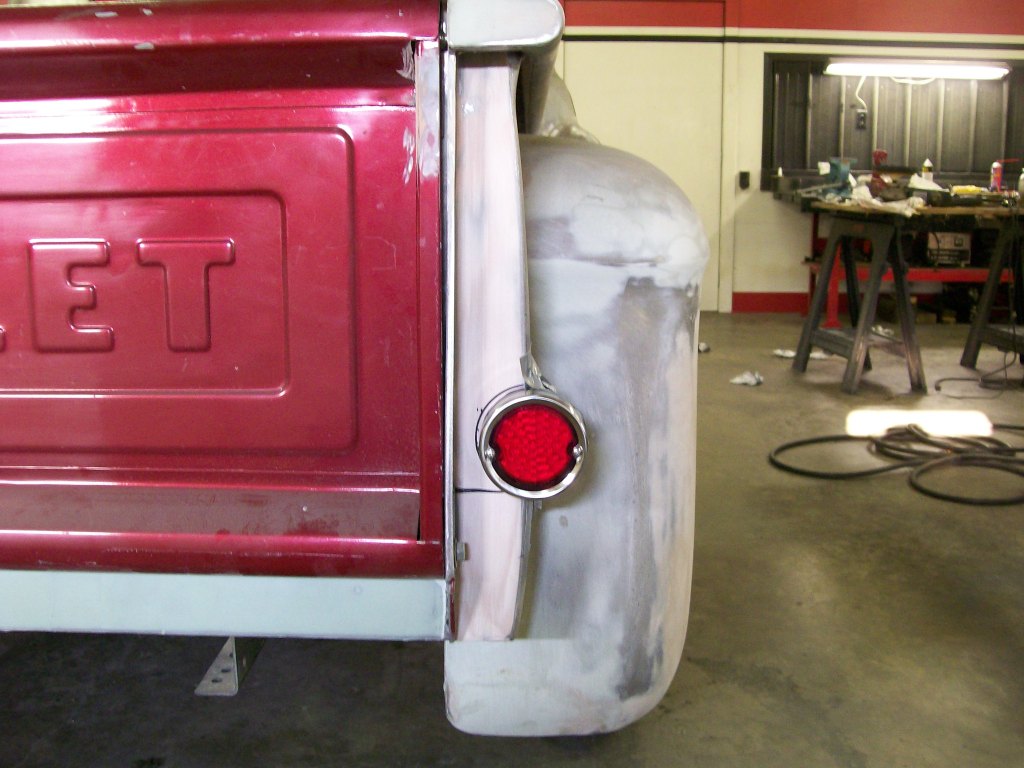
My tail light plan is to get rid of the bracket that bolts to the bed, then reaches out support the tail light housing. I've seen where the tail lights have been attached to the rear fenders and down underneath when the rear bumper is no longer used.
I have no problem keeping the 1957 truck looking like original, I'm just trying to smooth a few areas and ad a few personal touches.
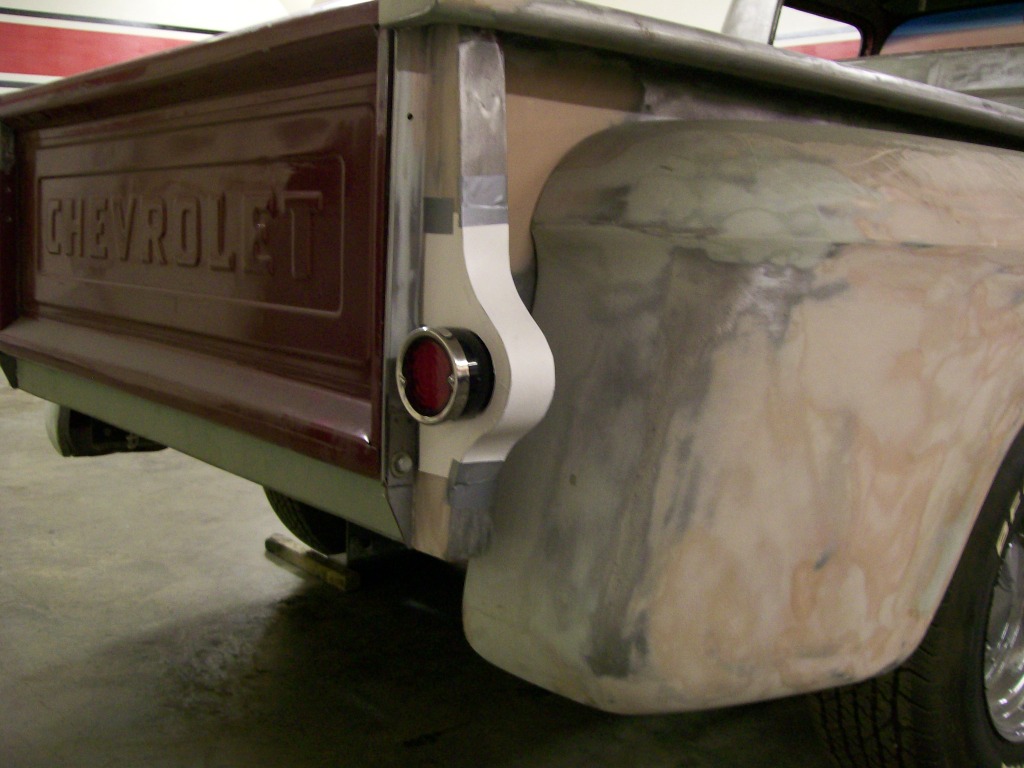
I'm happy with blending the tail lights into the reinforcement edge on the bed. I made the cut and fitted the tail light into place. Quite frankly, it's gonna need some work for this idea to work for me.

7-15-2012
I agree with the personal touch idea.
The subject reminds me of 30 years ago when I bought a 1965 Chevy. Back then in 1982, the first question was....is it all original? Mine wasn't, I didn't care, it was mine.
Then about 10 year ago, the term "resto-mod" came along. GREAT, I can restore a vehicle, yet modify it to my liking. No longer do I hear the "is it original" question.
Resto-mod, what a wonderful term.
I figured I would fit the taillight housing at least half way into the bed support, then smooth it with a little sheet metal and welding. Once I cut the support, and fitted the light and taped it in place as it is in this picture, I felt it was lacking.
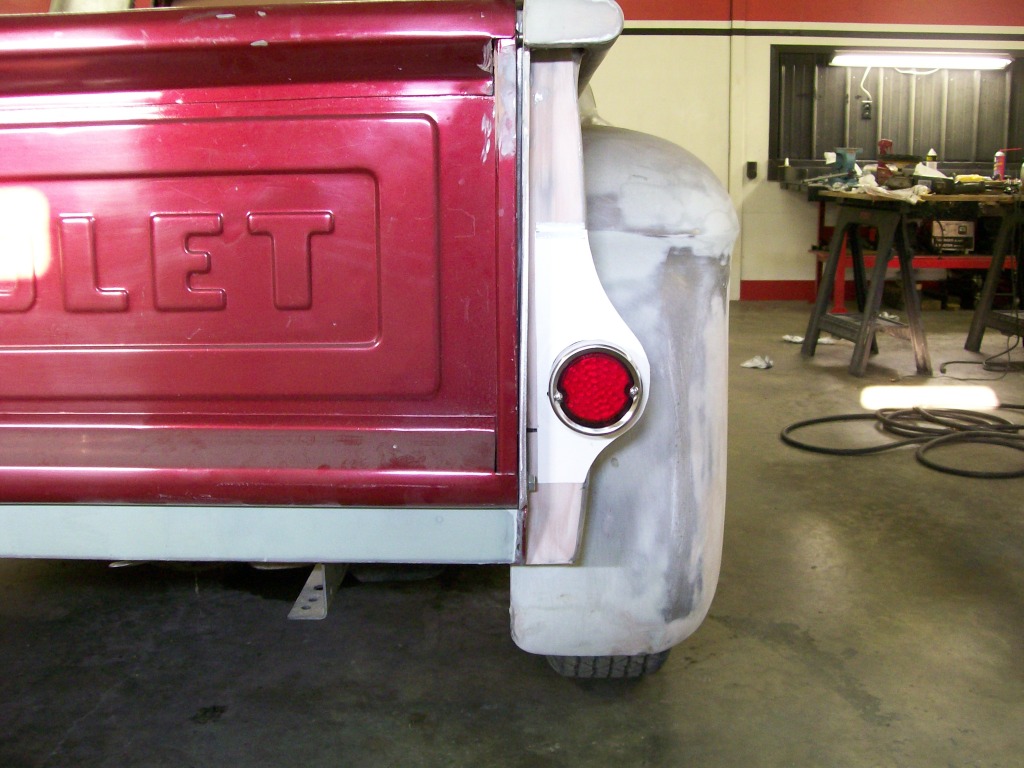
Let's face it, this is a 50's truck, use of sheet metal is ok. Just look at the size of the rear fenders as compared to what they coud be. They just need to catch the fling of mud and crud, but they're huge.
With this in mind, I figured I could add some sheet metal.
Once again I grabbed a sheet of construction paper and started drawing. From the drawing came cutting out some patterns.
Here is the look I have decided on.
7-16-2012
I'm glad you guys like. I sat on my cushioned roll around seat for along time before I decided to cut into factory sheet metal.
I think you're right Jeff88, I need to review my artistic abilities. I keep putting myself in situations where I have to force myself to come up with solutions with creative situations.
A quick look at the left side of which I was gonna do, as compared to the right side that I am doing. Much better on the right.
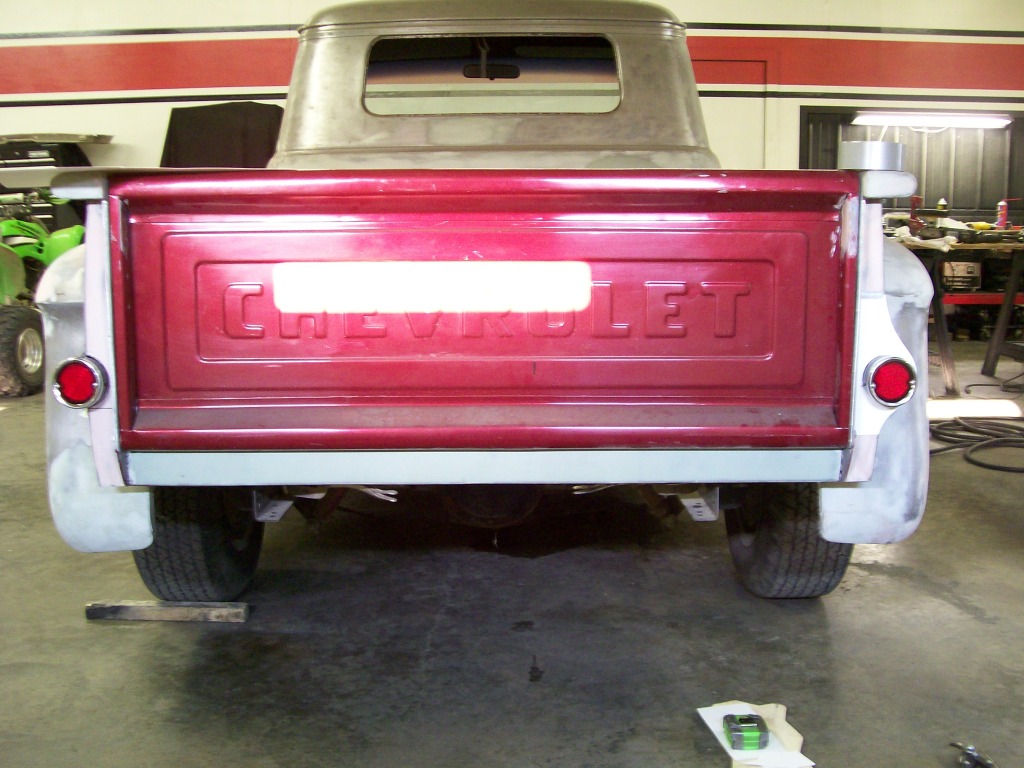
A side view of the construction paper mock up.
And that's it for the construction paper mock-up. After this I start the metalfabrication. Been a while since this thread really broke out the Mig welder and layed down some beads.
