You must be logged in to rate content!
15 minute(s) of a 668 minute read
6-20-2012
J-Quad, yes, if there one thing I have is alot of is Jeg's boxes. I'm not knocking any other mail order company, but I've had fantastic service from Jegs. One place that they have impressed me the most is their no-hassle return policy. Not that I like to return stuff, but the couple times I've been in a bad way, I know if I have to return something that I am gonna be covered by Jegs.
Jeff88, I like your imagination. For this mock up assembly the fins are being attached to the bottom side of the top plate. If this all comes together, this will be the same way I'll do it later too. The welding of the fins will be out of sight if they are attached to the top plate.
The more I get into creating items of art. If that's what we can call this.
 It's interesting how the small stuff can change the overall look.
For instance, the fins that reach from the bottom place to the top plate. I put a slight arch, or rounded cut to them. In this fashion it gives the look of a shark mouth. Had I given them a straight cut, they looked more like just fins or something to divide the air.
The idea of having the top plate extend futher forward adds to the agressive look also. Hmmmm. it's the simple stuff that makes such big changes.
Looks like if I recess the the fins back into the plates, the look turns even more like a shark mouth. The extra overhang of the top and bottom plates adds to the impression of the lips of a shark mouth.
Note also that the housing will be lower towards the carb when done. I have a plastic cap holding it above the carb right now.
Here's an idea of the front fins.
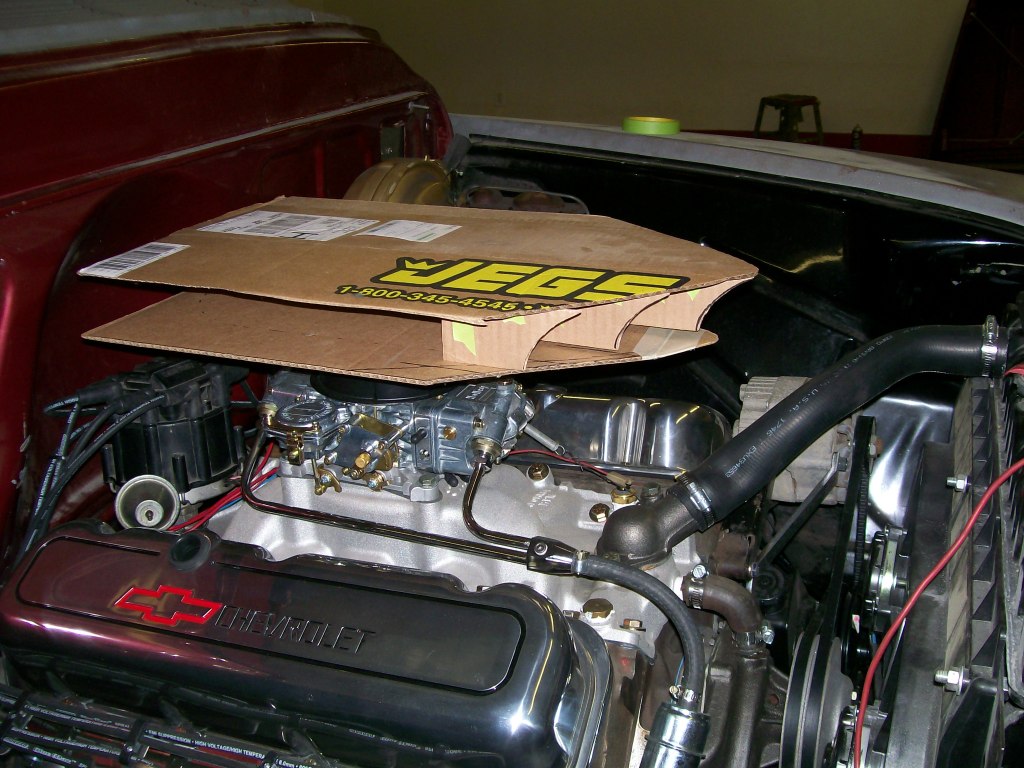
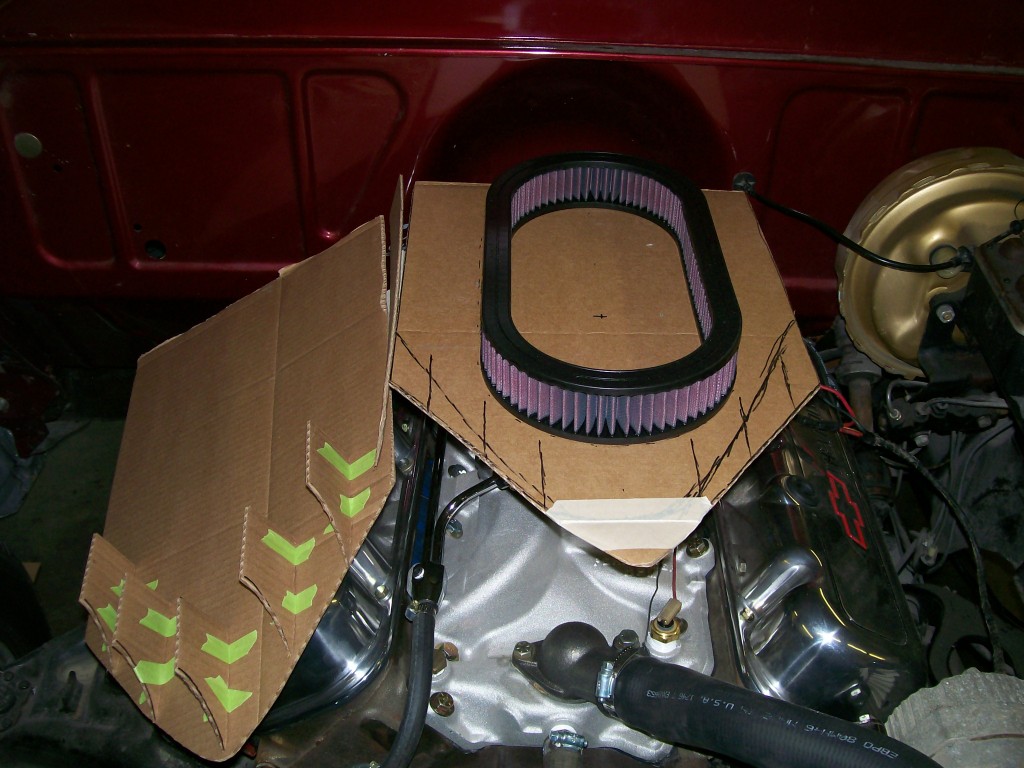
I like the idea. I also like the fact that it'll get plenty of air and once I get the side covers on, the air filter element will not be seen. I mean.... when did the air filter element ever become attractive?, They're not, it's just something we've allowed because it's the norm.
I still have a ways to go but here is an idea of how the element is gonna fit within the housing.
6-21-2012
Thanks guys, I like the direction this air filter is going. It is fulfilling the look, the hiding of the filter element, and should flow plenty of air. Now I just need to take it to the end. I still have to design a mounting system, I'm not gonna do the stud and wingnut if I don't have to.
In this next picture I've got the side in place. It has the same cut as the front fins. I also like that the air filter some what follows the forward lean that the front fenders have.
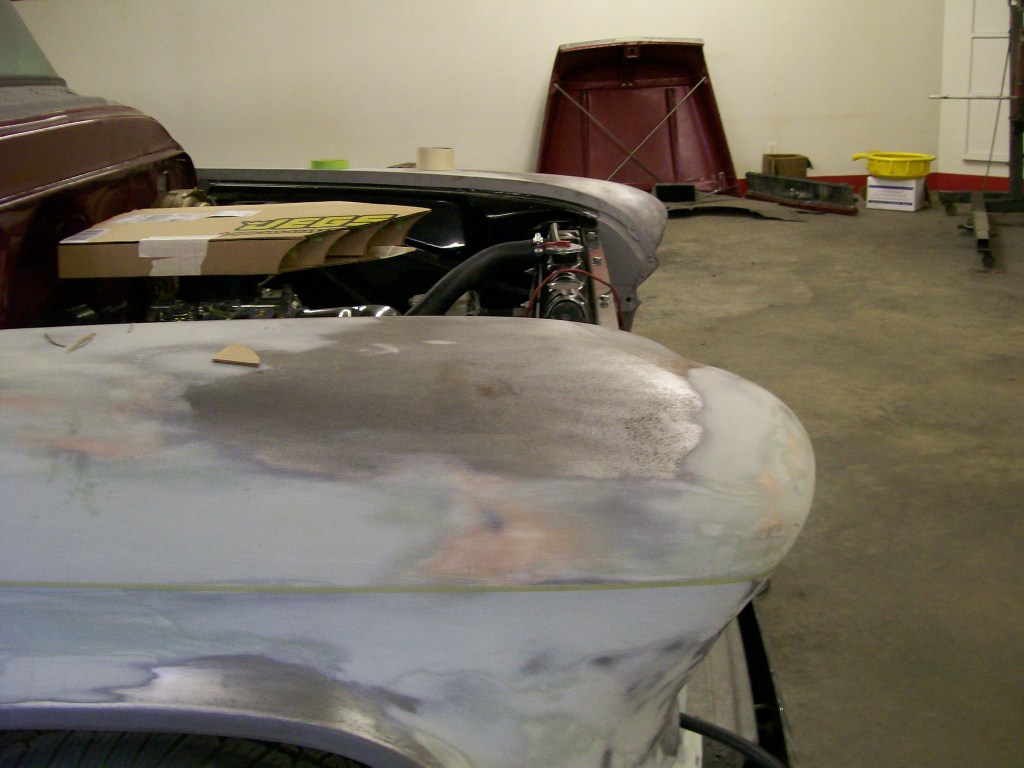
Now where I'm experimenting. The front has a great look to it, but I have to do something with the rear. In the above picture, it just comes to an square end.
In the picture below I've done some cutting to change the look. Grrrrrr, this ain't always easy for me to be artistic.

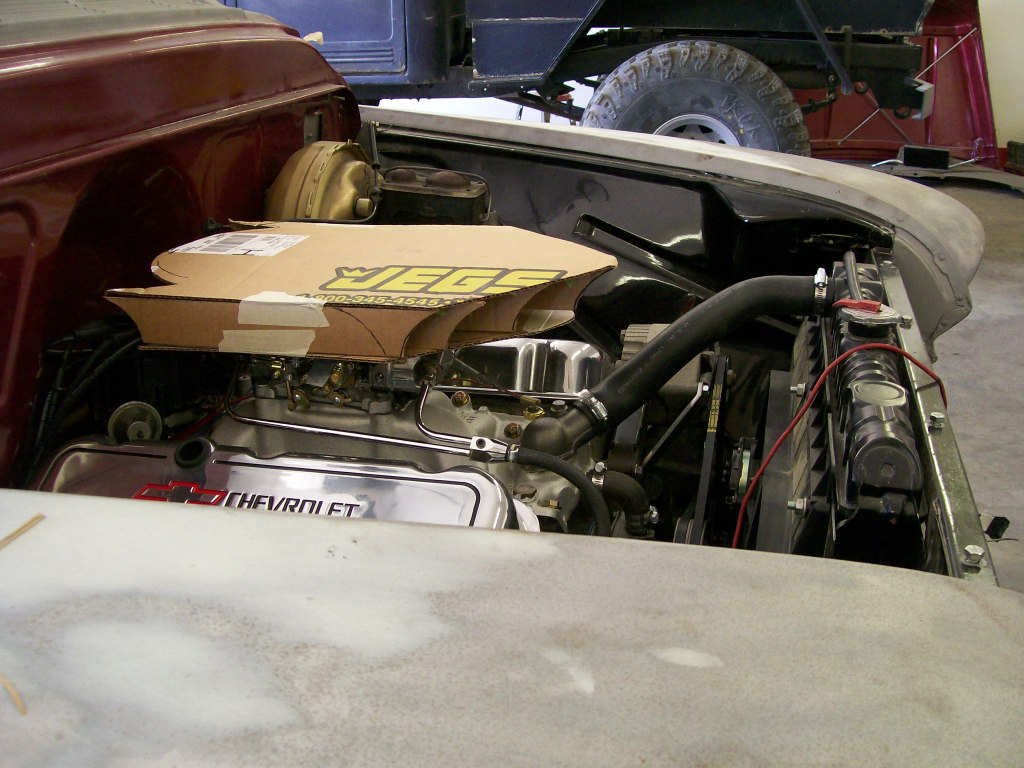
Good call, I didn't even go there. I was just trying to follow the curvature of the air filter element.
I kinda went with the idea of the wings/fins on the rear of the housing design is because cars during the late 50's were into the wings/fins coming off the rear quarter panels.
I think I'm close to the design I'm looking for, I just need to get the size and dimentions right.
Hmmmm. instead of having the side covers stopping at the height of the top plate, I could allow the side plate to go above and truely have a 57 chevy car look to it.
6-22-2012
Material wise, when and if this comes to be..... will be made out of aluminum.
Chances are, I will paint the aluminum housing. Then, just as I did wth making the side emblem out of stainless, I plan on cutting a stainless piece that will be a decorative overlay on the top of the housing. This decorative overlay will have my dad's initials cut into it and will serve as a part of the mounting system.
The painted housing will show through the cut outs in the decorative stainless overlay.
Of course, this is my first agressive attempted at such a project. I've got my finger crossed.

6-27-2012
I haven't had a chance, nor the progress to post lately. I had some familytime and spent a few days atving. We rode til I was exhausted and loved every minute of it.
Last week while I was getting into the air filter housing project I was waiting for a set of leaf springs for the rear of the 57 Chevy.
The issue being...when the truck originally came from the factory it had a straight axle with leaf springs up front. About 25 years ago someone before me removed the straight axle and installed a subframe from an elcamino for the independant front suspension. This change dropped the front end about 3 or 4 inches. Although they did remove a couple leafs from the rear springs to help level the truck, it just wasn't enough.
This is where I come in, I don't like the rake/angle of how it sits. Fortunatly there is a replacemant set of leaf springs to lower the truck. I got them delivered last friday and installed them yesterday. The springs didn't fully lower to the point I was looking for and I had to do some shackle changing, I'll cover that later.
For now, a look at where it was before I worked on it.
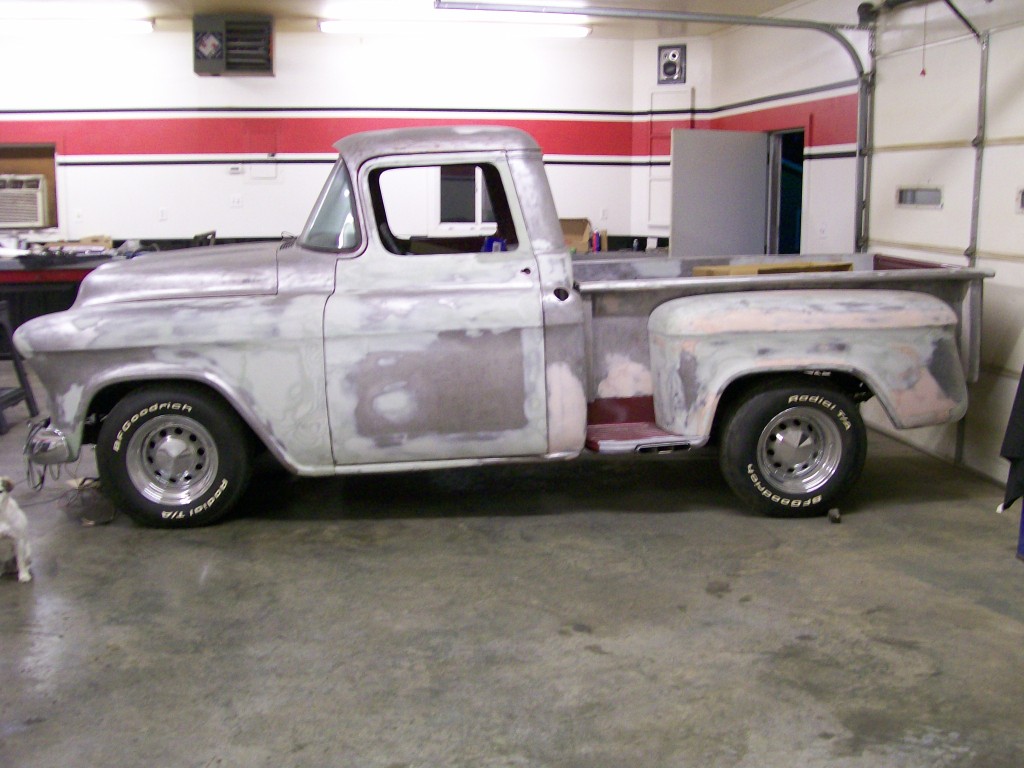
I managed to drop it 2 inches. Once I install the wood flooring in the bed it'll drop a small amount more, but this should be where it stays.
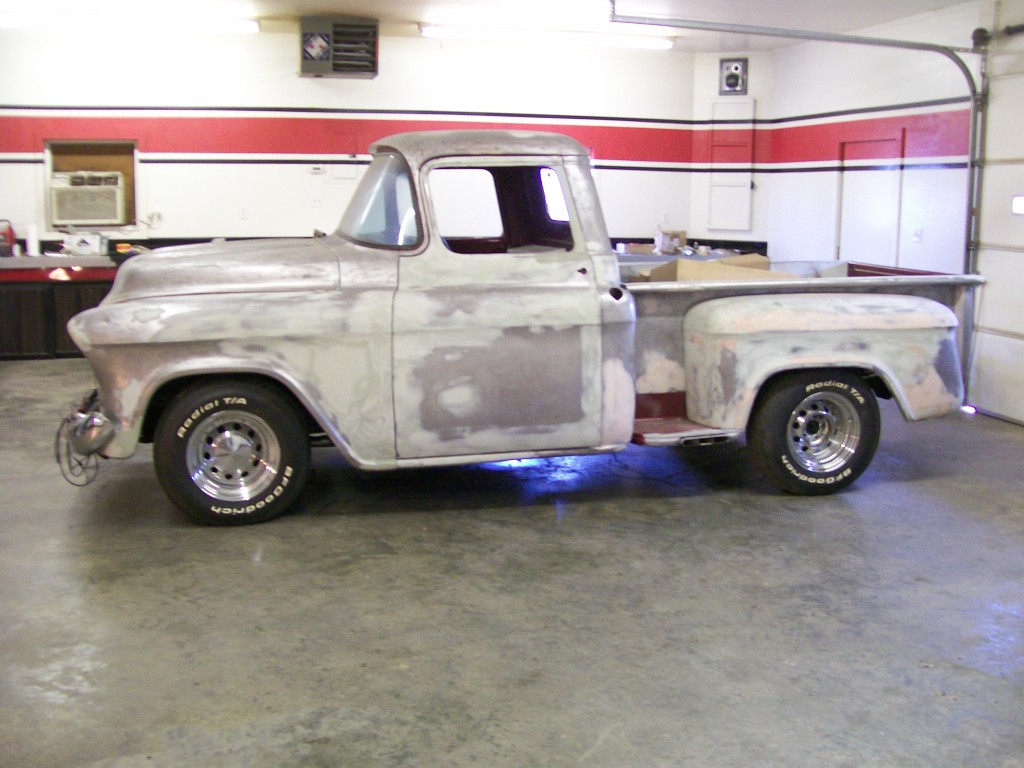
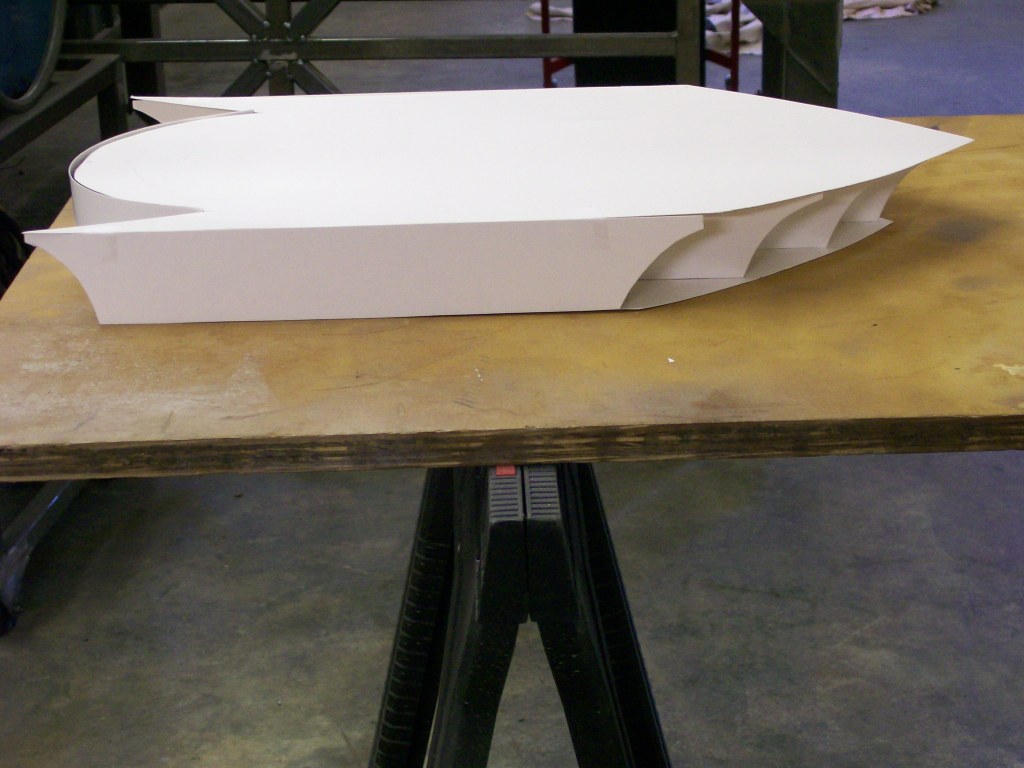
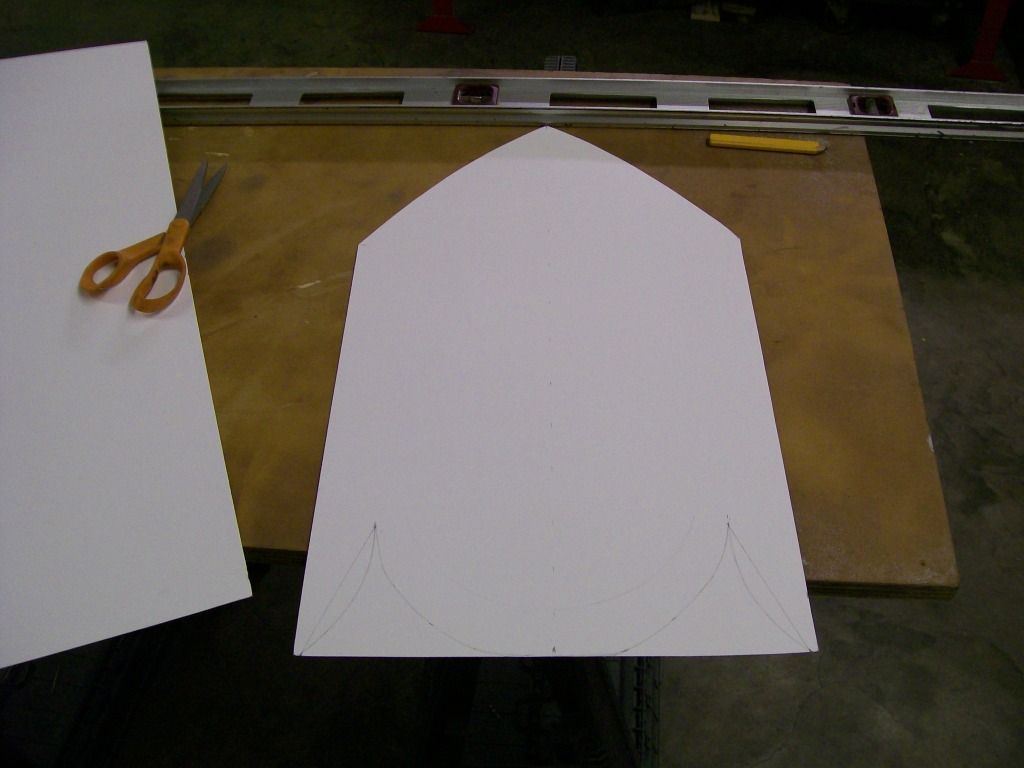
On the filter housing, I picked up some heavy duty construction paper and I'm in the process of defining the housing. I've stretched the housing about an inch and gone an inch wider also. Once I recreate it with the construction paper I'll have something more accurate to measure from while creating the cut path in the computer. I'm still tap dancing around the idea of this looking silly when done. Guess I'll have to finish it first, then it'll be personal preference.

I'm looking at the two pictures above and I see the exhaust tips sticking out. Then I know the engine is sitting in the engine bay ready to hit the switch and it's running. Then I remember the exhaust system, and the transmissioncrossmember, the pully making, the header spacers, the plug wire holders, cam install, ect... Guess what I'm saying, once again, as long as I focus on the progress done so far, it's easier to move forward than to think of the work still ahead. It's a mind game, just gotta keep moving forward.
Thanks the both of you for your honesty, it does require a certain drivewithin us to keep working on a project. Trust me, it doesn't get much easier as you age. The biggest thing I notice with age is my abilities have been sharpened, so I do get to the final result quicker.
I mentioned a set of new leaf springs to lower the truck. I was looking for a 2" drop, the advertisement read that I would get a 3"'drop. By the picture in the catalog I couldn't see a 3" drop by design. Sure enough, they only provided about 1 3/4" to 2" drop.
By the picture you can see the previous owner did remove a couple of leafs from the packs. I'm sure this gave around a 1" drop, it just wasn't enough.
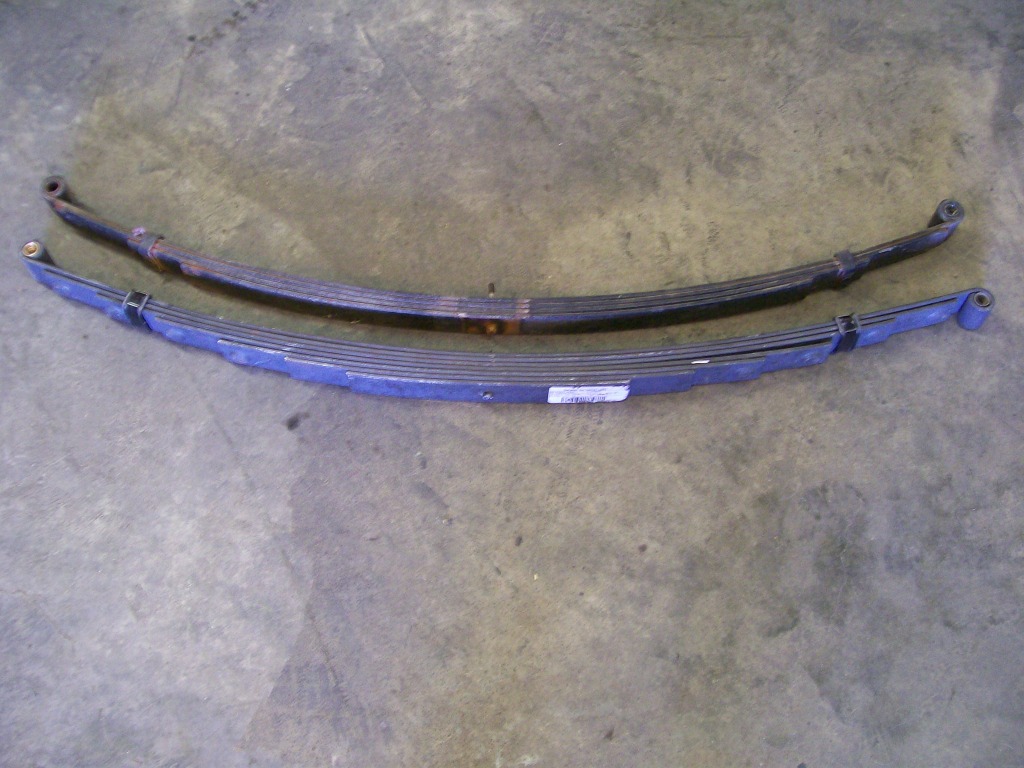
I like the idea that someone came up with. Just by rolling the end of the leaf spring eyelet to the opposite direction, it provides a quick drop of around 1 3/4". Great idea.....
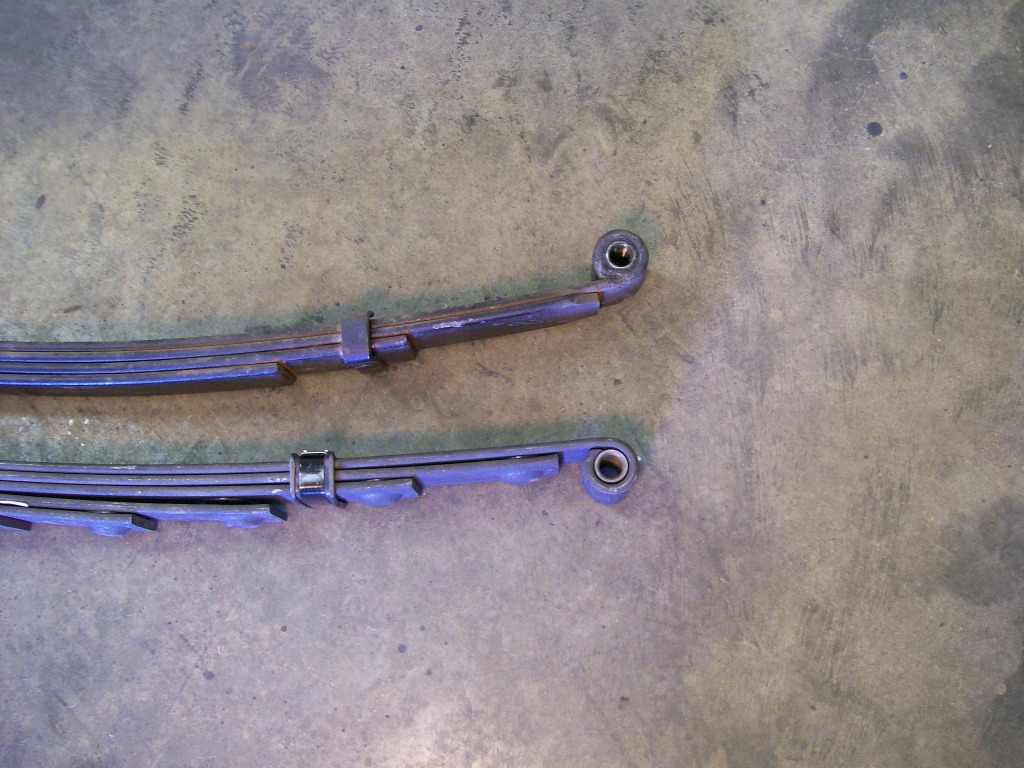
My problem was.... someone who removed the three leafs, removed 3/4" height. Now when I install the full pack, I gain the 3/4" of height right away. I don't get the full drop I wanted and I'm not gonna remove any leafs from the new pack. So, I had to make some extended shackles. Pictures to follow
6-28-2012
While removing the leaf springs I noticed the pins that go through the shackles didn't want to be tapped out with a hammer. What I found was a pin that was threaded, and it threaded into the bushing that was pressed into the leaf spring.
Once again, I give credit to the engineers 50 or 60 years ago. When I started to disassemble to remove the springs I noticed thick rubber washers between the leaf spring and the shackle. Usually, such as my Willys, you tighten the shakles right up against the spring bushing. This tightening would normally destroy the rubber washer. The rubber washer in this case is to seal the grease in and the dirt out of the bushing pressed into the leaf spring. These older trucks had grease zerks and you pumped grease into the pin and bushing during maintanance.
This design has a pin that that has three stages. First, a look at the internal threaded bushing and the threaded pin.
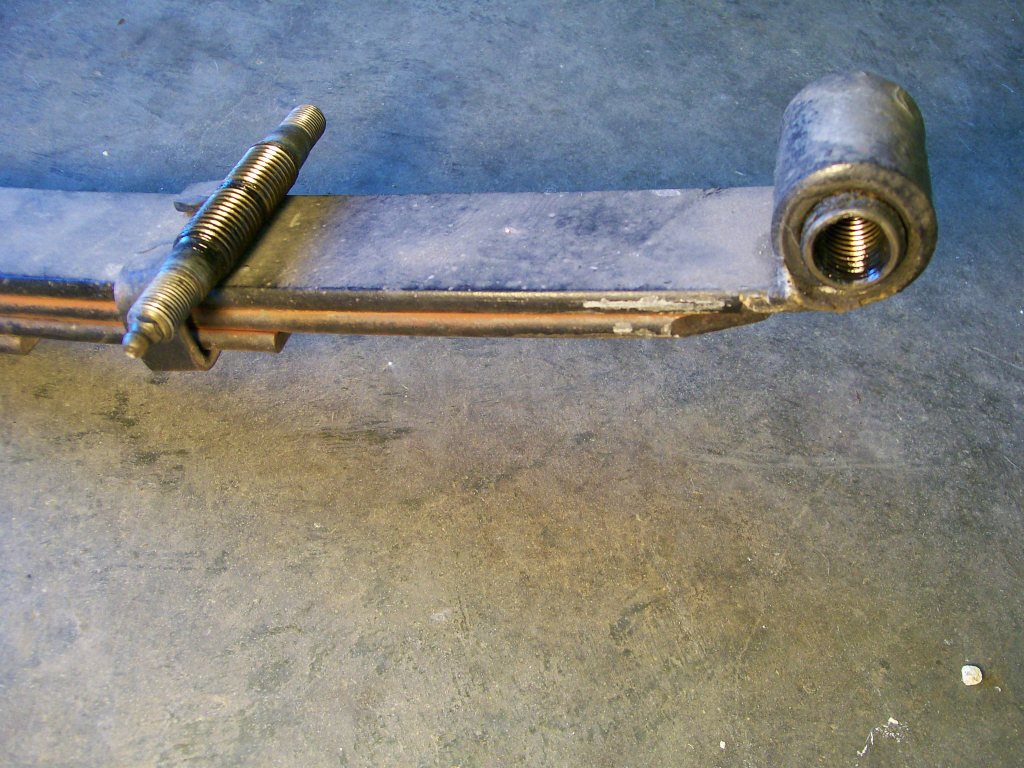
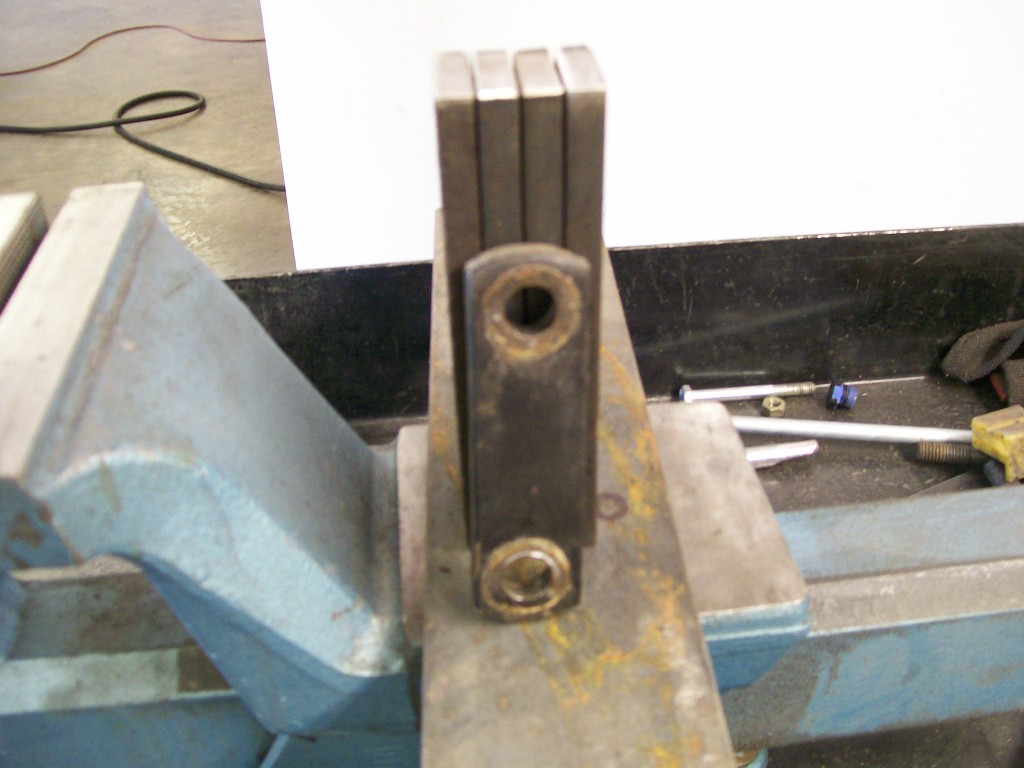
I am adding longer shackles to help drop the rear of the truck to where I want it to be. I added an 1 1/4" to the length of the shackles. Keep in mind, the change of height or lowering, is only half the changed length of the shackes. The axle is located half way from the pivot, (front spring mount). So if you change the lenth of the shackle 2 inches, you only get 1 inch of change.
A look at the old one as compared to the length of the new ones being made.
6-29-2012
Moving along on the shackle situation.... I have a closer picture of the shackle pin.
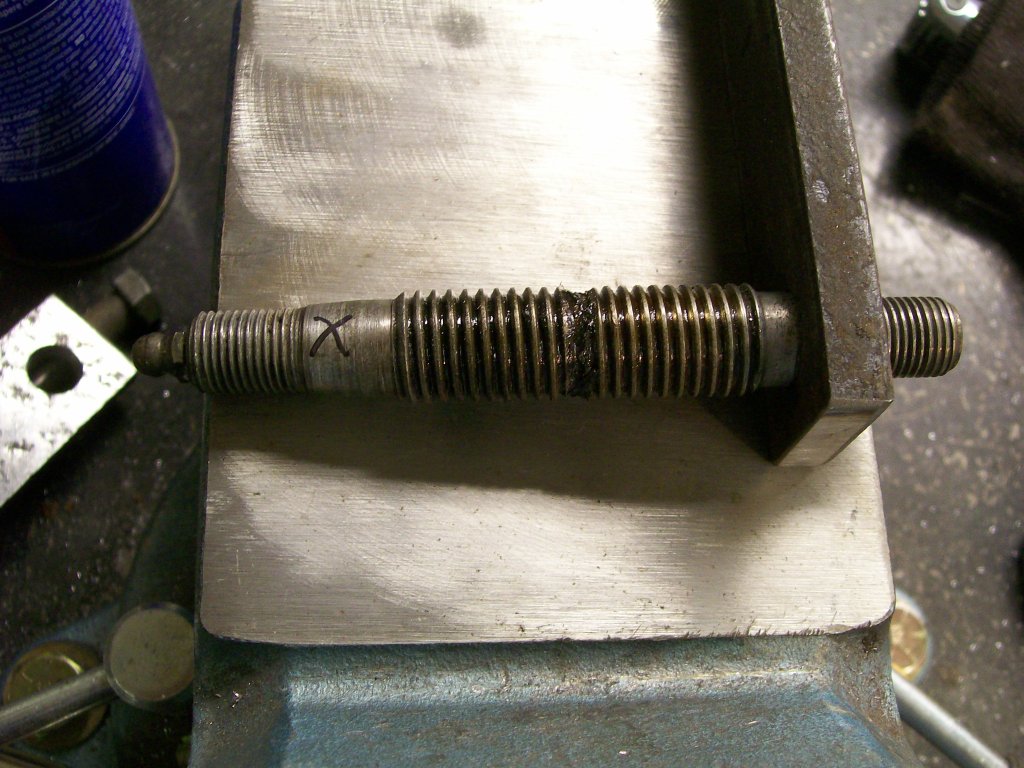
The pin has in the center, the larger threaded area in the center. Then there is a slight taper that reaches from the center to the outer threads. The taper is what keeps the shackles from closing in on the sides of the leaf springs. With this taper there, the rubber washer between the leaf spring and the shackle does not get smashed when all is tightened.
My issue is I have to drill the 1/2" hole to slide the shackle over the outer threads. Then I have to take a rotary brr and try to create a female taper to match the male taper on the pin. Too large a taper, the shackle will go too far and smash the rubber washer. Not enough taper, and the rubber washer will fit sloppy and not seal the grease inside the bushing.
Is this a real sensative area, no, but I'm still gonna do my best to get the right fit. For example, I drive a 62 year old Willys as my daily driver, it's because I am fussy in areas that I get in the Willys, turn the key and away I go.
To some, this is perhaps boring stuff, but the story isn't about fabricating metal so much as trying to understand the principle behind the original design. Once you understand the principle behind the design, you can someday appy it to a future project you may have.
A close up of the pin and a drilled shackle. I'm using some old scrap metal I had, I'm not sure of the exact length I want, so scrap will tell me exactly where I want to be when done.
I sharpied a an "X" on the taper. This is the taper I had to match.
All four shackles needed the same treatment, it took time, but in the long run, what's an other hour or so to do the job correctly. I'm sticking with the length I have now. I plan on getting a set of dark spoked Torque thrust,17" wheels all around. Perhaps a little wider in the rear to fill the wheel opening a little more.
 Now I'm pleased with the stance of the truck.
On the air filter housing, With drawing and cutting this construction paper,
I wish I would have spent more time on arts and crafts in school.lol.
From the cardboard creation, I got a real good idea of the size and shape. I took what I learned and altered a few areas while cutting the construction paper. From the construction paper, I had an accurate design to copy and measure from to get it into the computer.
I drew out a couple ideas on the paper as I was cutting, but still stayed with the original design.
Just a test fit over the carb.
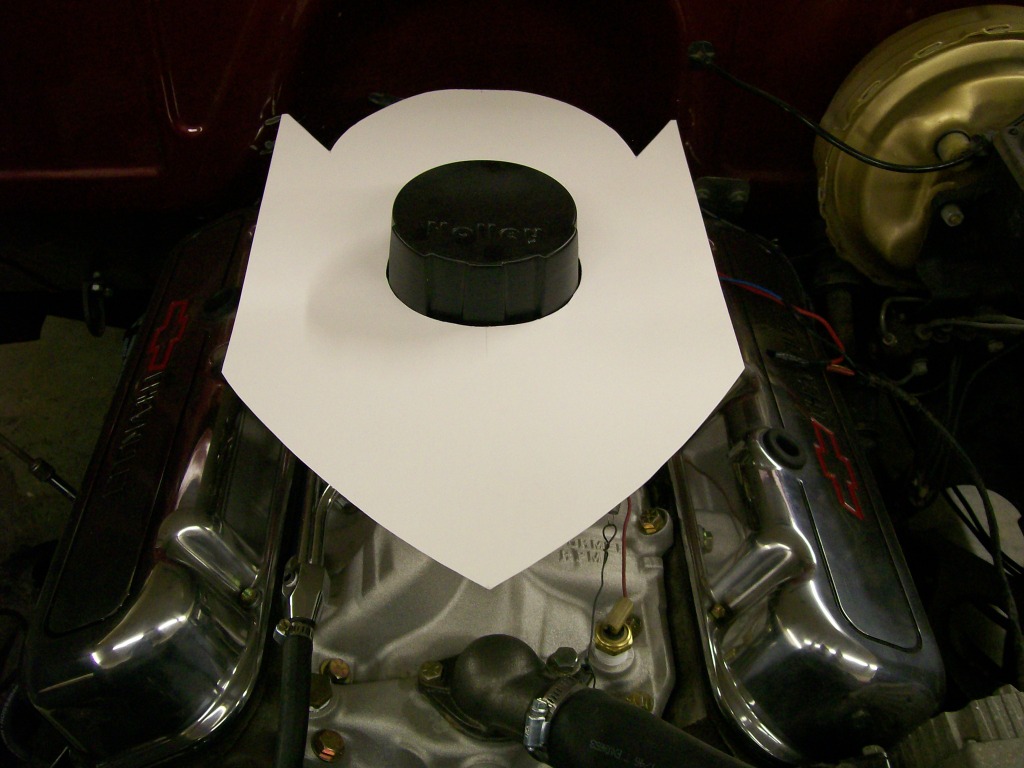
Now all the pieces have accuracy and time to dissassemble and scan into the computer.
