You must be logged in to rate content!
12 minute(s) of a 668 minute read
5-22-2012
Moving along with the exhaust decisions, I had a choice of 3 sets of gaskets.
There was the set of stock ones that came in the gasket set for rebuilding the engine. Then there was a set that came with the header package. Then I ordered a set of soft copper ones.
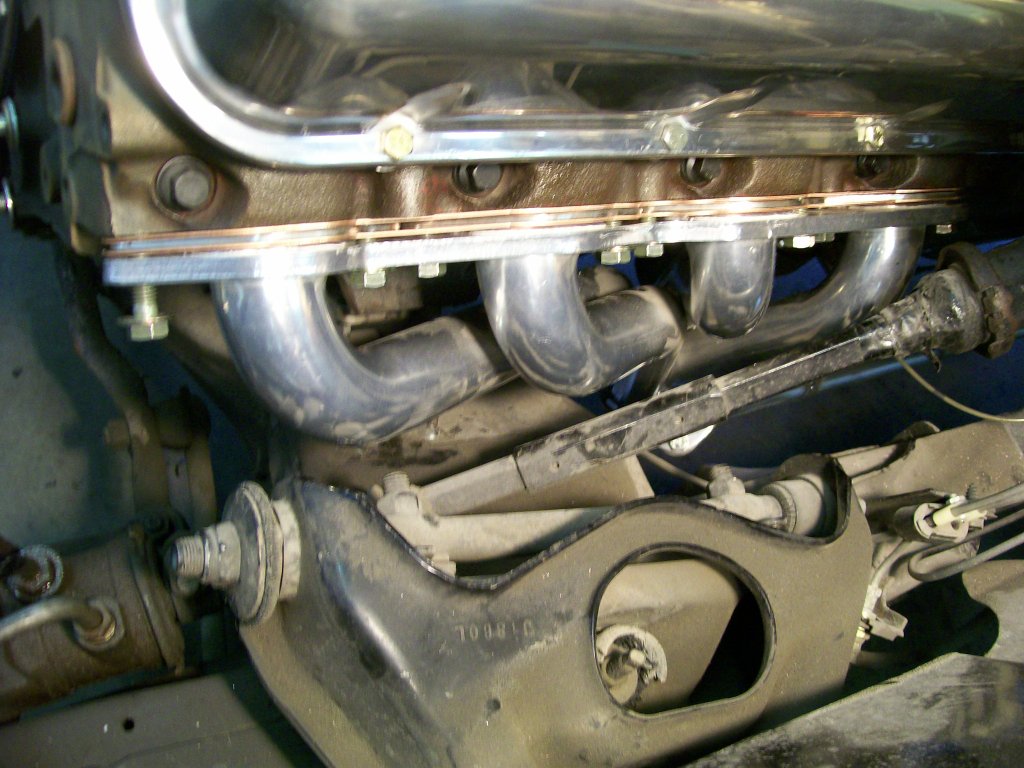
As many will recall, I made a set of 1/8" spacers to get some working room for the oil filter. I really perfered to use the soft copper ones on the side that I added the spacers.
This next pic is the three choices.
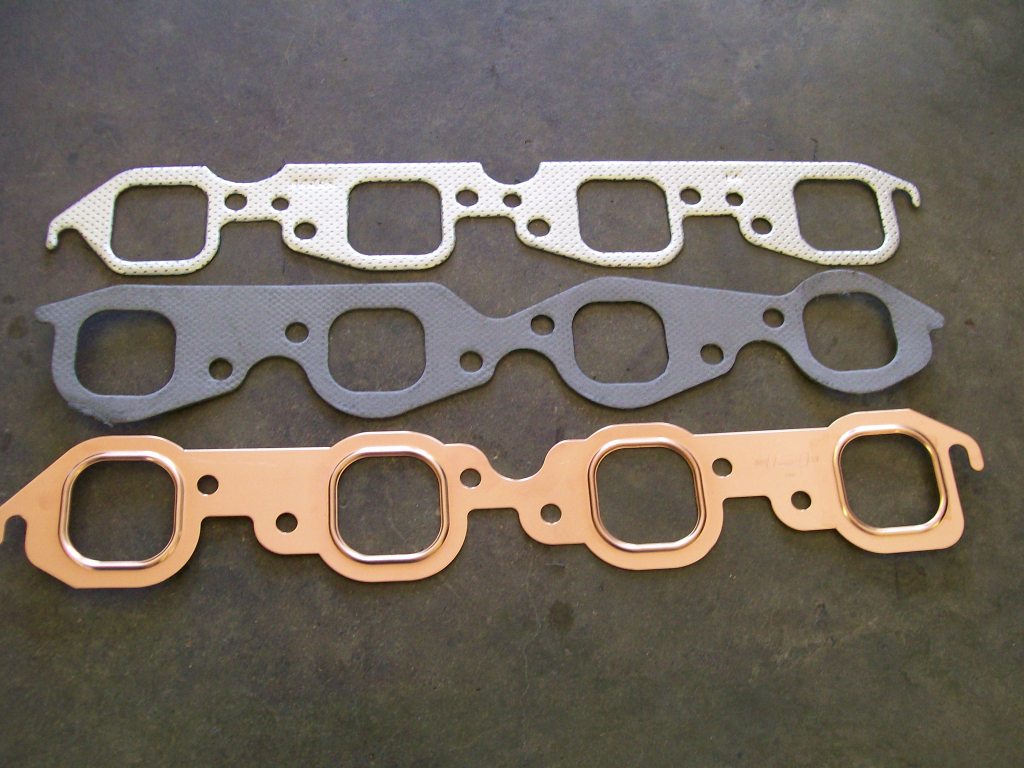
Actually I perfer to use the soft copper on the side without the spacers also, but I only have one set of them.

A look at how they fit together with the spacers.
I mentioned I had a issues when I started the truck for the first time. An exhaust leak was one of my issues. The leak was on the side with the spacers but the spacers were not the trouble spot. The problem was how the gasket matched the header flange.
Although it did leak, I did run the engine for about 20 minutes. The good thing about letting it run was there was a black powder deposit left on the gasket and the flange. The black deposit told a story of what the problem is.
I'll cover the issue next...
5-23-2012
Let's see... hmmm.
Doubt, or concern, it's been 1 1/2 years since I assembled the engine, not sure how the new cam was gonna react, home made pulley and some bracketry, definetly a concern of the new exhaust system, concerning leaks and sound, the header spacers not leaking, the oil system not leaking, the cooling system not leaking, ect.
Excitement and enthusiasm, wanting to see the engine run, wanting to hear the engine run, knowing the engine doesn't leak oil, knowing the engine doesn't leak coolant, checking to see if the exhaust cut outs open and close properly, trying the dual fan setup and seeing how well it pulls air through the radiator, ect.
Sorry for the long writing above, I'm trying to show the emotions that one goes through as an engine is close to it's first start up. Those who have been there, know the feeling. There is the excitement, but also the crossed fingers.
mudcrawler90, I got off track a bit, but the whole reason for putting the engine in the truck was to start the engine and check all the stuff I mentioned above. I also have a mess of wiring to deal with, and with the engine in and running I can fix all the issues with the starting and charging system wiring. Once I get the wiring straightened out I'll take the engine back out.
The engine itself still needs to be painted, and along with all the body work and priming and painting yet to do, the engine compartment will be detailed at a later date. It's also a real confidence feeling knowing that the engine is 100 percent ready to run once the paint work is done.
I did take a picture of how I used the engine bay for the start up, but not much anything else associated with the truck.

Let's see. red push button for the starter, hot wire to the distributor, small gas container, battery, toggle swith for the electric fans, and the wiring and rocker switch for the exhaust cut outs, yup, that covers it.
5-24-2012
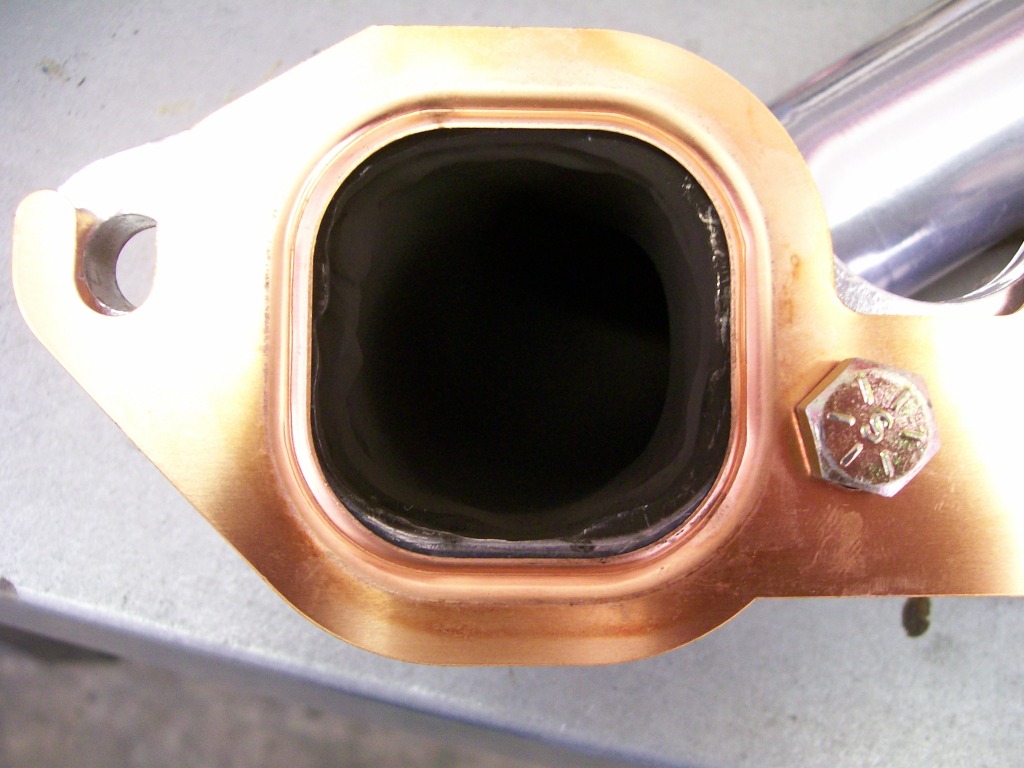
One of the issues I had to deal with at start up was a pesky header to head exhaust leak. I so hate the sound of header leaks, grrrrrrrr If the leak is small enough it can give the sound of an out of adjustment rocker arm.
As I mentioned, I used the copper gasket on the side with the spacers, yet the spacers were not the problem. The problem was with a header flange that didn't match the gasket.
Allbeit a very small gap, it has to be corrected. I ran the engine long enough to leave a darkened pattern to give me an idea of where the trouble is. Sure enough, I have a pattern left on the flange that tells the story.
In the next picture I drew an arrow pointing to the trouble spot. Right at the corner, the gasket drops just enough to leave a gap. Now I have to decide a pan to correct the problem.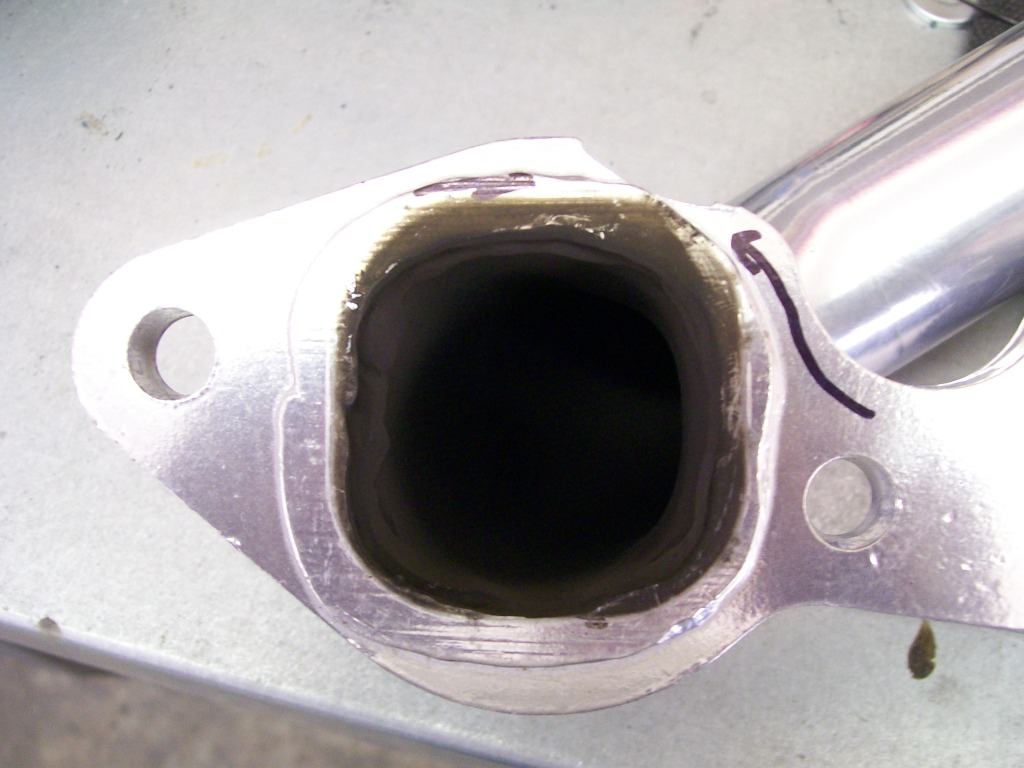
If you all know me, I'm ready to plug in the mig welder and fill and grind the flange to reach out to where the gasket can now be sealed.
I'm gonna go a different way. As I look at the darkened area all around the opening, I see I can raise the gasket when installed. By doing this I'll center the gasket to the flange, and by doing so I'll seal the corner leak. This procedure will center the gasket on all the openings along this whole header, which is also a plus.
I simply took a sharpie marker and at each mounting bolt hole, I marked about an 1/8 inch to the bottom side of the mounting holes. Then used the drill with a rotary brrrr to remove the material. Now once all the pieces are inplace, before I tightened the bolts, I'll push the gaskets up from the bottom side so they'll be where I want them to be.
This next pic has the gasket in place for a visual. With the gasket in place you can see the light colored area of the header flange showing how the gasket is now relocated.
This is simply a situation where we have different manufactures with slightly different tolerances, just something we have to deal with once in a while.
I figure I could just post all the good stuff during the builds and leave the headaches out of the posting, once again, this is the life of hot rodding, I gotta show both sides of the build.
5-26-2012
On to another problem I had to deal with on the 396 start up.
Start up, did I say start up, yup, that's where the problem was. This thing just wouldn't crank over worth a crap. Seemed that the problem got worse when the engine was warmed up.
History.... When this truck came to my garage, I never drove it, I never started it. I knew nothing about it's parts and pieces. When it came time to install the flywheel and starter on this engine, I used the parts off the 327 that was in the truck when I got it.
I used the battery out of the Willys so I knew it was good, but when I would try to crank the engine it would come to a near stop everytime it came to a compression stroke.
Assuming the starter was fine, and the battery was fine, I figured I had the timing too far advanced. Being advanced means the spark plug was firing before the piston had reached top dead center (TDC). If the timing is too far advanced the spark will try to force the piston back down the cylinder, causing the starter to have to overcome this downward force.
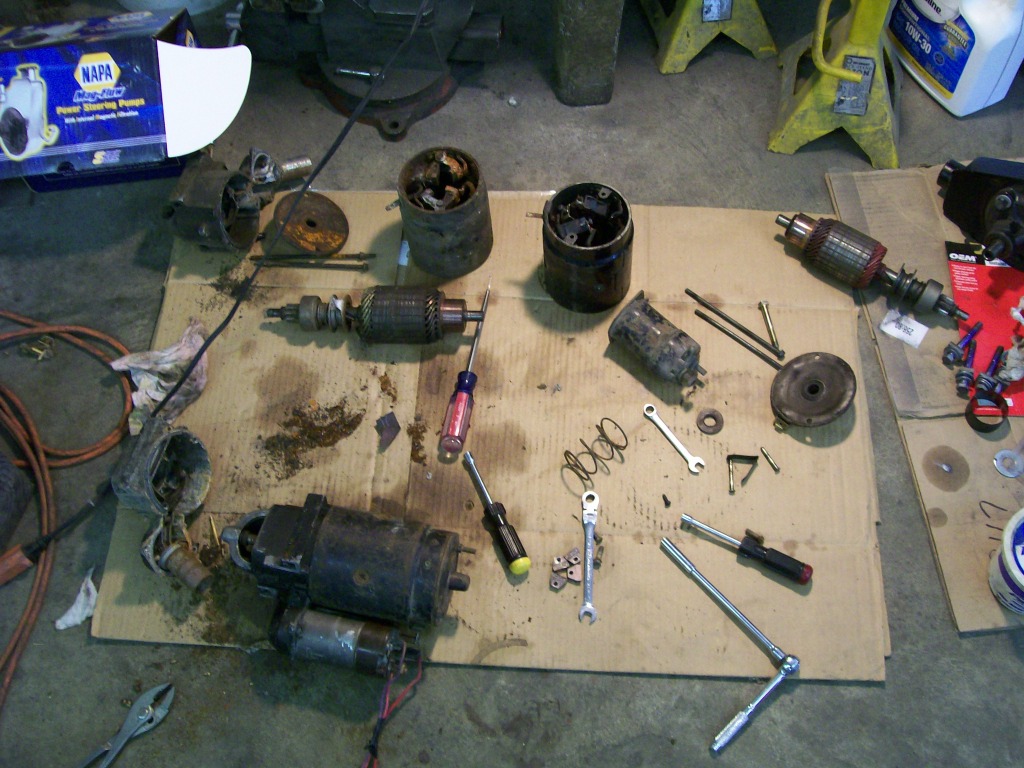
Ok, ok, I'm old school.") I don't have a timing light, my bad. After further diagnostics I determined the starter is drawing way too much amperage.
I don't have a timing light, my bad. After further diagnostics I determined the starter is drawing way too much amperage.
I didn't see any definate problems with the starter, but there wasn't any way I was gonna bolt that one back on again. I dug a few from my inventory and from the 3, I ended up with a very good working starter motor.
The end result of looking for the best parts...
Just another situation of knowledge over riding a situation.
5-31-2012
I've started the 396 a couple times over the last couple days, it puts a smaile on my face to hear it change from near silence through the mufflers, then turn into a roaring beast when I open the cut outs. Gotta be about the coolest thing I've ever done to an exhaust.

One final picture of the engine from the top. Note.. most of the bolts and many pieces will be changed, such as the intake manifold bolts will all be changed to stainless 12 point bolts, ect. Remember, this is just a test run.

One the other hand, the Willys made it's way back to the shop for a mechanical upgrade.
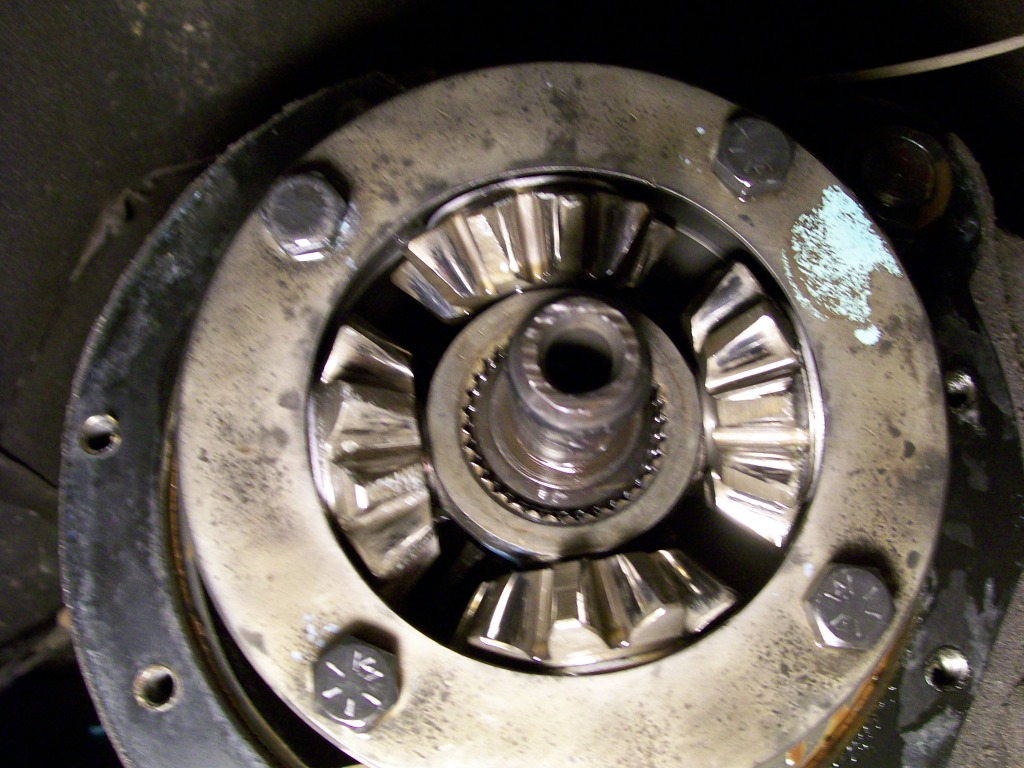
The transfer case is a NP 203 model. These transfer cases were extremely common during the 70's and 80's. They were known as a full time four wheel drive unit. What made them full time and usable as a daily driver was they had a set of spider gears that transfered the power between the front driveshaft to the rear draveshaft.
For those who have followed this thread, you'll remember spider gears being inside the rear axle. The spider gears allowed the two rear wheels to travel at different speeds, such as going around corners, but still keeping the powerapplied to the wheels as needed.
Now in the transfer case, it's the same idea, except they apply power to the front and rear driveshafts vs left and right wheels.
One way to create a part time four wheel drive with this full time system is to install front locking hubs. This is what I have had for years. Once I disingage the front hubs, I have to lock the transfer case into full time locking 4x4, other wise the front drive shaft would be the only thing spinning, which would not move the truck since the front hubs were unlocked.
With the front locking hubs being unlocked, I had to lock the transfer case into four wheel lock. For years I had a sloppy feeling when shifting from forward to reverse, then reverse to forward. The problem was, the spider gears were not designed to transfer the load that was being placed on them.
I decided to upgarde to a kit that will eliminate the spider gears and convert the transfer case to more of a part time transfer case.
A company called Mile Marker has a set of locking teeth that will replace the spider gears and get rid of the sloppy feeling that the spider gears are creating with this arrangement.
In the picture below, you can see the spider gears making contact with the rear tailshaft. It is these spider gears that I will replace, and basically lock the tailshaft to the housing that the spider gears are encased within. By locking the tailshaft to this housing, I will eliminate the movement that the spider gears allow.
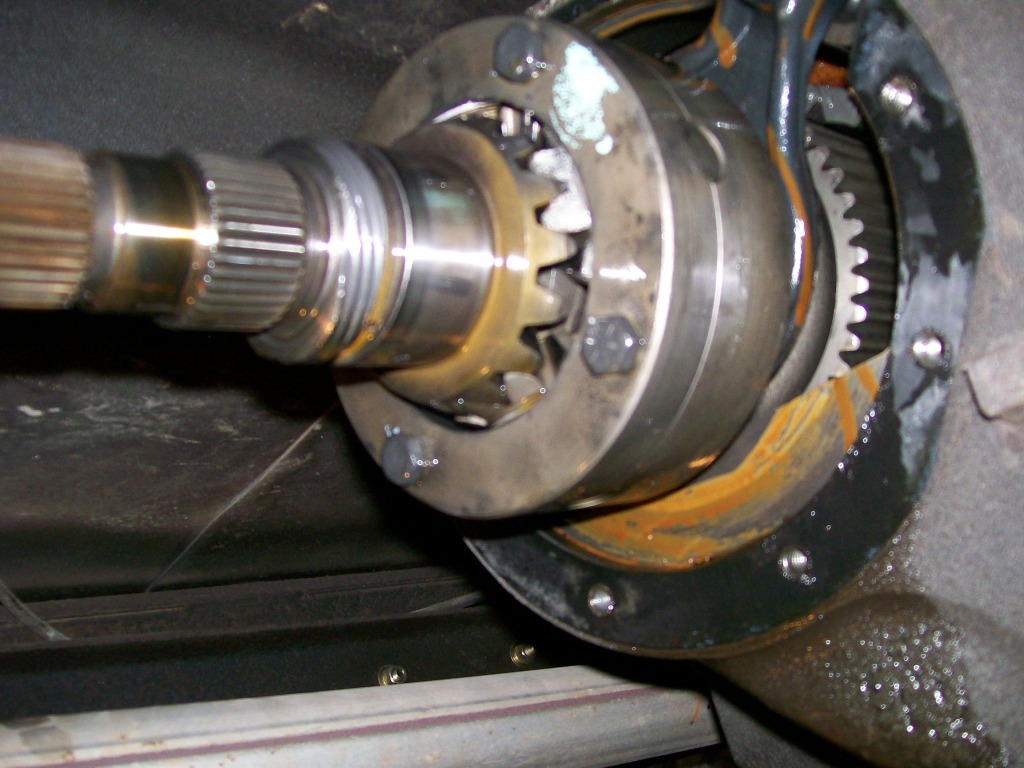
The areas that look rusty is accually the original gasket sealer used during assembly.
6-1-2012
In the last picture I had done nothing more than remove the aluminum tailhousing to show the tailshaft.
The tailshaft now slides off a short stub shaft. Being careful to put your hand under the area while removing the tailshaft, there are 15 needle bearings ready to fall out. Catch them, count them and put them aside.
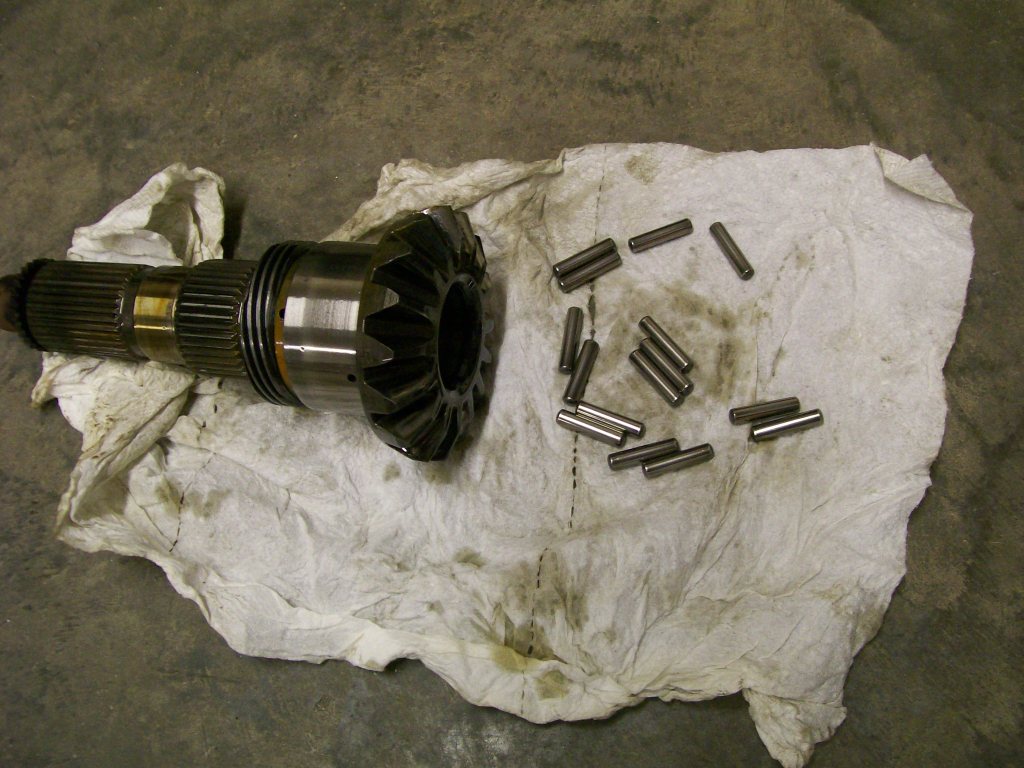
Next, a picture of the tailshaft removed. You can see the short stub shaft that the tailshaft was riding on.
Now a better look at the 4 spider gears that the tail shaft was being driven by.