You must be logged in to rate content!
9 minute(s) of a 891 minute read
5-16-2018
Interesting.. a lot of threads out there that exclude pics of the specific use of "needle" but just refer to the setups as "bearing" even if bushings are being talked about. It appears that all the Comp Cams issues are indeed needle bearing.
Here's an interesting post from CorvetteForum:
Quote:Originally Posted by CorvetteCoop  There is some great info in this thread. Unfortunately the failure mode found by the OP is not new and has occurred on several cars over the years. I have done some reading up on the various trunion "upgrade" options out there and here is what I found:
Comp Cams - $129
There are thousands of people using these with no issues. With that said, there have been many reported cases of galling of the trunion shaft. Unfortunately this doesn’t become evident until the bearing is removed from the trunion for inspection. I did not find any cases where this galling led to a catastrophic failure of the component. In several cases the bearing would spin freely but once disassembled the shaft was damage similar to the ones pictured in the OP. There have also been reported failures of snap rings breaking, which may or may not be the result of installation error.
Brian Tooley Racing - $115
From Brian Tooley’s post on tech almost a year ago regarding the difference between their product and Comp Cams:“We use the same trunnions and bearings as Comp does, we use USA made bolts and larger snap rings that should never break and provide slightly better pricing.”
Harland Sharp - $273
While similar in basic design there are some key differences that justify the price difference. First, Harland Sharp cross drills their trunions to provide access for splash oil to get to the bearings. Second, the Harland Sharp trunions include hardened washers between the c-clips and the rocker. Lastly, the materials used are more suitable for this application.
I found this info from two posts on tech that has some very good info on the differences between Harland Sharp and the rest:“The difference between the Sharp kit & most of if not all the less expensive kits is that they use full heat treated 52100 steel for the shafts & the others use a case hardened steel like 8620. The case hardened shafts are only a surface heat treat meaning the outside of the shaft is hard, prob .02-.030 deep but the inside is still soft. The case hardened shaft is a poor choice for something that has a hard bearing with & the load from the valve train on it.
There are plenty of unhappy people on here that have had the Comp kits fail, the early Harland Sharp kits also failed but I believe they had surface heat treated shafts also.”
“You are relying on a thin layer of hardened steel supported by a soft inside & 8620 that is typically used is not a good choice, the 52100 that Harland Sharp uses is a full heat treated steel used in some bearing applications.
And for everyone's information I am a tool & die maker @ the former GM owned former New Departure/AC Delco Chassis/Delphi bearing plant which made/makes bearings on all your vehicles so I know a little about bearings.”As was mentioned in the above statement, Harland Sharp had similar failures in their early design. They changed the material and design to correct the galling being found on these “upgrades” and as I understand have not seen reports of the same failure mode.
CHE - $420
CHE offers a unique solution as they do not rely on a bearing but rather utilize a bushing. This is regarded by many as to be the ultimate solution to the problem. I have not found or heard of any reported failures with the CHE product. Of course that comes at a price.
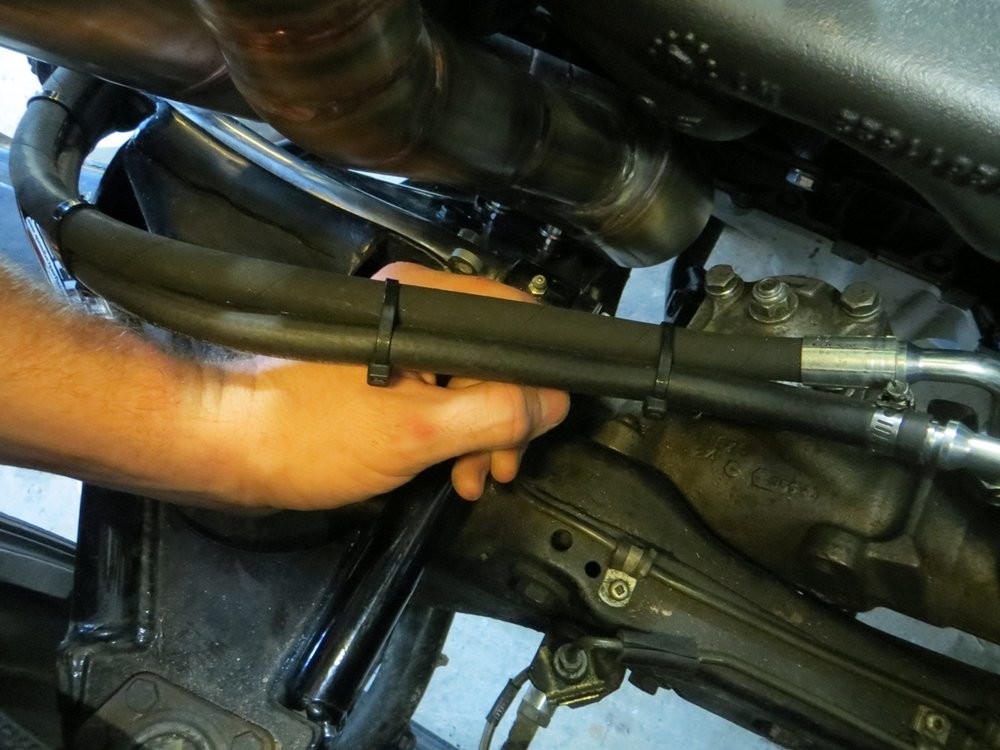
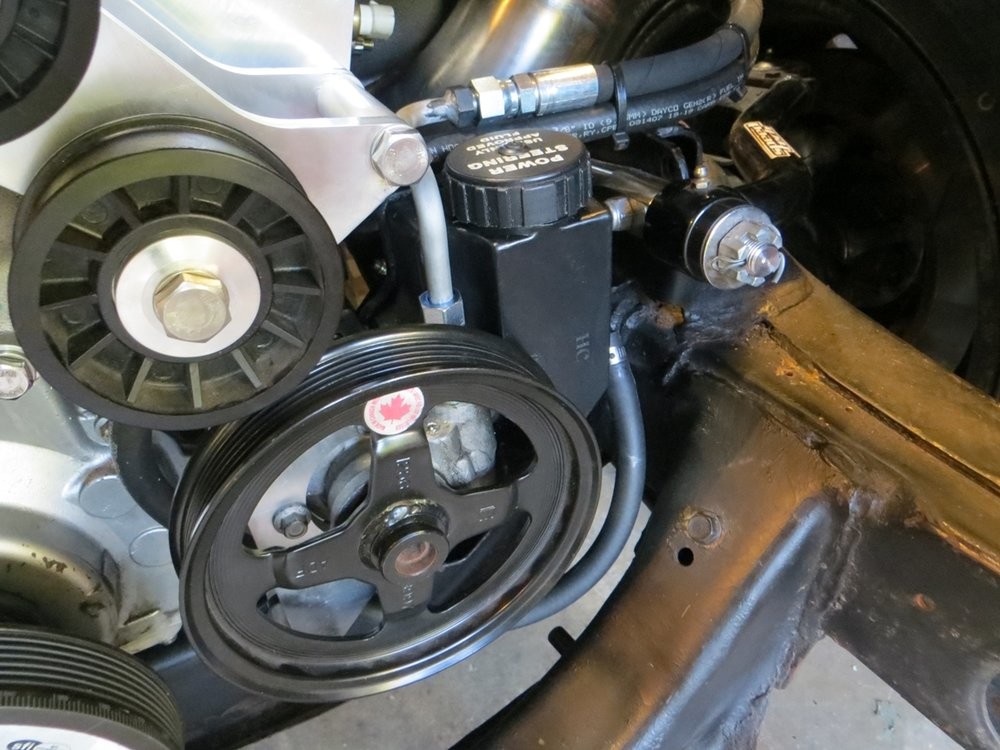
Got some more work done last night. Was trying power steering line options, ended up getting a Cherokee power steering high pressure line as it tightly hugs the P/S pump, to see how closely it could work...
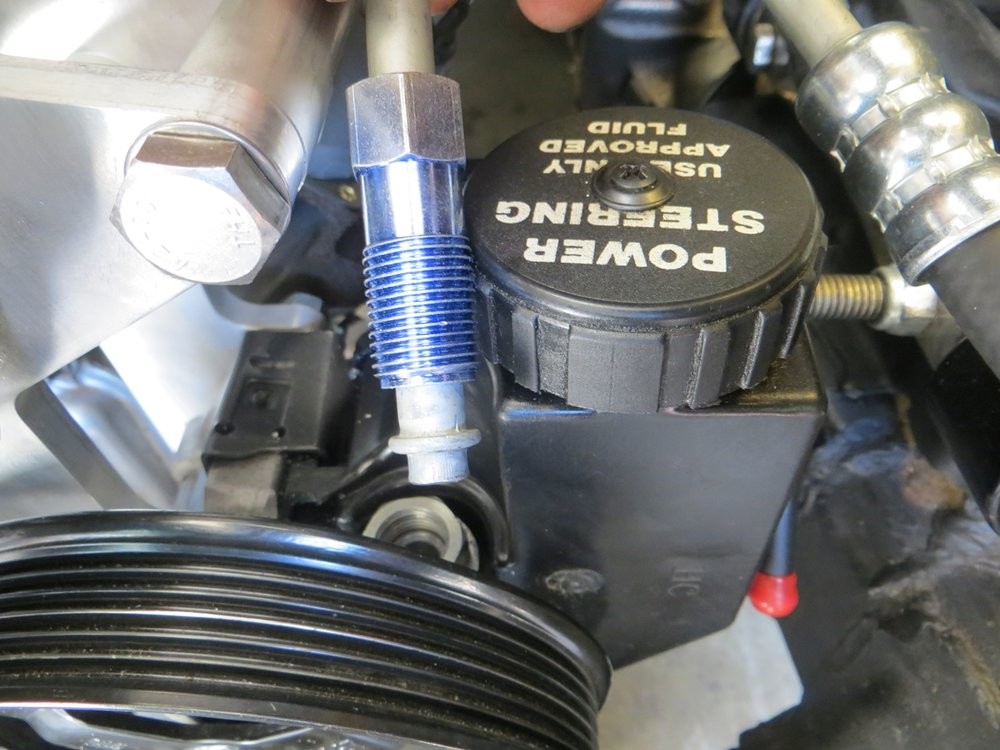

The downwards angle of the hardline behind the reservoir aims the flex hose directly at the UCA cross-shaft....
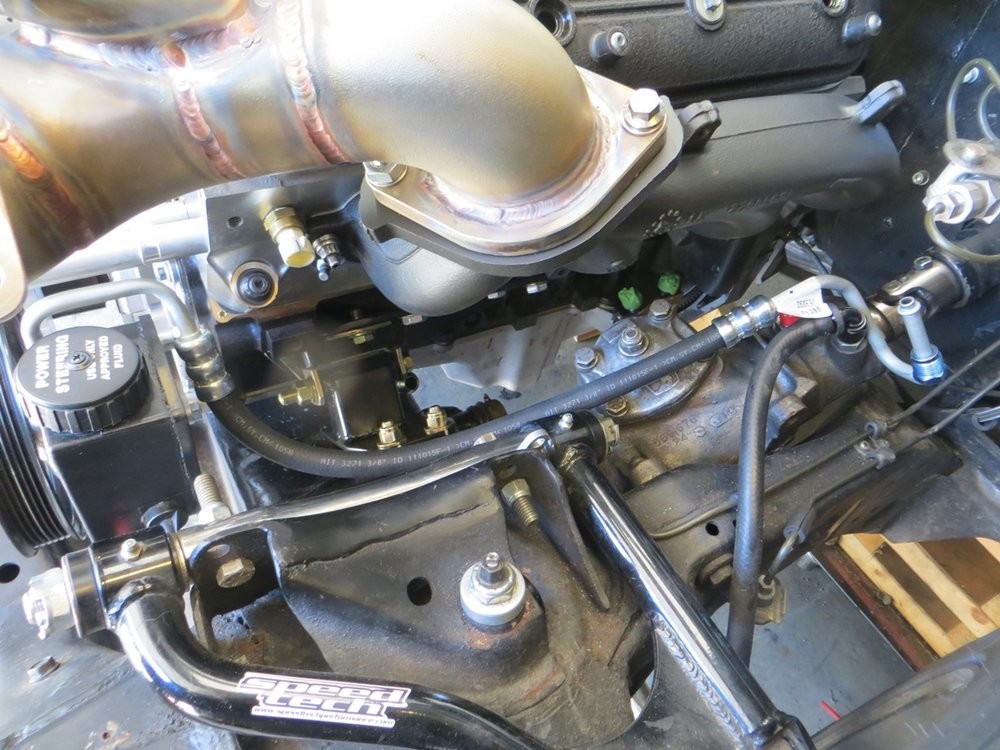
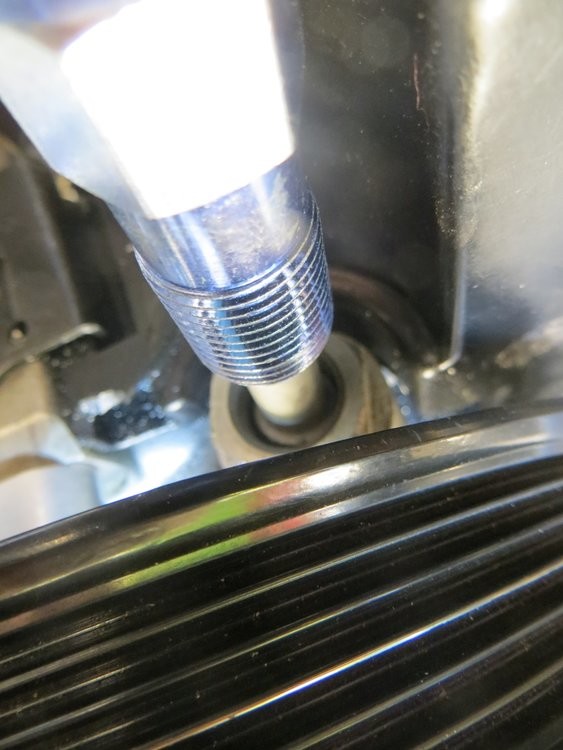
So I twisted the hardline behind the reservoir to be horizontal, to try and direct the flex line above the UCA...
I wanted the flex line to float above the UCA, with a mounting point above the UCA to prevent the line from touching anything under suspension articulation and engine vibration...
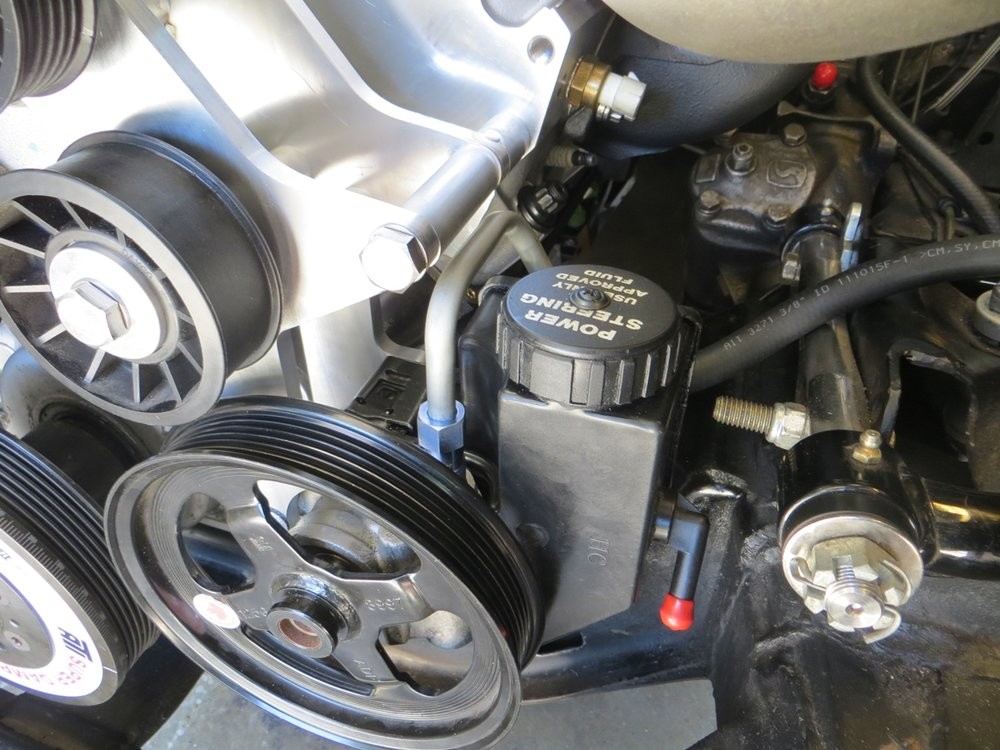
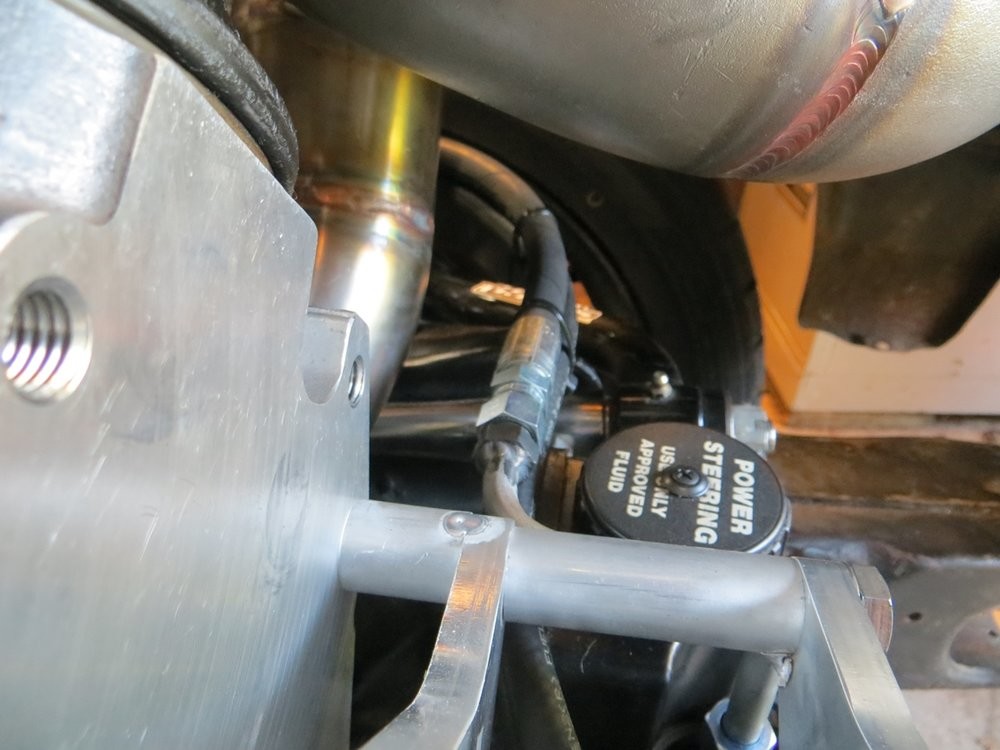
But unfortunately the overall length of the line was just a tad too short to crimp/flare/weld any fitting onto the box-side of the high pressure line, with minimal modifications...
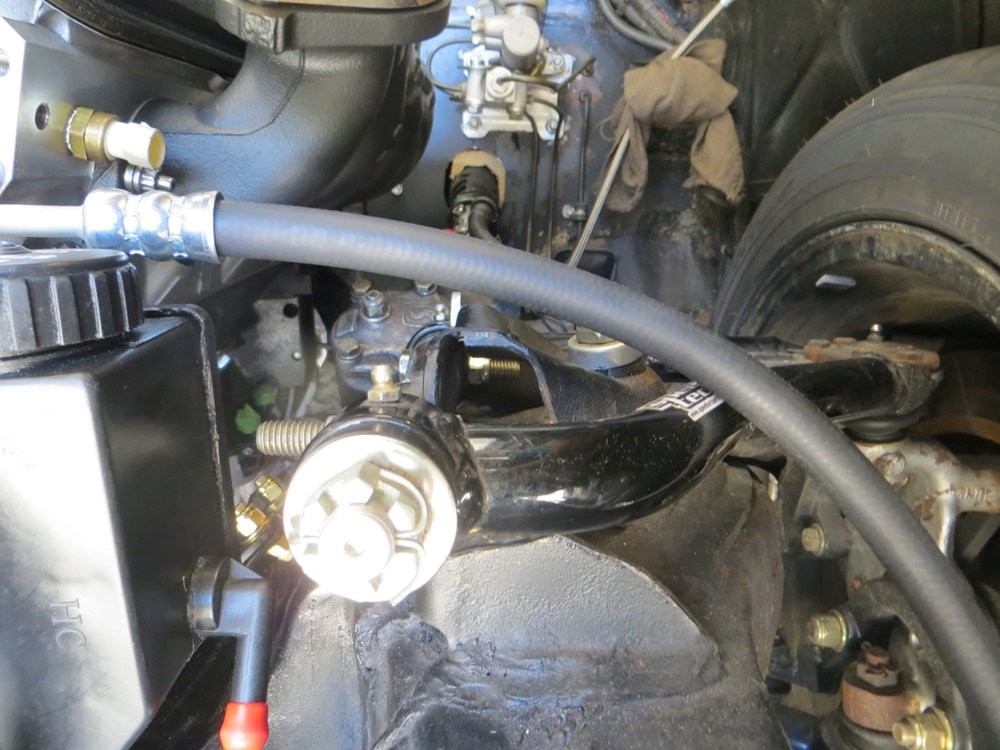
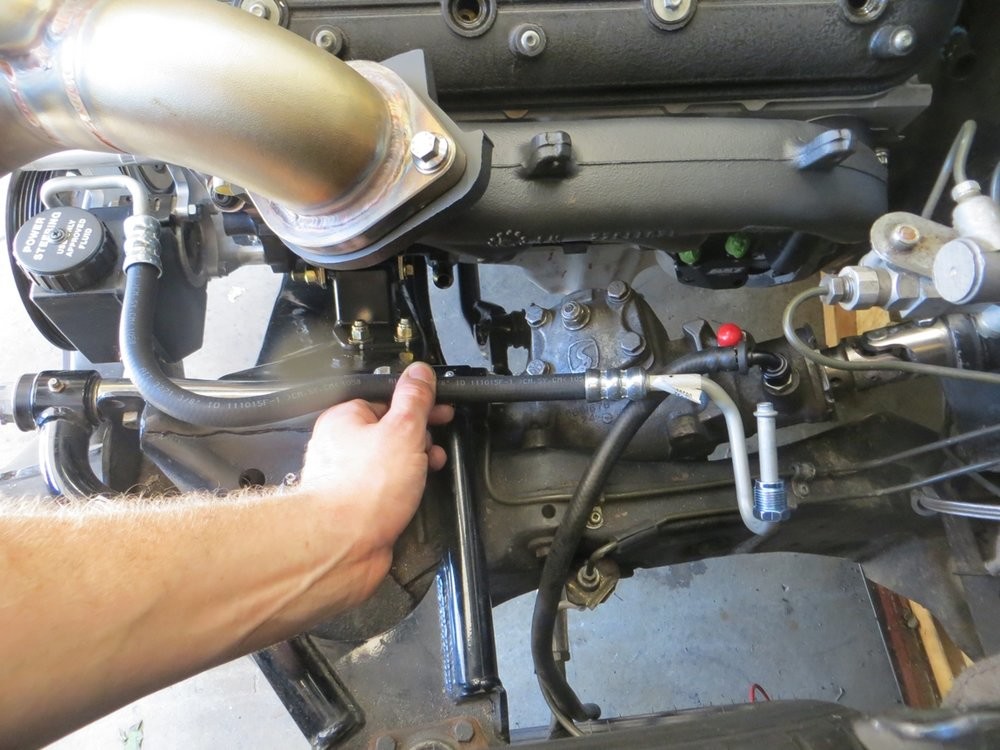
So I went to the trusty local industrial hydraulics shop and got some 3/8" hydraulic lines made up with 3/8" 37* JIC crimped fittings on either end. Long-elbow 90* fitting on the box end, to raise the hose up from the frame/UCA...

The pics from this top angle are deceiving, but there is a load of clearance to the UCA...
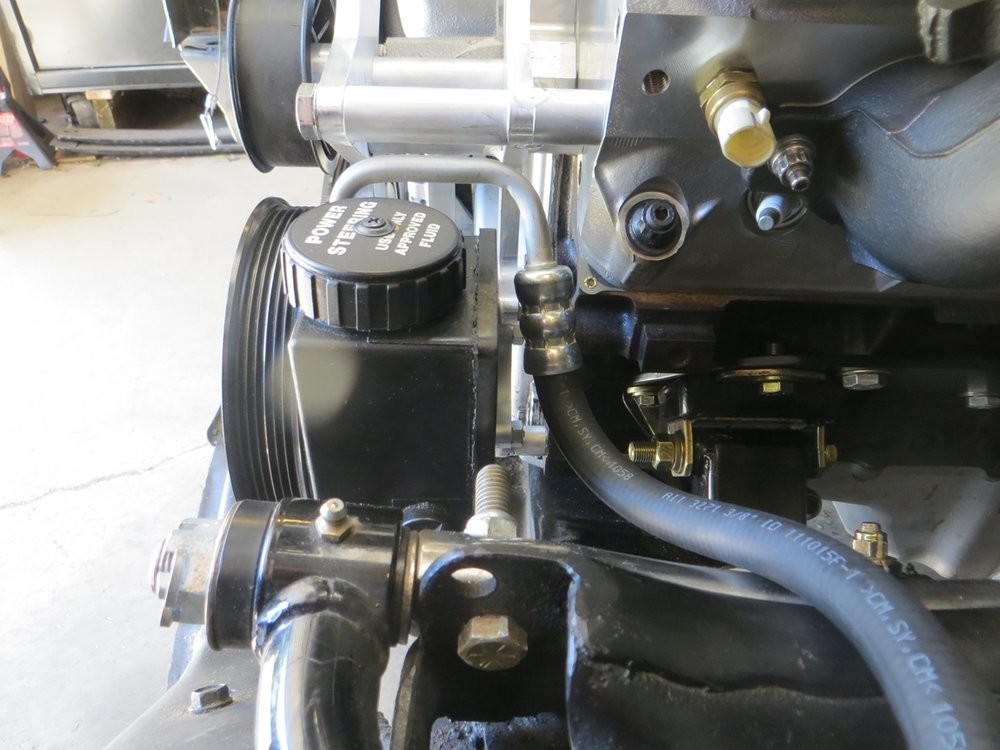
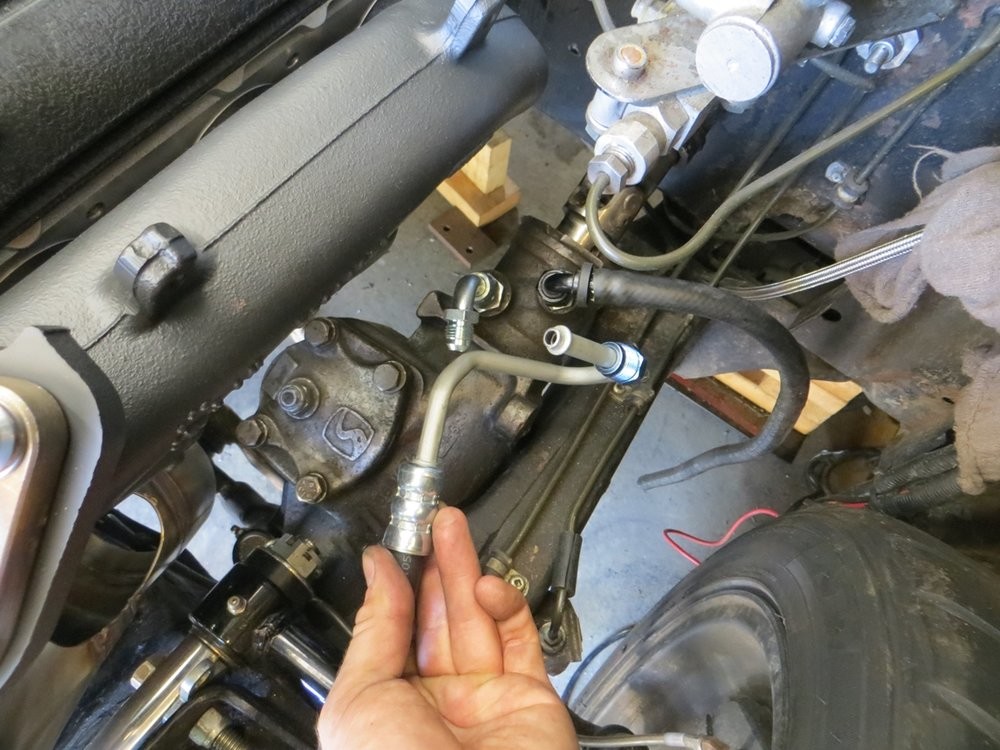
I welded a 3/8" JIC male bung to the Cherokee hard line, so I could use a straight crimp fitting on the pump-side of the line, to avoid clocking issues when having the two ends crimped onto the pressure line at the hydraulics shop...

The return line fishes thru the pump bracketry I made, is ziptied in place for security and isn't close to rubbing anything...
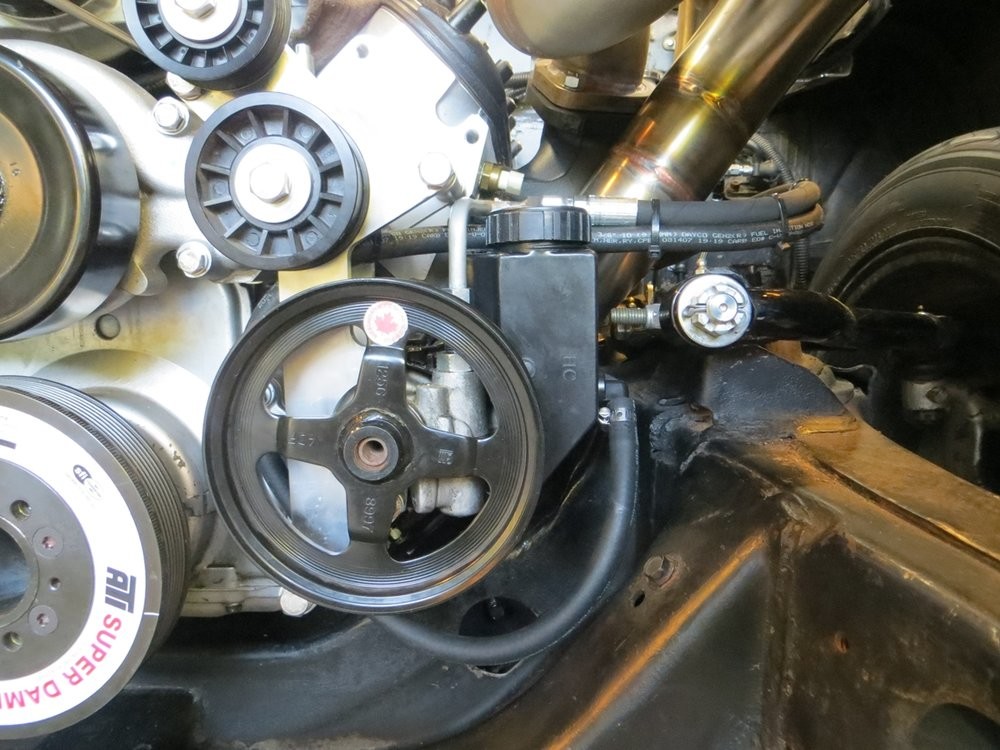
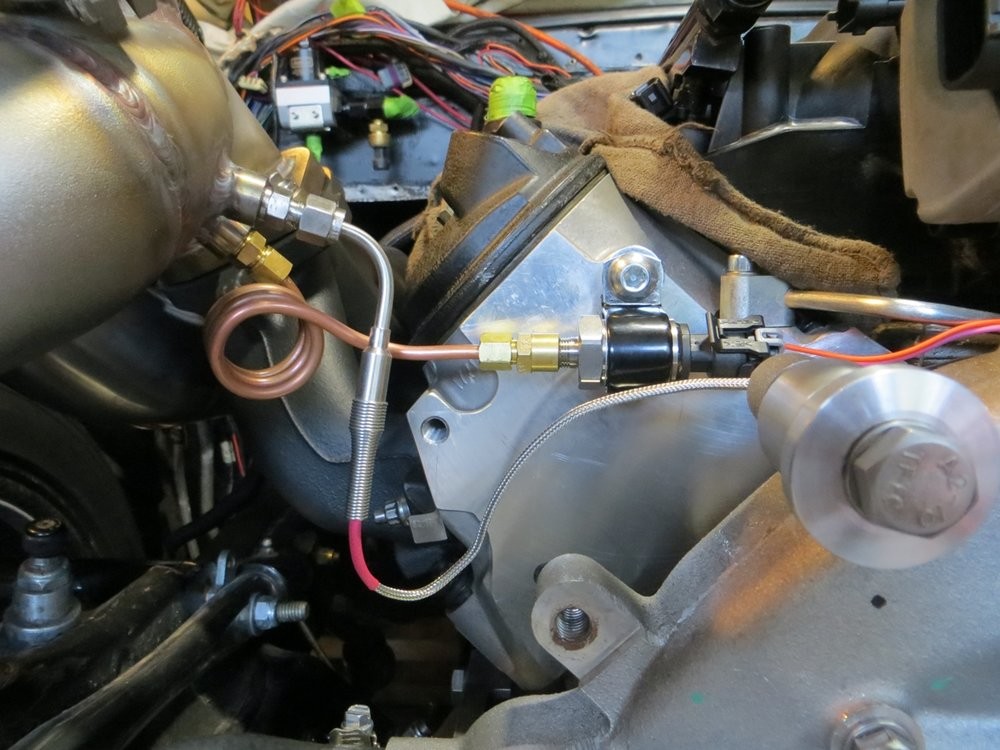
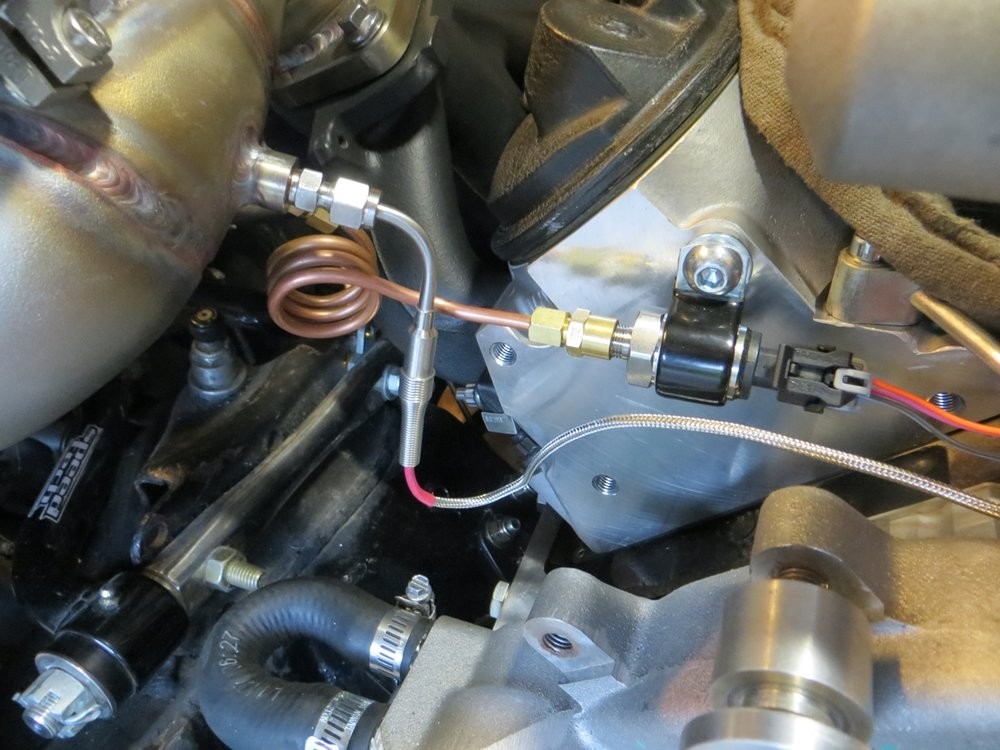
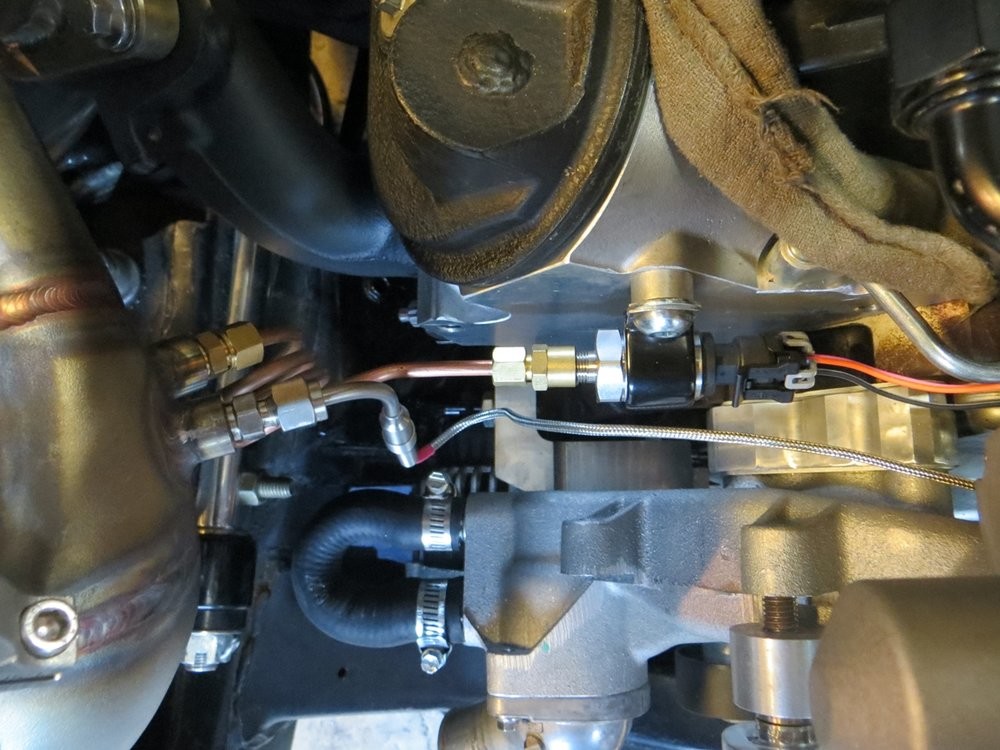
I also wrapped up the pre-turbo exhaust temp sensor, hardmounted to the head so that it wsan't just dangling and vibrating from the copper pigtail...
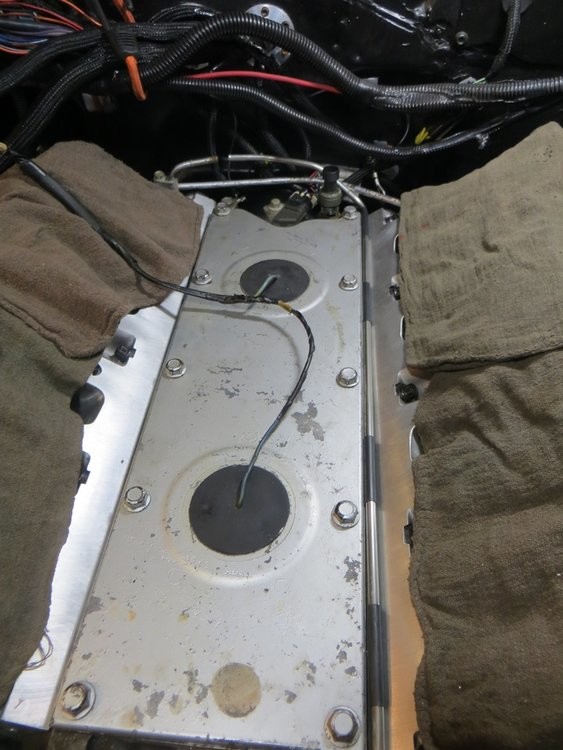
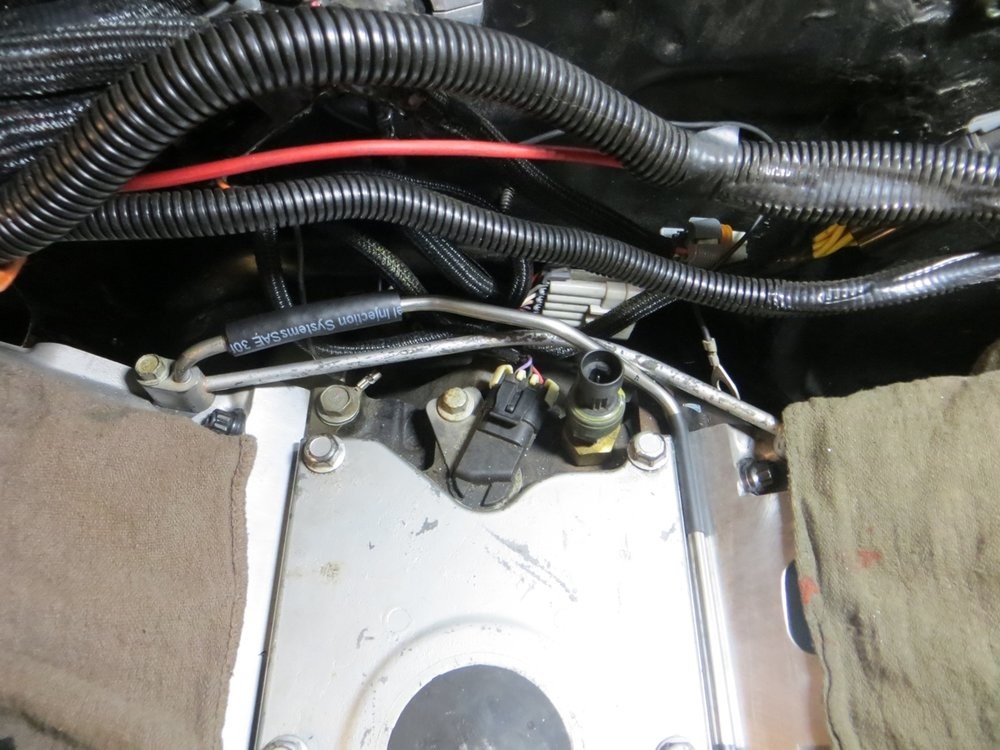
Next up was fashioning some type of 4-corner coolant steam vent setup. I've been trying to find the 4-corner LS6 part but they're pretty rare to find, and could never end up finding the actual part number for it. A common solution is an aftermarket setup that is a bunch of braided -3AN or -4AN line with hose ends and billet head-mount blocks.. but this would've been way too bulky to fit the low-clearance under the LS3 intake.
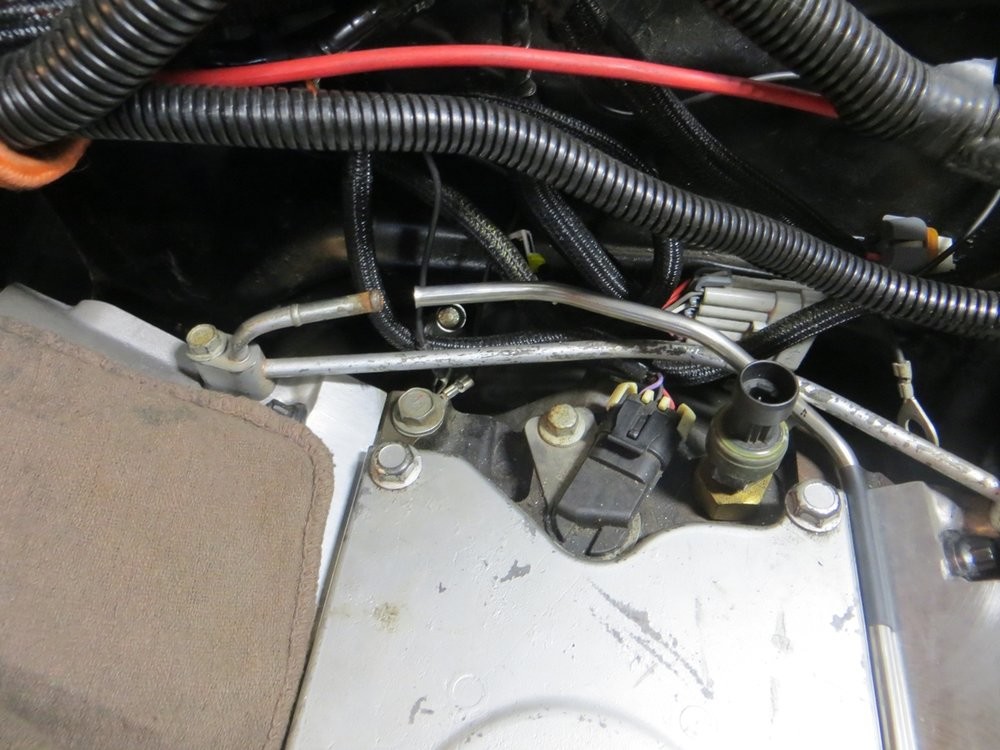
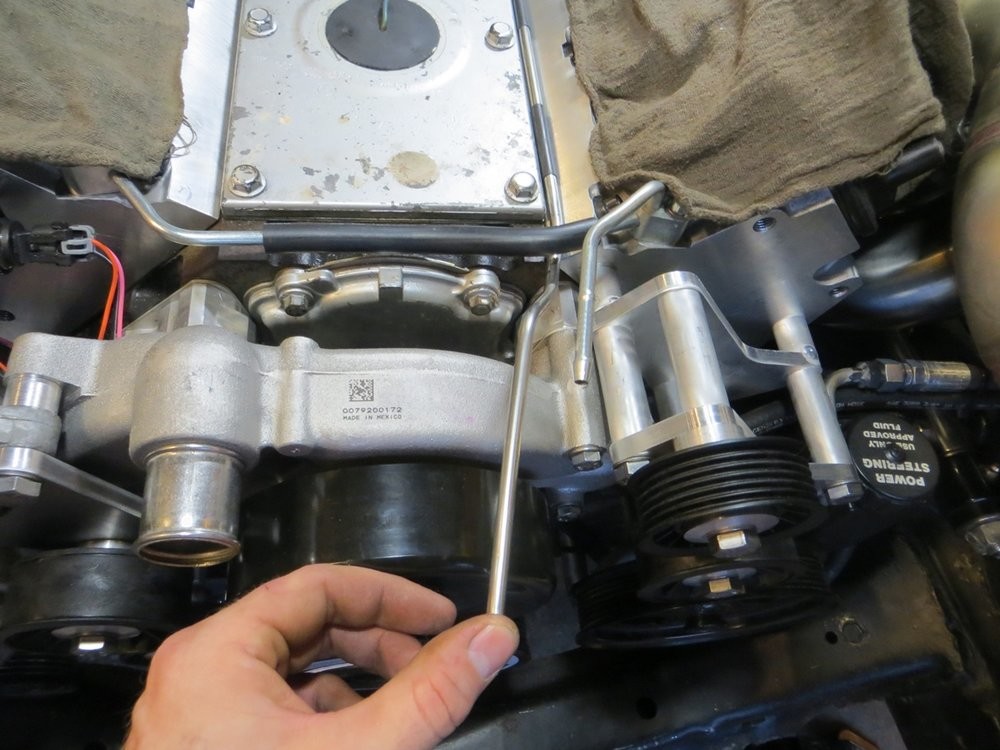
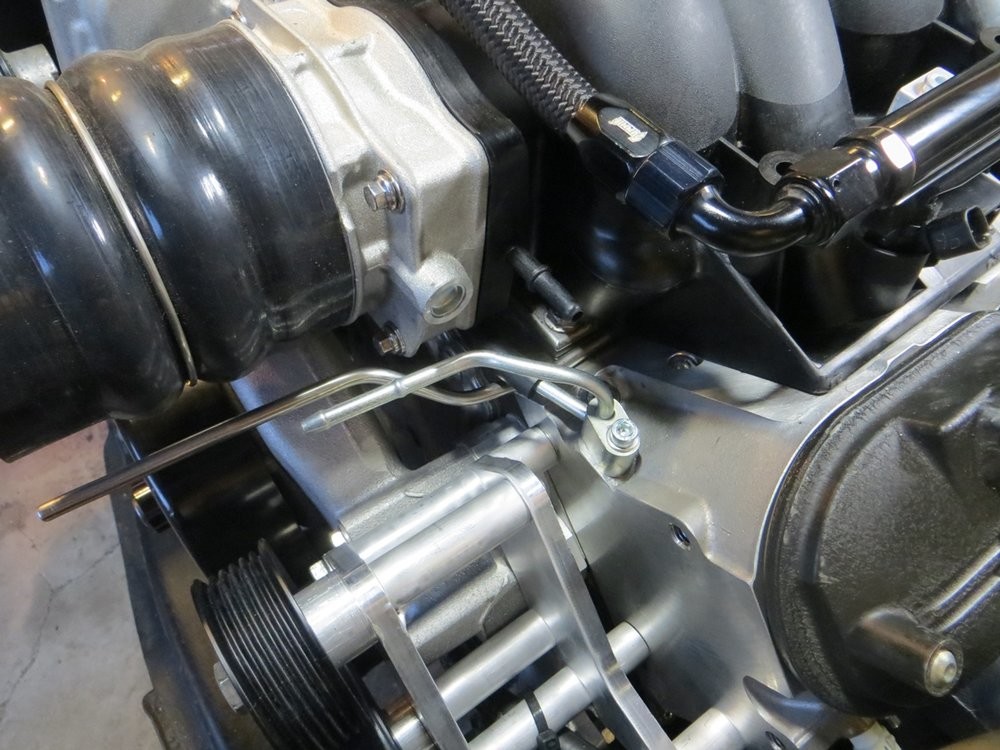
I needed the LS3 two-port front steam vent anyways in order to fit the LS3 intake and throttlebody, so I wondered what would happen if I just moved the truck/LQ4 two-port steam vent to the back, and made some stainless 1/4" line to have a low-profile solution for venting the back of the heads under the manifold...
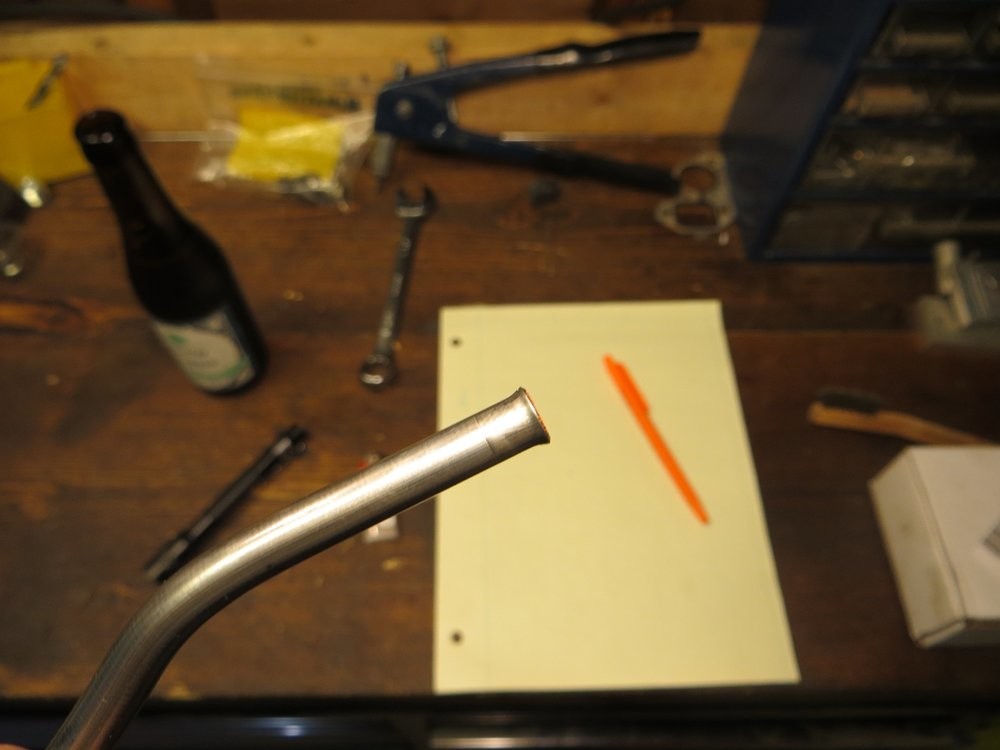
Just to help with vibration, I figured it'd be best to not crimp or braze or weld the tubes together but to just simply flare the custom tube and connect with some 1/4" rubber hose...
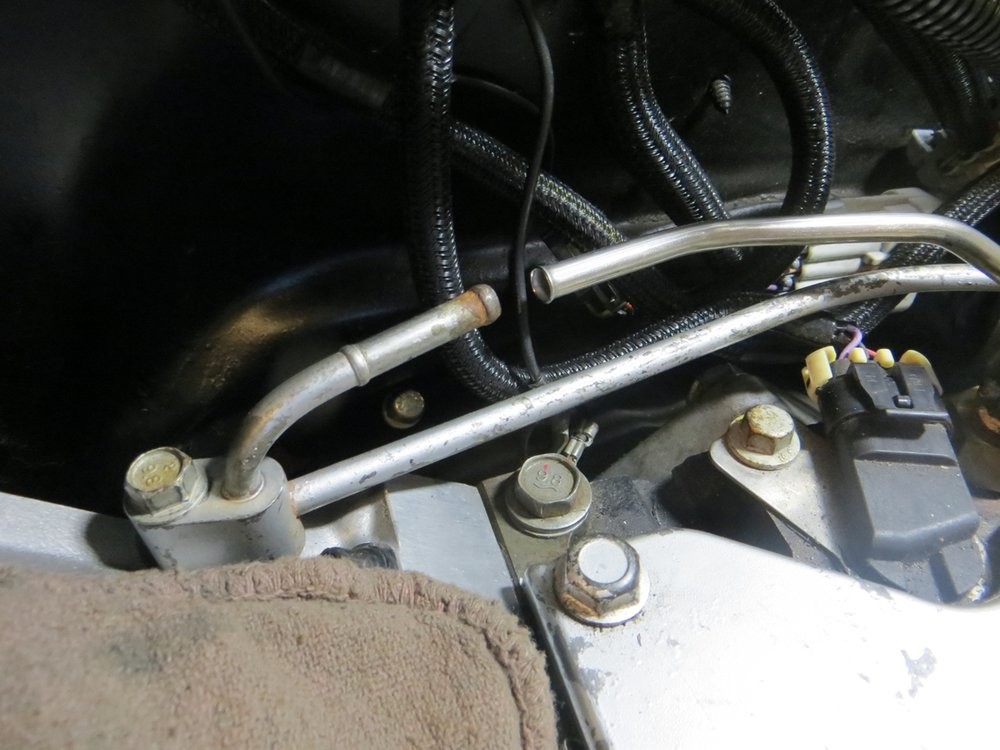
The flare is simply just the first bit of 37* flaring, with the sharp edges filed smooth so they don't slice/gouge the inside of the hose upon installation...
1/4" tube just tucks in the corner to the side of the valley cover, and clears the LS3 intake manifold bottom...

I haven't quite decided how to merge the two lines together yet.. I might just have them both individually merge with the upper rad hose junction block I already had from the previous setup...
Wow thanks for sharing!
Posted by Diggymart on 3/3/19 @ 12:40:25 AM