You must be logged in to rate content!
166 minute(s) of a 341 minute read
12-28-2020
V3.2 build (F2 procharger , 427, etc. )
Compliments of 1dirtyz @ www.ls1tech.com
since its the off-season on this side of the world, i decided to go ahead and start the re buildup of my camaro ( that and the stang and the scout  ) and document it here so i can keep a record of what i done.
my last season racing was horrible for this car, tons of issues that had to be tracked down and broken parts , so i decided to kinda start over.
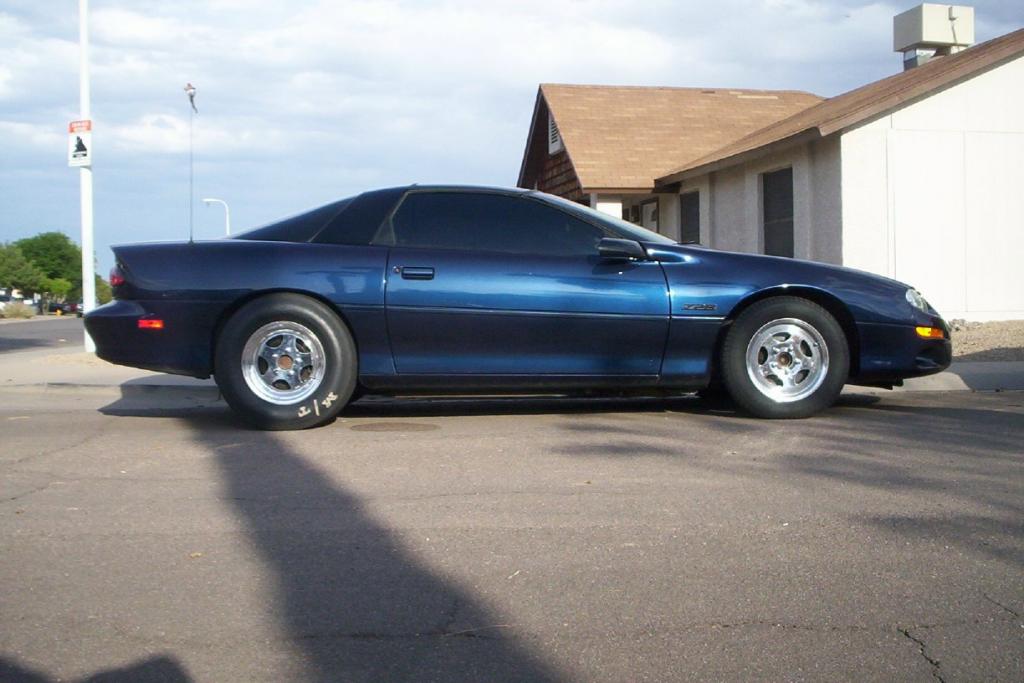
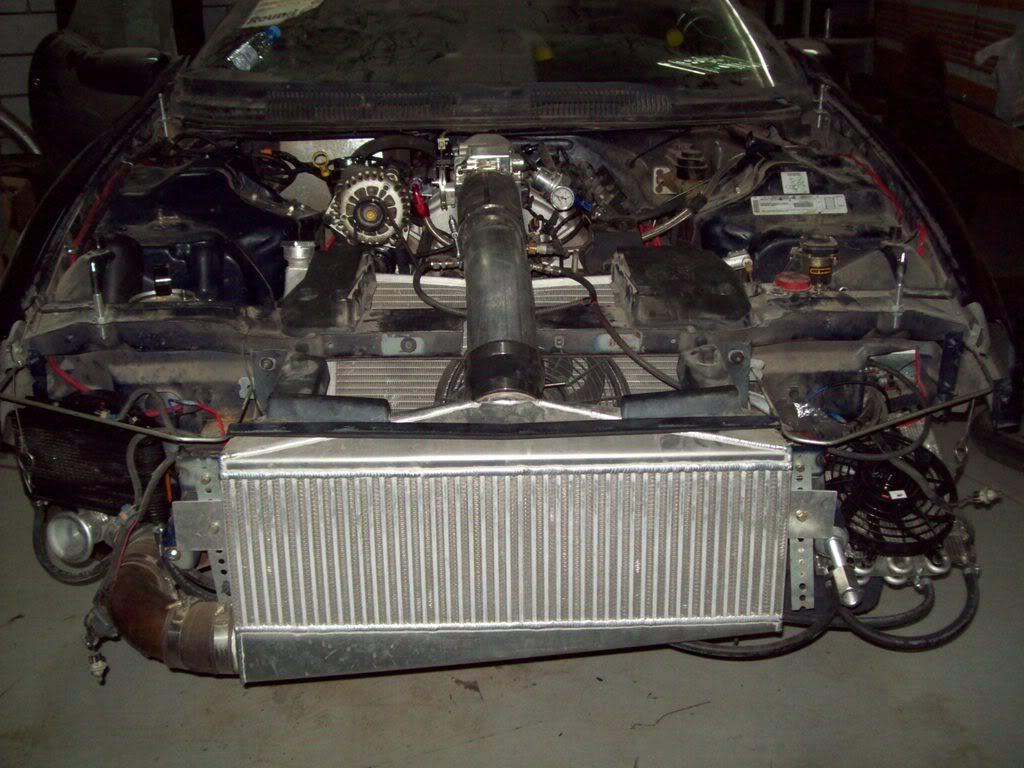
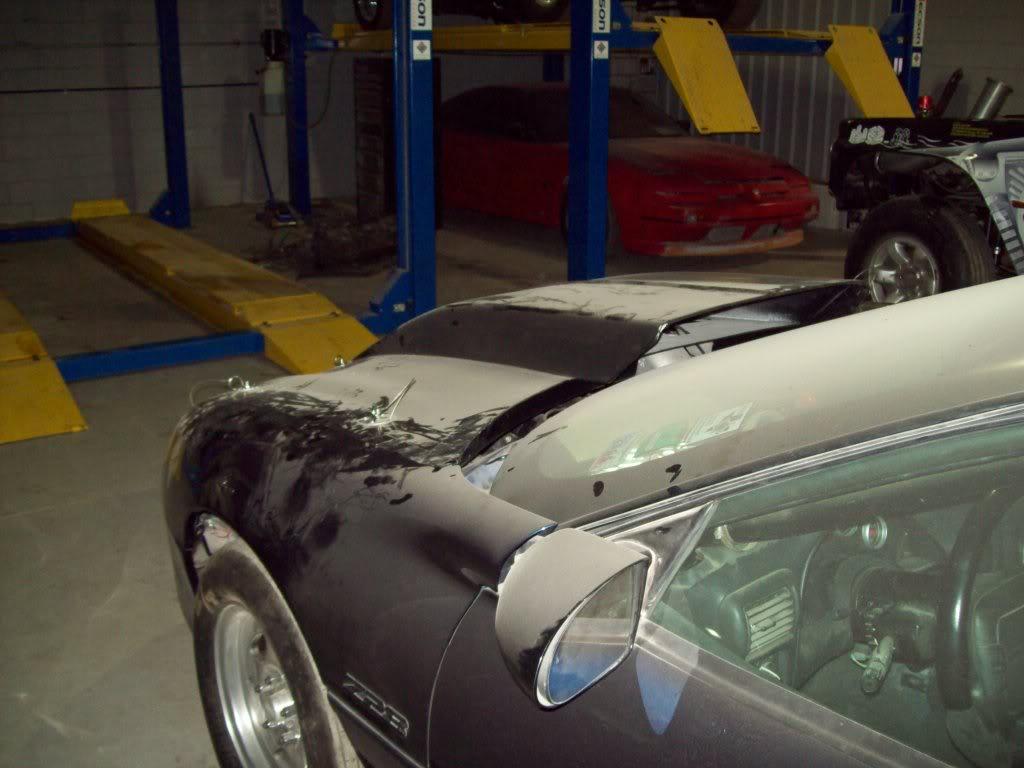
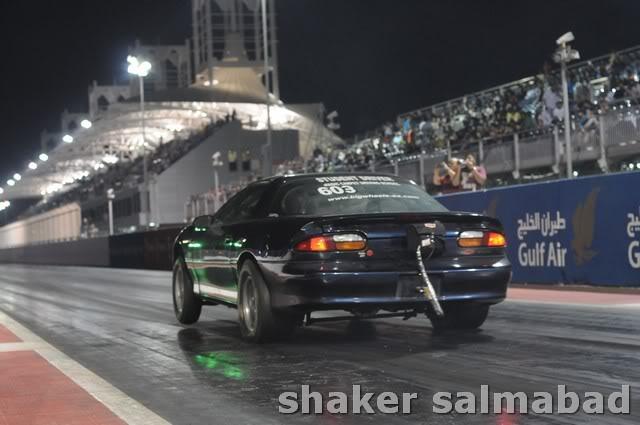
here is a little background on the car: its a 99 camaro , 427 aluminum block , l-98 heads, th-400 , methanol injection , F1-R blower and front mount . basically a drag car now.
i've decided to upgrade / redo alot of things ( some i already started ), so i'll post pics as i go .
here's how the car started 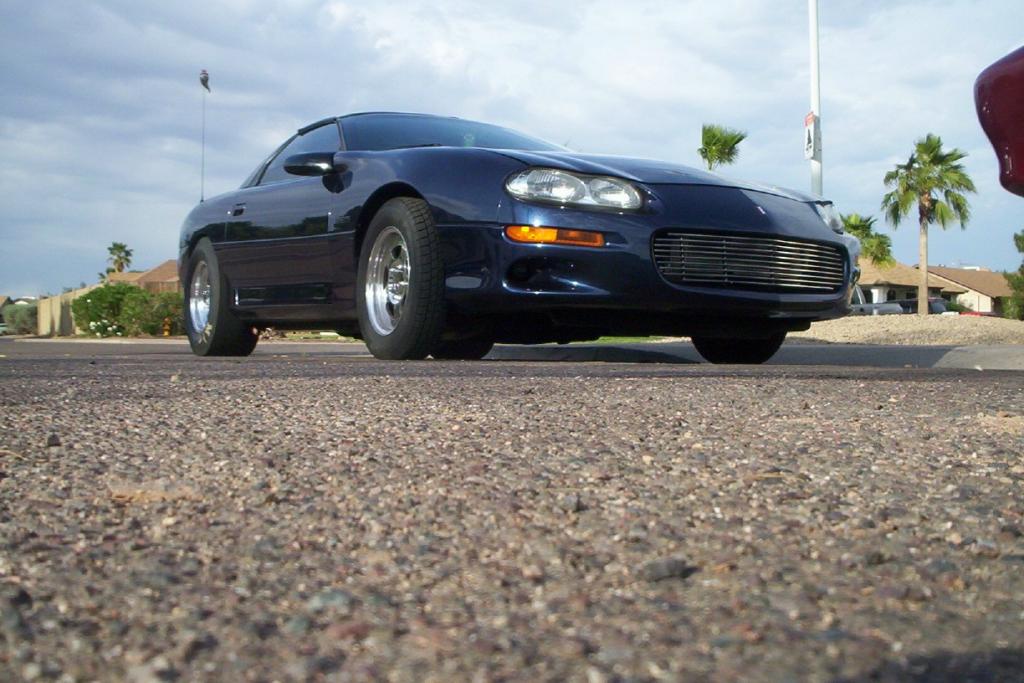
here's what i'm planing on doing:
-light weight brakes
-travel limiter
-loose some weight
-redo the inside wiring ( basically gut the dash )
-new tranny coolers
-rebuild tranny
-new torque converter
-abs delete
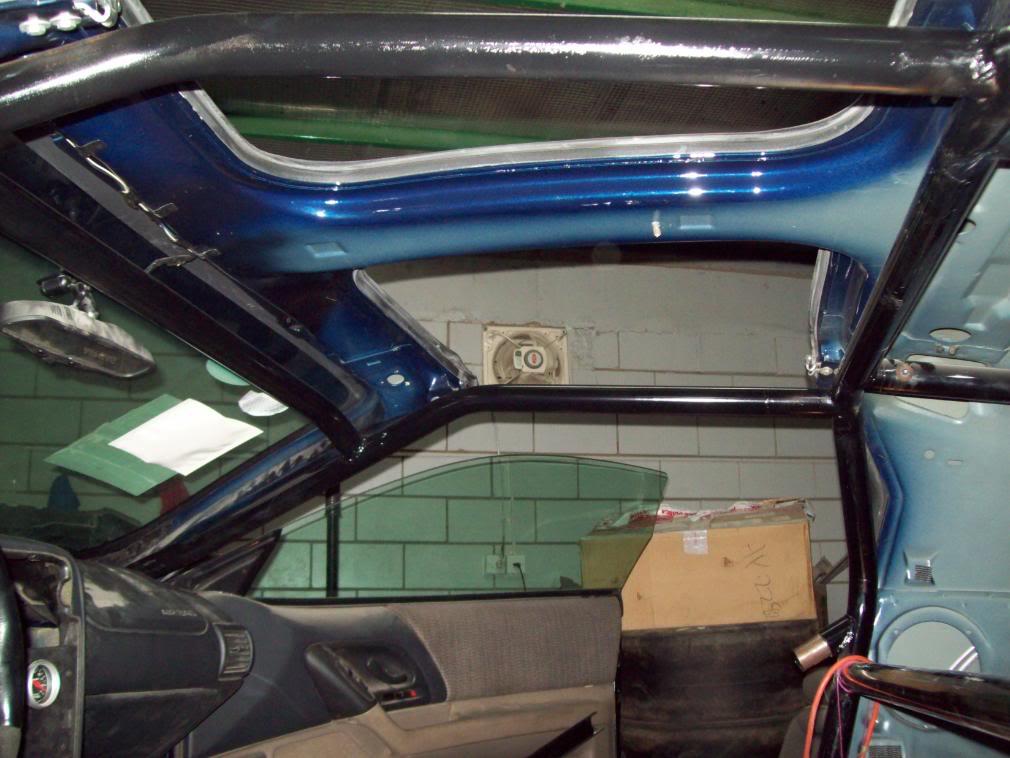
-convert 6 point roll bar to roll cage
-swap out F1-R to F2
-fabricate cog drive
-install ati's blower super pulley
-lower 1-2 gears
-carb intake and elbow
-new intake tube
-tow hook
-fix cooling issue
-install crankcase evac.
-redo tranny cooler
-bigger injectors
thats what i can remember for now
like i said, some stuff ( not much) , i already did , the others i'm just waiting for parts to show up.
6/18/2008
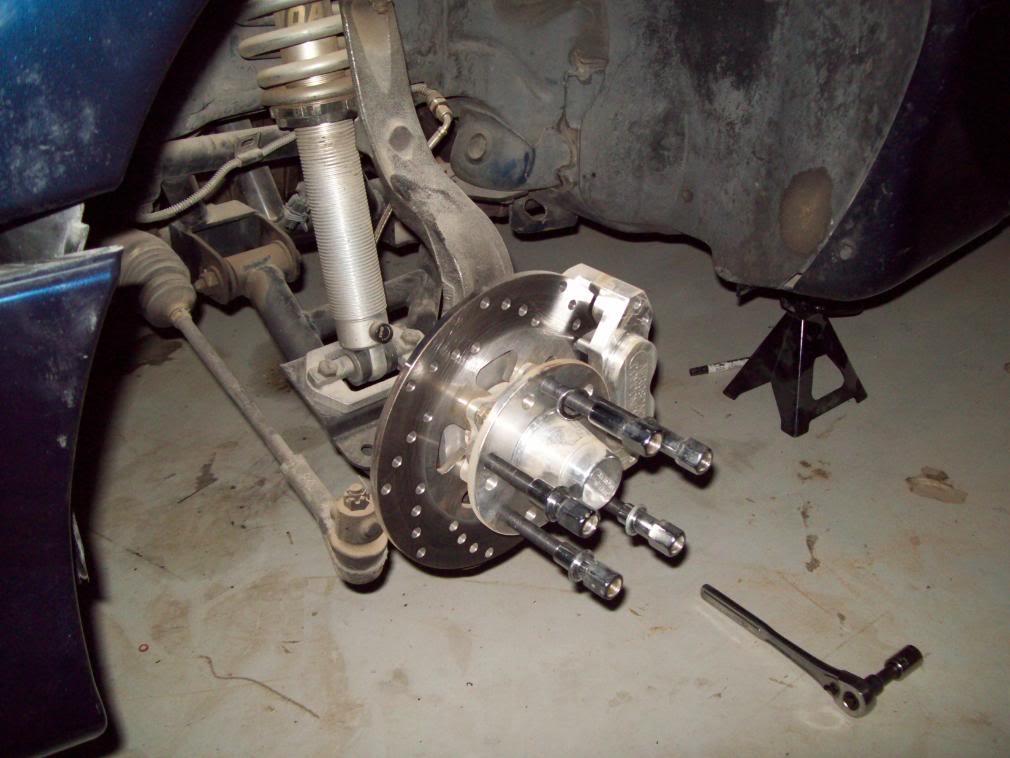
i got a set of aerospace brakes for all four corners , that and with the abs delete dropped about 65 lbs if i remeber correctly off the nose.
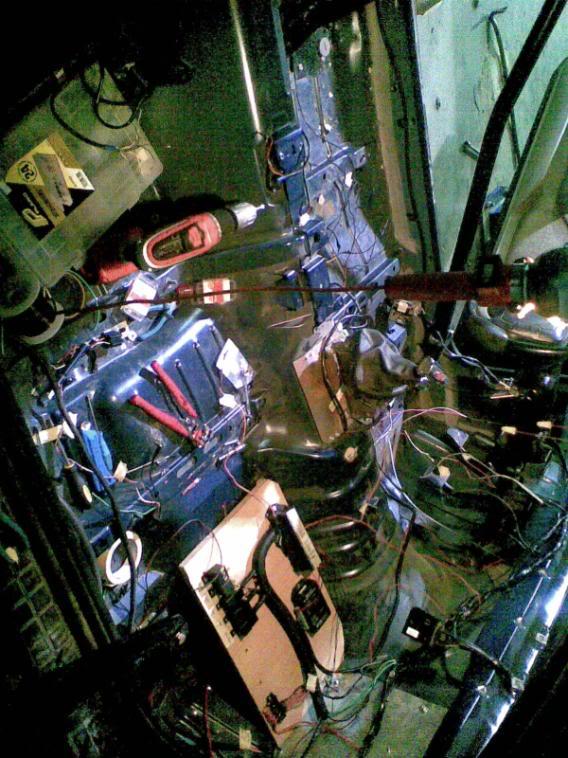
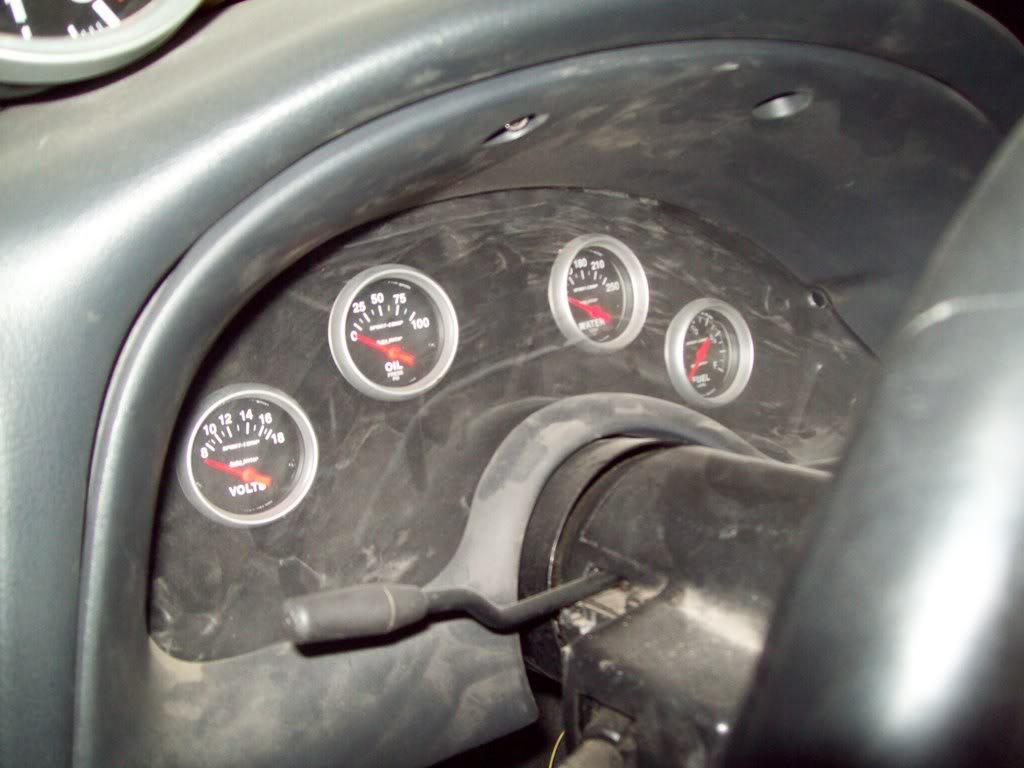
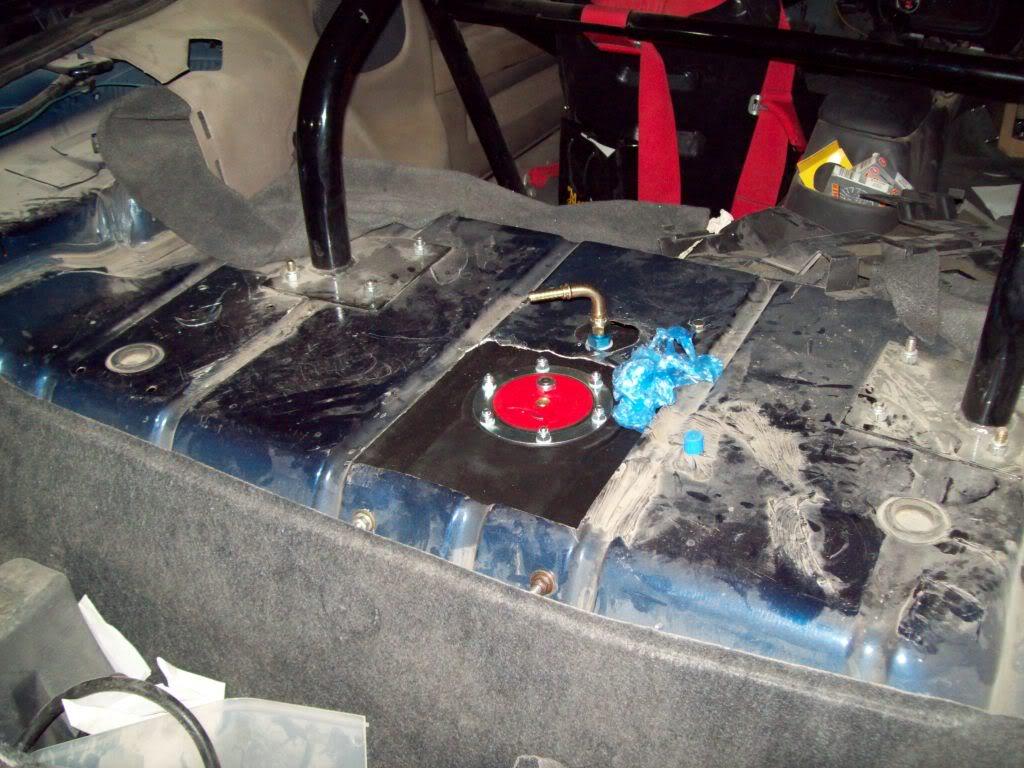
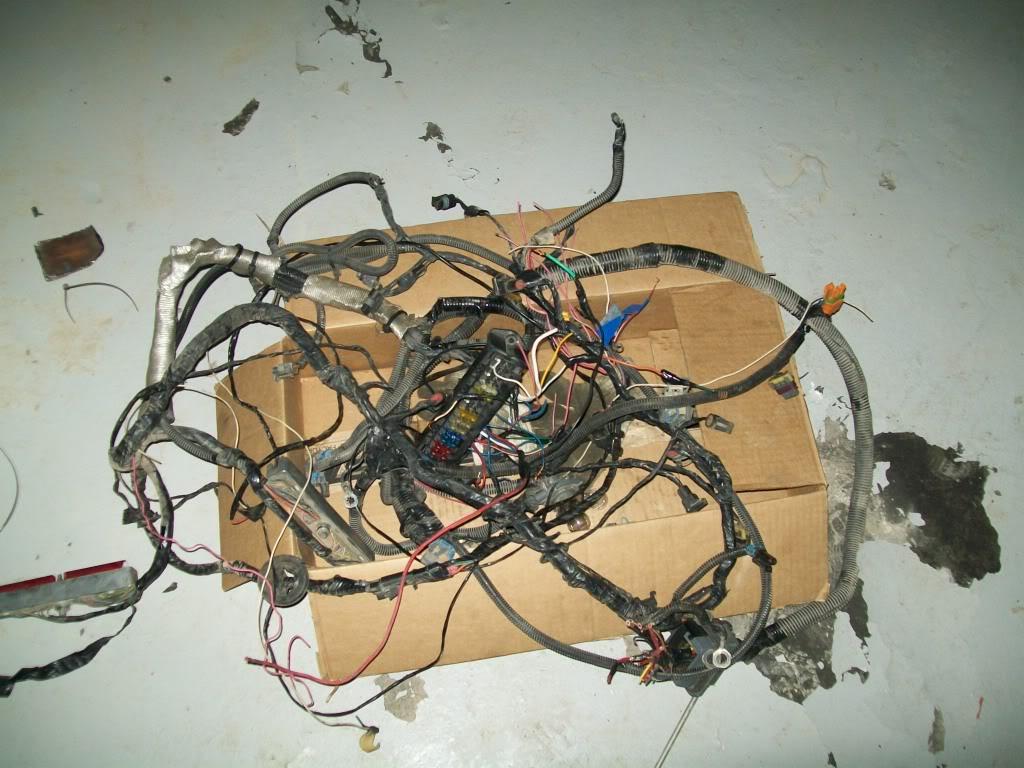
i also ripped and redid the electrical wiring from bumper to bumper , in the bottom of the pic you can see the "nerve center" of the car , all electrical stuff goes there
i also gutted the dash and removed the carpeting for loosing more weight.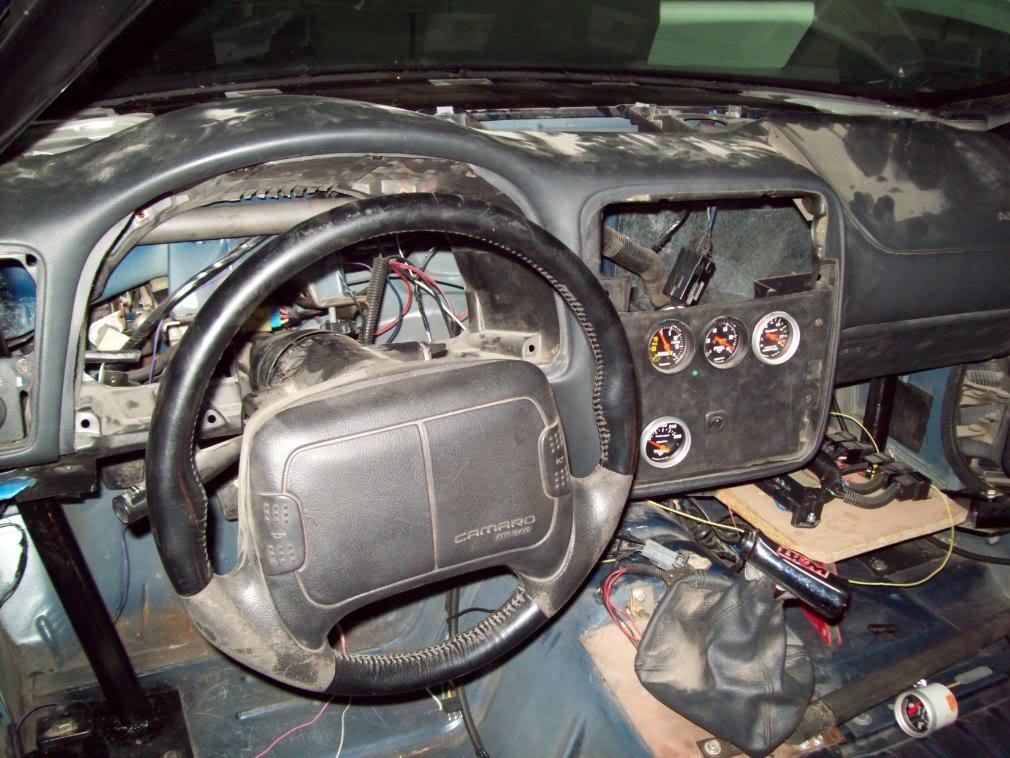
also finished up the roll cage conversion , now that was a pain in the ass , definatly have some one do it for you if you can!
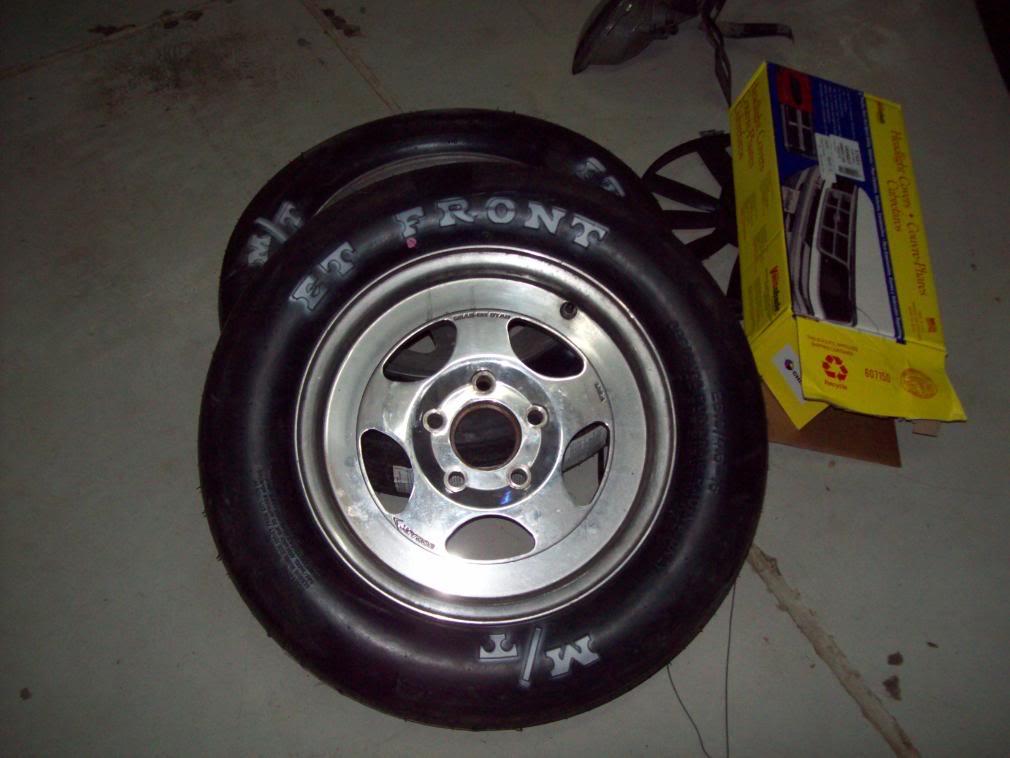
i also (finally) changed my 5 year old front runners ( VW bug tires) to M/T skinnies!
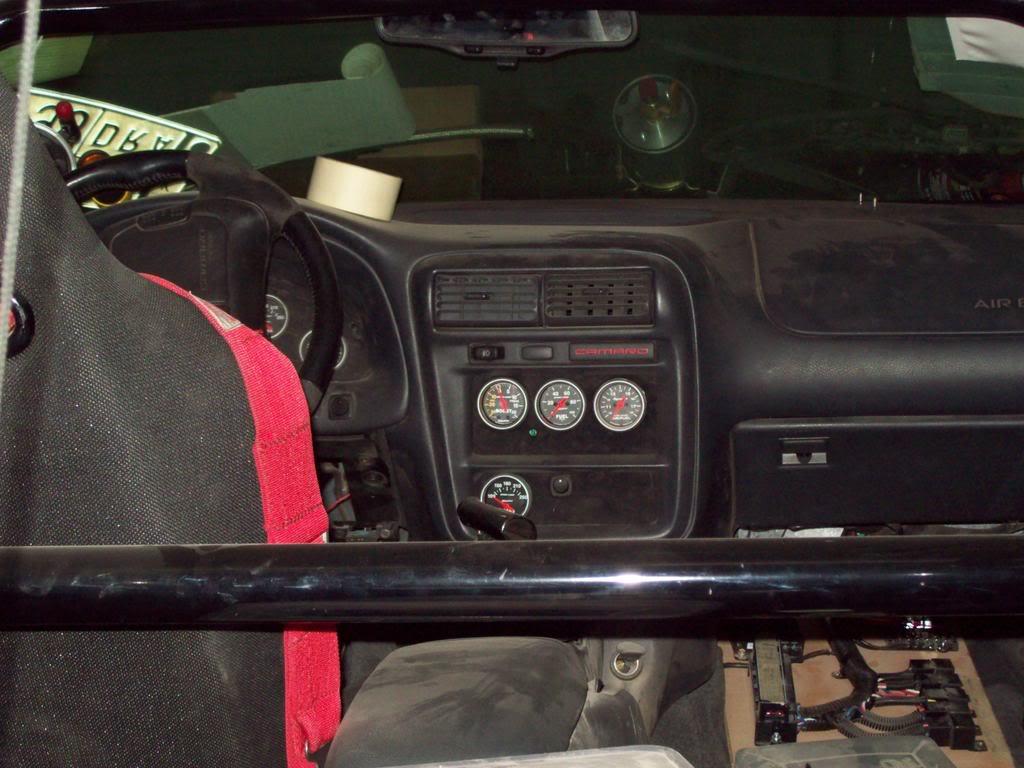
here's how the guages came out :
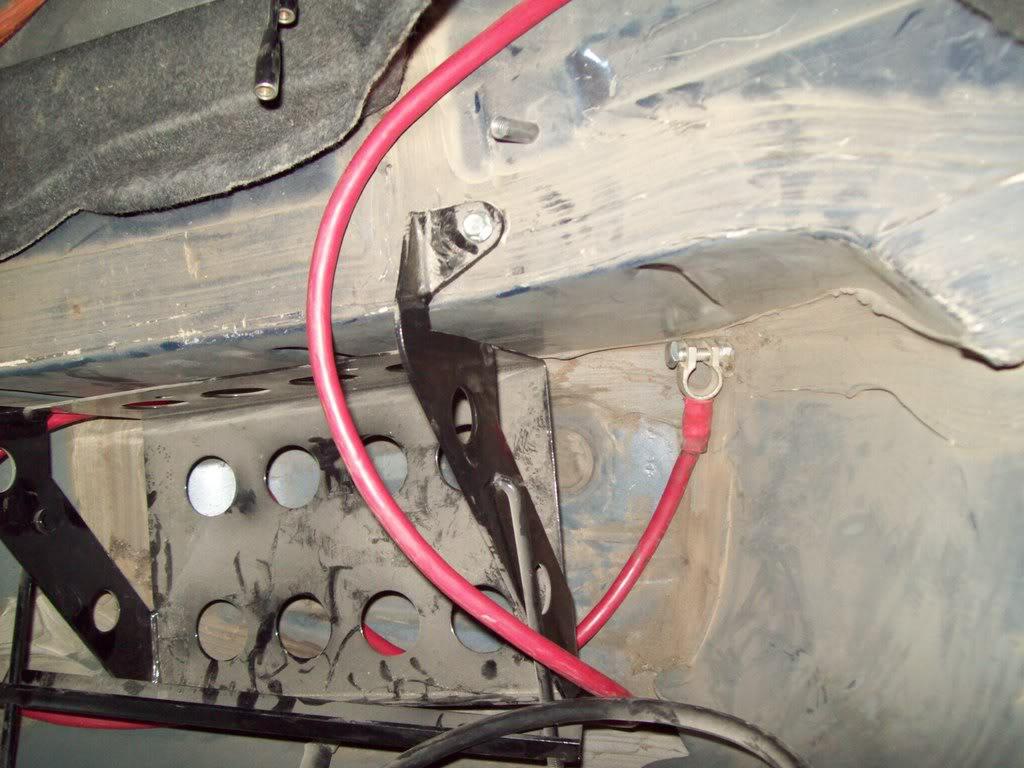
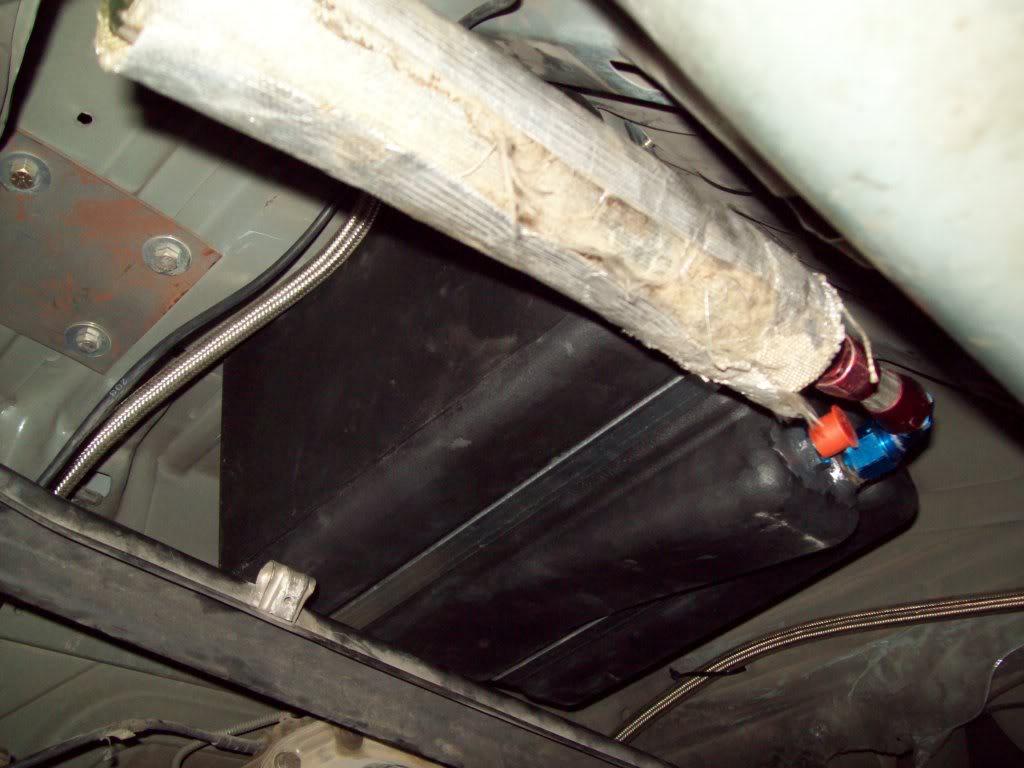
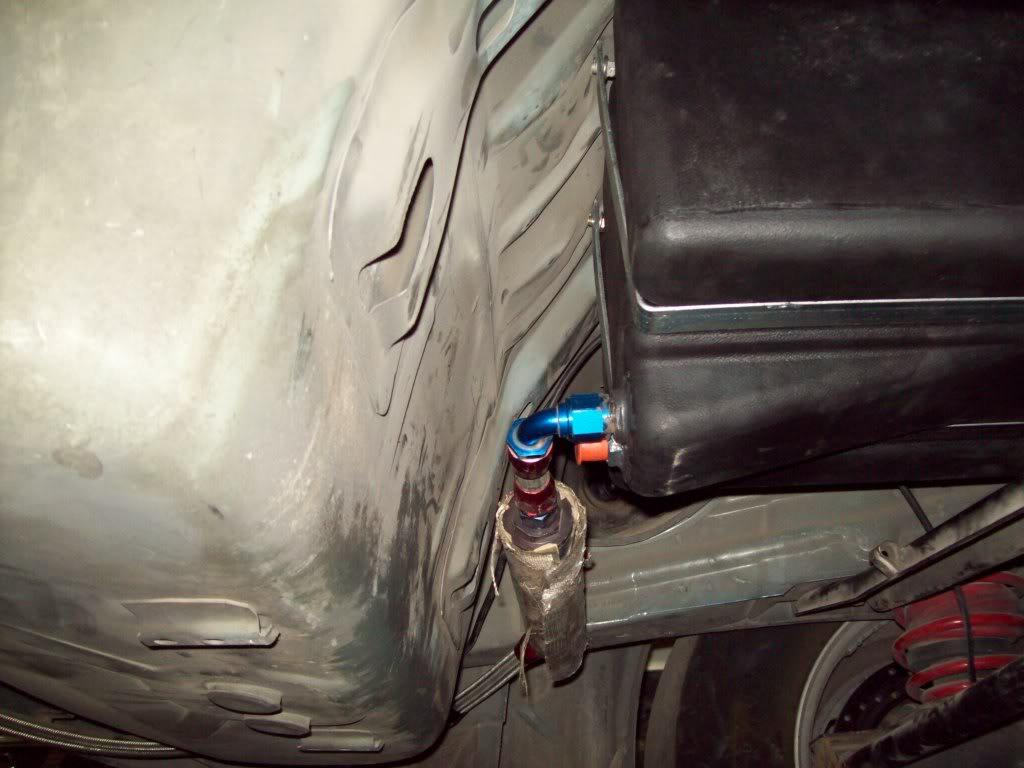
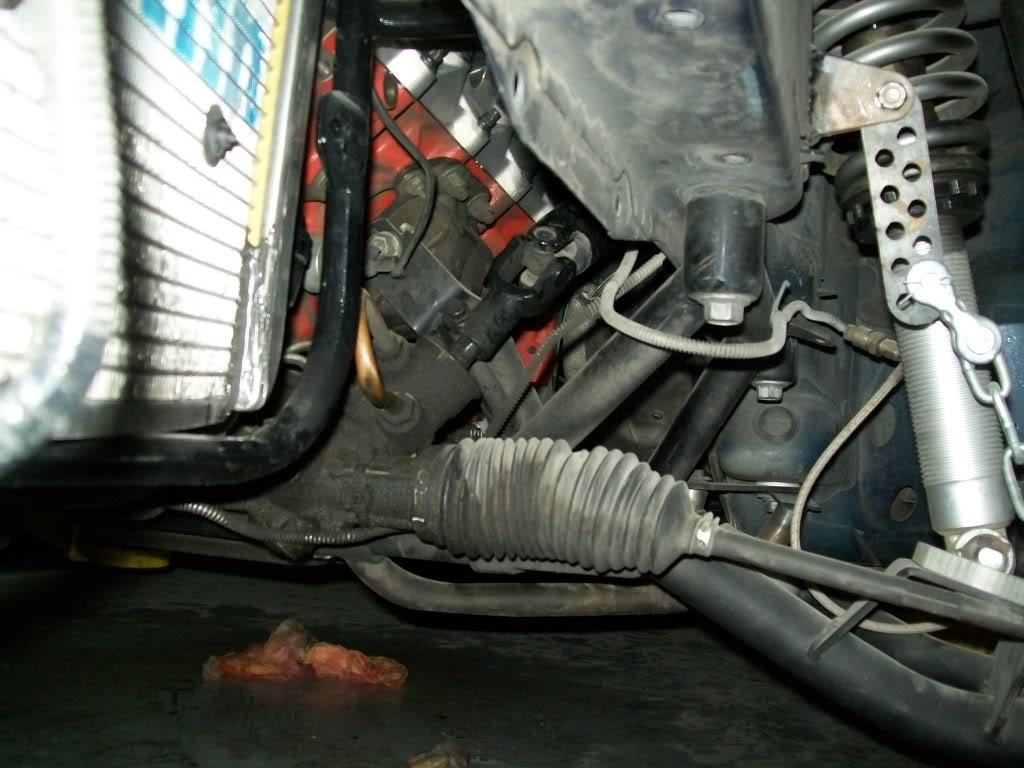
i also finished relocating a few things: i relocated my water injection pump and tank for better access to the location you see here , you can also see the remote battery disconnect solenoid .

i also removed the factory radiator puke tank and relocated my battery to the trunk to make room for the new puke tank and Accusump.
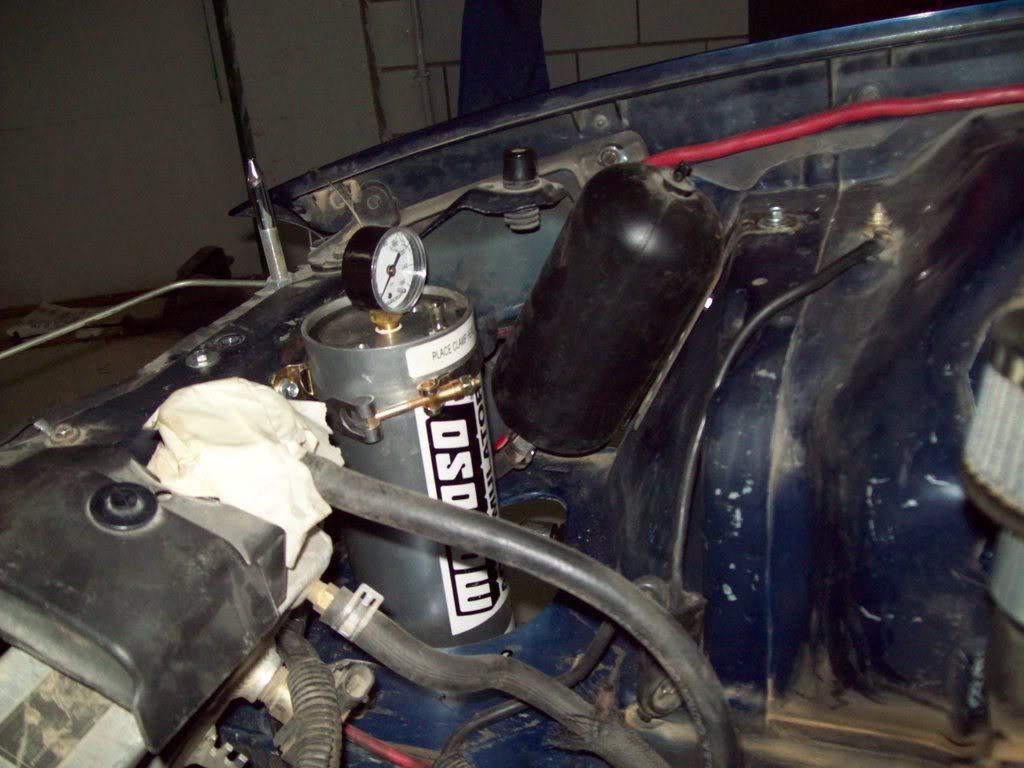
i still need to plumb the accusump , I'm just waiting for a few fittings that should be here soon
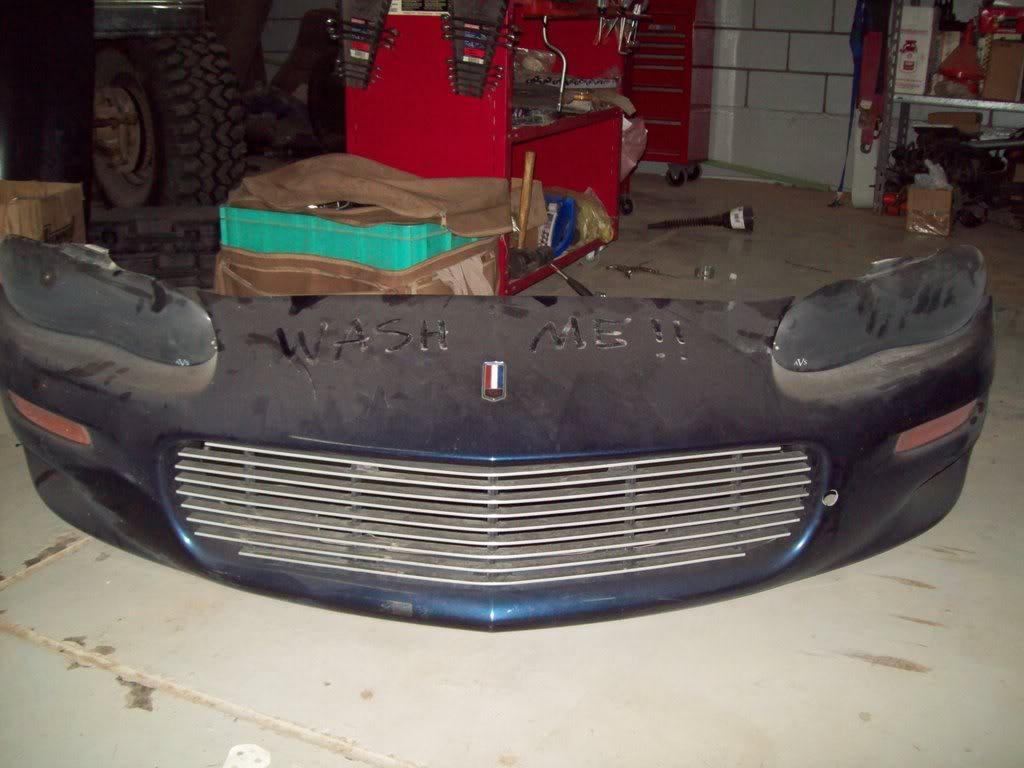
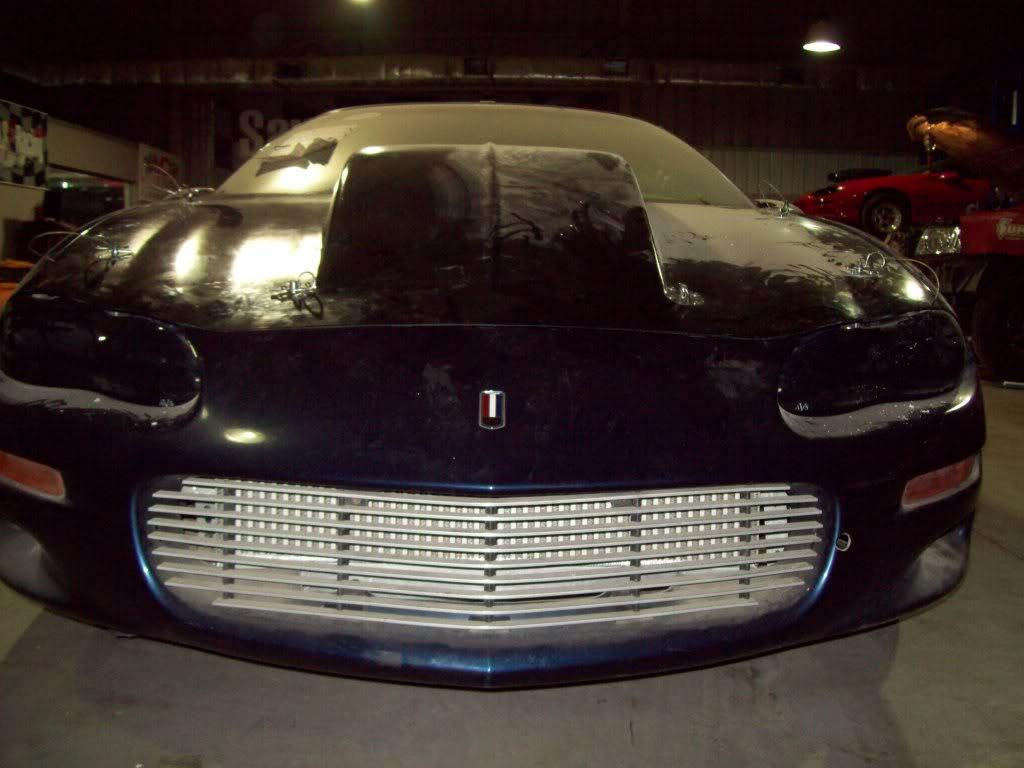
i also removed the headlights ( ahhh, the things we do to loose weight ) and covered up the hole they left with black headlight covers. i had to fab a brace to hold them from caving in at high speed. their bottoms are screwed to the front bumper.
i'll snap a pic of that tomorrow , but you can see part of the brace in the last pic.
when i had the heads , the only option was either the truck intake or the l76. i have the carb intake now which should flow pretty well. i totally agree with you , thicker heads are a definite plus , but for now, i'll stick with the l98's till i get a 6 bolt block
as for boost, I'm looking for 20 psi ( the F1-R was maxed at 12 psi on this motor), if the tune is ok , head lifting shouldn't be an issue at that level .
it was washed about two weeks ago ( the car is garage kept) before i went to the track . but on the way there i was driving for 4 hours through a dust storm, and on the way back it was a SAND storm , there was san in every nook and cranny in that car !
this is the crap i had to deal with for 8 hours ! and to make it even more fun :35 mph cross winds !
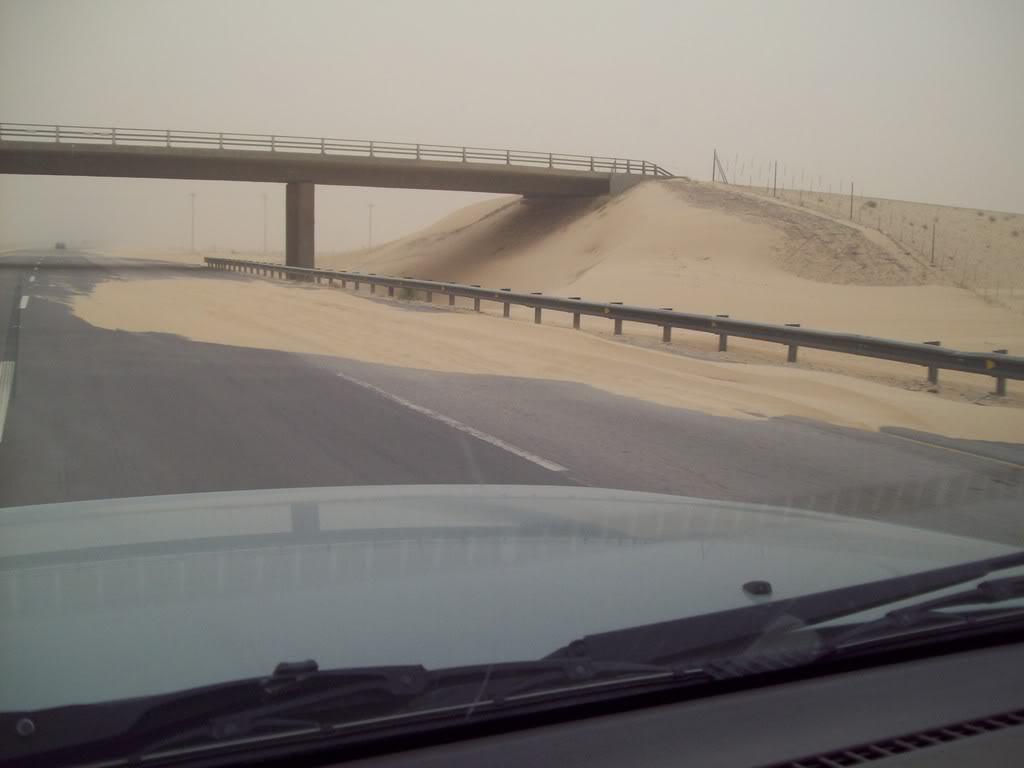
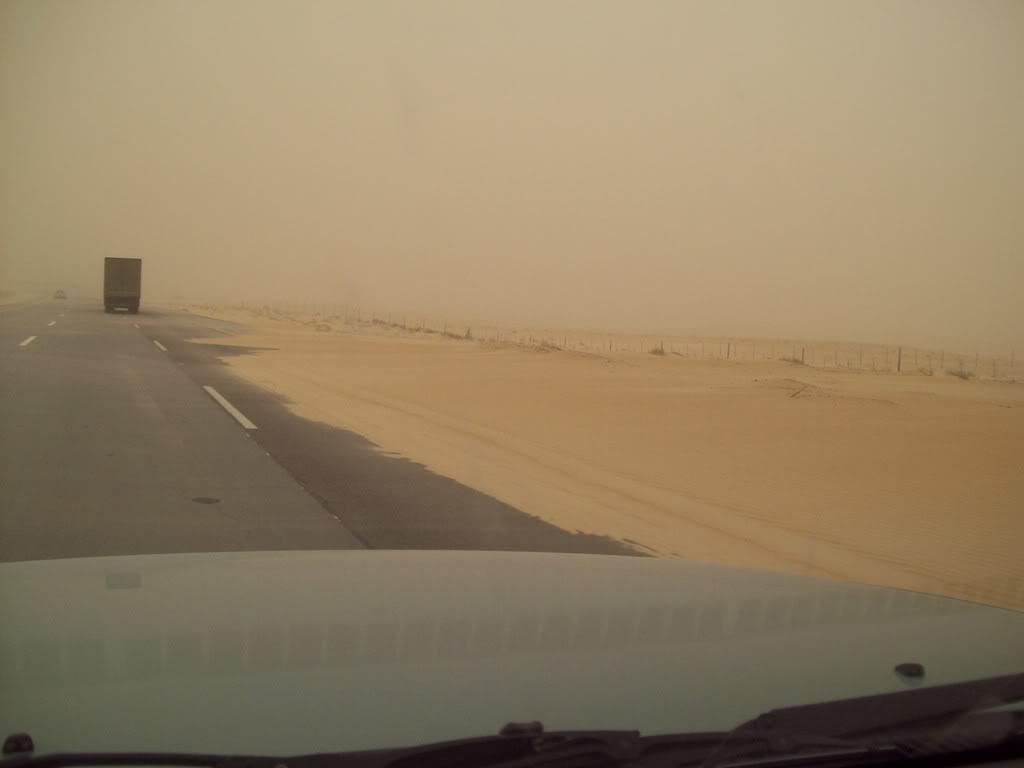
i live in riyadh, saudi arabia. i am originally from there and live there perminantly. the track you see is actually in the neighboring country of bahrain, hence the 250 mile trip each way to the track. you guys should see that track ! its the same track they hold the F1 races at and to say its a first class facility is an understatement!
qwiketz, i really don't think I'm getting belt slip ( i also put a cog drive setup on the car to verify - look for the pics soon). the car dynoed about 890 rwhp when i was in the states on pump gas with 408 , i'll dig up the video and post it.
if you are wondering about the boost numbers , you got to figure in the head flow , big headers , and monster cam the car has.
in the states back in houston , if i wash it it rains , in phoenix if i wash it birds think my car is toilet and take dumps on it , here , if i wash it i get a freak'n sand storm!
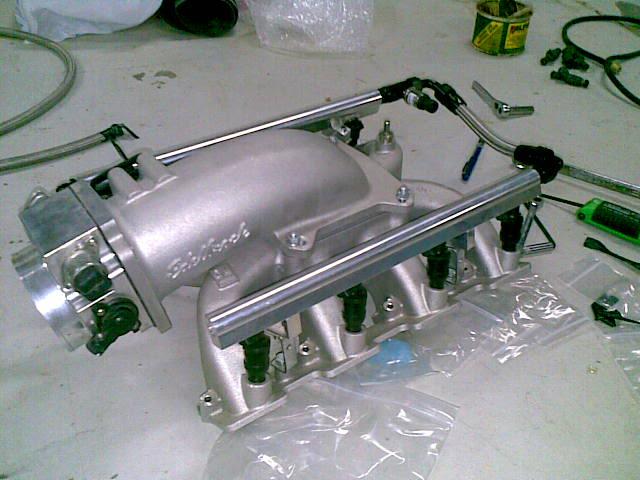
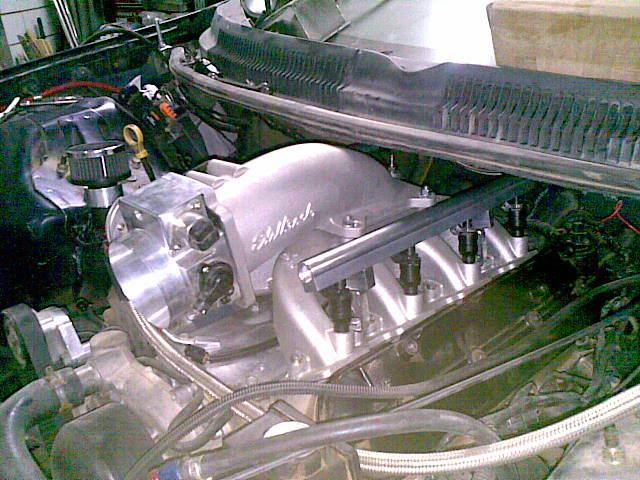
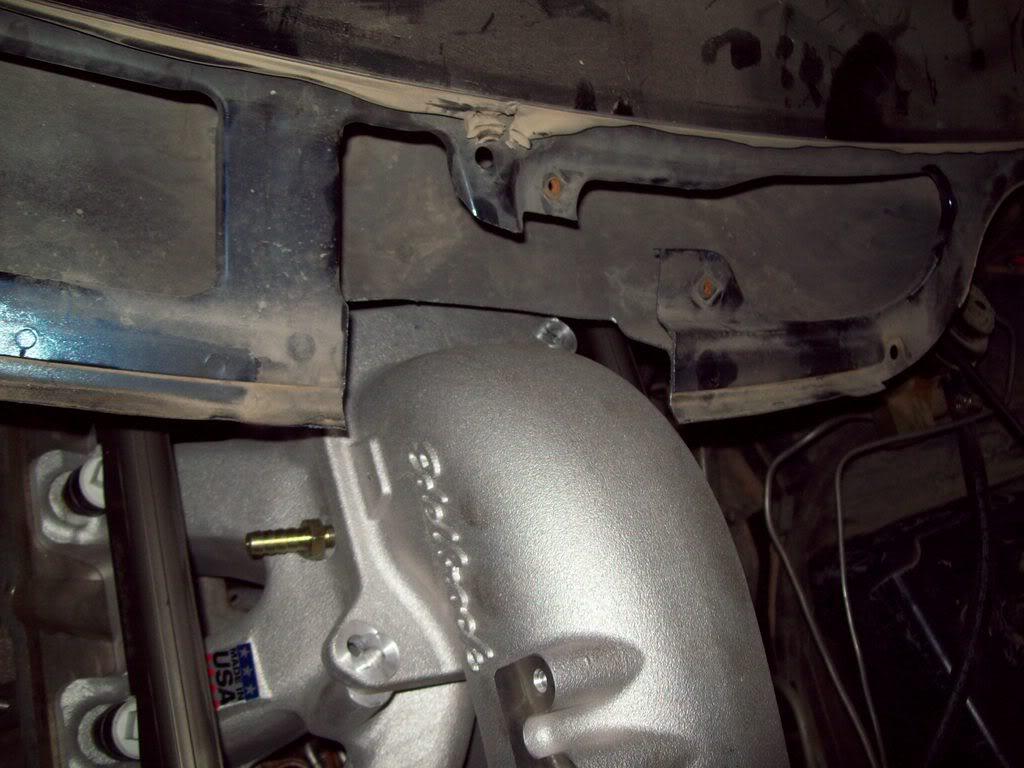
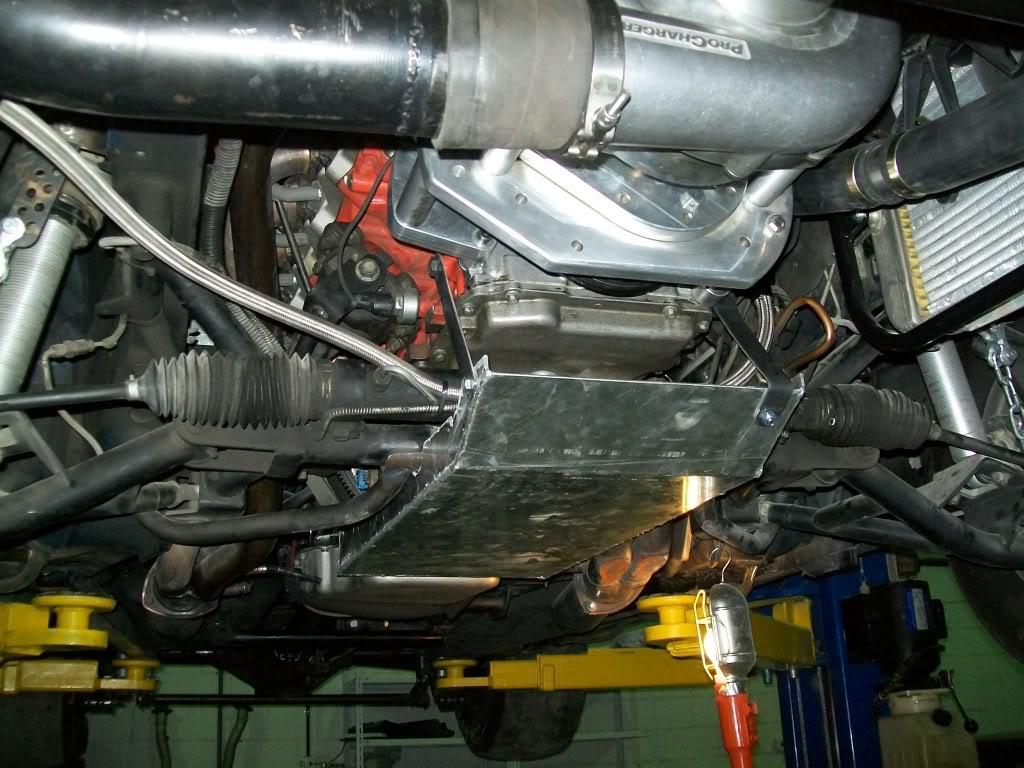
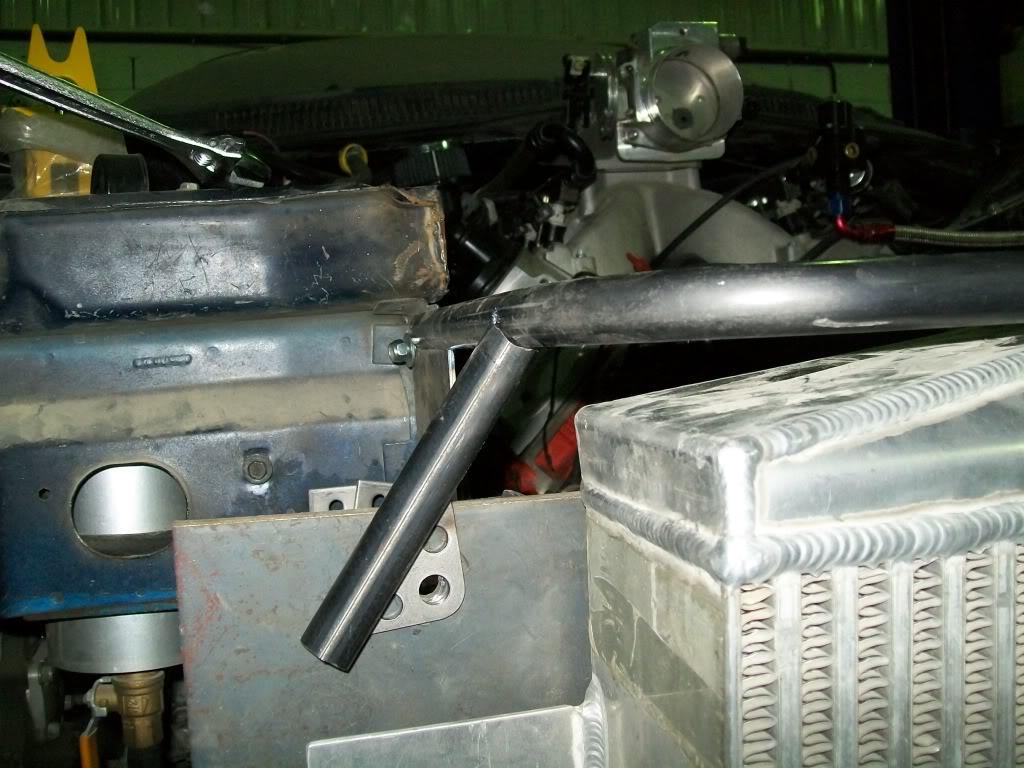
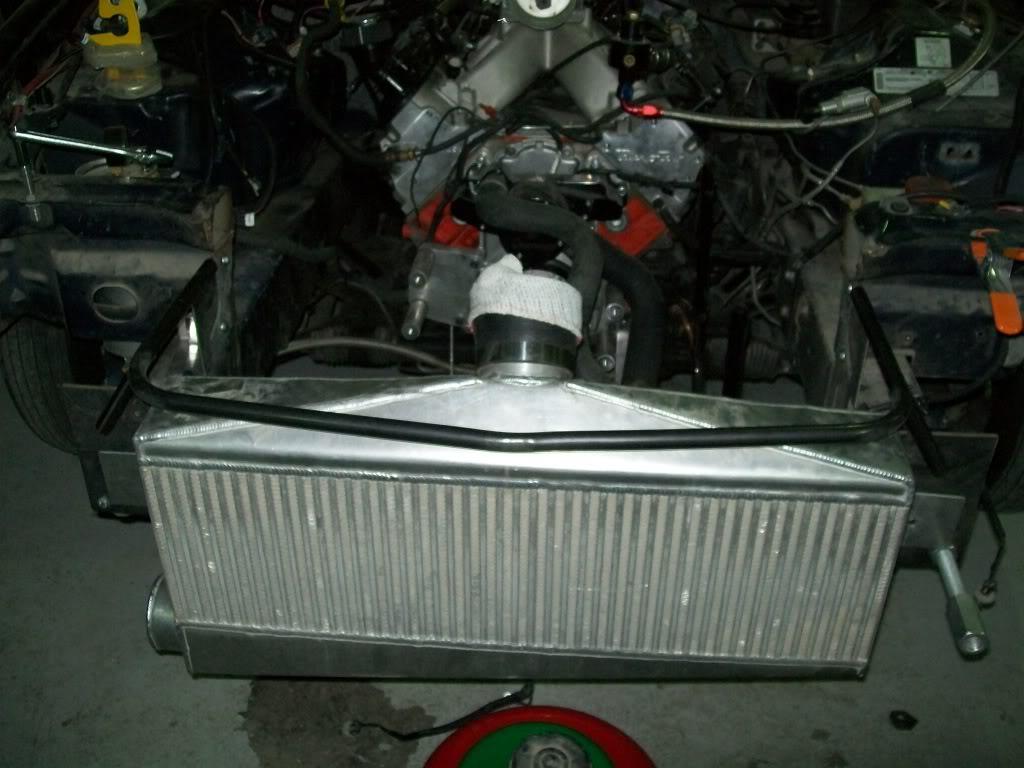
i also installed the carb intake and the elbow, now i need to fab up a tube from the intercooler to the TB.
you can see how this elbow clears the cowl and the plastic stuff on top of it . an added benifit of this elbow is that it has a wing type of thingy where it bends to help distribute the air better in the intake ( i'll try to get a pic of that soon)
and here is how the headlight cover brackets look like and how the front end looks with them on it 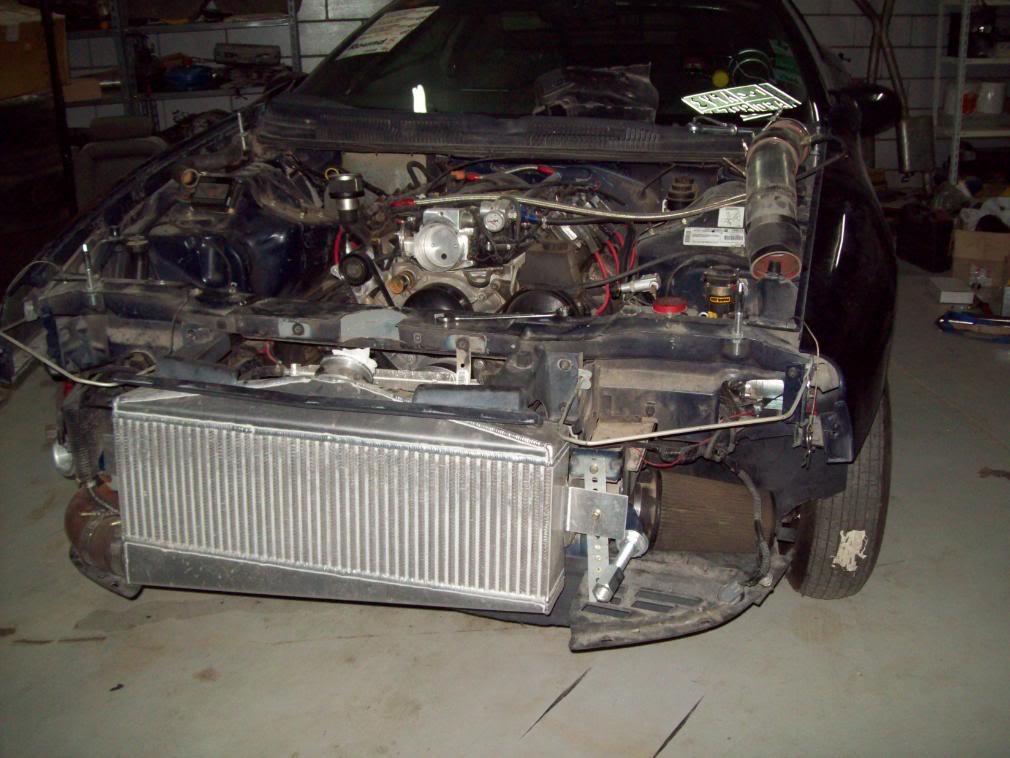
and in a further attempt to clean up the engine compartment (without actually washing it  ) i relocated my methanol injection controller to inside the car. tomorrow i should be getting some stuff in from summit so i can proceed with a bunch of stuff like plumbing in the accusump and other doodads.
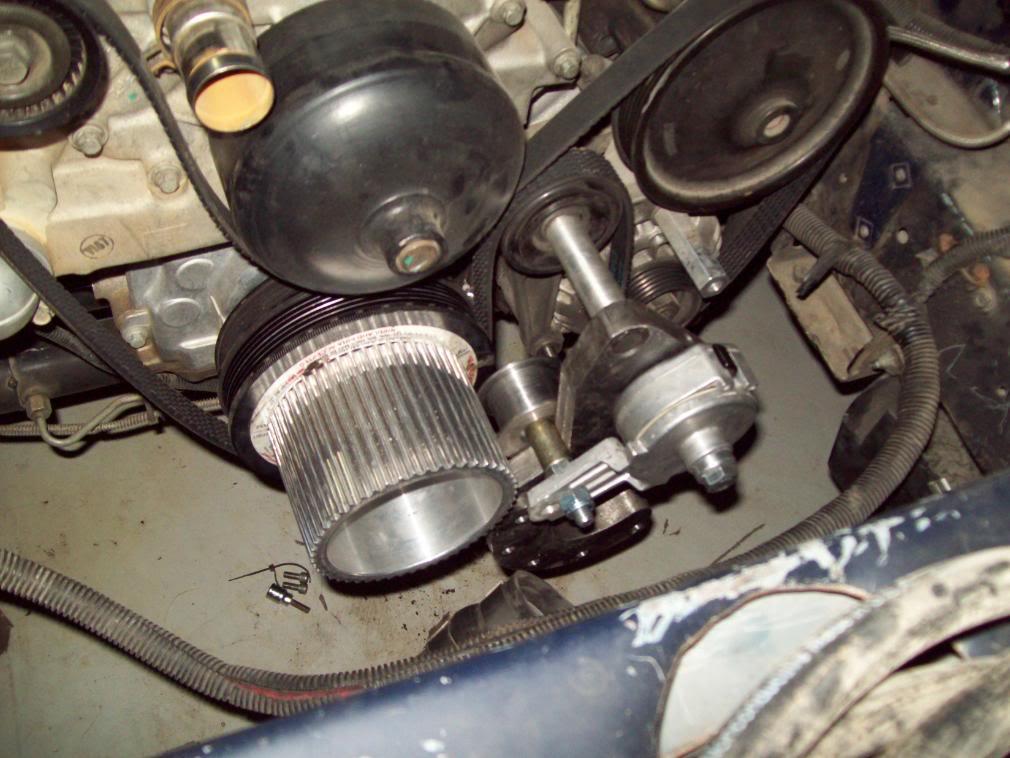
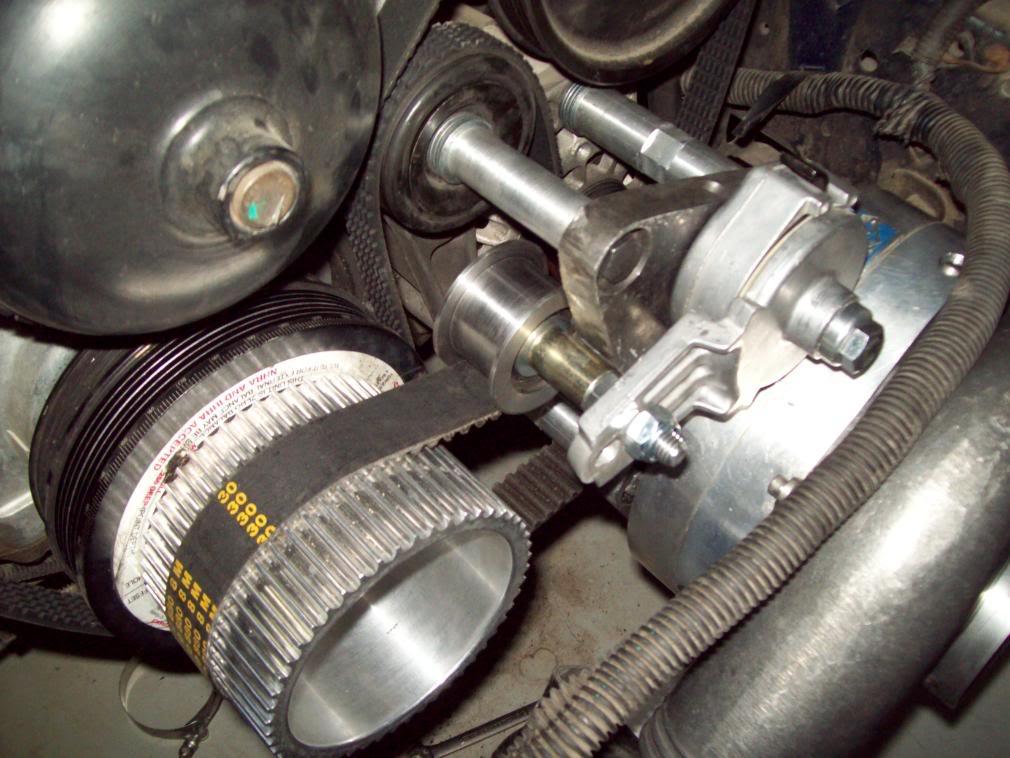
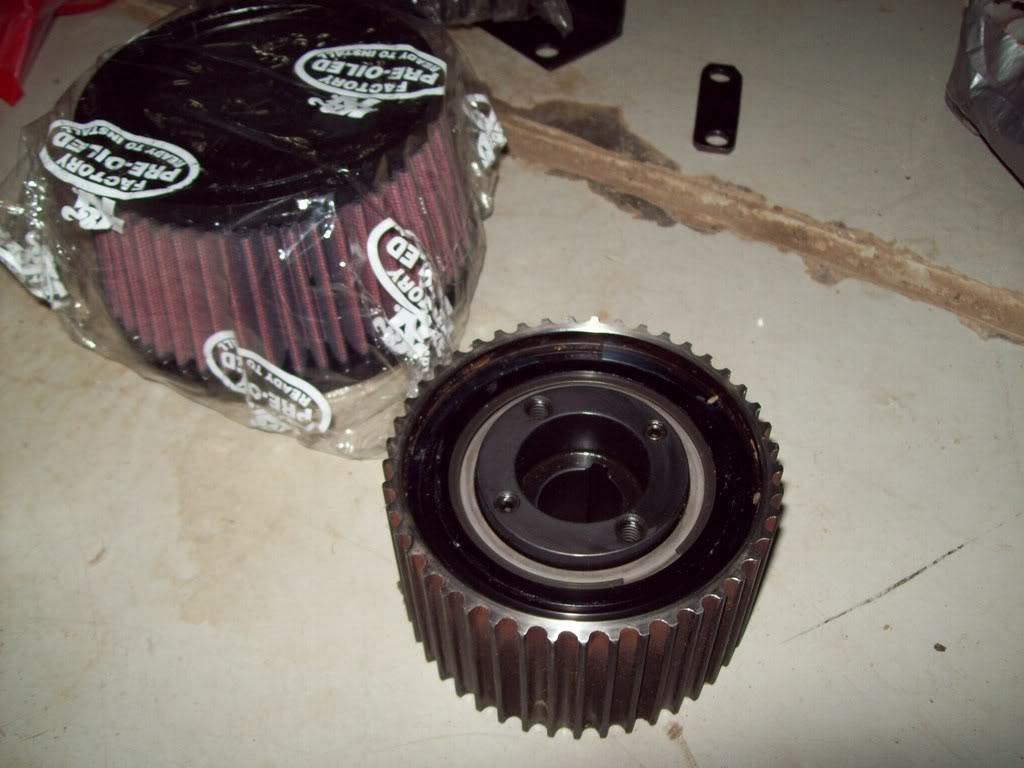
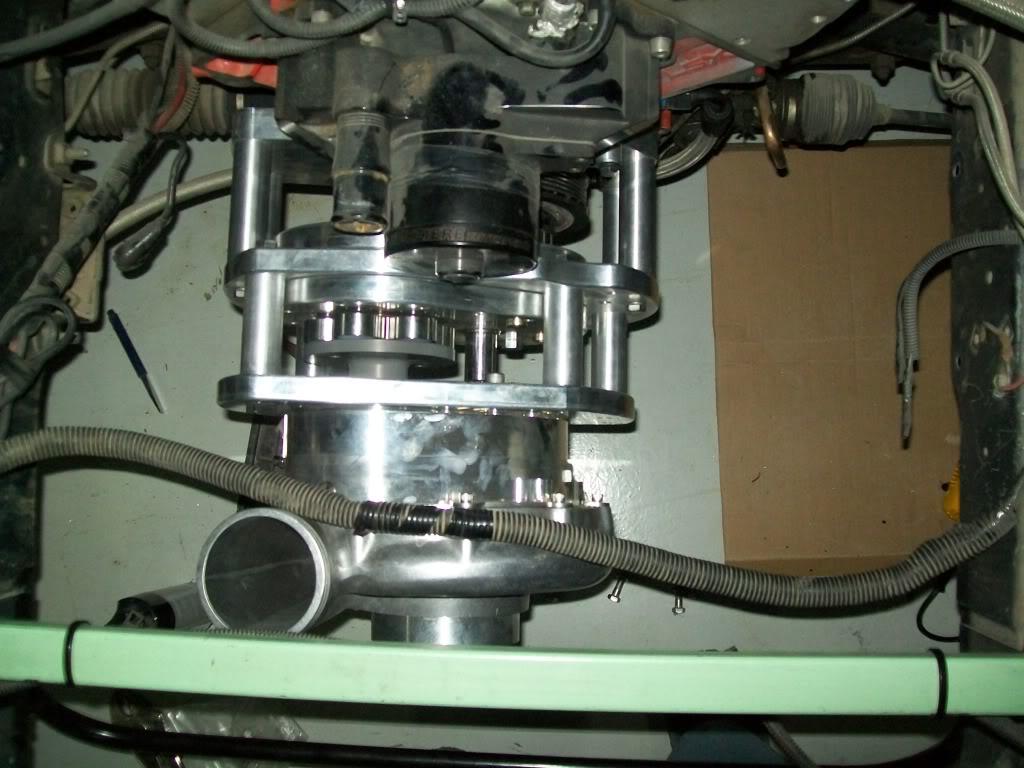
i already installed the cog drive i made ( for the last round ) without the ATI super pulley just to see if all my work was properly lined up and working good ( well it worked great , until i hit the revlimiter a few times and sheared the teeth off the cog belt - as expected )
6/20/2008
here is what i did to get the cog drive to work :
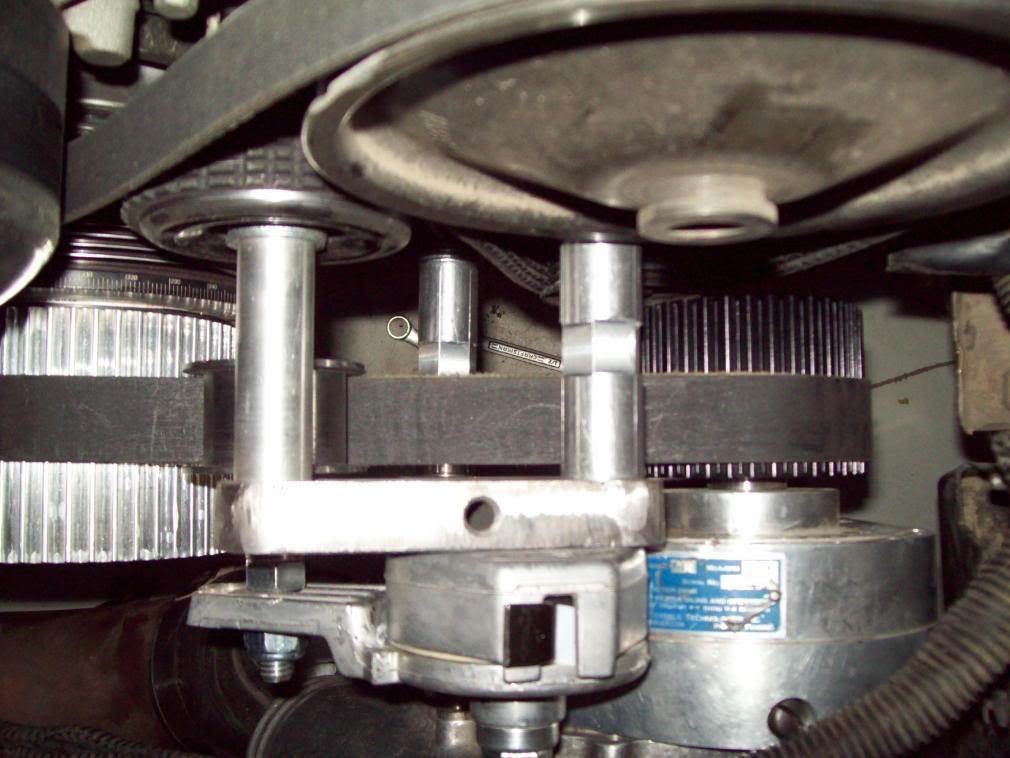
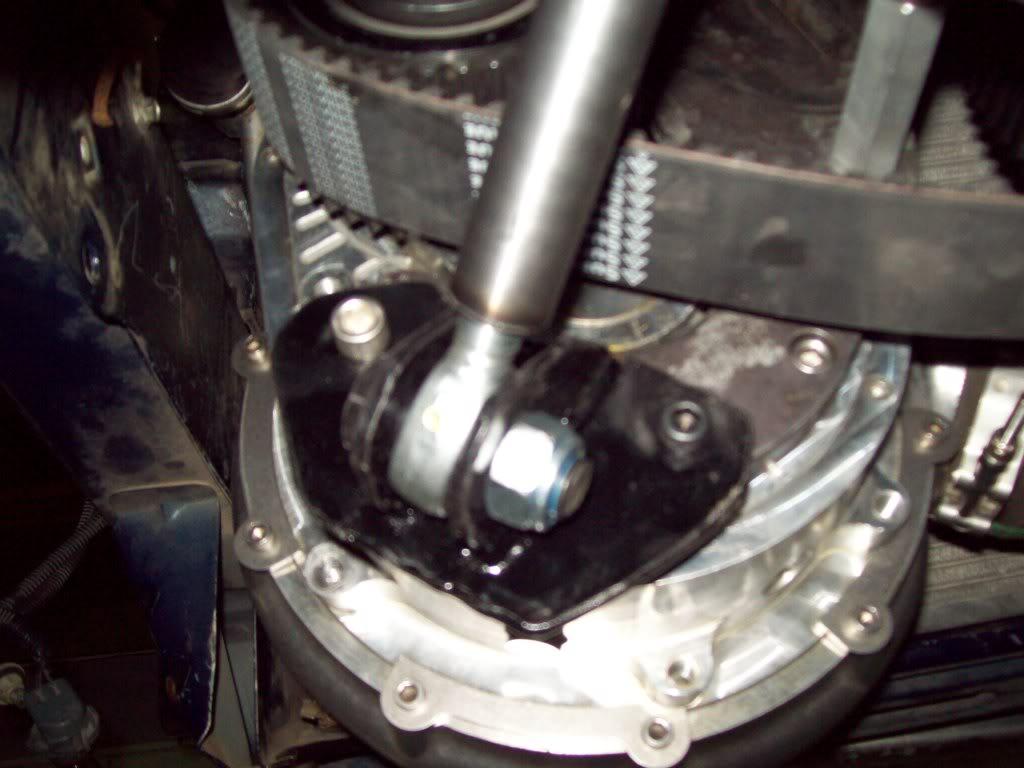
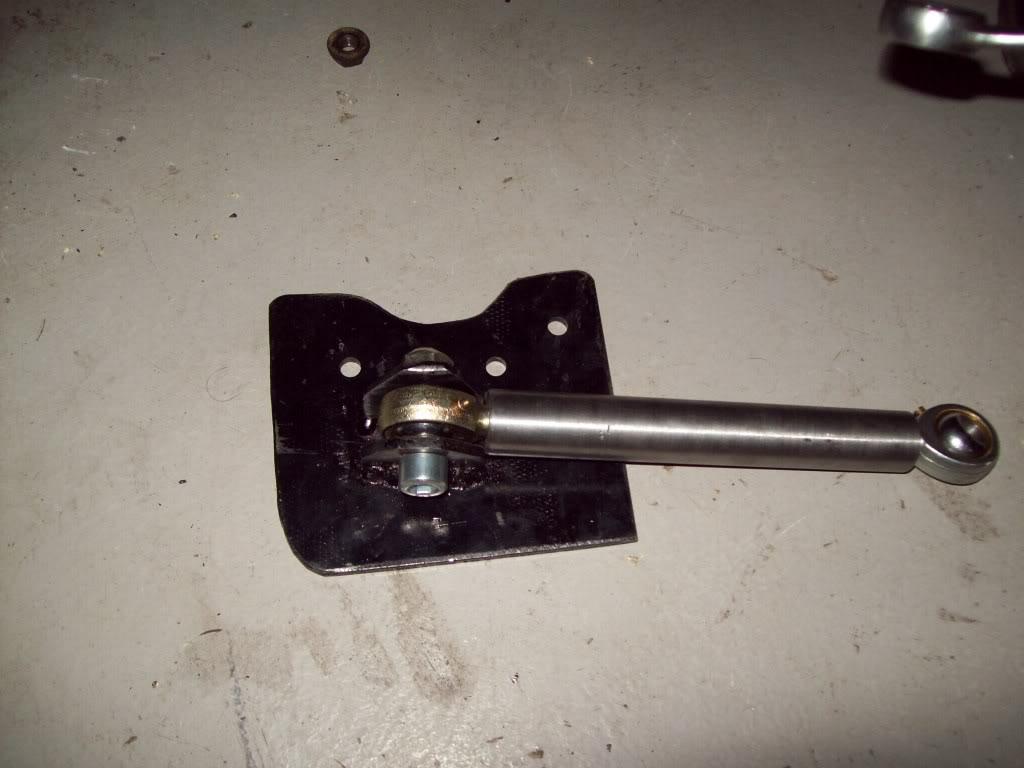
you start off with a stock ati bracket and notch it to clear the tensioner ( that i fabbed up at a local machine shop - along with the idler pulley and longer stan-offs):
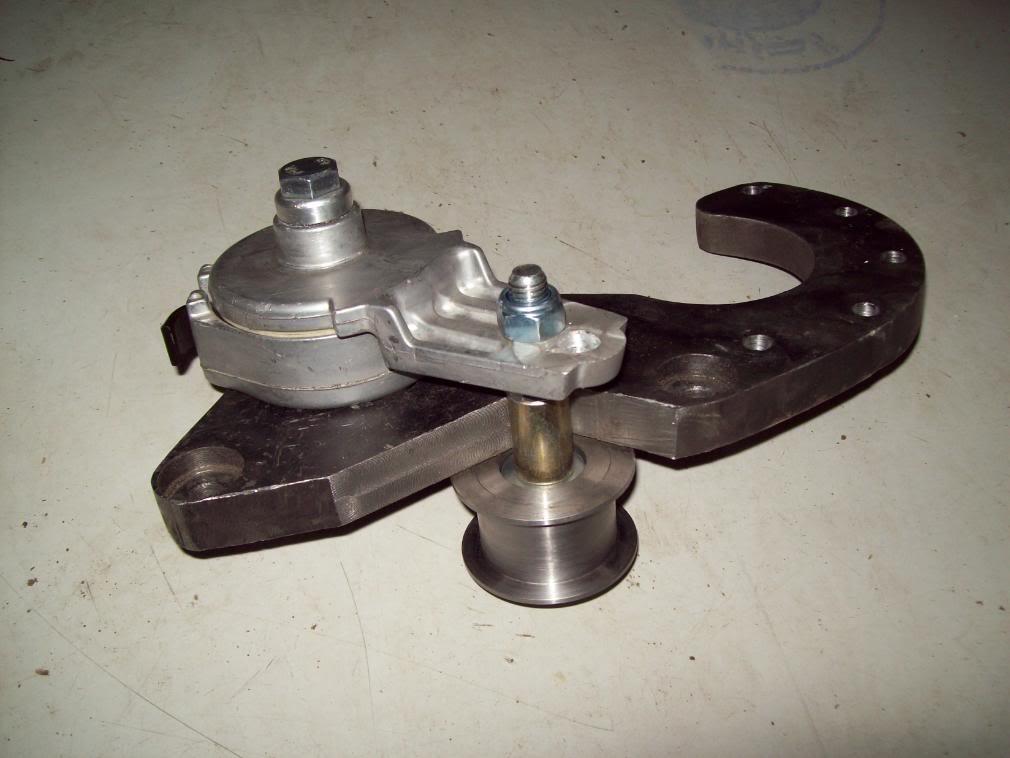
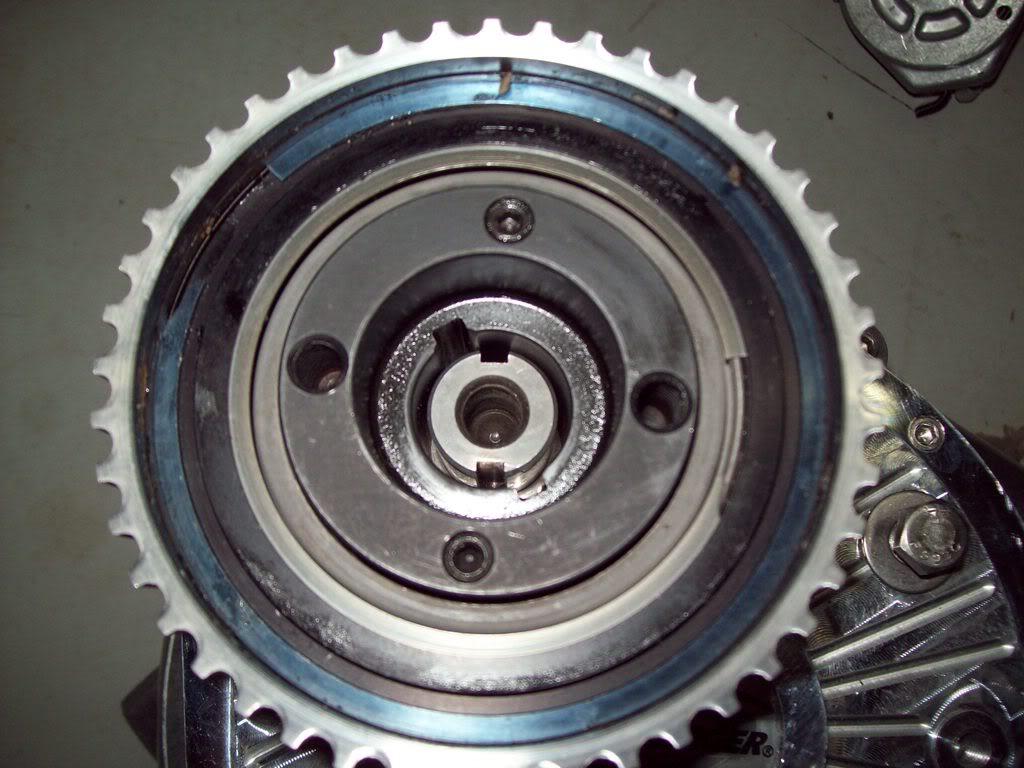
i got a BDS crank cog locally and had the local machineshop redrill it to the ATI balance holes.i used a 55 tooth one here casue i was using a 36 blower cog and didn't want to risk over boosting it on the F1-R - you can also see the standoffs here ( bracket was not mounted properly in this pic)
here's a pic of the standoffs :
and here is the finished poduct
and when you are building a cog drive for 2 cars and a serpentine for a third , all while experimenting , you end up with all these
off couse all this is coming off as soon as i get the ATI super pulley , thats when the F2 goes on , the bigger crank cog goes on , the super pulley , and possibly a wider belt.
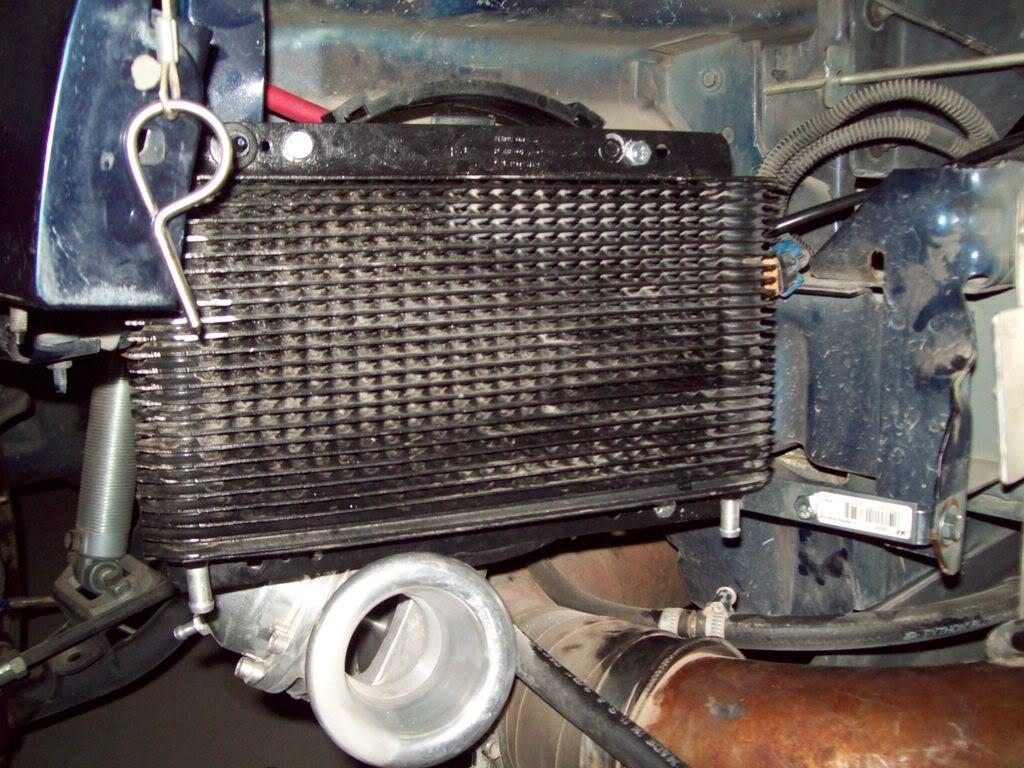
next up is relocating the tranny coolers to the where the headlights used to be ( i already did that , but i don't like how they are positioned and will redo them with fans on them).
so just so i remember what i need to do & get tomorrow, i need:
- X2 8" electric fans
- finish up the fuel rail / reg. plumbing
- remove exhaust shield from under tank to see if i can fit a sump on the tank
- mark & remove header extensions for welding evac. hose bung thingy
- get some soda for the fridge
the elbow is from summit (EDL-3847)-- better yet , look up ls1 elbow and check out your choices . one word of advice , if you don't have it , get the edelbrock throttle body with the elbow cause for some reason , the bottom bolt holes on the tb side of the elbow won't line up with the TB ( i had mine mashined to fit.)
the intake is from SDPC -----> and its a GM performance intake for the l-92 heads specifically , no machining required pn : 25534416 . they won't fit the LS1 style heads. ( for that look up edelbrocks manifolds)
6/23/2008
well i got some stuff in from summit today , mostly fittings and what not.
so i decided to plumb the oil accumulator ( A.K.A accusump) using the rear oil galley bolt ( the allen key bolt right above the oil filter) ....... bad idea !!!!!
i removed the driver side header and the block off thingy just above the oil filter so i could try to thread in the fitting ( adapter from the block,s metric thread to -AN male fitting ), because the threaded hole was recessed and how it was angled, i could not thread it in easily and it was a royal pain to tighten , only to find that the 45 deg hose end ( any hose end for that matter ) would not fit in such a tight confine ......
so i proceeded with removing the fitting , and guess what , it won't turn ; i couldn't get a socket on there due to how the whole thing is recessed and i ended up maulling the edges off the fitting . which led me to drive a big screw driver through it so i could turn it 
so now its back to plan A ( using the front port behing the alt. and relocating the alternator to the pass side head ).
i also managed to redo the tranny coolers ( and add one more in the process).
i now have enough coolers to start a new ice age , and enough oil capacity to jack up crude oil prices by $10 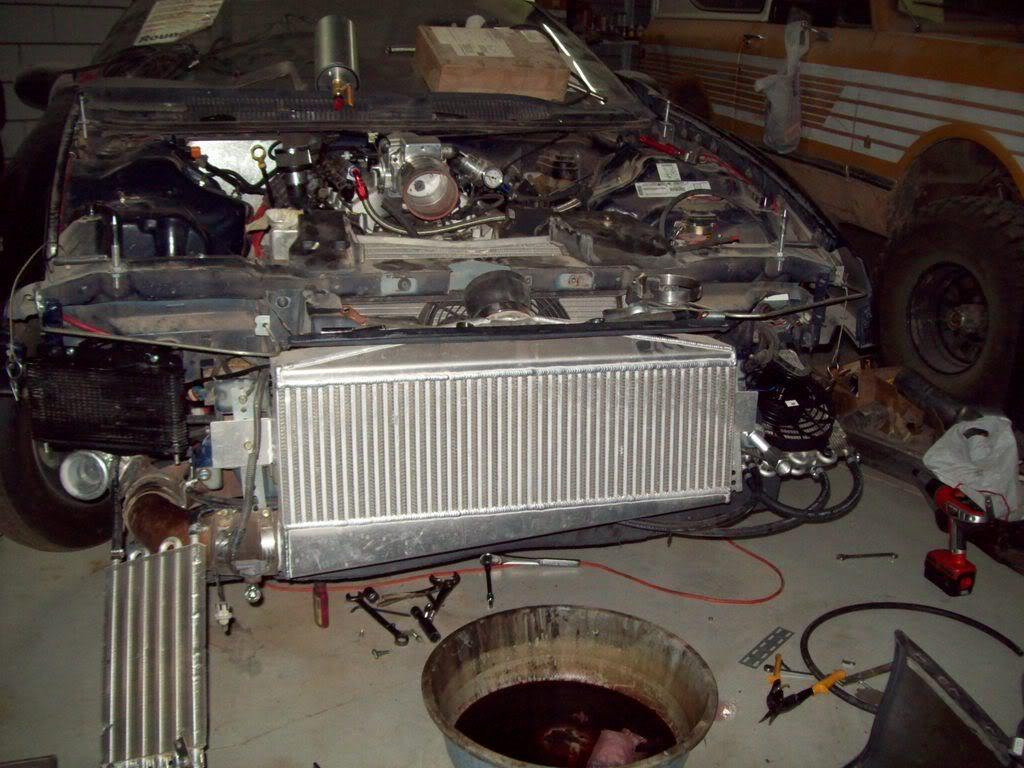
now i hace a fan cooling each side for the coolers too.
here you can see how i stacked 2 coolers on top of each other :
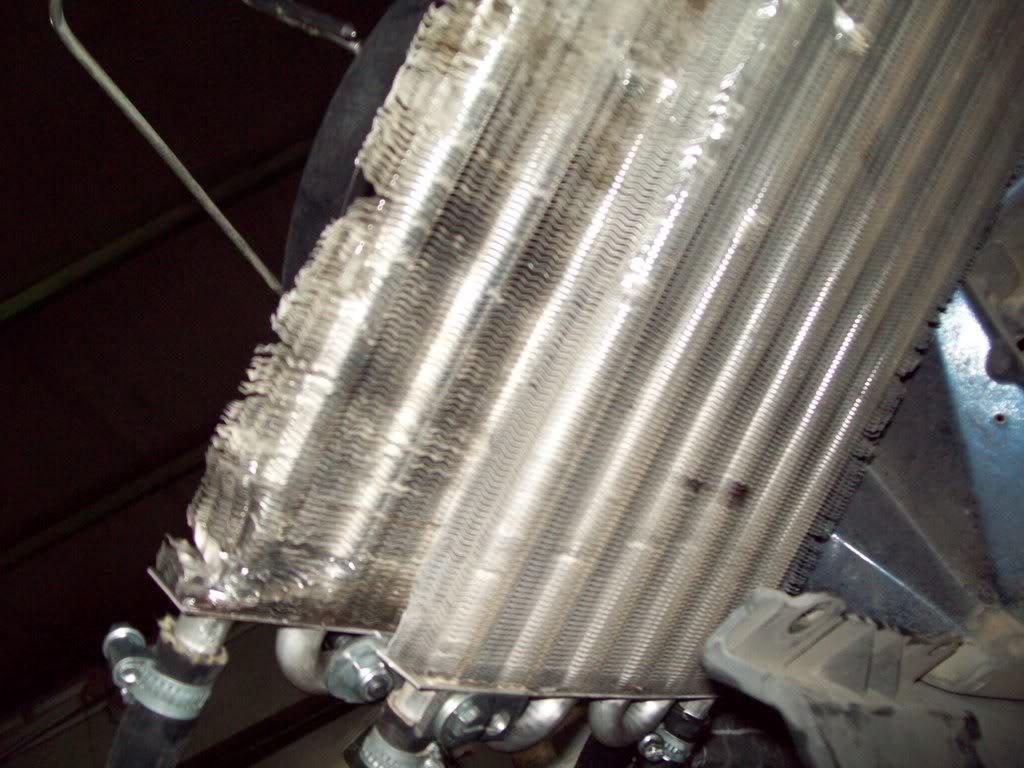
heres the driver side cooler, check out the BOV outlet : the outlet usually peeks through the foglight hole in the bumper , you can see how the part that peeked through got sandblasted !
all i have to do to finish this up is to ground both fans, mount and wire a relay for them in the car . i'm just debating weather to have them tied in to com on with the stock fans , or have them on with ignition with the option of a on/off switch to kill them if i want.
6/25/2008
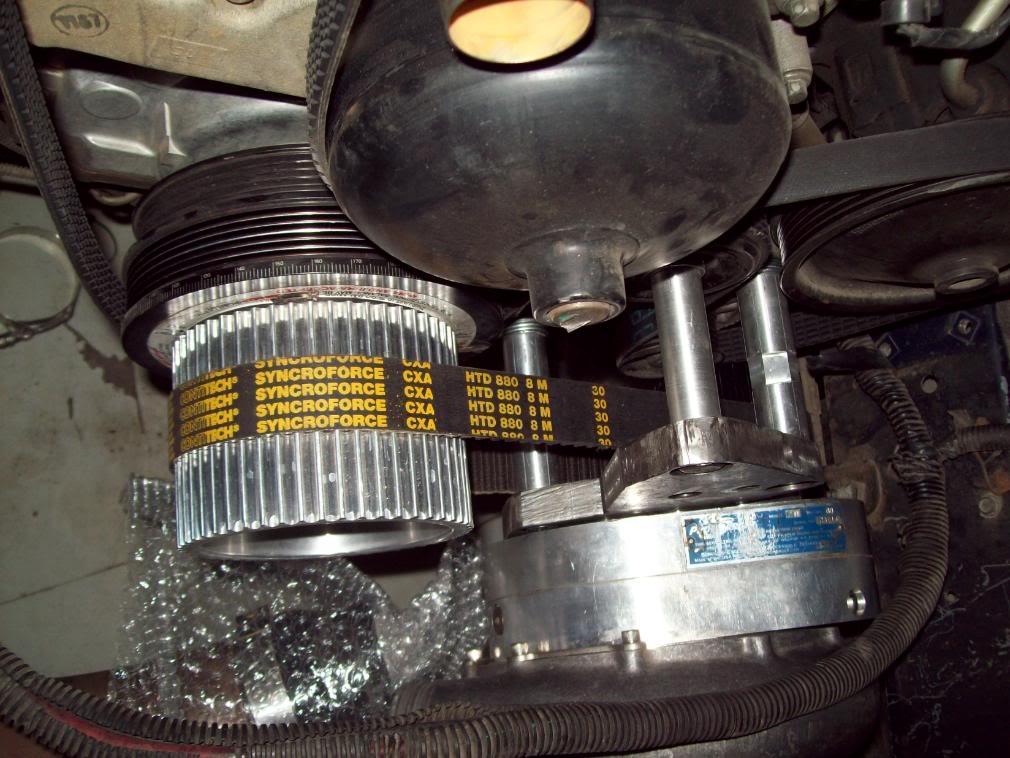
got my super pulley in today! got to take it to the machine shop to narrow it down a bit ( need to shave 12 mm off it - about .5 inch) i also swapped the crank cog from the 55 tooth one ( the chrome one in the pics) to the 73 tooth one . this got me into some fitment issues with the tensioner hitting the cog. i also found out that the brace i use on the back of the blower that attaches to the oil pan bolt hits the blower cog ( the damn thing is huge (45 tooth ! ) .
so its off tomorrow to the machine shop to :
- machine a new bracket with a bigger / different notch in the side ( i want to use the old one for the stang
- fab up a new brace with a decent bend in it to clear the cog.
- get a new tensioner and machine a slot in the arm so the arm length can be adjusted
i'll post pics tomorrow of the super pulley and the bracket if it is done.
6/30/2008
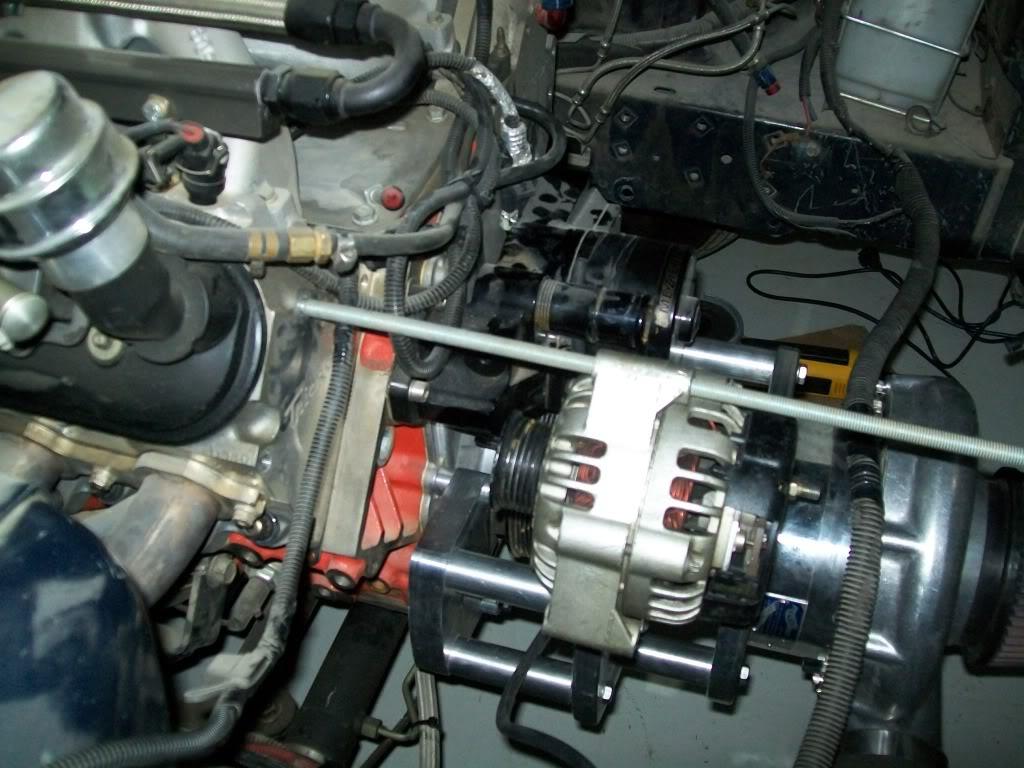
so , i got some stuff in today , mainly the alternator relocation bracket , k&n filter , and other assorted doodads.
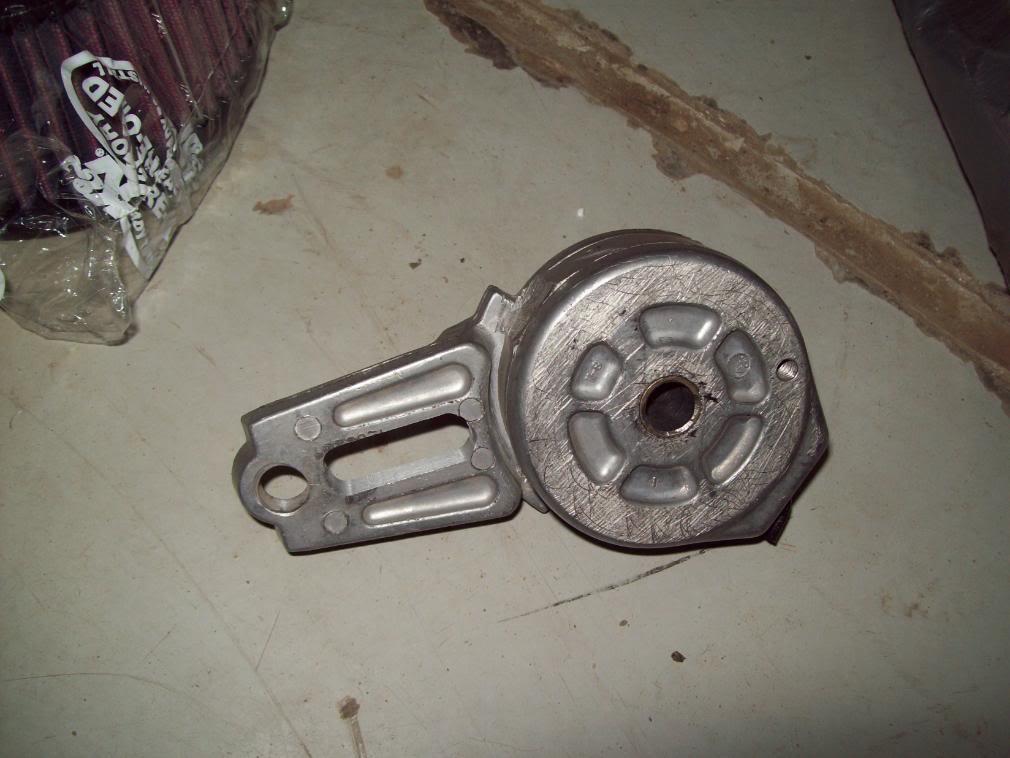
i also got the tensioner back from the machine shop, and now its adjustable
the new bracket and brace should be done tomorow. i also had them make new spacers to go inplace of the alternator in its bracket. ( so the bracket won't break)
funny thing happened when i was removing the alternator, i tried to spin it but it was seized! i couldn't figure out why it was like that , but when i tryed to twist it with a bit of force it made some grinding noises and a buttload of sand came pouring out . so i took out the alt. and blew air through it and cleaned it . now it spins freely ! ( stupid sand storm  )
)
i also installed the smokn' hawk alternator relocation bracket loosely to test fit the alternator ( i need to get new bolts and a tensioner - mine is a billet non-sprung one).
happy to report it clears the fuel rail . i used another ls1 alternator to test fit , but i will check final fitment tomorow with the f-body one to make 100% sure.
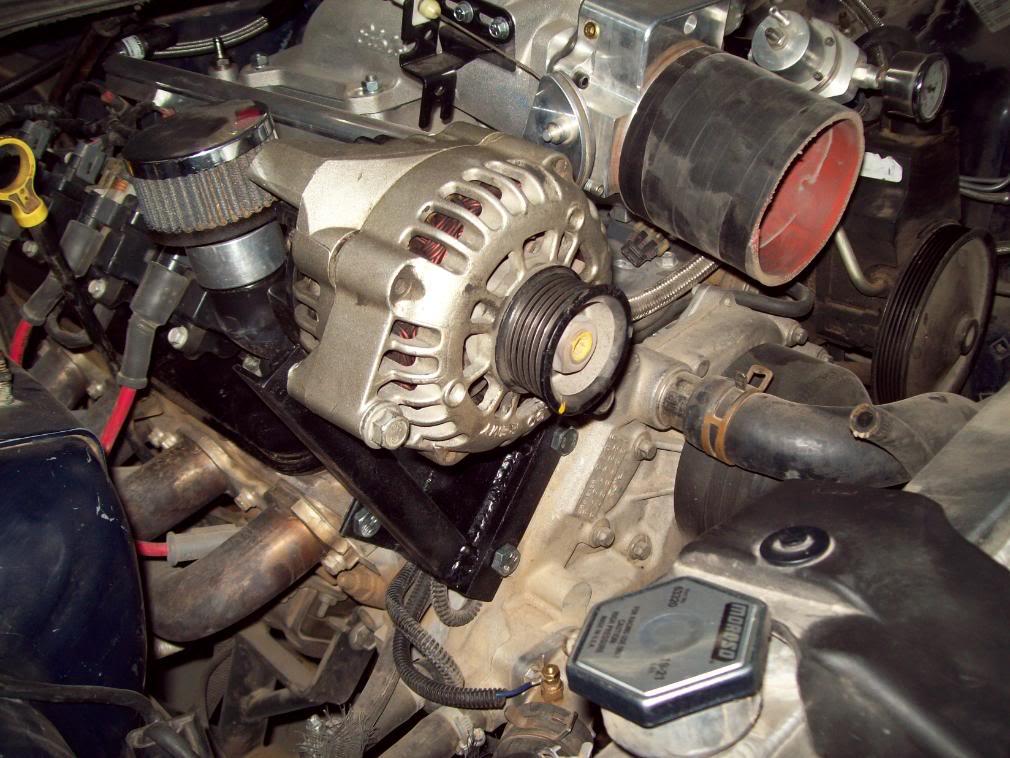
i also ended up rerouting the alternator wires , which came out quite neat in my opinion
the biggest bummer of the day is that i finally got the super pulley back from the machine shop ( after narrowing it down by 12 mm ), and when i take the F2 out to put the superpulley on it , i find out i was sent the wrong shaft diameter pulley !! the pulley is for the large shaft blower , while mine is the small one - like the F1-r and D1-sc.
the good news is that i will take it to the machine shop tomorow to have them make an adapter if you may call it that . i already talked to the guy there and he said no problem they do this kind of stuff all the time.
another no go was my plan on running a sump in the rear plastic tank. i was hoping it would have a flat enough spot to cut a hole big enough for the sump and epoxy it in place. i checked and it seems like it wouldnot work. guess i will just stick with what i have now: a bulk head fitting in the bottom of the tank with a -10 hose connected to it . i'm also planning on drilling another hole somewhere in the corner of the tank and install another bulkhead connector and cap to work as a drain for when ever i need to drain my tank.
what i have planned for tomorow :
- drop off the pulley and have the machine shop make an adapter.
- pick up the new blower bracket and alternator spacers
- install vacuum block and route vacuum hoses
- install the alternator and its bracket
- install the blower bracket and tensioner
- most likely buy a battery for putting in the rear.
on a side note, i just ordered an intercooler for the stang ,, which should be here in a couple of weeks ,which means all my parts will be accounted for and then , the stang build thread commences
7/5/2008
time for some updates:
the super pulley is a no go - just ordered a new one , but i will try another machine shop !)
got a battery ( yay! )
finished wiring the fans , they now come on with the ignition on , and i have a swith to kill them if i need to .
i also finally finished all the vaccum lines , i used a vacuum block i took off my stang a while back ( who said fords are useless ) and routed the main line from the manifolt to it , then from the block to various other thingys :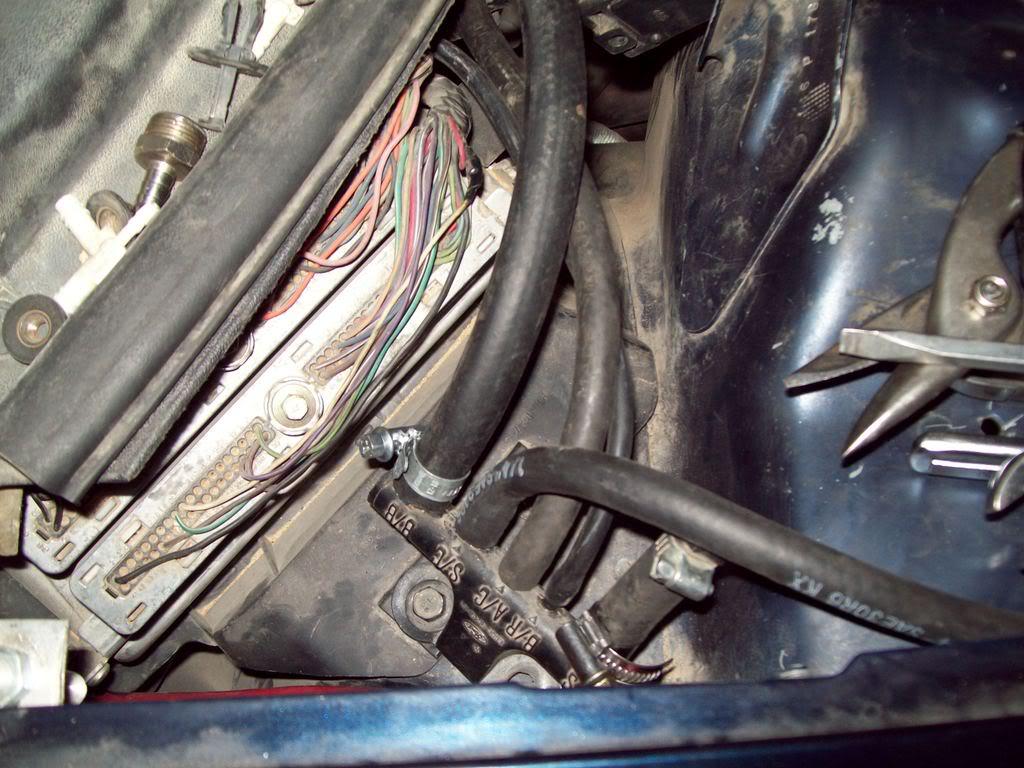
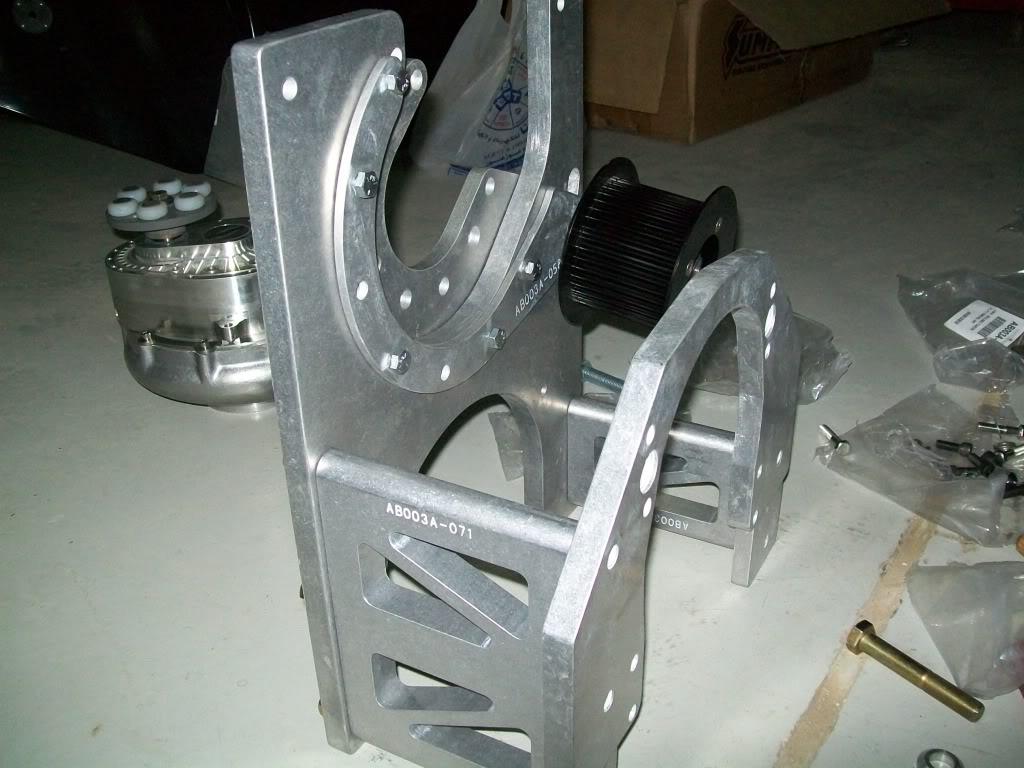
got the alternator and tensioner mounted for the last time :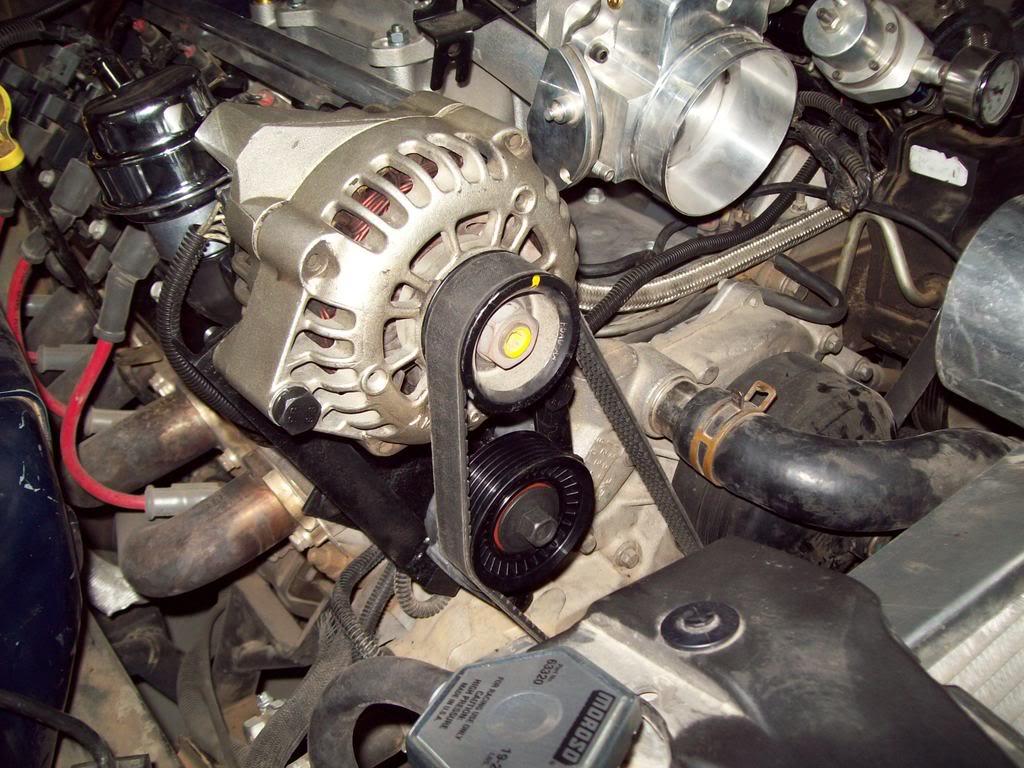
also got the alternator bracket spacers done and installed :the brace (the bar sticking diagonally ) is the old one , i didn't like how the new one turned out , so i'm building a totally "redesigned" brace . the tensioner now clears the crank cog and has sufficient travel::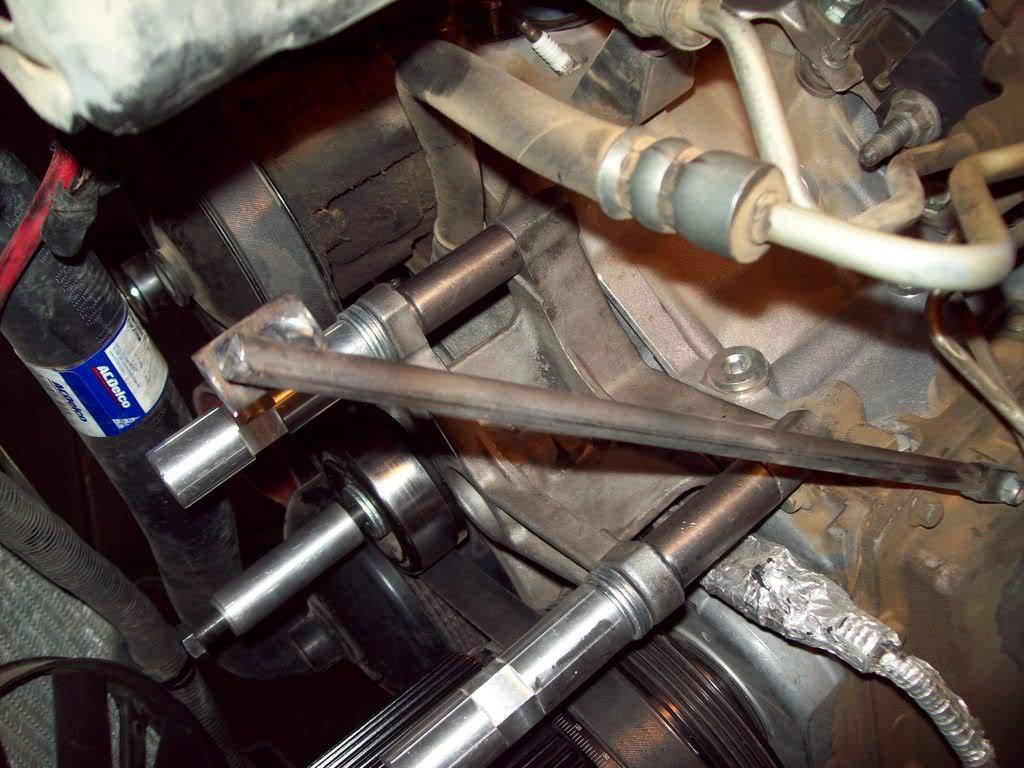
here is a side by side shot showing how i notched the new bracket :
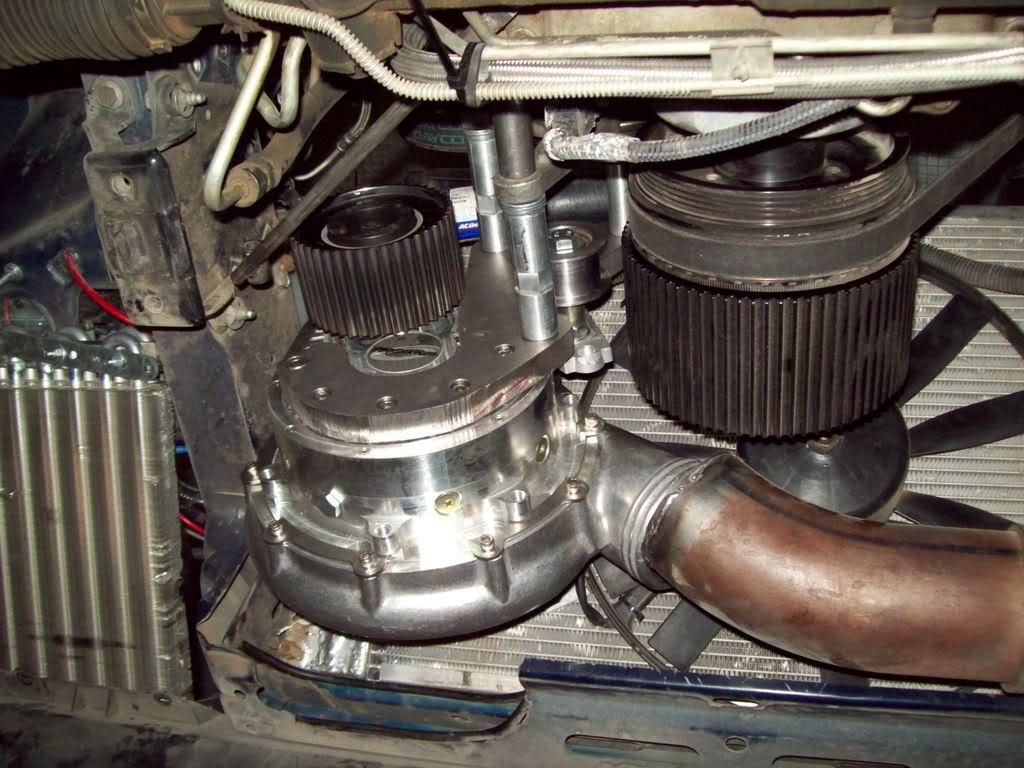
also almost finished the tube going from the intercooler to the TB, i welded a bung on it to thread in the IAT sensor, and will be welding two nuts to hold the methanol nozzles on there too.
so , up next is the following:
-label the switches on the dash ( just two labels )
-plumb the oil accumulator from the block to the canister.
-remove the passenger side header extension to weld the crankcase evac. thingy
-travel limiter
-put driver side header back on
-remove tranny for rebuild and maybe , just maybe , swap out the oil pan gasket .
-wire the alternator light and the AFR warning light from the dynojet commander
7/9/2008
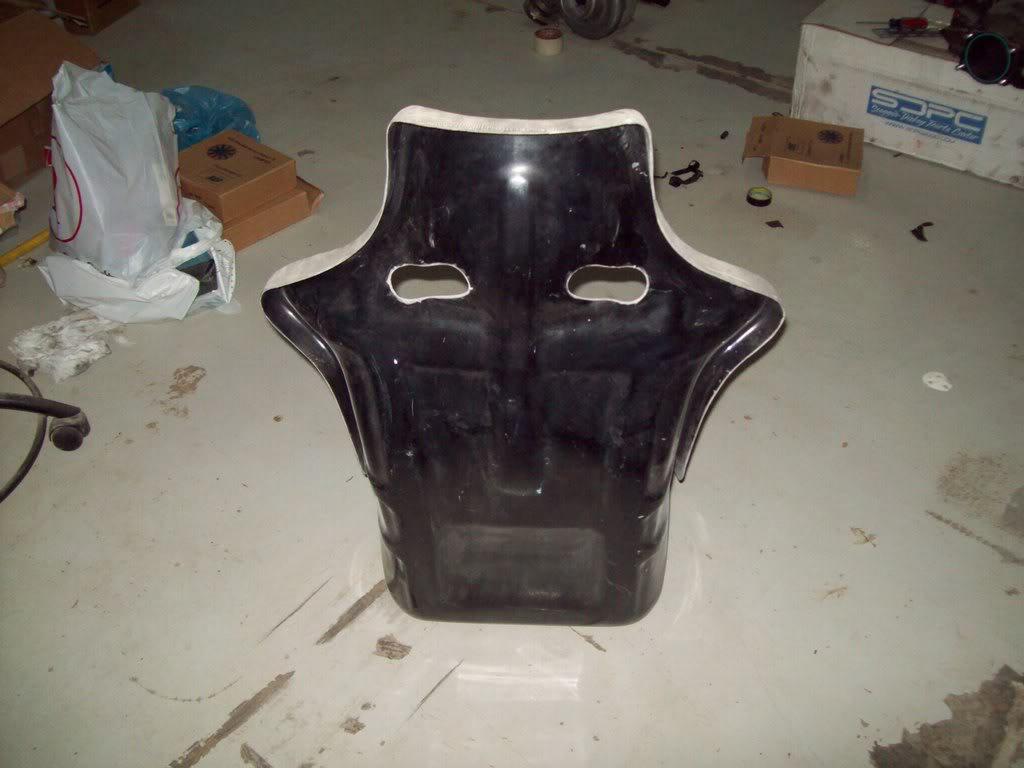
i got some stuff done in the last few days. i also managed to get a new fiberglass hood for my stang and this lightweight seat ( also fiberglass), all i need to it is upholster it and fabricate a mounting bracket/ base for it.: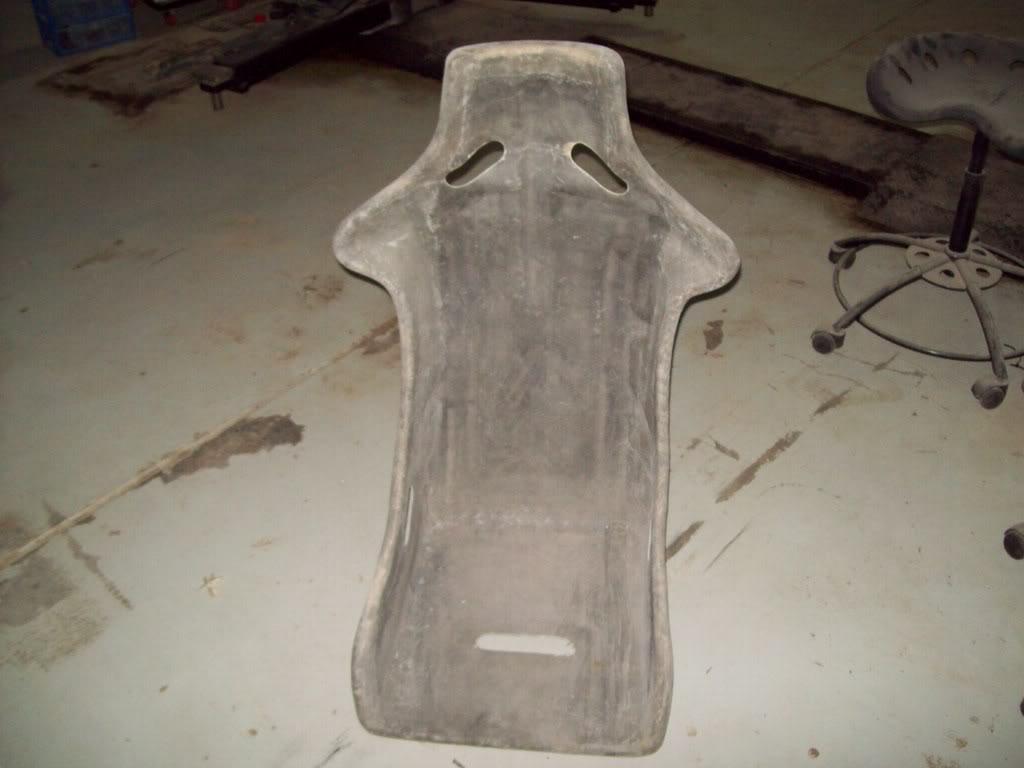
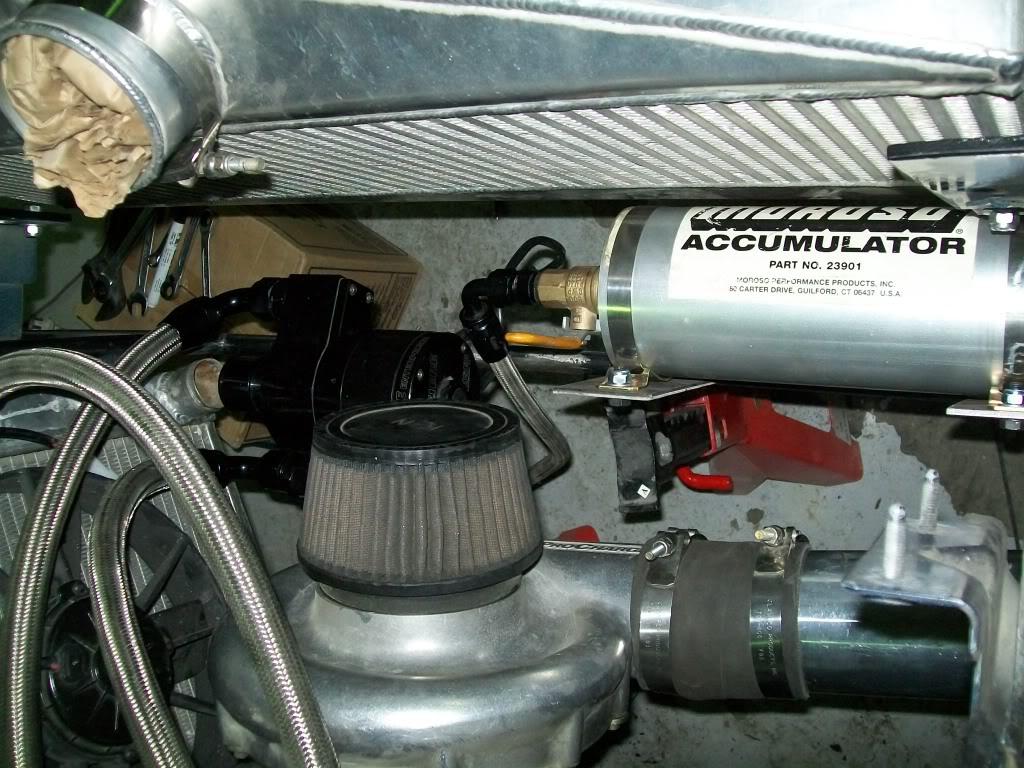
also managed to finish up plubming the oil accumilator:
i finally got around to installing a drain on the gas tank, it basically a bulkhead fitting with a cap.
( what do you do when you need some one to hold a wrench on one side of the car while you are on the other side, but no one is around??? )

according to my all knowing excell sheet, i finished 40% of the items on my list
so hopefully tomorrow i will finish cleaning the inside of the tank and button it up.
i should have the methanol injection nozzle bungs welded in on my intake tube , i already welded the AIT sensor bung on there. i might even paint the tube black.
and from the list i posted in the post above, i will be putting the header back in so i can fire the car up to see if there are any leaks and what not.
after that , the tranny comes out and we see what kind of damage we have
7/13/2008
finally got to work on the car again ( now that we crossd the " getting the engine started" milestone with the stang) .
i managed to finally finish the intake tube from the intercooler to the tb, i welded a bung for the IAT and two bungs for the methanol injection. 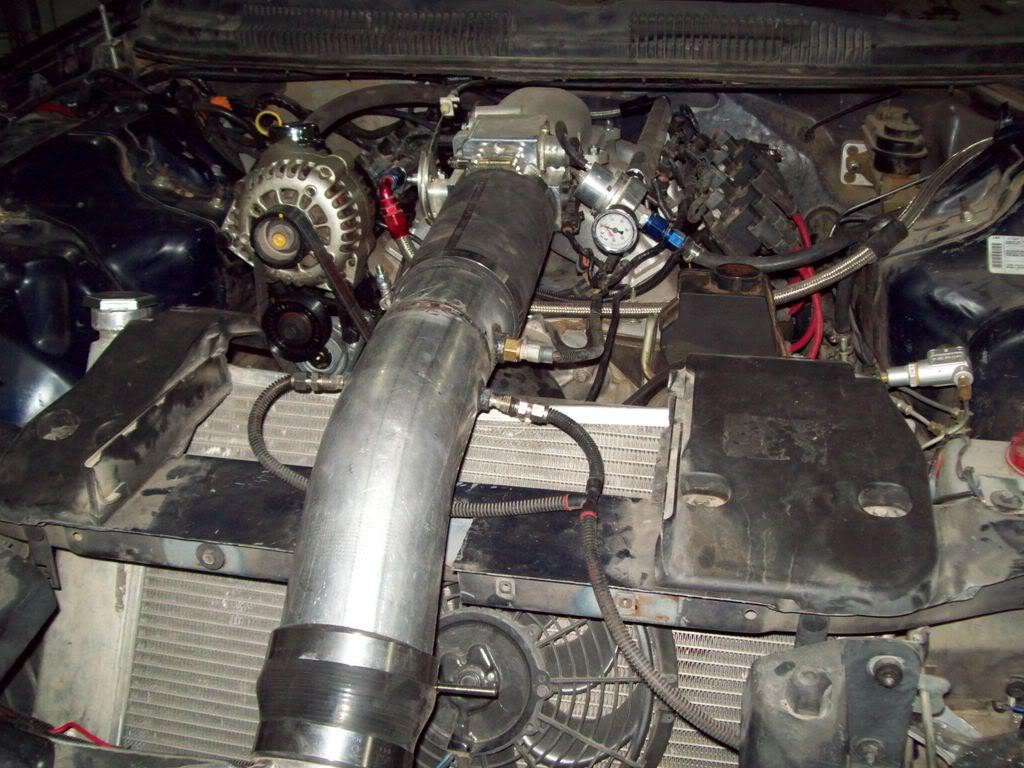
i also finished the crank case evac thing. i welded the bung on the header extension and routed the big'ol hose . off course there had to be some action , after welding the bung on the extension - and laying down some of the finest tig weld beads i have done - i come to find out i welded the bung so that it faced upstream of the exhaust ( it needed to be like the pic below so the siphon effect takes place). so out came the grinder and bye bye welds ... pure genius 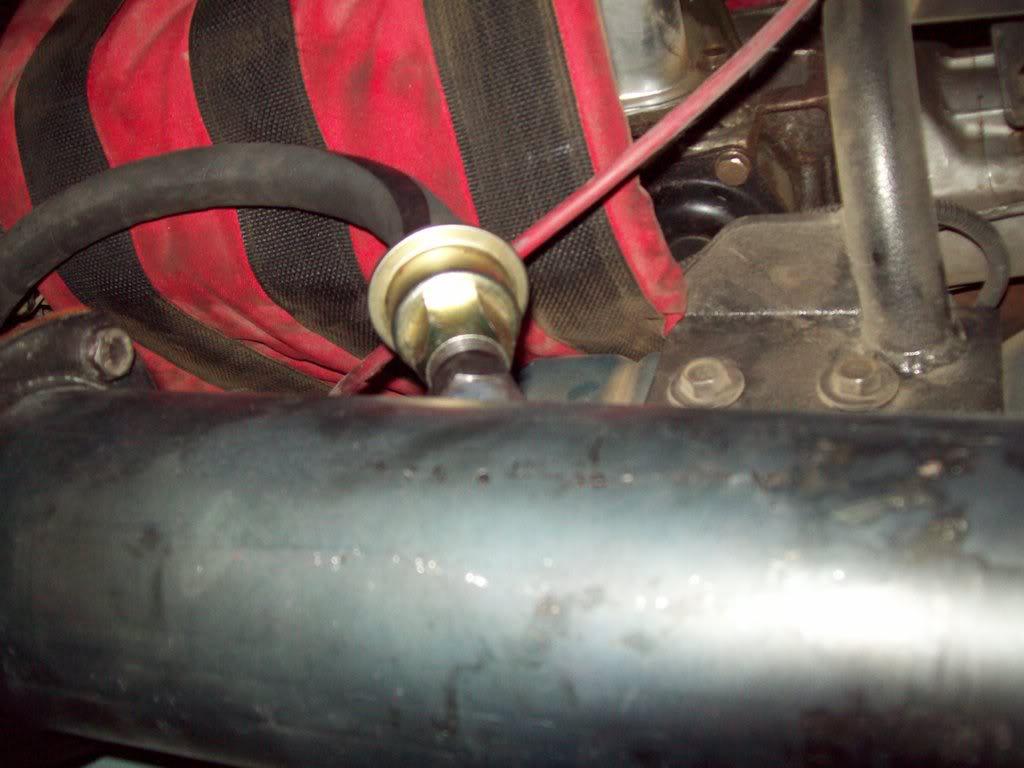
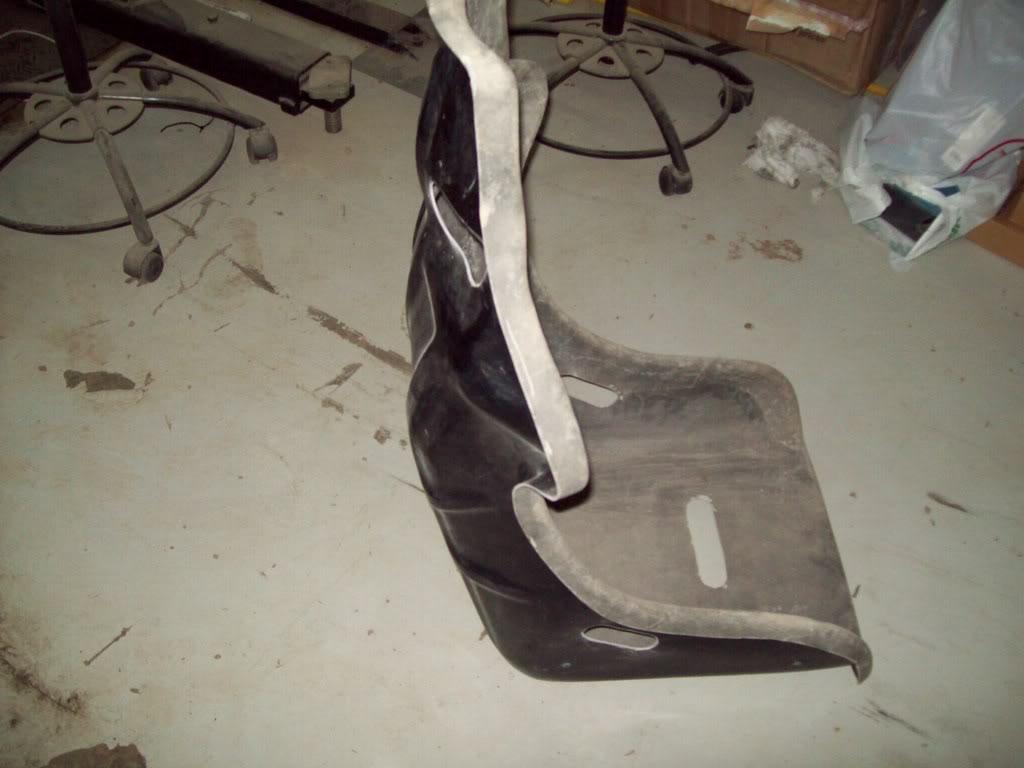
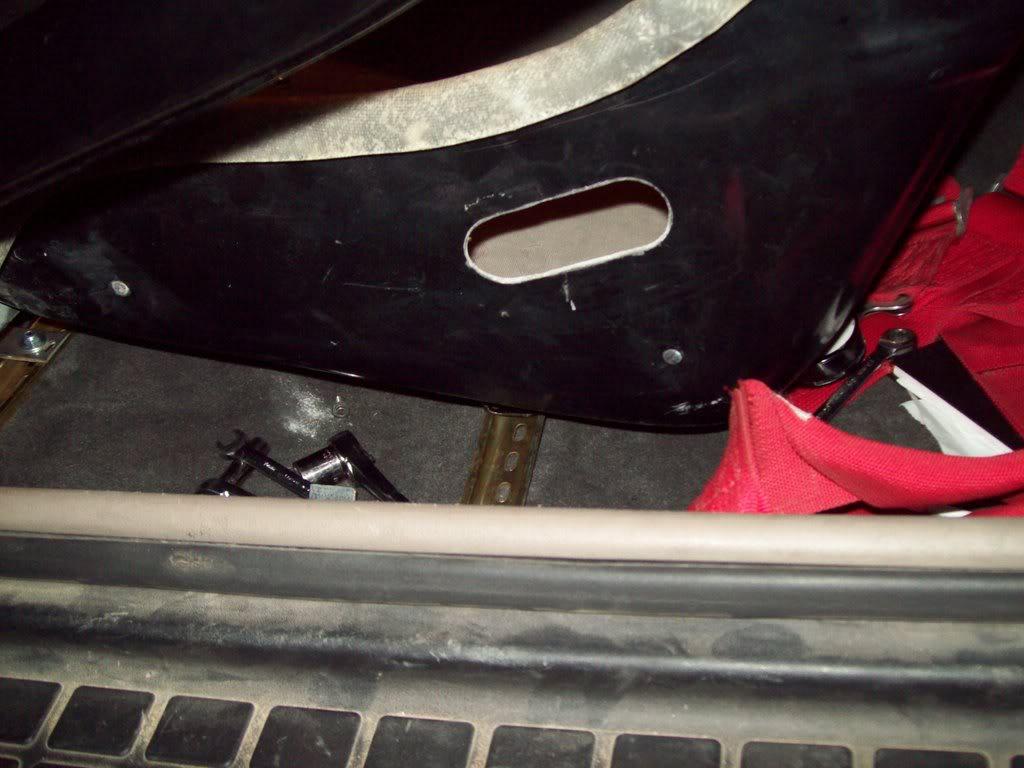
i also started on the new seat , i mounted the floor brackets ( thanks rufretic for the idea)
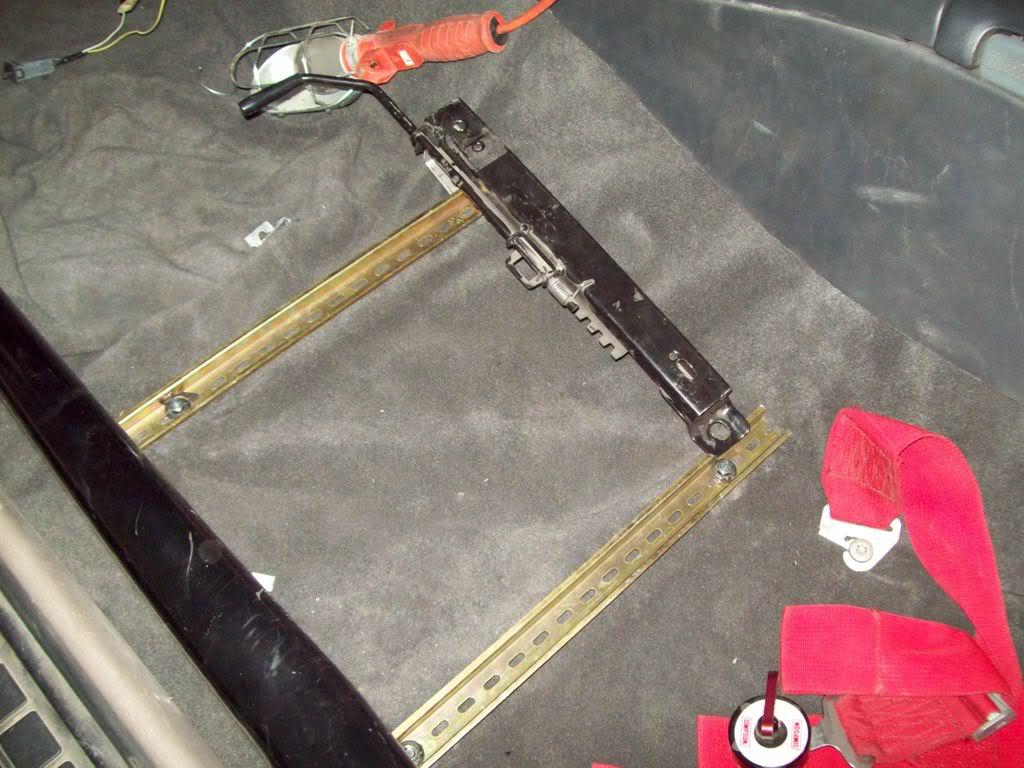
and mounted the old seat brakets i had to the seat ( they're adjustable)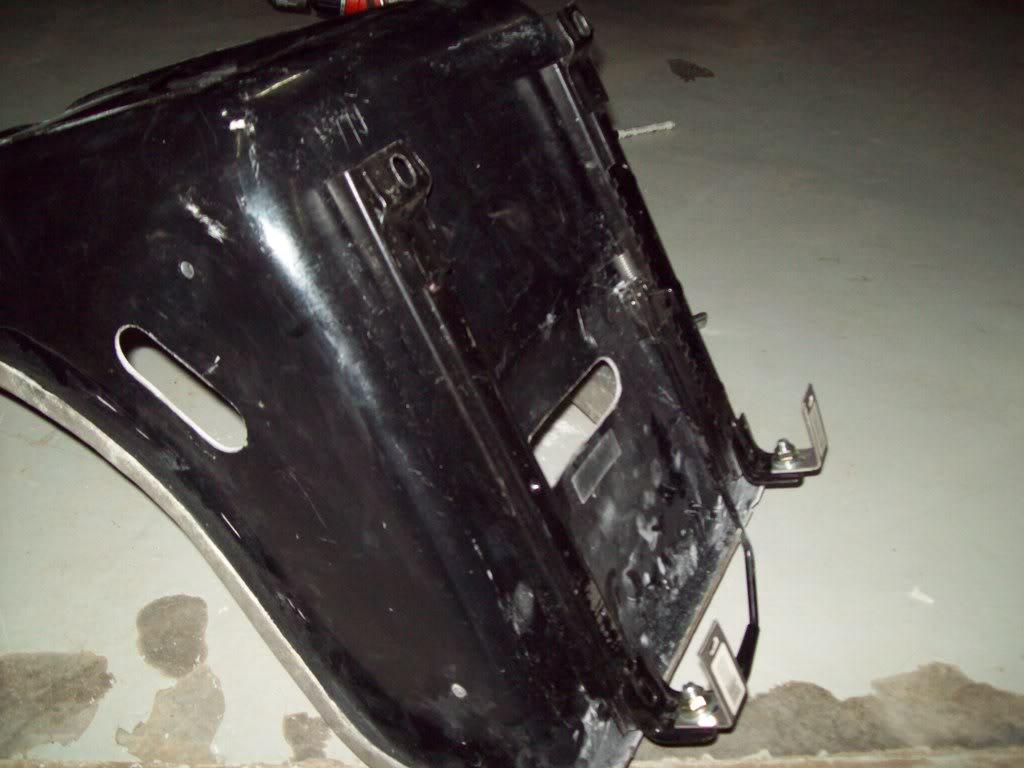
i just have to finalize the position of the where both brackets meet and then its off to the upholsterer for some padding on the seat. might i also add that using a file to grind away on a fiberglass part is always fun, especially when you are not wearing a mask or long sleeves and gloves
i also managed to kill two spiders and one huge Mf'n ant
I'mhoping to go to the garage tomorrow to finishup the seat, wire the alternator warning light and the AFR warning light, and then start her up and put her on the lift so i can get the tranny out. if i'm lucky ( or feel like it ) that should all be done tomorrow
7/15/2008
well the seat is done, all i have to do now is make an adjustable brace for the back.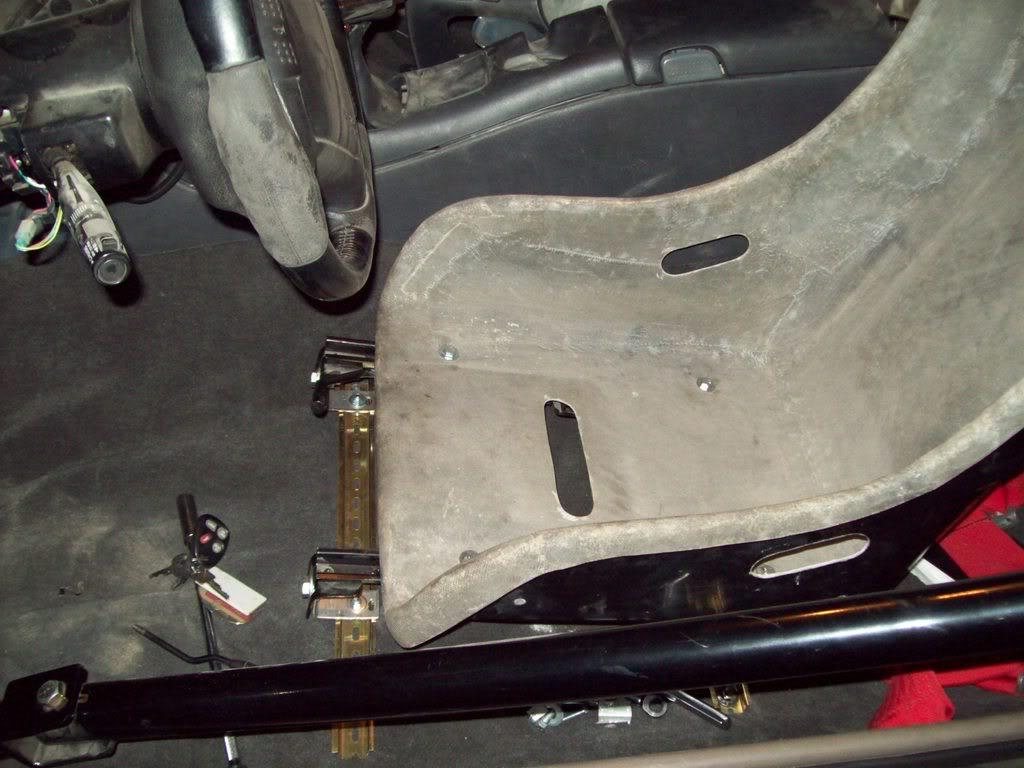
i also ( finally) wired the AFR warning light as well as the alternator charging light ( i put that one in the dash cluster).
minor setback though, i primed the fuel system to see if i had any leaks, and sure enough , i had guisers couming out from the injectors and fuel rail
i guess i have to redo the bracket that holds the rail inplace and maybe even get bigger orings for the injectors.
also pushed the car on the lift and started unbolting the tranny. i also managed to sell my mild steel sphon torque arm , so i can now order ( already did ) a chrommolly one
i'm also debating weather i should get a CSI trans shield to replace the flexplate shield and tranny blanket i have now. but i guess my wallet side of the brain is currently winning this debate
so for tomorrow , i 'm hoping to :
- pull tranny out
- pull torque arm out
- see if i can pull the oil pan gasket out without yanking the engine out ( i just said see, not try )
7/19/2008
ruf, the blow off valve if a godzilla one , i used to have a vortech mondo one on there but took it off back when i was having boost issues ( turned out to be a broken supercharger ) this one has a bit more spring pressure. with the vortech , at idle it would open , but withthe low vacuum of this engine the godzilla stays shut at idle untill you give it gas and let off ( basically as soon as it sees a bit more vacuum ).
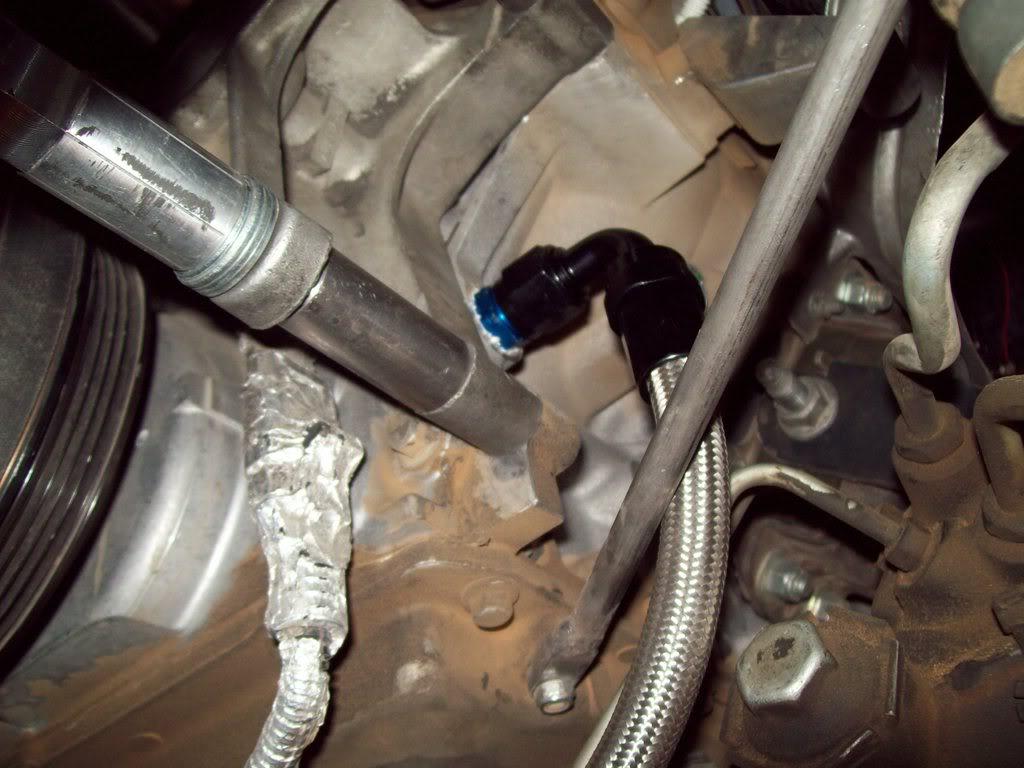
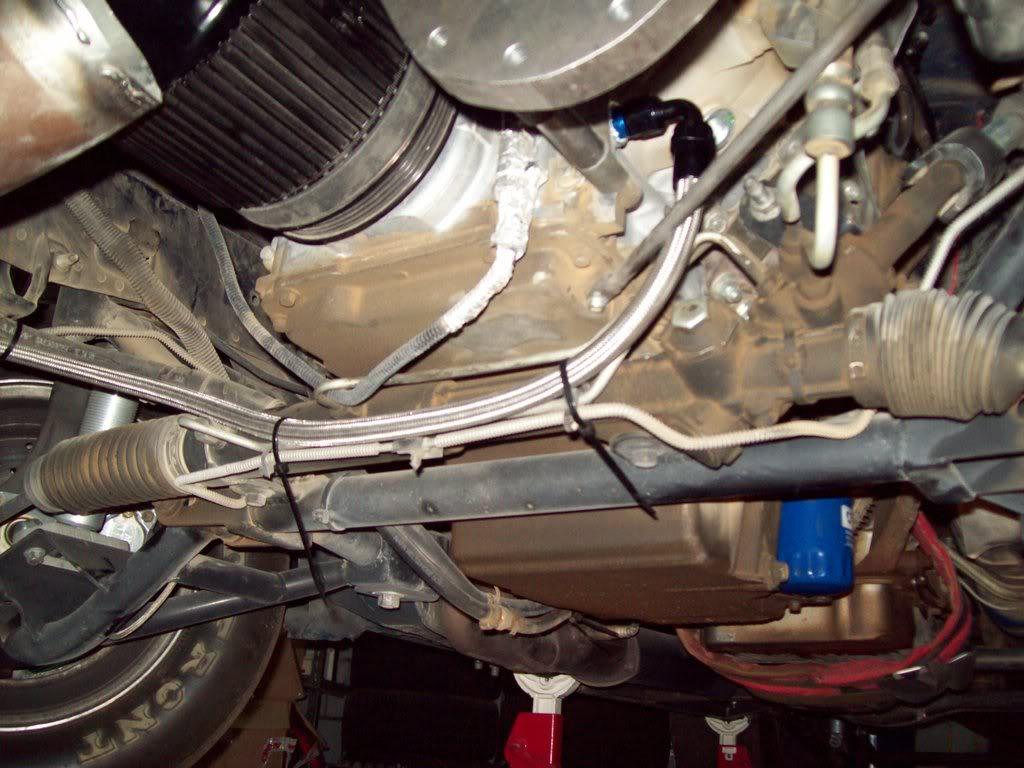
the hose you are talking about is the feed line to and from the oil accumilator ( acusump) on the side. helps keep things oily
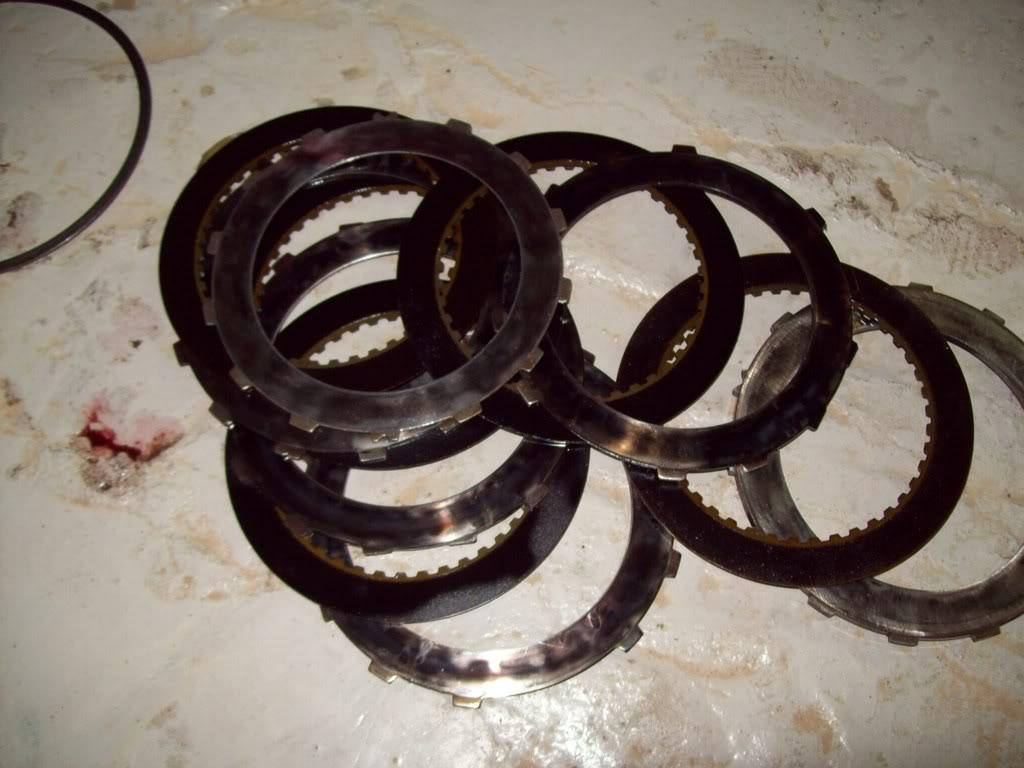
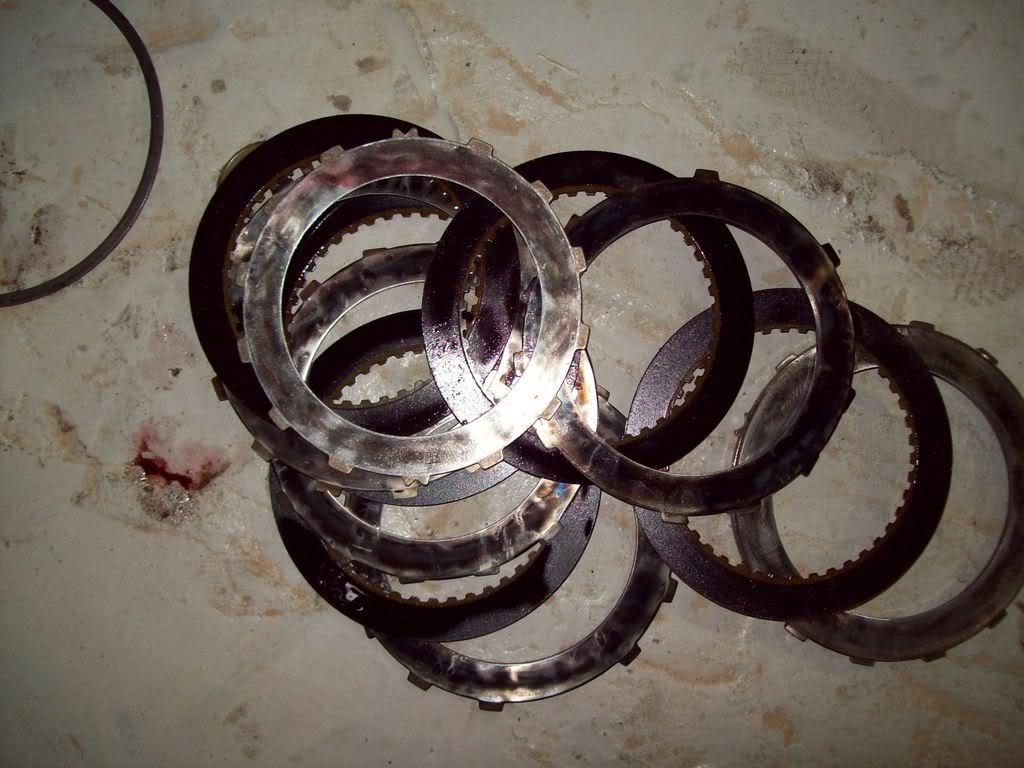
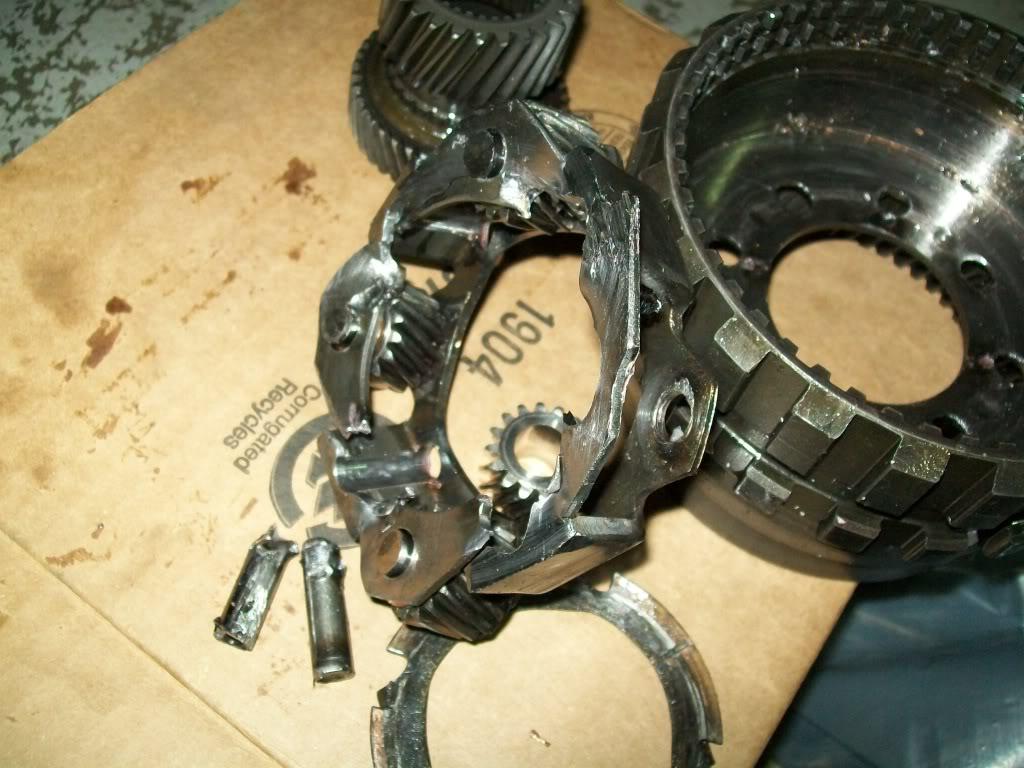
like i said before , i took the tranny out inorder to see what was going on with it . it was not shifting from 2nd into 3rd fast enough ( would take about 1 to 2 seconds) , even though i had a manual valve body on it. plus the trans temps were reaching the sky
( i wonder where all that sand came from )
the transmission was built be tristar over here (big tranny company here ), i specifically told them to use borg warner clutches in the tranny and that it would be used strictly for racing and the what kind of abuse it would see. they said no problem , we know what we are doing .
well after taking the tranny appart , i find out they only used borgwarner clutches in 1st gear ! the second and 3rd gears had cheap raybestos junk in them! , they also used a cheap plastic washer instead of the brass ones that are supposed to be used on the input shaft . apparently they used the cheapest rebuild kit out there and charged me for premium everything .
here's how the clutches looked like after 8 dyno pulls and 3 track runs: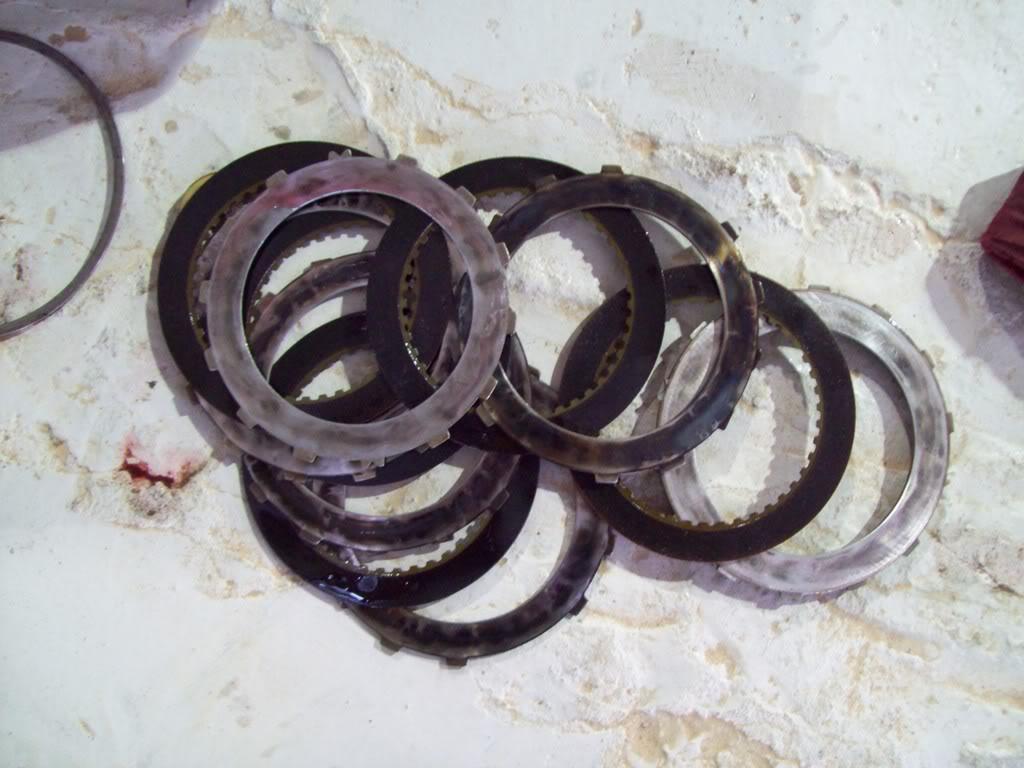
freak'n a$$holes
7/19/2008
got the intake back on the car after fixing the leaking injector situation
snug and dry now
i just need the tranny to be here so i could put it back in the car and then i could start it and see if the accumilator works . so far its been holding the air charge that i put in there before 4 days .
super pulley should be here by next week , and then its F2 time
7/29/2008
so , back in town and i got parts
the torque arm arrived ! so that's hopefully going in tonight.
some other stuff arrived as well , but no sign of the super pulley
tranny should be done too.
hopefully i'll get the tranny tomorrow and have it in as soon as the CSI shield shows up.
another to do item is the new dipstick, i'm tired of the fixed metal tube one , so i ordered a lokar blingy one it even has a disconnect and plug on the tranny side so you don't need to remove the whole dipstick off the car every time.
i'm also considering using quick connect fittings on the tranny cooler lines. i had them on there before , but they seemed to restrict flow . what do you guys think? should i use them or keep the setup as is?
7/30/2008
i got something done today
i finished installing the torque arm on the car , took me about 20 min start to finish, which made me feel good cause the first time i did it - 5 years ago - it took me a whole afternoon , guess a lift makes all the difference
all i have to do now is set the pinion angle
didn't get a chance to check on the tranny , but it should be done by now, all it needed was to have the pump installed. no word on the CSI shield though
i called summit up today and was informed that the super pulley has arrived there and is due to be shipped out today
( off course i totally forgot to ask about my tranny shield )
8/10/2008
wohooo! got the super pulley in yesterday, and its off to the machine shop today to have it narrowed, it should be done this afternoon.
i guess i should go back to working on the camaro now , i just have to tidy up the mess i made in the garage while working on the stang.
the transmission shield should be here in a couple of days i hope , and then i could bolt the trany back in !
8/13/2008
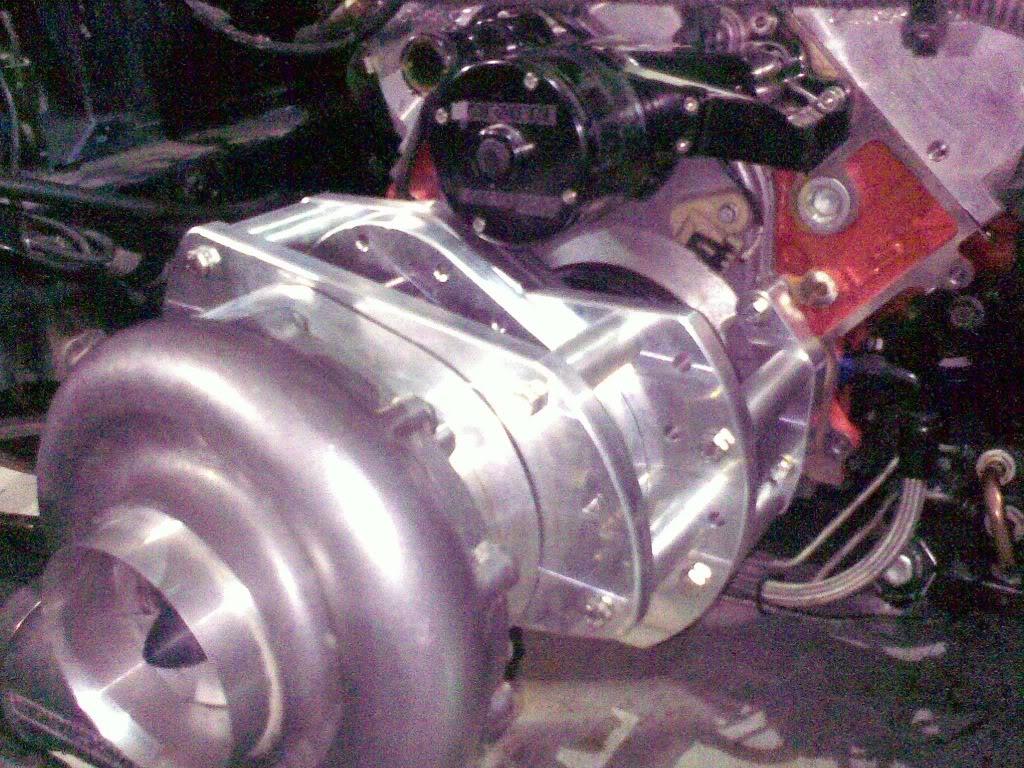
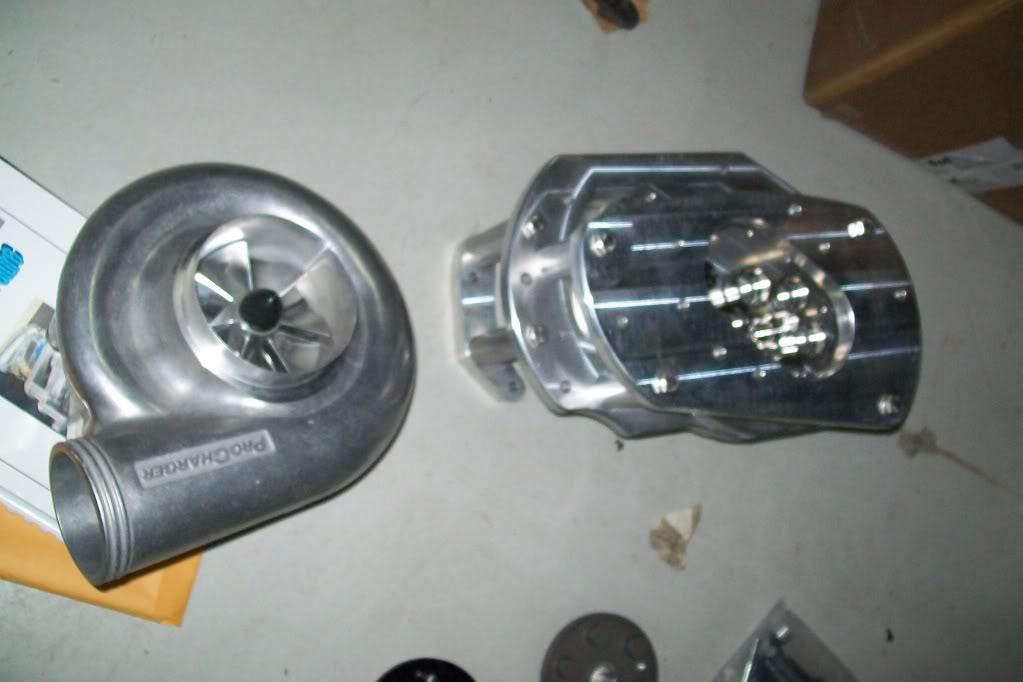
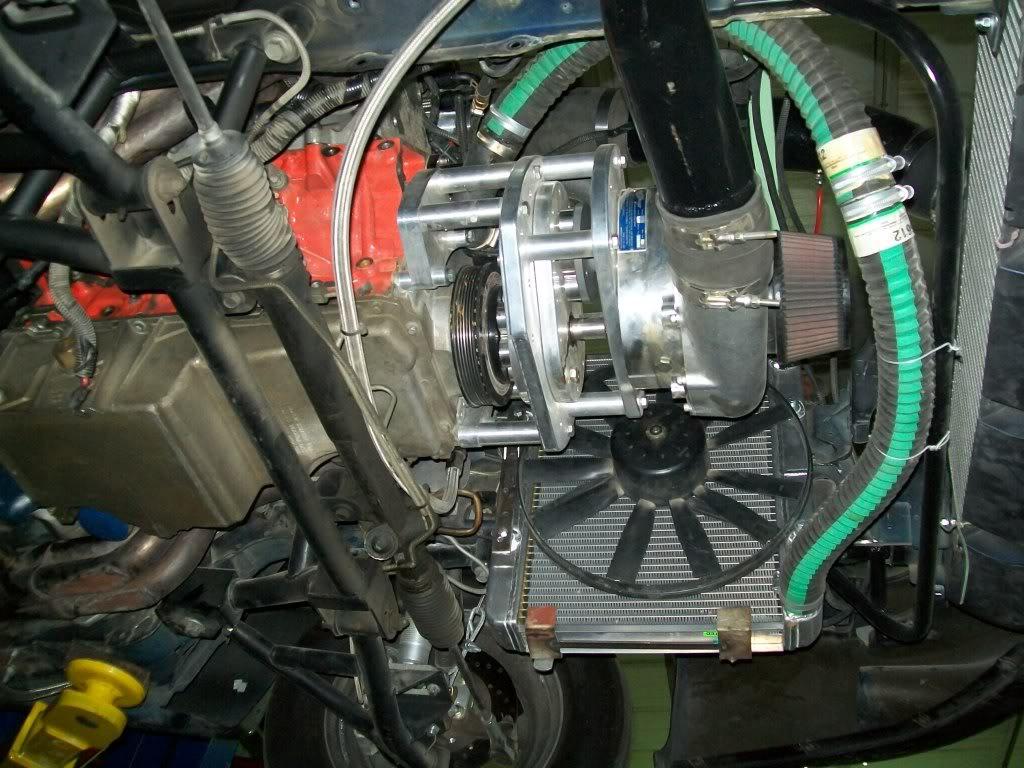
Its F2 time!
Heres the mandatory blower glamour shot: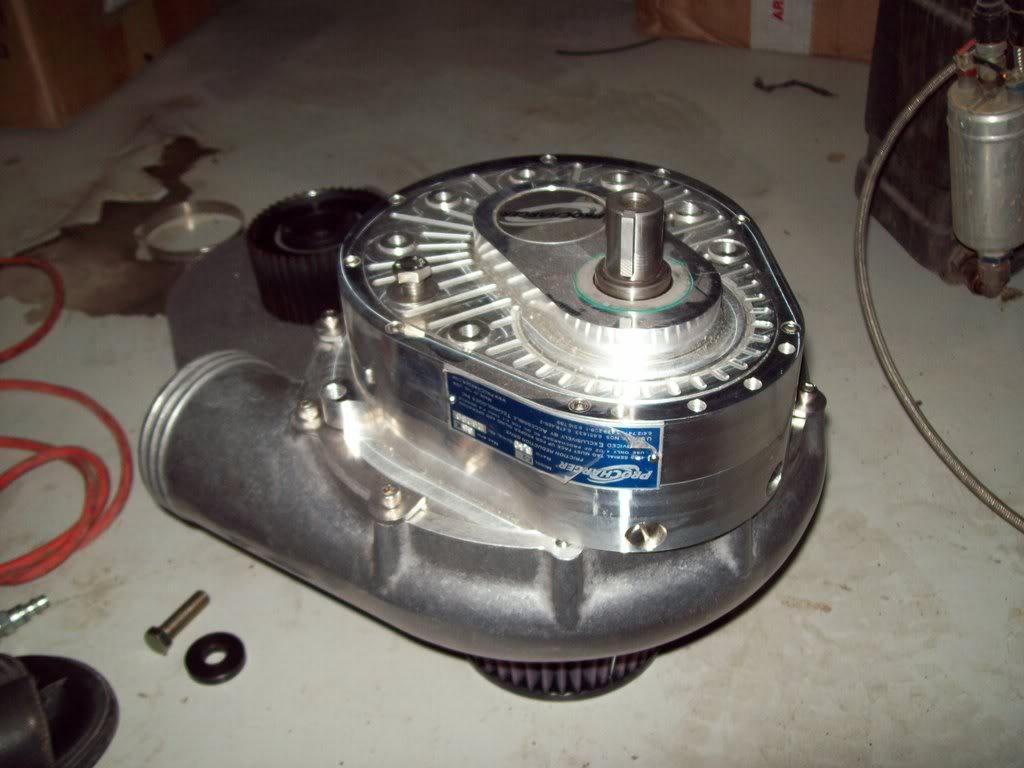
and here is the pulley installed ( note to all who are thinking of installing this pulley on the f-body bracket: you need to use the small spacer ring that pushes the pulley/ cog out from the blower , or else the cog will touch the bracket and cause a big mess!! ) :
I thought I had room for the dinky little filter I got , but apparently not , guess I have to find me a cover for the intake hole. ( sorry but i couldn't find a better pic to show )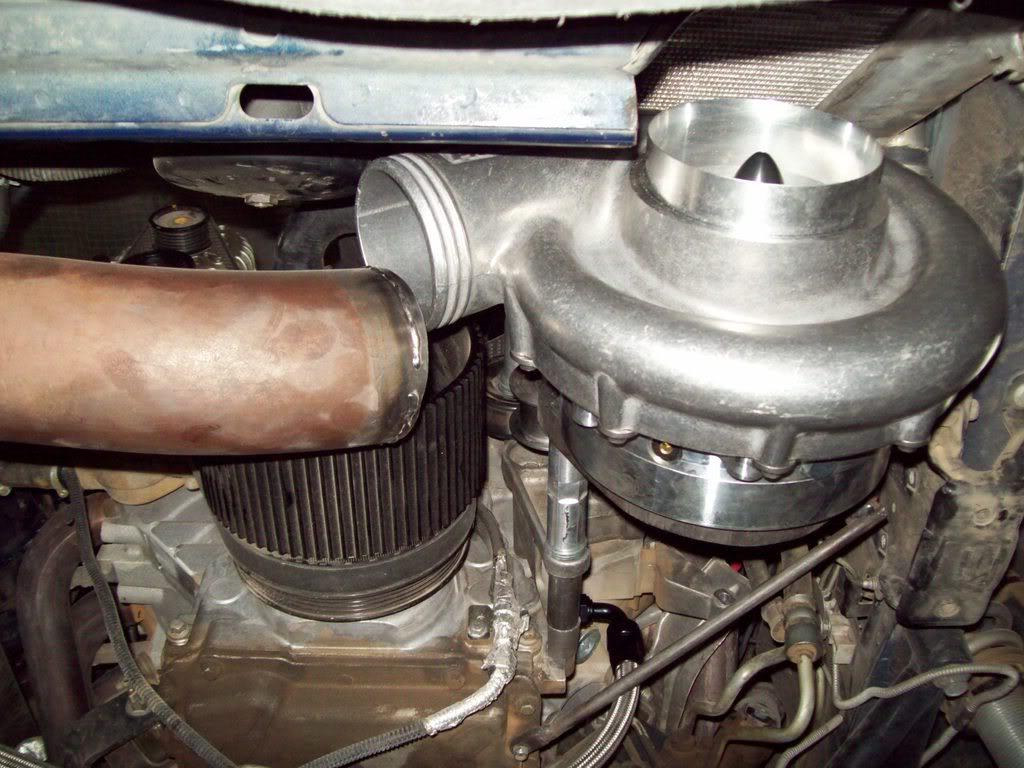
Another little snag I ran into was the blower brace; I was planning on running it from the oil pan to the top most mounting hole that is not used by the bracket. That worked fine with smaller serpentine pullies, but with the cog pulley being so big there would be no way to use that hole with the brace I had (I was planning on making the same brace you see here , but with a longer tube part on the end to clear the cog) :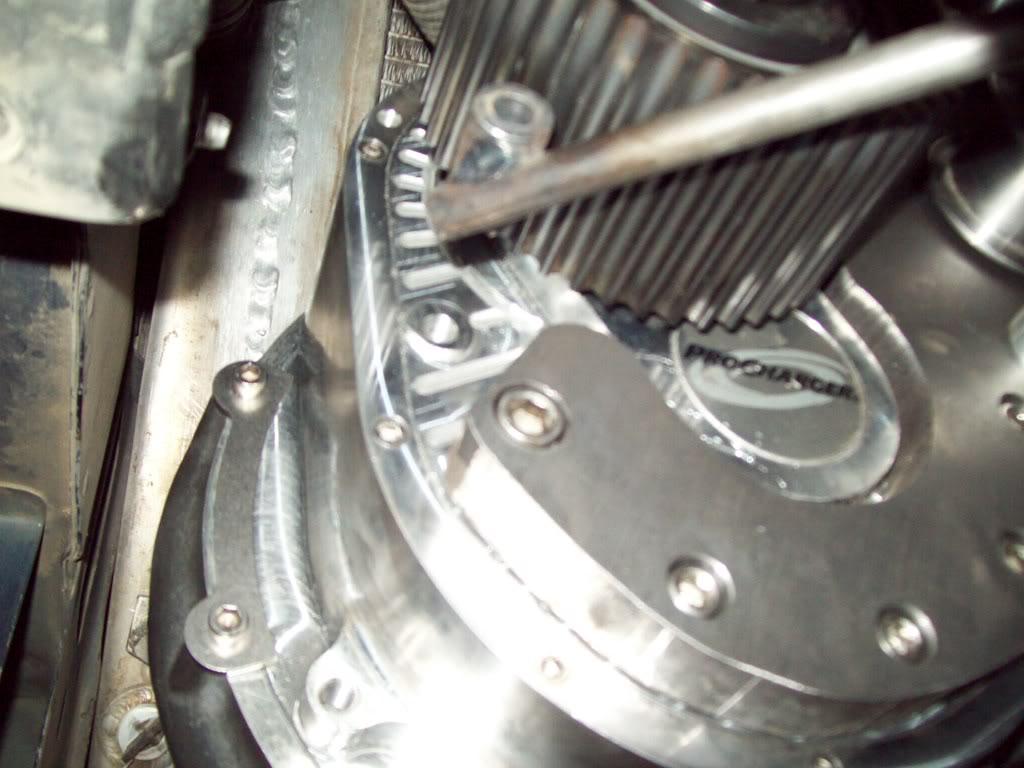
But luckily the blower has several other mounting tabs on the body of the unit that are further out: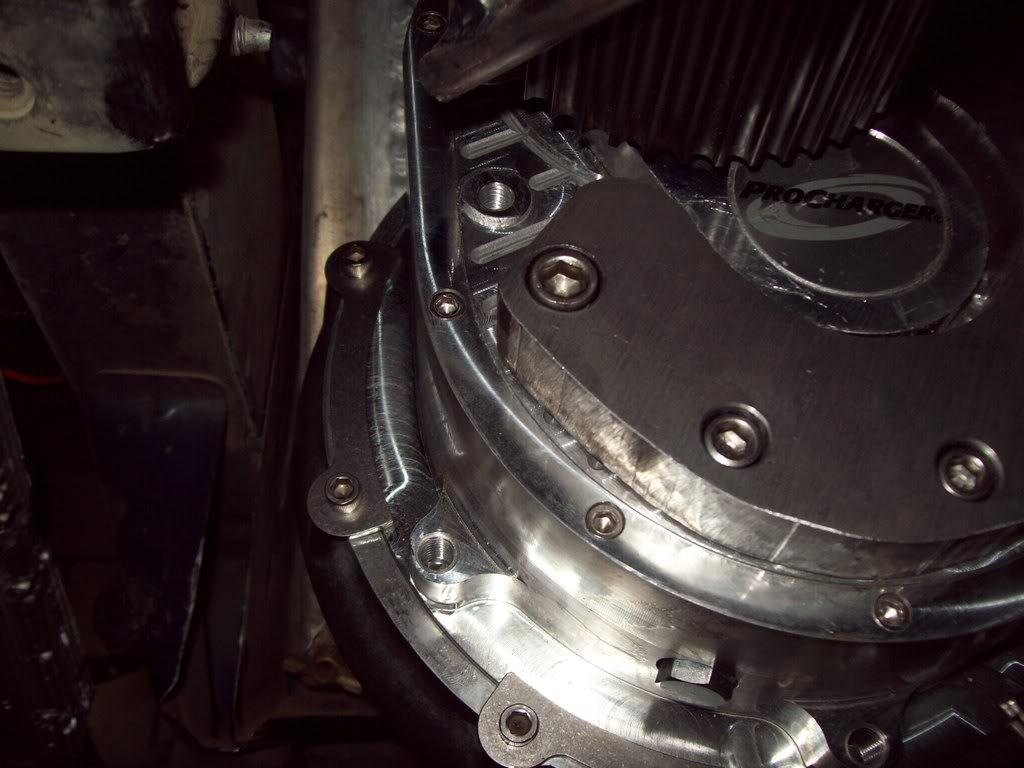
(the big ones by the drain bolt and the snail retainers)
'll be using one of those along with a longer tube section on the brace to make the brace assembly. I think its going to work out fine.
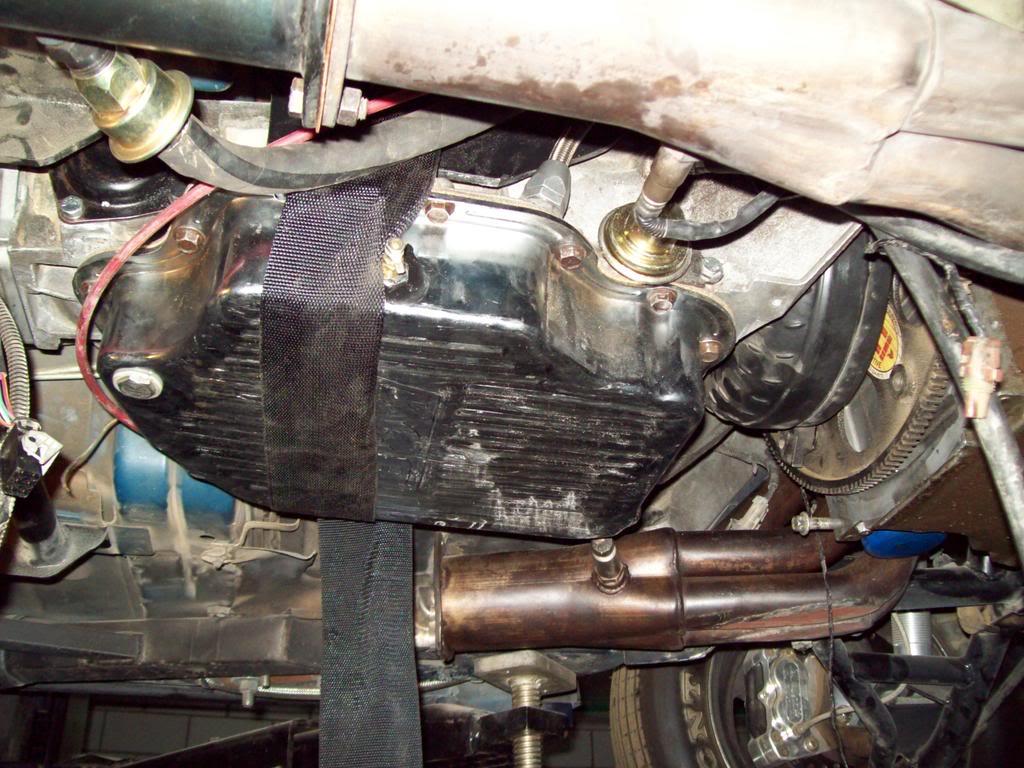
I also got my sexy looking CSR trans shield in yesterday 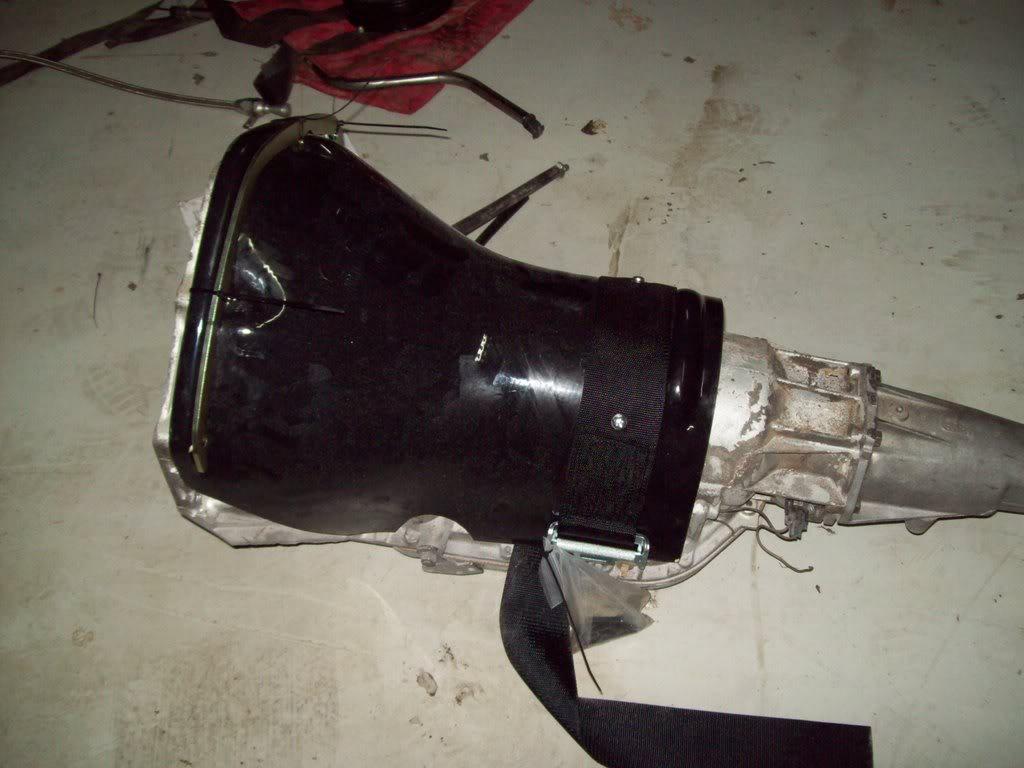
i also managed to stuff the tranny back in , just need to get new converter bolts since the old ones were getting mushed from all the times i took them on and off
and here is how a sexy CSR shield looks installed on a car 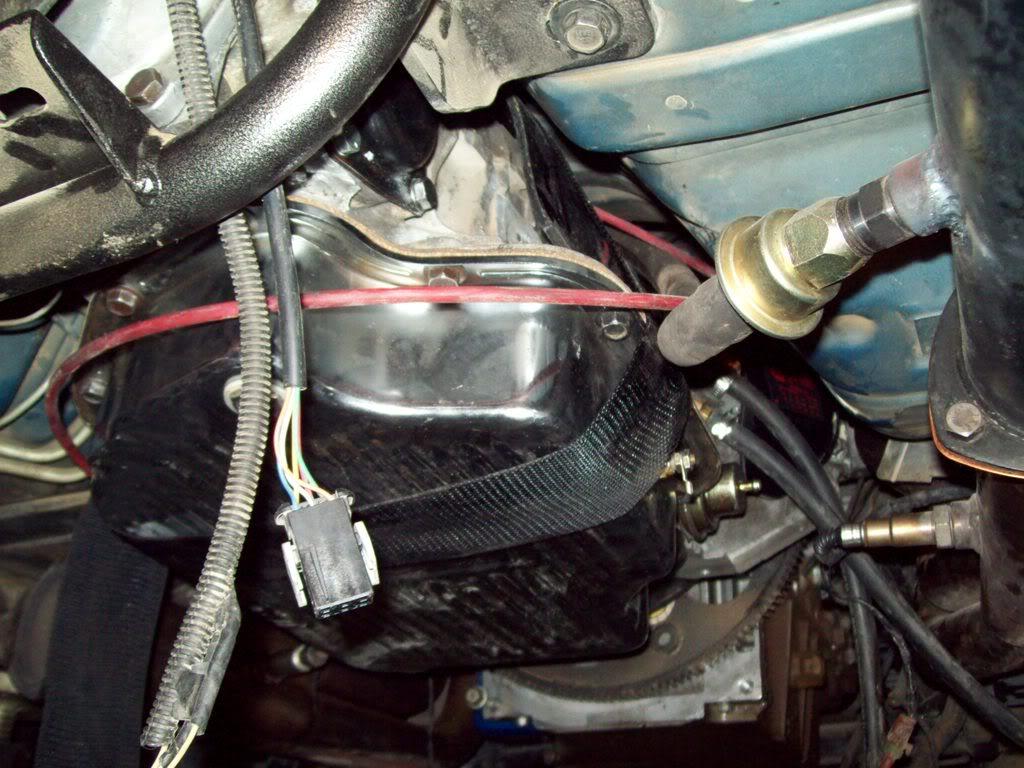
More misc. stuff done too; I relocated the trans temp sensor to the pan , installed the drive shaft, and finally managed to clean ( read : shuffle ) the mess I had laying on the floor of the garage. Sure feels good to walk around without the fear of slipping on oil
another thing i noticed while under the car is that the oil pan leak might not be from the oil pan gasket, it may be from the main cap external bolts . so i'll be taking one off to see if there was thread sealer or silicone used on them , if not then i'll be doing that.
i guess all i have to do now is bolt the converter, hook up cooler lines ,fill the tranny up with oil , check the side bolts and then i can fire her up !
next on the list :
- get cog belt
- set pinion angle
- fab blower brace
- upholster new seat and fab bracket for it
8/23/2008
so i finally get to start the thing
it fired right up with no issues thankfully .
i got a belt for it that was a bit longer than i would have liked ( it worked , but the tensioner was almost bottomed out) , so went and got a shorter belt, which didn't work. with my rotten luck the belt size i need falls between two sizes (1000 and 1040 ) and i need 1020 to be perfect . the solution : get a bigger cog pulley
another thing i noticed, there was a small leak from one of the transmission coolers , it has a cracked tube , so i have to replace that .
i also took the tranny out again last night, cause i have to take the engine out now . why you might ask???? well i think i just sold my long block! and you know what that means?? : its LSX time !!
i'm gathering quotes from a couple of places right now, and should be ordering one as soon as early next week hopefully!
wish me luck !
10/12/2008
i got to take the seat to the upholsterer , and i just got it back ( should have the pic uploaded tomorrow ). looks pretty cool if you ask me
the short block should be ready soon , i'm thinking in about 10 days it should be ready to ship. i also decided to go with a set of TFS 6 bolt heads done by TEA . should be placing the order anytime now, and they should be done in about 2 weeks
12/15/2008
man its been a while since i poisted in this thread , but here goes :
i finally got the short block in ( thanks trevor @ tsp ! ) as well as the tfs heads from TEA and the super victor intake manifold .
i was so pumped up about getting the stuff that i forgot to get the camera so no pics today
i couldn't do much to the block other than set it up on the engine stand since i still didn't get the head gaskets ( should be here in a week ). i also ordered some misc. stuff as well as a new oil pump which should be here in a week or so .
i also got my magna fuel big a$$ pump and fittings , fuel rails, -10 hose and fittings , low oil pressure warning sensor and light , and spool.
so for tomorrow , i'll start assembling the engine - well as much as i can without the oil pump and head gaskets , then maybe clean the engine compartment in preparation for the arrival of the engine
i'm just wondering if the intake elbow will clear the hood with the super victor intake , last i remembered i had some space left before it touched the hood with the gmmp intake , although i think i might need to trim the plastic cowl thingy .
other than that , i got the flu so i can't think right now
12/17/2008
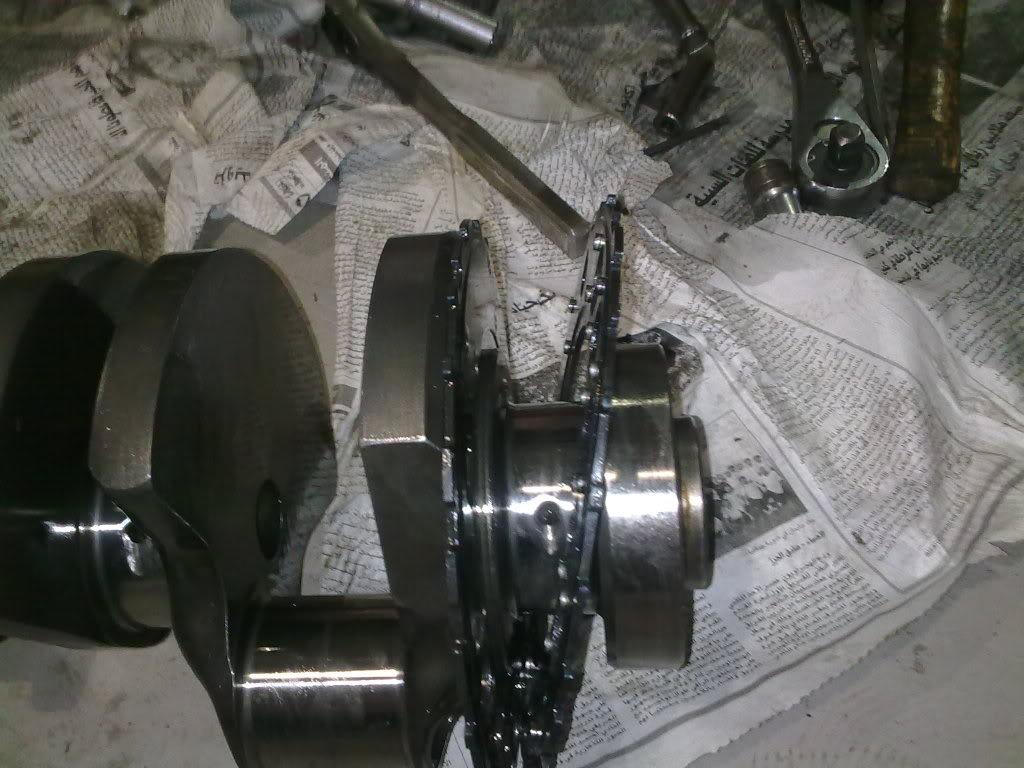
so i got some stuff done already; i finished the bottom side of the motor ( windage tray, pickup tube , pan , pump) as well as installing the cam, lifters & retainers, timing chain and cover, engine mounts ,knock sensors , and water pump . ( can you tell i was excited )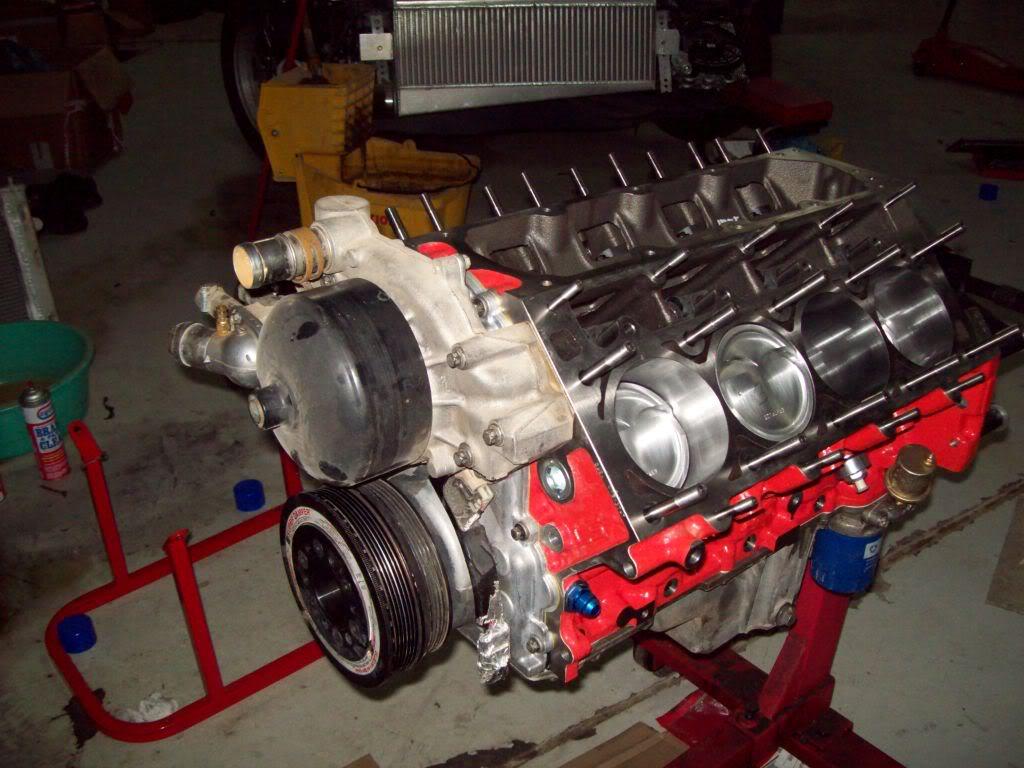
and here is a bling shot of the heads :p 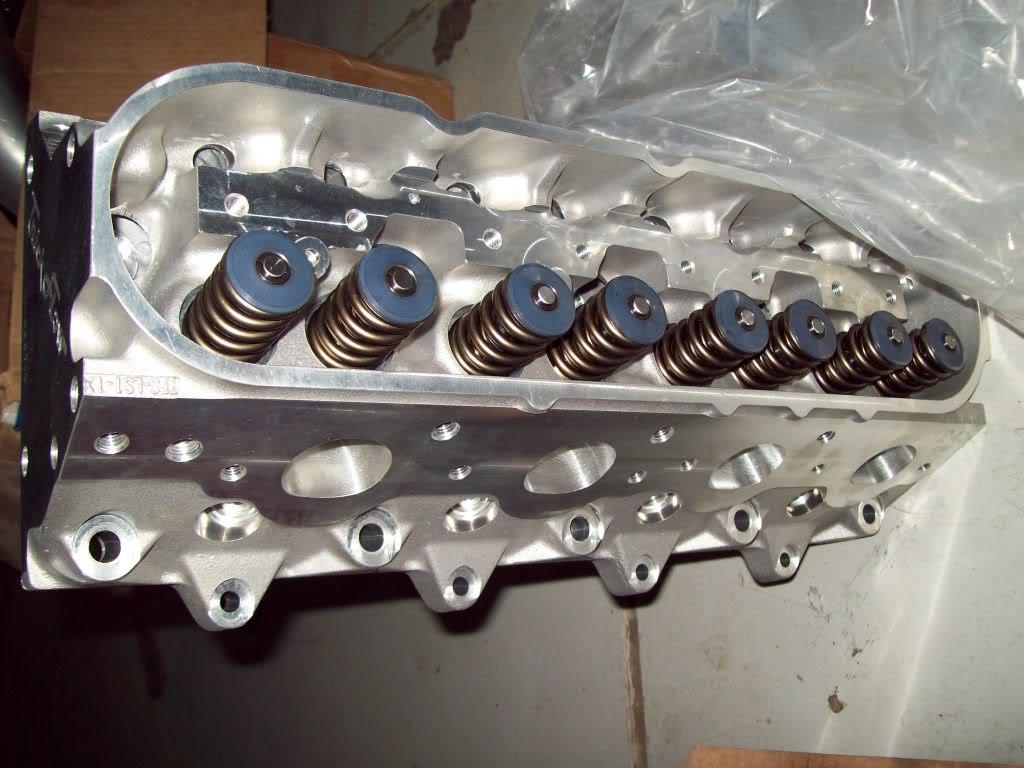
i also shoved the harmonic balancer on there and tightened it down , then i installed the blower bracket to check for alignment ( wich needed a bit of tweaking ).
right now i have to pin the crank ( since the balancer is already pinned ) and fab a blower brace that goes to the side of the block.
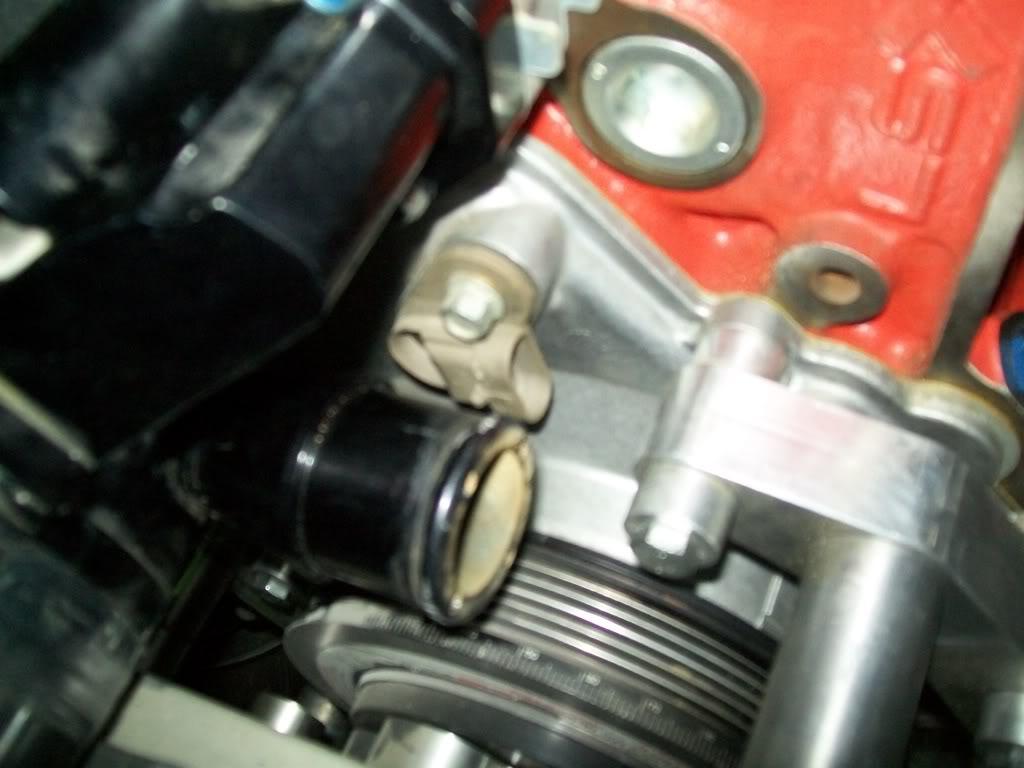
i did have a small issue with one of the plugs in the rear of the block , right now its sticking out a bit to the extent of hitting the rear crank seal housing/ cover .
the problem i'm facing right now is that the plug has a square hole in it to tighten it ( like what you have on the side of a diff housing ), but its neither a 1/4 inch nor 3/8 , its something in between . now i'm assuming the plug is pretty tight in there - since i coudn't move it - so i'm planning on taking the cover to a machine shop to take about 2 mm out of the indent facing the plug in the cover so it clears it.
so next up is :
- pin the crank
- fab the brace
- fix the cover
- clean the engine bay
- drop the short block in the car and start bolting stuff like tranny and what not
- start on the fuel system
that should have me pretty occupied till i get the gaskets and bolt the heads on
12/21/2008
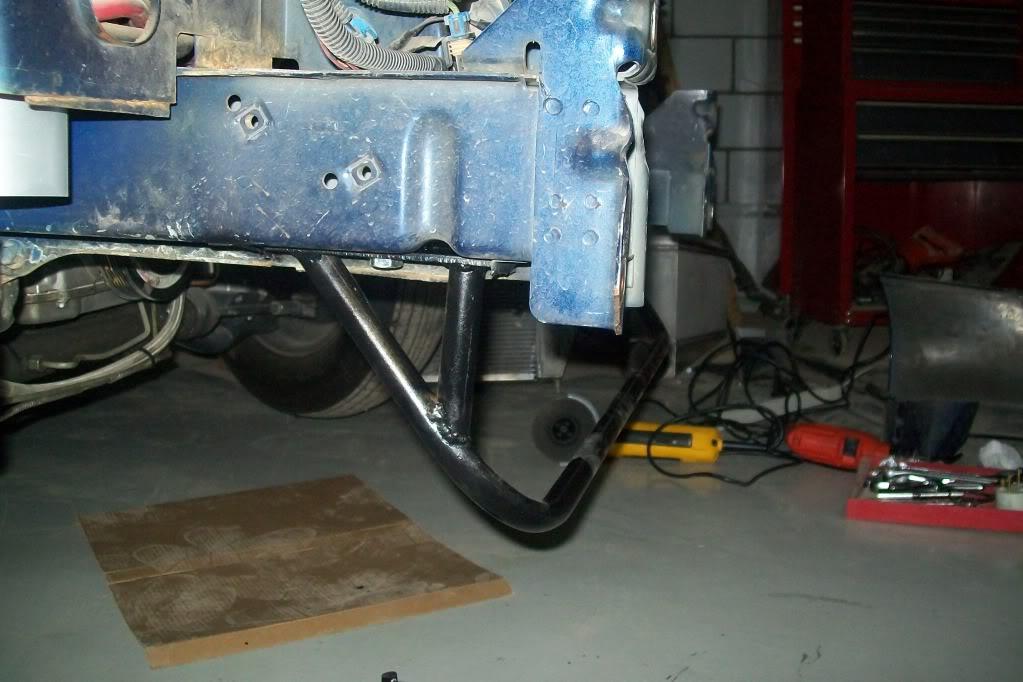
got some things done
i pinned the crank , fixed the rear cover , and kinda cleaned the engine compartment ( ddidn't have a shovel big enough ), i also finished fabbing the blower brace: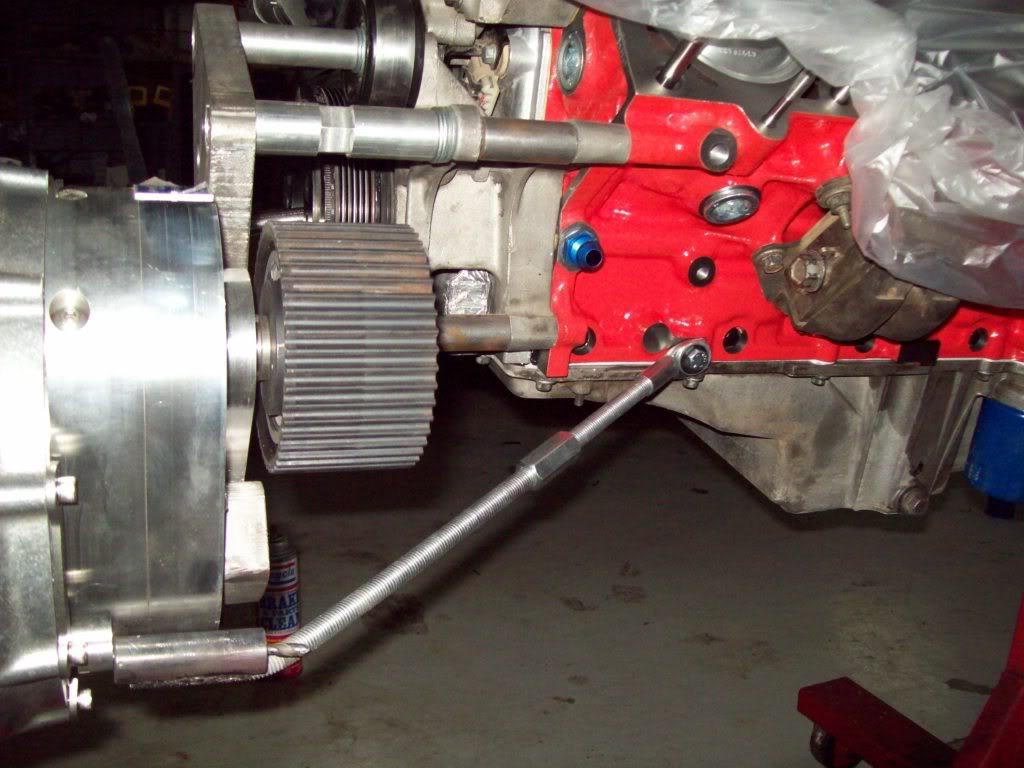
i also figured out where i'll be running the -10 fuel line and how i'm going to route it . also found out that the magnafuel pump is bigger than i thought so i'll most likely be mounting it up in the area where the rear bumper once was. i'm just trying to figure if i can mount it in a way that it would not interfere with the chute mount i'm planning on getting later on. speaking of -10 hose i opened the box of 20 ft -10 hose i ordered a while back and somehow it got mislabled and had -8 hose in there)
now all i have to do is get the head gaskets and button this puppy up and i'm in bussiness
next on the list :
-get my intake from houston999 who is "testing" it on his camaro
-mount the pump
-route the lines from pump to front of car.
-remove old pumps and some of their lines .
-i "should" start finishing up the wiring inside the car ( ses light , alt light , and low oil pressure light - will do it as a shift light deal thingy)
-if i'm not lazy i might even weld up the travel limiters up front
12/31/2008
small update,
got the intake back and got the 160 lbs/hr injectors on there as well as the rails. i'm holding on plumbing the rails till i get an idea how everything will look after i nstall the alternator ( to see if it clears the inlet to the rails.)
i already routed the fuel line from rear to front, just need to put hose ends on it and fix it in place.
i removed the old pumps and fittings associated with them.
and off course no progress on the wiring or eht e welding of the limiters
the head gaskets should be here in a few days after that its only a matter of hours and the engine is in the car. they got delayed at ups due to the holidays.
1/20/2009
just my rotten luck ! i got the gasket in and i started to put the motor together, then i find out all the nuts for the smaller head studs are the wrong size !
so i call up texas speed and they get in contact with arp and get everything squared away , arp will send replacements, but due tot he fact that i'm in a hurry , texas speed sent me nuts from a package they have and will replace them with the ones arp is sending ,,, now thats service !
other than that , i routed the impedance converter harness , and the fuel system is all plumbed and finished up , i also mocked a junk engine in there to see how the intake and elbow will fit , and then proceeded to slice away at the cowl ( i got pics and will upload them soon ), now the edelbrock low profile elbow fits ( note : low , not ultra low )
i really don't know if i would be able to make it to round 3 or not , but i'll be trying ! i also would like to attend qatar's round 1 happening 1 week after bahrain.
next up on the list i guess is finishe up wiring stuff, travel limiter , and hopefully slap the engine in there and get her all buttoned up and broken in
1/26/2009
so the nuts are on the way , and i had a bit of progress
don't think i'll make it to round 3 , but 4 looks like a definate yes
here are some of the pics i promised :
50mm cog belt and tensioner on the car
you can see how much wider i can go ( i see a 70 mm belt in my future )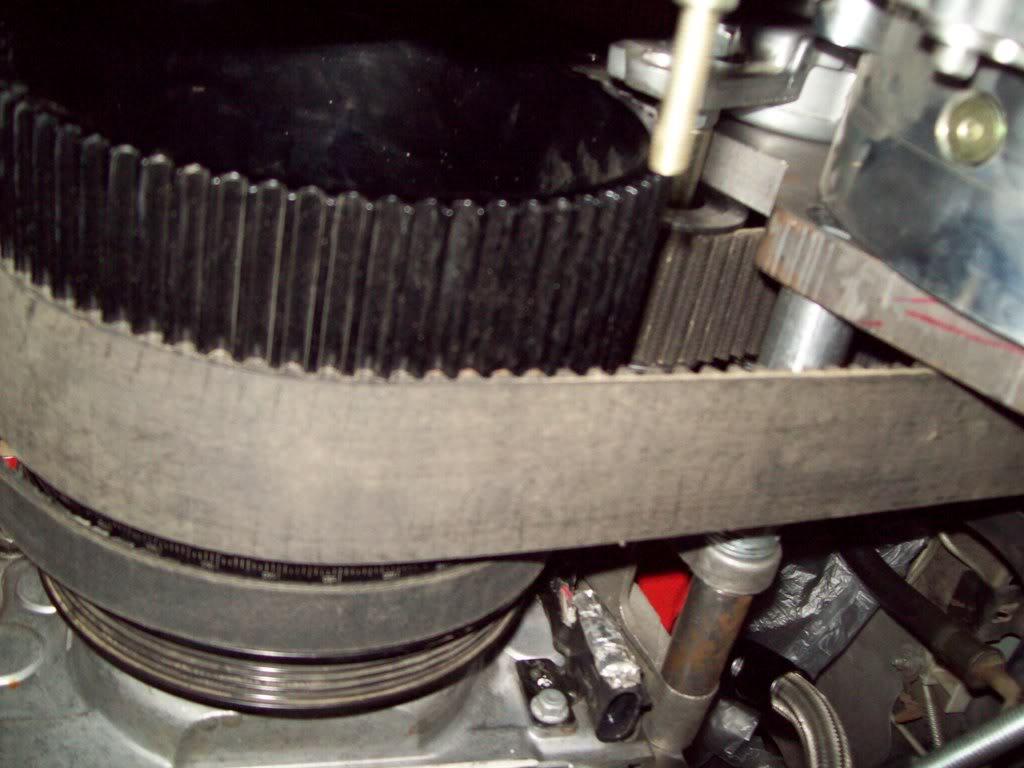
edelbrock elbow ( not the ultra low on , but the low one ):
how much it sticks out :
i also have the impedance converter all mounted up and wired, started on the pump wiring and it should be done today , as well as wiring the low oil warning light and the alternator light .
as soon as i get the nuts , i'll bolt the heads on ( and do the whole torque /loosen / retourque deal ), slap the headers on , and plug in all the sensors and hopefully fire her up !
then i have to weld those damn travel limiters ( this was supposed to be one of the first things i did on the car )
hoping to have her fired up some time in the next couple of days
1/31/2009
finally finished the heads , i retorqued the headstuds a few times. also bolted the valley cover finally , the low oil warning light sensor ,the intake manifold, and finished the driver side rockers.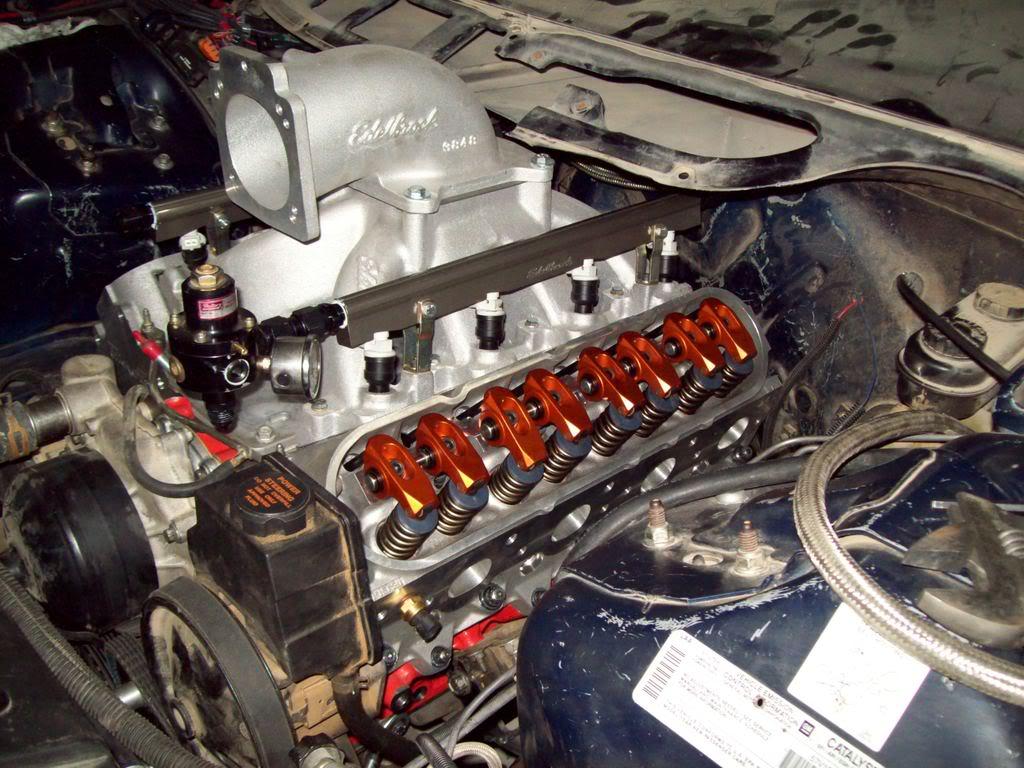
i'm debating weather to run the ultra low elbow ( i think it will clear the stock hood with this manifold ) or go with the one you see in the pic
2/1/2009
well a minor setback but i think i goit it fixed : i installed the alternator , which is relocated to the front of the passenger head , and found out that the fuel feed line doesn't like where the alternator is
so to fix this i need a 180 -10 hose end , but untill i get it , i used a 90 deg hose end and a 90 deg fitting on the rail . good enough engineering at its best :p
i also finally buttoned up the rockers, covers, harness and impedance converter. but found out i have to enlarge a hole and tap it for the knock sensors. the old location had an issue with the headers
should have the thing running by Wednesday i hope
i'm also playing around with the idea of ditching the alternator and powersteering pump , and installing an electric water pump to clean up the engine compartment and free up some horsepower . i will need to add another battery in the rear to make this work .
2/8/2009
WOHOO! i fired her up last night ,,,, got 50 psi of oil pressure right away , which is good
had a few issues to tackle though, the car would not start with the injector driver connected , it had spark but no fuel ( could this be cause the battery was weak ). i had to connect the injectors directly to the stock harness and only then would it fire right up ( ran rich for the 3 seconds it did , but it ran )
i'll go back tonight and recheck the grounds for the converter box and finish wiring the low oil pressure light .
then its off to a buddies shop for reprogramming and tuning ( basically pillage azooz's red mustang tune ) .
i will be getting a new cowl hood , as i really feel bad cutting the vfn one i have now, and a local guy here makes cowl hoods to order relatively cheap.
i was thinking of something like this to clear the elbow and the charge pipe from the intercooler:
what do you guys think ??
well not all is well today ,,, i took the car to a friends shop for the tuning part, but we couldn't get the car to fire . it would start if we had the injector driver bypassed and the injectors connected directly to the harness, but when i connected the impedance converter box it would not , only an occasional pop from cylinder 5 .
i tried re grounding the harness and that didn't help , i tried a new relay and that didn't help either. i also went and used another AEM converter and nothing happened then, so i now have the box being faulty ruled out .
we also went as far as to pull the whole harness out and do a continuity test on all the wires, and they were all ok.
i don't know whats going on here ,,,, why is it not working ??
tomorow we'll get the harness from the red stang and give it a try , at least if that doesn't work we can rule out a bad harness.
2/14/2009
inally figured out what was wrong with the harness ; turnes out i reversed the polarity on the injector pigtails some time ago , which meant no signal to the injector driver .
any how , the car runs great now, i had to fix a leak at one of the tranny coolers , and the travel limiter is on the car now. we also set the pinion angle and weighed the car ,,,, which came as surprise to me cause it weighed in at 3200 lbs without me in it !!! ( still have stuff to replace in the car like chromoly cage and sfc, as well as ditching the p/s and water pump and alt.)
i also found out that the serpentine belt i have is a bit too long causing the tensioner to fully extend .
all that is left now is a few heat cycles, then change the oil , then maybe hit the dyno !
2/15/2009
anyhow, i did an oil and filter change for the car today and and let her idle again ( trying to get in a few heat cycles in the motor before beating on it.
well found out that we didn't fix the trans cooler leak , so the one on there is going off and a new one put in tomorow. another curious thing i noticed is that the headers started glowing red after 5 minutes of idle.... initially timing was set to 10 deg. , so we changed it to 30 and the problem still remained ( afr was at a steady 14.7:1 to 15:1) . so we tried changing the timing in other tables ( the car idles at 1100 rpm and has almost zero vaccume at idle ) and that seemed to help it a bit , we couldn't let it idle longer cause the puddle of trans fluid was getting to be a lake
what is a good number for idle timing do you think i should shoot for ? and do you think this is timing related?
another strange thing is that the car keeps seeing knock at idle ( regardless of the timing we had in it) , some where in the 2 to 4 deg. range.
it i most likely false knock , but is there a way to desensetize the knock sensors at idle or low rpm's and have them operate normaly at higher rpms?
so tomorow i'll slap in a new cooler, put on the intake tube , and if all goes well with the header glow take her out for a spin around the block
2/18/2009
Fixed the header glow issue , turns out i had a faulty tps sensor and needed a crank relearn.
fixed the cooler too , and should have it off the lift and messing with the tune today.
all that is left i guess is making sure the alt. is charging, new serpentine belt and getting the new cowl hood
2/24/2009
well i just got my day old cowl hood from the paint shop and decided to see hoy it looks on the car , well it look goooood , so i decide to take the car out for a spin to make sure everything is working good,,,,,,, and the hood flew off !!!
in mu rush i forgot to put the pins on but luckly the damage was minimal , the driver side rear corner has about 2 inches of it cracked , and one of the pin holes is damaged, but other than that , its all fixable
on a positive note , the car pulls good ( even though i did it from a 10 mph roll in third )
3/15/2009
here are some update pics
my sexy cowl hood 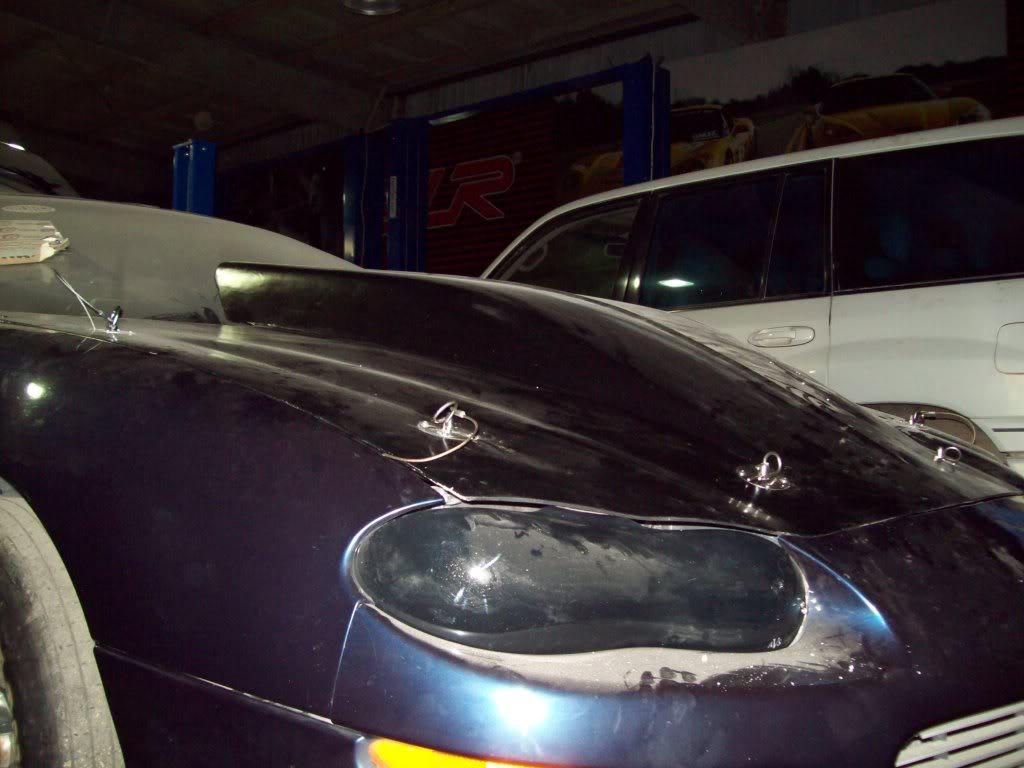
i ditched the stock tank in favor of a 5 gal. cell in its place , frees up some space down there since i will be relocating the trans cooler to the rear and also remounting the fuel pump so it hangs vertically 
i'm also scaling the car and setting corner weights soon , as well as finally strapping it on the dyno and making a few pulls .
i also just ordered a set of lower rear control arms and a new converter , since the old one won't work propperly with the new combo . those should be here within a week .
3/25/2009
got bad news ,,,,,
it snapped the belt twice now on the dyno on the first pull around 6k rpm
could not get a single full pass.
it seems that there is still flex in the bracket causing the belt to rip and break.
i also swapped the tensioner to a solid one and i still broke the belt ( second belt).
i'm bummed out right now , and seriously thinking of contacting one of the vendors here to purchase one of his brackets/crank support deals
3/31/2009
quick update :
i decided to remove everything and start over again ; i took the whole front end off the car in an attempt to rebuild it better.
upon tear down i found proof that the bracket was flexing : the all thread used to hold the alternator bracket to the block and the blower bracket was all bent ( both rods) .
i also made a new alternator bracket that mounts the alternator on the pass. side :
i also relocated the transmission coolers to the rear by the fuel cell to free up the front end. and i also removed the power steering pump and water pump ( planning on using a race electric pump). and i finally installed my rear adjustable lower control arms
as for now i have the following planned :
- electric race water pump
- build a different brace for the blower bracket ( kinda like EPP's unit ) cause i'm running out of time and will be ordering a different blower mounting setup)
- remount the intercooler ( read "properly" mount the intercooler )
- cut top core support and weld ends
- install new smaller radiator which frees up front of blower for breathing
- might cut lower core support and fab tubelar one in its place depending on the radiator i find
- later down the road order a remote mount water pump and install it in preperation for the new bracket.
i guess thats it for now
will post progress pics tomorow i hope
4/4/2009
its so slow it only needs this radiator to make it run :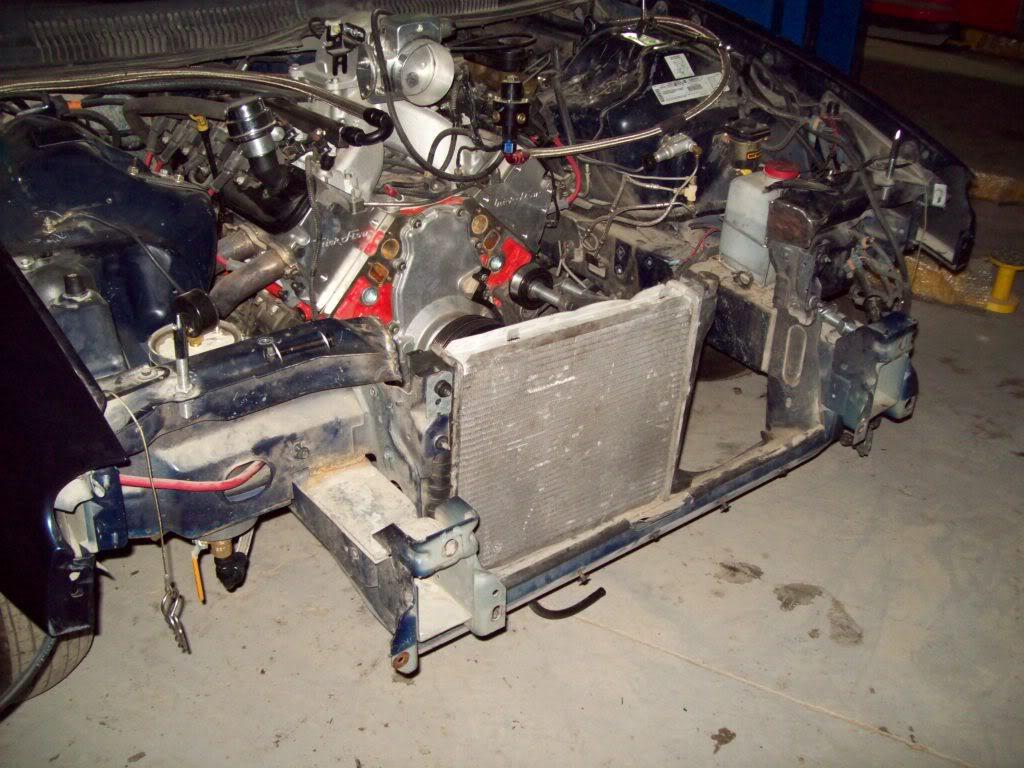
i'm thinking of running it later on down the road , should free up some space and weight
i also cut the upper core support and now i can stand up the radiator and the blower bracket mount braces are done , just need to finalize where the tabs will go and weld them on , then maybe weld the bar that will hold the radiator in place .
and the race water pump should be here today and i should have it on the car by tomorow , then its time to wire the trans cooler fan and the water pump.
the shorter hub is already on the car now and i should have the pics of how close it pulls the balancer to the cover by tomorow .
so i guess it time for reassembly soon ,,,, i should have the brackets done by today then its :
- mount the blower and brackets and check alignment
- place the radiator in place and finalize mounting
- mount the intercooler
then it should be ready i hope
4/11/2009
more updates :
finished up the supercharger bracket brace and it looks cool i might add ( still need to get some jam nuts)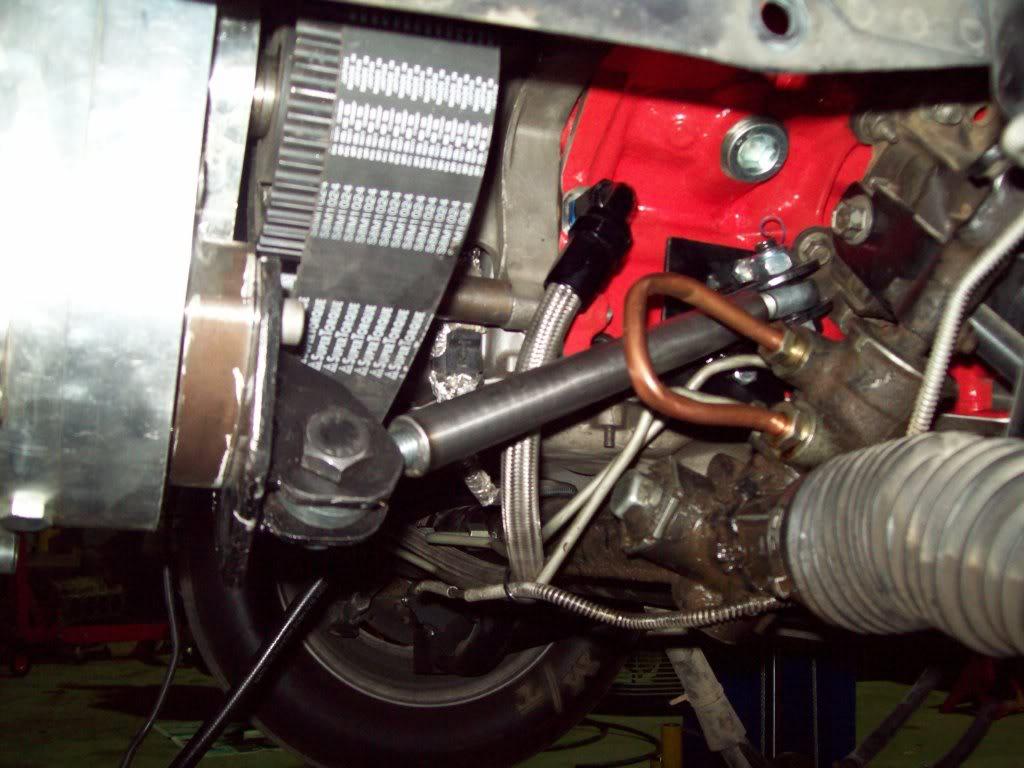
i also got the electric water pump installed as well as the rear control arms .
here you can see the remounted alternator and how it lines up with the new hub and balancer combo i used:
and here is a pic of where i installed the trans cooler in the rear of the car where the stock tank used to reside : ( need to get a smaller diameter fan )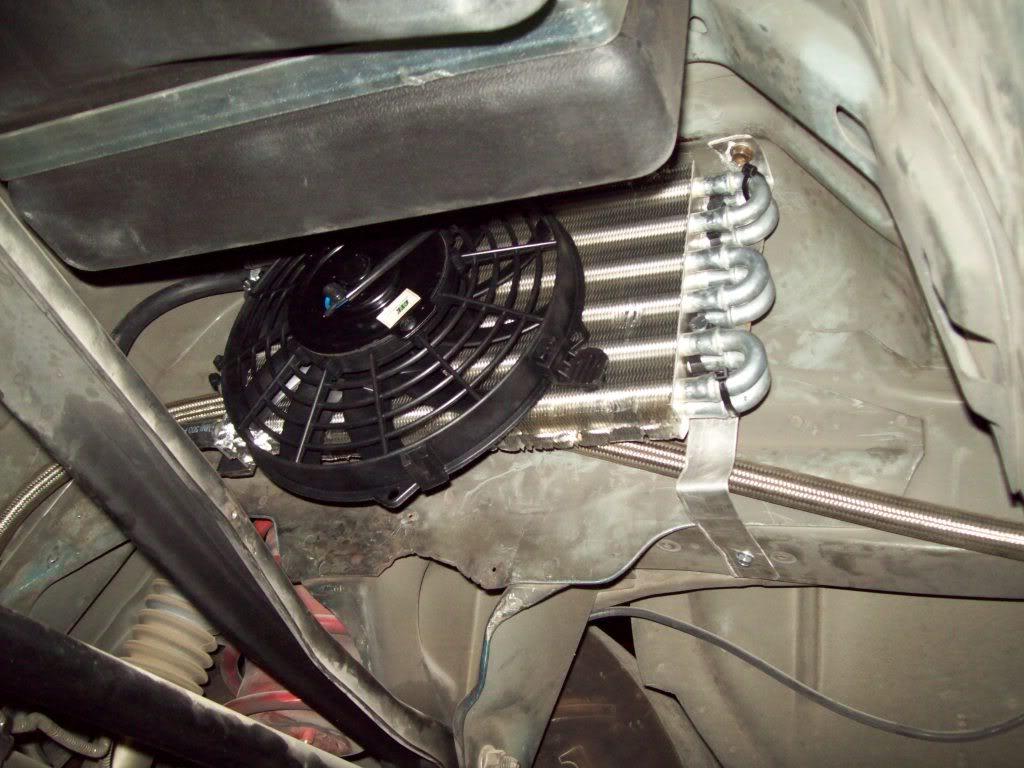
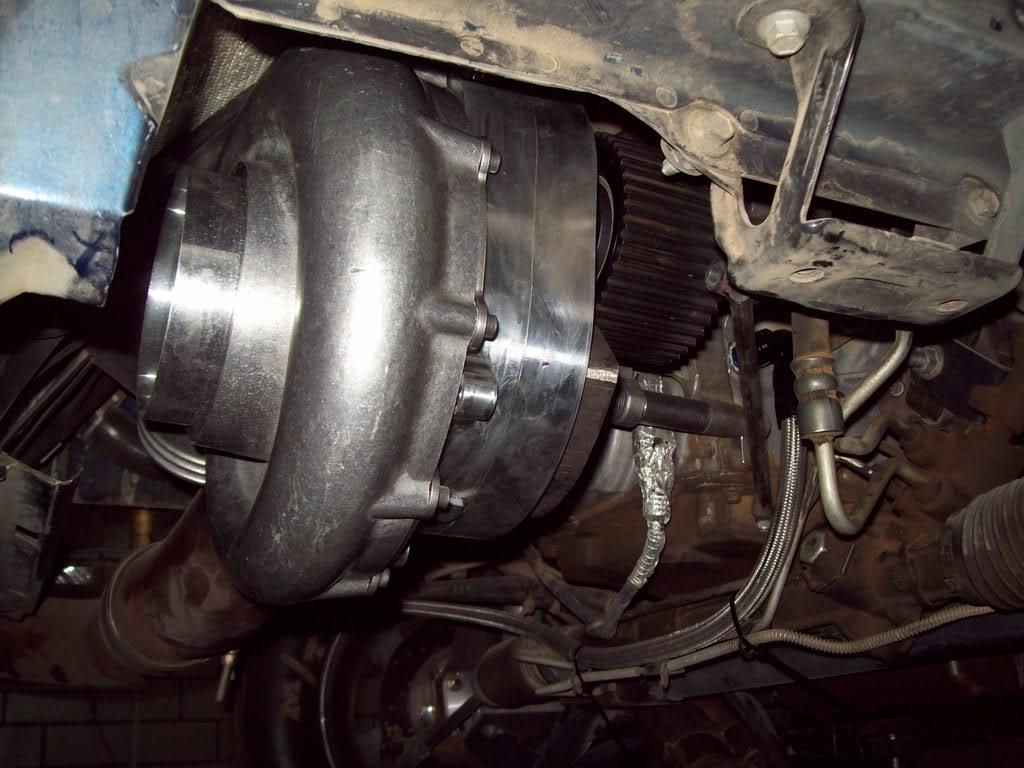
and ever wondered how much an F2 would hang on an fbody bracket? here's your answer
is just a bit higher than the oil pan line ! ,,,, guess i got to give madman a call and get some save your ass ( and blower ) bars:
i also got the neil chance converter in there, and i got a new spring for the bov ( softer ) and a bunch of radiator hoses to cut and splice my way from the pump to the radiator
so i should be ready to boogey tomorow i hope .
wish me luck!
4/27/2009
well we put the thing on the dyno ( finally ) and made two pulls before the belt lost its teeth
first time the car only made 10 psi , and remained flat at 10 psi from 3500 to 6500 rpm. after scratching our heads we found out that i forgot to remove the little cone filter i had on the blower and that the spring we put in the BOV might be too soft.
another thing we noticed is the idler would get pushed up after the run.
on the second run the belt shred its teeth which tells me the braces are working fine sice the belt did not rip . i'm thinking the idler moved up too much ( it actually did ) and caused to much slack on the belt . the cure for that would be to use the "jack " bolt to lock the tensioner in place (think of the original ATI setup ) that way when the the belt tries to "expand" it can't push the tensioner alog the slot.
other than that it made 730 @ 10 psi on a mustang dyno
5/18/2009
finally got around to fix and dyno the car
i put a holdown or jack screw ( or bolt ) on the tensioner to help keep it in place, and it seems to have done its job
did two dyno runs but the dyno was not reading rpm so we just did pulls under load to see if every thing is kosher ; and boy did it perform
we soon foundout another problem , the boost guage only went up to 20 psi
hp uners log showed about 27 psi at around 6500 rpm
so , now i have to fix a few odds and ends, like fixing the carpet and making a new tensioner idler with better walls ( slanted ) to help prevent the belt from fraying.
i also have to put the front of the car back together so it looks like a car again , and try to get some more dyno pulls in with Q16 before our race in two weeks .
6/1/2009
we had a race coming up last weekend ( weekends over here are thursday and friday), the car was ready to be put on the trailer tuesday morning so we can be at tech inspection on tuesday evening , but wouldn't you know it , the devil (known as azooooz on this board ) talked me into swapping his regular rotation F2, gear drive and dual 16v batteries to my car from his mustang that was not ready for this round.
so the mad rush tuesday evening started and by wed. morning the car was done !
i couldn't beleive it either , the gear drive fits with the radiator i had ( bee cool ) which was only moved forward a bit .
( the shitty part is that i got a ton of pics but it seems my camera got stolen at the track )
anyhow , we head to the track and make a few passes ( not one of them was a clean pass ) , i had no idea what it would do cause i never tried out the new converter or blower , tires were old, suspension setup was a bit different and the track was so so
i never managed to stall it up on the foot brake , but flashing it netted something like 5500 rpm - but soon lost traction around the 60 ft mark. we were having issues with data logging so no data in the begining , but the inboard camera showed 27 psi on the guage
one of the passes i turned on the meth injection and the car bogged bad under wot, so i decided to ditch that idea , and finally on the last pass on friday the car launched ok , pulled HARD in 1st ,,,,, and then fell on its face after shifting into second ...... intercooler hose blew off ,,,, but i got third place over all
here are some pics i snapped with my phone (excuse the crappy quality ):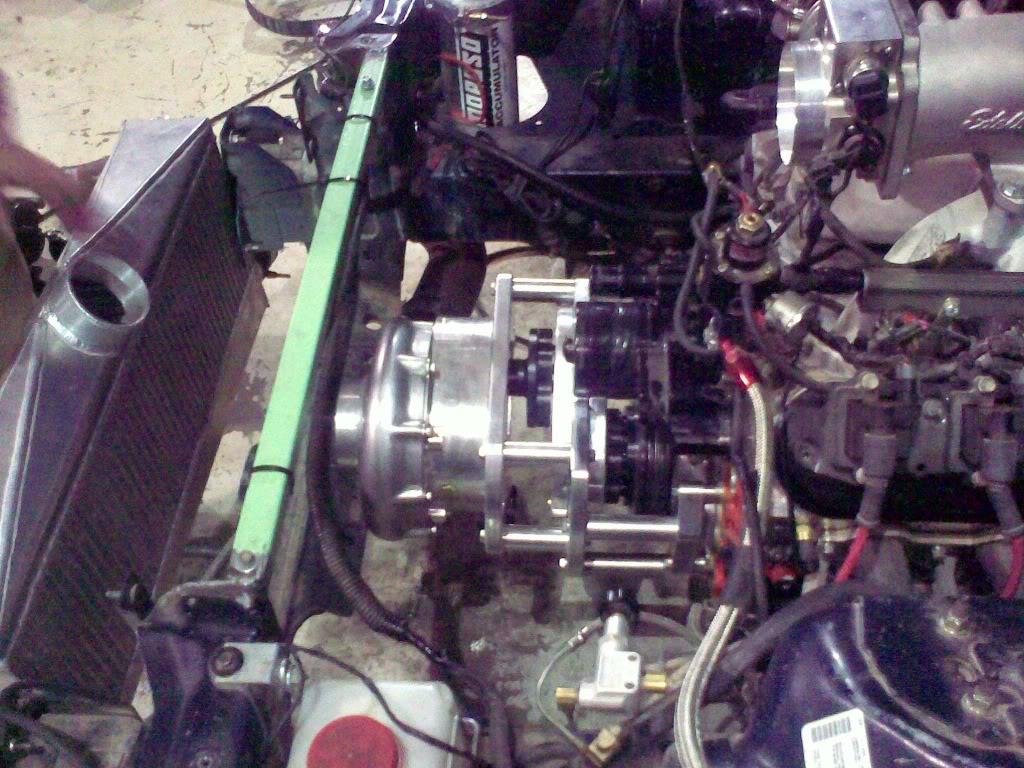
any how , the gear drive and other stuff will be returned back to the owner
and i'll be waiting for my new bracket to show up
i also have to add this :
GEAR DRIVES ROCK!!!!!
10/14/2009
well since i really liked how well the whole gear drive setup worked, i bit the bullet and ordered one.
i managed to find a straight trade for my reverse rotation F2 with a regular rotation F2 , so it just made sense to go that route
gear drive should be shipping anytime now.
as for the car , didn't do much the last 7 months but i did manage to take apart the tranny , only to find that i burned 3rd gear ( trans oil pressure issue ).
and i just finished wacking the lower core support :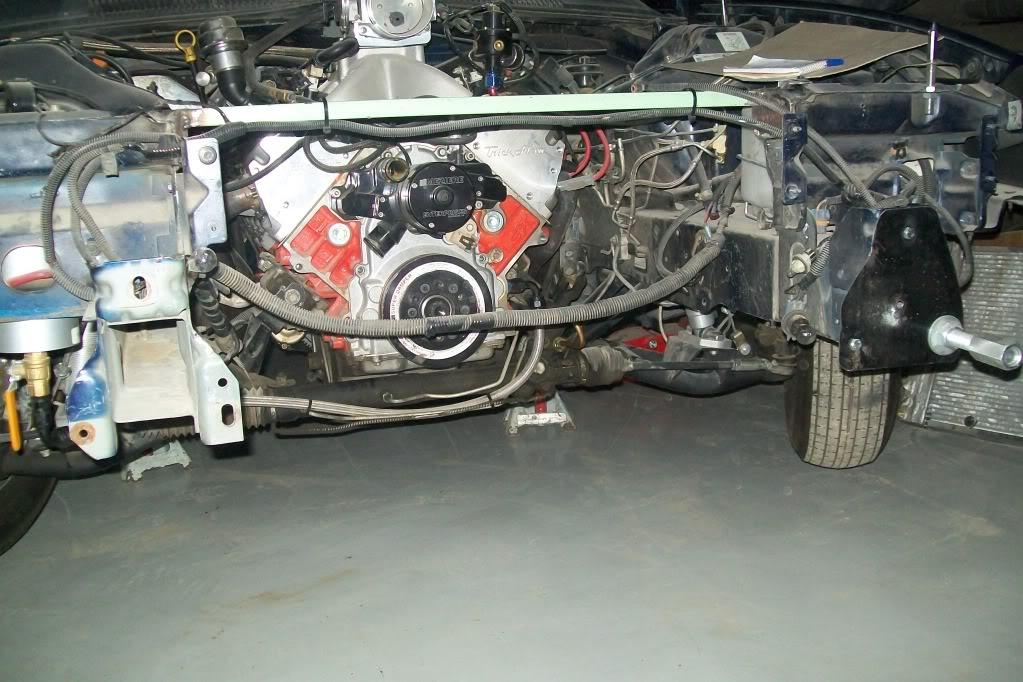
only to replace it with this sexy peice of fabricated awsomeness 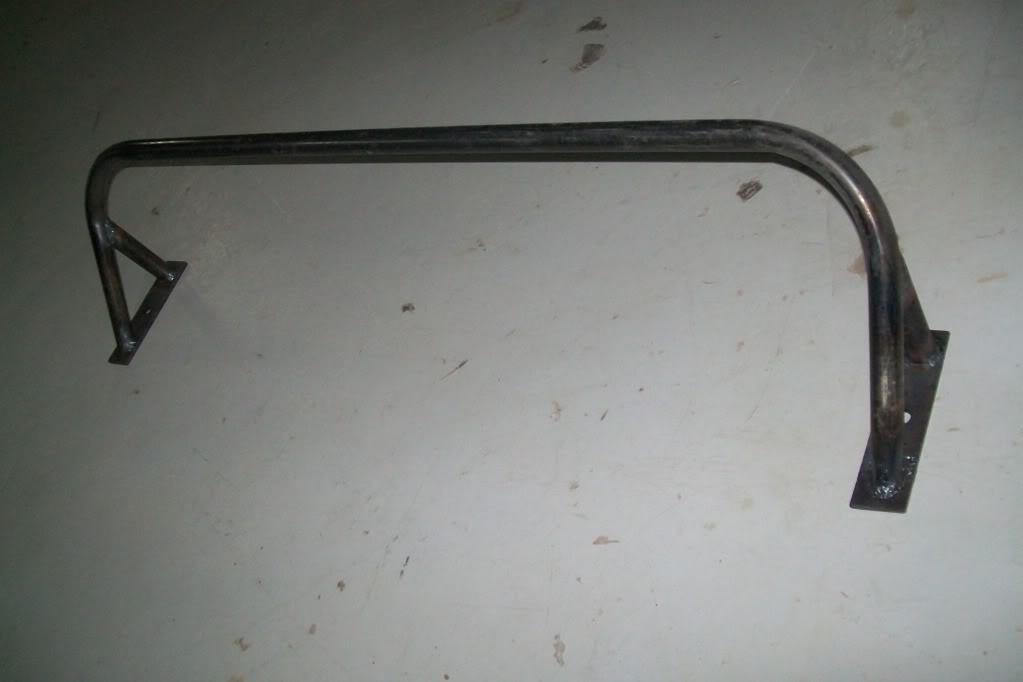
all i have to do now is weld a couple of tabs on to it so i can mount the stock radiator or a smaller on if i decide to go that route.
up on the list is draining the gas tank ( i know i should of done it ages ago), installt he gear drive , fab up some sort of alternator bracket , weld bigger beads on the ends of my tubing, and weld the two new ATI Race BOV's
10/22/2009
well i was wrong,,,, the gear drive showed up wednesday!
i'm going to get my but into gear and work on installing this thing today as well as other assorted odds and ends
and now on to the pics :
10/31/2009
more progress
i got the assembly all mounted up 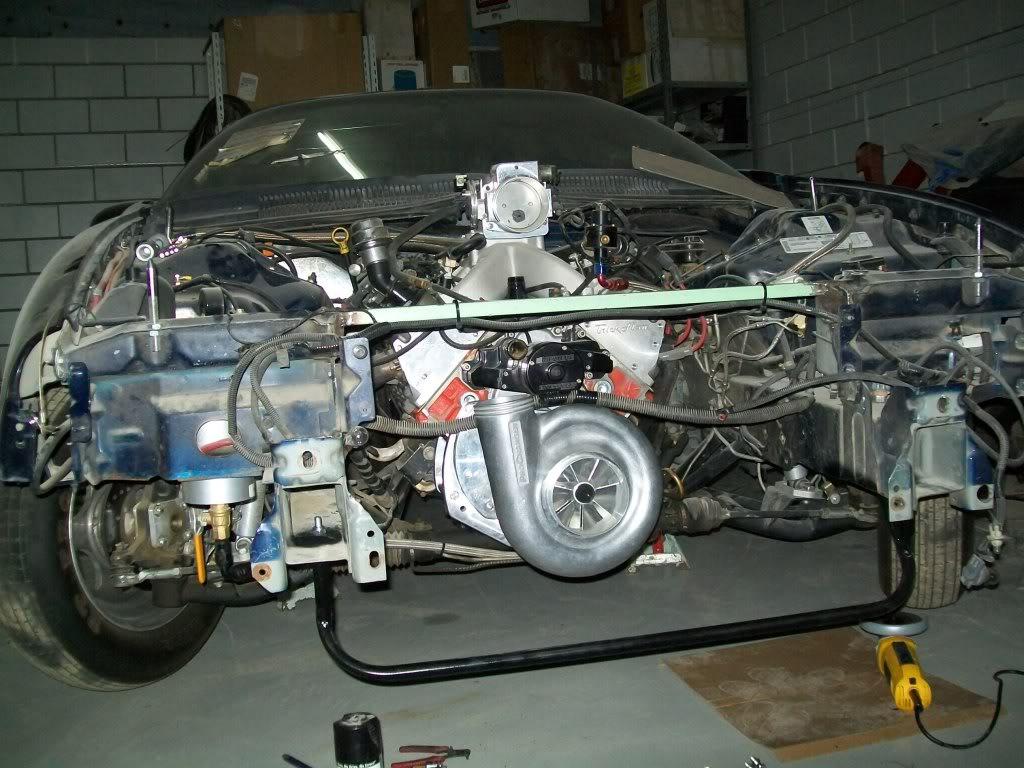
and now i'm toying around with how to mount the alternator , i'd like to run it off the balancer of possible , but that would man running it low in the passenger side and real close to the frame.
an alternative is to run it off the output of the gear drive , but i'm worried it might not get enough rpms ( since i'm limited to 18 teeth max on the output side; wich means i have to run something much smaller than that on the alt. ) ,
any how , here are more pics 
i just ordered a new radiator ( much smaller than stock) that i'll be running to the side of the gear drive, should be here soon .
i also finished up the charge pipe from the blower to the intercooler. all that is left is welding the BOV's on the inlet tube to the blower ( i have one , still waiting for the second one ) and i should be done with the piping.
11/5/2009
guess what the UPS santa dropped off 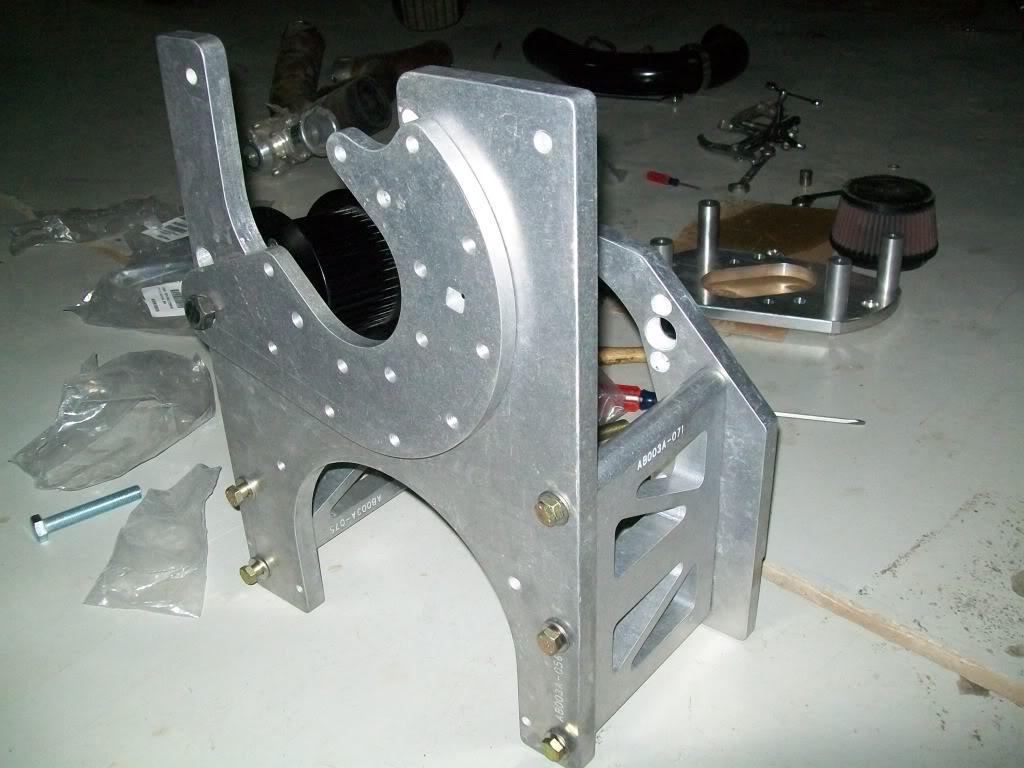
this was supposed to go on the camaro back before i got the gear drive , sooooo, this will find it's way to the mustang after i finish the block adapter and crank support
think its beefy enough
11/15/2009
radiator finally showed up yesterday, and i've been working hard trying to get the car done . it has to be on the trailer and ready to go by tuesday night
decided to postpone the alternator deal for now and just run dual batteries in the rear and charge them between rounds.
i also finished the charge pipe with the dual BOVs :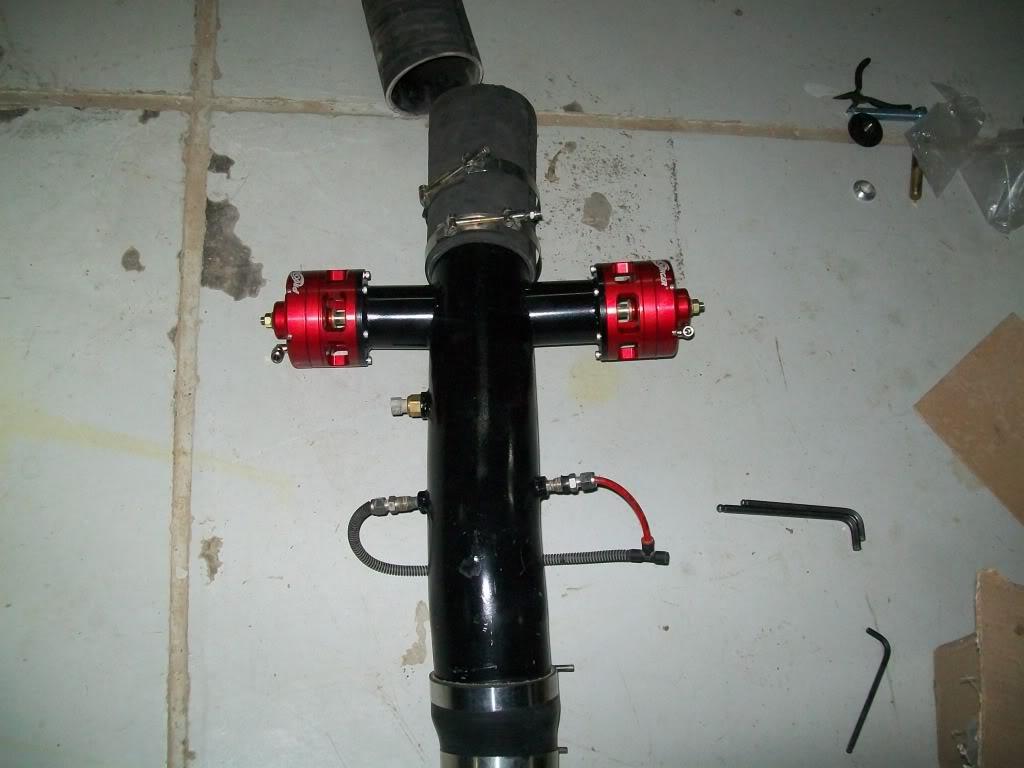
here is the radiator ( with foot as refrence )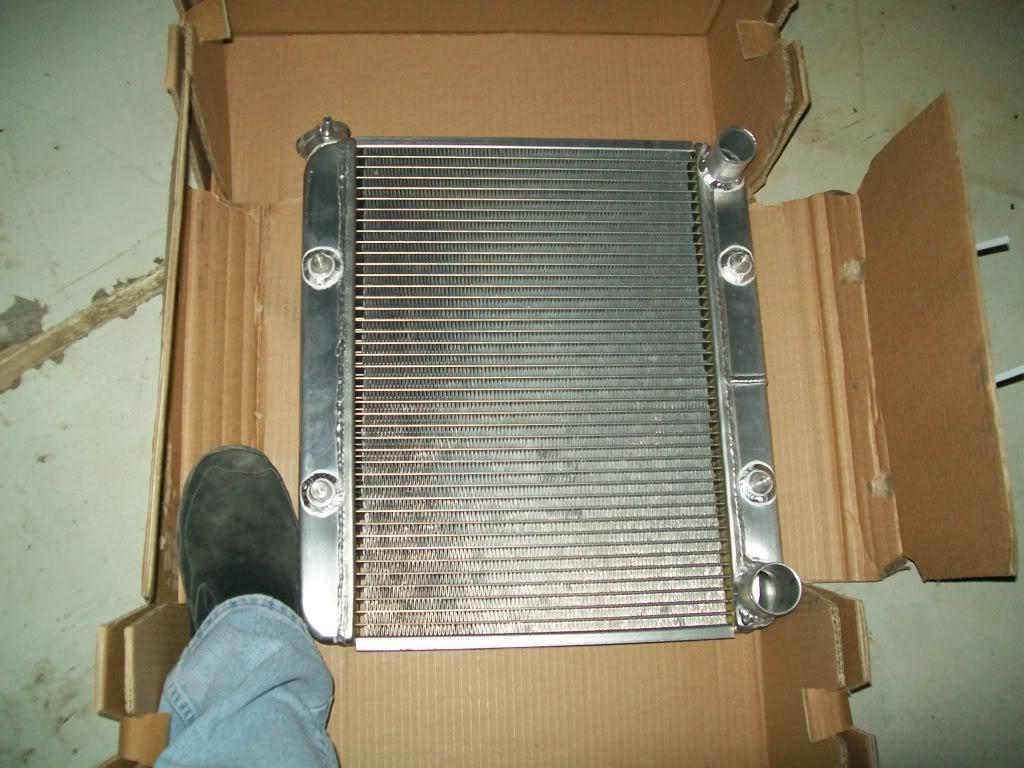
and here is where i've been trying to mount it :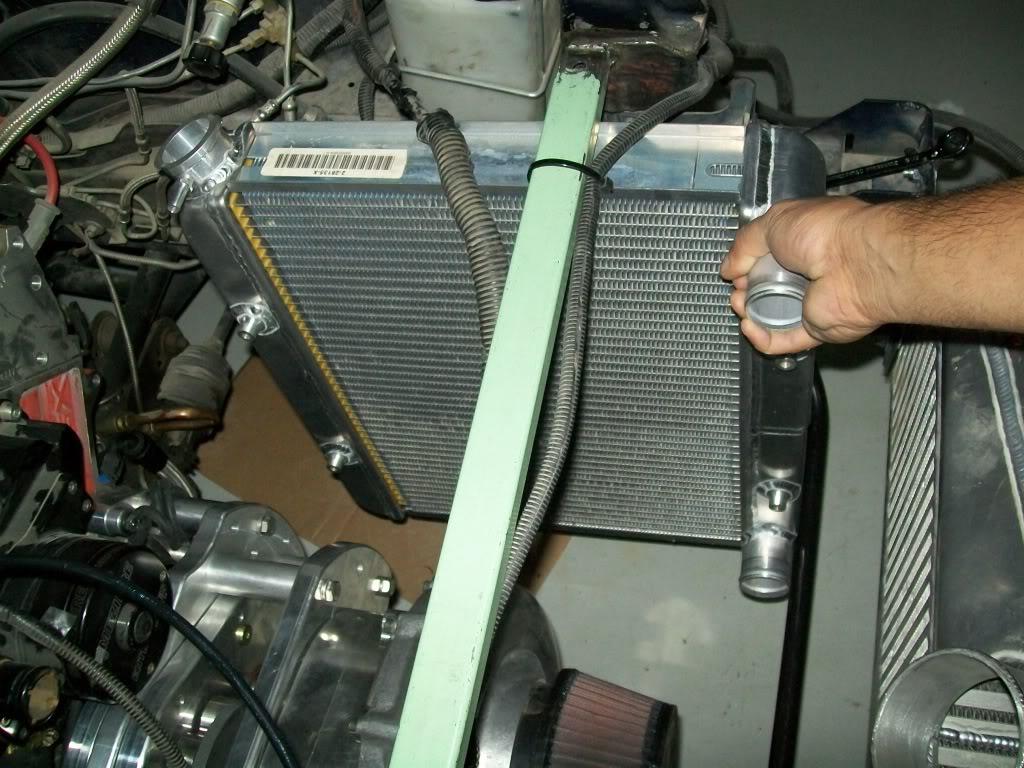
given the time crunch i might just not use that radiator now , and just go back to the old one for this race and take my time fabbing a mount for this one later .
i also got the MSD 2step in , but i doubt i'll be running it now since i want to install it cleanly
i learend some thing though , i should always have some sort of tubing and metal instock for "emergency" fabrication
11/25/2009
well i manged to get the damn thing in there , and it worked out pretty good . i have to redo the hoses , i'm just waiting for some fittings to arrive and i might be able to route the hose from the other side of the pump instrad of it looping like that.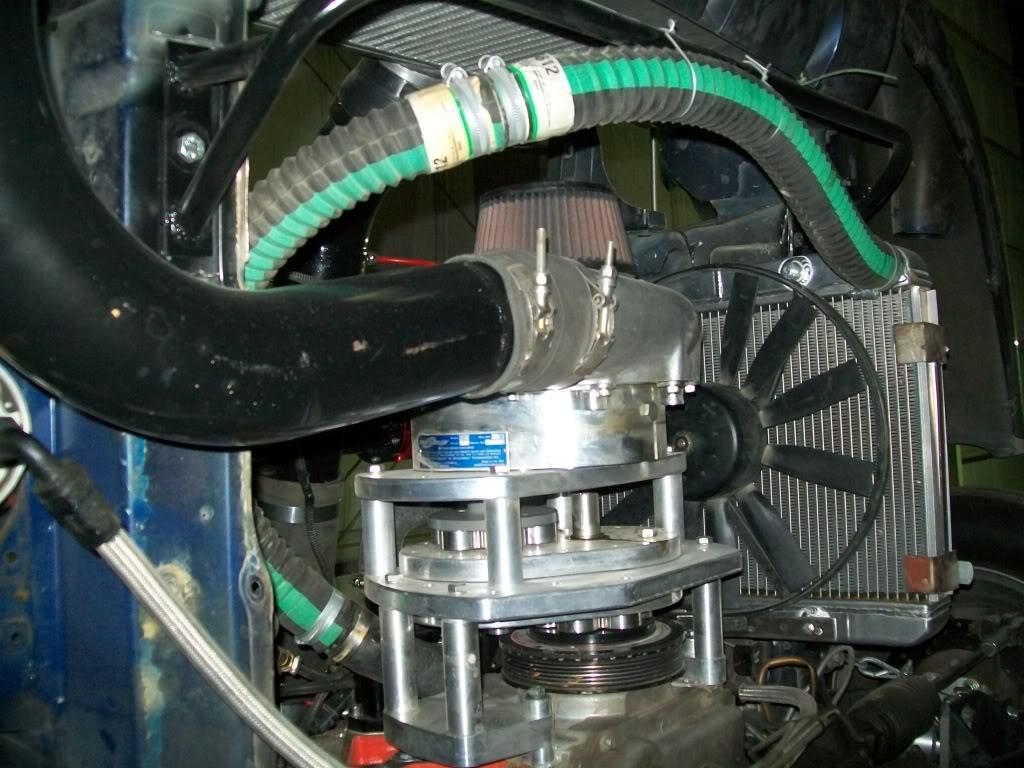
i did manage to take it to an 1/8 mile track , and i'm glad to say that all my last minute stuff held up
well,,, except for this stuff, which wasn't last minute cause i had it in the car for about a year now: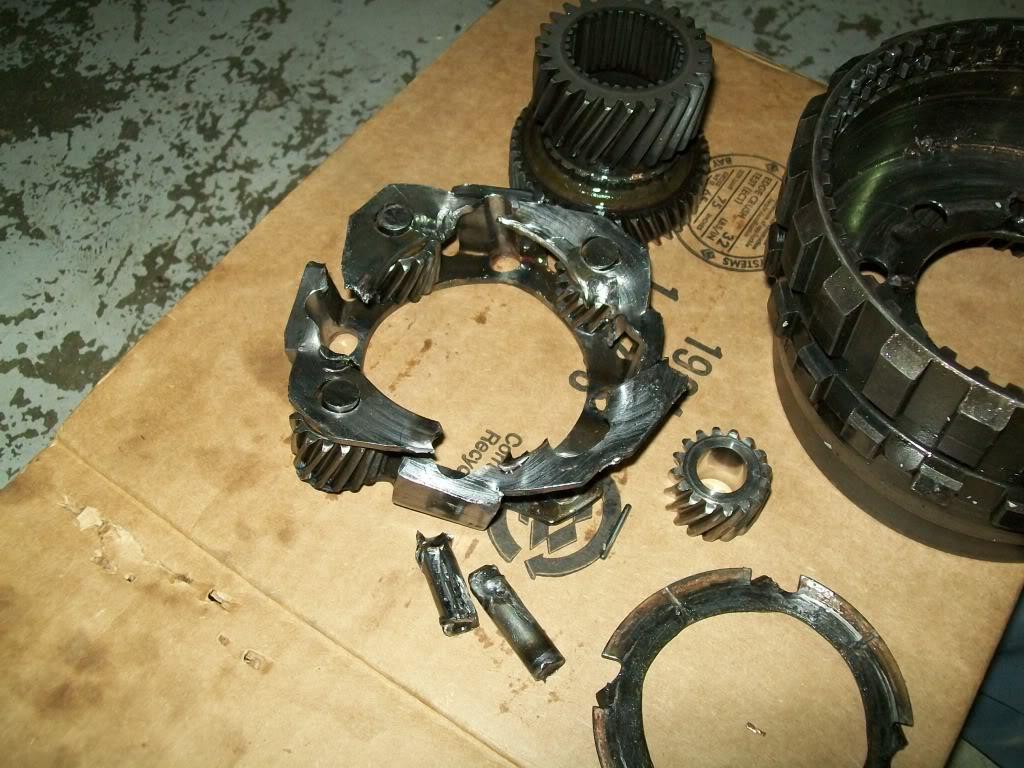
think its fixable ??
everyone told me that these lower gears are junk and it was a matter of time before i destroy them ,,,,, well their time was up !
other than that , i'm happy with how the car did ,,, i managed to get a personal best 60 foot time of 1.32 with my 2.5 year old slicks!
and the msd 2 step worked great too ( install was too easy ! ).
so next on the list :
-fix tranny untill i can get a new built trans from the states
-install spool and 3.08 gears
-redo cooling lines and radiator bracket
-change the gear drive ratio from 1.3 ( 17-18 psi) to 1.6
-if i have time take it to a local fab shop to have a new chromolly cage put in.
-probably send the converter in to get restalled , i need it to stall about 1000 rpm lower (and to tighten it up on the big end)
-get a vacuume pump on the thing!
12/27/2009
well i finally got into the 8's!!!!
took it to the track this weekend and got this 
funny thing is that i got a 1.35 with a bunch of wheelspin and pedaling ?!!?
oh well , its good and bad news for me ; good news is i'm sure i can squeeze a better 60' with new slicks ( ones on there are 3.5 years old!), and drop the time with higher boost and a more aggresive tune.
bad news is on the fifth pass the car just shut off mid pass,,,, found out today that of all things the back half of the reluctor wheel seperated from the front half and was spining on the crank!
you can see how the two holes don't line up anymore ( sorry for the crappy phone pic):
from what i can see now it seems that the two sides of the reluctor wheel are riveted or sort of stamped together and that is what failed .
guess the its time for a bearing inspection
it still has alot left in it ;
tires are real old and worn , it spun on that launch , it was on low boost ( 17 to 19 psi ) , and the tune was just a base conservative tune.
1/1/2010
sorry, fixed the reluctor wheel pic .
here's more: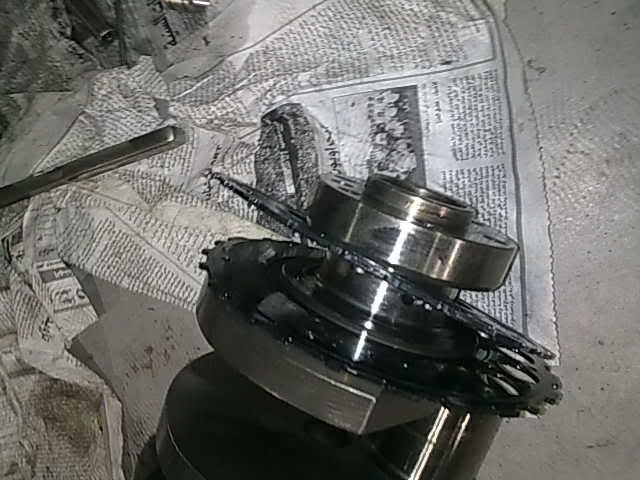
so , repairs are in order; ordered a new reluctor wheel and the tool to install it . should be here in couple of days
3/1/2010
man its been a whils since i updated this !
long story short :
changed the geardirve ratio to 1.6 , got 31 psi  , ran a 8.8@ 169 mph! ( took it real easy launching it - 1.6x 60' and short shifted second ) but it ran a bit lean and hurt the gasket.
took the motor appart , freshening things up now . should be done soon .
the parachute and mount came in , mount got powder coated and is on the car , got to install the chute and cable soon :
the chromolly cage and SFC showed up too , so it was time to gut the car ( again) and start chopping and welding :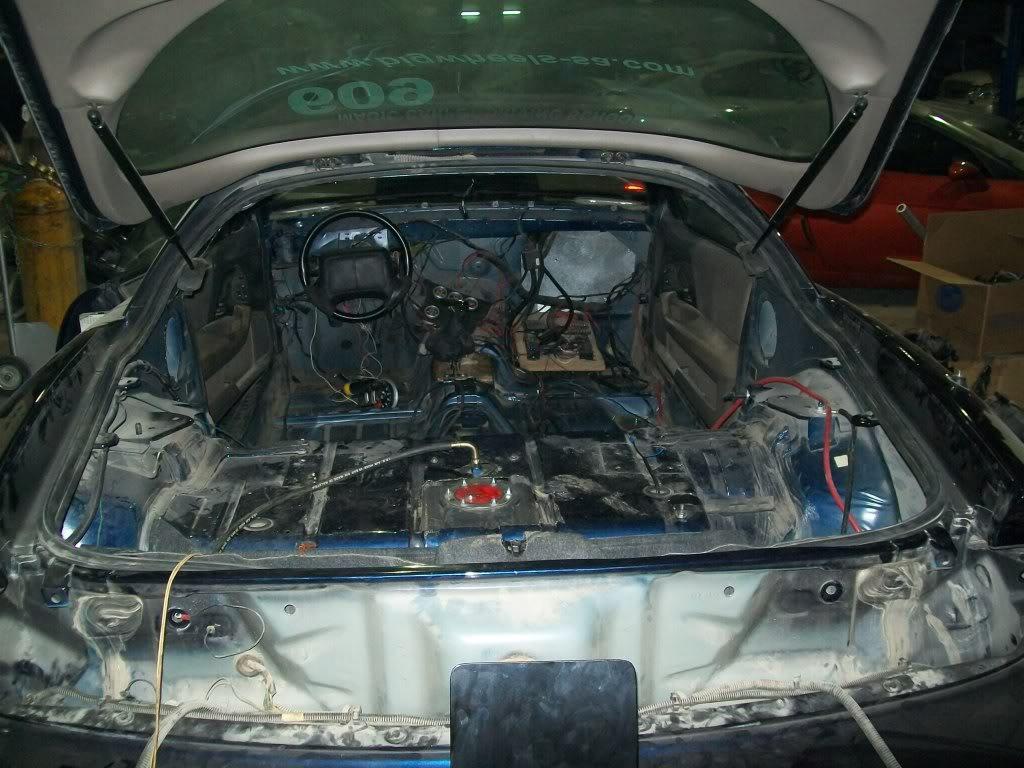

hoping to have it done within the next two weeks , since we have a big race coming up in Abu-Dabi on the 18th . i'm hoping for mid to low 8's ( shouldn't be a problem with a decent launch and propper shifting )
i might even try the transbrake there .
the never ending to-do for this time are :
- weld up SFC and cage
- install chute and window net
- wire two step to the brake pedal and install switch
- wire in a seperate button for the transbrake ( don't want it on the shifter - kinda hard wired my brain that the shifter button is the N2O button ) will make it a button on a the end of a coiled wire .
- screw the tires to the wheels
- figure out a way to run an alternator or find a 16V battery somewhere.
4/12/2010
nothing much to report , we never ended up going to abudabi ,,,,, long story
the cage and through floor sfc's are done, so is the chute and window net. i still need to screw the tires tot he rims and wire the two-step and the t-brake .
i found a 16V batt and now i have it running the pump by itself and the 12v. one running everything else (never went though with the alt. project )
i am trying to make it to the next race , but we'll see how that goes.
i did get in a few parts for the car , but since we just have a race on the 15th and one more 3 weeks later and the the season ends , i deciced to start that round of repairs and improvements then .
this includes engine freshen up , kirky seat , new radiator bracket , alternator (?) , new engine wiring harness, redo interior harness ( clean it up a bit ), and a few odds and ends here and there.
10/12/2010
man it been ages since i updated ,,,
lets see ,,, well i tore the engine appart again to replace the rods , kinda felt it was time to get better ones so i got a set of brand spank'n new howard's rods:
i also wasn't very happy with the engine wiring harness: it was the original one with all the unneeded wires taken out , plus it was integrated with the body harness. i also had an issue with it where the crank signall was intermittent due to a bad connector. so i decided to order a harness from ls1wiring.com where it would be a stand alone harness that can be swapped out without ripping appart the entire car's harness: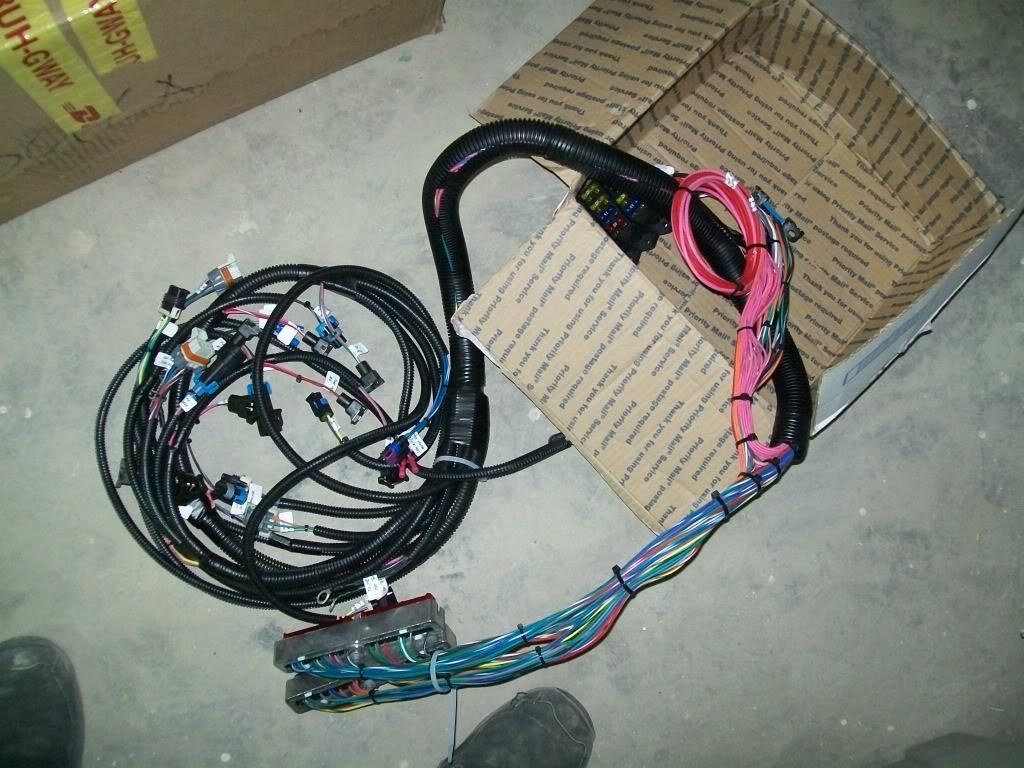
so since i was starting from scratch i decided to rip the interior and wiring all out :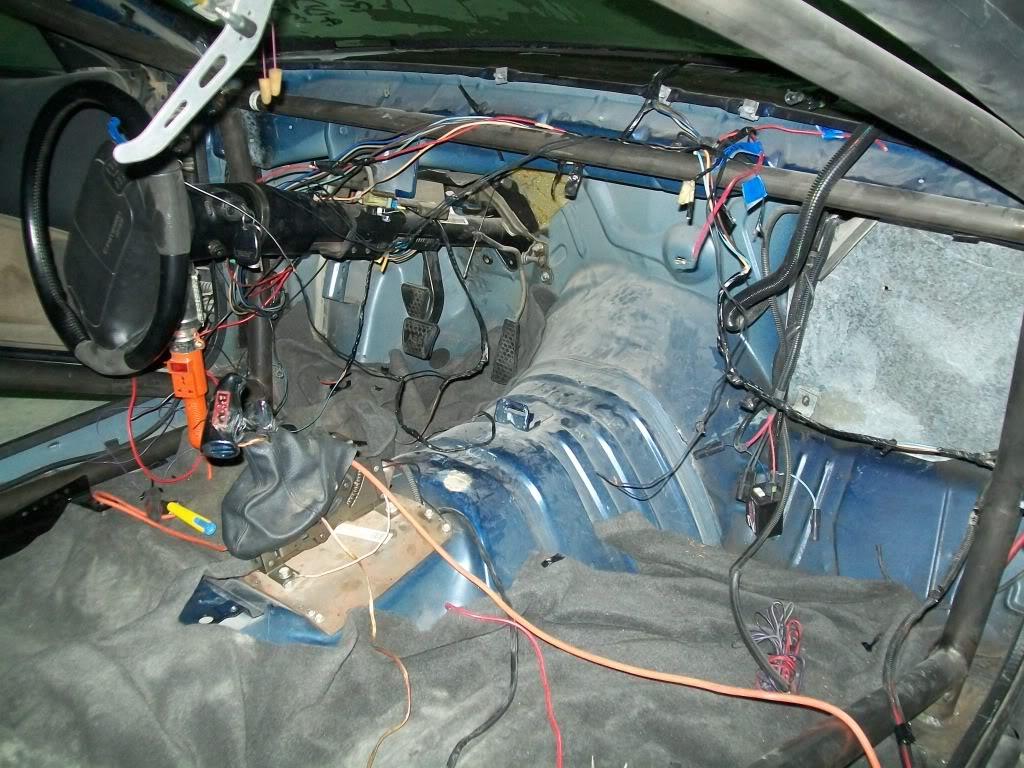
and how the new harness looks like on the car :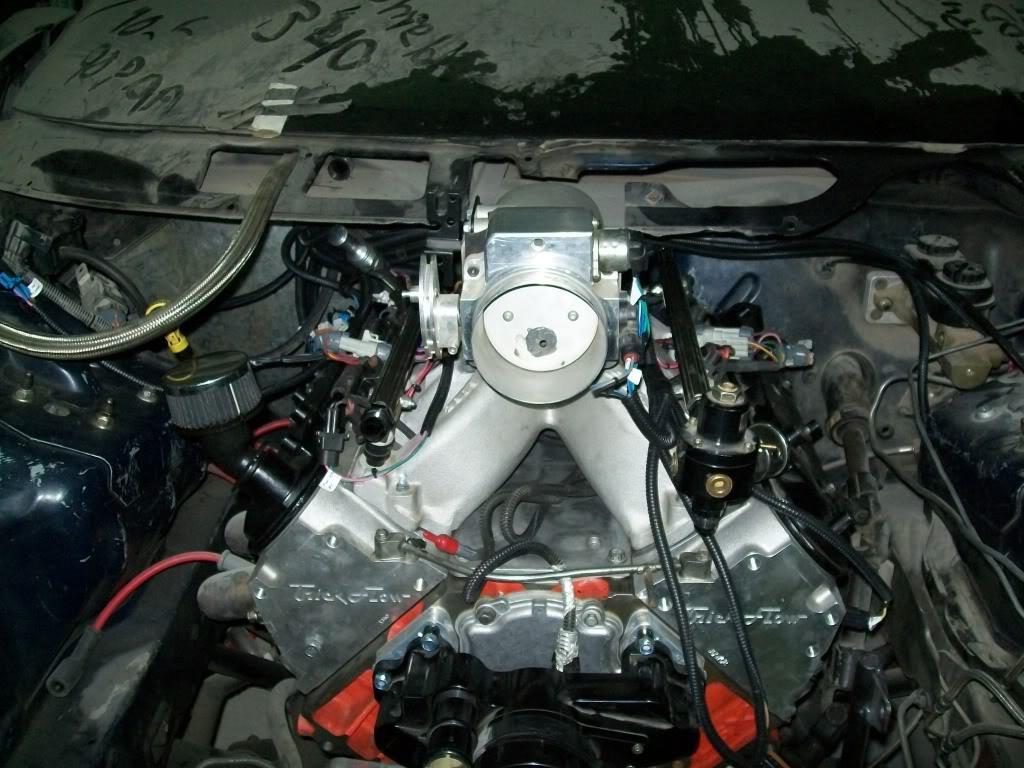
the plan was to redo the interior harness to minimize any chance of mishaps , i also needed a new relay and fuse board . so after being inspired by SMKN TA 95's panels i decided to build my own ,,,, and let me tell you after starting this project that no matter what he's selling his boards for its a steal !!! man building them is pretty involved!
the plan is to have a complete underdash harness that ties in the instrument cluster, rpm guage and lights , center cluster , outer sensors and devices , and the control panel.
right now i finished the under dash harness, as well as most of the panel , i have to start building a bracing system for the panel so i can mount it in the passenger side footwell , then build another brace thingy to use as a laptop mount ( more on that later ), here is how the panel base looks like ( still needs to be powdercoated):
and this is how the panel itself is coming along , its made from a sheet of lexan and i'm planning to cover it with some carbon fiber sticker sheet that way you know i'm serious 
and how it looks under the dash next to the relocated PCM :
and here is the underdash harness :
so i started a list of other odds and ends to to finish on the car , of which is finally drilling some rim screws in the the wheels:
and i got a new kirky lightweight seat and some brackets from racecraft :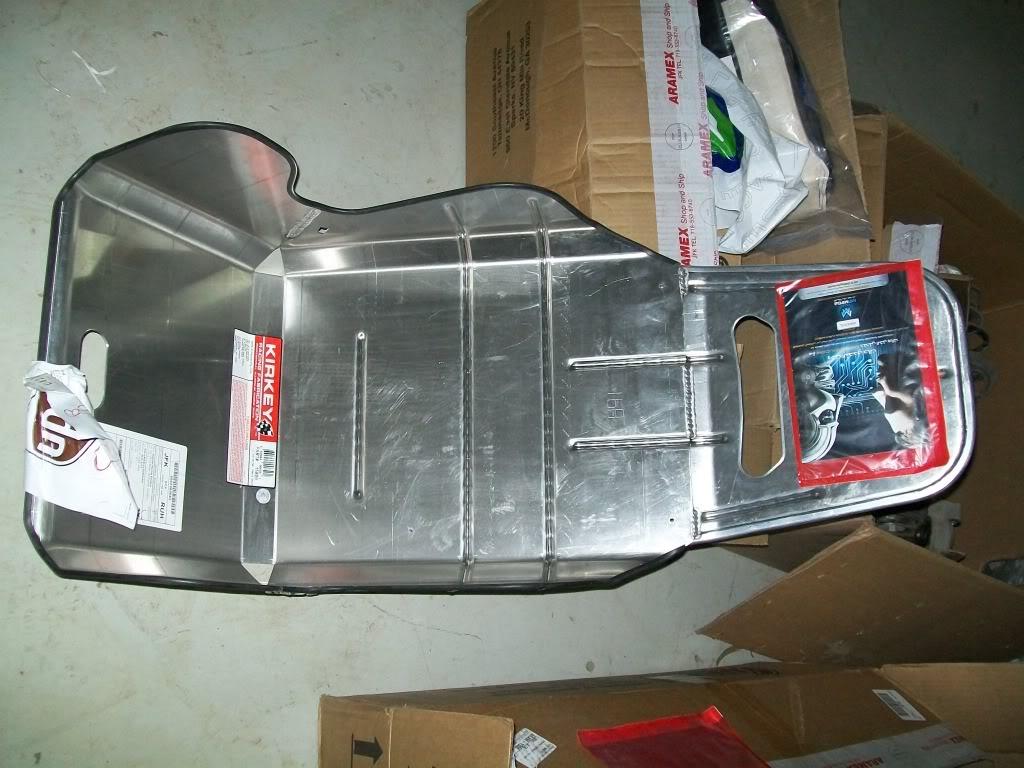
the brackets will enable me to mount the seat on the stock mounting studs: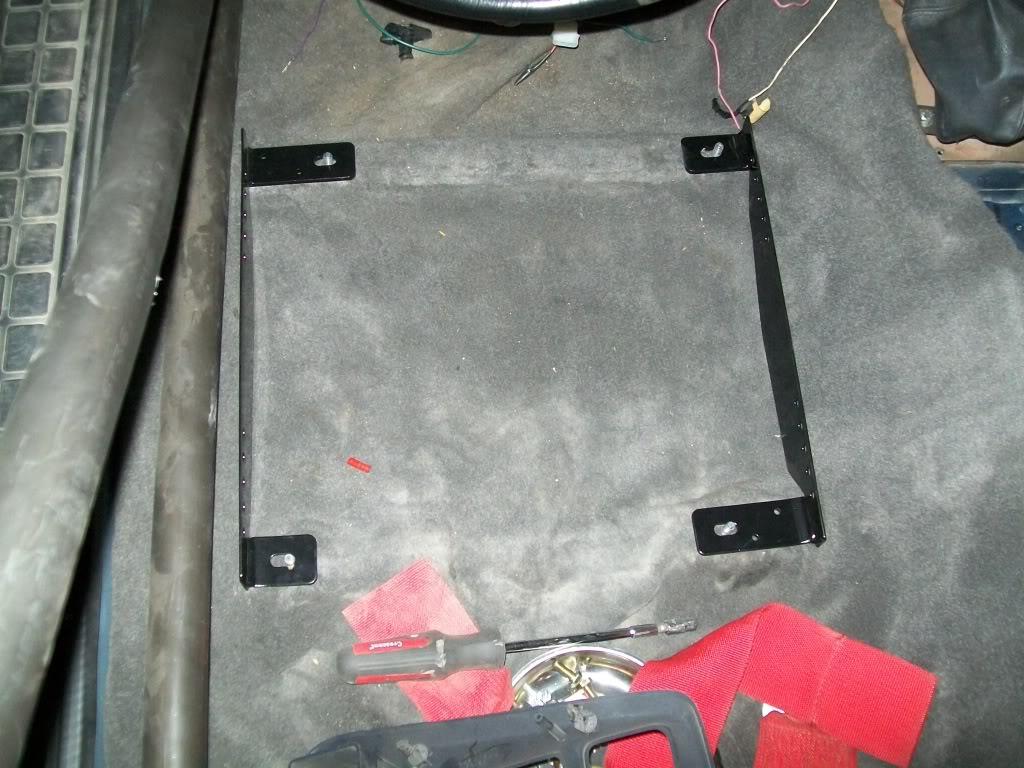
another thing i wanted to do is clean up the front end. i didn't like how the radiator was posotioned and how the hoses went all over the place. so to fix that i decided to chop off the funky green brace i had before and redo stuff
first off was to build a radiator cradle or bracket , so out came the bent metal tubes and the welder and i slapped a few peices together and got this 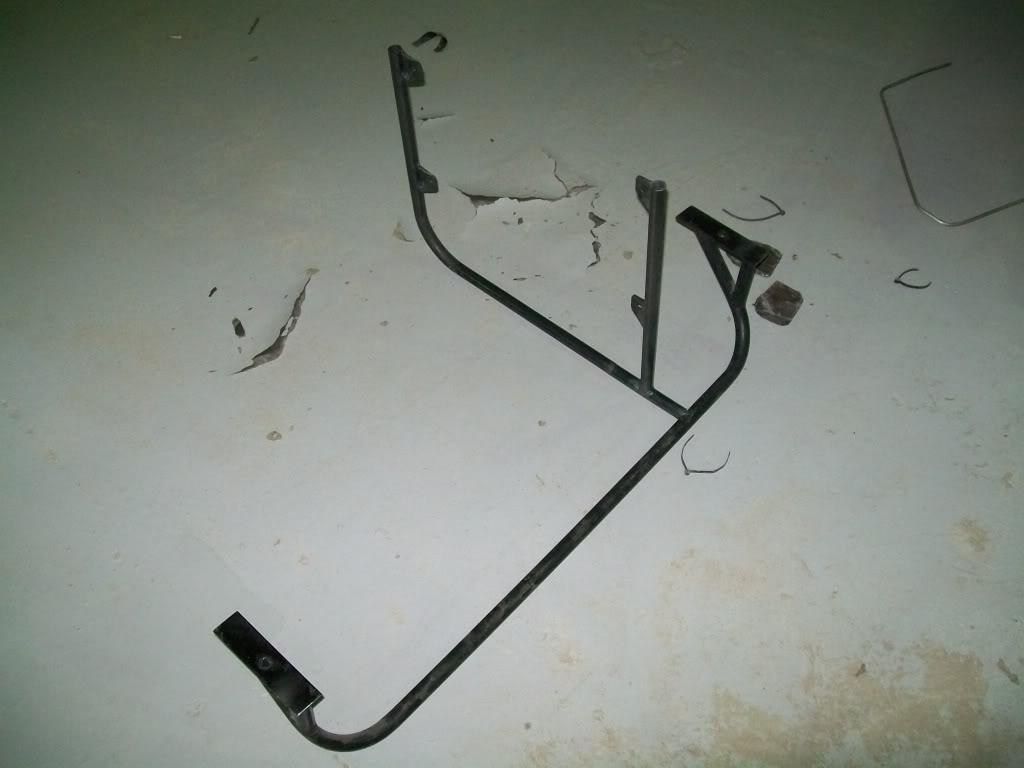
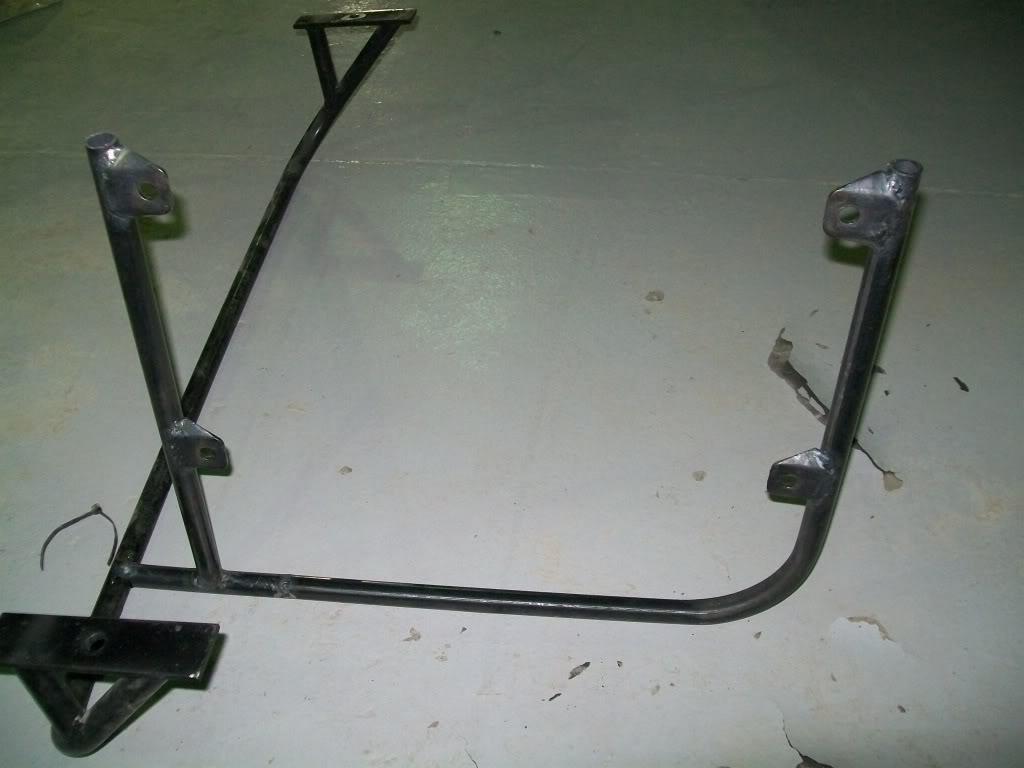
and how it looks with the radiator in place: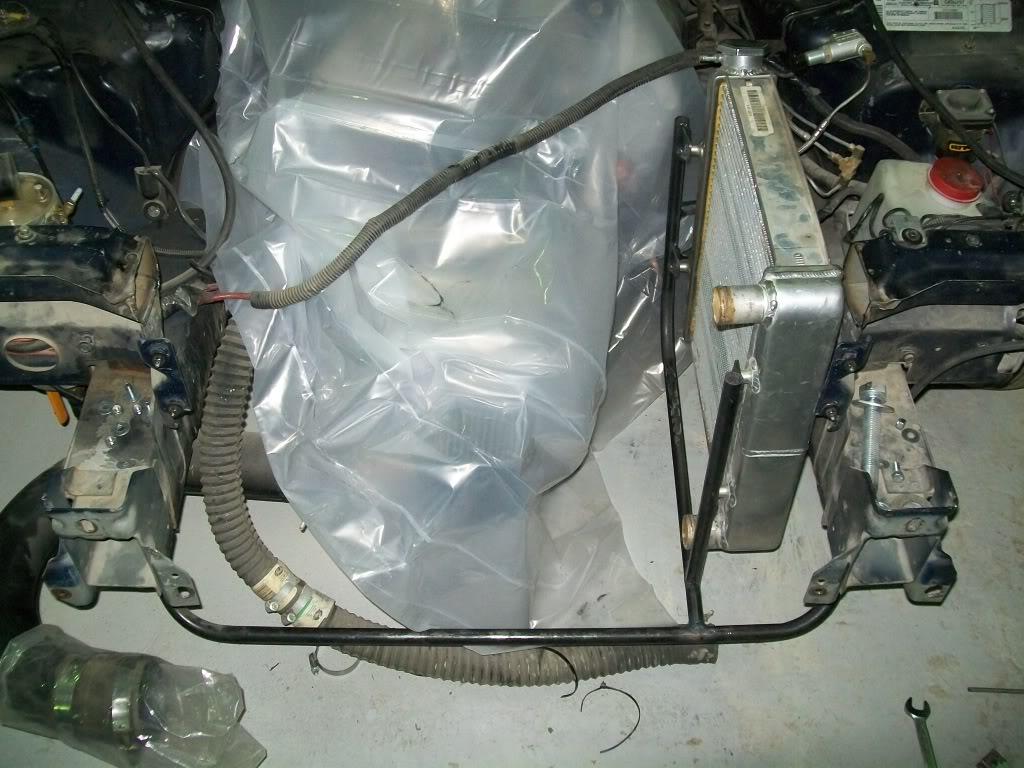
and to help with the water pump hose routing issue i made a set of water pump spacers that spaced out the pump about 3/4"si i can use the port on the driver side of the pump and not have the hose hit the cam sensor :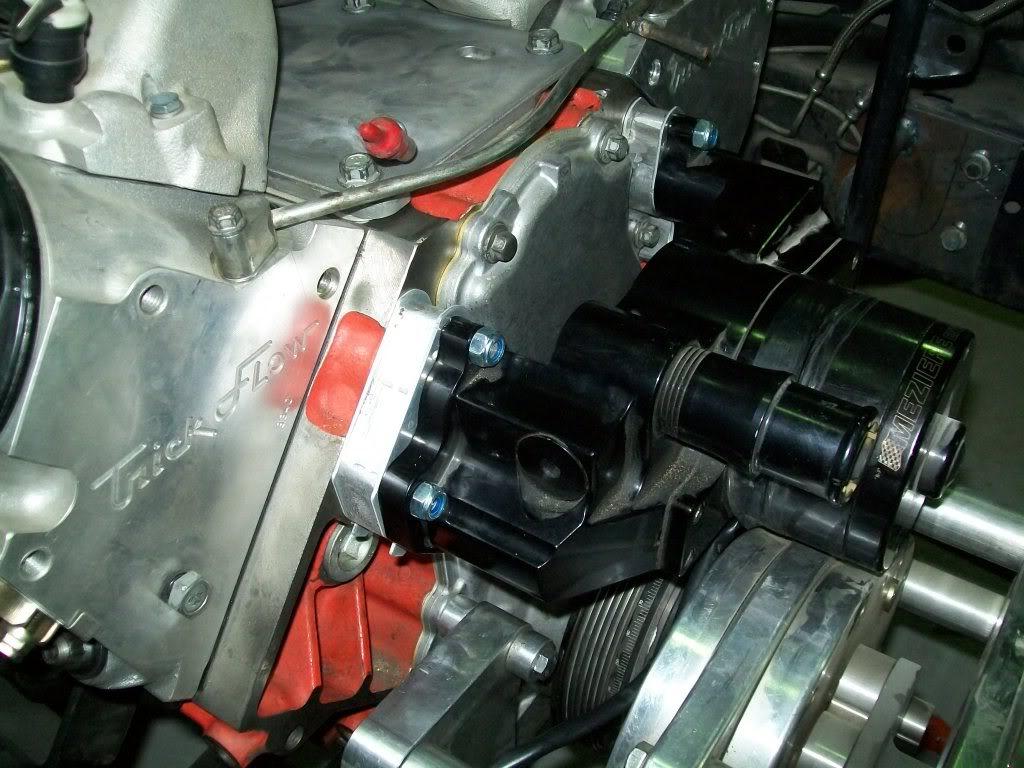
so that sums it uo pretty much
i still have to run the positive power cable from the battery to the panel , and build me an ignition panel (starter button and ignition switch) and run the ground cables. i also have to mount the charging posts in the back and connect the power windows .
another thing i have to finish is welding some panels to cover the holes left behind after cutting the upper core support. and maybe figure out how to incorporate a cross brace somehow.
i also plan on redoing the cables running from the batt to the starter to the alternator ( or where it used to be) and grounds, right now its a frankenstined mix of stock and other stuff so that needs to be taken care of .
also on the list is redoing the nose support for the front end. i was thinking of getting rid of the plastic/fiberglass peice up front and building a tubelar one that bolts to roughly the same location and also to the front of the frame rails ( where the crash bumper bolts up) this will also serve as a mount for the intercooler and from that i can weld some braces/outriggers to brace the bottom and sides of the bumper.
i'm also thinking of running a mechanical belt driven pump up front but the jury's still out ( till i do some research on the subject )
also on the list (i have to order it first ) is a lightweight steering coloumn and wheel , should drop about 15 lbs off the car
so to sum it up :
- postitve wire to panel
- ground stuff
- install dash
- connect wires
- mount radiator and hoses
- weld core support plates
- starter cable and ground
- charging posts
- bolt up seat and brackets and rear seat support
10/18/2010
got some more done ,,,, and did i mention how much i hate electrical work ! 
but at least i'm almost done,, i managed to finish the fuse panel , i had it covered in carbon fiber adhesive wrap to give it that " i'm cool cause i use carbon fiber stickers" look :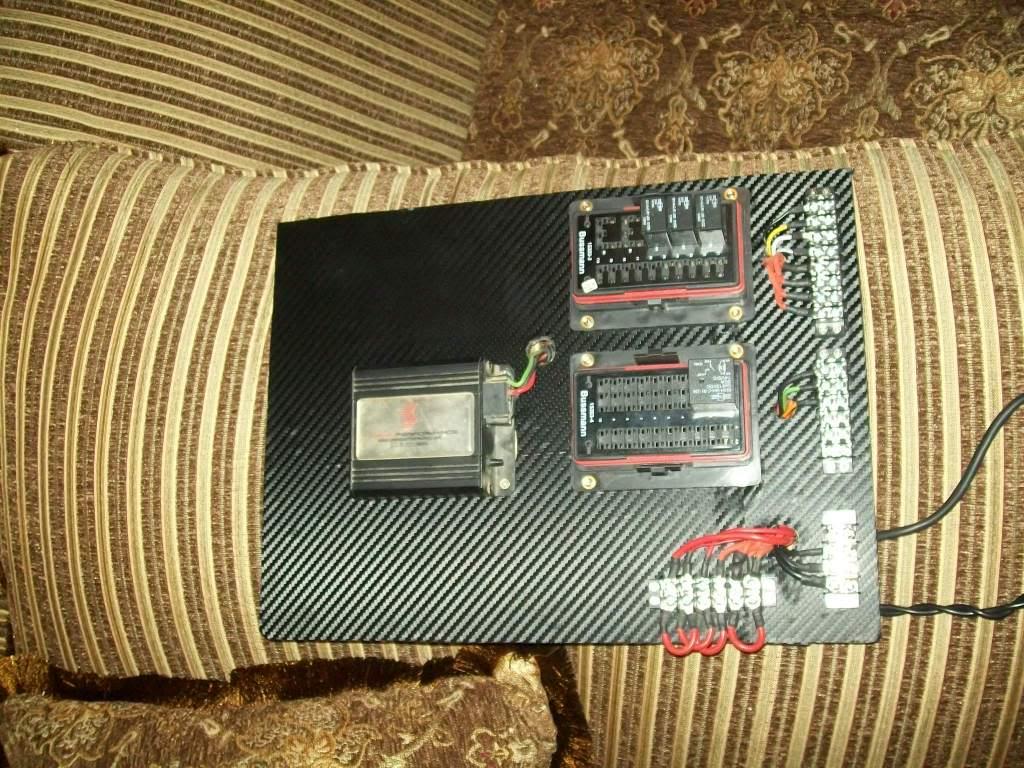
and how it looks in the car: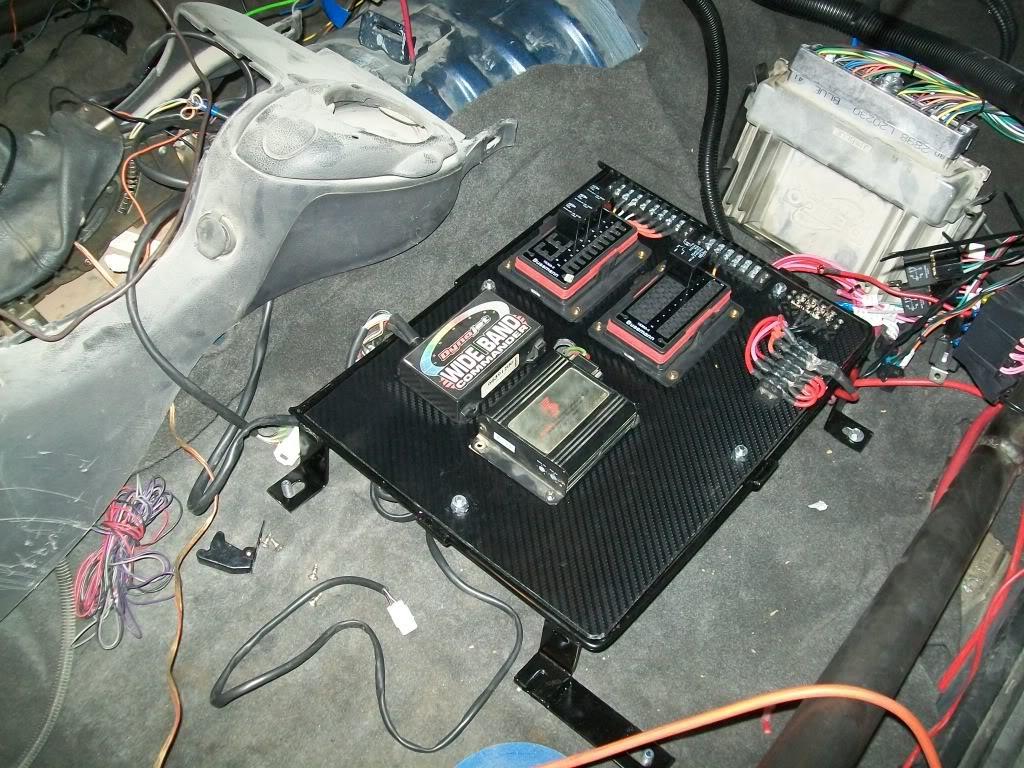
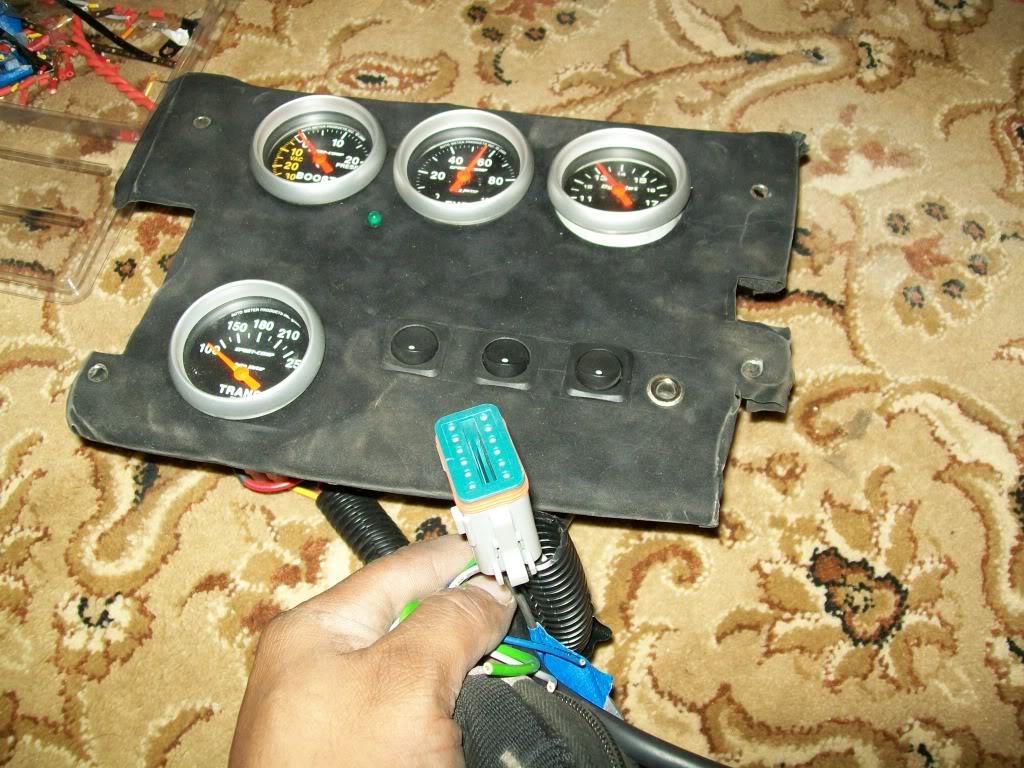
also had the instrument cluster guages all wired up a while ago as well as the center dash panel . the center panel now has trans temp guage , boost, and AFR guages, as well as a methanol pump light , trans brake plug port ( stereo jack used to plug in the trans brake switch if i'm running it ) and switches for the methanol injection, trans cooler fan , and 2 step activation.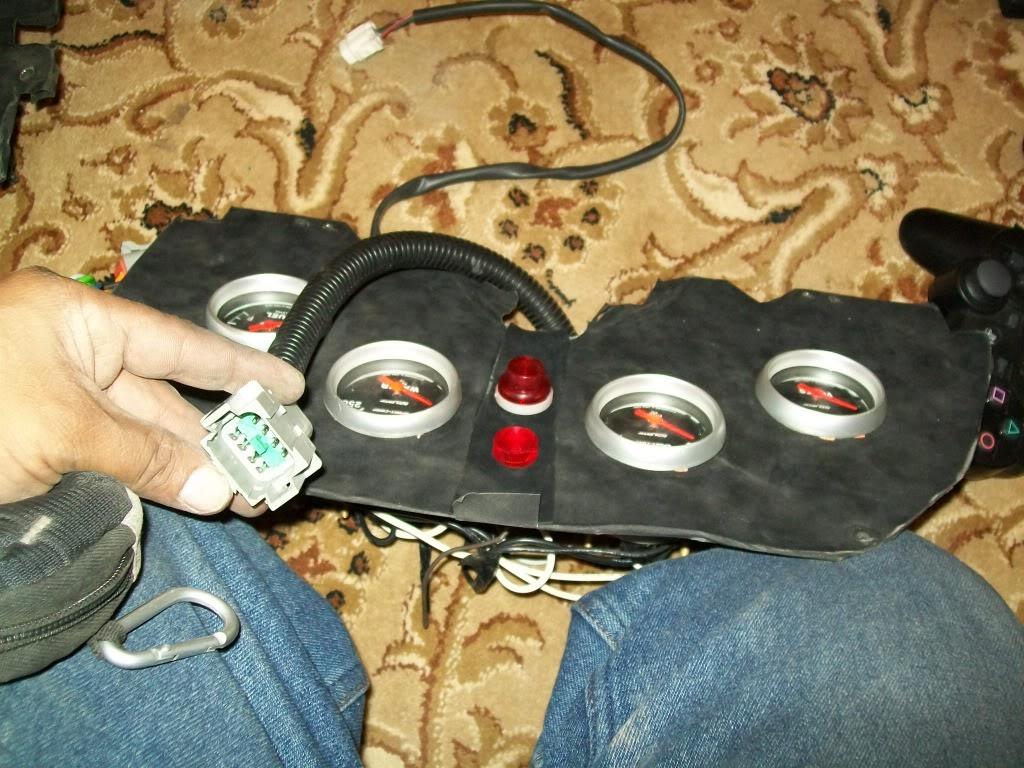
all i have to do now is connect a few wires here and there and electrical stuff inside the car should be done. which leaves me with connecting the trans temp guage and t-brake wires to inish , as well as running the main + cable to the starter and running the signal wire. also have to install the front radiator brace (took it off to take it to poweder coating but realized later i didn't have time to get it done)
so up next :
- ground stuff
- install dash
- connect wires
- mount radiator and hoses
- starter cable and signal
- install header on driver side
- bolt up seat and brackets and rear seat support
- connect a battery and see if it works
11/6/2010
ok time for some updates :
been working alot on this thing lately, trying to make the race this wednesday .
i finally got most of the wiring done in the car. i just had a small issue with ignition switch but it should not be an issue. also got the dash in place and bolted up , i just need to bolt up the center console now. ( no comments on how clean the car is )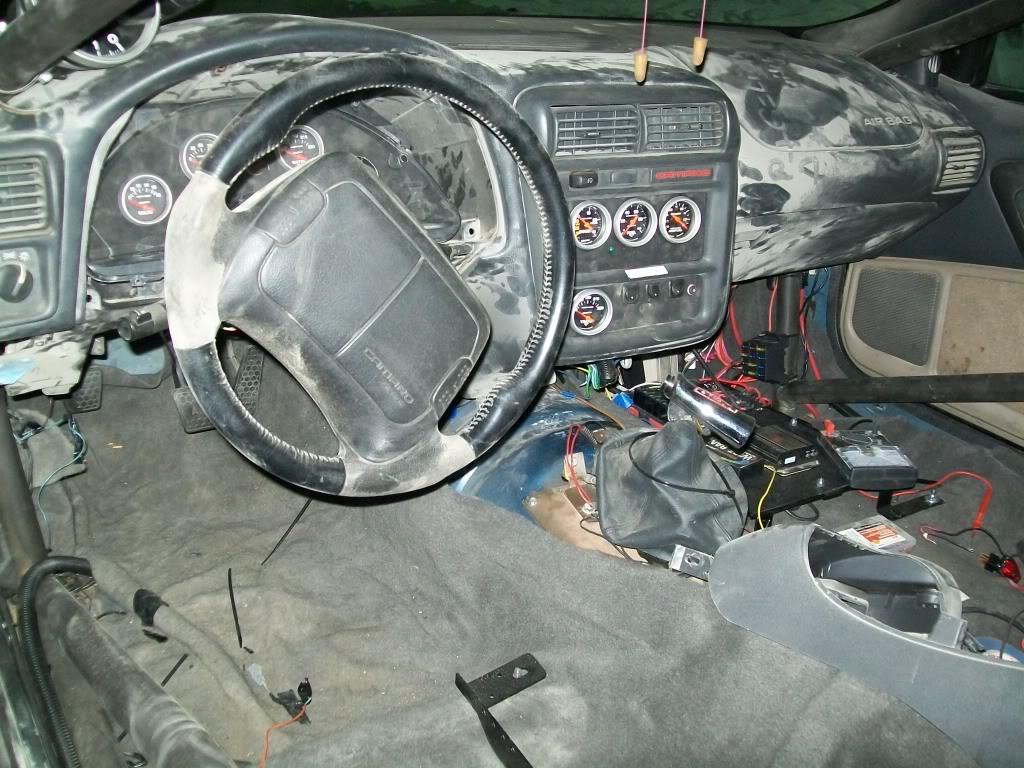
its amazing how much wiring can come out of a car that has been already worked on 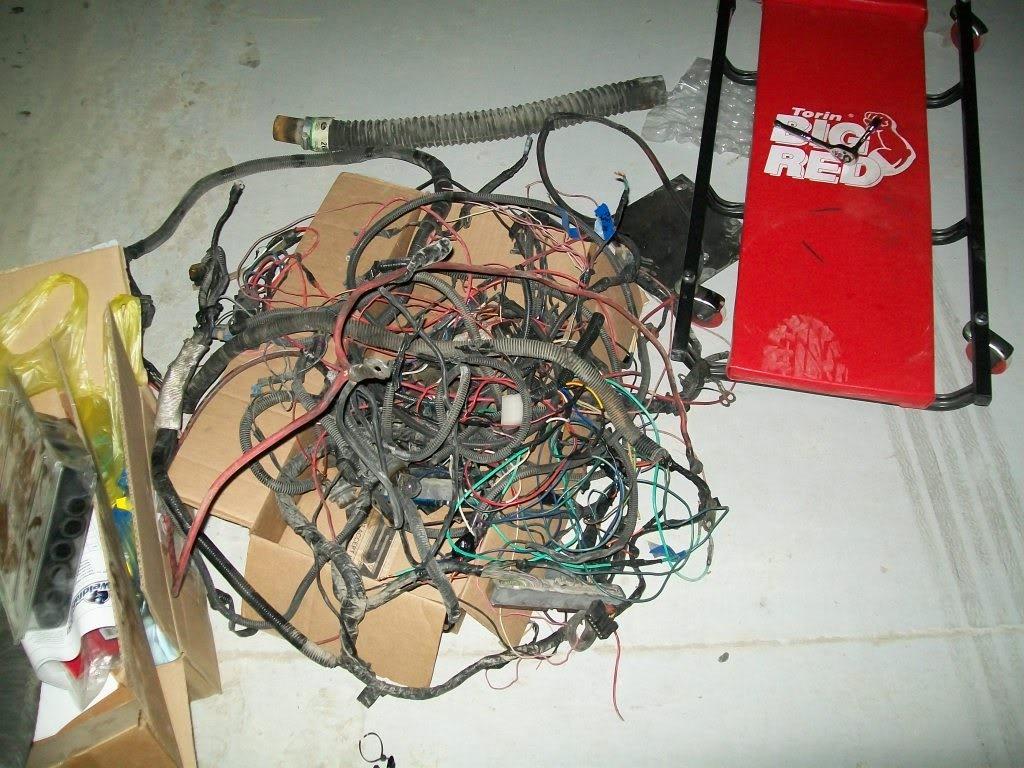
also got the kirkey seat bolted in and bolted in to the stock location using racecraft brackets, all i have to do to finish it is install ( and slightly modify) the seat back brace , but i probably will do that when i come back: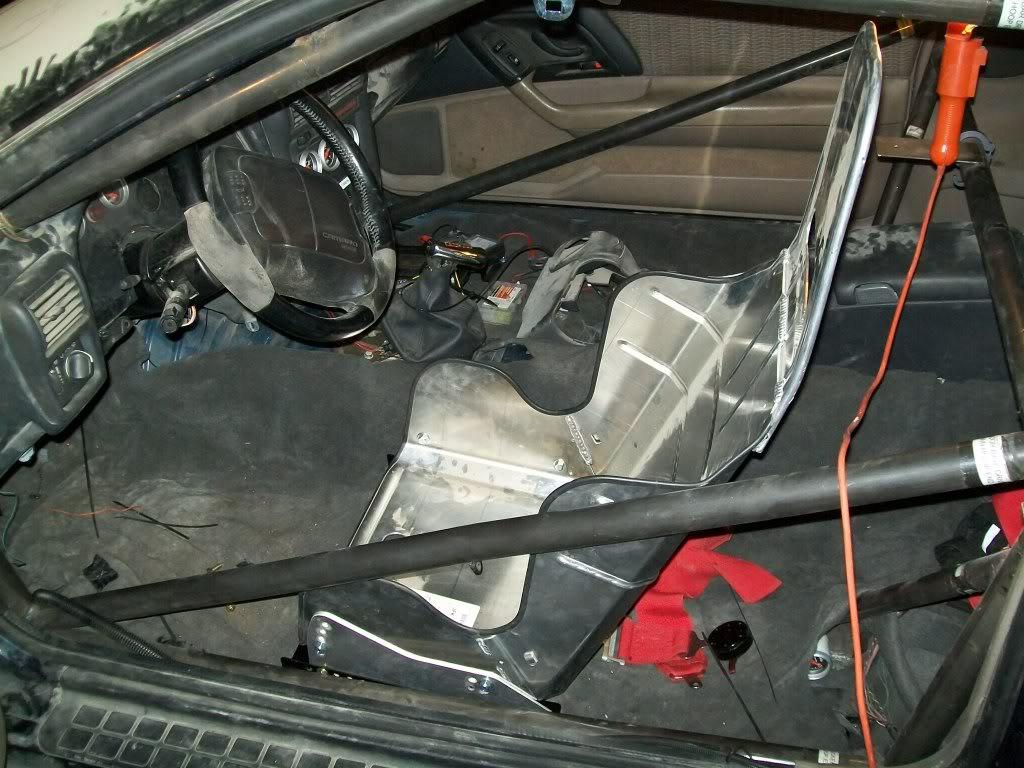
furthermore , i got the radiator bracket back from powder coating and i bolted it up along with the hoses, radiator and fan: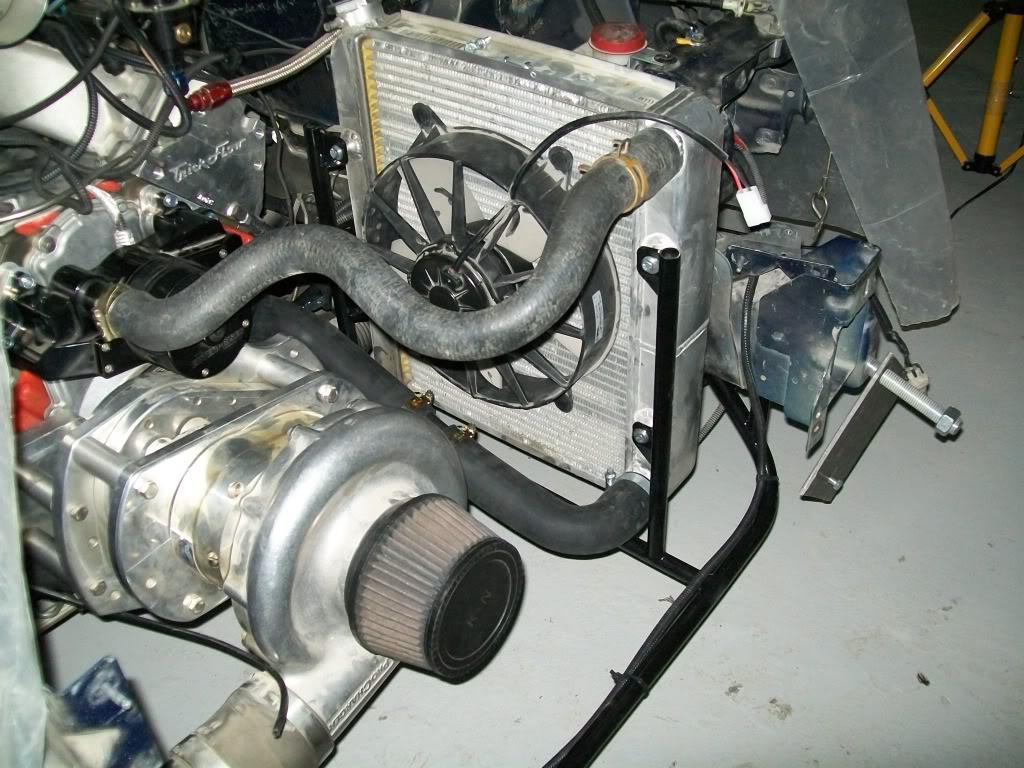
and in preperation for the new bumper brace bracket that i will be making later , i installed the frame horn plates ( these plates will be the base that the nose of the car will be bolted to ) and welded some nuts and a spacer so i can bolt the intercooler on to :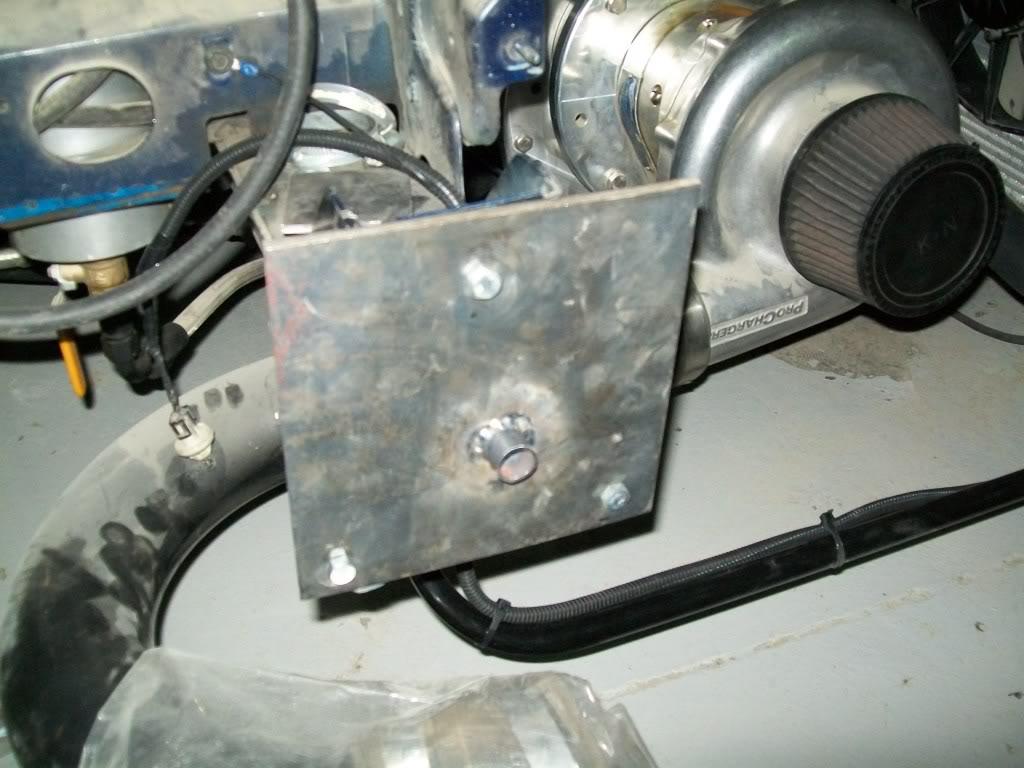
and finally got all the intercooler piping and header installed as well as the coils and what not.
so all that is left is bolt up the nose , drop in the batteries, oil change and coolant, check the shifter and fire it up to make sure all is fine and dandy
later down the road there will be some major weight reduction thats going to take place but more on that later evil:
11/14/2010
well its been an interesting weekend
got the car all done and ready , put it on the trailer and headed east
i managed to get a couple of test and tune runs on wednesday after tech inspection ( the race was thursday and friday) and quickly noticed there was a problem :
the car would not hook ! it would jump off the line and unload around the 60ft. mark .
it almost seemed to not want to weight transfer at all!
so i started to mess around with the suspension setup ( it was setup exactly like last time out and it worked pretty well then); i loosened the rear shocks as well as the travel limiter, wich seemed to help a bit. i don't need mention that on the second run the two step i installed kinda worked , the switch got stuck open and i had to stop using it ( i had it connected to the brake light switch - which was cracked ) and mid run the car just shut off ,,,,,,,, forgot to tighten the + battery terminal
well , come qualifying day and after two test runs the last day i decided to drop tire pressure down to 9 psi from 10 to see it it helps, the first run it hooked better ( looking at the log i only gave it 30% throttle in 1st and around 50% in second ! ) but it just broke traction mid second gear wich netted me with a horrible 10 second pass IIRC , which by the way does not get me in the field . i have to add that the weather was humid and there was condensation everywhere , so that could have been a factor.
so in the second ( last ) qualifying attempt i decided to pull some power off the line by cutting some timing and giving it more suspension travel up front ( about 1.5 to 2 " i think). the car still spun in first and second and got a 1.47 60foot ( even thogh it was half throttle through first gaer and second) but i got a 8.8x@161 mph pass !
off to eliminations , first run i decided to pull more timing and remove the travel limiter all together ; it launched ok-ish (1.4x 60 ft) then unloaded and only spun in first gear , second was full throttle ,,,, wich netted a personal best of 8.6@164mph !!
i was seeing somewhere around 26 psi and the AFR was a RICH 10.2 !
i don't know if it's the hoosier slicks i got on there right now or something else that's causing my traction issues ( slicks have less than 10 passes on them but are about a year old), i always used M/T's and like how they hook , i just went with TNTaddict's advise and tried the hoosiers to see if the work .
in any case , there are some chages on the way along with some major weight loss in the process , i'm thinking 8.0's are really close in my future
11/15/2010
Here are some pics i got off another fourm (thanks again shaker :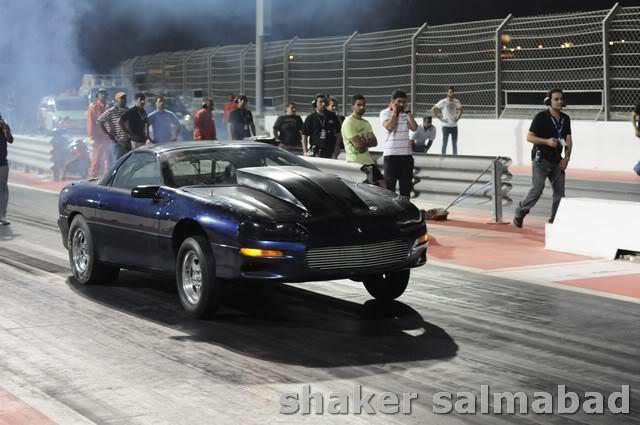
you can see how the car twists to one side , even though it has a beefy antiroll bar, i'll have to look into that too
11/27/2010
uggggh, totally forgot about the season opener race in qatar this weekend
sure its only an 1/8 mile track but i really can use the track time to dial in the car .
so in my infinate wisdom i decided to remove the whole rear end and torque arm off the car in anticipation for some goodies , so now i have to put those back on , as well as the transbrake solinoid and blower and blower drive. then i have to scale and adjust the swaybar and pinion angle . i also have to fab up some sort of panel under the engine to act like a containment system to prevent oil leaking on the track in case of a "catastrophic engine failure" , and if i have time fix the 2 step switch
forgot to mention that i had to take all the stuff infront of the engine off ( blower , drive, balancer and waterpump) so i can get to and replace the front main seal wich decided to leak .
i wonder what it would do launching off the trans brake at 4k rpm
12/5/2010
time for a quick update ,
didn't make it to the first round in qatar last week , but i think i'm ready for the second round this weekend ( thursday and friday ) . they have their races on a pretty tight schedule ; they have a race every weekend for three weekends then they pause for a weekend and contiue with one more race the weekend after xmas . then the venue changes to the Abudabi track at Yas marina where they will have the same deal where they race every weekend for four weeks !
any how , on to the pics
so i did get the rear end back in as well as the blower drive, blower, and transbrake . and i finally wired the VSS (speed sensor ) so i can log it
also managed to set pinion angle (wich was set at +1 for some reason ! )and adjusted the sway bar .
another thing i had to do was get the engine tray fabbed up and mounted , and here is how it came out :
it tucks in nicely and sits higher than the headers , so it shouldn't scrape that bad
and since i'm uploading and posting pics , here is the 8.6 from the last race in bahrain :
the speed is in KPH which comes out to 164.04 MPH
this is with spinnig all through 1st
12/20/2010
time for an update :
went to Qatar for the second round , trying out the transbrake and the 2 step as well as working on the suspension . i also hooked up the VSS sensor so i can log speed
did a few test and tune runs before qualifying and in the first one launching off the footbrake the car got a 1.38 60' (not really pushing it ) which is good because that meant the traction issue i got was solved .
the next runs ( including the qualifying runs got progressively worse , i didn't know it at the time , but the plug wires i had ( 4 year old MSD) were shot , it got so bad that the car would not stall high enough to engage the 5000rpm 2step and would just bog as soon as the brake was released and the car would not pull properly ( almost felt like it had a missfire)
anyhow , after i came back i decided to take a look at it and two of the wires simply came off without any effort at all, which means i was racing on 6 cylinders and would explain the overly rich readings i was getting .
on a positive note , the geardrive was working great ! i maxed out the 3bar sensor i had pushing 30 psi, but the missfires took their toll on the bushings :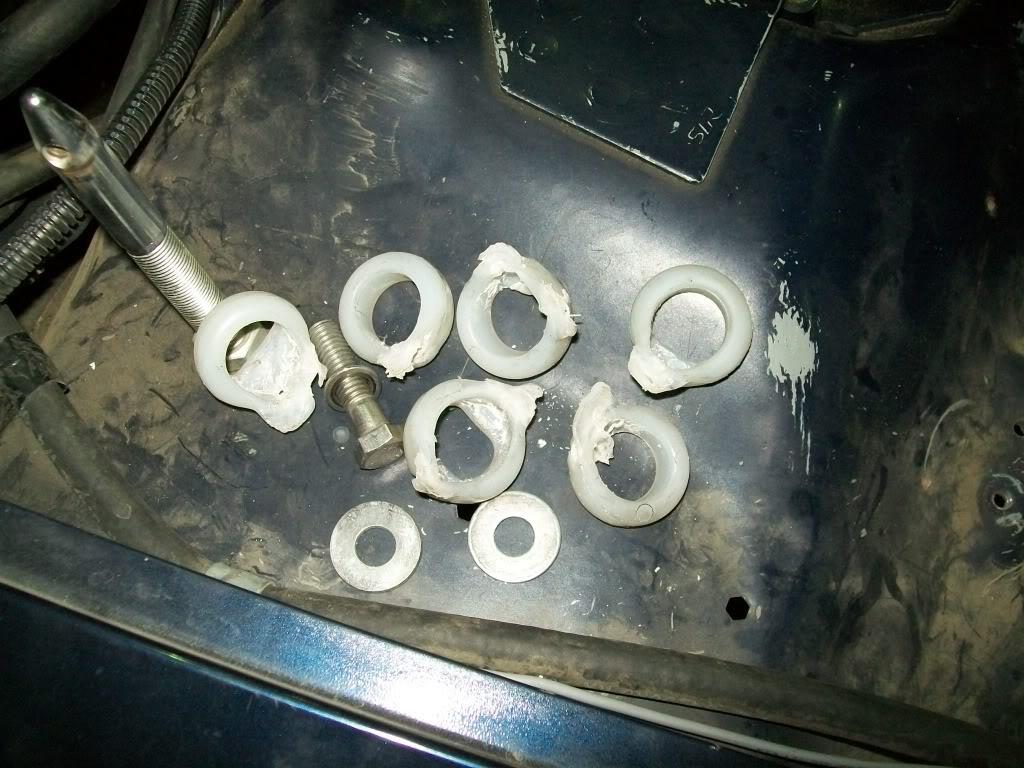
also started to work on the tubelar front end to hold the face and headlight covers on, it will be a one peice design. some pics of the progress i made :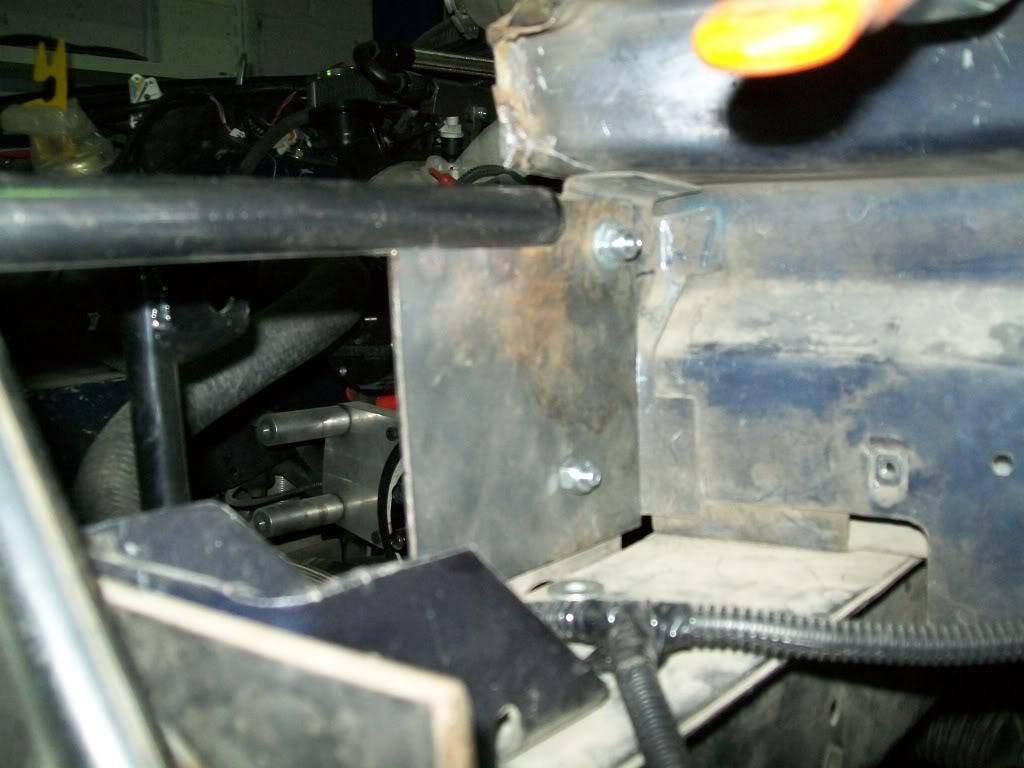
still need some trimming and a few tabs welded on to hold everything in place.
then its off to the powder coaters to have it and some other peices done.
also got the AFCO shocks in today , i ordered a set of fronts and rears as well as adjustable spring perches for the rears. and will dig in to those pretty soon .
also got some remote water pump fittings coming in soon , i already have the remote pump (had it for over a year and a half) and was thinking of installing it to clean up the front of the engine some more.
the pump will mount right next to the radiator and will have two lines connecting it to the block . i'll snap some pics as soon as i get the stuff in .
i've also been toying around with the idea of a belt driven fuel pump , its dependable , greater capacity for feul delivery, and lighter ( i loose the 16V if i go belt driven). i'm still in the "thinking about it " phase.
so next on the to do list is :
- finish front end brace
- install shocks and springs
- new gear drive bushings
- remote water pump and weld mount
- figure out how to get an alternator on there ( so i can run a smaller battery in the rear )
12/27/2010
Got more stuff done :
i'm almost done with the face brace
just need to drill a few more holes in the tabs and have it powdercoated 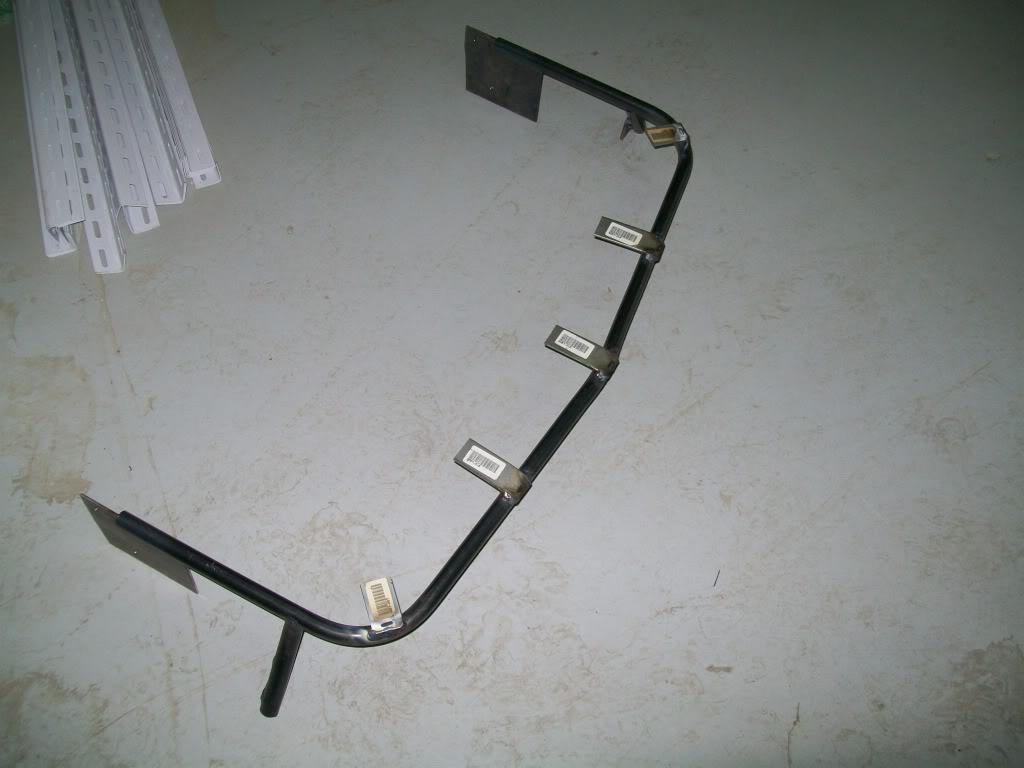
and i just got the new geardrive bushings from the supercharger store, these are the new improved ones ( black) and should hold up to the abuse. a lspped them on and installed the blower/geardrive assembly.
also started working on the remote water pump , i decided to go that route to free some space for the alternator as well as better looks
the water pump will be placed just next to the radiator outlet and connected via a 3 inch hose like so :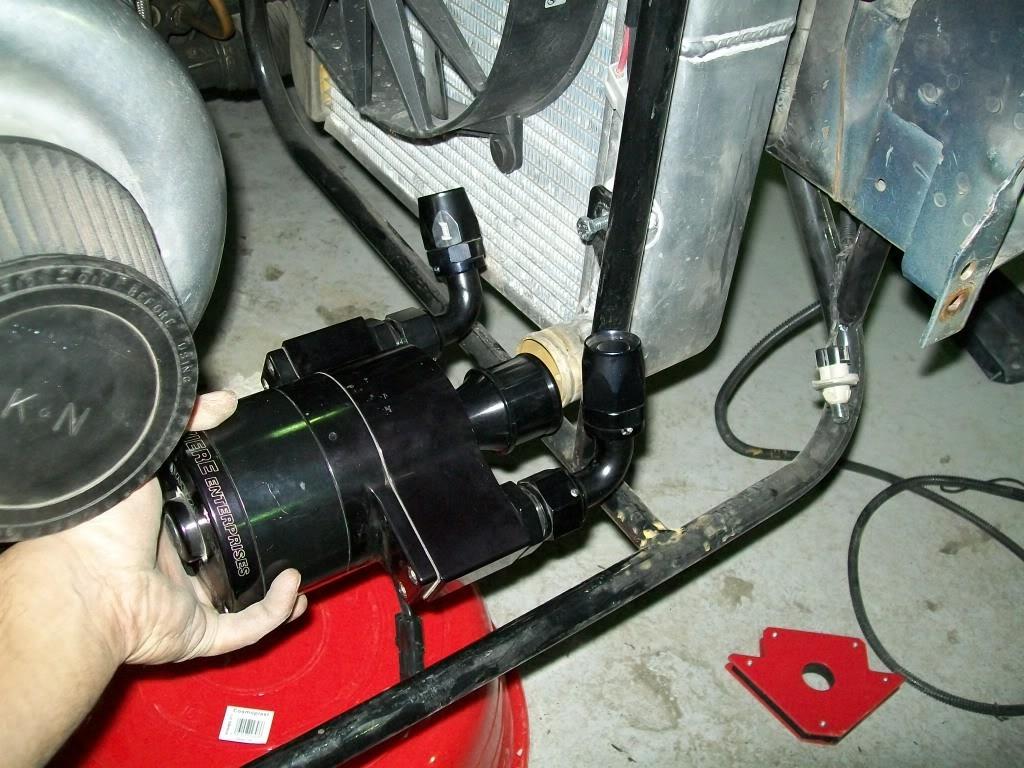
to do so i had to weld a pad for the pump to sit on , so out came the tig welder and :
and here is how the block adapters look like with -12 hose ends sticking out of them: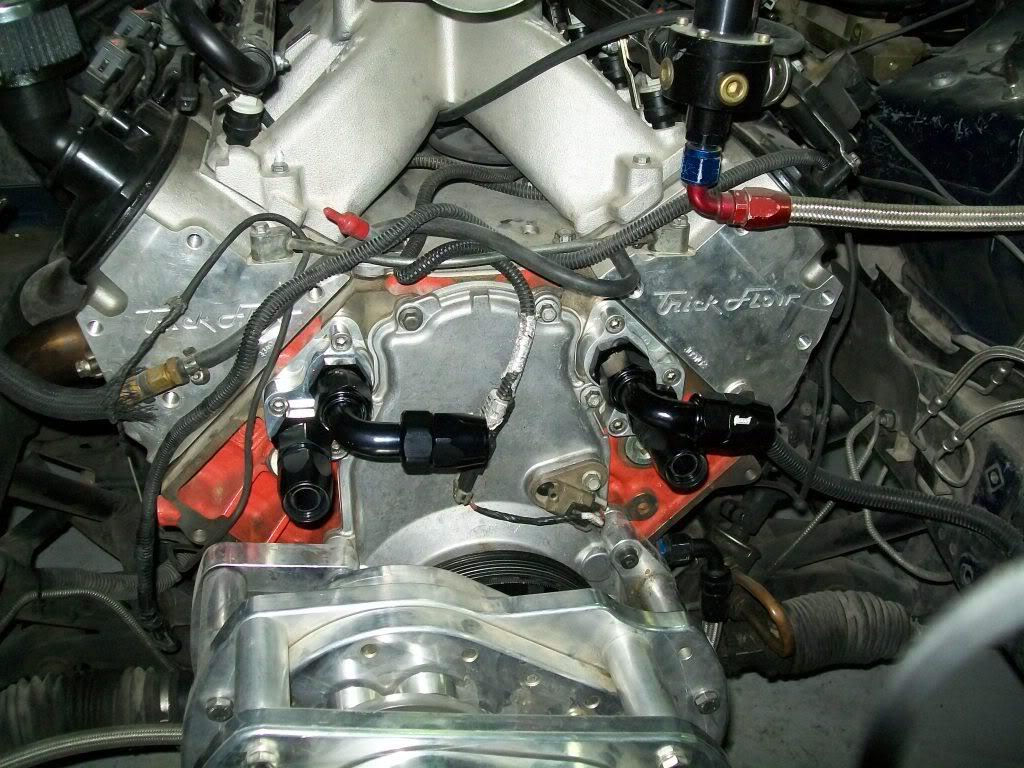
all i have to do now is make the -12 hoses and send the brace off to be powdercoated .
i also got a nice xmas gift for myself
a set of front and rear AFCO double adjustable coilovers and adjustable spring perch :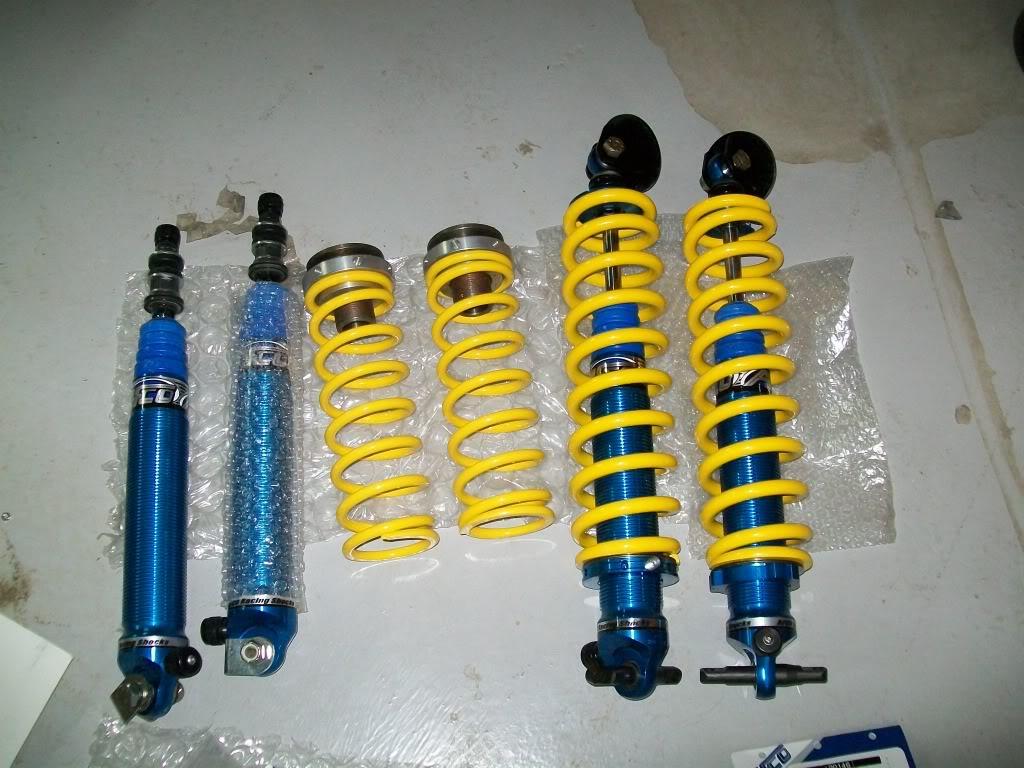
those will go on next
1/14/2010
some updates i guess ,
i still didn't put on the suspension parts , but i did talk to kurt urban regarding the exhaust i have on the car and we came to the conclusion ( well he did , i just basked in his glory ) that the current 1 7/8 headers i have now are choking the car and i need headers with primaries with at least 2-1/4" or ideally 2-3/8" primaries with a 4.5" merge collector (necking down to 4") .
so after knowing that , i decided to get some made ,,, only problem is that something that size could not be found off the shelf and has to be custom made, and the closest place to have them made is at the Alanabi team's garage in qatar . so i called them up and they said no problem , i just have to supply the collector and flange and they'll do the rest.
so i just orderd a set of flanges and some Dynatech slip on collector mufflers which should be here in a week or 10 days .
but since i'll be waiting for the stuff to show up and get made, and since there is a race coming up soon , i decided to install a set of American Racing Headers i had ordered ages ago , they are 2" primaries and had a 4" merge collector (necks down to 3.5") . i ordered thse some time ago and asked for a regular collector but got a merge collector instead , and i was under the impression that merge collectors would only help an N/A motor and not a f/i motor. so i thought these won't hurt at all - especially since the car would not pull at all on the top end .
here is how they look compared to the old ones :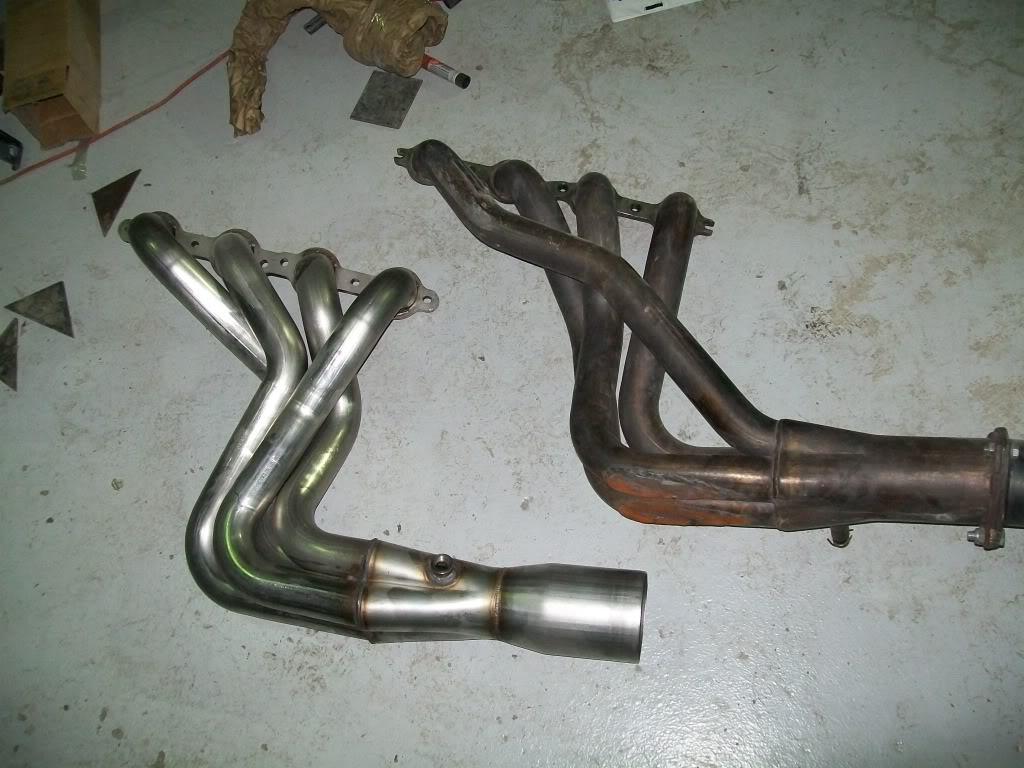
these headers fit nicley , but only thing i noticed is they stick down a bit more than i like: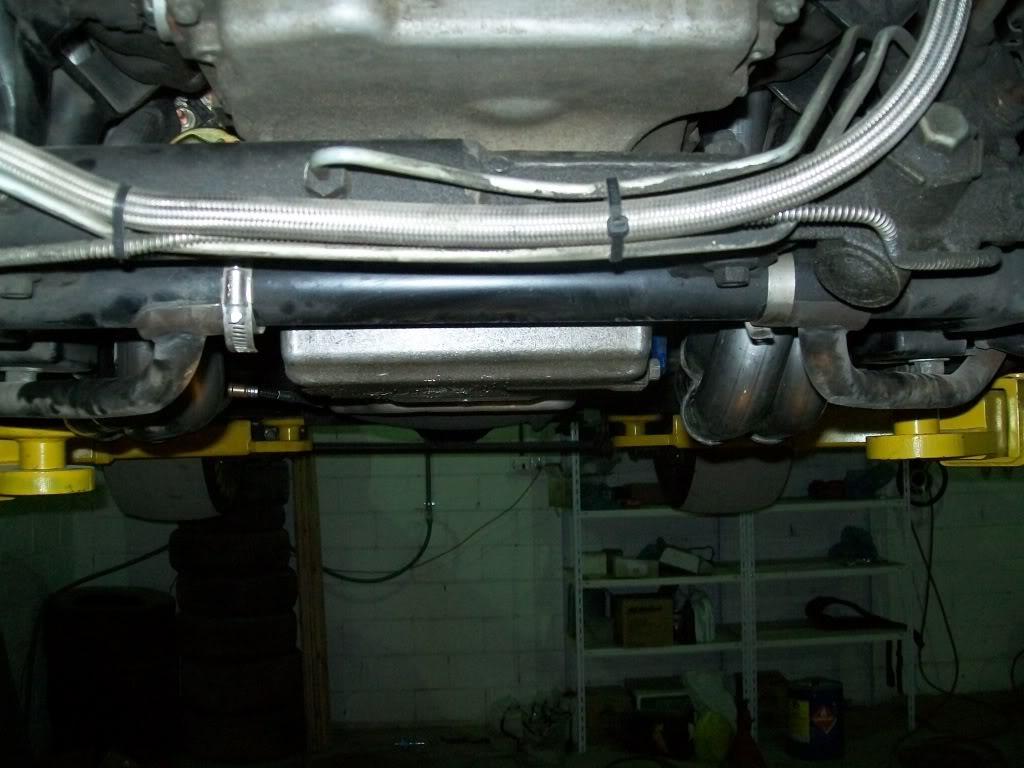
and how they look under the car :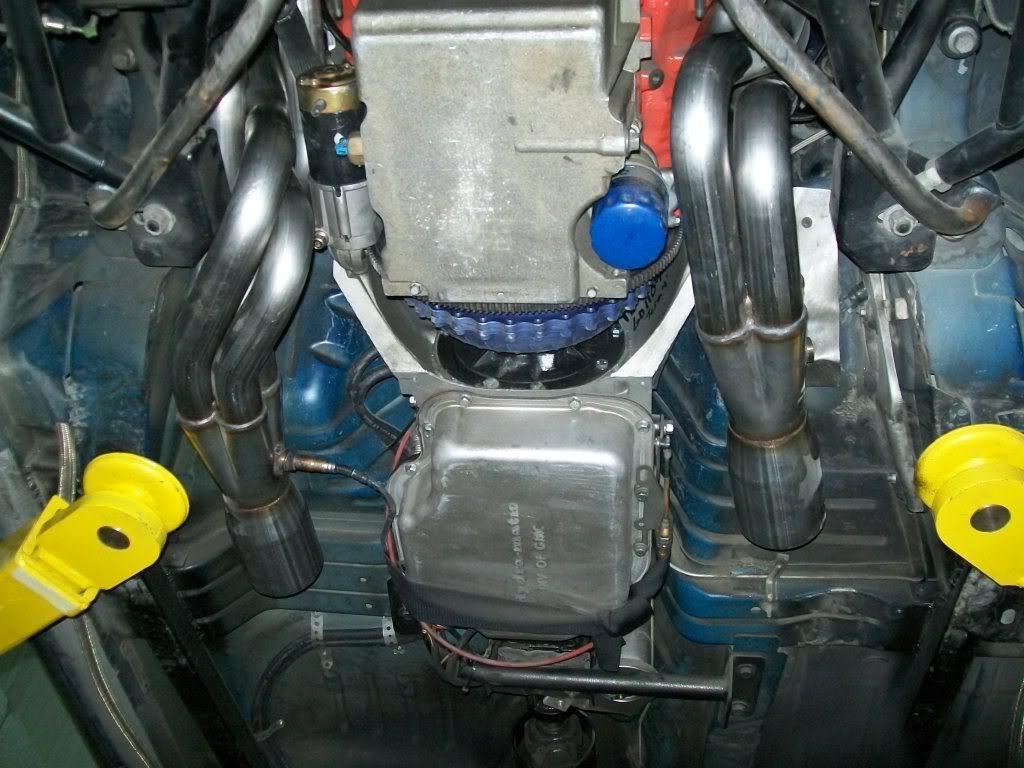
also got my lexan windows in , i'll try to snap somp pics of them when i get chance and try to figure out when i'll install them.
aaaaaand i just got an update from racecraft regarding an order i placed , should be shipping out on monday , more details when i get the pile of stuff in
i still have to fix the brake pedal switch for the 2step , i just don't seem to have the time to do so even though its just a simple task of attaching a small switch tot he pedal.
guess next up on the list of to do stuff is to swap out the suspesion peices and fix the pedal switch. i also want to remount the accusump canister horizontaly and make me a set of headlight (cover) brackets .
1/25/2011
quick update while i'm here , took the headers off and i'm going to install the old ones again ( will sell the ARH ones so no need to use them up ) . the plan is to take the car to the shop in qatar to have them fab me a set . i ordered a set of dynatech collector mufflers ,,,, the large by huge ones ( 2-3/8 primaries with 4.5 outlet) and one showed up ,,,,,,, lets just say inorder to get them to work under the car i have to lift the car about 4 inches so those collectors don't scrape
soooooo, i ordered a set of regular collectors ( same size , but no muffler) for my plan and backup plan ( more on that later in the post ) , these should be here in a week or so . so when ever all the collectors are here , i'll head to the shop and have them build me a set of headers like i said , BUT ( notice the emphasiss on "but") instead of having them routed under the car , i'll see if they can have them routed forward and to the sides . they will exit ( at least i hope so ) right infront of the front tires .
i tryed placing the collector muffler under the car in that position and on the pass side all i have to do is relocate the Accusump can ( something i've been wanting to do for a while ), on the driver side it gets a bit more involved : i'll have to "twist" the radiator to one side so it clears the collector, and inorder to do so i'll have to redo the radiator mount .
off course all this fuss is so i can put a big collector on there while not compromising ground clearance - plus it looks bad ass !
and if that is not possible , then we move to the backup plan : have them build a set of traditional headers that exit under the car and use regular collectors . sure its not as fun and exotic as the first idea , but hey , beggers can't be choosers
sorry but no pics this time , but i'll snap a few next time i'm there so you guys see what i'm talking about .
so the plan now is to build a new "core support " to hold the radiator in the twisted position so its ready to be used it the front headers are a go .
more updates soon
1/29/2011
i did some work on the car in preperation for the headers
turns out i can't run the collector through the fender for a couple of reasons , one being that one of the primaries will be about 6 inches long and the other is that the master cylinder is in the way . i can see how it could be done with an exhaust pipe like on a turbo car , but there is no space with a collector unless the car is something like a tube chassis deal . so i guess its down to forward facing and under the car now
like i mentioned earlier ,, the regular collectors will be here within the week, only after that will i take it to have the headers fabbed up .
i decided to remove the radiator mount i have on the car and fab a new one instead of hacling up the one i had already . the plan is to mount the the radiator tilted to the side a bit to give more space for the primaries to go through.
first off here is the monster of a collector that i have to work with :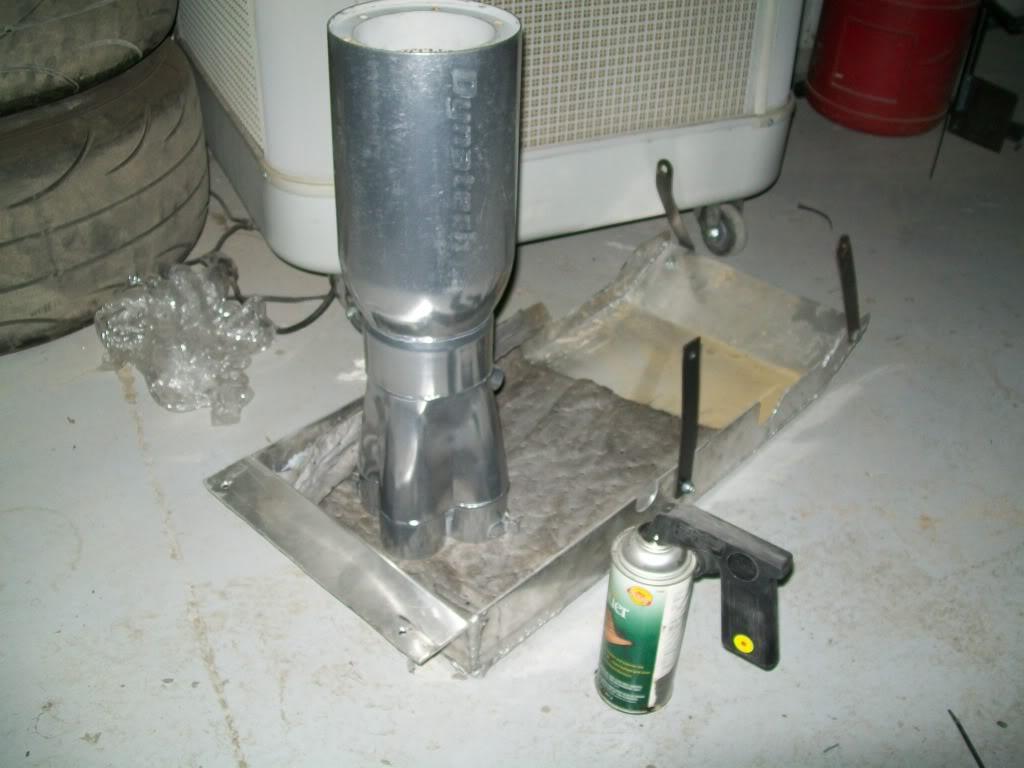
its 2-3/8 primaries going into a 4.5 inch collector then through a 6" muffler , here is how it looks if it were to be installed under the car ( these will drag on the ground as is ) :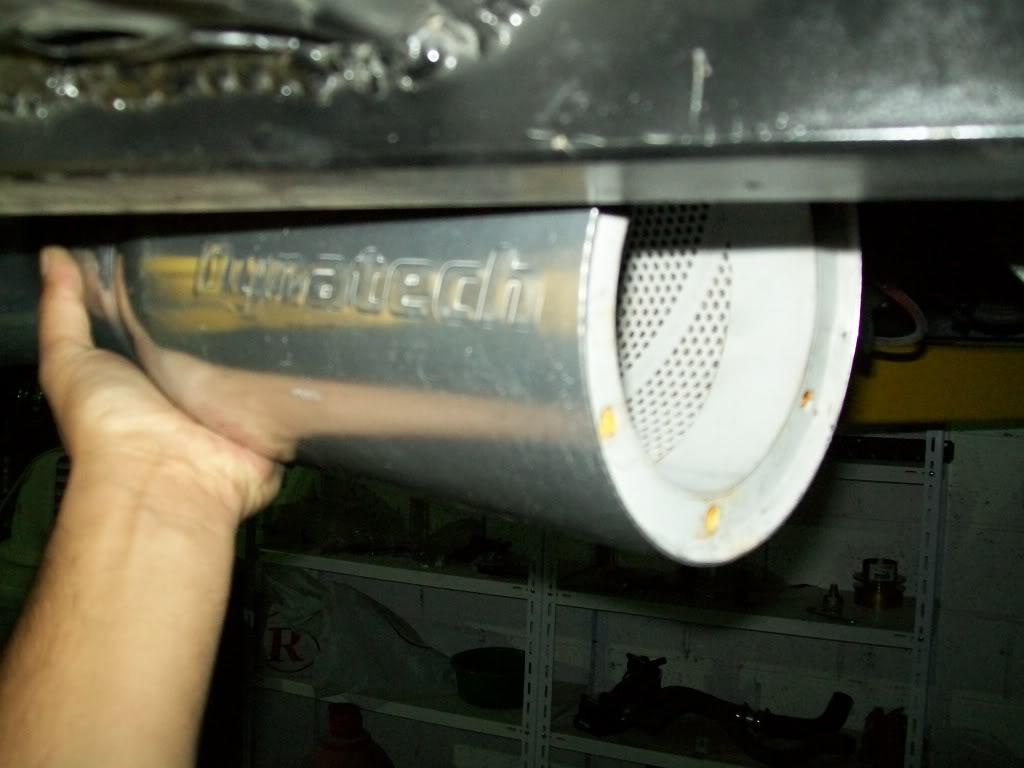
here is how they look from the front (picture makes the primaries look huuuge ) :
if i run the headers up front i can use these monsters without issues and i can switch to regular collectors if i need to .
and here is how the radiator looks after moving it to the side, you can see how much room it frees up :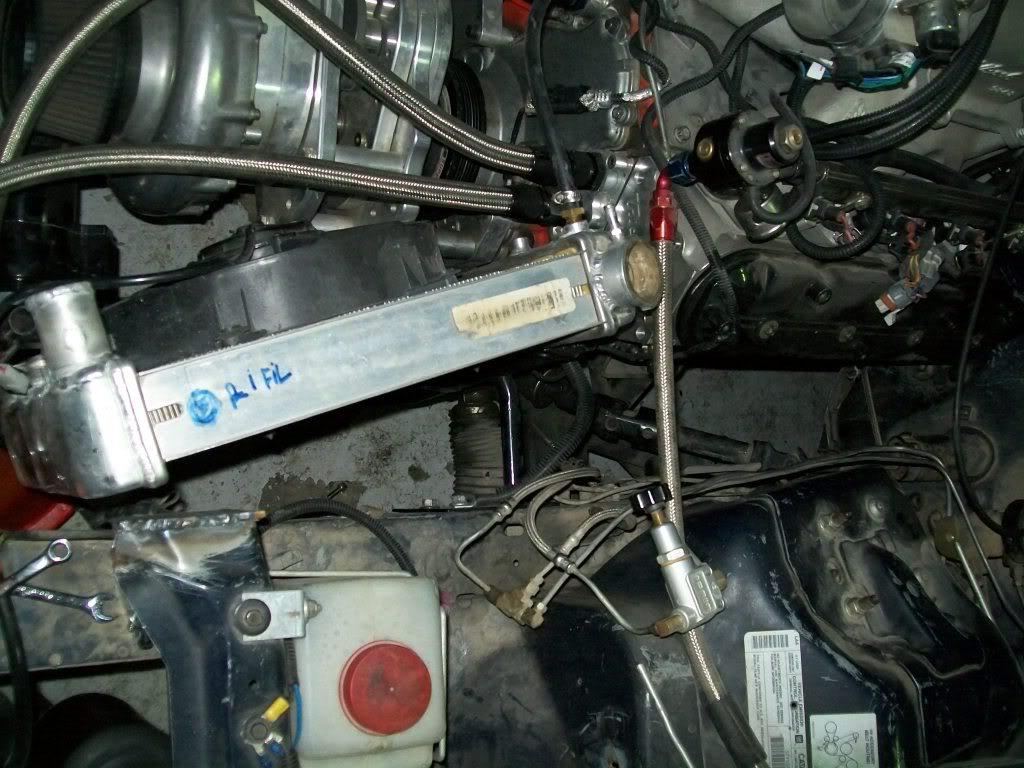
(you can see the collector peeking at the top left of the pic)
and this is where the collector will be when done, it will have a tip turning it to the side instead of having it go through the bumper facing forward :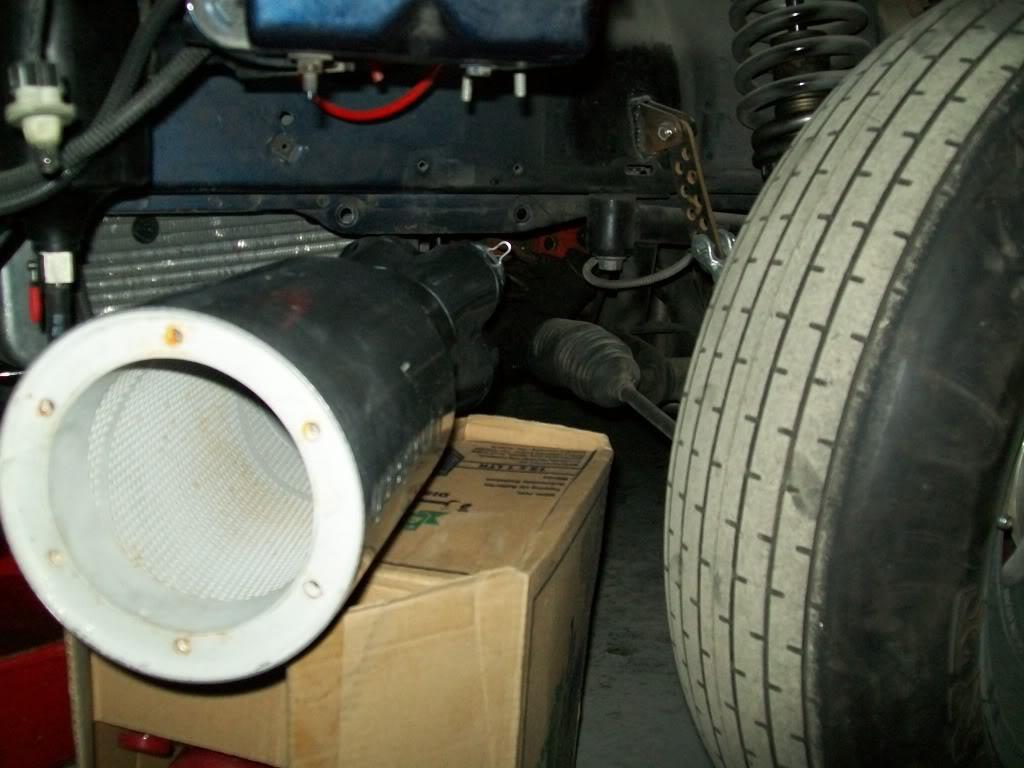
and here is the begining of the new radiator mount, it will have the radiator , water pump as well as the oil accumilator all bolted to it :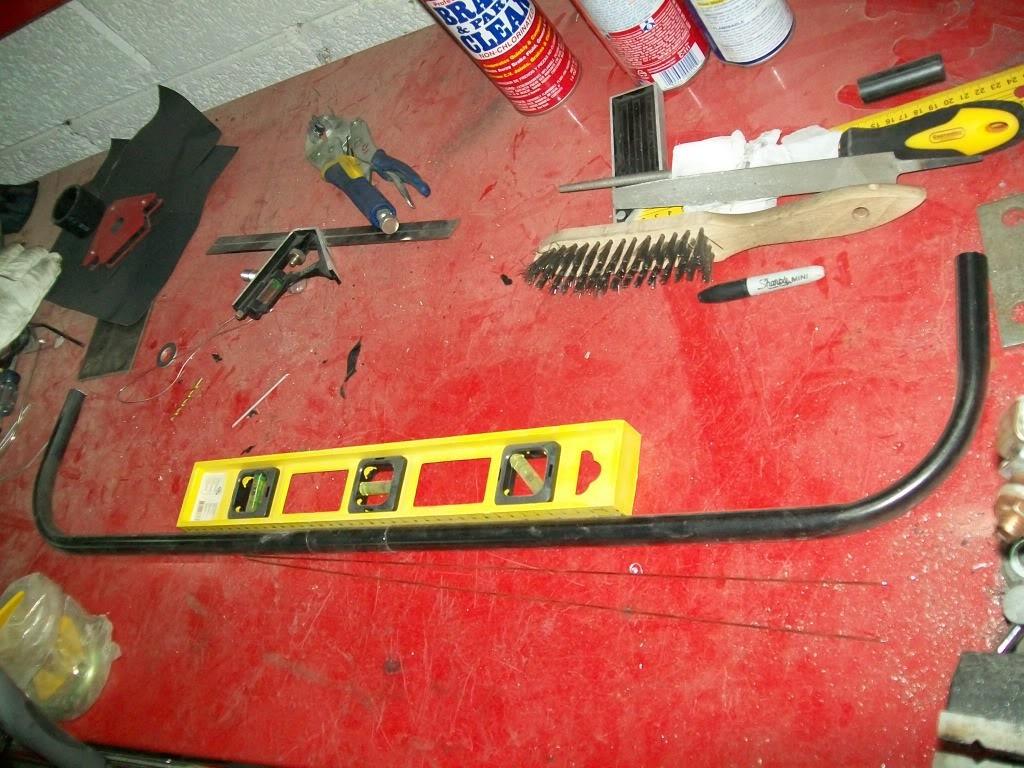
so far i finished the radiator mounting part, next up is the water pump plate and the accumilator mounting plate :
2/1/2011
i guess i can call the radiator mount bracket done ( well almost done, i still have to powdercoat it ) , but the bad news is that in my rush i forgot to snap pics of it on the car and i already installed the intercooler.
anyway , here is how it looks 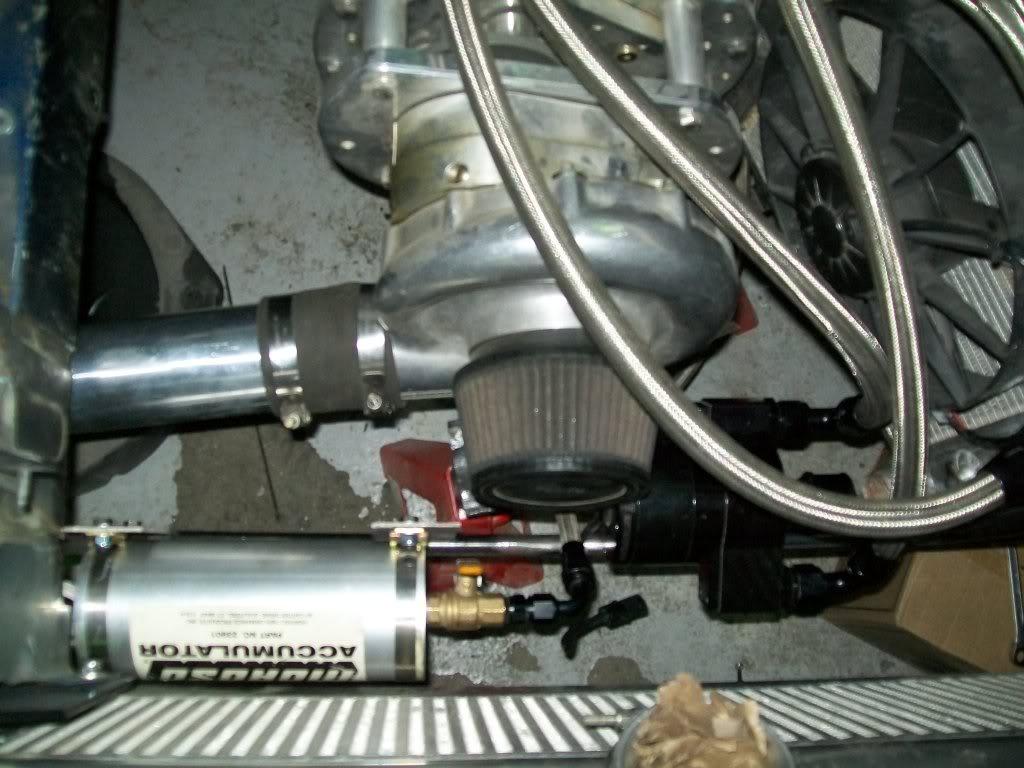
so now i have to put the old headers back on , attatch the steering shaft, connect the lower radiator hose and fill with fluids.
my only problem now is waiting for the collectors to show up in time. if they do show up before thursday , i can take the car over to the shop and have them fab the exhaust up . if not i'll have to either take the car with one collector ( the huge one) and have them fabricate both sides using that one alone as a template , or wait till next week and take it then but then i run the risk of missing round 3 in bahrain .
2/2/2011
pooooop!
i just got off the phone with the shop manager and he said they are real busy and could not do anything till the 18th ,,, and the race will be on the 23rd so no headers for me ....
guess its back to the 2 inch headers again
2/4/2011
more poop but in a good way i guess , i took a look at the flanges i got and guess what : they were 1-7/8 port size ! now imagine i drove all the way to Qatar only to find out i gave them the wrong flage size !
kmracer, i know its a bit big , but i'm anticipating future growth
but to tell you the truth i'm starting to think ( espacially after talking to kurt) that i should go with 2-1/4 primaries into a 4.5 collector .
anyhow , i was looking at the car last night and started mocking up how the header tube routing is going to look like , cause i think i'll be taking a crack at it
so i just ordered a set of 2-1/4 flanges and will order a bunch of mandrel bends in the same size and see what i can do
2/19/2011
i got the new flanges i ordered from madman, he made me a set of stainless steel 2-1/4 primary header flanges : (the LS7 gaskets look anemic compared to these ! )
furthermore , i put the 2" headers back on the car since the plan is to go racing this weekend (depending on the political forcast ) , if not then its off to qatar for the new headers.
moving on , i placed an order for a whole bunch of parts from racecraft and some other vendors a little while ago , and there has been a steady stream of parts showing up
to begin with me and TNT Addict got in on the group perchase for the lexan window kits , and i got a a set of windows to do the whole car ( sorry no pics )
also , i got a set of dual rear claiper strange brakes: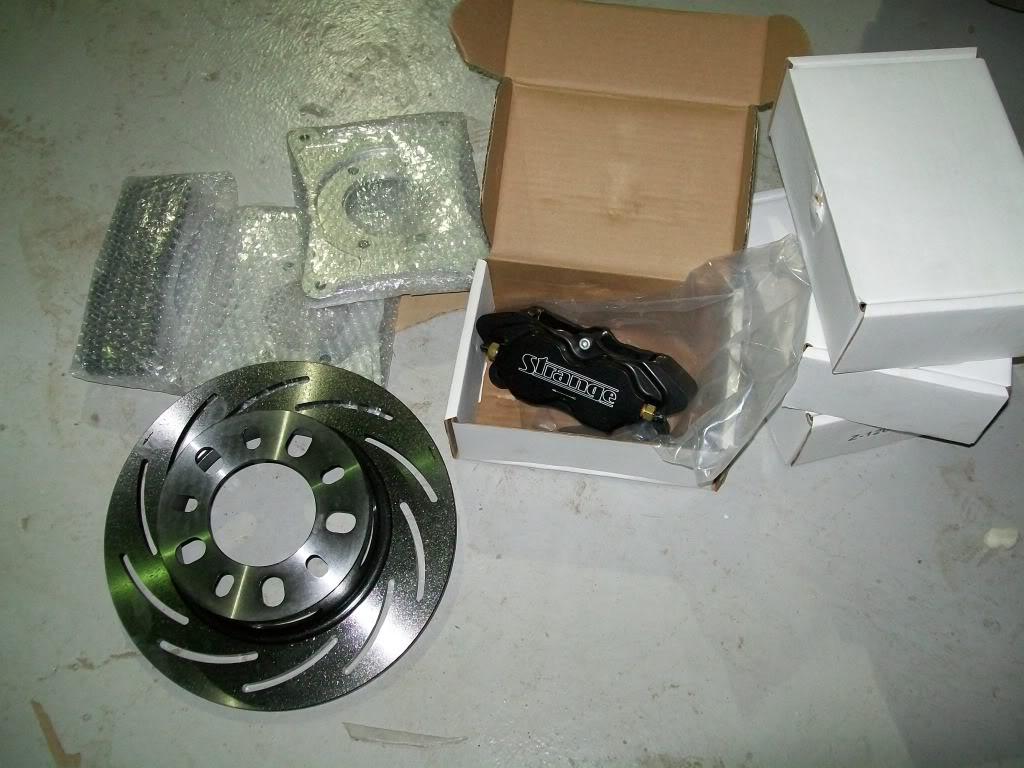
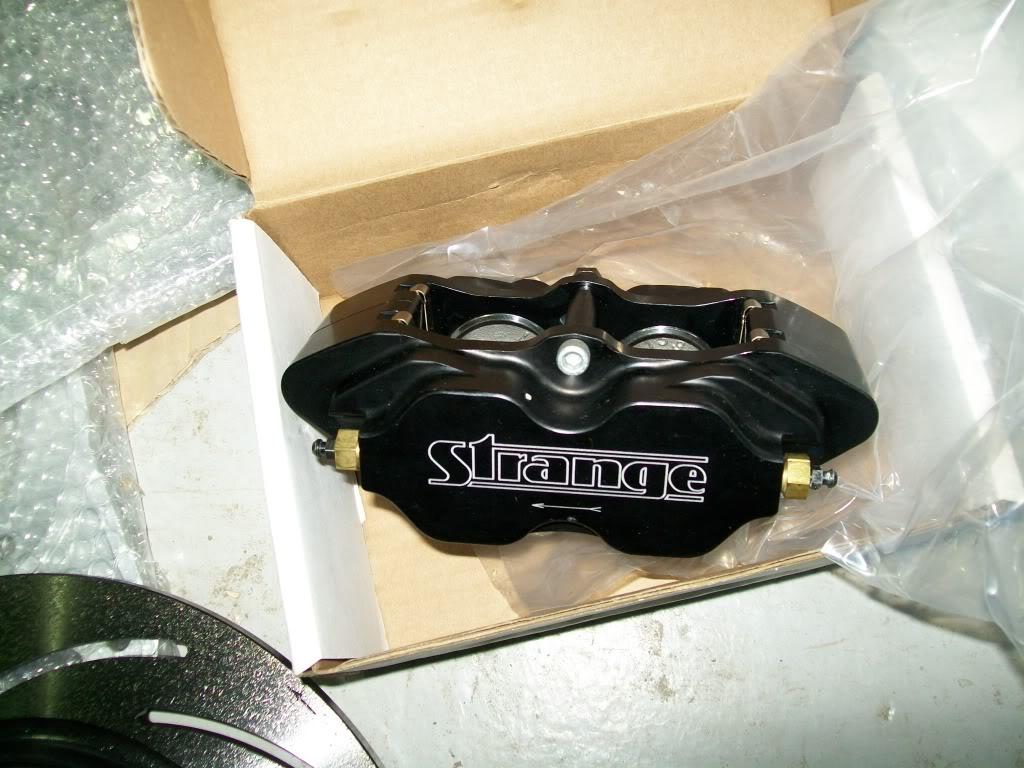
and also ordered a drag steering coloum along with with quick release hub and steering wheel :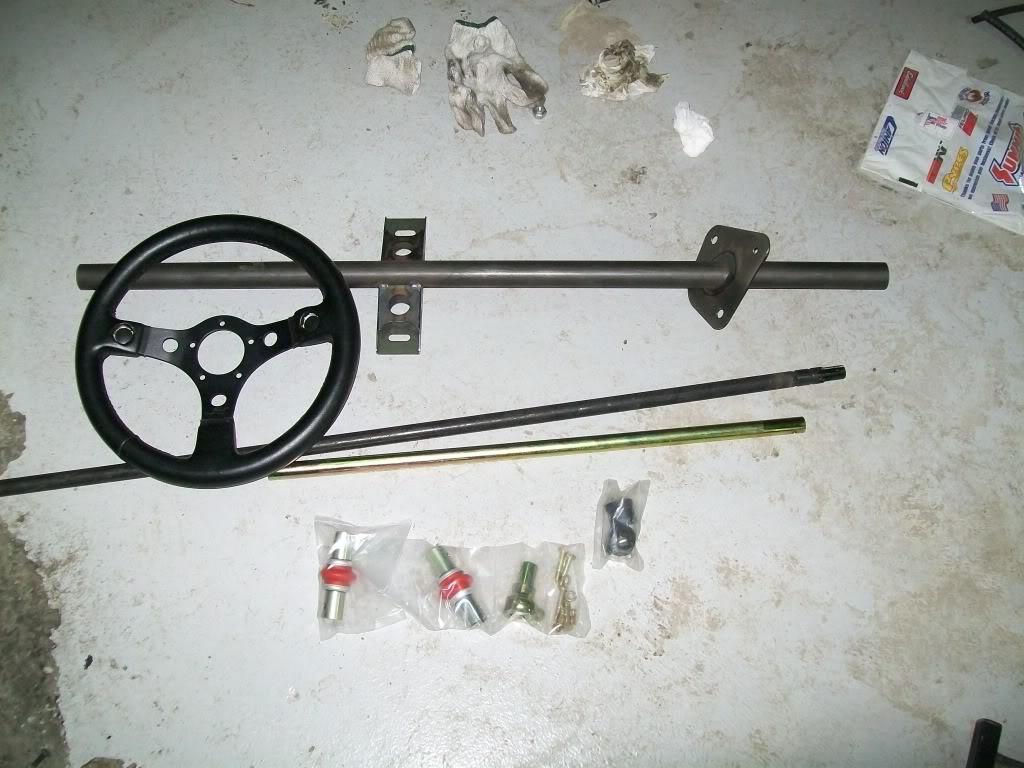
and because i might get the headers done soon i decided to install the column so as to know what room there is to build the headers. so out came the stocker and in went the new one here is a comparison :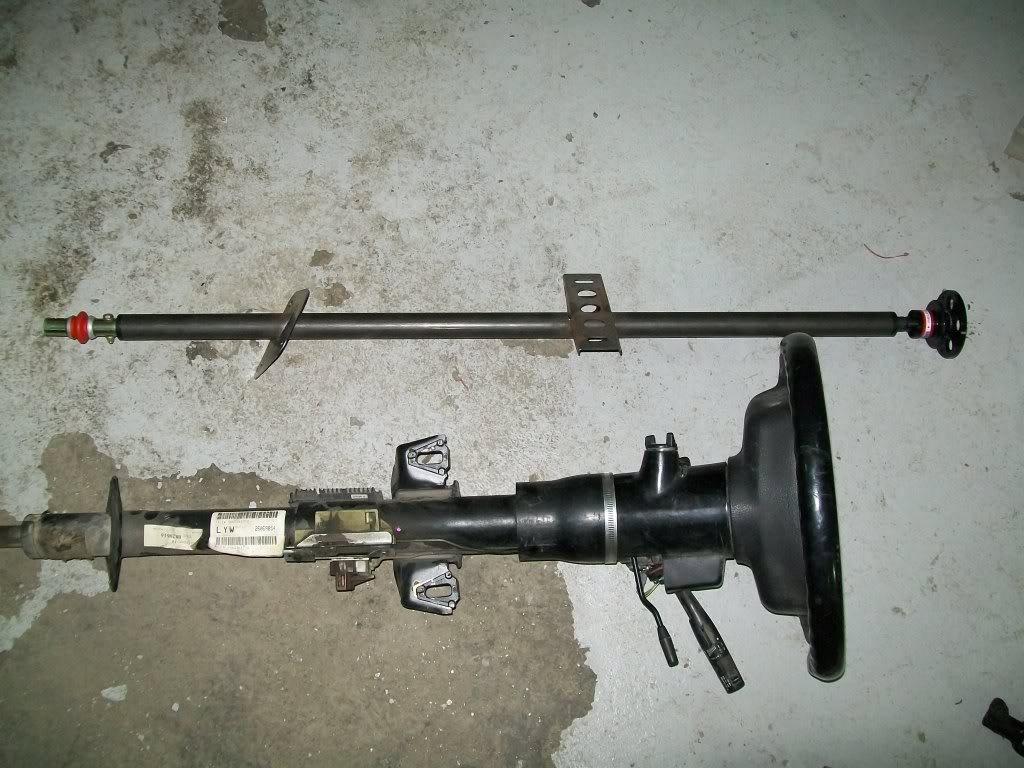
and here is how it looks on the car , the wheel sticks out too much for my taste , so i'll have to shorten it when i get back ( its going to be removed any way to get powder coated) :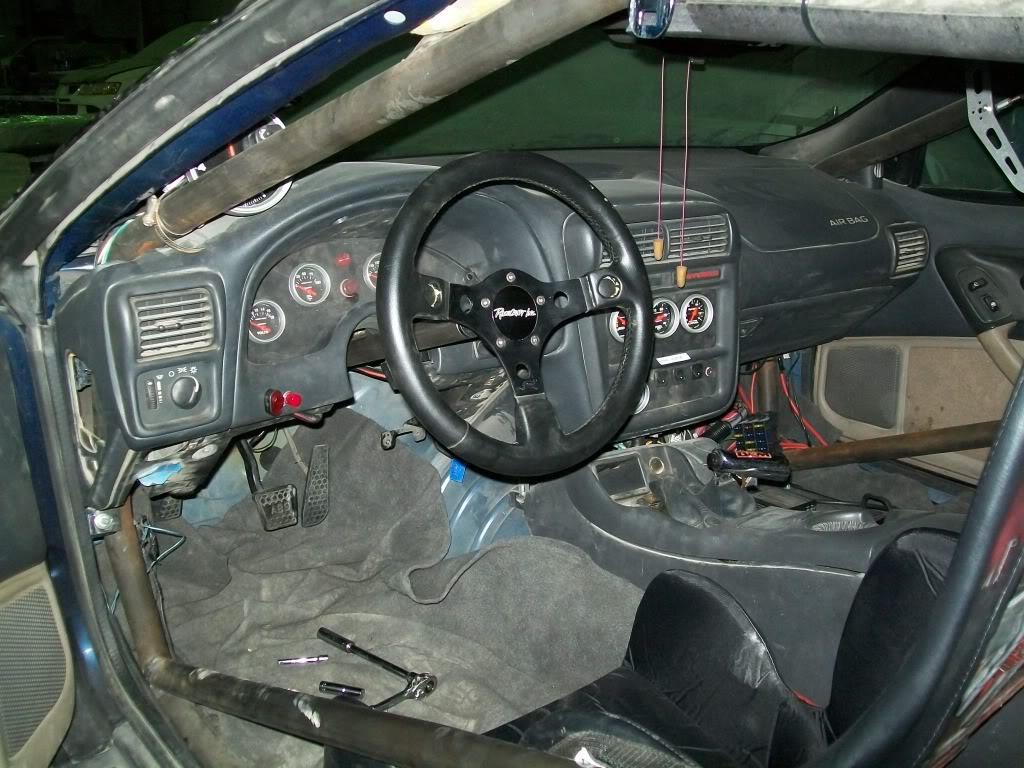
i also got in the new 9" housing in , its too pretty to put on the car 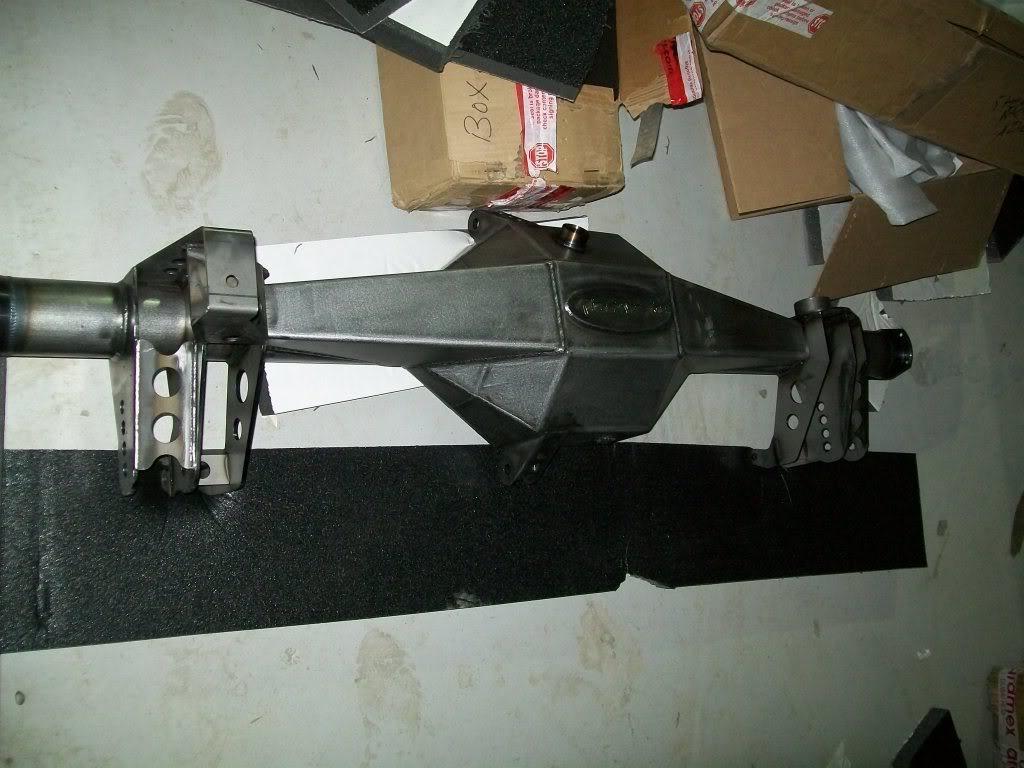
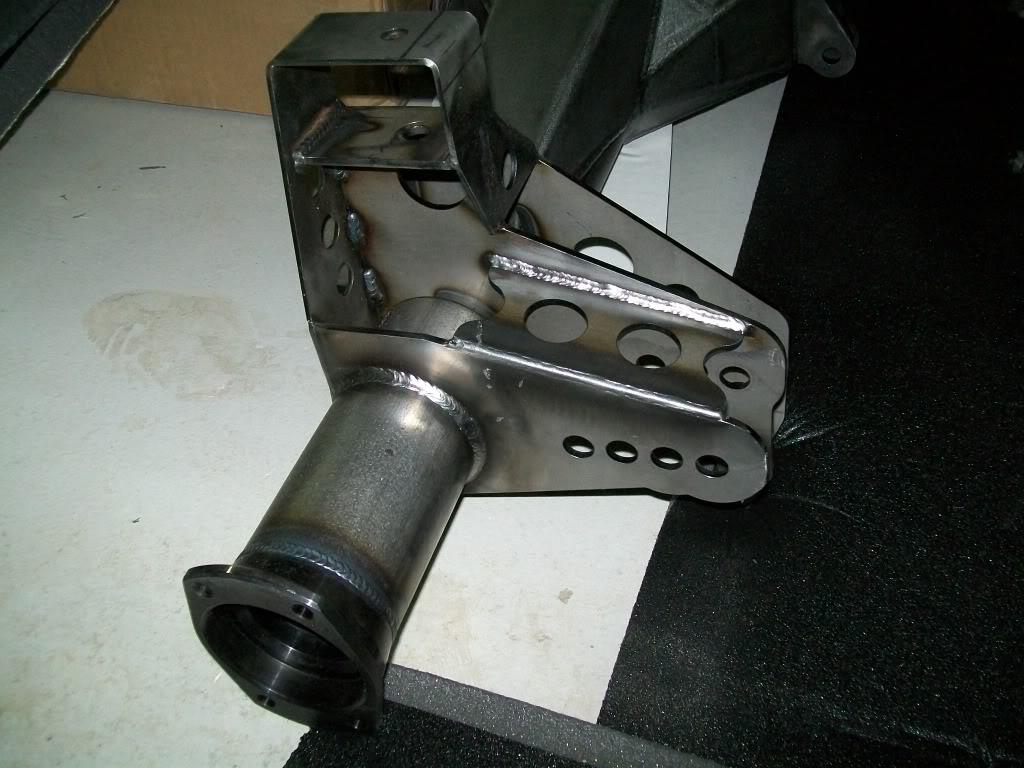
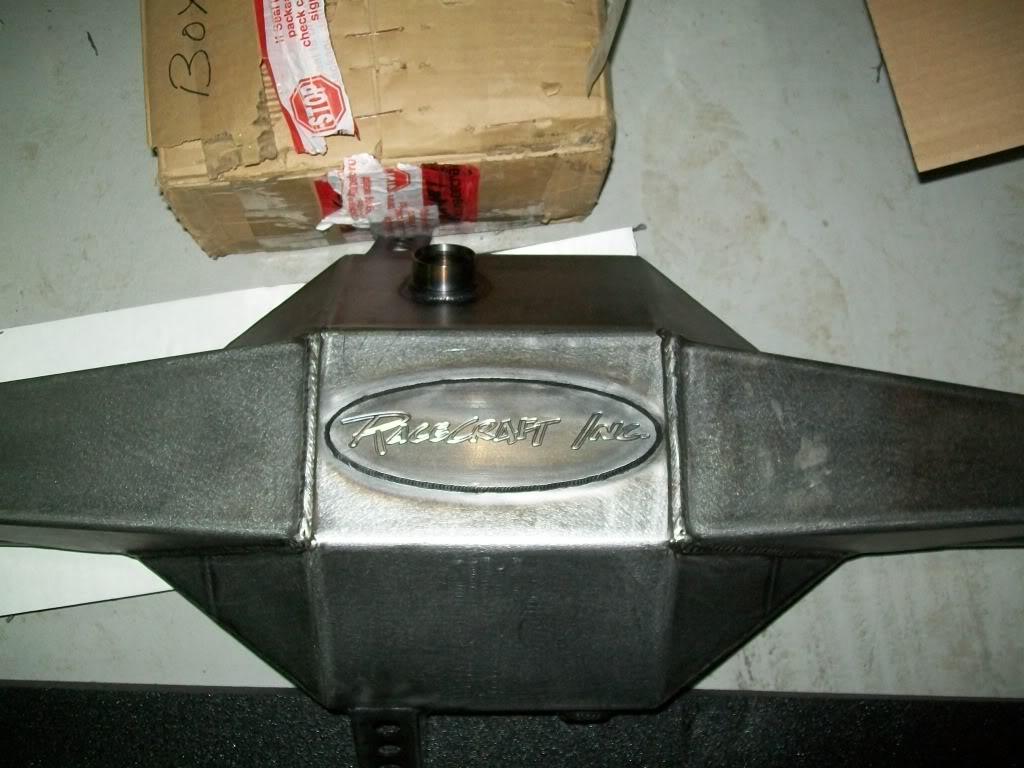
and here is whats going in the housing: lightweight aluminum 3rd member with 40 spline spool :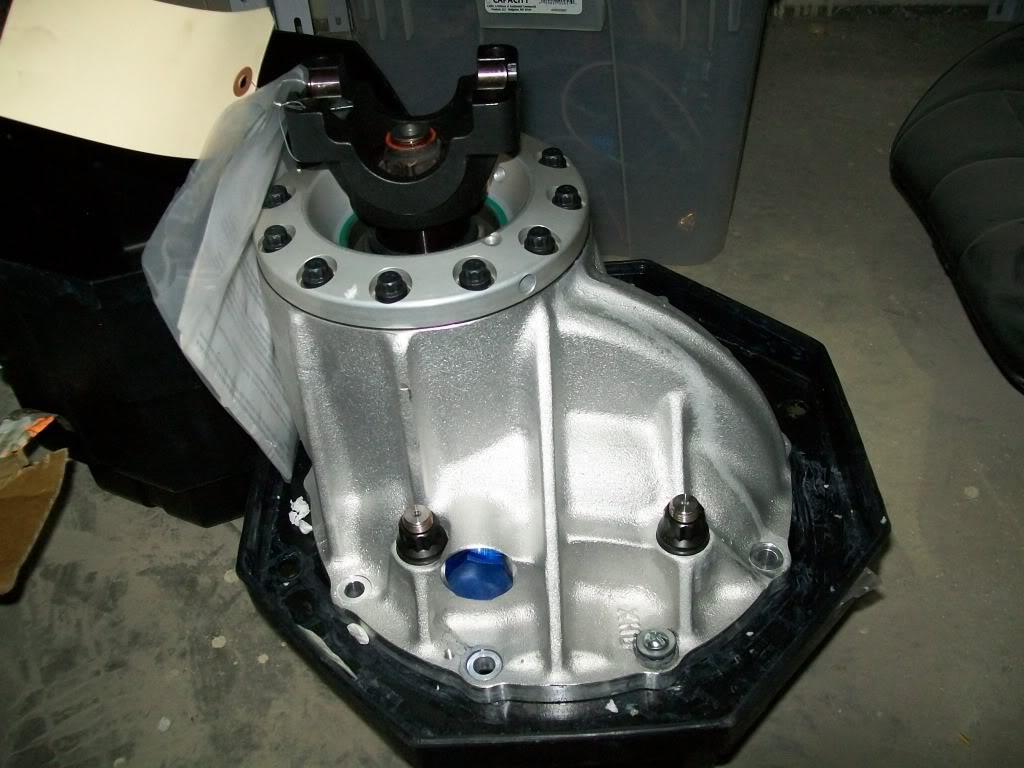
and to to connect all that a new torque arm 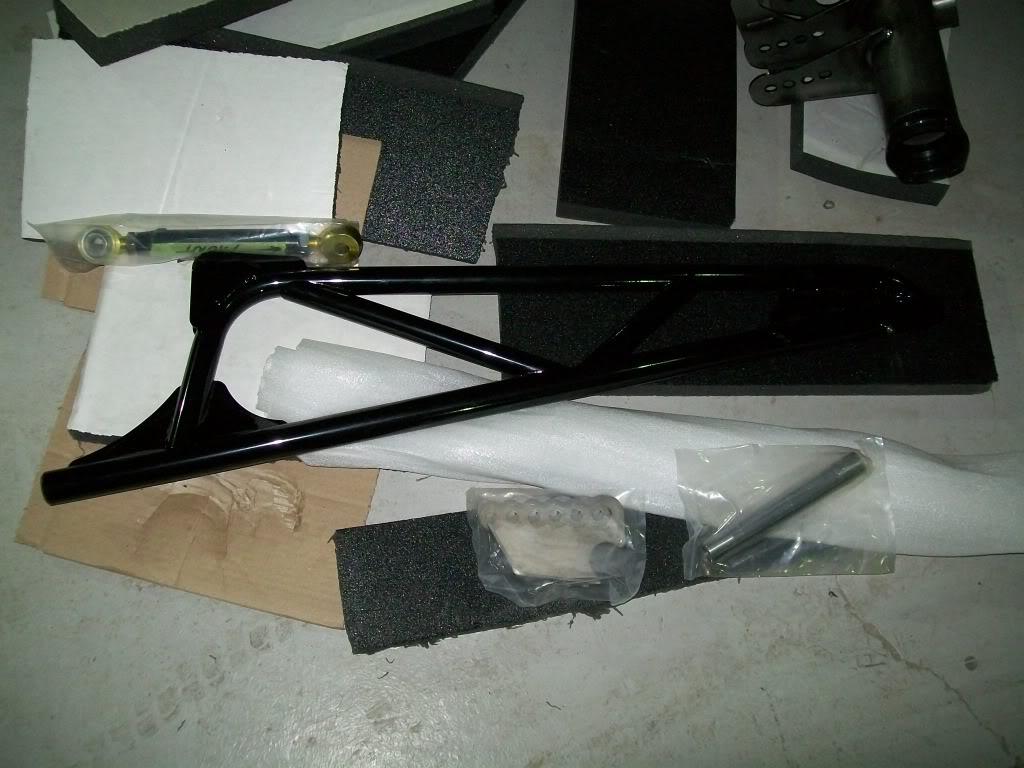
i'm still waiting on the new anti-roll bar as well as some chromolly tubing to make x bars on the doors as well as down tuber from the cage to the front of the car ( frame horns).
also on the way are a set of mark williams 40 spline lightened axles to stuff into the housing.
off course i don't think i'll have time to install all these items this season , so i'll probably take my time and wait till the off season (summer over here) and do them all at once ( well maybe the shocks will be installed soon )
other plans i have is to convert to a mechanical pump and fabricate a small tank up front ,,, but thats not so high on my to do list right now
2/26/2011
the 2-1/4" bends i ordered came in , so i started working on the new headers . first order of business was to make a mock up header out of some PVC pipe and bends . i had to use 45 deg bends all though the mock up phase cause they follow the real header tube bend nicely . i also put the plug wires on so that i can work around them and insure easy plug access.
here is the begining of the process, i started from the #8 primary and worked my way forward: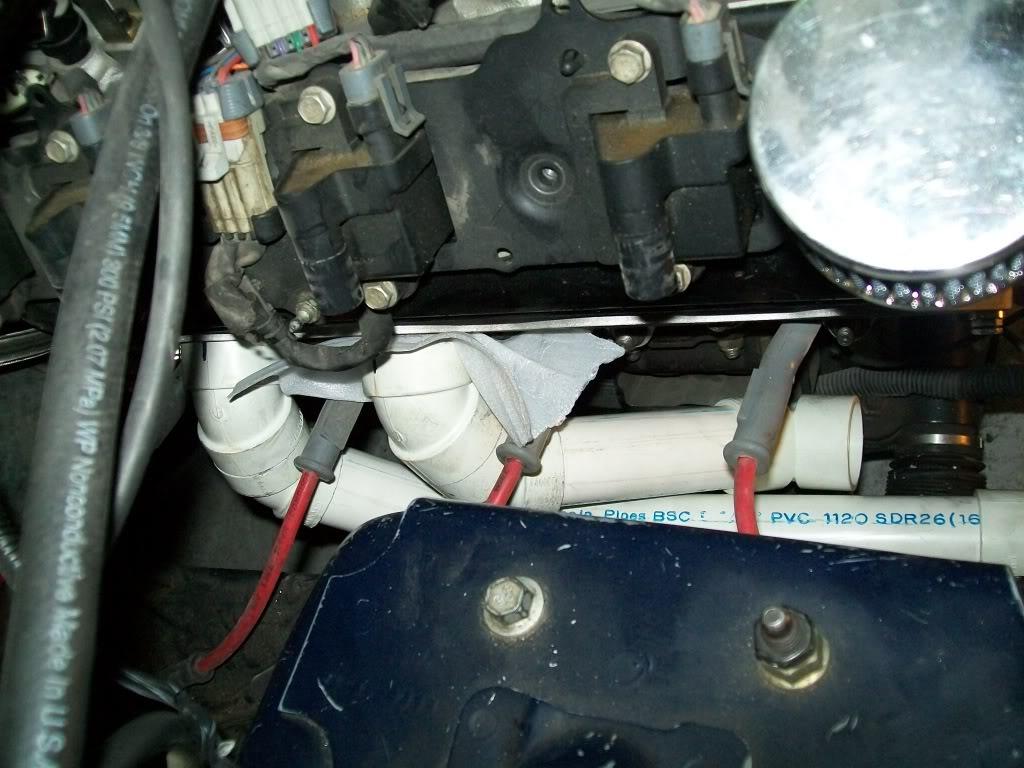
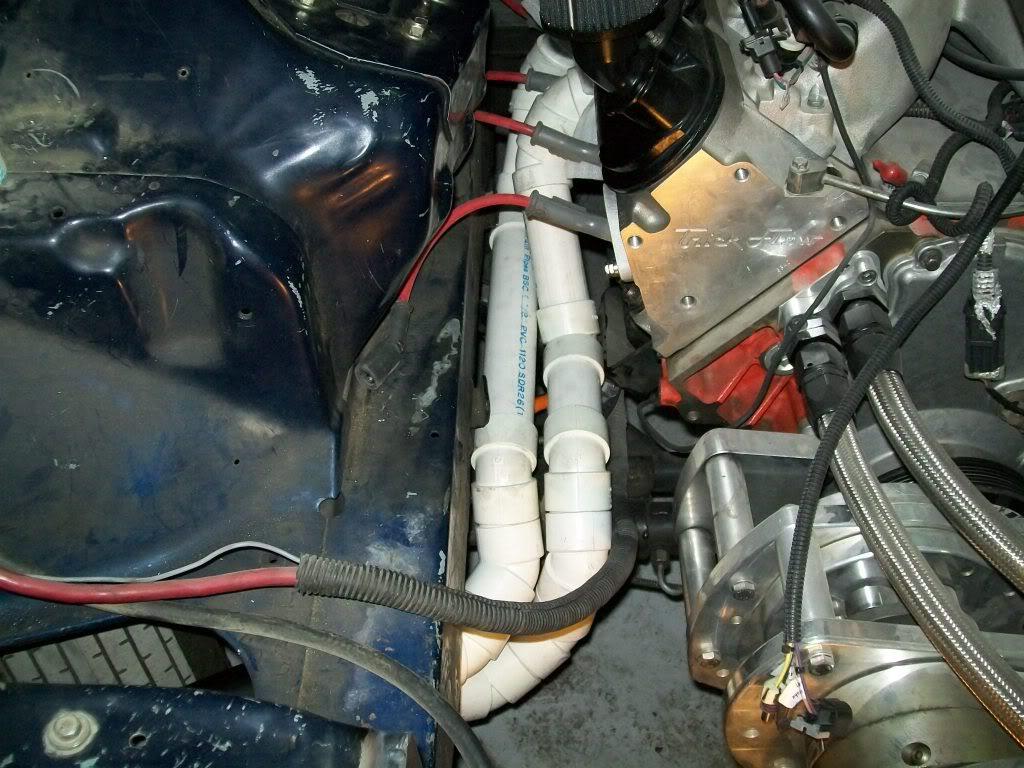
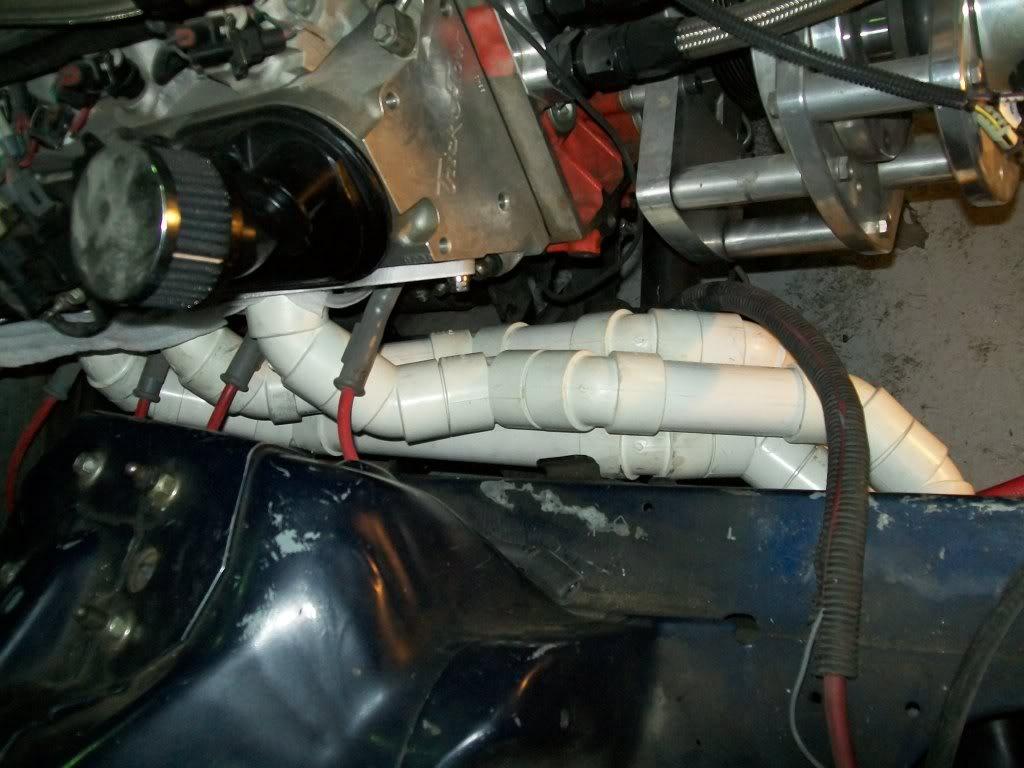
and thats when i ran out of elbows
any how , after looking all over the place at headers today i decided to modify the routing i have right now , the difference will be that the # 6 primary will be on top of the #8 primary where they go horizontal , and #4 will be closer to the block and closer to #8. that way i get better primary tube length and all i have to do is route #2 forward then down.
more to come as soon as the plumber calls
more plumbing details
i rerouted the hoses to see if it would work that way and it did . i get primarries with less variation in length than the previous design. here is how the second incarnation looks :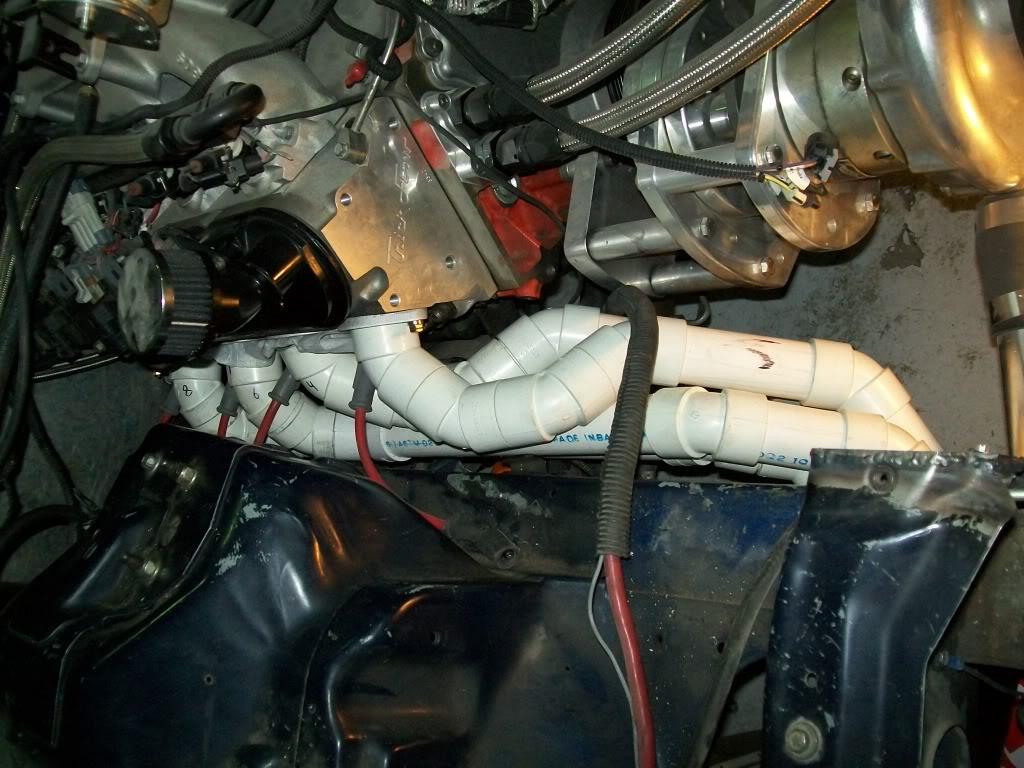
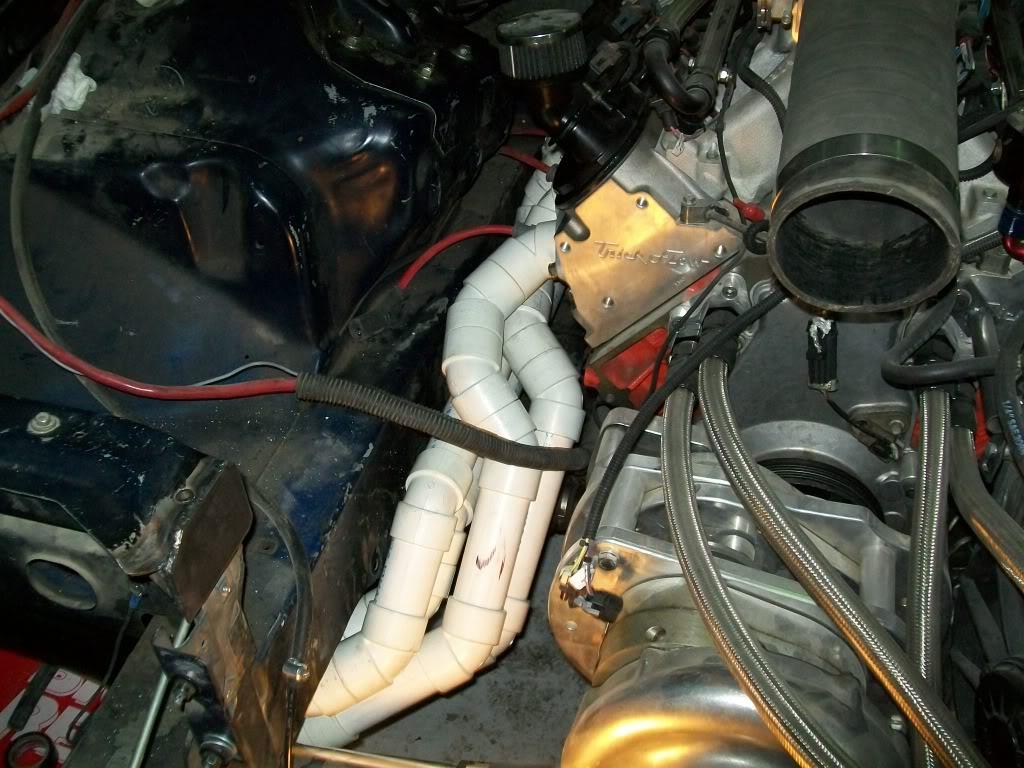
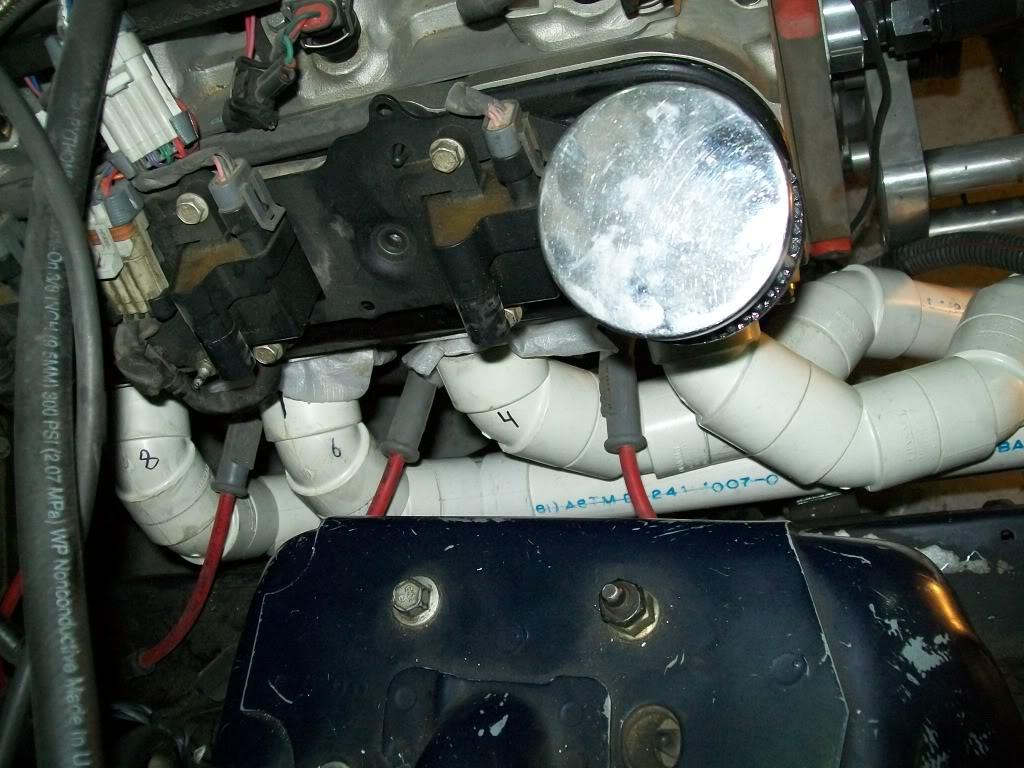
and here is how it is after screwing everything inplace :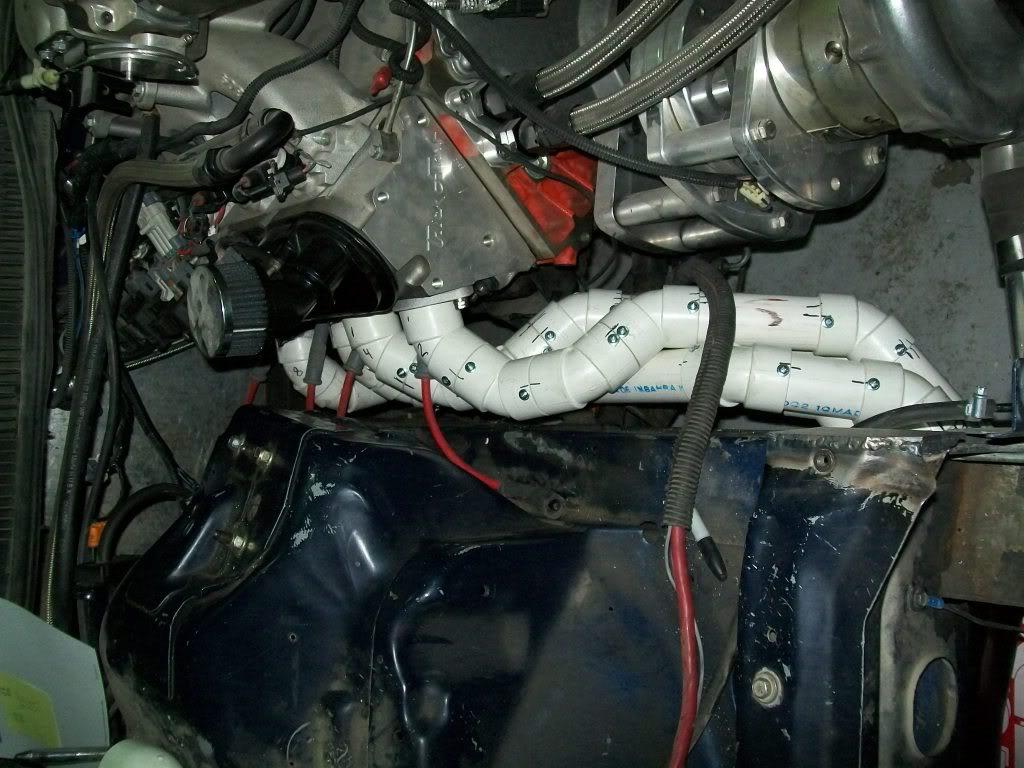
another thing to note is that i changed the collector angle , initially i had it at about a 45 degree angle (refrencing from the face of the block) , but it was somewhat of a hassle so i changed it and made it parallel to the face of the block ( pointing to the sides at a 90 deg angle from the face of the car):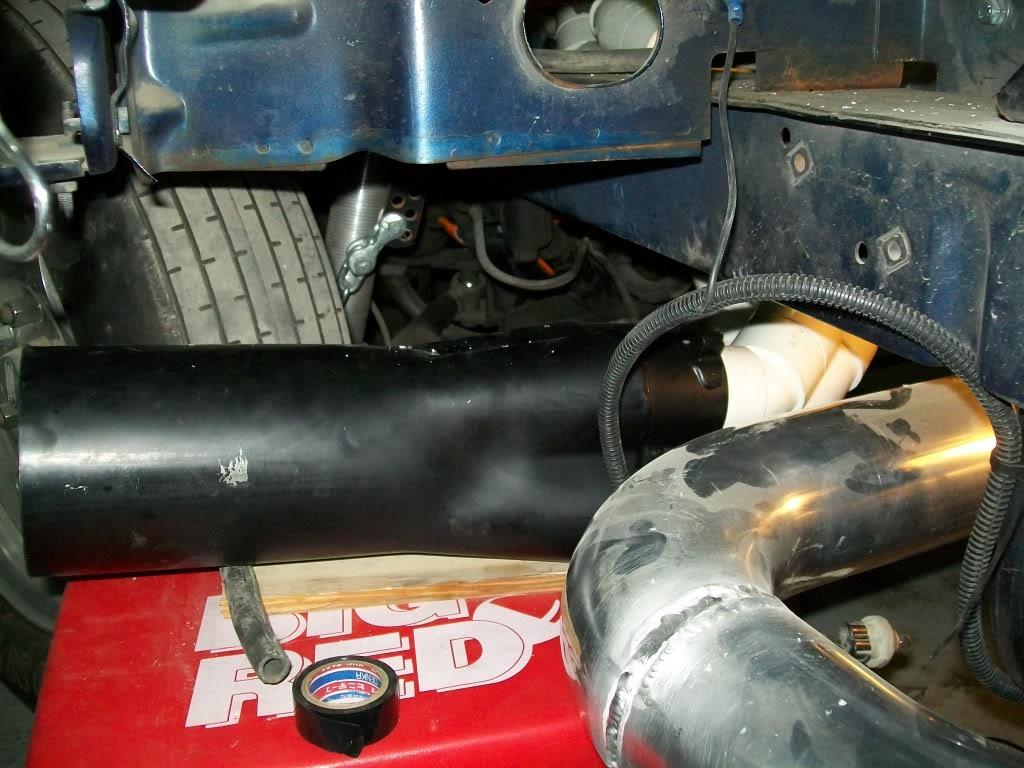
i'm still on the fence on the collector angle , but either way , having made the PVC header gave me a proof of concept and now i know what to avoid,,, plus if ever we start running these cars on water instead of gas i'll be set !
so , next step is to decide on the collector location and figuring a way to fix it there so it doesn't move when i'm fitting the tubes.
3/5/2011
so i moved over to the driver side to see how to tackle it , i started once more from the rearmost (#7 primary) and worked forwards. the plan is to have #7 & #5 primaries tuck as close as possible to the block to clear the steering shaft .
here is how the mockup looks :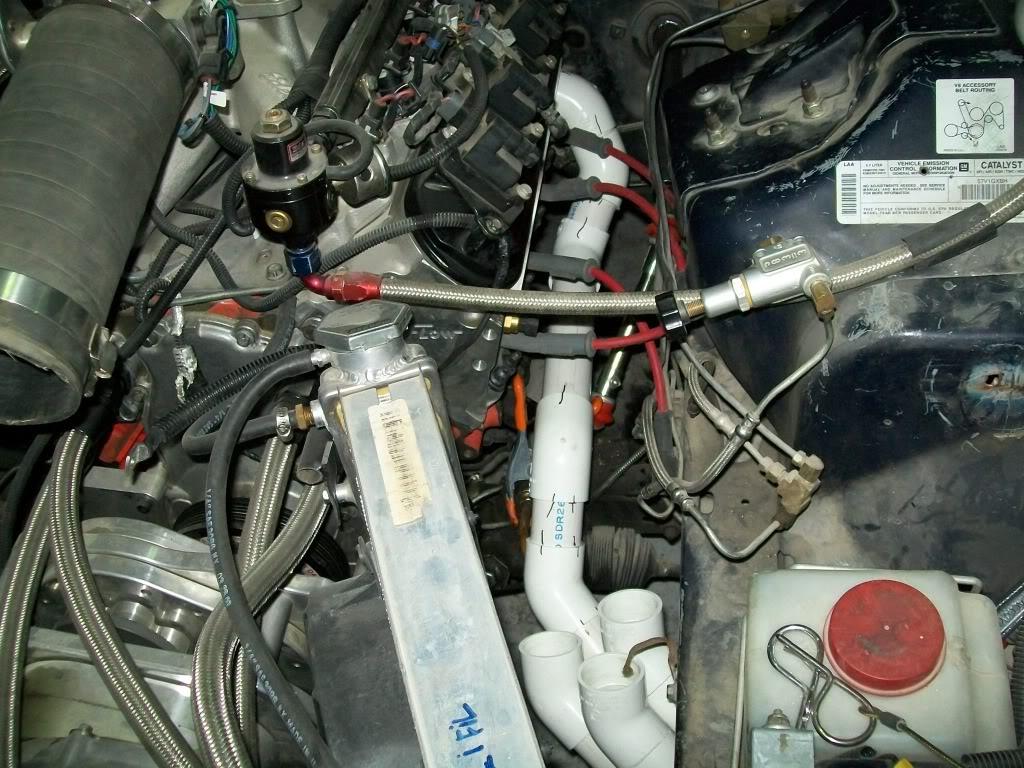
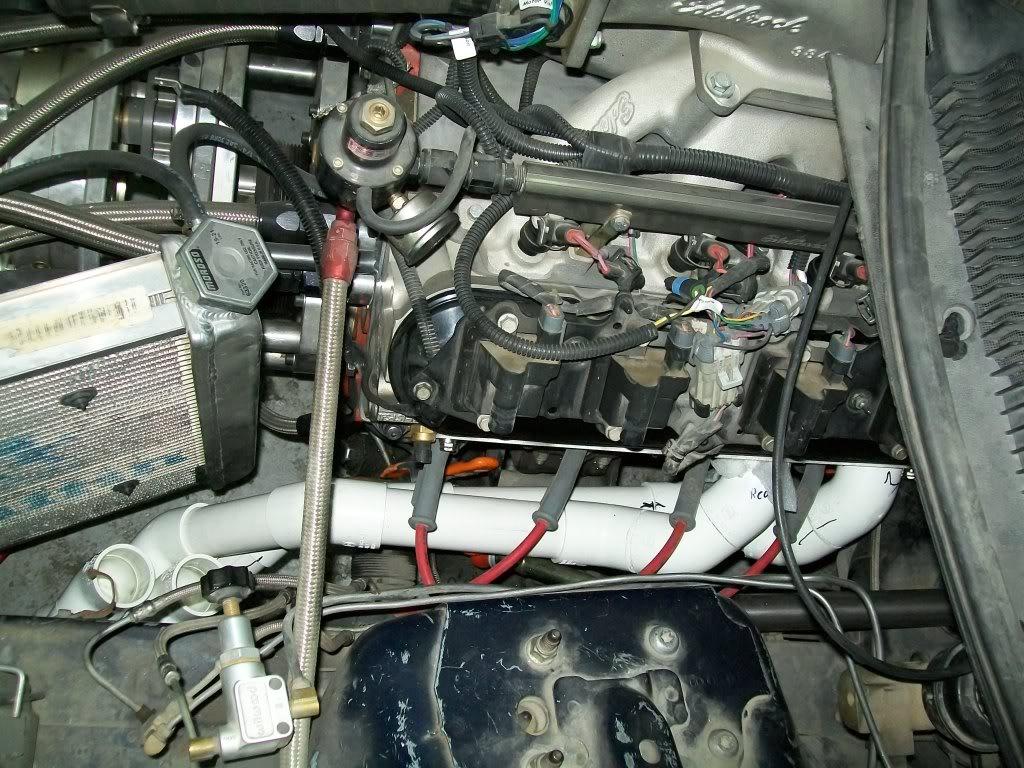
and here are the madrel bends i ordered :
i also was planning on using these header welding rings , makes lining up and welding tubes much easier , but after some consideration i decided to just use tack welds instead :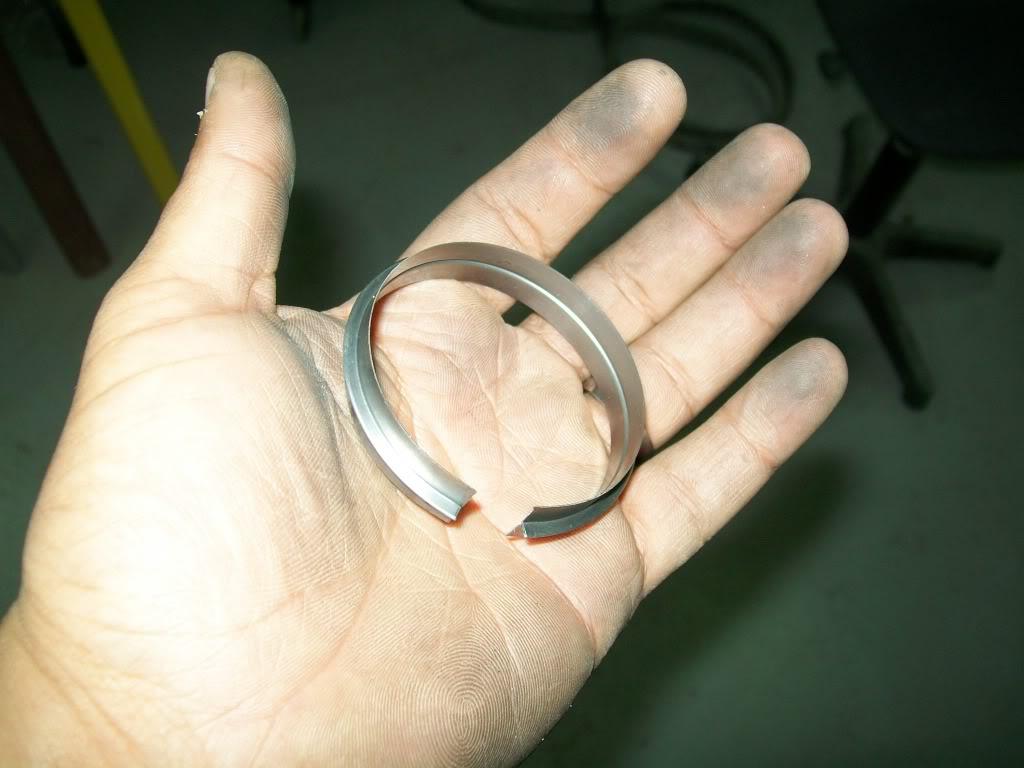
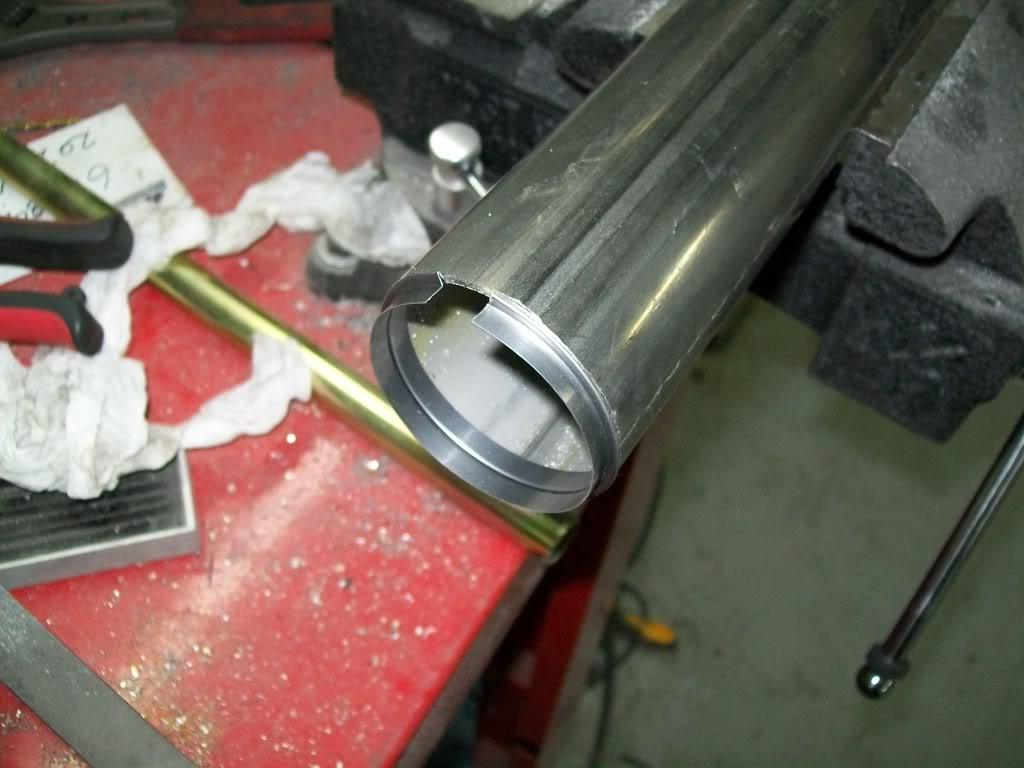
and as the wise man once said : the journey of a thousand welds begins with a single tack weld 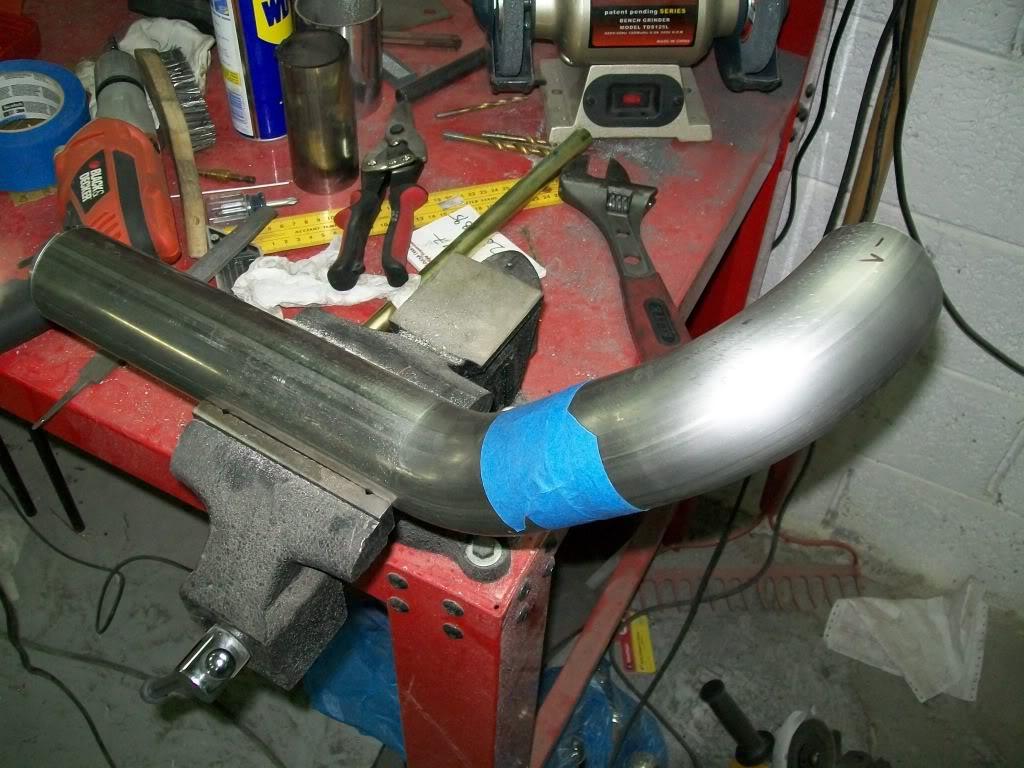
and here is how far i got (don't mind the middle primary it fell out of the port as i was taking the pic ) :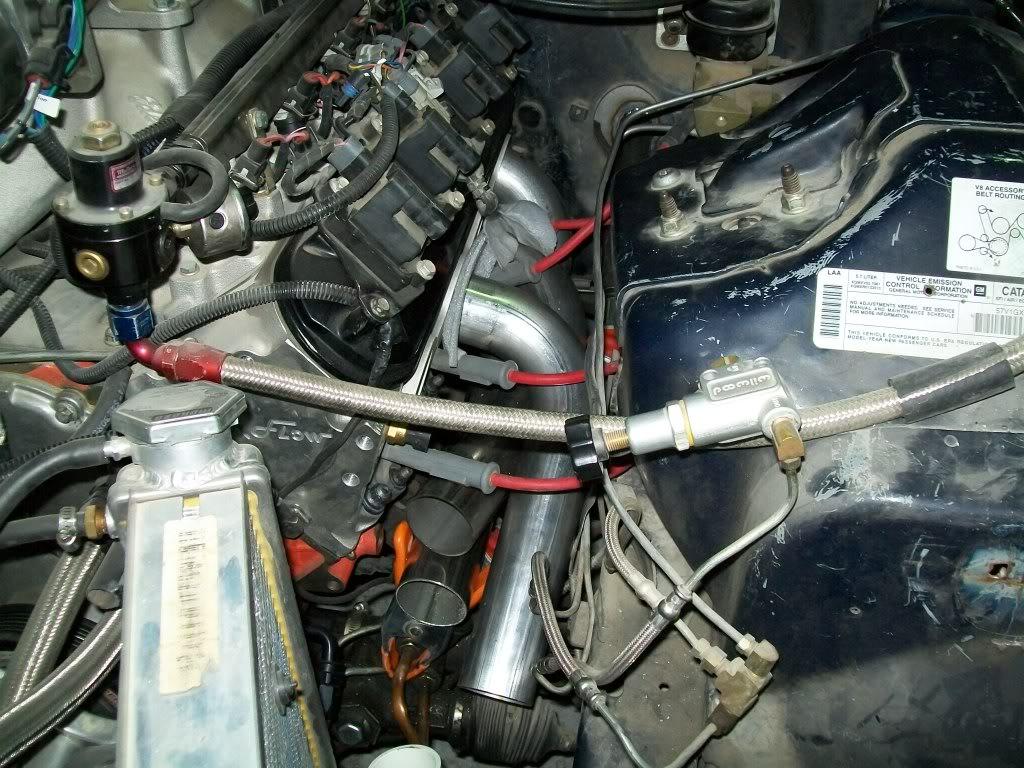
so far i got most of the first few bends of the rear cylinders on both sides , next up i'll have to place the collectors in place and find a way to mount them so that the don't move during the fitment process .
wish me luck
3/7/2011
some progress today :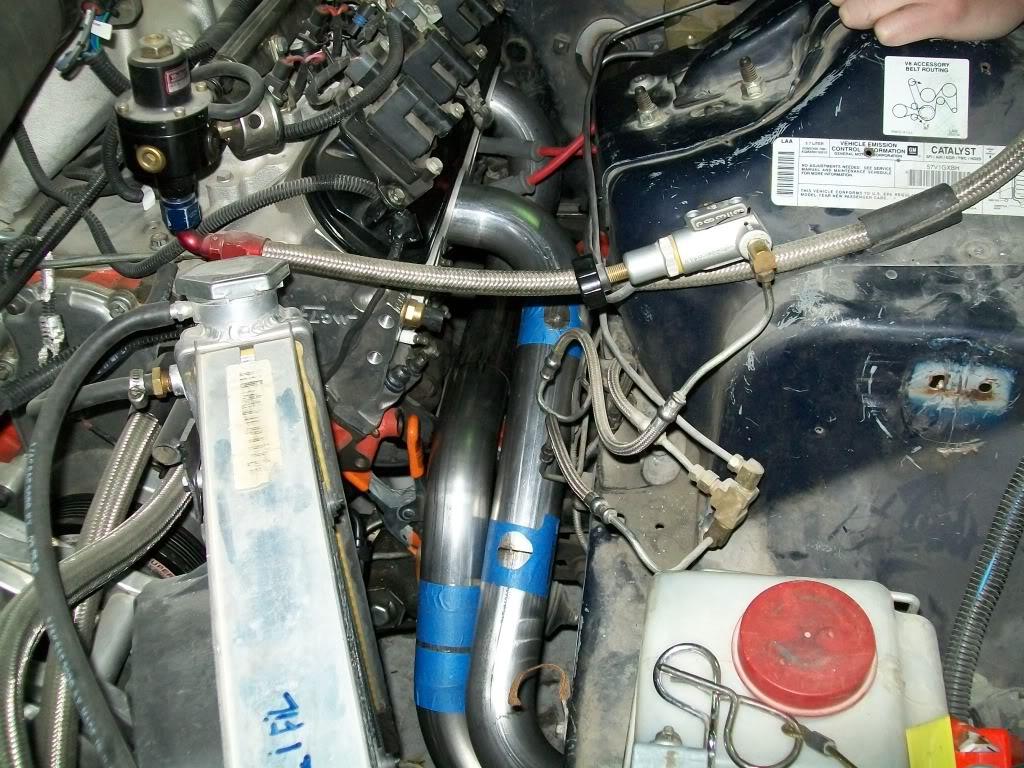
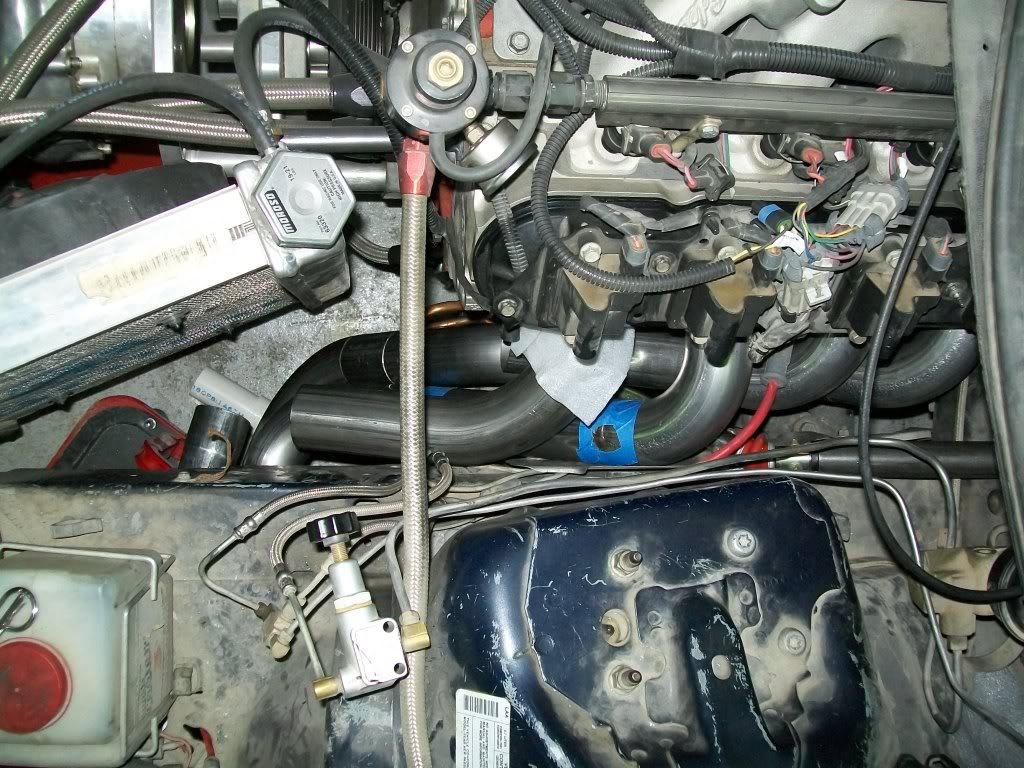
i have #7 and #3 pretty much done , i just need to trim a small peice from the #7 primary to make it fit just right
the plan is to finish the driver side which is the hard side and then move to the pass. side .
3/10/2011
any how , i'm almost done with the driver side header i just have one small thing to finish and i can start welding stuff up :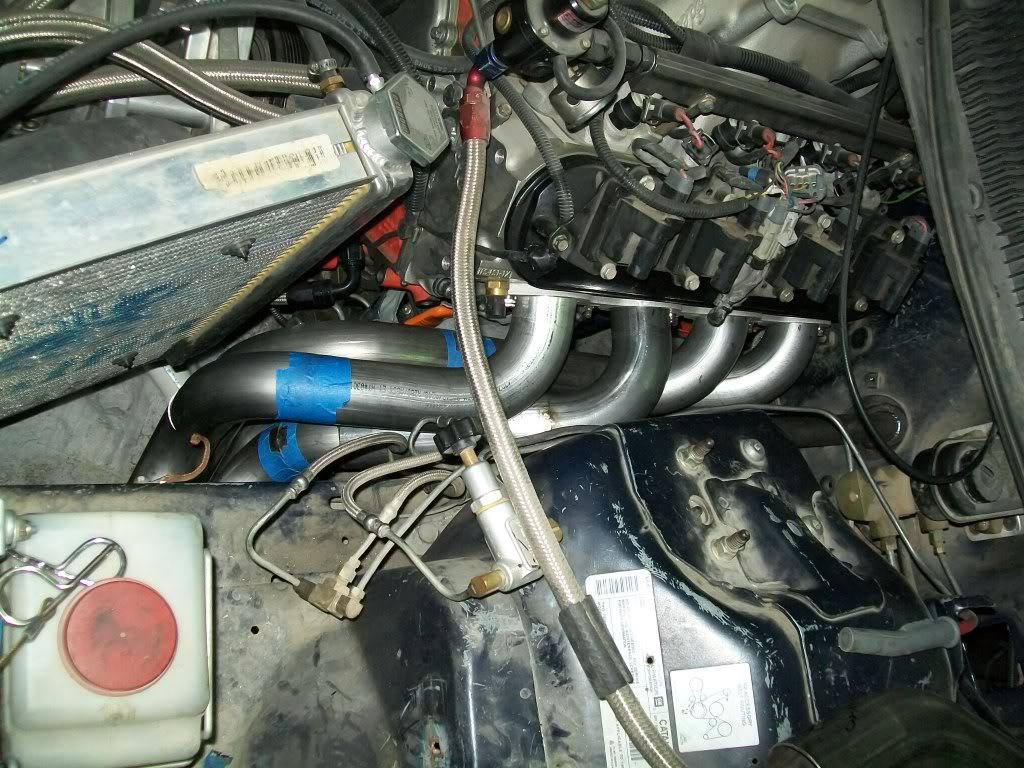
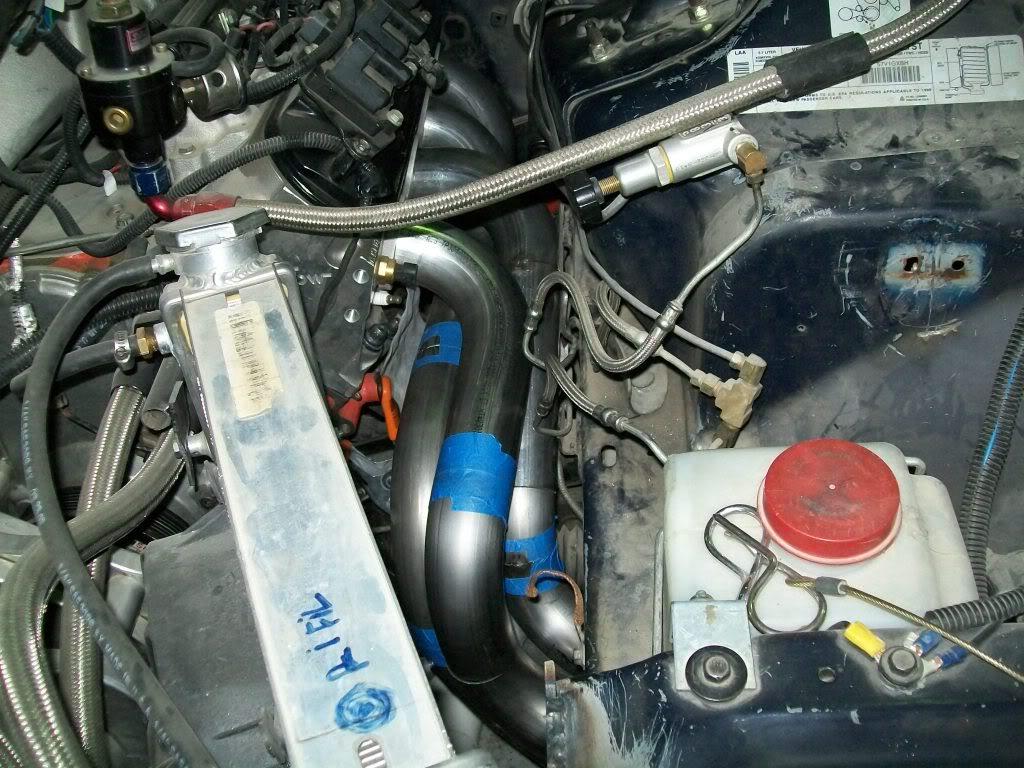
and after that i started on the passenger side ,,,, and even though i have more room on that side for some reason i'm having a hard time getting things done . sure it could be a brain fart but i think i was getting tired and needed a fresh start . at this rate i'm finishing one primary per day .
3/15/2011
small update :
axles finally showed up yesterday
40 spline gun drilled and lightened puppies from mark williams :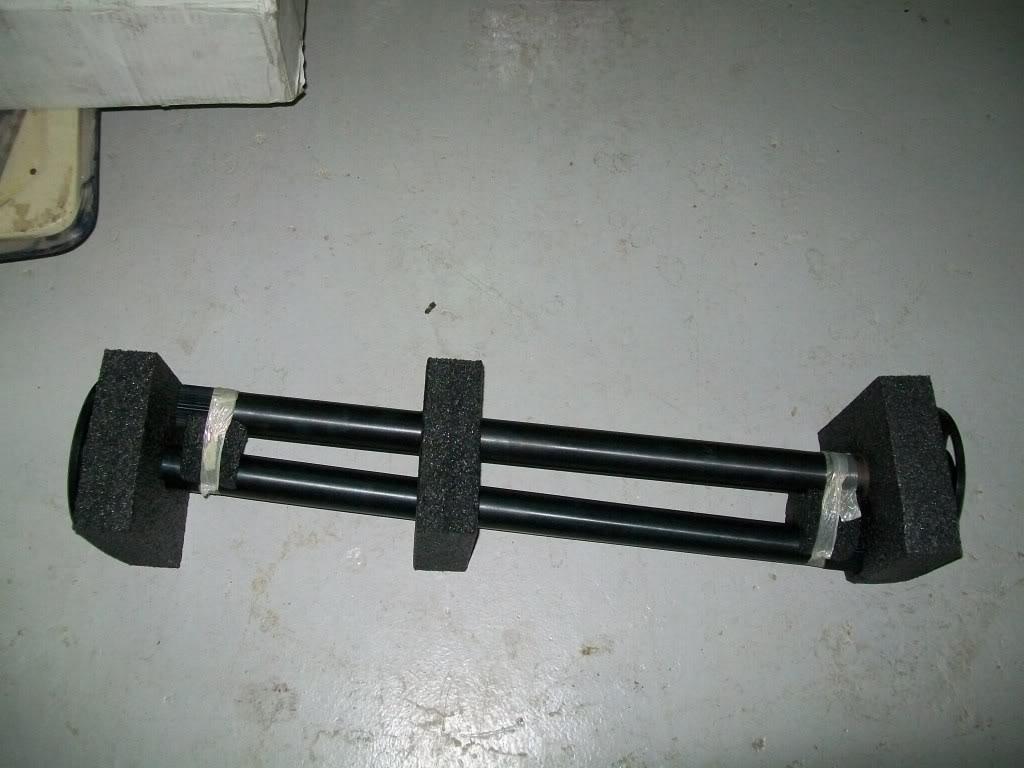
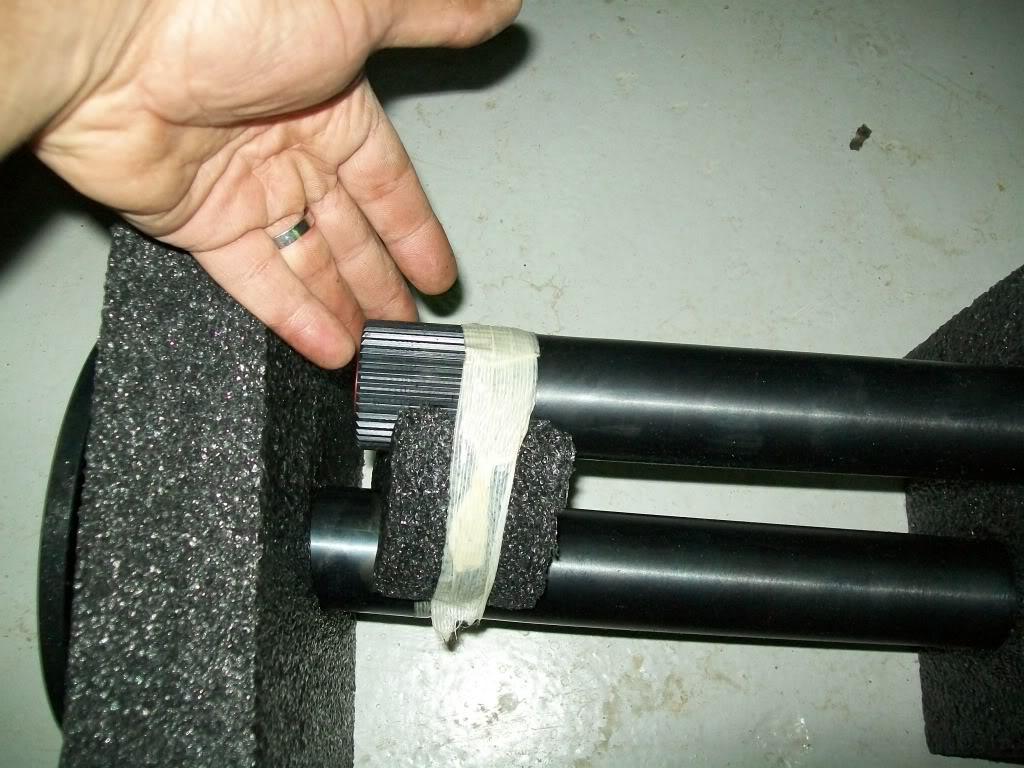
as for the headers , i'm almost done with tacking up the driver side and 1 and a half primaries away from finishing the passenger side
here is how the passenger side looks so far :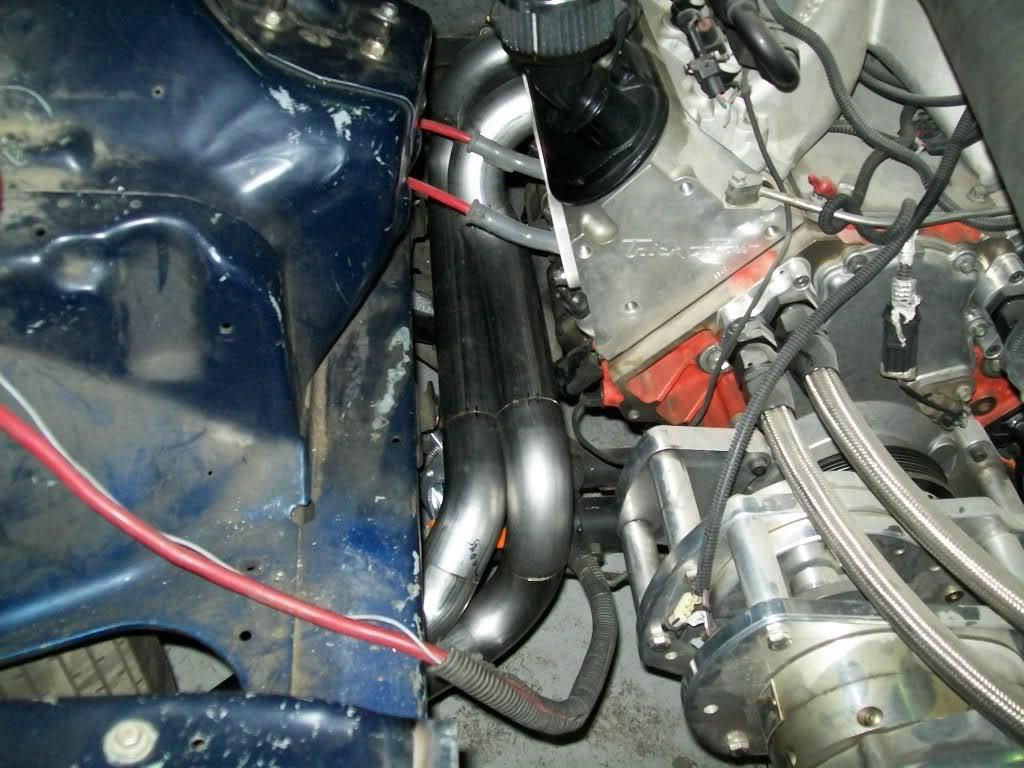
i'll try to finish both sides today , and maybe start welding them up tommorow .
and if get some time i'll start assembling the rear end and maybe later mock it up on the car to see where to weld up the sway bar brackets .
3/18/2011
slow progress but progress nonetheless
i guess i can call the passenger side header fulley mocked up
here is how it came out , all i have to do now is weld it up :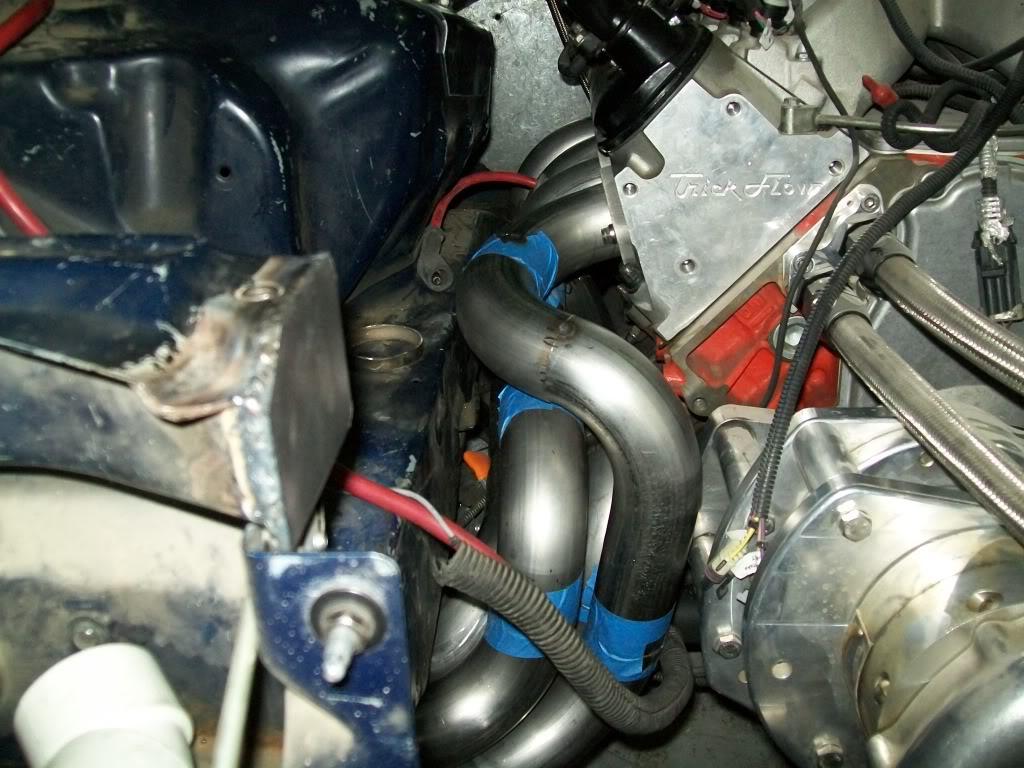
and another angle :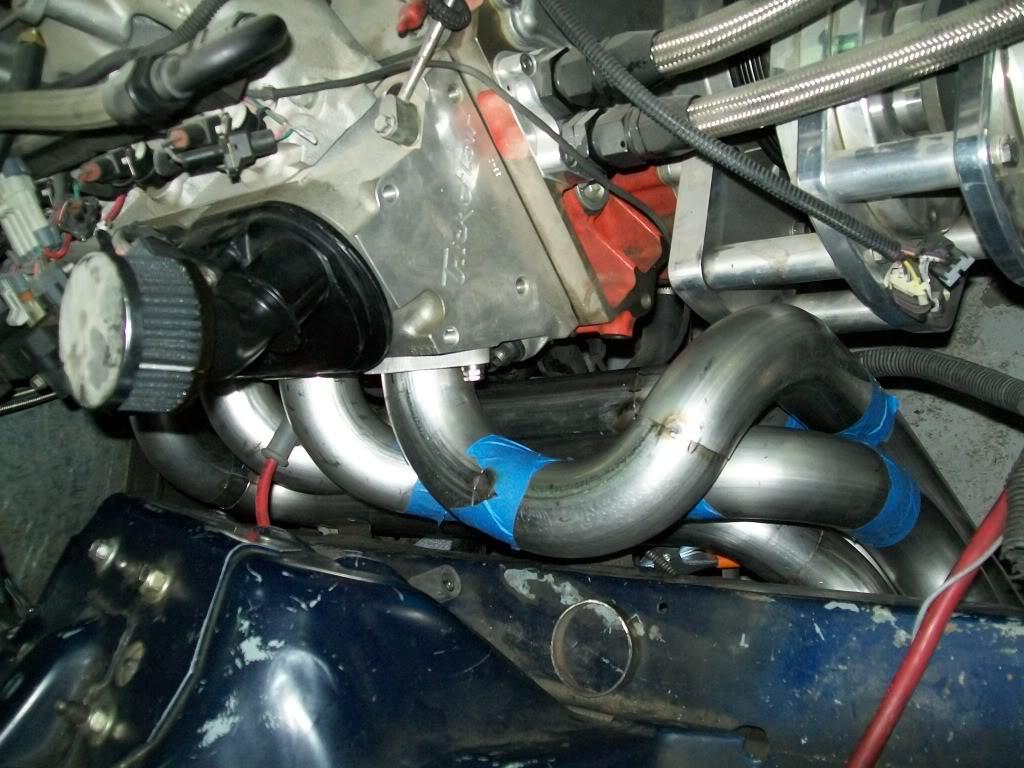
so now i'll finish the driver side , i think i might change the routing of one pipe so things can fit better .
3/21/2011
finally ,,, i got the driver side all routed and mocked up 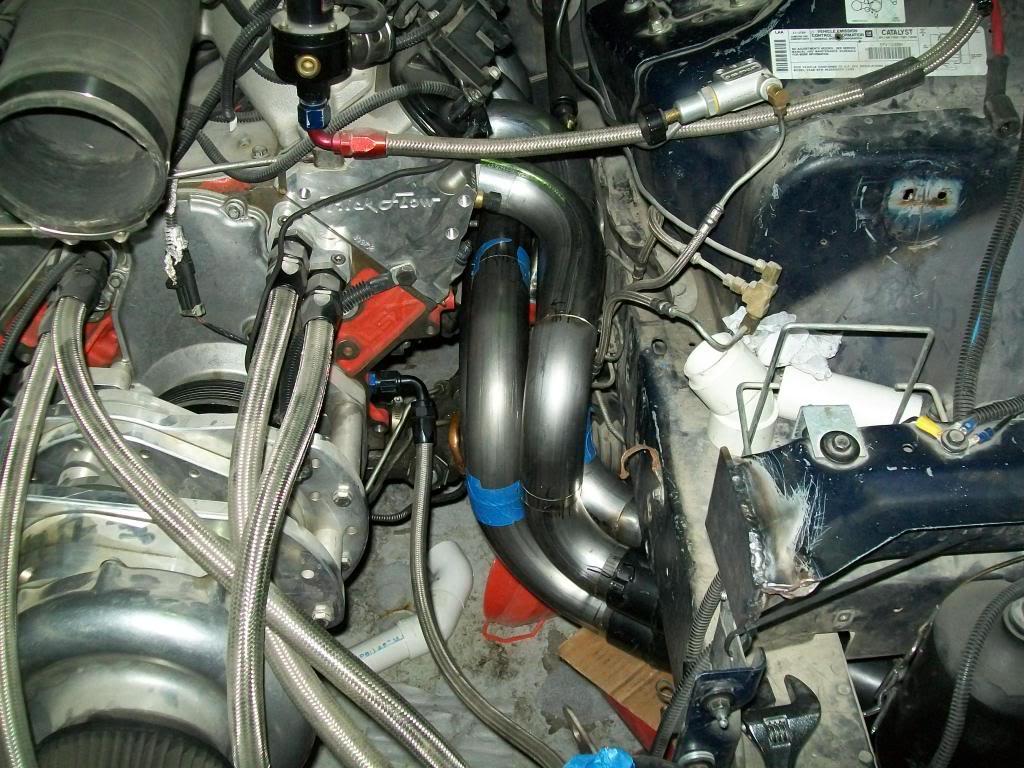
so after that it was on to the next step : welding
i managed to finish two primaries :
so now all i have to do next is finish , welding the primary tubes, then weld them to the flanges, weld the tabs that hold the collector on to the tubes, install an O2 bung and call them done
3/22/2011
yup , i did that when i got the gear drive |( thanks for looking out for me)
any how i finished welding all the primaries , all i have to do now is weld the little tabs to attatch them to the collector and weld the other ends to the flanges . here is the semi finished product :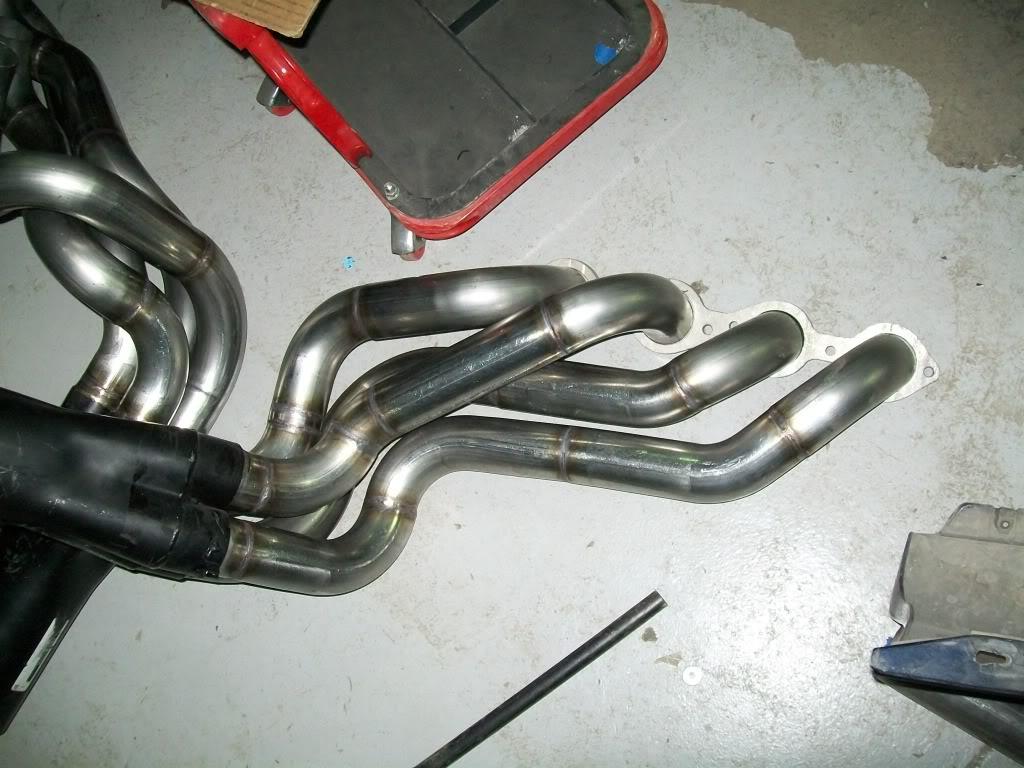
4/9/2011
well i finally had some time to drop the headers off to a machine shop to have their flanges surfaced. i just got the headers back yesterday and here is the almost end result ( still have to weld the extensions and O2 bungs ) :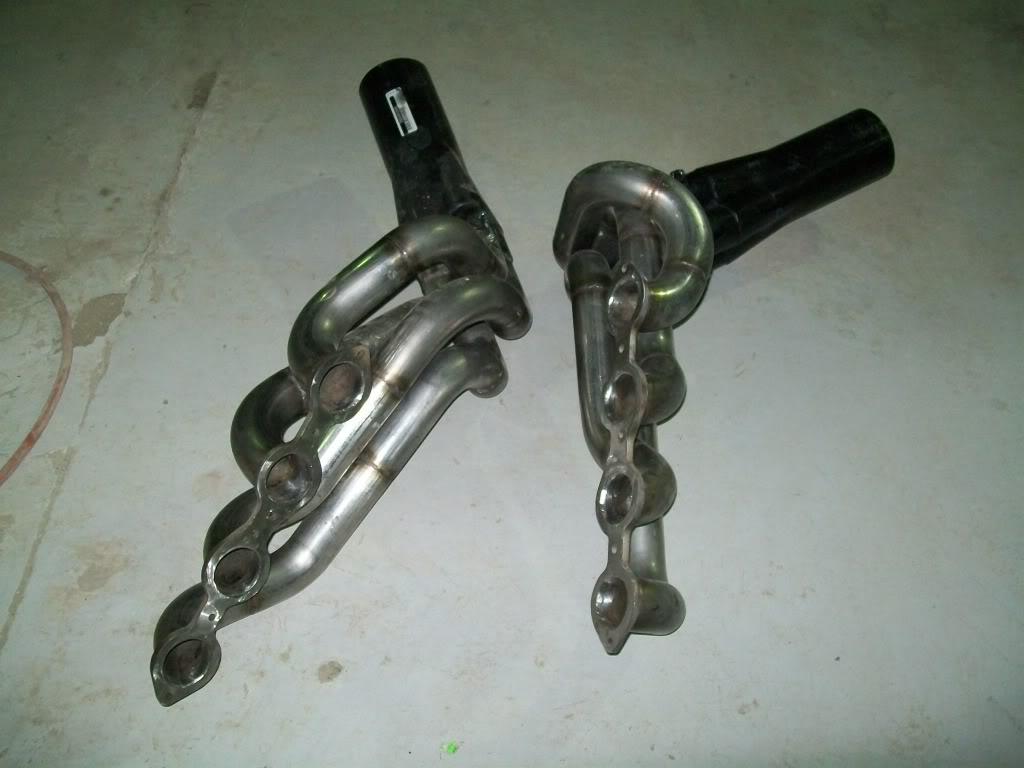
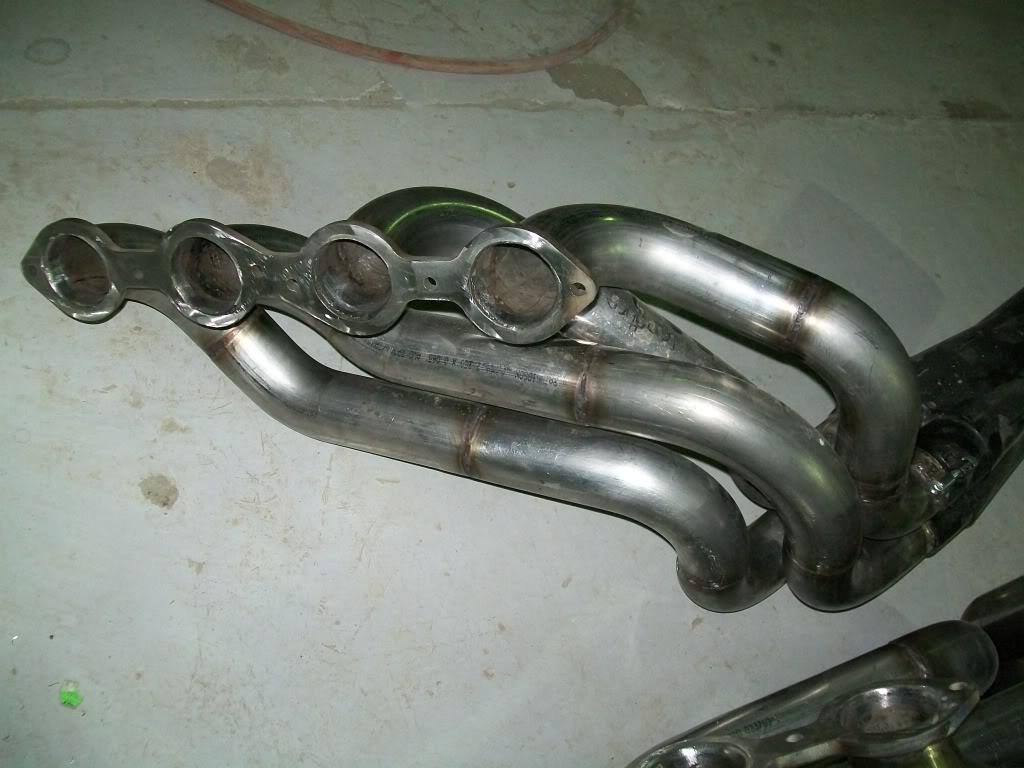
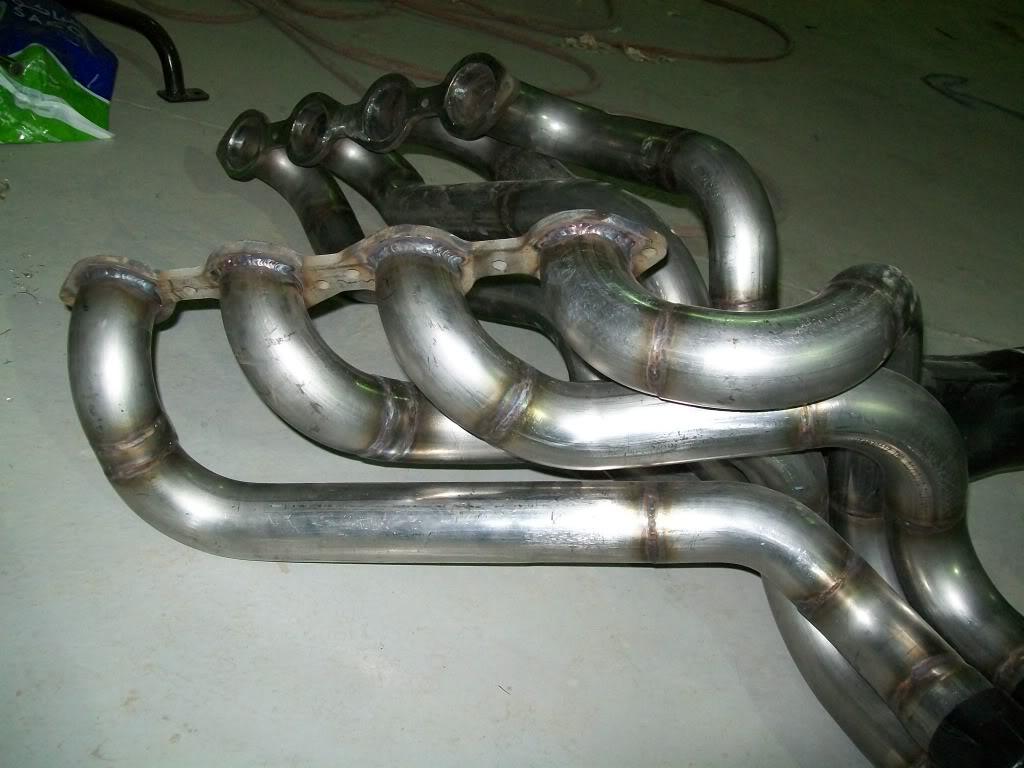
up next is to hae the bungs welded on , extensions/bend welded on , then i have to wrap the driver side so it doesn't melt the steering shaft joint boots and boil the brake lines. then cap it all off with drilling the bumper for the exit holes
after that i can move on to other stuff like assembeling the new rear end ( weld a few tabs on it and powder coat it ) and installing the adjustable rear spring mounts and so on
4/20/2011
some updates to write about :
i stil didn't install the headers cause i need to slide a heat barrier sleeve over the steering coloumn to protect the u joint from the header tubes ( one is real close ), i'm waiting for the thing to show up and i don't want to install everything now only to tear it appart later . i also need to weld the O2 bungs on there
i welded the sway bar brackets on the housing , along with the brake lite tabs :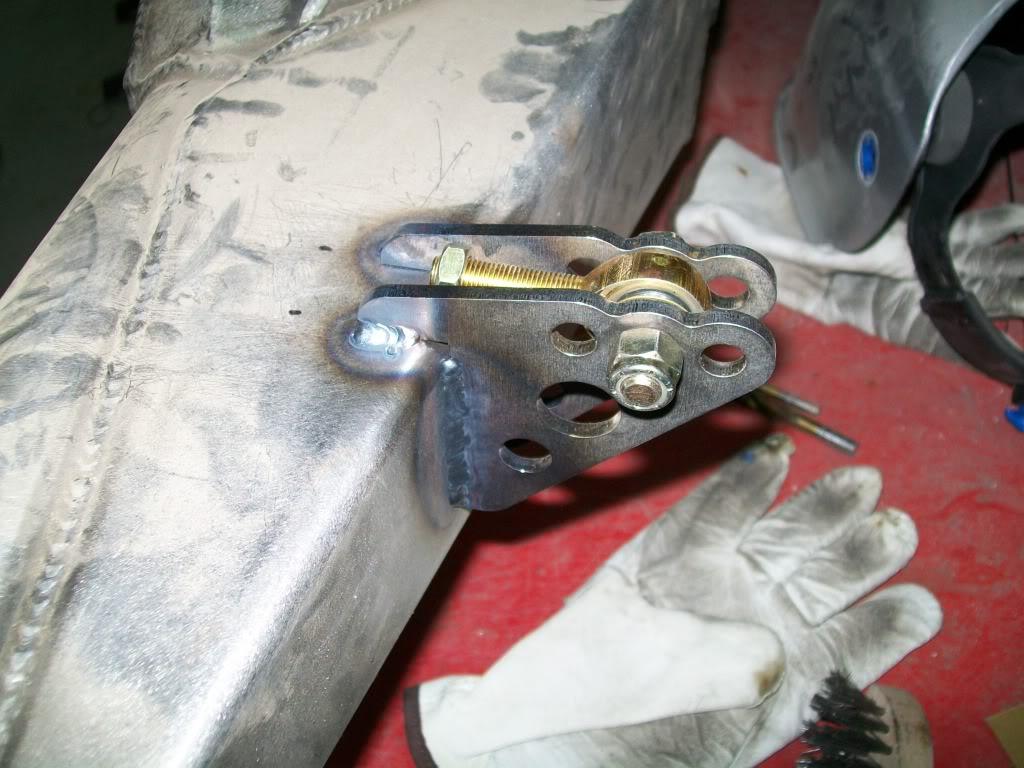
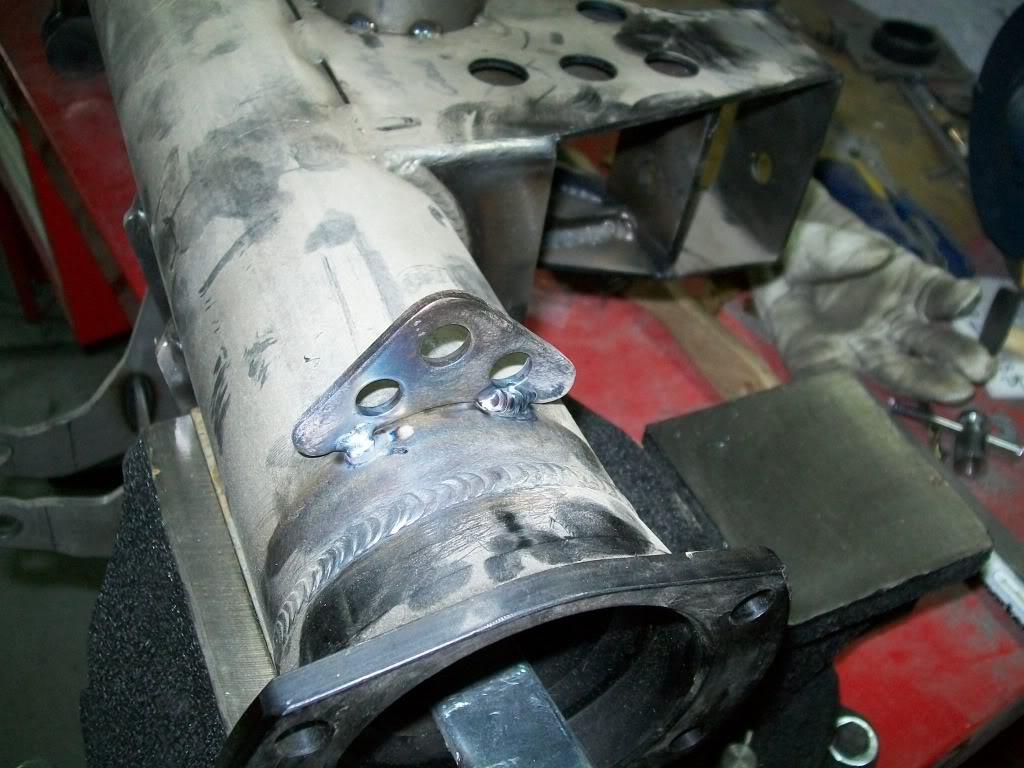
and i sent everything to be poweder coated , so fast forward to last night ,,,, stuff came back from the coaters :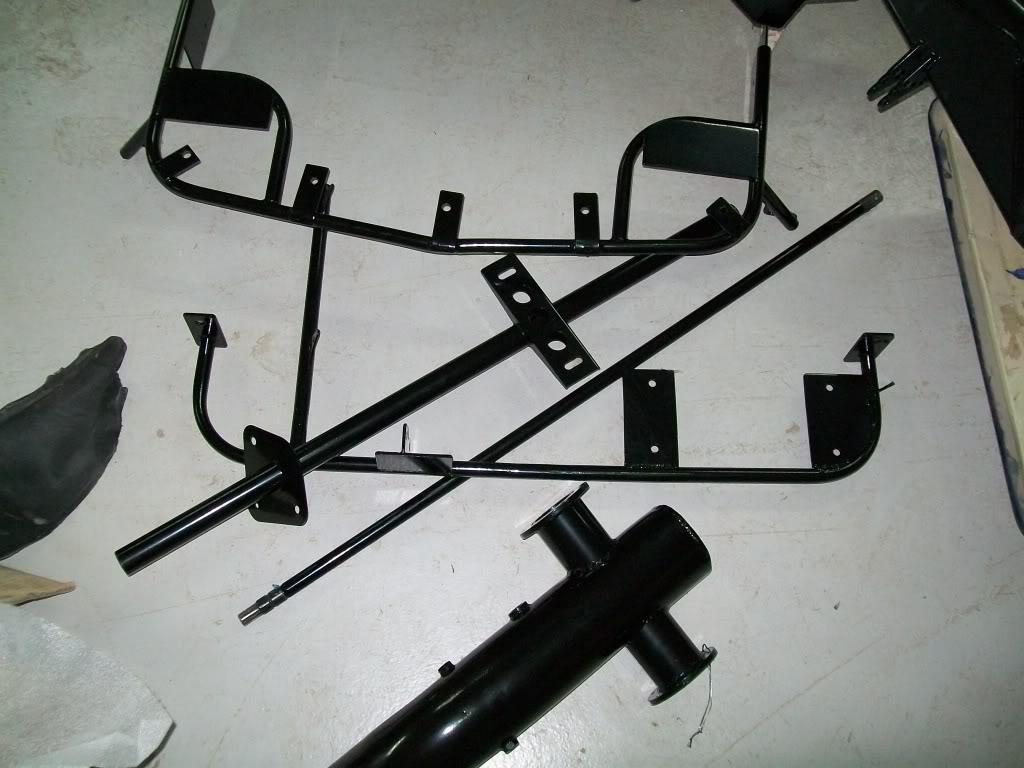
sexy coated housing :
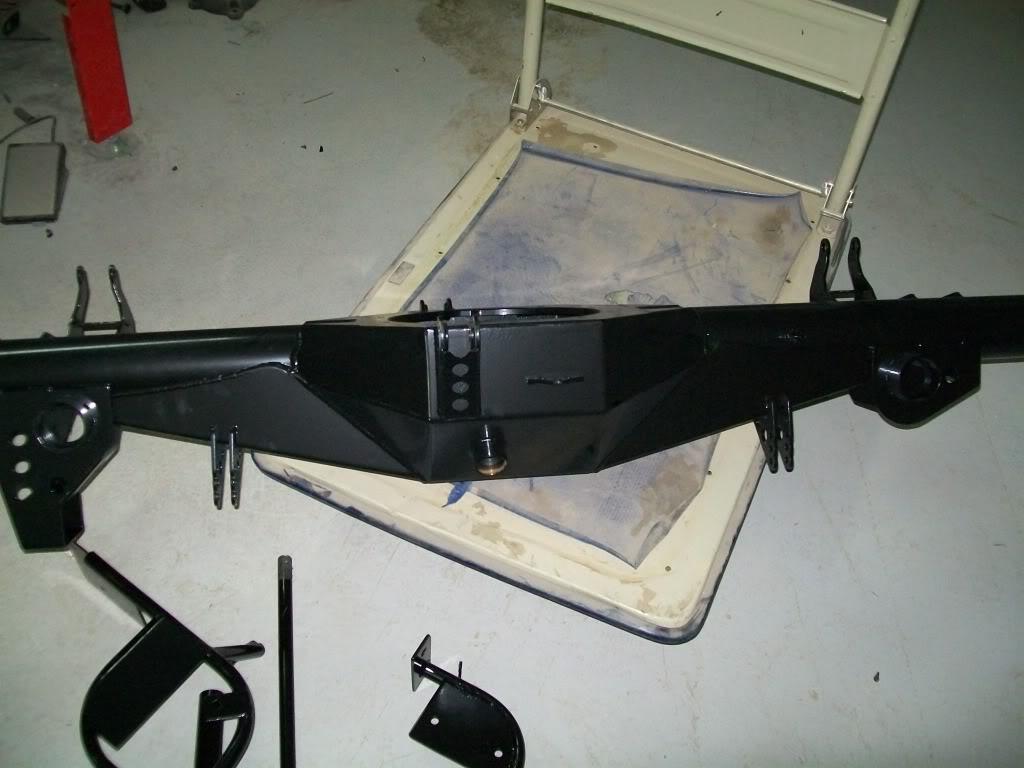
so i decided that i won't do the important stuff like welding header bungs and installing the braces and other stuff, and just do stuff i don't need to do right now : i started assembling the rear end
here's the equally sexy 40 spline third member (again ) :
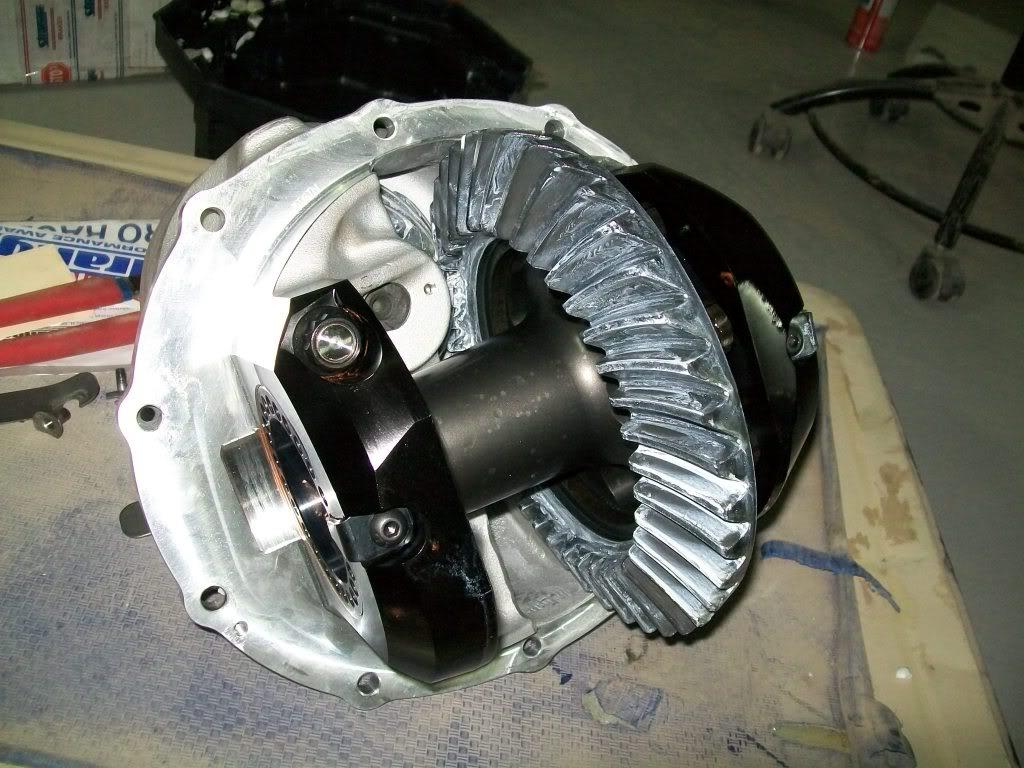
and here it is installed along with the axles and studs :
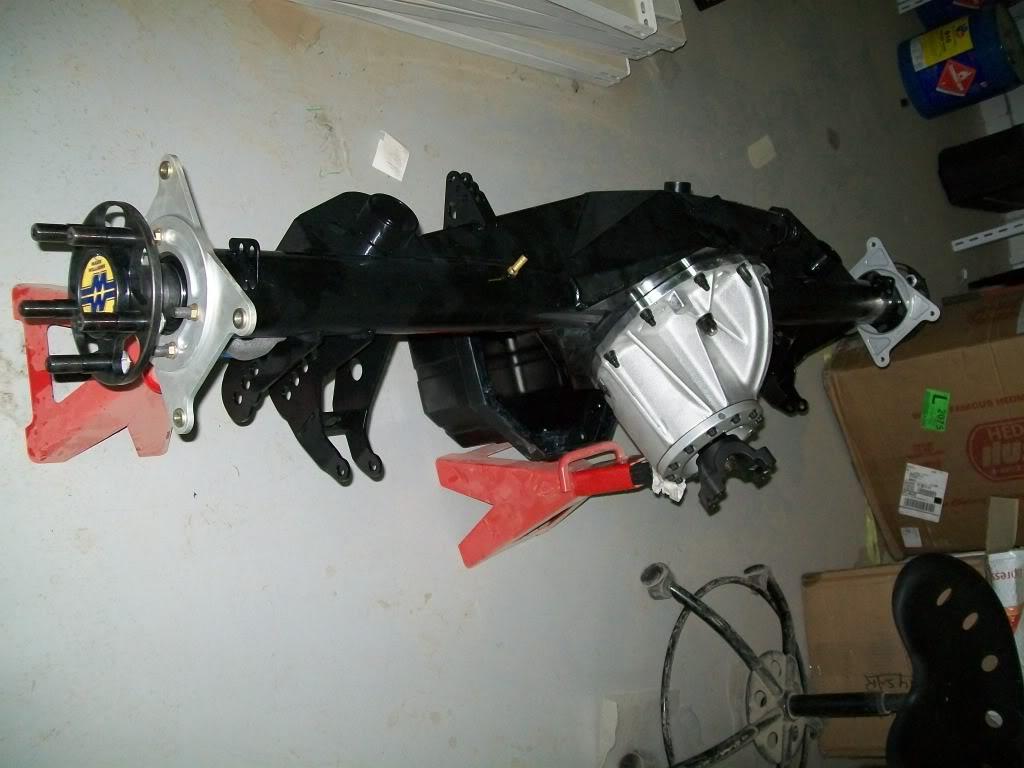
dual caliper set up - for those days when the rules don't allow trans brakes
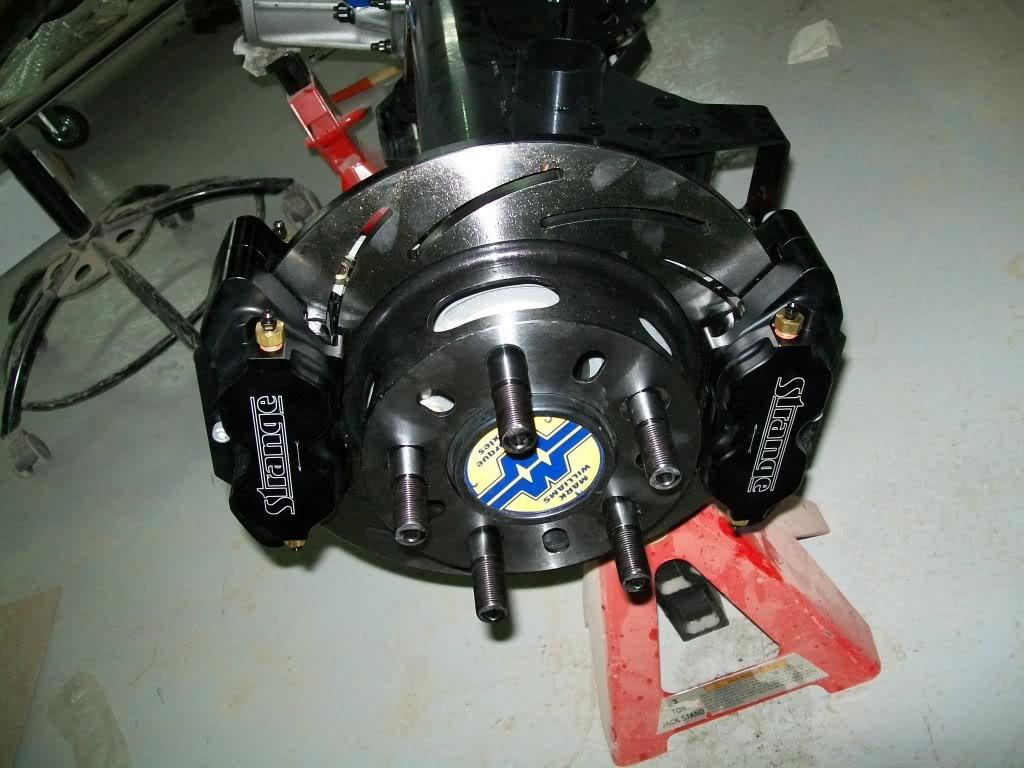
i still need to plumb the brakes but i think that's all thats left for this rear end to be called done .
so next time i will try to do something important , like weld the O2 bungs on the headers and wrap the primaries and installing the front brace. i should also look into redoing the front brake lines since now would be a good time to clean the mess i have up there
another item on the to do list now is shortening and rerouting the starter + cable and signal wire.
and lastly i should scale the thing before i start slapping things on it to see the difference .
7/19/2011
man its been a while !
lets see ,,,, i got some stuff off the never ending lit done : i got the headers wrapped on the driver side so it doesn't hurt the steering shaft , welded the O2 bungs to both collectors ( one for the wide band and the other as a spare ) and welded the extensions to the collectors and rerouted the o2 sensor cable. i also just finished cutting holes in the bumper for the exhaust to go through , all that is left is to get some trim rings to clean up the holes :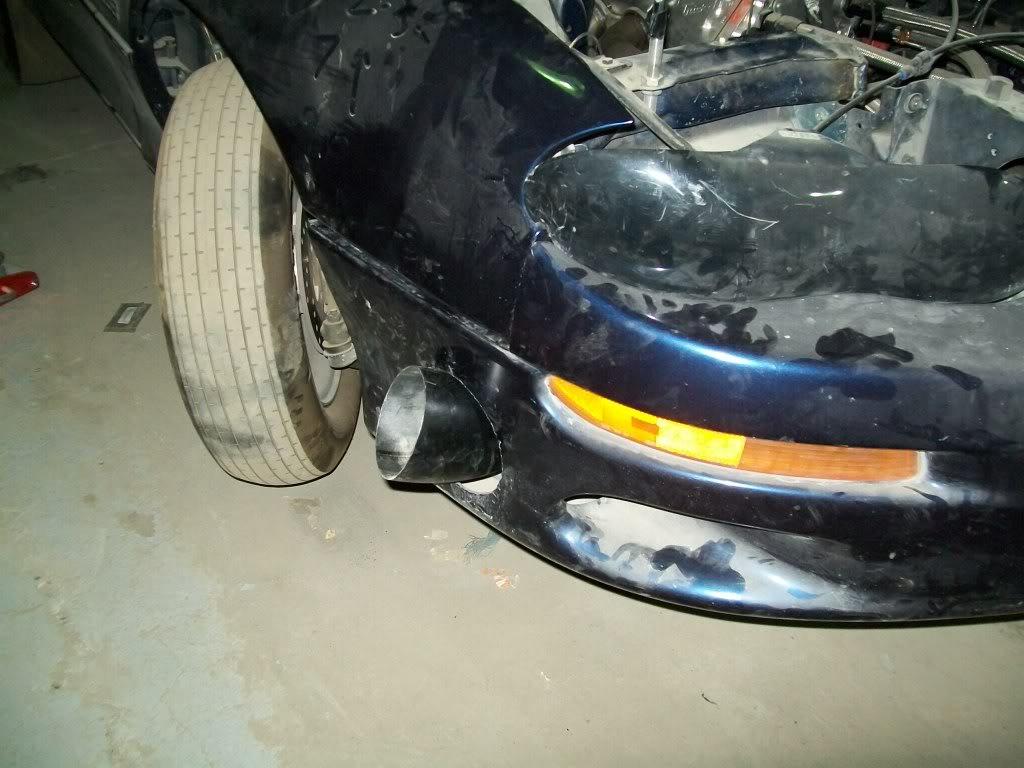
i also finished welding the bungs on the new radiator ( same as the old one , but with less leaks ) i had a couple of AN bungs as well as a port for the steam vent and i added a place for a cathode thingie (sacrifical metal) just for added peace of mind when the car sits for a long time.
also added some insulation on the radiator where the header gets real close to the radiator . (sorry no pics )
the rear end is pretty much done , all i have to do now is run the hard lines from the calipers to the center of the housing . after that its ready to be shoved in place along with the new torque arm
i also got word that the racing season in bahrain is going to start in just over one month
so i guess i better get stuff done; so next up on the list is to reroute the battery cable , install the torque arm and mount along with the rear end, install the new swaybar , remove the glass off the car and install the new lexan i got , and finish a few odds and ends i can't recall right now
10/3/2011
ok , so i think its about time for an update , sorry for the delay but i've been busy with other stuff
so here is how the almost finished radiator looks like with the bungs 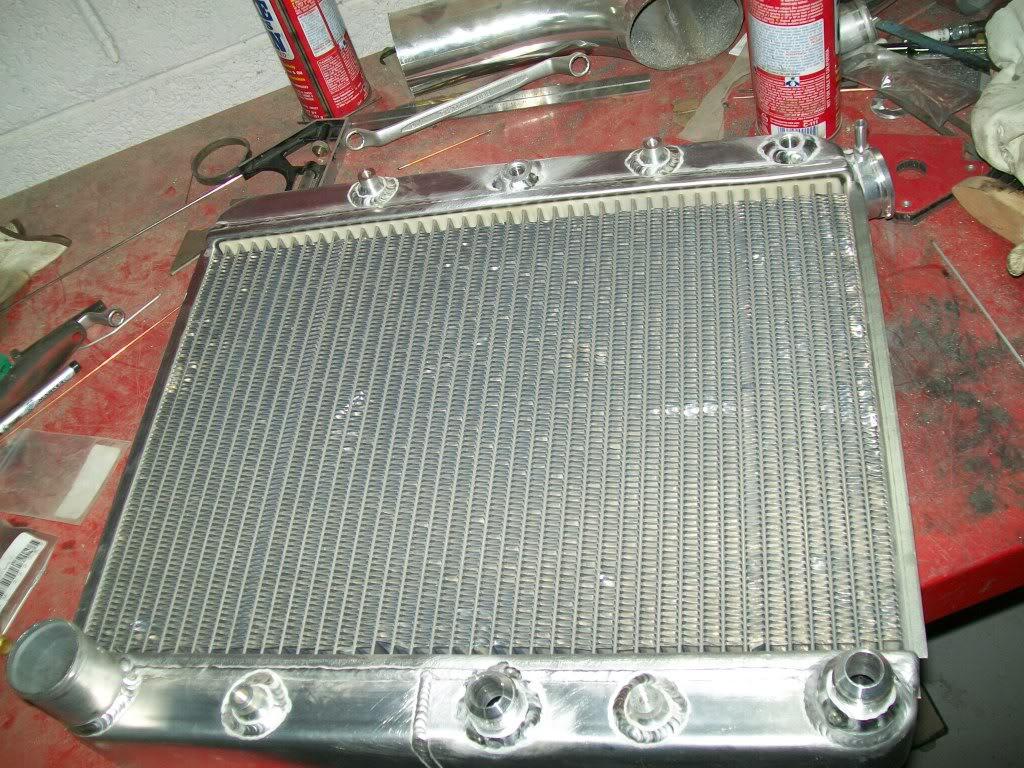
and i finally got around to finishing the rear end deal , but before i could get in there i had to remove ol' trusy the 12 bolt . it was kinda like saying good bye to an old freind ( not that it was going any where ( heck its probably going to see even more abuse later on ) - looks brand new to me 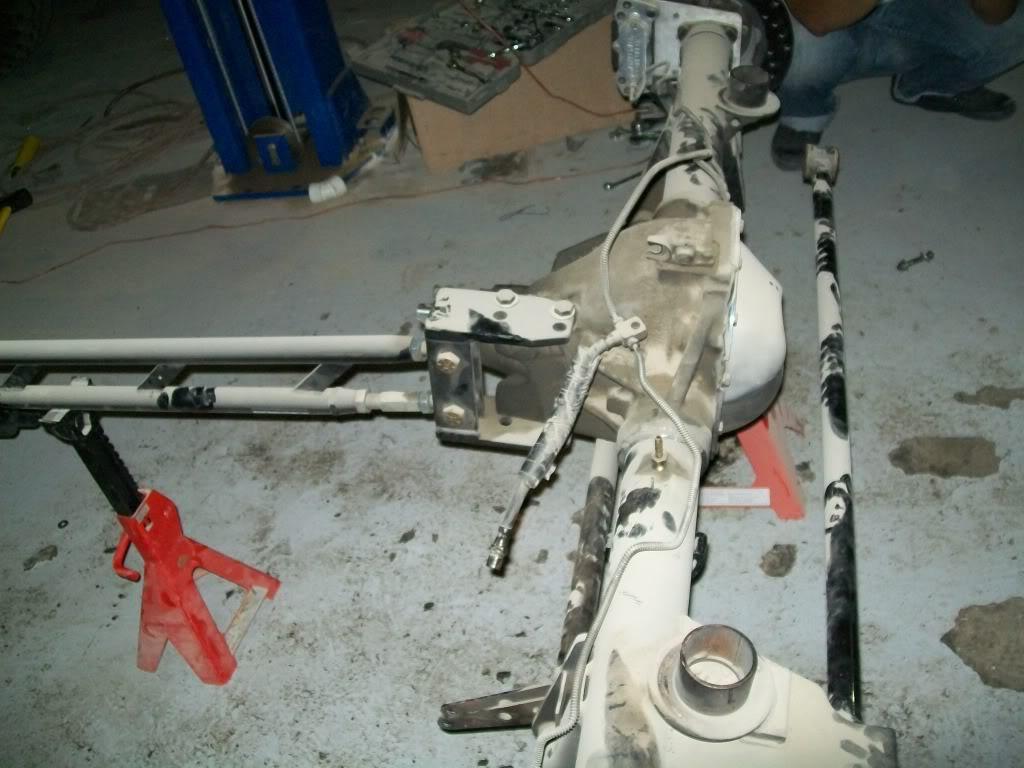
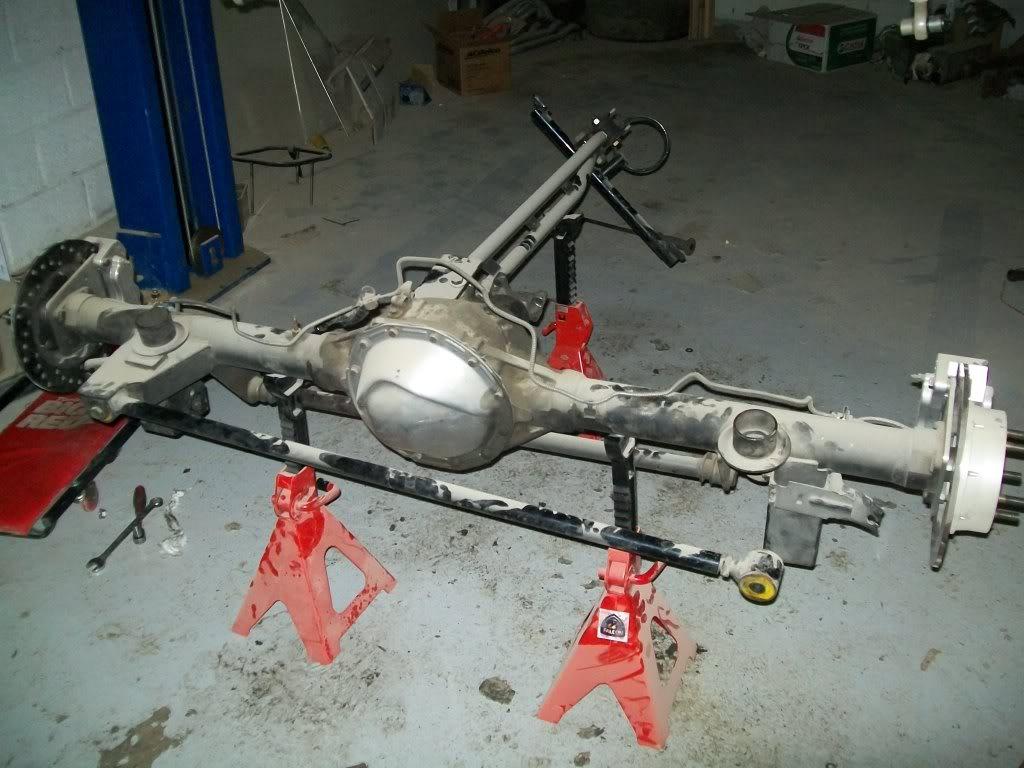
and here it is next to the new one :
and this is how the rear end/ torque arm combo looks like :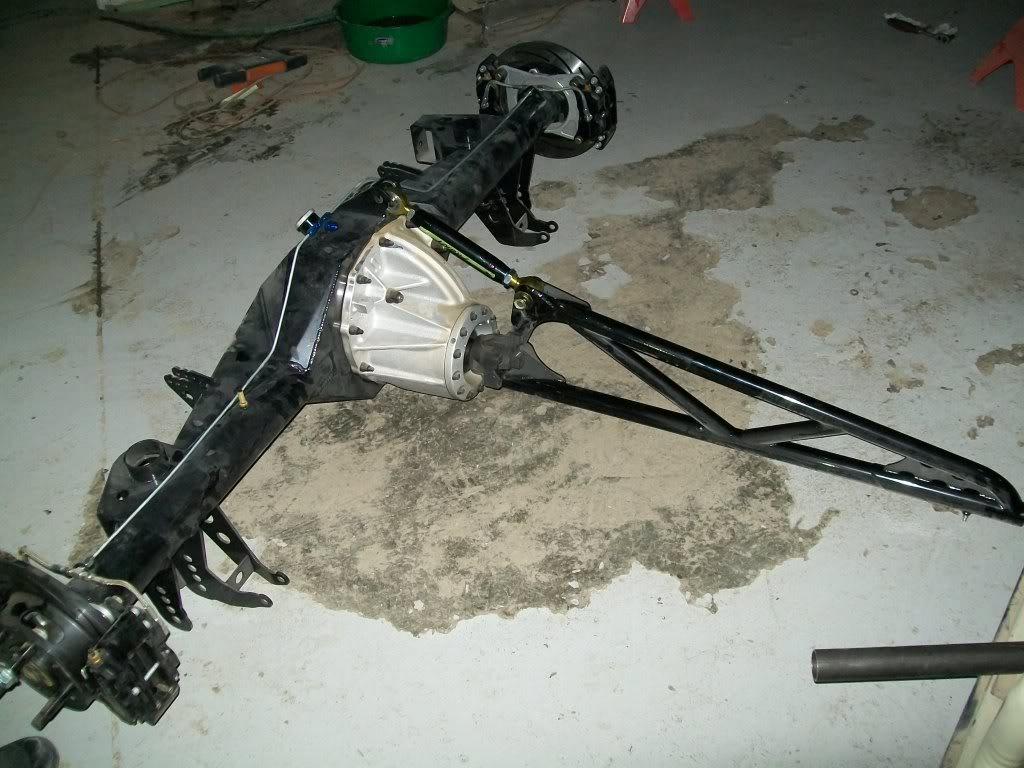
moving on to the new rear , i plumbed the brake hard lines , and decided to weld the rear spring adjusters on to the housing instead of the frame. 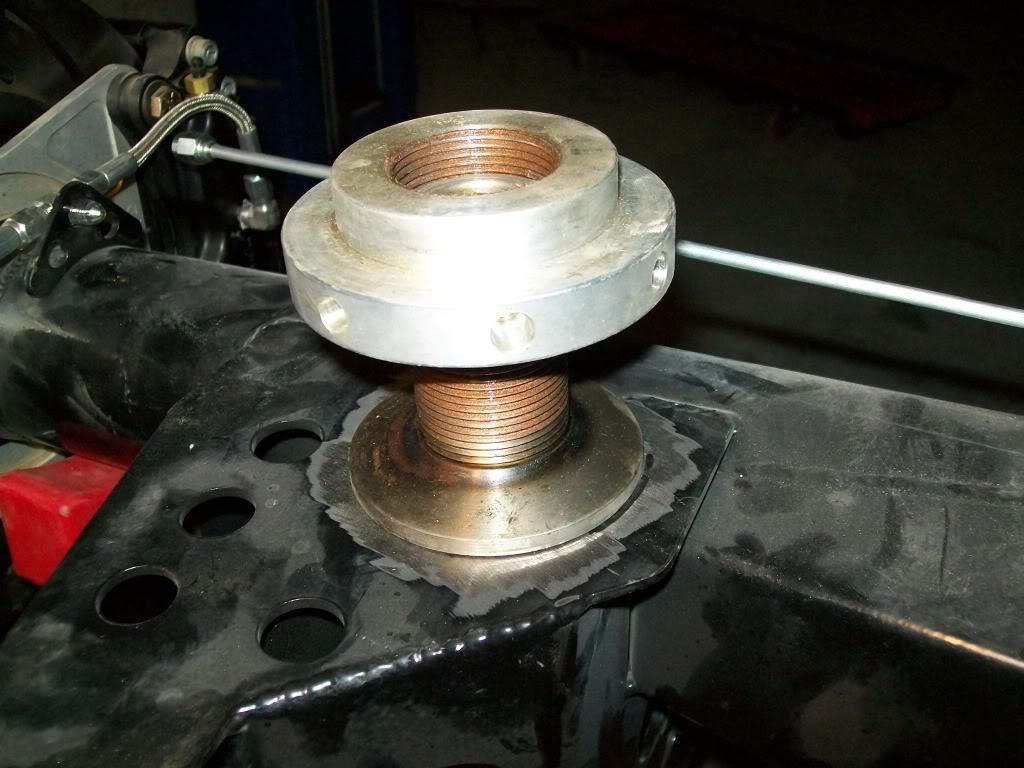
i reused the spring locators that i cut off the housing and mounted them in where the spring sits in the frame, i welded a nut in the center and used a bolt through the locator to locate it :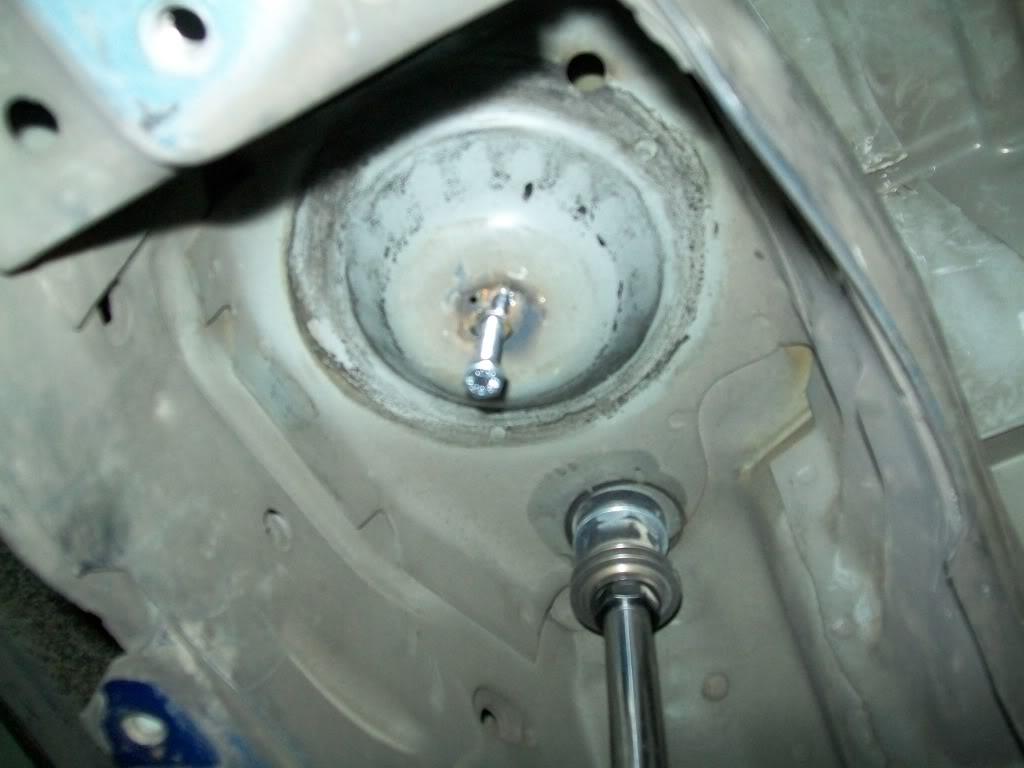
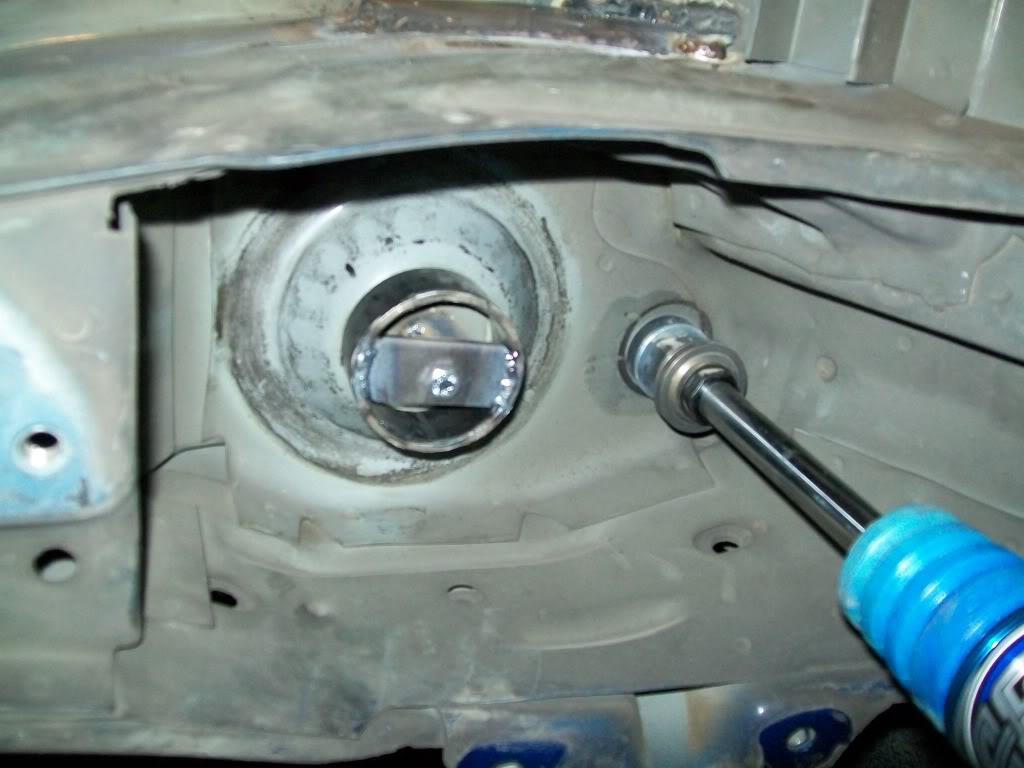
and here is the obligatory "diff in place shot" :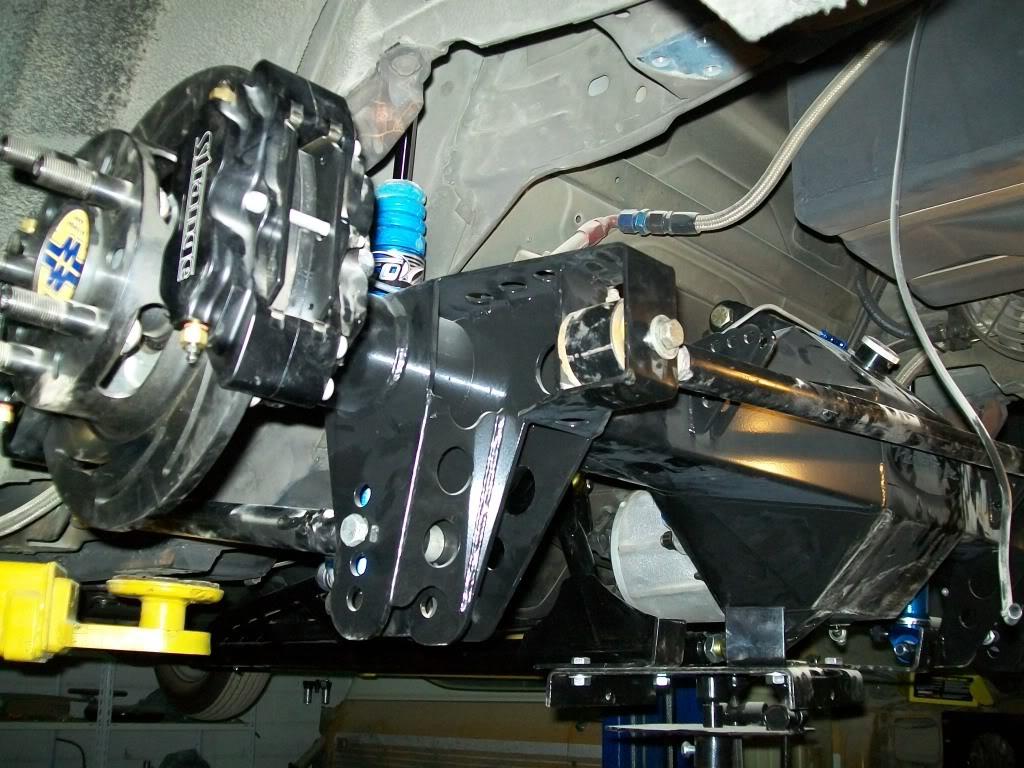
next up on the to do list was to install the new sway bar , the old one was welded to the 12 bolt housing. at least this one can be removed later on
it starts with drilling a few holes on each side and welding the mounting plate on each side: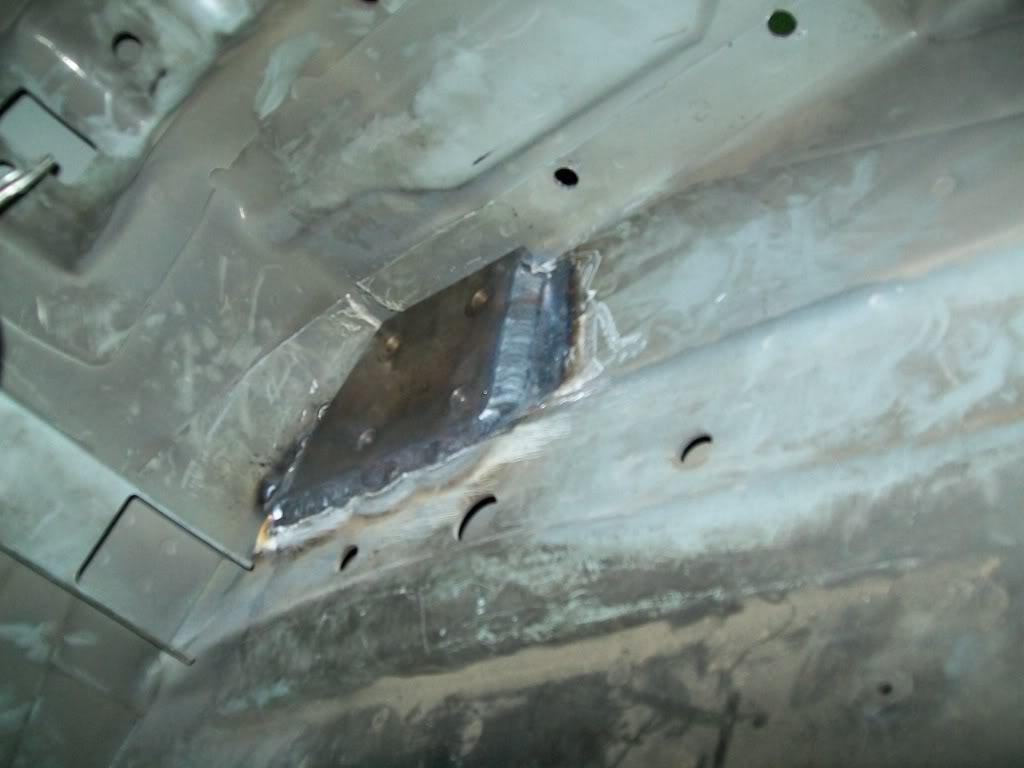
then the sway bar and bearing plate get bolted on to that plate: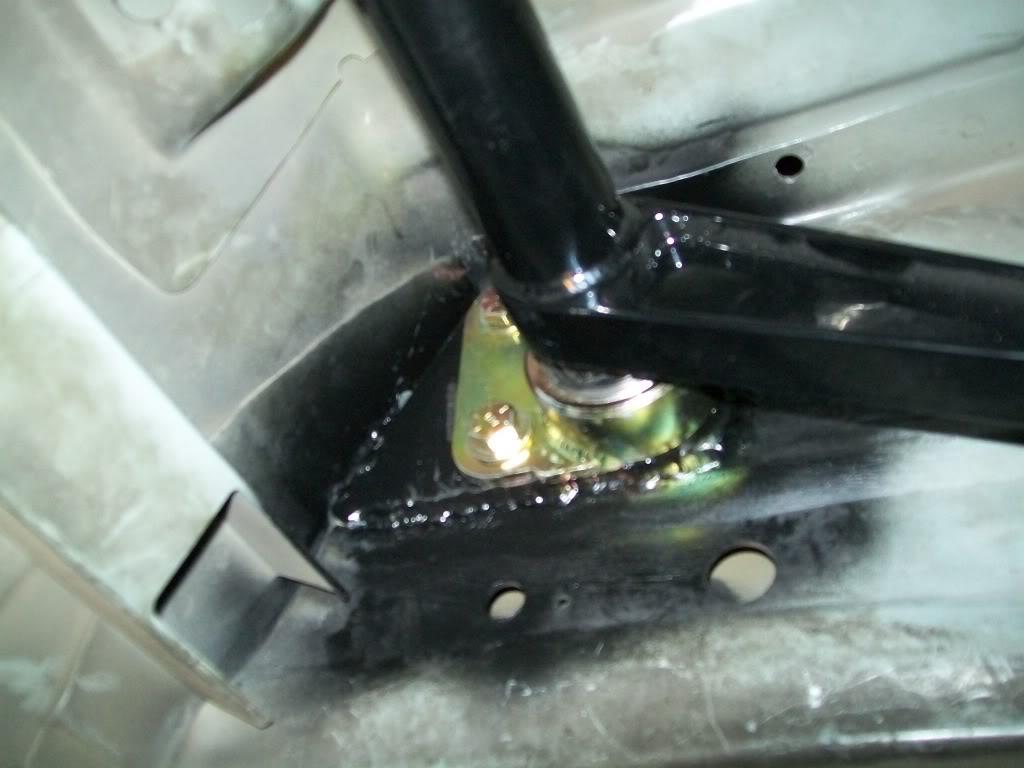
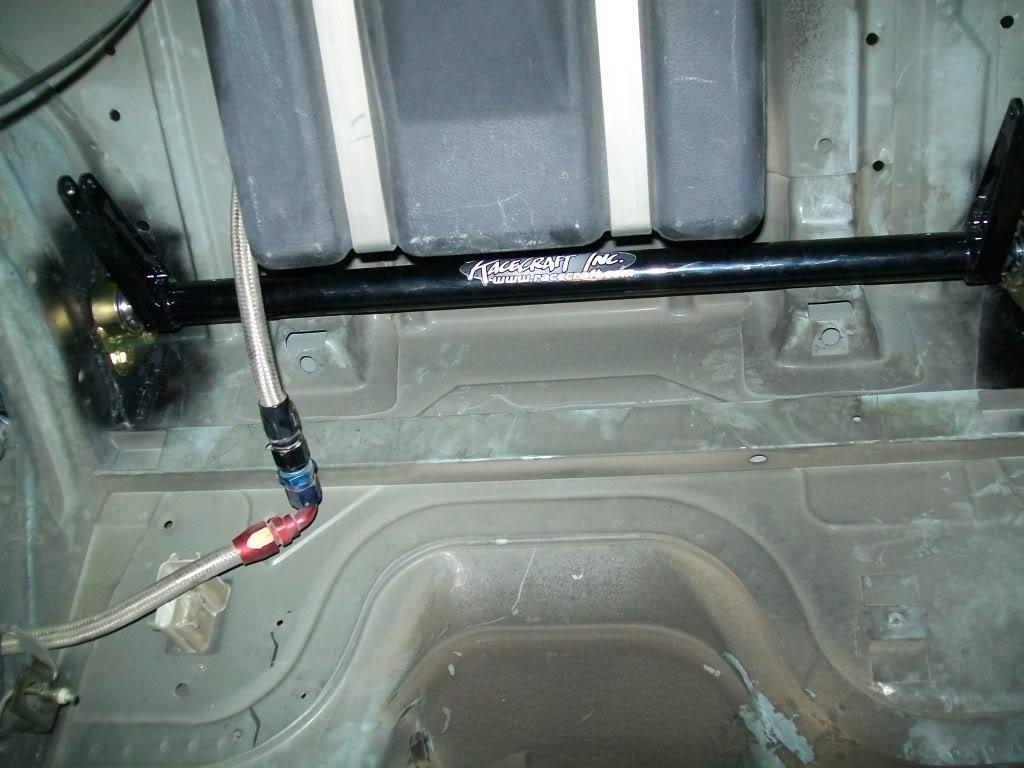
so after doing that i had to do the crossmember for the mounting of the torque arm .
the cross member required "some" welding 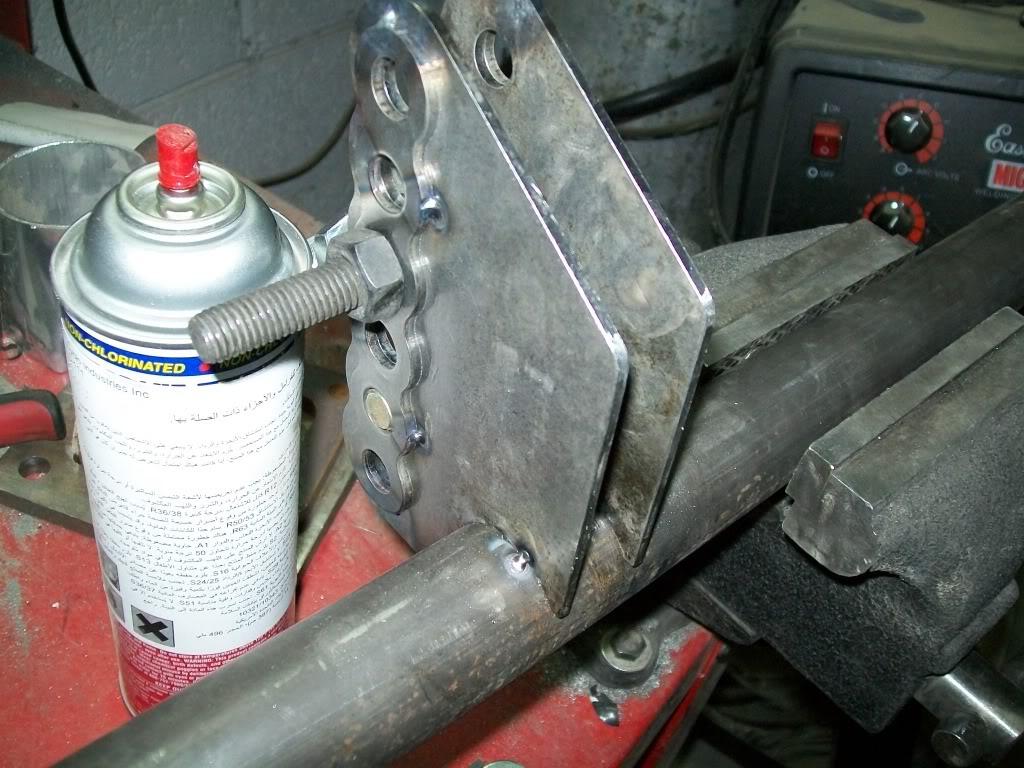
finished attatchment point with doubler plates welded on :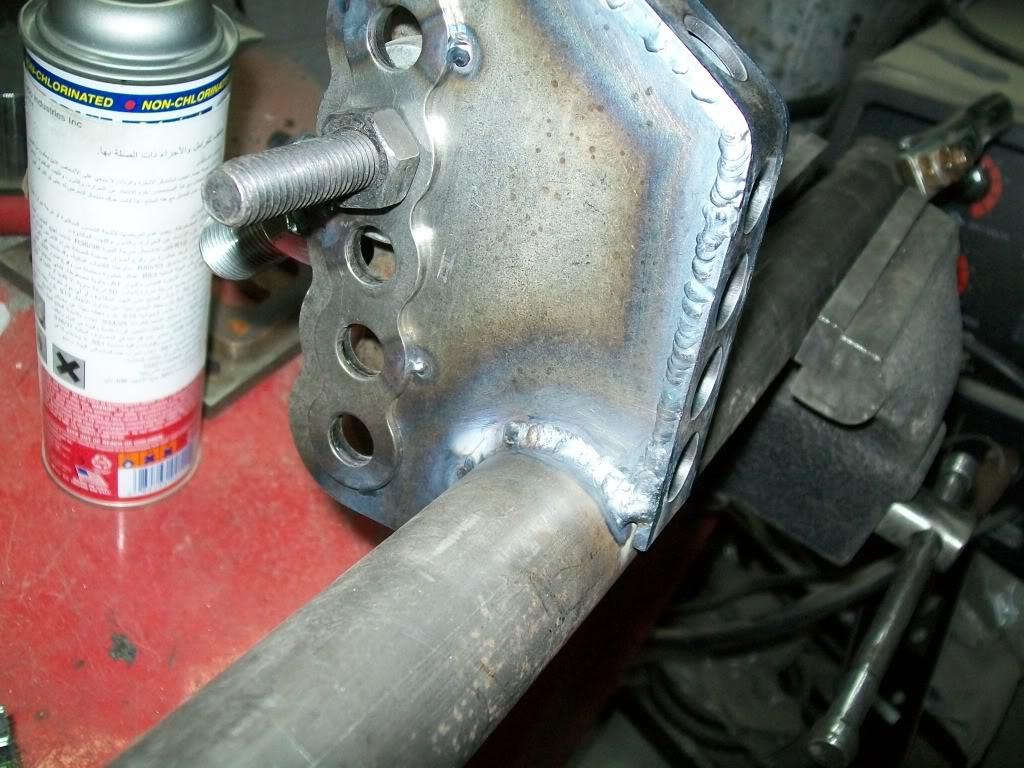
the plan was to weld the pipe to the subframe connectors , but me being me , i decided to make the crossmember removable. i did so by welding a "C" channel peice that fit snugly around the subframe and bolted the crossmember to the subframe that way :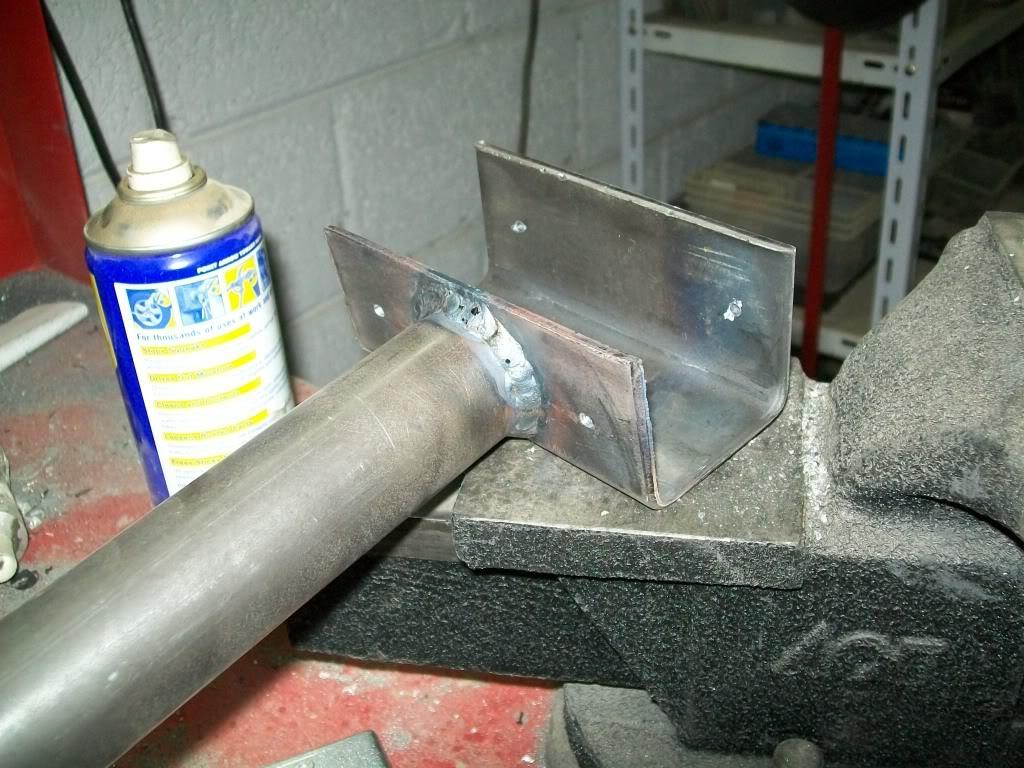
(sorry forgot to take pics of the thing installed)
all i have to do now is to have it powdercoated and call it done
another thing i had to do when i installed the swaybar was i had to relocate my tranny cooler cause it was in the way now, so a new cooler and location was called for; the best place i found was under the passenger feet area ( where the passenger header used to exit ) :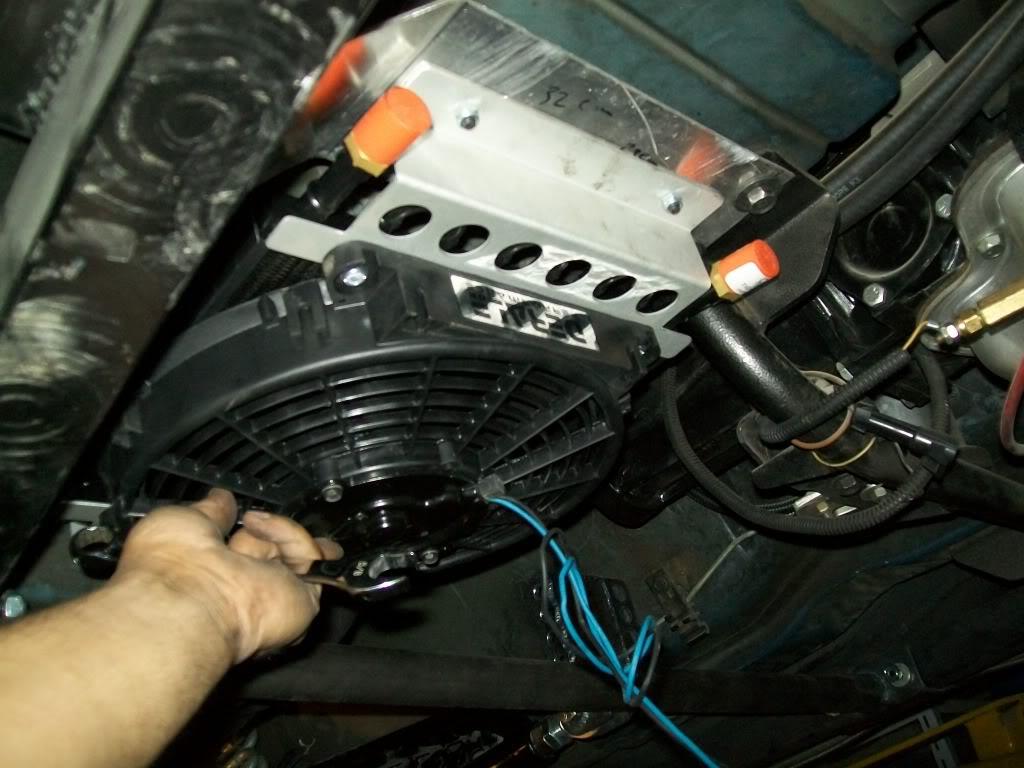
i had to make a small bracket to hold it in place :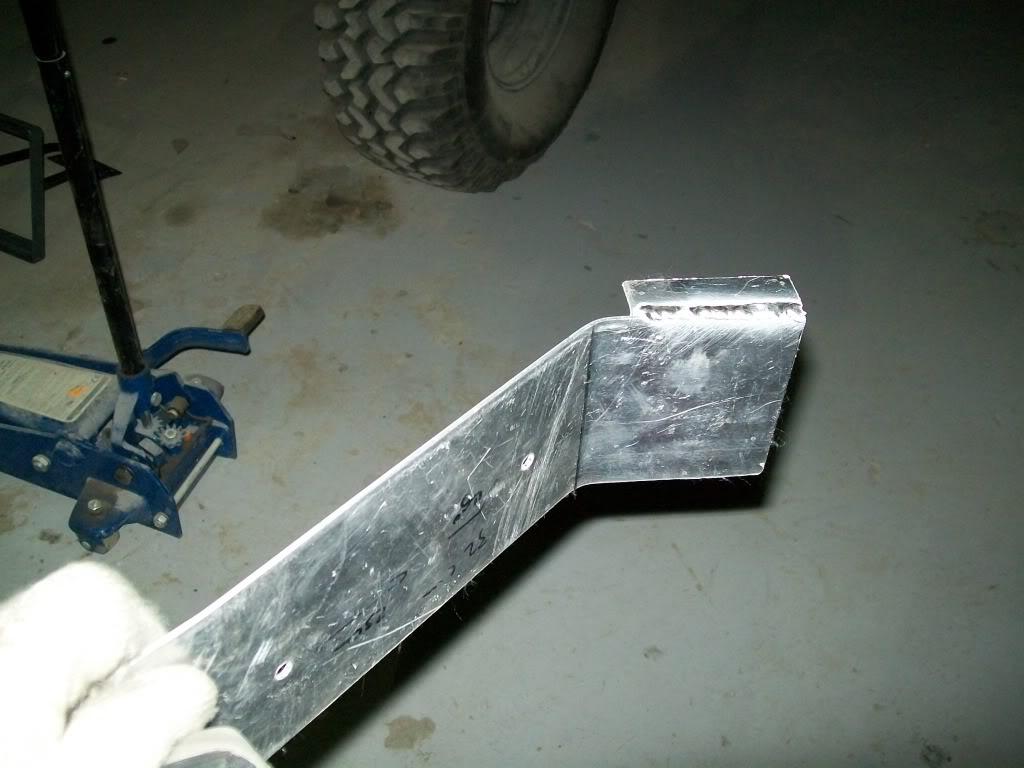
and here is how it looks (almost done ) :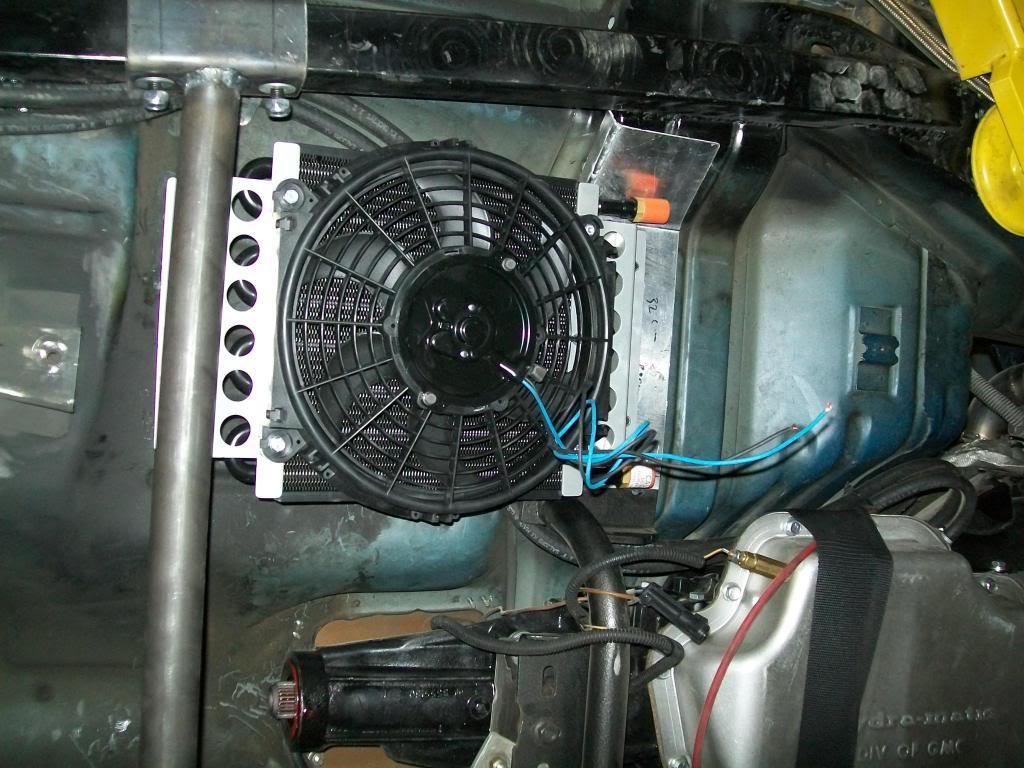
i just need to install the new lines and fittings as soon as they show up .
and finally i got around to installingthe exhaust rings on the bumper ,,,, i like how they look 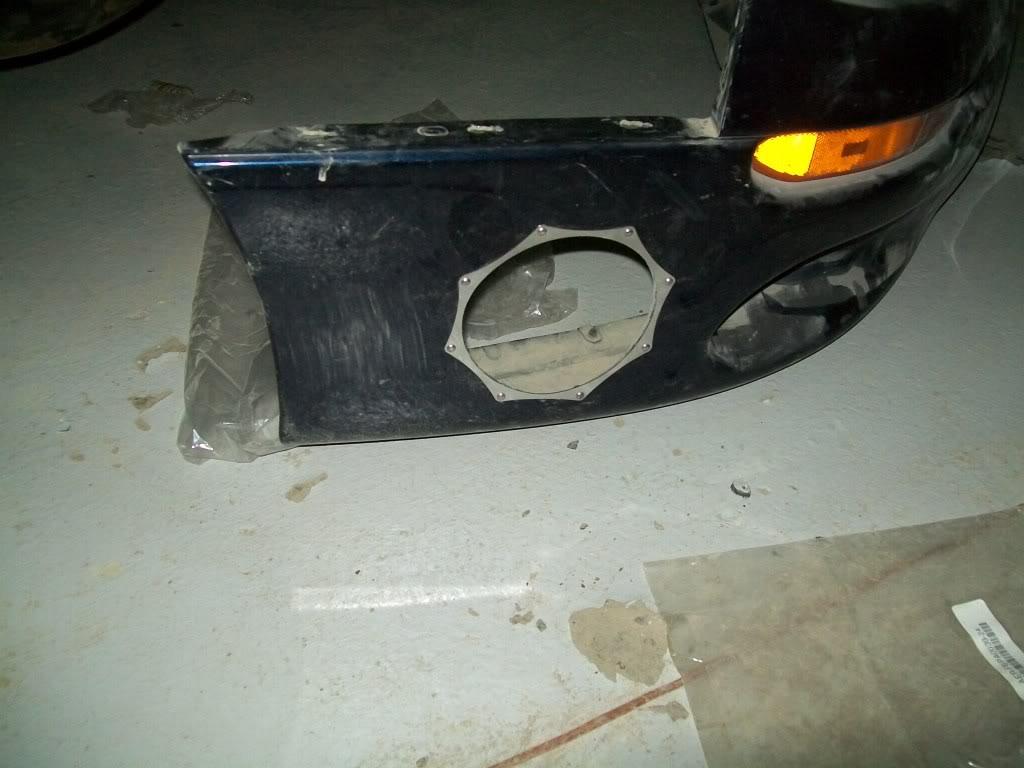
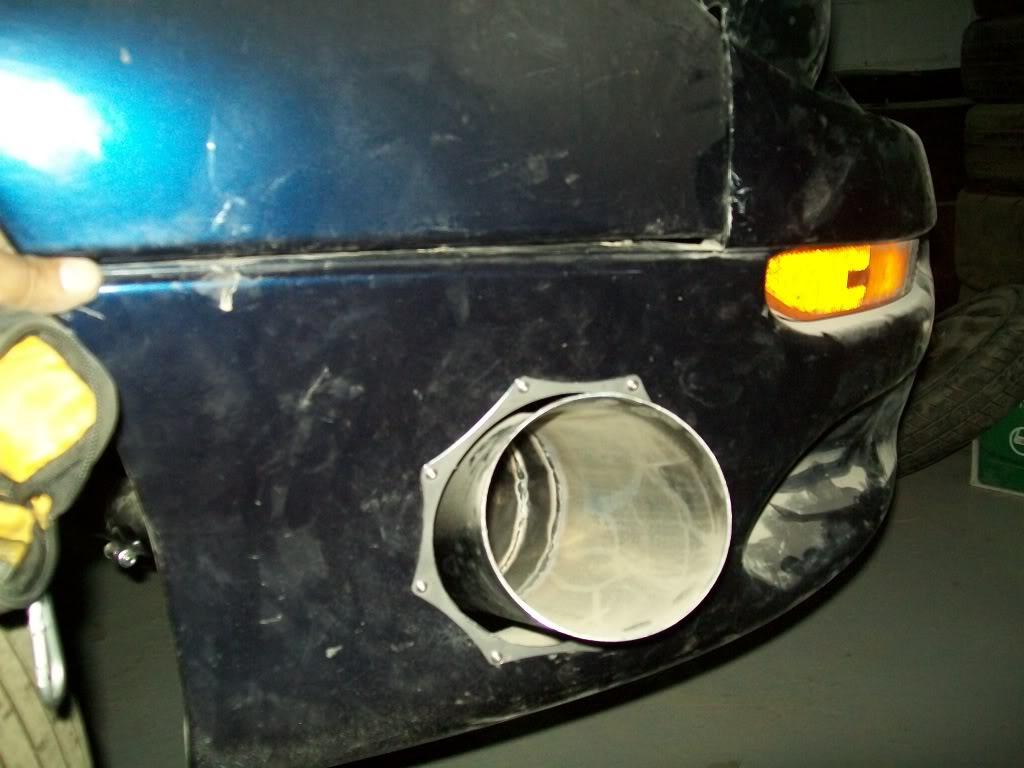
i also have to check the clearince between the fuel cell and filler cap on the housing , it seems kinda close but i can't be sure untill i reinstall the cell. if it does touch , i need to fab up a new cell ( most likely have a budy here whip one out of sheet aluminum ) that clears the cap. but more on that later.
next up is to make a radiator brace that moves the radiator just a bit away from the headers and attatches to the frame instead of the head . after that connect all my coolant hoses and fill her up. and if i get a chance i should start working on making some sort of headlight cover brackets to help heep them in place.
i also have one more flexible brake line ( to connect between the diff and the original hard line) to install , just waiting on the correct fitting to show up.
and since i'm going to be spending more time up front of the car , i just might insall the new afco coilovers i got in there
10/12/2011
not much to report other than the torque arm is off the car and at the powdercoaters.
some time back i remebered that i didn't have a driveshaft loop any more , so i looked around and found somethings i thought i could use. so i ordered a bmr bolt in shaft loop, a removable universal one , and a DIY one also from BMR. fuuny thing is the one that fit the best - or with no modification or work was the bolt in BMR one ( i had to turn it around) . the little dip they use to clear the exhaust now sits nicly under the torque arm mount and clears it nicely 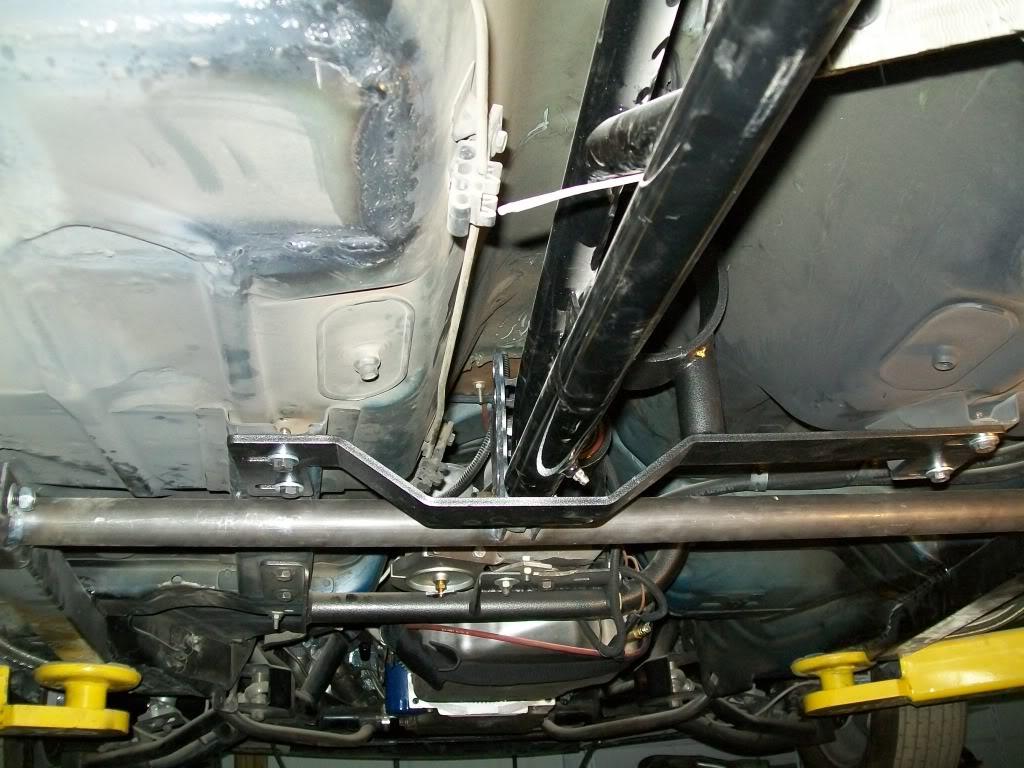
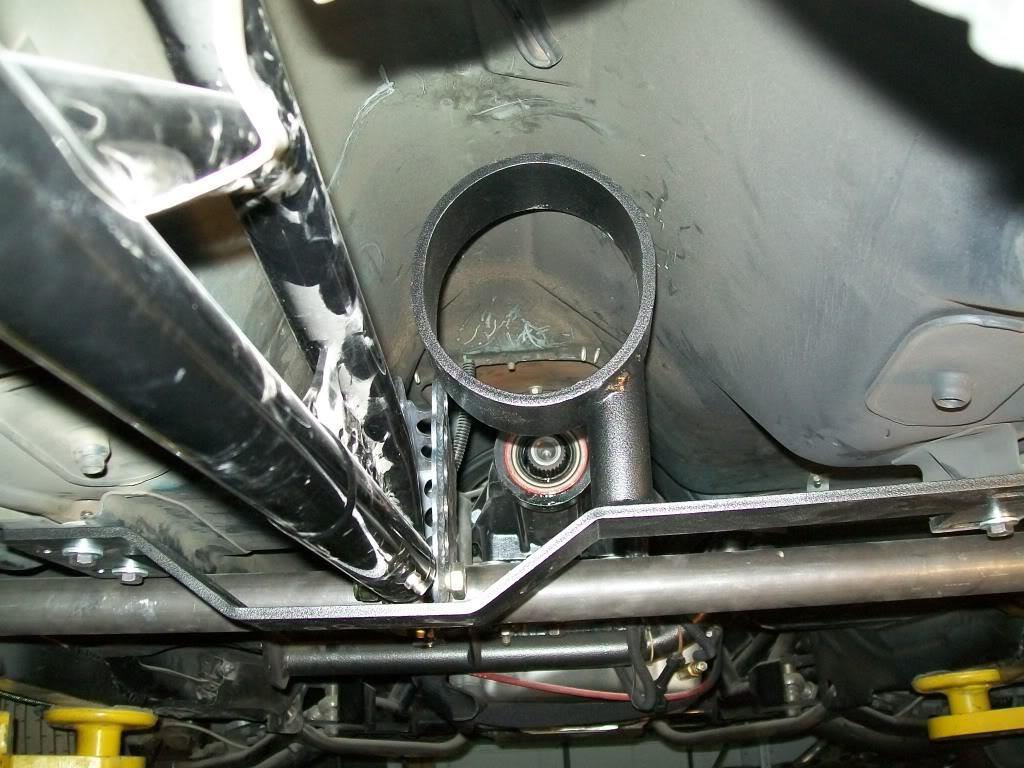
hopefully i'll have some quality time with the car the next few days so i can really get stuff done
11/20/2011
So we finally make it out to the track
out of the box with just shock adjustments recomended by the one and only MadMan ( Thanks Brian!!) the 3440 lbs raceweight camaro got a 1.25 60' right off the trailer !!
other runs we were not as lucky ( read wrong brake bias, miss shift , no log , broken throttle cable , loose pcm ground , coolant temp ses. not connected, etc etc, ) , but the car did manage a best of 8.5 @ 260 kph ( 162 mph) with a 5.4 in the 1/8th if my memory serves me correctly (i have to double check the slip )
now on to the bad news ,,,, in the second eleimination round i decided to stall the car a bit higher ( up to 3800 -4000 rpm ) ,,,, the front u joint didn't want anything to do with that so it quit ! and in the process took out the tranny and cross member
(sorry for the blurry pics , will get better ones soon )
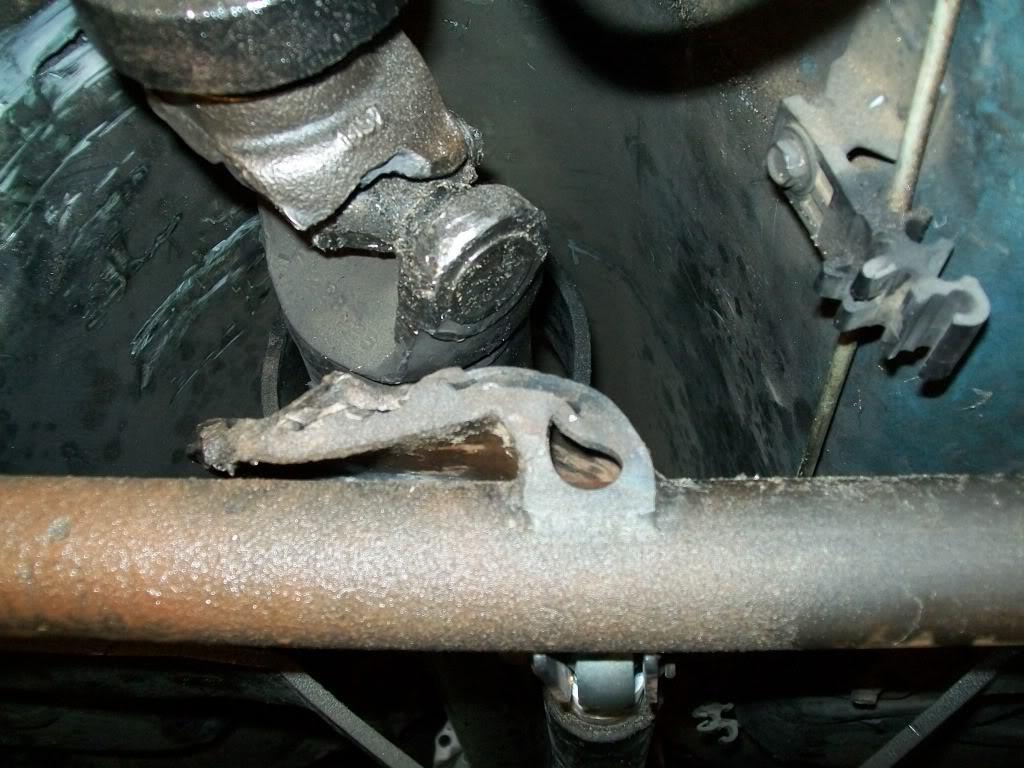
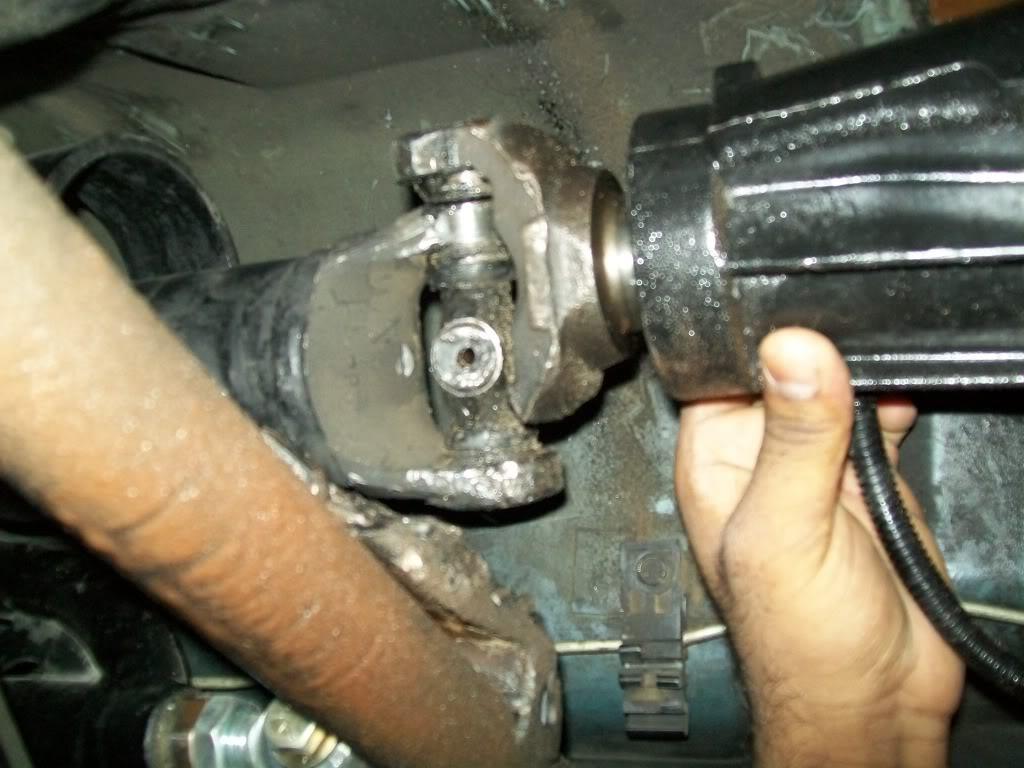
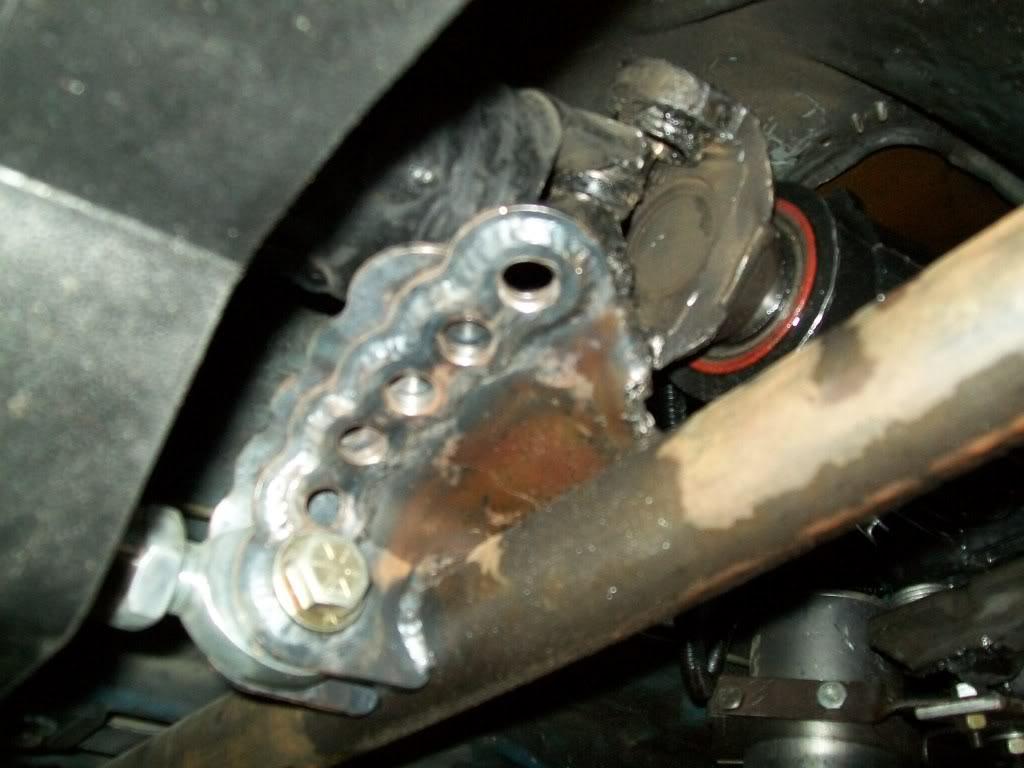
case damage :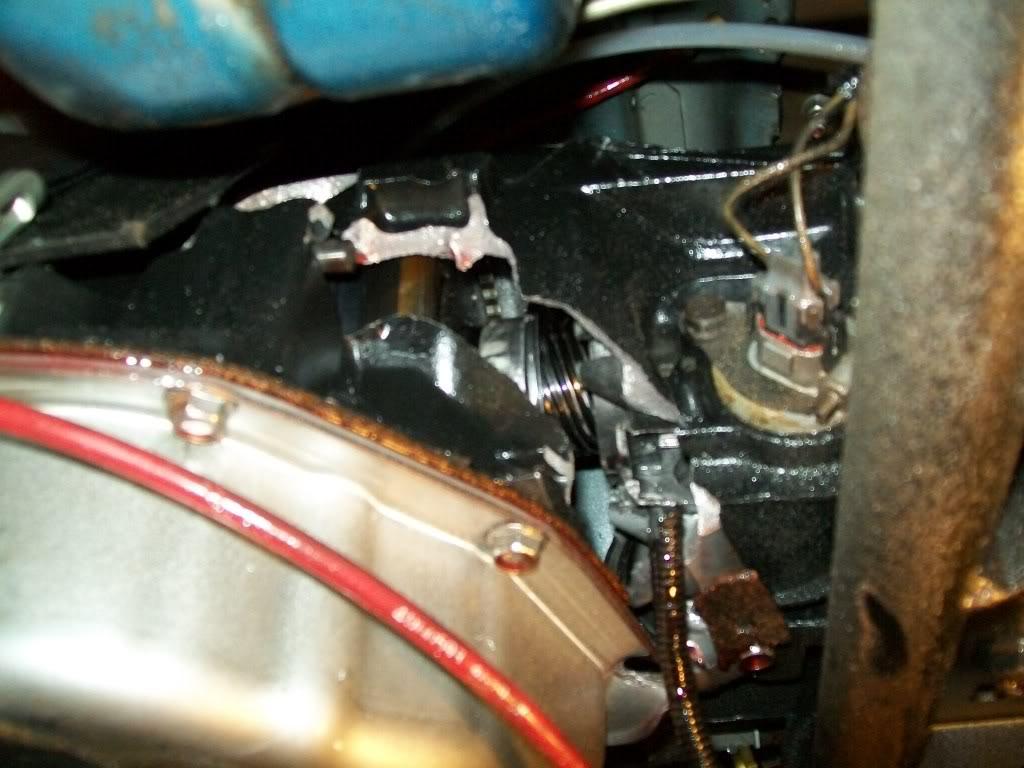
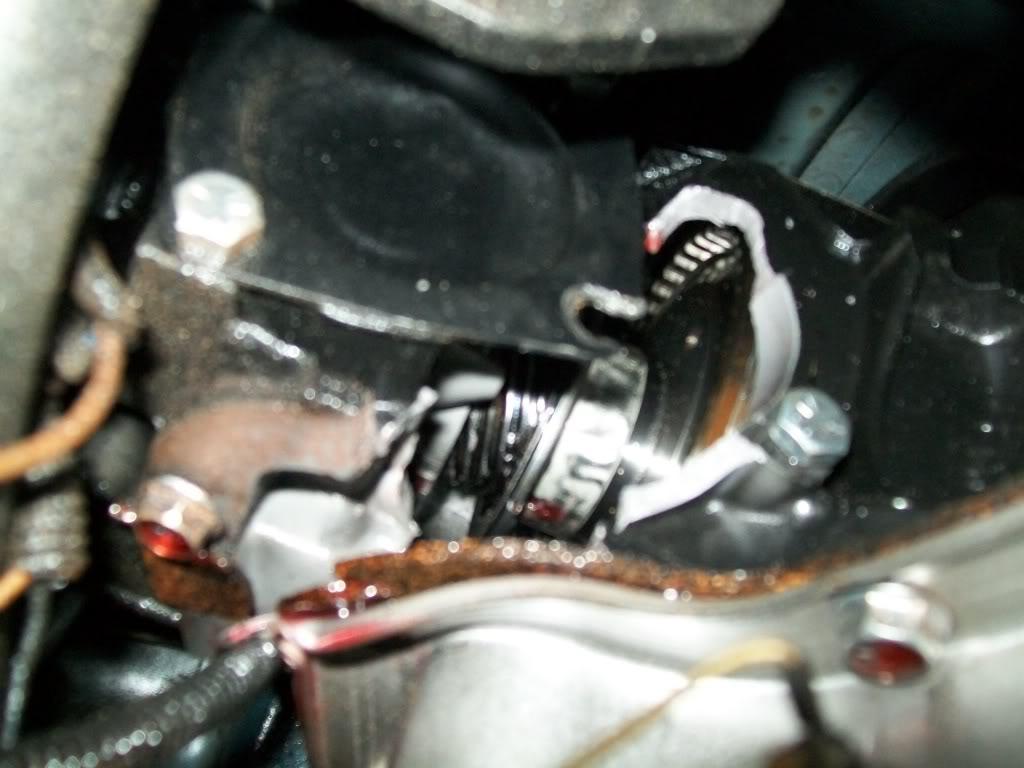
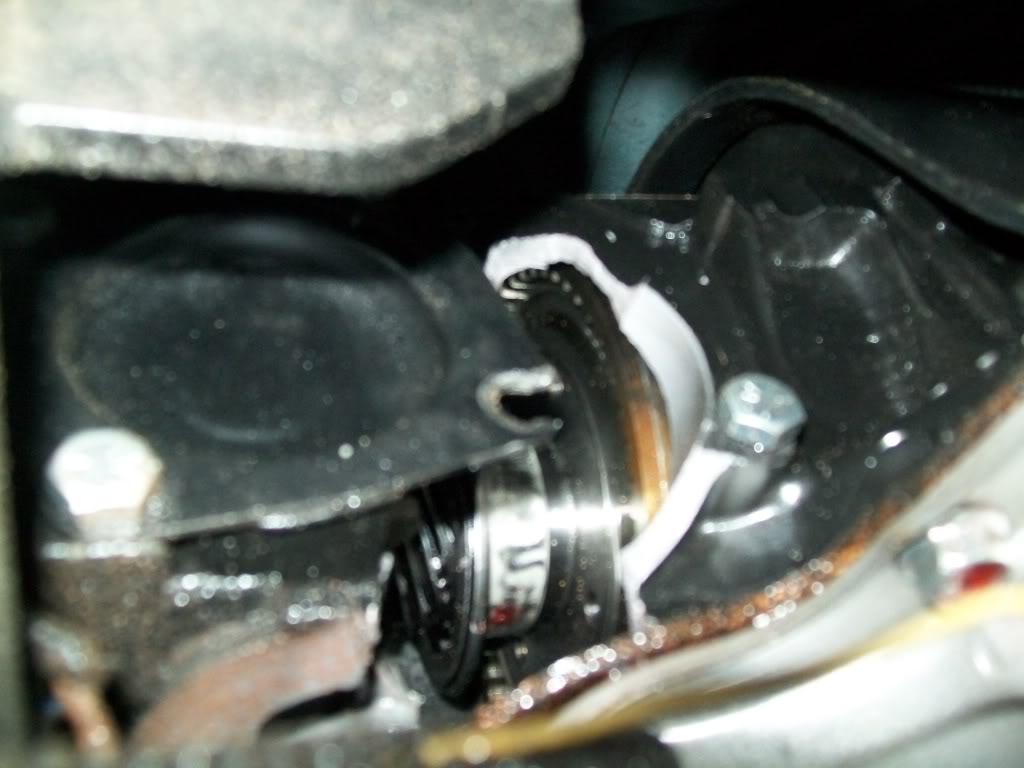
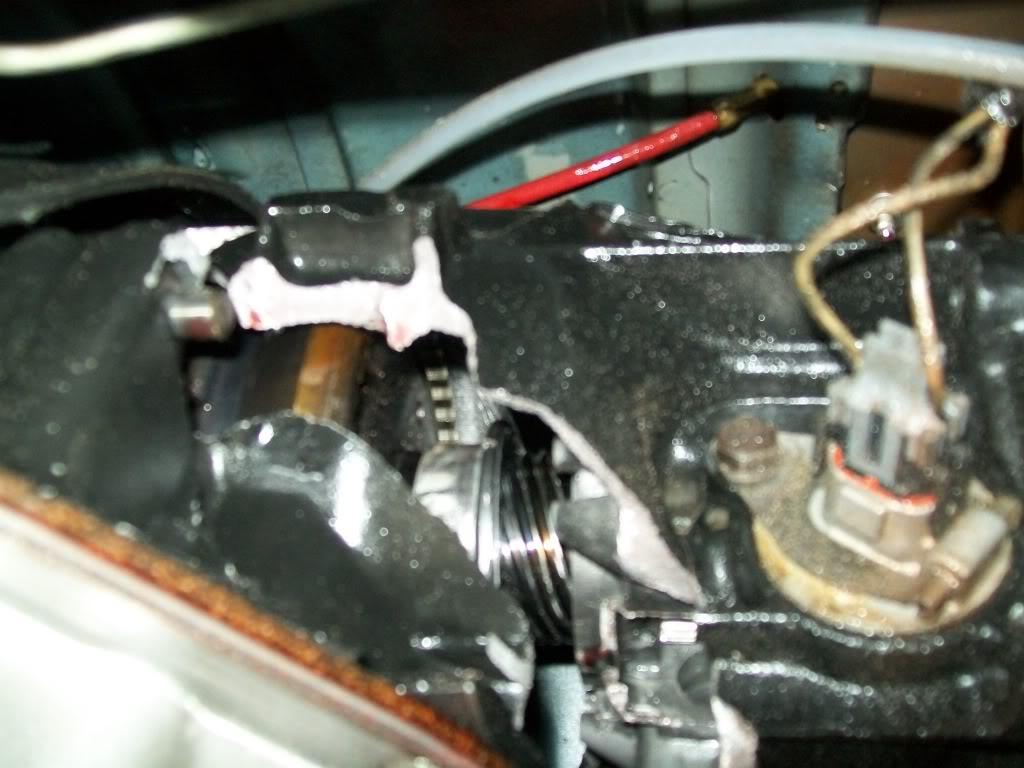
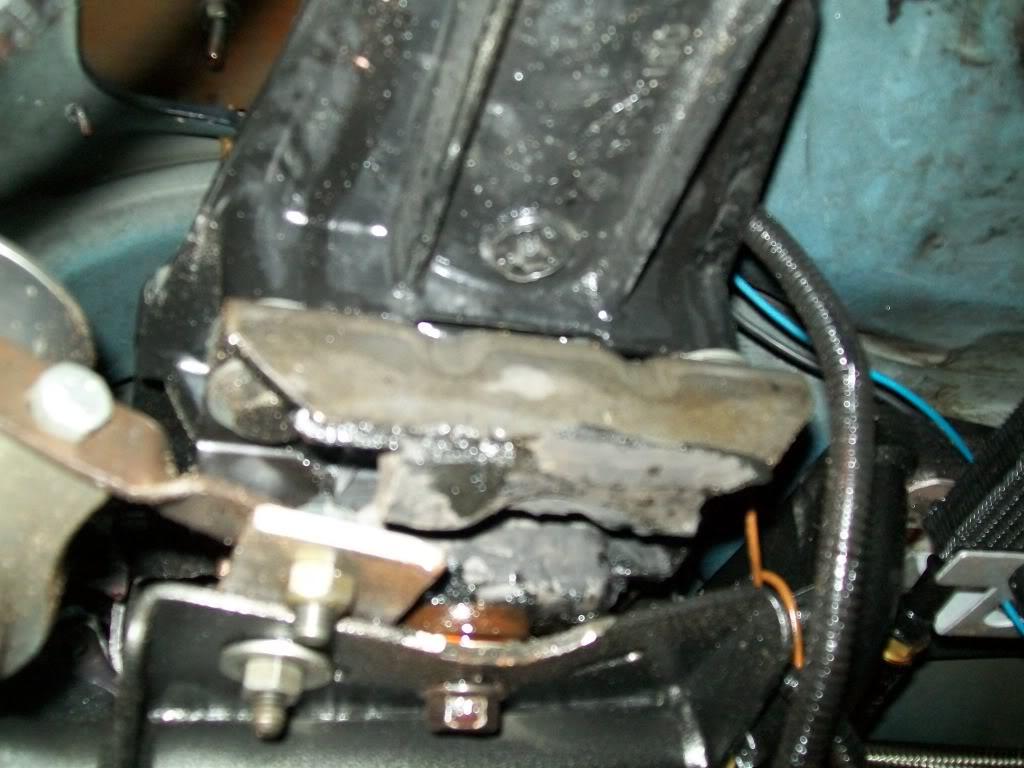
floor damage :
the bmr d/s loop did its job nicely , imagine if i had one of those bigger ones that hug the floor pan , think of how much more the damage might have been .
in any case ,looks like i'll be needing a new tranny now along with a s shaft and loop
i also should have a vid or two uploaded pretty soon .
the silver lining in the whole thing is now i know the thing has a lot left in it , and along with the upcoming weight reduction plans this pig will fly
11/20/2011
this is the 8.5 run , check out the antisquat !!
and this is one with me just launching without stalling the car:
11/30/2011
here are some HD vids that i just uploaded ( same runs as above )
second test run :
first round of eliminations ( no stall ) :
death to tranny :
and here are better pics of the trans :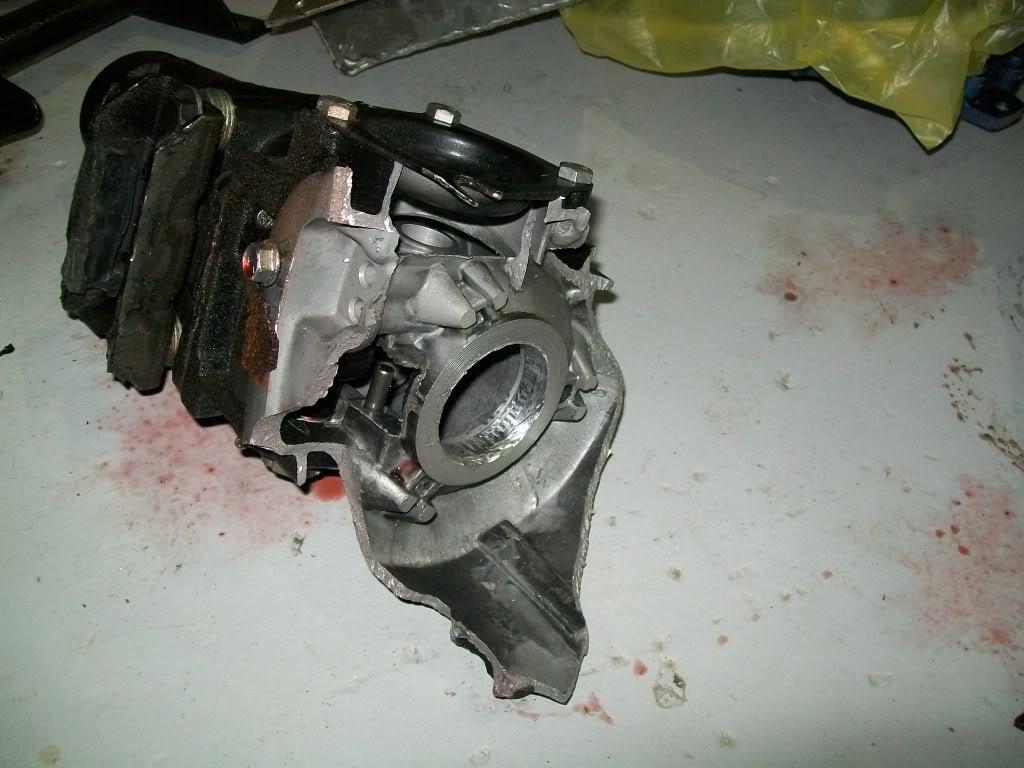
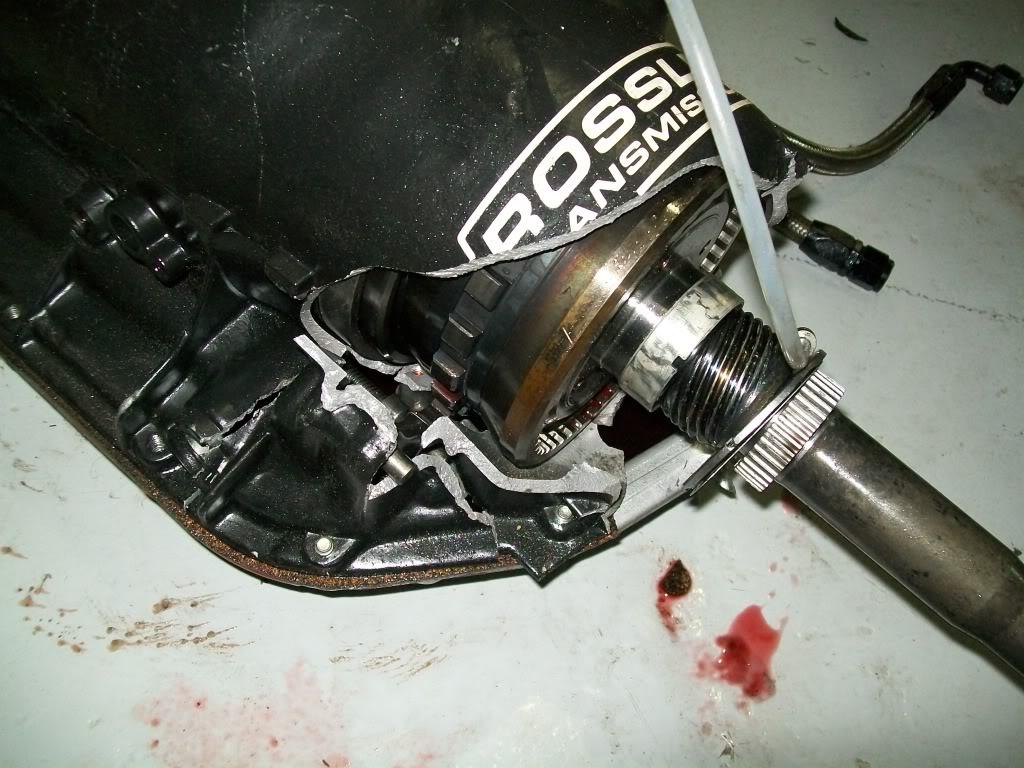
on to updates ;
i tore into the front of the car last night , i too k the nose off , which found to be ripped slightly on the bottom on both sides of the grill ( due to the nose getting squished in at speed - need to barce it ), and then i proceeded to remove the blower and gear drive ,,,, when i found a little surprise : the bolts holding the coupler tot he balancer had shared off (i'm assuming a long time ago given the ratteling noise i was hearing ) in the balancer and i was lucky that they shared halfway in , so i still had something the drive the coupler ! 
well after a few hours trying to get the broken bolts out i finally succeeded , and with almost no damage to the hub !
the good news is the new crosslinked polymer bushings (the black ones ) look like they just came out of their box 
so moving on , i plan on redoing the mess known as my front brake lines
here's a before pic :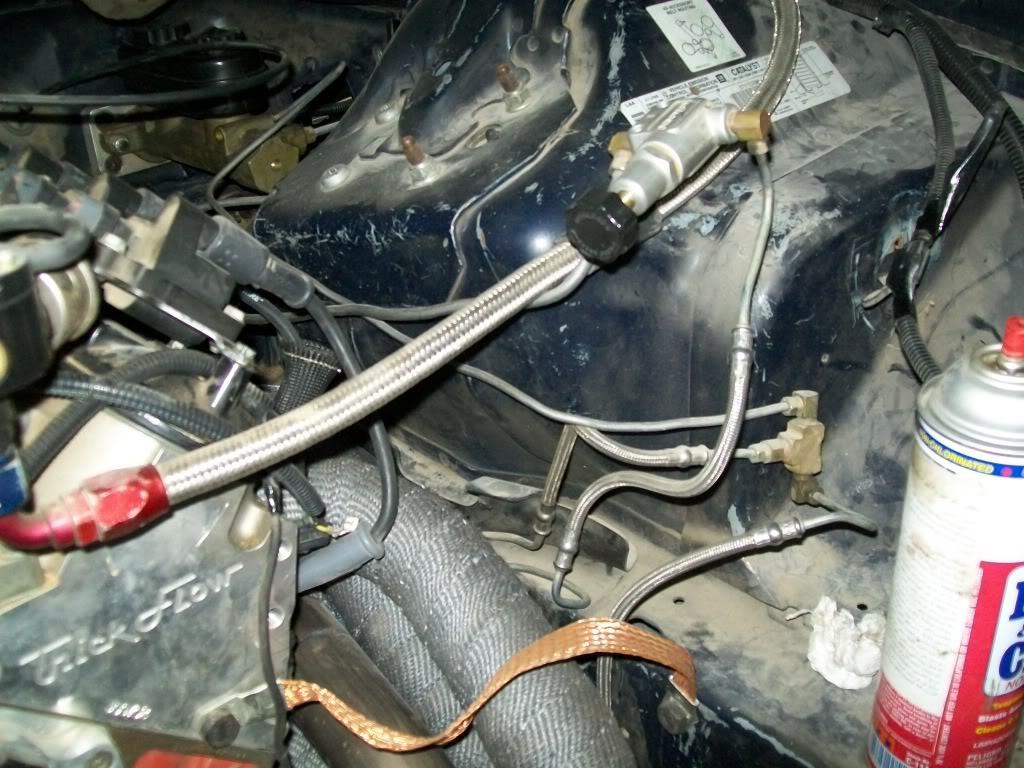
and soon i'll have the after one
so the plan is to do he following :
- remove the bashed up torque arm cross member and install a new one ( on the way )
- remove the front brake lines and redo them properly
- replace the aluminum fuel cell with a new plastic one i just got in
- relocate the accusump thingy to inside the car instead of in front ( free up some space )
- i'm thinking of cutting the area infront of the front wheel wells to free up some space - see why below
- i might relocate the radiator to infront of the wheelwell and have it horizontal instead of where it is now so i can regain the area next to the gear drive
- i have to redo the front brace so that it incorporates the headlight brackets , nose brackets , hood pins, and bottom of the nose supports
- i might ,,, just might replace the front coilovers to the AFCO ones i have sitting here , but it depends on how i feel
this should keep my hands full for some time , ithe list goes on and on but i'll post that stuff as i finish the above .
3/18/2012
well its that time of the year i guess time for an update !
picking up where i left off last time : i got the new tranny in from rossler, got that installed along with a new mark williams driveshaft. the new tranny has the short style tail housing unlike the onld one which had the long one. now if i ever needed another trans i can "borrow" one from the guys over here
i also got the busted tranny rebuilt locally and slapped it on my stang for "testing" , so far so good
i also ordered a new third member with 3.4 gears instead of the current 3.07 ones, trying to find some time to install them 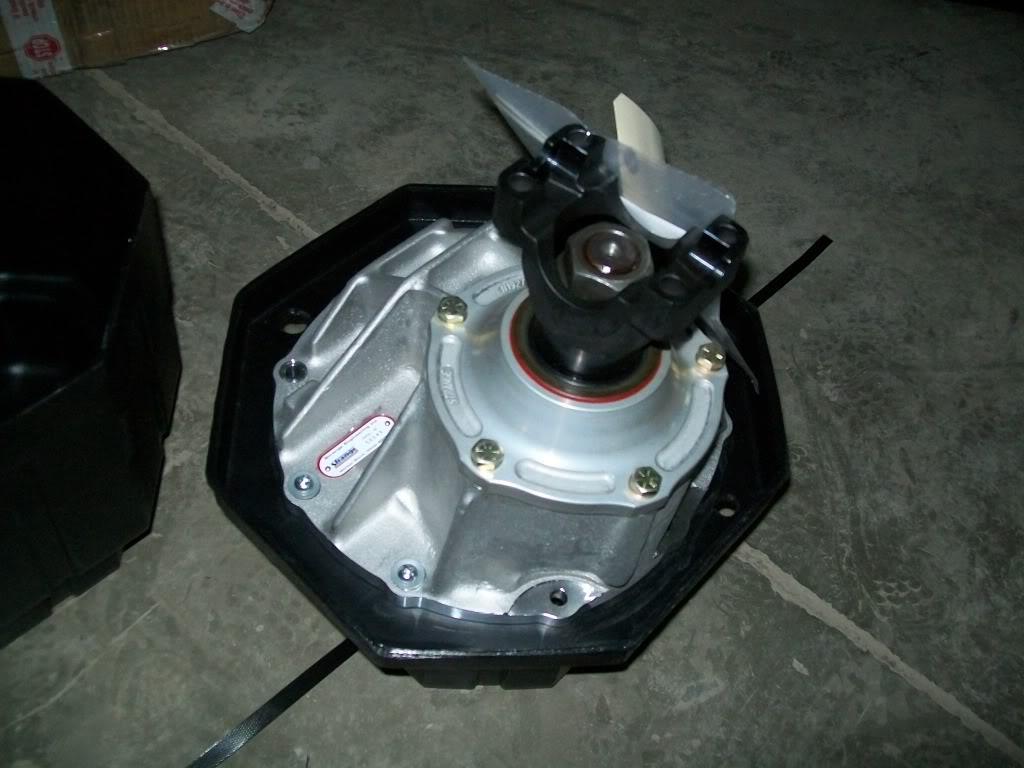
and in case you were wondering how bad the torque arm crossmember was damaged, well you be the judge :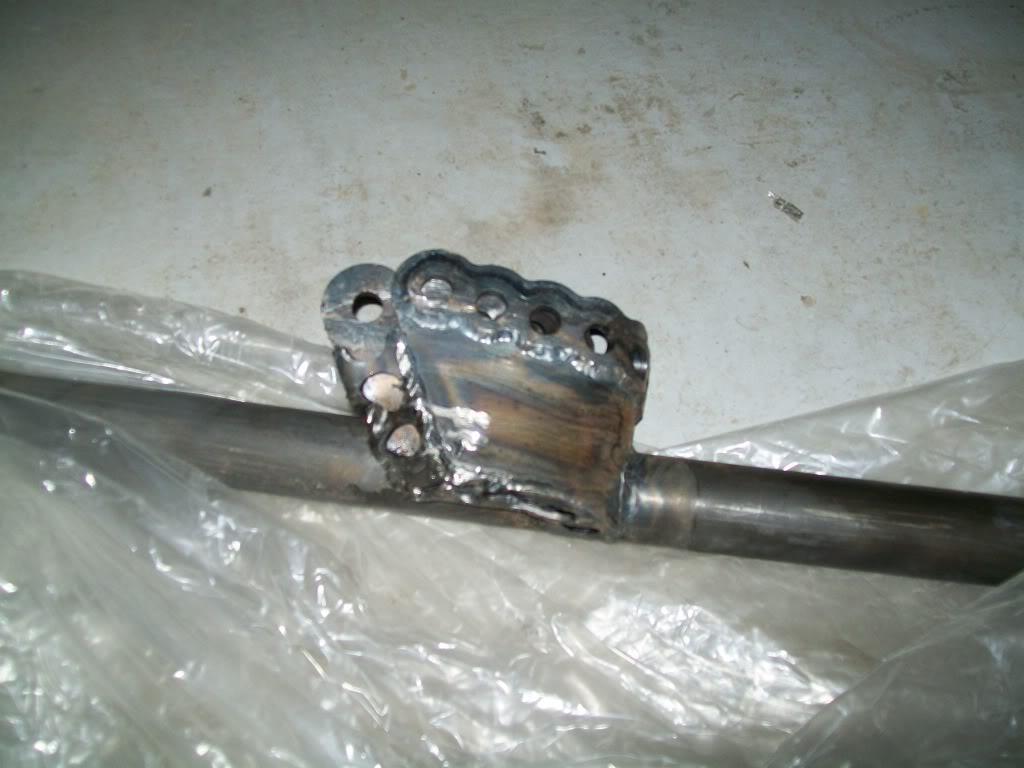
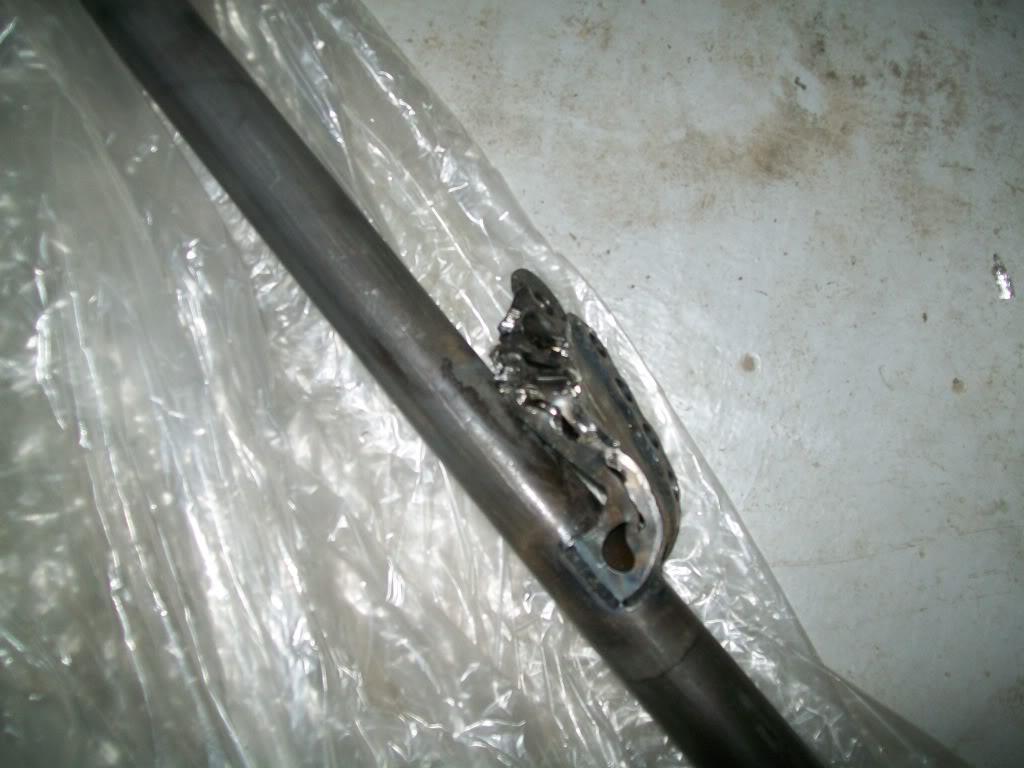
i then turned my attention to the front brake lines , i took everything off and replumbed it. i started with a new location for the prop. valve and a bracket to hold it in :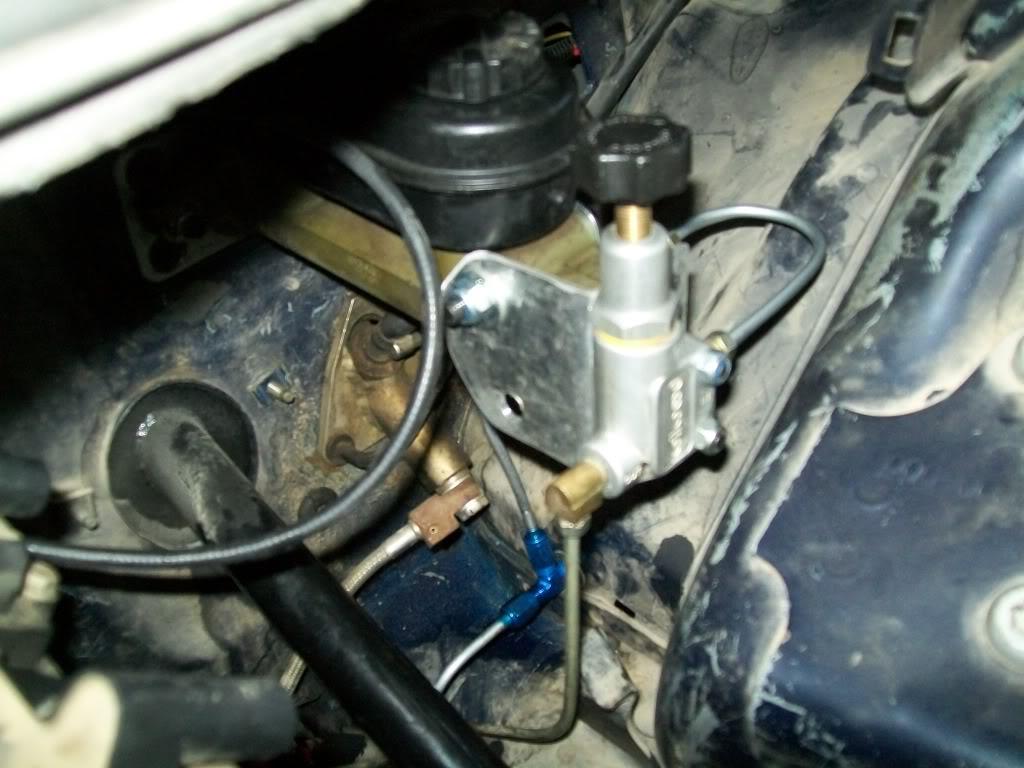
and then proceeded to making the rest of the lines, here is the line that follows the bottom of the K member: ( forgot to take any more pics ) 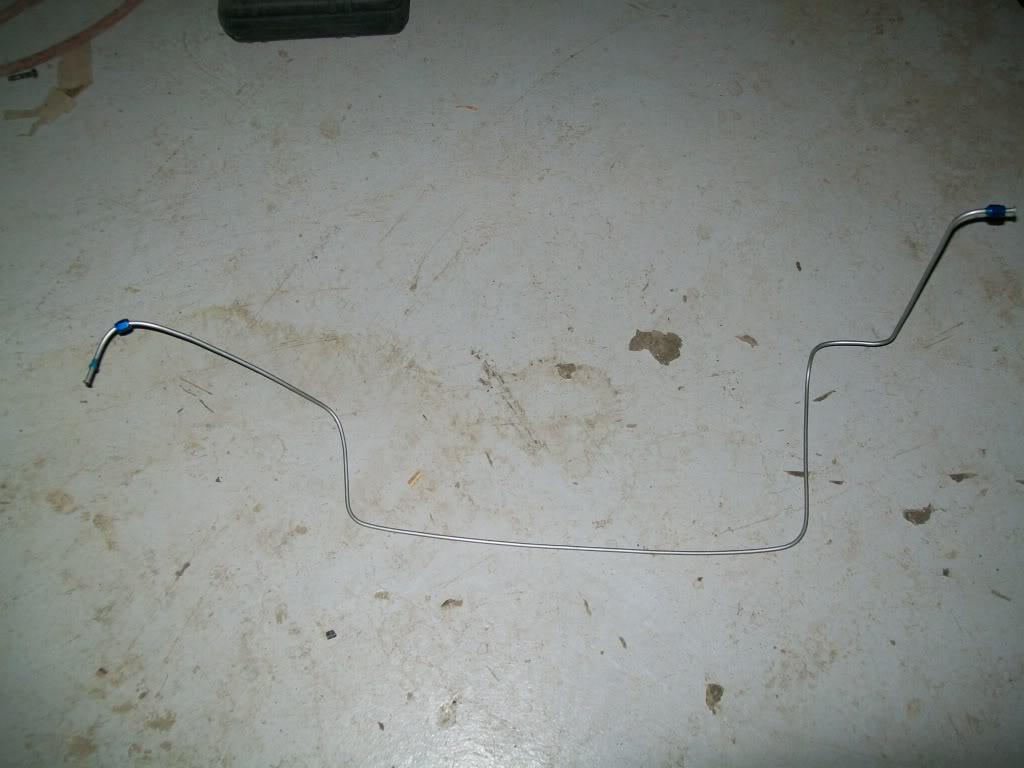
after that i resumed messing arround with the front nose support , this will hold the headlight covers, top of the nose , and tie in with the frame horns. the smaller one will hold the hood pins as well as the bottom of the nose peice. this is how it started out as :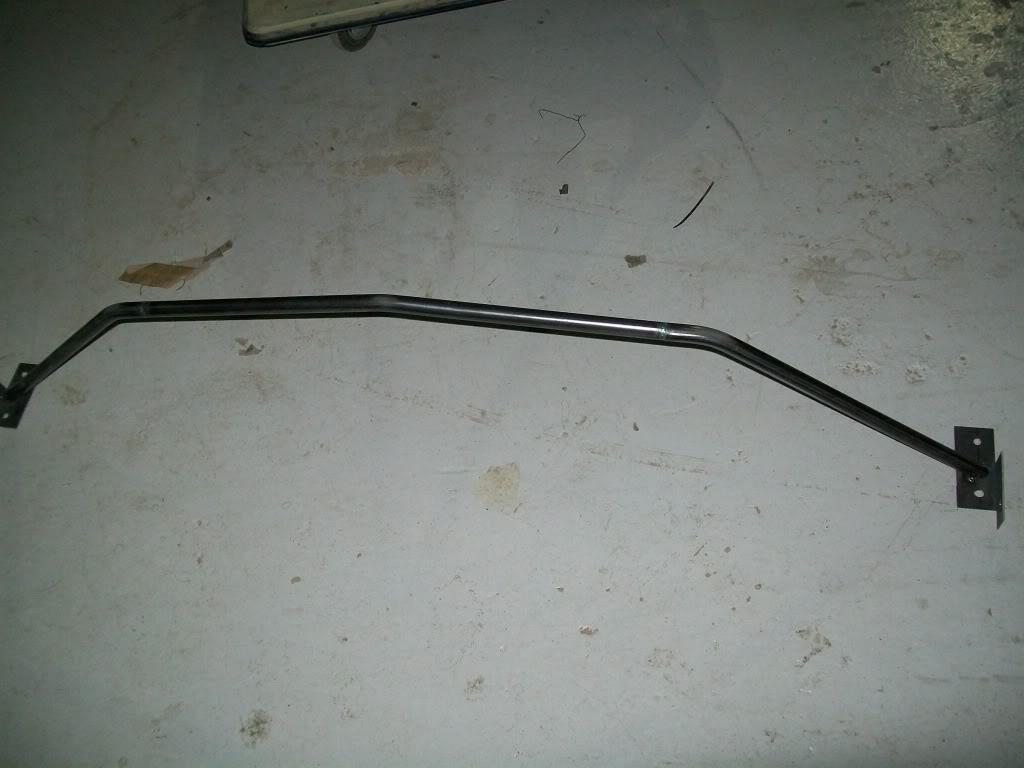
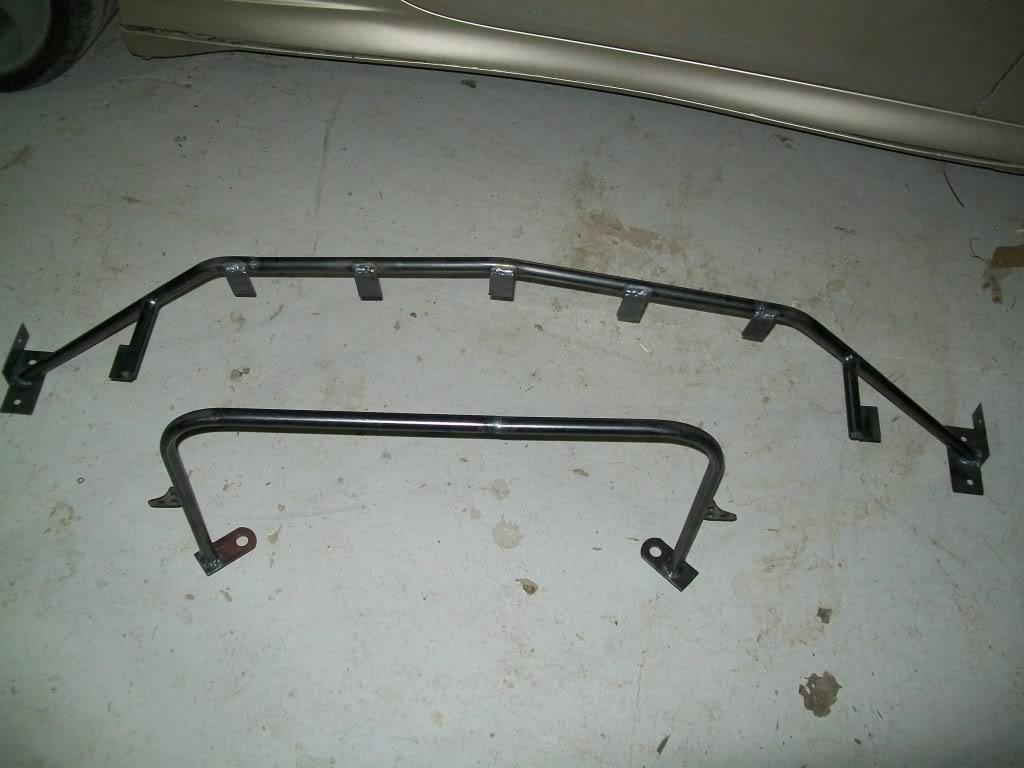
and here is how they attatch to the frame ( don't mind the other brace with the waterpump attatched to it , thats the old one and i was just to lazy to remove it ):
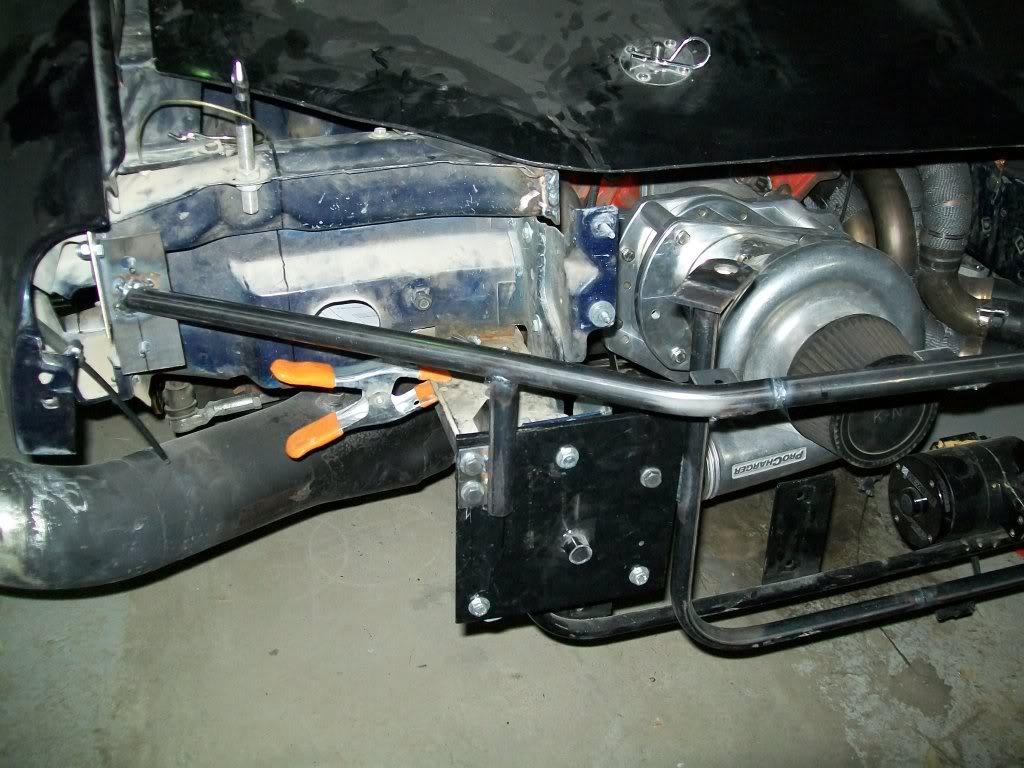
since these pics were taken i added brackets to hold the headlight covers as well as tabs to hold the bottom of the nose, but i didn't get pics of them yet , so as soon as i get the parts back from the powdercoaters i'll snap some pics
i also finished some work inside the car, last time out i was told by the tech guy i needed to relocate my window net mount to inside the cage as well as installing a net above me because it was a Ttop car. i was also asked to redo the batt mounts ( i agree since the ones on there were pretty aneimic ) as well as install a seat back brace .
new window net location :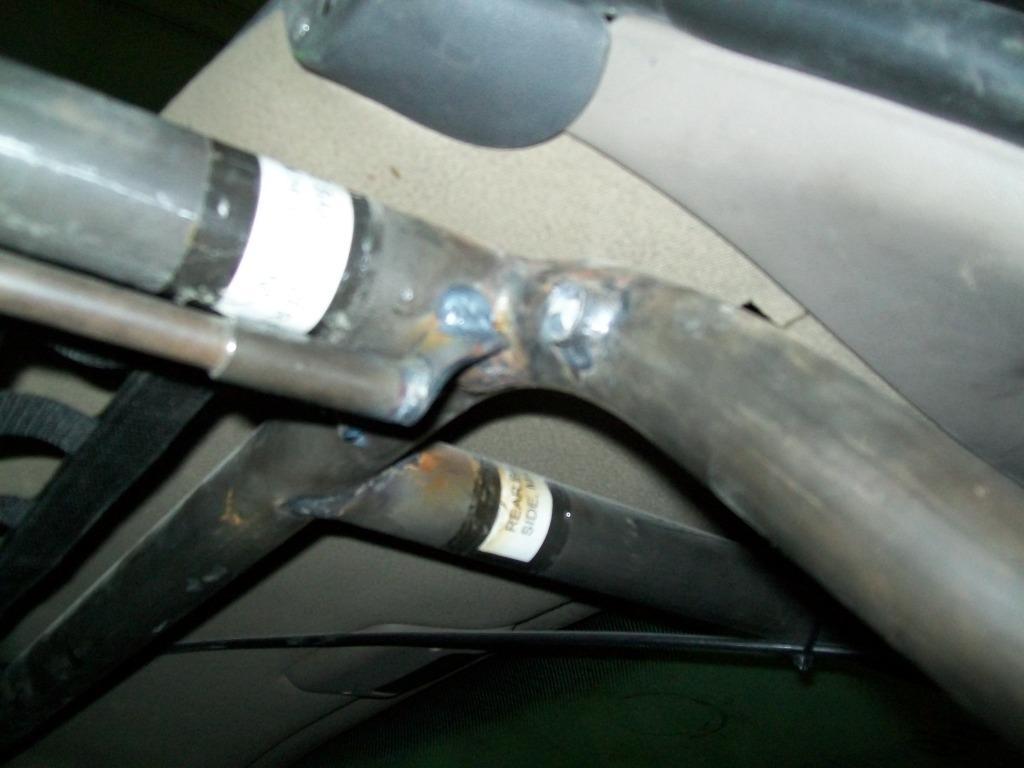
window net and t top net :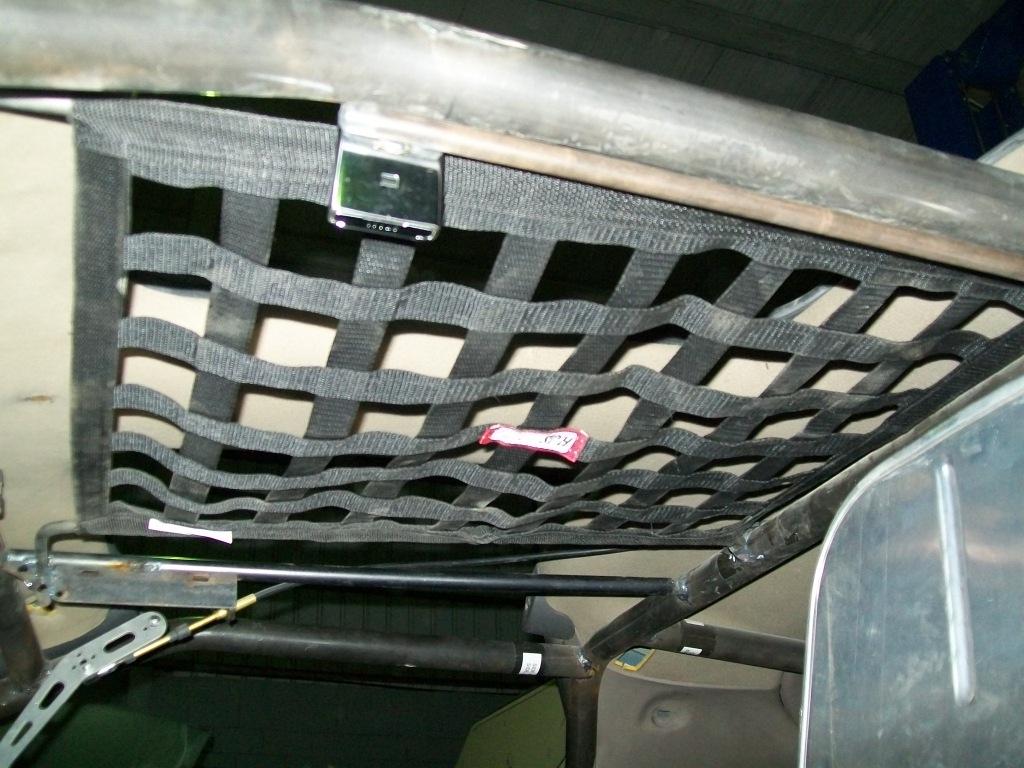
and how it looks from the top :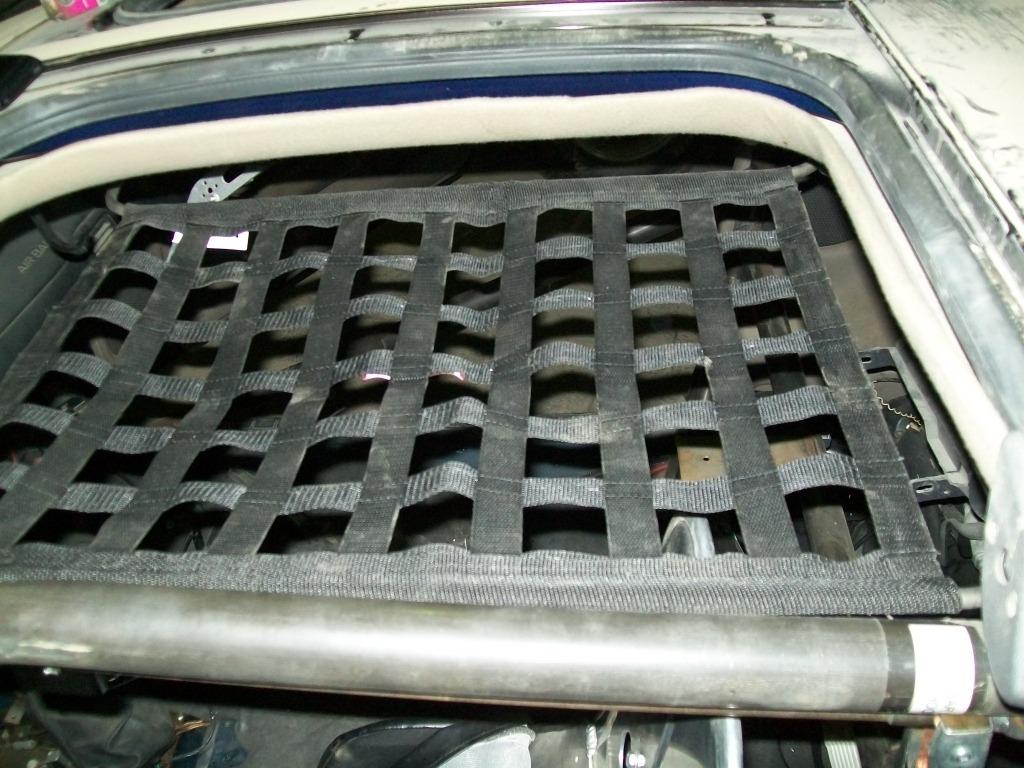
and here are the new and improved trays , just need to powdercoat them 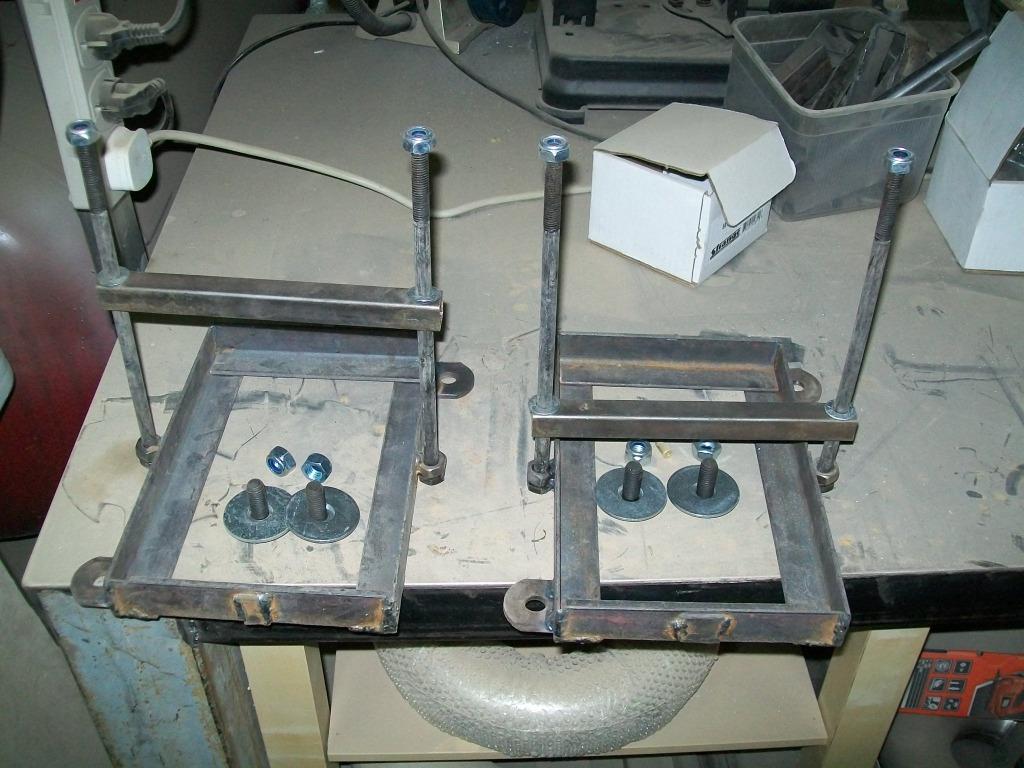
moving on , i started with messing around trying to find a suitable mechanical fuel pump location. like i mentioned earlier , the plan was to remove the core support completely and mount the rad and cell in there . given the mess i have in the engine compartment my pump locations were somewhat limited , here is what i came up with :
this spot was too low for my liking :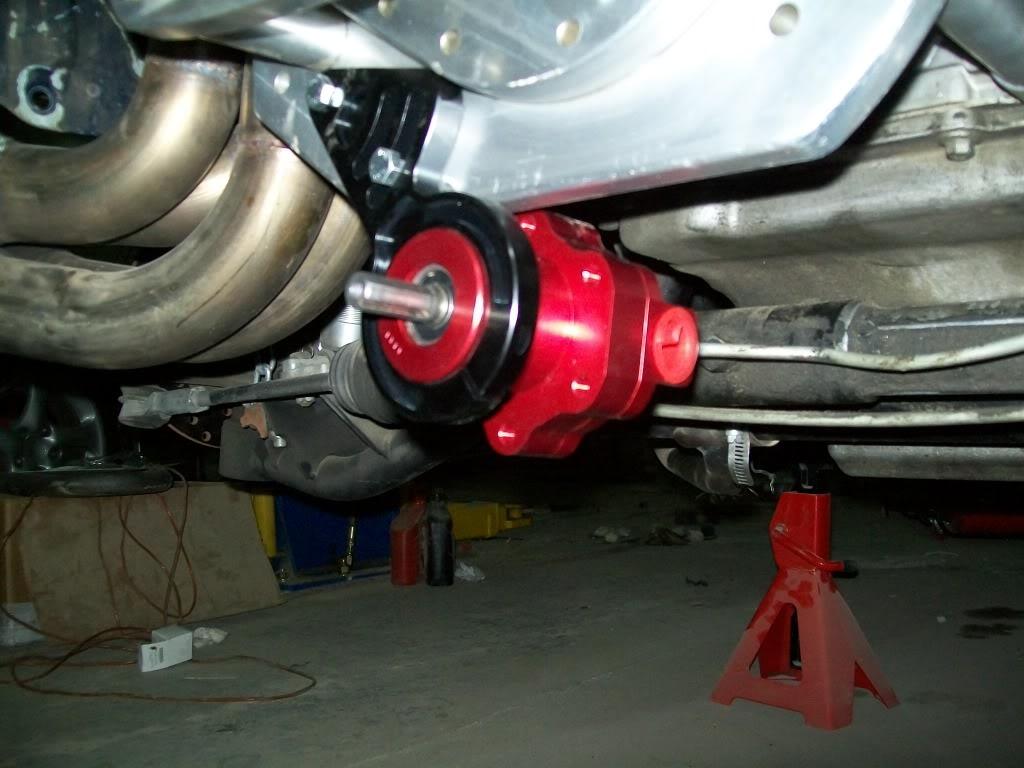
this one was better :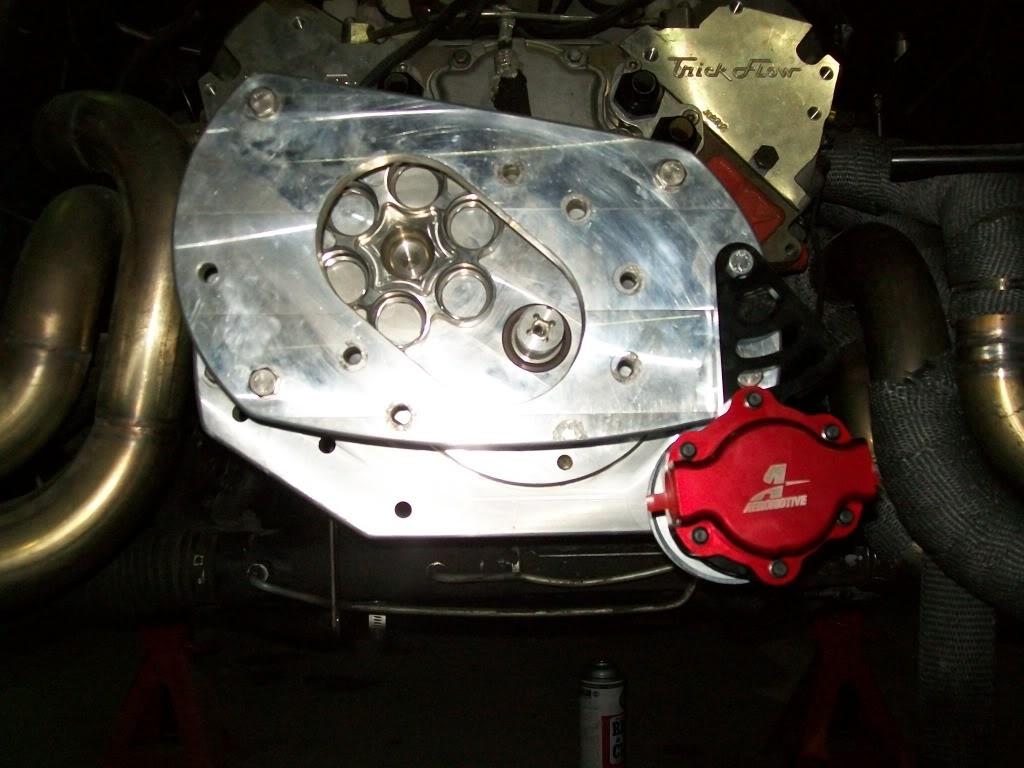
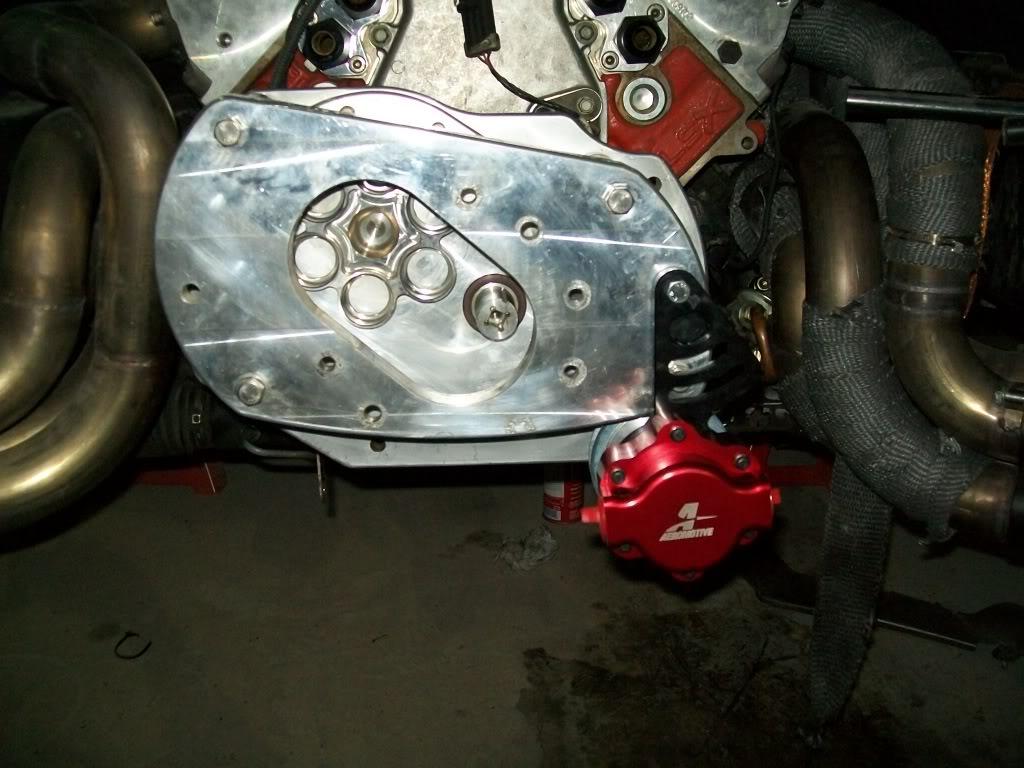
and if you are wondering why not up top , well the alternator is going on there and this location gives me the best belt routing . either way , i still didn't install it yet, i'm waiting to finish the tank first as well as the new radiator location before comitting to that location .
contiuing with the theme of relocating everything i moved the oil accumilator out from the engine compartment and into the the driver fender . it sits nice and snug in there and out of the way , yet still is easy to access if i need to do so: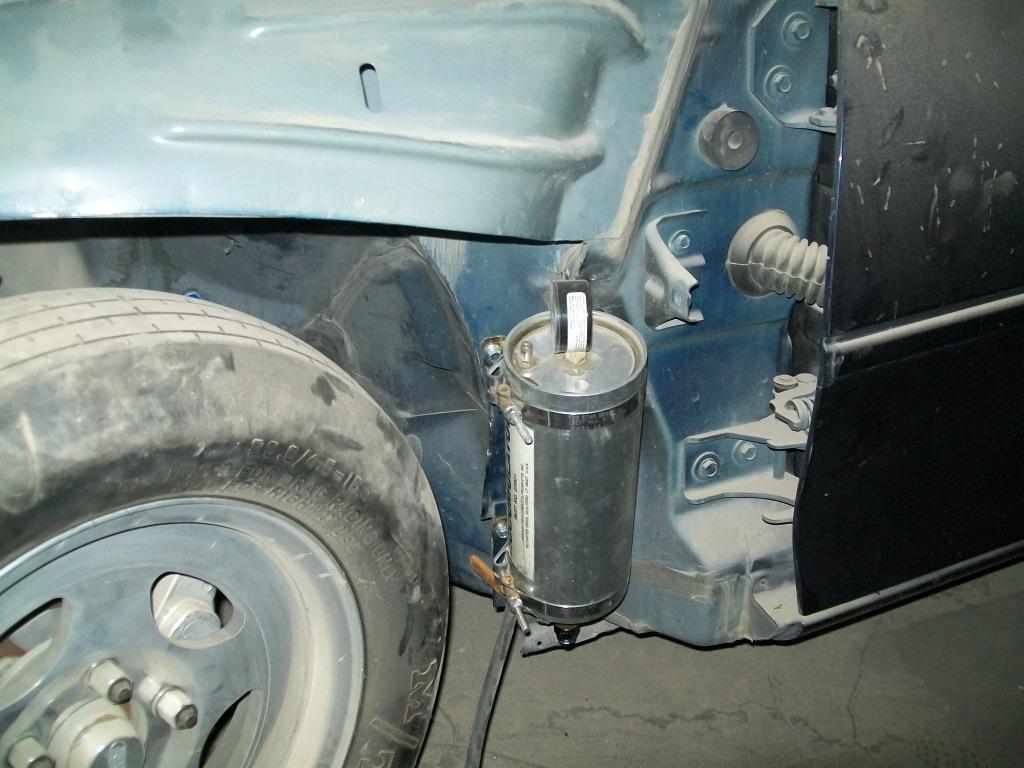
now we get tto the part i kinda hated to do but after doing so i thought why didn't i do it a long time ago: cutting th core support out completely. i did this for two reasons, the first being that i need to relocate the radiator away from the headers and horizontal to free some space, and the second being that i need to place a fuel cell on the passenger side to gravity feed the new pump. and here is what i ended up with :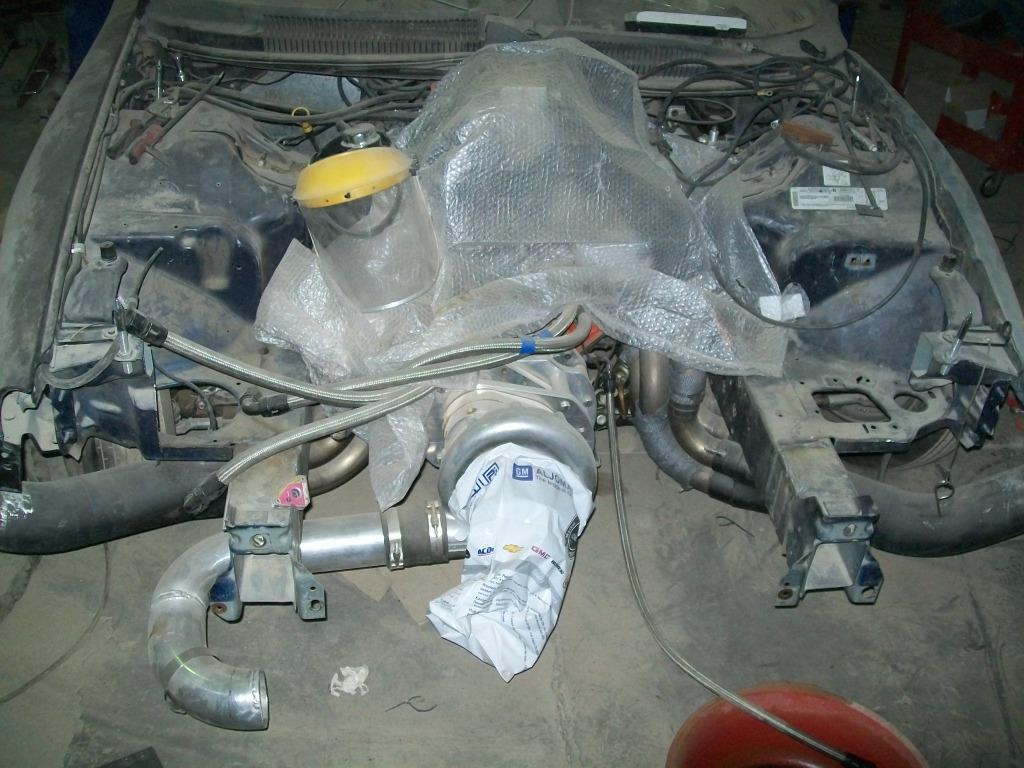
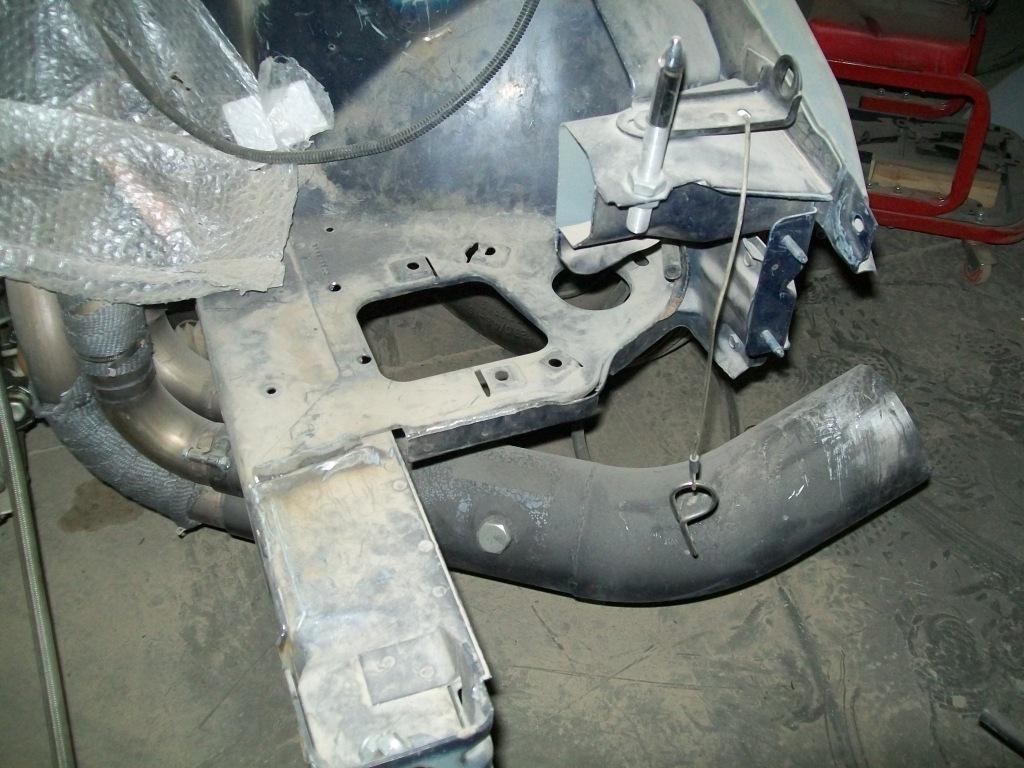
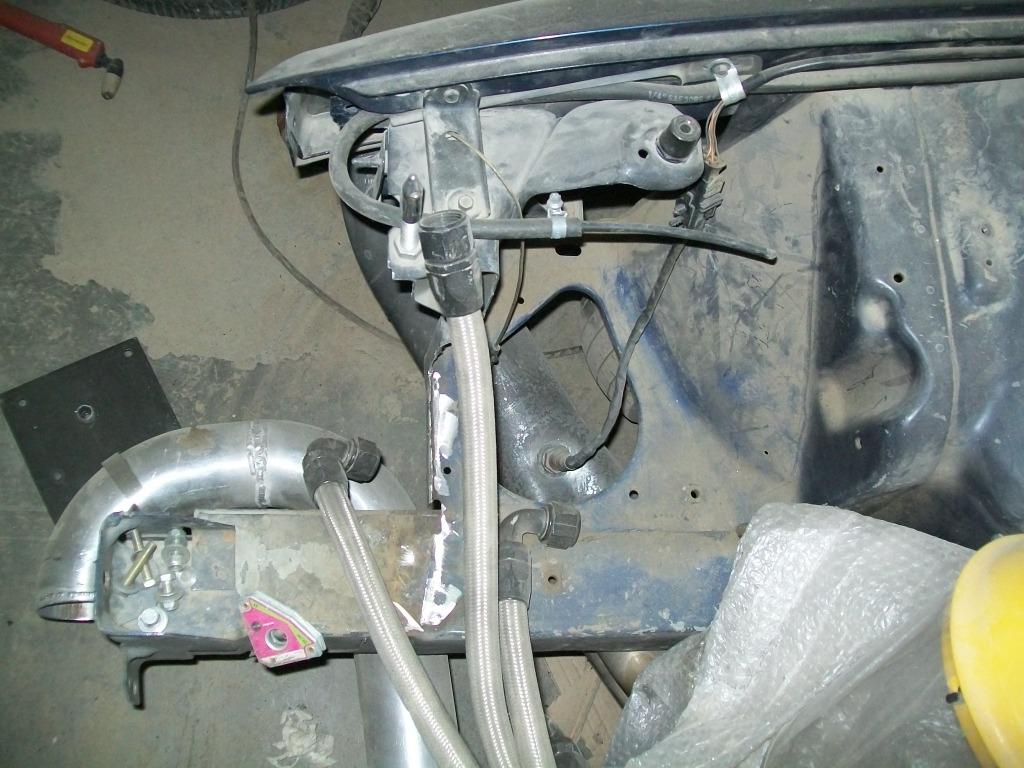
and here is one of the proposed radiator positions , the other is slightly tilted up towards the rear of the car - will have to decide when the nose brace comes back from the coaters to check for interference :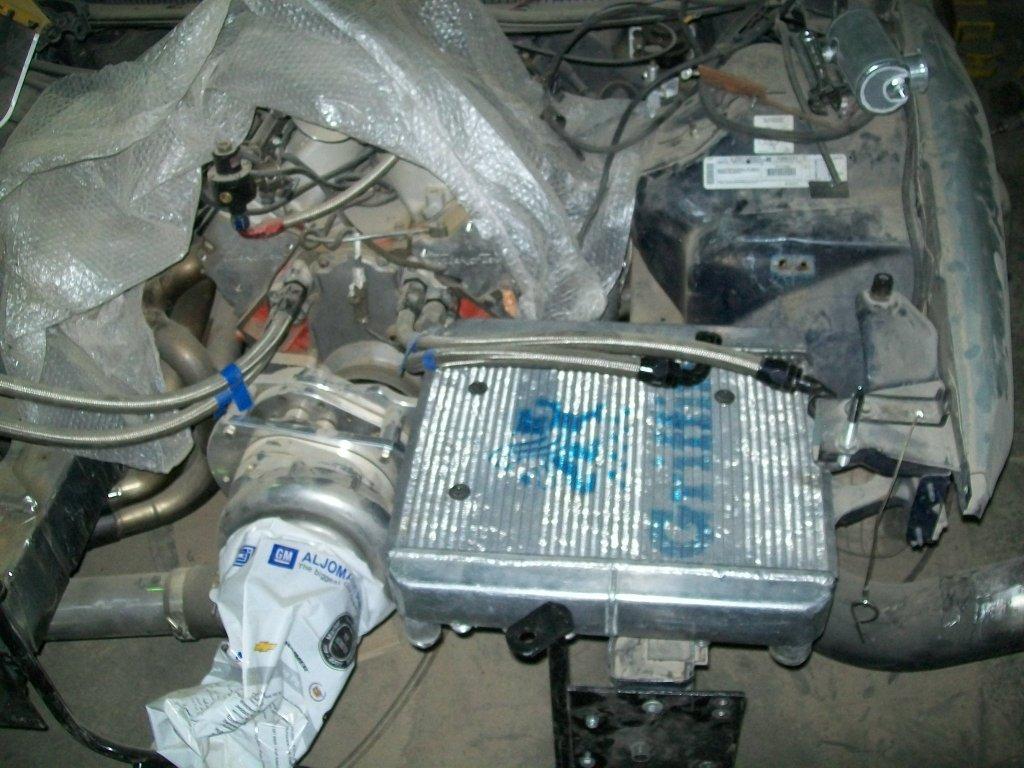
so now i have to finish the following :
- plumb the accumilator and call that side project done
- get the front brace and mount it up front and install the headlight covers on it .
- mount the radiator and build its mounting fixture and plumb it .
- weld the water pump mount to the frame horn under the radiator.
- patch up the hole on the core support stubs .
- swap out the third member.
- start building an aluminum fuel cell to mount up front.
5/23/2012
update time
the oil accumilator is all plumbed up and done and so is the driver side fender, and i aslo swapped out the fuel line with a new one ( Q16 is not something to take lightly ) . i also finished the front nose brace, but i had to take it out and redo the upper tabs so that it fits better , just need to take it to get re-powder coated along with a few other things . batt trays are in as are the batteries, and i swapped out the old thottle elbo to a bigger ( read less bendy) one.
i also finally finished the new radiator mount , it took a while but i think it came out ok :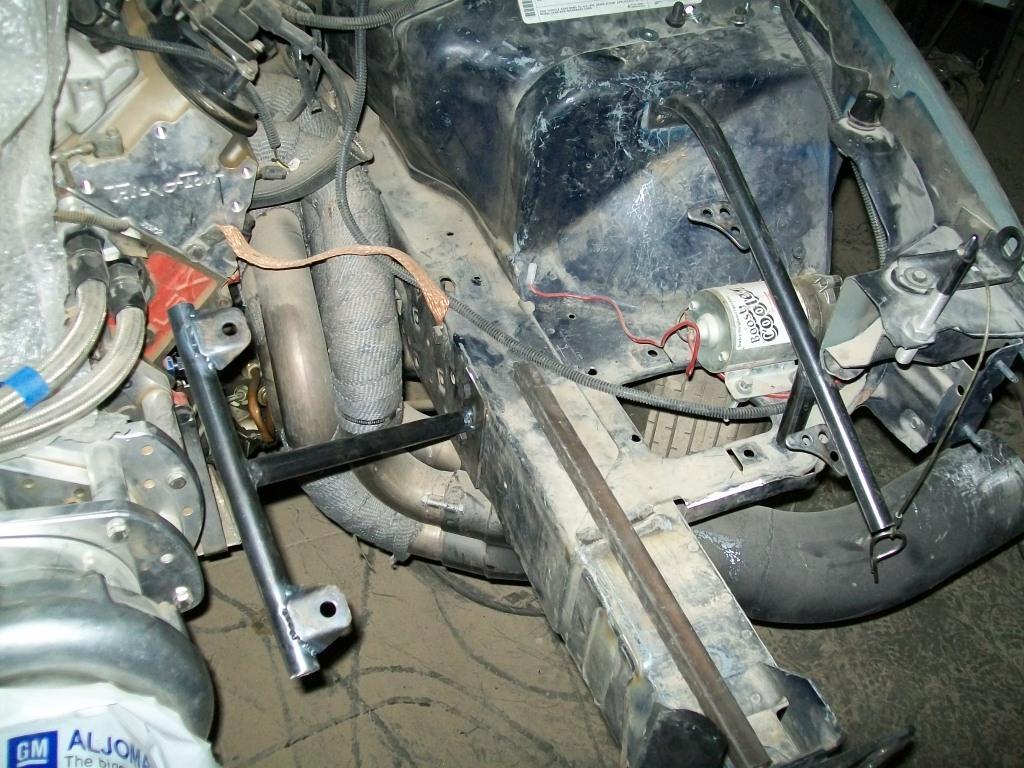
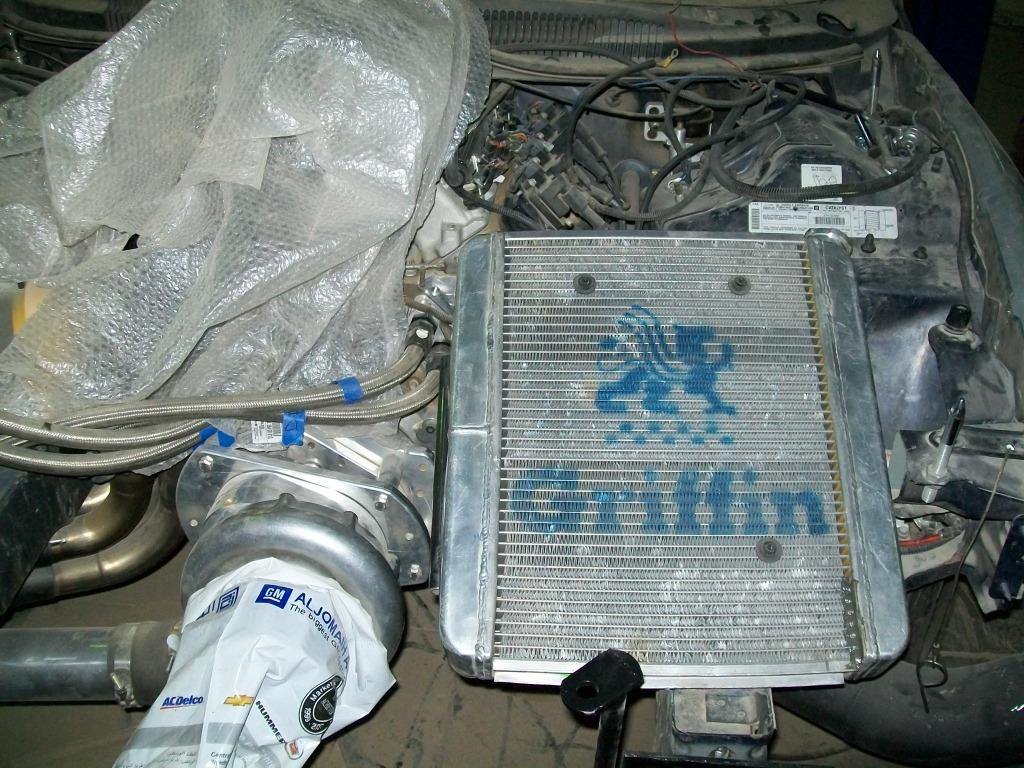
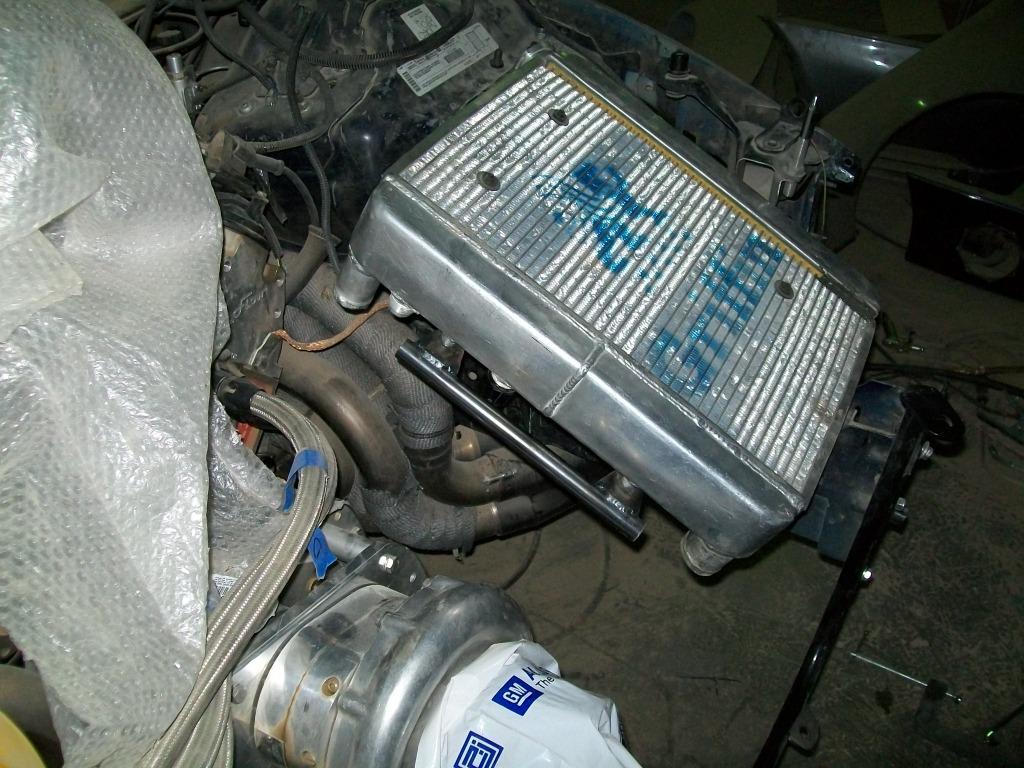
what you don't see here is the water pump and the revised location. the plan was to run it under the frame horn, but after some fenaggeling with it i found a nice cozy spot for it right under the radiator and above the frame horn. i also installed the methanol injection pump next to it in the same location.
i also began looking at ways to mount my alternator, so after a few minutes of just stairing at the front of the engine , i came up with this location :
it fits nicely , alt. and belt clear the hoses , and is simple to make. the plan is to have a metal standoff coming out of the pass. side head into the alternator on one side , and the other side will have an adjustable rod with rodends on both sides to add tension to the belt. ( more pics to come later).
also started on fabbing up the fuel cell, like i mentioned earlier , i would like to do away with the electric pump and have a mechanical pump in its place ( more voleme, and i get to ditch the 16 volt battery i have in the back just for the pump! ). so the plan is to have the cell located opposite the radiator on the passenger side frame horn ( where the original battery used to be) .
here is how it started out :
and here is the propsed location :
i still have to weld the top of the cell , as well as the fittings and breather/tipover valve and cap . should have it all done pretty soon.
and i've been playing around with the thought of relocating the fuel pump ( the electric one ) up front , and temporarily mounting it to the framehorn under the cell , that way i have the car running untill i can get the mech. pump installed . but thats just me thinking out loud - which is never a good thing
so up next we have:
- reinstall the nose brace
- adjust the front most hood pins
- finish welding up the fuel cell
- finalize the alternator mount and wiring
- install the mechanical fuel pump
- install the oil breather / catch can
- install headlight covers and screw them in
6/25/2012
some progress to report:
i welded the bungs and made the cap hole on the tank :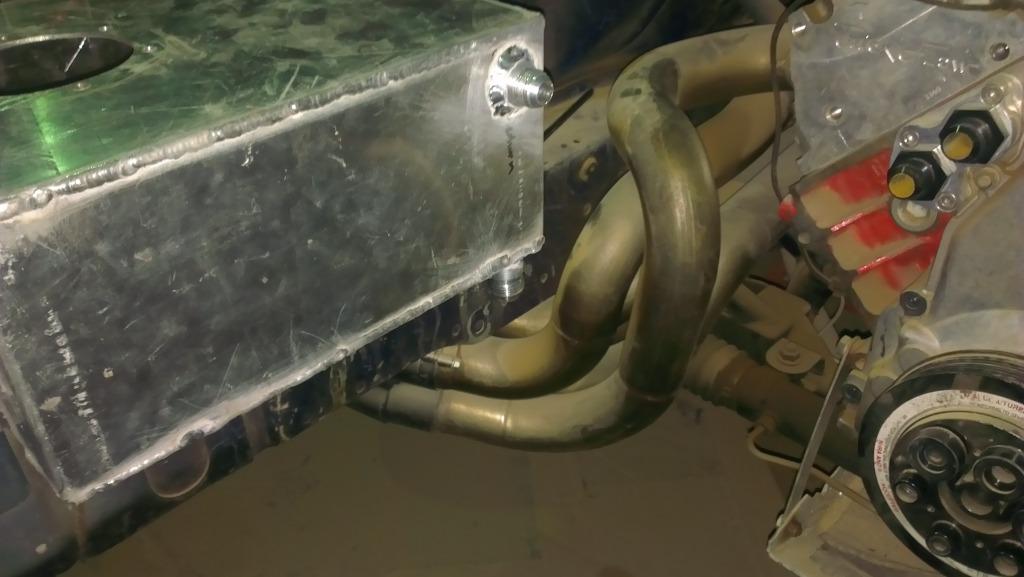
and then i dropped it off at the powdercoaters and two days later i got this 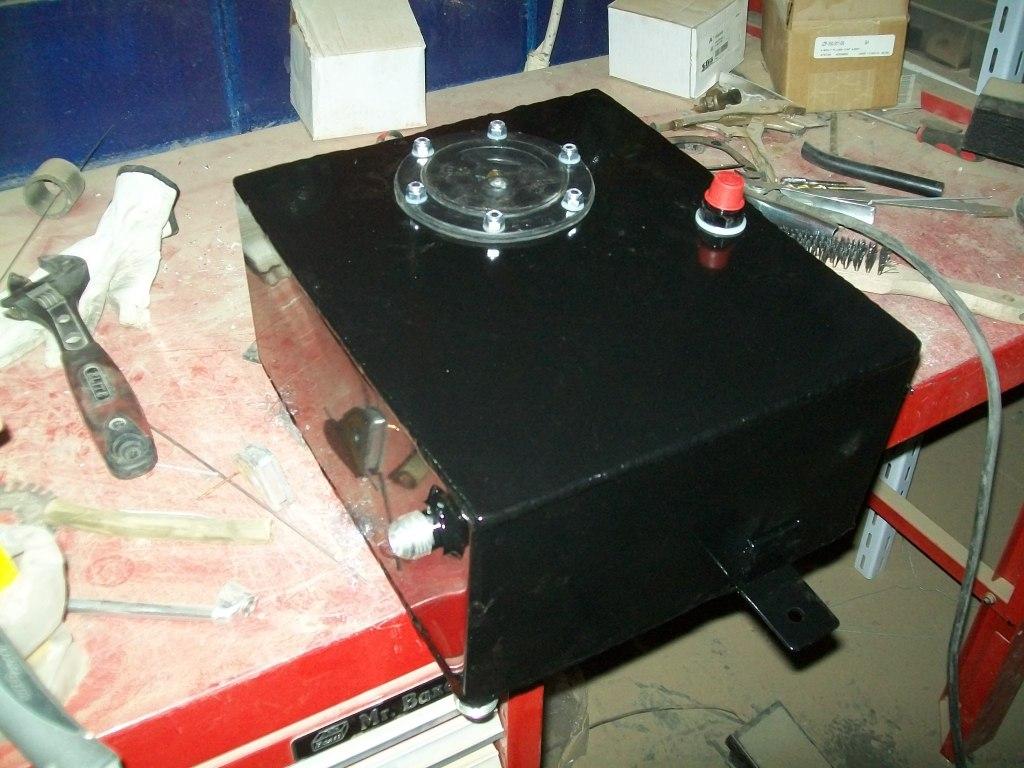
and this is how it looks like installed in place along with the oil catchcan/breather :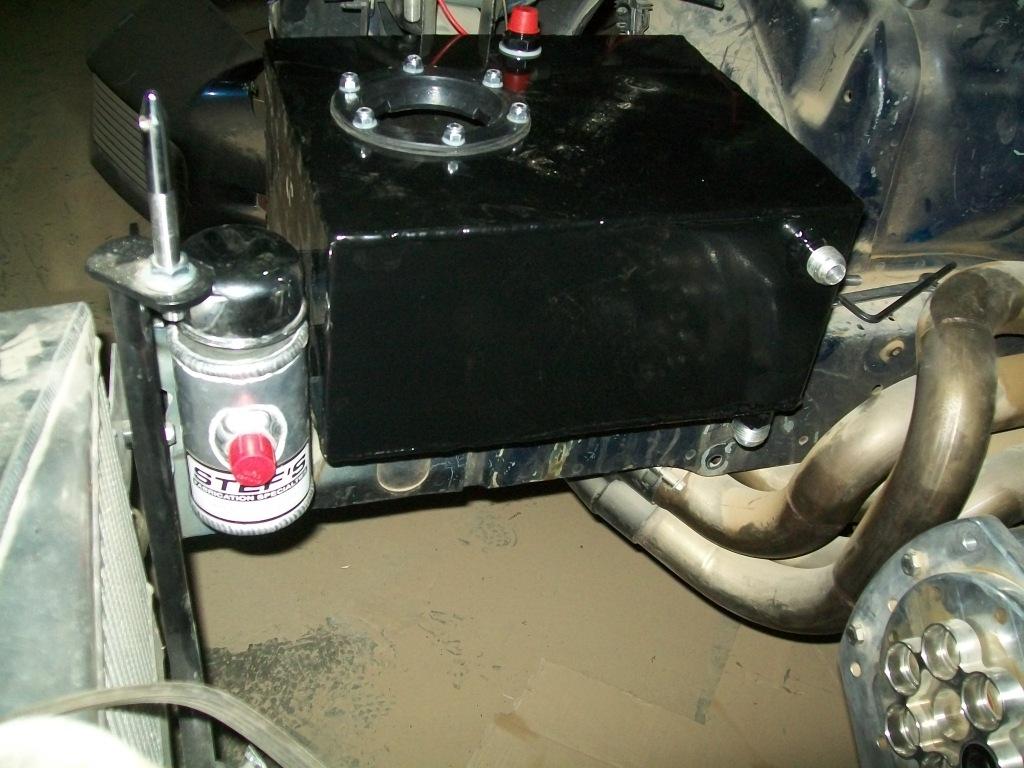
right now i'm just waiting for a few more fittings to show up and then i could button up the fuel lines.
after that a turned my attention tot he alternator and its mount, i really didn't like how the alternator was mounted above with the rod all to one side .
so i decided to make a new mount that bolts to the pass. head instead of the driver side and add a brace to stiffen it up and have it powder coated . you can see it in the pic right behind the alternator ( the only clean part on the car ), i also redid where the adjustable tension rod mounted so that it no has a better mounting angle compared to the other position :
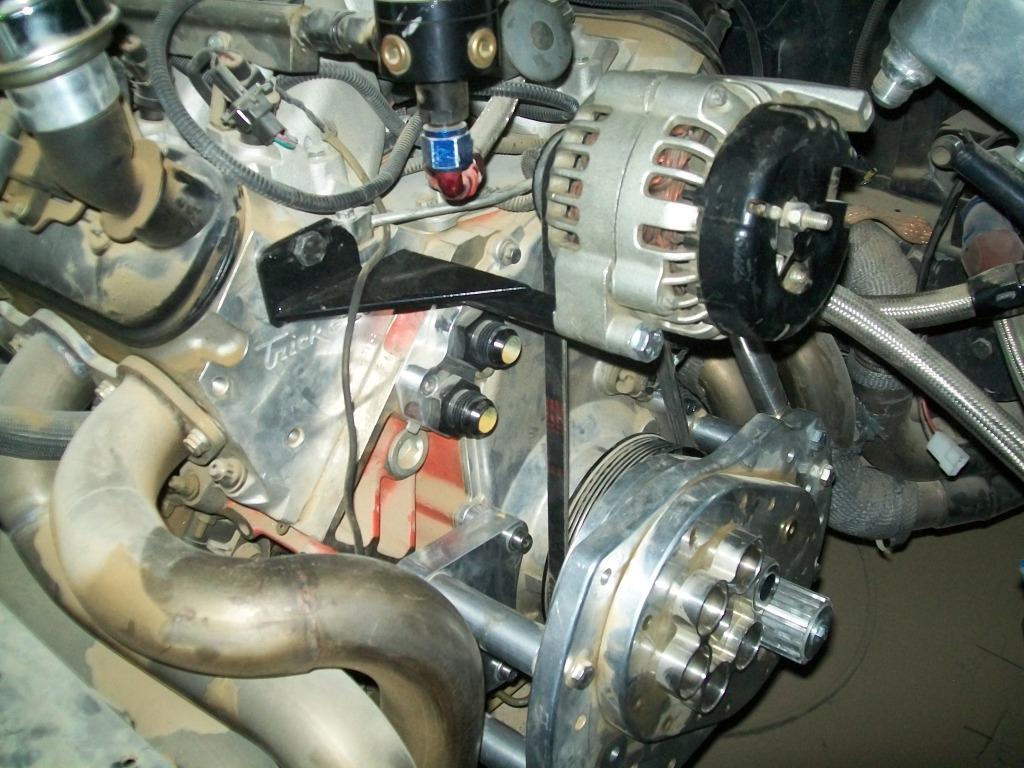
now the only problem with this setup is that clearance gets a bit tight between the alternator belt and the coolant fitting :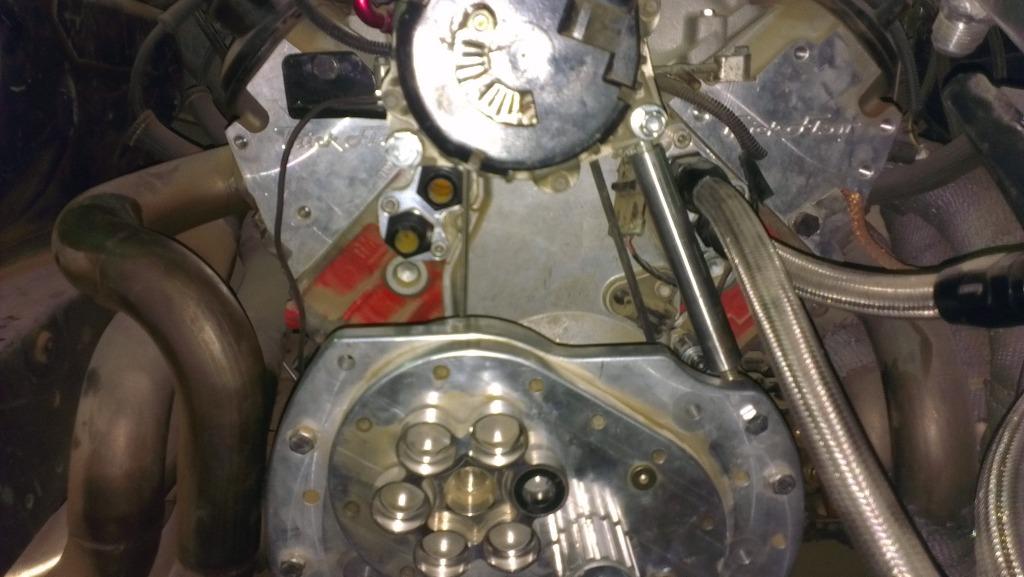
but luckily replacing the straight hose end with a 45 deg or a 90 deg. hose end solves this issue ( went with a 45deg. ) :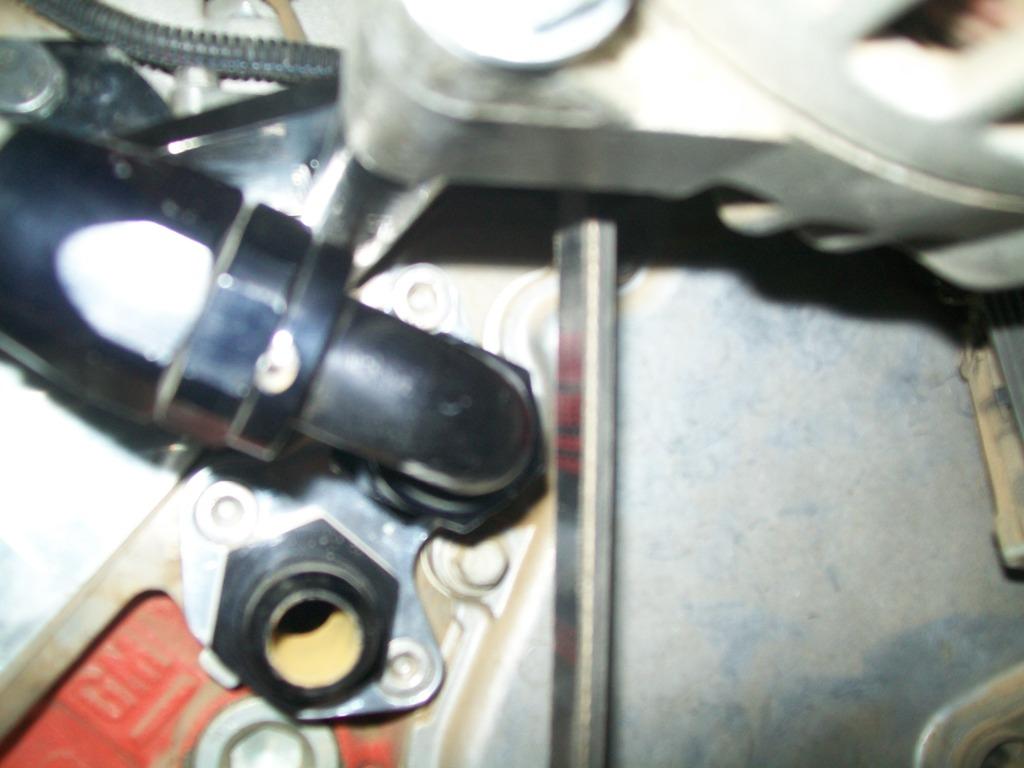
i'm also working on mounting the mechanical pump now, the plan is to have it hang from the side of the gear drive where it will sit lower than the fuel cell, that way i won't have any priming issues ( i hope) . like i said earlier, i'm just waiting for a few more fittings to show up and then i'll be in bussiness
so next up :
- run the breather lines to the catch can
- run the tank vent lines
- mount the fuel filter
- plumb the fuel system from the tank to the pump and return
- install gear drive and pump belt
- install nose brace
- install nose and headlight covers
- wire the fan, water pump, and alk. kit.
i'm contemplating thaking the intake off and swapping to the new injectors i got as well as new bigger fittings on the rails, but that means i have to remove the impedance converter and its wires, retune the thing and to tell you the truth i don't want to be caught with my pants down when the next race starts in a month or so.
7/21/2012
more updates
i did manage to finish a few thigs since the last time i updated this thread .
the tank breather hose as well as the engine breather hoses are connected , i also wired the Alternator up and have it up and running :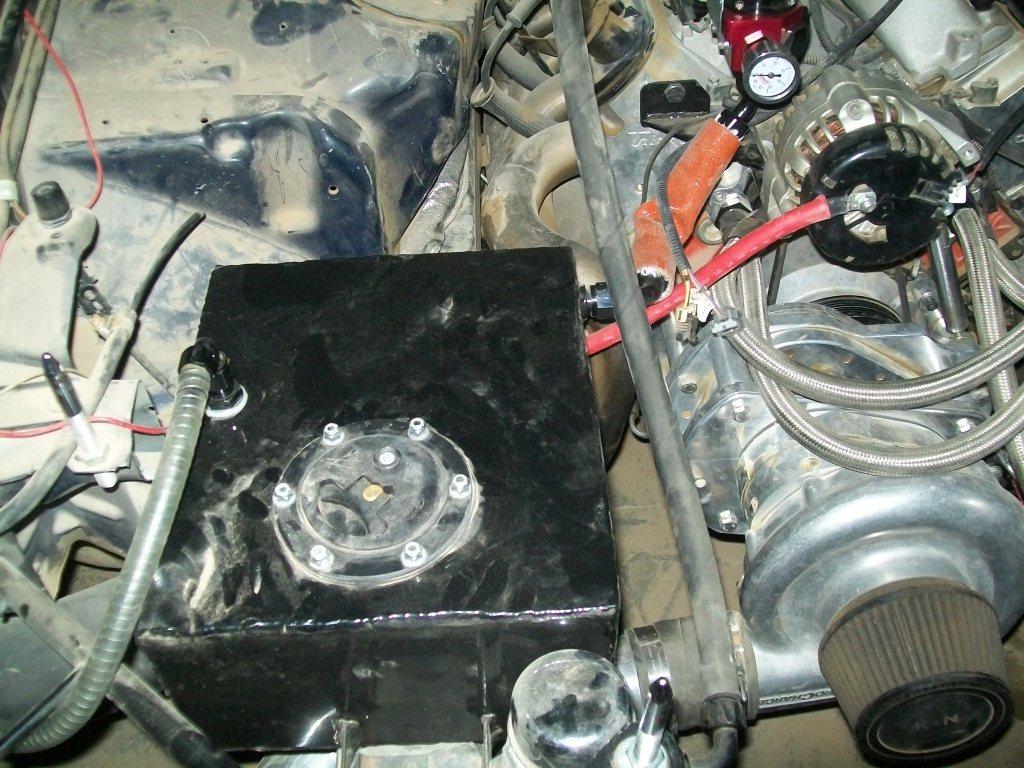
the fuel system is currently finished ; the pump is mounted and plumbed , along with the regulator and filters and tank: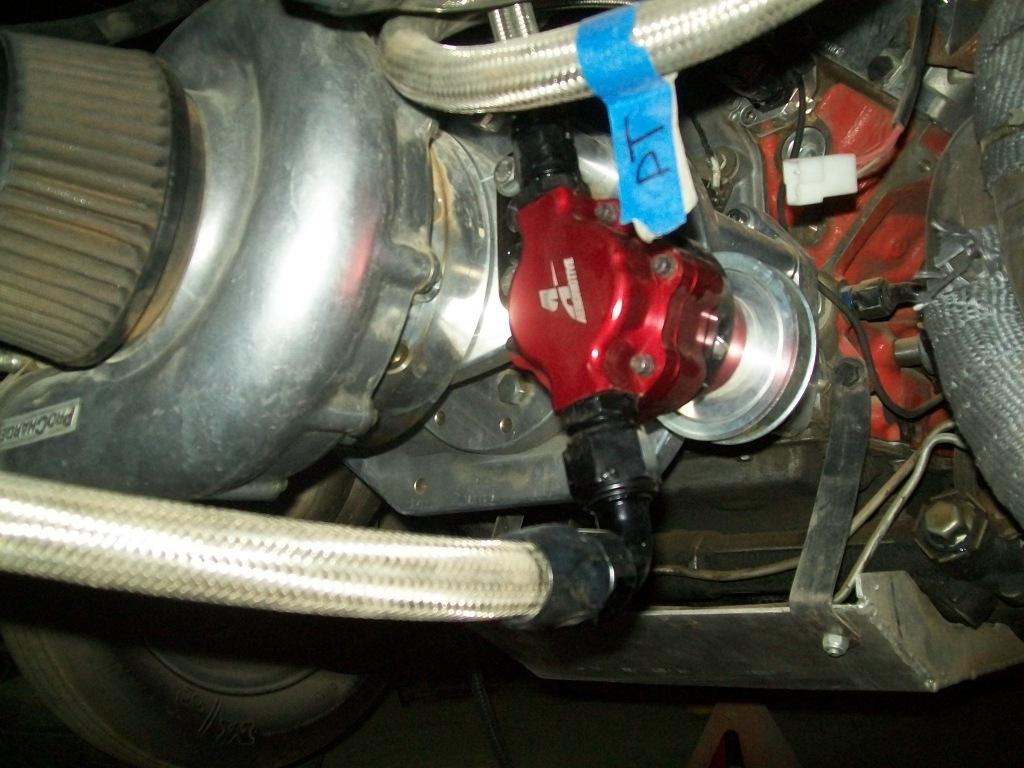
and i found a nicle little spot for the radiator puke can , but after installing the nose i figured i should raise it up a bit more since i have the room to do so :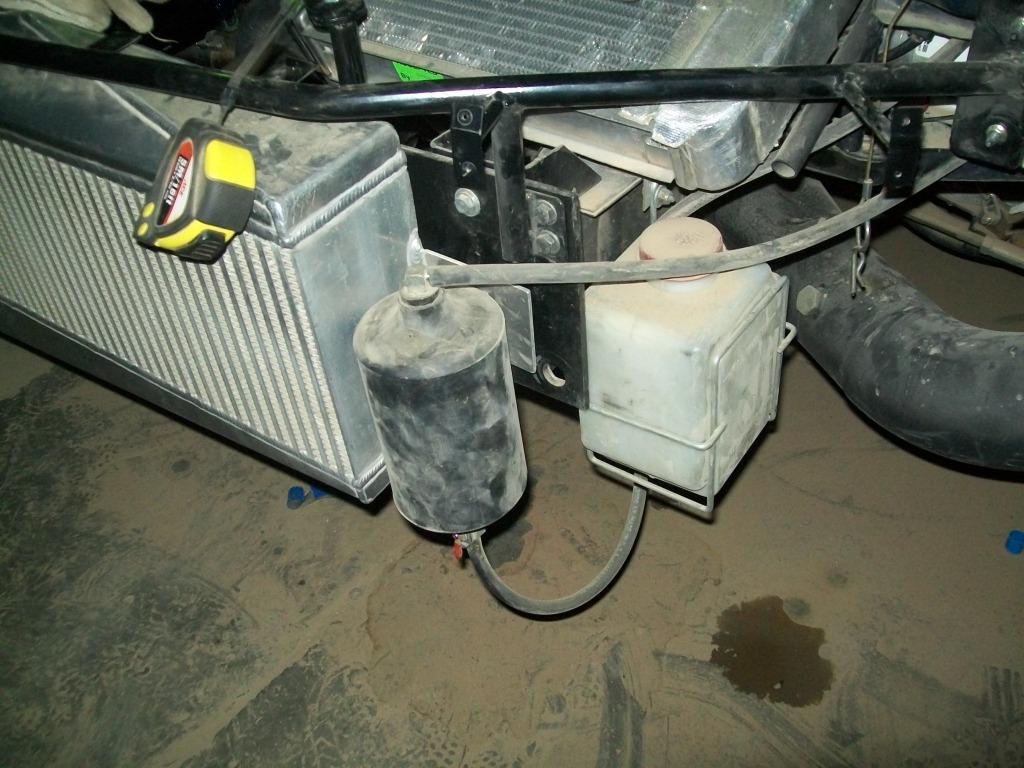
and here is a general picture of the engine compartment all done up :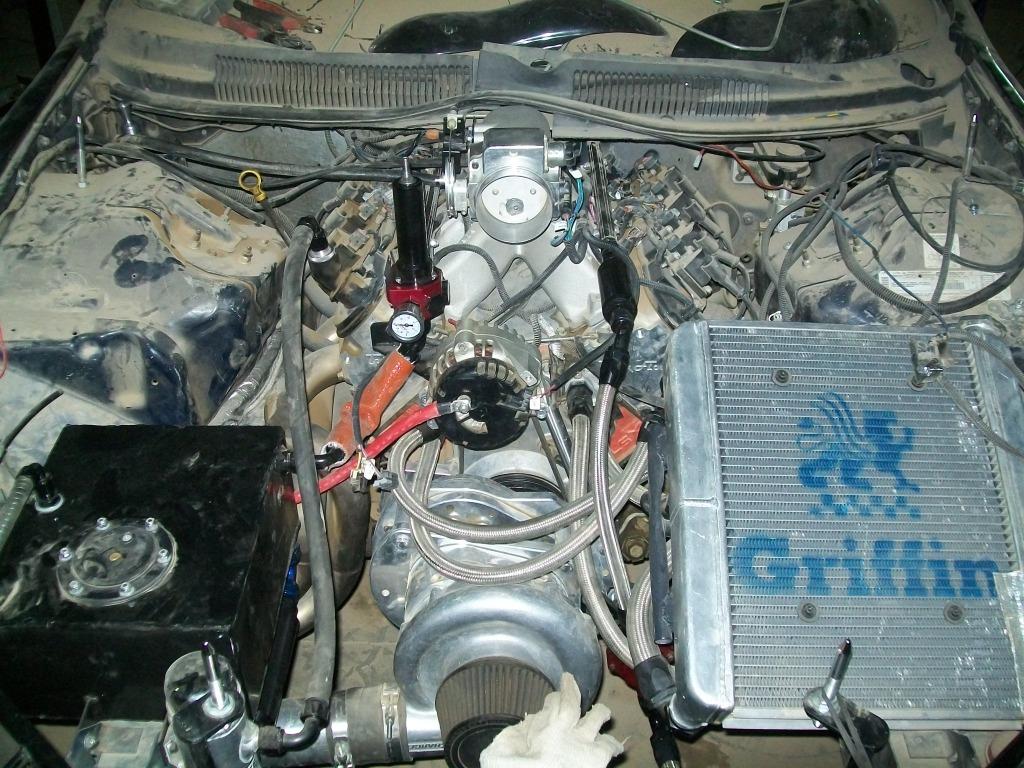
and i finally got to tinstalling the headlight covers and mounting them securely. as well as wiring the water pump and fan ( didn't get to the alky kit yet) .
now for the bad news , i did fire the car up and everything worked fine , untill i started noticing the temps creeping up . so after further investigating it seems that i have too much air in the radiator due to the fact the it is sitting horixontal and the fill cap is in the same location as befor , which means i can't top off the radiator .
so in order to fix that i decided to remove the radiator again and weld a fitting at the highest point in the radiaor to make it into a bleeder/ fill hole for now.
if that doesn't work , i'll cut the filler neck off and weld the hole shut , and run a line to a remote tank to use as a expansion tank deal .
another thing i noticed is the the brace i fabbed up to hold the nose inplace actually mad e the nose sit lower than bofore , which means there is a gap between the leading edge of the hod and nose . so now i have to remove the brace and basically elongate the mounting holes making them into slots so i can move the brace up.
also thinking that now since i have an alternator and battery drain is not an issue , and since the electric fuel pump is no more , why not use its signal for the trans cooler
so on the latest to-do list we have :
- elongate brace holes
- remove old cell
- relocate puke tank a bit higher
- weld bungs on radiator and check
- reinstall brace and nose
- maybe install the new front coil overs i have sitting here for almost a year now