You must be logged in to rate content!
17 minute(s) of a 767 minute read
6-16-2015
6-16-2015
Thanks Nate! It's been a long, daunting process and sometimes I feel in over my head, but it's getting there! It's been almost 4 years now since I was last driving it around, and the memory of being behind the wheel is part of the motivation to finish. That said, I'm slow and methodical, and don't always dedicate enough time to work on it. So it takes forever.
Answers: The wheel covers are just really nice originals I got at WCCC. I've also tried in vain to find someone who can reproduce the red center medallions. If I got my hands on some, I'd find a set of non-scratched wheel covers with good chrome, redo all the black paint and stick new emblems on. I think that would look great, to me the hubcaps and whitewalls look classy. Plus most people go with styled steel wheels or Magnums or whatever, it's actually pretty uncommon to see a car with nice hubcaps anymore, which makes it kinda cool IMO. Depends on the personality of the car of course.
Yes I will definitely pinstripe the car when it's ready for that. I may either use one of those tape-on templates and paint them on myself, or have a pro do them by hand.
I'll be at the show, but the Snowball will not. ![]() Still got a ways to go.
Still got a ways to go.
12-3-2015
Well I think I'm past due for a random update... most of these things happened months ago, I was just too lazy to post! Let's get up to speed now.
Picking up where I left off, I was getting ready to put the fenders on, which meant I had to finish with the kick panel speakers first. I finished off the holes in the sheet metal, threw a little paint on the bare edges, and installed the aftermarket buckets and speakers.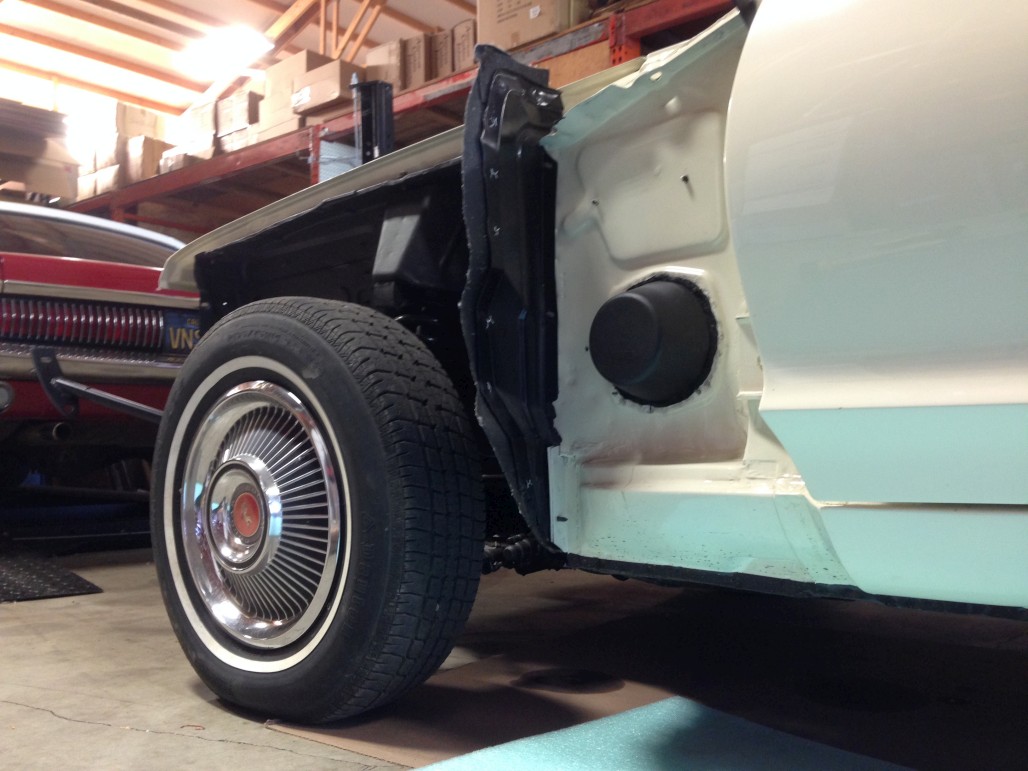

Generous amount of sealant for good measure...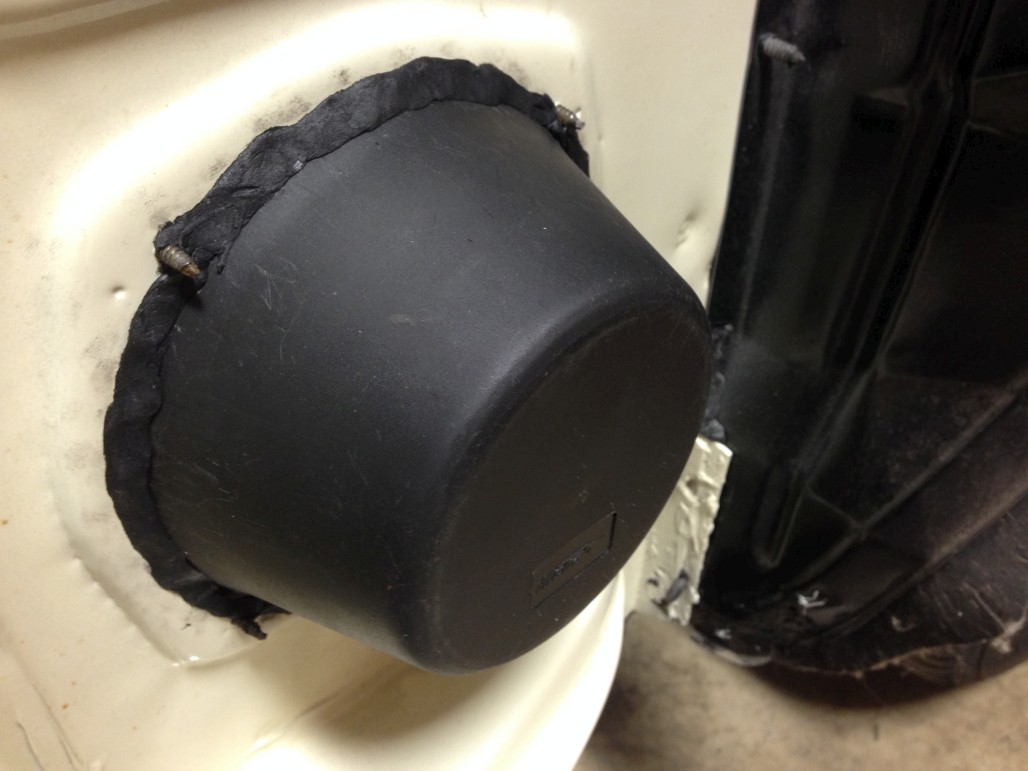
I have the wires run to the trunk area because the current plan is to use an amplifier. I'm going to see if I can make some kind of mounting plate to attach the amp the the underside of the package tray without creating any new holes in the car. Will cross that bridge later.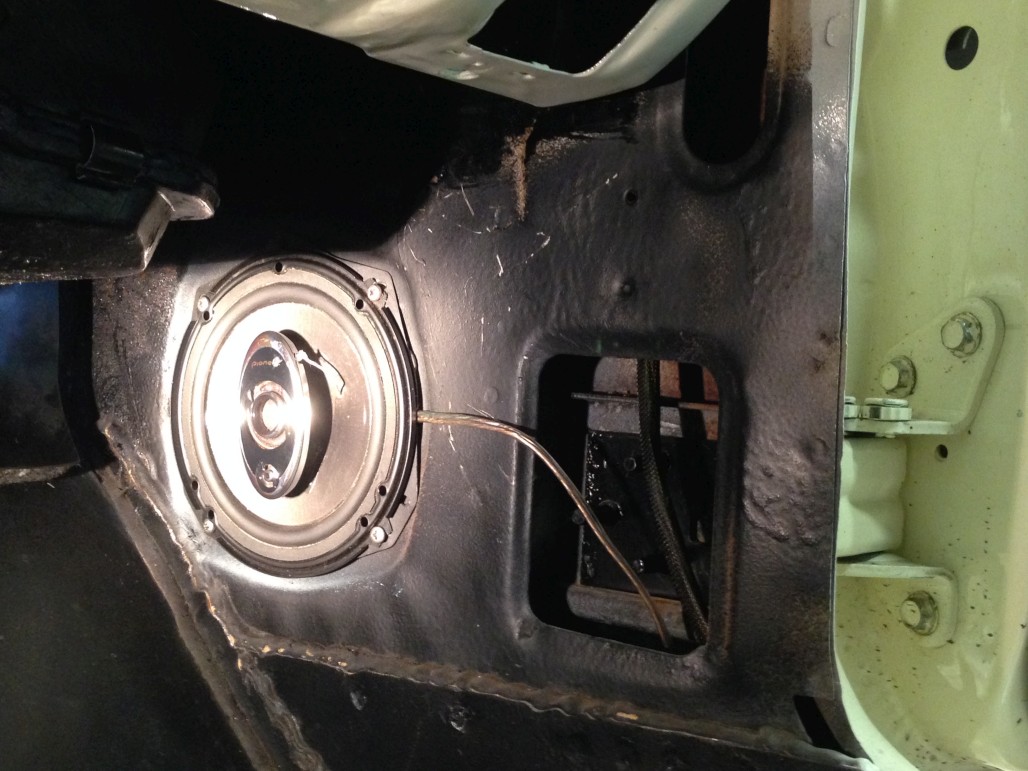
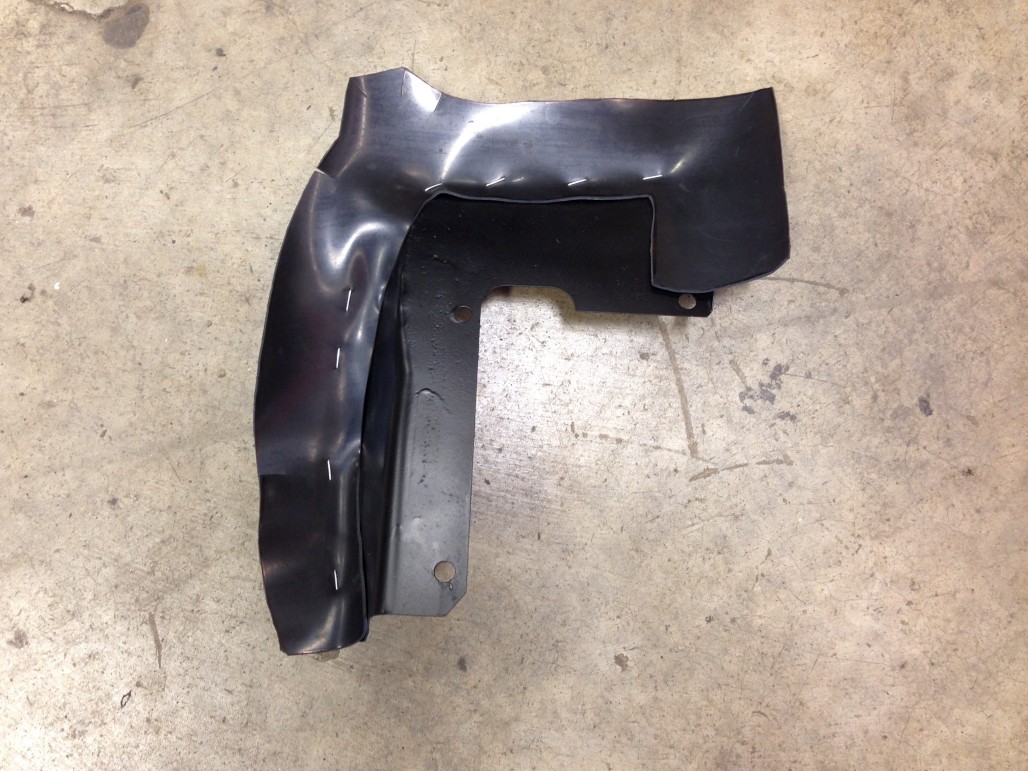
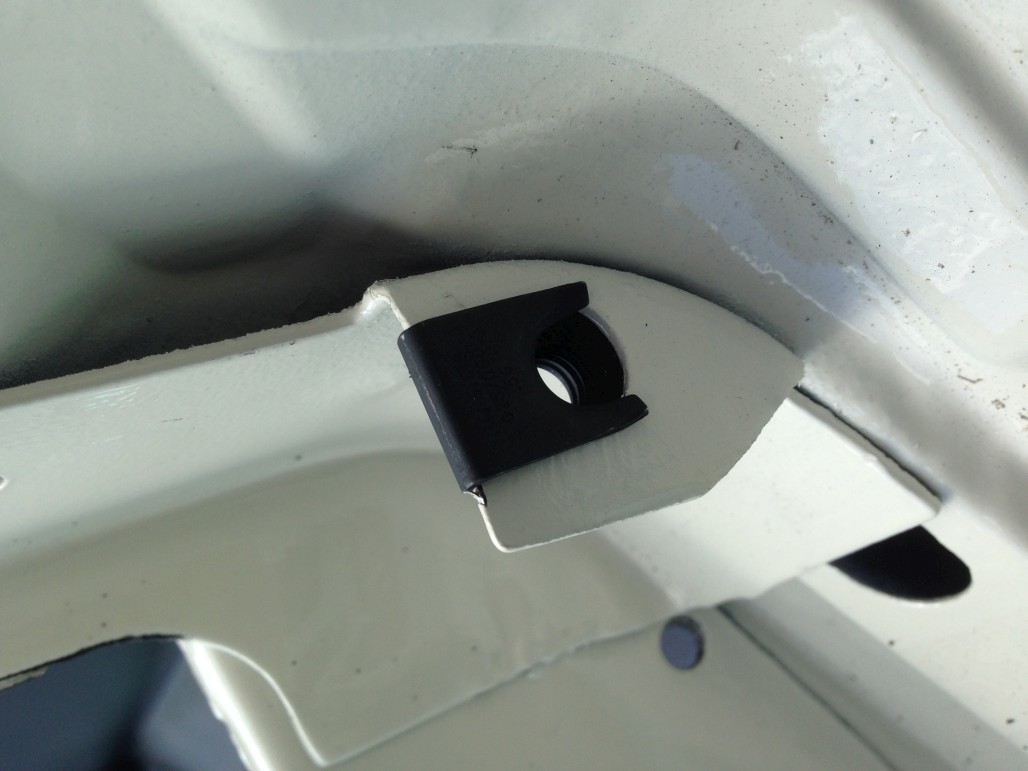
I also had to fix up my LH front splash shield. The rubber was much more brittle than the other side for some reason, and broke into a few pieces when I took it off the metal bracket. So I ordered some sheet rubber online and made a replacement.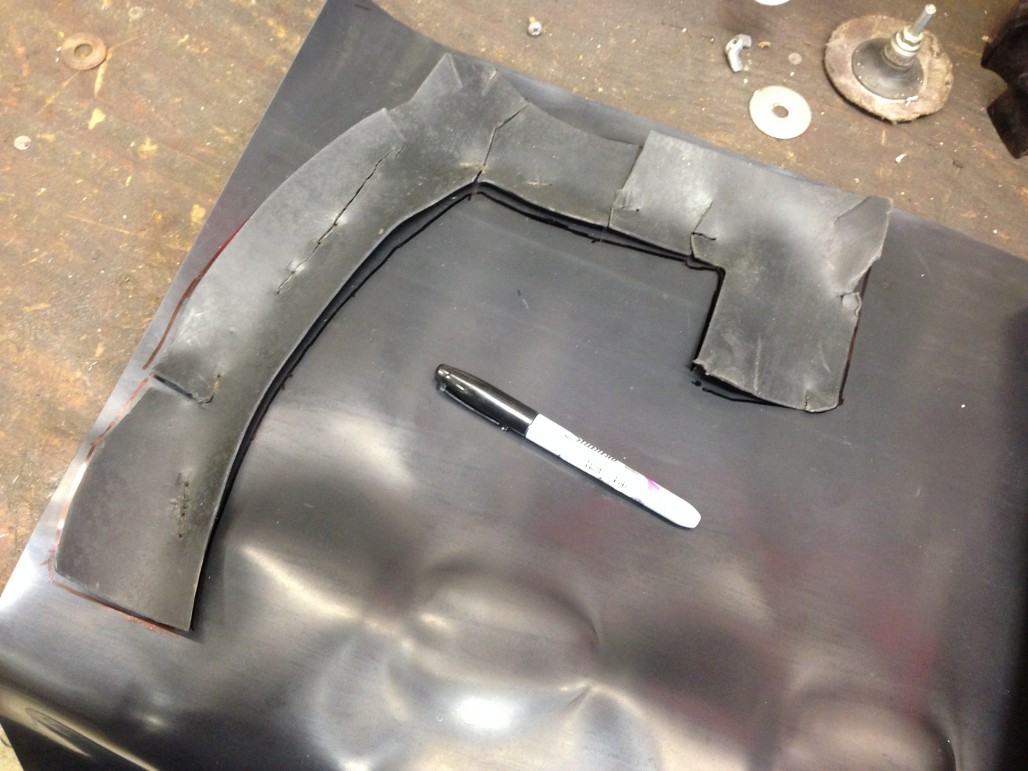
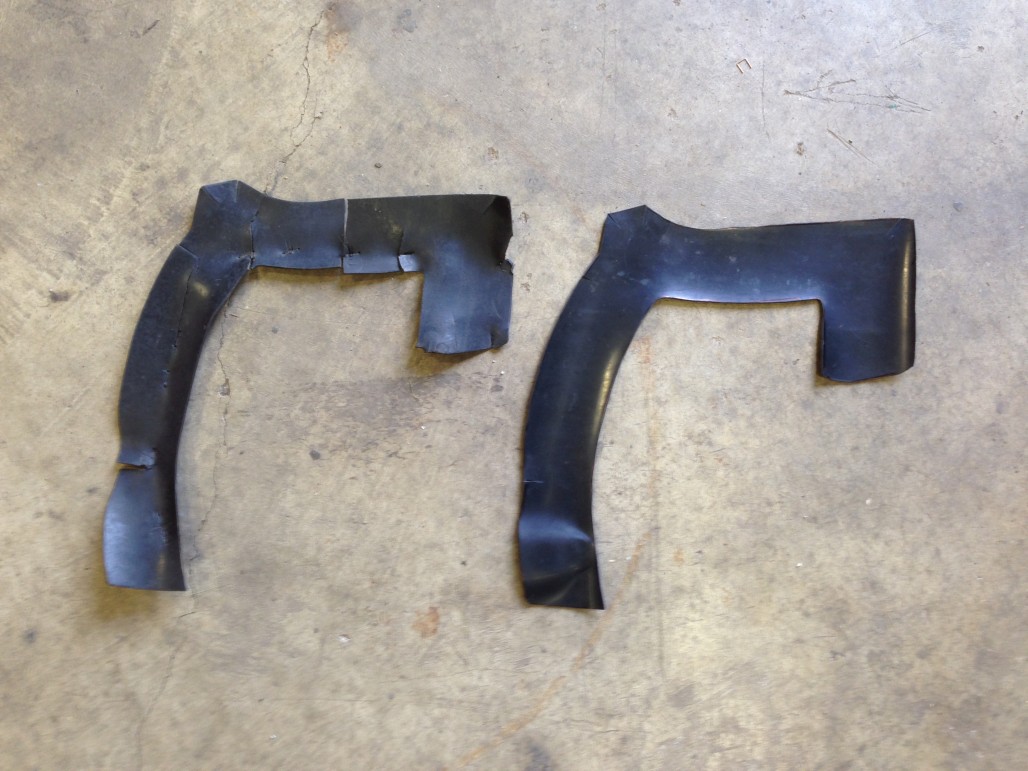
The new rubber was the right thickness, but not as rigid as the original stuff. I did some research and picked the one that sounded the best for this application... there are a lot of different types of rubber! I don't remember now what type it is, but feel free to chime in if you know what the proper type of rubber would be for this. I didn't use the reproduction kitbecause not only is it for Mustang, thus shaped incorrectly for the Cougar, but the rubber is even thinner and floppier. It sounds like a Cougar version may be in the works, which would be great, but for the time being I think my solution will work fine.
Anyway, test fitting onto the [sandblasted] bracket so I could poke through the staple holes to reuse them: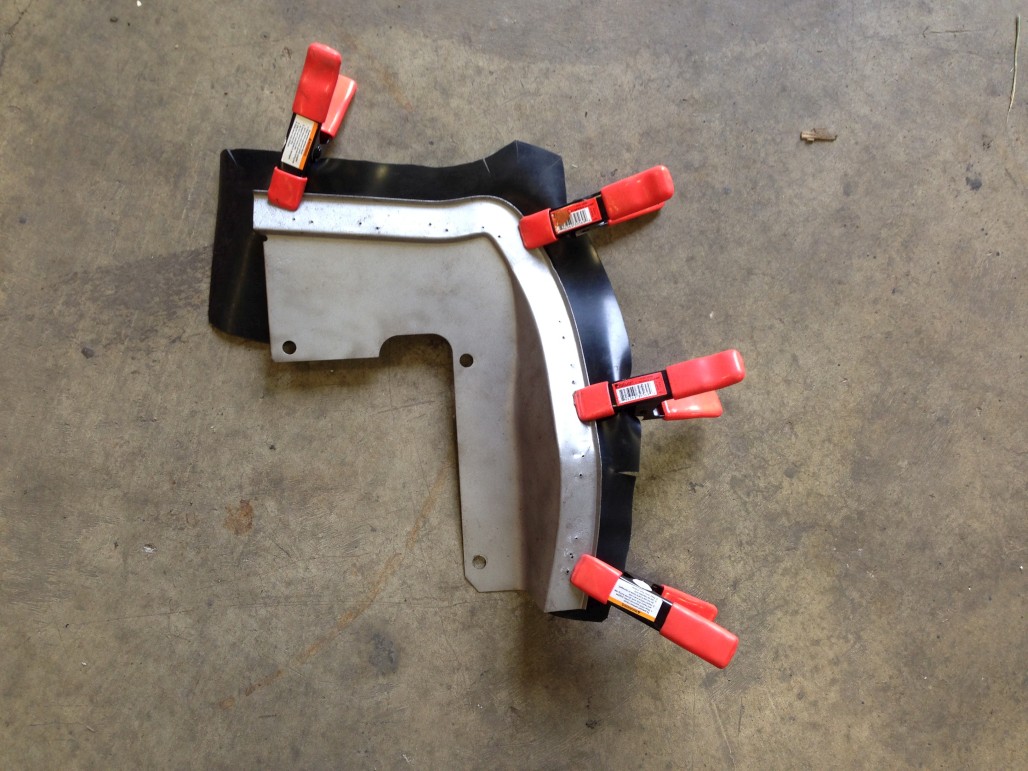
And fastened in place with wire after painting the bracket: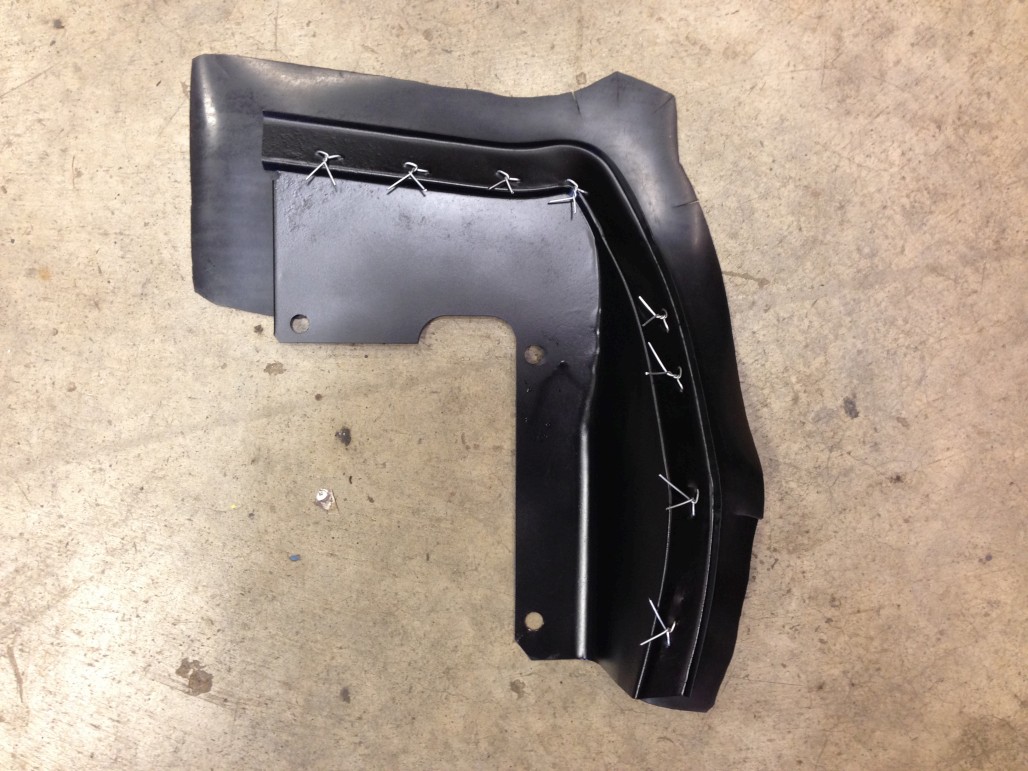
Next, it was time to get the fenders themselves ready. I wanted to undercoat the inside of the fenders for good measure / original-ness, so I embarked on a journey of masking the entire outer portions so I could do just that. This took a while. The giant piece of foam was a lifesaver, I highly recommend having one around.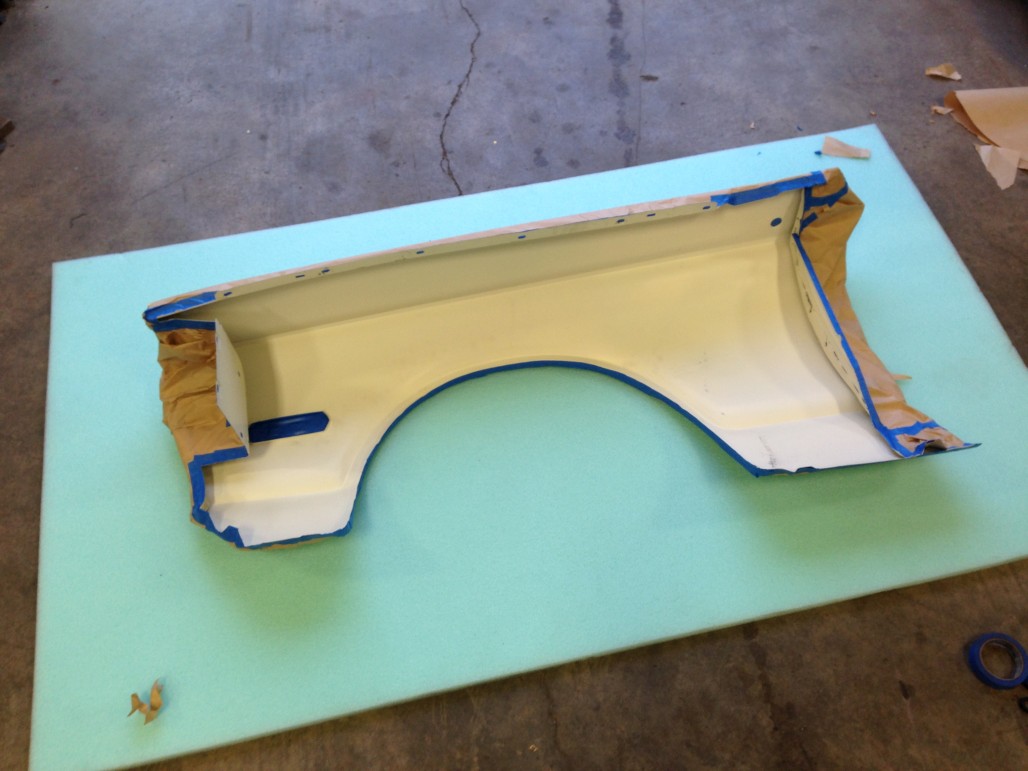
Then carefully set it down outside to do the undercoating: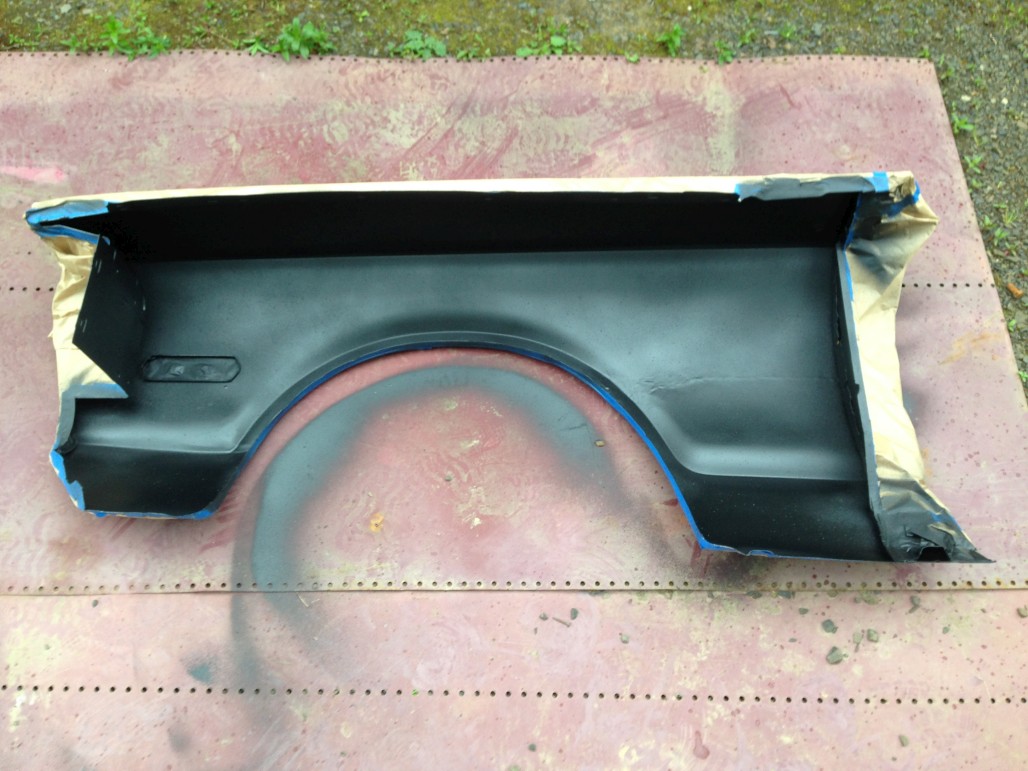
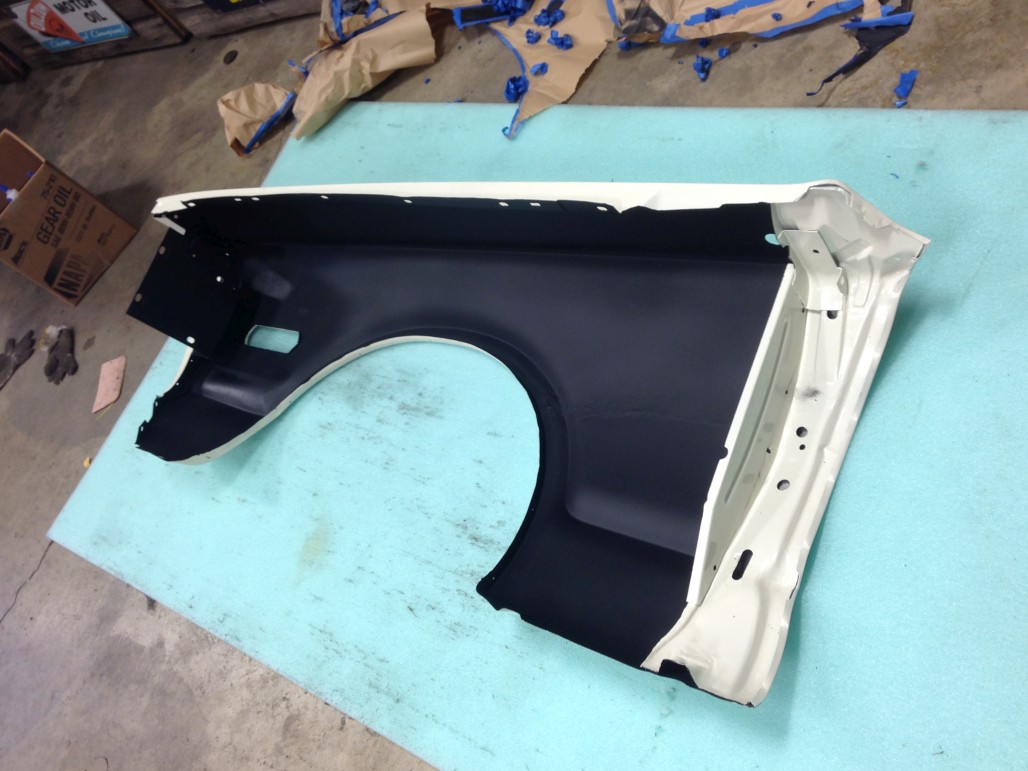
Next I revealed this front flange and refined the masking on the leading edge, so I could paint this area semi-gloss black. I know it would have been body color originally, but my thinking is that it will look cleaner behind the grille if everything is blacked out.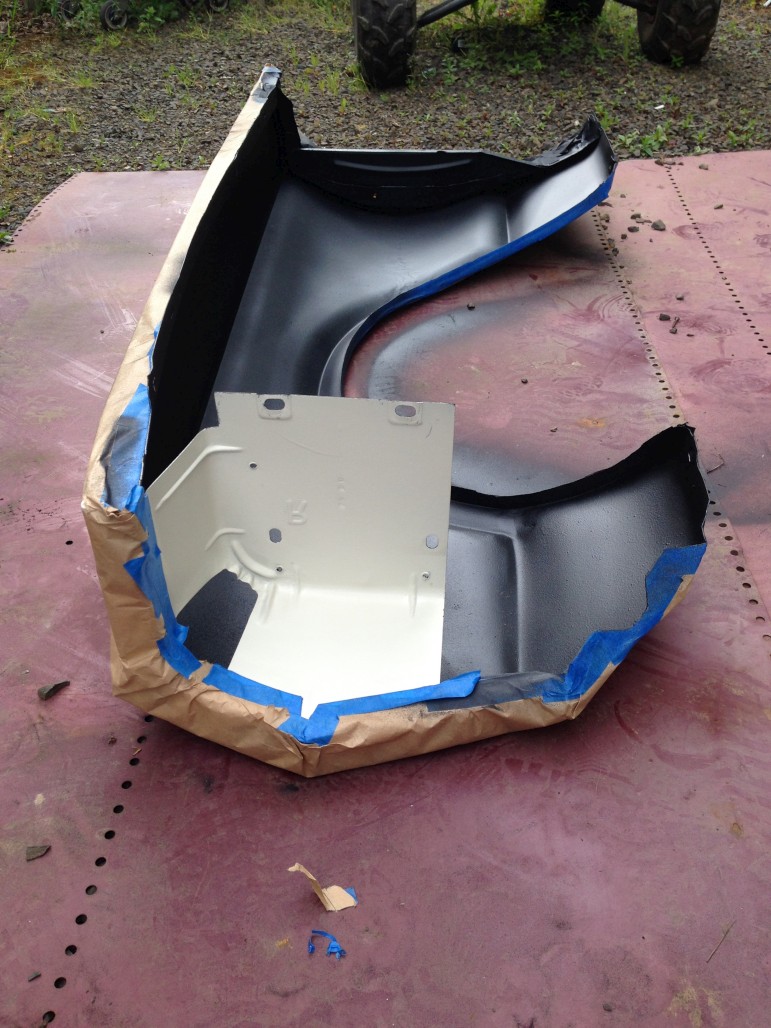
Ta-da: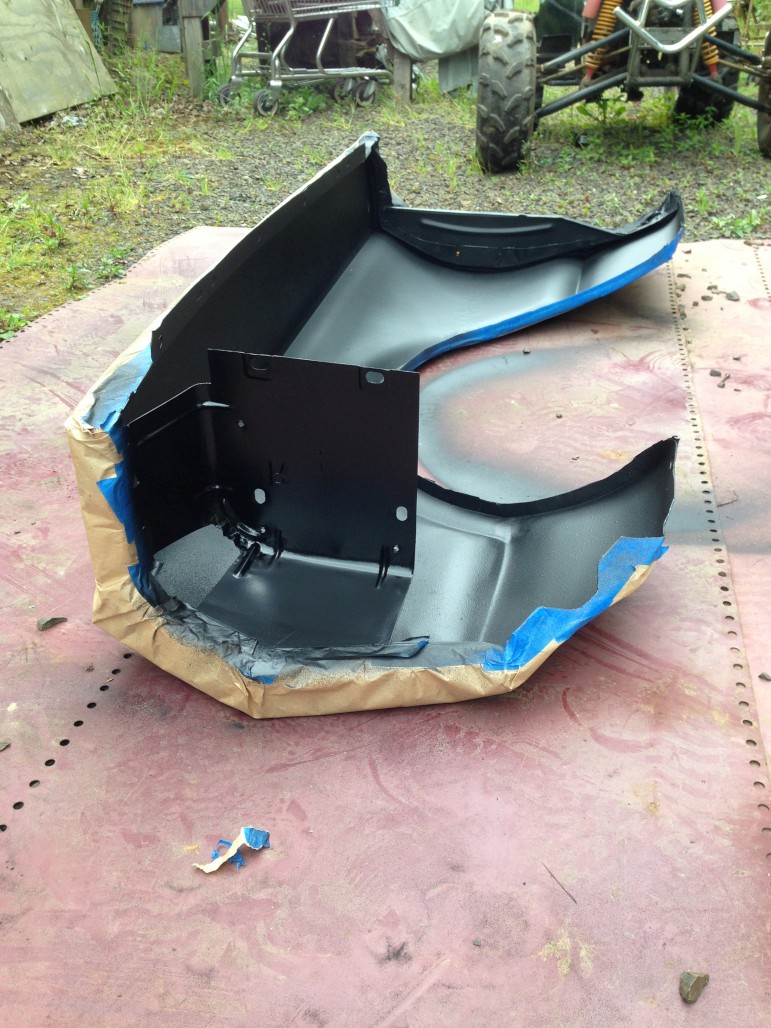
Unmasked and pretty: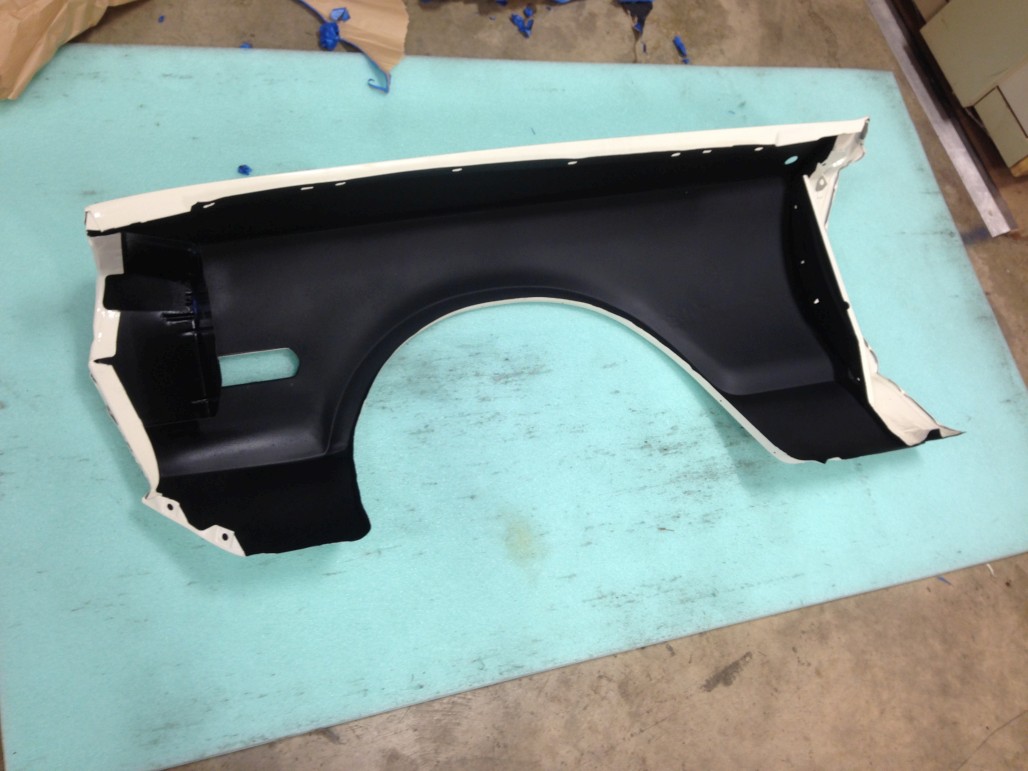
... and then did the same thing to the other fender, of course. Guess I don't need to show you those pics. You get it.
Now it was time to put them on the car! Kind of exciting to put such big pieces on.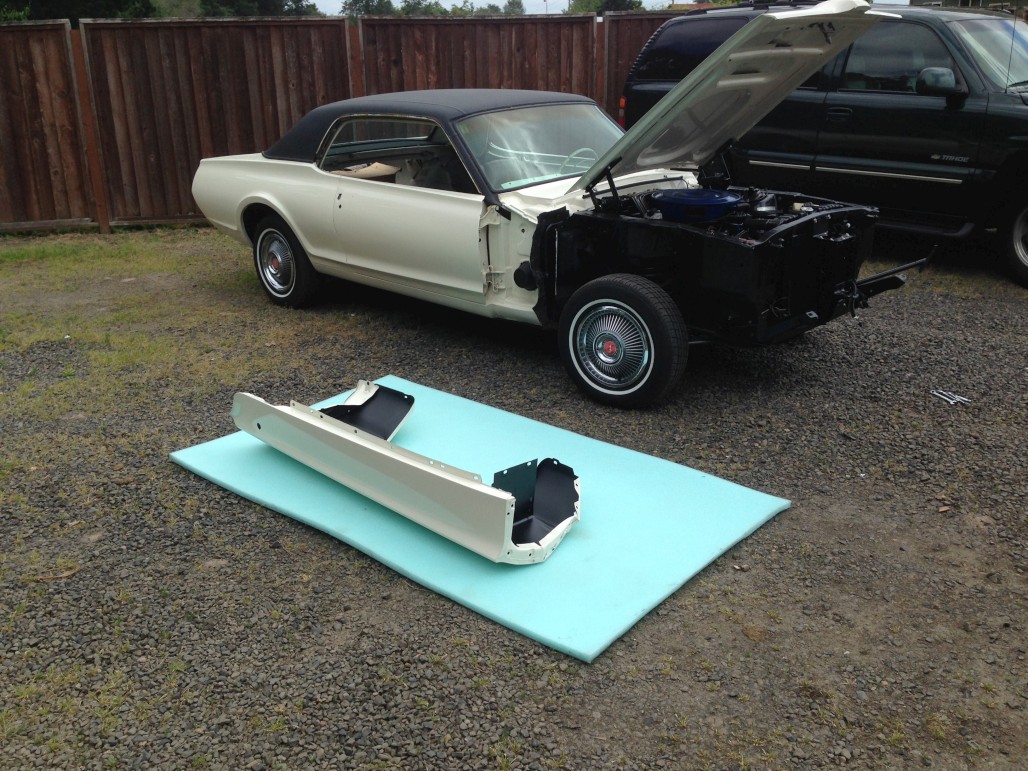
But first, don't forget these clips (I used this kit)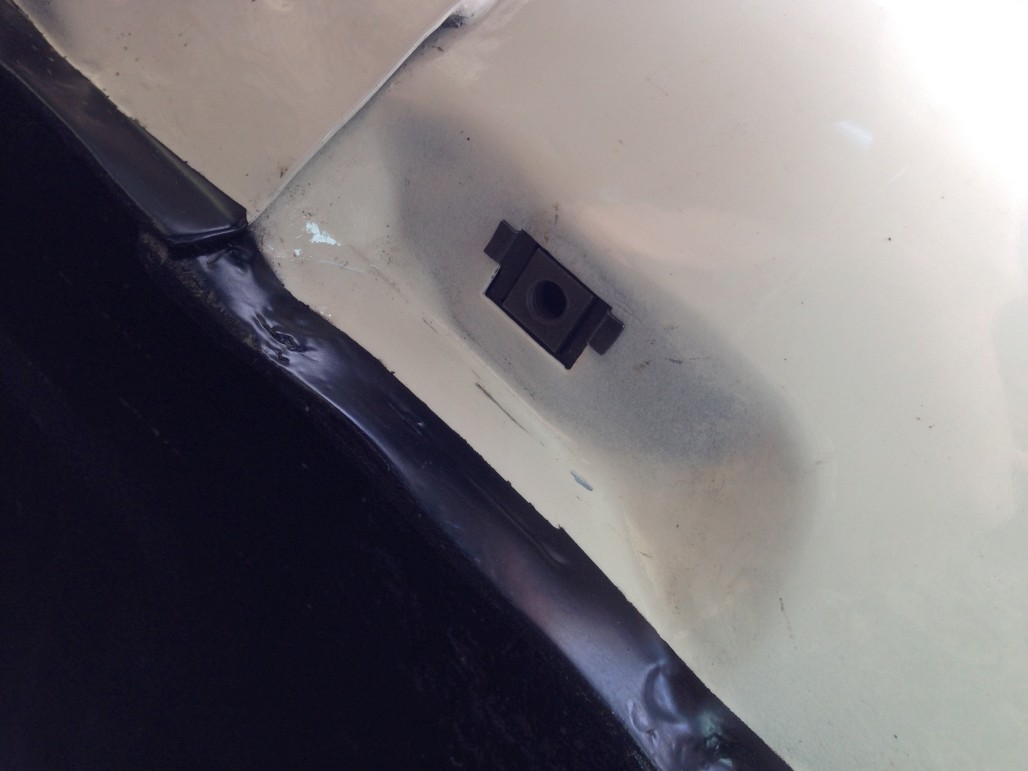
...and also a line of goo, kinda like factory, to seal the fenders to the aprons. Same 3M "strip caulk" I've been using all over the place.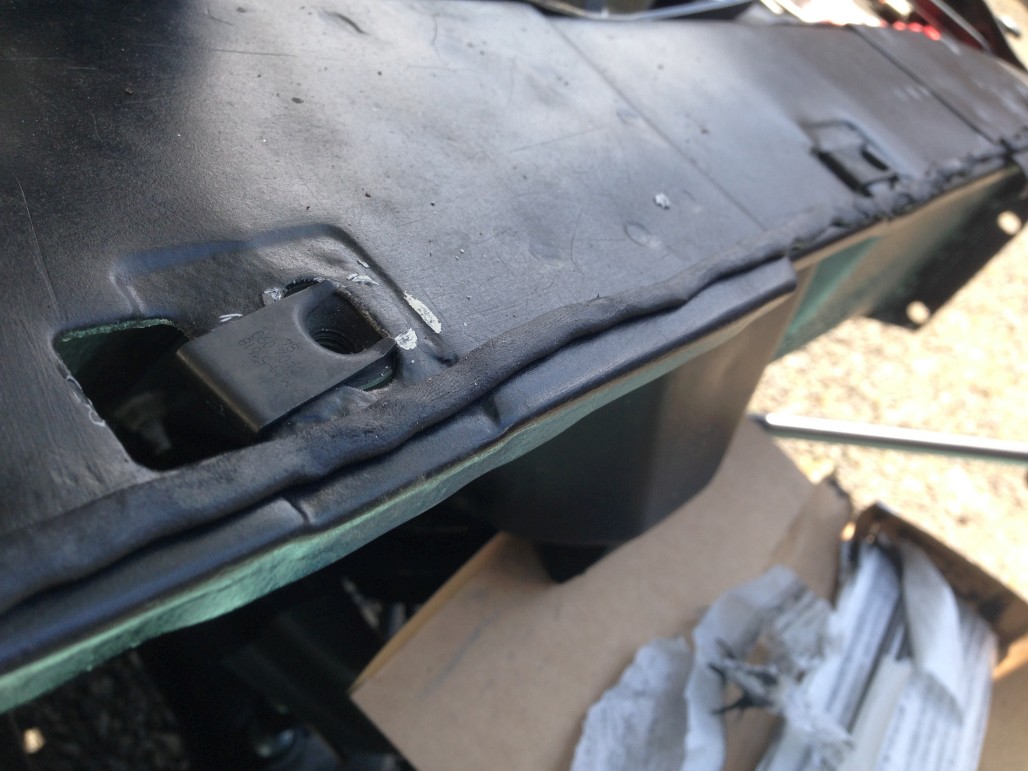
Fast forward after some fiddling around, trying to get it lined up to the door and hood, going from one end to the other snugging bolts down, and: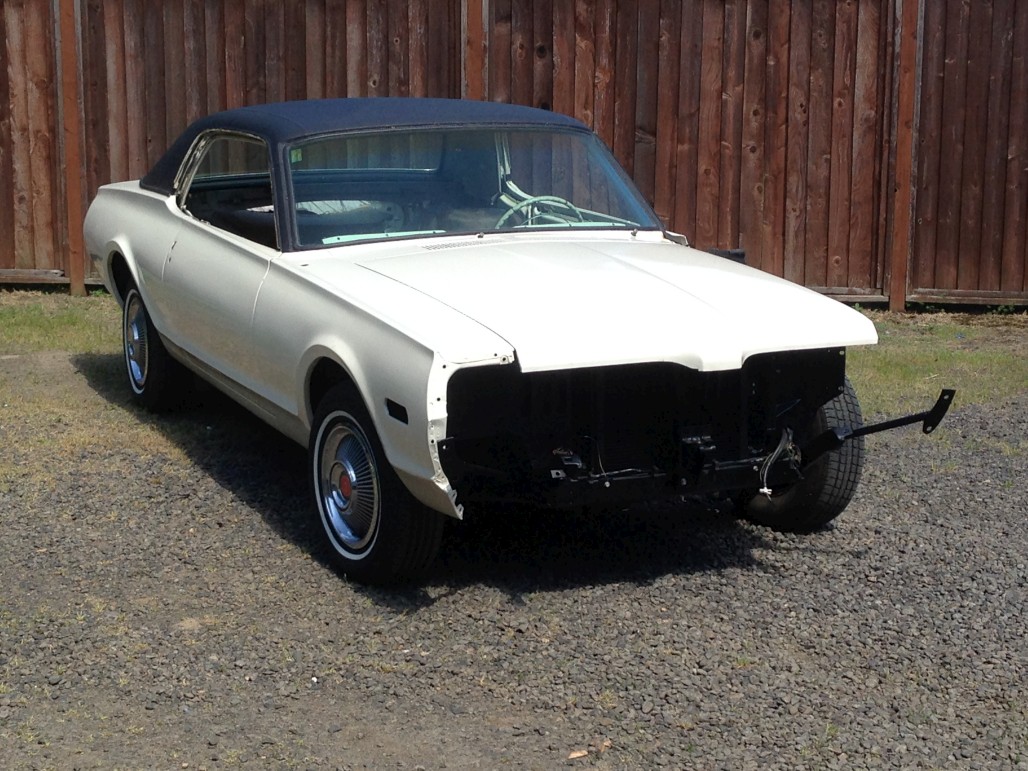
Gaps looking decent, for a noob: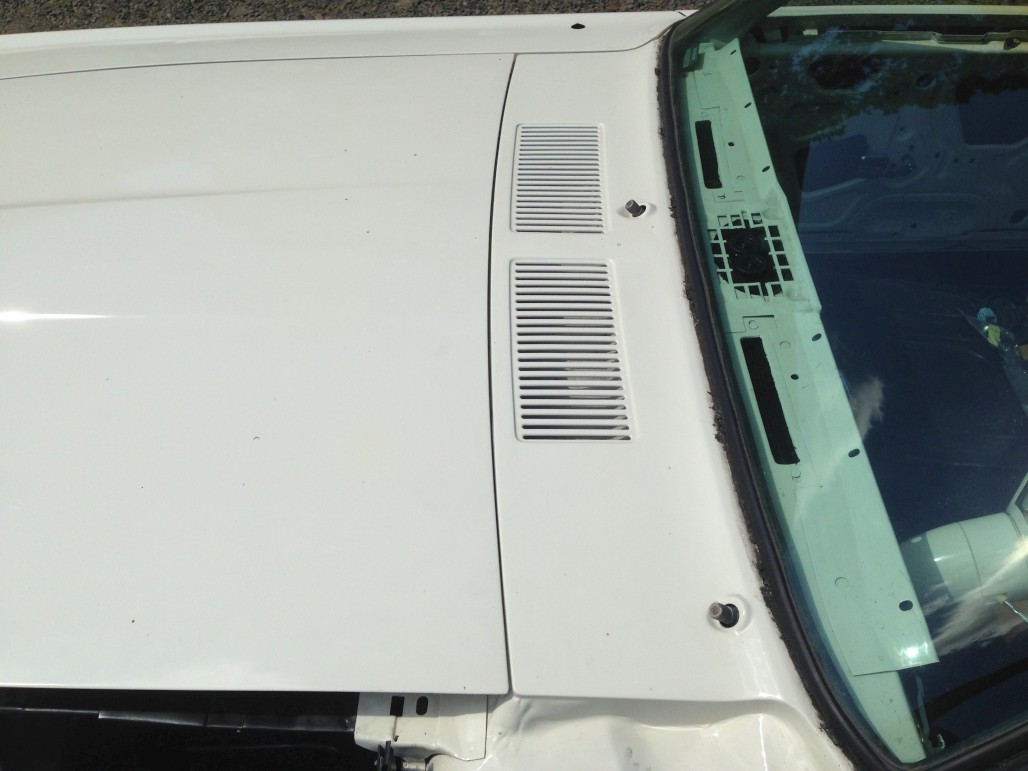
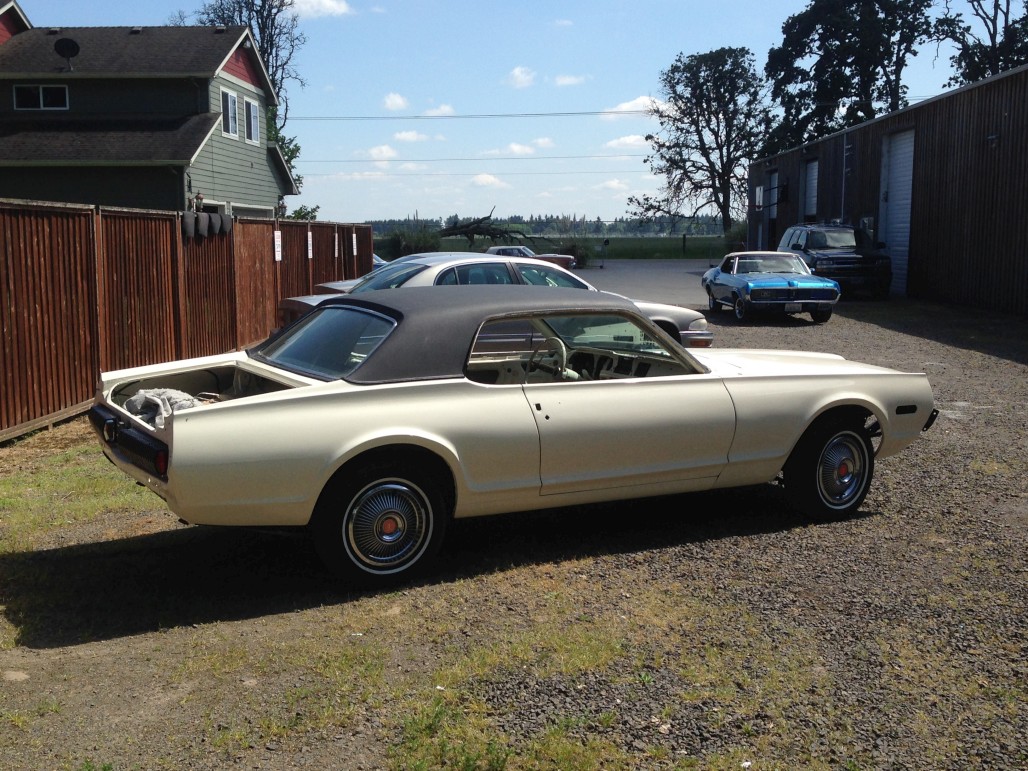
Repeat process on the other side: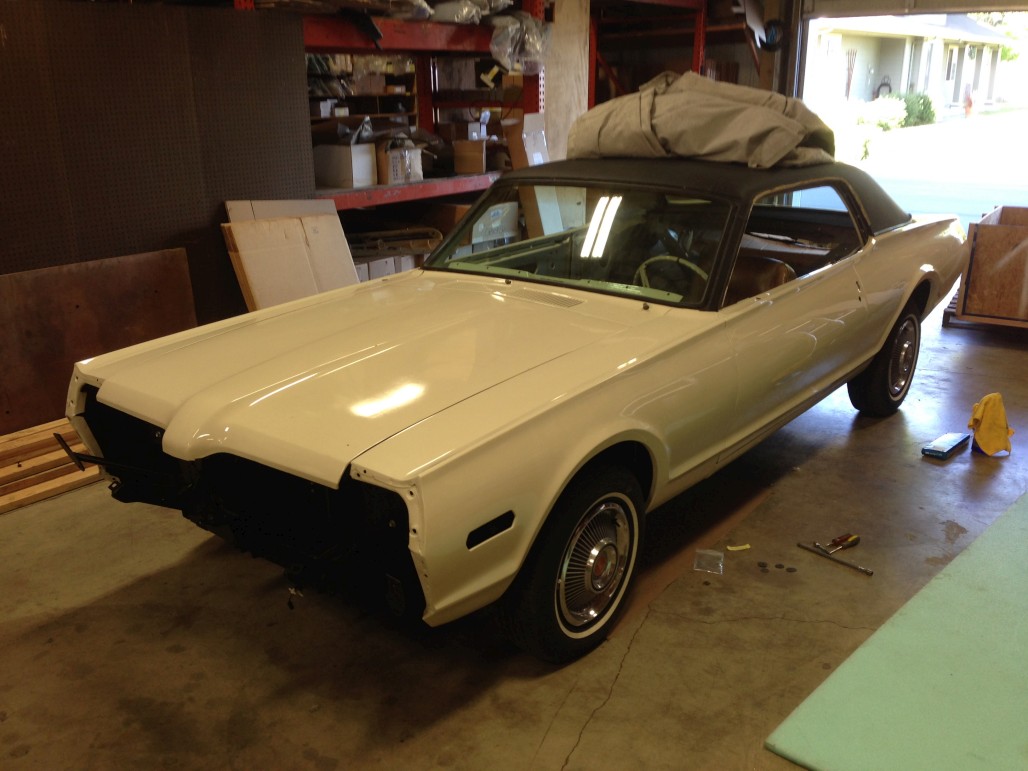
Another look at gaps: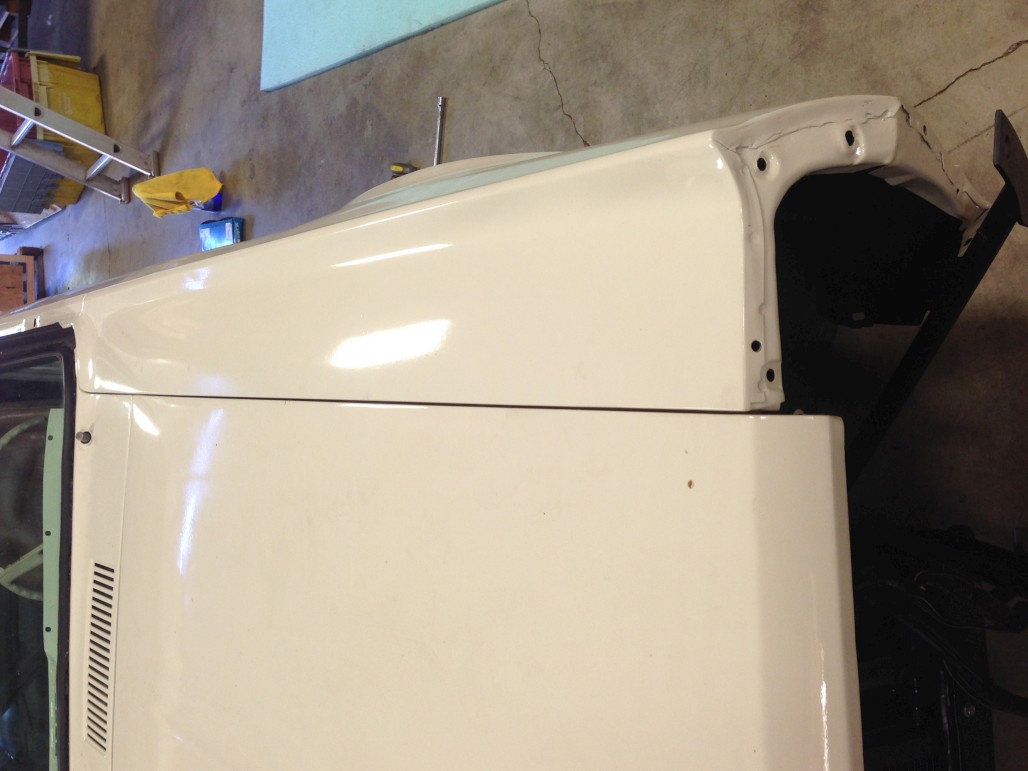
Yay! It looks more like a car now. Pretty cool to see it with most of the major panels on, finally. Speaking of major panels, next up was the trunk lid. Given the issues I'd had with my painter, whose current whereabouts is unknown, I decided to just paint the hinges and rods myself. The Duplicolor "perfect match" Wimbledon White is a pretty good match for Polar White (same color code) so I picked up some rattle cans and primed, painted, and cleared these parts. They came out pretty good.
Sandblasted: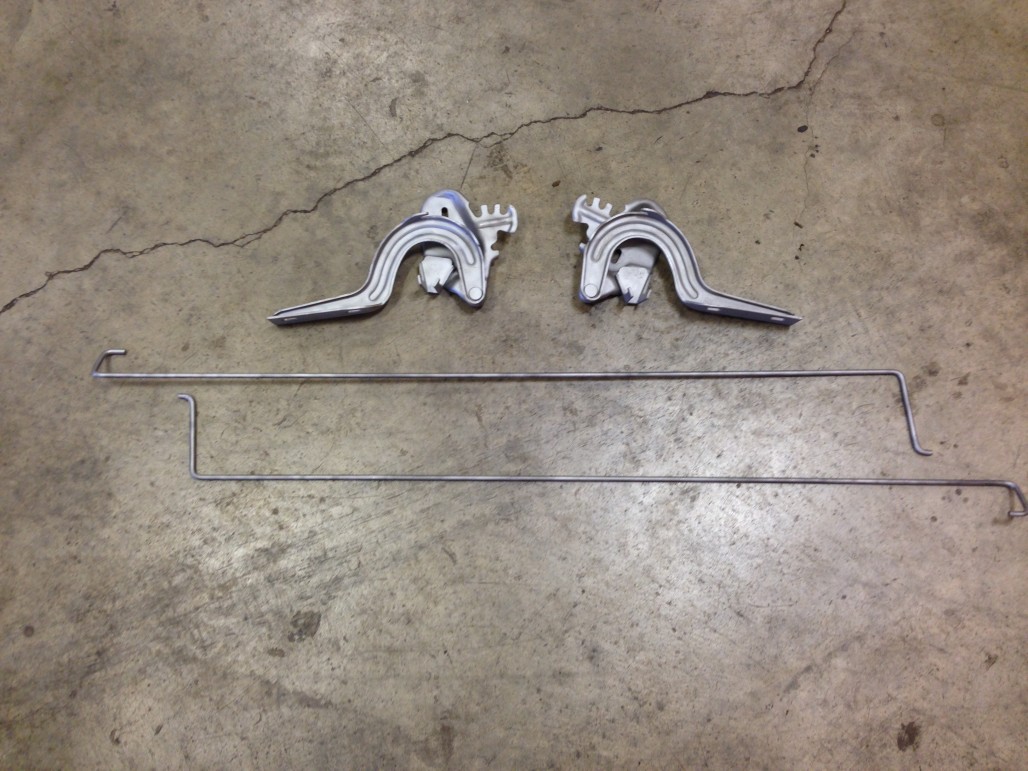
Done: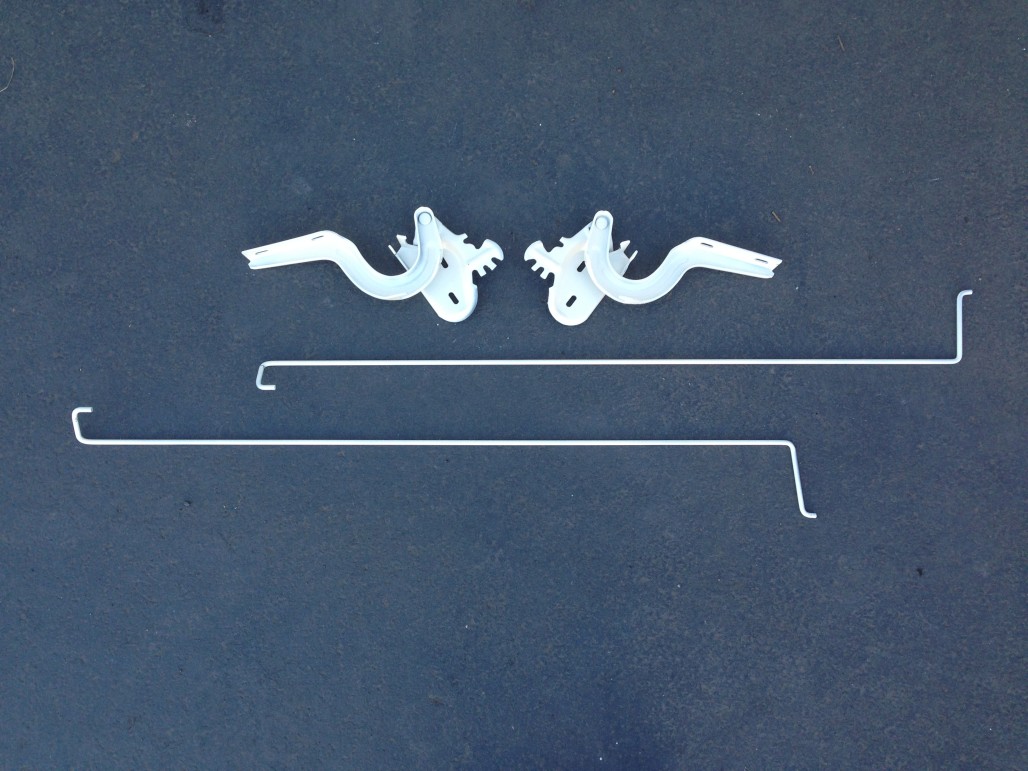
Installed: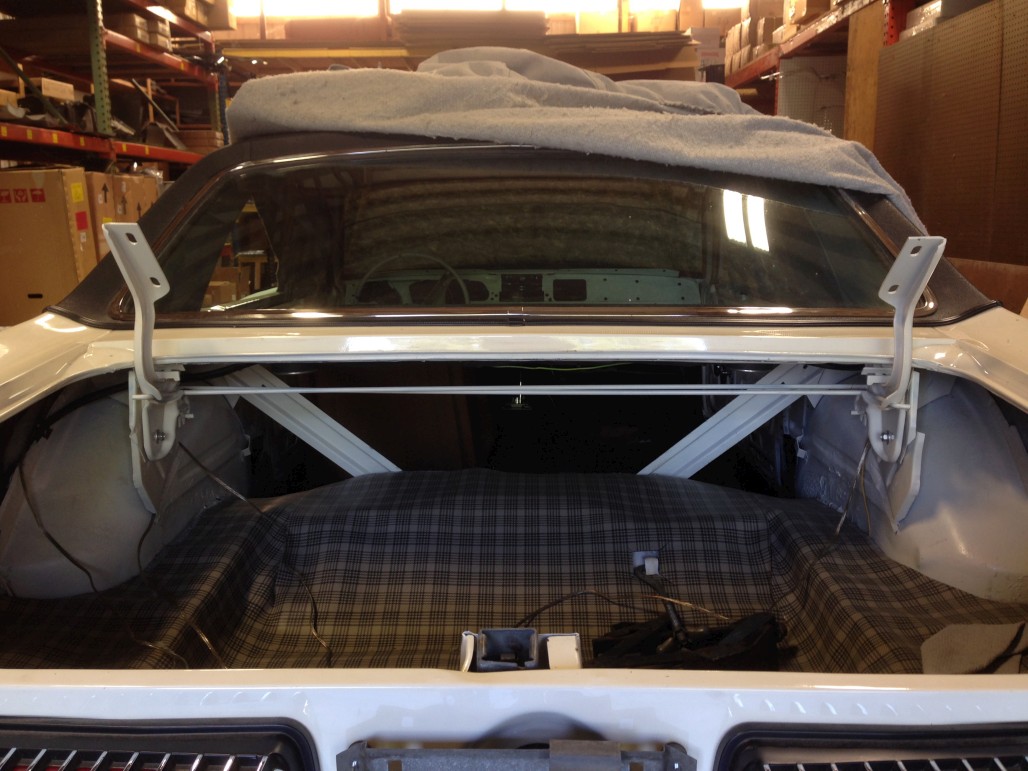
Definitely scratched my paint up trying to install the rods... will have to touch these areas up. The rattle can paint is probably not as durable as real automotive paint.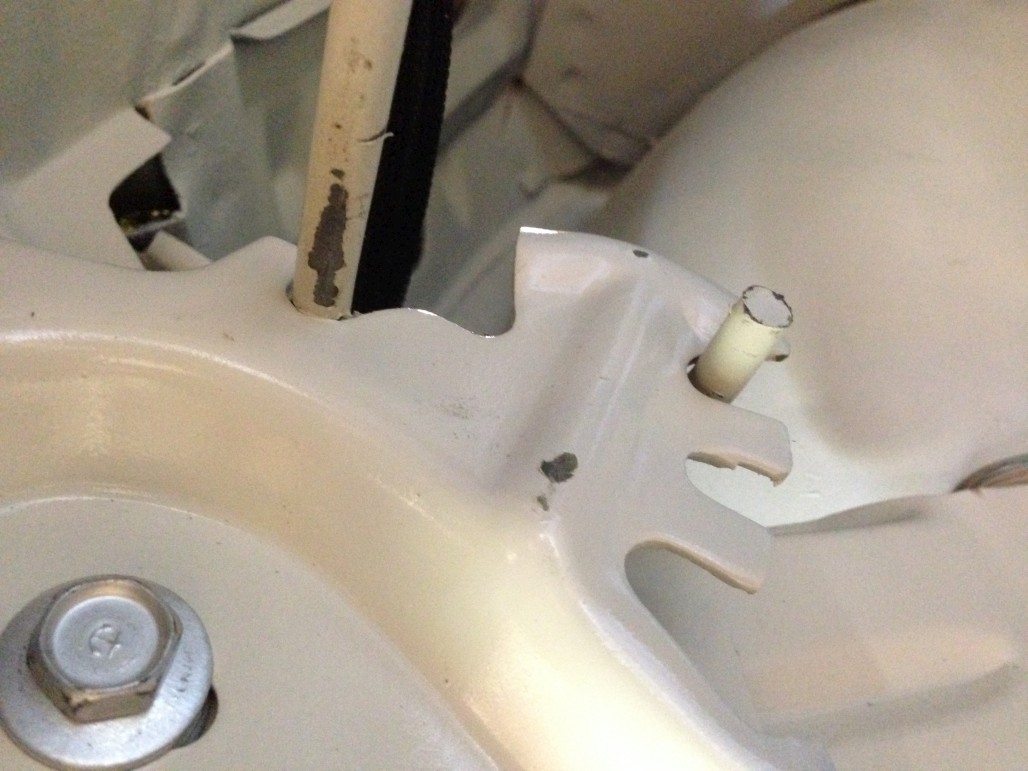
Meanwhile, here's the bottom side of the tunk lid, before and after installing the latch and weatherstrip.
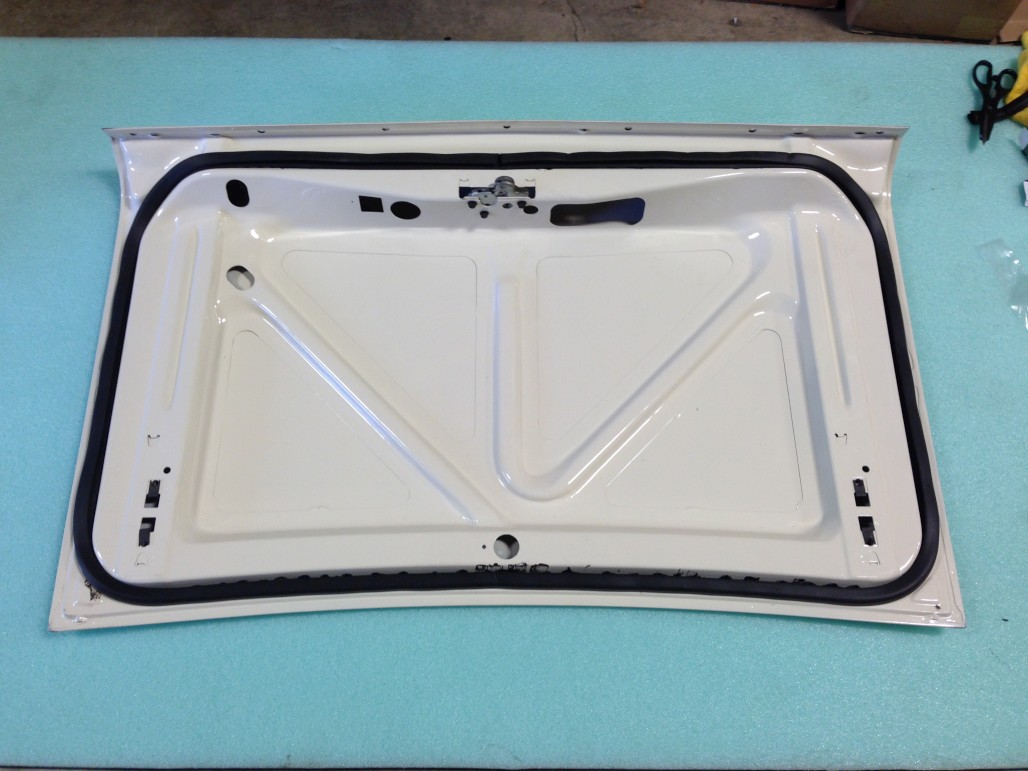
By the way, notice how I got a little overzealous with the weathersrtip adhesive? Anyone have any tips on how I can clean that up without messing up the paint? A solvent perhaps?
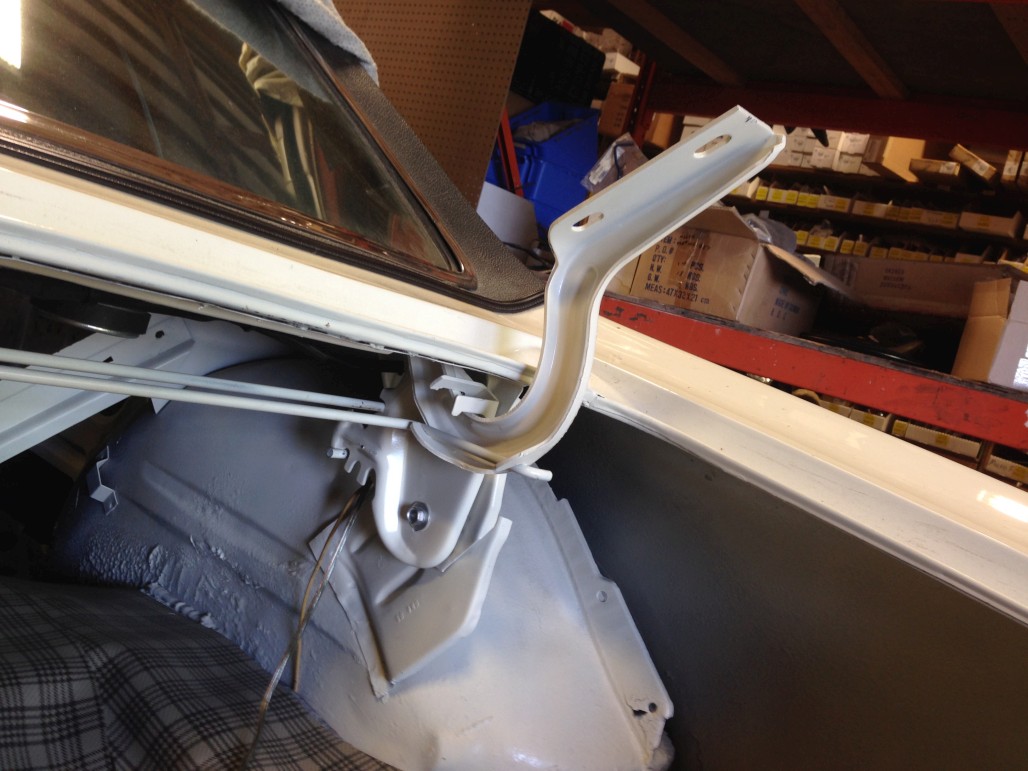
Finally, here it is on the car. I ended up laying in the trunk with a socket and flashlight to adjust the hinges while a helper made adjustments to make sure it was on straight / even gaps.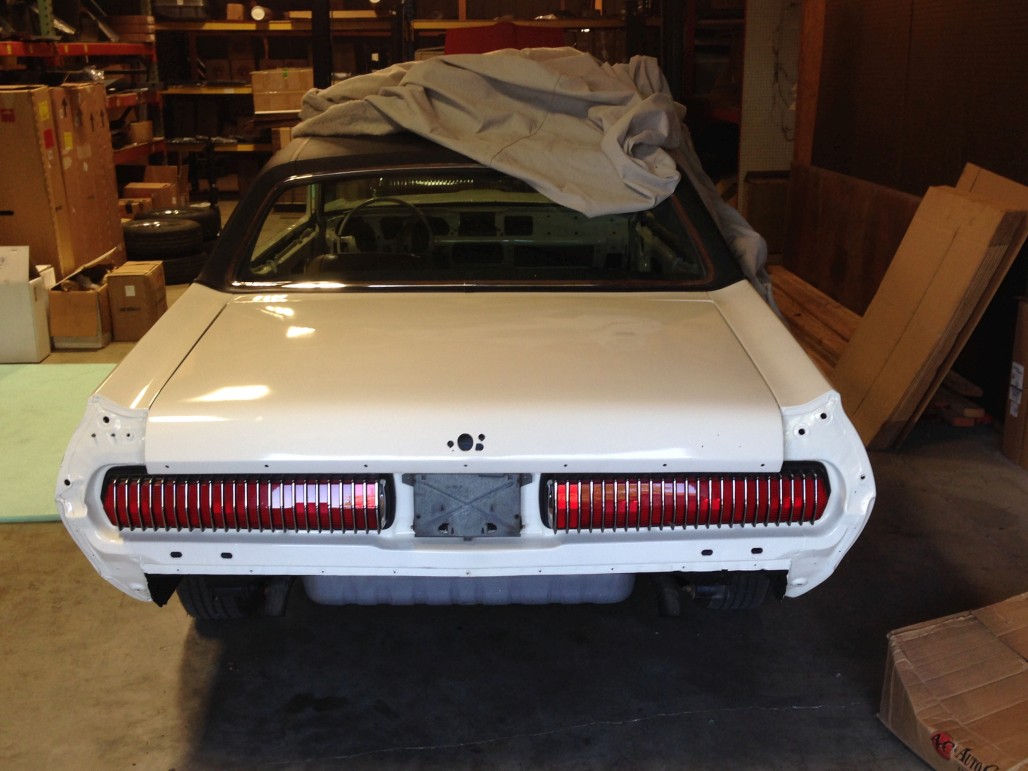
So... remember how I had the rear window channel patched with 2 different used pieces? (This was before the new patch panel was available) Well, I just found out that the contour wasn't quite done right, so the forward edge of the trunk lid actually sticks up a little. Bummer.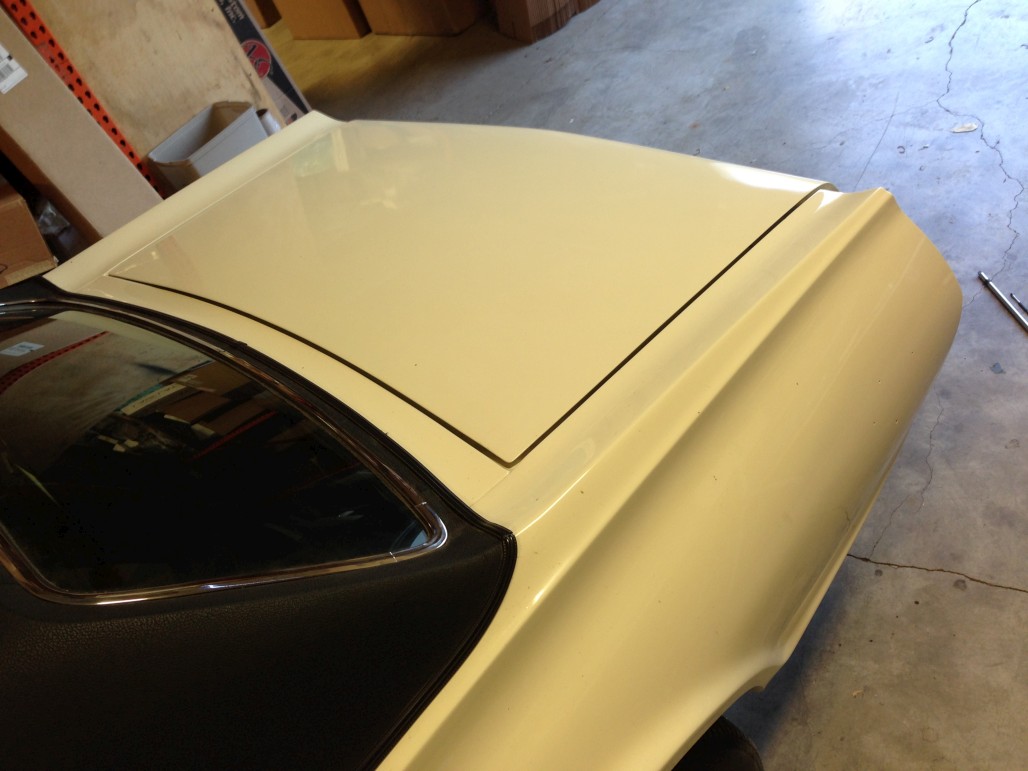
Anyway, how about a little educational segway about trunk lid installation? This is a short video I made on how to install the torsion bars, using this tool. Also I show which side is which (the bars are side-specific) and mention the anti-rattle strip.
So... that was back in June, and that's basically the last major thing I've done. Wow... I've been slacking!
I hope to have more updates soon, but we'll see if that actually happens. One of the current things I'm working on is polishing the stainless window frames for the side windows. Still need to do some sanding, buffing, and reassembly... then figure out how all the mechanisms and stuff go in the car. Luckily there are plenty of other Cougars nearby to look at. Until next time!
Ah, I was going to mention that. Good to make note of this for anyone reading: normally, the extensions should be put on the fenders first, then put the fenders on the car. They will be hard to install with the fenders on the car, although supposedly it's possible (haven't installed the front splash shields or vacuum tank yet).
Why didn't I put them on first? They haven't been painted yet. ![]()
I'll probably do a separate post on my paint / body woes that I've alluded to. It's part of what's been keeping me from moving forward. Hoping to remedy this situation in the near future.
12-4-2015
Alright, let's see if I can outline what really happened with the bodywork & paint. The guy that did the work was known only as Jose, and he didn't speak English. He was an experienced body man looking for work, trying to make ends meet, and seemed like a nice enough, hard working guy. I'd had a chance to see what he could do, and he seemed to be quite skilled. There were a couple guys here that spoke Spanish, so at the time, I had interpreters and all was good. He was willing to work for way less than what a retail body shop would charge, and to me this is what made it possible to move forward. I couldn't afford anything more.
Sept. 2011 (wow) is when I dove in and started the roof replacement, which led to fixing the other rust and body damage on the car, which led to a decision of doing a full repaint. Jose did the work in the WCCC yard where I could check in on progress regularly, and he was doing a good job, as you can see in my early posts.
Late in the year (Nov) the car got moved off-site, because Jose had been allowed to use shop space by someone he knew. Here the floors were patched in the cabin and trunk. I went to check up on the car regularly, and progress looked good. Then the car came back to WCCC.
Finally, in May 2012, the car and most of the major panels had been prepped and were in primer. Jose was able to use another friend's shop to spray the body shell and the doors. I got the car back by the end of that month, and was stoked to see it in fresh paint.
Eventually I decided to go all-out, and pulled the engine. Around April 2013 I had Jose prep and paint the engine bay, and something went wrong with his mixture... the paint is still a little soft to this day and I can scratch it with a fingernail. But it looks good overall. In hindsight I probably could have gotten better results from rattle cans myself.
Keep in mind at this point, the fenders, hood, trunk lid, extensions, valences, etc had still not been painted. Something I would continually bug him about.
I don't know what happened in his personal life, but it seemed to be in turmoil. He started working at yet another shop in another part of town, and still had my parts with him. I kept showing up to bug him periodically, and he wanted me to buy more paint materials (I'm pretty sure he used supplies I had previously bought for other projects). Finally, in May 2014, when I was in France, Don sent me this picture: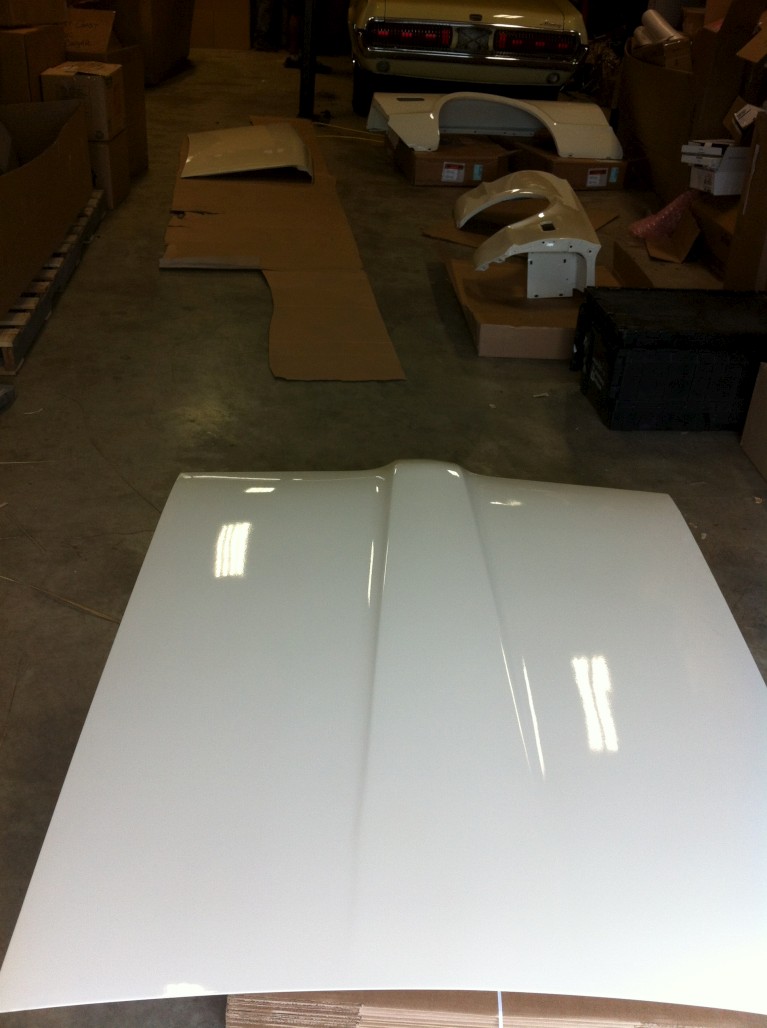
At last! The hood, trunk, and fenders were painted. Only 2 years after the body shell and doors had been painted, with a different batch of materials, in a different environment, with different equipment... see where this is going? So far, the pictures you've seen have been from far enough away to say, "hey cool, that looks good! Yay for progress!" Well, let me zoom in a little.
Hood closeup: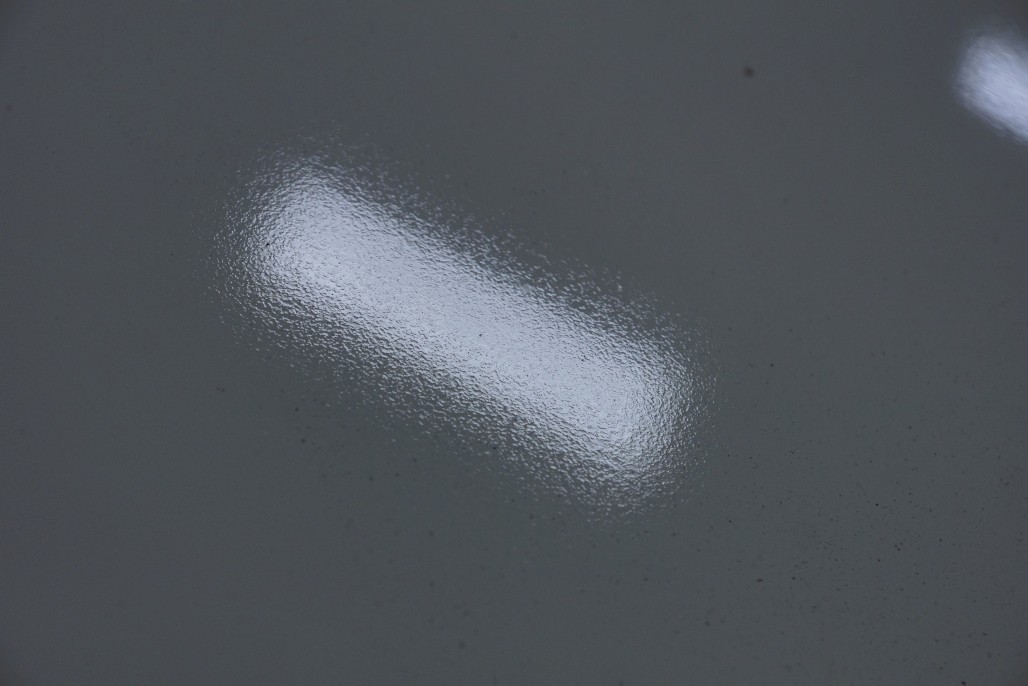
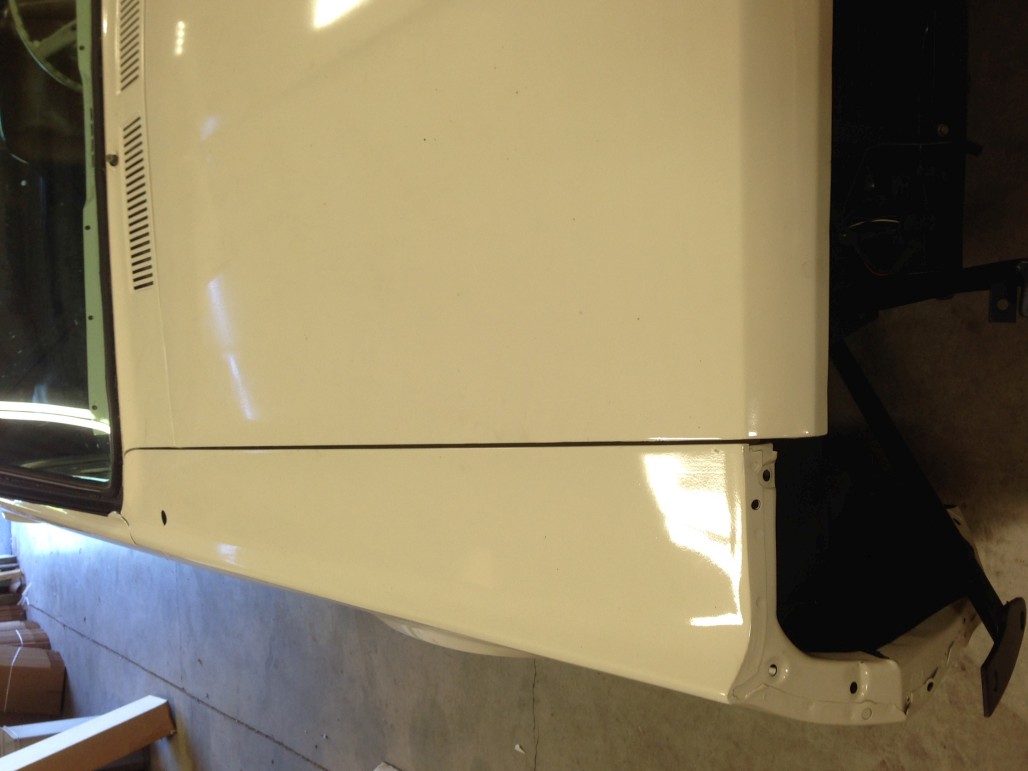
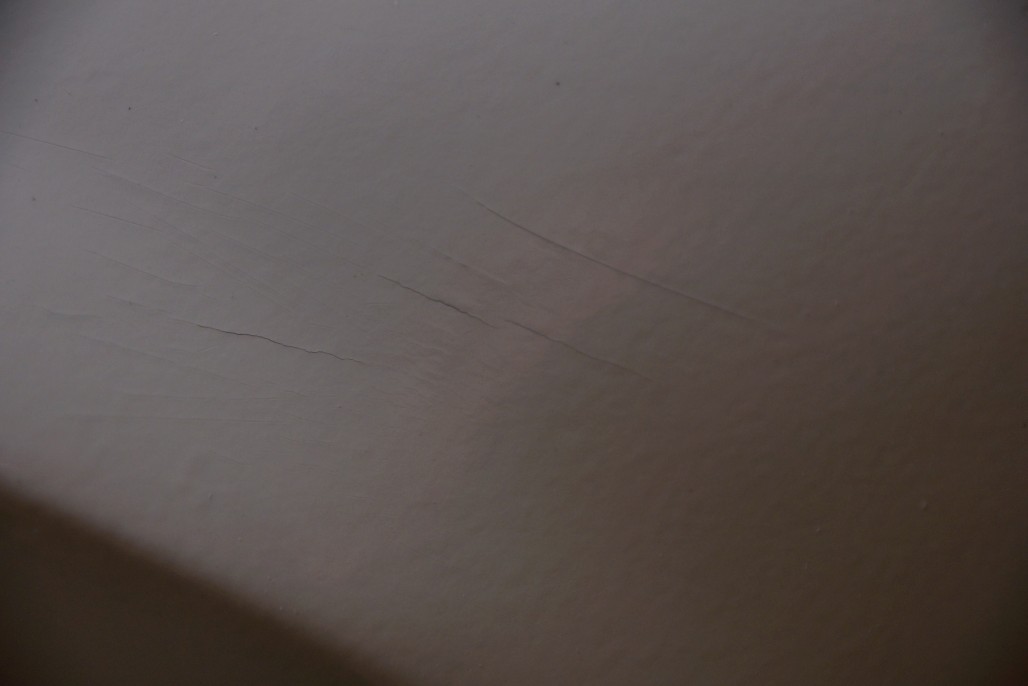
Fender drips and cracks: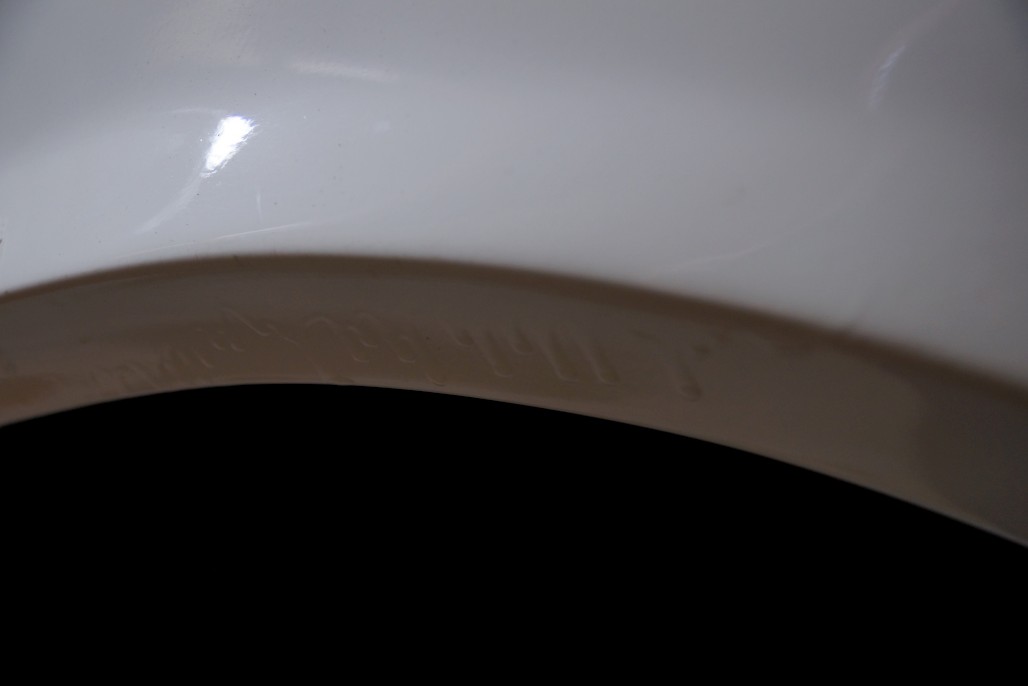
Dust bubbles & orange peel on trunk: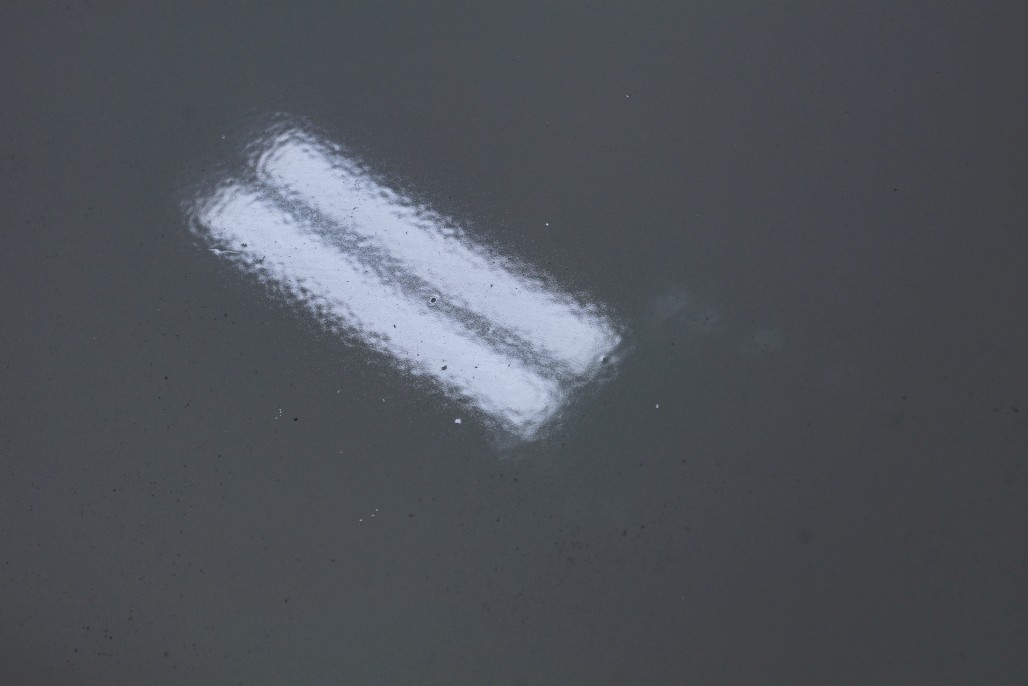
Other fender "texture"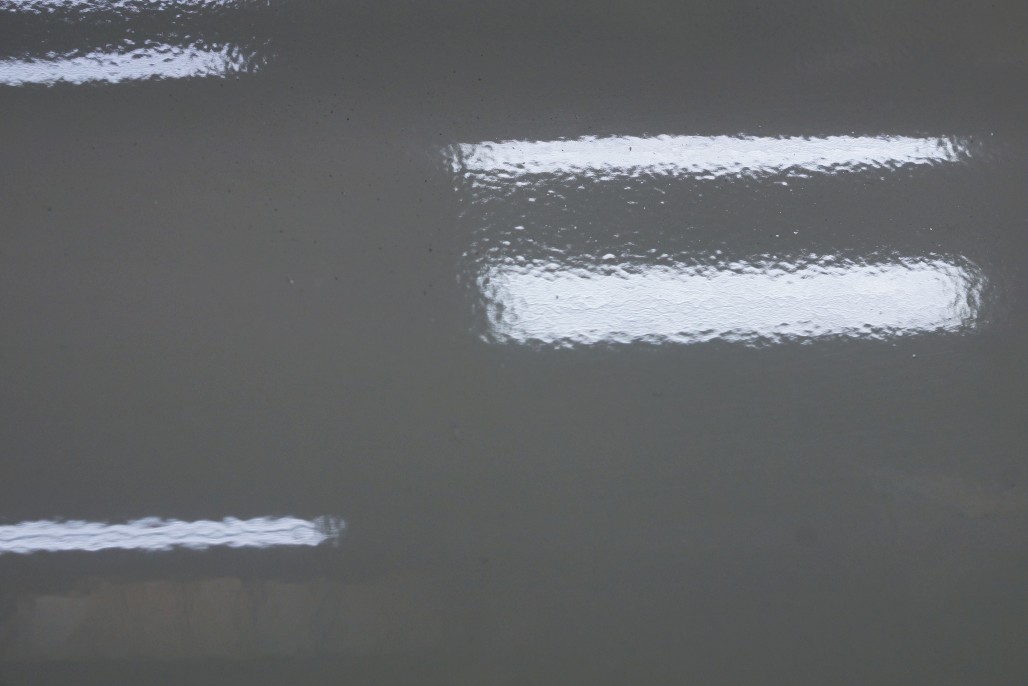
Hard to get a picture of, but this one kinda shows the waviness that's everywhere. Not the end of the world, just one more negative.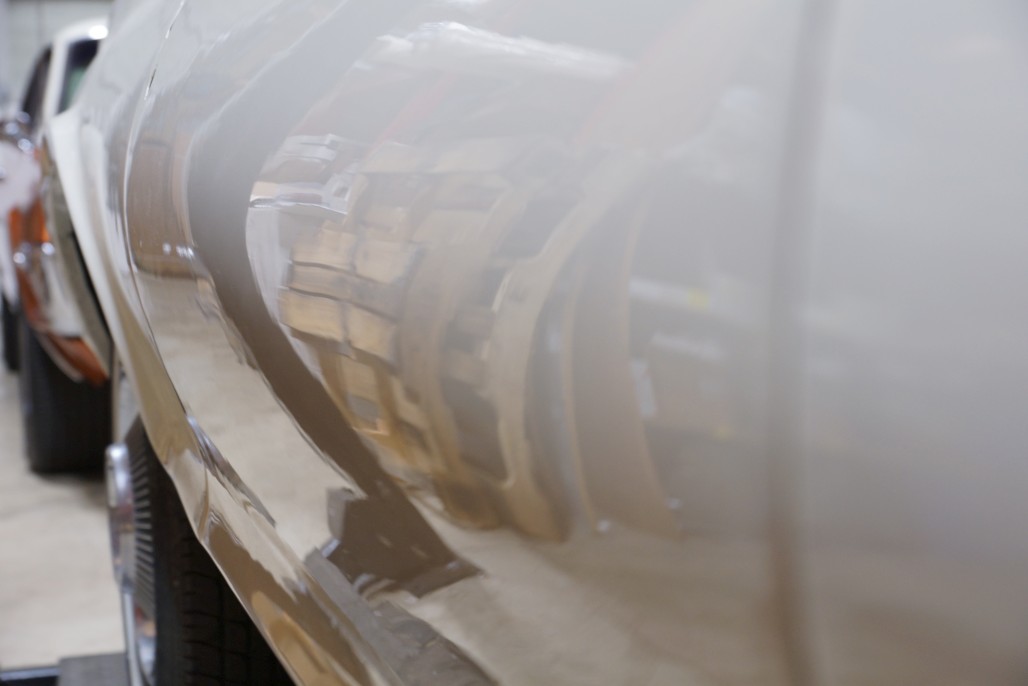
Fender vs. door difference in finish: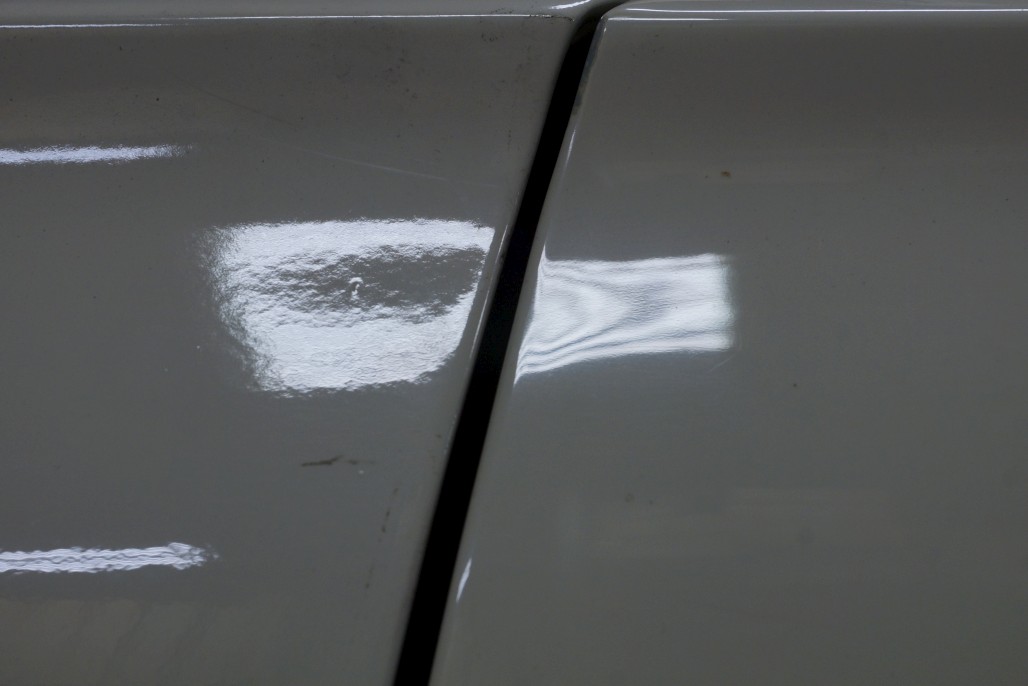
This one I think shows the difference in color the best. It's hard to capture, but if you look closely, it's there. Hood vs. cowl: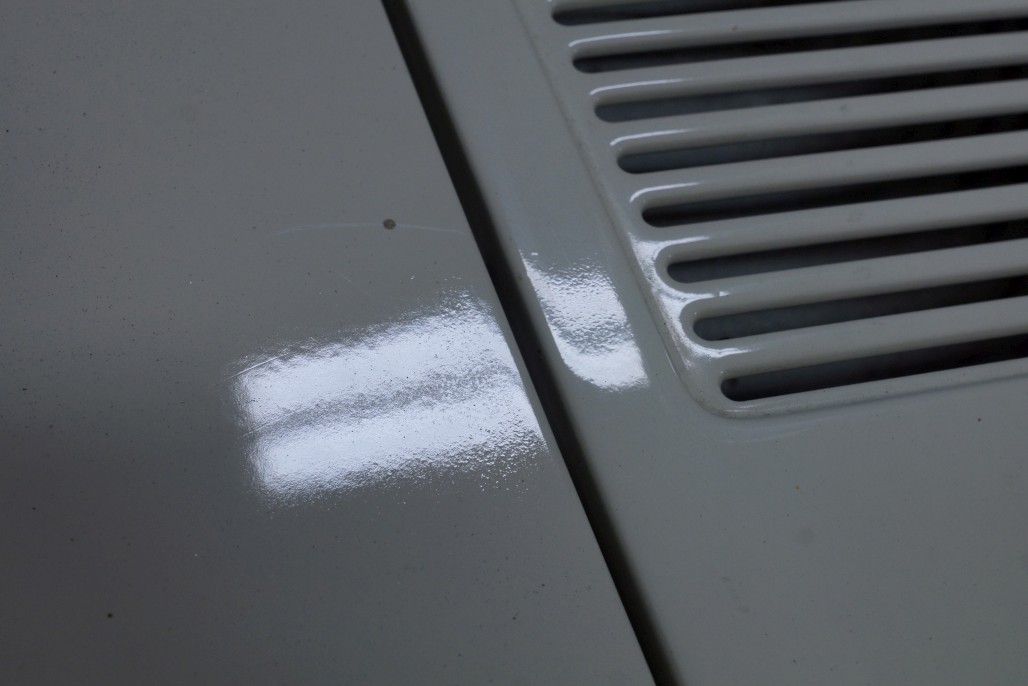
Anyway, after this, I was hoping to get the rest of the little pieces finished in a timely manner - valences, stone guard, fender & quarter extensions, glove box door & ash tray door, trunk hinges and rods, So I could at least get the car together and try to color sand / buff out his paint job and make it look decent. After weeks / months of constantly checking in, hearing his false promises over and over, giving him the benefit of the doubt way too many times, I finally gave up. Give me back my stuff, I'll figure out something else.![]()
![]()
![]()
![]()
![]()
![]()
![]()
![]()
![]()
![]()
Current plan? There's a good restoration shop up the road who seems open to the idea of finishing up the body & paint on my car, and I can partially pay for the work by doing some photo / video stuff for their business. They want to get the panels aligned better, prep the unpainted parts, block sand the entire car to smooth out the waviness / imperfections, and spray fresh color and clear. This is the only way it'll be "right," but painting the entire car twice is mind-blowingly frustrating. Of course it will just be the outer surfaces, but still...
So there ya go. I think this whole fiasco is what's really slowed me down from putting the car together. Don't get me wrong, I've been lazy at times, and distracted by other things, but I didn't feel like I could "finish" the car when the paint work wasn't satisfactory.

So nice in honor of your grandparents.
Posted by Diggymart on 1/3/20 @ 8:04:16 PM