You must be logged in to rate content!
8 minute(s) of a 767 minute read
11-12-2014
Wow, it's been almost 7 months since my last update. I've been meaning to post some stuff for a while, but overall this summer I barely touched the car. I think I hit the "slow slump" stage or something. I could blame life distractions or any number of things, but I think the simple answer is that I got burned out and let my motivation slip. It's hard to stick with it after a few years go by, and I'm that much more impressed watching some of you guys relentlessly hammer away on your projects. That being said, here's something cool I did back in June this year.
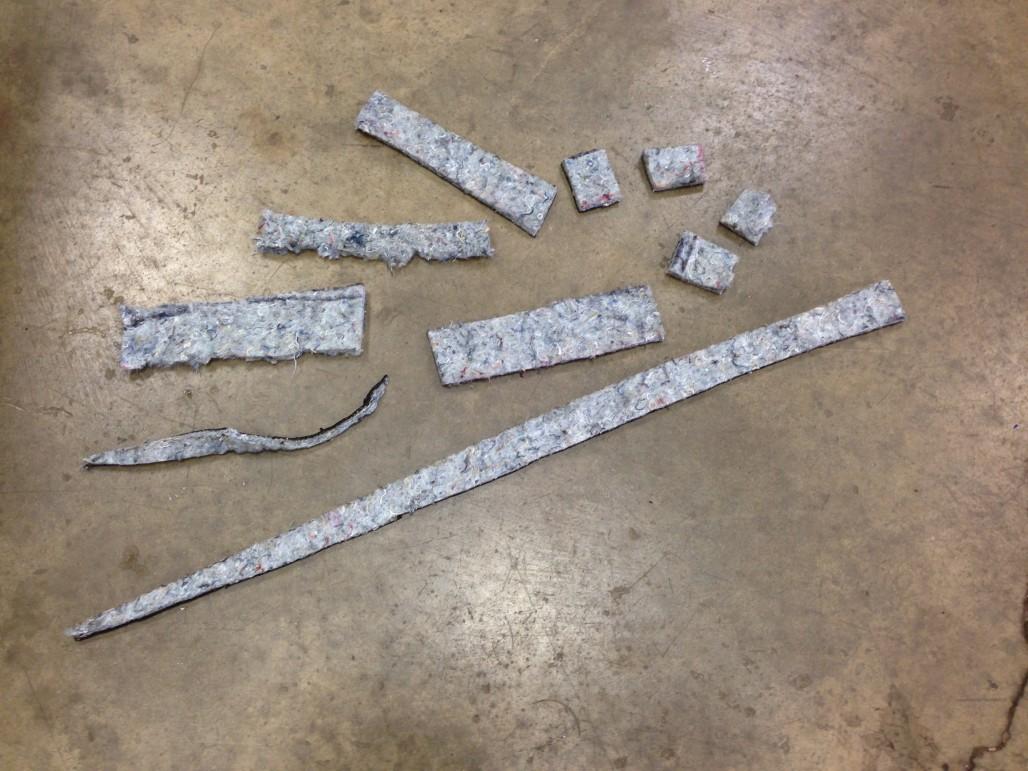
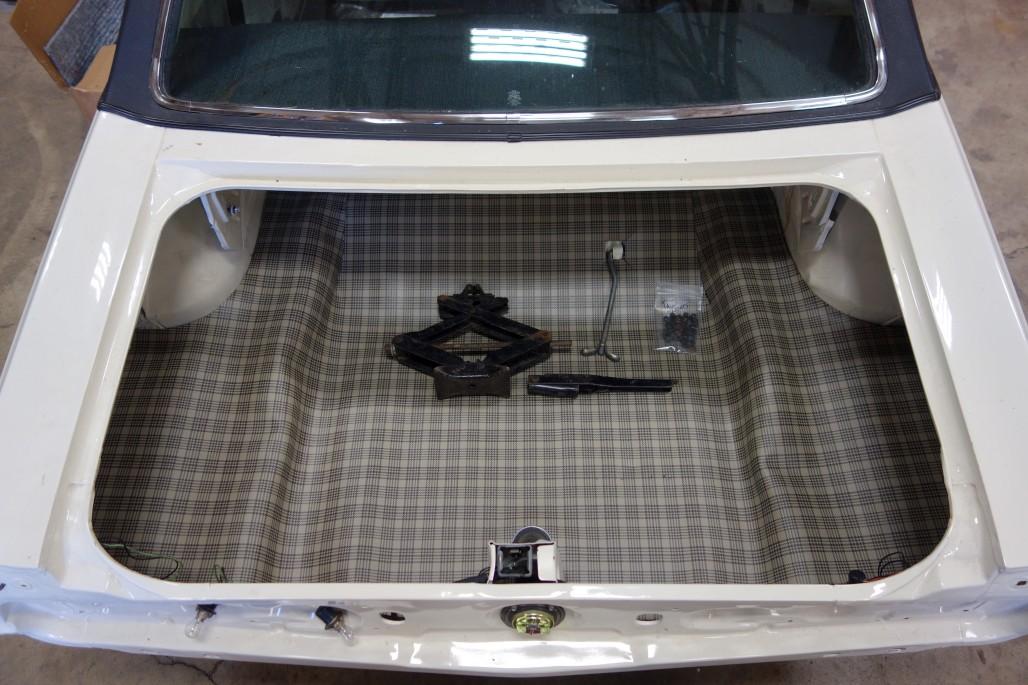
First off, I had to throw down some insulation in the trunk. I got this kit that has all the pieces for the whole car (note to self, take new pictures for that product). Pretty nice thick stuff, though most of the thickness is the is fluffy "jute" portion and not the tar backing.
I did have to do some trimming to get everything to fit just right.
I used a smidge of spray trim adhesive here and there to keep things in place. Also I should note that I installed the repro trunk filler boards before this.
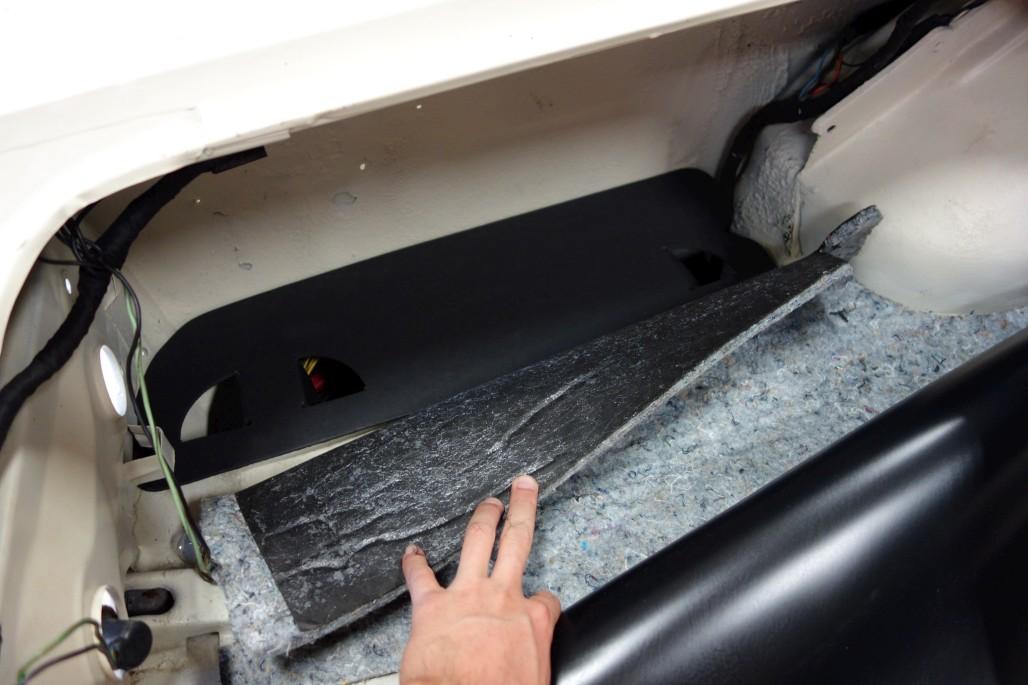
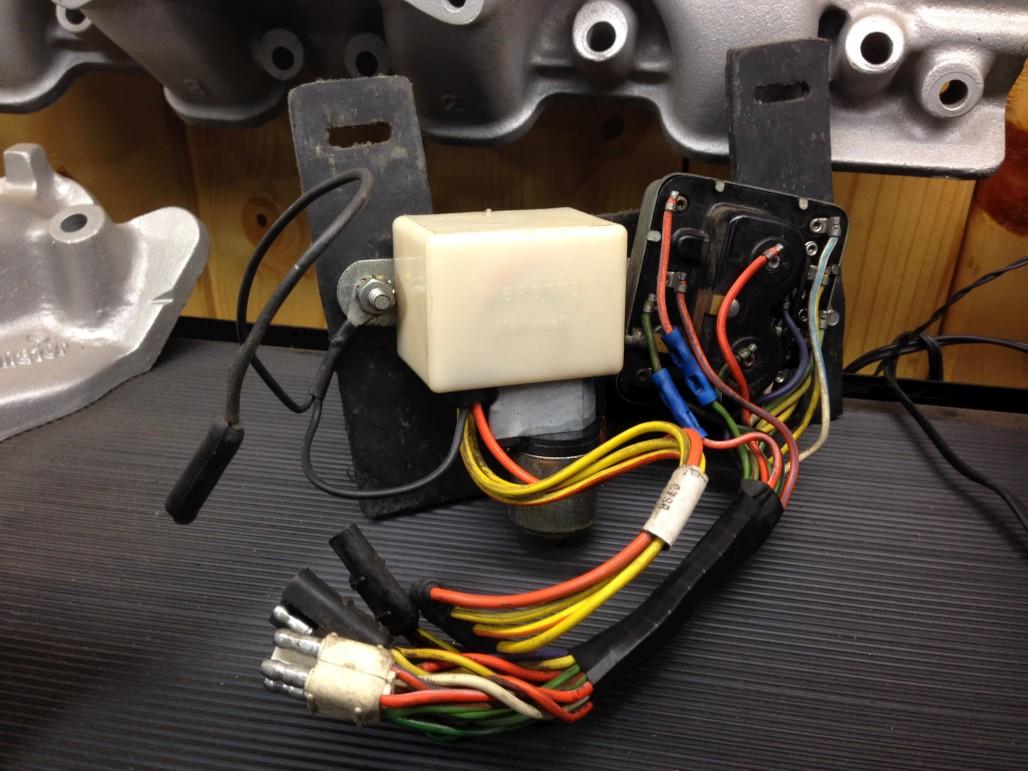
Also hiding under there is my old mechanical sequential box. Not original to the car since it says "Motorcraft" on it and has a couple spliced wires. It seems to work fine though so I just put it back in. Maybe someday I will upgrade to the solid state box.
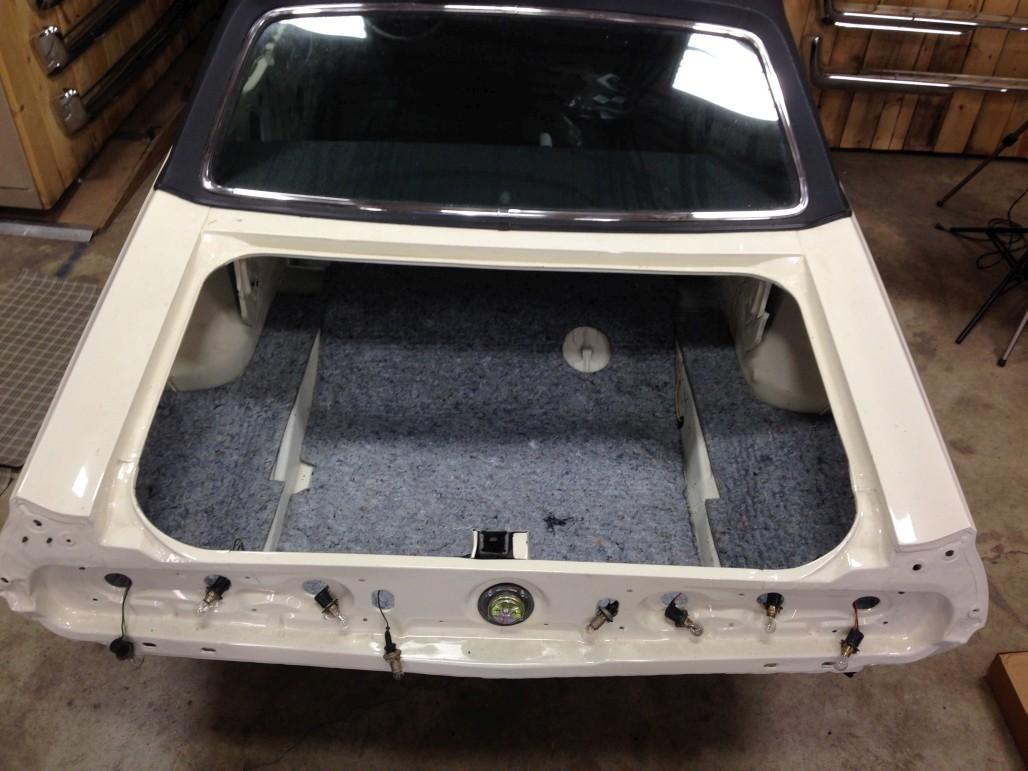
Then I got to throw in a new trunk mat, and of course I opted for the premium version. It's really nice. I put the spare tire J-bolt in place and threw the jack in there. Still contemplating whether I should strip and repaint the jack or just leave the patina the way it is.
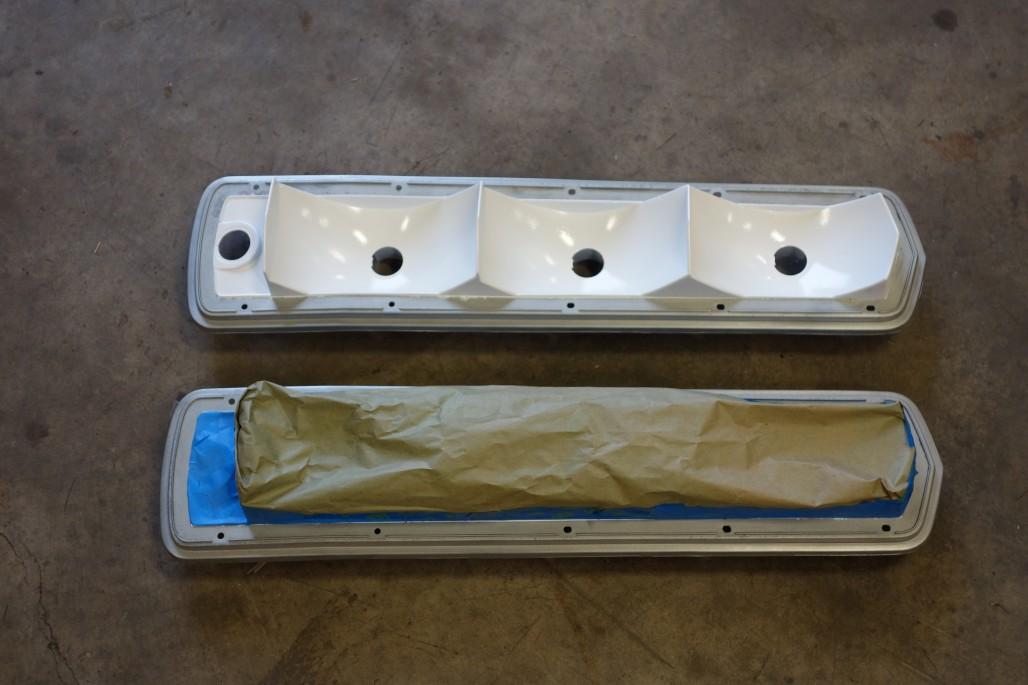
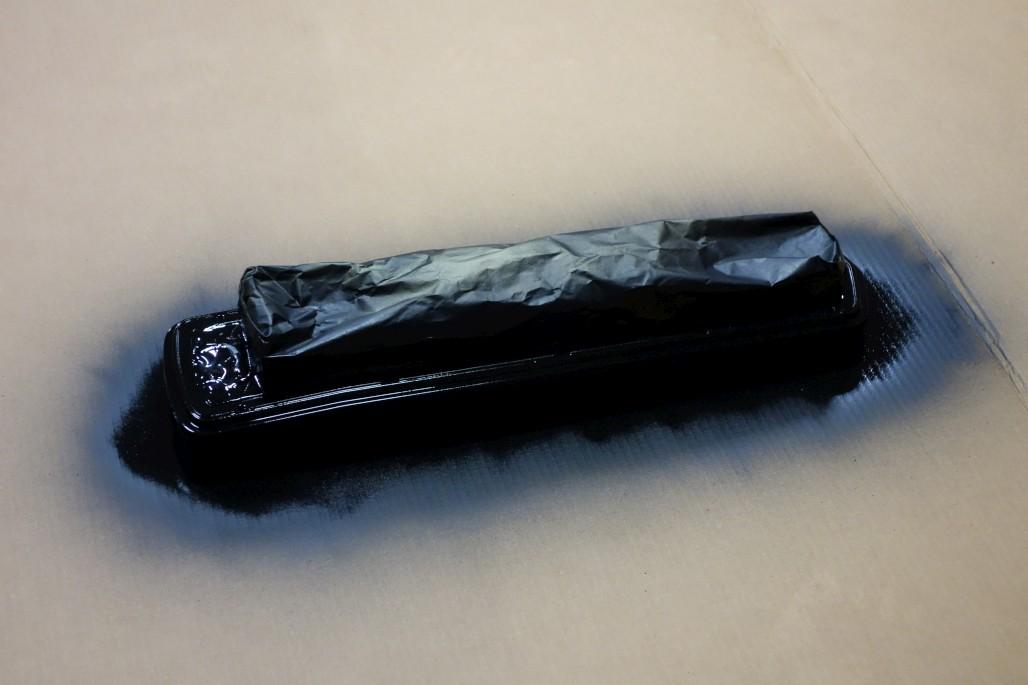
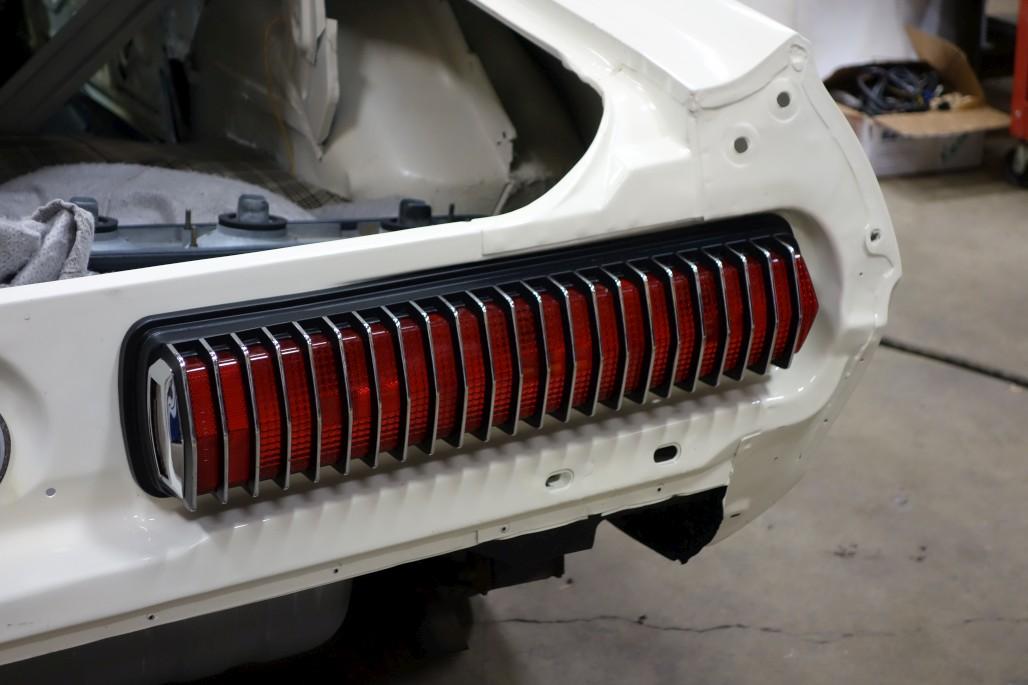
Now it's on to the cool stuff. I had been looking forward to restoring the taillights for a while, since they're such an iconic part of the car. I started by sandblasting the front sides of the housings, leaving the rear sides alone since they were in good shape and still had the galvanized plating or whatever it is that preserves them. Then I masked around the outsides and painted the inner areas gloss white. They were originally a shiny silver, but I decided to try gloss white to give the lights a nice even glow. The thinking here is that white will actually reflect more light than silver. Then of course I had to reverse mask and do the outsides in SEM Trim Black (great stuff).
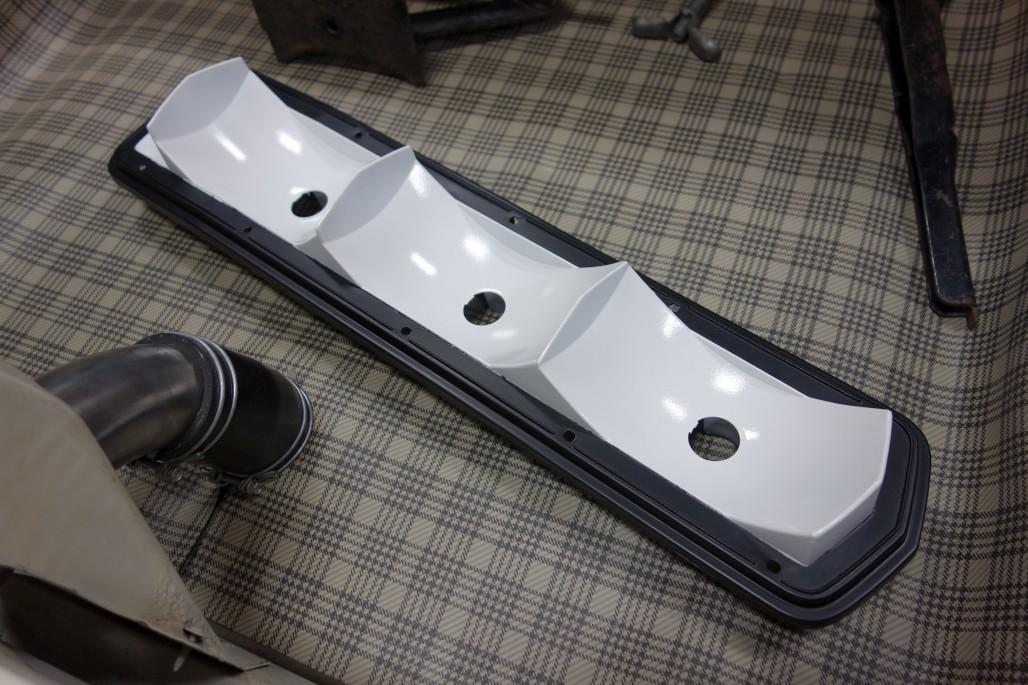
Then I went ahead and replaced the seals on both of them with this kit. It's great that all this stuff is reproduced (sometimes I'm still impressed how much is available for Cougars, especially after restoring an Opel). I used weatherstrip adhesive to stick them on.
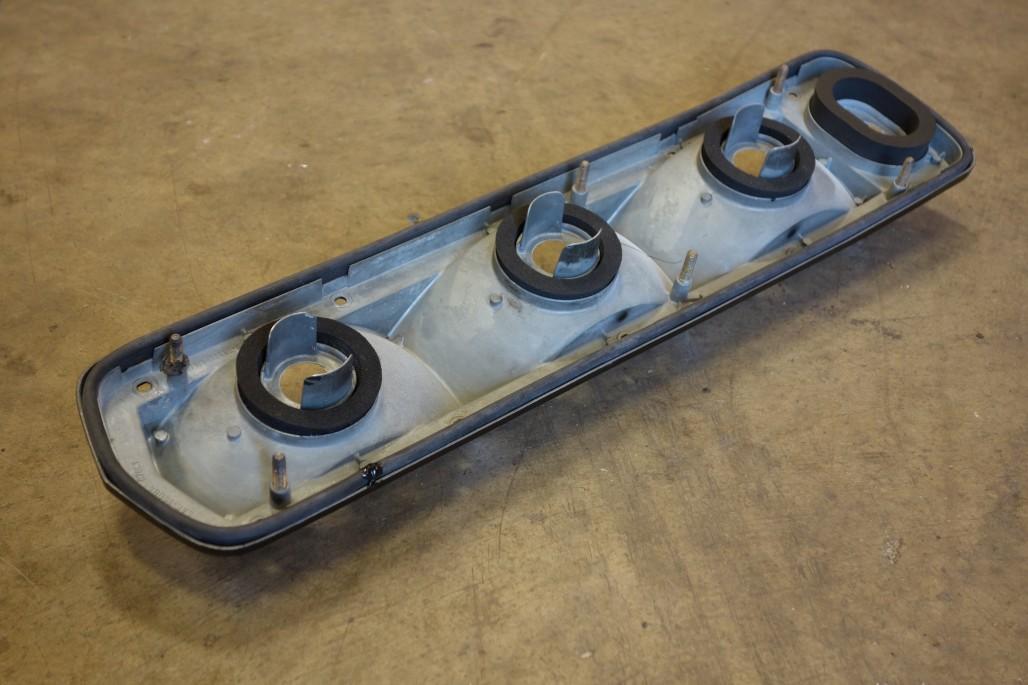
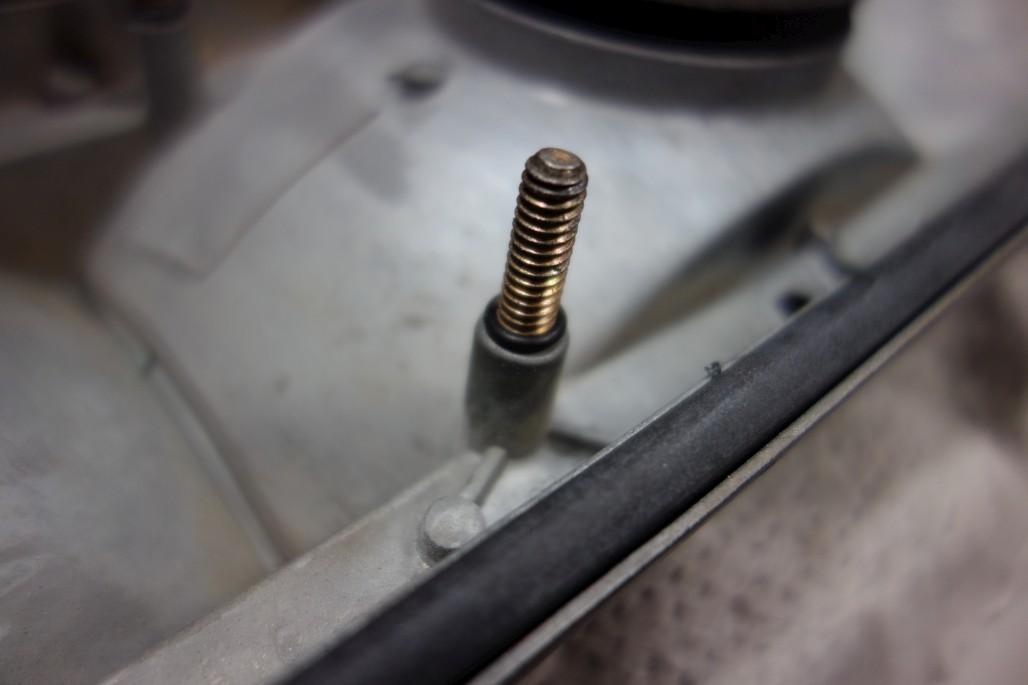
Also, when taking the old seals off, I noticed that there were some little rings around the threaded studs. I substituted some new generic o-rings to replace them. Whether or not this is actually necessary, I have no idea.
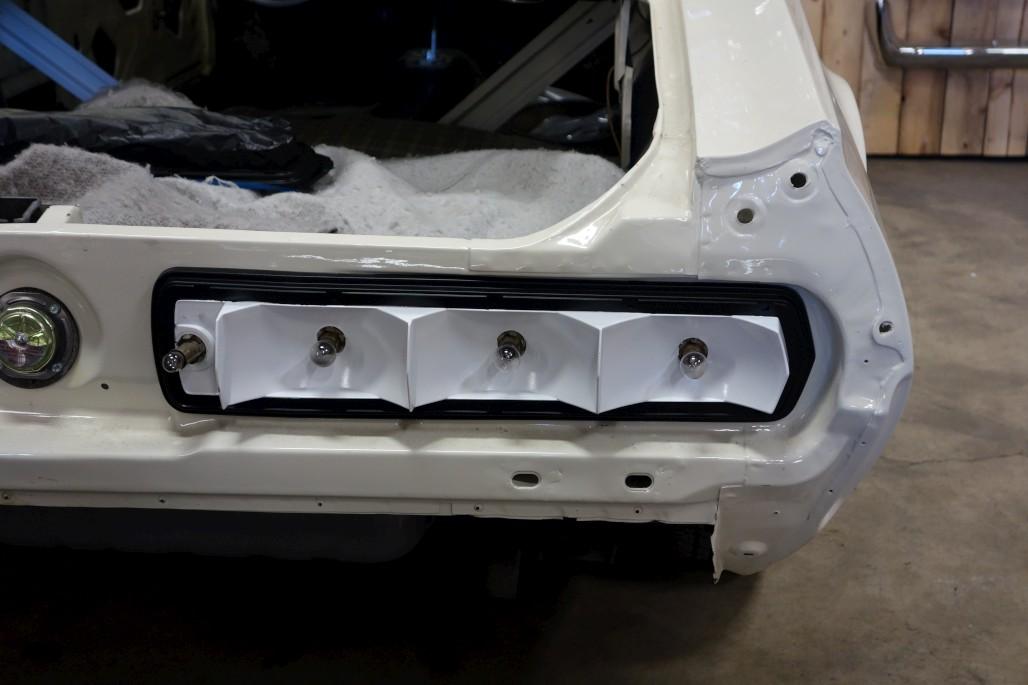
Test fit just for fun:
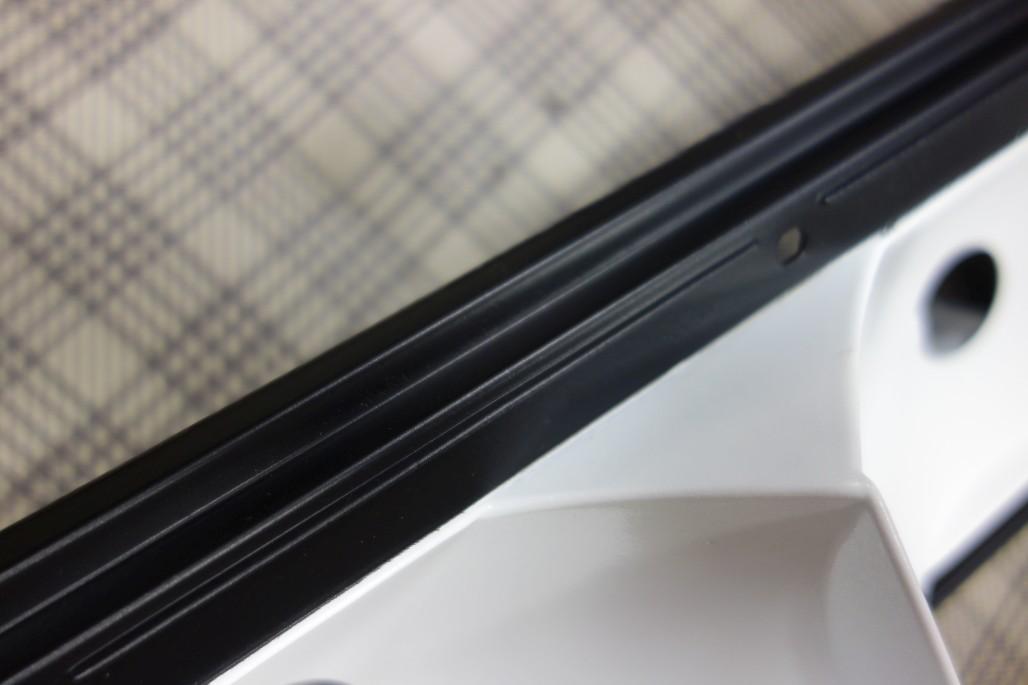
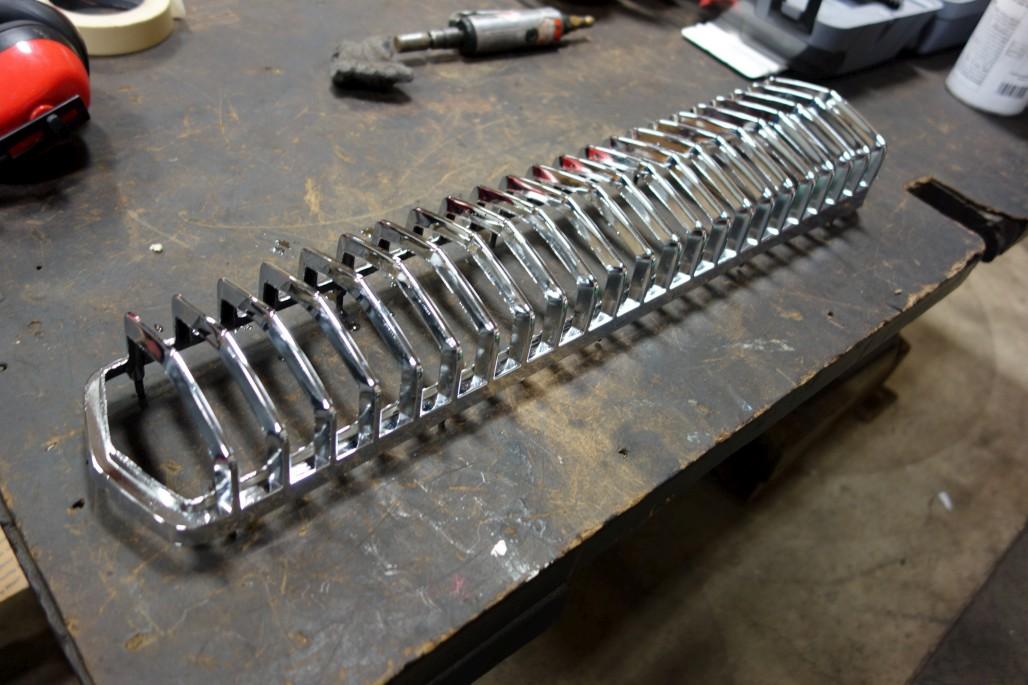
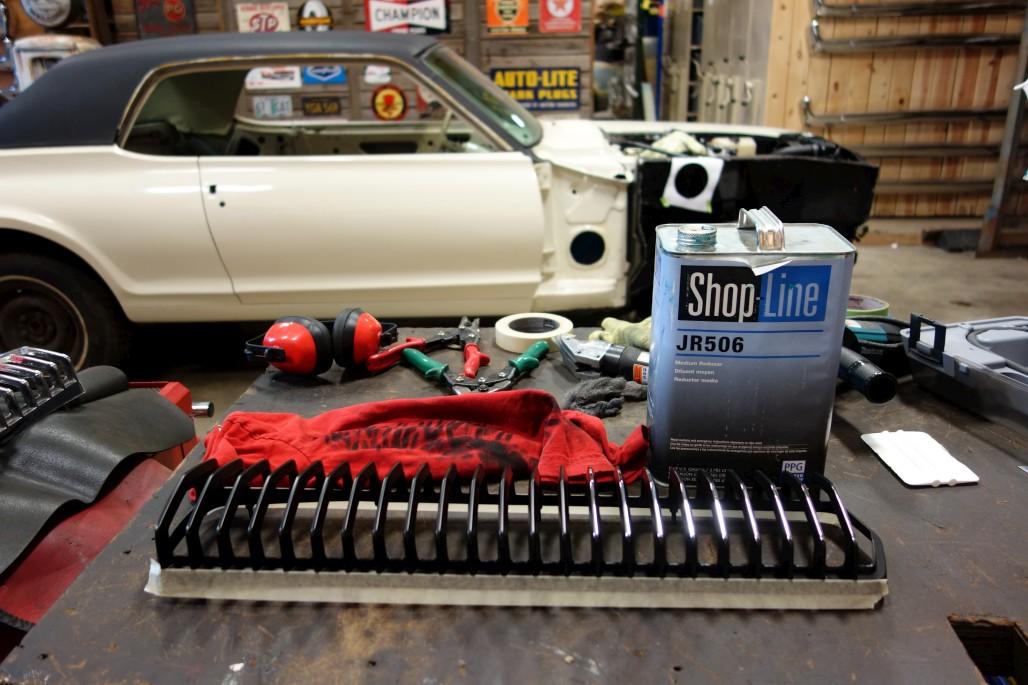
Now the real fun begins: the chrome bars. My originals were pretty pitted, and rechroming wasn't in the budget. Luckily I happen to work at a place that has hundreds of good used bezels, so I dug through the pile and found some pretty nice ones. Stripping off the old paint was an adventure / chore that took some trial and error. Easy Off oven cleaner turned out to be the best stripper. If you do this, make sure to do it outdoors and wear gloves. This stuff is gnarly, avoid breathing the vapors. Anyway I let it sit for a while (~20 min) and then used various nylon brushes to get the old paint off. Then a good bath in water, some steel wool, etc. I had to do this process about 3 times to get all the nooks and crannies stripped. Eventually, both bezels looked like this:
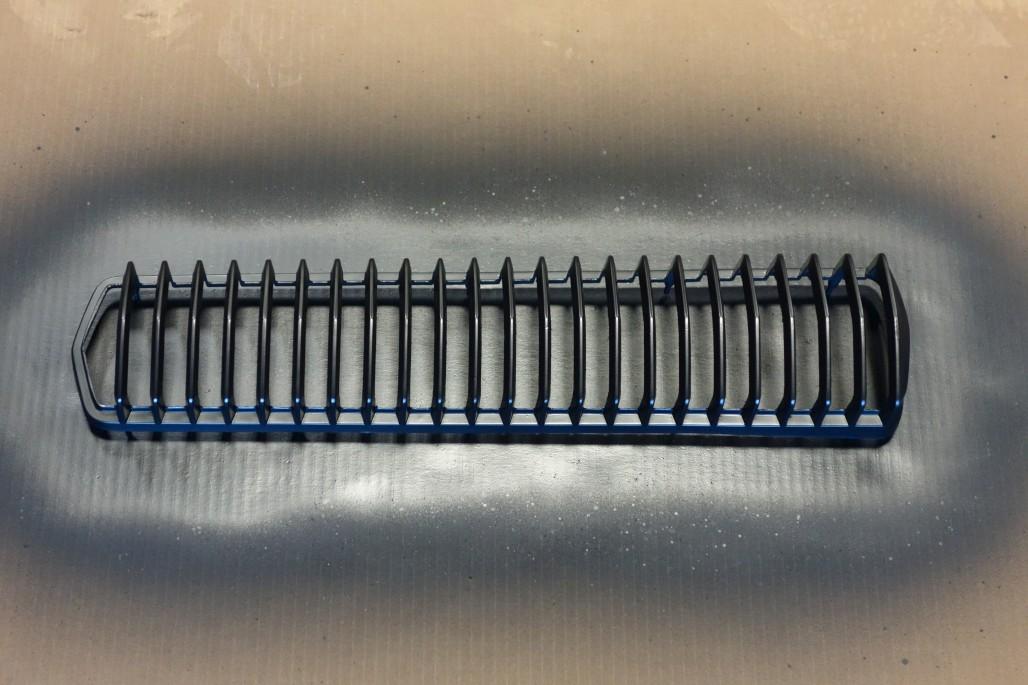
Once I got the bezels as clean as possible, I painted over them with no masking, again with SEM Trim Black.
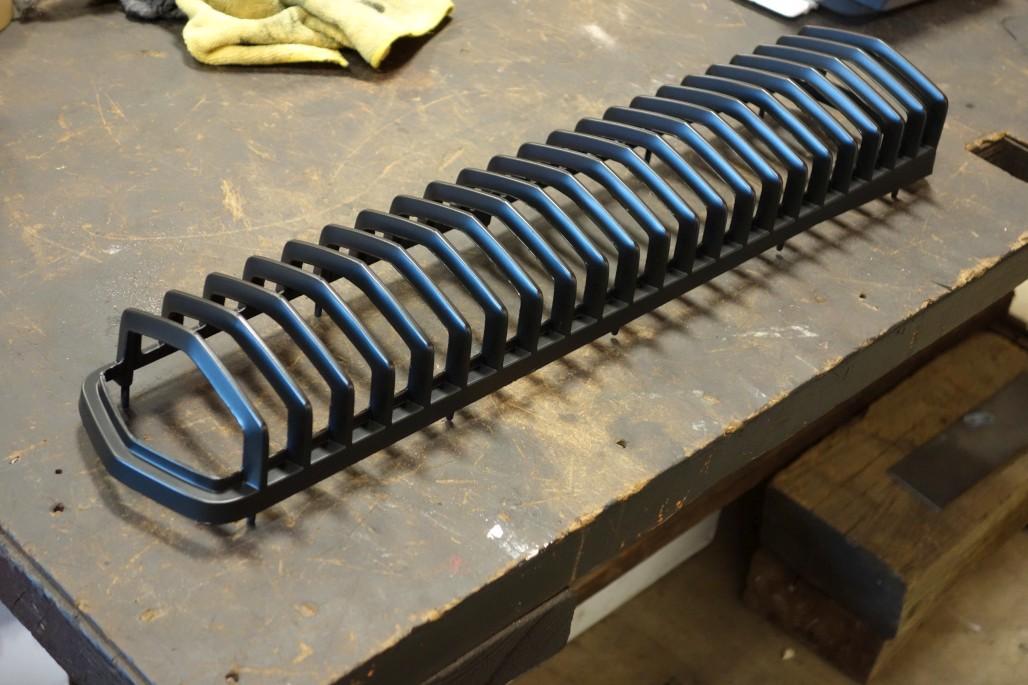
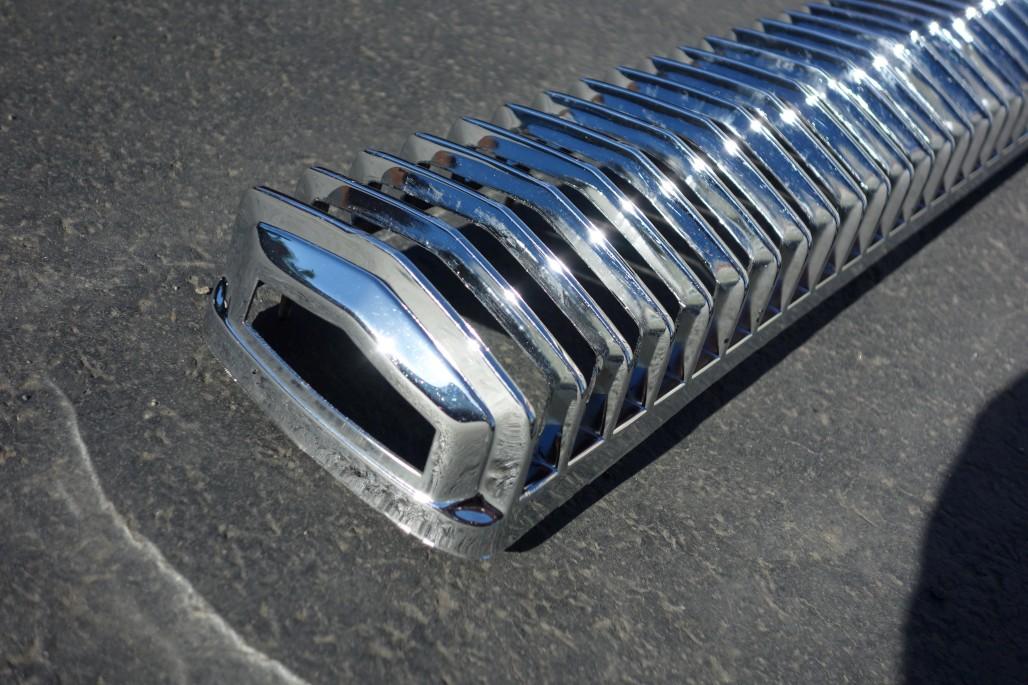
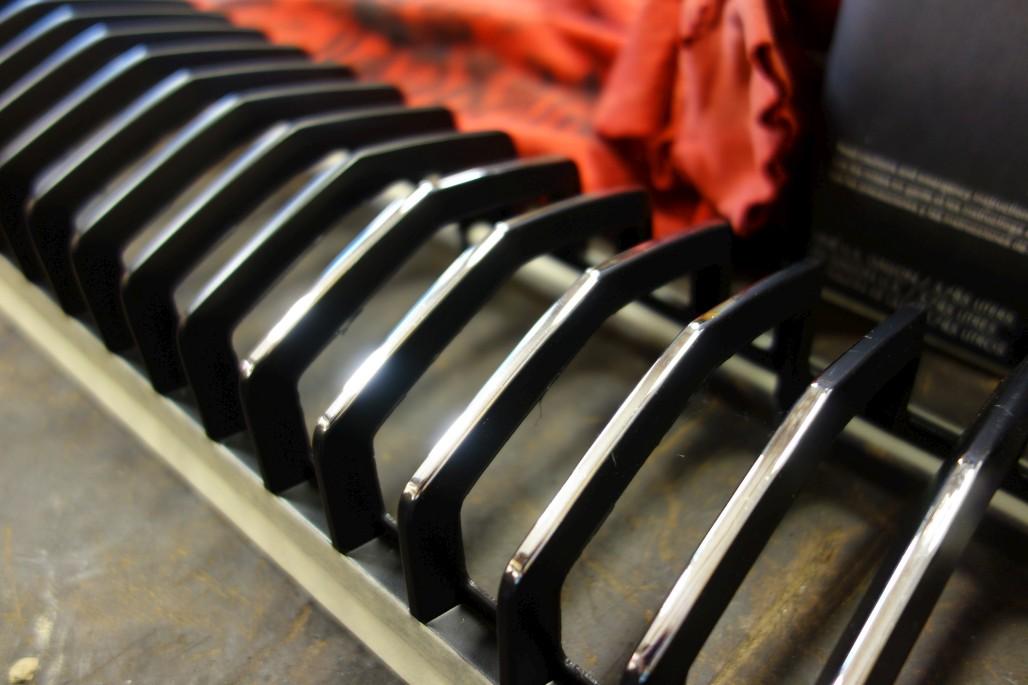
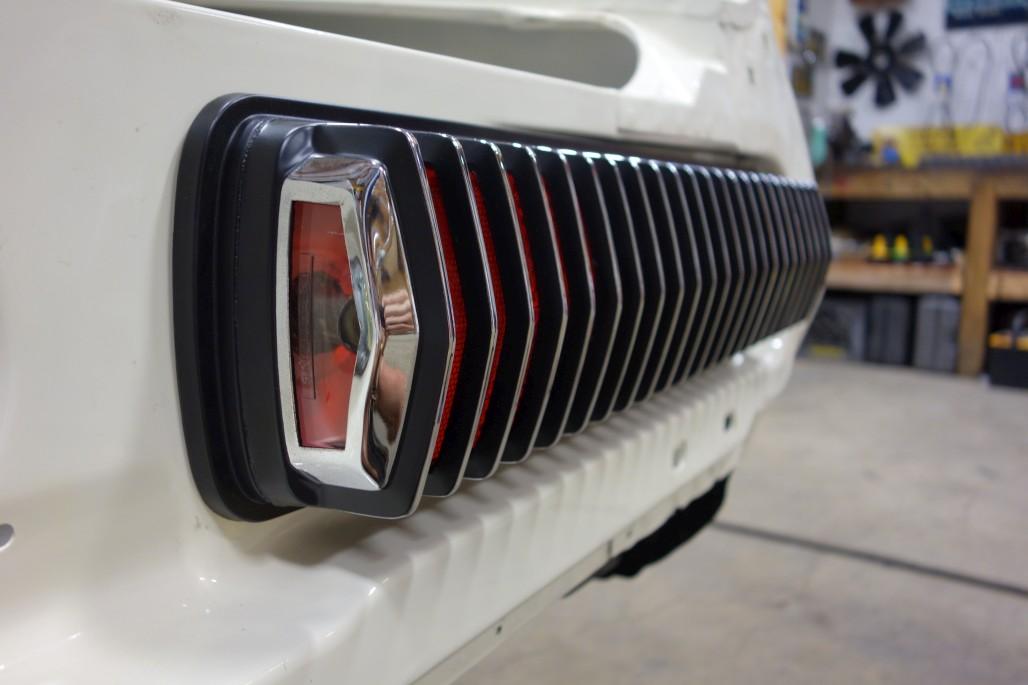
Now it's time for the tedious part... I used an old t-shirt and a can of reducer, applying a little reducer to the rag and then rubbing the paint off each bar with my fingertip. This is the way to get clean results and nice smooth edges. I experimented with 1/8" masking tape on my old bezels before doing these and didn't like the harsh edges I got with that method. Anyway, here's a midway progress shot.
Here you can kind of see that I did the outward-facing sections first. I went back after this to do the top and bottom edges.
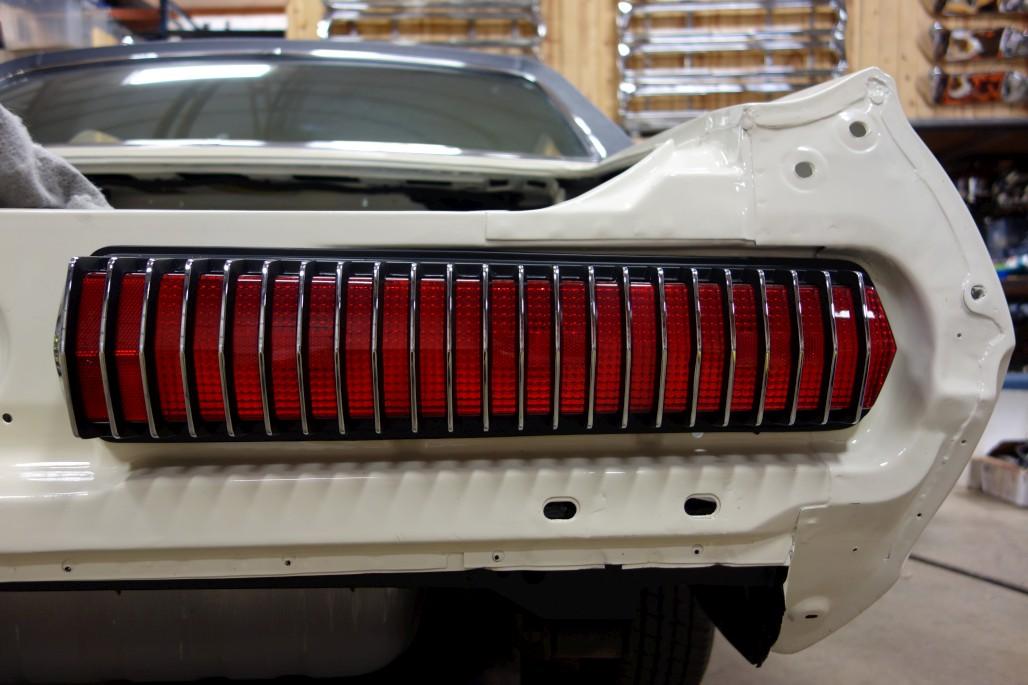
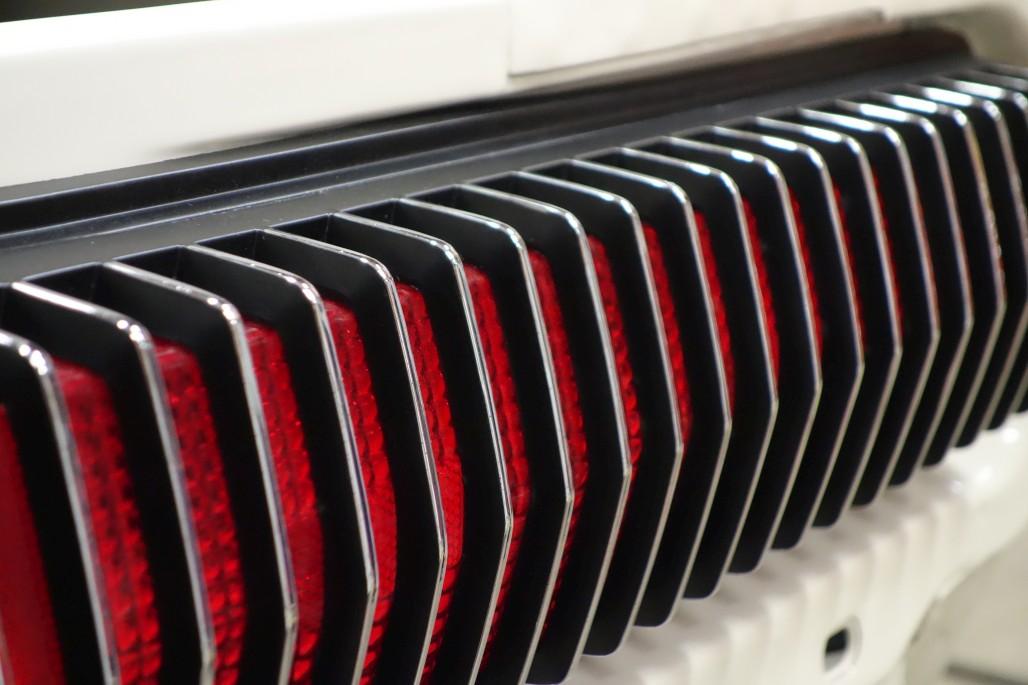
Fast forward many hours later, add some brand new taillight lenses (which are fantastic) and gaskets, put it all together, and the results are stunning.
I did end up using some masking tape on these license plate end sections, just to make sure I didn't wipe outside the lines.
It looks like I don't have a picture of the whole rear of the car with both lights installed, but use your imagination. They both look that good.
What I do have, however, is this random video I did to compare normal incandescent 1157 bulbs with the plug-and-play LED bulbs we currently carry. I decided to stay with the regular bulbs, given the overall "original" theme of the car, and of course because I'm a cheapskate.
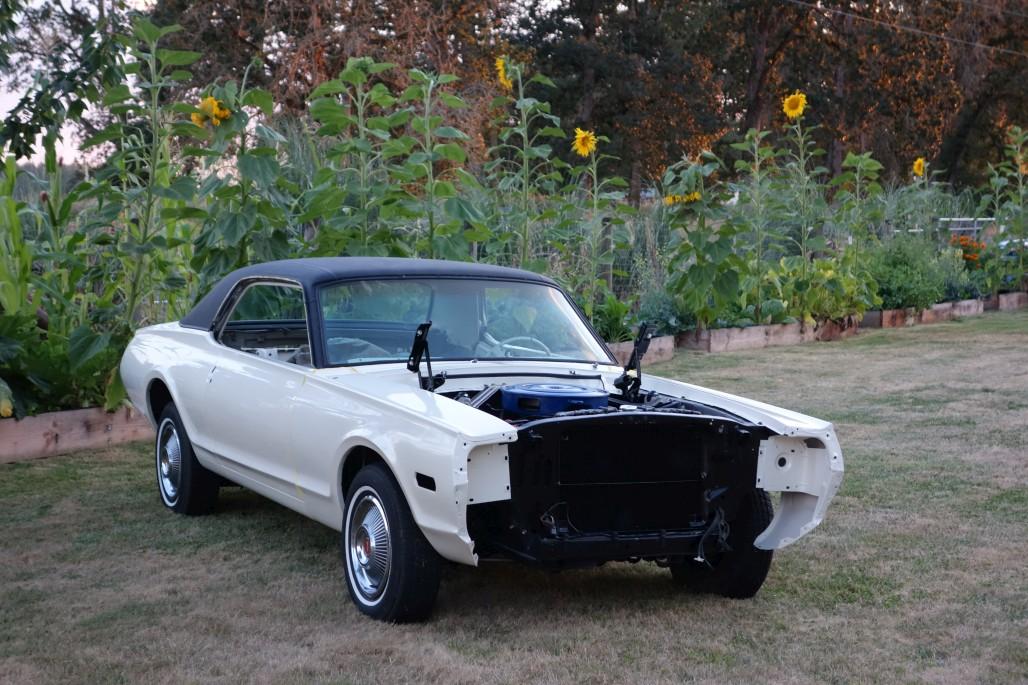
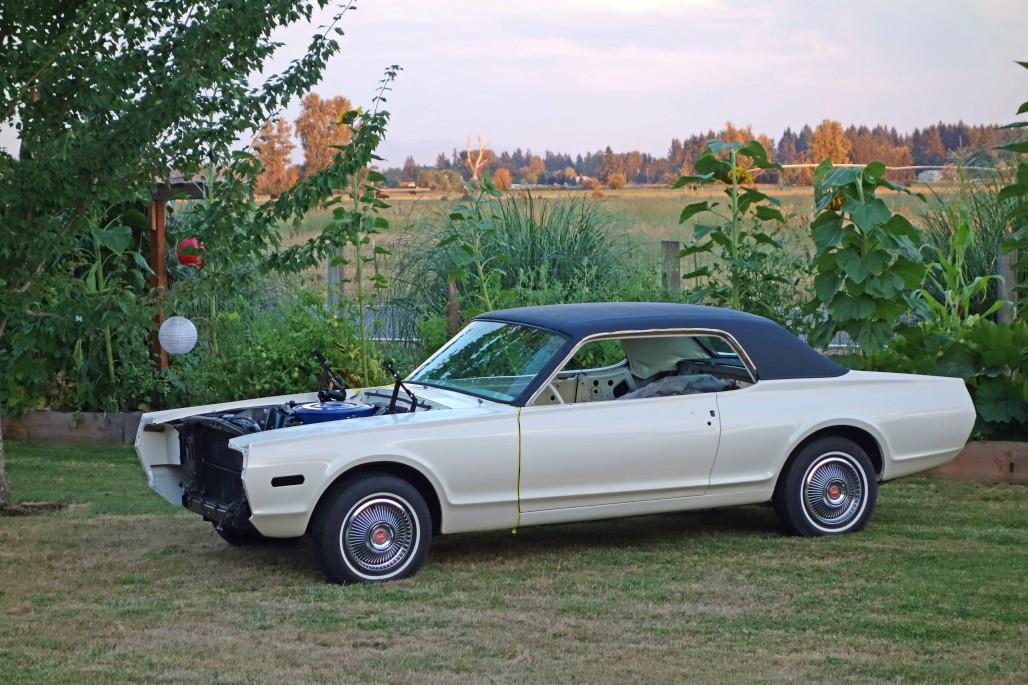
Finally, I'll close with some shots of the car as it sat during our Open House this August. I spruced her up as best I could and just kinda loosely put the fenders on to make it look more car-like.
And that about does it. It's been in hibernation for some time, and I really need to get back to work on it. But now it's cold and dark. So who knows how much progress I'm going to make over the winter. But anyway... stay tuned!

So nice in honor of your grandparents.
Posted by Diggymart on 1/3/20 @ 8:04:16 PM