You must be logged in to rate content!
9 minute(s) of a 767 minute read
1-29-2014
Cheers! I should also mention this about the nut that secures the chrome shift lever to the smaller arm - you have to get the tension just right, so that it's firm and doesn't wobble, but not so tight that you can't move the shifter easily. I found that I could make final adjustments in the car with an open end wrench. For some reason it's not a jam nut on mine, but I think some of them were, which would make more sense.
So Steven, you could always try to tighten that nut a little and see if it improves your shifter feel for now, before you take it out and rebuild it. Surprisingly, mine was still nice and tight before I rebuilt it, so I probably didn't even need to replace the bushings, but "while I'm in there..."
1-31-2014
Last night, I reached another very cool milestone: driving the car under its own power. The last time I was able to do this was in late 2011 if I remember right. Having finished hooking up the brakes and bleeding the system, and topping off the transmission fluid, and adjusting the valves again, I fired her up and reversed out of the shop, then drove back and forth in the driveway a couple times. I'm happy to report that the power disc brakes work very well! Something is dragging though, since the car didn't roll freely in reverse. It does run smoother now after adjusting the valves. The only thing that needs work is the choke, but I need to hook up the heat tube. I have to thank Darrell again for sticking around after work to help me get it going. I could hardly believe it when I was sitting there on the metal floor, driving my car under its own power. So cool!
And luckily, Darrell grabbed a camera and filmed some clips for posterity. The thing you hear dragging under the car is the handbrake cable, which I haven't fully hooked up yet.
I'm very stoked about that.
But now I need to go harass the painter guy. The following parts have still not been painted:
-Hood
-Fenders
-Trunk lid
-Both valances
-Stone deflector
-All 4 fender & quarter extensions
-Glove box door & ash tray door
-Trunk hinges & rods
And here you thought I got the car painted quickly without hassle. Not all of it.... the saga continues!
4-21-2014
Time for an update! Nothing monumental, but a few interesting things to report on.
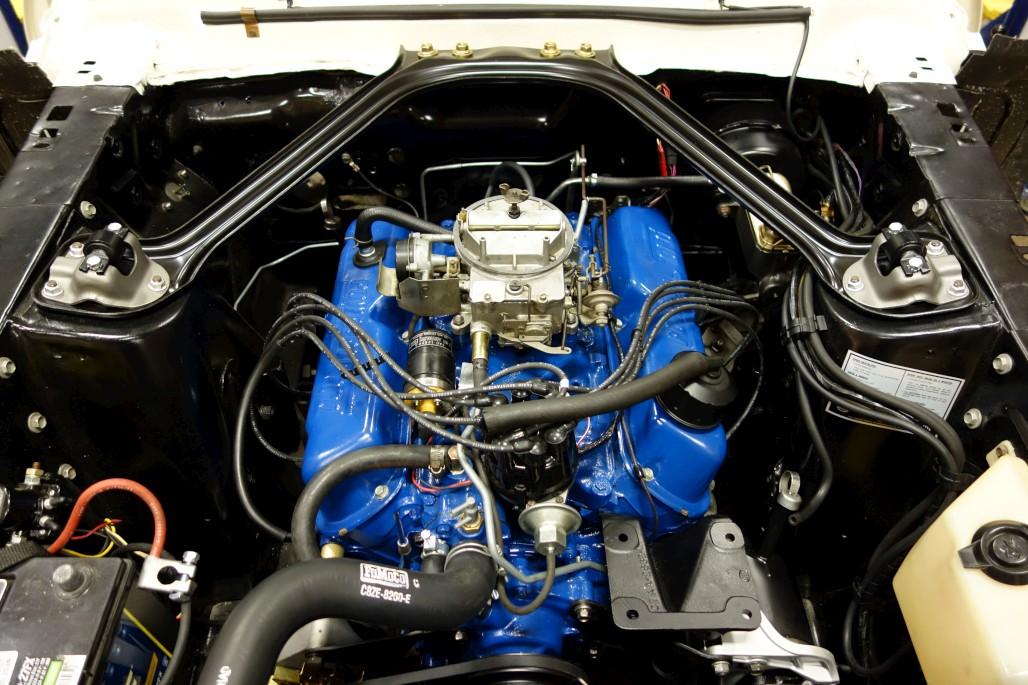
First of all, I finally installed the export brace. Luckily I didn't have to struggle too much to line it up. I first installed both ends through the carriage bolts on the shock towers, which went fairly smoothly since the bolts can slide around a little, then I had to use a round pry bar through the holes at the cowl side to scootch the whole thing over a bit (maybe 1/4") and start the new bolts & nuts there. Then I installed my shock tower caps, which are the original ones, repainted, with new nuts and bolts for the shocks. Some pics:

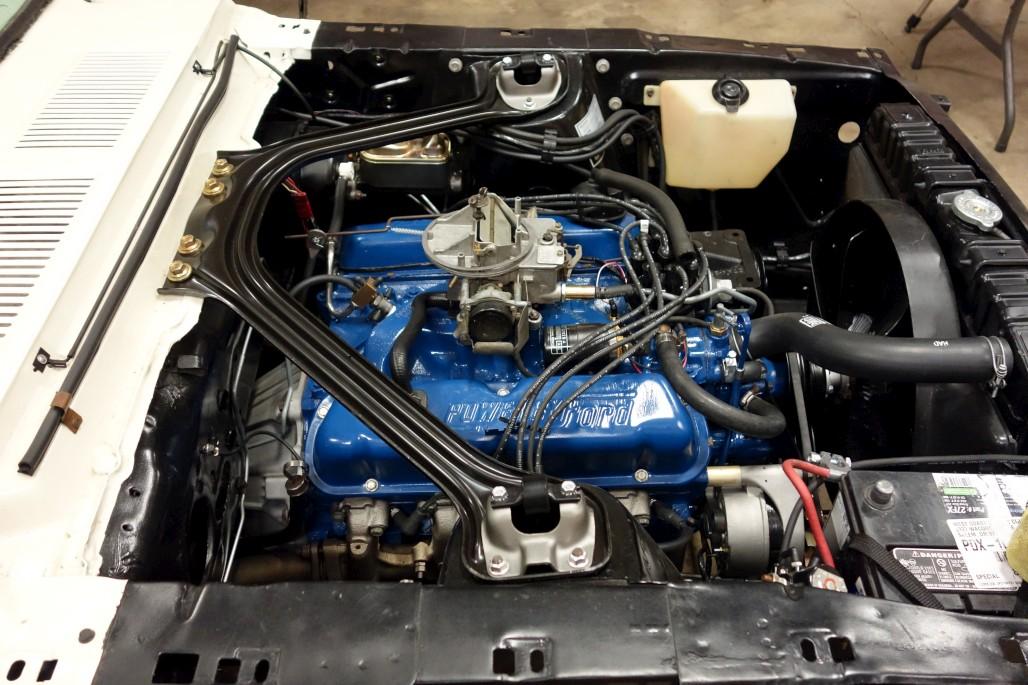
Hmm now does something else look different on top of the engine? Yep, I changed the carburetor. What I had before was a generic remanufactured 2100 (later Motorcraft style) with 1.08 venturis. It had a leak from the accelerator pump due to a stripped bolt hole, and it always had hesitation problems. Anyway, some of you saw the other thread I started asking about my options. I ended up refurbishing an original 1968 Autolite 2100 C8OF-K carb, which has 1.23 venturis and is designed for a 390-2V. The difference in rated CFM is 356 vs. 287. I hadn't ever rebuilt a carb before this point, so I did some research and learned a lot in the process. Carbs are finicky creatures with lots of variables. Luckily these 2 barrels are pretty simple, but it still took me a few hours to clean it all up, use new parts from the rebuild kit, and exchange a couple parts from my other carb and get it all dialed in. Some trial and error to get everything right with the linkages and choke and stuff. I still need to do some final adjusting but I'm happy to report that it's on the car, and it seems to run better than it did before. Seems like an improvement for sure.
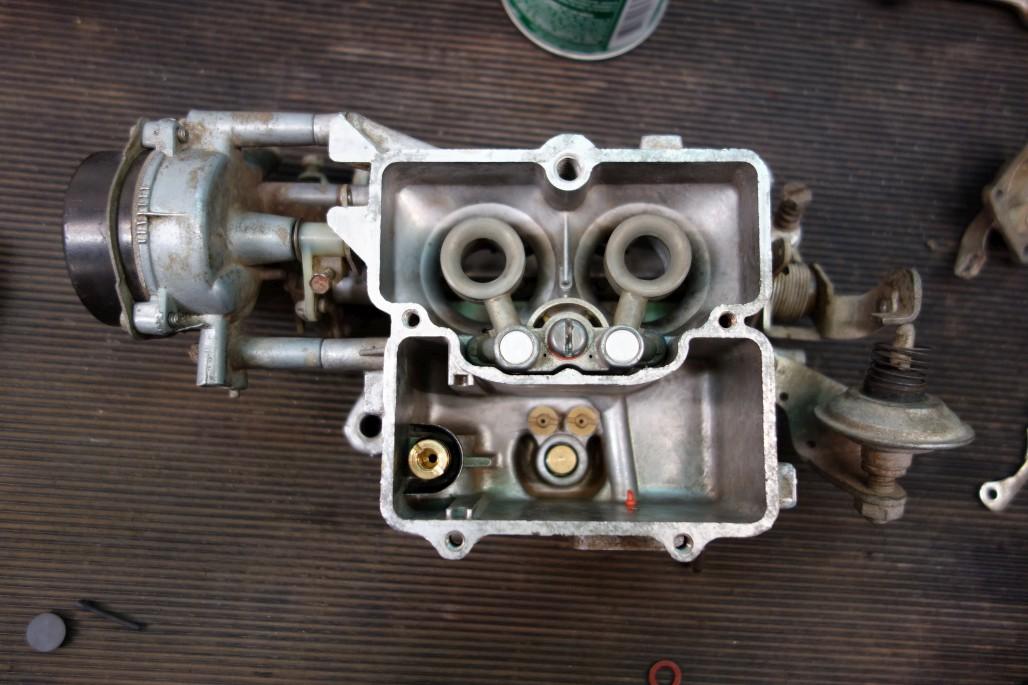
Mid - rebuild... wish I would have taken a few more with everything apart, but I tend to not stop to take pics when I'm in the thick of it.
I think I may need to replace the dashpot, it seems a little sticky. Might just need adjusting. Anyway, some more pics on the car.
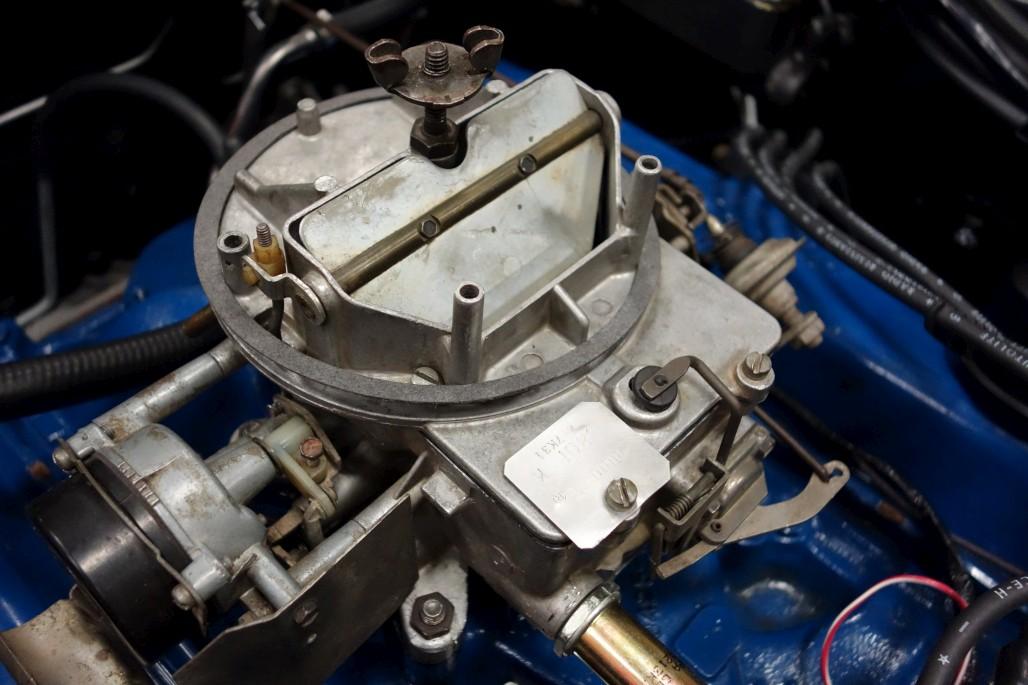
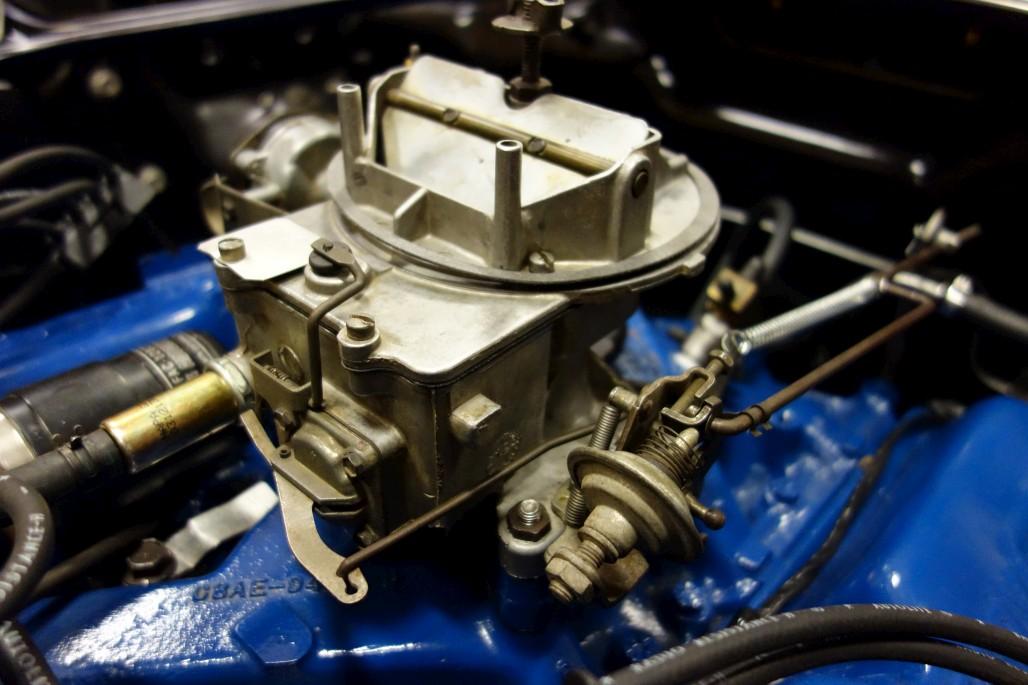
I do need to replace the little rubber cap for the fuel bowl vent. The "HYGRADE" rebuild kit did come with one, but it broke when I tried to pull it through the hole on the metal arm. Luckily I found a source for a replacement here. Also ordered a brass float while I was at it.
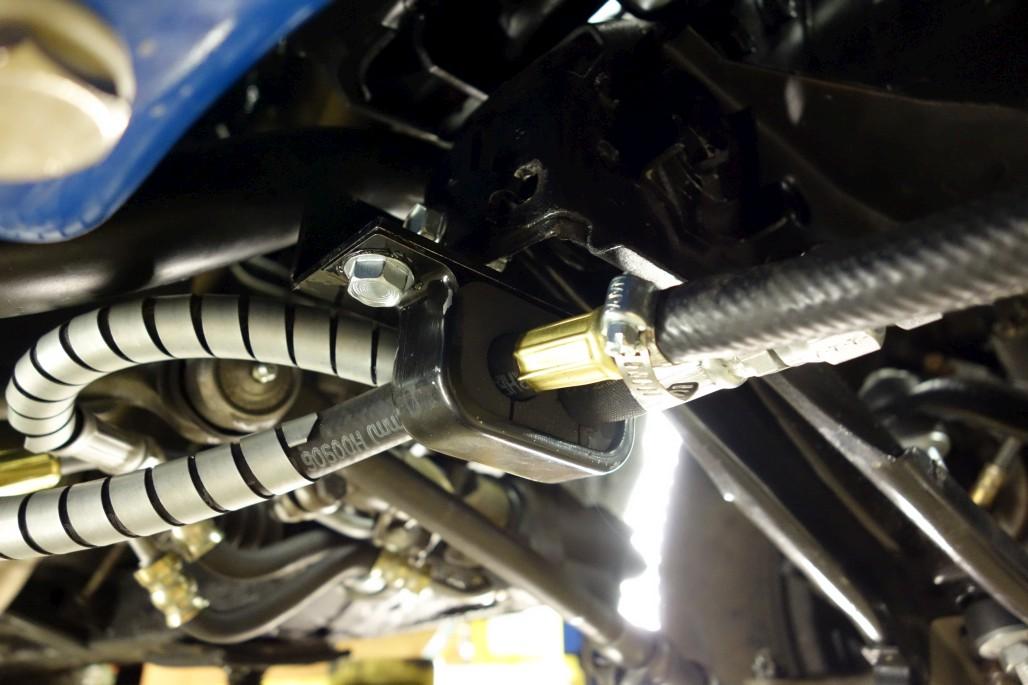
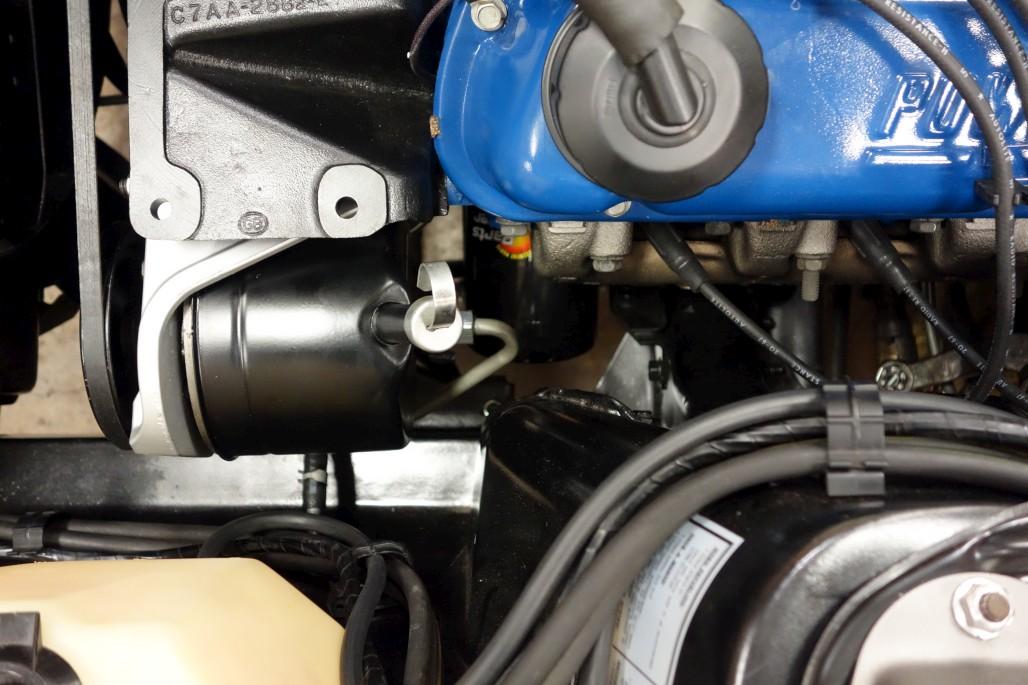
Next order of business, I now have functional power steering! It feels nice, I gotta say, after muscling the car around all this time. However, nothing goes simply, and I had to take the pump out ~ 3 times before I got it right. But here's the breakdown.
I decided to use the big block hose routing, to avoid the stupid-looking loop by the shock tower, as seen here:

So, I got the appropriate bracket and mounted it to the car. The holes needed to be drilled, which was tricky with the oil pan and everything in the way, but I figured out a way. Also got this hose kit. Check it out. (Note: the 2 short lines are old-stock Canadian made Omega brand hoses that I found.)
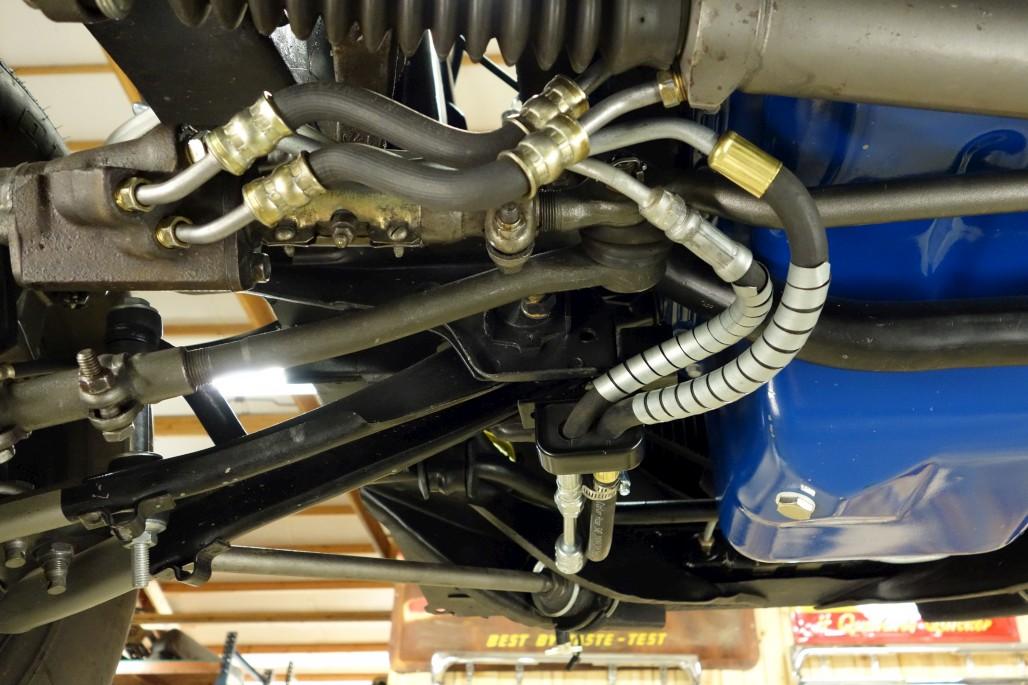
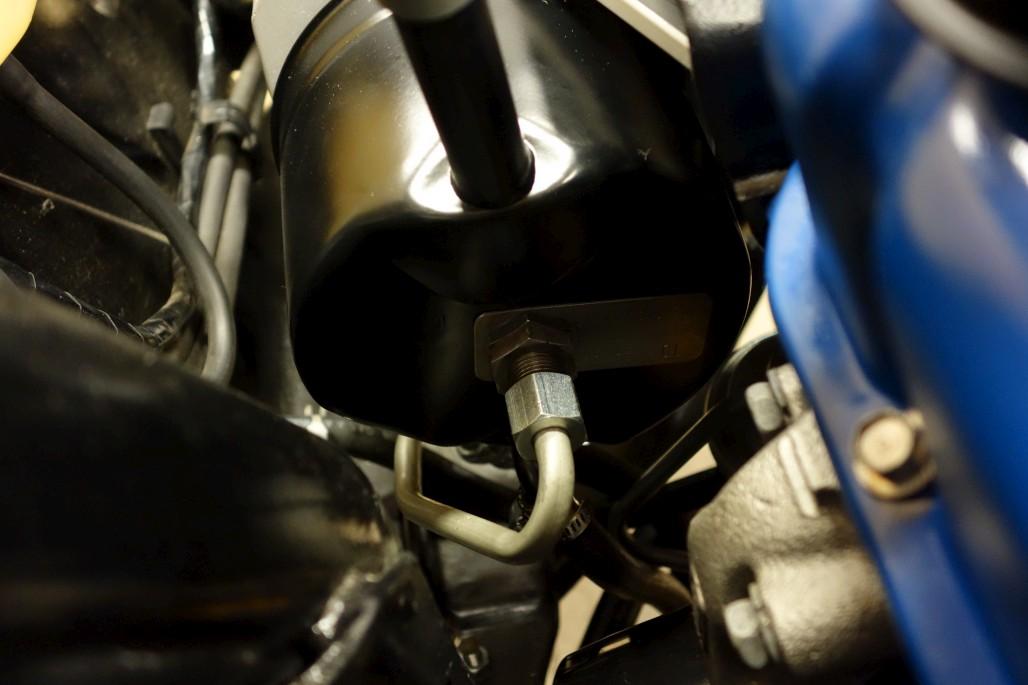
However, once I went to hook up the return line to the PS pump, I realized I had overlooked one important detail. The "neck" that comes out of the PS reservoir comes out straight on a 67-68 small bock. That meant that with my modified routing, the return hose would have to connect like this:
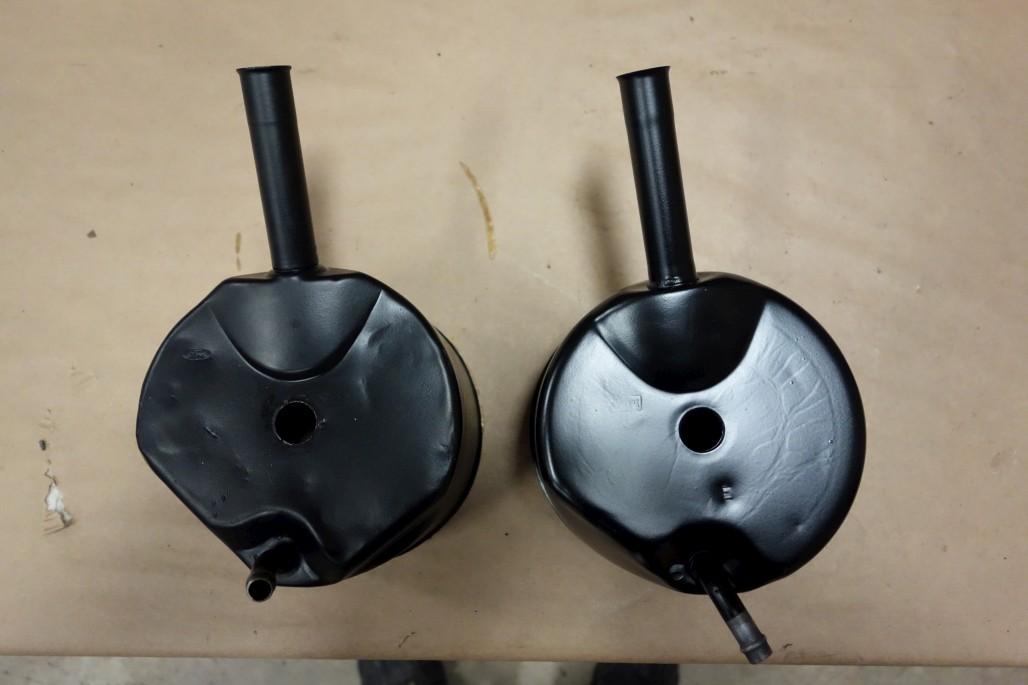
I didn't like that very much. So, I had to remove the pump from the car, take off the reservoir can, and replace it with one of these (69 small block) which has the 90-degree downward elbow I needed. Here's a comparison after I cleaned up & painted the replacement reservoir.
That did the trick. One other thing I'd like to suggest is to get this seal kit if you're going to mess with your pump / reservoir. After reinstalling it the first time and adding fluid, it leaked quite badly from around the reservoir. I had to drain and remove the whole thing again just to replace the large o-ring and other seals I could access easily (there are several that I didn't replace just because I didn't want to delve too deeply into the inner workings of the pump. It's a remanufactured unit, though I'm not sure how old it is). That solved the leak. But it was a little frustrating to have to to remove / dismantle / reinstall / multiple times.
Anyway, once everything was back in the car, all I had to do was shorten the return hose a tad, and then everything fit nicely.

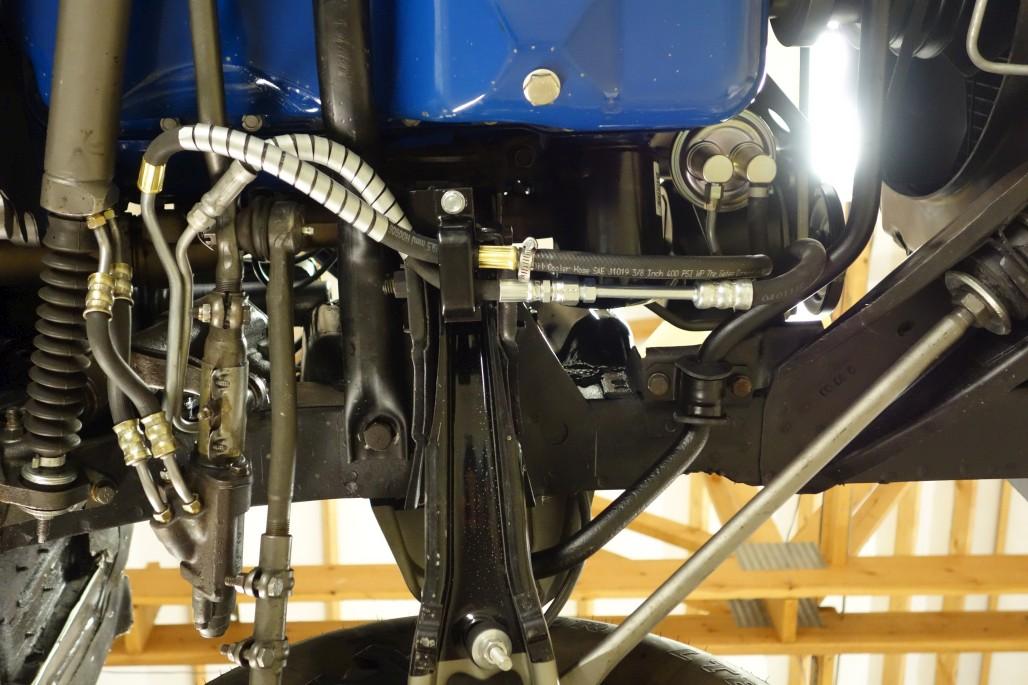
Overall I'm happy with this routing. It's straightforward and less cluttered / awkward than the original way. The only thing that seems weird is how the hoses all have tight bends near the metal fittings. Seems like they should have been designed to arc more smoothly.
Anyway, that's all for now!


So nice in honor of your grandparents.
Posted by Diggymart on 1/3/20 @ 8:04:16 PM