You must be logged in to rate content!
6 minute(s) of a 767 minute read
10-23-2012
Big news of the day... new vinyl top is on!
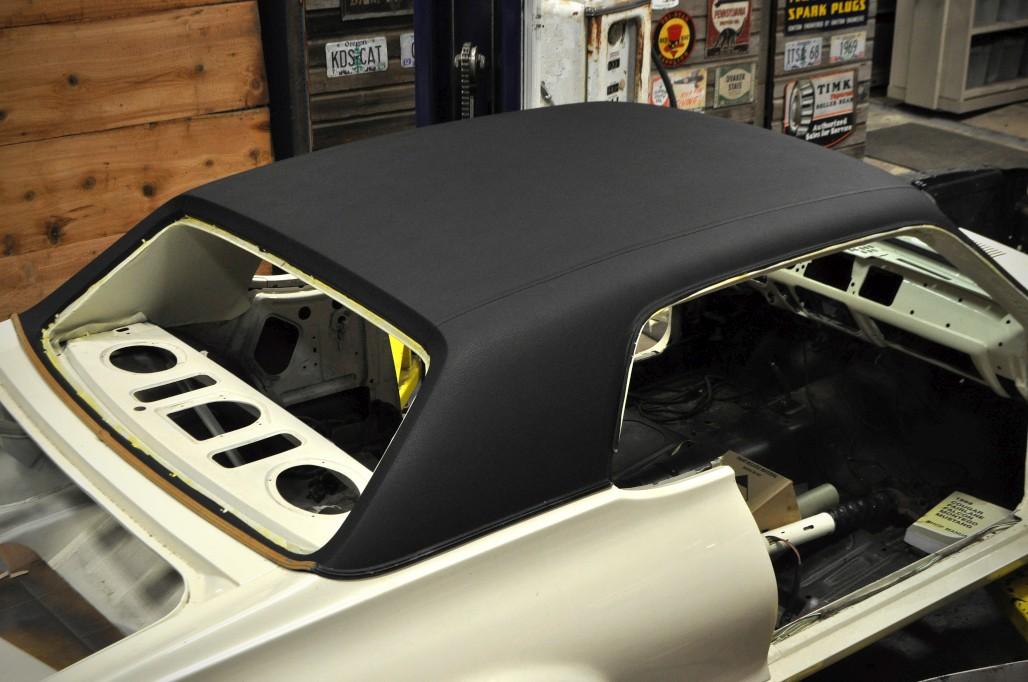
Very happy with how this came out. The only little thing that isn't perfect is the RH stitch line, which is a teeny bit crooked. But otherwise it looks awesome. Good tight fit and everything. Oh, and ignore the saddle-colored trim pieces. I grabbed those from the shelf because I couldn't find my original ones. ![]() Needed to paint mine anyway, so if they don't turn up I'll just blast & paint these ones.
Needed to paint mine anyway, so if they don't turn up I'll just blast & paint these ones.
Installed by the same guy who did my headliner, and the convertible top in our most recent video.
This is the top of the line, OEM material from SMS Auto Fabrics (link). As of right now, WCCC doesn't even offer this particular top, for a couple of reasons. First and foremost, it takes a long time to get these from SMS. Mine literally took about 3 months to receive from the time it was ordered. The other reason is that it's expensive. The retail price would be somewhere around $400 or more. But in my opinion, if you intend on keeping your car for a long time and you care what it looks like, or if you're doing a concours resto, it's definitely worth it. The quality of this material is just so much better than the typical one we sell, not to mention it's exactly the same as the originals. I'll talk a little more about the differences down below.
Finally, Don and I installed the front windshield using the rope technique. This pic is from before we started putting goop in between the rubber & glass, which was kinda tricky. I haven't even started on the inside yet because I'm a little bit scared of messing up the white headliner. Anyone have tips for doing this with the glass in place?
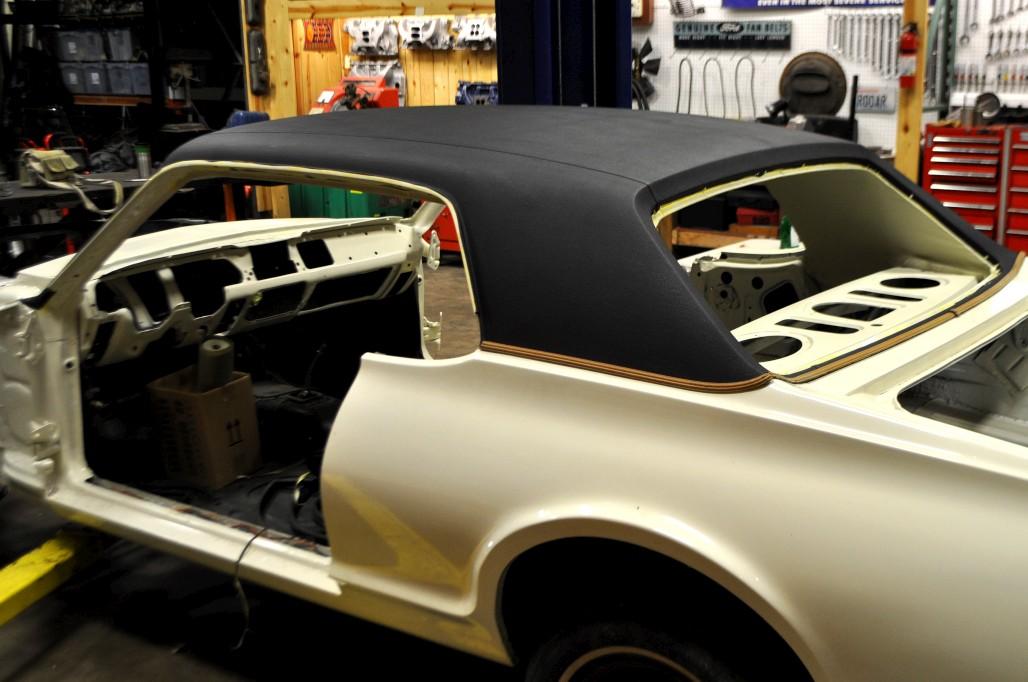
Anyway, a little more about the vinyl top. I took a couple of comparison shots with the "average" reproduction that we sell (top in pics) and the "concours" version (bottom in pics) that I put on my car.
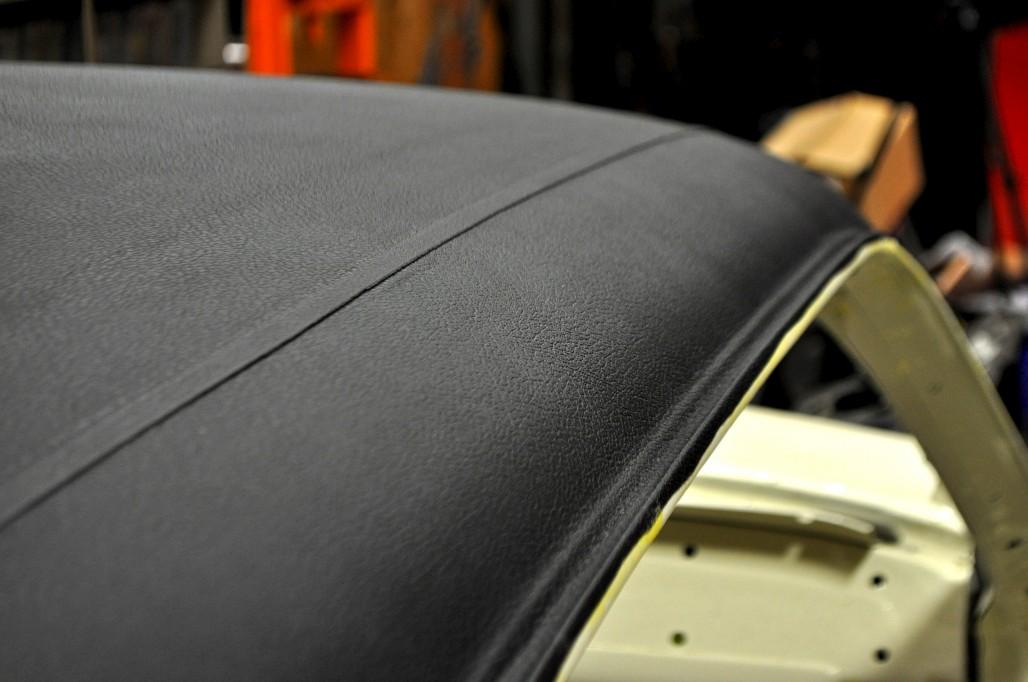
A couple different views of the texture:
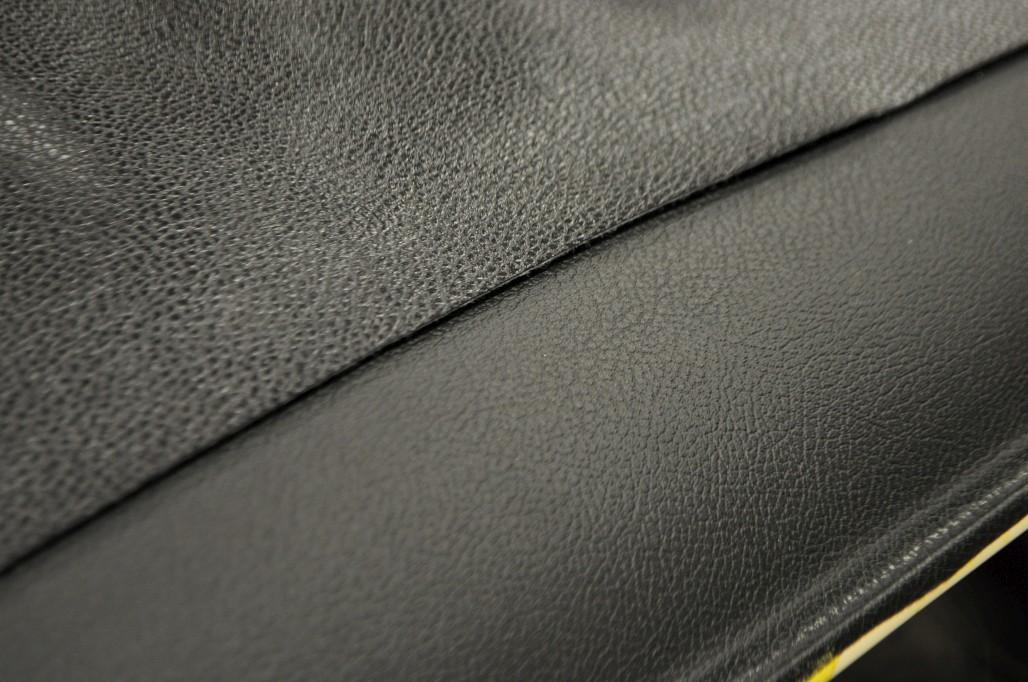
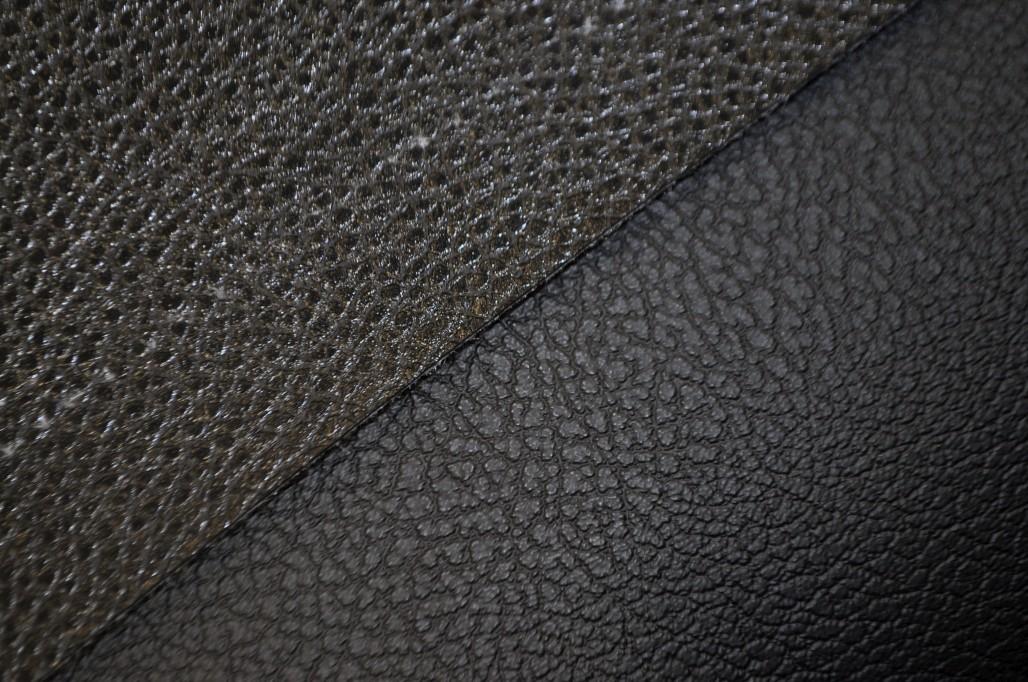
A couple things I noticed about the "average" one - the texture is a little bit rougher, and it has a shiny finish, which I don't really like. Also, when you pull on it, you can actually stretch it a little, whereas the "concours" one is very taut and won't stretch with your bare hands. The texture on mine looks more natural and precise and it has a more matte finish, which looks better IMO. Another thing about the "average" one that you can't see here is that there is a fairly noticeable repeating pattern that you can see when it's installed on the car. The "concours" one probably repeats the pattern too, but if so I haven't been able to tell. Here's the back:
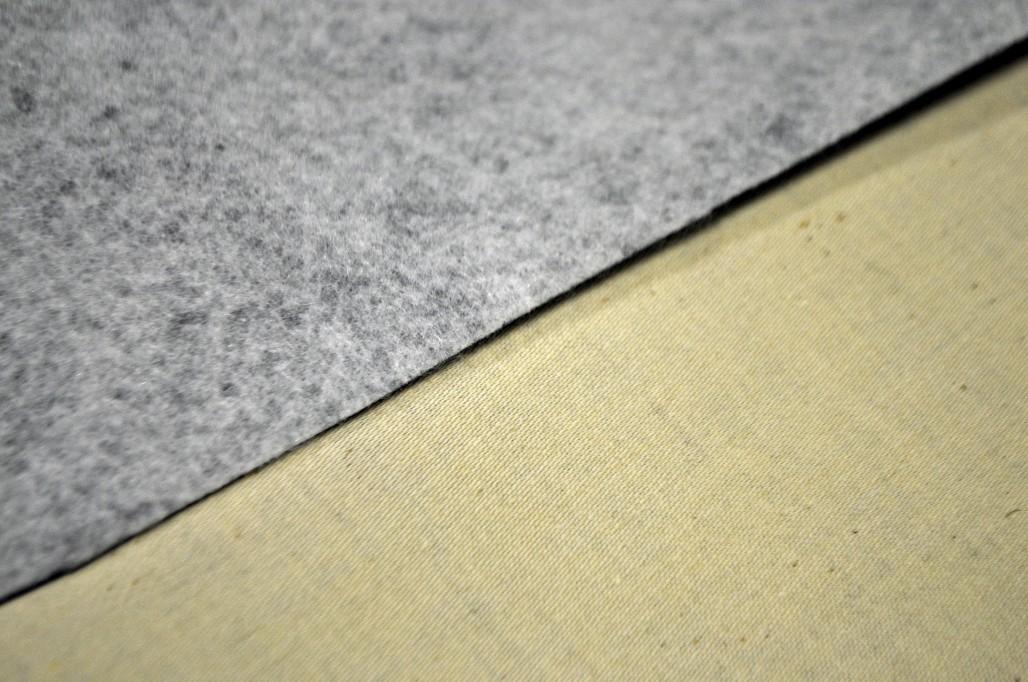
If you've ever pulled an original vinyl top off a Cougar, then you will have seen a canvas-like backing material that looks like the bottom one in this pic (concours one of course). The "average" one has soft white fluffy stuff on the back that doesn't seem like it would do much to stop moisture. I guess the good thing about it is that it would provide a little more padding to hide imperfections on your roof's sheet metal. But the overall feel is just cheaper.
So, just to be clear, I'm not trying to put down anyone who has put the average top on their car. In fact, it's been the only new vinyl top option that most people knew about for a long time (my car had that kind of top on it before). It does the job and looks good (see pics on the listing on our site of the Tiffany Blue '68). However, seeing it next to the OEM material, and seeing the proper one installed on my car... it makes a huge difference in the quality of the car's appearance, in my book. I'm hoping that we at WCCC can at least try to stock one or two of these premium tops and get them on the website, even though they are hard to get a hold of / replenish.
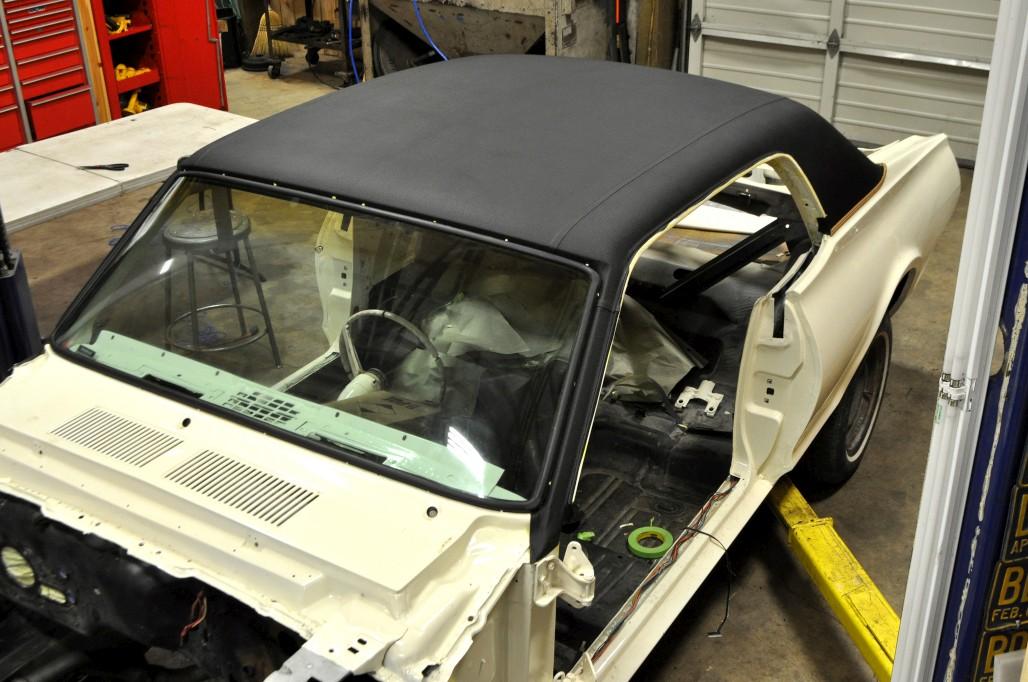
When the installation was all finished, I had to step back and absorb it for a while. It really looks great in person. That, and it's starting to become recognizable as the car I want it to be.
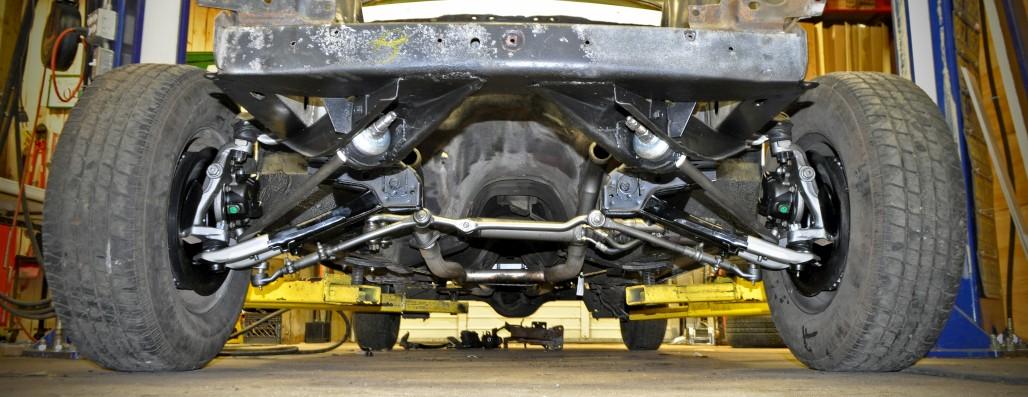
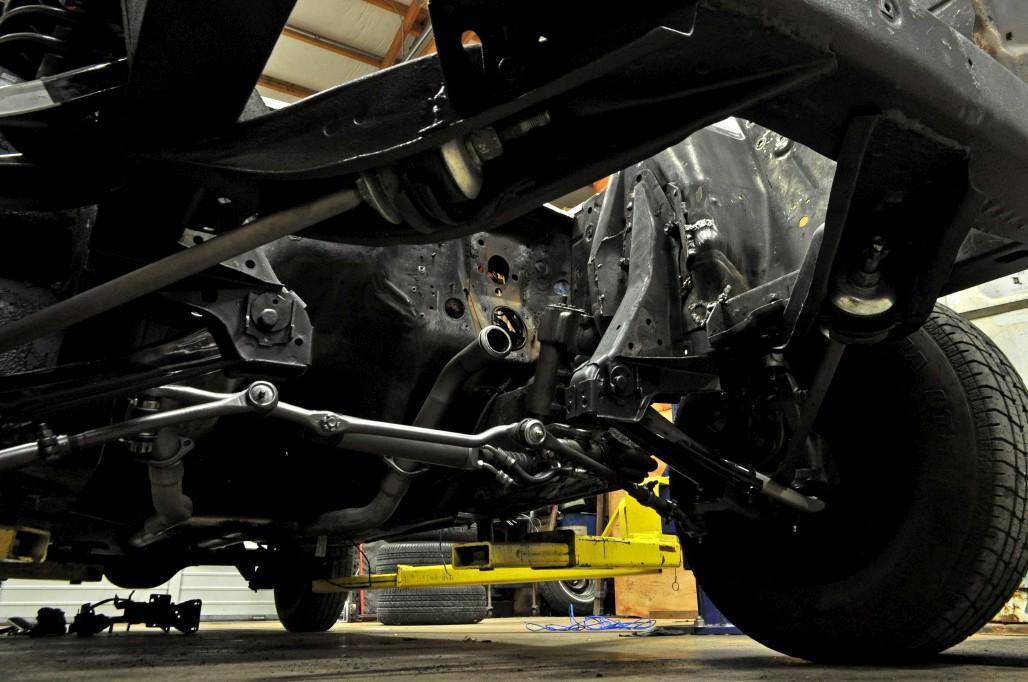
Also, while I'm here, the front end progress is very good - I cleaned up and painted the drag link and tie rods (had to replace one of the inner tie rods) and put them in the car, with a new idler arm, rebuilt power steering ram cylinder (mine had a bent shaft and a dented cylinder), and hooked it up to a rebuilt steering box (mine was shot). Strut rods also cleaned up / painted and installed with new bushings. Brakes are essentially done on both sides except for the lines. A few things still need buttoning up / torquing / cotter pins / etc. Here's a couple quick pics, sorry they are on the ground and you can't really see a whole lot.
The Snowball rolls on!


So nice in honor of your grandparents.
Posted by Diggymart on 1/3/20 @ 8:04:16 PM