You must be logged in to rate content!
11 minute(s) of a 214 minute read
4-22-2013
Dennis, if you only knew how many ill fitting reproduction parts I have just thrown in garbage or had to modify to make them fit you would be totally amazed. The first time I restored a Mustang (a 67 GT fastback) I was new to these care and just could not believe how they managed to sell all the crap i got from National Parts Depot and got away with it. When you get a front fender extension that is 5% too small, windshield moldings that fits so bad that you at first think they must have been put in the wrong package, a trunk lid where I had to redo the corners, a door skin that I just could not believe was made by someone who knew how a 67 Mustang door was supposed to look like, a trunk trim that I still have not figured out what it was meant to fit, a front bumper that was an inch too wide and I can probably go on forever. Some reproduction parts are very good as well, like the tail ight chrome for the 70 Cougar, but it is amazing that the product control is so poor, especially at the big parts suppliers like NDP and Mustangs Unlimited. Last week I got a steering wheel from MU that I guess never will be installed on a car because of the terrible poor quality and that it feels like crap in my hands. I tried to complain, but so far they seems to have forgotten to answer my e-mail. One thing is poor made reproduction parts, another problem I have all the time when I do these cars are sellers shipping wrong parts or parts not as described. But that's another story.
If I should mention one car I have restored where I got absolutely perfect reproduction parts all the way it must be the 1957 Thunderbird i restored from a pile of rust a few years ago. For that car I ordered all my parts from Casco http://www.classictbird.com and they made me very happy and the restoration easy. They do an incredible job making many of these parts at their own shop in Ohio. 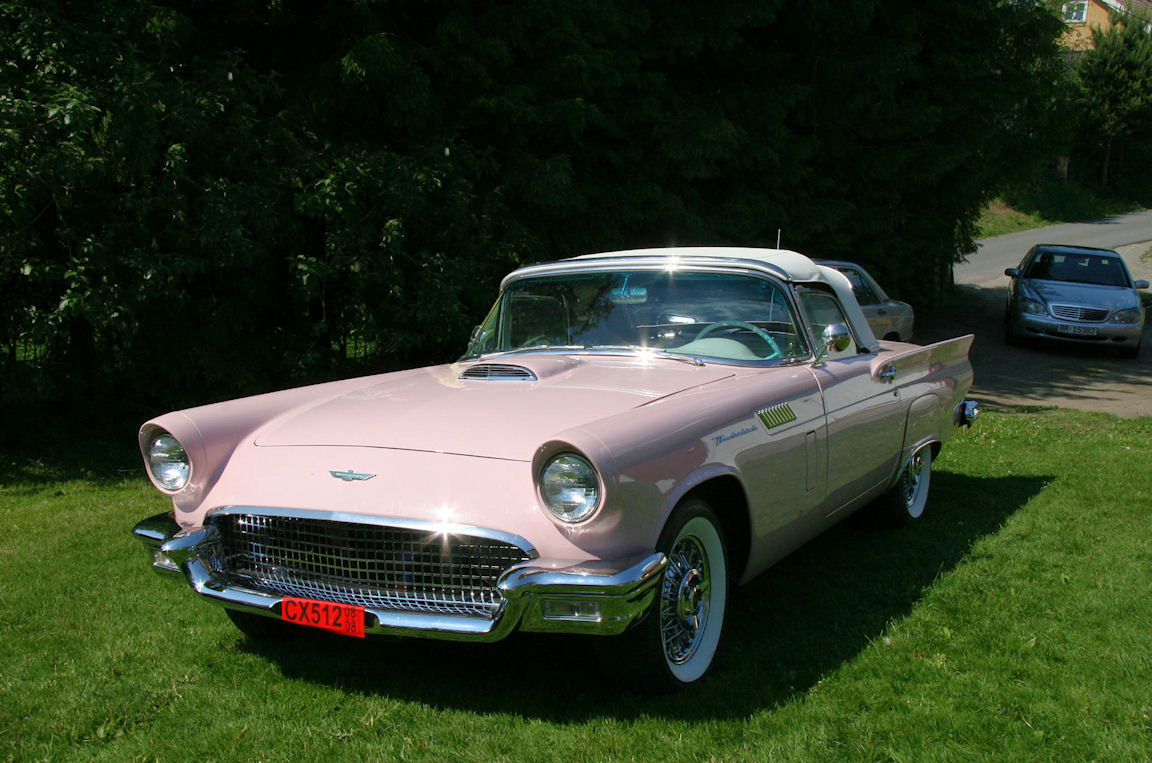
6-30-2013
Restoring cars is not easy. Sometimes you have to do things over again to be satisfied with the result. As I mentioned in my earlier post I was not happy with the headliner and after looking at it for a month and getting more and more irritated by how it turned out I decided to pull the glass and roof trim and redo it. What I did not tell in my previous post is that I had already installed the headliner twice. The first time came out totally miserable and then the second time when I relocated the bows it came out better but far from perfect. At the Mercury Club of Norway sumer meet there was another sun roof cougar and the the headliner in that car was perfect, and it turned out he had used a regular headliner from a non sun roof car. That made me wonder maybe I should order a std headliner for my car instead of the sun rood headliner ![]() . Maybe there is something about these reproduction sun roof headliners that just is not right for my car? So I ordered a regular headliner and when I started to install it I noticed right away that this would work much better. The first thing I had to do was to relocate the bows back to their original position, which is a good sign. From there everything went smooth and easy and the result is so much better
. Maybe there is something about these reproduction sun roof headliners that just is not right for my car? So I ordered a regular headliner and when I started to install it I noticed right away that this would work much better. The first thing I had to do was to relocate the bows back to their original position, which is a good sign. From there everything went smooth and easy and the result is so much better ![]()
But that's not all. When I pulled out the not so successful headliner I noticed that the sun roof motor was hanging in only one of the rubber mounts. Or maybe I should say what used to be rubber mounts. The had now turned into bakelite and when I tried to remove the nut on the remaining mount it also broke off. Not good, but far better to find this out now than later when the new headliner is in. I was unable to find similar rubber mounts so I decided to make a new mount and also to relocate the motor a bit to minimize the bend on the power transfer cable from the motor to the sun roof gear. This is a much better solution and the the motor runs much better after the modification. As you can see I have not used any insulators, so the motor makes a little more noise now. That is not a problem for me at all. 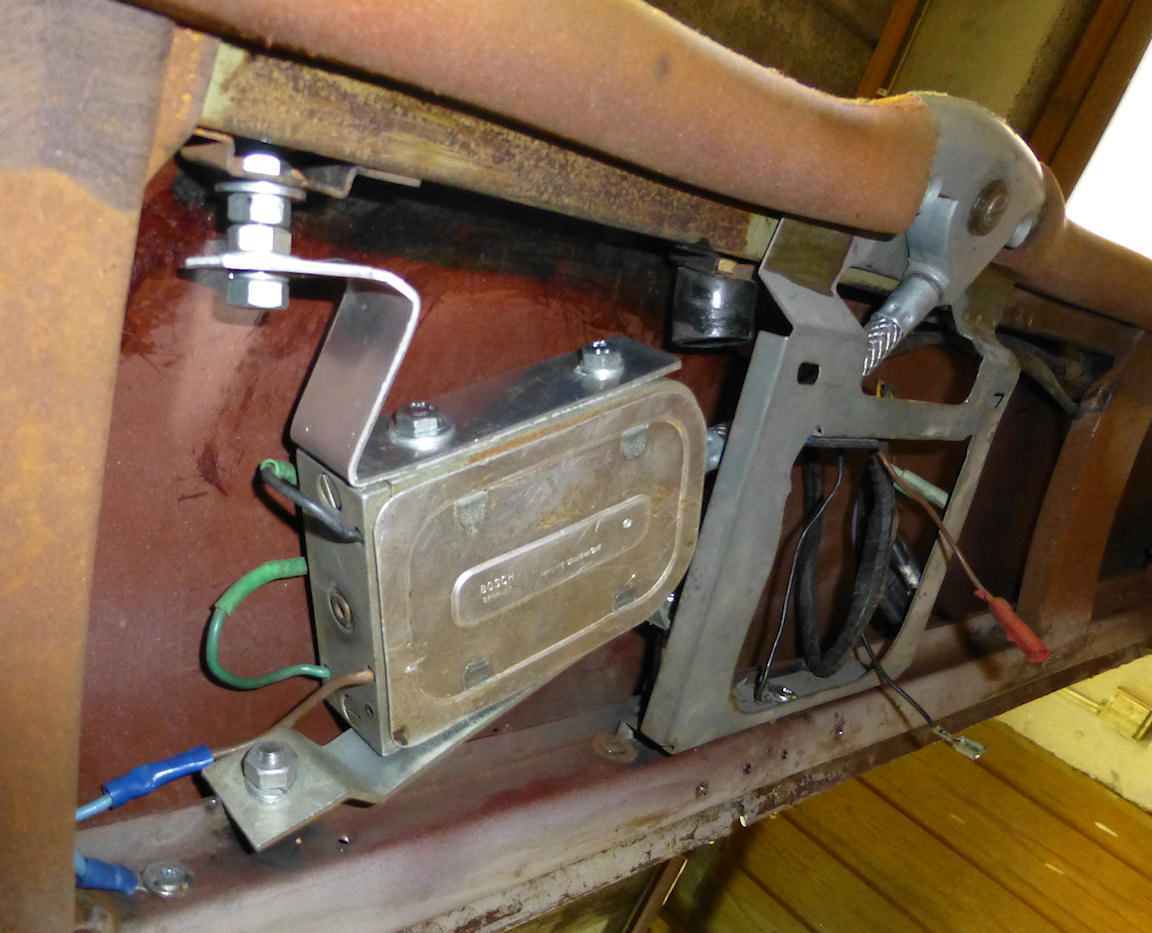
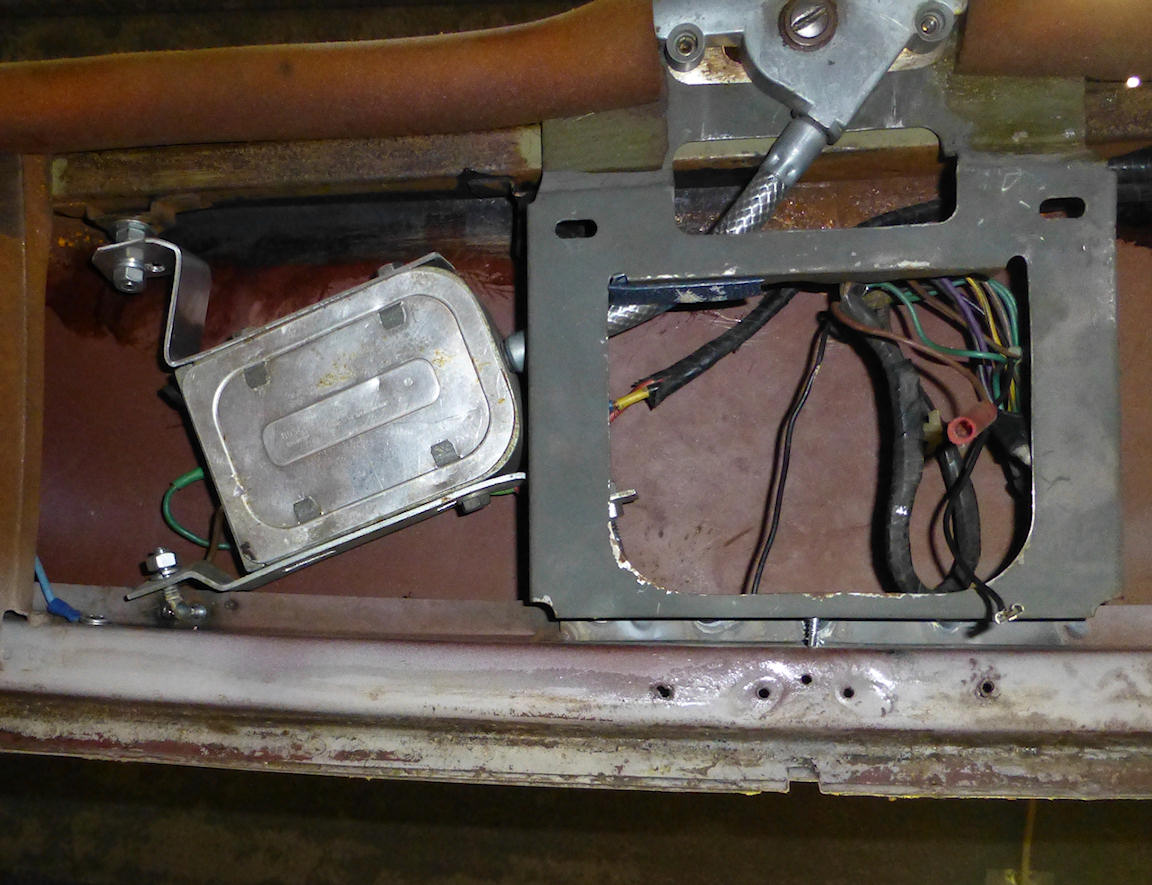
I also want to mention that I decided to put some insulation under the sun roof cassette. In my opinion this serves two purposes as it both insulates from noise and it will also protect the passengers head if they should accidentally knock their head in the roof. This picture was shot before I tried to install the headliners. 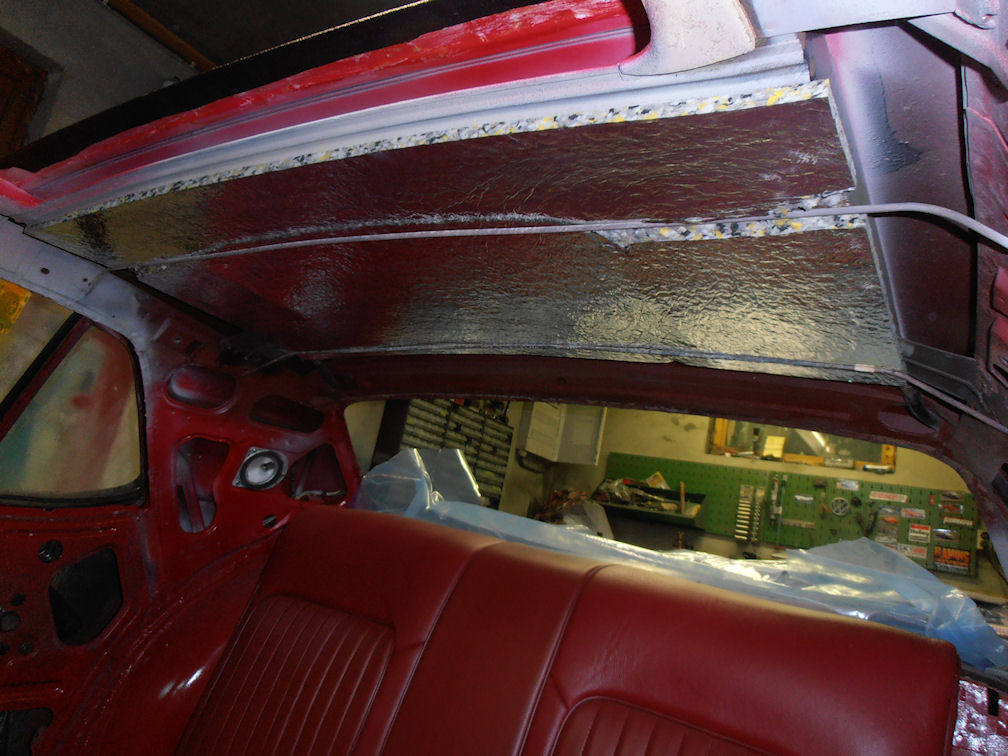
Here is a picture of the holes I had to make to relocate the bows for the sun roof headliner. The number 1 hole is the factory made hole for a non sunroof car, the number 2 is the holes I made to relocate the bow for the reproduction sunroof headliner and as you can see the headliner bow now is located back in the holes made by ASC when they installed the sun roof. 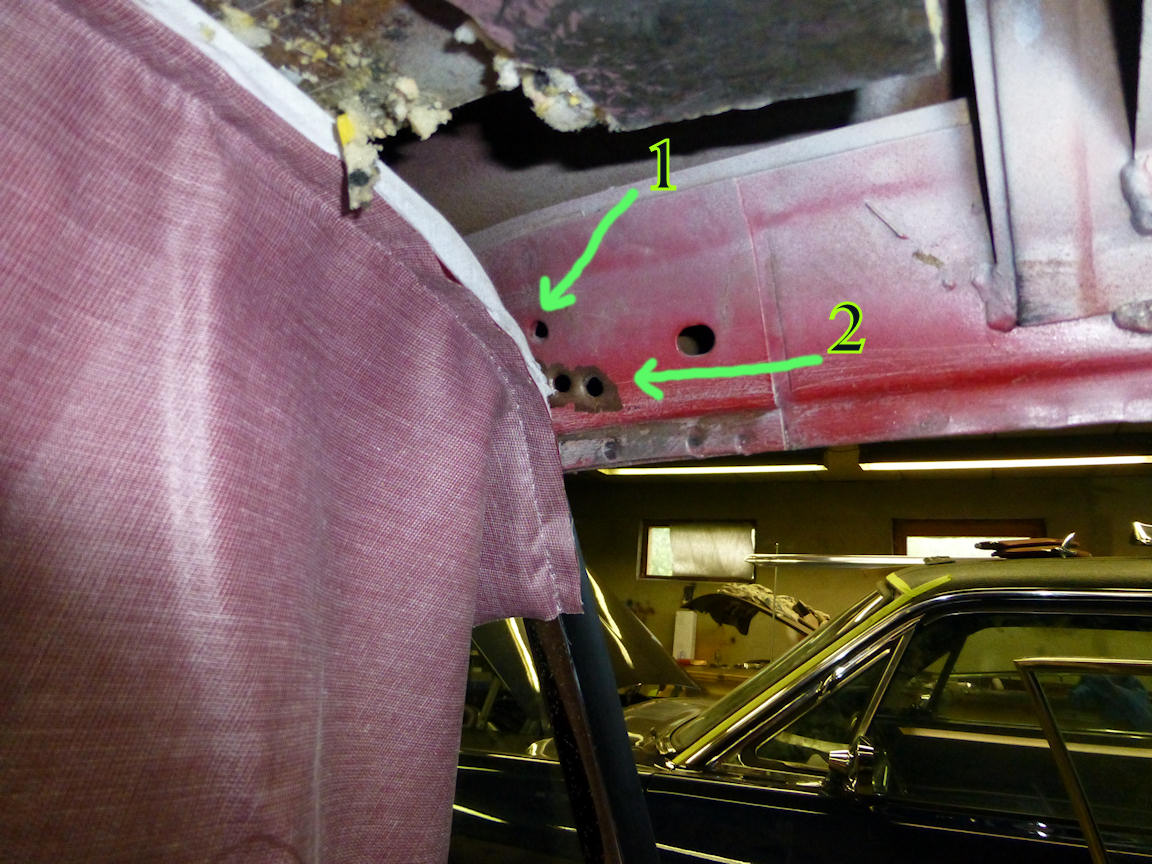
Now here is a tip I would recommend when you install a headliner. When you hang up the headliner you can stretch it out and test how it fits using windlace to hold it to the edges of the roof. Then you don't need to use any glue before you are 100% sure it is located right. 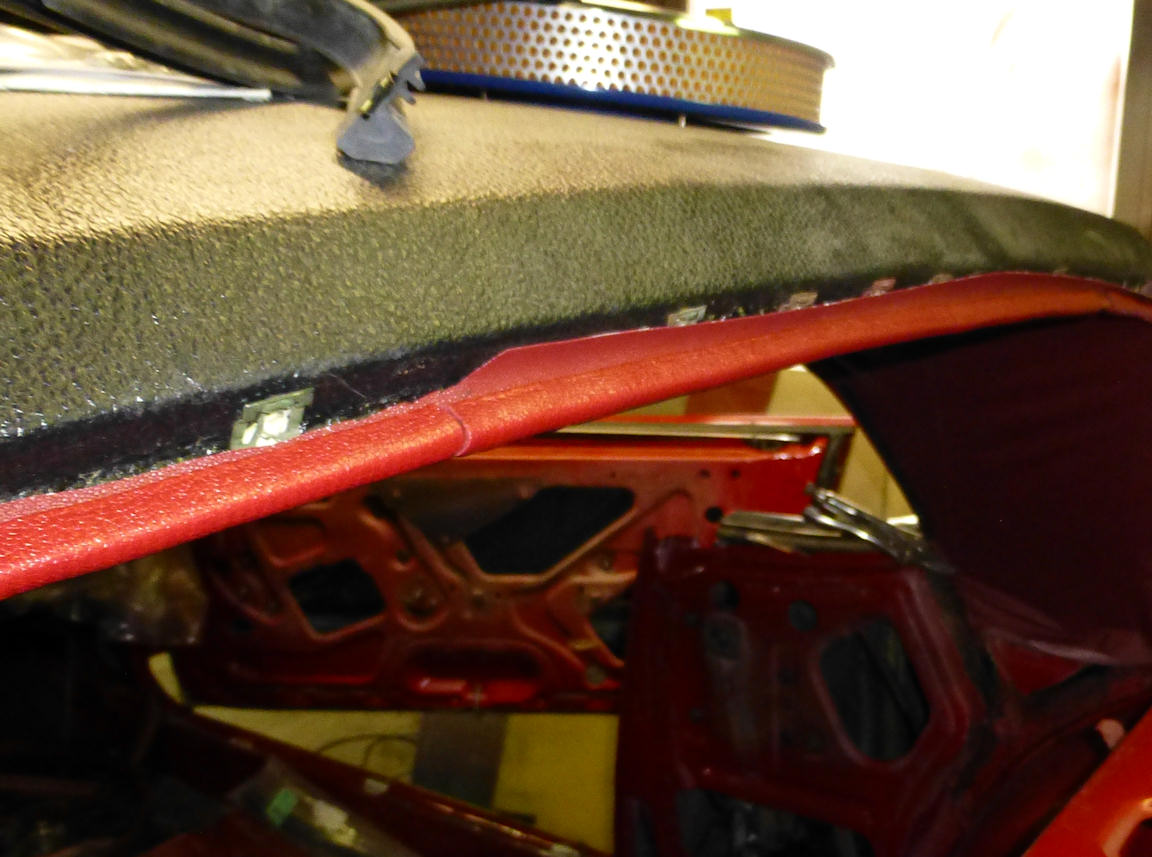
OK, so now for the final result. Looking good, eh? ![]()
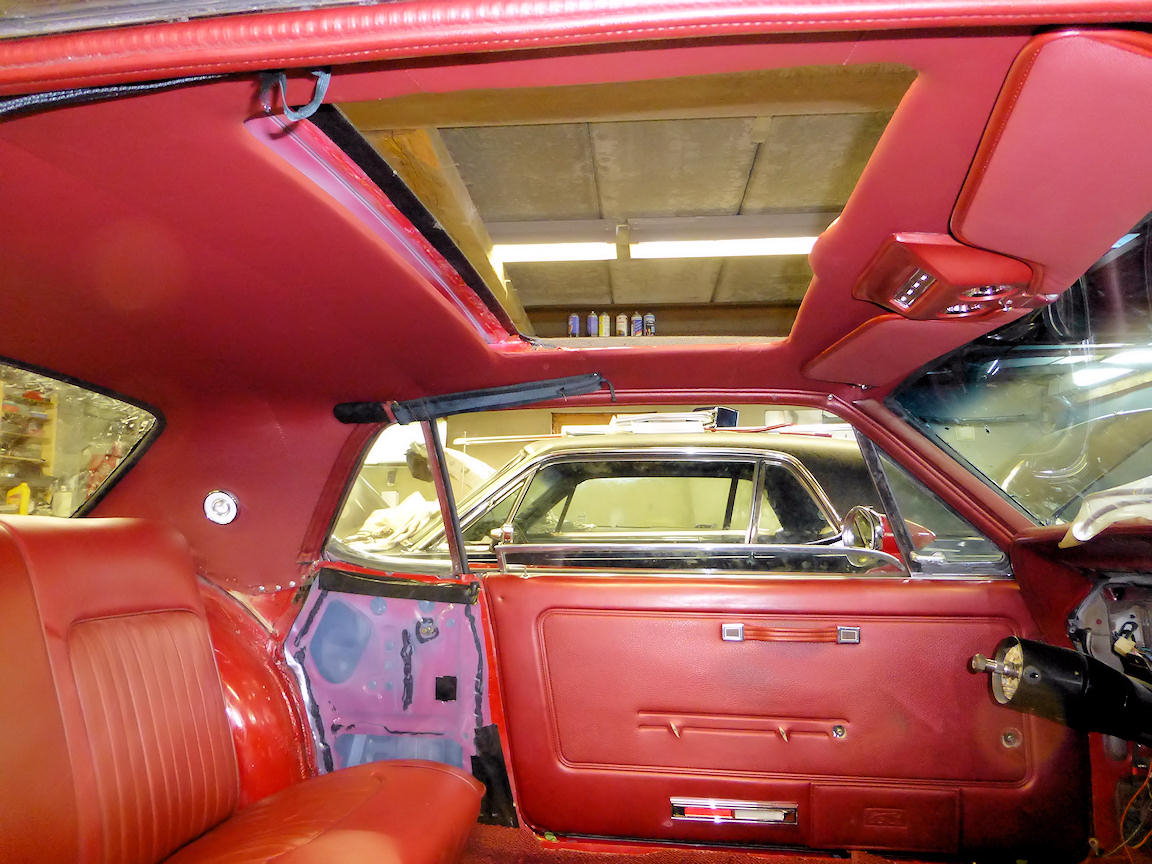
While I am in the mood to post some updates, here is a little more.
I want a discreet but still upgraded stereo system in the car. So this is what I ended up with, JBL 6x9" in the rear and Blaupunkt 5 1/4" in the front. On the top of the rear speakers I decided to use the reproduction speaker grilles and ordered a set like these http://www2.cougarpartscatalog.com/69pktraygrl.html?attribs=76. I also had to make a new plate for the package tray so I bought a masonite board at a local store that had exactly the same surface structure as the original. I used the old cracked on e as a pattern and also cut out the holes for the speakers and the rear defogger that I will install. 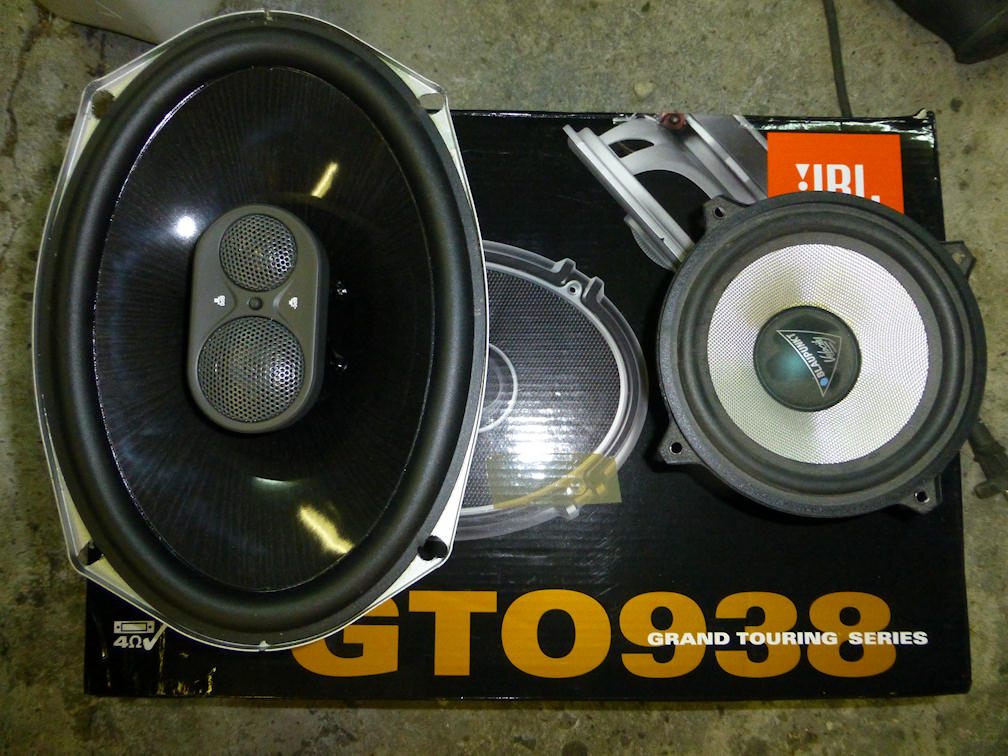
Here is the speakers and new package tray in place. Also in this picture is an aluminum plate I installed behind the seat instead of the cardboard plate. This plate has two functions that I like. First of all, the fuel tank is a part of the trunk floor. With a major hit in the rear who knows what might happen and this plate adds a little security if the worst thing should happen. The plate will also stiffen the rear of the body, so that is also good. I decided to paint the speaker grilles the same color as the interior as I just don't not like them in black. I don't know about Cougars, but for full size Mercury these were usually painted the same color as the interior when factory installed. Finally I am installing a rear window defogger in the package tray. The one pictured is not correct for the car and is only used to make the holes for the installation. I have a NOS all correct defogger kit that will go into there. 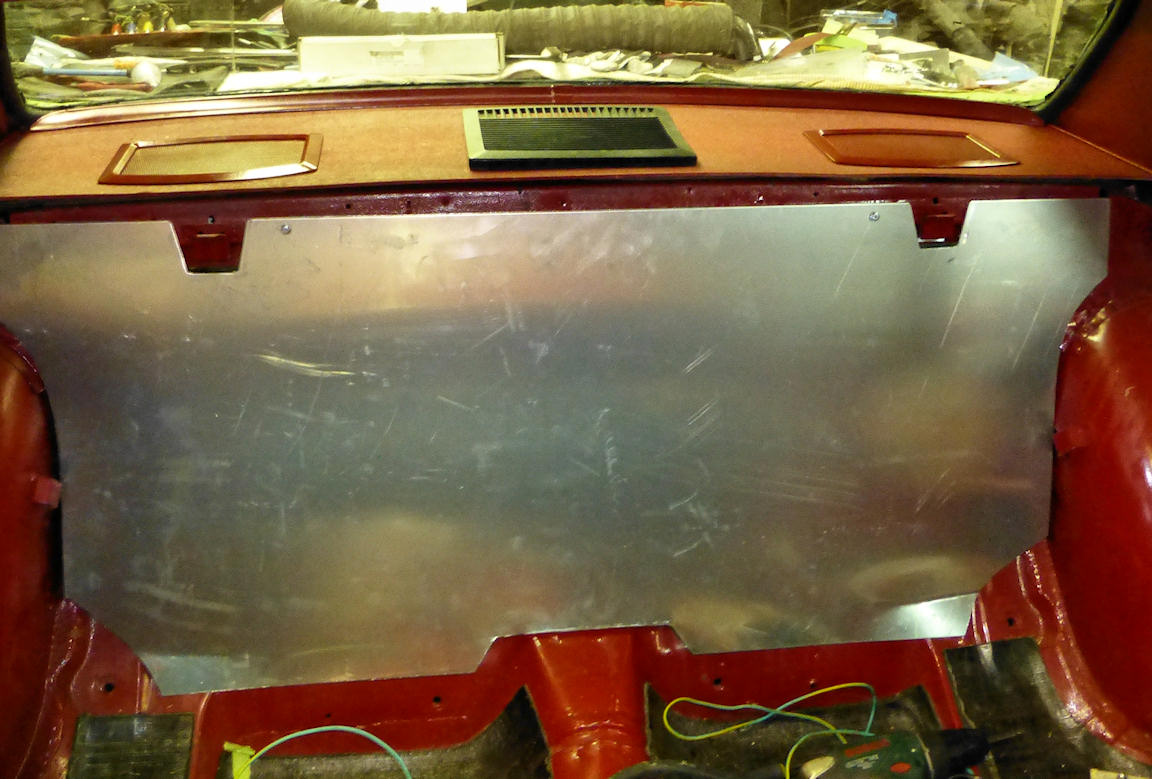
The aluminum divider plate were covered with sound deadener on both sides. For thee trunk side I use a self adhesive asphalt type material that looks very neutral and original and behind the seat I used the same sound deadener I used up in the roof. 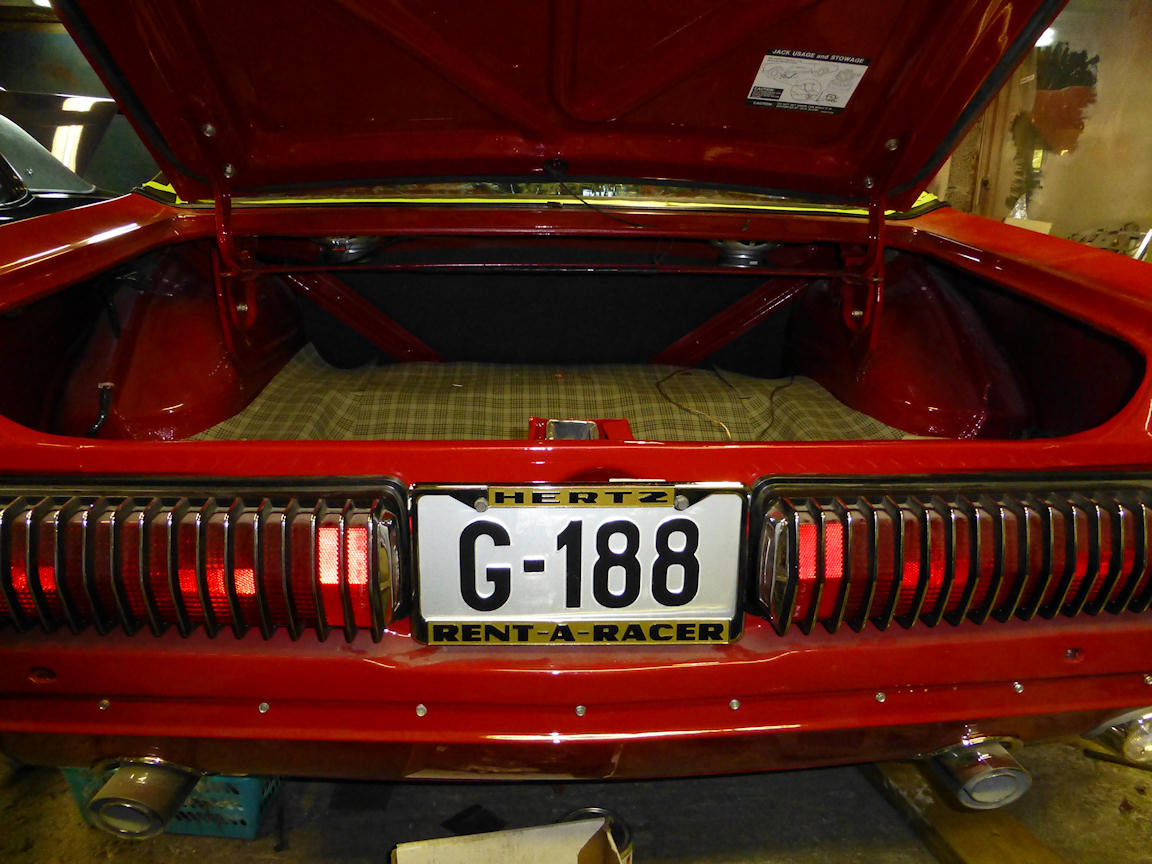
OK, so here is the inside of the plate with the sound deadener. Here i have also installed the carpet in the car. 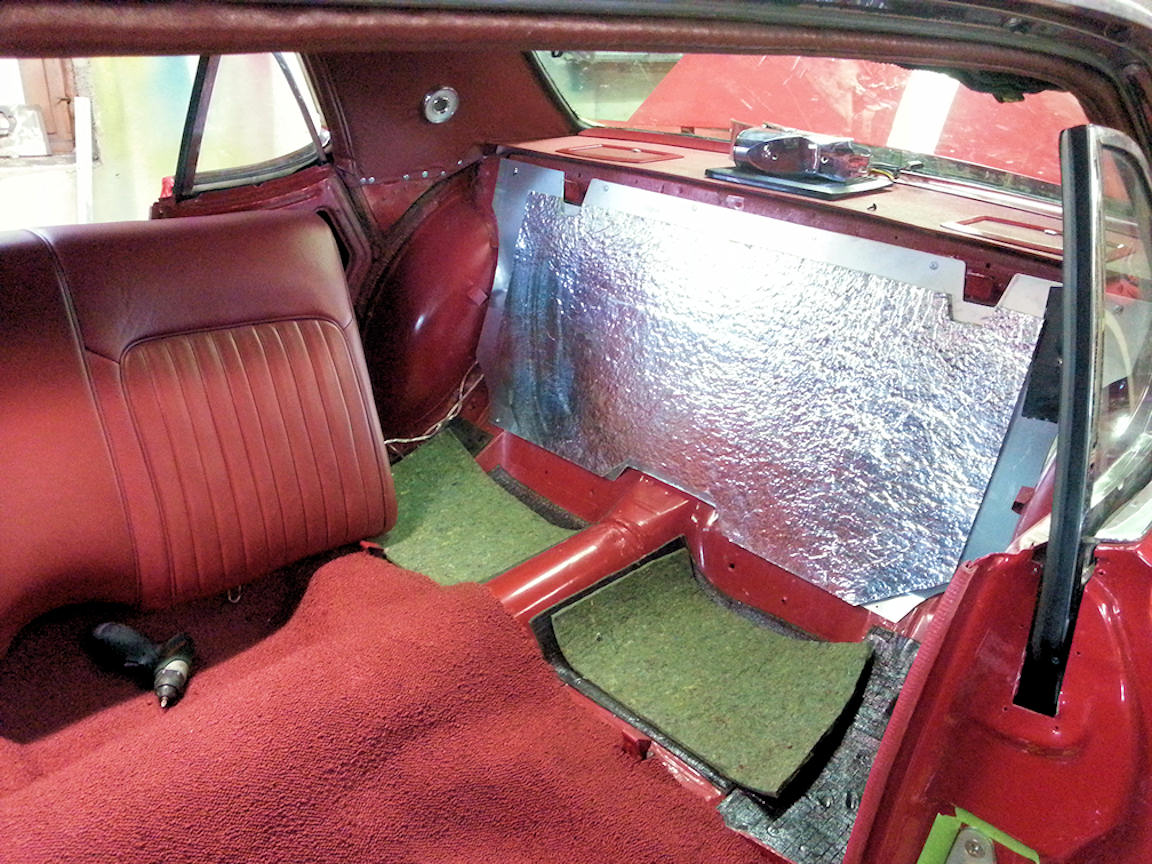
As some of you probably have experienced, the plastic used for the rear interior panels are usually extremely brittle and cracked. The set I bought together with the door panels for my car were among the better I have seen, but still had cracks in them. Luckily this is easily fixed by using fiberglass and polyester. 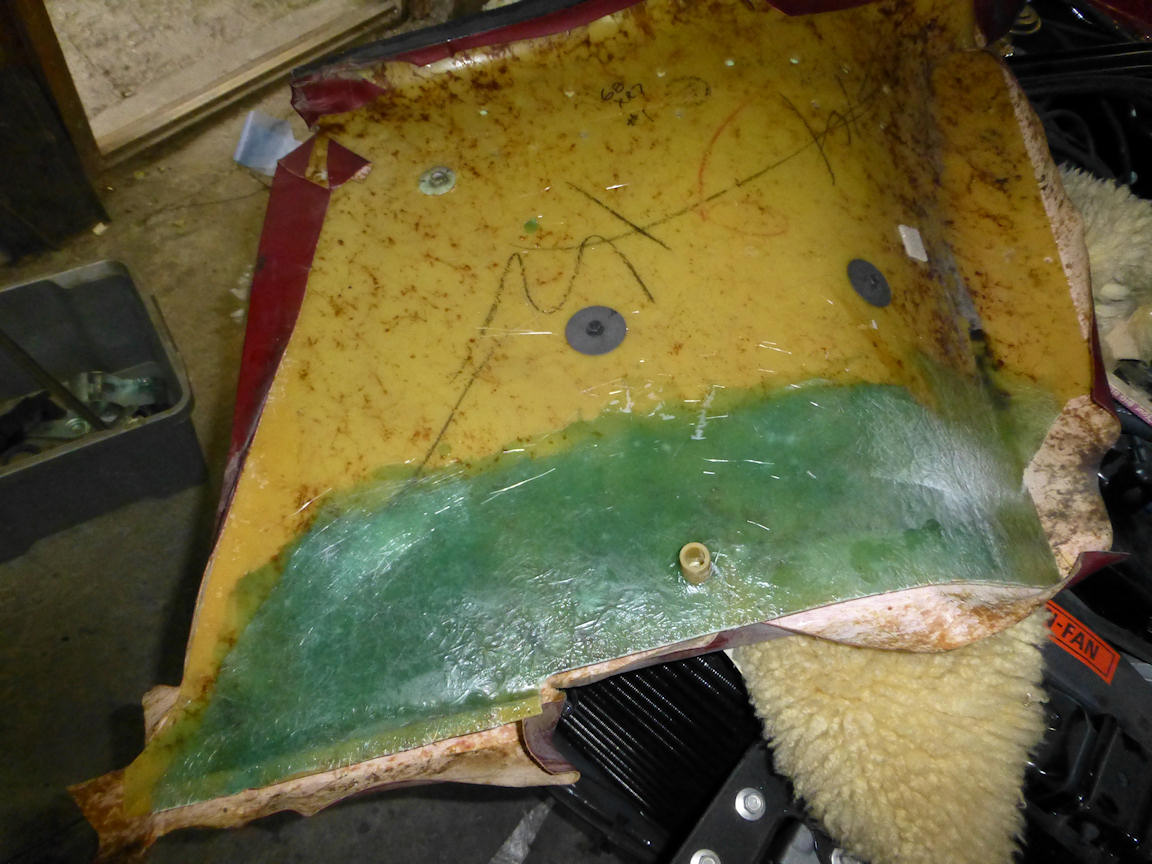
Tonight I installed the panels in the car. 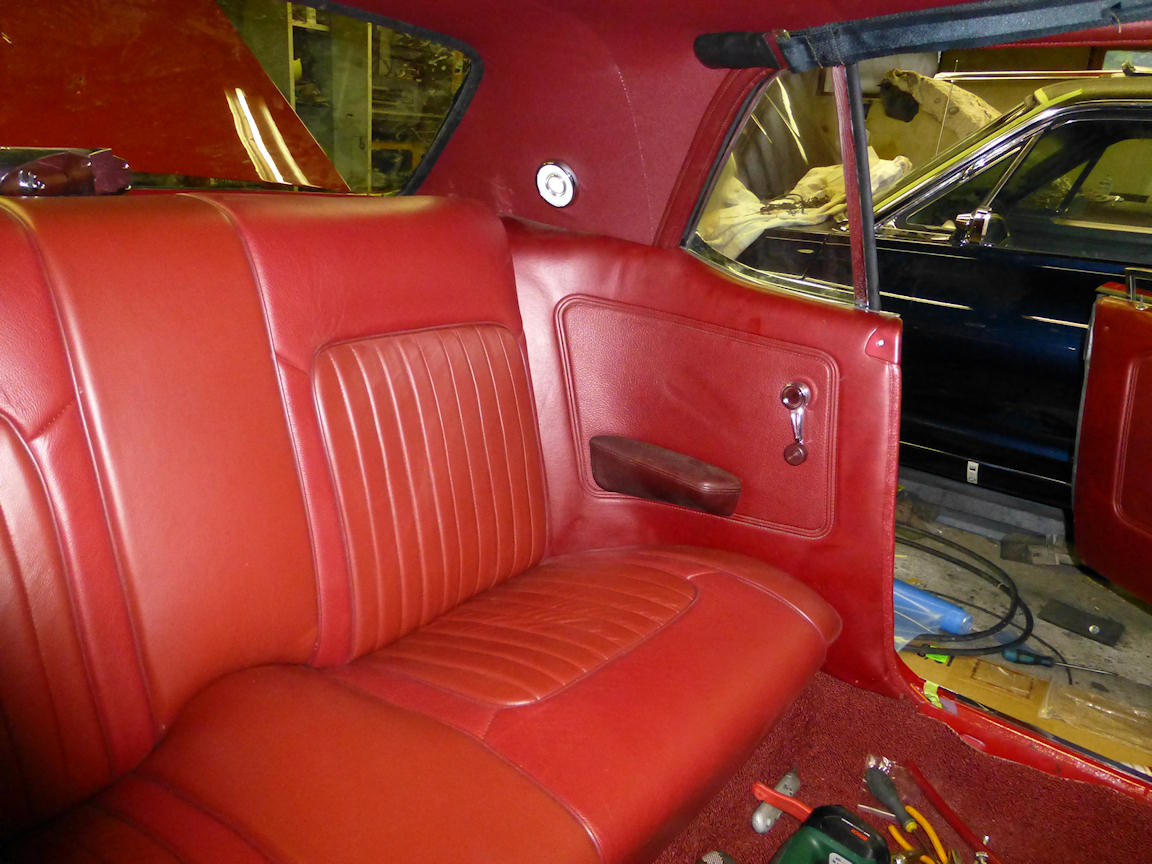
Just for fun, this is as messy as it can be inside the car when I am working. 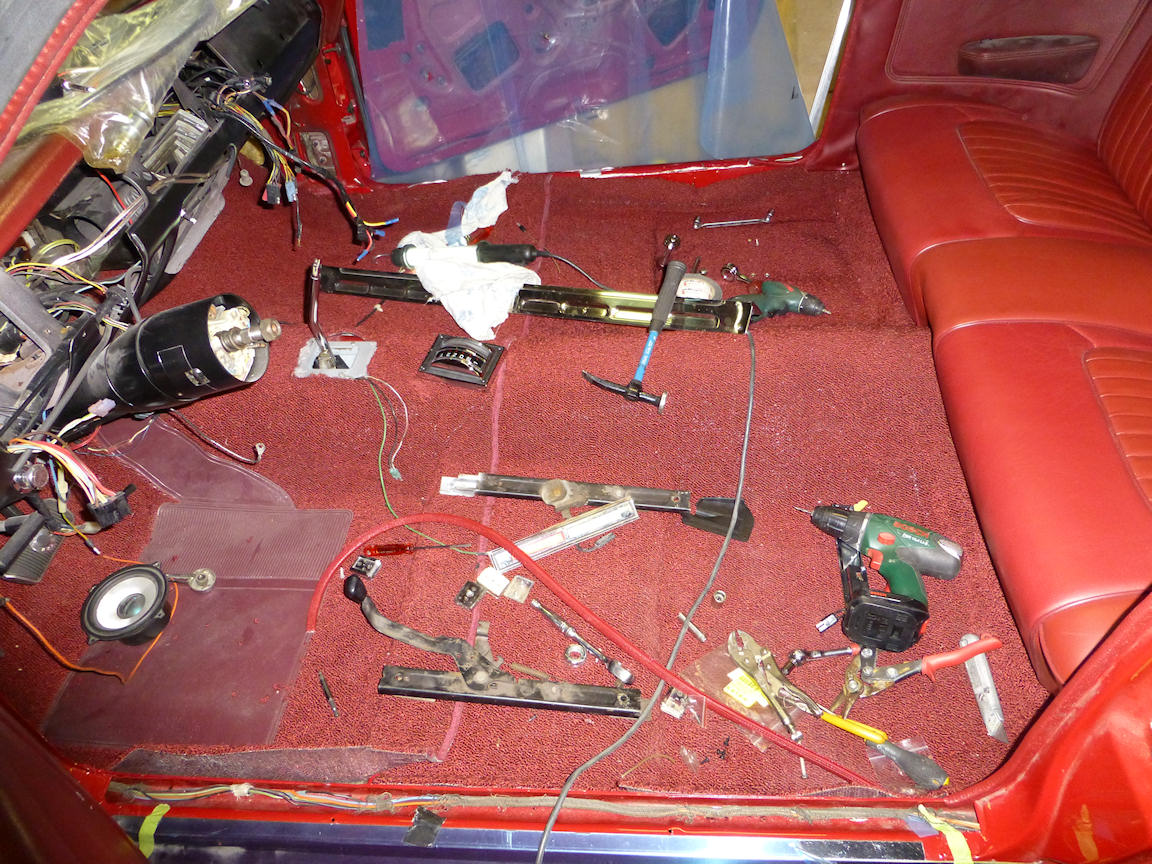
Which leads me to mention another pretty funny reproduction part. I bought a new shifter bezel for the G and while the chrome and indicator is really nice, I can't say the same about the quality of the rubber shield for the shifter rod. I guess it is another cheap rubber part made out of recirculated car tires in India or whatever. At least the rubber broke when I pushed the bezel on. Luckily I had bought a good soft quality Scott Drake rubber shield before I decided to replace the whole bezel so I installed it instead. I guess I could write a book about not so good reproduction parts when I am done with this car. 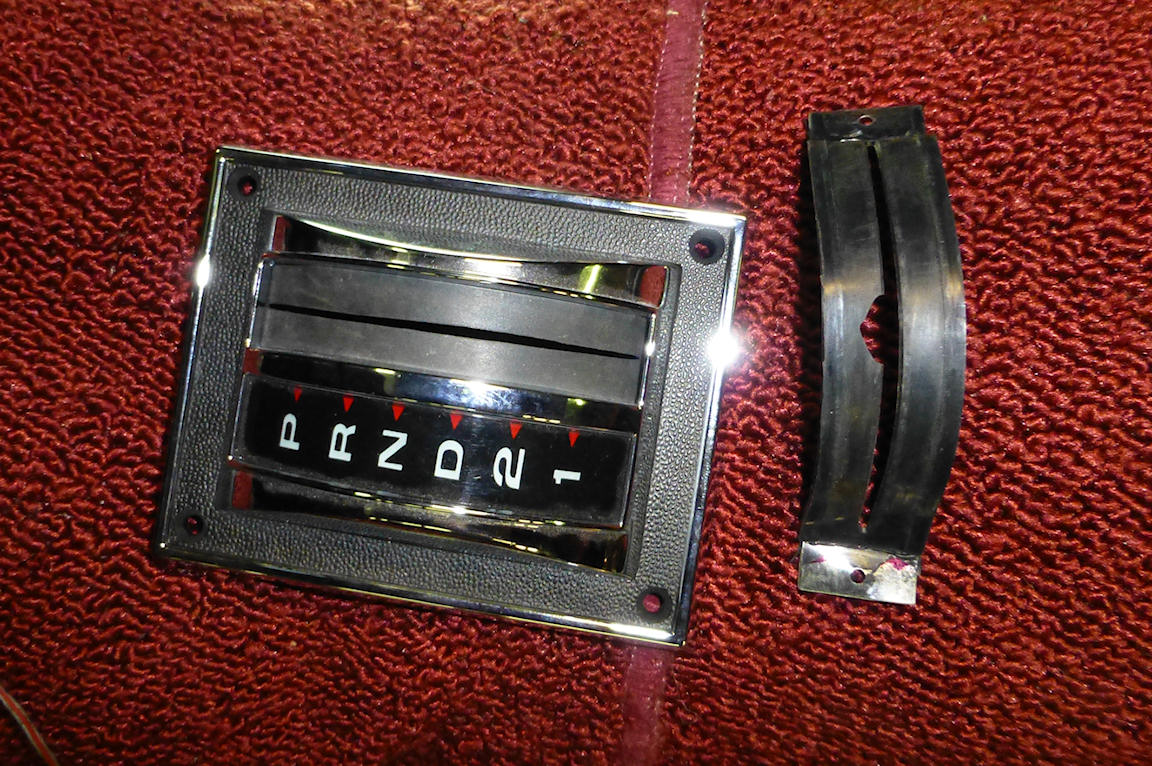
OK, the final picture for now.... not very interesting, but very important. Here I have made good quality plastic shields for the doors to protect the precious mint condition interior door panels I bought for the car. If these are not there the door panels will be wavy and rotten in no time. Before I put the plastic on I gave the inside of the door shell a very careful treatment with anti corrosive goop and wax to protect it from future rust problems. 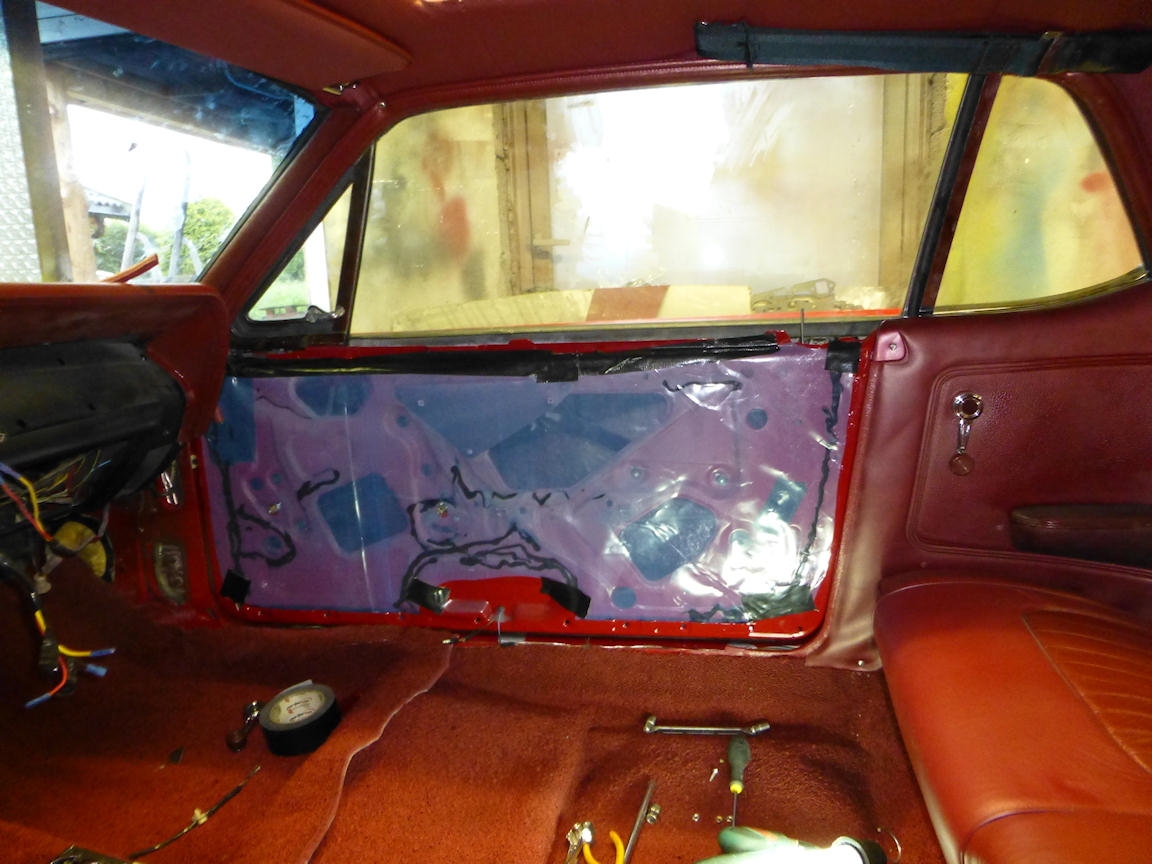
Nice build!
Posted by Diggymart on 10/11/20 @ 2:20:28 AM