You must be logged in to rate content!
28 minute(s) of a 519 minute read
12-2-2013
12-2-2013
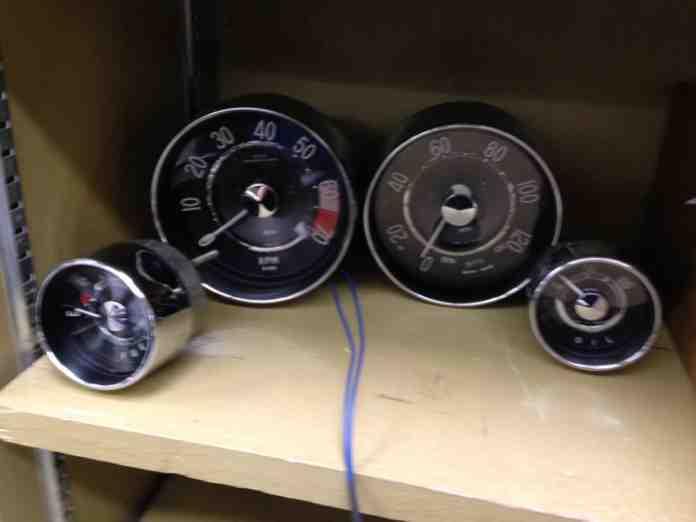
North Hollywood Speedometer sent me a picture of my rebuilt gauges today. They should be done by the end of the week. They have some work to do to the water temp gauge. I can't wait to get my hands on them!
12-20-2013
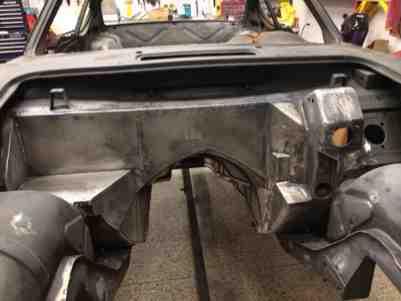
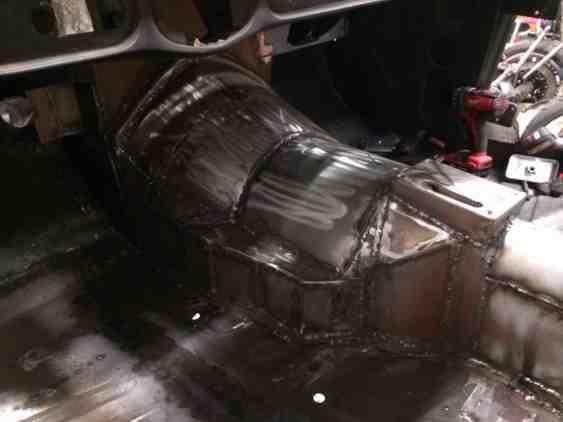
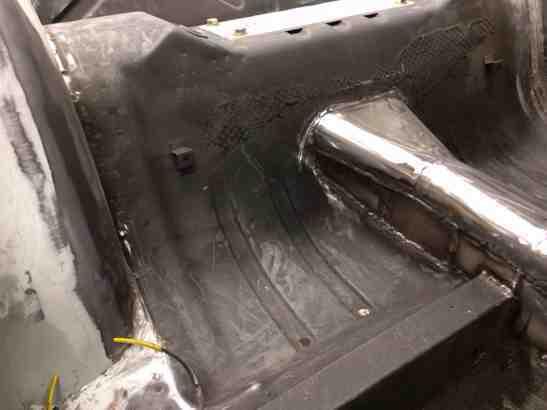
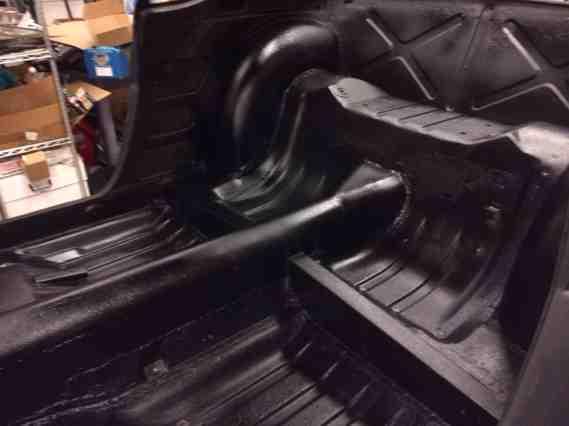
Well all the metal work is done to the firewall, transmission and driveshaft tunnels. I have a couple misc unused holes to fill and I will be ready to prune and undercoat.
Since I no longer have the original seat belt mounts I need to add those. I am not sure where I want to place the front mounts though. There was a bolt the is currently there but is not large enough for the seat belt. Can someone on here tell wat it was originally used for?
I was thinking of placing the bolt/mounting plate where the silver dot is. It is at the same location as the mount on the outside of the car. What do you think?
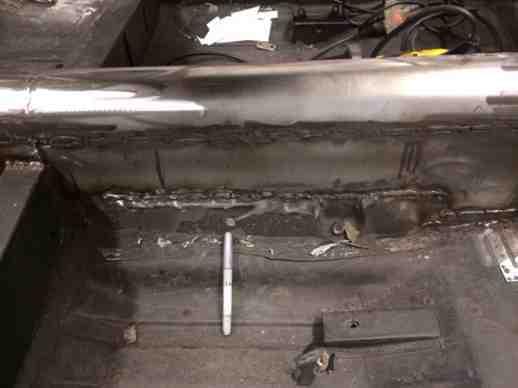
Here are a couple pictures of the final shape of the metal work. The area around the steering column was by far the most complex. It is tight around there. There is a small flat spot to the left of the column that is ther to mount the DBW throttle pedal.
1-8-2014
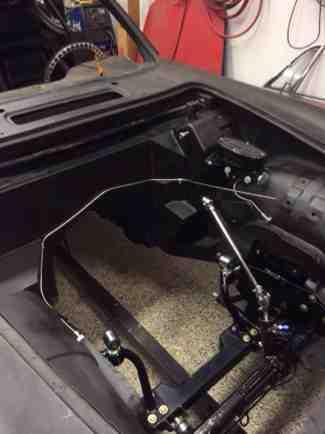
I've had a little bit more time to work on the car recently. I was able to complete the metalwork, prime the car again with epoxy and then undercoat the bottom of it with Raptor Liner. I had some Raptor Liner left over so I coated the inside floor of the vehicle as well. I really cleaned up the look. I think it looks nice.
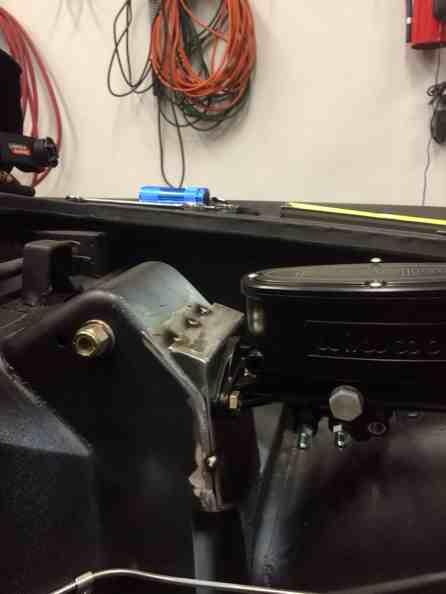
I have now started working on the plumbing. The master cylinder and proportioning valve are in. I am working on the front brakes. I had to order a few fittings to work with the stainless tubing so it will be a few days before that arrives. Once it arrives I will have all the fittings I need to do the brakes, fuel and air conditioning.
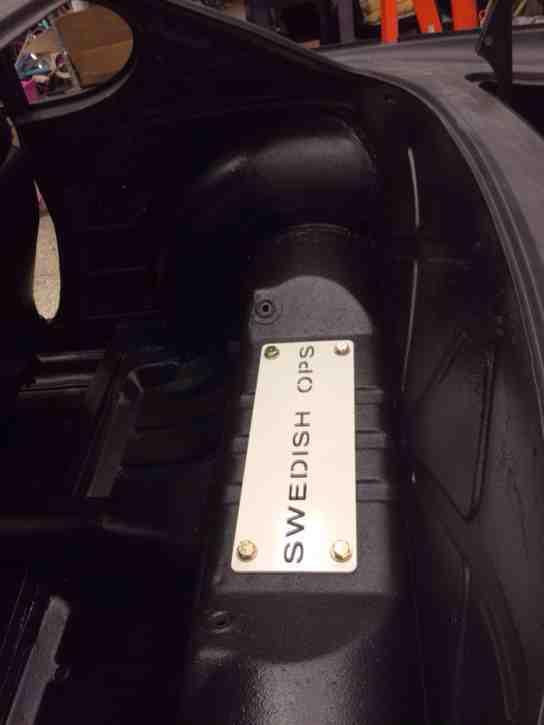
Once that is completed I plan on doing the wiring. I want to get the car so it will actually start and drive before I take it to the body shop. I am in no hurry to take it to the body shop though. I plan on using the flush mount glass kit that Swedish Ops is building but it doesn't sound like it will be ready until this coming summer.
Here are a few pictures of the car right now.
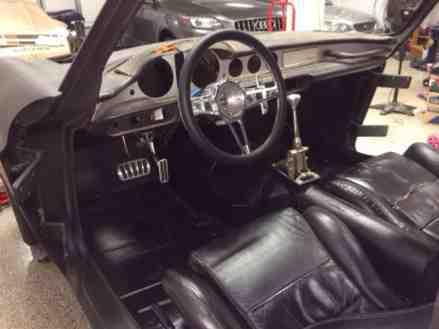
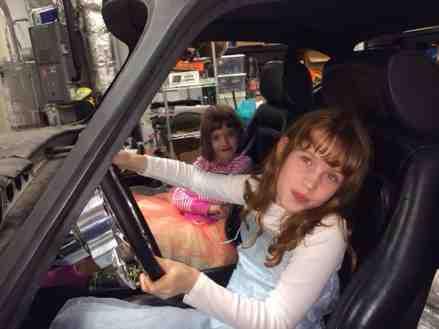
I had a couple helpers to assist in assembly. It was right before bed so they are wearing their "work jammies". LOL!
2-12-2014
It has not been a very productive month. Between going on vacation and a family member dying I've been pretty busy. I have made progress on the plumbing of the car. The fuel line is in from the tank to the engine compartment. The brake lines for the rear of the vehicle are done. I'm waiting on a fitting to fit the front brake lines.
Sam came over a few weeks ago and helped me out on a couple things. He identified that my ratio for my manual break pedal was off. I ended up raising the master cylinder about 2" to get to a 7:1 ratio. He also helped me out on some wiring questions I had particularly with the layout.
I picked up my new gas tank today. I had it made locally and I think it turned out great! I rerouted the inlet hose to make room for a dual exhaust and I plan on doing a little bit different set up for the gas cap.
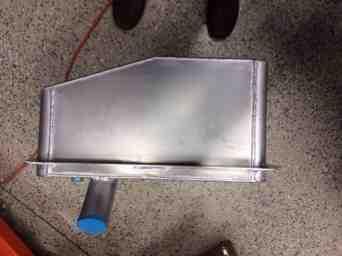
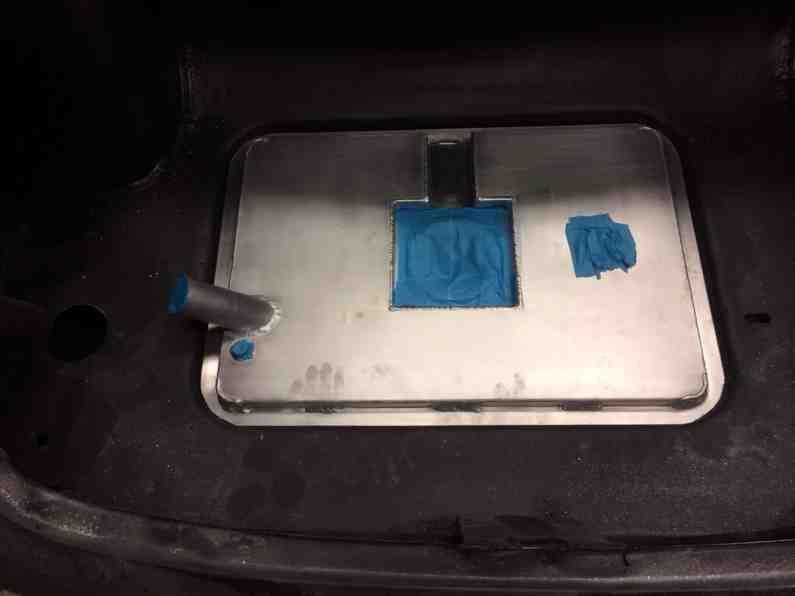
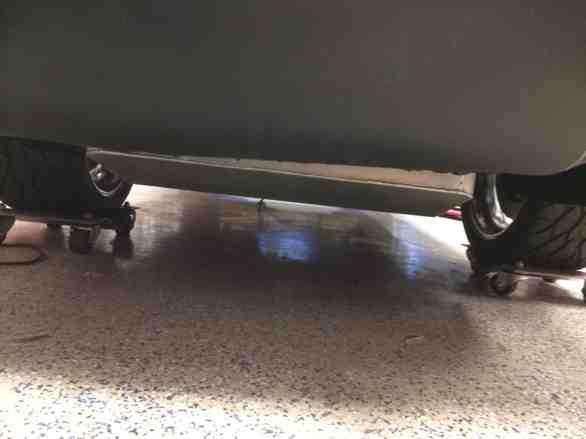
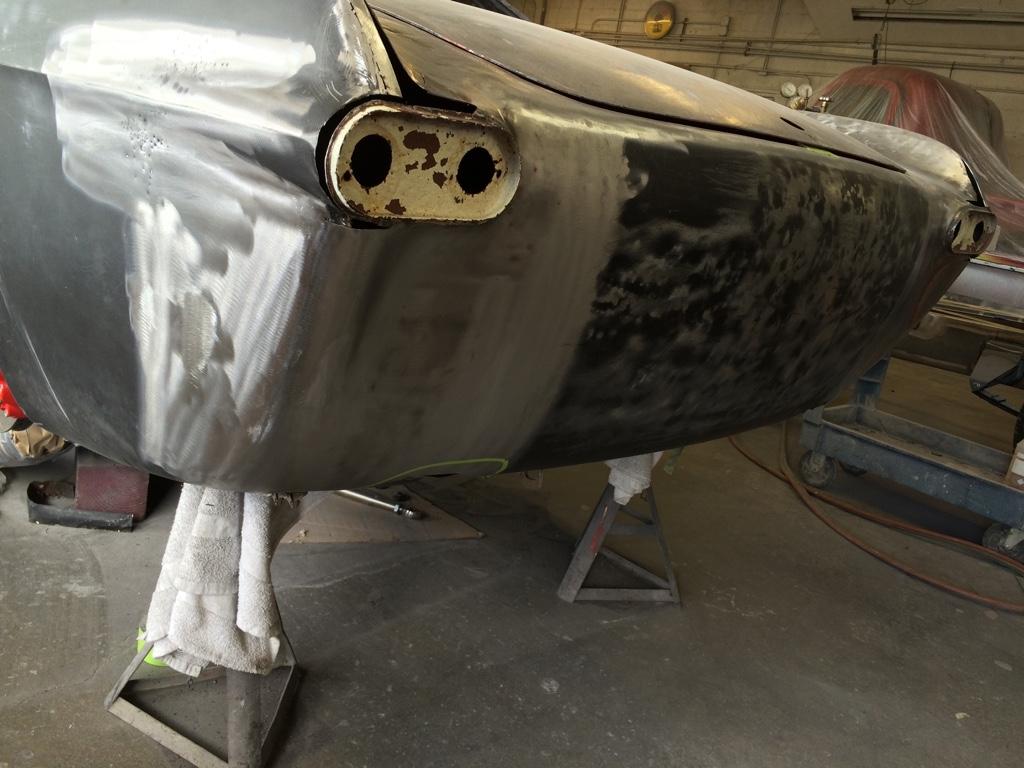
I have some body damage on the rear valance. Once it is repaired the gas tank should be pretty much even with the rear of the car. I'm actually thinking about taking it over and having a black anodized finish put on it. That one only cost me about $50, will make it look better and help it disappear.
3-26-2014
I haven't worked on the car much lately. I've started to rewire my old Mustang. I do have the engine back in as well as the transmission in its final position.
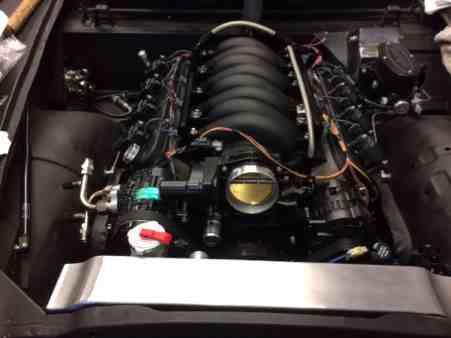
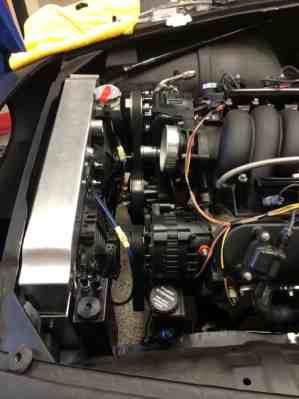
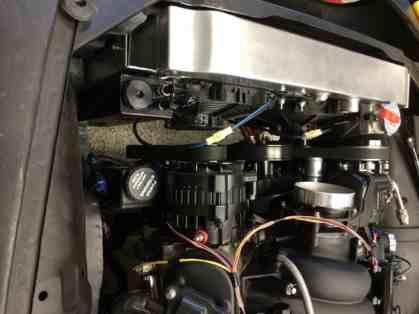
I started laying out the hoses and I've had to buy a couple new AC ends since I don't like the angles on a couple. I've put the wiring harness on the engine but have not drilled a hole in the firewall. I must say that the Easy Performance harness I purchased goes in very easily. LOL!
My next obstacle is finding a place for an air filter. It's really tight in there and with the addition of an overflow tank I'm not sure what I'm going to do yet. If anyone has a suggestion I'm all ears!
I also need to fabricate a mount for one of the coils. It has a slight interference with the brake pedal assembly.
3-30-2014
one filter placed front left or front right of the engine bay connected to the intake with a 90degree pipe or an S pipe if needed.
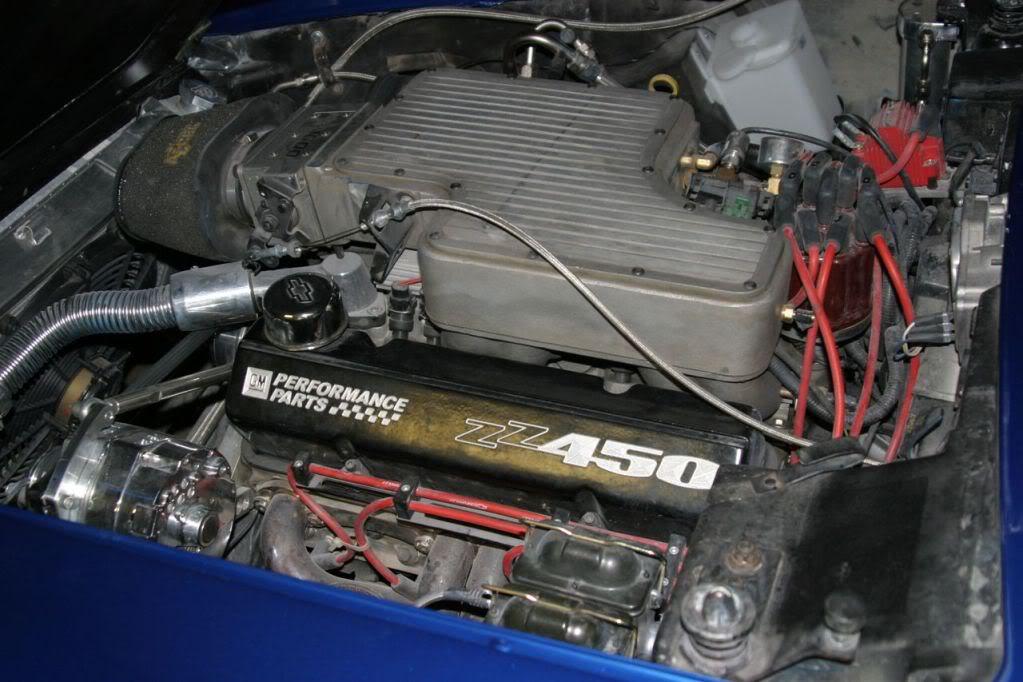
Or, it does look like there's room for just sticking a filter directly on the front like we have on our '68 corvette. Is it a 4" air inlet? Plenty of universal cone, rectangular or oval filters that would probably fit.
3-31-2014
Thanks for the idea on the filter in the front. I have purchased a filter/MAF setup that is very similiar to the one pictured from Street & Performance but the base of the filter and hose bib for the crankcase vent system interfere with the drive by wire throttlebody. If I was using a throttle cable setup I think it would have worked just fine. I have pretty much come to the conclusion that I will have to do the 90 fight out the throttle body and put the filter there. Hood clearance becomes a major issue on the 1800's compared to the Amazon where it is much more forgiving.
I was hoping to have a setup that mounted the filter in the area below the radiator to act as a cold air intake but I can't find a way to snake the tube down there. I even tried using oval tubing which is only 2.5" wide instead of the full 4" inlet tubing. I also considered exiting the fender panel behind the radiator but was concerned that it would have issues with the tire/headlight if the filter was located in the wheel well. As I mentioned earlier I am wiring my other car right now and that will take me a couple weeks to complete and after that I will scratch my head a little bit more.
6-1-2014
We'll I was able to start the car up today. It runs for about a second then turns off. I had the computer reprogrammed from the Escalade tune to a Vette Tune and they were supposed to shut off the VATS but I am questioning that now. I also forgot to put a ground on the engine to the chassis so I will do that in the morning and see if that corrects the problem. I don't have a code reader but it looks like I will need to invest in one. Any other ideas for simple things to check?
The Motive bleeder did not work for me either. The dual Wilwood master cylinder is too long to get a seal. That sucks because both my cars have that MC.
6-9-2014
I tracked down what I thought is the problem in the wiring. I'm not sure so I am taking the computer over to be reprogrammed for my camshaft and to make sure that the VATS are turned off. I hope to have it back tomorrow or Wednesday.
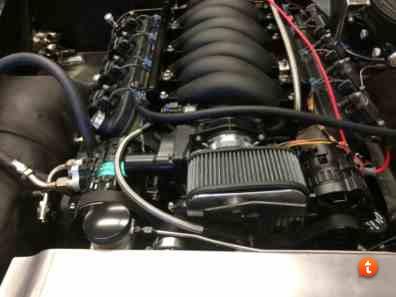
In the meantime I was able to fabricate a new throttle body mount for my air filter. I offset the hole and was able to use the rest of the assembly. I still need to tap a hole in the mount for a hose to connect to the passenger side valve cover.
6-12-2014
She is Alive!!!
6-16-2014
That is a good queston dd. I originally planned on adding subframe connectors to stiffen the chassis but after listening to others on this forum I decided to hold off on that till the car was being driven. I also have a 1968 Mustang convertible that has considerably more horsepower than this car and it needed to have a fair amount of work to stiffen the chassis enough to handle the power.
Where I can say that this car would be more rigid than a Mustang is the way the front end is permanantly attached to the car instead of having bolt on fenders. It would allow for more triangualtion. Wether that is enough or not is the question here. If I find out that the chassis needs to be strengthened I will first start with SFC's and then go to a 4 point cage. I really don't want to do the cage unless it is needed because of the safety of the passengers in the rear seat.
The other thing that will help me with not twisting the chassis is tire spin. I will never be able to just stand on the throttle and have the car hook up like a drag car. I just don't have enough tire for that. I will have to use part throttle until I get the car moving then ease into full throttle. Like any high power, light weight car it will require logic and technique when driving it. I do know that it will be one fun car to drive and I am looking forward to that day.
7-29-2014
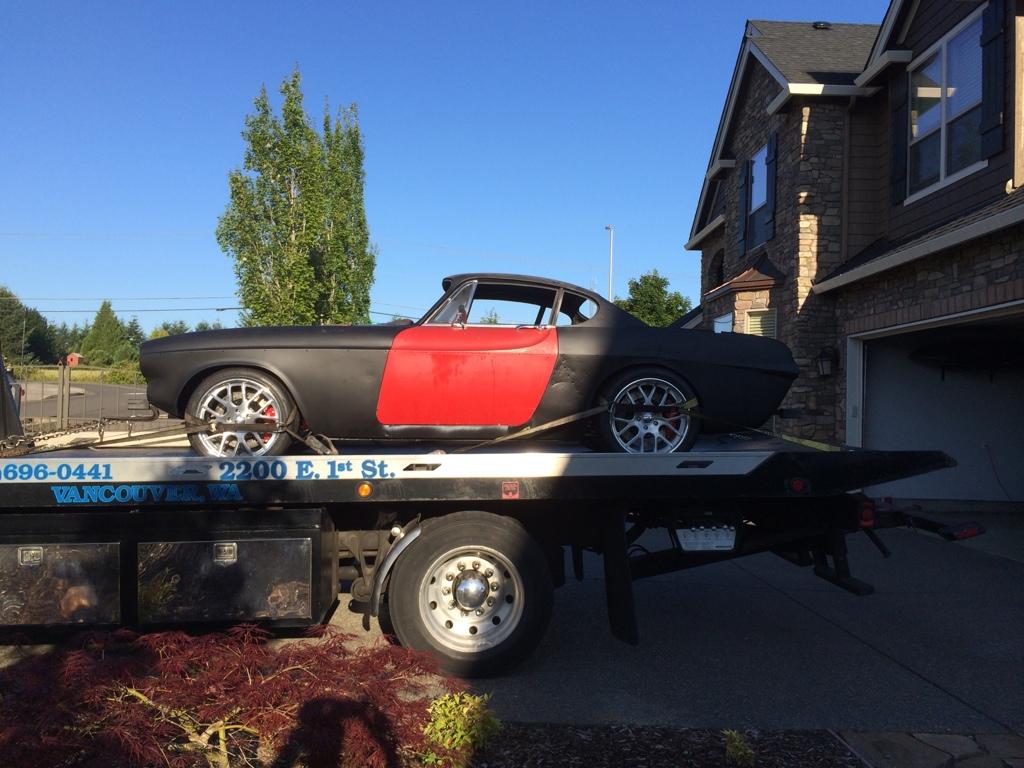
Officially off to the next phase of the build and likely the most noticeable part.
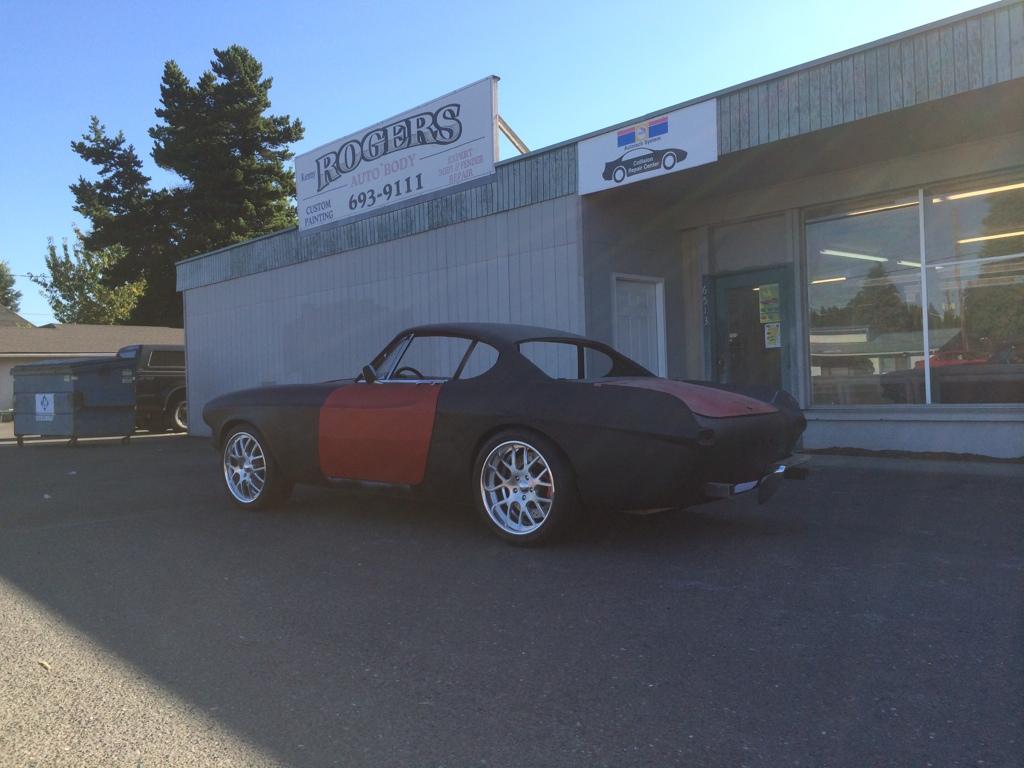
8-18-2014
I was planning on running it in the channels below the driveshaft where the seat pans curve up. I have also been thinking of using oval tubing to gain another .75". The tightest part will be the crossmember under the seats which a stock 1800 also has to deal with.
The other thing I am considering is using some shocks from JRI Shocks that have a hydraulic ride height adjustment. They are a bit spendy but they would give me 3" of ride height adjustments with a flip of a switch. The advantage of that over air is the package of supporting items (pump and fluid tank) are substantially smaller than air. That kind of sucks because I have all the items I need with the exception of bags to do a fully adjsutable Ridetech setup. I picked up an Air Pod with levelers and digital controller for a song and a dance. I may end up leaving that on the shelf until the next project rolls along.
9-16-2014
Since the car is at the body shop I haven't been able to do much. I did paint the engine and the transmission the same red as the Wilwood calipers. I figured it would act as a nice accent and tied and other areas. I sprayed down some epoxy primer first followed by urethane.
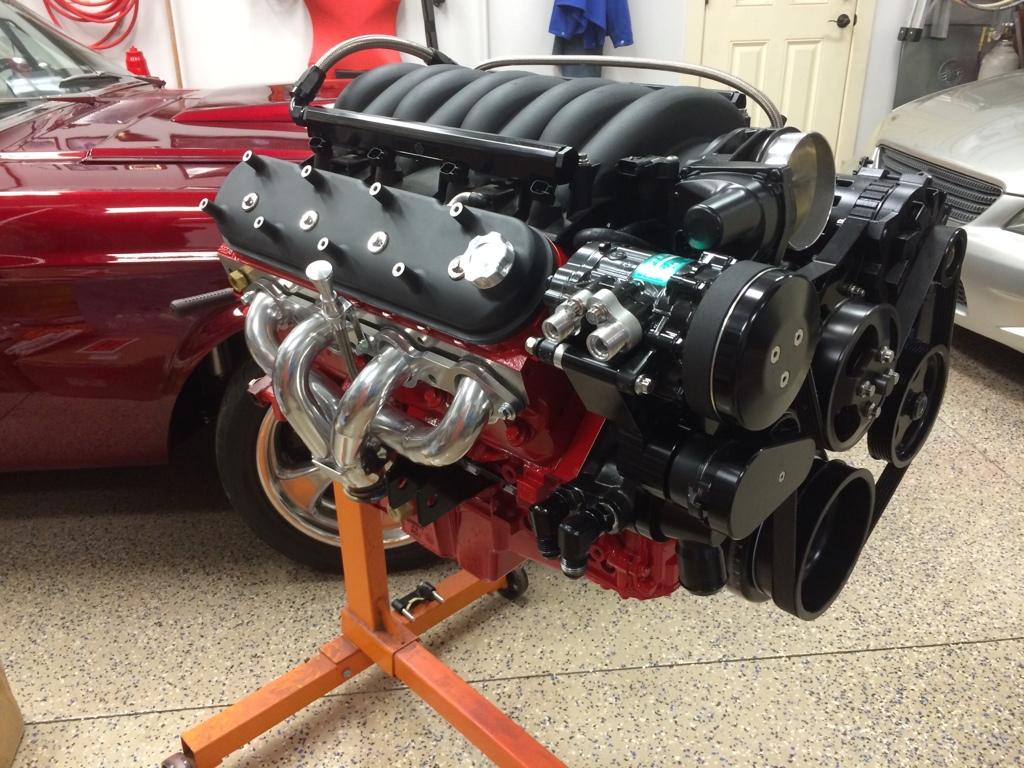
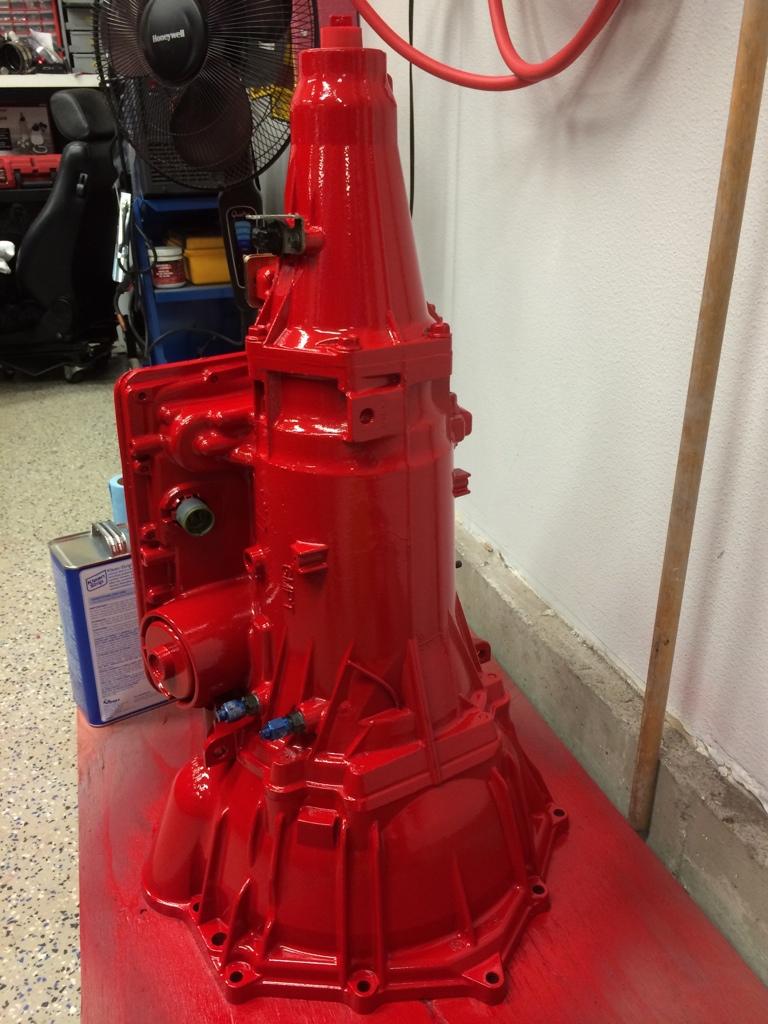
10-28-2014
There isn't much to update at this time. I am still waiting for the body shop to START working on the car. We have a lot of time before the agreed upon completion date (next year this time). I have placed a deposit for the interior to be done. I am going to ship the car off the The Recovery Room in Nebraska when the time comes. It looks like I am on a completion date of March 2016. It is a long time away but I want to make sure it is done right the first time around. I hate doing things twice. That is when it gets real expensive real fast.
I agree that restoring/customizing cars is a journey that is often frustrating but if done right well rewarding. It looks like Sharp Touch does some nice work. I really like the Mustang on their Facebook profile picture. That thing looks nice!
The link I had put on the thread origially regarding my Mustang is gone. It was an article that Mustang/Auto Enthusiast wrote and I think they are out of business now. I am doing some modifications to the engine managment system on that car as I write this. It is at the tuner right now. Is there a particiluar question you have about the car?
Over the past month I have converted the old Ford Computer/Harness from a early 1990's Mustang to something more modern. I had an SCT chip to handle all of the modifications I did to the car but unfortunantly I was not happy with the way the computer was processing all the information. I was having idle surge issues when I would lift off the gas pedal. I have switched over to an Accel DFI Thruster engine managment system that should easily handle everything I can throw at it and at the same time upgrading to a race bypass valve for my Vortech supercharger. I am hoping to have about 600 RWHP when all is said and done.
In addition I have been making improvements to the handling to the car. I recently switched over to a new set of shocks from JRI whom I consider the best shock out there for the money. In addition to that I put on wider wheels and tires. They require a bit of fender rolling to fit perfectly so the old ones are still on until I have time to work on that. My end goal is to drive the car a lot on the road and take it autocrossing. The last time I was out on the autoX I ran about 1.5 seconds slower than a brand new track prep'd Roush car complete with a factory installed roll cage. That was before the wheel and shock upgrades. I hope to close or eliminate the gap with the the recent mods.
After all those mods are done I honestly think that car will no longer be a work in progress. I have to call it quits at some point and I think I have gotten there. That is until I head to SEMA in a few weeks and see what kind of new performance items are out there.
Overall I want to do the same thing with my Volvo. Combine old styling with modern performance to create a fun and exciting car to drive.
12-12-2014
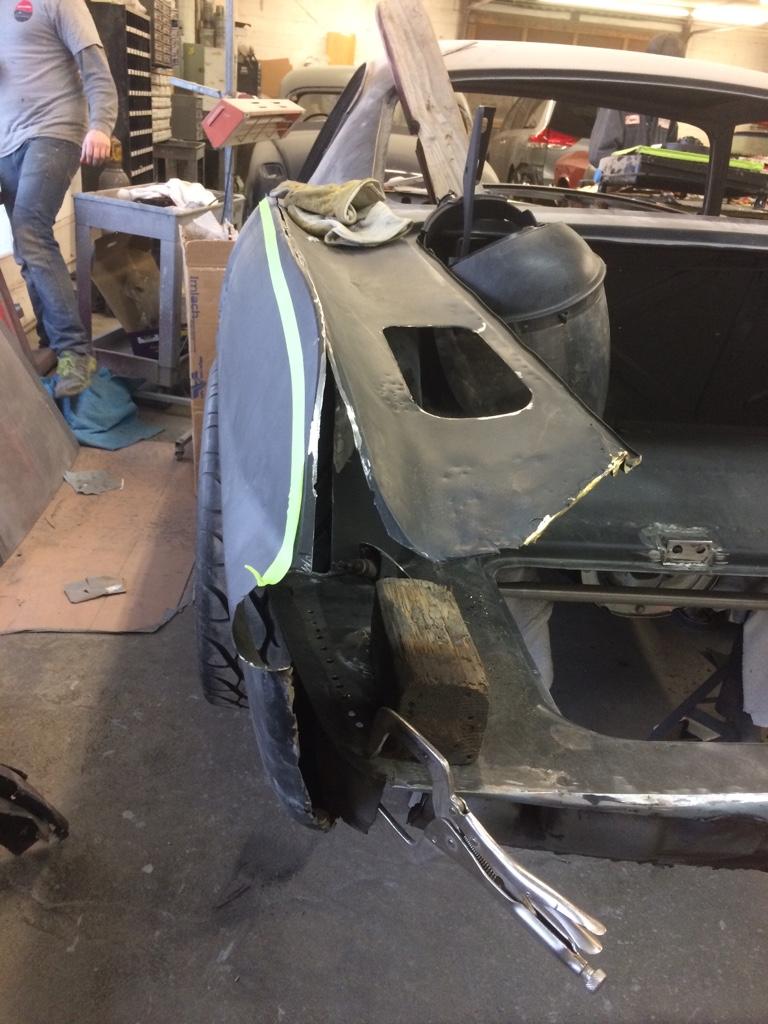
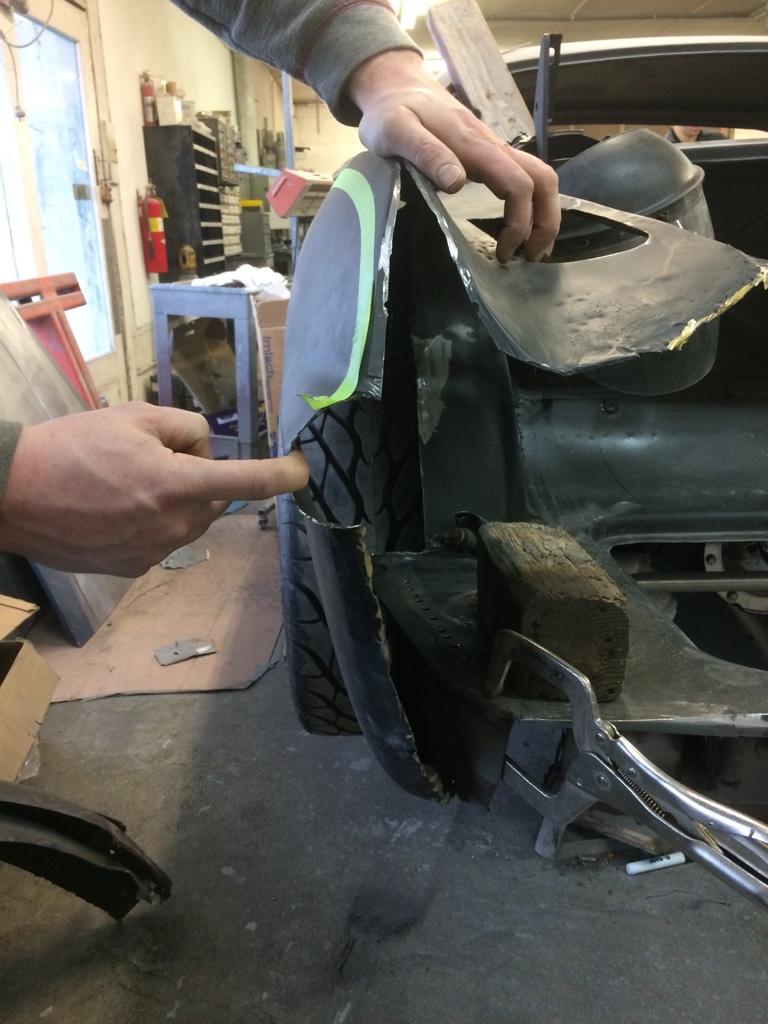
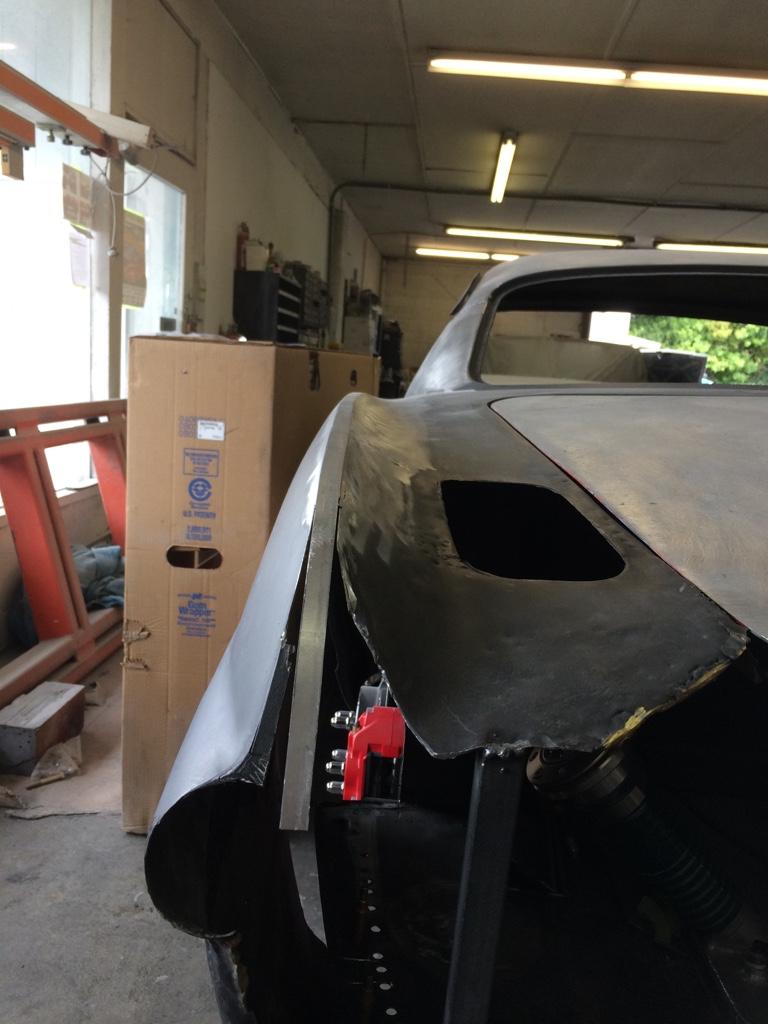
I'm starting to see some progress on my bodywork. It started at the rear of the car to do repairs and modifications. It looks like the planet this point is to widen the rear sheet-metal by approximately 4 to 5 inches. That should give us A closer look to the rendering of the VOX rendering. The fins will be reduced in size while the quarter panel is having the taper from the wheel well to the rear valanced reduced.
We are currently evaluating our options for a rear diffuser and it looks like I will need to make custom taillights to get the look I want. There is not much to see at this point but it's a start and you can see the general idea of where we're going.
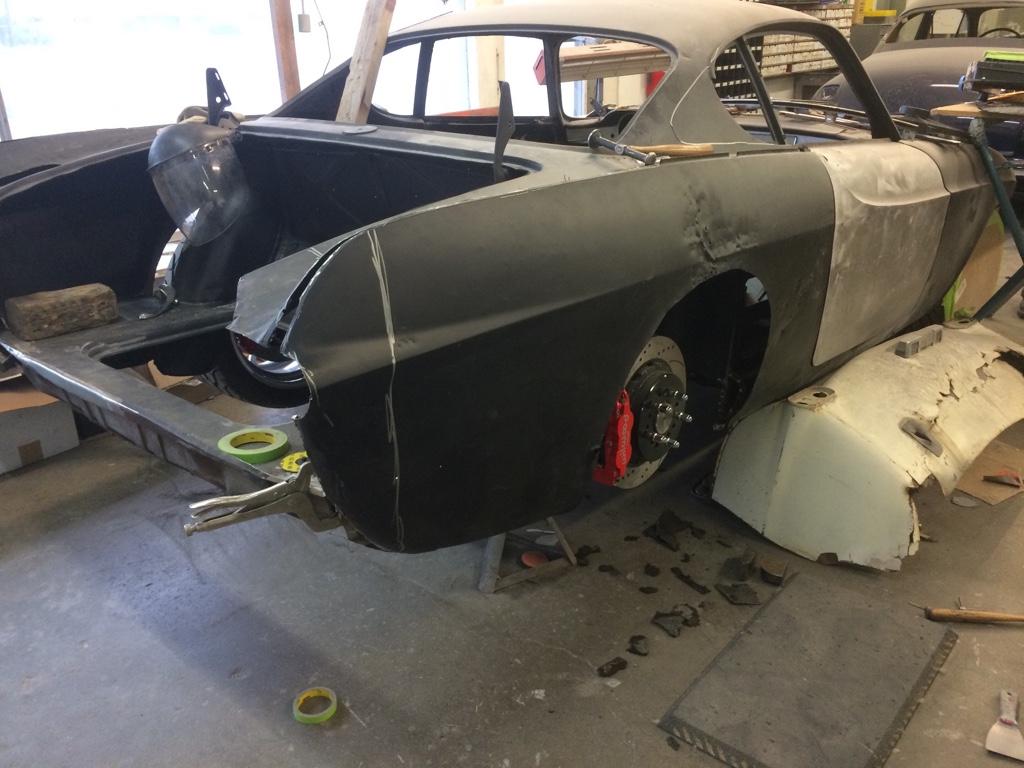
1-28-2015
I have a minor update on the car. I did some measuring and it looks like the rear will be about 6" wider than stock. This will make it the same width as the front (outside of headlights) and 5" narrower than at the doors. It will still retain general flow of the car but will be closer to the Vox renderings visually.
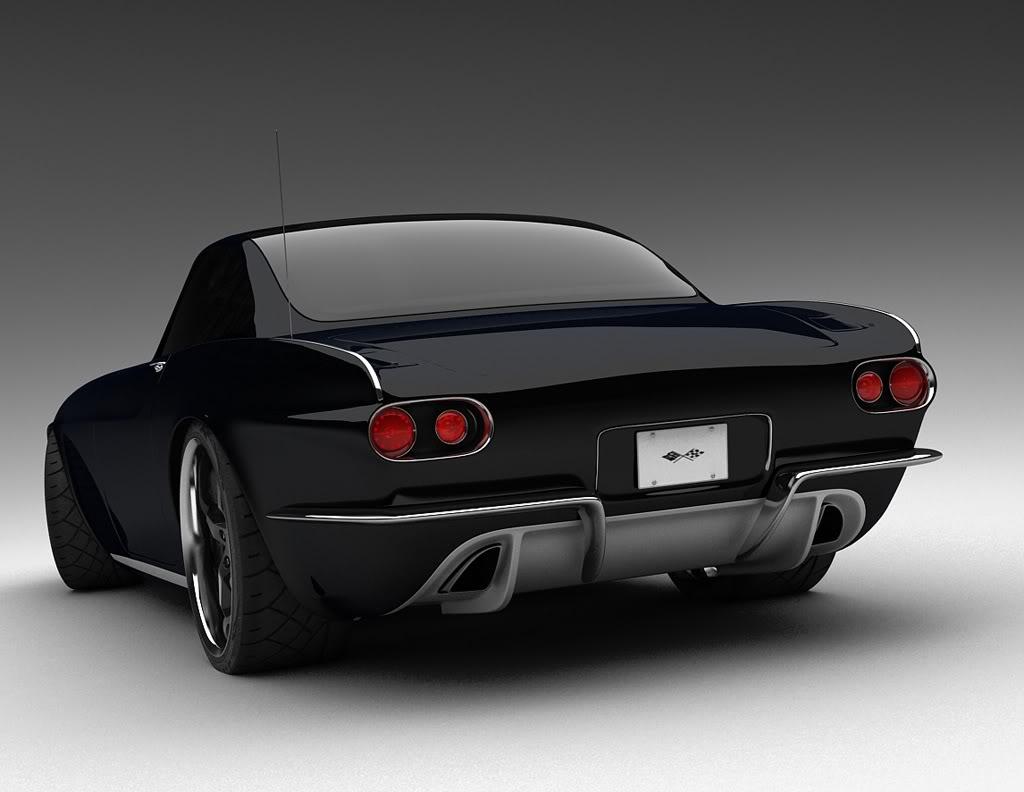
When I first ordered my wheels I was a little conservative and could have gone with a larger backspacing on the rear. It has driven me crazy and this past few weeks I narrowed the 8.8 Ford to fit the way I want. In the process I converted the rear end to have 9" ford ends thus eliminating the C-clip axles. I think the fixed caliper Wilwood brakes will work better and I feel a whole lot better with that setup. The narrowing really wasn't that hard to do. I purchased a jig on Ebay and went to town. I forgot to take any picutes but it looks about the same as it did before. The tires fit right inside the fenders now and will reduce any kind of flare that may have been needed. Now a simple fender lip like stock will work fine.
4-1-2015
Sorry for the late reply and update. I have been reworking some of the rear suspension. We took some of the bulk out of the crossmember and boxed them even more for additional strength.
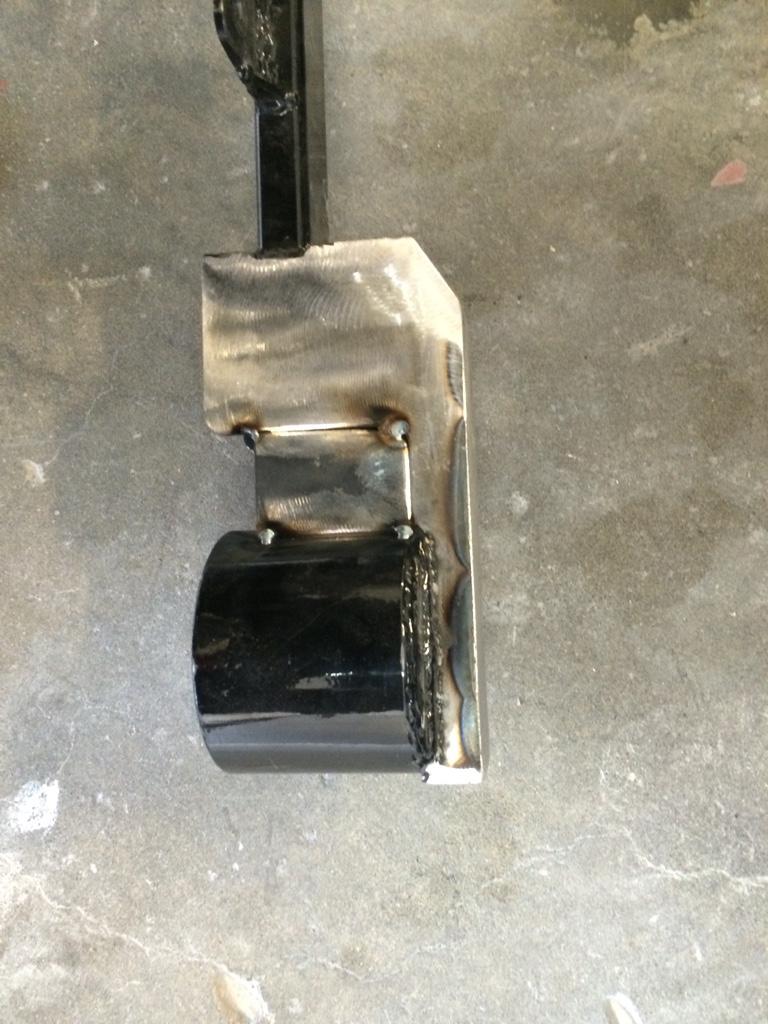
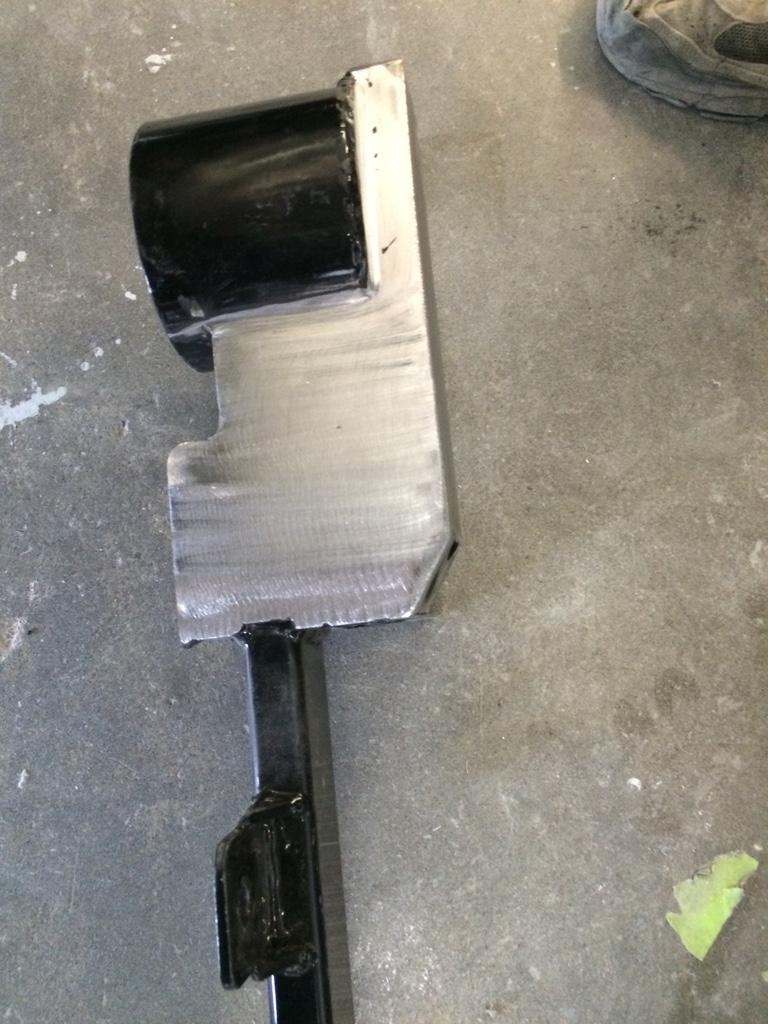
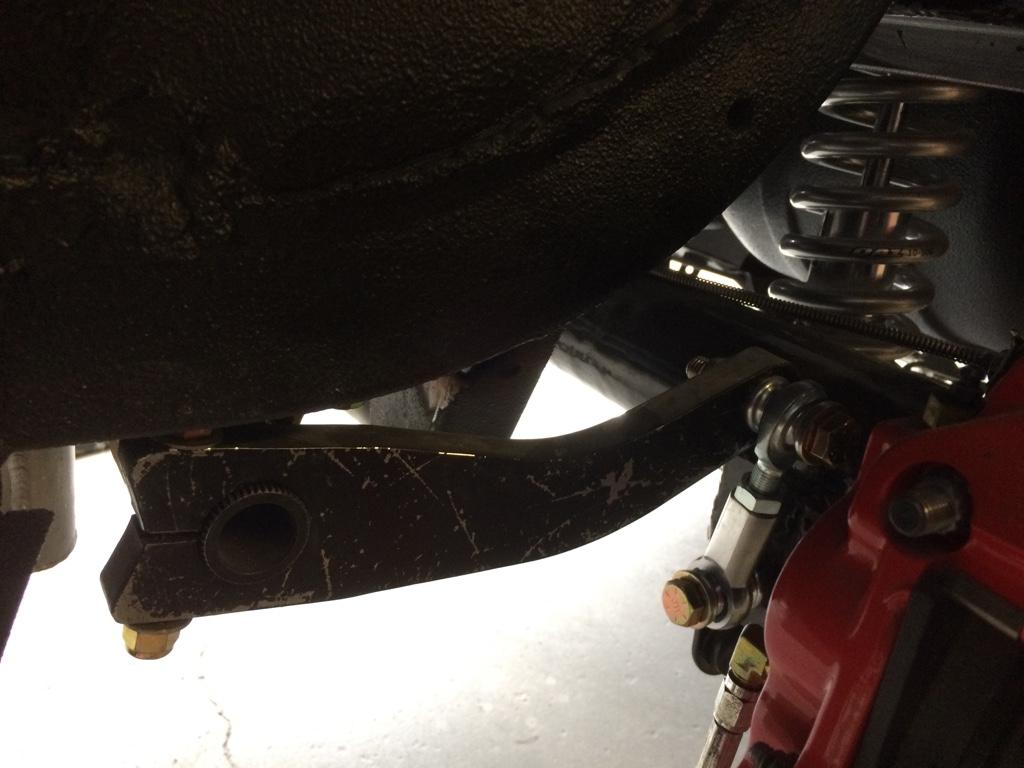
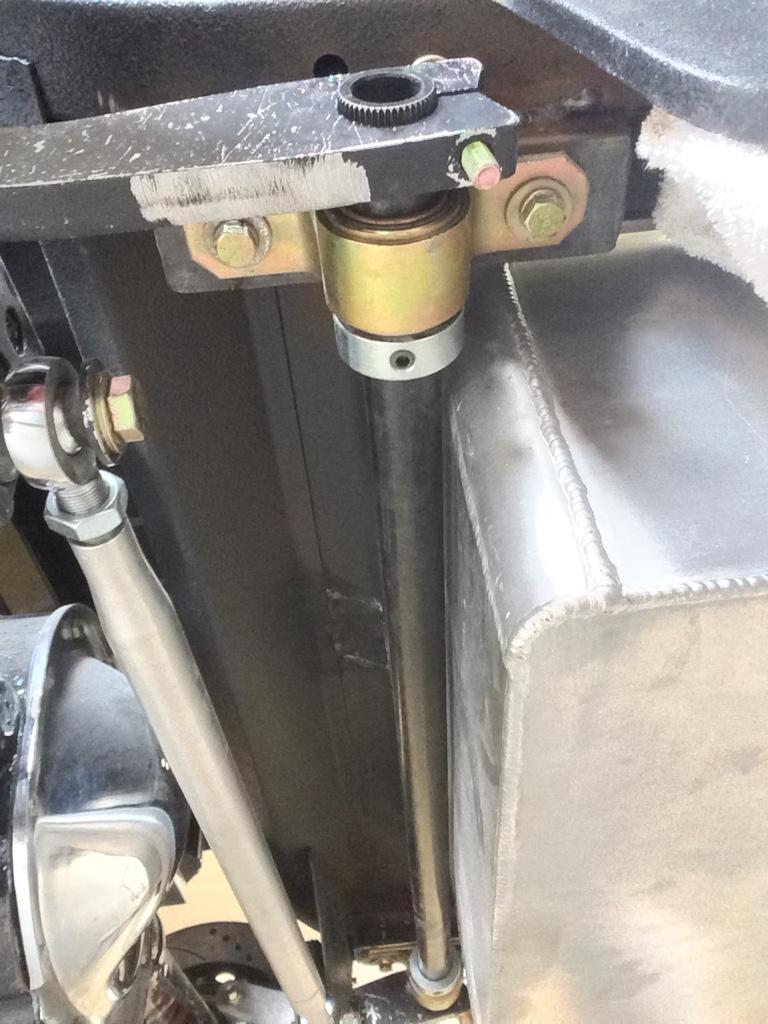
I also added a rear sway bar. The bar mounts are pretty simple. I used 2.5" angle iron and welded nuts on the back side. I boxed them in on the ends to create additional rigidity. I then had my bodyshop weld them in place. I wish I had at home for that part but it was a pretty simple job.
The bar is 37.5" long and is.188" wall hollow tube. I will likely pick up a .250" wall swaybar to swap out for track or autocross events.
I have started working with Ultimate Performance for some new JRI shocks and tuning advice. I met the owner JJ last summer when he helped me with some shocks for my Mustang last summer when he worked for JRI.
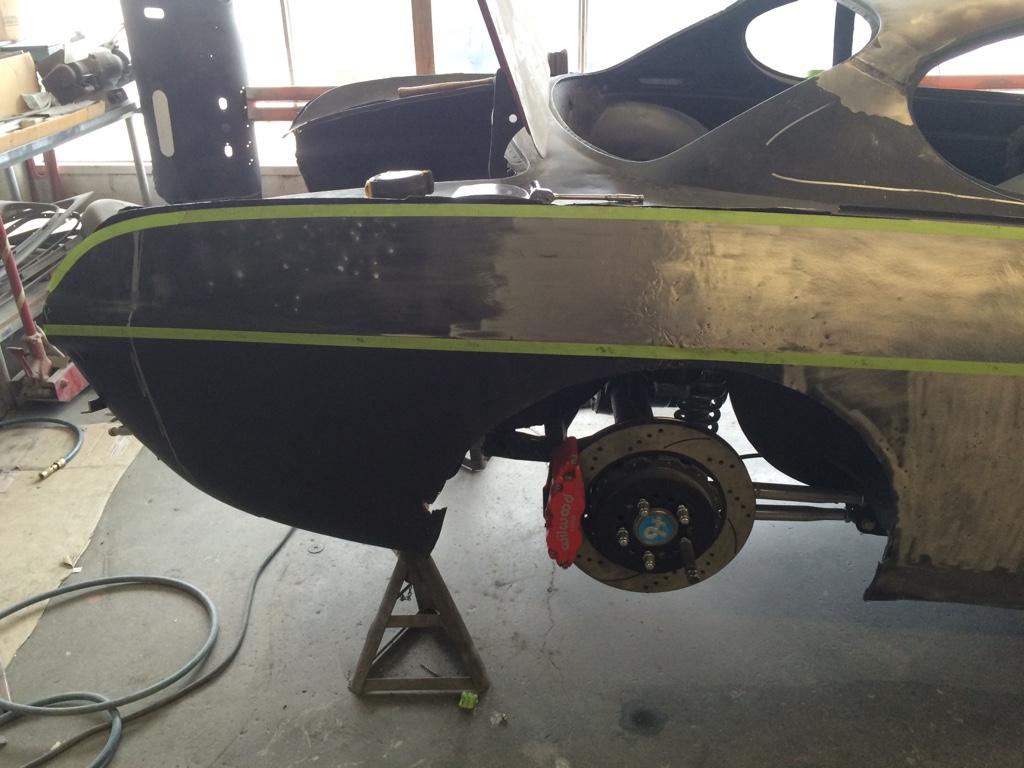
As I mentioned before, the car will be a few inches wider than stock in the rear. We've started to rework the fin in the back. They will be slightly reduced in the height as illustrated by the tape lines. It should look very close to the rendering when we're done.
The shop has also repaired the horrible fender overlap on the passenger front fender. It must've been a repair from 25+ years ago.
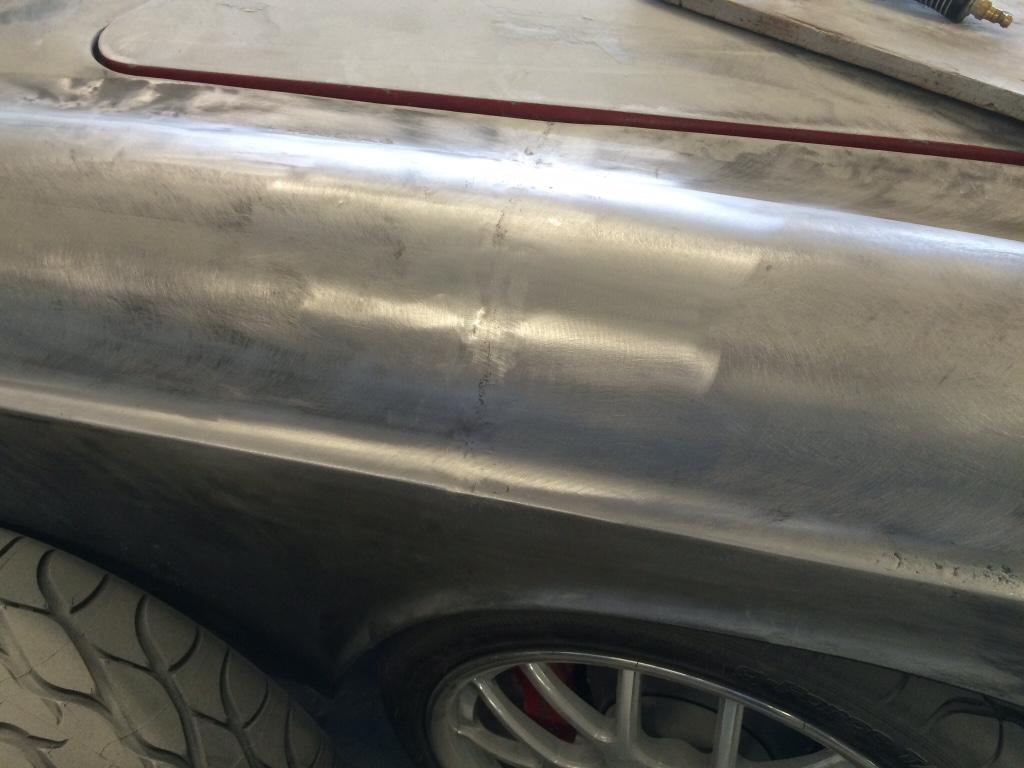
As far as the rear valence goes it will likely take a little trial and error. Weplan on ordering a few rear valances from Newark cars. The body shop likes that idea because they'll be able to return any we don't want or don't think will work. We plan on using as much of the original panel as we can but by adding metal to widen it to fit the car. One thing that will be nice by widening the panel is that the Corvette rear bumpers should fit better and will not need narrowing. I will keep you posted as that begins to develop. They should be starting on that this week or next week.
I plan on having some chrome trim on the top of the fin like the original but it will be custom made from brass and then chrome plated. On the top of the quarter panel we will have a 7/16" wide flat area to mount the trim to.
4-8-2015
You are not alone Pete. There are a few of us crazy guys around here. LOL!
There is a bit more progress to report this past week. They continued working on the rear quarter panels. As you can see the fun is still there but just a bit smaller. We will make some trim to fit on the flat piece on the top of the quarter panel. They have started working out the plan of how to reattach the original rear but making it about 6" wider. I am pleased with how the shape is starting to take. It should look very much like the Vox rendering. There will be some variation on the rendering on the front and rear valance. You have to have some personalization don't you? ![]()
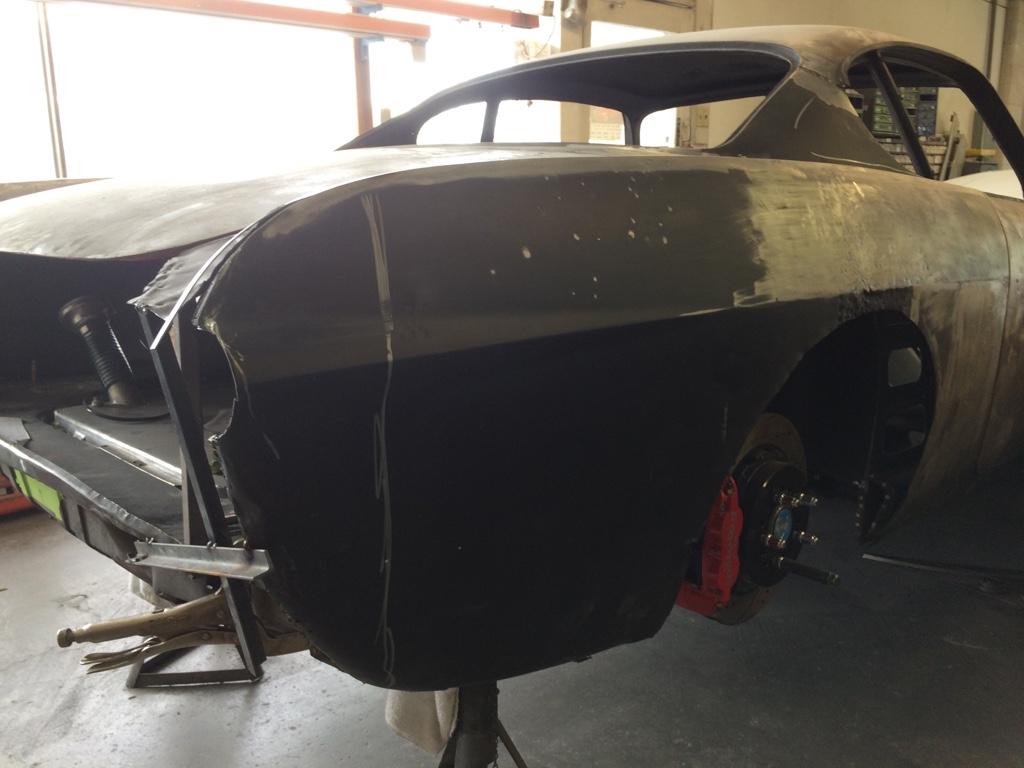
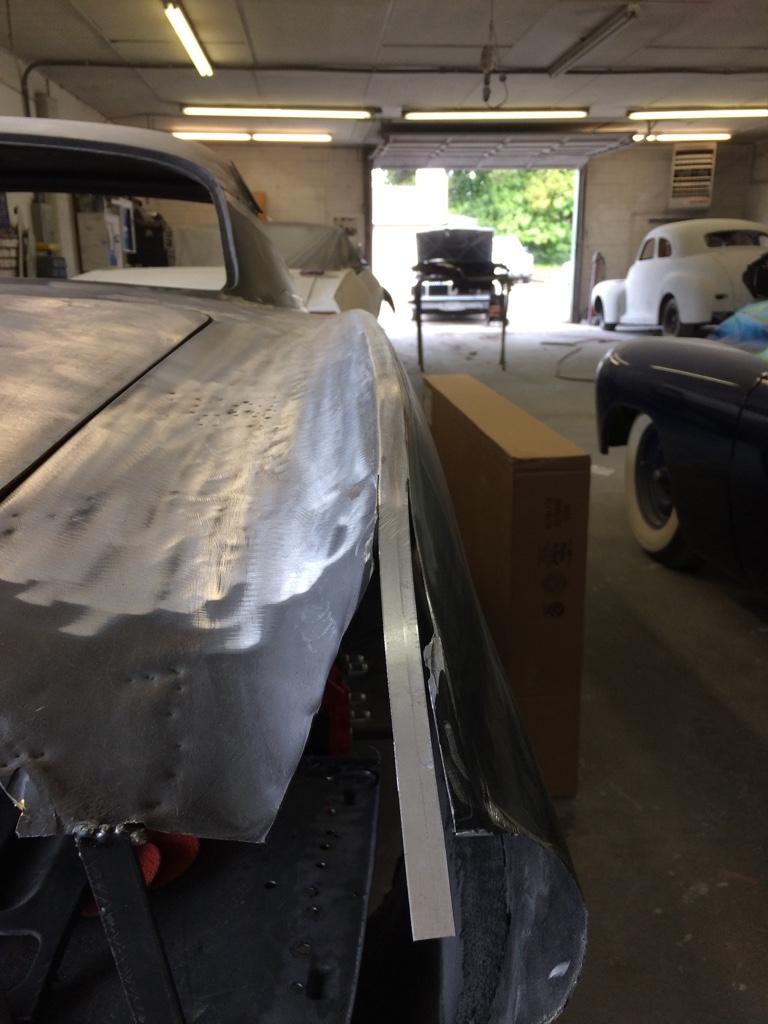
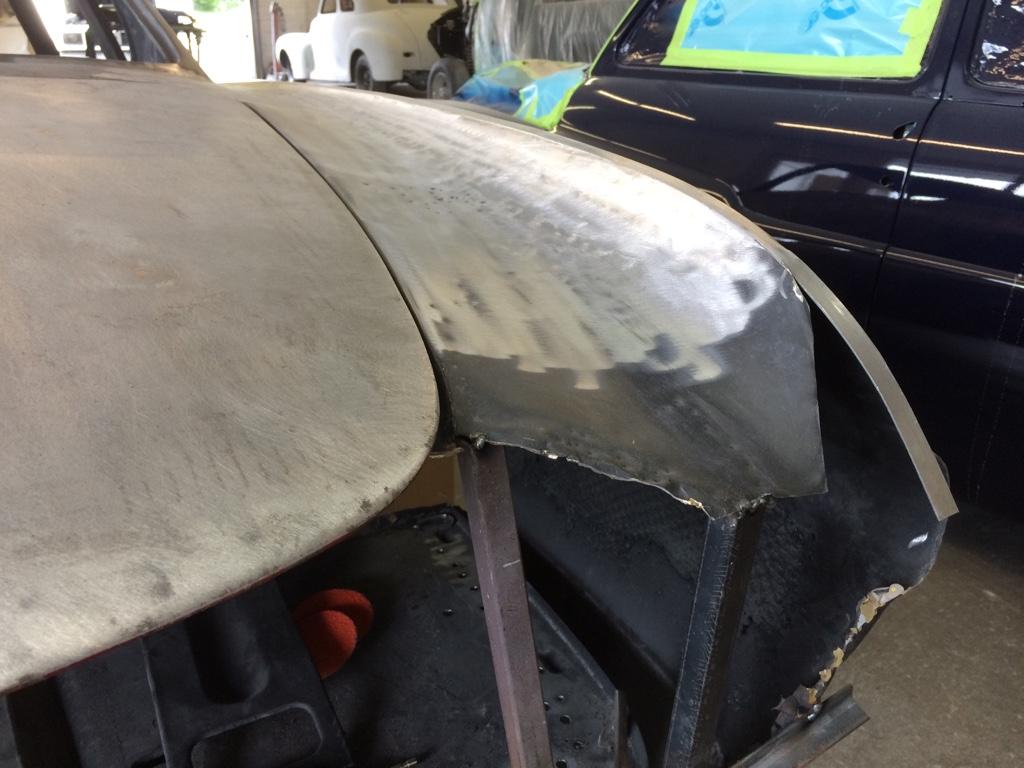
4-7-2015
I had to move the firewall back about 5". It is basically where the back of the battery area is. You will also need to redo the transmission tunnel as well as the driveshaft tunnel. It is all pretty easy if you are decent with a Mig welder. The mini tub wasn't that bad either. I basically cut the wheel housing down the middle and added about 1-1.5" of metal in the middle. The wheel house is now at the frame rail. I don't have my car here but you can take that measurement on your car to yield the distance.
I think I am going to relocate the lower rear link to inside the frame rail to give me a little more room. Right now I have a 265 tire and don't think I would have to do anything to the outside of the body if you wanted a stock look. By relocating the lower link I think you would have enough room for a 295 or 305 tire. I know that Robert has done this mod and he is running a 315 tire but he notched his frame rail about 3/8". You can also fit a 275 tire on the front of the car with the use of his suspension.
I know that Robert has had some problems prividing suspension parts to people for the last year or so but in the last week has partnered with another complany to produce, ship and track all the orders. Basically eliminating him from that side of the equation. I hope that takes care of some of the problems he has had in the past.
6-3-2015
Thanks for the compliment. It sounds like you have a pretty fun project you are working on.
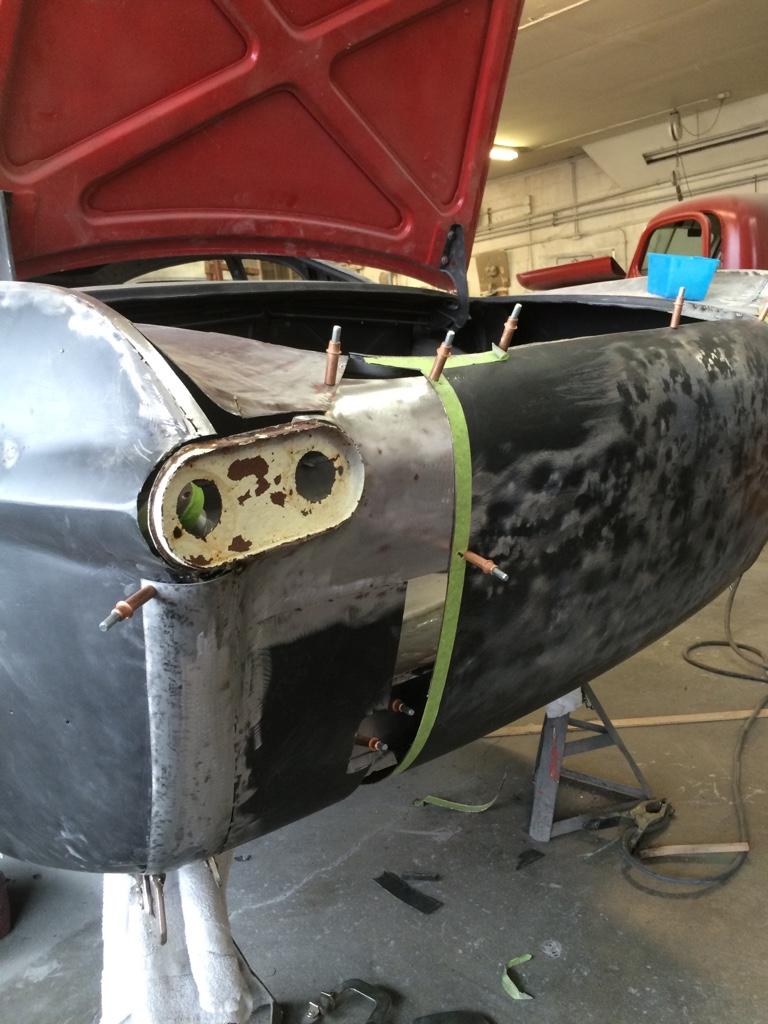
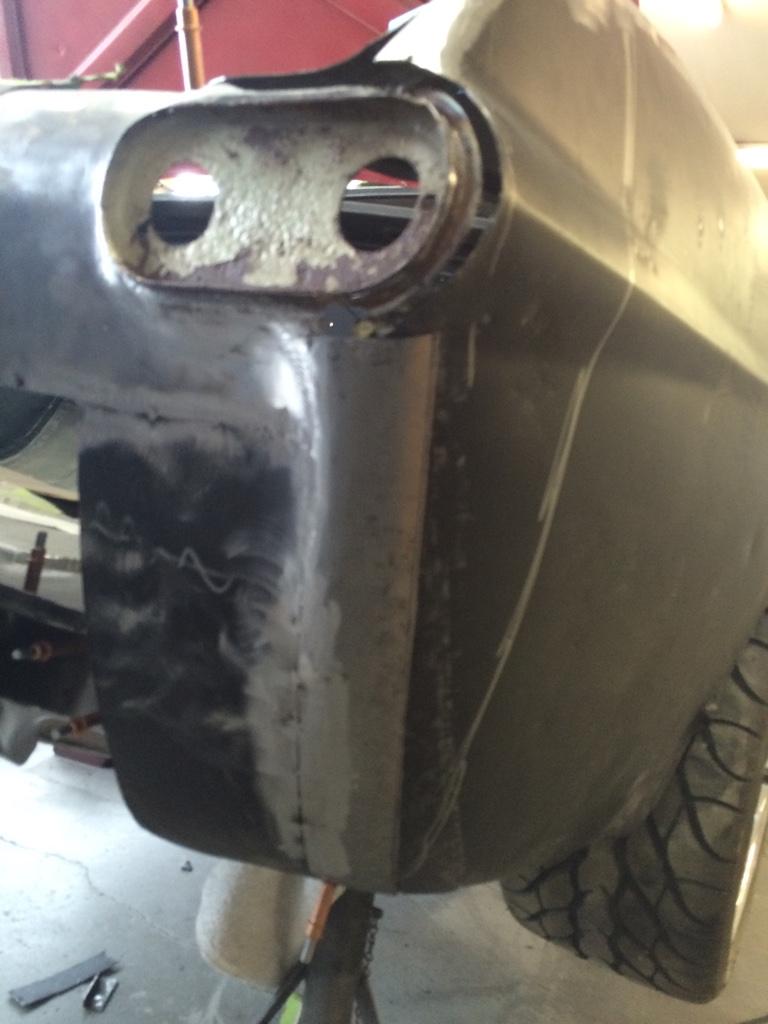
Progress has been a little slower this past month. We had to wait for some new trunk drop down panels from Wolf to be made. They were insulted and now they have started working on the rear panel now. That is off to a pretty good start and is coming into shape .
We are still taking about tail lights and I am exploring a few options right now. I think I have a plan there but I am waiting to hear back from a guy that may be able to make what I want. Fingers crossed.
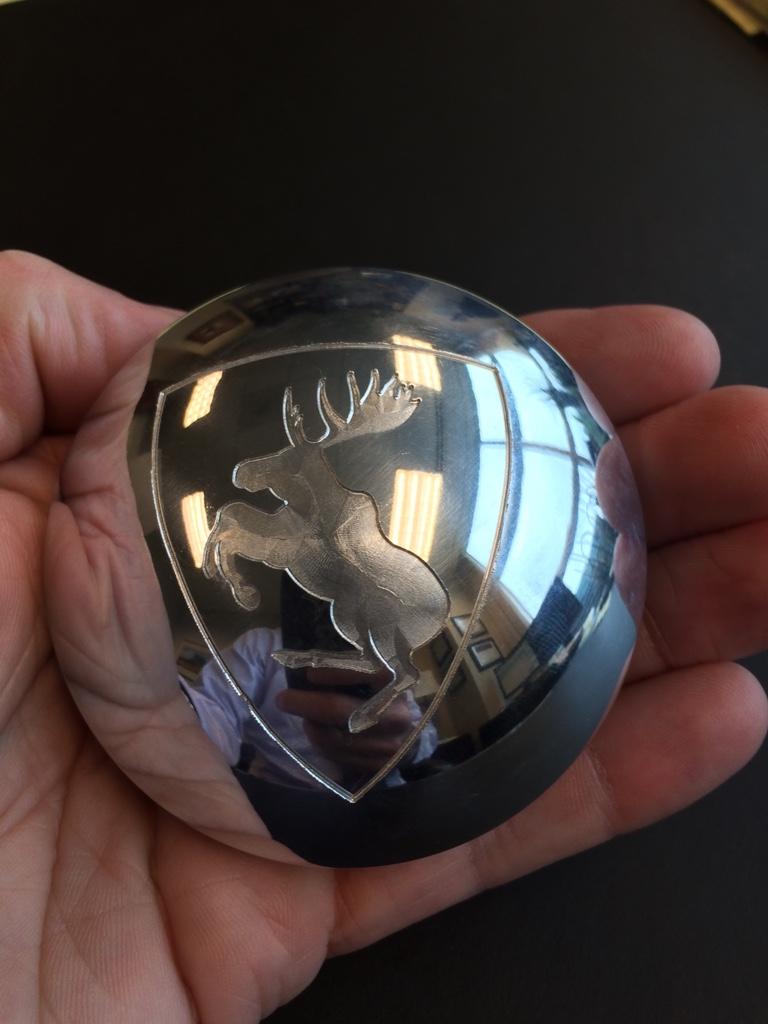
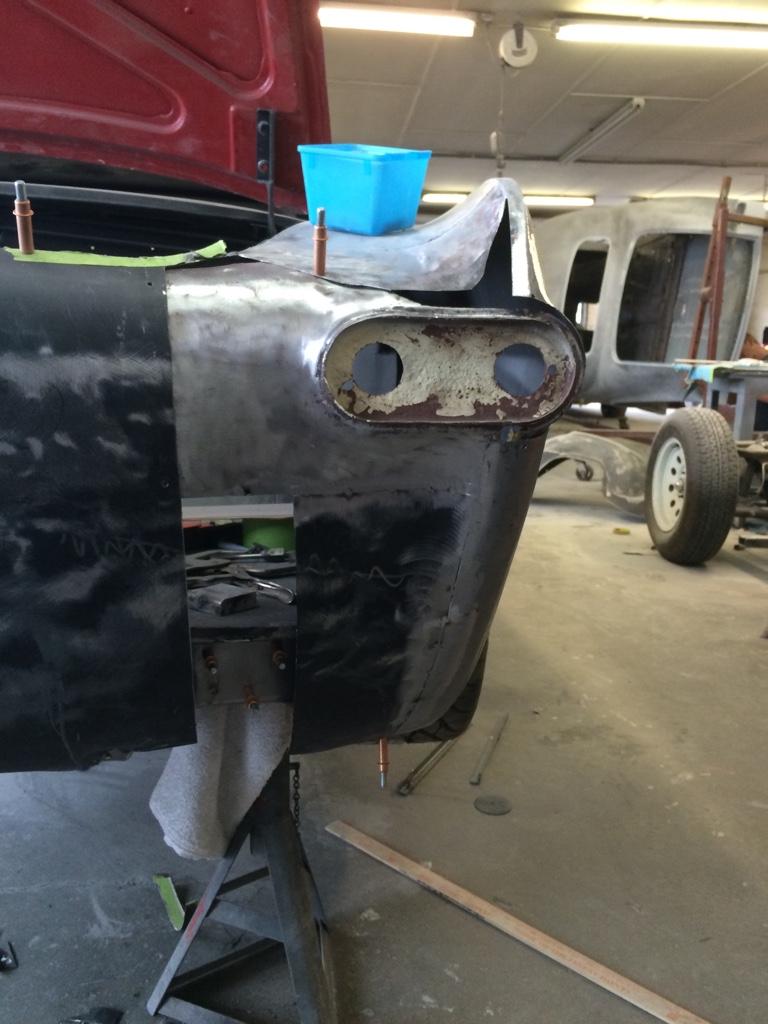
I decided I wanted to add a little touch of Volvo history to the car. Instead of advertising the wheel brand on my center caps I had new caps made. They incorporate the prancing moose logo. They came out pretty cool!
6-18-2015
I keep forgetting to take pictures when I go over there. The rear panel in pretty much done. They are finishing up the gaps on the trunk to make sure everything is the same. That involves a lot of cutting and welding to make it just right. When that is done they will have to finish off around the exhaust holes. I will also need to mount the Corvette rear bumper on there. Once that is fitted we can work on the diffuser. I guess we are quite a ways from done now that I think about it. ![]()
The tail lights I decided to use are from a Lotus Elise S1 and were shipped over from the UK. I got them in 2 days! I went for a set of aftermarket lights that were full LED and will give it a great look. The lights will be slightly frenched into the rear panel and I will have trim made to simulate the original bezels that came with the car. I will post some pictures when I get some.
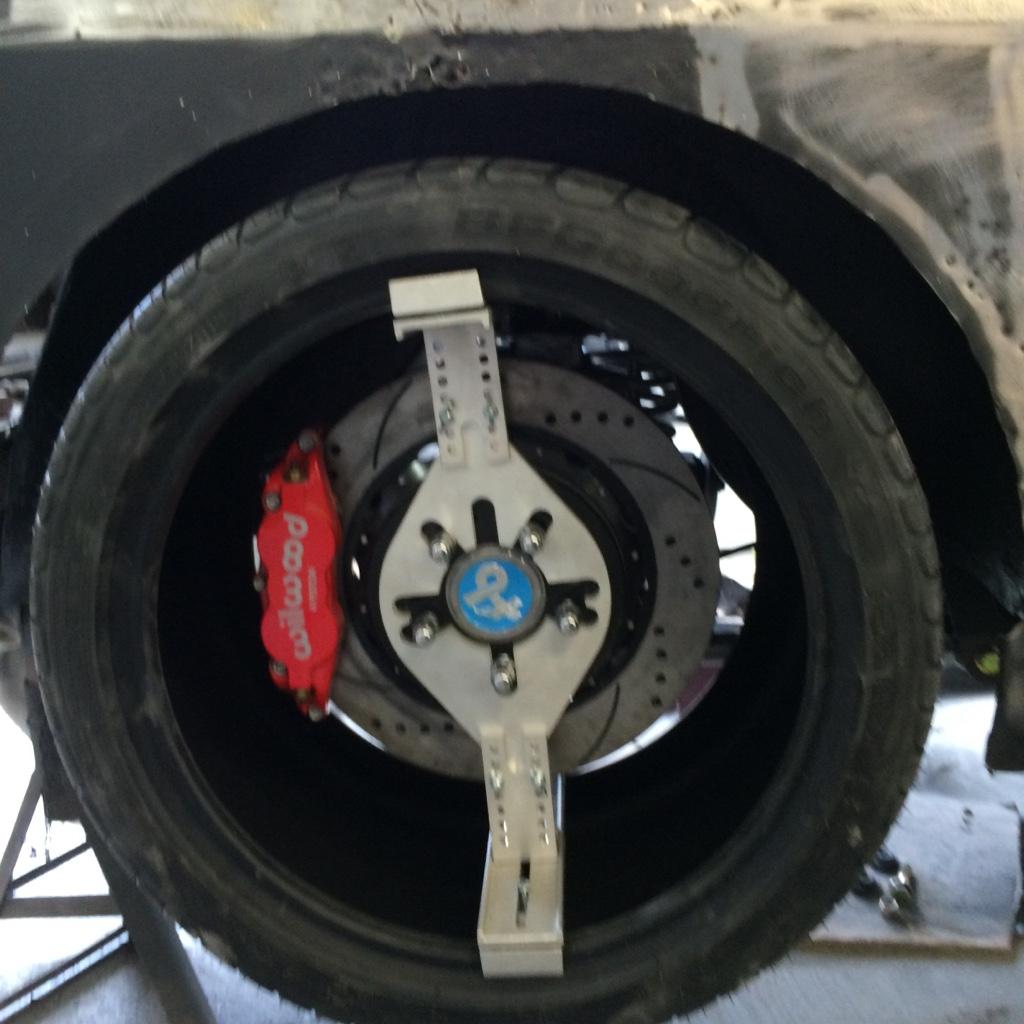
I also go the new tires in. My plan is to have two sets of tires/wheels for the car. The existing set will be for street use and the new set will be for more track or autoX use. The new tires are 315/30/18 BFG Rival S and it doesn't look like much will be needed to make them fit! Between the mini-tub and body modifications I think I can get them to slide in there with about a 1.5" fender lip. I don't think I want the look of a flare so I will end up relocating the outter link bar to the inside and I will have all the real estate I need at that time. With all the modifications I actually thingk I could get a 335 under there without too much drama. I won't do that since that would create too much of a difference in width between front and rear tires. From what I have read and experienced you want to keep the tires no more than 40-50 mm different in width. (315-275=40mm)
The front tires will be 275/35/18 but they are still on backorder. I hope to have them in a few weeks which is in plenty of time before they will start working on the front fender modifications. The tires should fit without any major mods but I want to raise the wheel arches up an inch or two to acheive the look I am after.
6-20-2015
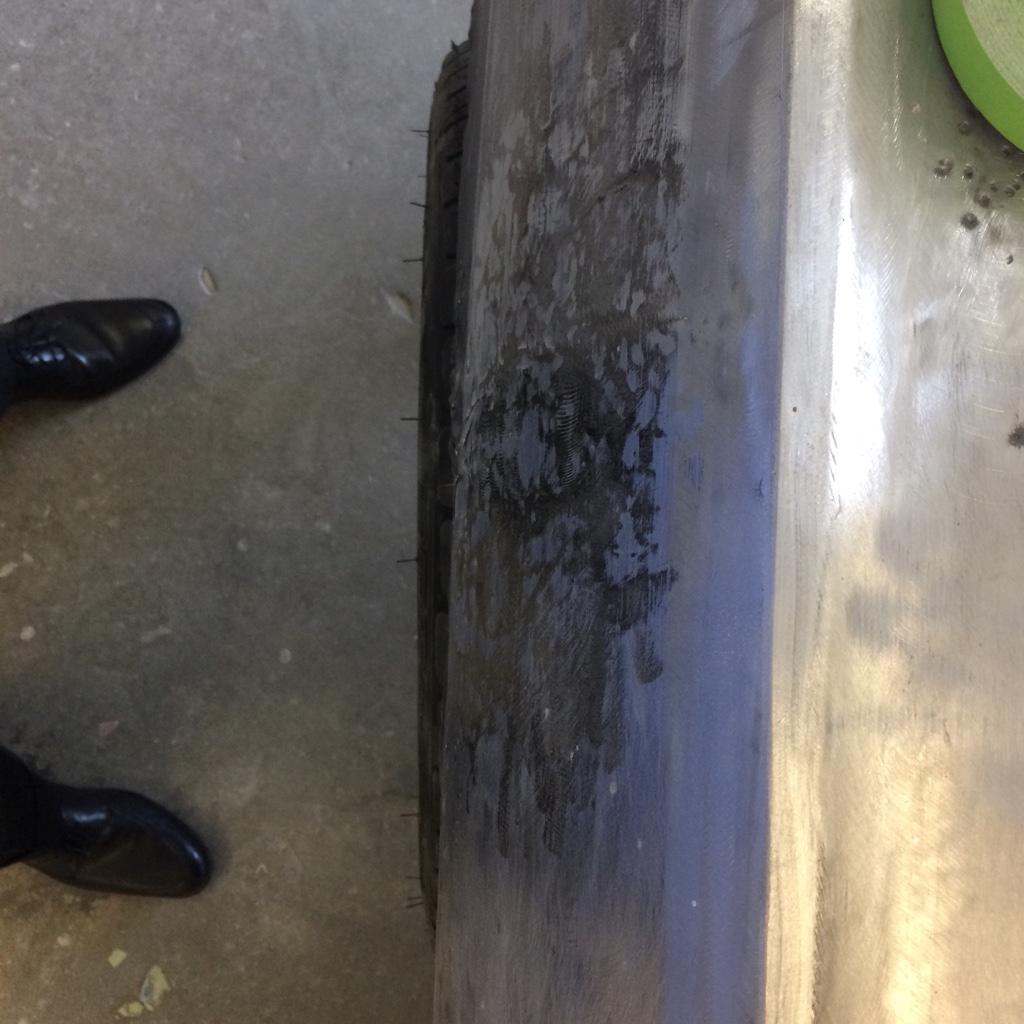
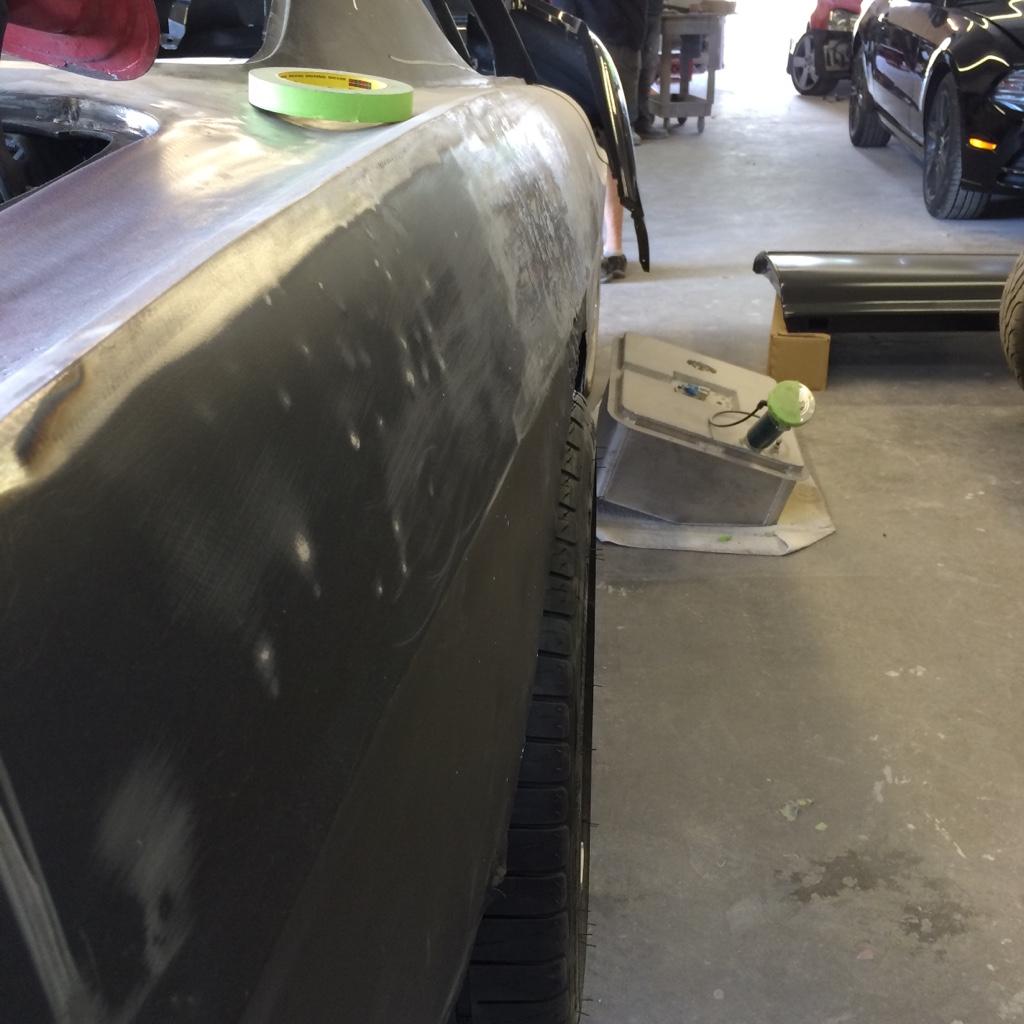
Here are the new tires in their place. I will move the back spacing out by about 1/4" to allow the new wheels to all all the extra width to the inside thus allowing the old and new wheels to look exactly the same. No need for wheel spacers. The only change is to relocate the lower link to the inside.
7-13-2015
I was at the body shop today to discus ride height. It looks like the diameter of the tires I am using is the same as the original tires from what I can see. It looks like the car had 185/70 15's as an available tire. If someone can confirm that I would appreciate it. I would like to have some assistance with on thing. I would like to know what the original ride height is from the bottom of the rocker to the ground. If anyone can help me with that measurement I would be in debt to you. ![]()
I want the car a little lower than stock but not obnoxiously low that I can't drive it. Thanks!!!!!!!!
On a side note, the Amazon wheel arches will cover the 315/30 18 rear tires perfectly. No need for a flare other than the stock lip of the fender! I am so happy I mini-tubbed the car! After I relocate the the outter link bar to the inside everything should clear just fine.
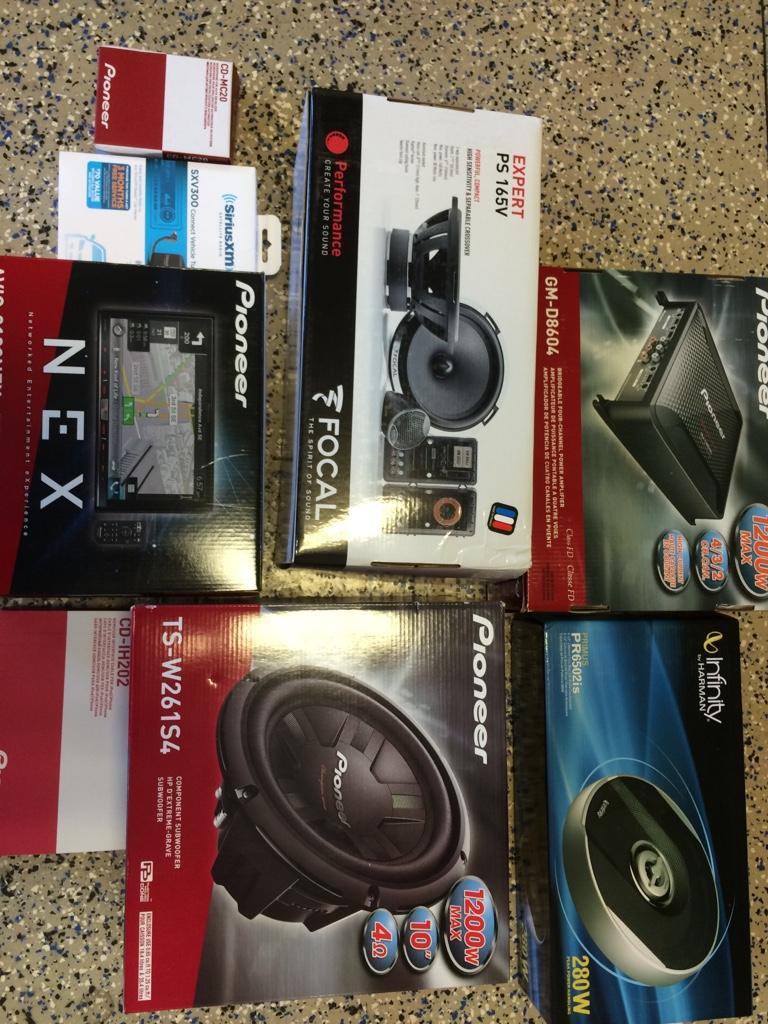
I have all the components for the sound system. A little early but I hate to wait for parts when I do need them. The head unit is a navigation unit from Pioneer and appears to have all the bells and whistles my new cars have including a backup camera. Should be a decent sounding system.
Great photos!
Posted by Diggymart on 12/4/23 @ 3:59:23 PM