You must be logged in to rate content!
14 minute(s) of a 270 minute read
2-17-2009
Cool! I used leaf springs out of a mid 90's Isuzu Amigo and I flipped them around so the longest end is upfront, if that makes sense. Here's a comparison of the two.
The longest end just so happened to be the same length from eyelet to center / mount (sorry, forgot the exact term). You might want to look around the junk yard and see what you can find, that's pretty much what I did. I believe the S10 leafs are 2.5" wide and the Isuzu's are 2" wide. I don't recall the length of the S10 springs, but if I had to guess they were 55"-60" long, and the Isuzu springs are 44" long. As long as can you find some similar in size you should be good.
2-20-2009
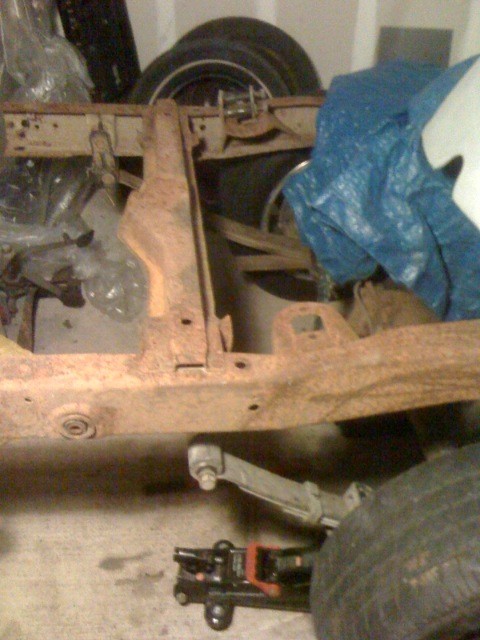
Last night I finished disassembling the chassis. What a DIRTY mess. The front of the frame is caked with dried up mud. I've got a lot of cleaning and sandblasting of small parts to do. My plan is to hopefully power wash the frame this weekend and I'll sand blast some parts here at work.
I went to autozone to see if they had a ball joint separator to rent and I didn't realize how many great tools they have to rent. From piston ring compressors, oil pump primers, etc. Lots of tools I'll need and almost bought. I'm glad I didn't buy any tools right away. I will end up buying a good valve spring compressor from summit cause the one autozone has isn't all that great.
More later...
2-23-2009
OK, so by this weekend I had "Johnny 5" disassembled and the frame and suspension parts were ready for a good wash. I called up a couple friends to see if they could help, but as usual they were busy and I had to figure out a way to do it solo if I wanted to get anything done.
First I had to widen the distance of the center blocks so the frame could slide out which required some thinking. I need to put the good old 2x3 boards under the car again to keep the body suspended. I lifted one corner at a time and slid a couple small cut pieces of wood under the body. This allowed me to slide the lumber under the body and so I could move the stack of center blocks out. Needless to say this was a tedious process, but I got it done safely.
Next, I had to find a way to load a 400-500 lb car frame in the back of my truck solo as well. I ran a board under the back of the frame, put my floor jack under the board and jack it up so the rear could roll. While crouching I had to lift the frame "horns" and slowly pull the frame out. Wasn't too bad, just required some thinking.
Then I had to get it in the bed of the truck. I lifted the front of the frame into the truck and pull it in just enough to get past the lower front suspension arm mounting points so nothing was dragging. I call the jack again, put it under the front cross member so it could roll, and I lifted the front of the frame and rolled the whole thing forward. Pain in the arse, but I got it done. The drive to the car wash was right down the street so I didn't have to go too far.
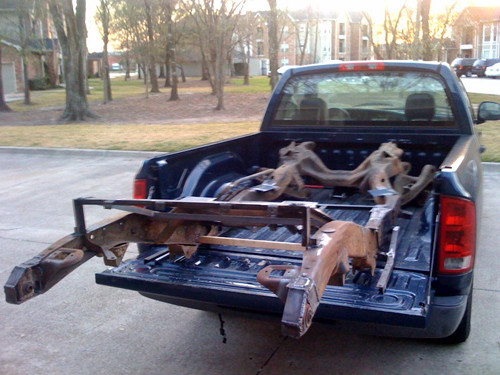
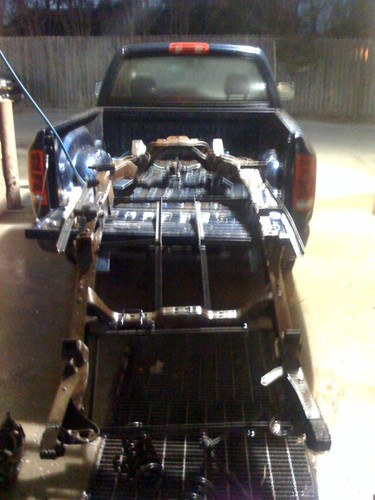
So as I was power washing the frame I need to flip the frame over so I could give the underbelly a good wash. As I rolled the frame on it's side while still in my truck bed the frame got away from me and landed on the side of my truck bed. Put a nice soft ball dint in the side, it pounded the corner right above my right rear light taking off a section of paint about the size of a golf ball, and it put many scratches in the paint. All I could do was get pissed for a moment and say oh well.
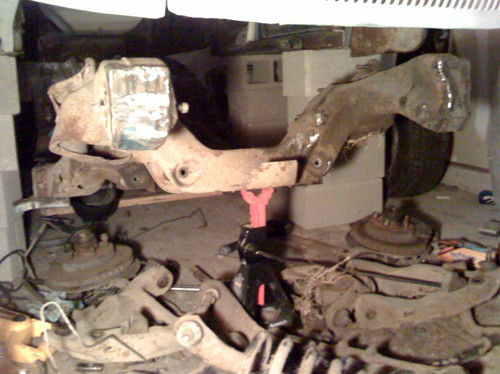
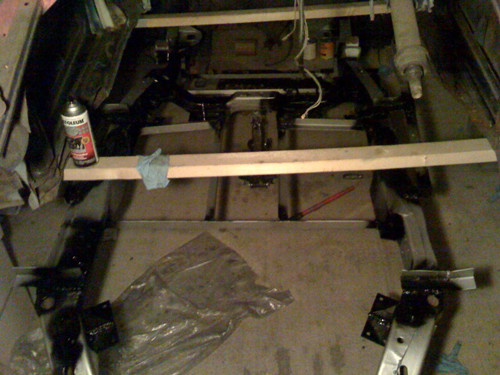
Here's the frame upside down after all that mess.
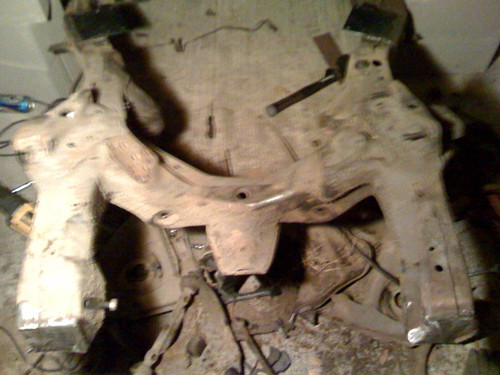
So I again had to flip it over with about as much luck as the first try and took the washed frame and parts home. Now it was time to get the frame out and back into the garage, but this time upside down so I can finish up and redo some over head welds that didn't turn out so great. I had to once again figure out how to flip the frame and get it under the car without dragging it. My creeper helped out a lot cause the gas tank mount sat on it nicely lifting the rear up. So the whole thing rolled under the car without hardly any problems. One of my neighbors happened to pull up while this was going on and he was more of a headache than any help. I know they guy was worried about my well being but he began to sound like my mother, LOL!
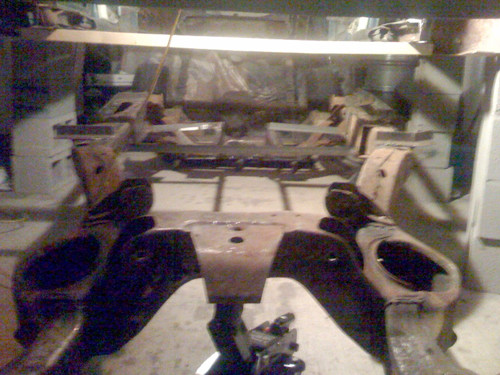
I know it doesn't seem like I got a whole lot accomplished, but I did manage to get all that done solo. I also, ground away all the bad looking over head welds and began welding. Hopefully this week I can finish welding, get some parts sand blasted and move closer to getting the frame in paint.
2-26-2009
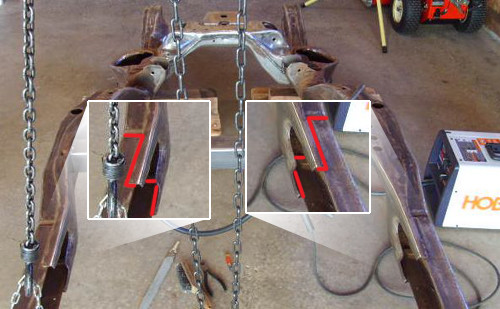
Awesome! I'm glad to see you're making progress. You might want to start thinking about how you're going to cut the frame. Look through my thread and you can kind of gauge by the pictures how much you'll need to cut off the front and rear, but like you mentioned you'll need the springs to start on the rear and shortening the wheelbase.
Main thing is you'll want to figure out where you're going to make your cut to shorten the wheelbase. Easiest way is to grind away the factory welds right after the point where the frame bows out. Once you grind away the welds you can pull the two halfs apart. Then cut away as much metal from the frame rails as needed to get the 94.5" wheelbase.
Member custom interiors did the same. See this thread.
frame welding
3-20-2009
Update...
Over the past couple of weeks I've been taking care of the underside welding and have finally finished. Not much to really photograph change wise. Hopefully this weekend I'll get the chance to pull the frame out from under the car, clean up the floor, and begin painting.
I also received some more parts and tools that I ordered. Cam bearings, rod bearings, main bearings, rear main seal, piston rings, valve spring compressortool, blocks plugs, a set of cleaning brushes, etc.
Also, I was able to find the factory stamped suffix codes on the front passenger pad of the block. Anyone know what these numbers mean?
12S231437
F 0313OKB
Last but not least I got the piston parts numbers off the top of the pistons.
TRW L3022F
.030 (which I already knew)
I was able to find out the specs on these pistons:
L=Forged in the part number
Compression height is 1.535.
Pin height is 0.927
Ring sizes are 5/64 5/64 3/16
All I've got for now. More to come hopefully soon.
4-9-2009
Quick update...
I bought some more new parts. Seems like there's always something else to buy. Parts I got to finish up the motor, tranny, rear diff, and chassis:
Hydraulic lifters, some lube for the lifters, short water pump - aluminum alt. bracket (mounts up top), starter, B&M street shift kit for the th350, adjustable modulator, B&M drain plug for tranny, bushings for tranny, tranny cooler, intermediate tranny band, all new shocks, bearings / seals, rear brake hose, and diff gasket / gear oil. I think that's all...?
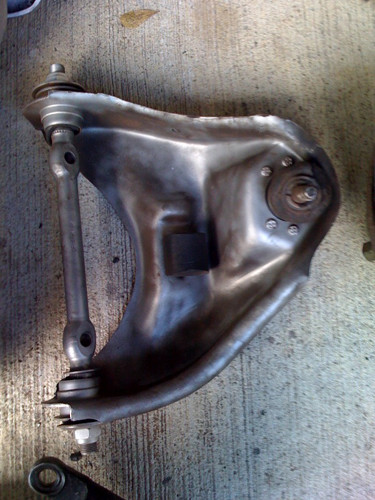
Also, during this week I've sand blasted all the a-arms, put on a second coat of master serires on the frame, and I sprayed some glossy black automotive Rust-o-leum in the areas that are hard / impossible to reach with a brush.
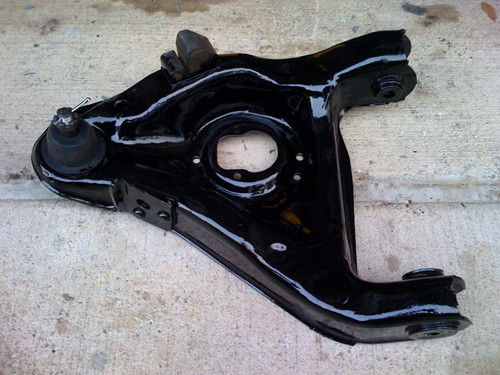
One of the sand blasted a-arms
4-13-2009
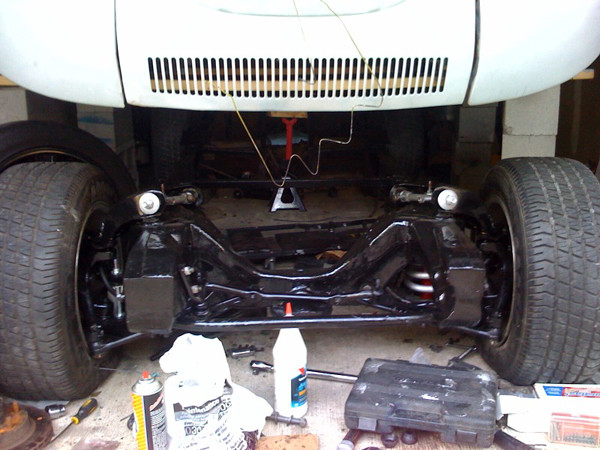
OK, I've got the frame completely painted in the Master Series glossy chassis black as well as the front suspension. Also, I installed all new bushings, and ball joints in the control arms. Next is to put the front suspension together and begin working on the rear suspension.
More later...
4-20-2009
Got some work done to the bug. Actually, I put in about 10 hrs time, but it really feels like I didn't get a whole lot done. Getting in the coil springs, even with a compressor, was a real pain without the full weight of an engine or the vehicle to help, but I got it done. That took up most my time.
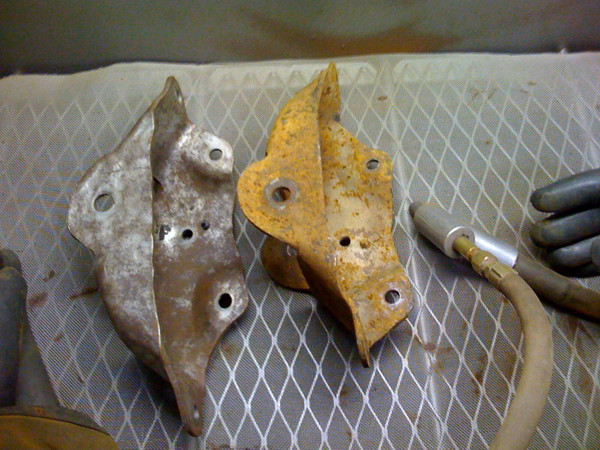
I sand blasted the front leaf spring mounts.
And some misc. parts.
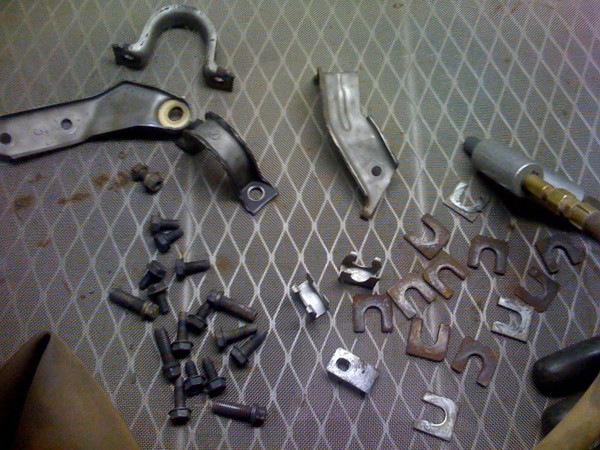
Misc parts painted.
I didn't realize just how bad the cabinet sand blaster at my work was clogged up until our engineer saw just how slow the process was taking. We filtered out the beads, put it back in, and it worked like a champ. I kinda thought it was taking forever and it wasn't really doing a great job of removing all the rust, but what do I know? I don't do this everyday and can't really complain because my work allows me to use some of their equipment. Any who, it works much better.
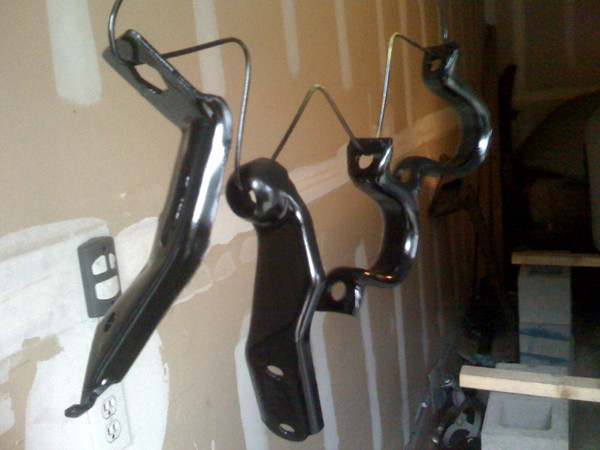
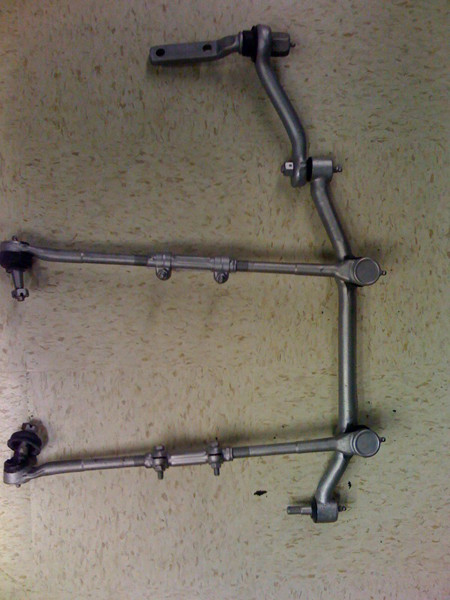
Here's the steering linkage sandblasted.
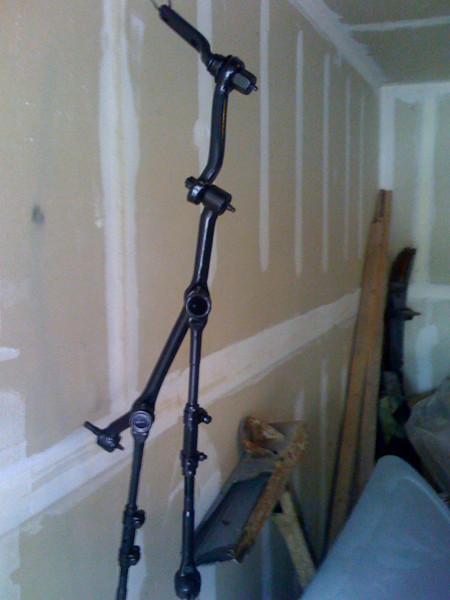
Linkage with new tie rods installed and painted.
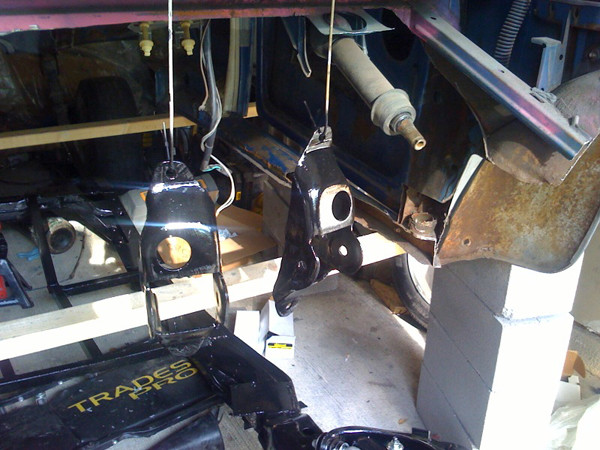
Leaf mounts painted. You can see in this picture just how much I had to cut out of the heater channels. Quite a bit. Welding rods work great for hanging parts so you can paint them.
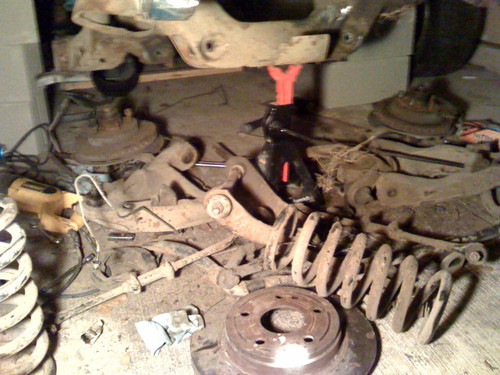
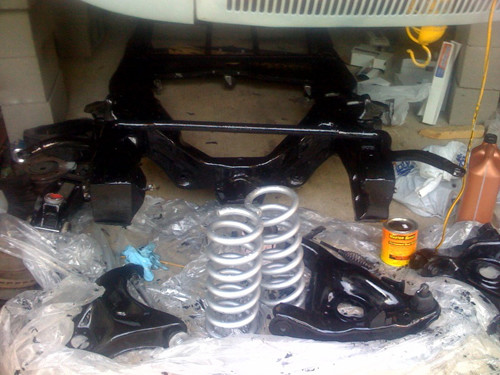
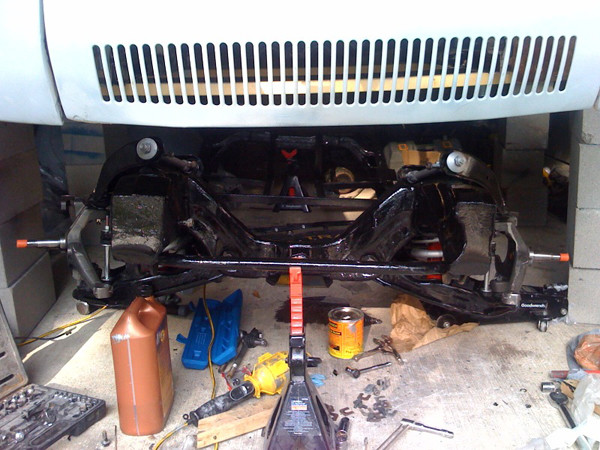
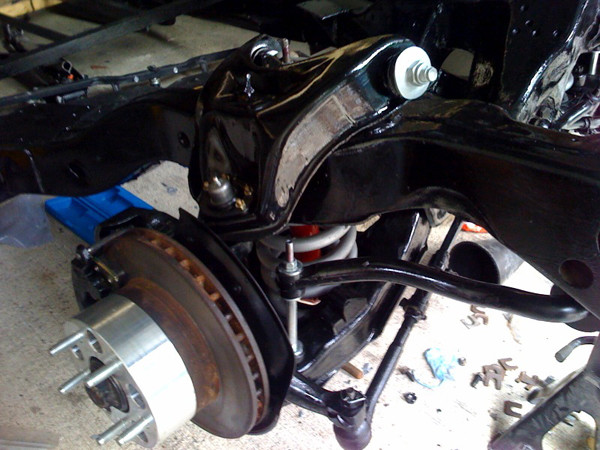
And here's the frame as of this weekend. Control arms installed with new bushings and ball joints. Coil springs painted and installed. New shocks installed. Lowered 2" spindles. Sway bar painted and installed with new bushings and new sway linkage.
Thats about as far as I got. More later.
4-27-2009
Got some more work done this week and weekend. This will be kinda short because I smashed my finger working on the car this weekend. Leaf spring fell on it. Good thing it's my ring finger that I use to play guitar with and it's a good thing I DOn't have a couple shows to play this coming friday and sat. It's all good though. That's why we have four fingers.
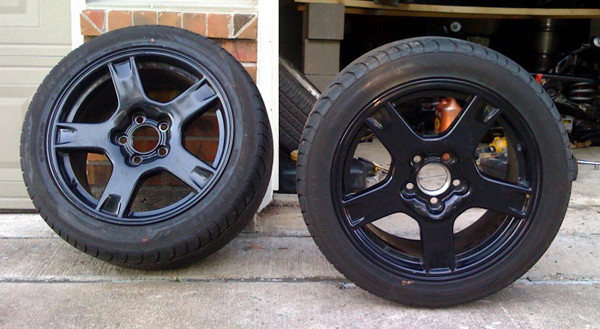
Here's a pic of the wheels Ray lent me so I can compare to see if I'll like my wheels black. These are the same wheels and these are for the rear. 18" x 9.5 Thanks Ray!
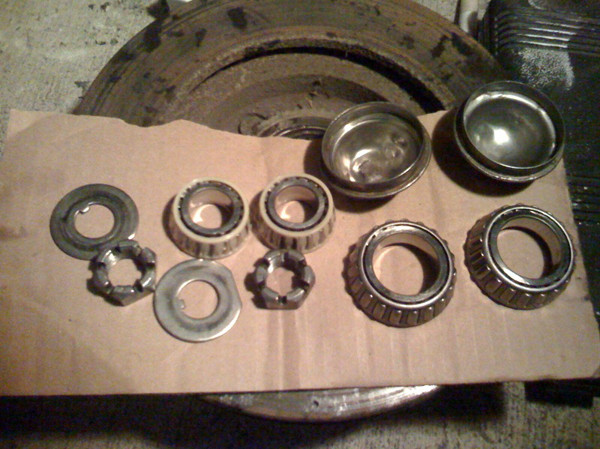
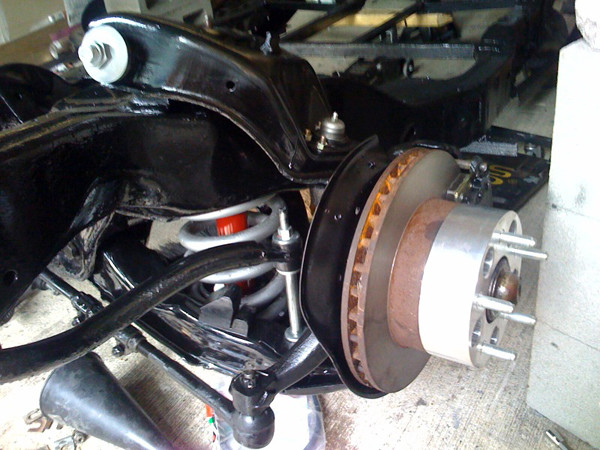
I thoroughly cleaned the wheel bearings, thrust washer and castle nut to later find out I had bought new bearings. : Well, the bearings were in really good shape so I'll hang onto them, put new ones in, for future maintenance.
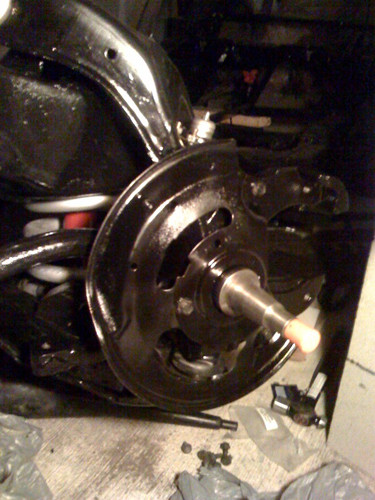
Painted the spindle and dust cover and installed.
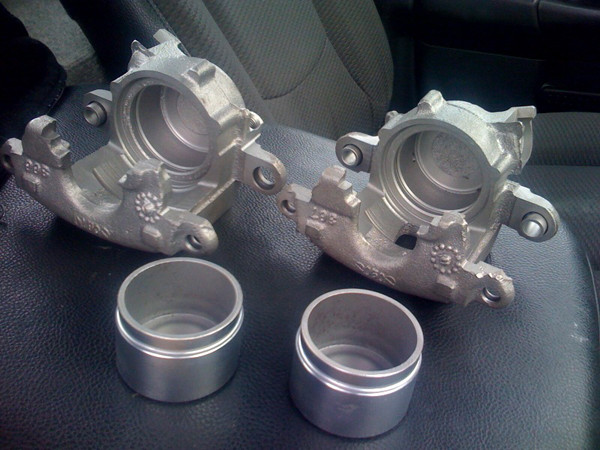
Sand blasted the calipers.
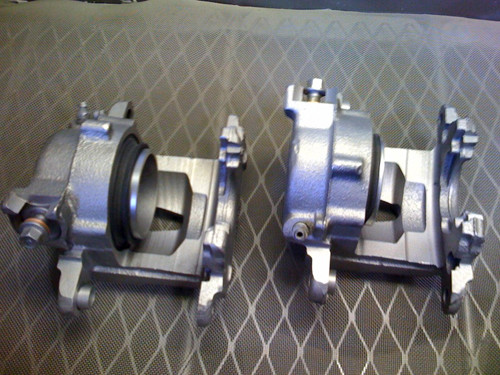
Took them apart to clean them and found a good bit of corrosion. Notice the rust on the dust boot.
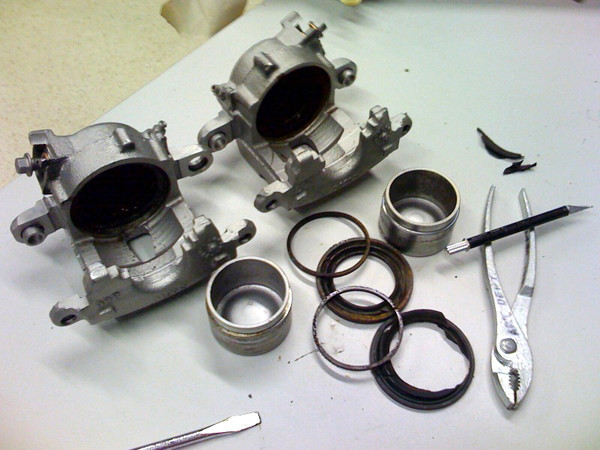
I cleaned them and then blasted the inners to find out that one of the pistons had some corrosion which gave me doubts about using for rebuild. So I just bought a new caliper for $10 from the Zone.
Bearings packed, new seal, and rotor assembly installed with the good ol 2" spacers. Tire rod / steering linkage installed too. Front susp. finished.

Impressive!
Posted by Diggymart on 4/27/20 @ 2:40:48 PM