You must be logged in to rate content!
48 minute(s) of a 99 minute read
1-11-2021
School me on stance (now a build thread)
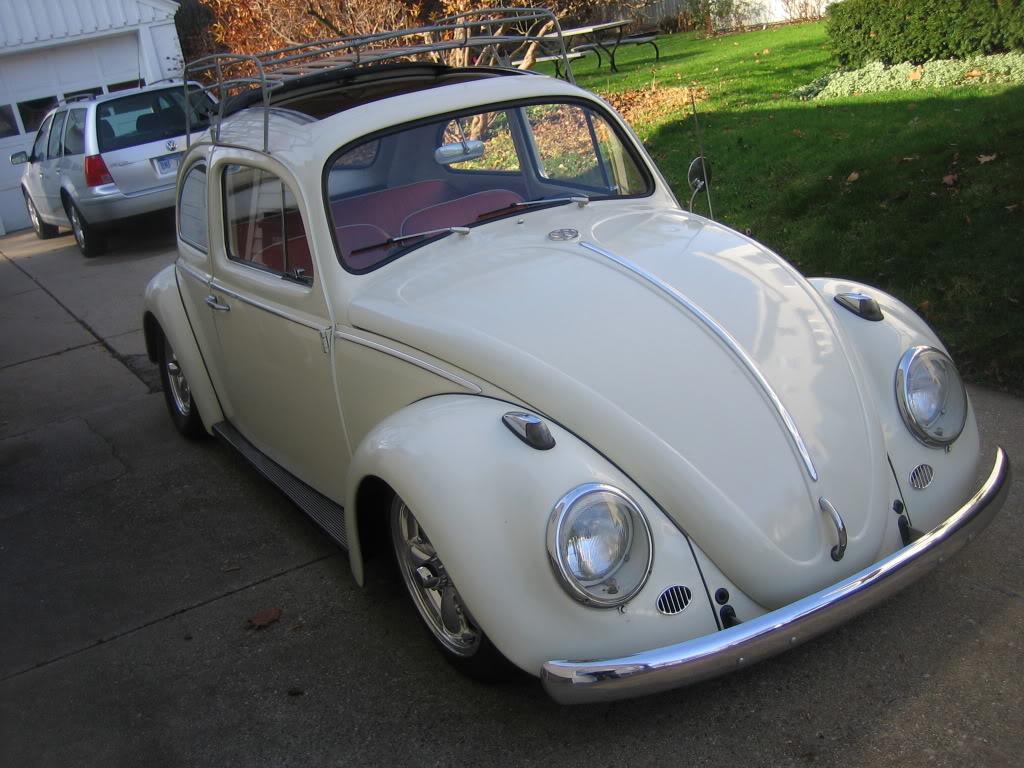
Compliments of Zeeuwvw @ michiganvw.org
11/19/2009
Here is my working plan:
1. Buy an air cooled - I'm hoping to find a solid shell that I can just go ahead and start working on without having to do a body-off restoration or anything. The more I read the more I think the black car listed above is the perfect candidate. That early sixty's vintage has the nice classic look without the high price of the '50s cars. Parts are widely available for a reasonable price and easy to come by.
2. Keep the other Corrado shell for a while and see how I feel. That way I can always go back to that. However, if I get swept up in aircooled culture and want nothing to do with Corrados, I can sell it off along with my seats and wheels.
I'm pretty stoked either way.
11/22/2009
Long story and pics to follow. Things didn't go as plan, but I couldn't be happier.
11/22/2009
Ok, here is the saga with pics. Sorry for the delay I was too busy joy riding to type.
Sorry for the lack of complete photo documentation. You'll have to use your imagination for a good portion of this.
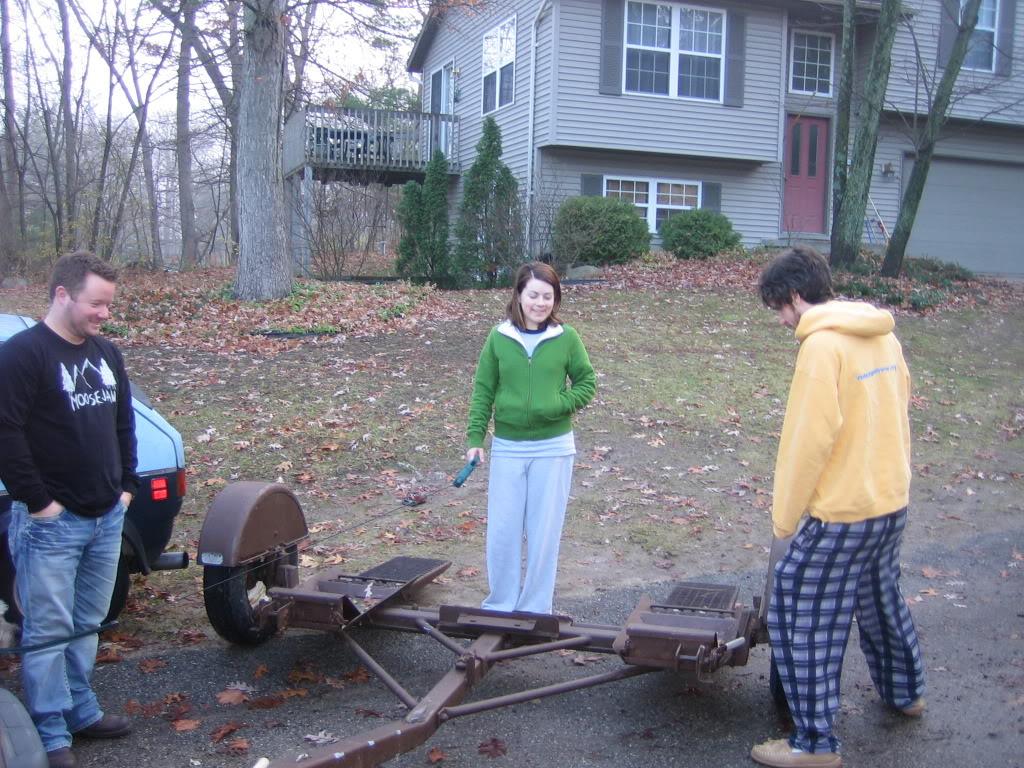
Drew and I left my house yesterday about 8:00am, picked up the bosses' huge conversion van, and headed to Steve's where he greeted us in his PJ's to load up the trailer. Nothin' but class buddy :D:
Then it was off to Walled lake to check out the black bug. Three hours later were were looking over what I had built up in my mind to be the next project.
Believe me when I say I had every intention of buying the car. I had already planned most of what I wanted to do to it, picked out the parts I would need and lost sleep thinking about the best way to approach the project. Well, without bad mouthing the car or seller too bad, let's just say it was not the pristine starting point I had imagined. The car had some questionable work done to it in the past and the body was not nearly as nice as the pictures seemed to indicate. On top of that the engine would have needed some serious work or possibly replacement to get it road worthy. It could have been a good starting point for a project, but the owner was not willing to move on the price at all and I couldn't justify spending that kind of money on a car that would clearly need more then I could afford.
So with an empty heart and trailer we started on our way back to Grand Rapids. About half way to Lansing we started thinking. We have a trailer, a truck and a big wad of cash. Let's make the most of it. I made a quick call to the owner of the white '63 and he agreed to knock $700 off his asking price right then and there. We knew it would be a long day but figured what the hell. It could be a fun trip.
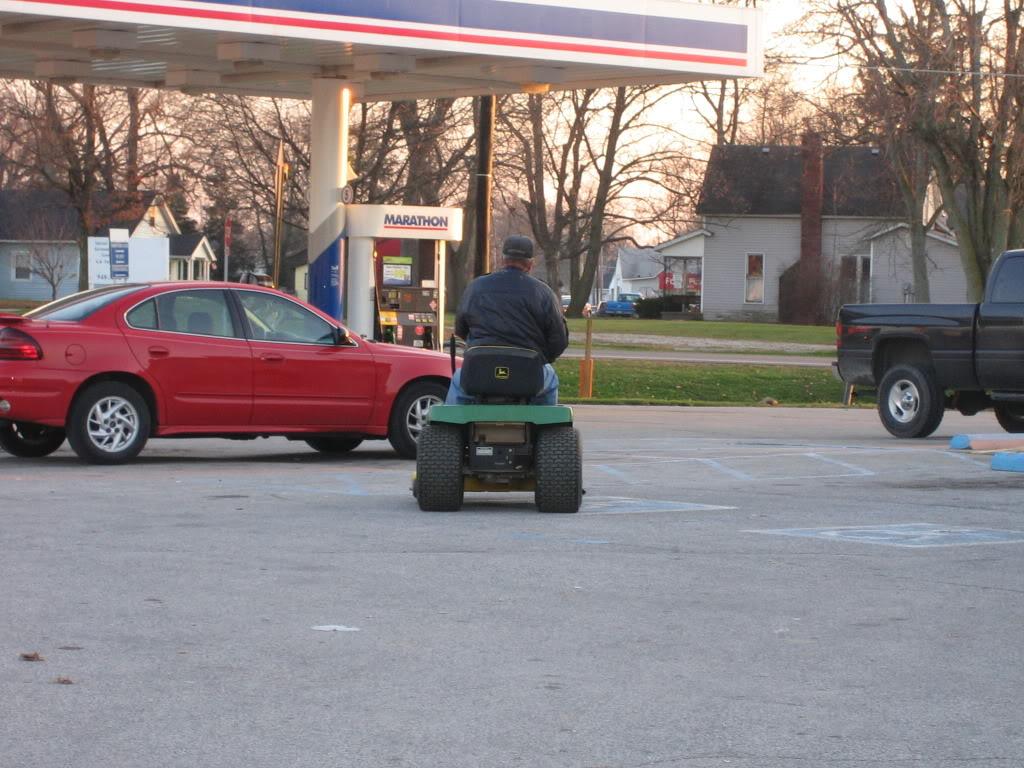
Now for some reason I had convinced myself that this car was IN Fort Wayne or very close to it. We were supposed to call the owner when we got close so a few miles into Indiana I gave him a ring. He claimed his exit was just south of Ft Wayne and then 25 minutes west. I'm guessing your sense of distance gets thrown off when you live in the middle of nowhere or something because it took a lot longer then he thought to get there. About two hours past Ft Wayne we were finally at our destination of Kokomo Indiana. The drive wasn't all bad though. How often do you see a senior citizen riding his tractor to the gas station to get a cup of coffee? Only in Indiana.
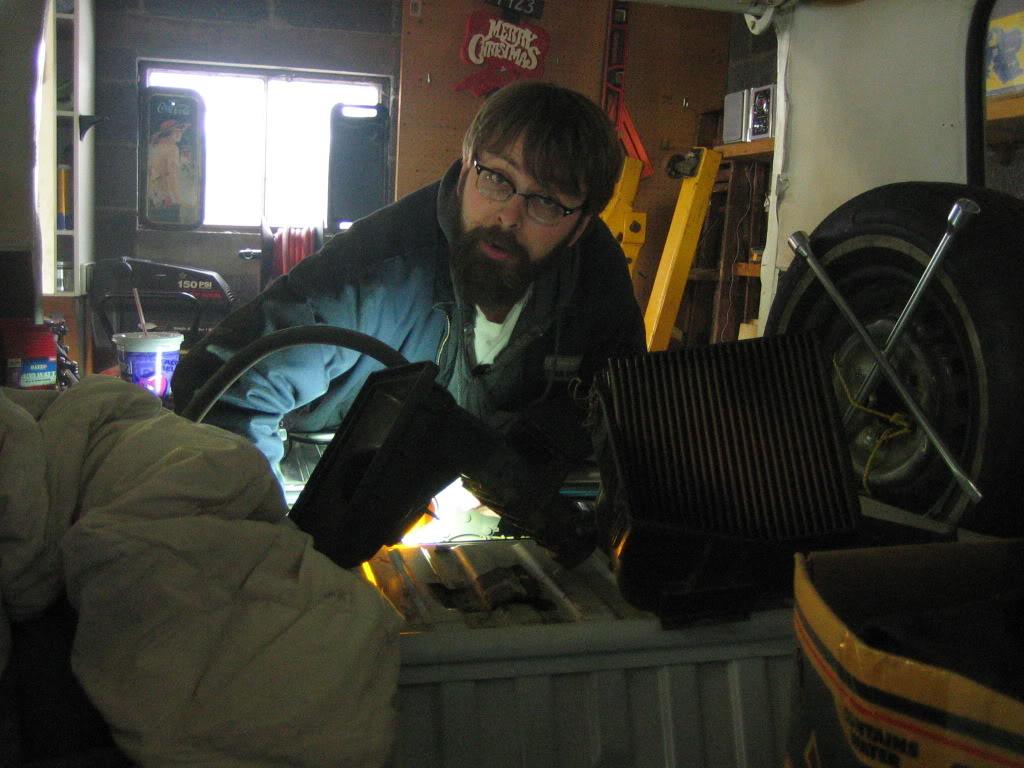
Ok, so when we finally get to the guy's house it's dark but he assures us that his garage is well lit enough to view the car. I believe his quote was something like, "Ya can see a shit stain on a mouse in there". In southern drawl of course. I guess we were almost in the south.
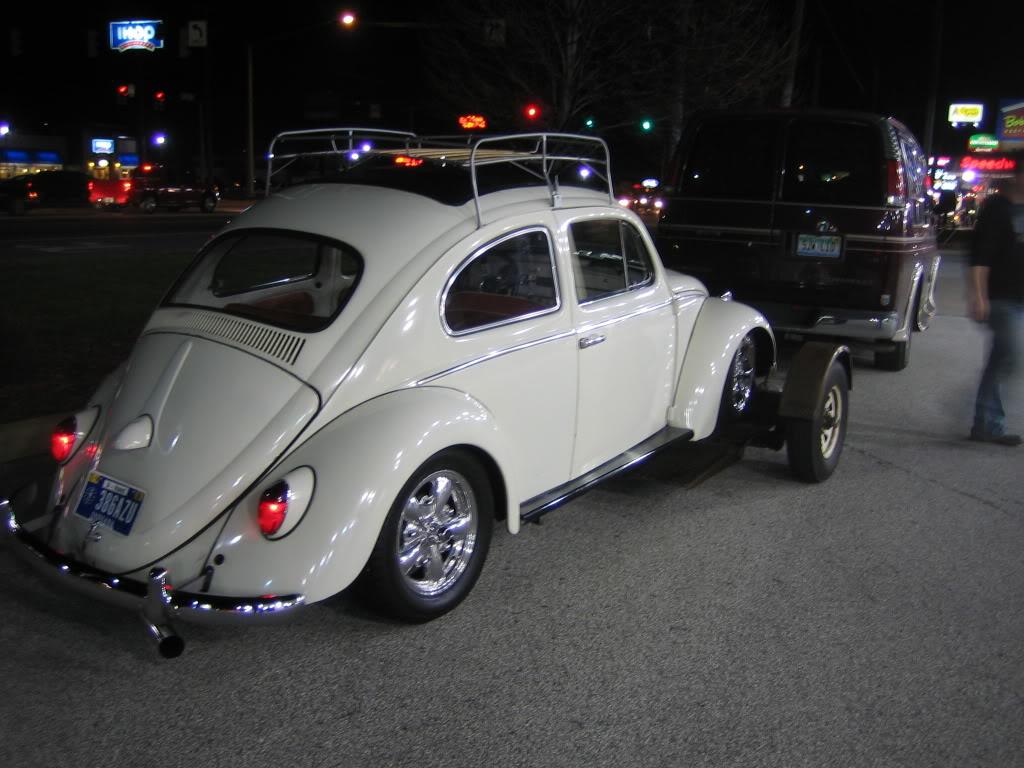
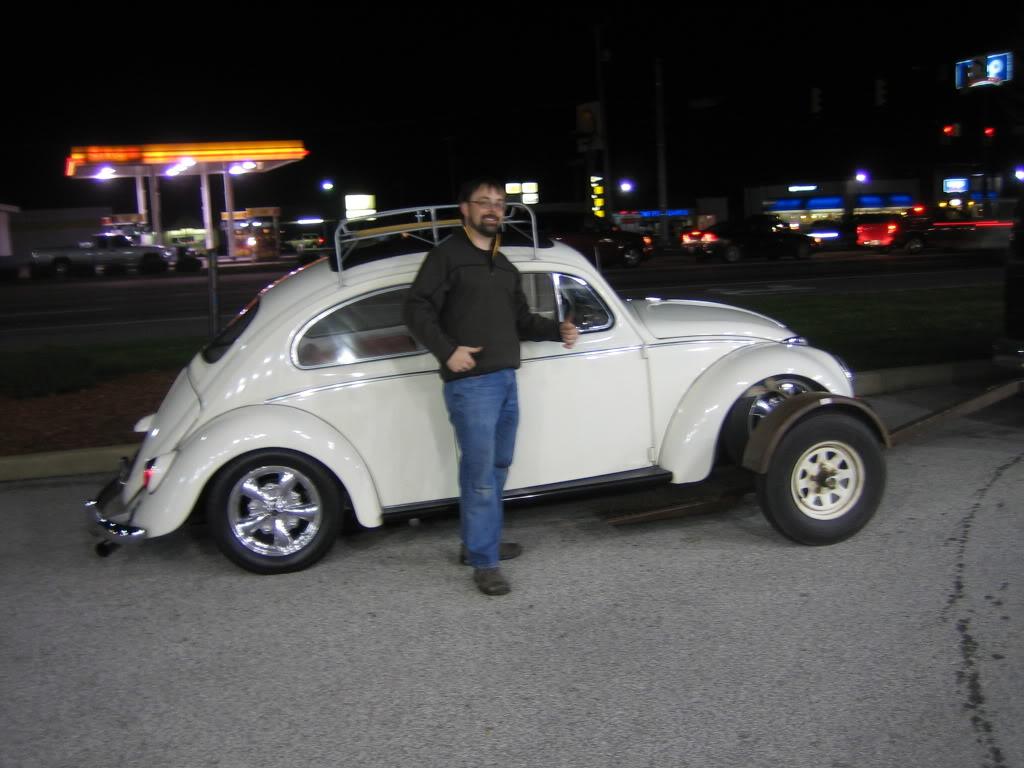
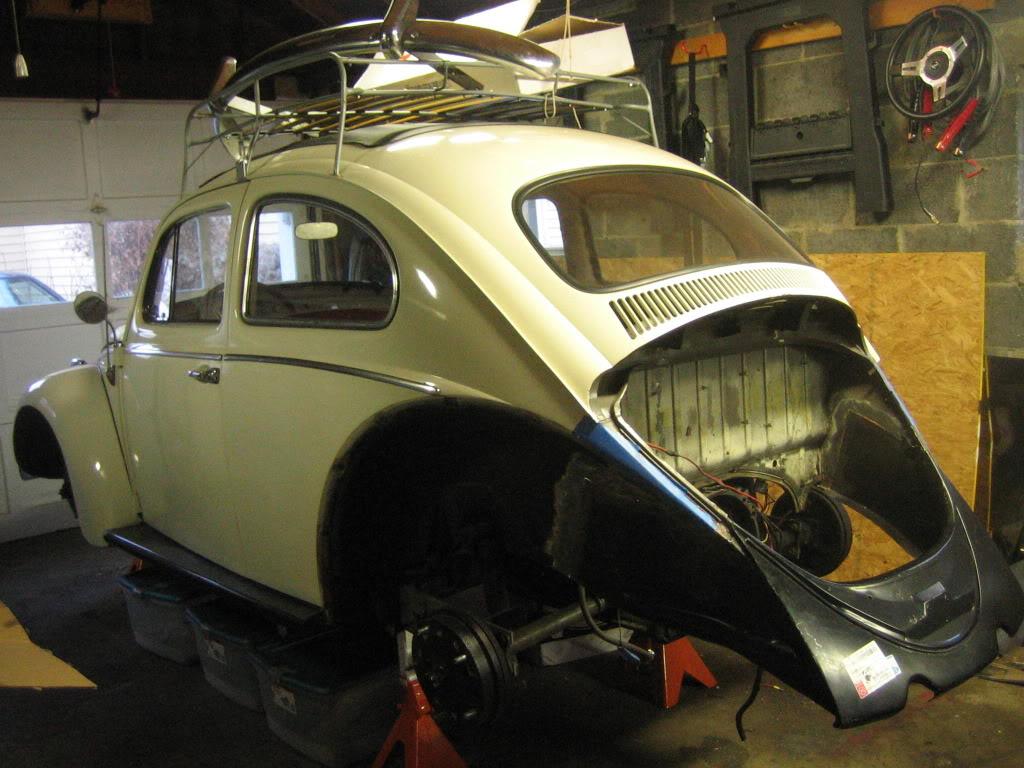
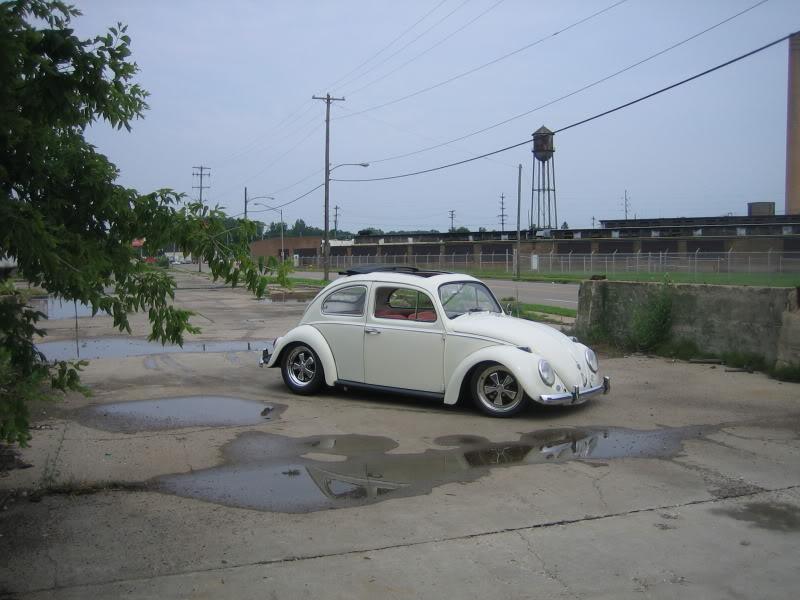
I have to say, as soon as he opened the garage door and I saw this car sitting just right I knew we wouldn't be leaving without it. A quick inspection showed the car to be very solid. The underside had almost zero rust and the body showed only a few dents and scratches. Unlike the black car, this one had good fitting panels and doors that shut properly. The paint was not great and there were plenty of imperfections, but overall it seemed to be very solid. On top of that the interior was nearly perfect and it had a bitchen' rag top. The best part was this one actually ran and drove. We took it around the block and my shit-eating-grin must have been huge.
I know some of you may think buying someone elses' project isn't the best way to go, but you have to look at the facts. I paid only $800 more for this car then I would have for the black car. For that money I got a running driving car in solid condition with a bunch of cool parts. Even if I don't like all the modifications I can at least sell those parts and be ahead for the ones I want to buy. The black car was basically a questionable shell with some (not nearly all) the parts required to put it back together. The choice seemed obvious and I don't regret it at all.
So we did the deal, raised the rear end up a bit and loaded her on the trailer. Then I remembered to take some pictures.
Here is the rig:
Proud new owner:
Drew even decided to fix up Steve's trailer for him a little bit. We could probably have used some lights or at least reflectors but these just seemed to fit just right.
Fueled by energy drinks, coffee and hostes cakes we soldiered into the night and back to GR. The drive back went smooth as can be.
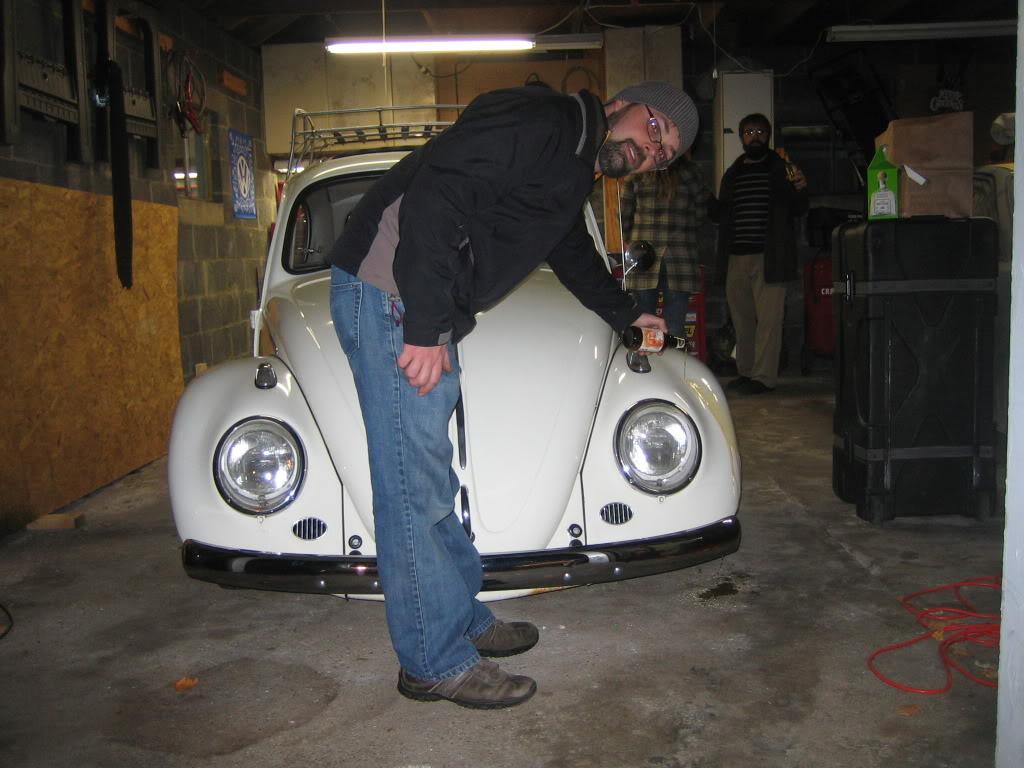
When we got home Janee, Joe and Stehpanie came over to celebrate the new whip.
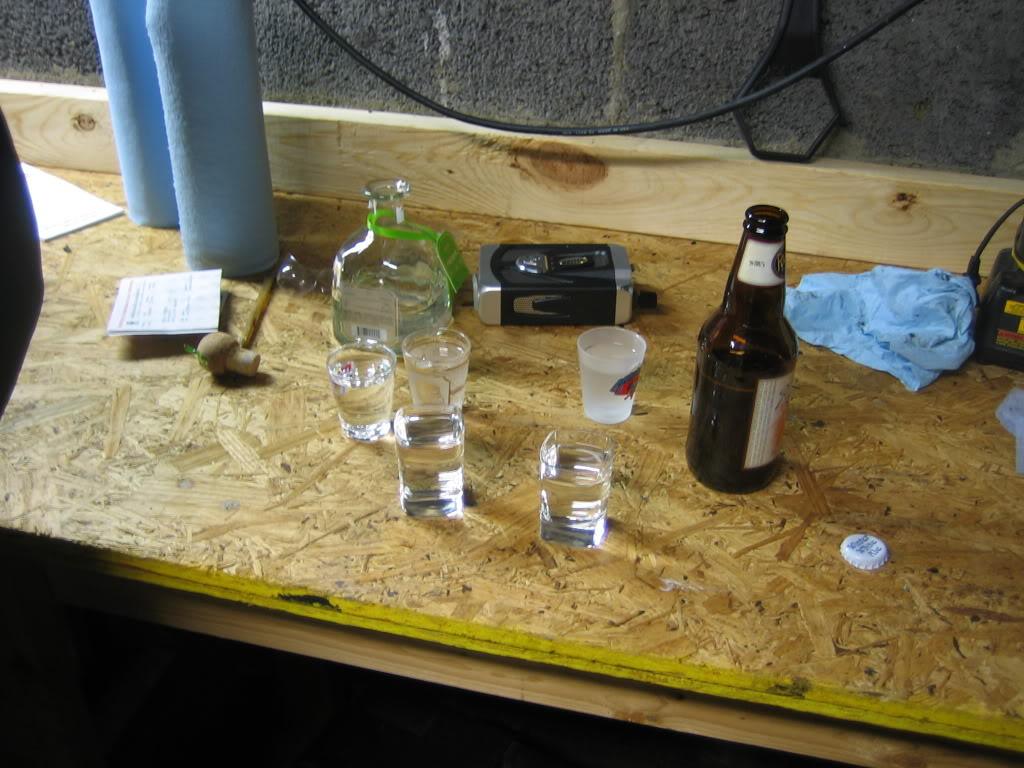

For some reason we decided that Christening the car would be a good idea. Not being a big fan breaking a bottle over my freshly purchased car we just poored a little over the fender. That should work.
It was a quite a trip to be sure. We were on the road more or less for some 16 hours. I spend almost $200 on gas but I think it was worth it. The car is great. It has all the features I was looking for and plenty of character to go with it. I'll detail my plans later. For now here are some pictures I took this morning cruising around. I'm lovin' it. :D::D:
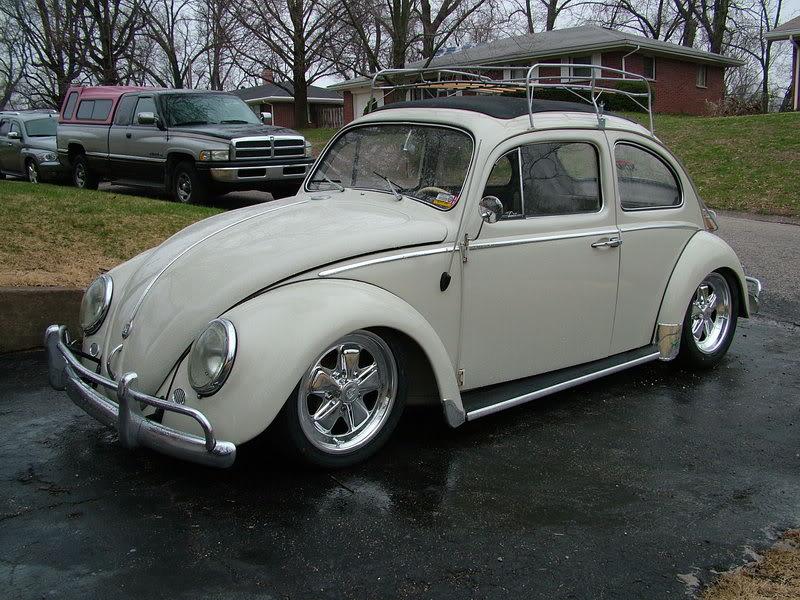
From what I remember of the add and what he told me:
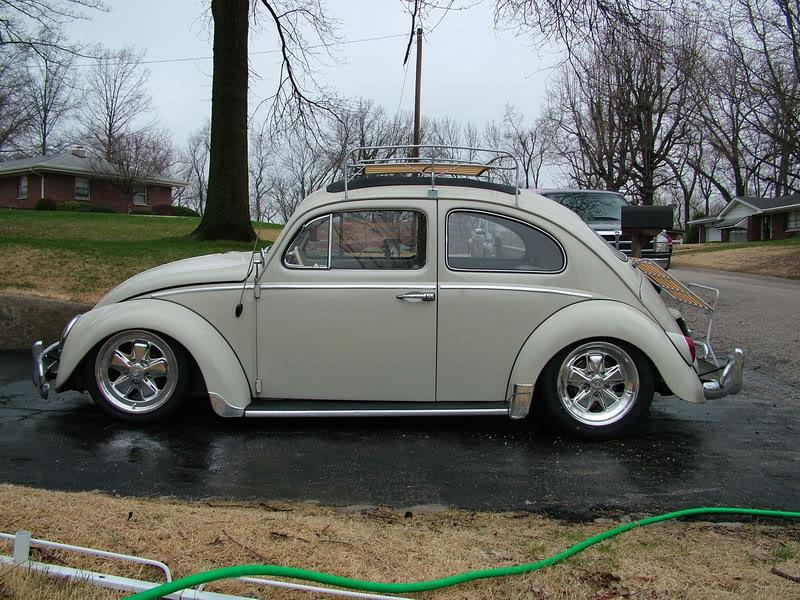
Up front-
6" narrowed front beam
Drop spindles
No shocks
Rear-
Adjustable arm thing-a-ma-jiggers. Pretty cool. You can raise and lower the car with just an an allen wrench. Plus it doesn't result it super crazy camber (although I know some people dig that).
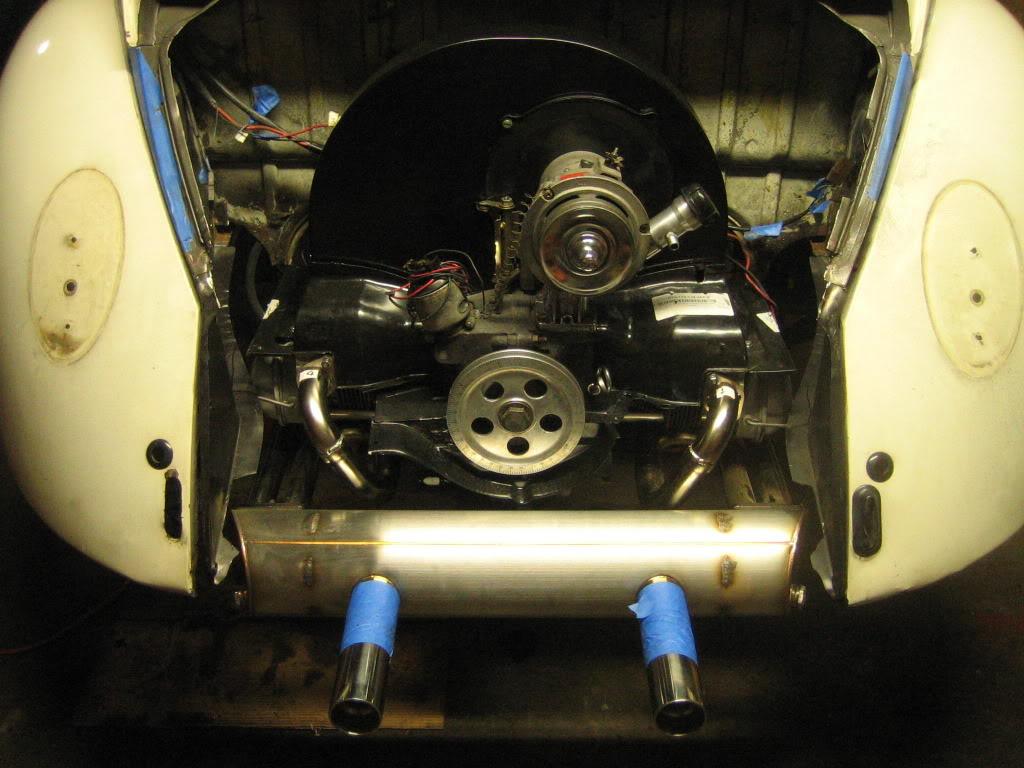
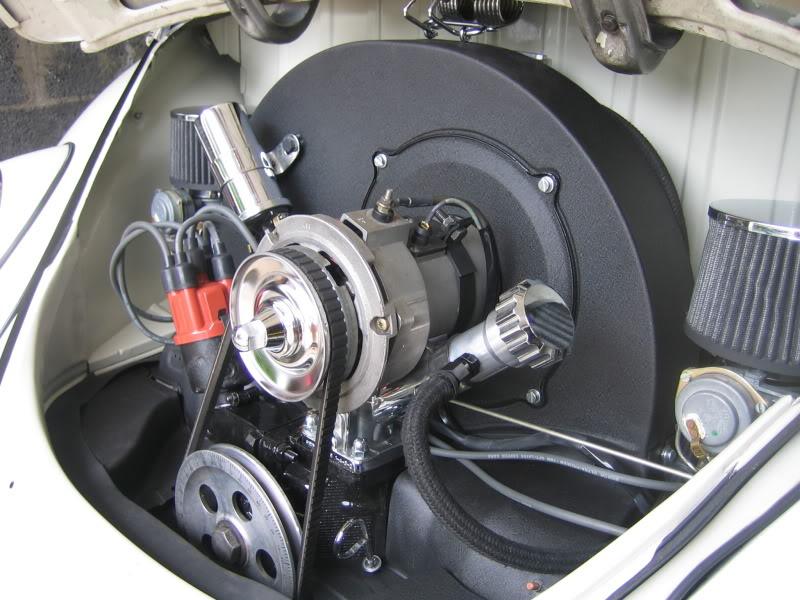
Engine-
1642cc dual port
Dual solex carbs
12v conversion with alternator
Electronic ignition
J-pipes
Megaphone exhaust pipe with no muffler (this has to go)
Tons of chrizome tins and such. (probably getting rid of those)
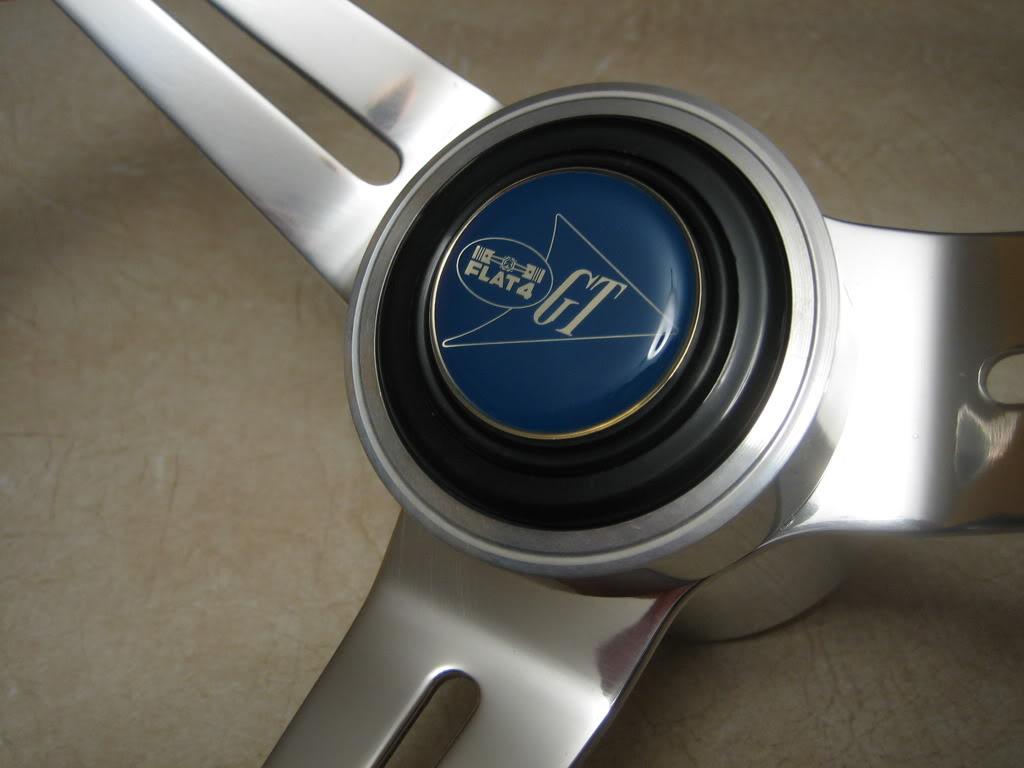
Inside-
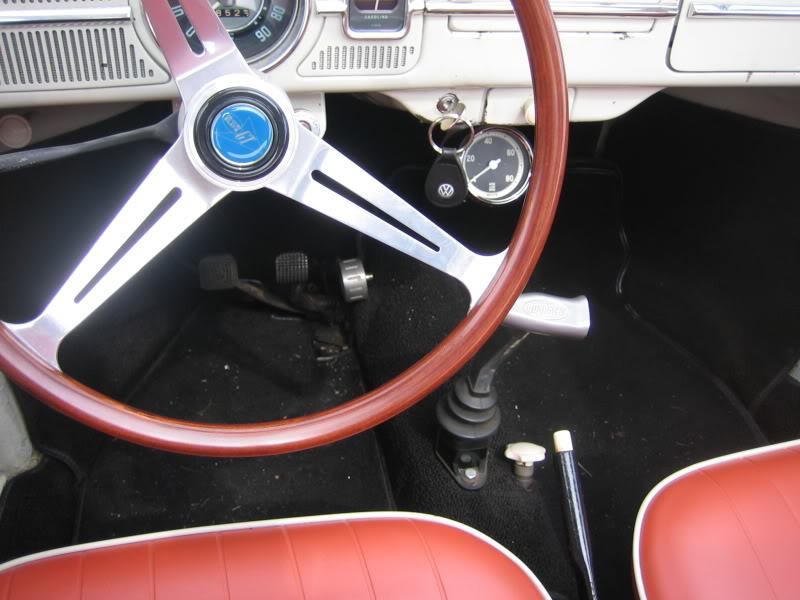
Cheezy steering wheel
Bug Pack shifter
Outside-
Reproduction roof rack
tinted rear tail lights
Billet running boards
Pop-out windows
Just noticed-
Poly transmission mount
Dual master cylinder (I think)
11/22/2009
Update:
The car got impatient waiting for me to decide what the first project would be on her. She started marking her territory pretty strongly. There is a puddle of what appears to be brake fluid or gear oil under the right rear wheel. I'll be picking up axle seals, shoes, cylinders and fluid tomorrow. I also need to purchase a big arse socket for the axle bolt.
So it begins.
12/1/2009
I'm still contemplating my wheel choice. Don't want to rush into this.
I'm not crazy about the super skinny wheels that a lot of folks are running. I like to see a little dish and some rubber on the road personally.
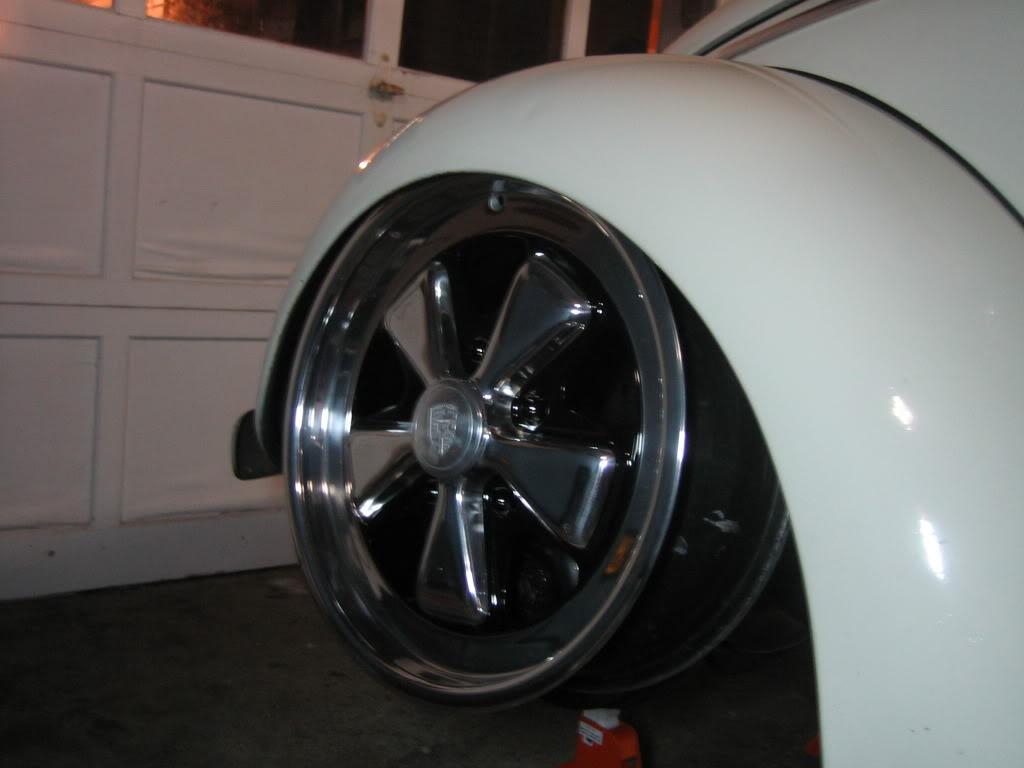
I'm leaning toward 16" Fuchs. Thoughts?
Also, this guy is running "short axles". What does that mean exactly?
12/9/2009
I'm terrible at holding on to money. These should be on there way to me soon.
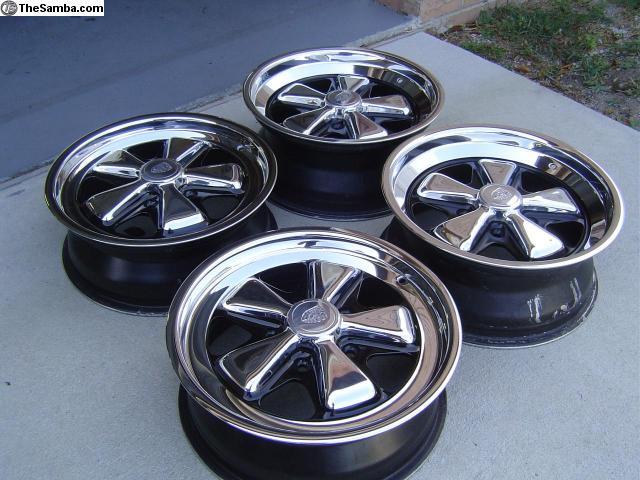
They are 16" six's and seven's. I just found out the guy doesn't actually have them, he has to restore a set to those standards and that could take a few weeks. Oh well, I guess I'm not in a hurry.
12/20/2009
I haven't made much progress on this thing other then ordering parts.
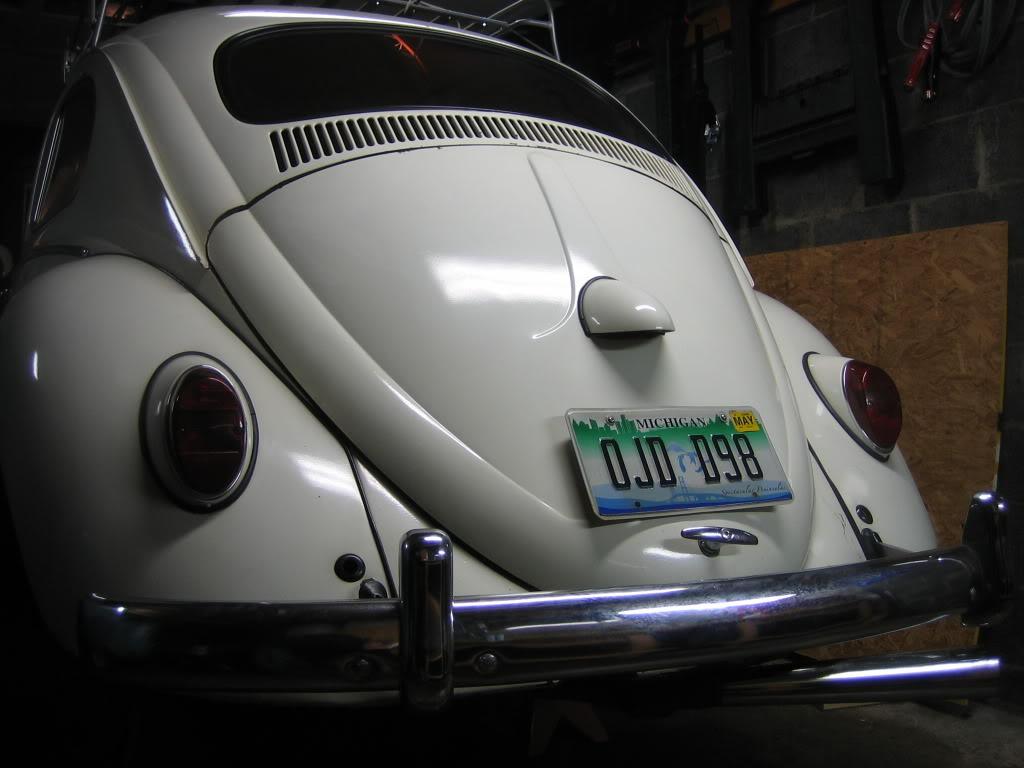
I did install some new rear tail light lenses that aren't ghetto smoked like the last ones. It's hard to tell in this pic, but they look a lot better.
I picked up a couple odds and ends from the GAS storage facility that I might use. I also invested in some reading material that should help me in the new pursuit.
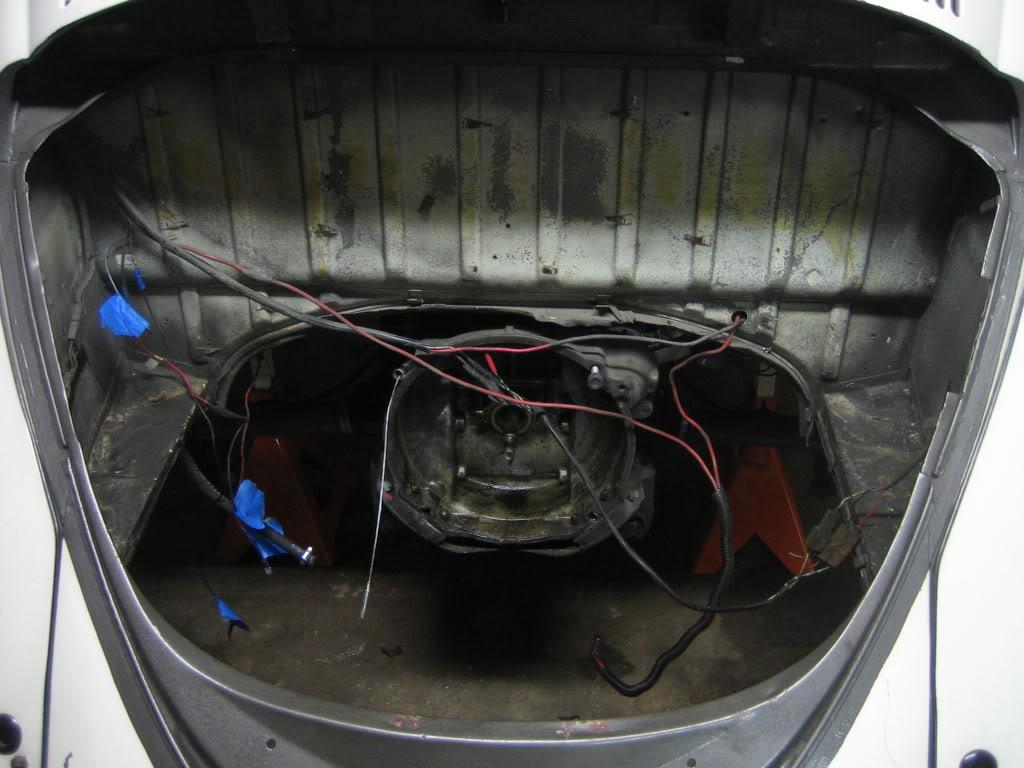
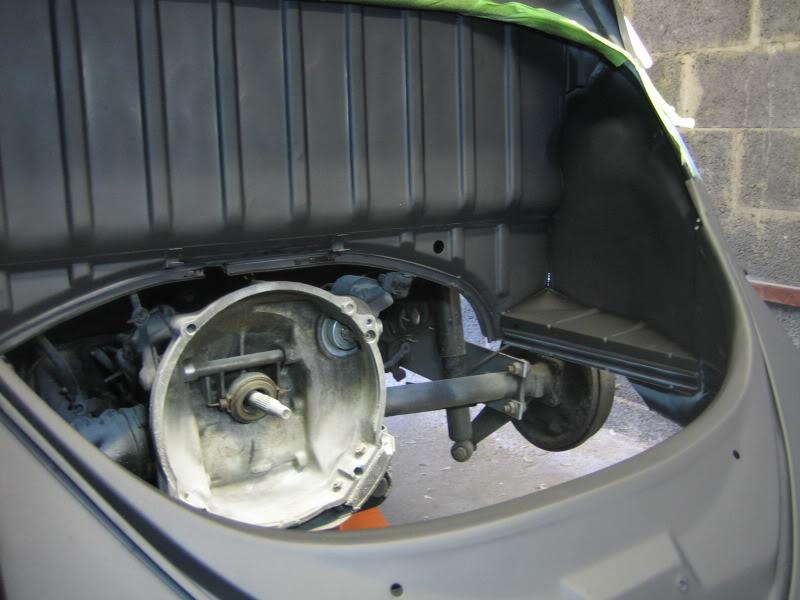
In preparation for the CB disc brakes on order I got the car up on jack stands and ready for action. This was quite a task by itself. There was a lot of 2x4s and various jacks involved but I got it up there
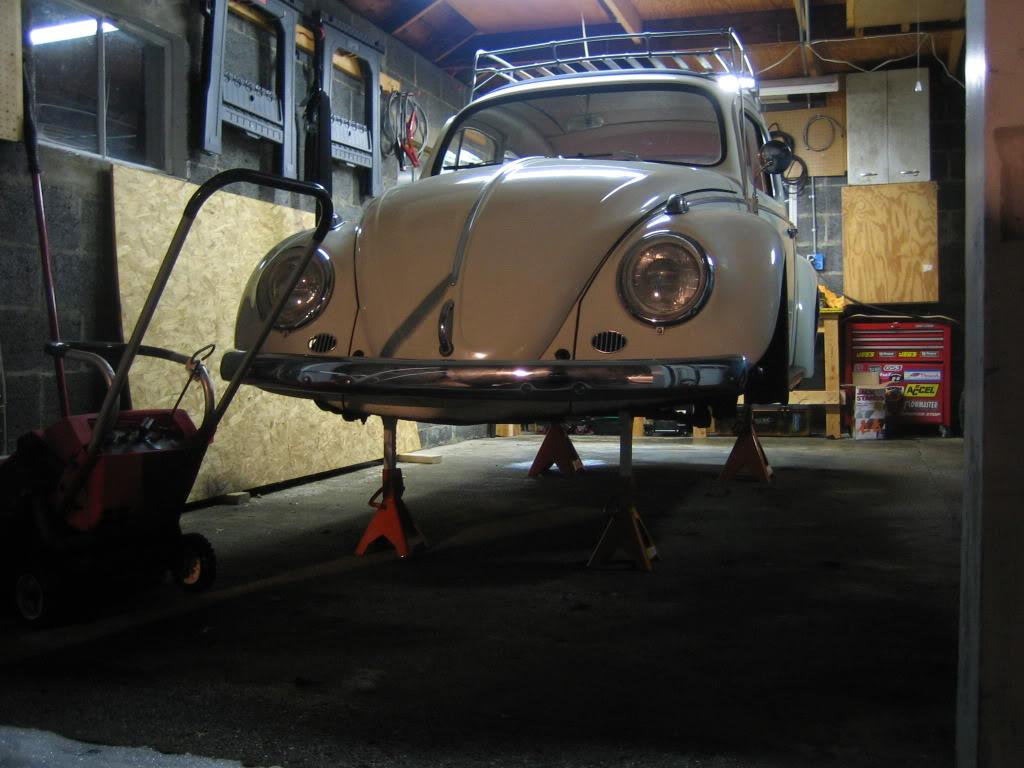
I finally had a chance to poke around underneath. It really is pretty solid.
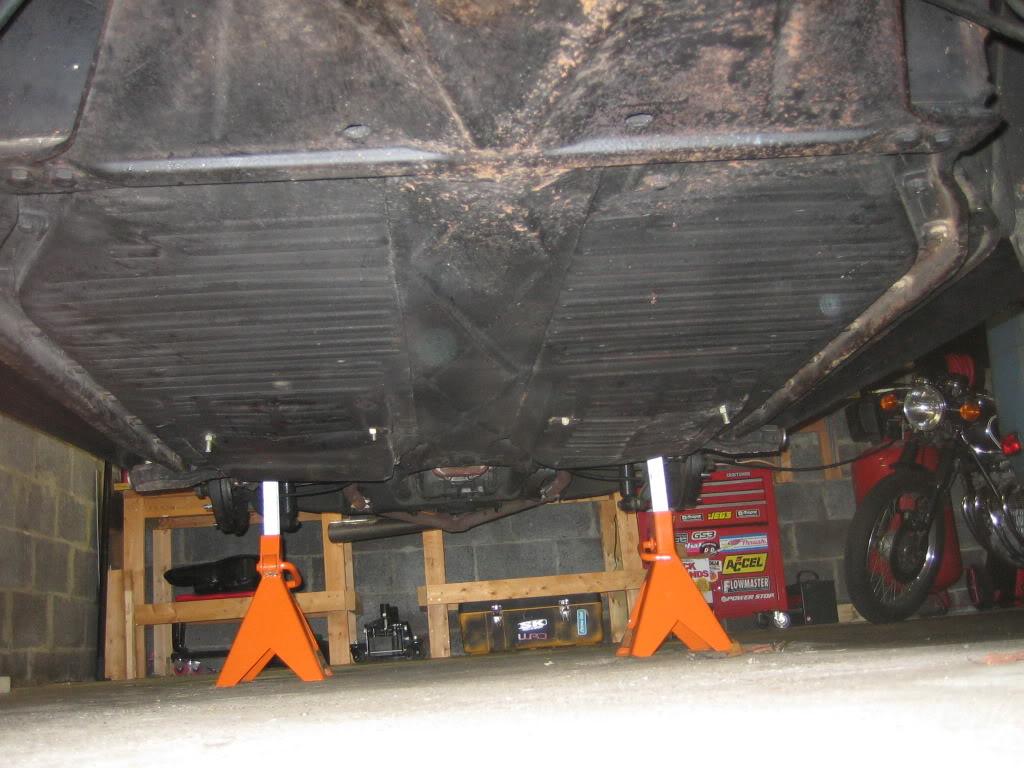

Now I'm just waiting for parts to arrive. If I don't see some stuff soon I may get the motor pulled so I can get started on some changes there.
1/6/2010
I made a little progress on this thing the last few days.
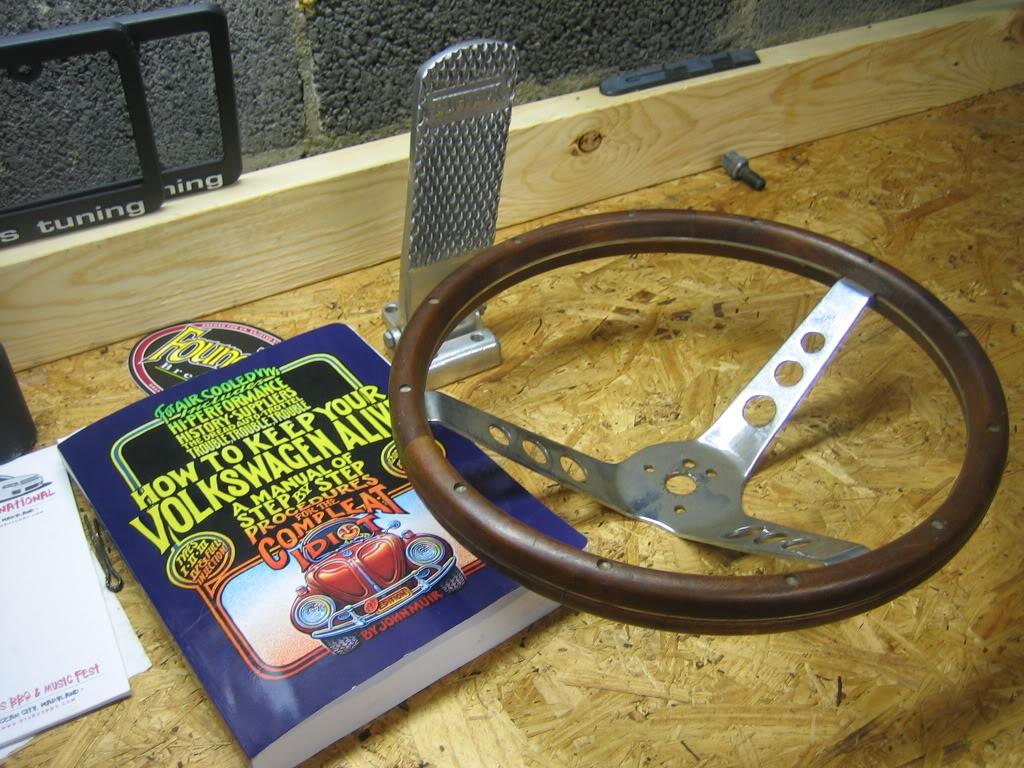
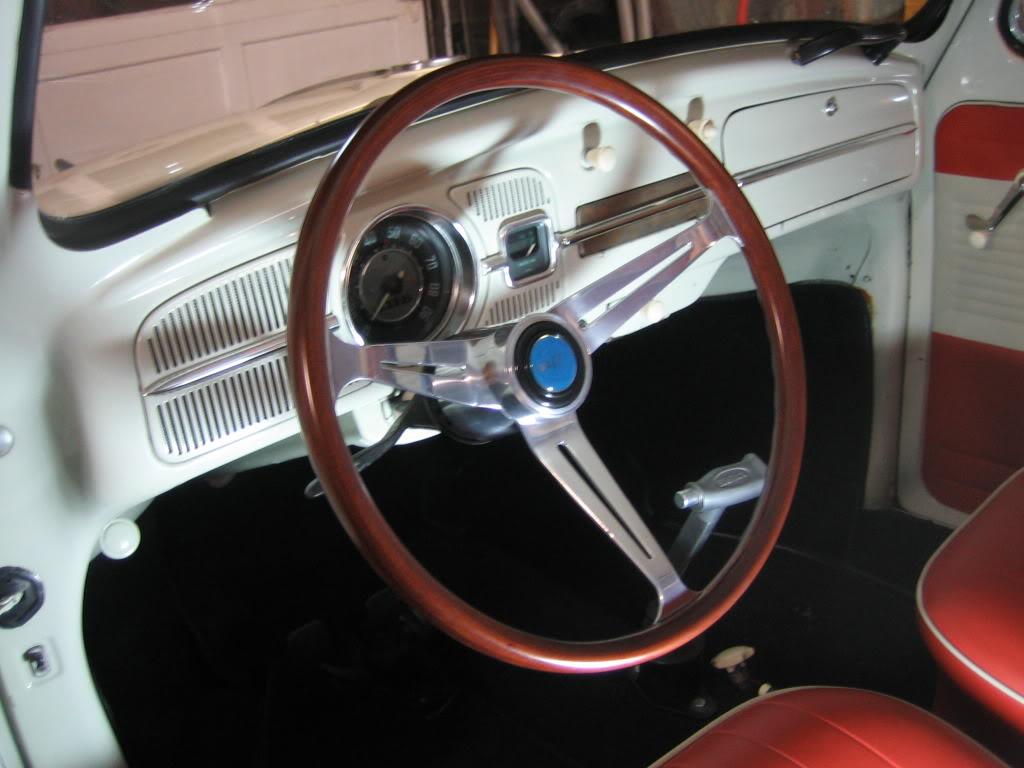
I know my priorities are a little off but the first thing I did was install a new steering wheel. This is a reproduction of the original empi. The originals go for $1000 or more and this one was much less. I'm digging it.
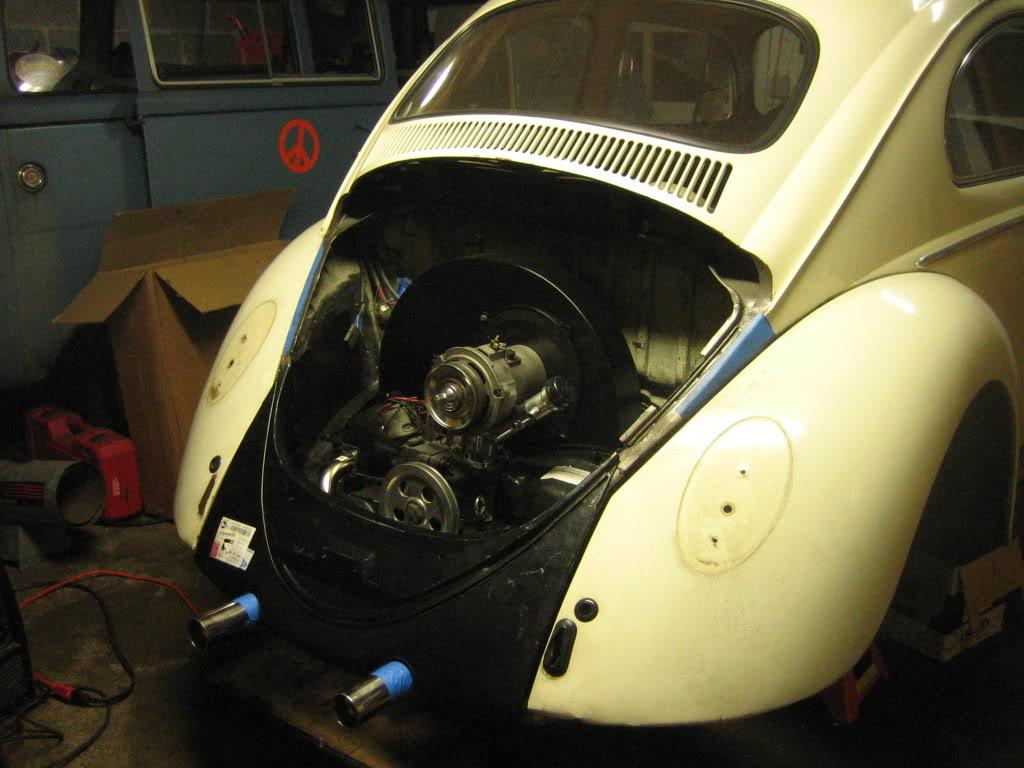
Then I was messing around in the engine bay trying to get a list of required parts and the engine just jumped right out onto the ground.
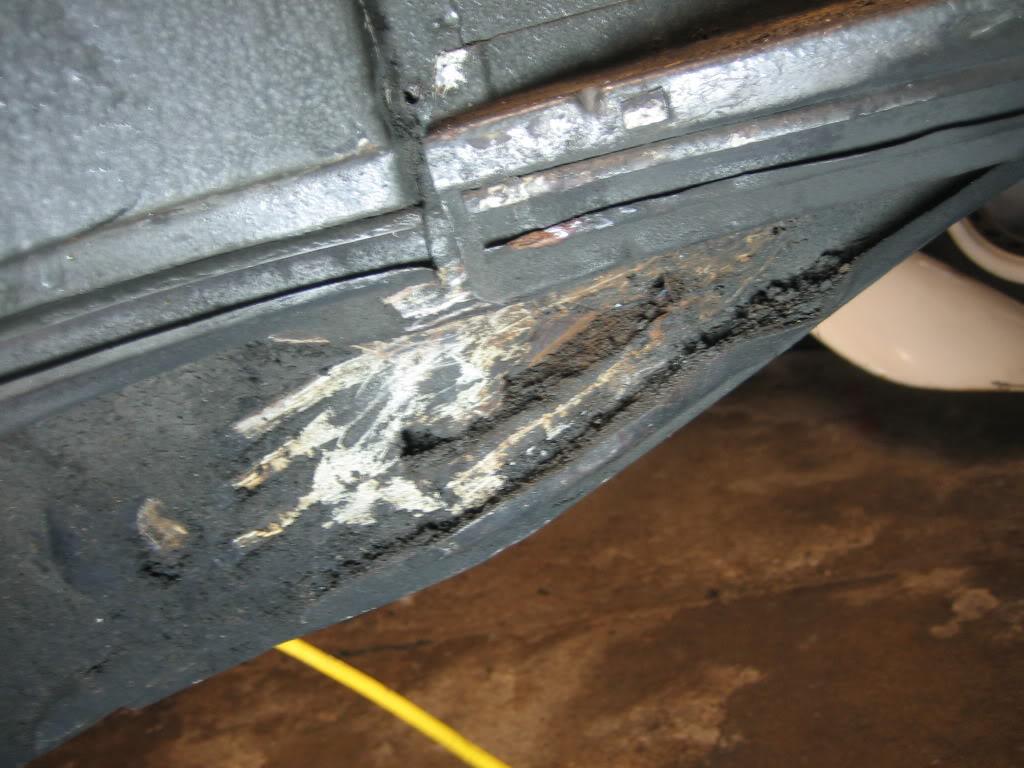
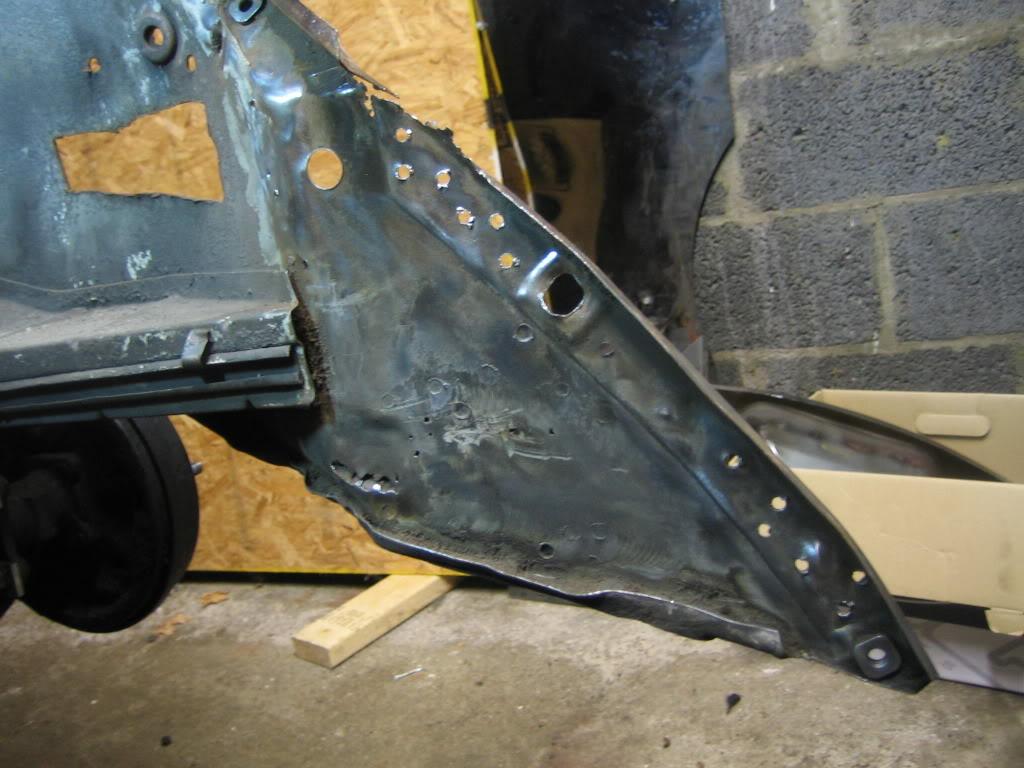
Another planned project was re-painting the rear appron. However, a little digging revealed a ton of bondo. This thing is going to need to be replaced.
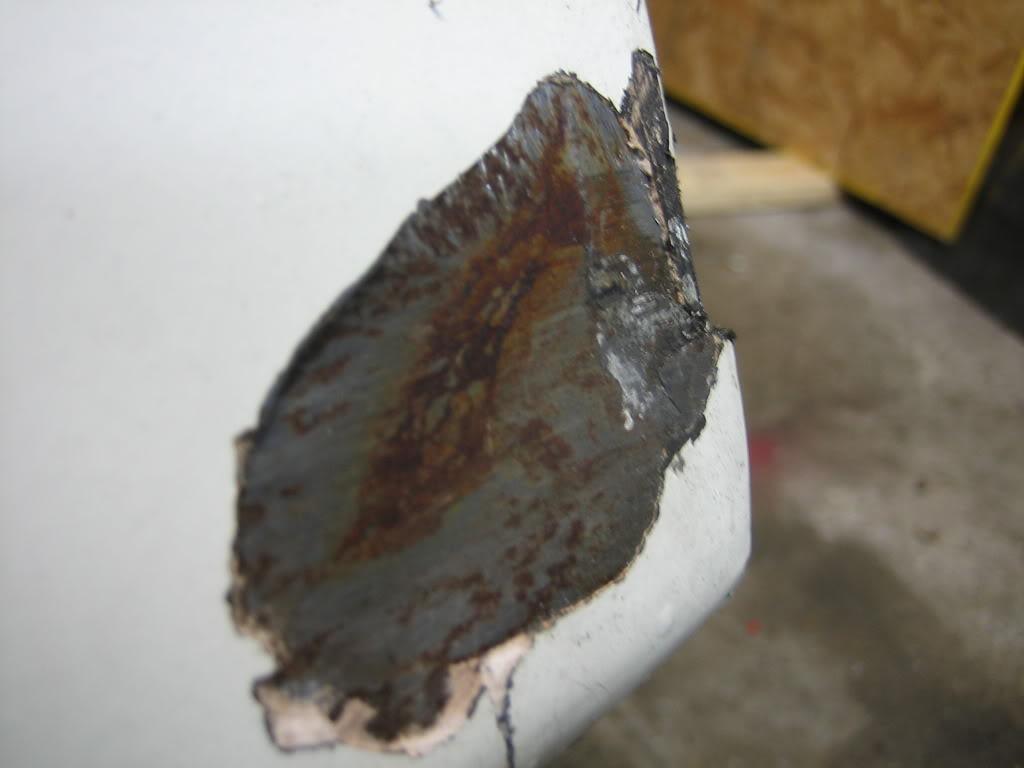
Then the plot thickened. First of all, someone cut holes in the side of the quarter panels. I'm guessing maybe for carb adjustments?
Then I found quite a bit of rot in the same panels. ewwww
So, questions time. I figure I have two options. I'm wondering which will be the best overall for a nice driver.
1. Get replacement quarter panels, cut and weld them in. This will take care of the rust and holes but require more work. I'm also a little concerned that cutting the OE panels will have a negative effect on the cars value and potentially not fit quite right.
2. Clean up the rust as best I can and treat it so it doesn't spread. The spots are not visible from above so it would just be me that knew (and anyone reading this I guess). This would be easier, cheaper, and more original.
3. ?
Thought are appreciated.
1/13/2010
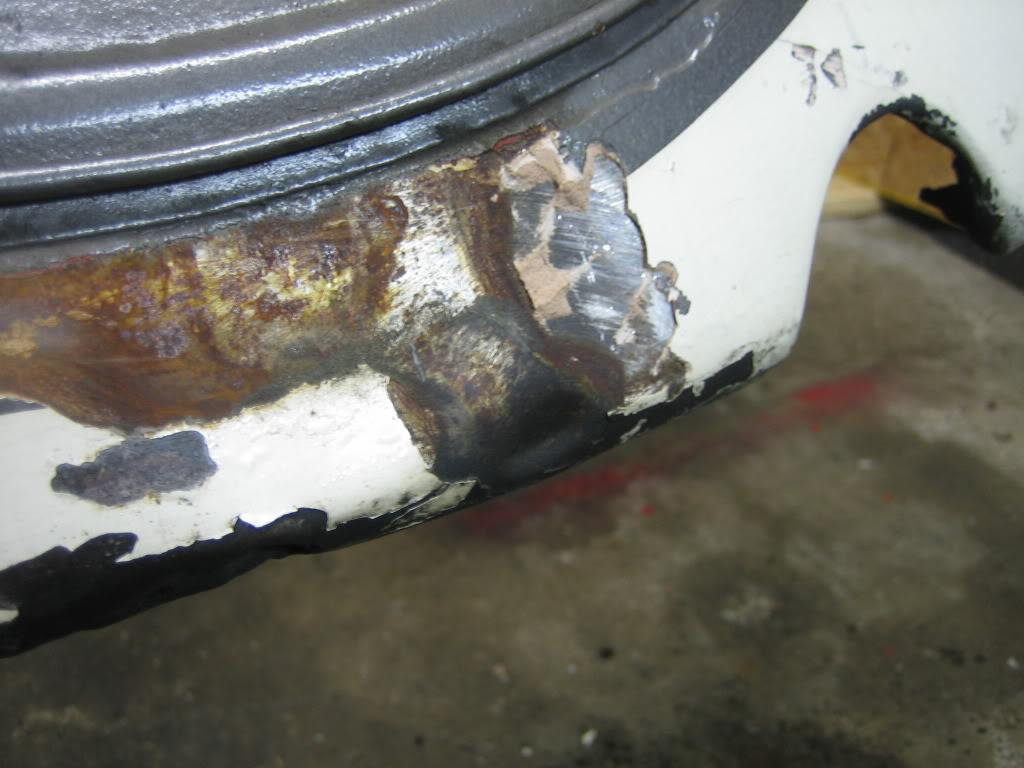
Did some more exploration tonight.
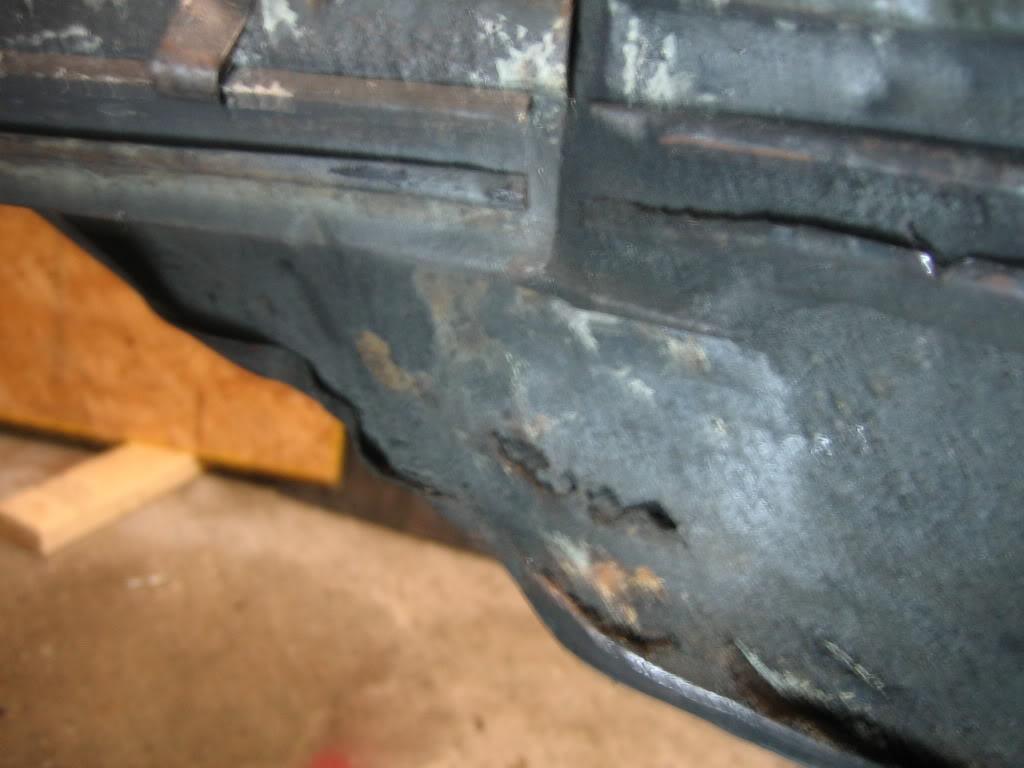
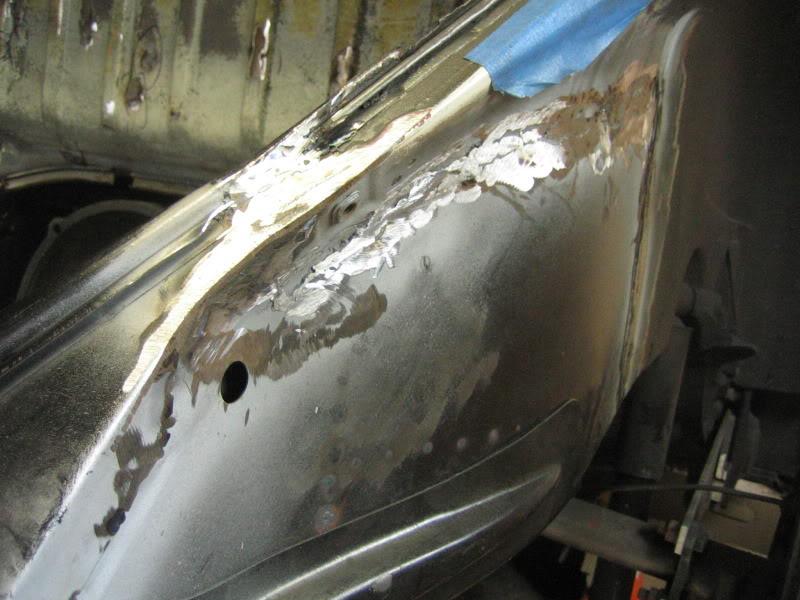
After drilling out a bunch of spot welds I was able to remove the old rear apron. Then I used a wire brush to clean some of the dirt off and get a good look. It isn't too pretty.
The left side is the worst. Some of the damage was from me prying on the panel

The right side is a little better
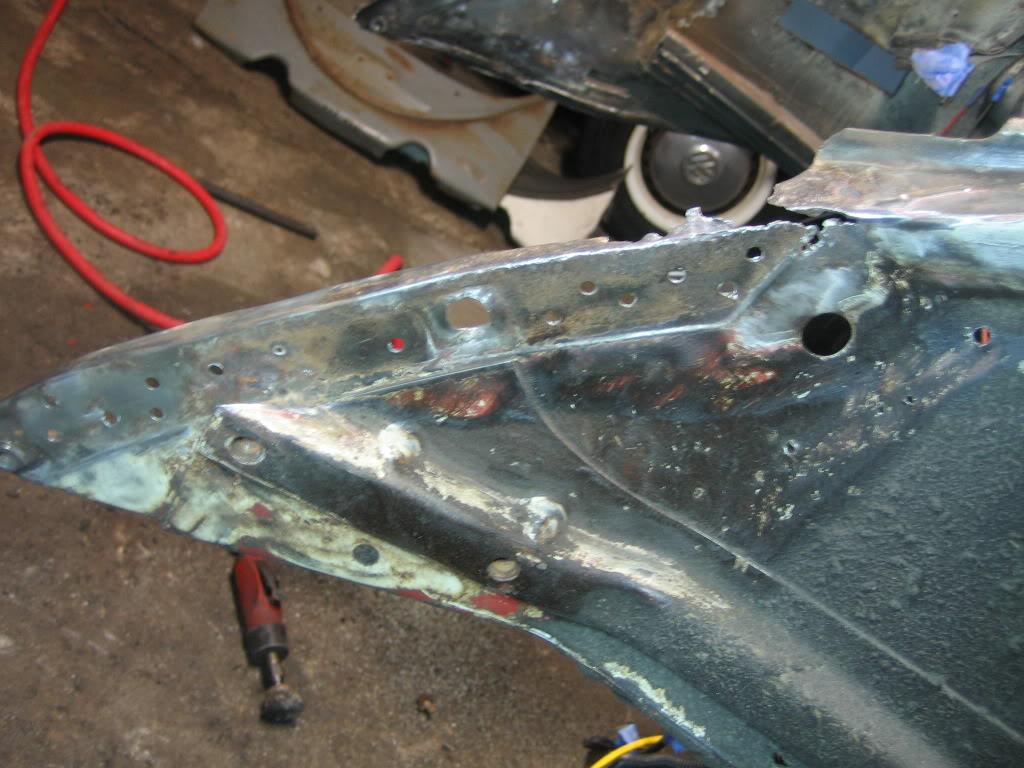
That's not a lot of material to work with. Then again, with the new panel test fitted most of that is covered up.
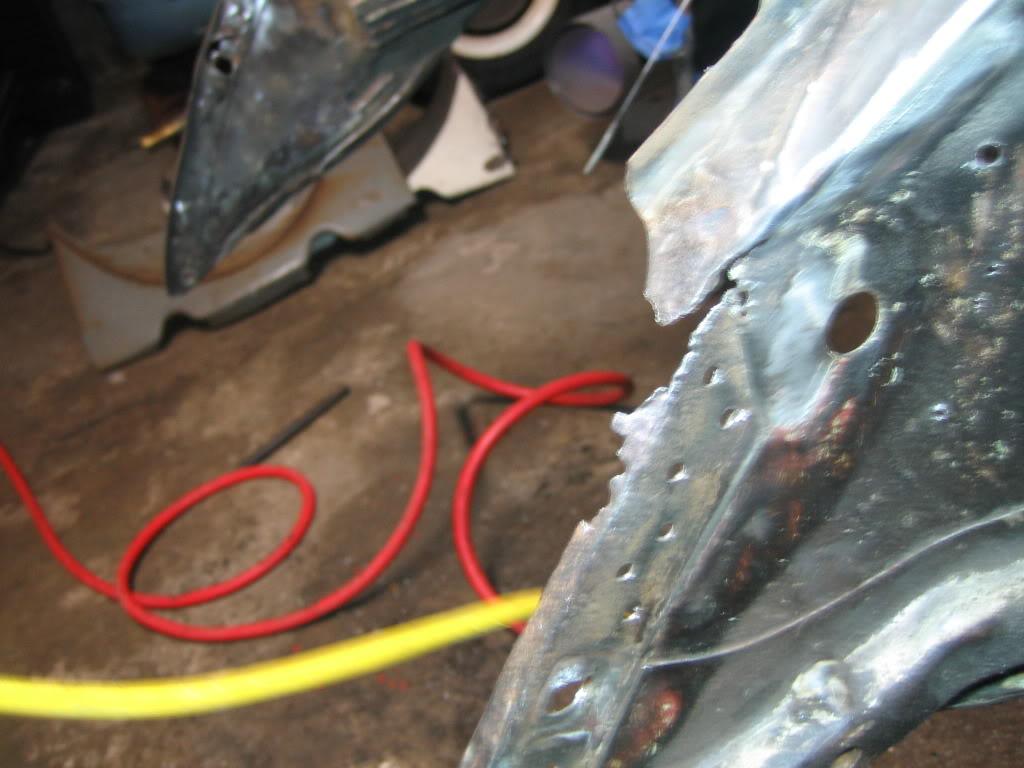
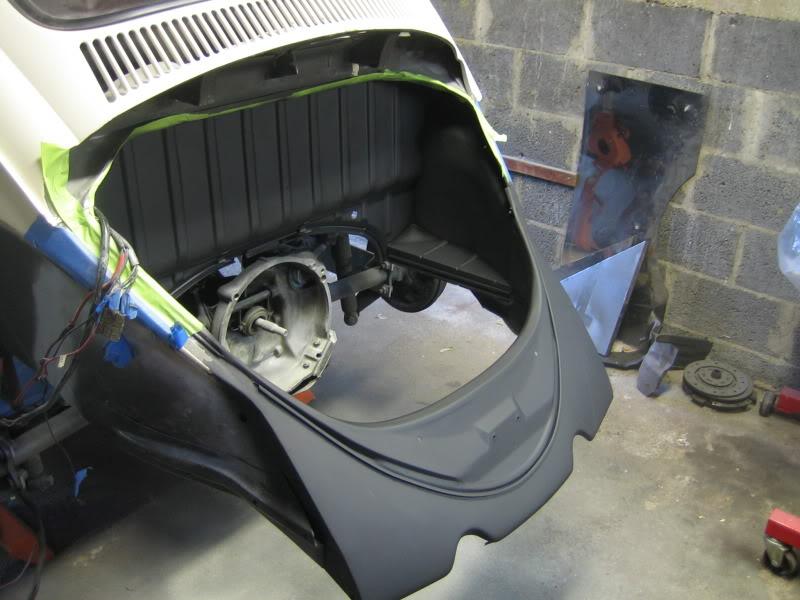
The bug is looking pretty bare

I've got to decide on whether or not to proceed without patch panels. We'll see. In the mean time parts are showing up for other aspects of the project. I'm getting excited.
1/16/2010
Small update:
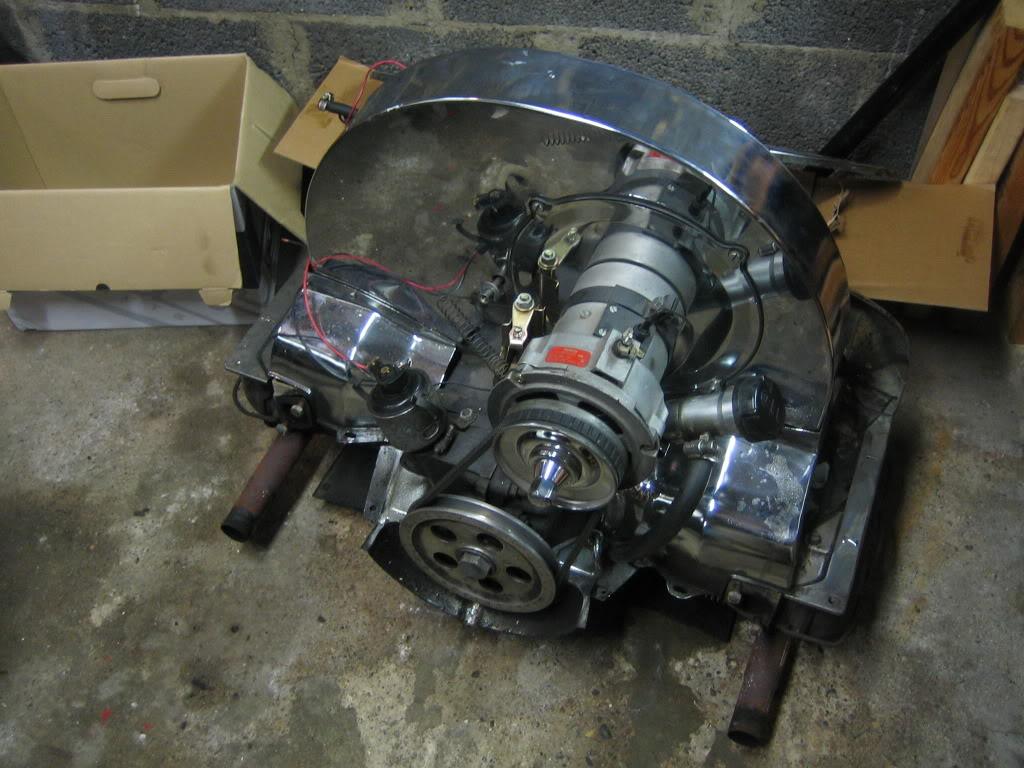
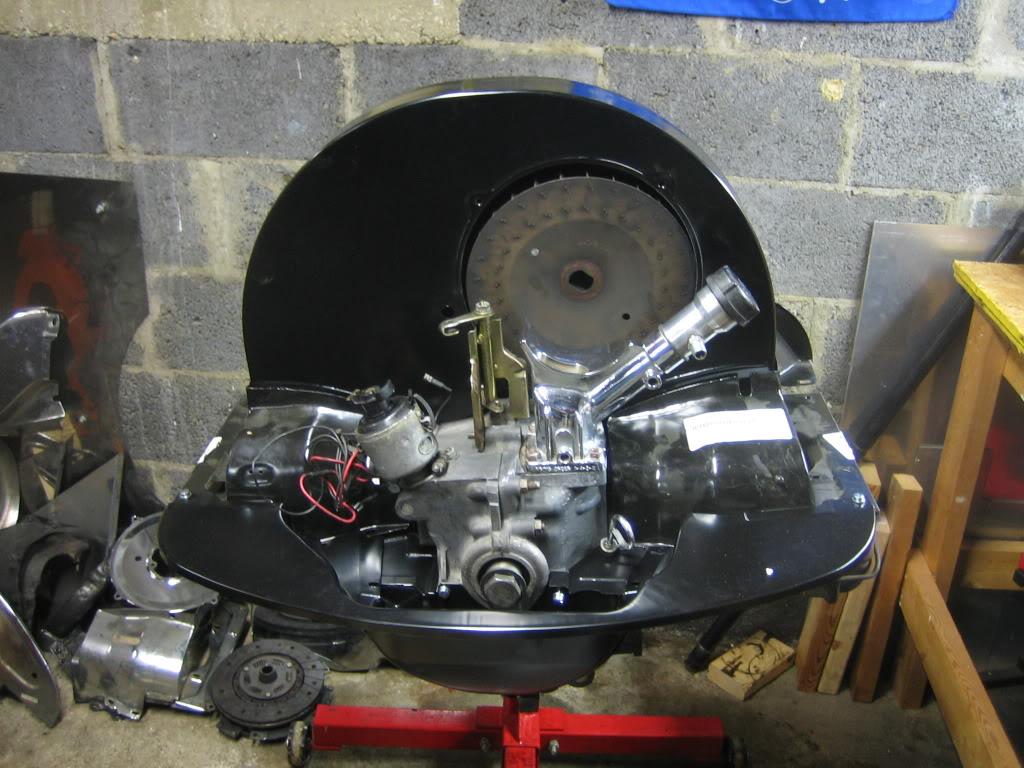
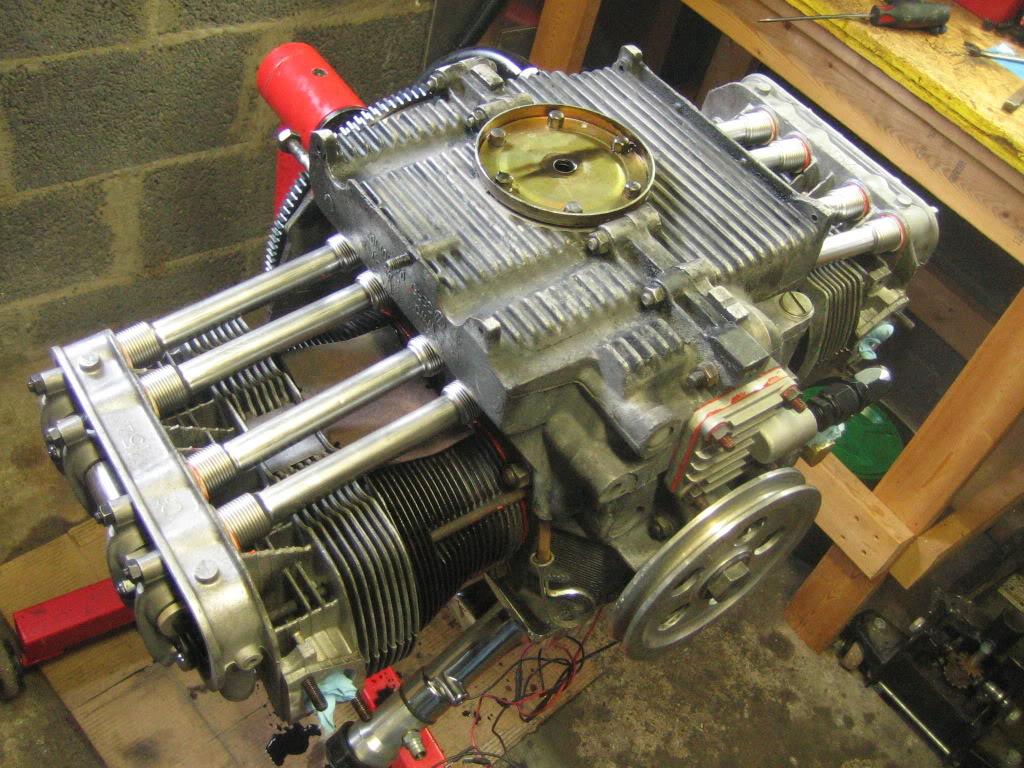
With the temperature hovering around freezing I decided to take the opportunity to de-grease the motor a bit. I also got it mounted on the stand for easy access.
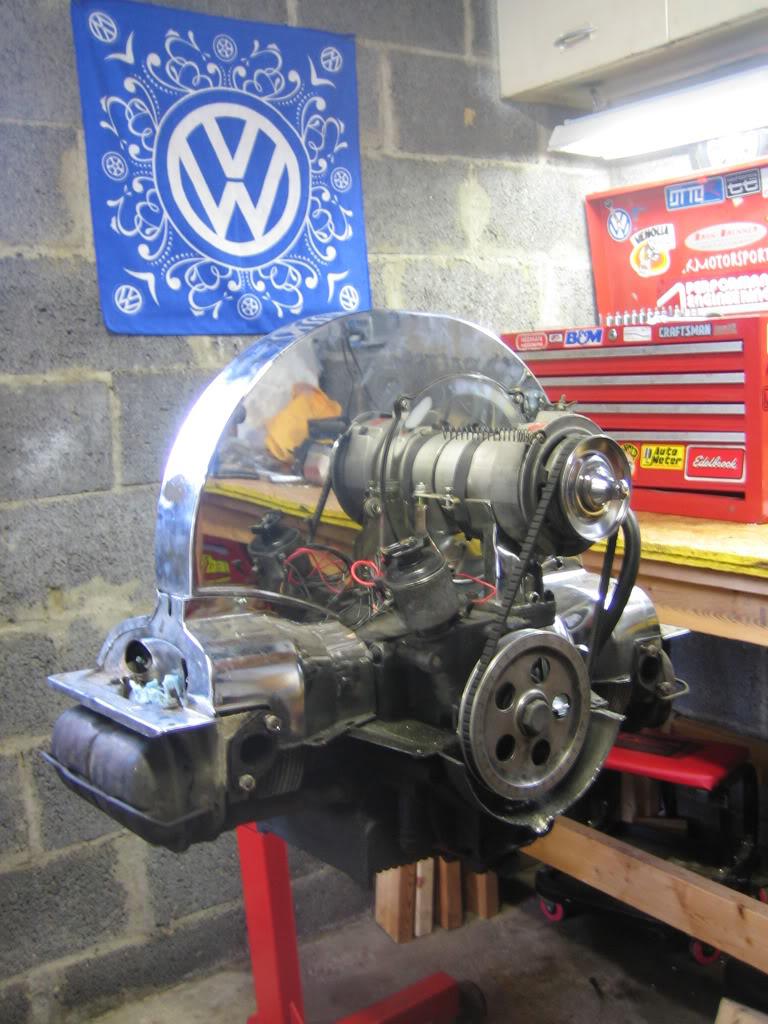
After pulling the tins off I pushed the whole thing outside for some serious elbow grease. A clean air-cooled motor is a cooler running one so I think my efforts paid off. Plus it will be easier to do some of the little things on it now.
Anybody need some chrizzome

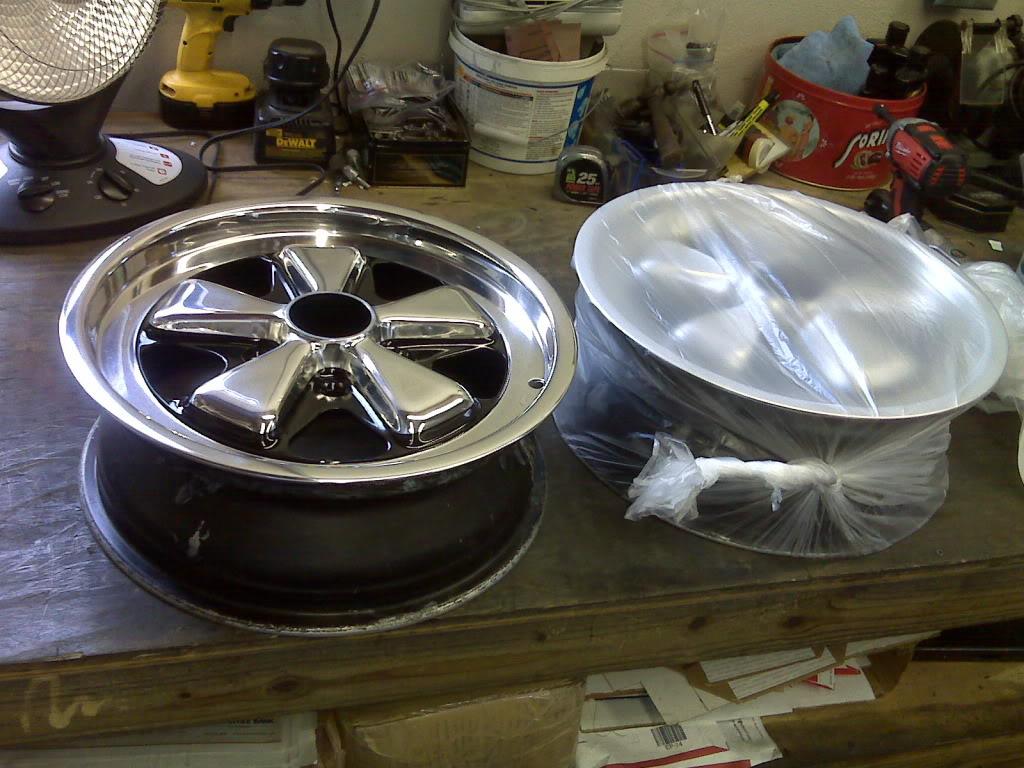
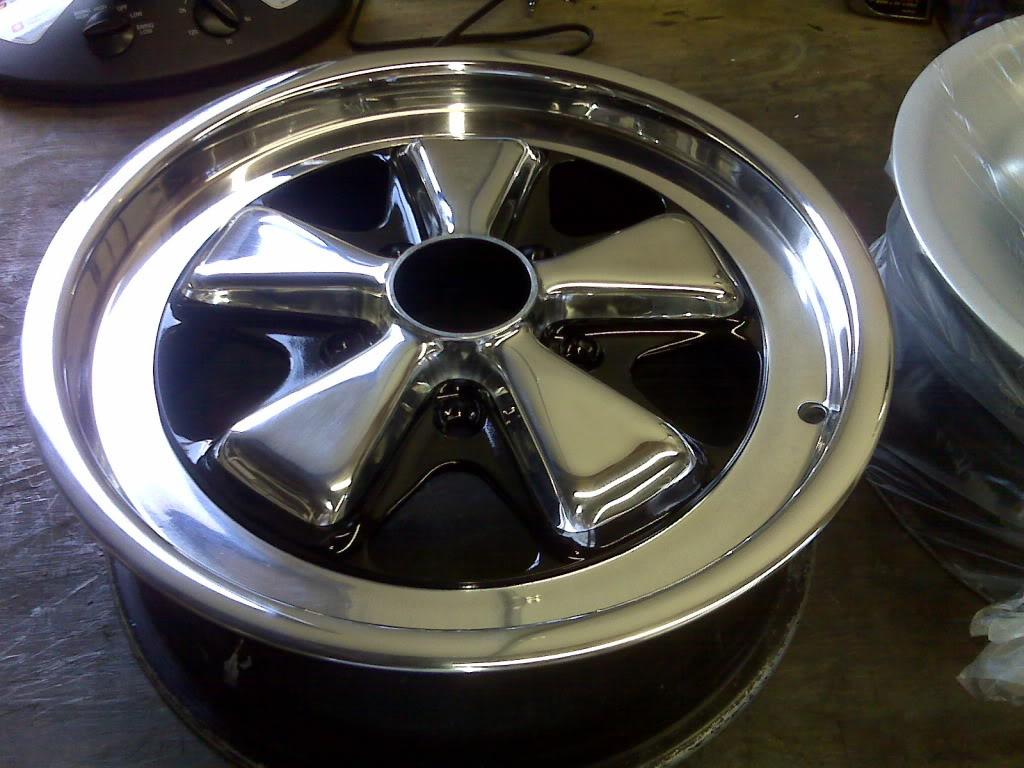
My wheels should be shipping Monday. The re-finisher sent me some pics. I can't wait.
1/25/2010
I got some more work done this weekend.
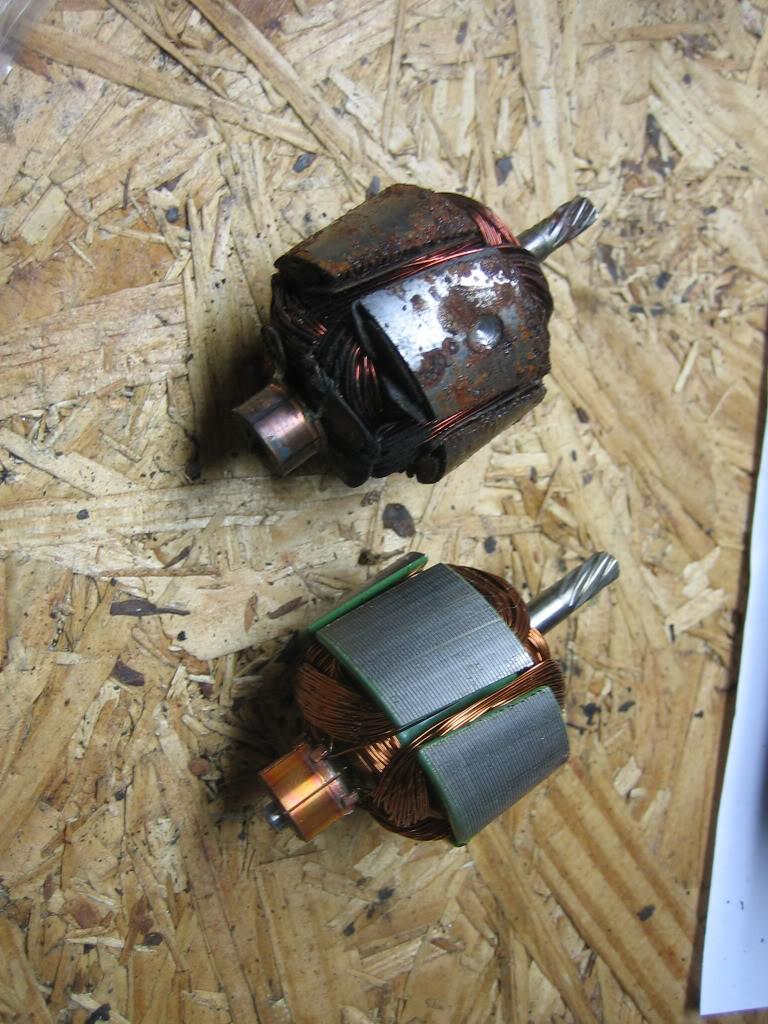
I took a little break from the motor and body and did a project I could actually finish. The previous owner of my car upgraded the electrical system to 12v from 6v but never got the wipers working. I want this car to be usable so having working wipers is a must. There are a few ways to address this problem. The best way seemed to be modifying the wiper motor to work with the higher voltage. A couple companies offer a replacement armature to make the conversion work. However, they are only available for SWF motors and I had a Bosch. So, I picked up a used SWF wiper assembly, the conversion and some new pivots for good measure.
Here are the two parts side by side. I have no idea what the difference is. They look the same to me
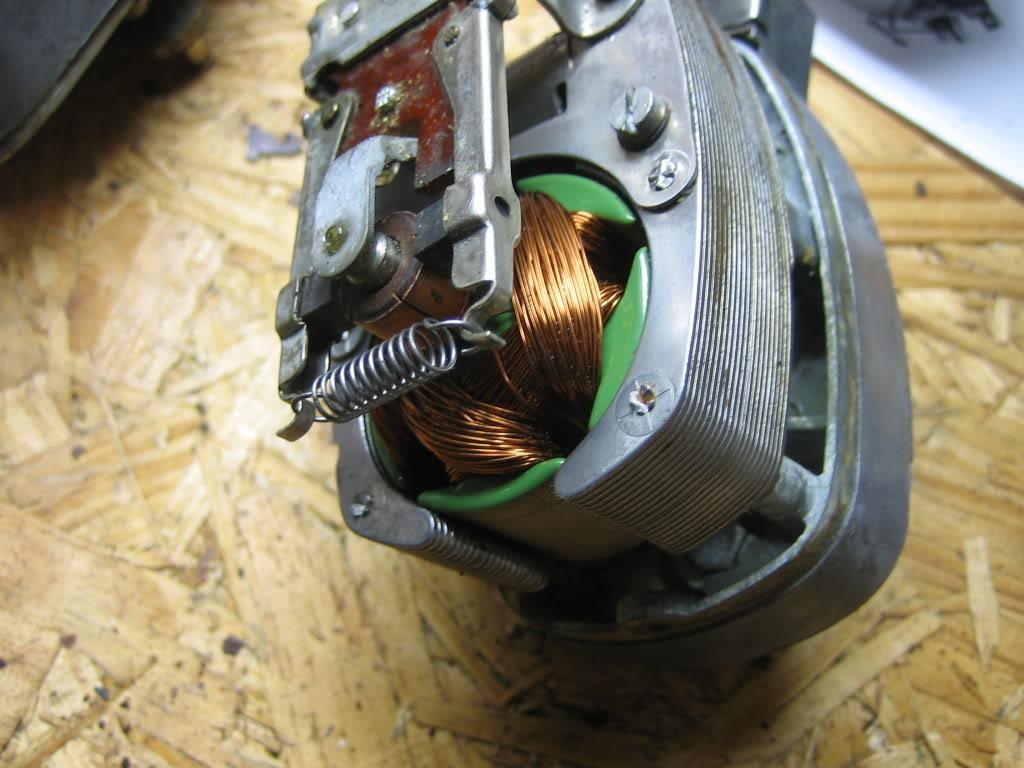
The new armature in the motor
I cleaned and painted the wiper assembly while I had it out. Here is the completed assembly next to the old Bosch one.

I also got my wheel in this week. I don't have the brakes on yet so a proper test fit is not possible. This gives you an idea of what they should look like though.
got my new "OE" tins and started test fitting them. These are gonna require some serious love to fit correctly.
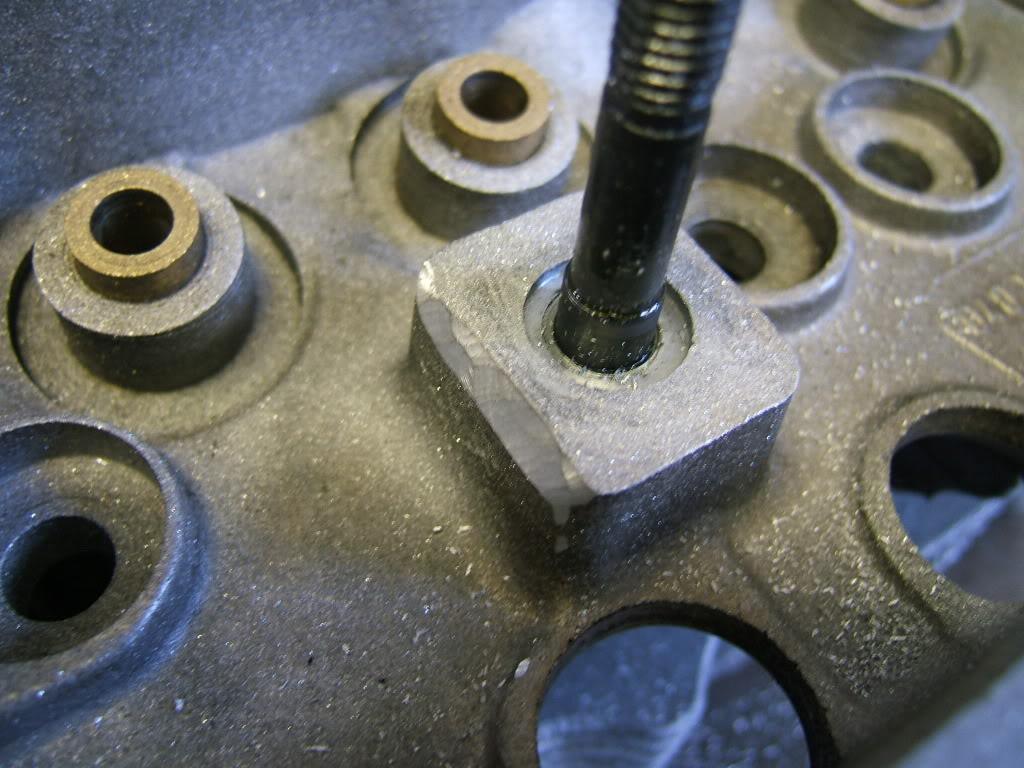
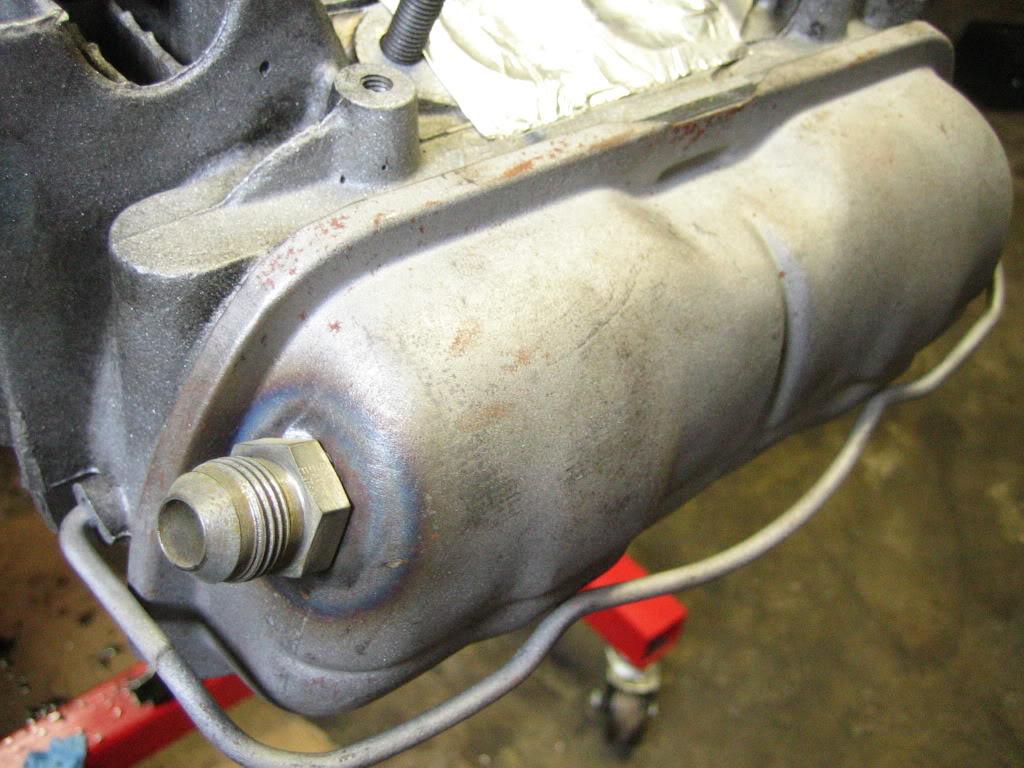
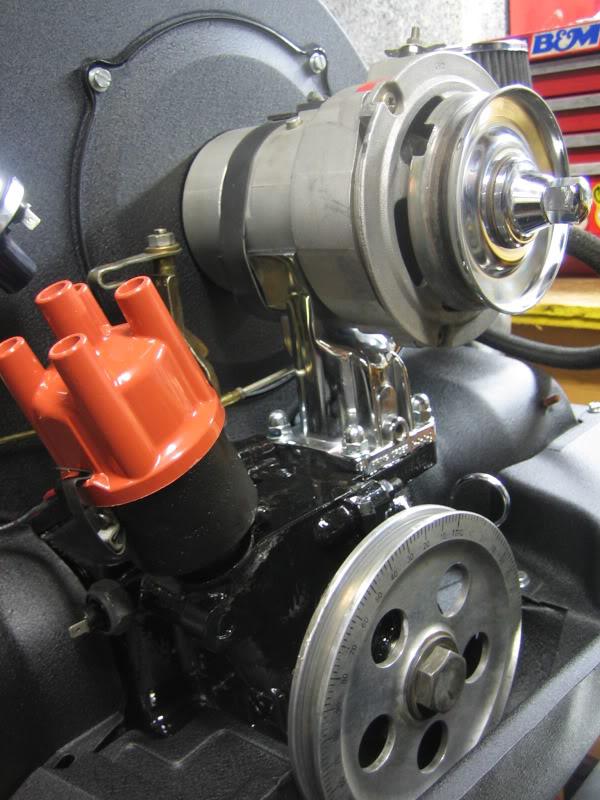
Finally, I got the engine prepped for the full flow oil system. For those not familiar with this, the idea is to re-route the flow of oil from a strictly internal affair to an external path. This allows plumbing of external oil coolers or filters. The oil pump outlet gets plugged and a new cover allows the oil to flow out. Then you have to tap the case to allow a new return port. Some people say this should only be done with the case split. Others have claimed it can be done with an assembled engine if the proper precautions are taken. I decided to go for it.
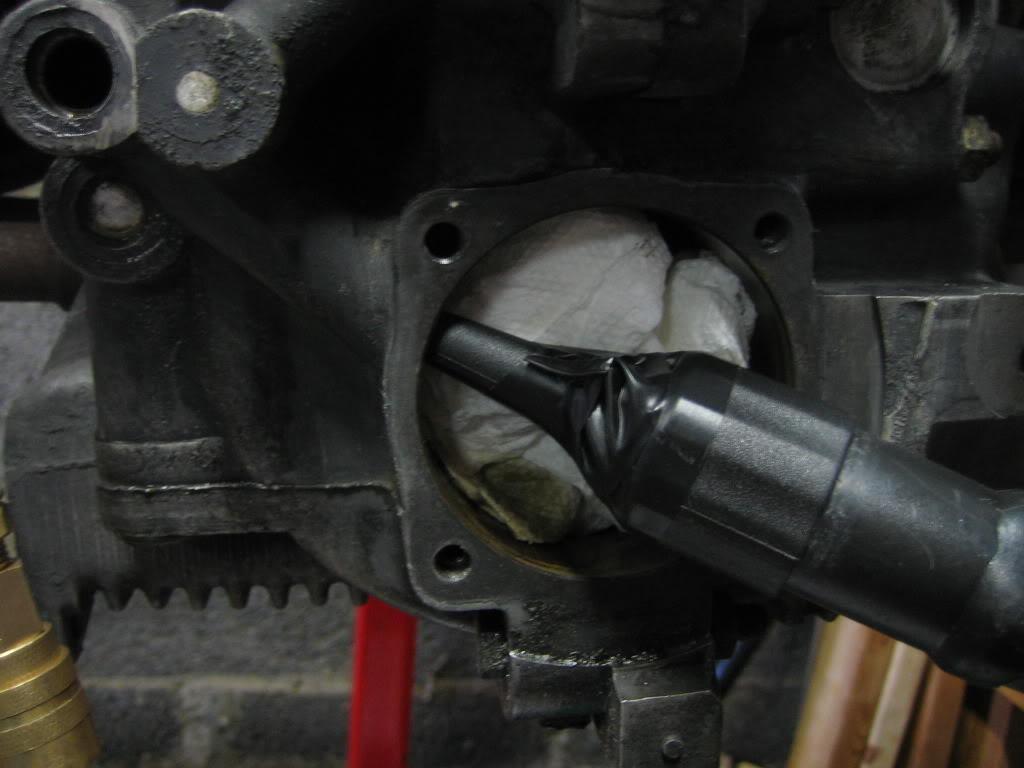
I started by tapping the return port. It has a small freeze plug from the factory that is pulled out with a slide hammer.
My technique for keeping metal shavings out of the engine has three parts. First, I removed the oil pressure sensor and plumbed pressurized air into the oil passages to force any loose particles outward.
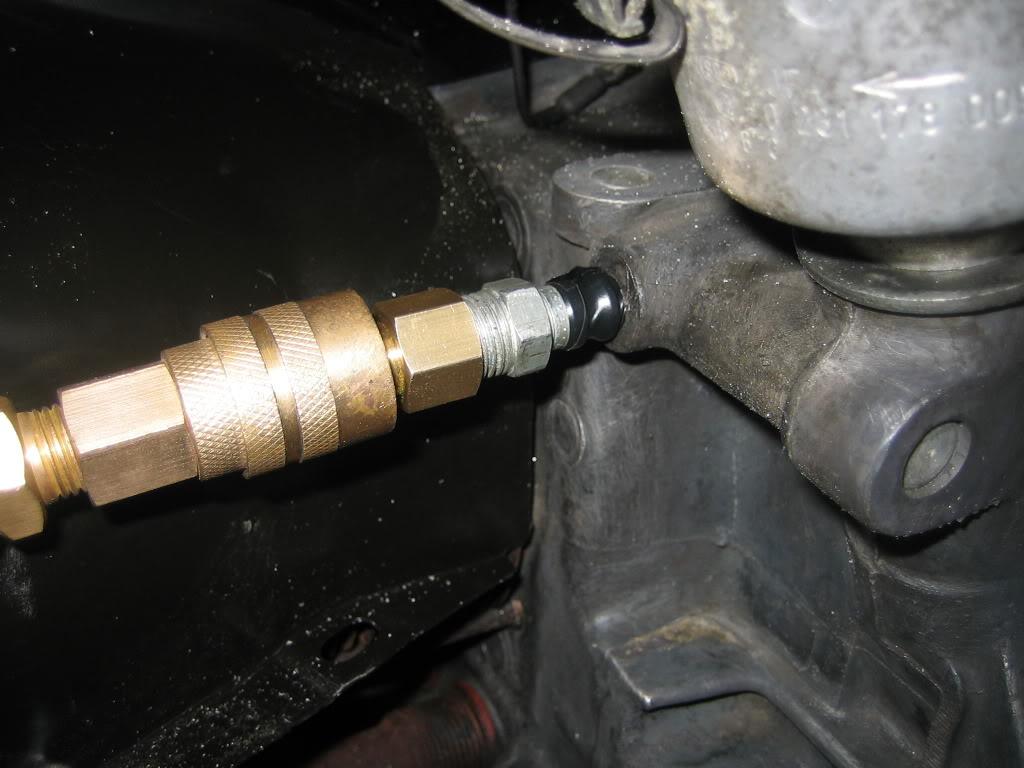
Then I used a shop vac to suck any metal out that falls down the oil pump passage
Finally, a healthy amount of grease on the tap helps to keep all the metal captive.
I took my time in drilling and tapping. I would cut one rotation and then back off the tap, clean it and re-apply the grease.
This is the metal shaving laden stuff that was forced out of the passage.
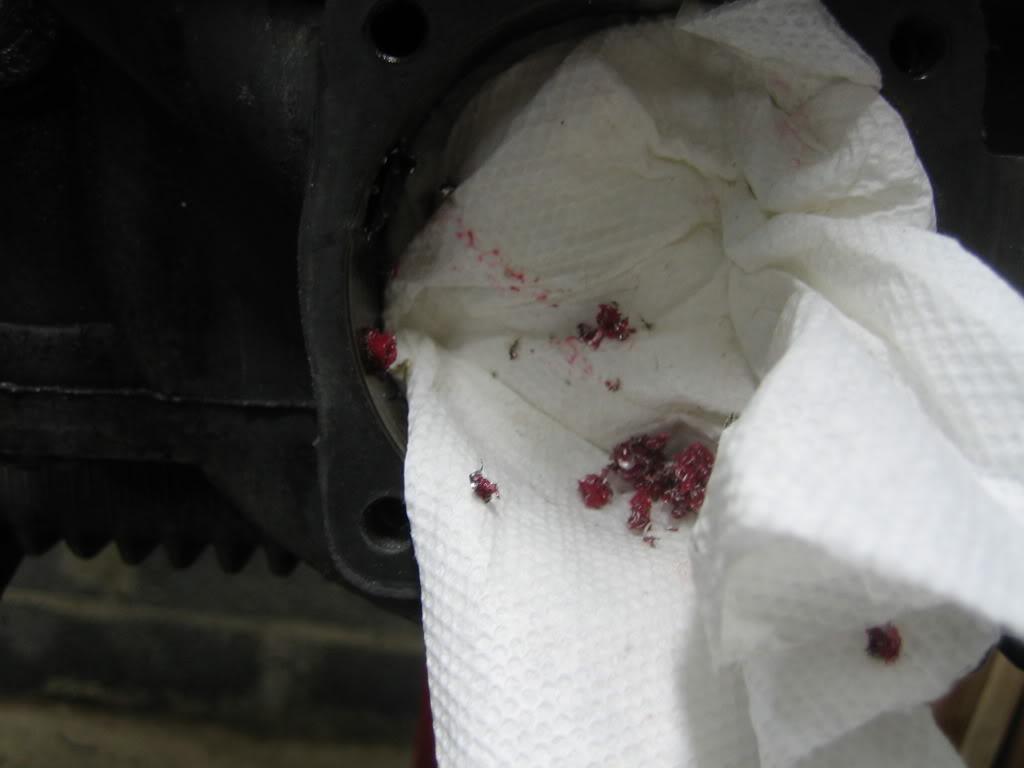
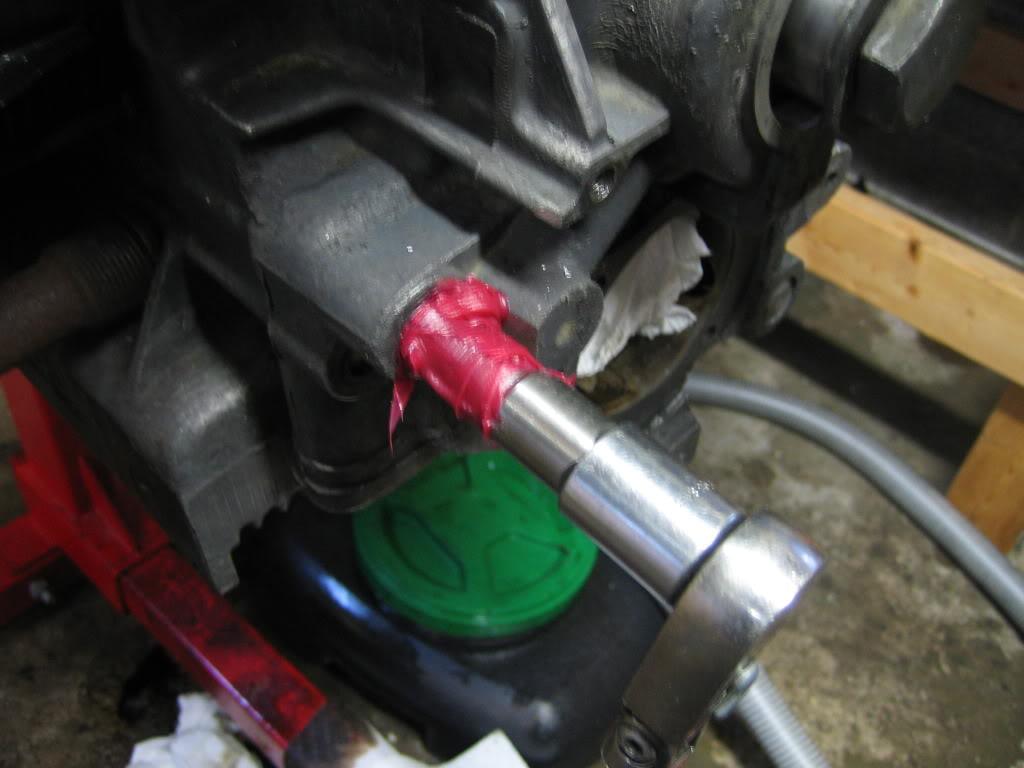
After the port was cut I used a couple cans of break clean to get all the grease and shavings out. With the oil lines pressurized all the bad stuff was forced out. It was messy but effective.
Here is the result.

I purchased a new oil pump that already had its factory outlet plugged and installed it with longer studs
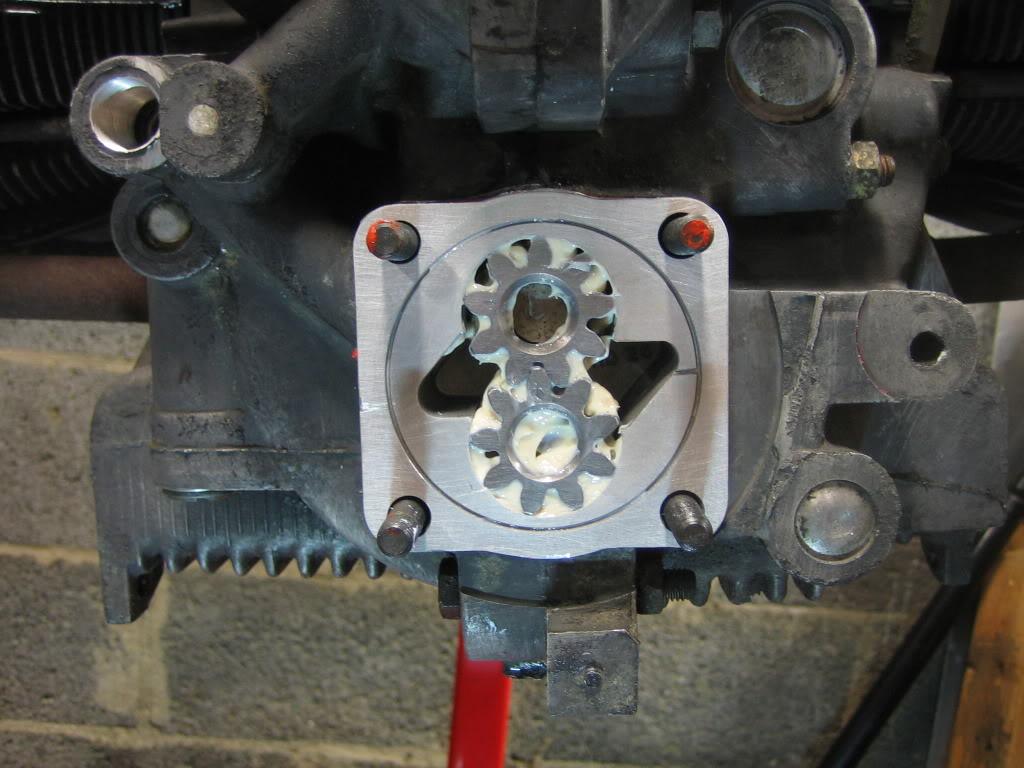
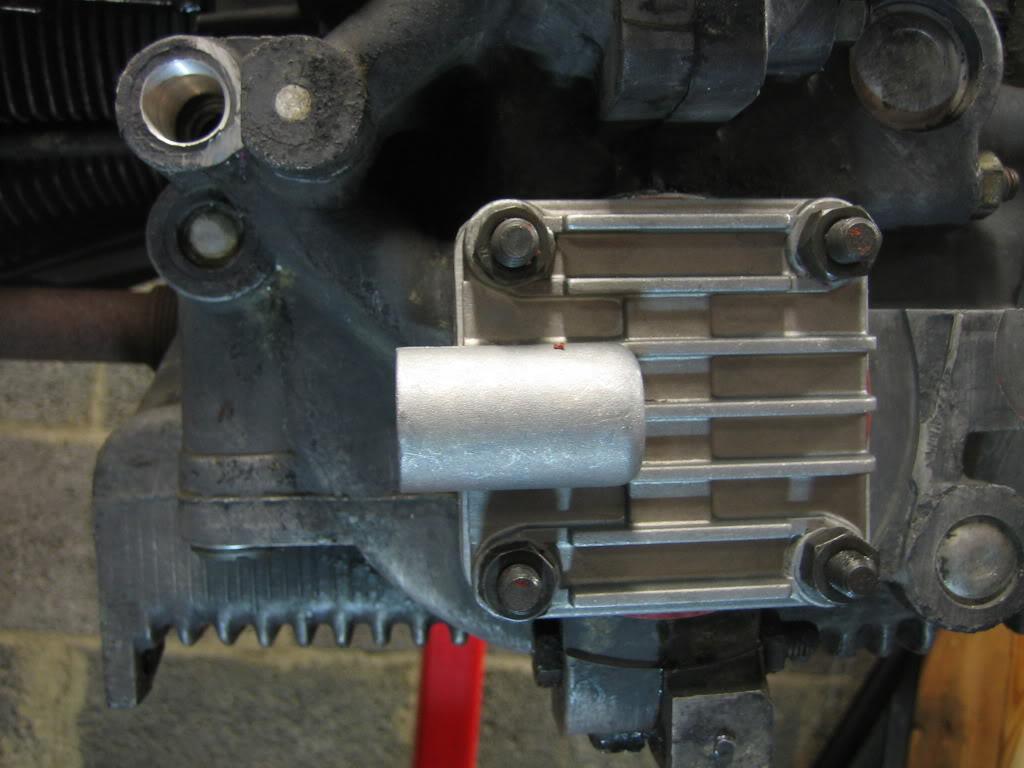
Then I installed the pump cover with new sealing nuts. All it needs now is the correct fittings and the filter stand.
Hopefully I got all the metal out???!!??
1/27/2010
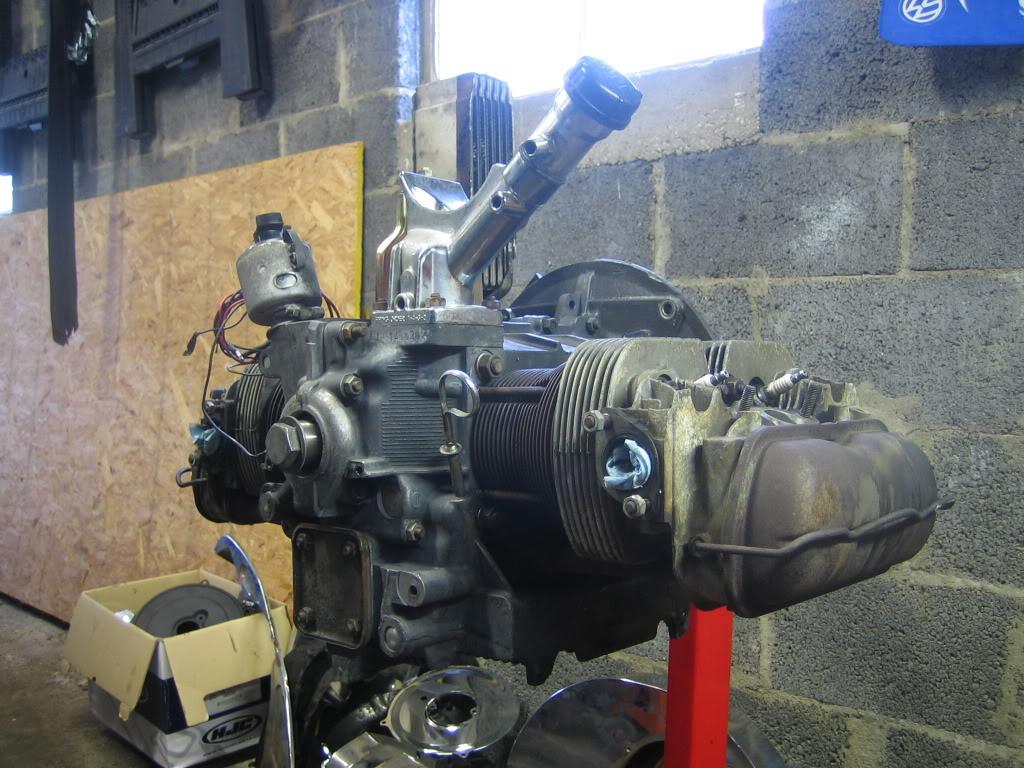
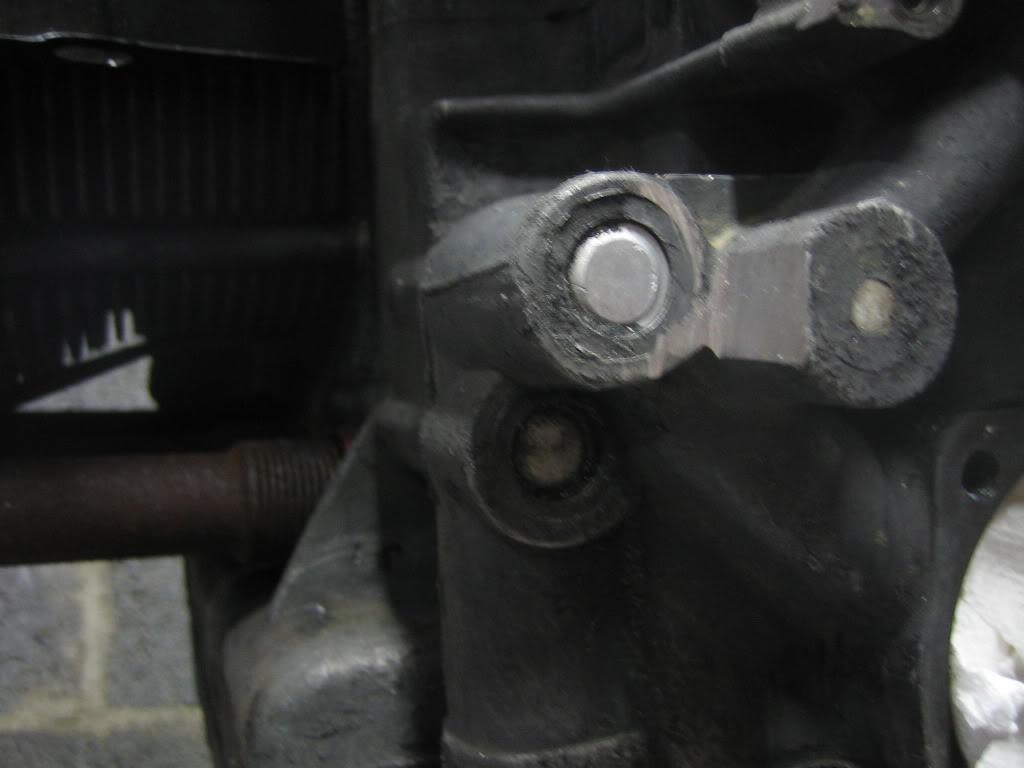
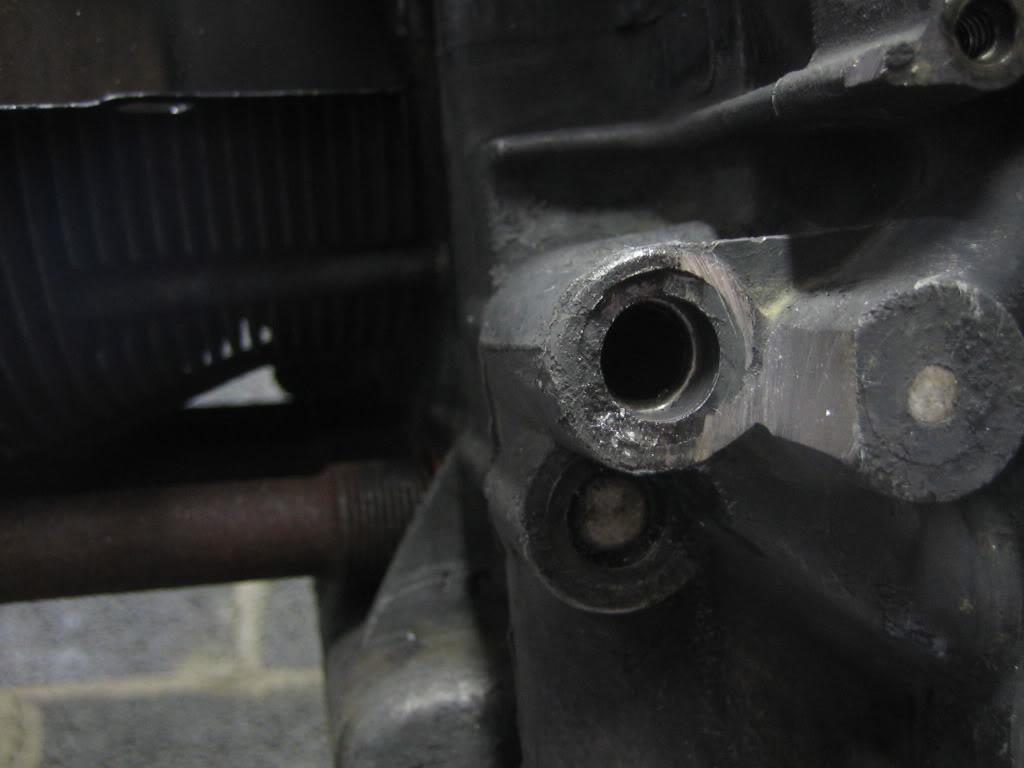
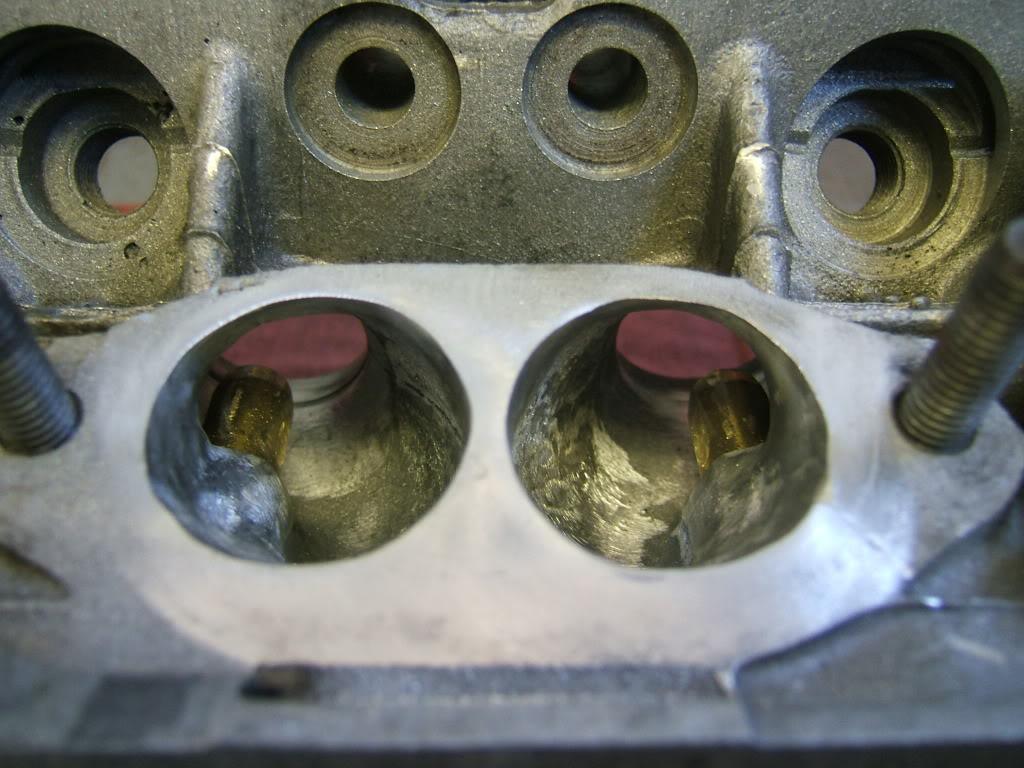
Dug my whole a little deeper tonight and pulled the heads. I really planned on just pulling them to replace the push rod tubes.....but now I might want to do a little freshening up too.
It gets smaller all the time.
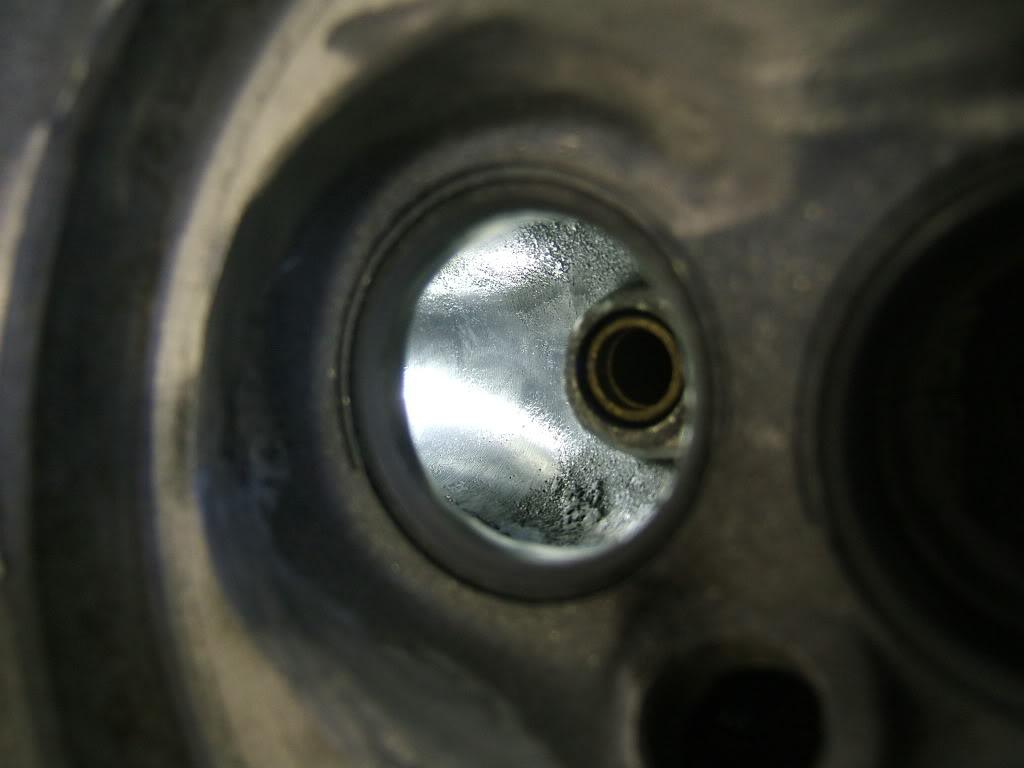
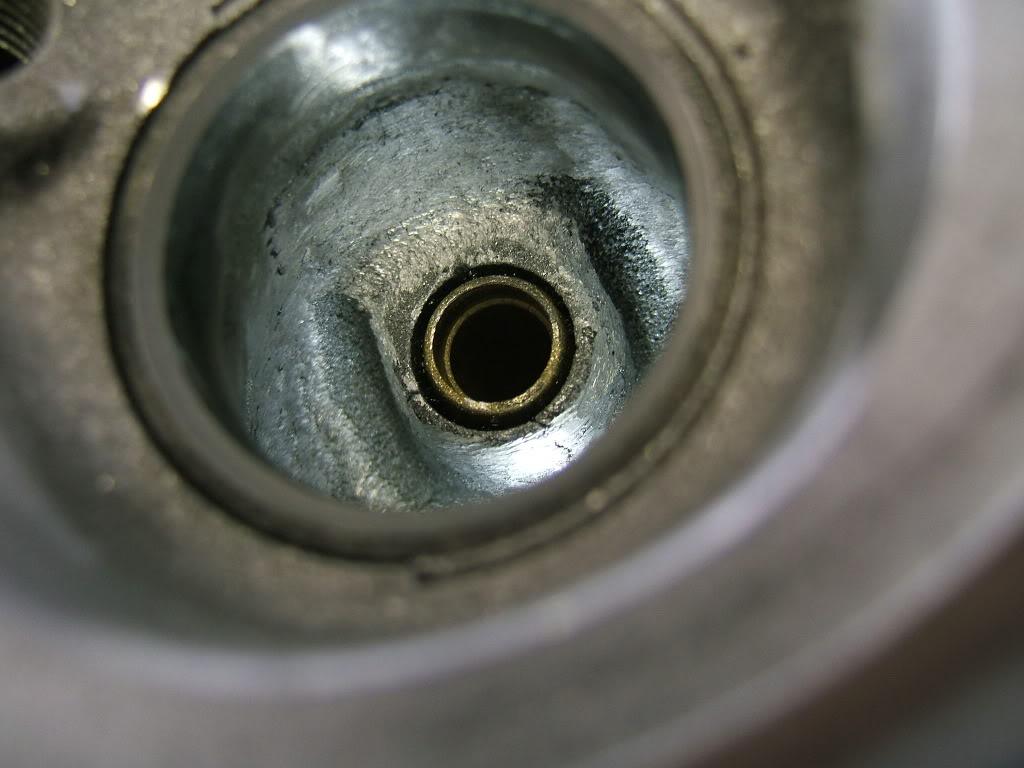
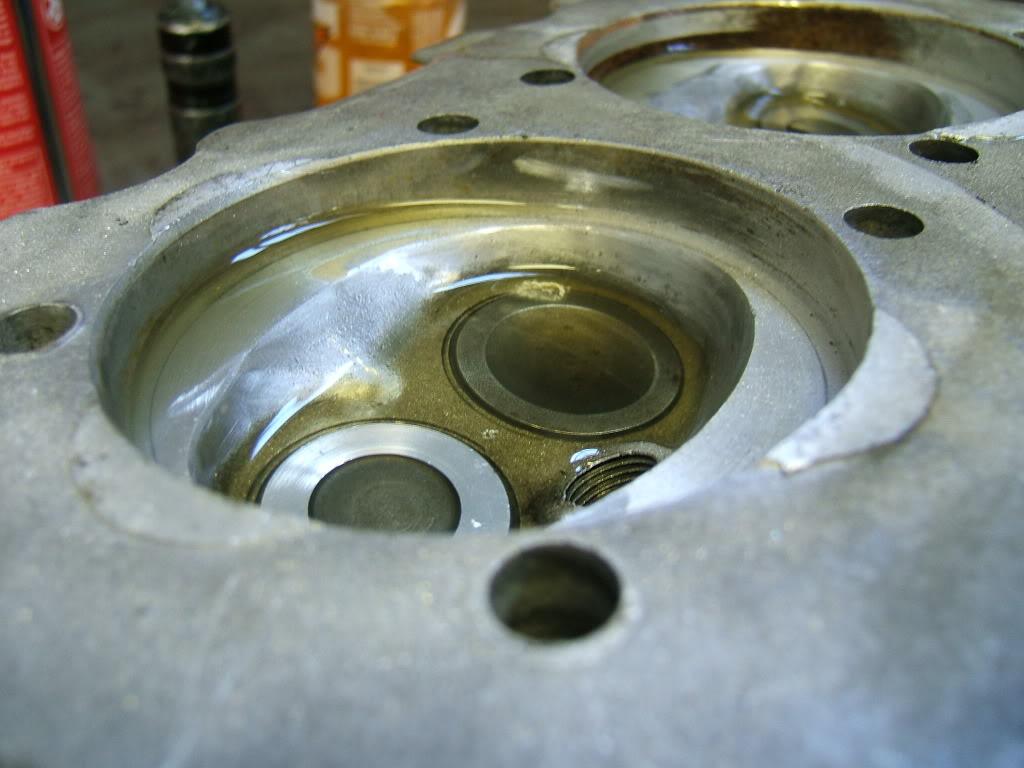
Here are the heads. See the discoloration on the intake valve of cylinder three? It's oil and I'm a bit concerned. There was a decent puddle in there when I pulled the head. The cylinders show a bit of scoring but nothing too extreme (I don't think). I'm really wishing I had done a compression and leak down test before I pulled the motor. Of course at that time I was just gonna replace the tins :D:.
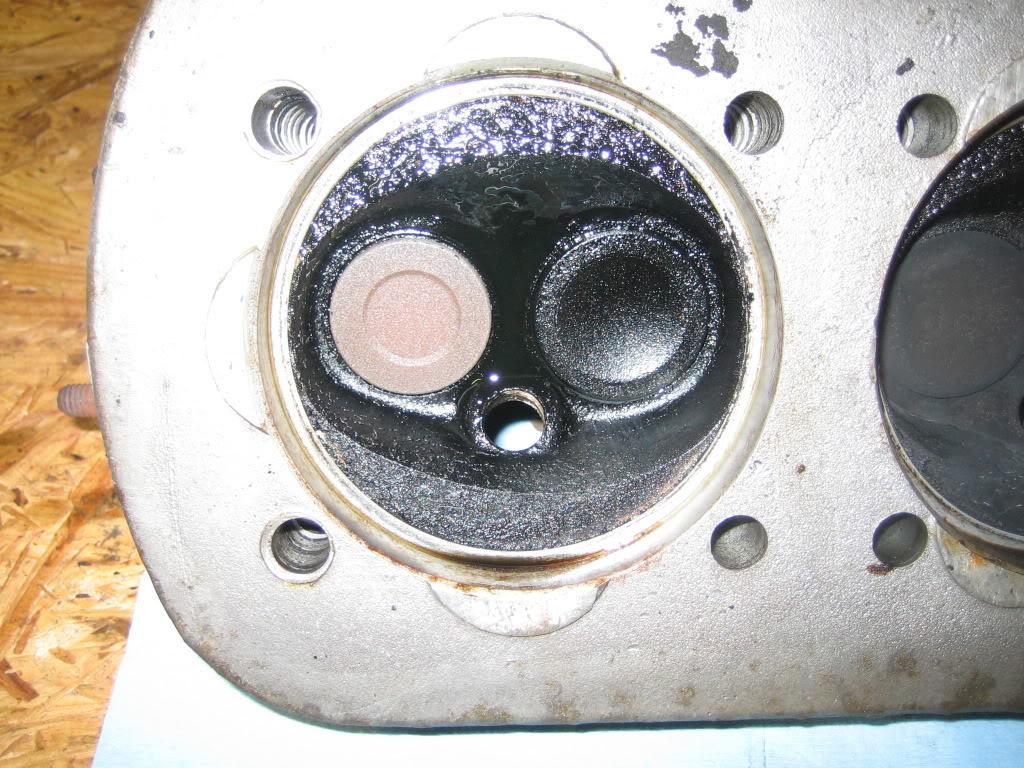
Any ideas on this oil build up?
1/28/2010
Hmmm, I started looking into endplay. If this is correct I could be in serious trouble.
You guys warned me about opening this can of worms.
"
"Speedy Jim" wrote with a "poor man's" endplay test -
- Remove the flywheel and push in on the bearing. (Prying with a large screwdriver works well.)
- Push the crank back in from the pulley end.
- Repeat. What you're trying to do is make the crankshaft move longitudinally through the case.
- Look for movement at both/either end of the crankshaft.
- If you can see any movement of the crankshaft, the bearing has spun.
In other words, see if the crankshaft can be push-pulled long-wise through the case. If you can see/feel more than the tiniest motion (0.006"-- same feel as a normal tappet movement), the end-play is excessive, usually due to the bearing. If the bearing has been spun, you can NOT compensate by shimming more."
1/30/2010
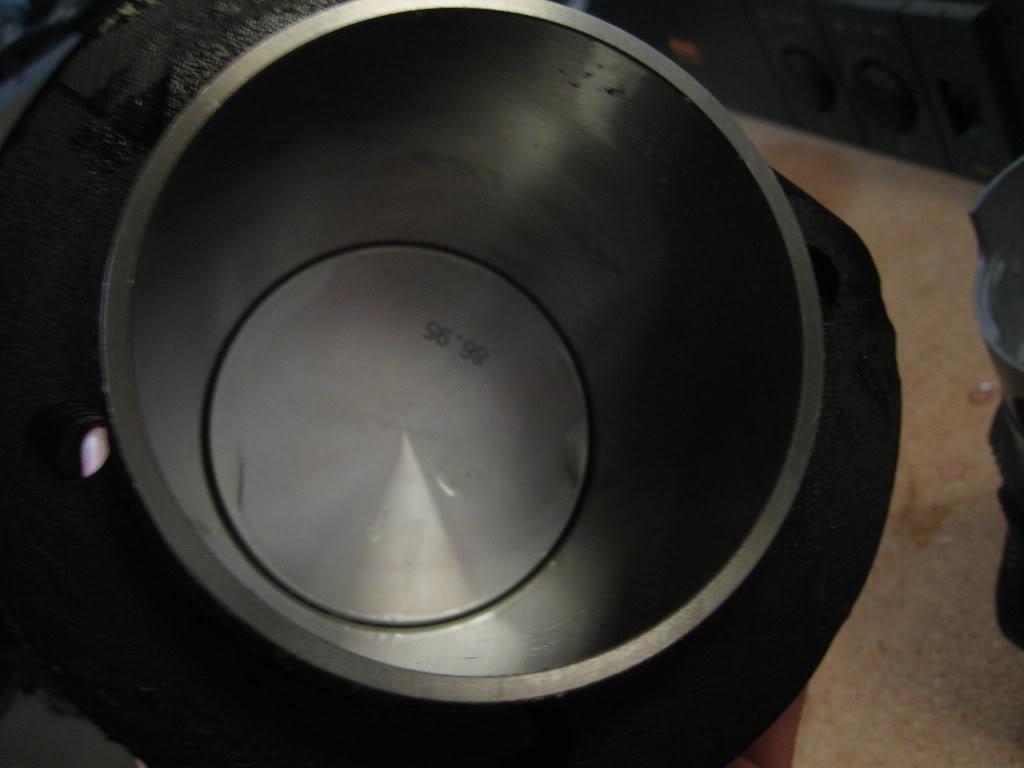
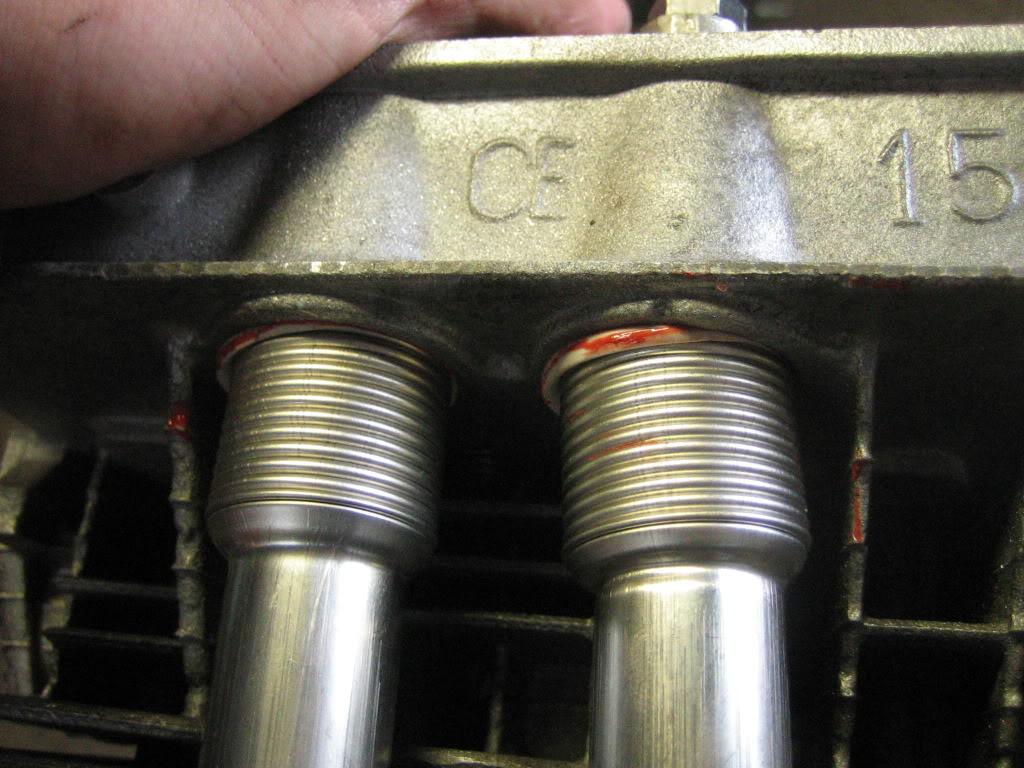
I had another shitty discovery this morning. I was measuring the pistons and cylinders in order to get some new rings and found they are only 85.5mm. That's a stock 1600 piston and not the advertised 87mm. Now I'm not sure if this thing was ever even rebuilt or just slapped in there. :ugh!:
1/31/2010
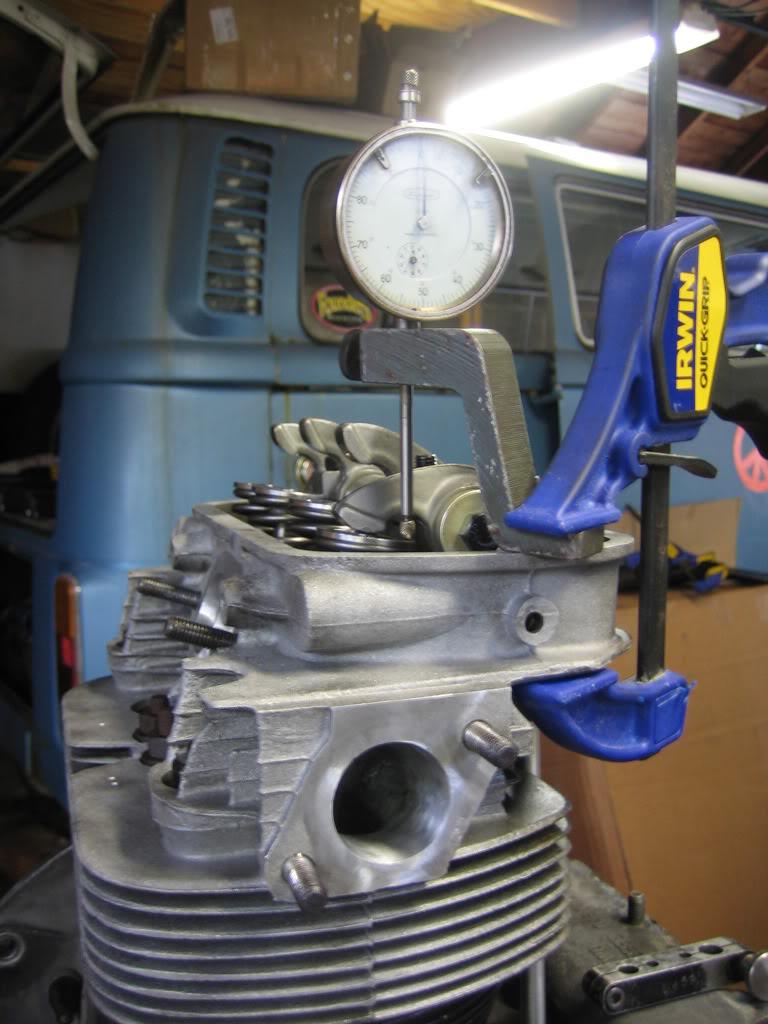
Ok, I did a proper end play test with a dial indicator
I've got .0075" of end play. That's not nearly as bad as I expected. I feel better now.
2/3/2010
Ok, so I'm cool with the end play concern. Things should be good with the proper shims.
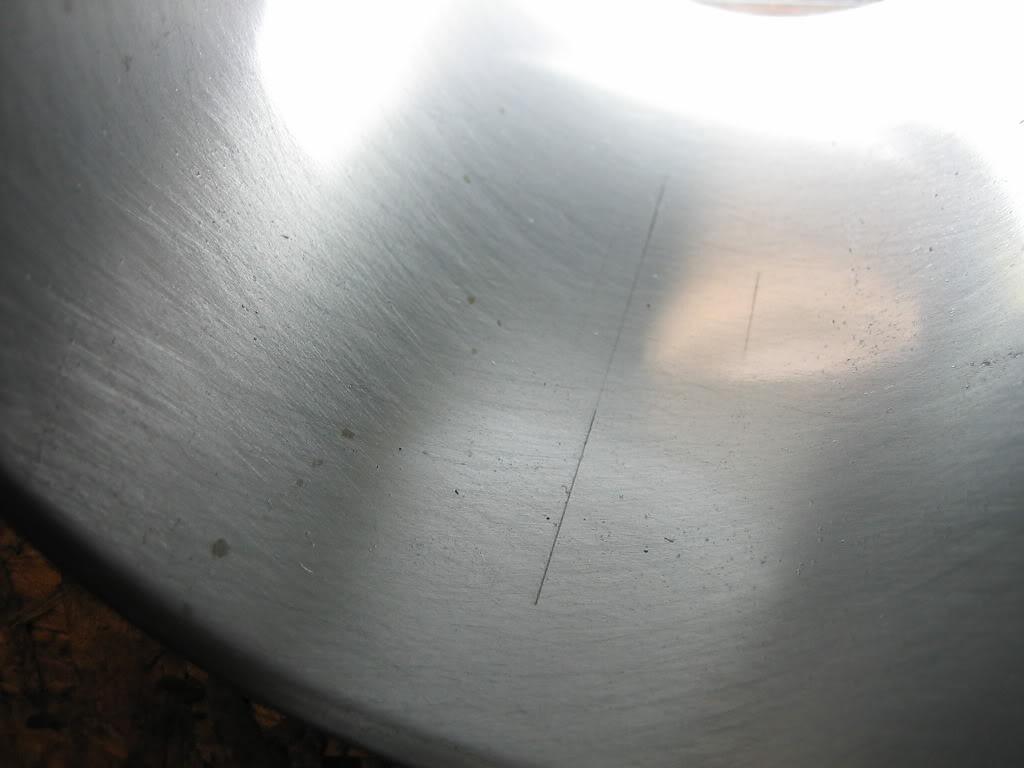
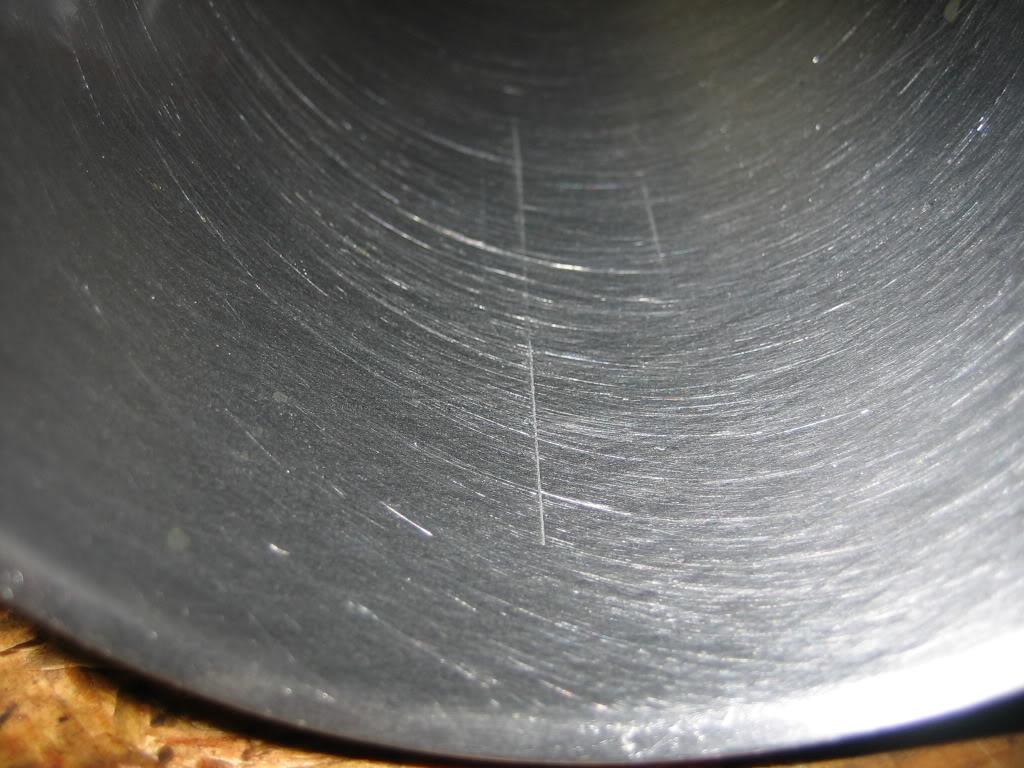
I did some honing on the cylinders today and it didn't turn out so well. After nearly 20 minutes of going at it there was still some gnarly scrapes in the cylinder wall. I guess I'll be getting some new jugs and pistons after all. While I'm saving for those I'll start inspecting the heads. Hopefully they look a bit better.
But here is my best shot at photos. These scratches were so deep I'd have to take a ton of material off to loose them. At that point the cylinder would most likely not be strait anymore.
2/3/2010
Damn, what is with you guys and your desire to have me slap this thing back together all half-ass? Sure, I'd like to build a super cool motor soon but who knows if I'm going to have the time or money to do that down the road. Then I'm left with a poorly built engine and no money to fix it. I'd rather put this engine together knowing that it is in good shape and can last me a while if I need it to.
Yes, it's relatively easy to pull the motor on these cars, but not that easy. I certainly don't want to have to do it again right away. I'd feel a lot better about spending an extra $100-$200 to know that it was done right and won't burn a bunch of oil.
Ed, Yes, my fingernail catches on the score big time so I'm sure it would allow oil and compression to pass.
Steve, if I had C-Tech machine hone these things they would probably charge me close to half of what new cylinders cost and then I'd be left with thinner cylinder walls which are prone to over-heating.
Plus, it will take a lot more time to get the existing pistons all cleaned up a ready to use again. If I get new ones they are ready to go out of the box and I just have to gap the rings. That will allow me to focus on finishing other parts of the project sooner.
Sorry to rant, I really do appreciate the advice and I realize you guys are trying to be the voice of reason. I just don't get the logic in this case.
2/5/2010
I haven't decided exactly which route to take. I'm leaning toward these big valve heads. While you're in there ya know?
Here is the break down of options:
0. Do nothing and bolt the heads back on with worn guides - $0 (not really an option for me)
1. Rebuild the heads myself with help from Joe - $100 + lots of time + learning experience.
2. Rebuilt heads from Brothers or Dons - $220
3. Rebuilt big valve heads from Brothers - $320
4. Waiting to hear from Jim's Buggies?????
2/9/2010
I dropped my heads off at Jim's Buggies in Nashville (michigan) last night. They'll be doing new guides, valves, retainers, HD valve springs, locks and fly-cutting.
I just have a few little parts to pick up now and I'll have everything ready for re-assembly.
2/18/2010
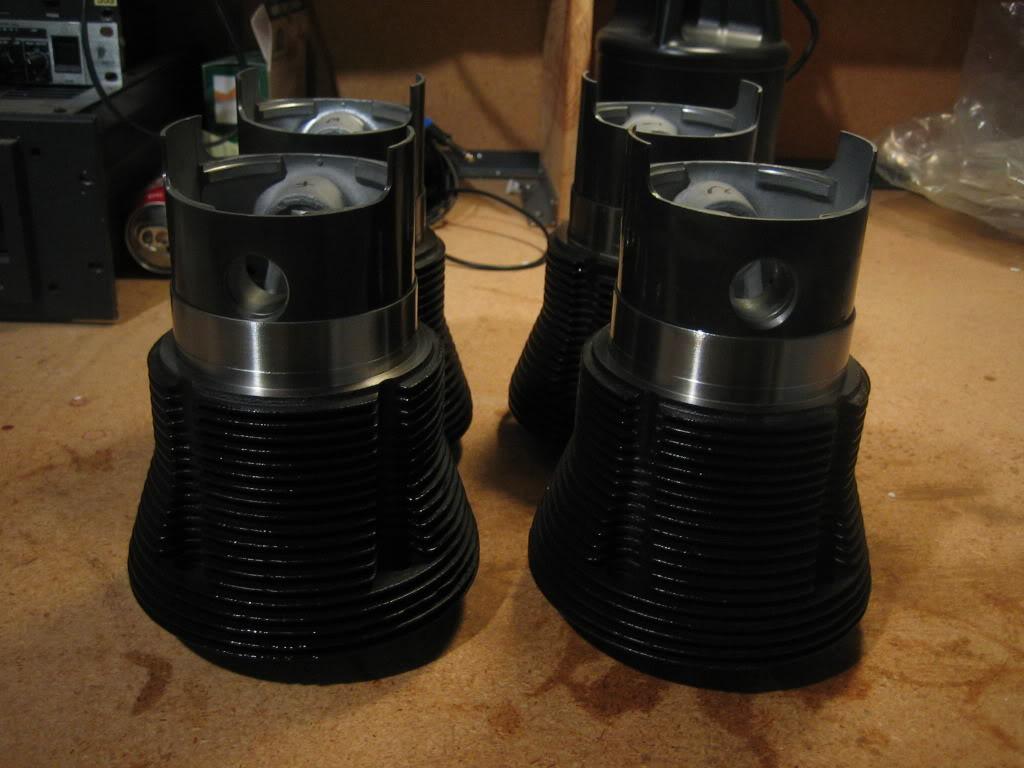
This is kind of a boring update but hey, I'm making progress.
The last couple nights I worked on getting the new pistons and cylinders ready. First I cleaned and painted the cylinders. From what I've read this actually helps heat dissipation. Then I check the ring gaps, cleaned everything again, oriented the rings, lubricated everything and dropped the pistons in.
They are now bagged and ready to slide on.
Hopefully my heads will be ready this weekend and I can make some progress on port matching them. Who knows? Maybe I'll have time to get everything bolted together.
Here are some boring pics of pistons.
3/6/2010
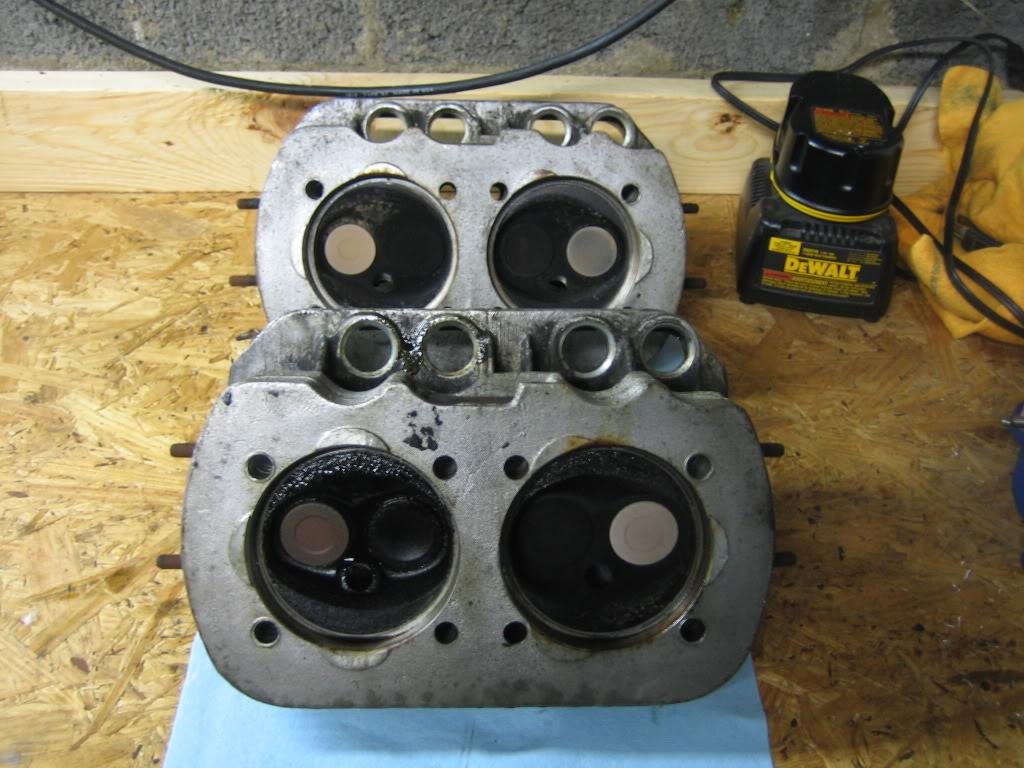
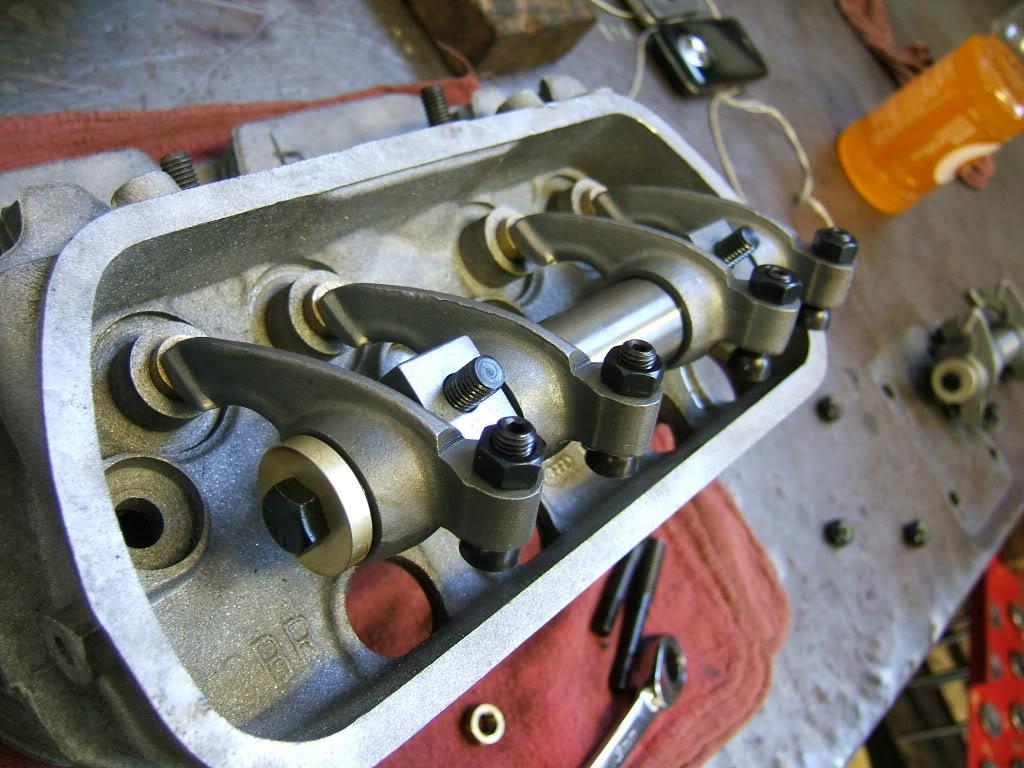
I finally had time to get the heads finished up today.
They were first sent off to Jim's Buggies to be rebuilt. Jim bead blasted the castings and fly cut the combustion chambers for more compression and a good sealing surface. They also cleaned up the ports a bit and cut the valve seats. They assembled the heads with all new valves, guides, keepers, retainers and HD valve springs. I could have run them the way they were but I couldn't leave well enough alone. I tore them down again to add some special touches.
What started as a simple port match turned into a mild port and polish. I was pretty conservative but hopefully it will make some difference. If nothing else I learned a lot from it.
The ports were actually pretty close between the head and intake manifolds. The area in black is all I needed to remove. After matching the port size I blended the difference in diameter into the port for a smooth transition.
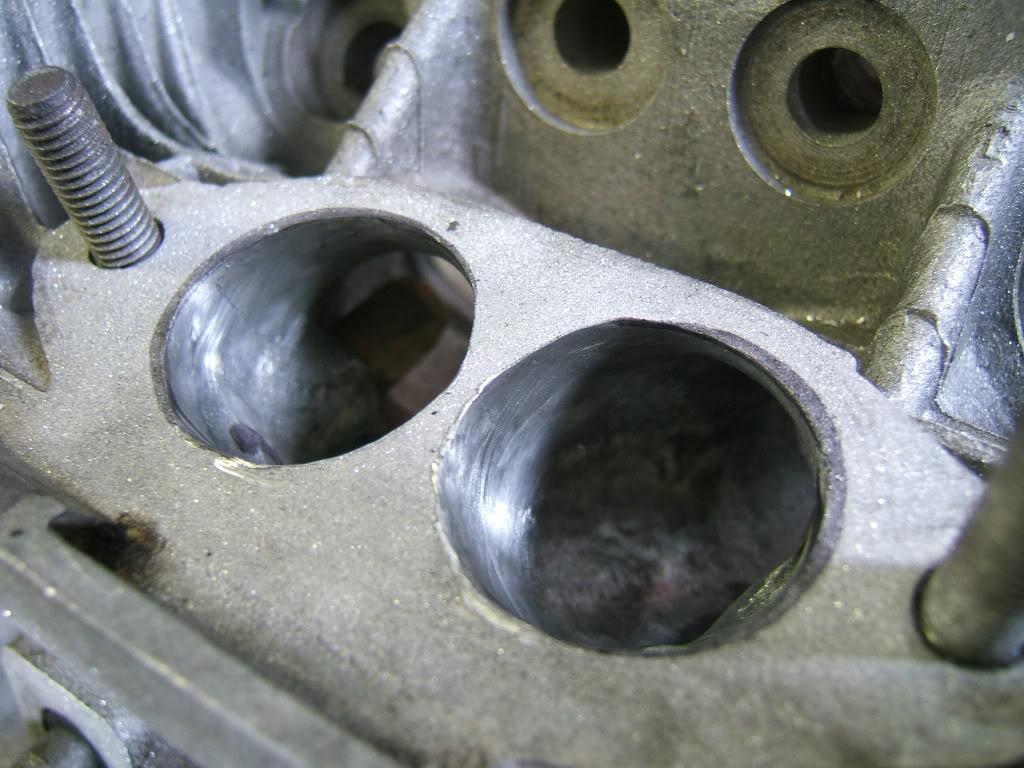
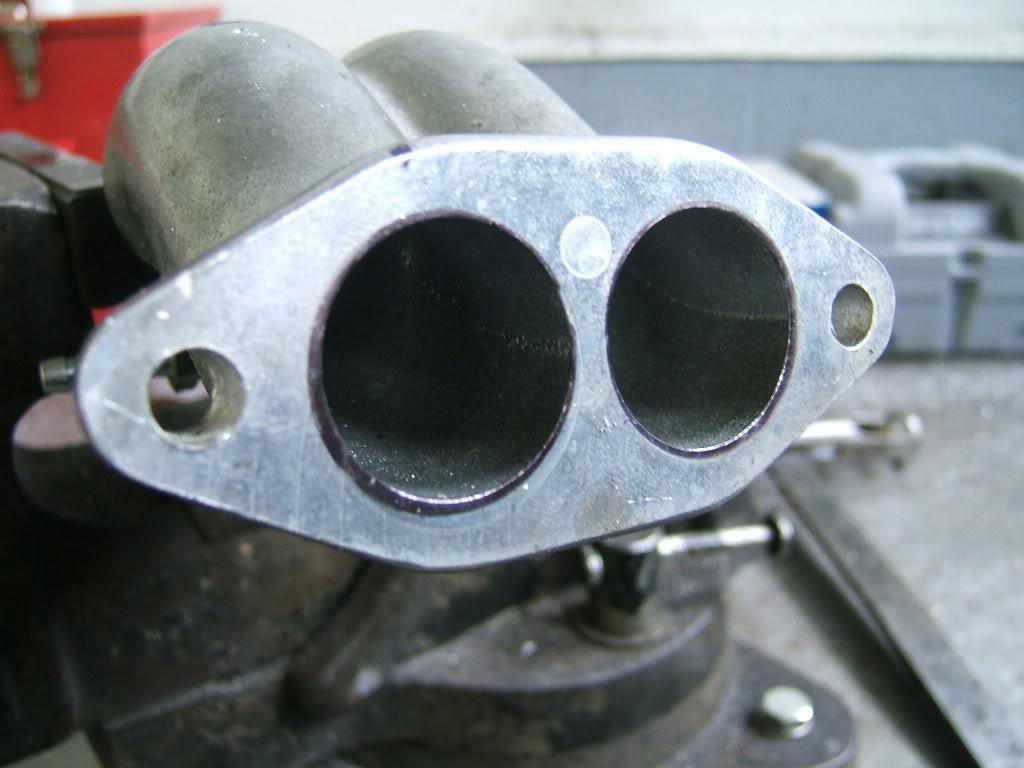
I also tried to straiten out the air flow a bit on both the intake and exhaust. It's really tough to see from the photos but a fair amount of material was removed from the intake manifolds and ports. I finished it off with some 80 grit sand paper to keep the fuel atomized.
I am a little concerned about what appears to be a small crack in the valve guide boss shown in this picture. At this point I decided to let it go. We'll see how she holds up.
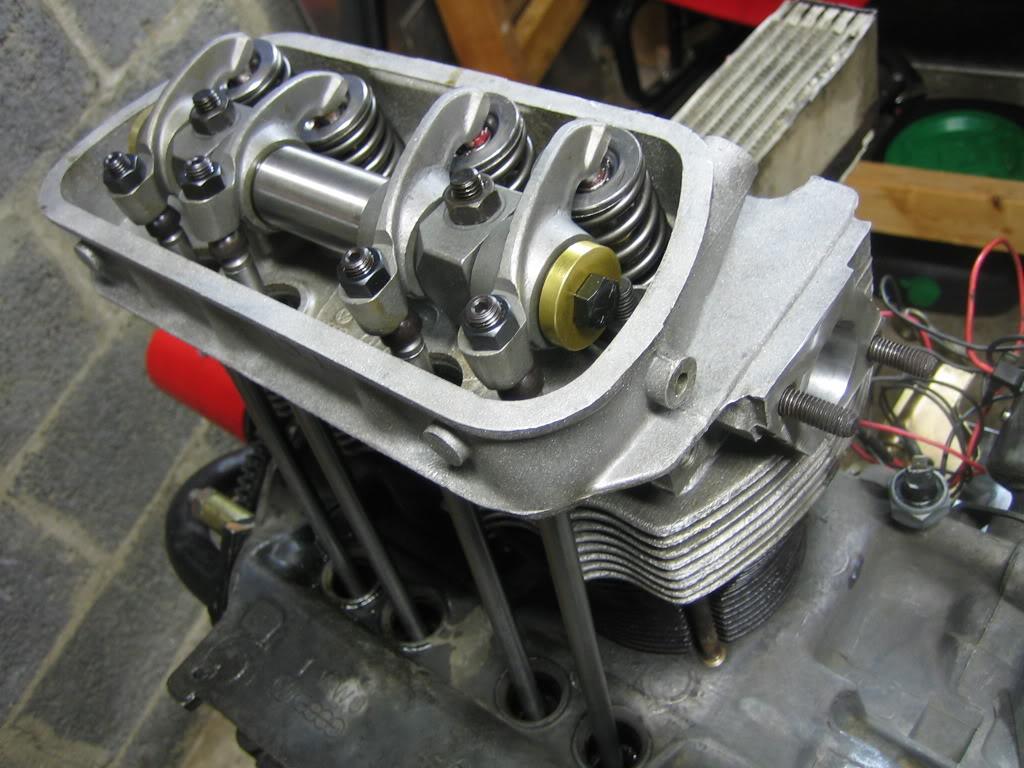
Here are the 1.4:1 ratio rockers test fitted. For those not familiar with these, they increase the valve lift to promote more flow. I had to clearance the rocker shaft stand slightly to make them fit.
I then lapped the valves for good measure. I'm not crazy about the amount of seat surface area the valves are touching but sources assure me it will be fine.
Finally I assembled the heads and did a leak test just to be sure. All appears to be well.
I am now waiting on some new pushrods so I can mock up the motor and do final assembly. Hopefully tomorrow I'll start on the body work.
3/20/2010
I've got a lot of work to do but things are moving along.
Over the last week I've been getting the motor mocked up and today I did the final (I hope) assembly.
I temporarily mounted the pistons, cylinders and heads on the case to figure out the valvetrain. I started by checking the geometry of the ratio rockers. They looked pretty good so no shims were necessary.
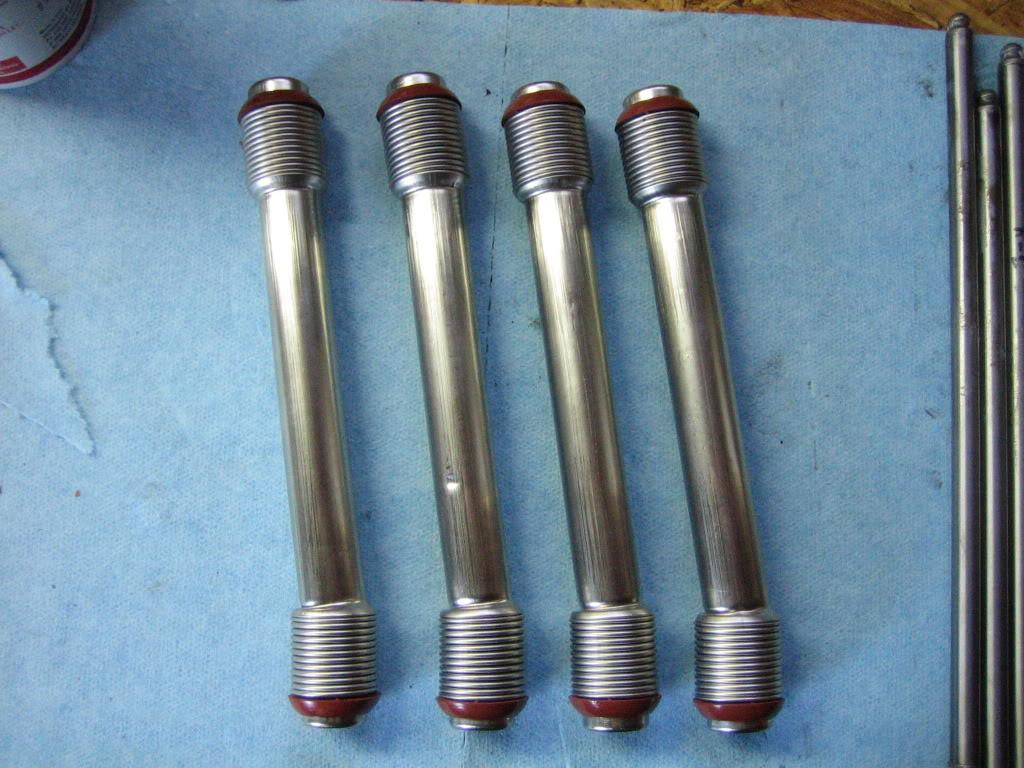
Then I measured and cut the new shorter chromoly pushrods.
When everything was set I took it all apart again, cleaned it up and did the final assembly. I used stainless steel pushrod tubes with silicon seals. However, they are not really fitting right and I'm a bit concerned they won't seal.
When I bolted the heads on they were 1/4" or more from the cylinders until I torqued them down. It seemed like the pushrods were just too long and didn't have enough space to compress. I've never assembled an aircooled engine before so I decided to proceed anyway just to see what would happen. The tubes compressed enough for everything to fit, but they don't look right now. As you can see from the pictures they are tweaked at either end to fit in the space. This just doesn't seem right to me.
What do you guys think? I'm afraid if I order new tubes I'll end up with the same problem.

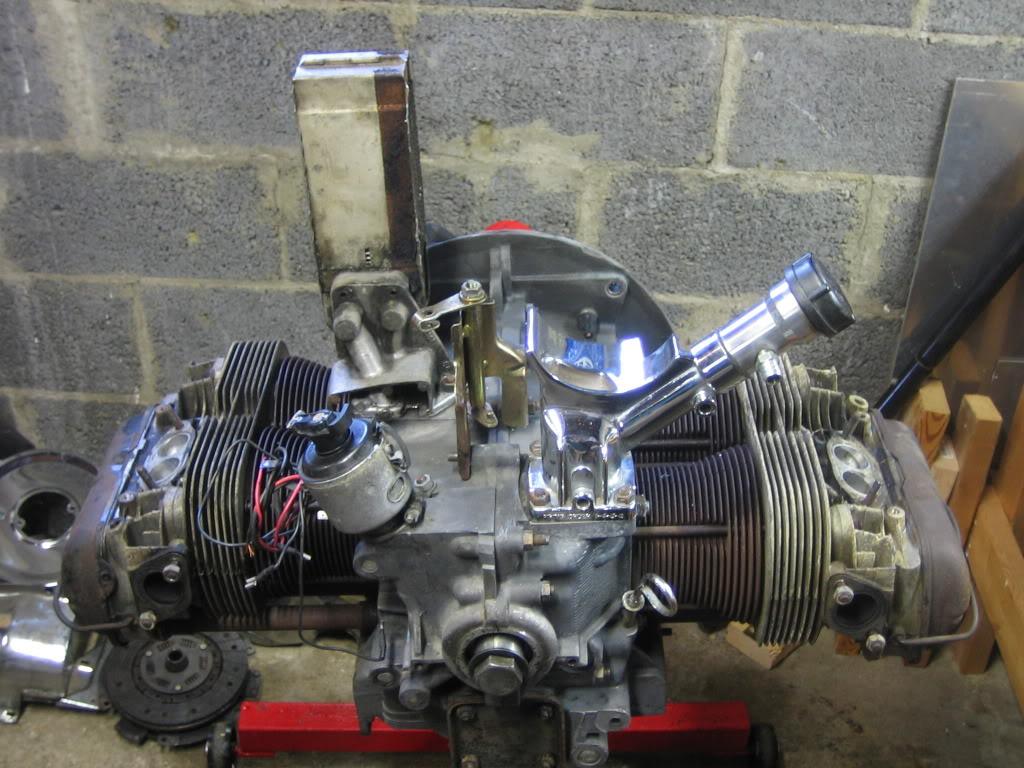
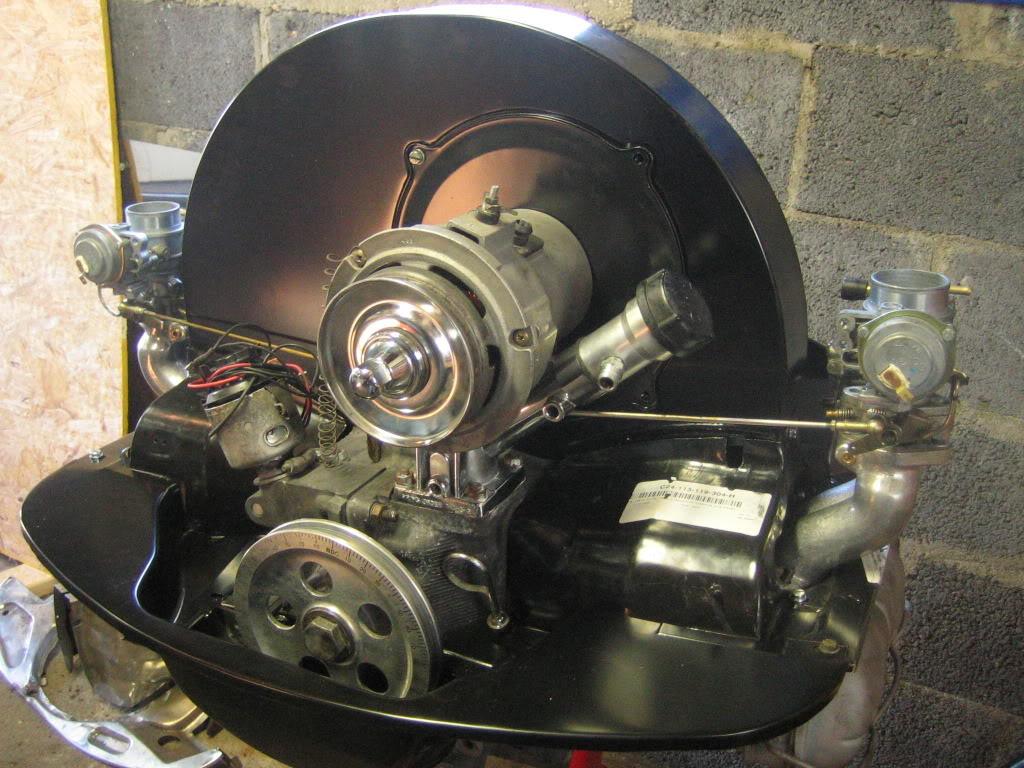
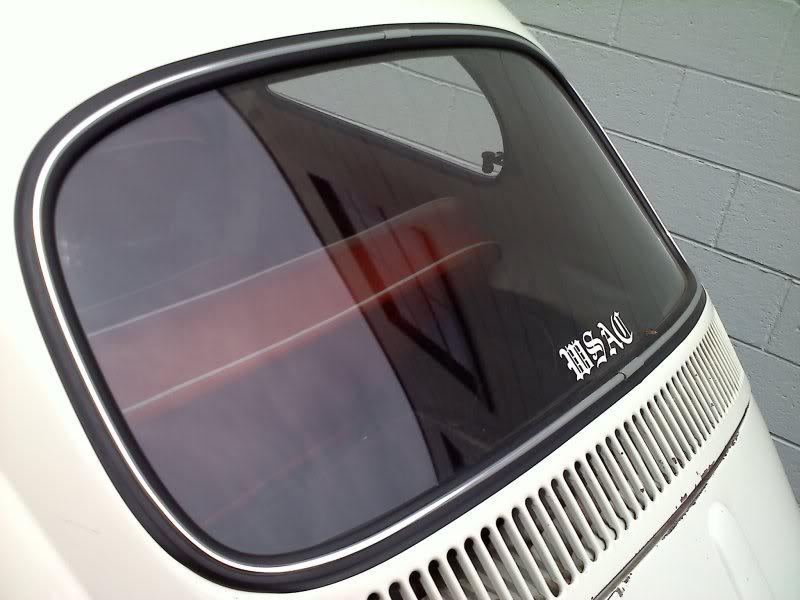
I went ahead and assembled the engine a little bit more just to get things sealed up. The WSAC helped out big time on these valve covers. Darren sand blasted them and Joe welded on some AN fittings for my breather box. They will be powder coated later.
Speaking of Joe, he was over today and got the bus running. It still needs some serious love but it was good to hear it make some noise.
The next step if I don't have to re-do the pushrod tubes is fitting the engine tins. I'm also making some progress on the body work but I'll update the thread with that stuff tomorrow.
3/21/2010
Ok, here is the second attempt. I took everything apart, cleaned all the sealer off and re-assembled using some standard pushrod tube seals. I arranged the tubes so the tweaks were all in the same orientation. This seemed to at least get the seals centered properly. It did mean that the tube seams are not all on the top, but I'm willing to compromise at this point.
Here are the tubes aligned.
And installed. The seals seem to be seated much better and are not being forced out like before.


I'm thinking of trying it like this for now. If they leak I can install some spring loaded tubes without too much trouble later.
3/21/2010
I did make some more progress today.
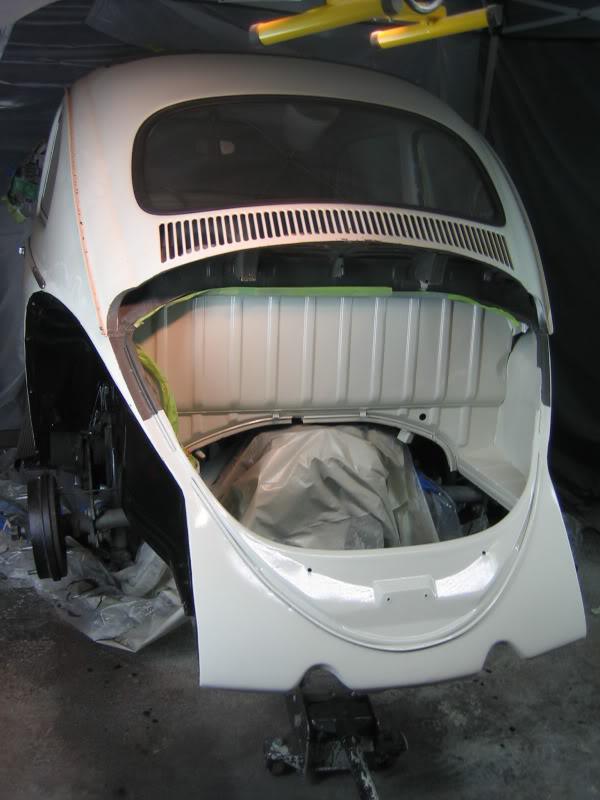
With the engine assembled I fitted the tins. There was quite a bit of modification required and they still don't fit perfect but what can ya do.
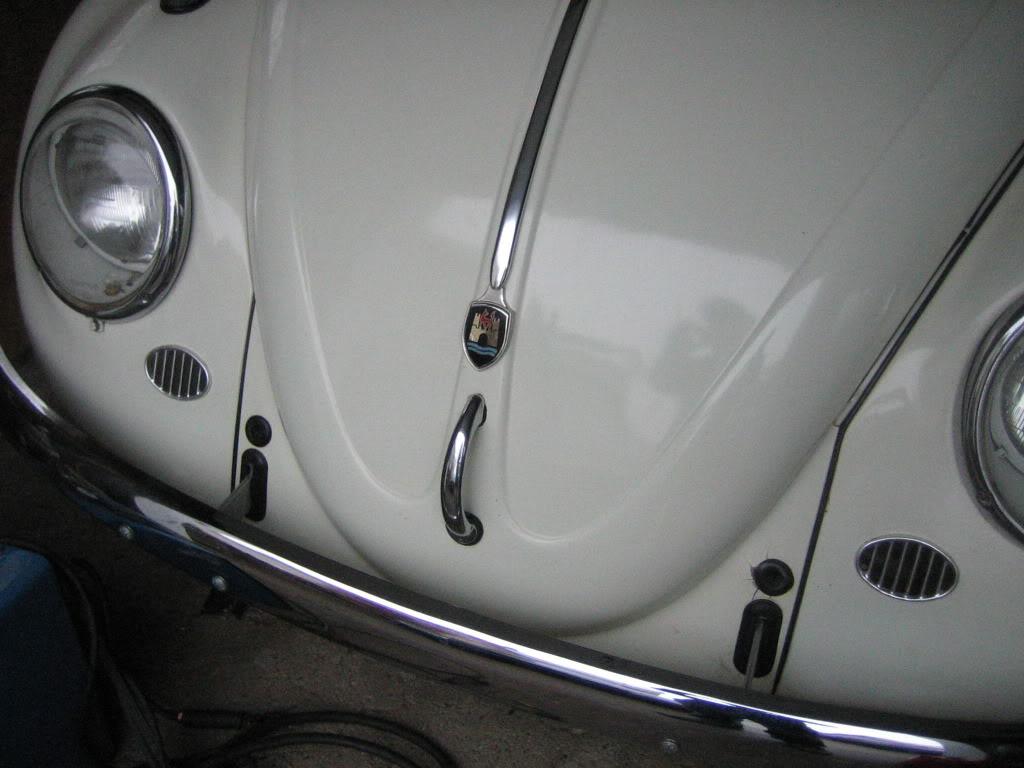
I installed a new hood molding and wolfsburg badge to mix things up.
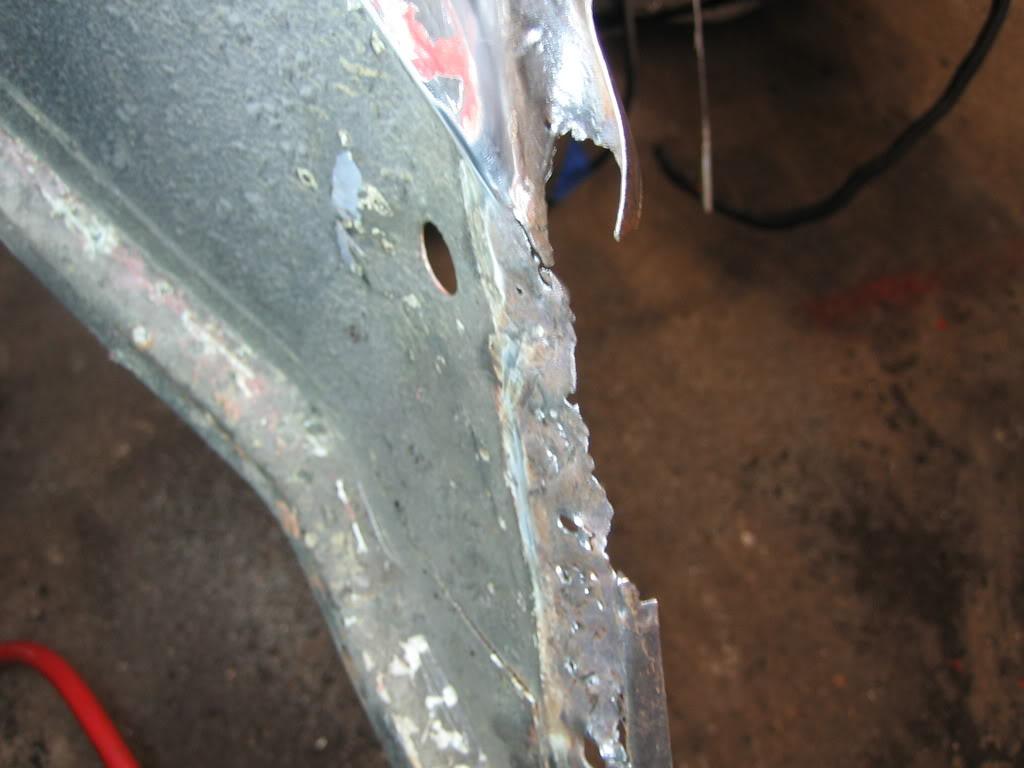
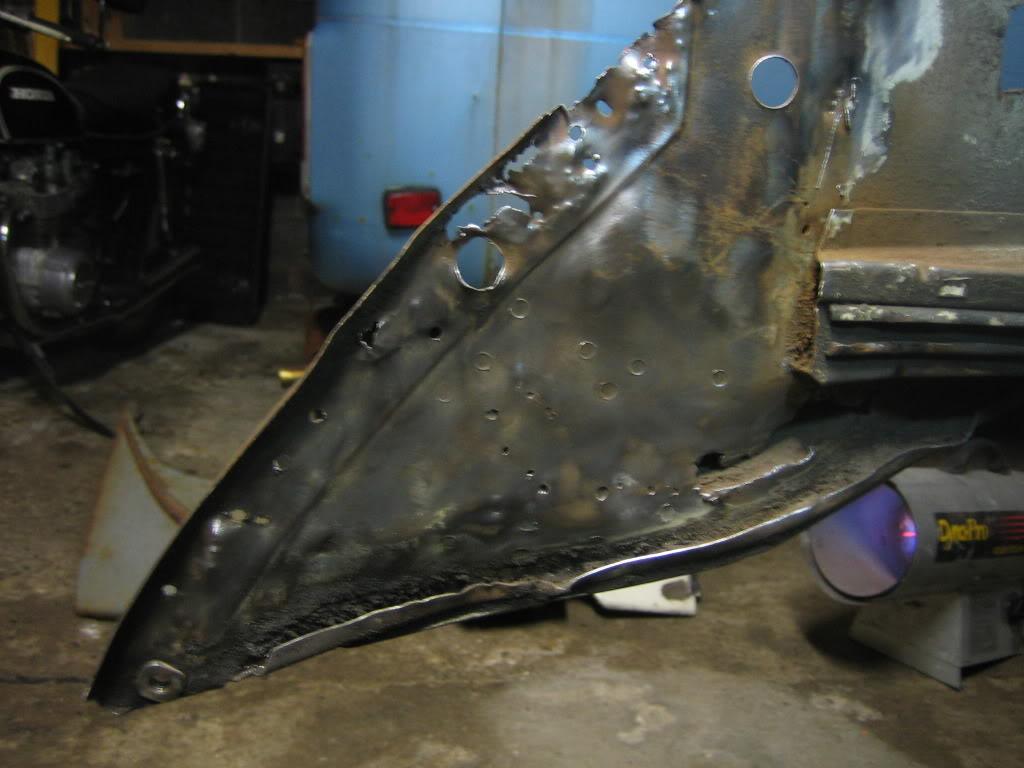
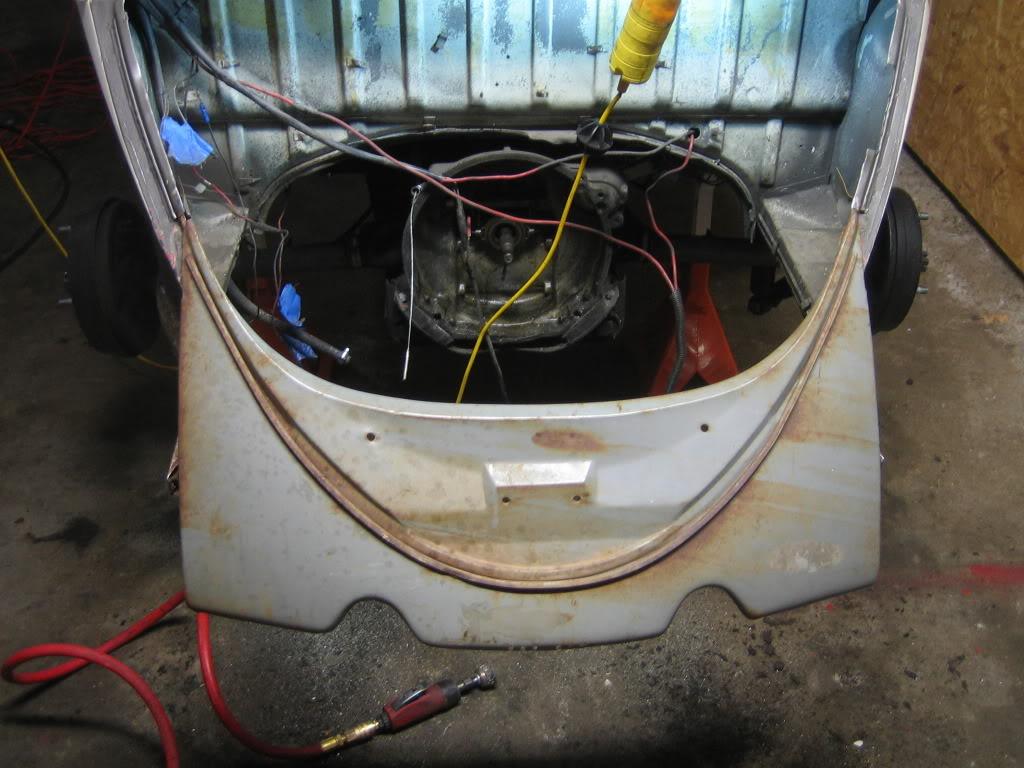
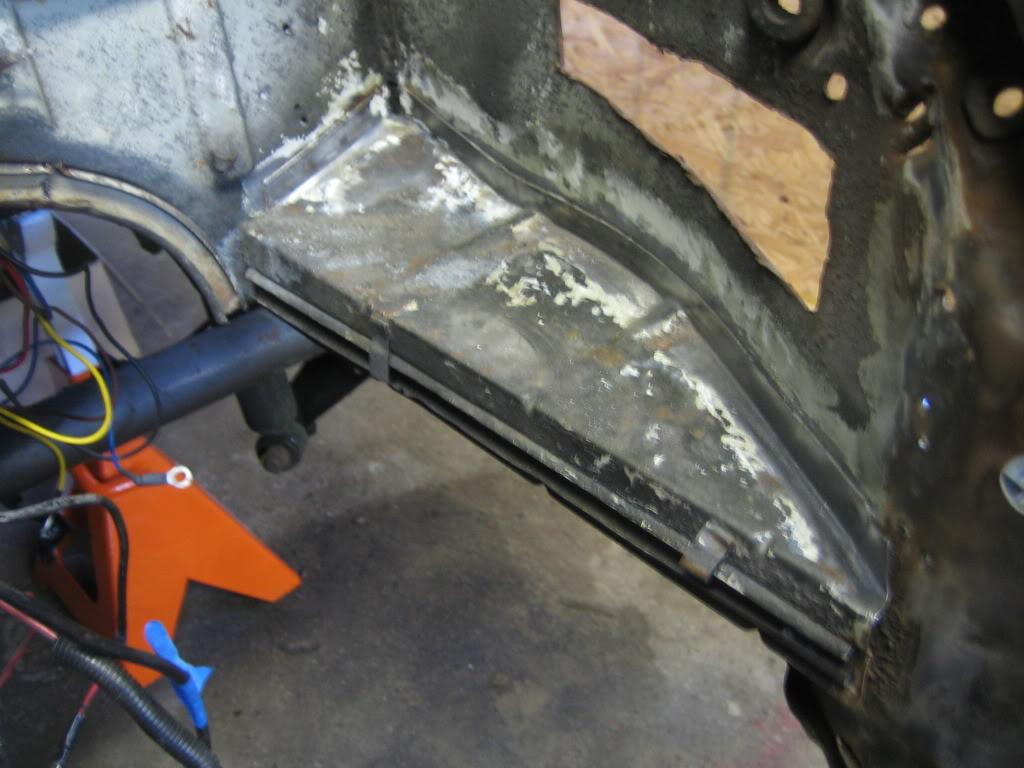
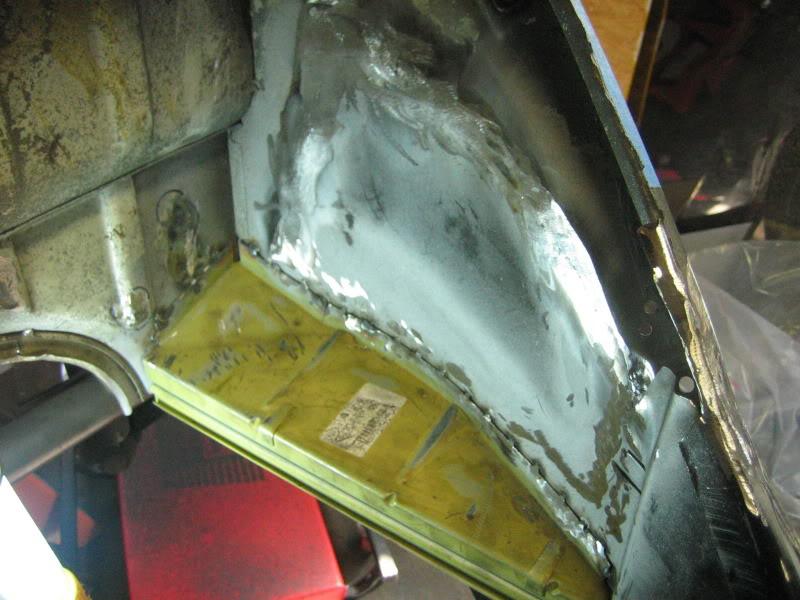
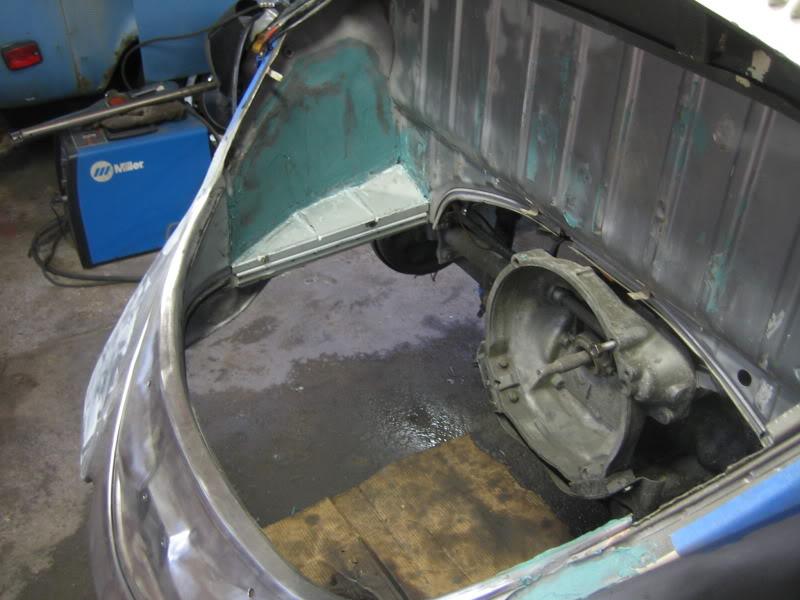
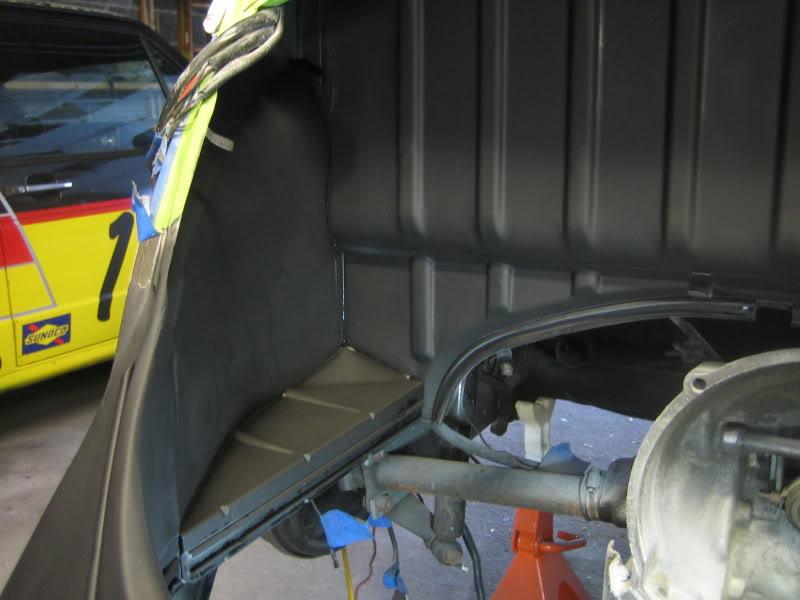
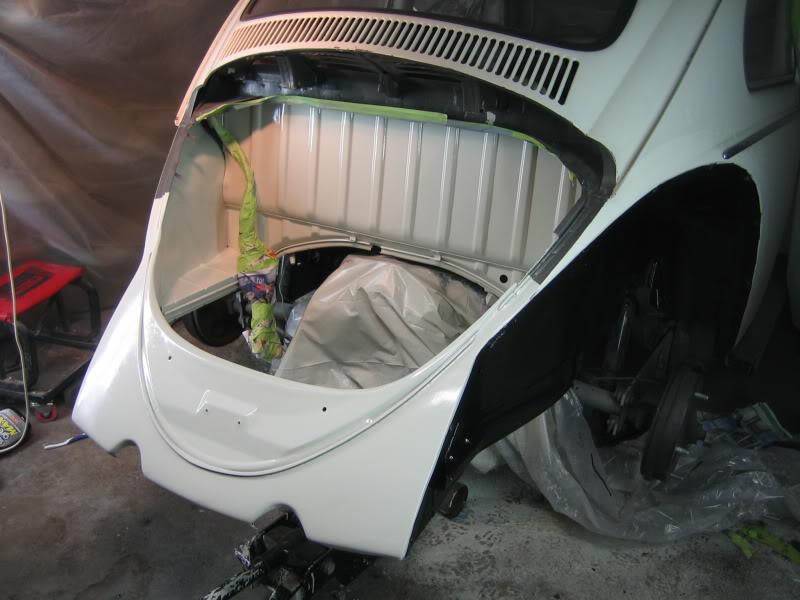
I've also been working on the body stuff. I first needed to fit these new rear side panels.
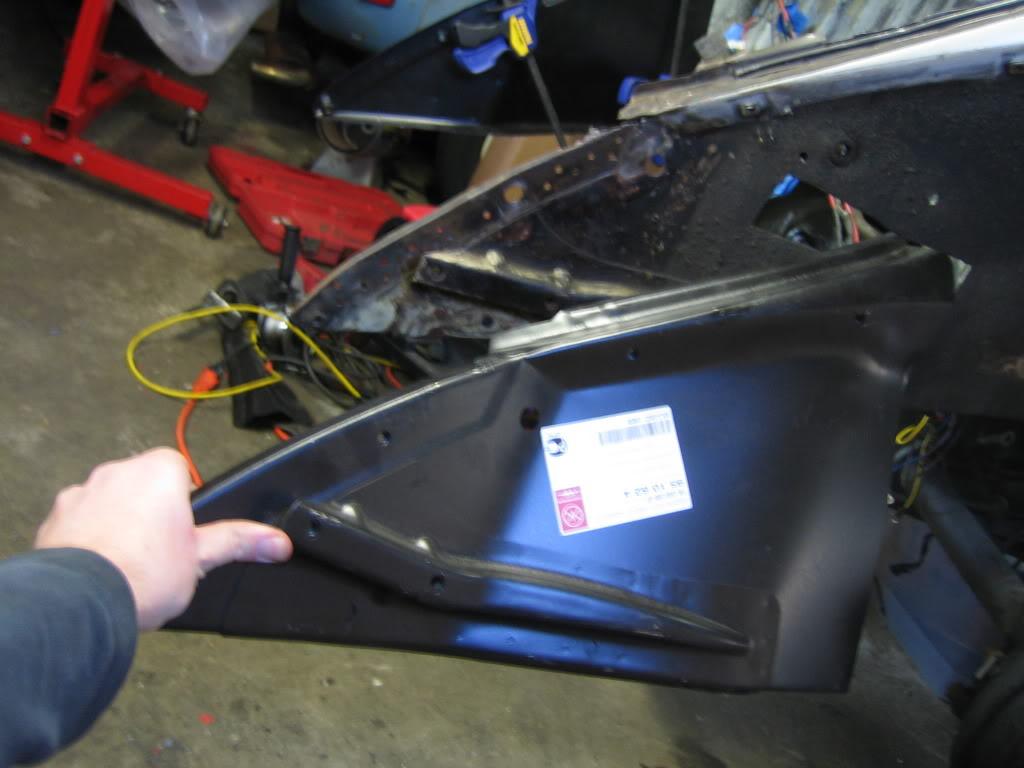
Step one was removing these shelves.
Got crazy with the sawzall.
Then I trimmed the new panels and the chassis to match.
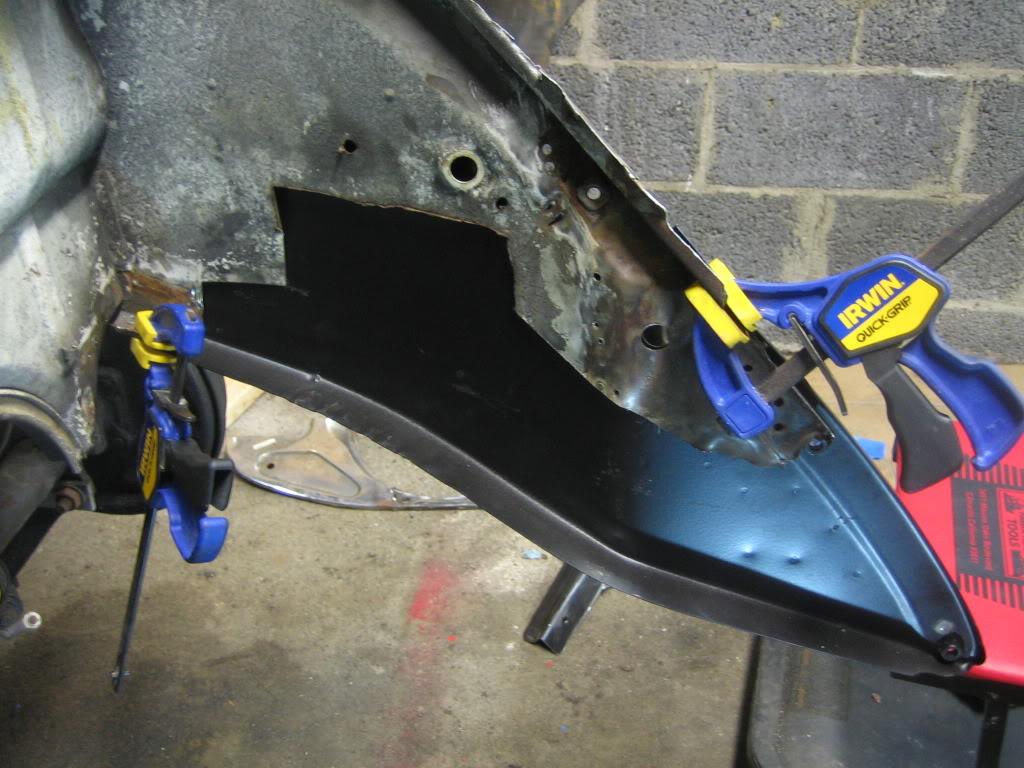
Today I tack welded the panels on and started fitting the apron. There is a lot of adjustment to do before the final welding. Does anyone have a body hammer kit I can borrow?

It is starting to look like a car again so that's nice.
3/28/2010
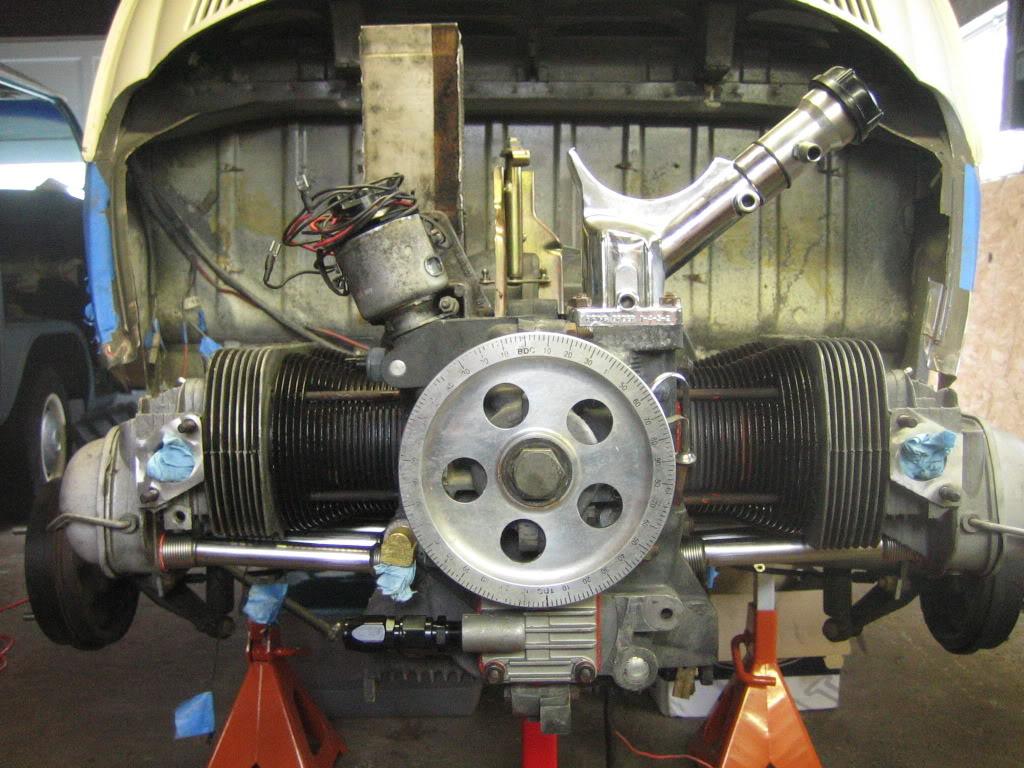
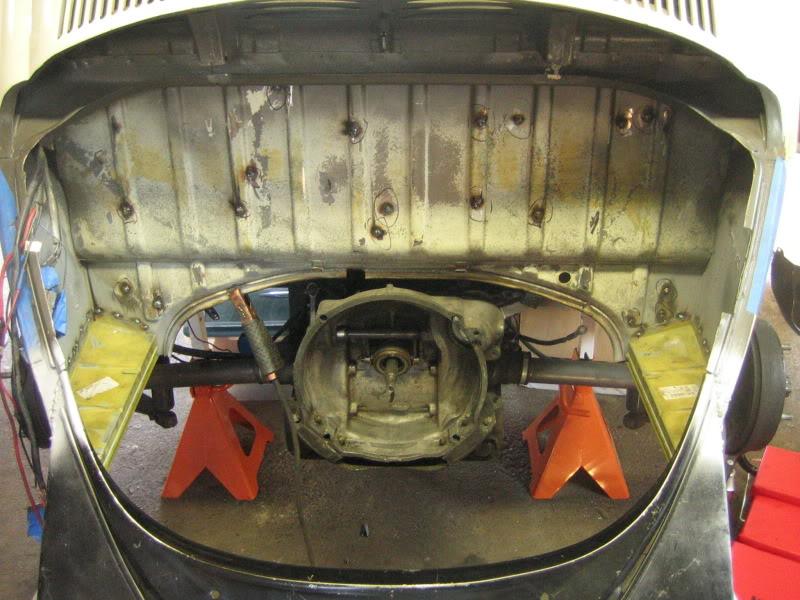
I've been working on getting all the panels fitted up this week. As expected they all fit like total shit. I put the engine back in to make sure I got everything to line up.
At the same time I am teaching myself how to weld (with some pointers from the big bro). I probably could have picked an easier first project but it's too late for regrets now.
Mocking up parts is good for inspiration anyway.
4/29/2010
Ok, update time.
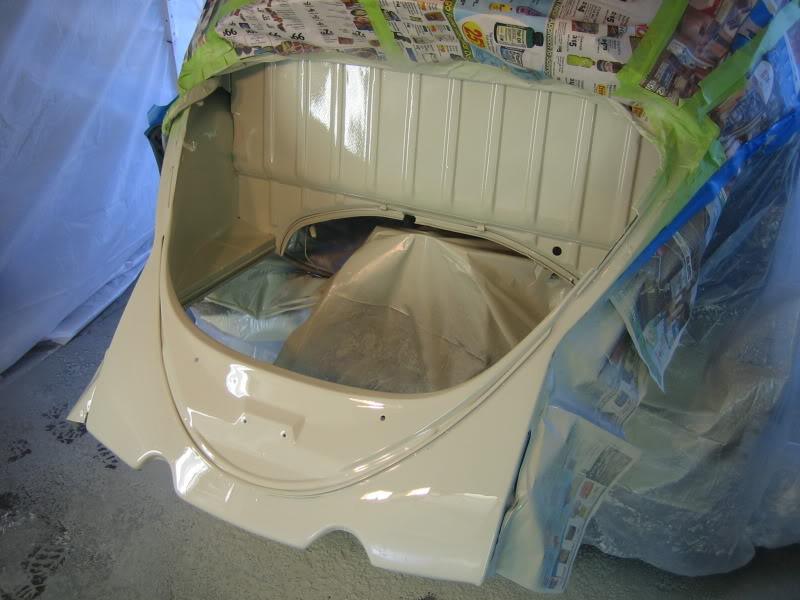
I've been soldiering through the body work. Over the last few weeks I got everything welded up. The metal is very thin in places so it took a lot of welding, grinding and re-welding. The end result was...ok.
Then last weekend covered the old girl in jelly and she did a full stip tease. That combines with some light sand blasting and sanding ended up with a bare metal bay and apron.
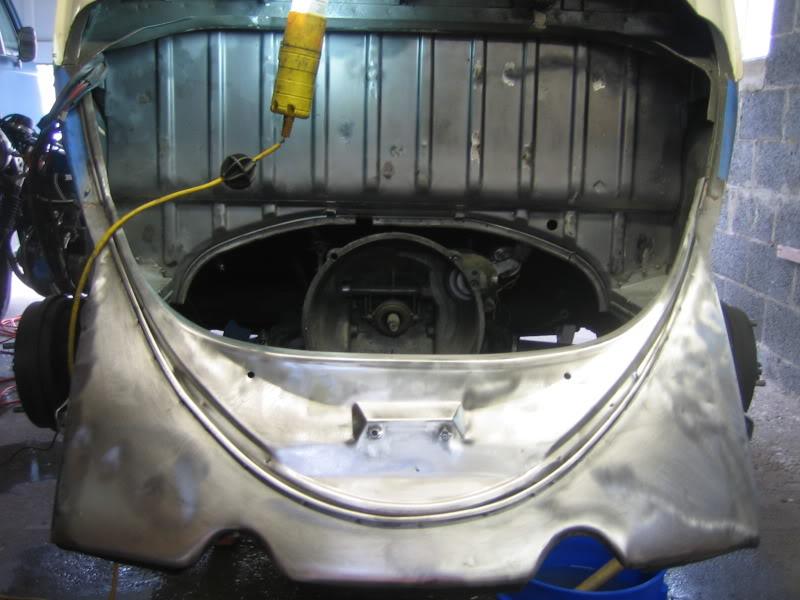
I started adding some body filler to a few spots but got distracted by the motor.
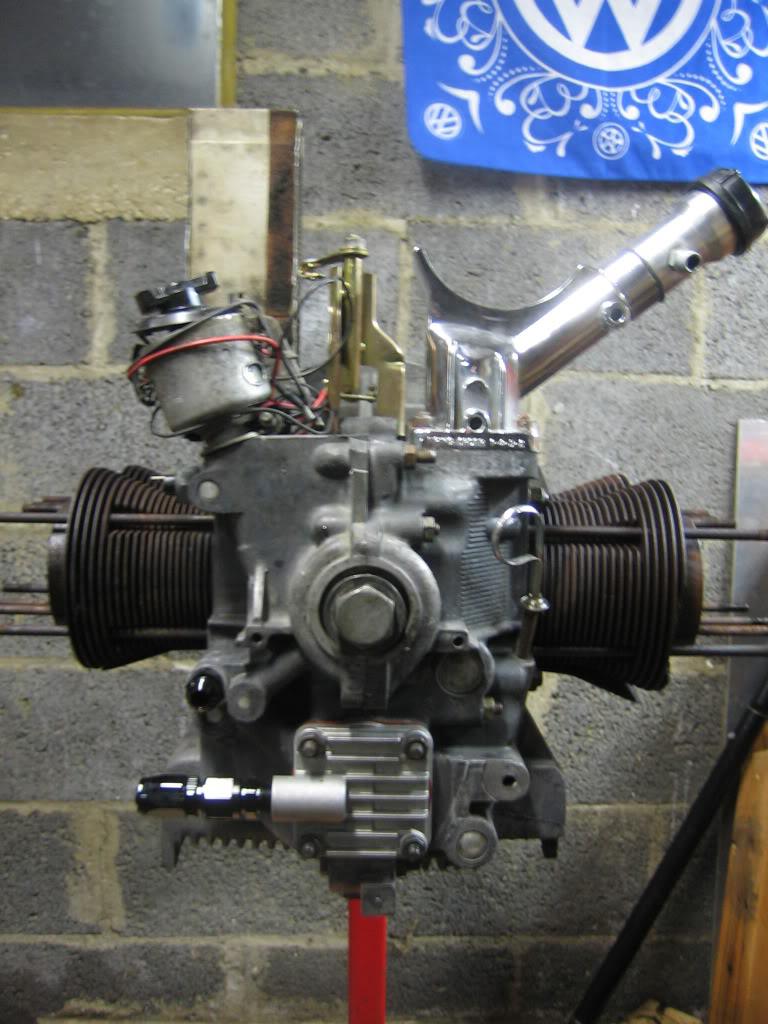
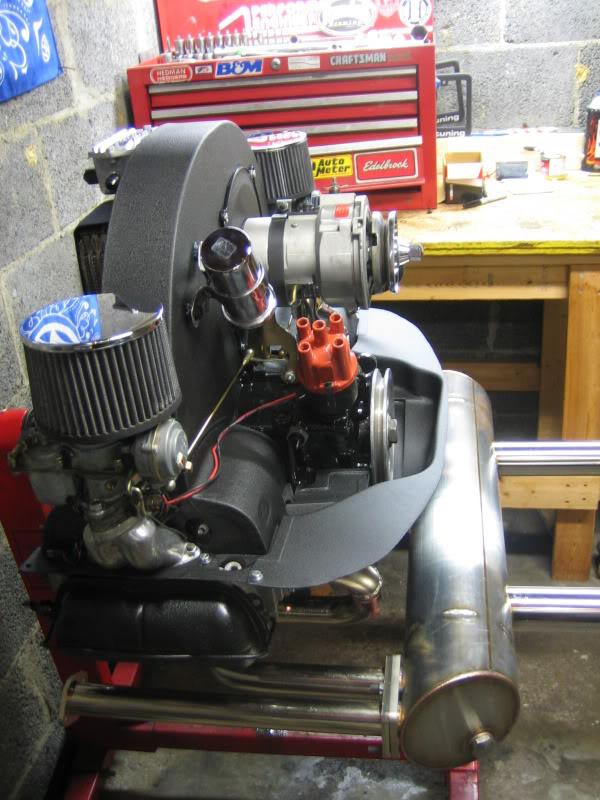
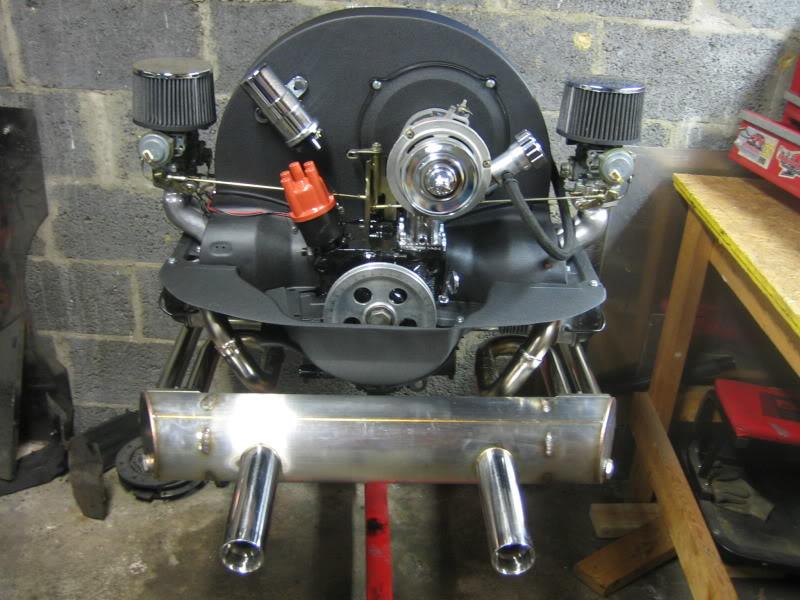
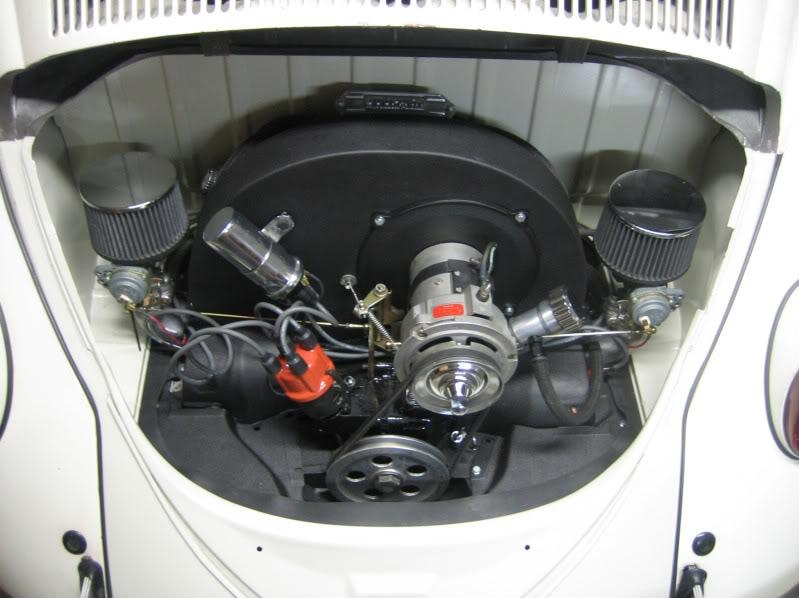
The motor is just about done save a few little details. Magnum powder coating did an awesome job on the tins. I went with a wrinkle black to give it a nice vintage feel. The case looked dingy next to these nicely coated pieces so I por-15ed it.
I'm now working on getting the brakes and wheels on so I can roll it out of the garage and continue on the body work.
Busses may not be out of site just yet....
5/17/2010
I met my goal for the weekend.
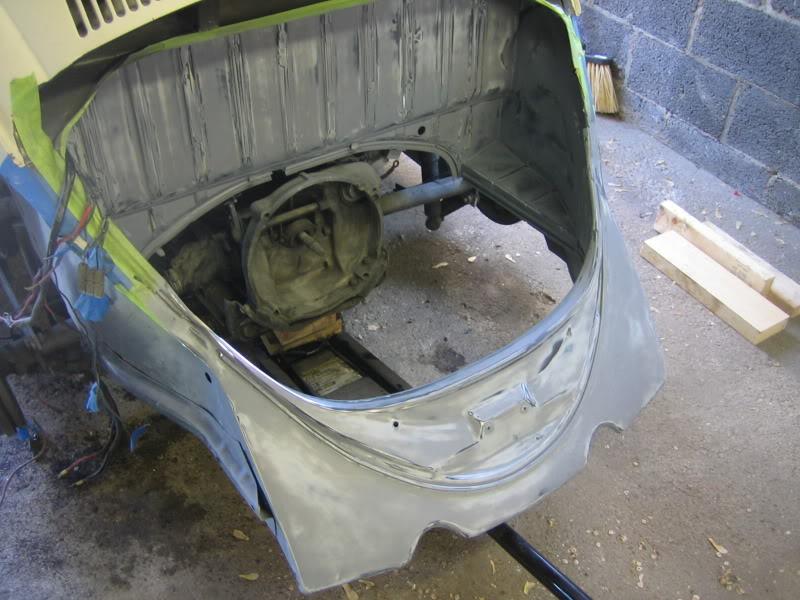
After five applications of filler it was smooth enough to throw some primer on there. For some reason the stuff I got was black. Oh well.
Now I need to alternate between sanding and priming while working up to a fine grit paper. Then it'll be rolled outside (after I put the suspension back together) for the final coat.
I think it came out pretty good. You might never know that a new panel was welded in. Plus I smoothed out the where the side panels meet.
6/1/2010
It was a very long weekend for the bug. I am really trying to get it ready for Motorstadt but everything is taking longer then expected (this is normal).
The last two weeks have been a sanding frenzy. In the end I got her all smoothed out to 800 grit.
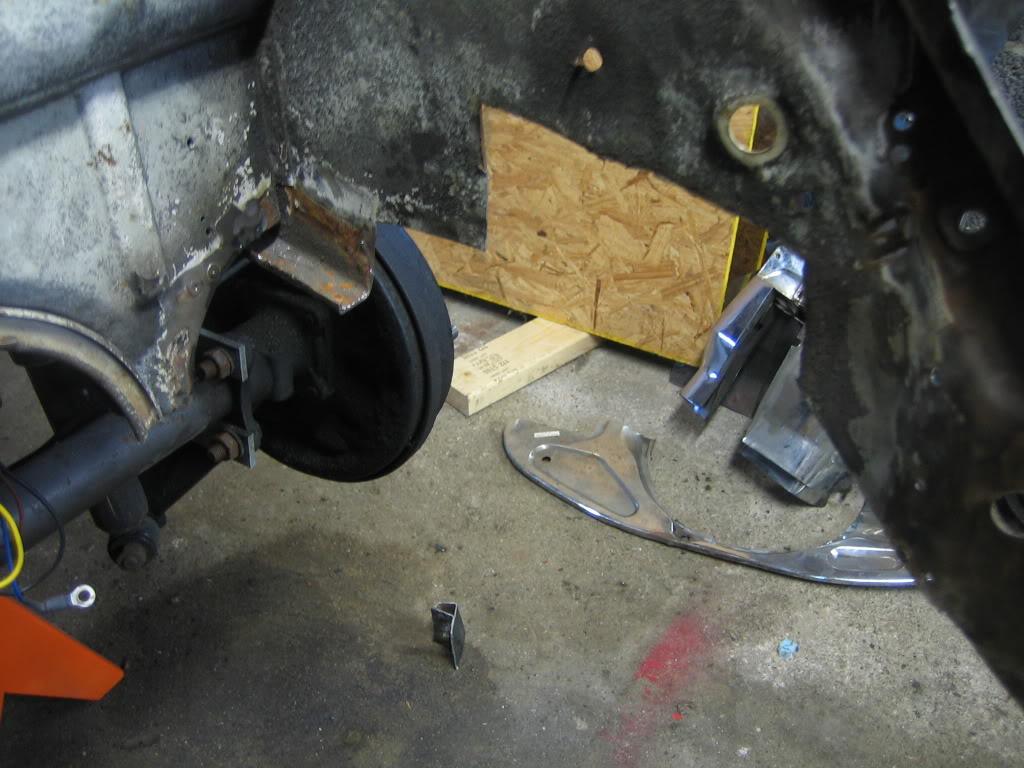
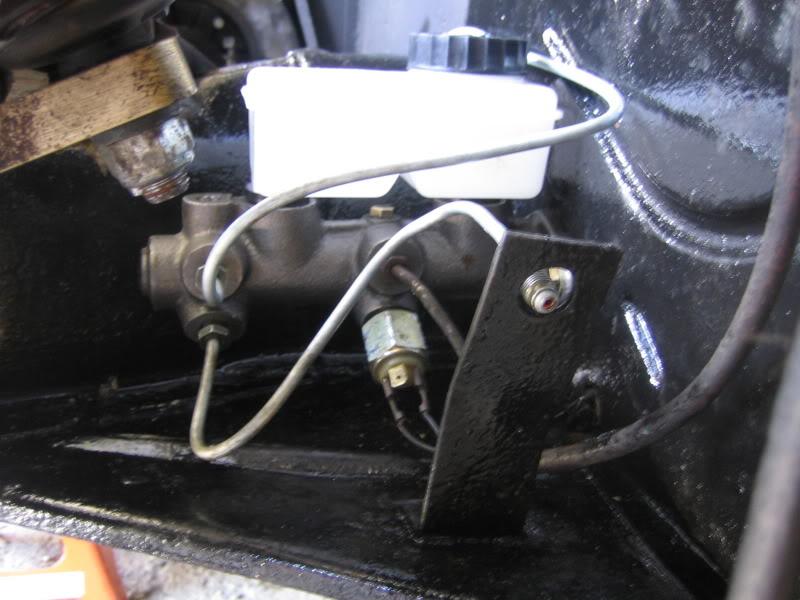
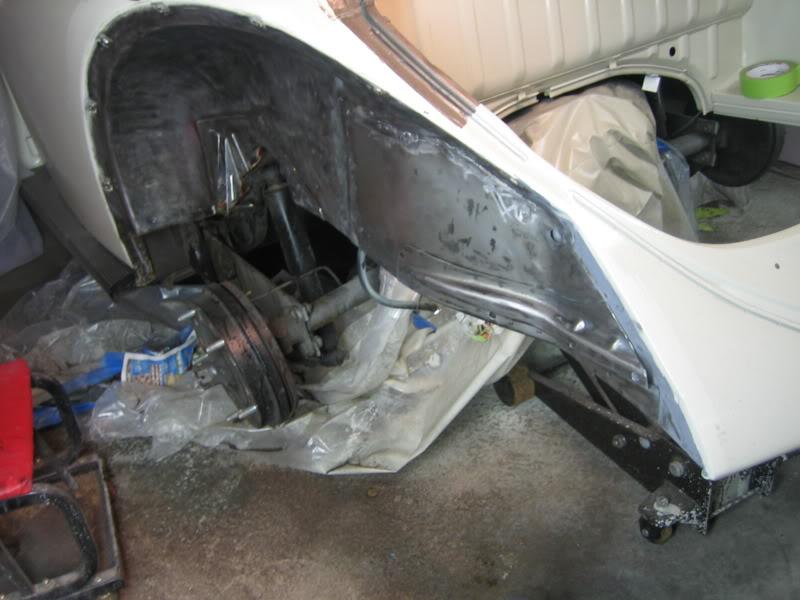
Before I could lay paint I needed to get the car mobile so I started on the brakes.
Here we have the dual circuit master cylinder. I also took the opportunity to bend up some new lines and clean/POR15 the whole area.
I've also been chipping away at the spindles. I replaced and reamed new new king pin pushings before POR15ing the whole thing. They are CB performance 2.5" drop spindles.
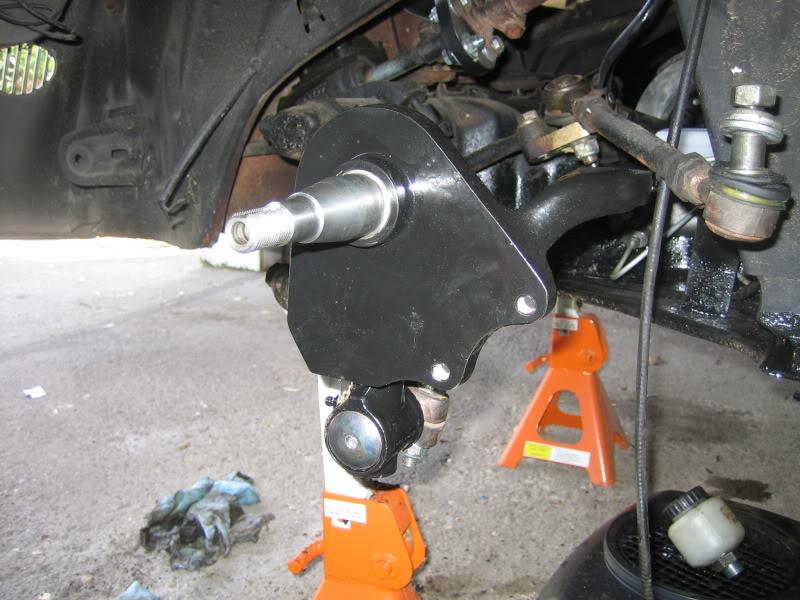
Then the brakes with braided stainless hoses.
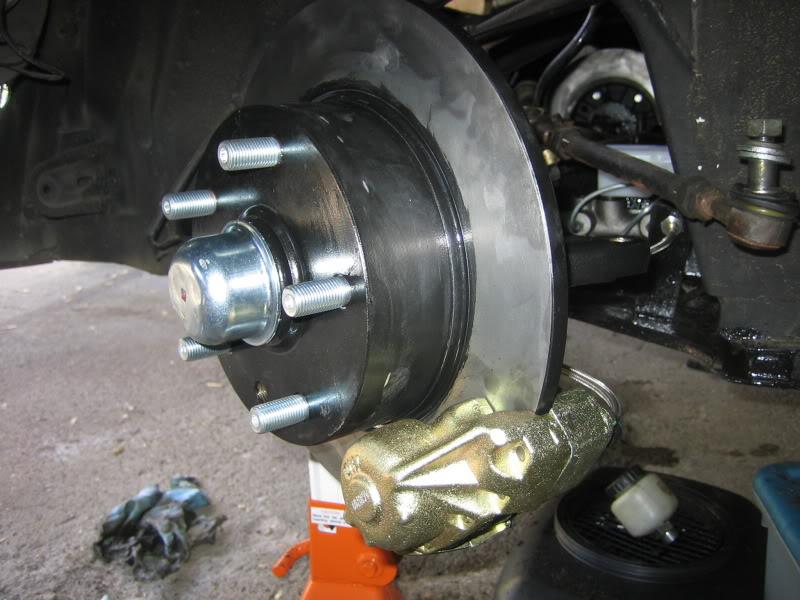
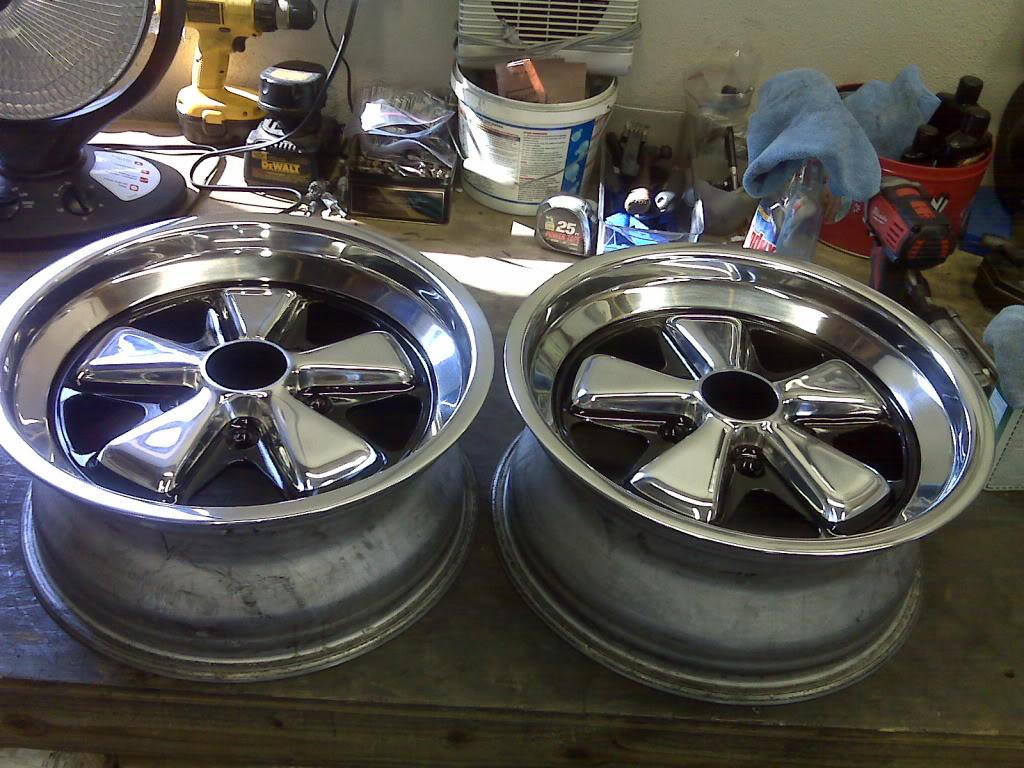
Finally I was able to mount the front wheels and get the car on the ground. This is good inspiration.
Time for paint. I rigged up a high tech paint booth in the garage thanks to some plastic and a tent on loan from Joe. Damn it was hot in there.
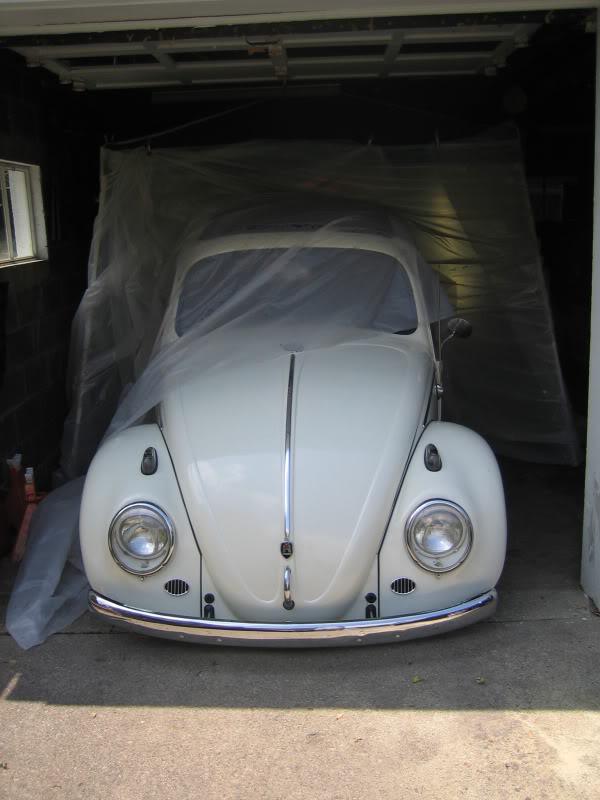
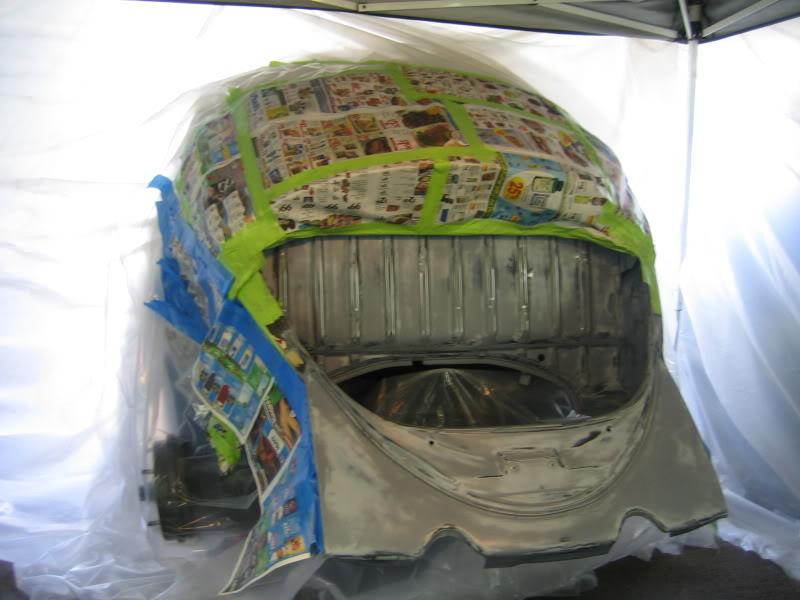
Then I let the paint fly. I'm using a single stage PPG custom mixed to match. This is my first time using a paint gun so I had trouble getting a good finish. First it was too light and bumpy. Then too thick and dripping. I'm going to try and wet sand out some drips this week and maybe touch up a few spots. I'm also going to paint further up the sides as it looks crappy with the seam right there. Overall I am happy with the prep work but my application and the color matching do not do it justice.
Yesterday I was hoping to make even more progress but I was without power for the better part of the day. I did manage to get the inner fenders stripped down and POR'd.
I've got a ton of work to do in the next two weeks. Hopefully the 4-day weekend I scheduled will allow it all to come together.
6/7/2010
Key turned at it runs.....poorly. I'm finishing up the suspension, fenders, tail lights and test fitting the wheels. Joe is going to come over tomorrow and try to dial it in.
Video or at least pics to follow.
6/8/2010
Well, this is a pretty boring video, and I forgot to adjust the clutch. It's all I got for now though.
The exhaust sounds really nice. It's got a low rumble that makes the engine sound much bigger then it is.
The valves were set at .006" for the intial build. I plan to re-adjust them to the .002" you recommended tonight. Joe has a flow tester to synch the carbs and a light to adjust the timing. Hopefully it will be ready to go engine wise tonight. Then I just have to worry about some lighting issues to make it road worthy. After that I'd like to do the top and window seals if there is time to make it water-proof.
Here's a couple more pics. I really slacked on progress shots. Hopefully I'll take some good ones when the weather is nice again.
Also, big thanks to Tony for helping with getting the engine in on Sunday. I couldn't have done it without you man.
6/9/2010
Joe worked his magic tonight and it's running great. I drove it to the shop to get some fuses and such with no (major) issues. Sort of forgot that there was no license plate but oh well.
Tomorrow:
- Change oil
- Adjust valves
- Perform shade-tree alignment
- Replace headlight
- Slot bump brackets to allow decklid to fit
After that it will basically be road worthy and legal. Then it's cosmetic stuff.
Driving it to work tomorrow if the weather isn't too bad.
6/9/2010
Here is tha hotness!
Tonight I aligned the car, changed the oil, and fixed a broken headlight.
I got it on the highway and she actually pulls pretty well. The speedometer said I was doing 80 mph but I have a hunch it's slightly off.
Still more to do....:ugh!:
6/10/2010
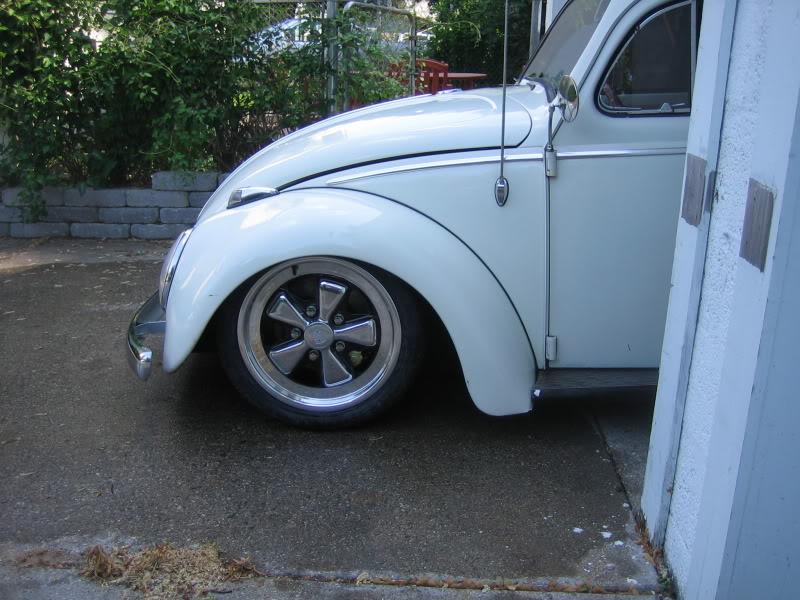
I did a really quick wash a lunch and snapped a couple.
I think it needs to be lower in the rear but that's going to involve messing with the splines. WSAC hook ups?
6/12/2010
Apparently there are forces in this world that do not want me driving this car to motorstadt.
After somehow sorting the alternator and belt situation I was all set for the trip. On a final road test around 7:00pm it started to buck and loose power. I managed to limp it home after some interesting truck dodging on the highway. From what I can tell the fuel pump is shot. It's now after 10:00pm so even Autozone is closed. It's just not gonna happen.
Do not shed a tear for me friends, oh no. I have made peace with this situation and am now looking forward to a stress free weekend of good friends and fun. The relative luxury of the GTI will be a nice treat.
See you all there.
6/15/2010
Brian J. hooked me up with a nice deal on a Walbro fuel pump. It looks much better then cheap little one that was on there. I threw it on temporarily last night and it seemed to do the trick. I'm going to mount this one under the fuel tank instead of up near the engine like that last one. Hopefully the continuous prime will extend its life.
Now that the pressure of Motorstadt is off I'm going back to grandpa stylz. I need to wet sand the new paint yet and re-mount the fenders properly. Then I've got a new canvas top, window rubber and chrome, a bitchen tach and a few other odds and ends to take care of. Then it's time to drive it.
Of course it is leaking like a stuck pig from the trans input shaft. I'll be re-building or replacing the trans this winter. Hopefully I can limp it along until then.
6/27/2010
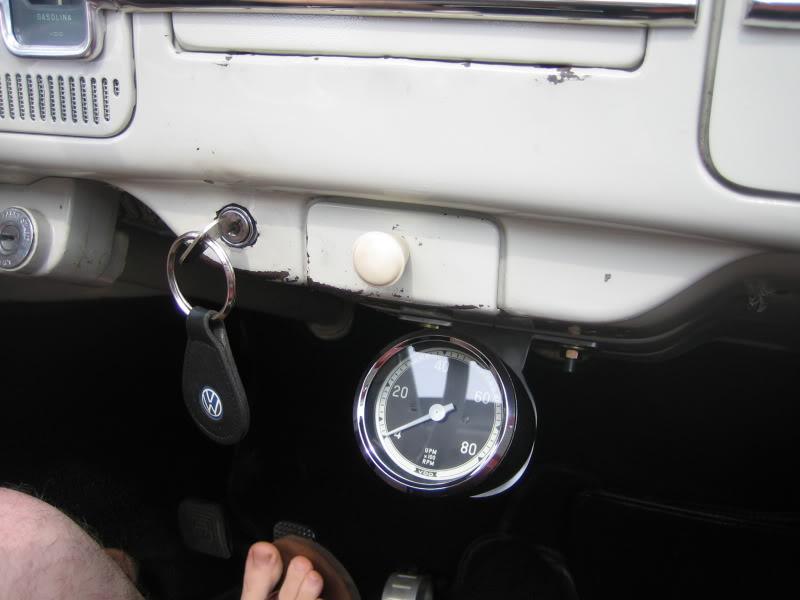
Took care of a couple odds and ends this weekend. This is my favorite part of a project, the little finishing touches that really make it cool.
I fabricated a bracket for my tach. It's a little rough around the edges as all I had to work with was an angle grinder and and palm sander. I may go back and clean it up later on. The tach itself is a replica of a vintage VDO with modern guts. I think it works really well with the interior. Plus, now I can avoid over-revving the newer motor.
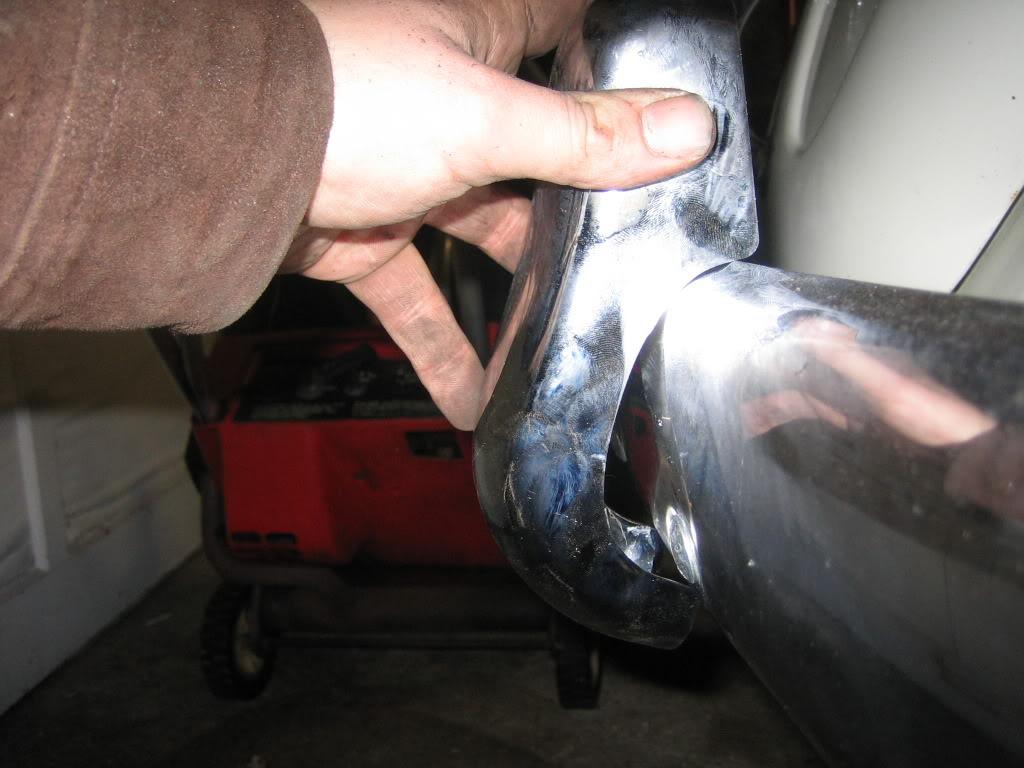
Then I finally got around to mounting the over-riders on the front bumper. If you recall they didn't fit for shit. Some liberal grinding with the dremel (which ultimately perished as a result) and we were back in business. I used some rubber trim piping to clean up the rough edge and make up for any irregularities. I think it came out pretty good and I can avoid buying a new bumper.
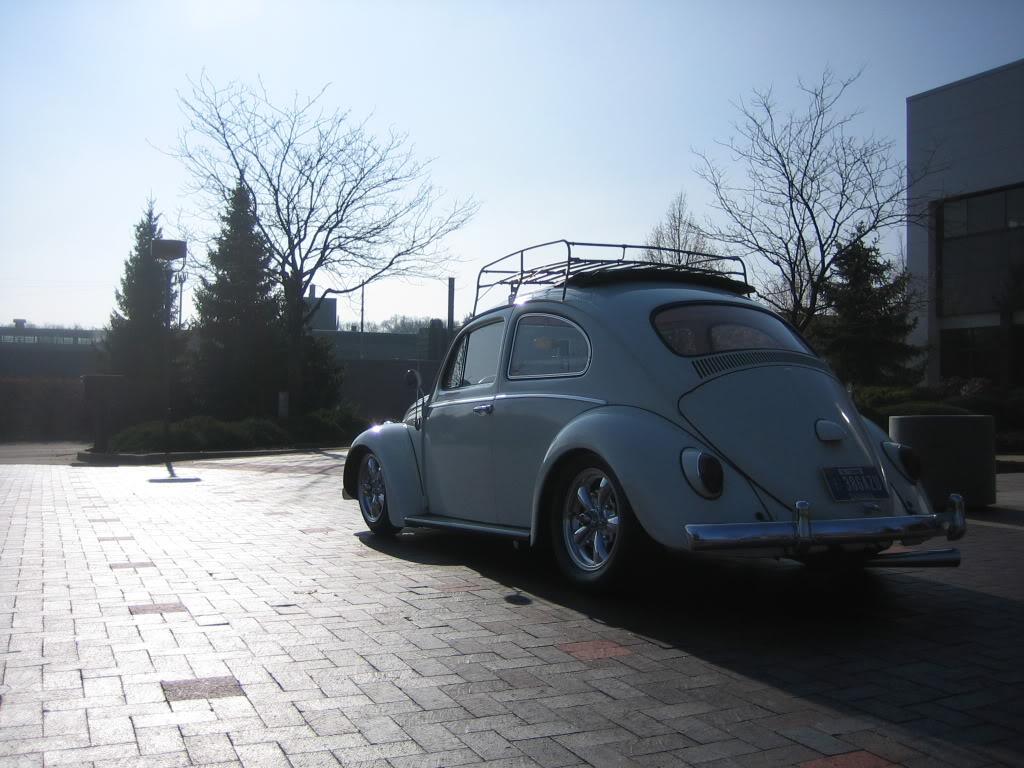
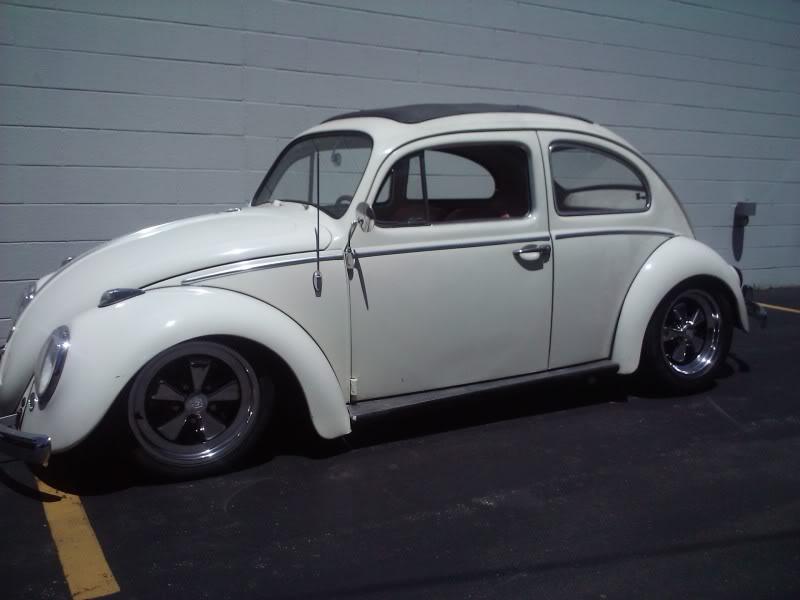
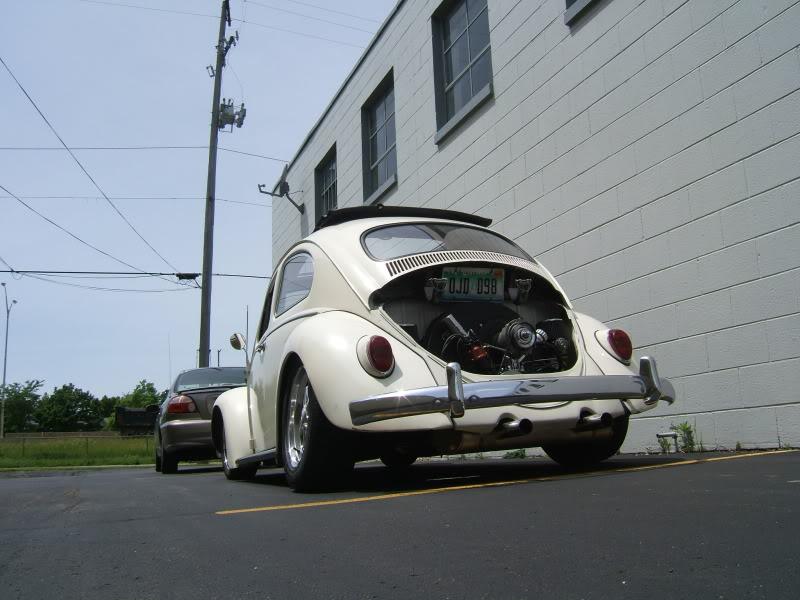
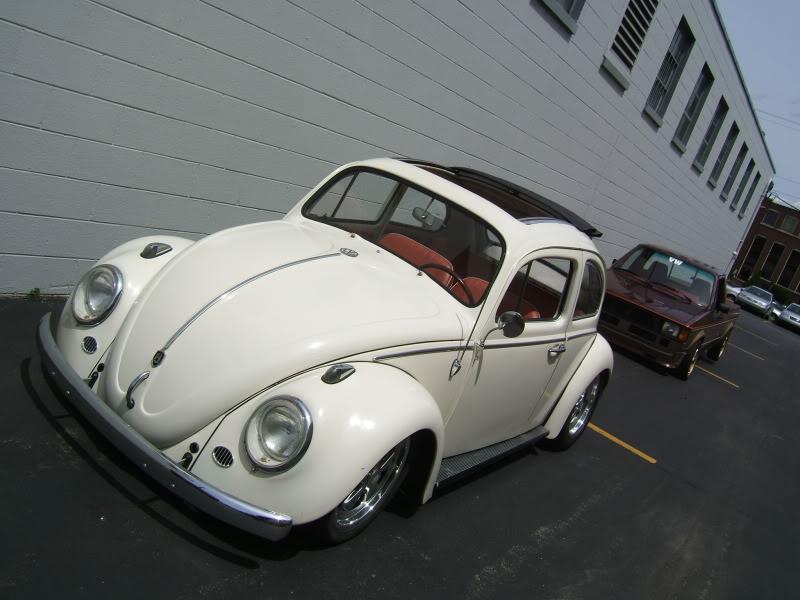
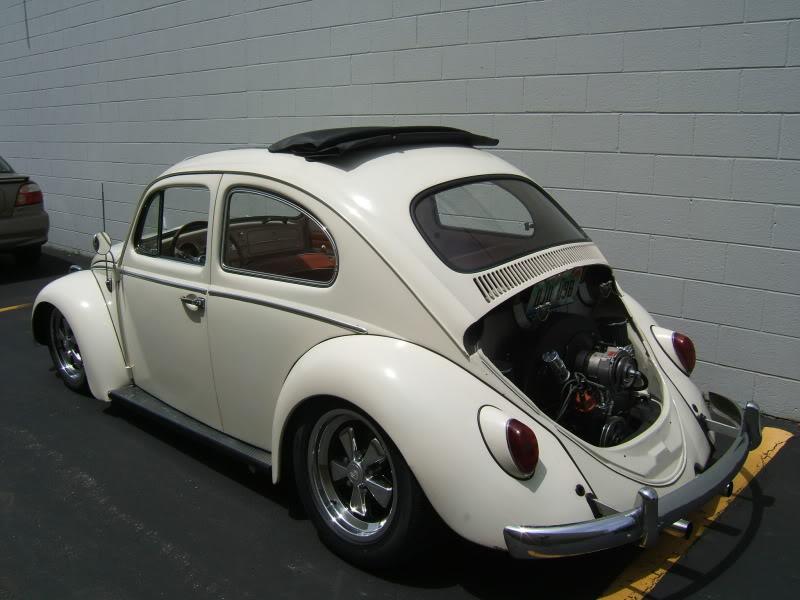
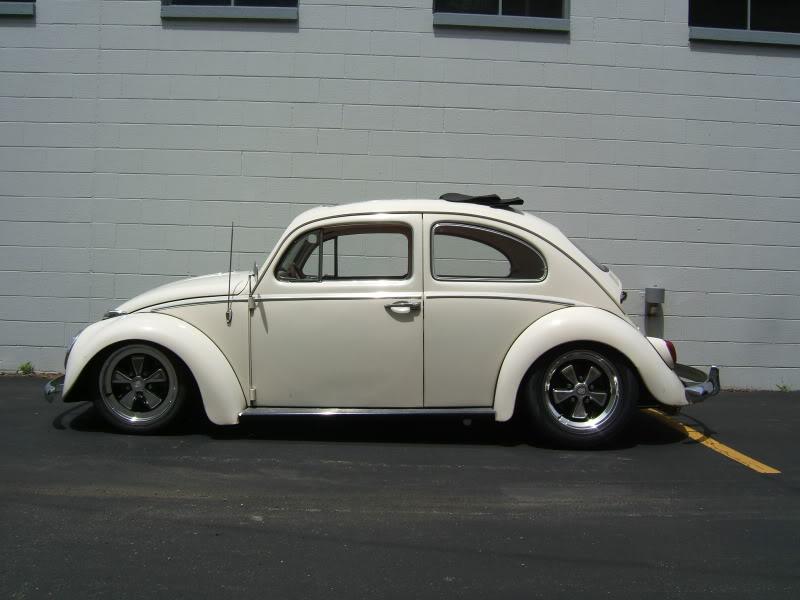
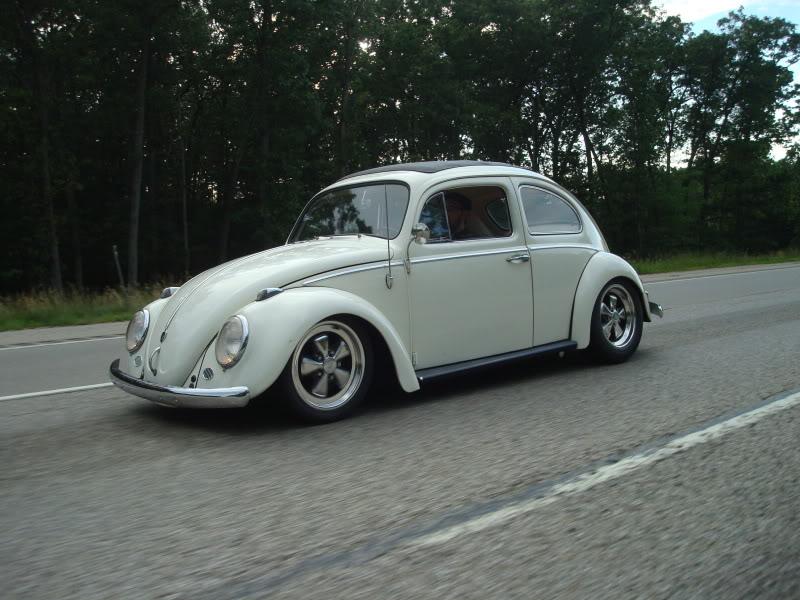
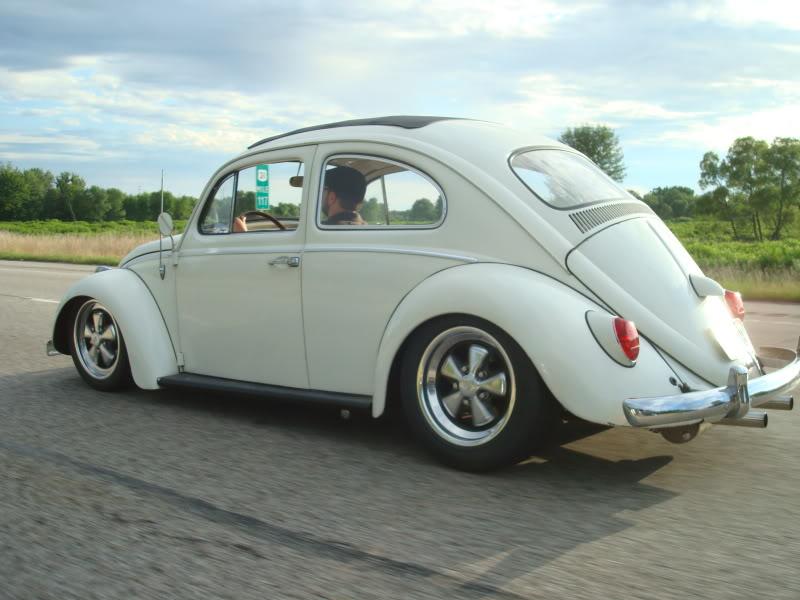
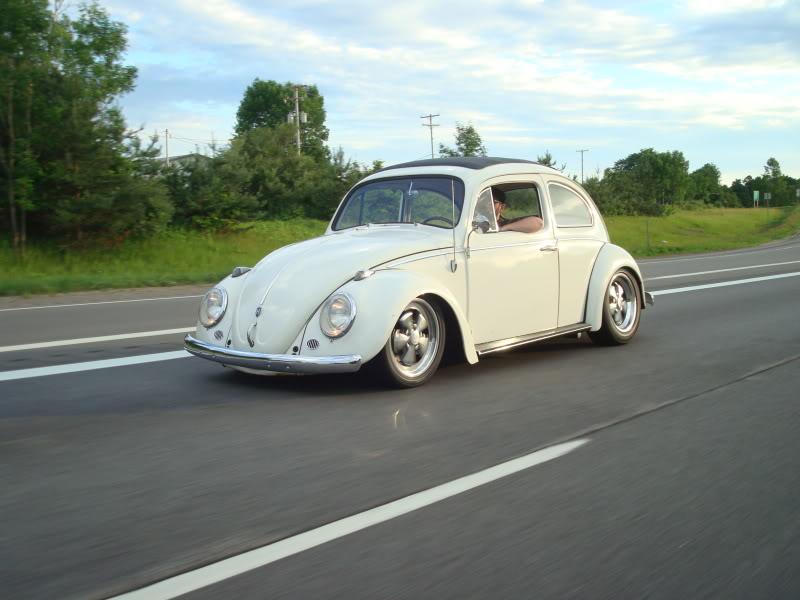
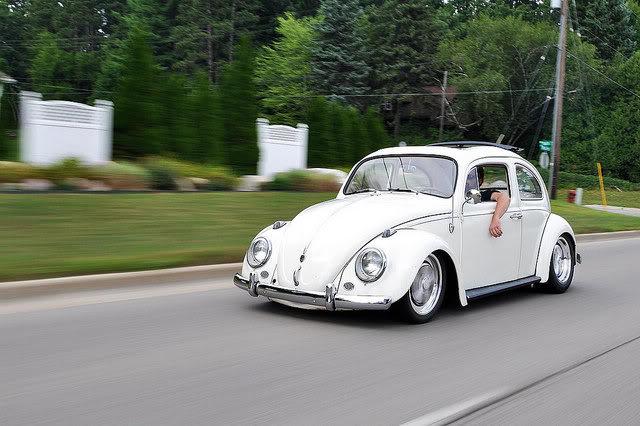
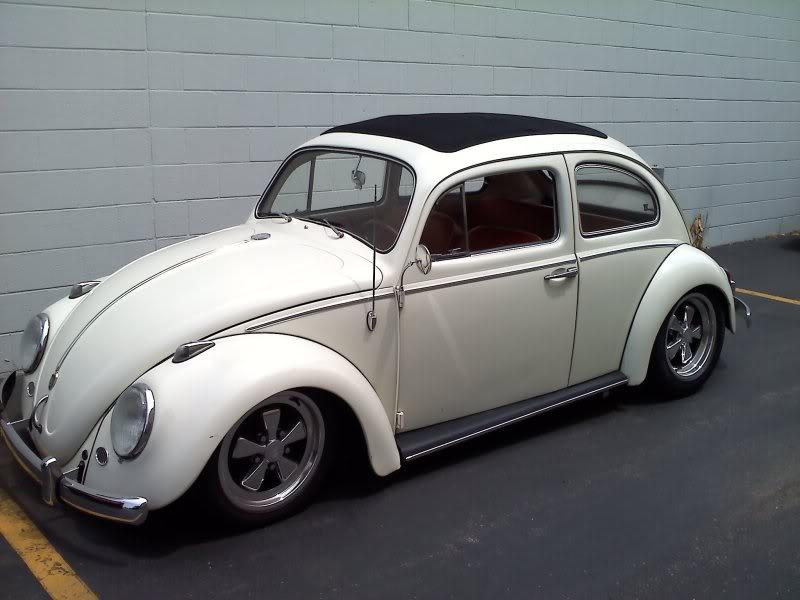
With that stuff handled I her up and took her out for a proper photo shoot. I'm not much of a photographer but I was pretty happy with the result.
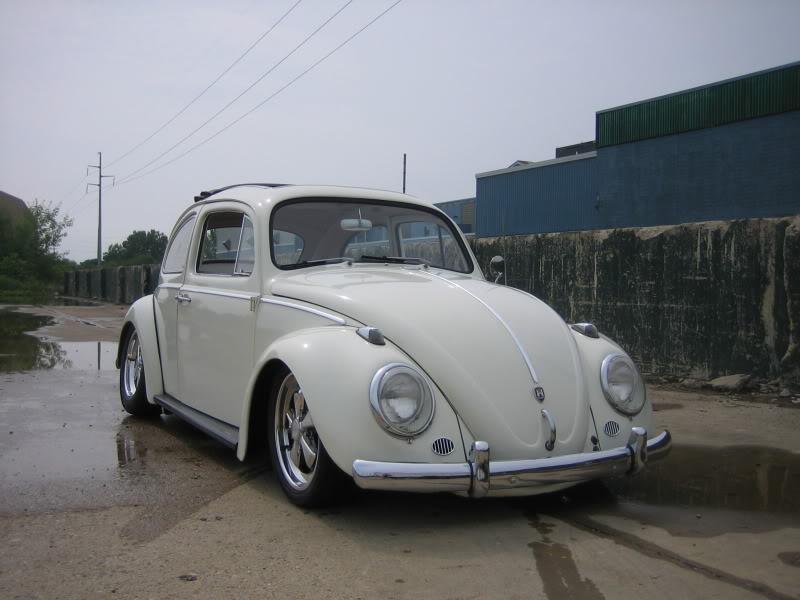
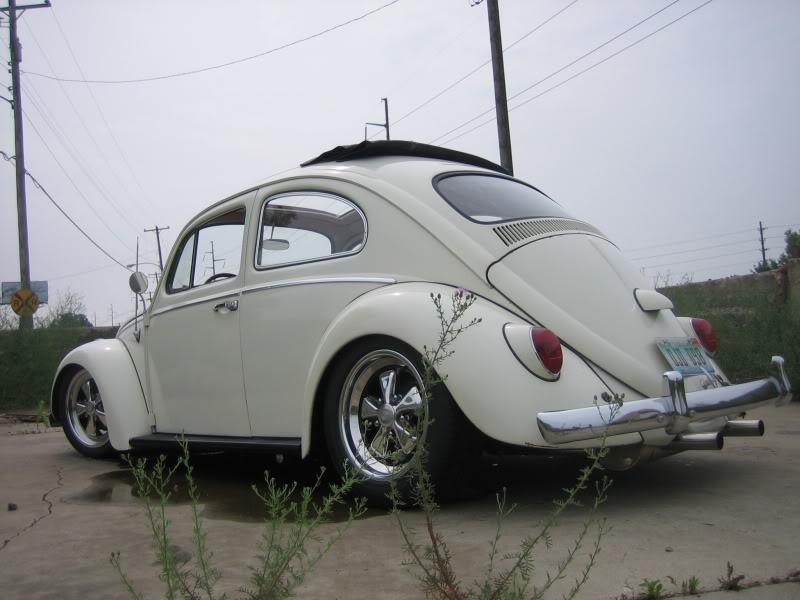
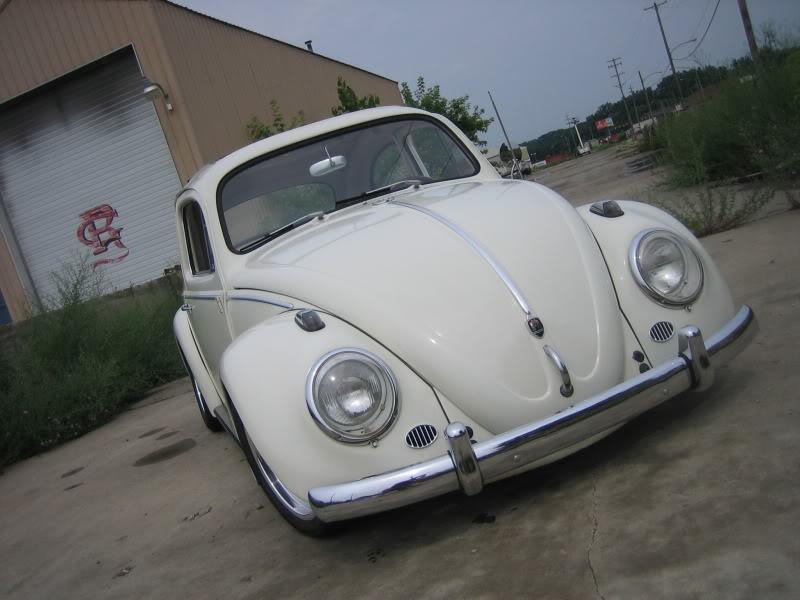
Lots more little stuff to do. I'll be chipping away at it.
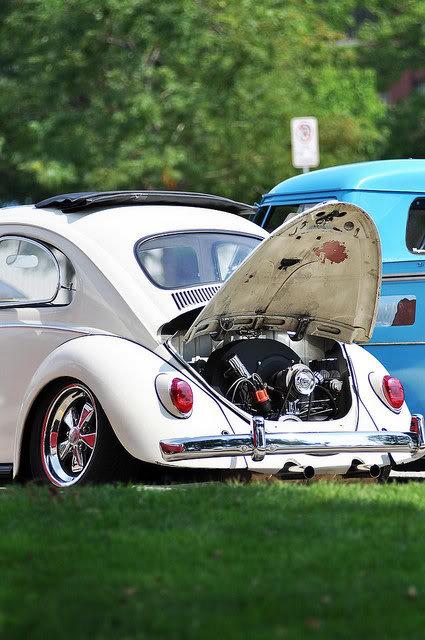
3/4/2011
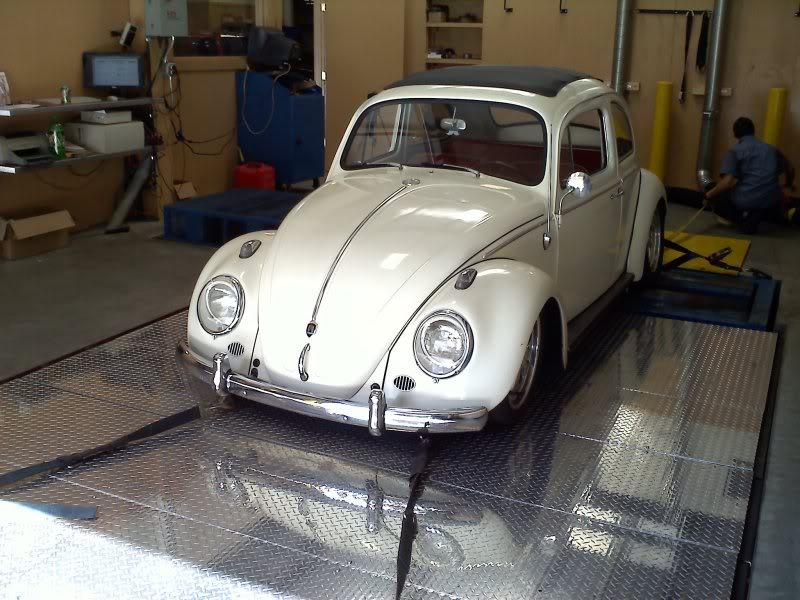
Well golly. I guess I barely posted about this thing all summer. We did a bunch of stuff. Dyno, drag race, cruise.
After a bunch of fuel pump and alternator BS she was running great in time to go away for the winter. I have been chipping a way on a few things this winter. Can't wait to get it out again.
Here are some memories from last year:

6/8/2011
I've been doing a little fine tuning on the car the last few months.
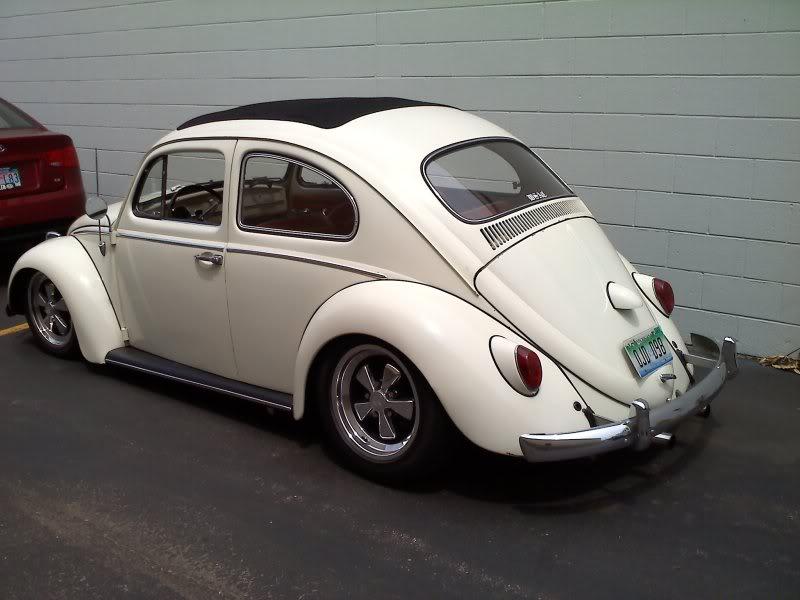
I replaced the crappy ripped vinyl top with a nice canvas one. Really adds some class.
I also replaced the window rubber on all but the fronts with the correct chrome trim units. The car was rocking more of a "Cal-look" with no chrome but I'm trying to put it closer to stock. The window rubbers were a huge pain in the ass and I broke one windshield in the process but I'm happy with the look overall.
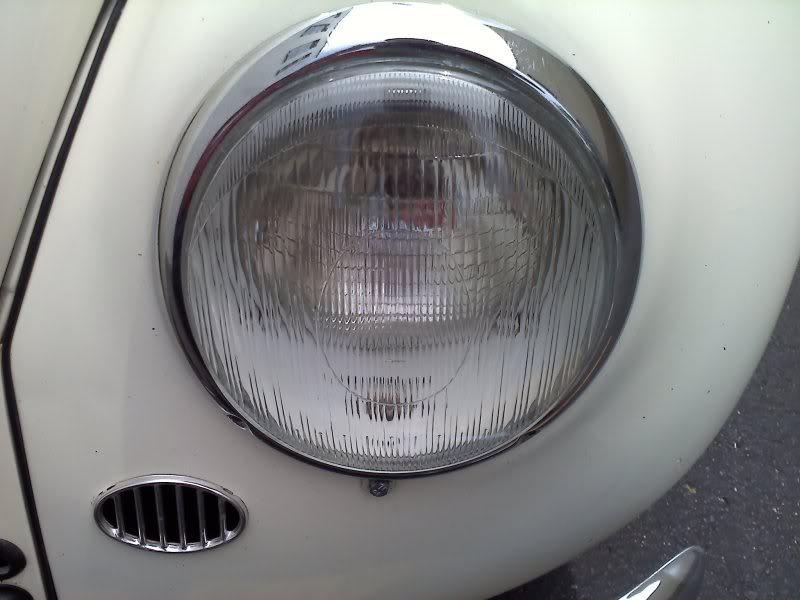
I also installed some "euro" style fluted headlight lenses. Again, it's a small touch that I think makes the car more unique.
Then I replaced the billet aluminum running boards with some factory style rubber ones with a chrome strip.
Lastly I raised the front end up just a touch. It leveled the car out and made it a little more usable.
Now the car is cosmetically pretty close to the way Wolfsburg intended. The casual observer might not notice these small changes but I dig um.
Great! Nice job! She looks ????
Posted by Diggymart on 10/29/18 @ 11:40:08 AM