You must be logged in to rate content!
26 minute(s) of a 54 minute read
12-21-2020
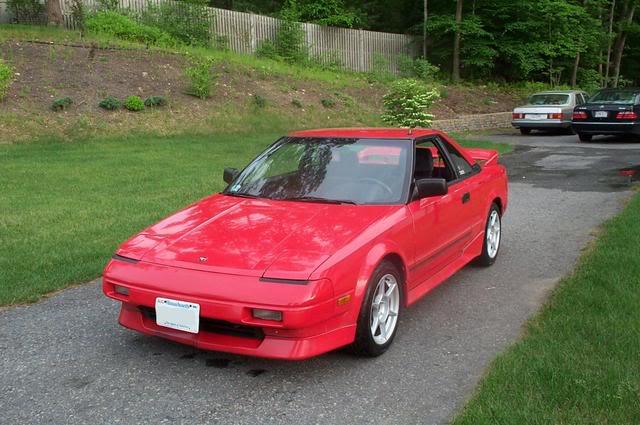
Resto-Mod of a 1987 Toyota MR2
Compliments of Turbowned @ www.mr2oc.com
Hello all,
Though I've owned my current MR2 since November of '07 and spent countless hours and over $15,000 on repairs and modifications, I've not spent nearly enough time restoring it. Thanks to my current job as a Toyota parts "professional", I can "afford" to buy all the parts needed to restore my car!
I have decided to put body work and paint last on the list as it will be the most expensive and I want it done absolutely 100% right, so don't expect to see the rust on the quarter panels disappear anytime soon. I'll be replacing broken, cracked, worn out, and otherwise junky parts on the car with new or excellent condition new parts, cleaning everything thoroughly, replacing rubber weatherstripping, and doing my best to eliminate NVH (noise, vibration, harshness) issues created by my loud honkin' exhaust system!
Some of these may not be in chronological order, as I'll be posting pictures of work done prior to starting this thread, but I should be able to recall details if anyone has any questions.
Hope you enjoy this thread!
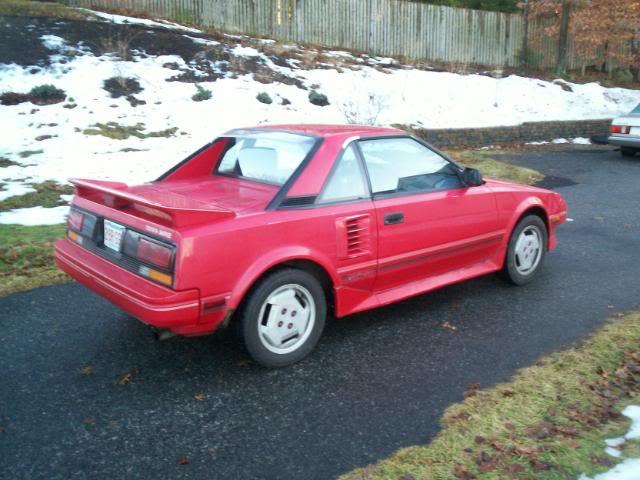
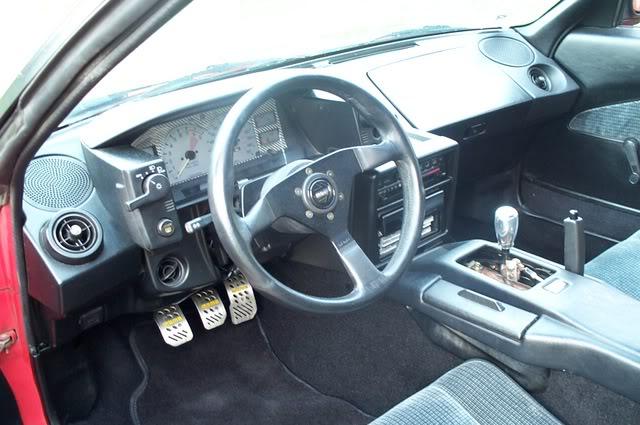
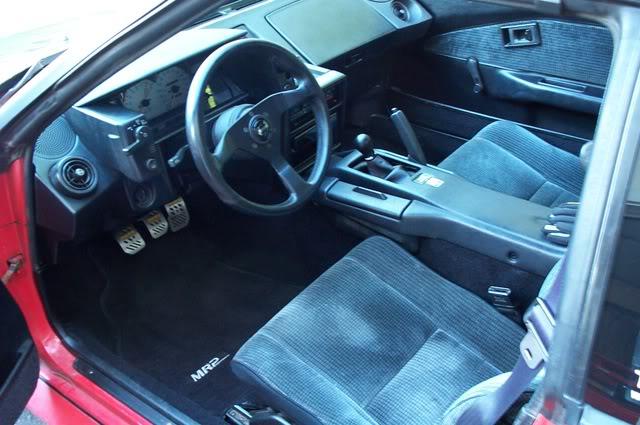
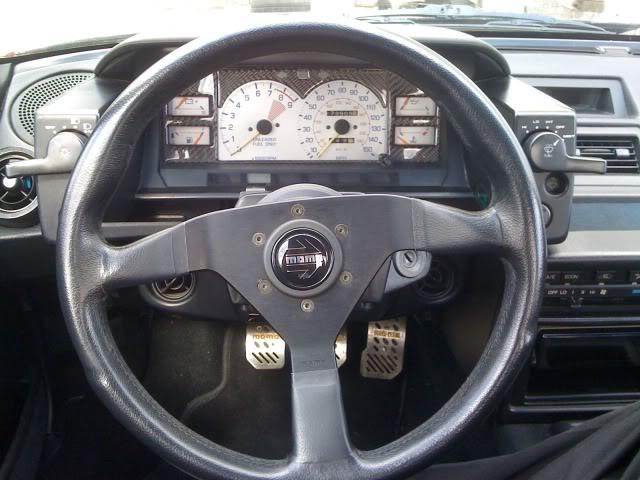
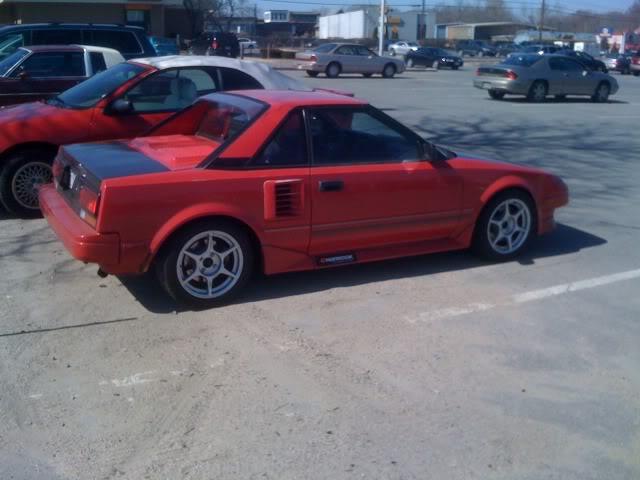
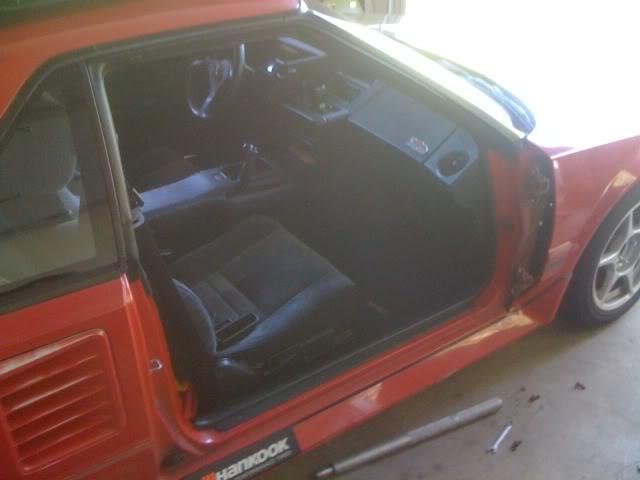
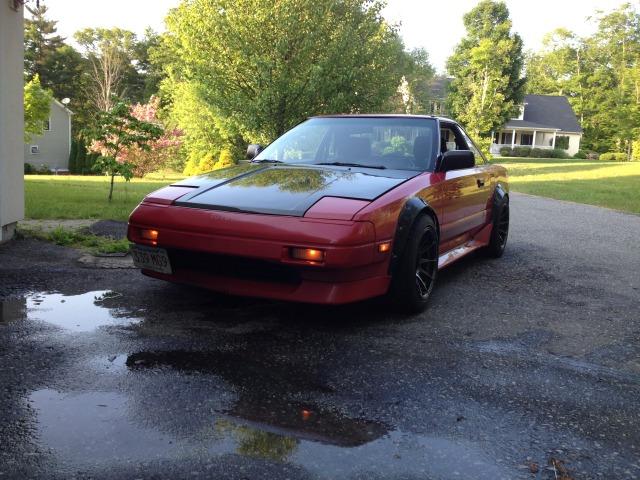
Here's pics of the car when it started (I had already swapped the stock steering wheel with my MOMO Monte Carlo 320mm wheel). Thankfully the car was mostly complete with the exception of carpet. There was plenty of rust to be dealt with, but luckily not as bad as most New England cars, as this one came from Virginia and was nicely undercoated. The interior was nice with no cracks on the dash, and nothing broken save for the ashtray hinge. Even the trunk release worked! However the brakes and suspension were rubbish, the oil cooler lines leaked like a sieve, and well the paint and vintage graphics were painful to the eyes.
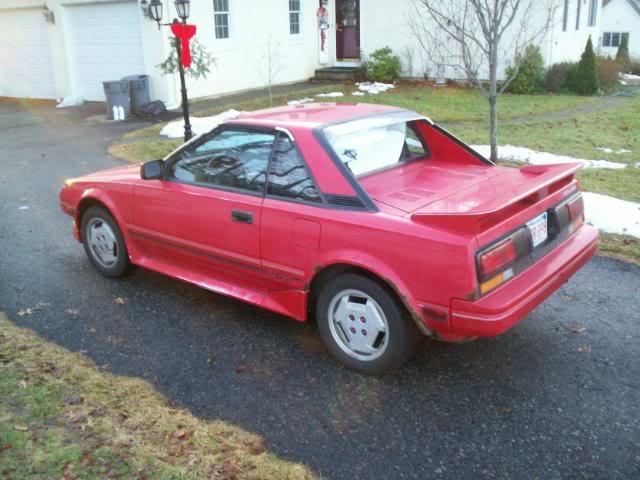
Then I did a whole lotta stuff... (keeping this simple) full brake and suspension system overhaul, new carpet, OEM reproduction floor mats, wheels/tires, and a lot of cleaning and detailing (I use Meguiars Deep Crystal 3 step system to clean, polish, and wax the paint; it's extremely tedious but it works wonders for faded pink paint!). I also touched up the a-pillar trim and wiper arms with semi-gloss black paint. 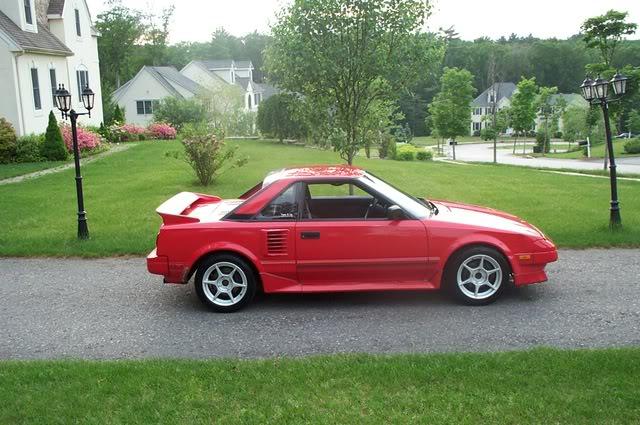
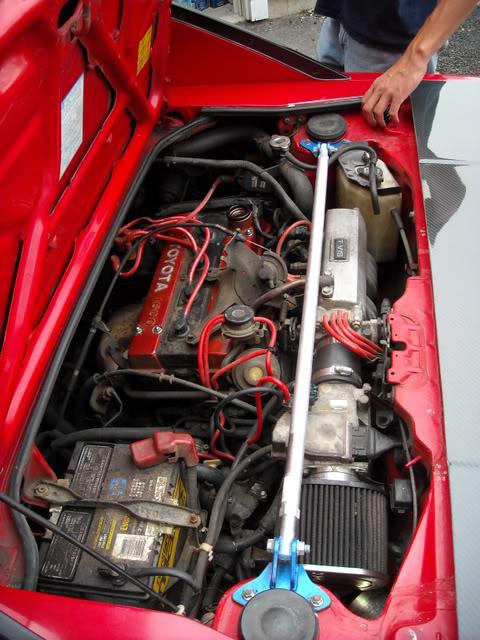
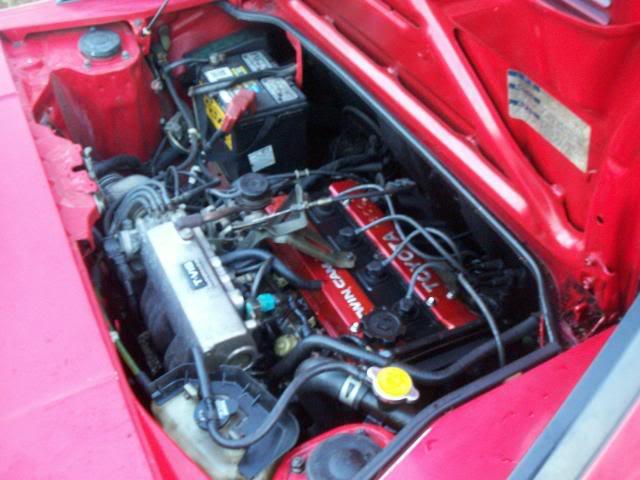
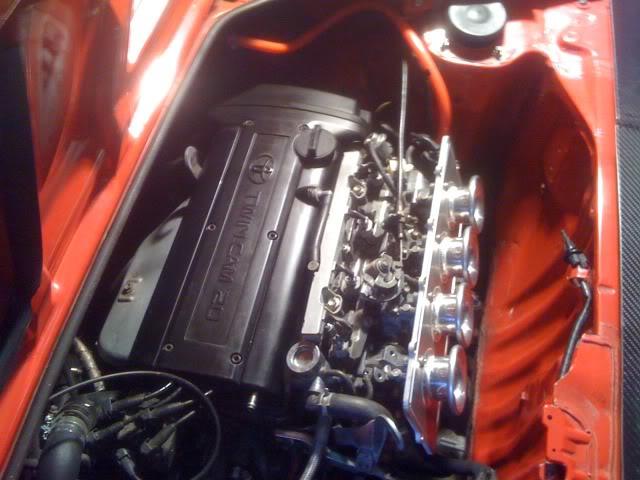
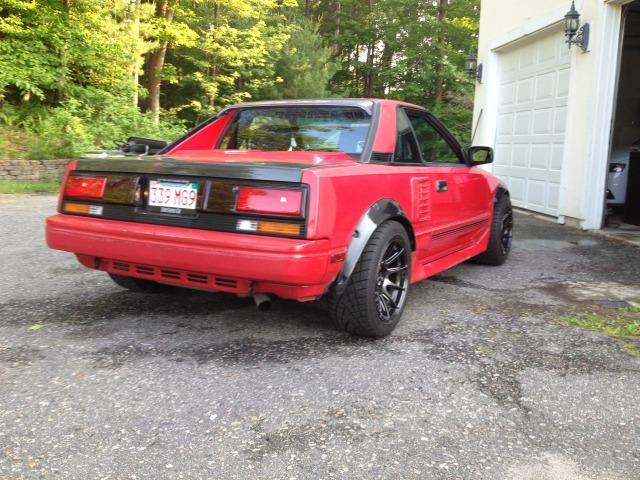
Then in August '08 my original engine kicked the bucket. I decided to replace the engine with an AE92 MAP/DLI 4AGZE. About 8 months later I had the swap completed. It turned out to be a dud engine. Waited another year before I could afford another 4AGZE. That also turned out to be a dud. I had enough with that, so I got a shiny new credit card and bought me an AE111 blacktop 20v 4AGE! In the meantime I had replaced my hood and trunklid with carbon fiber bits from RaceOn USA (read: junk) and KD Garage (read: rare), and traded my HKS N/A exhaust for a Supercharged engine lid.
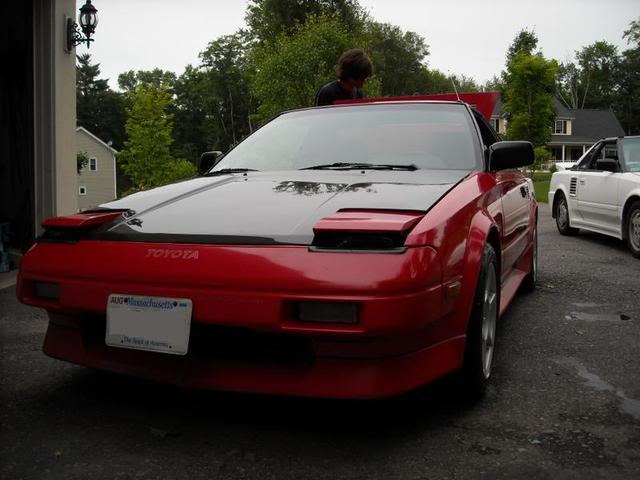
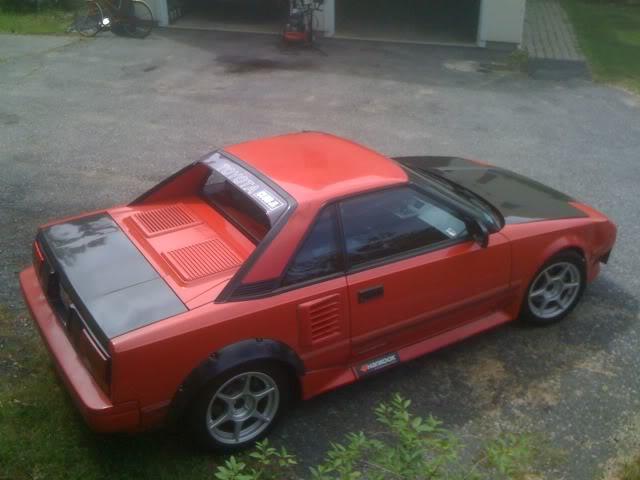
2 years and many headaches later, I ended up with this:
Now that I've briefly covered the history of the car, on to the current work!
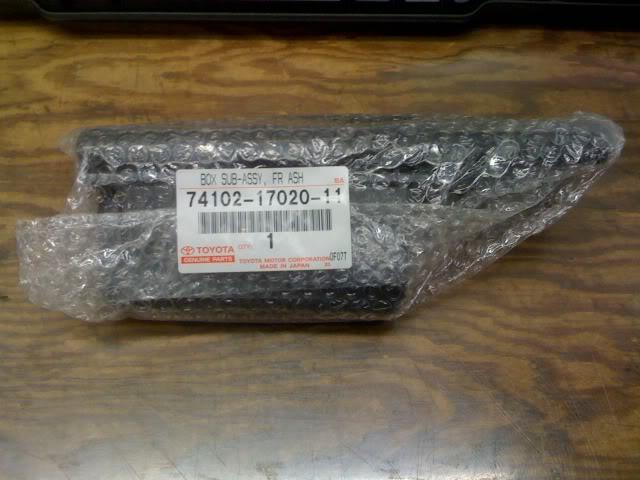
Starting with the broken ashtray, I replaced it with a brand new piece:
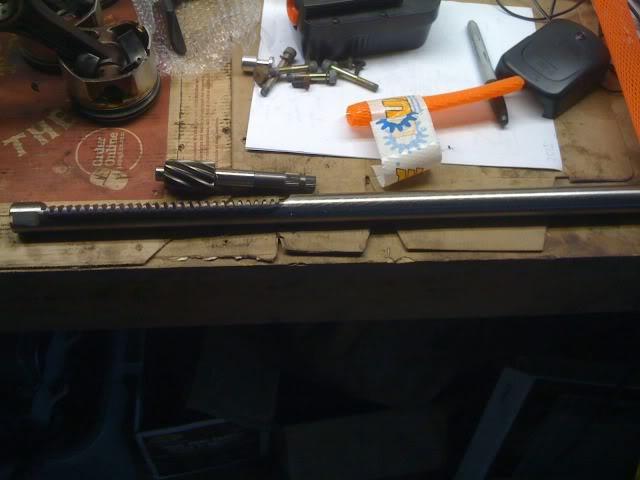
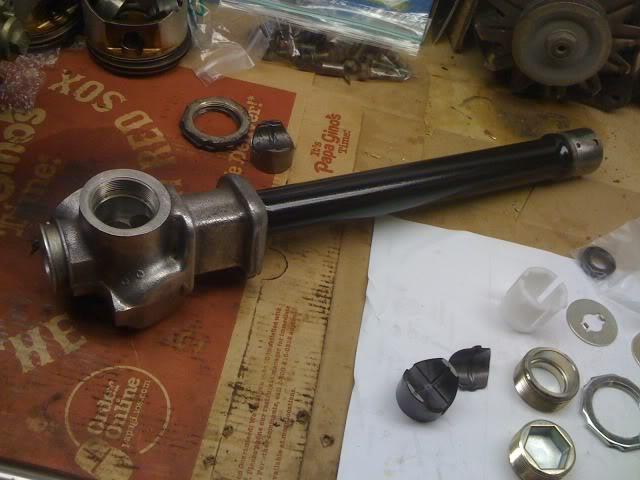
Then, I tackled the sloppy steering rack. Unfortunately I didn't take pictures of the carnage to the original rack and pinion, but there was significant wear causing two places where it would bind and make terrible noises! I replaced the rack with a Quaife QSR and every single other part that was available new from Toyota. I also thoroughly cleaned the inside and outside of the steering gear housing and re-painted it:

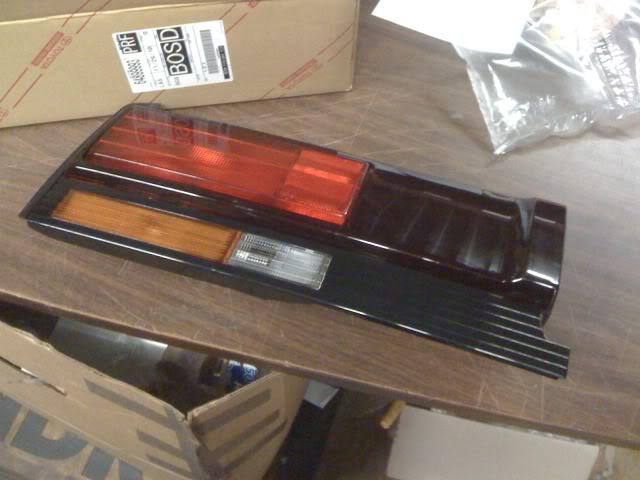
Then I replaced the cracked, pitted, severely scratched tail lights with brand new OEM lenses and gaskets from KBOX:
While at work I noticed we had a "noise kit". I checked the part number; turns out it cost over $80 for this little guy:
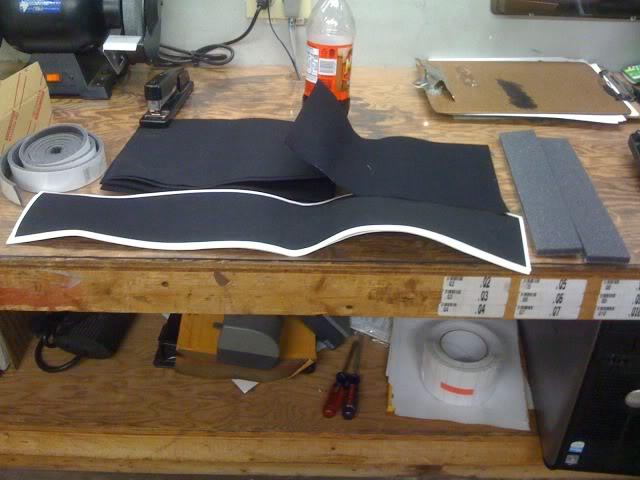
I decided I could do better and instead ordered foam and felt-backed tape from Findtape.com, and Dyna-mat-like sound deadening material (not quite as good though  )
)
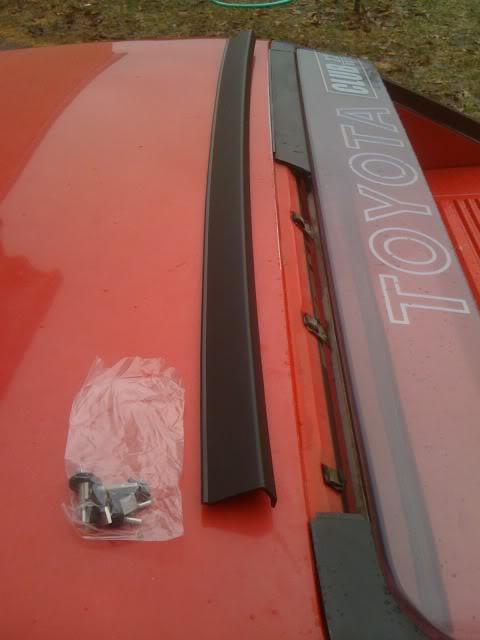
I replaced the top c-pillar trim which had broken off on the highway (JDM ECU limits me to 111mph... it broke off around that speed):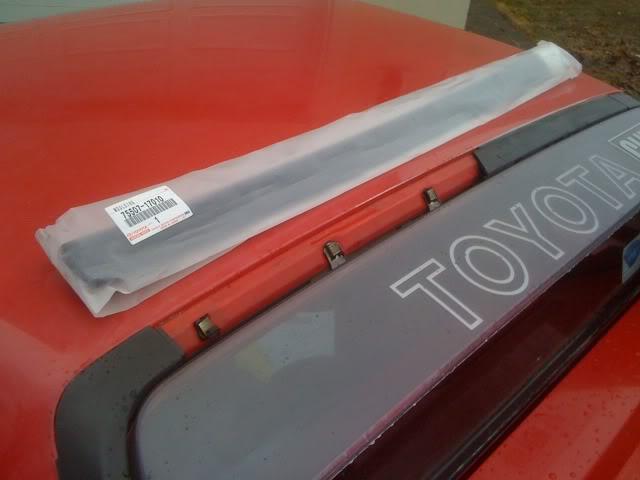
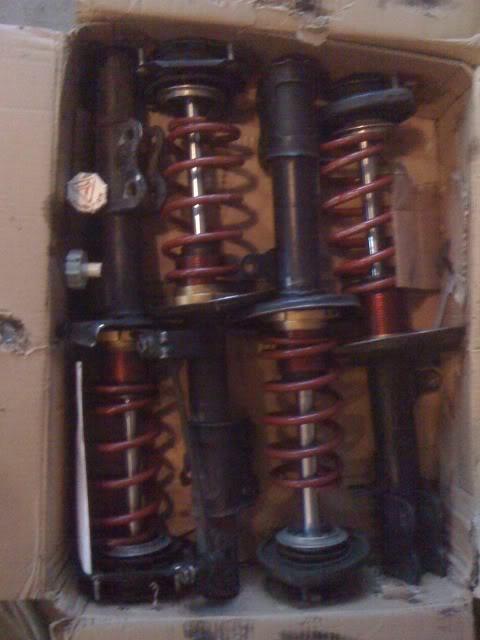
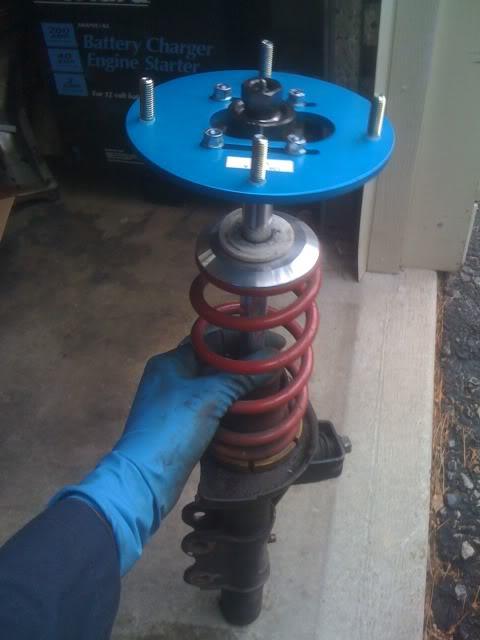
I picked up a used set of Ground Control coilovers with Koni dampers from Josh A. (tarmactrr), and replaced my Tokico HP struts and ST springs:
4/2/2011
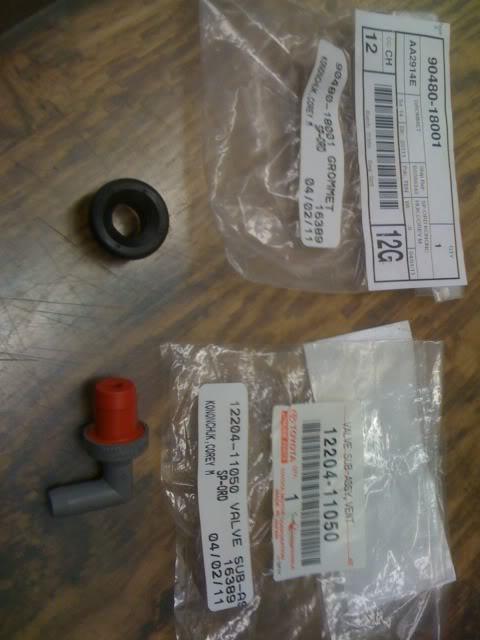
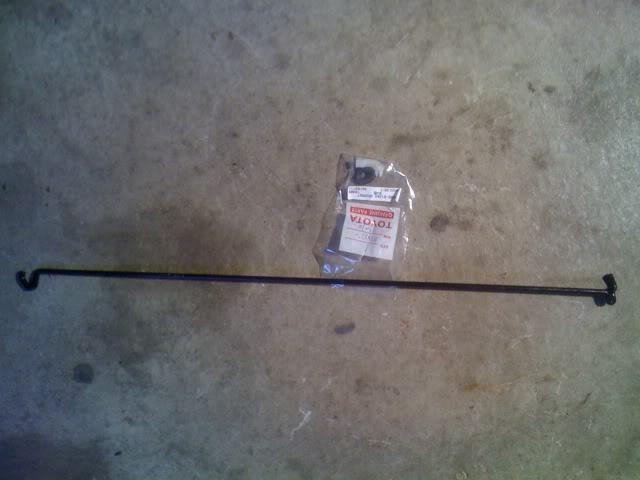
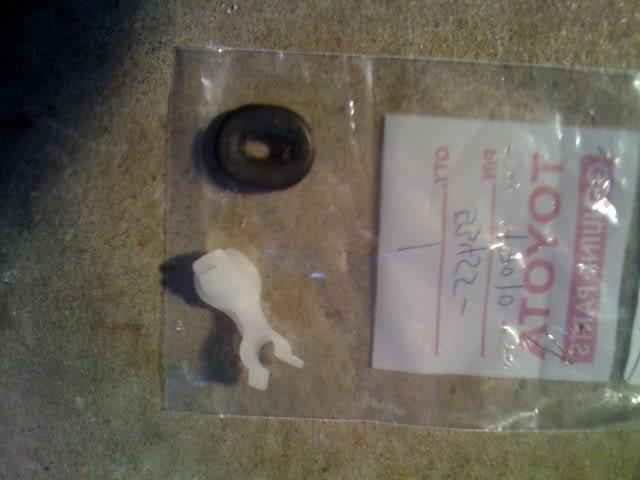
Just picked up a new gas cap, PCV valve and grommet, hood prop rod, grommet, and clamp. Hopefully the gas cap will save me a teensie weensie bit of gas compared to the worn-out original. The PCV valve won't be on there for too long because I plan on hooking my oil catch tank back up, but for now I figured it was best to replace the original one. I'll post pics later today!
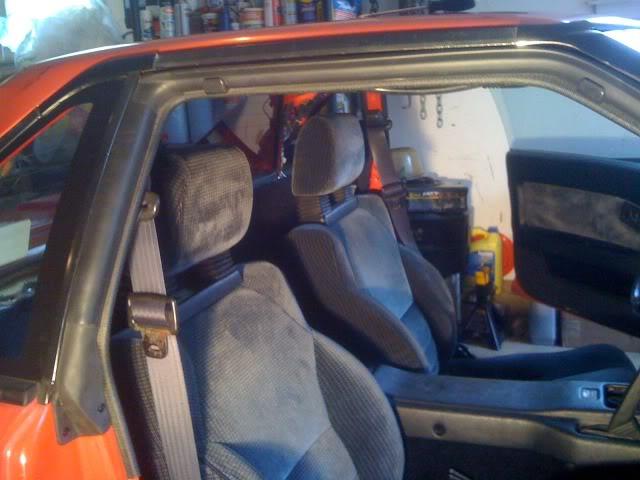
I also replaced the window weatherstripping, and wow what a difference it makes! It took some time to make sure each side was perfectly in the metal channels, but now there is greatly reduced wind noise, no more leaks, and the windows don't rattle when I go over bumps! I'll be doing the door hinges and door weatherstripping later today.
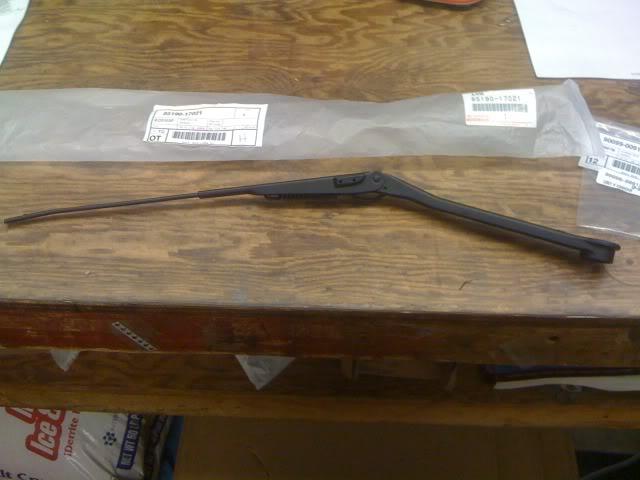
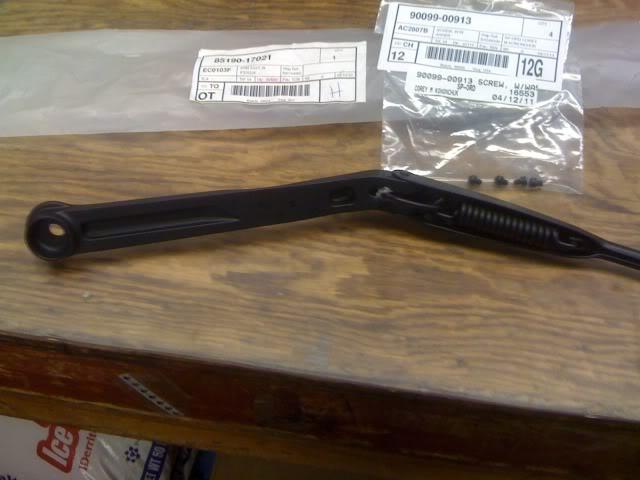
Next on the to-do list is new wiper arms ($160 for the pair; ouch!), and if I can convince my insurance company, I hope to get the last OEM Toyota windshield in the country. I don't know how they're gonna take to paying for a $930 windshield... lol
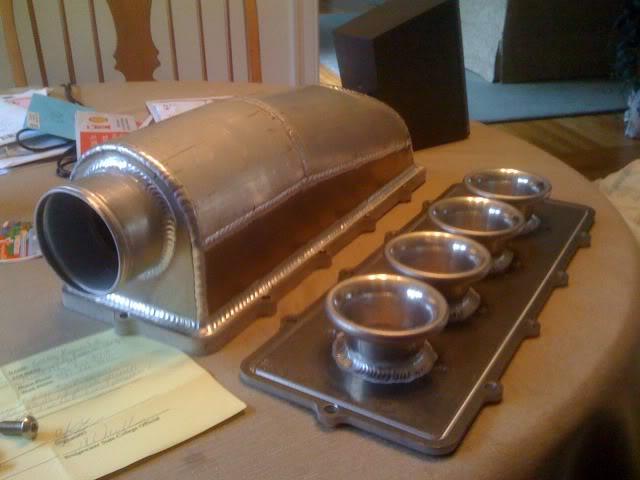
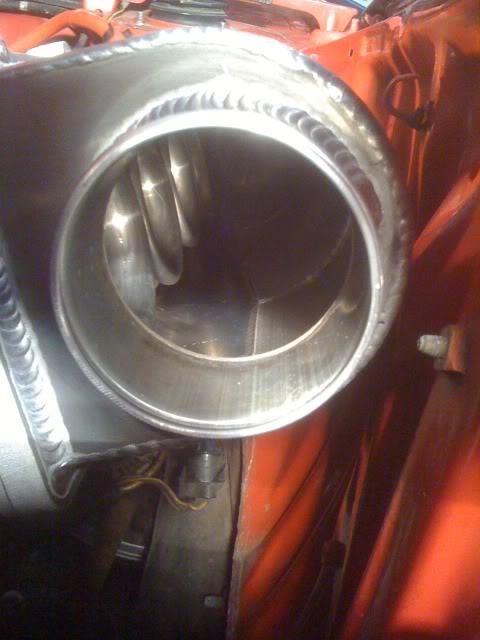
Also being made for me right now in New Zealand, is this little guy:
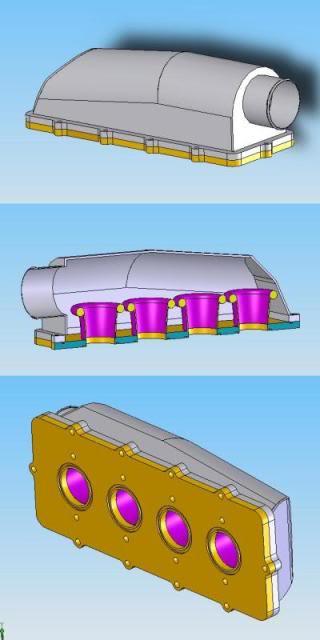
Turbo inlet plenum for my eventual 7AGTE 20v build 
4/12/2011
Busy weekend, busy week. Unfortunately not busy with MR2 activity. Although I did go from averaging 29mpg to 31.2mpg after replacing the gas cap! Best mod, ever.
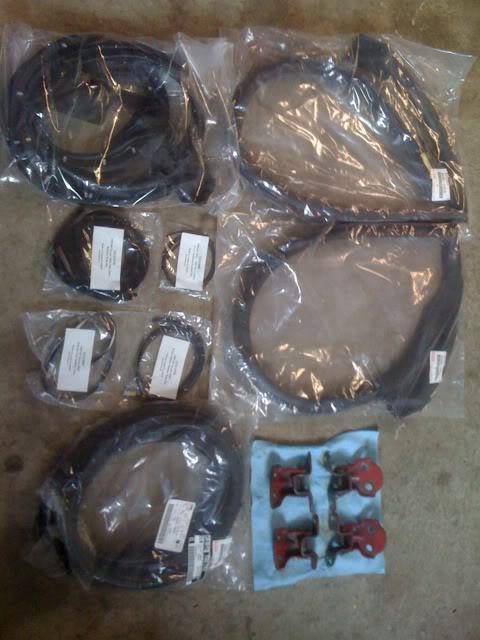
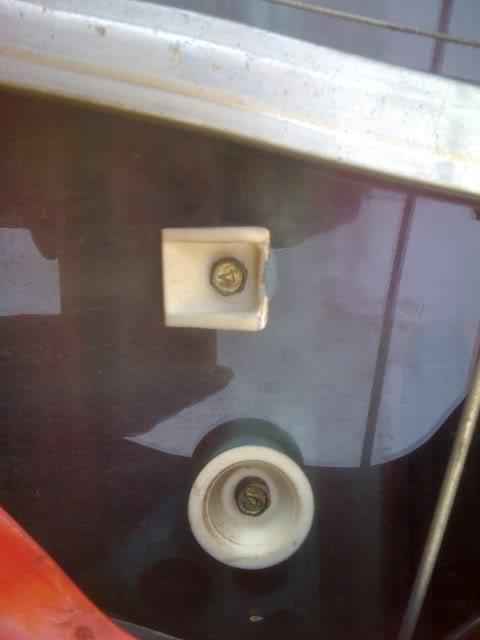
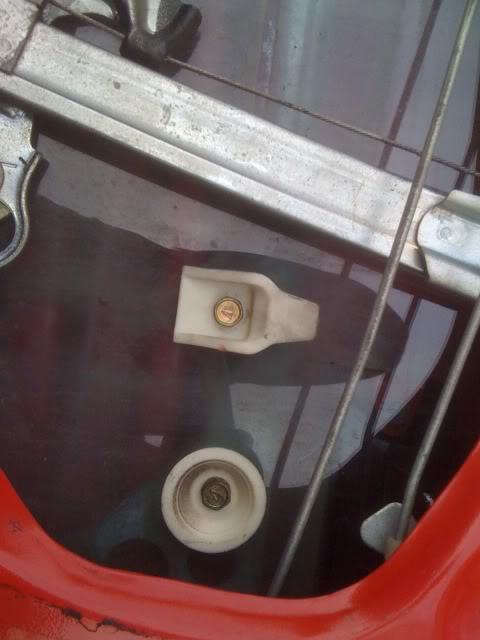
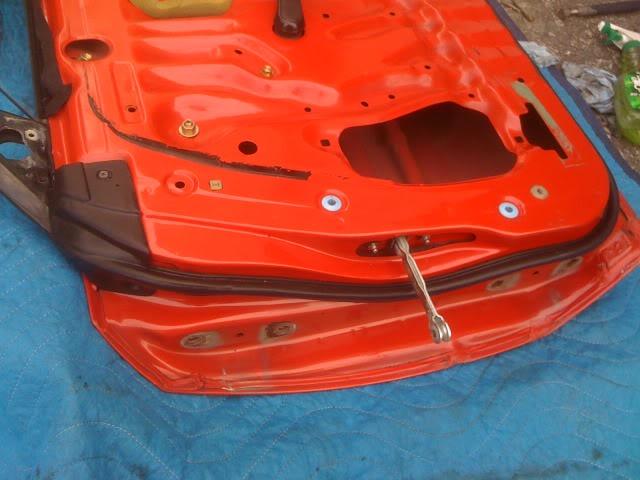
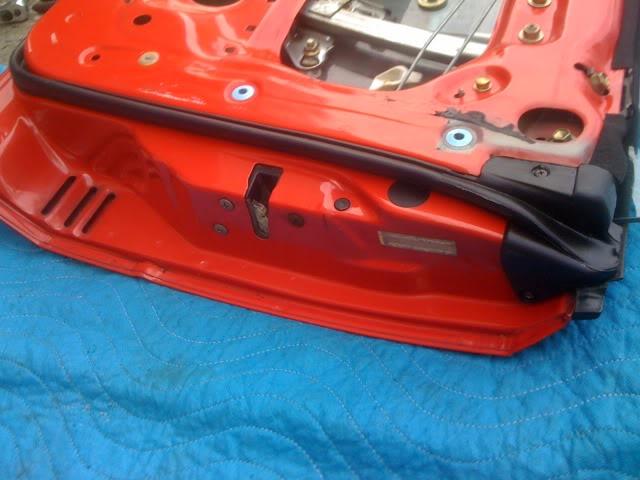
Posting this retro-actively, because I forgot I did it a while back... replacing my window, frunk and trunk weatherstripping. Got all new weatherstripping from Toyota and KBox, and a good used set of door hinges:
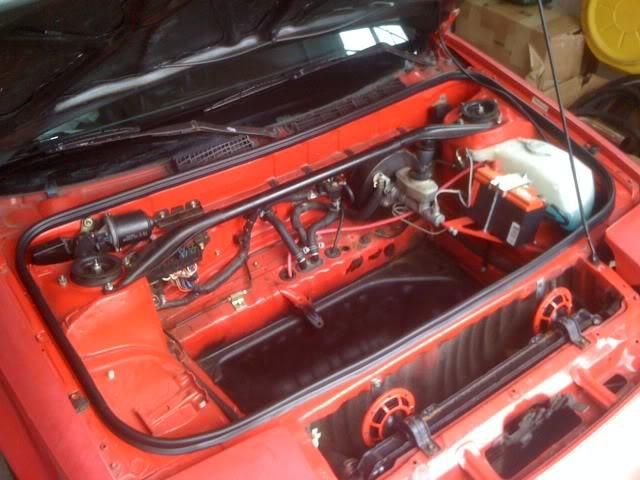
New frunk weatherstripping installed (use a heavy duty cleaner like Simple Green to get any built-up grime off the area where the weatherstripping goes):
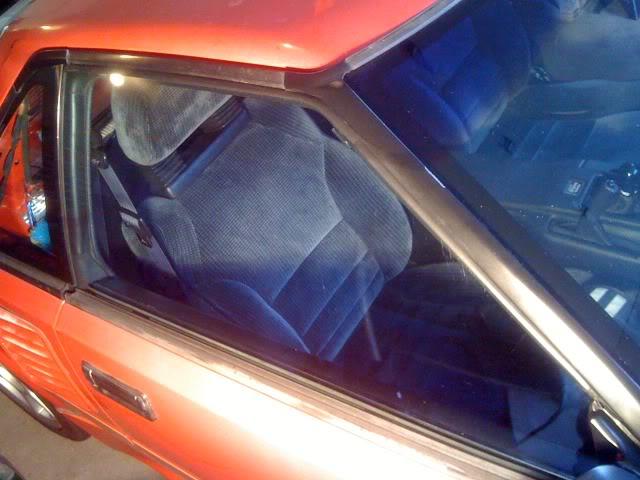
New window weatherstripping (old vs. new):
Forms a nice, tight seal now:
4/14/2011
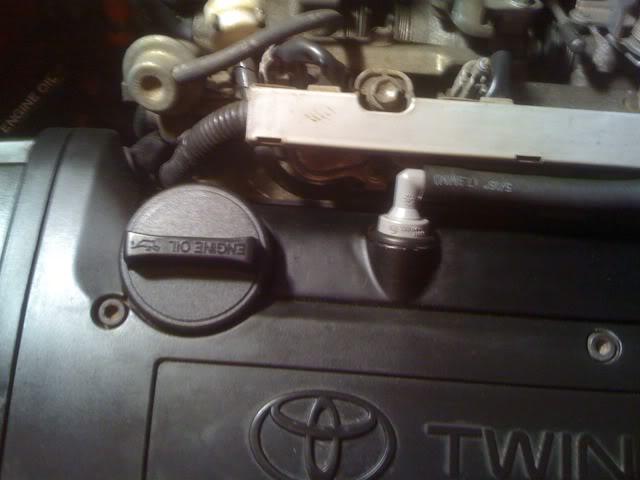
I replaced my leaking oil cap, gas cap, and (most likely) clogged PCV valve:
Replaced my bent hood prop rod, and worn-out grommet and clamp:
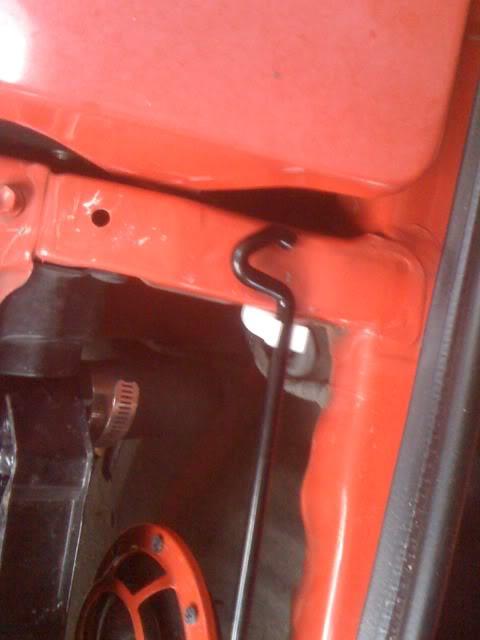
The prop rod now clamps down with a satisfying "click"... It's the little things...
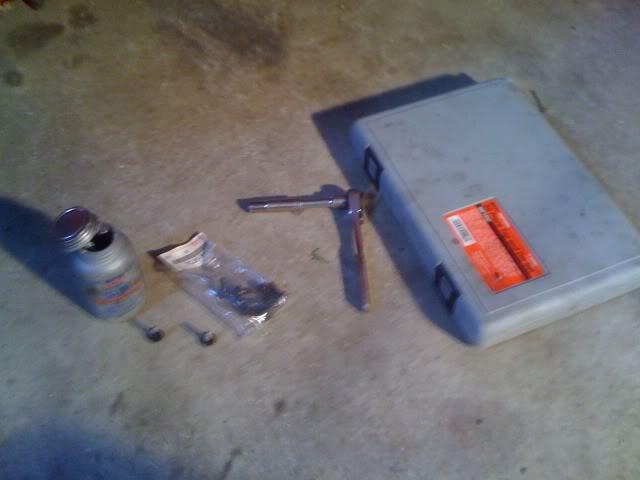
My rear bumper cover was held on with just 4 mis-matched bolts, so I got a set of 10 new bolts, chased the threads, and installed those. I broke one bolt off so I'll have to try and drill it out later. Eventually I'll sandblast and paint the brackets for the F&R bumper covers...
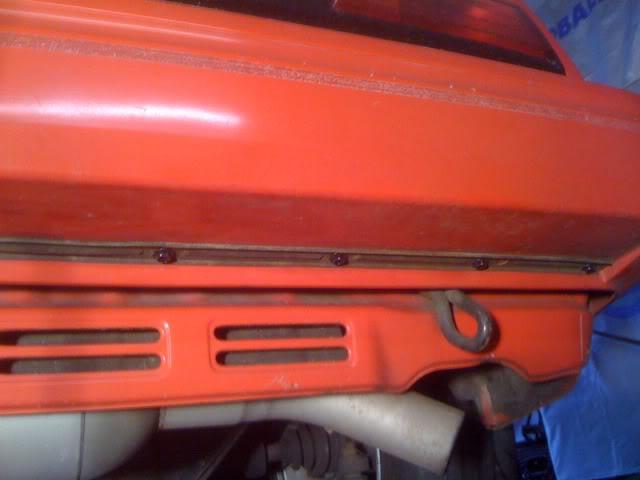
Tap and die set and anti-sieze are your best friend!
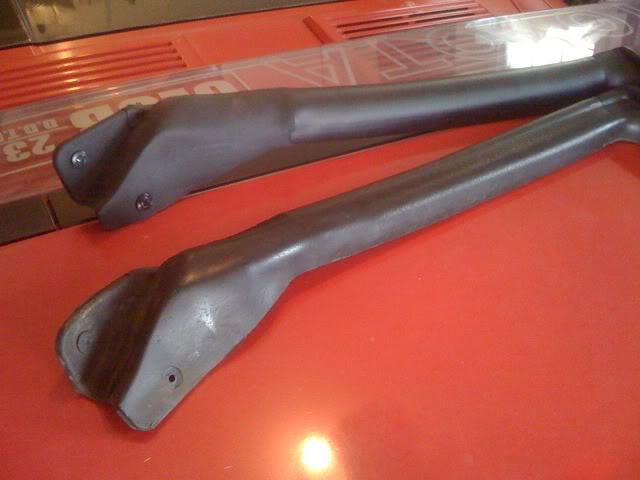
Very costly, but I replaced my wiper arms. My driver's side was so worn out it wouldn't hold to the windshield anymore, and it would skip over the rain rather than drag it off. The pass. side had a bolt break off on it and would deflect, causing the wiper blade to get caught under the fender/a-pillar trim at times. $160 later, I can see!
I cracked my windshield by trying to wedge a large box into the passenger seat... D'oh!
I needed a new one anyway, so that will be next on the list. I'm gonna see if I can get my insurance to cover an OEM one... there's one left in the country and I want it! lol
5/16/2011
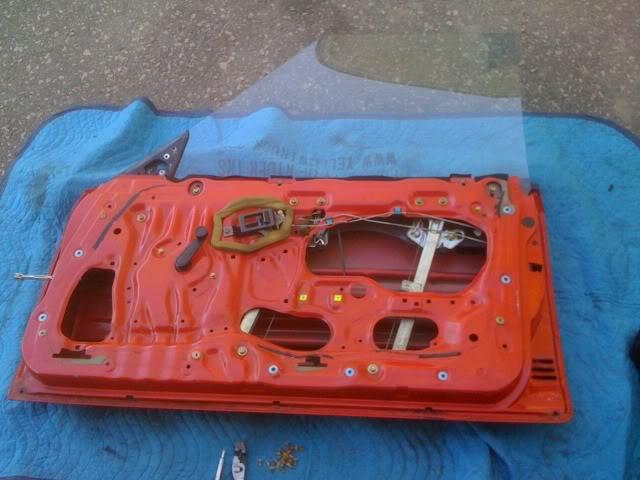
I started taking my doors off to replace the hinges, door checks and weatherstripping. I bought a used set of hinges and replaced the passenger side. The driver's side were still a little too worn for my liking so I bought brand new hinges and am in the process of painting them now. I also replaced a broken plastic stopper for the window and lubricated the handles and lock cylinder.
Putting it all back together, the passenger door is like brand new! No more sagging, no more squeaking handles, and no more need to body-check the door to get it open! It pops smoothly and closes without having to slam. I can't wait to get the driver's side finished!
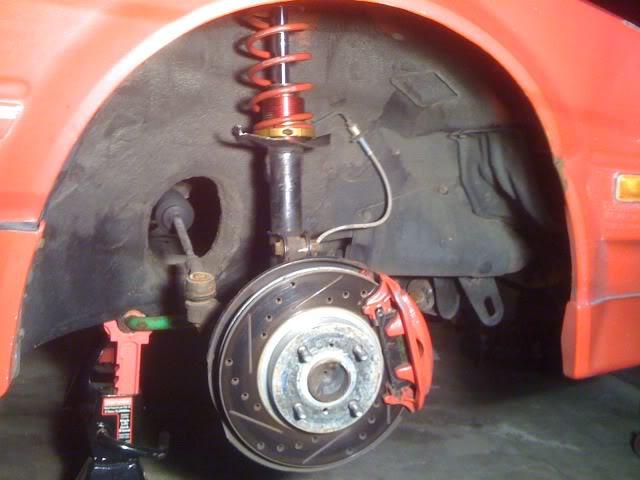
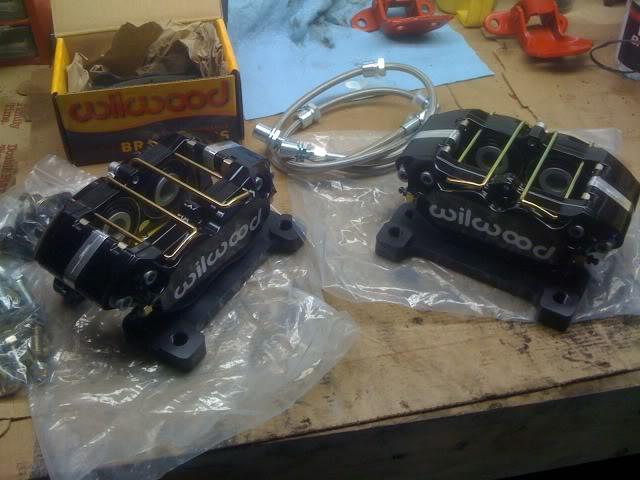
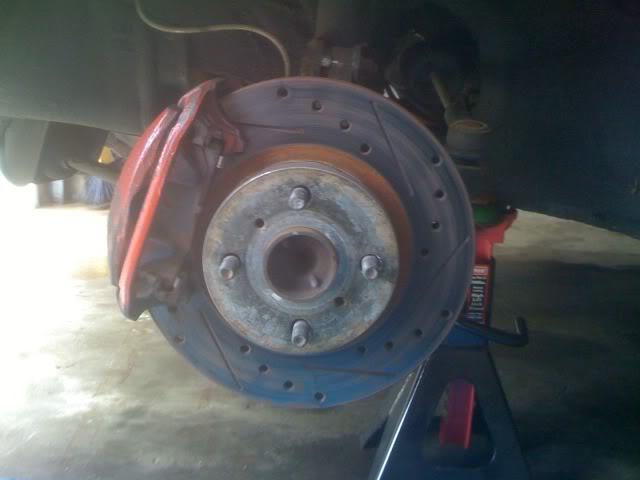
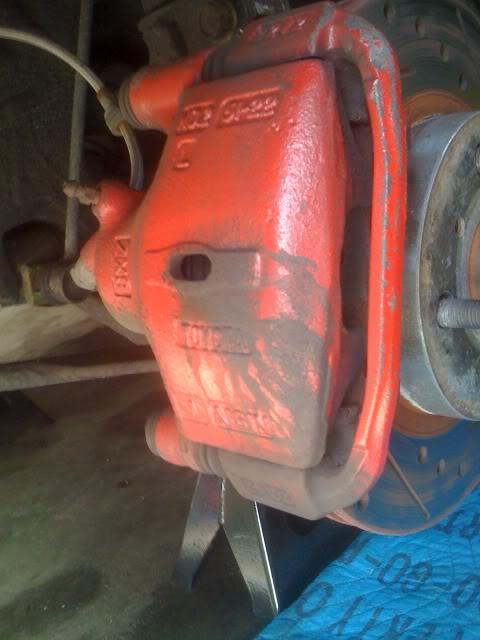
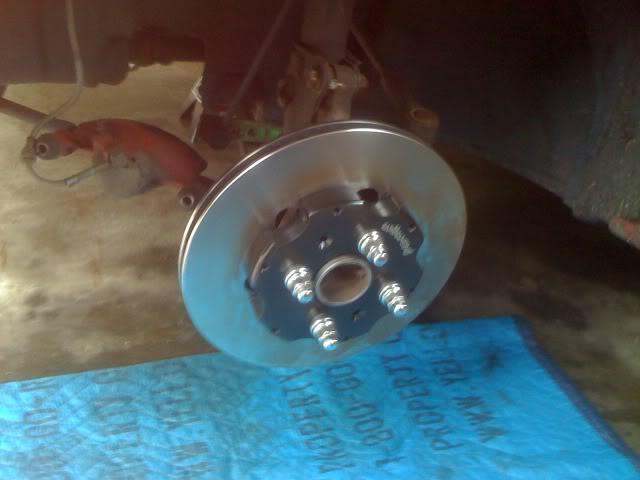
I also changed my mind on rebuilding the front brakes and bought a Wilwood big brake kit from FastBrakes: I custom-ordered 11" two-piece rotors and DynaPro dust-boot calipers. I didn't like the idea of using calipers without dust boots on a daily-driven car.
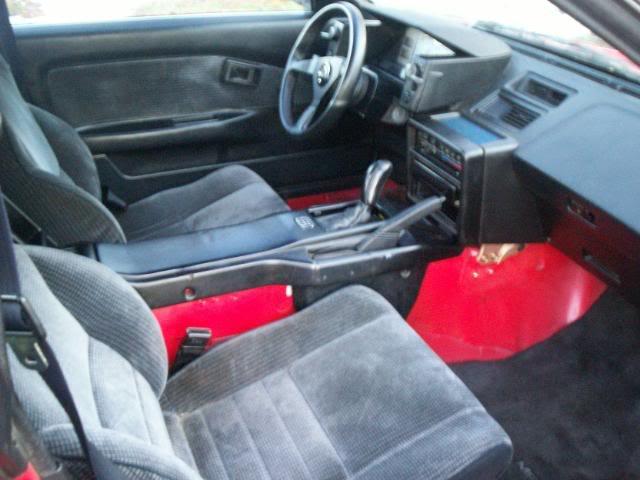
And since I'm too tall to fit comfortably with the stock seat, I bought a Recaro Profi SPG fixed bucket that I'll be mounting to the floor with a Wedge Engineering bracket. I'll post pics later this week when it's all done!
5/22/2011
More new stuff! Pics from replacing the weatherstripping/hinges:
Beginning with removing the door:
Try to keep your fender liner installed if you roll your fenders, otherwise this can happen (it also showers your windshield with sand and road debris)
Panel off, old weatherstripping removed:
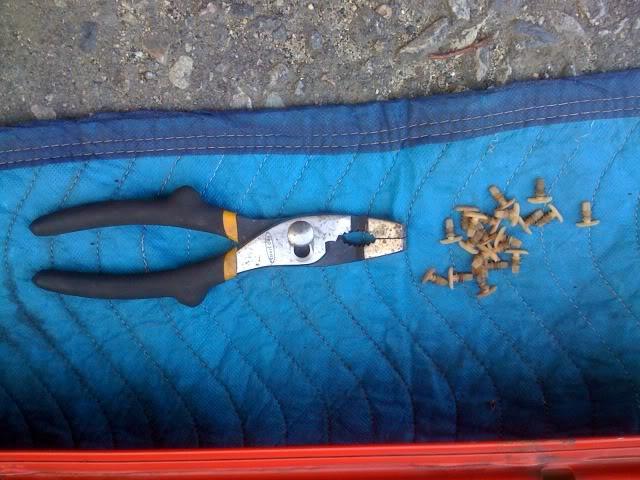
Had to pull all of these clips out:
Found a broken stopper, which I replaced from a spare door I had. Kind of a pain because I had to reach my hand behind the glass to hold the backing plate for the bolt in place, and it was a tight squeeze:
All better:
New door checks and weatherstripping installed, and cleaned 25 years of dirt off the inner frame:
At some point I'm going to cut out a new template to replace the plastic sheet over the door and re-adhere it with similar adhesive, just to keep dust/water out. I'm guessing it's to keep the door card from getting soggy, lol.
New hinges for the driver's side, before I painted them (definitely should've primered them before painting, red over black took almost a whole can of touch-up paint):

New headlight buckets and trim, to replace the rusty/corroded ones held together with hope and zip-ties (install pics to come soon):

"Big" brake kit from Fastbrakes came in! I was annoyed that he didn't change my ship-to address to my work address, so I had to drive to the nearest depot to pick them up since I wasn't home to sign, but other than that I'm impressed with the kit so far. I'll be taking all of this coming Tuesday to install them, so nothing is half-assed. (Painted door hinges in the background, lol)
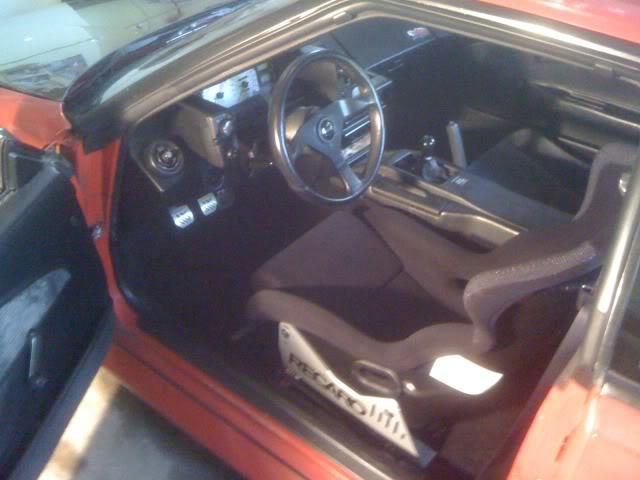
Installed my Recaro seat using Recaro aluminum mounts and Wedge Engineering bracket; no slider. I feel like the guy wrote down 5' 2" instead of 6' 2" when I told him how tall I was, because sitting in it I feel like my mom's just been in the car. My knees are behind the steering wheel! A little annoying, but there's not much I can do and for $137 or whatever shipped I can't complain too much. I'm taking the bracket to my fabricator tomorrow to put longer tabs on the back and drill and tap new holes to mount it further back. I also need to figure out how to get it lower because I still can't fit with a helmet on. Otherwise, the seat is COMFY! It also saves 13.2lbs over the stock seat, which is just awesome. That's with the mounts and bracket.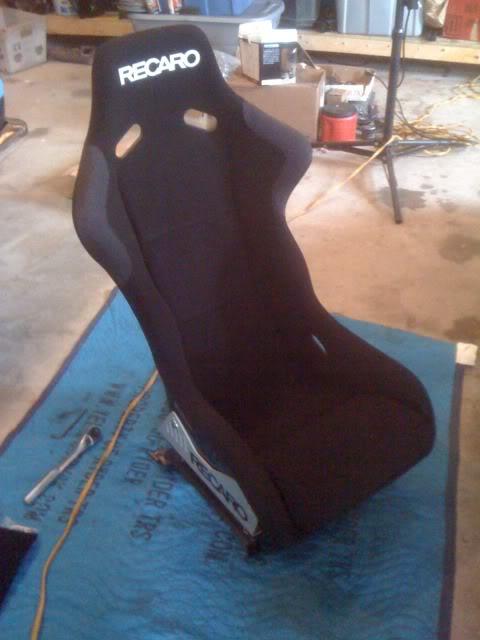

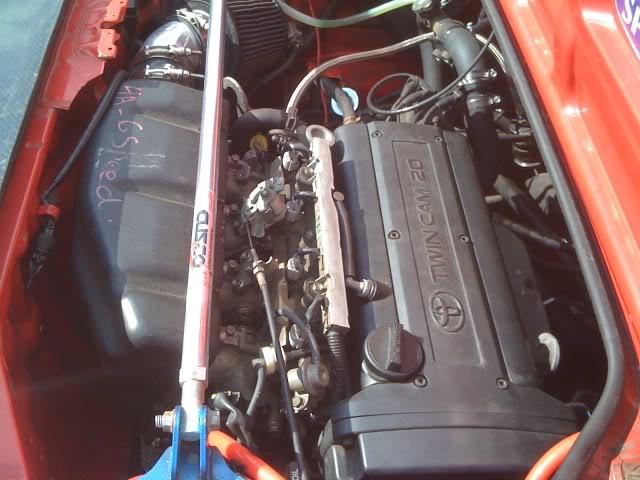
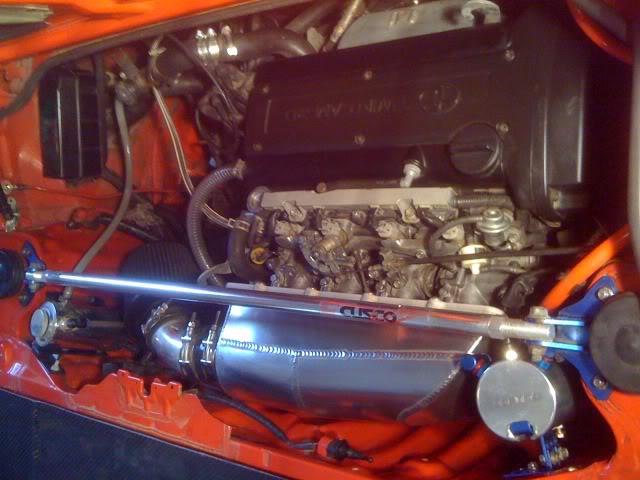
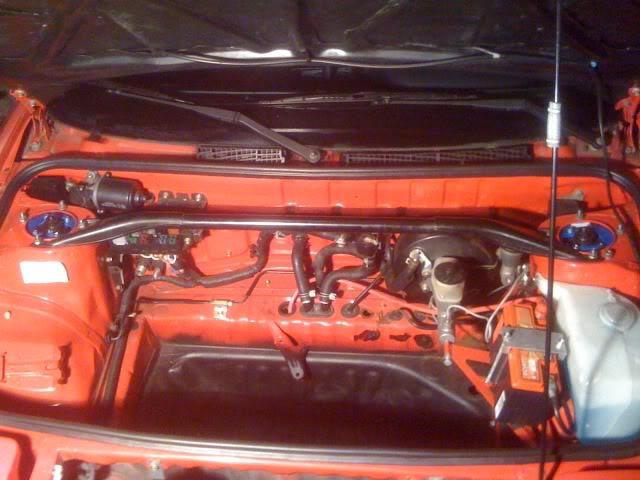
Got my turbo inlet plenum in this week, also. While I think it may actually reduce power in N/A applications (or at least torque, because the airbox is smaller than the stock one and doesn't have the long runners), I installed it anyways because I'm a ricer and shiny things excite me. I was very impressed with the quality of the plenum, especially considering what I paid for it to be made for me. Thank you, Barry Manon!
I also re-installed my Cusco oil catch can which I didn't have space for previously:
5/26/2011
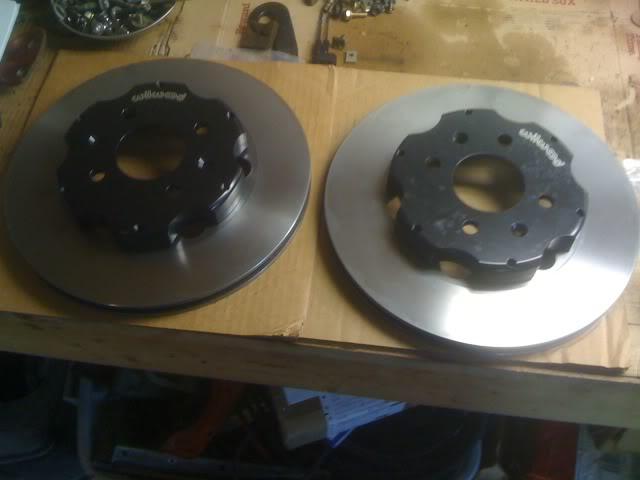
Installed my brake kit a couple days ago; I'm very impressed with it! The guy at FastBrakes (I forget his name) was very helpful; too. I was a little concerned with the rotors not being perfectly centered on the hub, so I called him and he offered to make me centering rings if it ended up having too much runout. I plan on measuring it soon to find out whether its necessary or not. Onto the pictures:
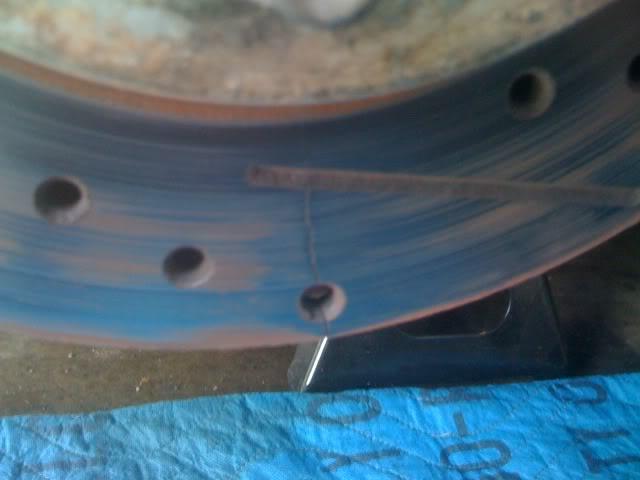
You can see how badly I needed new brakes. The brakes got so hot it cracked the rotor in 4 places:
Took the old brakes off and thoroughly cleaned the hubs and caliper mounting points with a wire wheel, wire brush, sandpaper, and brake clean:
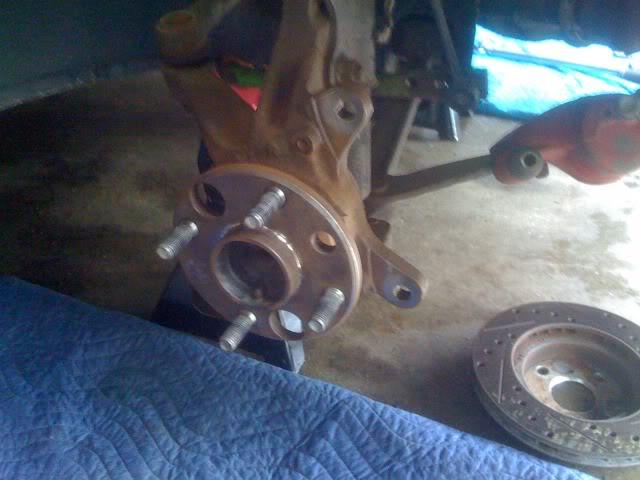
Test-fitting the rotor (the weather went from 50 to 80 that day, so the temperature change caused the rotors to oxidize instantly! Oh, New England)
Caliper installed, brakes bled (didn't have any wrench the right size for the bleeder screw, had to use a miniature adjustable wrench, lol):
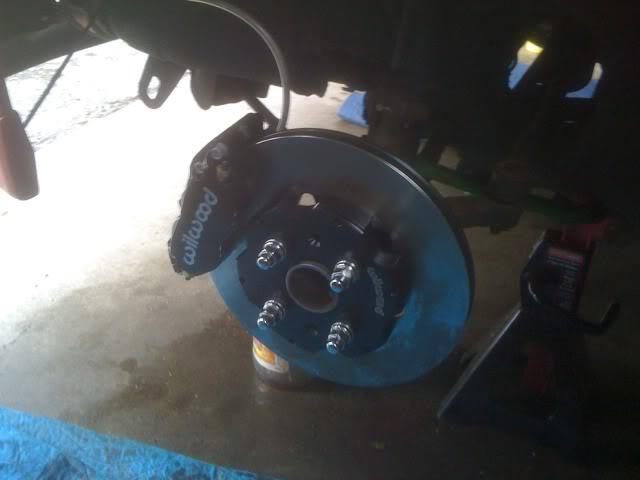
Wheels back on, on the ground:
So far I'm impressed with the stopping power. We'll see how they hold up long-term.
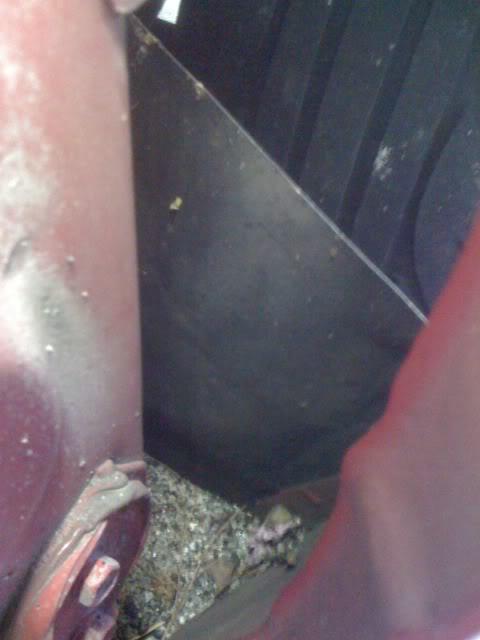
In the upcoming weeks, I plan on replacing the driver's door hinges, finish applying sound deadening to the rear firewall and replace my rear trim/speakers, install new outer window skimmers (still looking for a solution to the inner ones - no longer available through Toyota), headlight buckets, and new Screaming Chicken badge.
8/6/2011
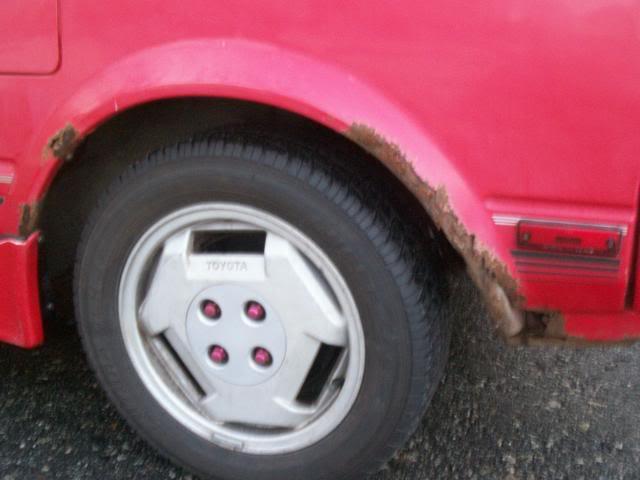
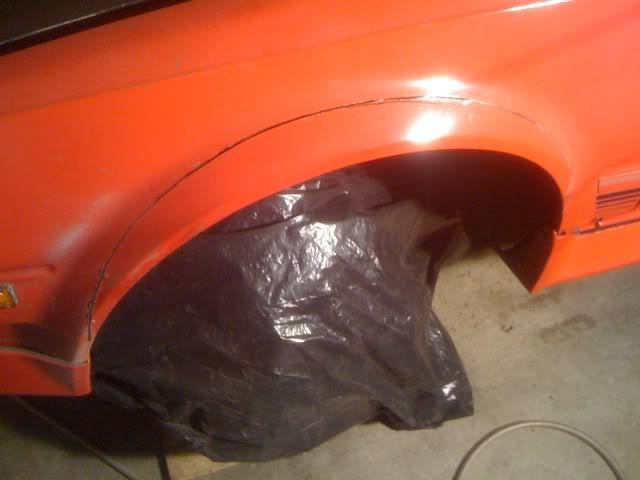
I decided to address the rust issue with my rear wheel arches by... cutting them off!
And riveting ZG flares on:
I forgot to upload the in-progress pics; I'll put those up later. It wasn't too pretty but it works.
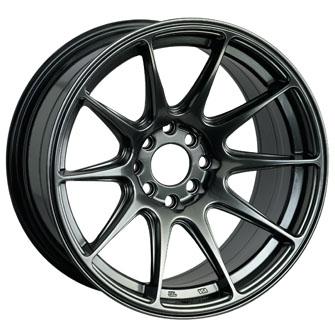
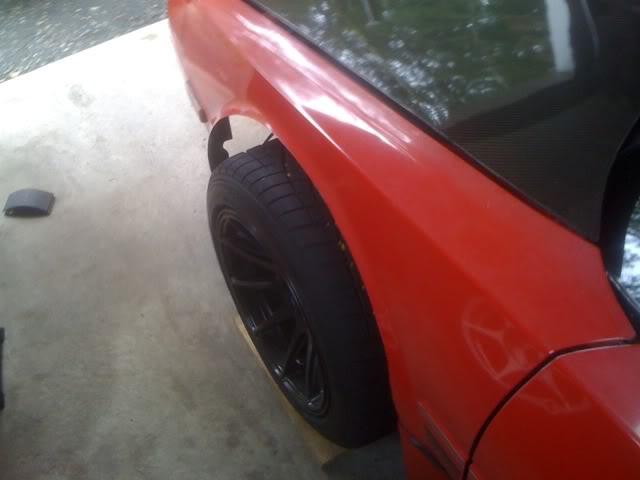
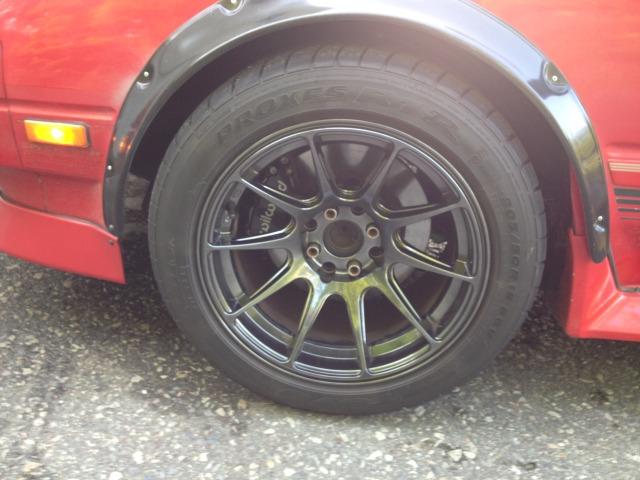
Since I now have a whole lotta wheel gap to fill (front flares will be going on soon), I went ahead and bought these XXR 527 in 15x8.25" 0 offset all around:
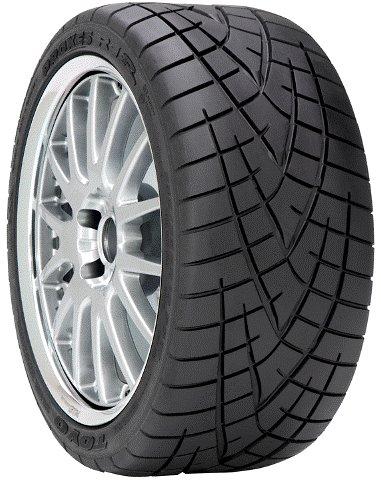
And Toyo Proxes R1R in 205/50ZR15F and 225/45ZR15 R:
I'll edit this particular post with actual pics when they arrive next week. Now I can be JDM HERRA FRUSH, y0!
9/9/2011
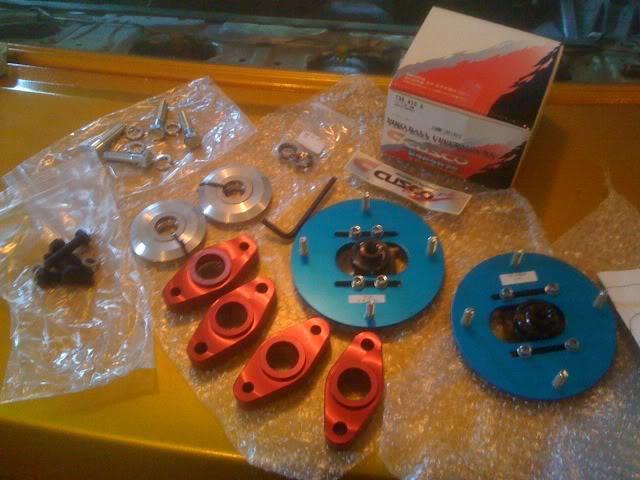
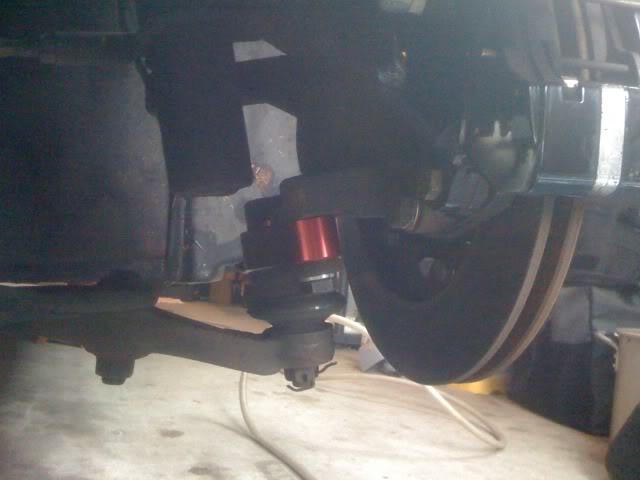
I had to order a new sleeve for the rear because one of the coils got damaged in shipping, but not a big deal. I also got the weld rings so I can eliminate the spring perches, and I just bought Cusco front camber plates as well as T3's upper hat system and front/rear RCA's. Hopefully I'll be able to tuck the front tires under the flares now.
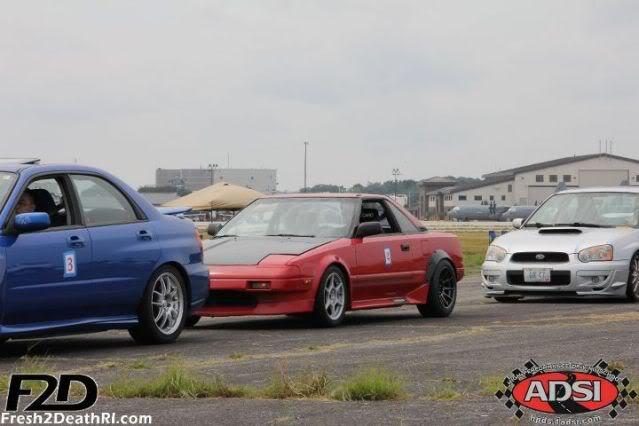
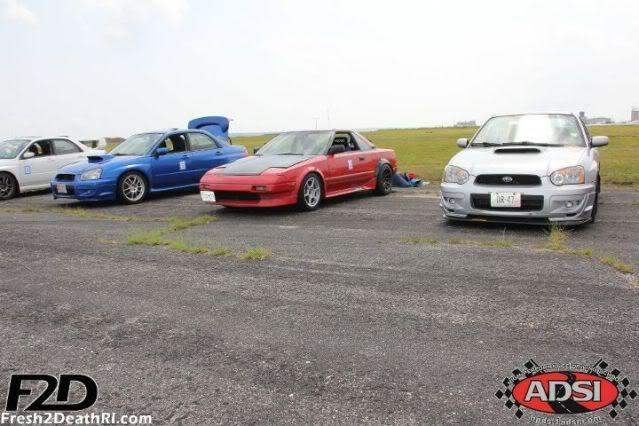
Here's a little teaser from last weekend at an ADSI event with the rear wheels installed:
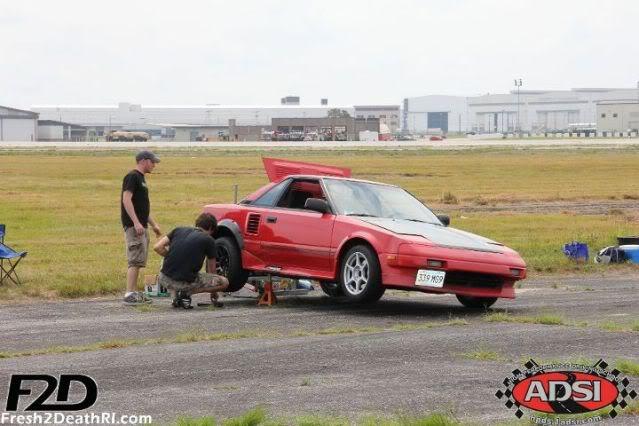
Fixing a rubbing issue on the right side. With a hammer!
Also got a ride in an Elise that day and all I can say is "wow!" It's like a much more refined MR2, with a much lower seating position. And no carpet.
9/23/2011
These wheels do need hub-centric rings, yes. Luckily the ones included with my Kosei K1's were a direct match.
I just finished installing the Cusco camber plates, T3 upper hats and RCA's this weekend. I cut out the fender arches in the front and have begun on the rears. I'm going to need larger flares for the front since they stick out a bit even with max. negative camber. I had to use different bolts in the camber plates because the ones provided by Cusco were too long and interfered with the upper hats. I'm also going to need a serious alignment. The toe got all thrown off by the RCA's and camber plates, so I'll have to tow it to an alignment shop.
Meanwhile, I picked up an AE86 Corolla GT-S coupe, and have begun tearing into that to make into my (hopefully reliable) winter beater: http://forums.club4ag.com/zerothread?id=98140
I plan on keeping it as stock as it is now so I can keep any spare $$ for the MR2 and eventually my 240Z... that poor neglected Z 
In other news, I got hired for sales at Audi instead of Lexus so unfortunately no more parts at cost+10%, but hopefully I'll make enough commission that it won't matter! I've been in between jobs this week and the spare time has been a blessing for both car projects.
Here's some pics of me cutting out the wheel arches. I used a 3" cutting tool that I bought at Harbor freight - it did an excellent job. I then sanded the metal smooth to (hopefully) avoid cutting myself. I'll obviously need to rust-proof them soon.
Making marks of where to cut:
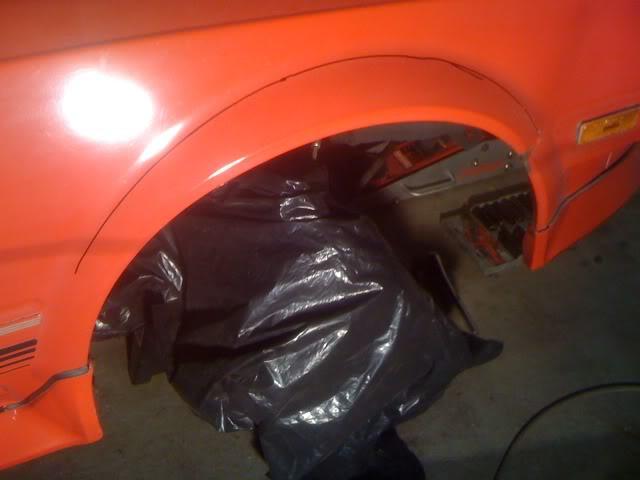
Zip! gone.
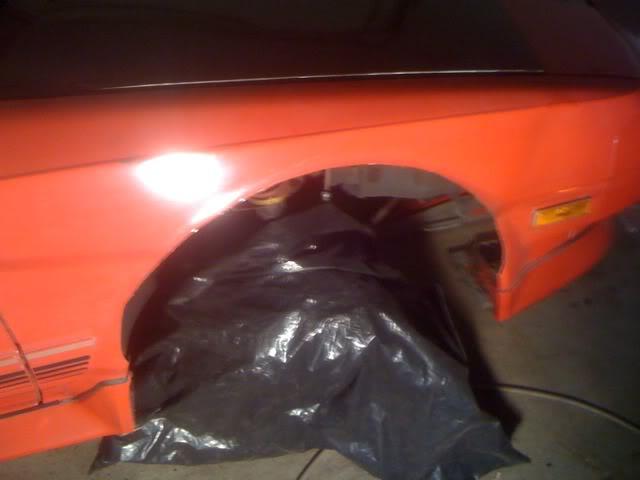
Working on the left side:
And here it looks with the wheel fitted (no proper alignment yet). The wheels just barely clear the front spoiler and side skirts. I actually had to replace the bolts fastening the front of the side skirts with thick zip-ties so they wouldn't rub. Looks pretty goofy but it'll have to do until I can afford real staggered-fitment wheels.

9/30/2011
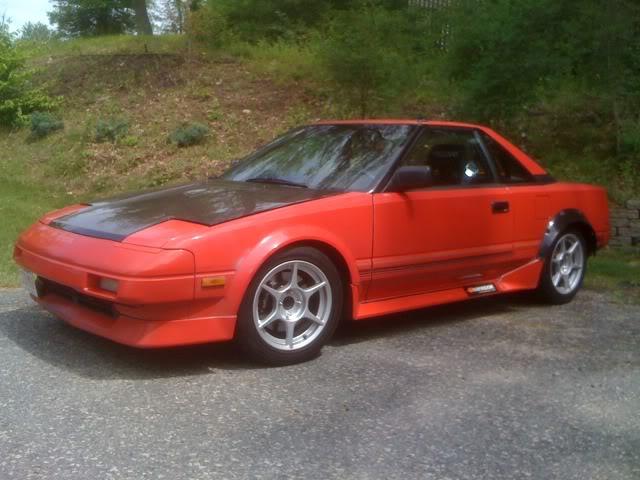
I've been very busy but here's a pic of the car after getting it all buttoned up (for now):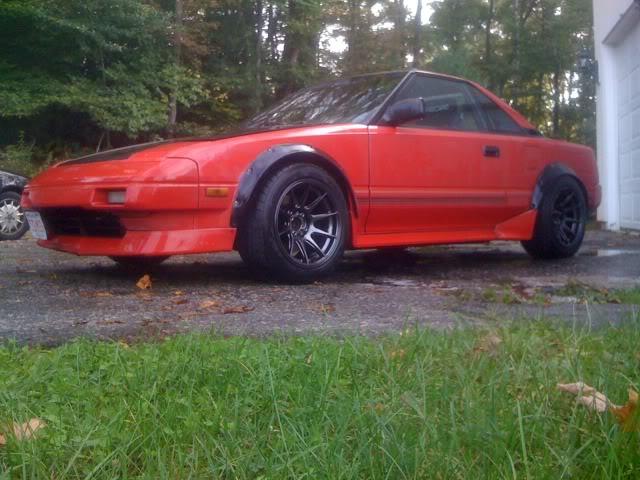
12/13/2011
Welp, not much to report lately. Snapped a sway bar mounting bracket, and the engine started running like crap again even after I replaced the cap/rotor and plug wires. I got a new windshield! Sadly it's not the $900 OEM Toyota one, but it'll do
I'm getting a brand spankin' new 2012 Audi S4 6MT on a company lease for the next 6 months (read: holy freaking crap I'm so excited!!!), so I can take the MR2 off the road and hopefully get some more work done to it. I'm shifting focus to finishing my AE86 project so I can do a little drifting in the spring and then sell it in the summertime. Then, MOAR MR2!!! Stay tuned
6/22/2012
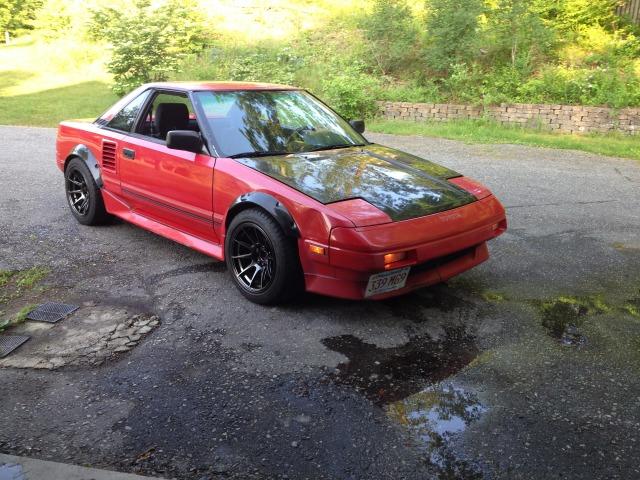
Sold the Corolla - that was a mistake of a purchase!! Just put the MR2 back on the road today, and by "on the road" I mean I got an inspection sticker, LOL. I managed to replace the capacitors in my 20v ECU and it seems to run a lot better, but I still want to go stand-alone eventually. I also ordered two rear wheel bearings, rear sway bar end links (so I can finally mount my ST rear bar), left rear brake caliper, a fuel filter, and beefed up front sway bar brackets. I'll be getting a low-mileage C52 to replace my crunchy old one, then hopefully hitting up some auto-x events ASAP!
Awww yeahhhh
7/19/2012
Small update: On the "resto" side, I just got a low-mileage C-52 gearbox from California. It looks practically new! Thanks to trdhawk for that one! I'll be installing my Kaaz LSD finally
On the "mod" side, I've decided to build a 7AGTE 20v from scratch. I just picked up a Garrett GTX2863R dual ball-bearing, billet compressor wheel turbo, TiAL sport 38mm external wastegate, 4AGZE 8.9:1 compression forged pistons, and am about to get Crower 7A forged rods. Following that I'll be getting 550cc injectors, Supra TT fuel pump, liquid-to-air intercooler, custom MRP turbo manifold, and some sort of programmable EMS. Once I've amassed all the parts I need, I'll take my 20v head and mate it to the built 7A block and get everything together and tuned. I'm shooting for 300-350bhp; wish me luck!