You must be logged in to rate content!
20 minute(s) of a 158 minute read
12-2-2013
A few months after this work I also added a red LED in the hood scoop (I think it looks great, but I’m in my 40’s and stuff like that was really popular “in my day”). Installation is about 15 minutes if you already know where you’re going to route the wires. I ordered the optional 4 button remote that toggles the LED strip from (1) On, with multiple levels of brightness, (2) Flashing, with multiple speeds, (3) Pulsing, with multiple speeds and (4) Off.
Yes, in the State of Washington it is illegal to use this product on the road, but I’d argue the legality if te car is stationary and unoccupied. Got it from Custom L.E.D. Service, L.L.C.
In Scoop Red L.E.D's

While the Whitelinefront and rear sway bars helped with cornering quite a bit, I wanted a slightly lowered look with even better sporty performance. I found that a lot of FXT owners spoke very highly of the Swift Springs. A quick visit to the Mann Engineering website and the springs were on their way. VTR installed them, and it turned out to be one of the best overall mods. They compliment the sway bars, and the handling is much firmer, without a harsh ride.
FXT ride height pre Swift Springs and after they were installed. Ignore the wheels in the “after” picture. It’s just the best post-spring install photo I’ve got


At about 50,000 miles, I wanted to find something that would make the FXT stand out in a (Subaru) crowd, but still have a stock appearance to a non-enthusiast. The look of blacked out headlights was always appealing, and fit the theme of the FXT. Since I’m not the type to DIY much, I went to Google to find a bolt on option. CarID has a replacement headlight that is plug and play and features halo-style lights, projector beam design with better visibility and brightness, and an Audi-styled LED “brow”. They arrived two weeks later and were installed in a few hours. Aside from the tint, this is the modification to the FXT that stands out to others. I also debadged the sport grill and relocated the horn. From the factory the horn is attached to the radiator frame, positioned horizontally, directly below the hood latch, on the front of the frame. I relocated it to the rear section of the same frame, vertically so that it is “hidden”.
Halo + LED Projector Lights

At about the same time the headlights were replaced, my tires were at 53,000 miles. If I wanted to get larger wheels, this would be the time. I bought a set of 18 x 8 O.Z. UltraLeggera wheels from TireRack.com shod with Falken ZIEX ZE-912 245/45R18 100W tires from Buy Wheels Today (OEM is 17 x 7 wheels with 225/55R17 tires). This upgrade is what is known as a +1 swap. While the rim was larger, the height of the tire was lower, leaving the circumference of the new wheel and tire very close to that of the OEM tire/wheel combination. This leaves the speedometer and AWD system unaffected. I wish I had researched this purchase more as well. I went with the tire size that the website suggested. I think I would have been happier with a larger or wider wheel. Or both.
18 x 8” O.Z. Racing UltraLeggera wheels & Falken ZIEX tires


At 54,000 miles I installed what turned out to be one of the most disappointing purchase experiences of the FXT build.
I live in a more-ghetto-than-not area of Seattle, and the O.Z. wheels definitely stand out as nice, aftermarket and prime candidates to be stolen. I didn’t find researching security options for wheels to be very easy. Coming from the standpoint of a person who isn’t knowledgeable of what is and isn’t really secure vs. cosmetic. I ended up liking the look of Zerg Industries extended security lug nuts. They came in multiple colors, looked sexy and boasted to protect the investment in the wheels.
There were many issues though. First problem was the description, or lack of one. They were supposed to be “security” bolts, but didn’t outwardly say what made them more secure than normal lug nuts. Turns out that 16 of the nuts are traditionally 6-sided (4 per wheel) and 4 are 7-sided. Their advertisement DOES list that in the specs, but not as part of the description. They also come with plastic enter caps that screw in with an included torx/hex nut tool, but don’t mention what purpose these serve. I’m a tire noob, so to this day I still don’t know if these plastic screw-in inserts serve any purpose other than looking interesting.
I wanted to so something special with the lug nuts that I’ve never seen before. At least not on purpose. My plan was to have 4 sets of 5 different color lug nuts. Each wheel would have a different color lug nut, and the mixture of colors would be identical on each wheel. The inspiration for this came from the first season of Dexter and the nail polish colors of the prostitutes that were victims of the Ice Truck Killer.
3 months (July 26, 2013) before I got the wheels, I started trying to get my lug nut vision to come to fruition. I first contacted the Zerg authorized rep, DemonWerkz. I asked them via a Facebook PM if it’d be possible to get a set of the Zerg lug nuts, in the color variety I wanted. Within 20 minutes they replied, saying they’d have to check with Zerg. I didn’t hear back, so on July 29 I PM’d them again, asking for an update. 3 minutes later they replied, saying they hadn’t heard back yet, and would call Zerg the following day. On August 2, 2013 I PM’d again for an update. On August 3rd they replied that Zerg wouldn’t do that. Within a few hours I PM’d them back, accepting that my idea wouldn’t happen, and ordering a set of simple black lug nuts. I didn’t hear back from DemonWerkz again until August 26th, when they told me that they overlooked the order. The order was placed, but I didn’t get anything over the course of the next 3 weeks. I called DemonWerkz and they told me the lug nuts were on back order. I gave up on DemonWerkz and ordered from StreetLightz instead. They arrived a week later. They do look nice, but are fragile. After being installed, removed and installed again, they show significant signs of scoring and have lost much of the black anodization.
Zerg Industries Extended Security Lug Nuts

A road less traveled
I’d been very curious about what kind of ¼ mile times the car would run as it was configured. I went to Pacific Raceways for a “Test and Tune” event. I was impressed (mostly) by my final MPH (104) but the 60’ time and launch with the automatic, well, sucked. The best time I could manage was in the very high 13’s. I wanted to have better control of the power the FXT has. I admit that I’m not the best at using the FXT to the extent of its capabilities. I decided to research that it would take to convert my SH to a 5 or 6 speed.
Pacific Raceways Test n Tune day!

First thing that I learned was that there had been full STI swaps into the SH Foresters, but only one conversion where the original FXT motor was mated to an STI transmission. That build is located here.
I didn’t look into the possibility too closely, but the thought of tossing a 5 speed manual transmission from a base Forester 2.5 crossed my mind. It seemed like the cleanest option. It probably would work, and be the easiest option. But, after a brief bit of researching, I learned that the 5 speed transmission doesn’t hold up to high HP motors.
Getting information on what it takes to put an STI transmission was harder than I thought. The posts I saw on various boards said that it either couldn’t be done at all because the hardware didn’t match up, that it would be too much work (arguably true if you are the first one to do it), that everything matches up just fine, plug and play (big no to that) and that the CAN bus doesn’t match up between the two (the most accurate of the information). Contacting the tuner of the other FXT that was able to do the swap successfully proved to be discouraging. When asked what they did to make the swap a success, they stated that the hardware was swapped, but that the electrical was still incomplete. Although vague, they said that key features, like ABS and traction control was not functional.
Luckily for me, two of the best tuners in the US within an hours drive from where I live. I went to Dom at MPS and he told me that it would probably be possible, but new ground for him. He couldn’t give me an approximate cost or tell me what parts I’d need to source. I then turned to PIA, who were very confident that it could be done. It would just be a matter or how long and how much money it would take. While fiscally daunting, that was at least inspirational. PIA it was then!
I touched base with Steve and Mike at Steve’s Pacific Import Auto, in Tacoma, WA. They are one of the many Seattle area tuners, and a favorite among the Subaru crowd. Lots of impressive cars have been built here. Arguably the most well know of those was the first independently swapped (STI drivetrain + interior + suspension) SH FXT’s. Many have seen this video of it online.
It was discussed that the ideal position to be in would be to have a complete donor car. Since that’s an $8,000 to $12,000 proposal, and outside of my budget, I asked what the other options would be. Initially Mike and Steve suggested getting, at a minimum, these parts:
• 6 speed STI Transmission from an ’08 – ’13, including drive shaft, cross member and center differential
• Complete pedal set from the STI
• Starter from the STI
• Brake master cylinder from the STI
• ECU from an ’08 – ’12 WRX hatchback with a manual transmission
• Complete wiring harness (everything that connects to the ECU) from the WRX
• Instrument cluster from the WRX
• Decel g/yaw sensor from the WRX
• Shift trim from a 5 speed SH FXT
• Shift boot from a 5 speed SH FXT
So off to the internet I went in search of parts to make the dream of a 6-speed transmission into a reality!
The search for parts
I found the transmission and assorted STI parts from NASIOC member Austin, AKA “littlewhitewagon”. He is located in either southern or central California, but was headed to Portland to some socializing, and offered to bring the transmission and parts with him, in exchange for gas money. We agreed on a price, and soon it was all sitting in the back of the FXT. I went to the local dollar store and bought two $1 shower curtain liners. They protected the carpeted area in the FXT from getting oil and dirt. I also placed some cardboard back there to eliminate carpet dents and lightly cushion/suspend the tranny.
2011 STI 6-speed transmission and assorted parts


I brought the parts down to PIA the next day, where they inspected and stored them until my conversion time.
I researched locations to buy the ECU and wiring harness. Seems like the easiest place to find one is Florida and the tri-boroughs of New York. I was luckily able to locate a donor car in the Tacoma area, at B & R Auto Wrecking out of Graham, WA. I dealt with Shawn in their internet sales group. After negotiating a price for the ECU and harness, I went down to their Graham store to pick it up. Took a few days to get what was ordered, and soon afterwards they too were in the hands of PIA.
Steve, owner of PIA, wonders what he got himself into

I soon went on vacation to Boston, and dropped the car off with PIA, where they started on the swap. I couldn’t be more excited, and anxious too. The day before I left it was discovered that I would need the instrument cluster (as suspected), which I also obtained from B & R.
2010 WRX Instrument Cluster

The swap
A week was spent in Boston, and I was anxious to get back to Seattle and the FXT. The PIA guys told me that the transmission went in without a hitch. Though it wasn’t planned, they had to use the rear FXT axles on the front of the Forester, because the front STI axles were barely too tight of a fit. We didn’t have to use the STI axles that Austin gave me with the transmission, but they were there, had less mileage than the FXT and were obviously going to be happier down the line with the extra power.
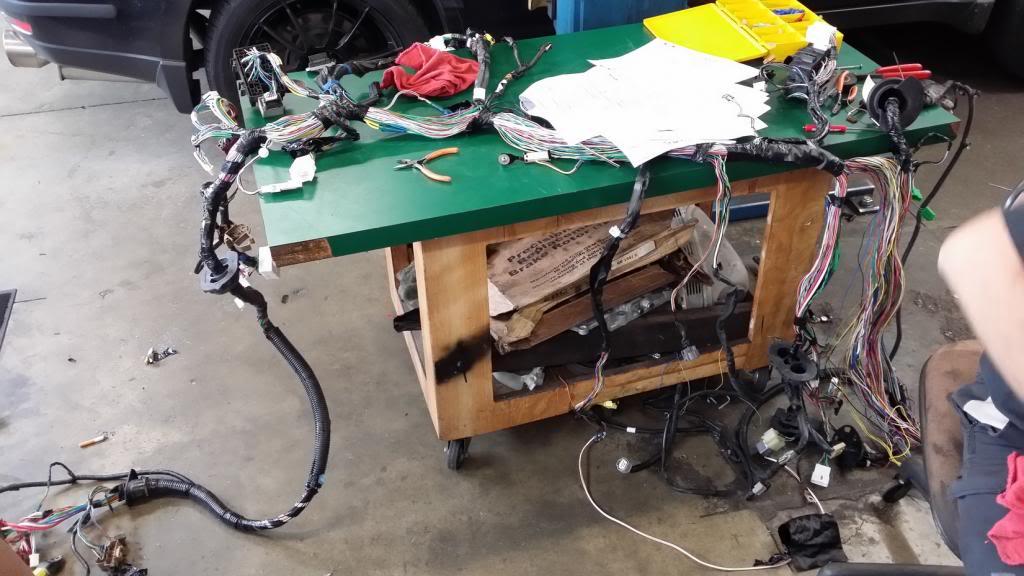
The original plan was to remove the interior and swap the FXT harness and install the WRX. Steve got a copy of the wiring diagrams for the FXT and WRX. The majority of the interior was removed. The FXT harness was removed. Many hours into the wiring swap, Steve determined that it would actually be faster and more efficient to identify the parts of the harness that were different, and graft the WRX connectors to the FXT harness. The ones that were different were mainly (or solely, I’ll have to confirm) associated to the transmission connectors. I spoke to Steve at the E85 tune and he said that if he did it again, he’d just get the correct connectors and add them to the FXT harness, without removing it. Hindsight is 20/20, and I this case would save 40ish hours from the process.
Since this was a one-off installation that was essentially all done on the fly, a lot of hours went into getting everything right. Steve from PIA said that when it was all added up, the total time was 66 hours. That included the 60,000 mile maintenance, aligning the headlights and tune time. If he had to do it all again, he estimates the time at approx. 20 hours
Dash comes off


It was discovered that the ABS pump and decel (G/yaw) sensor both needed to be swapped from the WRX as well. The ABS pump was needed to get rid of the error light it creates when the FXT ABS pump communicates with the WRX ECU, and the decel sensor for much the same reason, as well an additional wire needing to be added to the sensor. I’m not sure exactly what caused the need for the additional wire, but the hill assist doesn’t work without it.
More modifications!
• Injector Dynamics ID1300 injectors
• Body painted handles
• ABS pump from the WRX (mentioned above)
• Decel (G/yaw) sensor, mentioned above
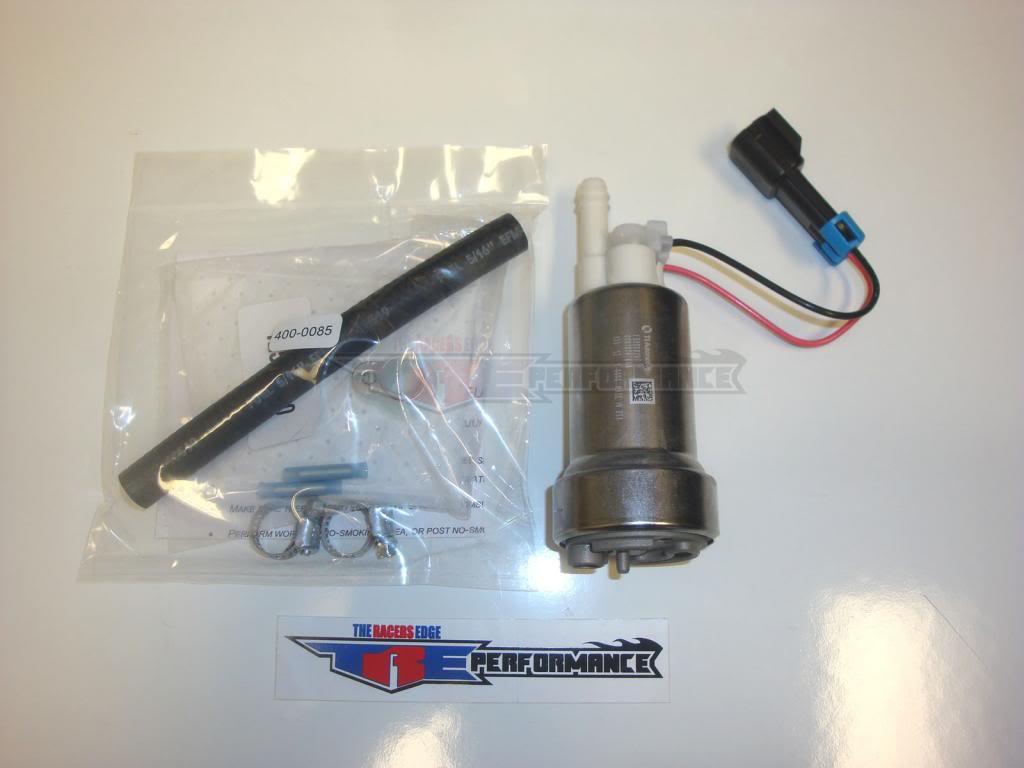
Along with the STI 6-speed installation, the subject of upgrades necessary for the E85 tune came up. At first the thought was that only some larger injectors would be needed, but it turned out that in addition to the injectors, the fuel pump also needed to be upgraded.
419hp / 420tq

DCCDPro

ID1300's

The PIA SH FXT has door handles that are painted the body color of the car. I’d had my chrome door handles plasti-dipped for quite some time. I loved the look, not to mention it added to my blacked-out theme. Steve was very happy with the results he had with his, and suggested I do the same. I agreed, and Steve sent the door handles off to prep and paint. When I picked up the FXT, they were the first things I noticed. They look great!
Painted Door Handles


Decel Sensor (FXT sensor shown)
ABS Pump (FXT pump shown)

Walbro 460 LPH Fuel Pump

Pictures of the transmission swap


Final touches
Feeling that I’ve been neglecting the engine bay, I had to throw a little bling inside. Classy COBB battery tie down!
Cobb Battery Tie Down

I ordered a few vinyl overlays from JDM Fanatic Vinyls. I think they look pretty good.
Front Emblem


Rear Emblem


Steering Wheel Emblem

Interior featuring the new tranny with classic COBB shift knob

Click this link for a video of the final dyno run
Coming soon....
... reports on the other work that has been done, but I haven't finished writing about, including:
Props to Sleepy1, Aussie Dave, Nate_Fisher and a ton of others without whose assistance and inspiration I couldn't have made it this far
And discussion of future mods (in order of how soon they will be done), including:
Paint chrome fog light rings (Done)
Install yellow fog lenses on fog lights (72 hrs)
Cobb oil cap/screw (1-1-14)
Custom Titanium FMIC (3-1-14)
Strut tower brace (3-1-14)
XT hood delete (switch to NA hood) and de-badging (3-1-14)
Trunk area brace (TDB)
Back up camera (TBD)
Different exhaust (TBD)
Big brake kit (TBD)
Turn signals in the mirrors (TBD)
Prova D steering wheel (TBD)
Current State


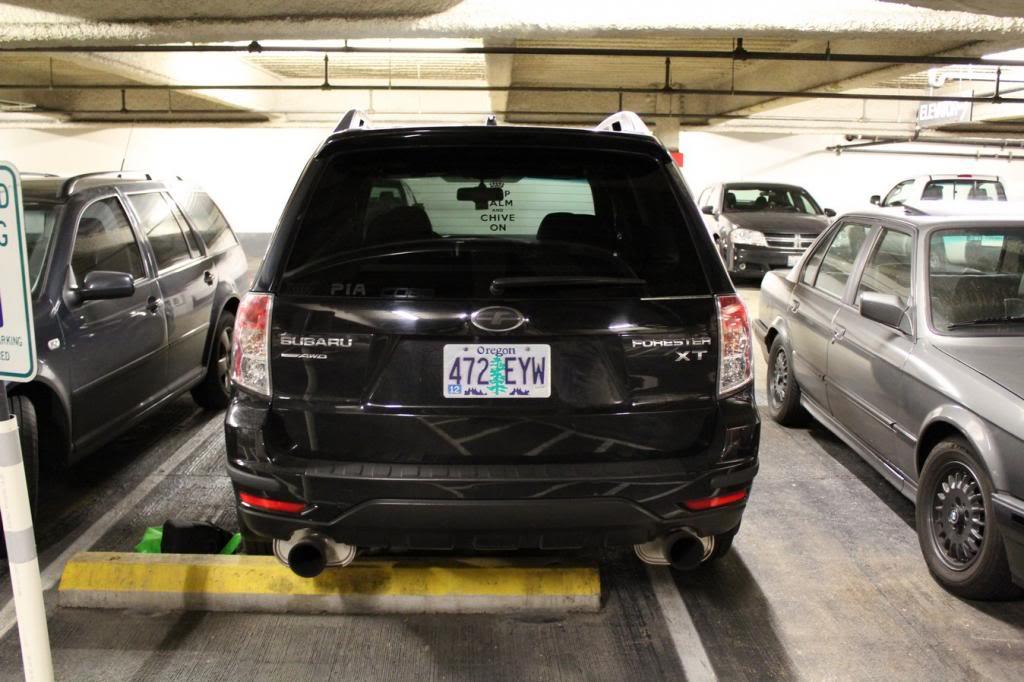
Looks like a fun little sleeper!
Posted by MPower on 10/12/20 @ 2:03:01 PM