You must be logged in to rate content!
3 minute(s) of a 82 minute read
1-7-2010
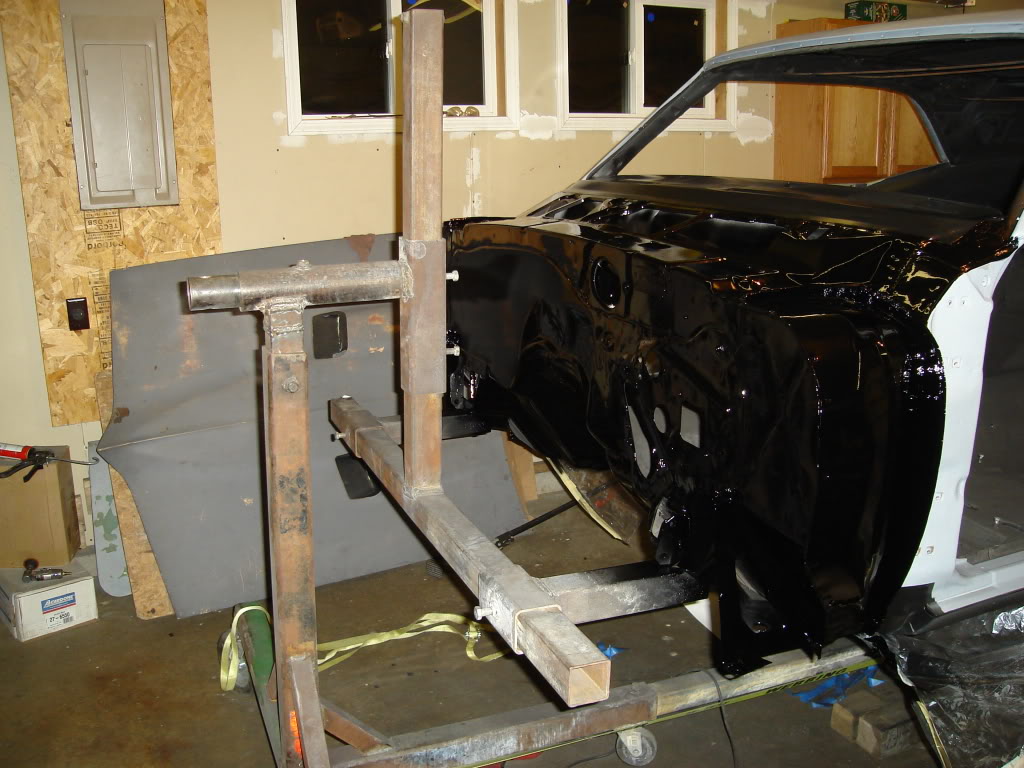
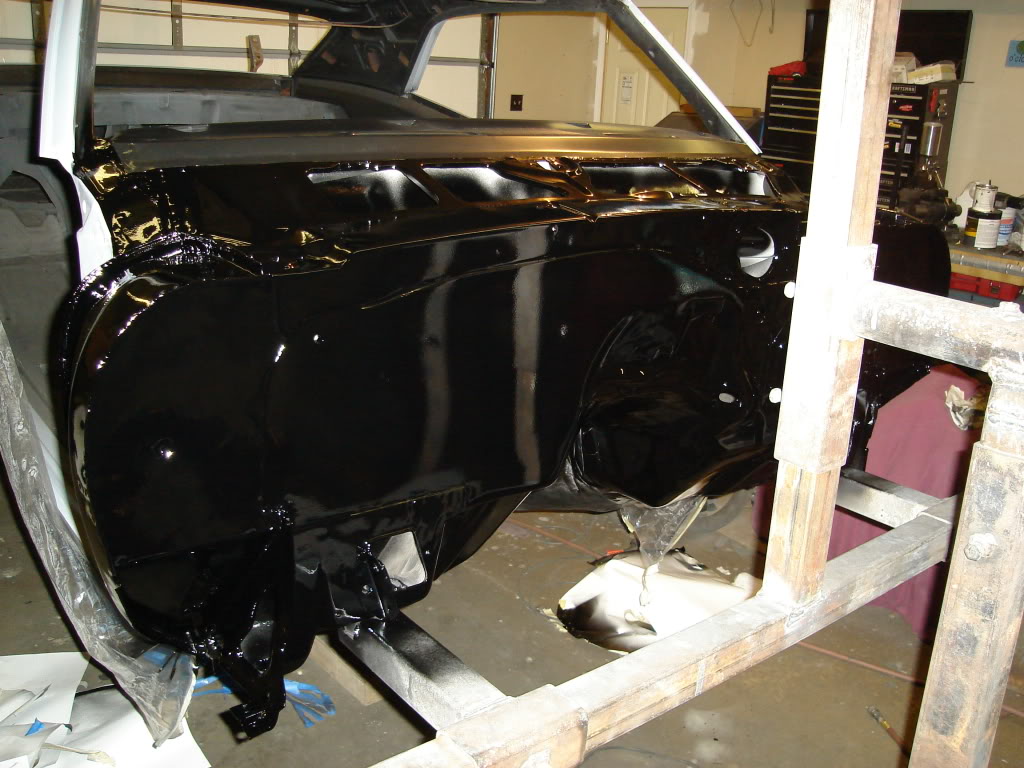
I spayed some PPG DCC gloss black paint on the firewall last night.
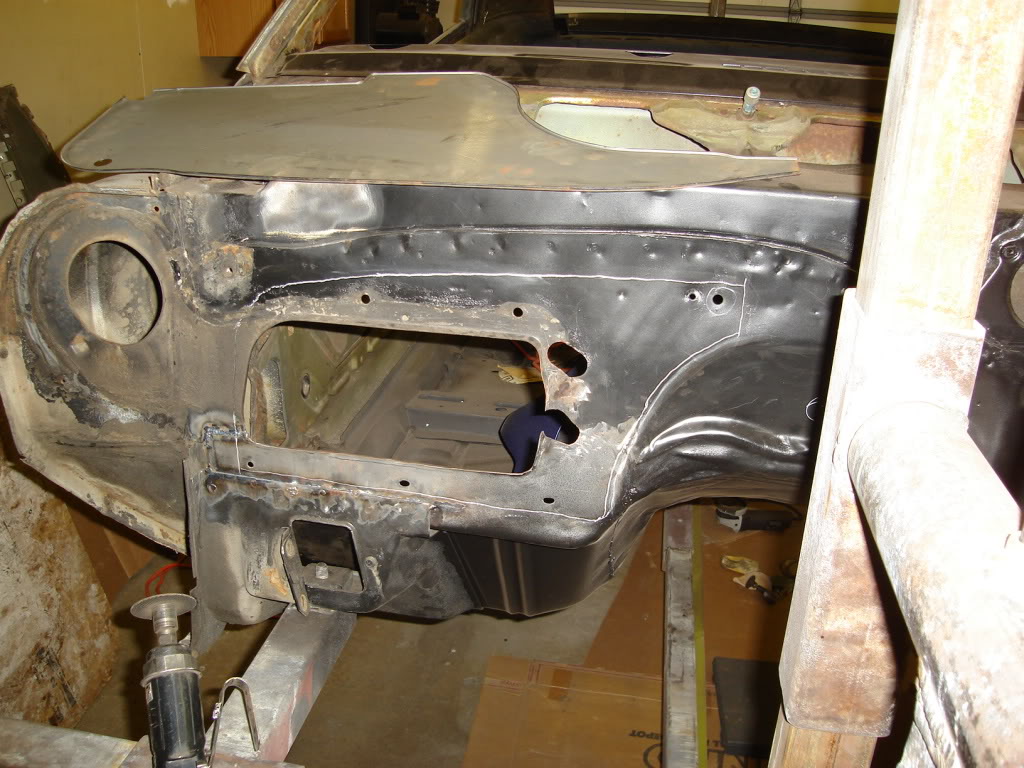
Here is one before pic first.
1-8-2010
I started with sanding the whole thing down to bare metal.
Cleaned with wax and grease remover
Acid etched all bare metal
Wiped down with tack cloth
Applied body filler numerous times
Sealed with primer sealer PPG DP90 (two coats)
You can top coat up to seven days but I'm not that fast
Applied seam sealer, let dry for at least one week
Scuffed down all primer
Applied heavy fill primer
Block sanded out filler primer
Wiped down with wax and grease remover,tack cloth
Sprayed primer sealer again
Waited to long and had to scuff down primer again LOL
Wax and grease remover,tack cloth
Sprayed primer sealer again DP90
Top coated with three coats of PPG DCC gloss black paint
I'll wait a few weeks and cut and buff the upper cowl and the area that I smoothed.
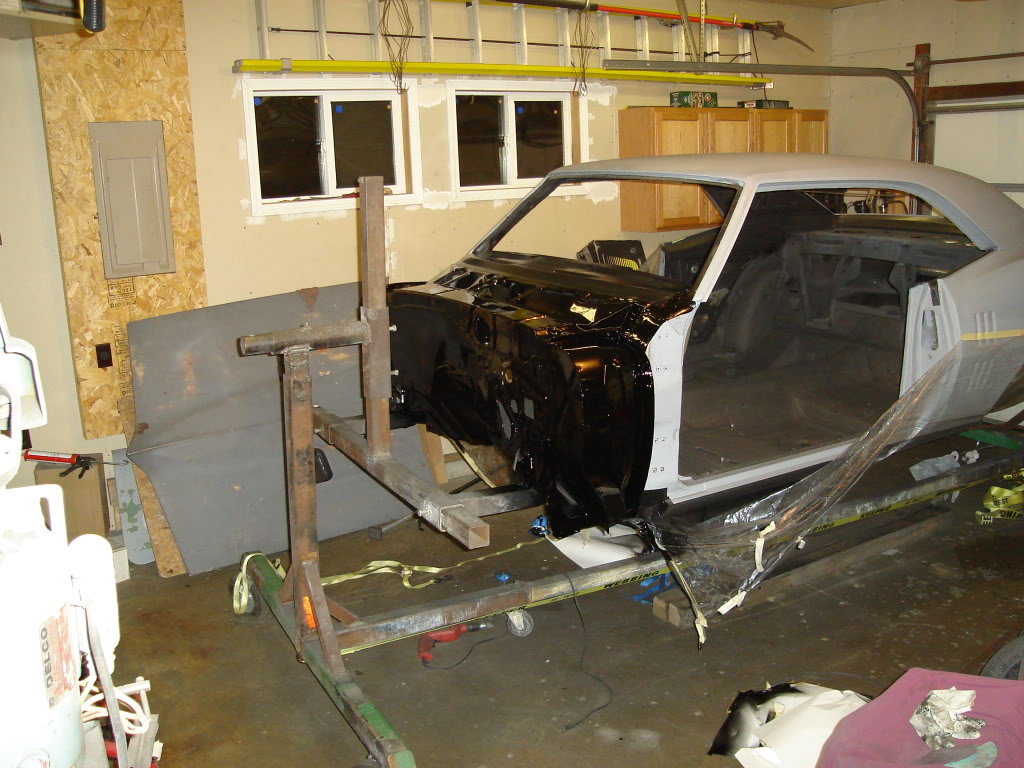
2-9-2010
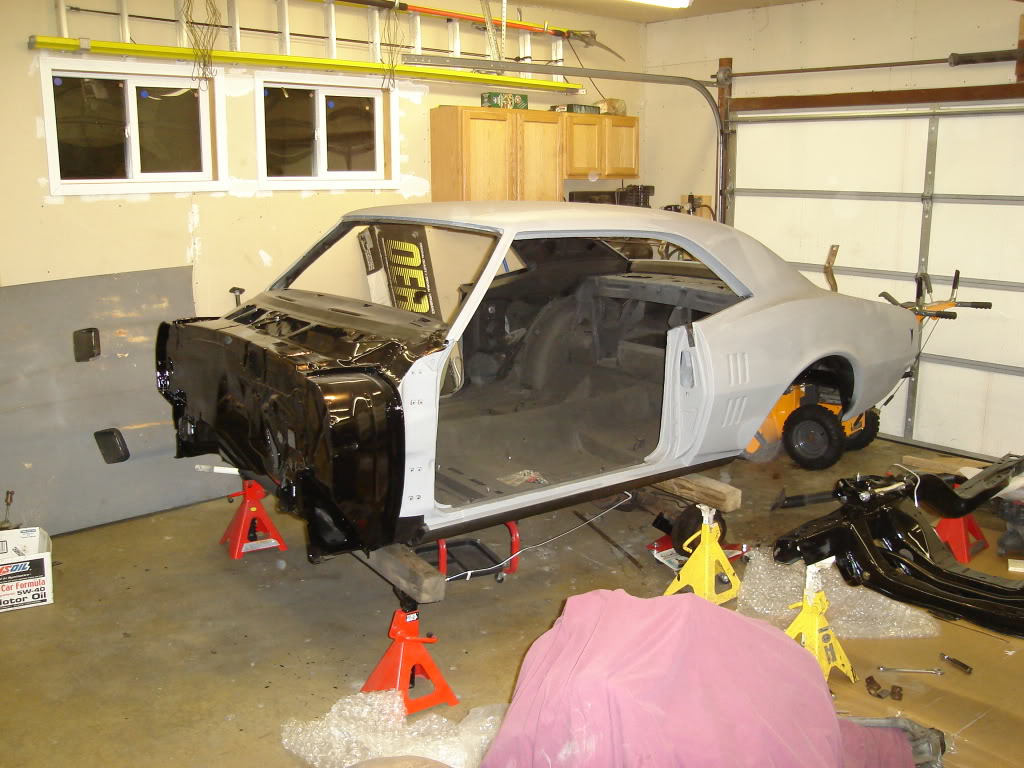
The big day finally came LOL the car is finally off of the rottisserie. Placed it on jack stands for now intill I get the subframe all put back together.
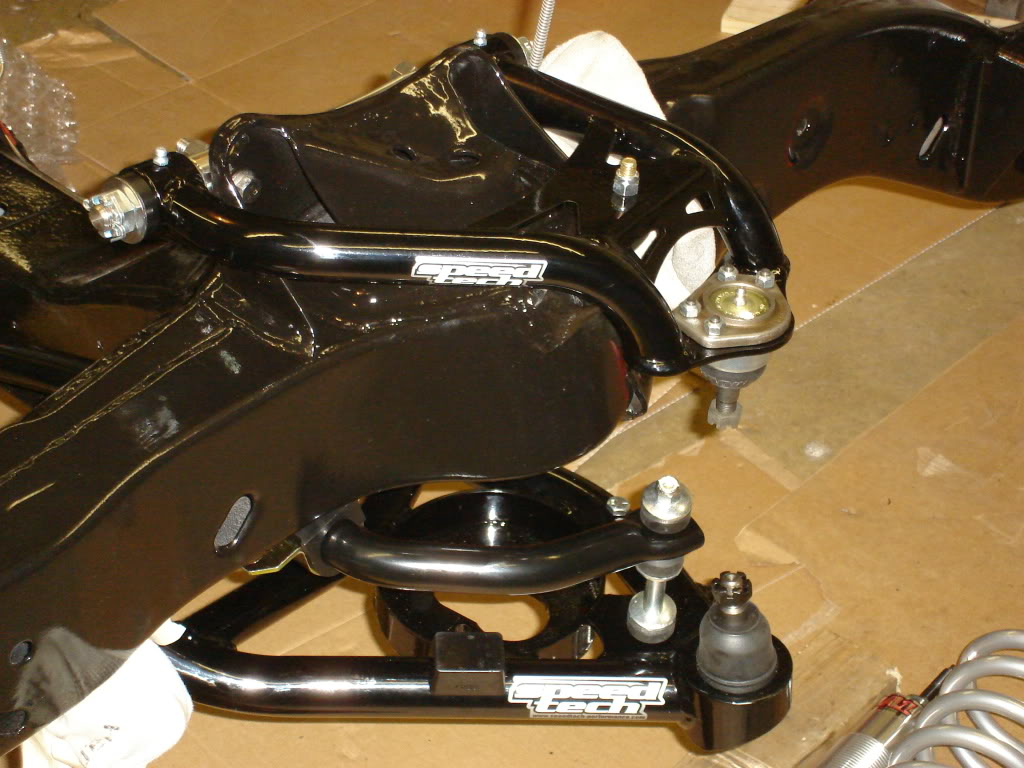
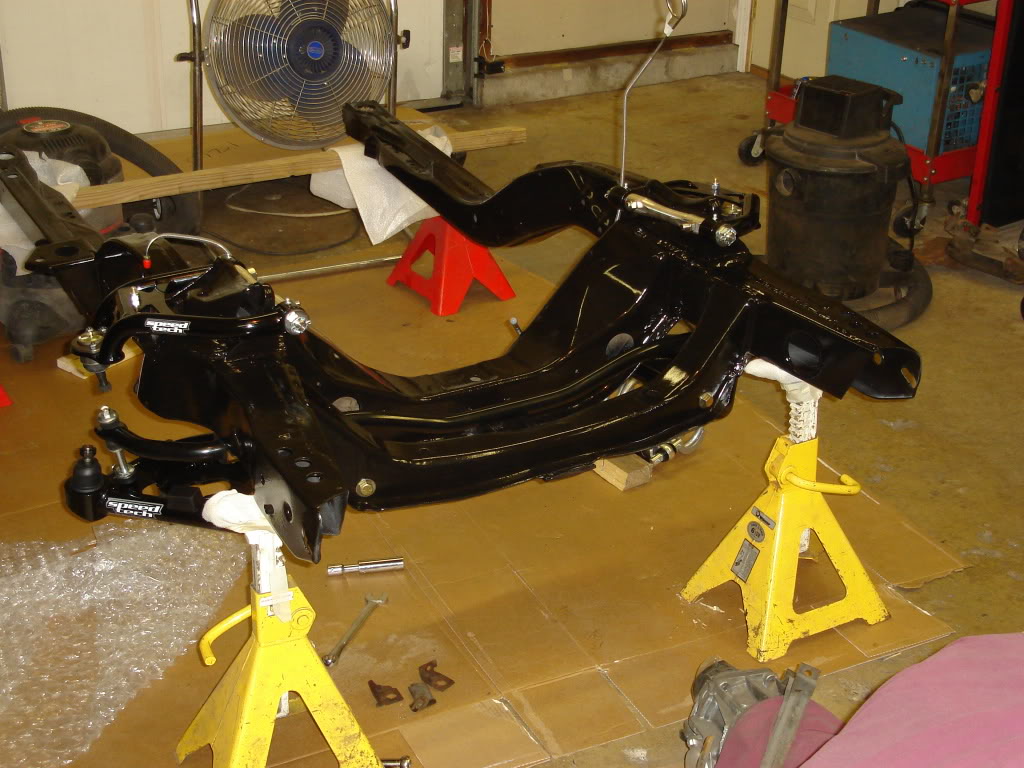
I tack welded the perches onto my 12 bolt. I will install it with the rest of the suspension and if the pinion angle is correct I will weld it solid and clean it up for paint.

I started putting on new parts. Lower and upper control arms, and sway bar. I will have to do a few mods to the sway bar to make it fit correctly. The bar is more than twice the size of the old one. So I will need to drill new holes in the frame and make some threaded plates for inside of the frame to bolt it to.
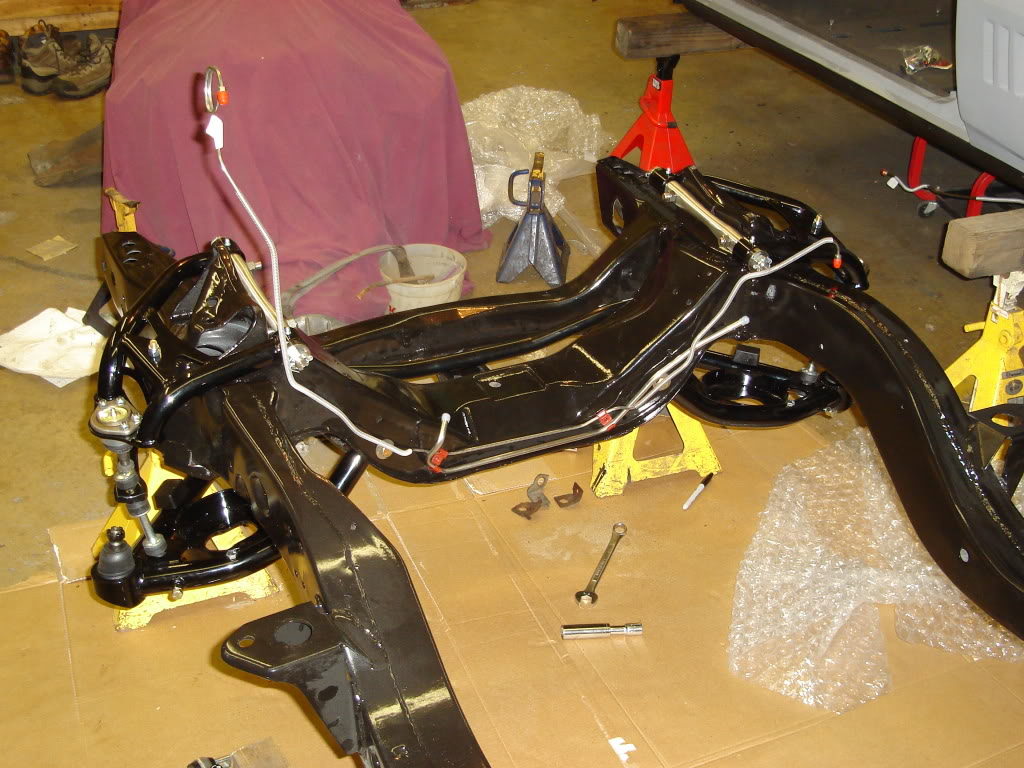
Worked on installing the rear brake lines and fuel lines. They have to go in before the engine is installed.
Comments

Great car!
Posted by Diggymart on 1/23/21 @ 2:12:47 AM

Beautiful car and I loved the documented build from start to finish.
Posted by [email protected] on 9/5/16 @ 12:41:07 AM
Great car!
Posted by Diggymart on 1/23/21 @ 2:12:48 AM