You must be logged in to rate content!
5 minute(s) of a 224 minute read
5-14-2009
.....of silver POR-15 on the passenger floor pan. This one showed up a few holes that I missed the first time around when I pulled the duct tape off the bottom.
I hurried home from work so I could get the first coat down by 5:00 PM, I finished by 4:58 and ate some dinner.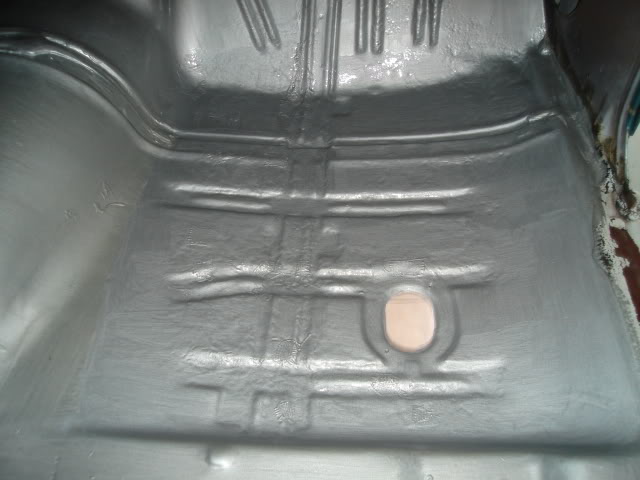
Right now I'm waiting for the second coat to tack-up so I can lay down the third and final coat and call the floors done. I wanted to get this done before the weekend so I can get under the dash and finish up the cleaning and final prep work before laying down the insulation pieces, I need to order the insulation in the next few days.
I know this build seems to be progressing slowly at this point, but as you know both collecting and paying for all of these pieces just doesn't happen overnight.
But some very cool stuff should be happening soon.
Thanks for looking!
5-16-2009
.....in preparation for the A/C install. The inner fender on the passenger side needed to come out so the old heater box assembly on the firewall could be removed.
The front bumper needed to come off first, it would have to be removed to do the body mount replacement anyway. The grilles were removed as well to have access to the core support so I can mount the condensor. There are also two 1-1/4" holes that need to be cut so the A/C hoses can pass through the support to the condensor.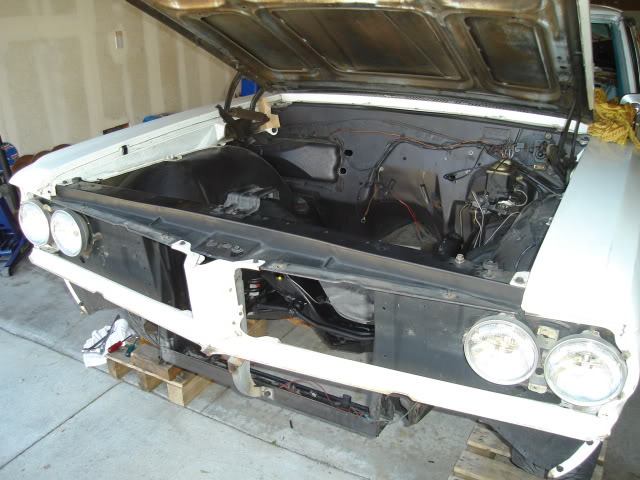
I took off the fender, even though the A/C kit instructions show it staying in place. It's easy to scratch up the paint on both the frame and inner fender trying to get it out with the fender in place.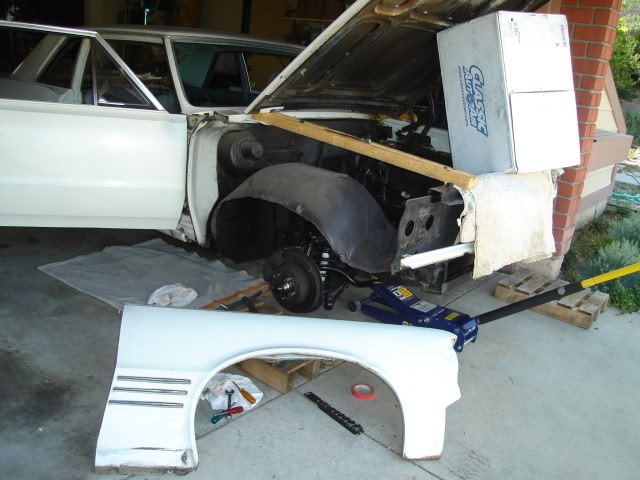
The heater box assembly came off easily by removing the last two screws that were still holding it to the firewall right next to the fan motor. The six nuts holding the rest of it down had already been removed while I was taking out the inner heater box under the dash.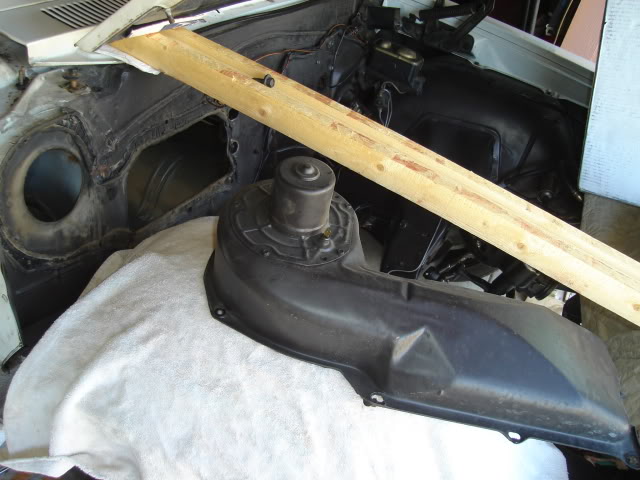
I used a putty knife to remove most of the factory sealer, the temps were in the 90s here today so the sealer was pretty soft. The remaining sealer residue came off easily using some old gasoline that I drained from the old Tempest fuel tank.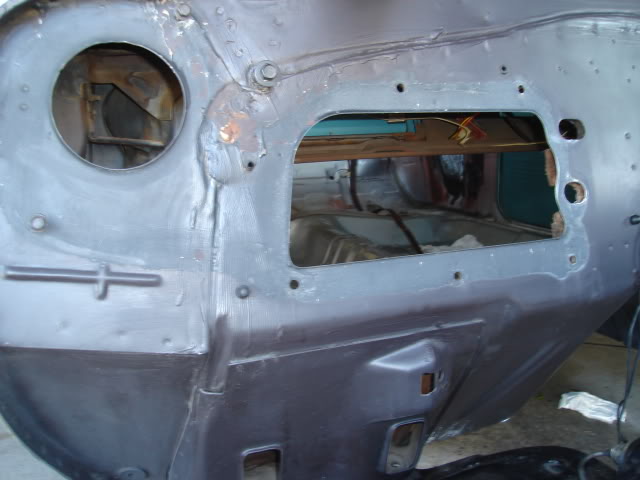
Here's the main blockoff plate that was supplied in the kit being held in place.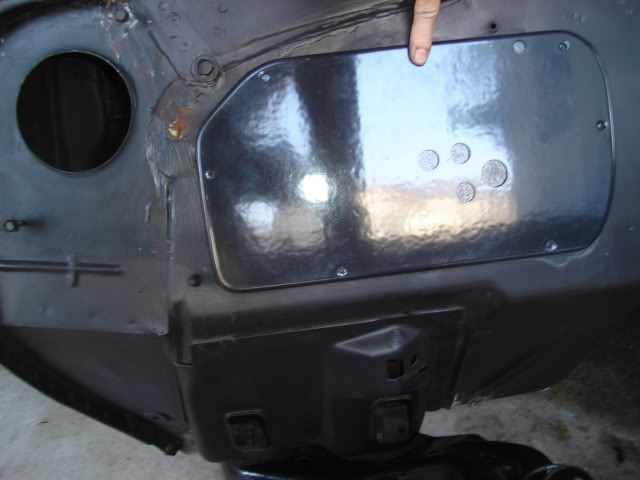
Rather than use the supplied blockoff plate for the heater blower opening I'll use this 4" hose adapter that I fabbed out of stainless steel. This way I can supply the LS3 intake with some cool air ducted from the cowl vents.
The hose adapter is a piece I removed from my '64 GTO when I retired it from the dragstrip and put the stock heater assembly back in.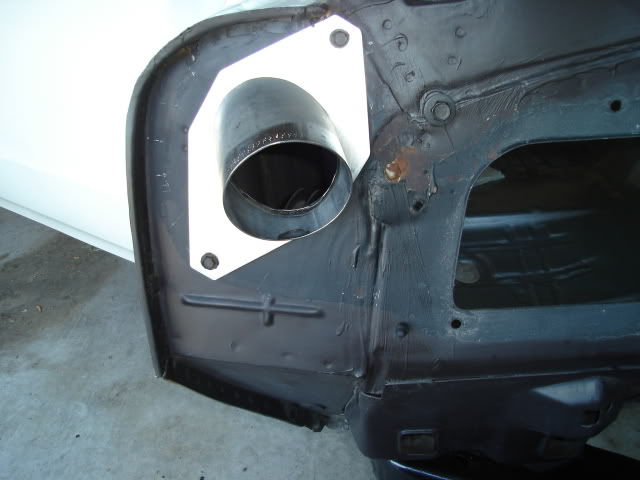
I scrounged this factory intake hose and several others like it from a self-serve boneyard about 15 years ago when the mid-70s GM cars could still be commonly found there.
Another view of the hose adapter and intake hose. I took the opportunity to tidy up the original white paint on the cowl with a little Simple Green. Did I say this thing was cherry?
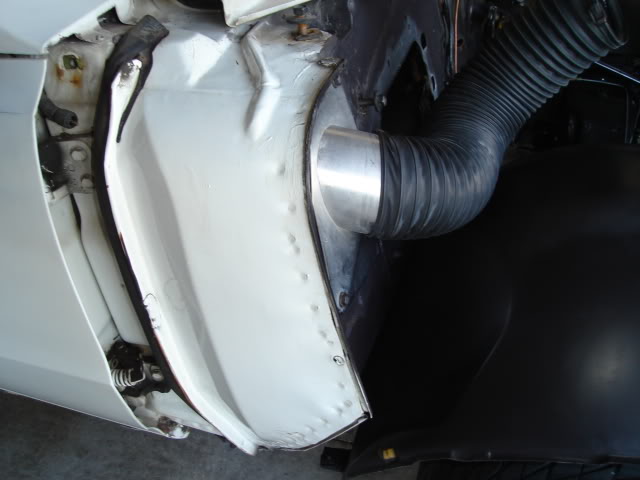
Heres a pic of the 455 HO engine in my GTO with the cool intake air from the cowl taken from two locations. The hose on the driver's side connects to another adapter that takes the place of the factory wiper motor, another thing I removed to save weight at the time.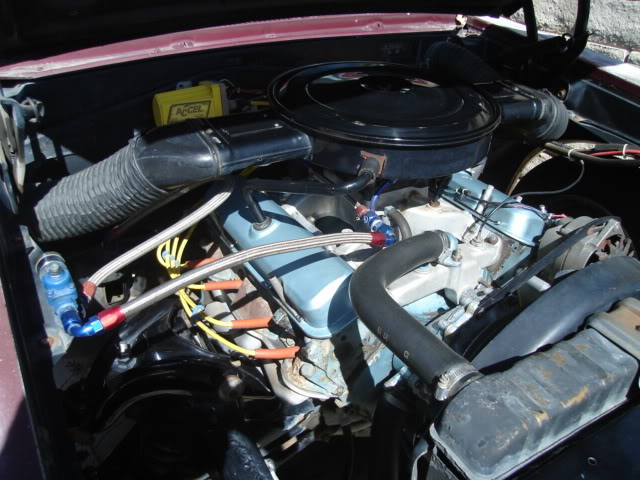
I'm looking at doing something similar with the LS3 but with only one inlet. I'm going to see if I can mount a stock '73 -'74 Pontiac V8 aircleaner on top of the engine just like the one pictured above.
Hopefully there's going to be room to build a big enough intake plenum over the stock LS3 intake to mount the air cleaner on and still get the airflow needed. No matter what I'll find a way to duct cool air from my fitting at the heater blower opening to some sort of air filter.
Still goin' at it.

The Tempest!
Posted by Diggymart on 3/26/21 @ 3:09:22 PM