You must be logged in to rate content!
10 minute(s) of a 390 minute read
1-28-2013
1-28-2013
I've been in Fairfield, CA all this month so there are no real physical updates to the car. However, my temporary relocation did bring a nice surprise. I got to spend some time down at Rotary Extreme in Union City to observe and even participate in some of Ben's recent R&D for his newest designed Vmount kit.
Being a relative long time customer, when he told me he had some great ideas for what is to be his final redesign of the Vmount kit, I was all ears. My initial reaction was that the more slanted angle of the intercooler would help my obvious space issues. But, there was more sweetness that I didn't know. He has relocated the condenser to the backside of the radiator allowing the radiator to get full blast fresh air, while the condenser still gets pulled flow from the fans while the AC is on.
I got a chance to see the setup work on his R&D car, and I I gotta say, I was impressed. Overall fitment looked great. As our condensers get pretty grubby from use, it was nice to finally see those red and blue Koyo lettering, and the signature polished radiator core that RE provides. The condenser now remains completely hidden on the backside. Custom spacers allow the fans to mount in the OEM position. The overall drop of the system was no lower than the sway bar. Overall, a very slick design.
I even got a chance to drive his FD to feel the A/C efficiency. While driving, the change was invisible as the system was very efficient. The system only began to slightly heat soak as he let it sit and idle for 15+ minutes. Though still cool, it wasn't "as" cold. Granted, this is pretty much the nature of all AC systems. Additionally, his car is a 95 with the wonderful 134a we all love. I look forward to giving my system a charge of the renowned champ ES-12 with this design.
There were quite a few other upgrades including a powdercoated intercooler mounting frame, and included ducting. I'm sure Ben will chime in with more details as the kit comes to fruition.
Overall, it was a really cool experience getting to see the company first hand, and meeting the owner. I look forward to bolting on my new shiny parts ![]() .
.
5-12-2013
Finally time to post up some updates....
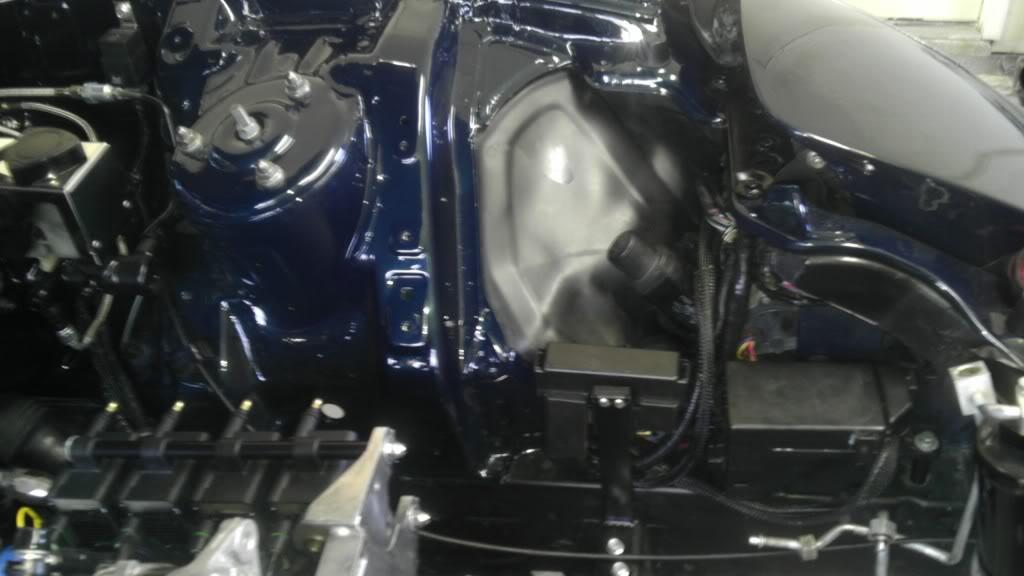
WIRING
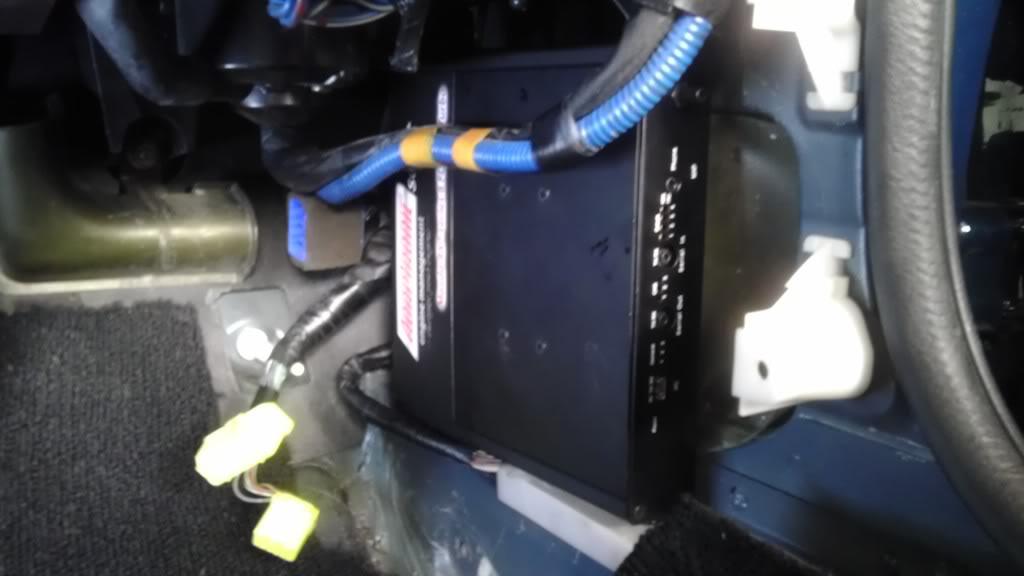
Just when you think you're done... there are more things to wire up! My "tuck" turned into a combination of fuse box relocation and some wire tucking. Overall, I am pleased with the result. As I mentioned, I was debating on moving the box to the rear, or bin, or the roof ![]() . Somewhere other than its ugly stock location. What I decided was hopefully the best of both form and function. I relocated the boxes to the lower frame rail. I then routed all engine side wiring through the fender and back under the brake booster. It turned out pretty clean, and didn't unnecessarily extend wiring through the car. With my Vmount, and upper custom shroud, they will be quite hidden.
. Somewhere other than its ugly stock location. What I decided was hopefully the best of both form and function. I relocated the boxes to the lower frame rail. I then routed all engine side wiring through the fender and back under the brake booster. It turned out pretty clean, and didn't unnecessarily extend wiring through the car. With my Vmount, and upper custom shroud, they will be quite hidden.
The Rywire harness turned out great! clean and easy to install!
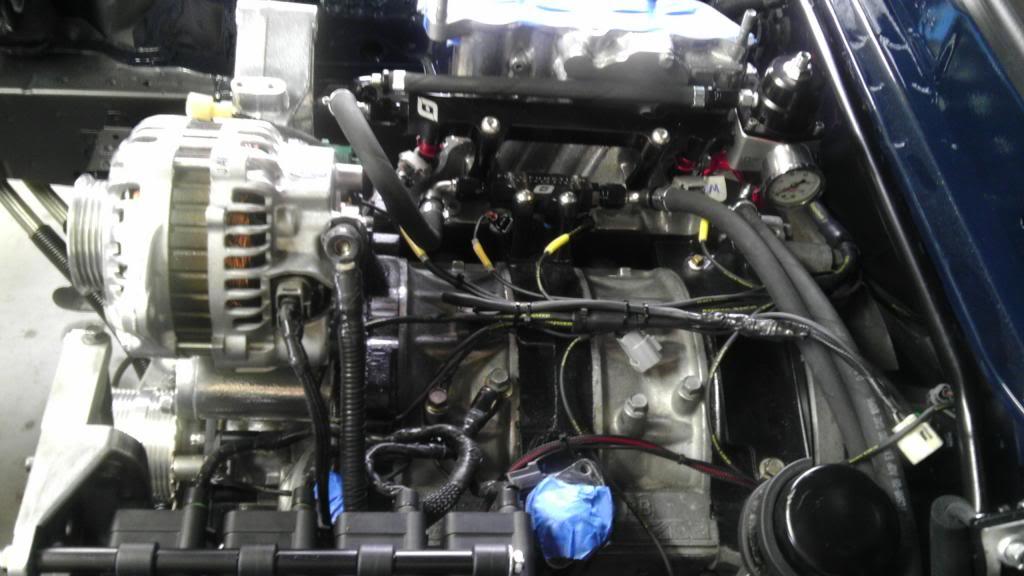
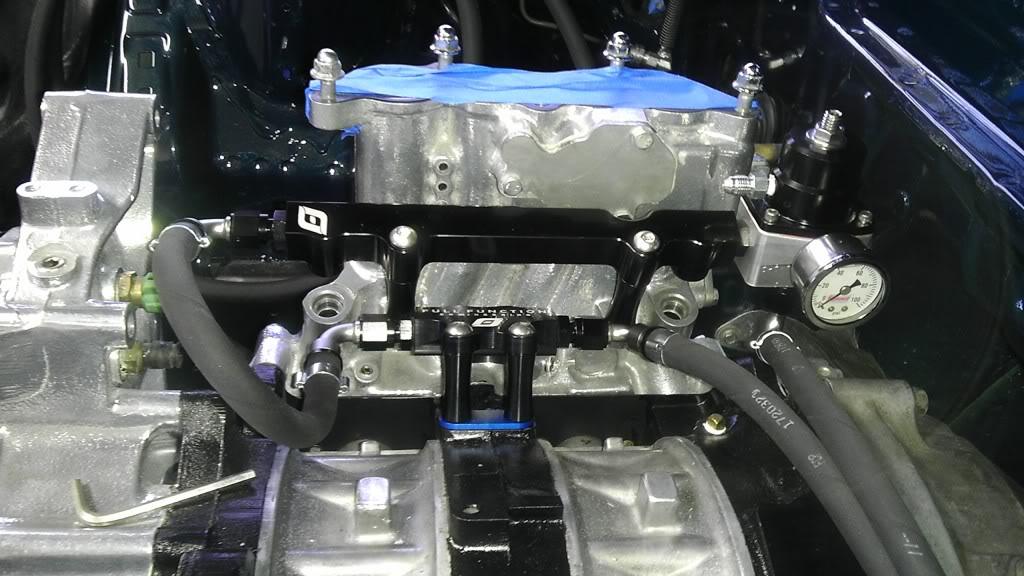
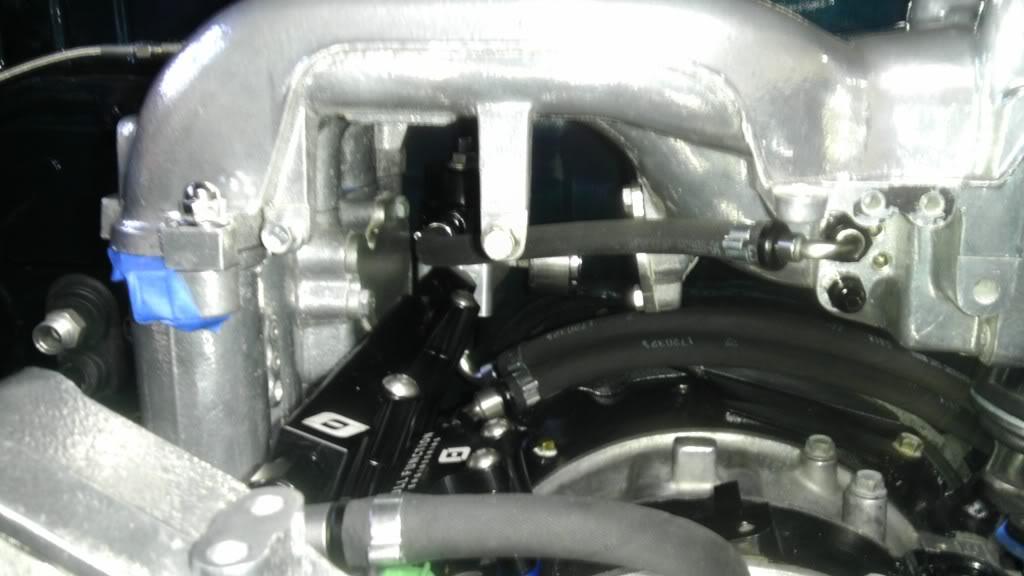
FUEL
The fuel system is pretty much complete. I used Pushloc fittings with Otiker clamps and they turned out well. I have tested the system up to 75psi without a single leak. It's amazing how much easier it is to work with those FFE Rails. On the pump side, I do plan to replace the factory plug with a higher amp aftermarket. I have yet to have issues, but I have seen some of them melt causing nasty effects.
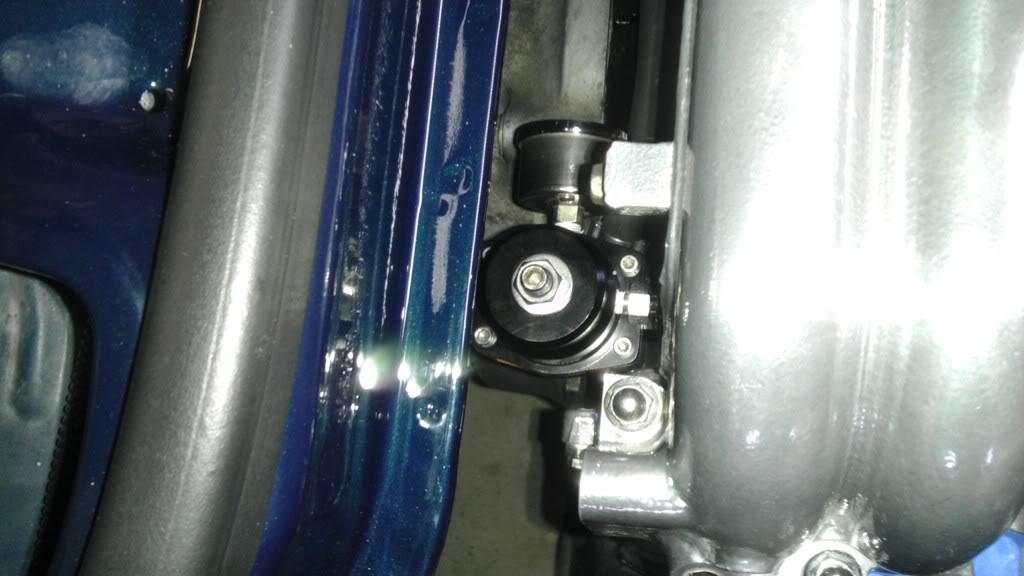
I decided to mount the FPR to the secondary rail. A trick I picked up from the Sake Bomb boys ![]() . It worked out very well and clearance was not an issue with the factory manifolds and FFE rails. I did have to use a 120 fitting on the return, but everything turned out great. Thanks Dan & John for the idea. I am still running a series system as you can see, but I have no doubts that it will perform to my expected power level. Yes, the little blue injector spacer is black now
. It worked out very well and clearance was not an issue with the factory manifolds and FFE rails. I did have to use a 120 fitting on the return, but everything turned out great. Thanks Dan & John for the idea. I am still running a series system as you can see, but I have no doubts that it will perform to my expected power level. Yes, the little blue injector spacer is black now ![]() .
.
ECU
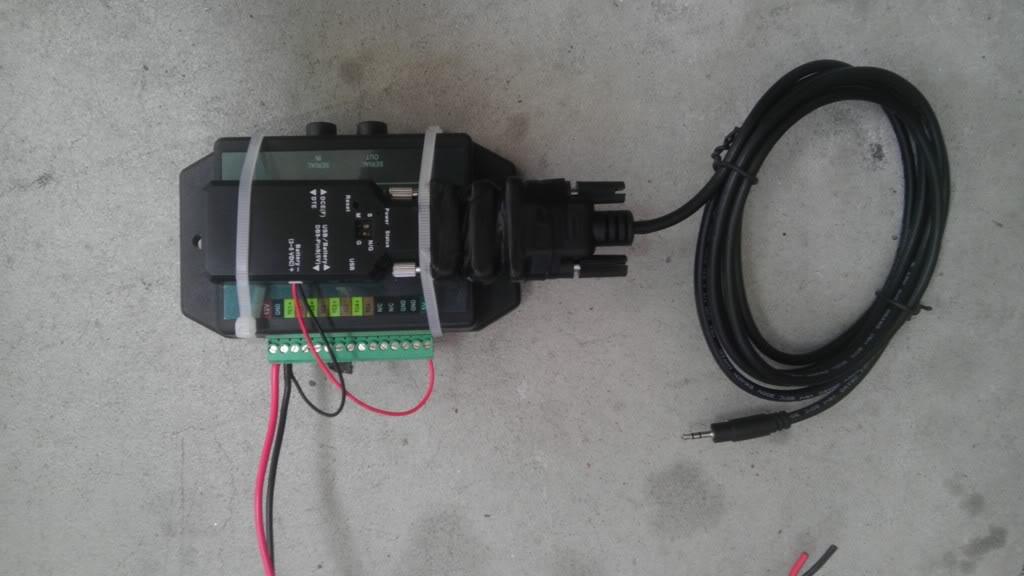
I received my new Adaptronic Select ECU and started playing with it right away. As I have probably mentioned, I am not a tuner. Thus far, I like the ECU. The features and setup are pretty straightforward. With the Adaptronic I wanted to do a few things differently.
- Dual EGT logging and a new wideband: The Adaptronic has Serial input/outputs and workes very well with the Innovative wideband. During closed loop tuning and adaptive learning, the wideband self checks the sensor for accuracy and reports to the ECU if things are off. This triggers open loop before the map is edited wrong, or bad things happen. Innovative also has an EGT thermocoupler module called the TC-4. Like most serial devices you can piggyback them into the ECU for logging or viewing.
- AI control, boost by gear, direct fire, and traction control:....OH MY! A few of the features of the Adaptronic are pretty sweet for a plug-in ECU. I setup the ECU to control boost via a MAC solenoid, as well as controlling my water injection solenoid. The boost by gear will take some time to setup, but will likely prove useful considering my power level and traction issues. I also switched to AEM coils with direct fire that I will outline below. As far as traction control goes, I'm not there yet. This will likely be a coming winter project as I start to get the car sorted out, tuned, and laying down rubber. Nonetheless, pretty exciting to see this feature.
- Adaptive Tuner: This is a pretty cool feature. Essentially an Android App developed by a savvy enthusiast. It interfaces with the serial connection of the ECU via Bluetooth, and displays engine metrics, and adaptive learning flags. As updates have been released, we can now edit the fuel map via smart phone.... Pretty neat.
The bluetooth dongle requires 5v for power. How ironic the TC-4 has a 5v output for sensors. ![]()
GALAXY PAD
As I once again began to look at my gauge options and knowing I would be putting a better stereo in, it really fell into place. I had a decent array of Defi gauges that worked well. But with all of the sensors and added interior affect I was looking for a cleaner solution. I have been following Adaptronic's updates on their PLX gauge integration. Not to say I will not put a single column PLX DM100 gauge in later, but we will see how it works out.
The Pad install has been going well, though not quite finished. My video below outlines the updates..
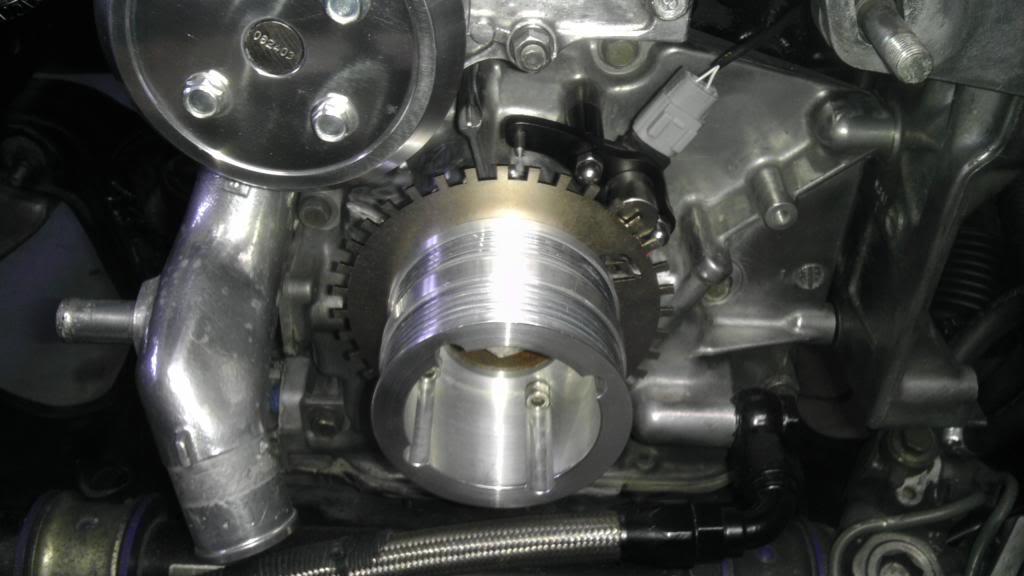
DIRECT FIRE, FFE, and AEM COILS
Like others, I made the move to AEM coils. The Adaptronic has the ability to utilize the FFE trigger kit, and direct fire ignition. My previous coil setup performed well with the HKS Twin Power, but I wanted to upgrade anyway. My mounting solution turned out pretty well I think. The coil bracket holes are spaced identical to the power steering brackets....go figure. With some spacers from McMasters, and a set of custom wires from Magnecor, I am in business. I do plan to add a support bracket to the rear of the coils. As you can see, they are counter hung from the bolts. Though very solid, I think a support bracket is in order.

BETTER FLOW!
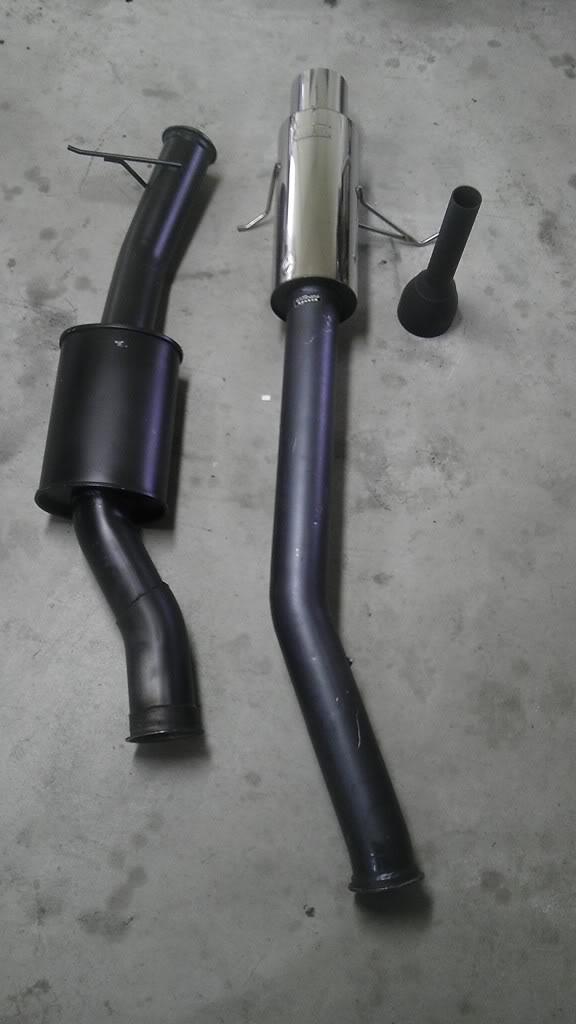
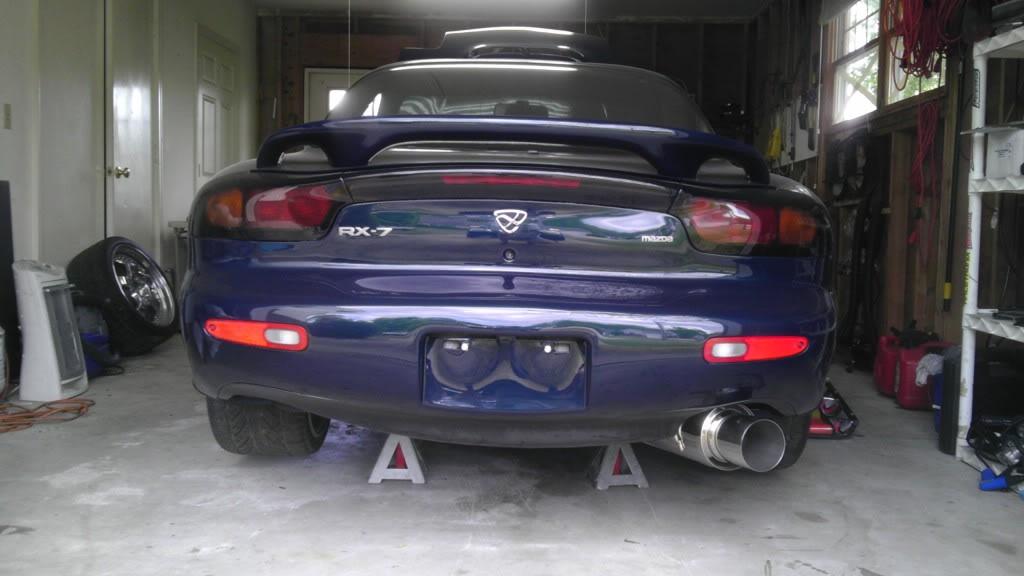
With my new power goals, I had to get the entire hotside sorted out. The T4 Ptrim 1.15ar 35R was a step in the right direction. So I bit the bullet on a proper manifold setup. I am awaiting my dual wastegate Turblown manifold and 4" downpipe. Pics coming soon. My plan has been to go with a full 4" exhaust. Of course, this represents a problem with actually having it made, making it myself, towing the car to and from a shop, and all the problems that present themselves with a custom piece. I recently stumbled onto a 3.75" Greddy Race exhaust and I didn't think twice on clicking the "Buy from Goodfella" button. For those that don't know, this exhaust was discontinued quite some time ago. The mid section has even been modified to fit a 4" vband downpipe. Magical...
More updates on the way.....
- More ceramichromed parts
- More wiring
- No more silicone vacuum lines... ever.
- Rotary Extreme's NEW Vmount design!!
- WI revisions
Thanks everyone!!!