You must be logged in to rate content!
60 minute(s) of a 124 minute read
1-6-2021
LS1 Miata Build Thread
Compliments of fourwhls @ http://www.roadraceautox.com
I have discussed this build quite a few time on here, but I figured it was time to get off my ass and document it. I'm not even sure this is the appropriate place for a build thread, but since there is so much fabrication and design going into it, it seemed appropriate.
My build started in November 2009 and is still not done.
Procrastination and having a great co-drive for autocross has slowed down the progress significantly. My autocross season is from March to November, note the lack of progress in those months.
My goal is to have it done for my first local autocross in March 2011. I am off work the next week and hope to get a lot done.
The following posts with dates at the top are to get everyone up to speed. Here we go....
11/30/09
***THE OLD***
Chassis:
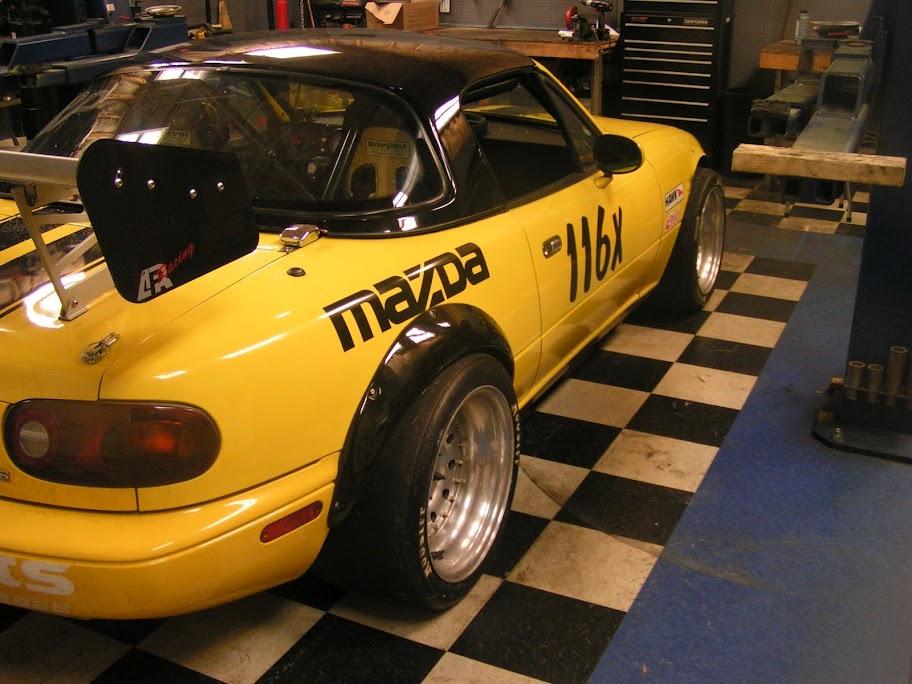
1992 A-package (Sunburst Yellow with Black Stripes)
131K miles
Hardtop
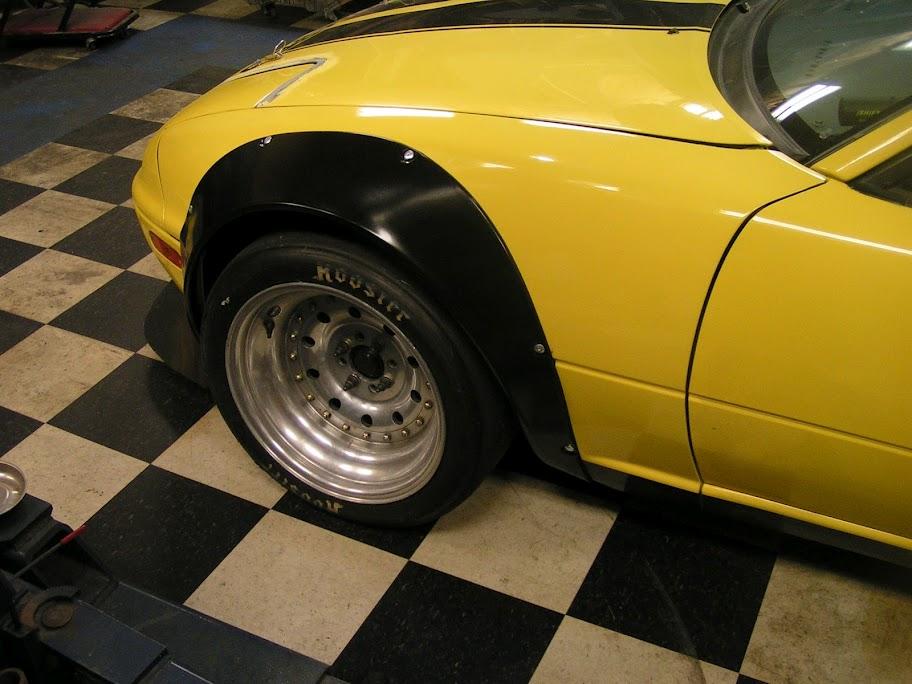
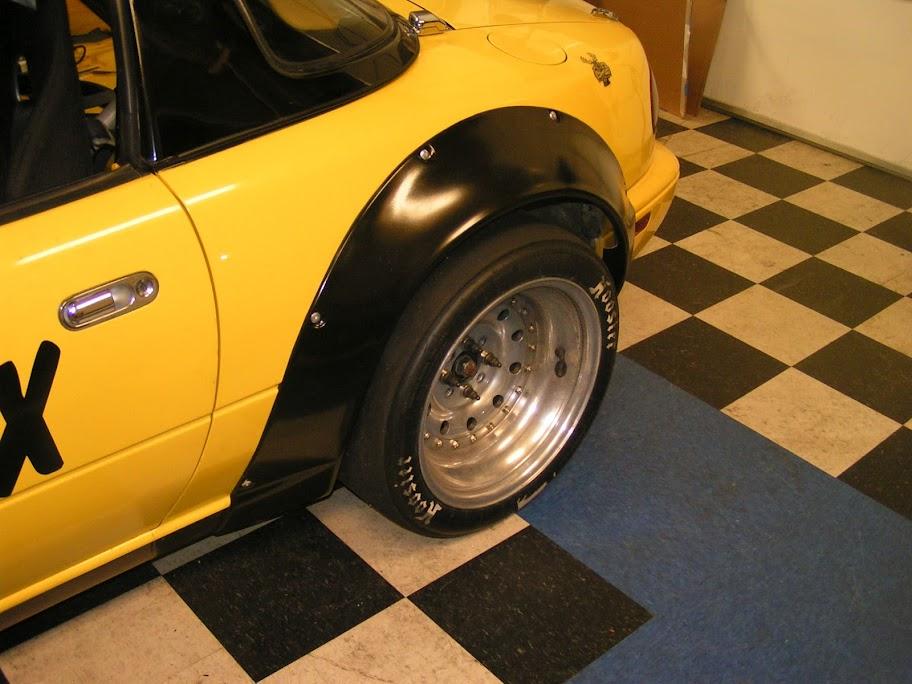
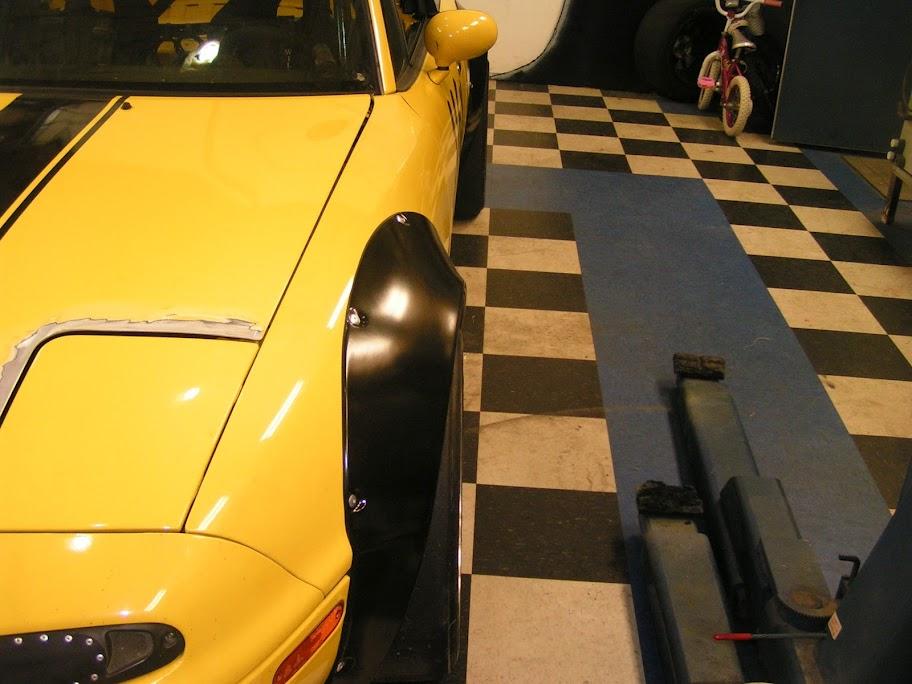
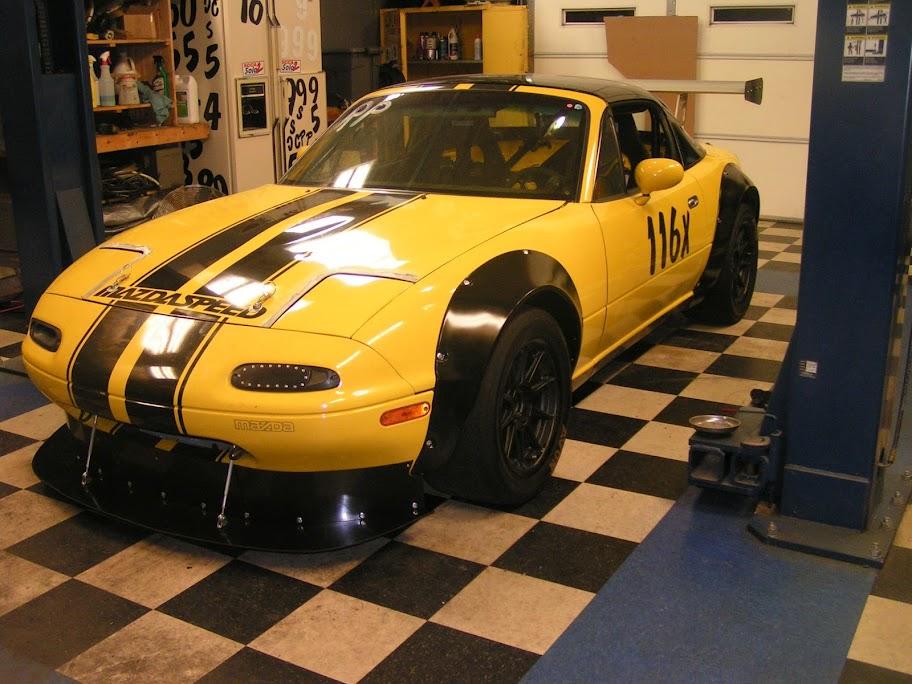
Autokonexion Fender Flares
Garage Vary Front Lip
APR GTII Wing
‘99+ Brakes and Rotors
Suspension:
Ground Control Coilovers (750/450)
Koni Race Spec Shocks
Racing Beat Hollow Front Sway Bar
Stock/No Rear Sway Bar
Polyurethane Offset Bushings
Wheels/Tires:
275/35-15 Hoosiers on 15x10 Keizers for AX
225/45-15 Toyo R888s on 15x9 6ULs for Track/Street
Interior:
17in Ultrashield Rally Sport Seats (Driver and Passenger)
350mm Momo Mod 78 Steering Wheel
Harddog HCDD Roll Bar
Willians 6pt Harnesses
Soft top removed
Previous Driveline:
Coldside Supercharged ’00 1.8L (225 RWHP)
5spd Transmission
4.3 Torsen Differential
Starting weight (as described above with the 6ULs):
2264 Lbs without driver
Weight Distribution- 51%F, 49%R without driver
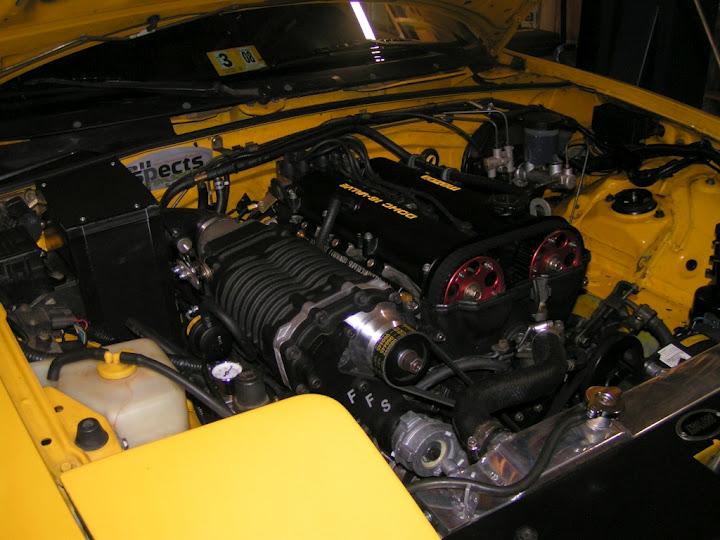
***THE NEW***
New Engine/Transmission (V8R Kit):
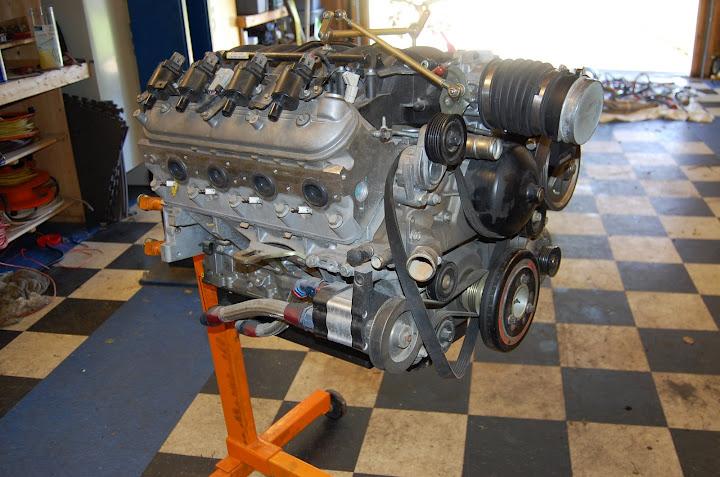
ASA Spec (stock car) LS1 5700 engine (Built by Lingenfelter Performance Engineering)
(430HP/430Tq)
GM Raceshop Bottom End
Lingenfelter reliability/performance head work
ASA Spec Custom Cam
Complete Dry Sump Oil System (Peterson pump, filters, tank, Moroso pan)
ATI Super Damper
T56
Clutch/Flywheel (TBD)
Willwood Clutch Master Cylinder
Here's a video of this cam in a F-body LS1: [IMG]http://www.youtube.com/watch?v=uL1OhyPw9Sw
Rear End:
Mazda RX7 Turbo II Carrier
Mazda 929 Differential (3.73)
Mazda RX7 Turbo II LSD (clutch)
Mazda RX7 Turbo II Half Shafts
Miataroadster Hubs
Brakes:
Wilwood SL-6R 6 Piston Front Calipers
Brembo 4 Piston Rear Calipers
11.75in x 1.25in Rotors Front and Rear
Mazdaspeed Miata Master Cylinder/Booster
Wheels/Tires:
23.5 x 11 x 16 Hoosier Radial Slicks (R75) on 16x11 Real Wheels for AX
Track tires TBD
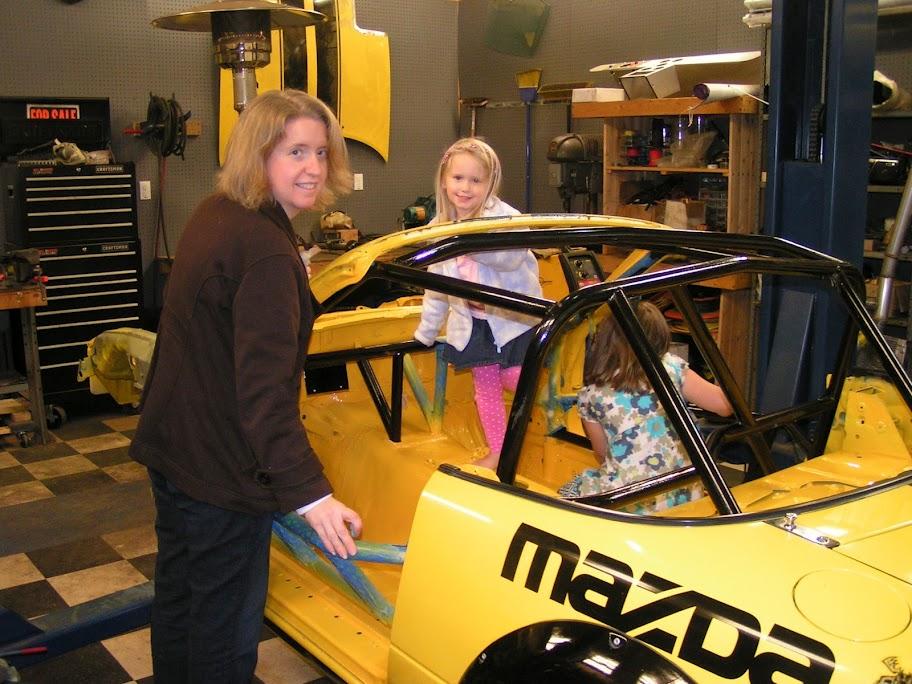
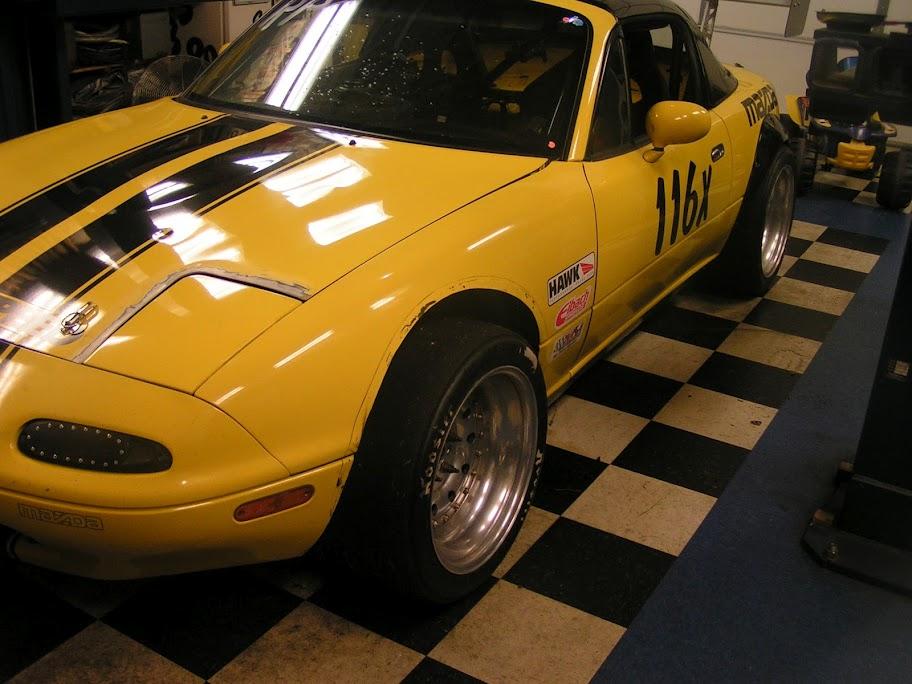
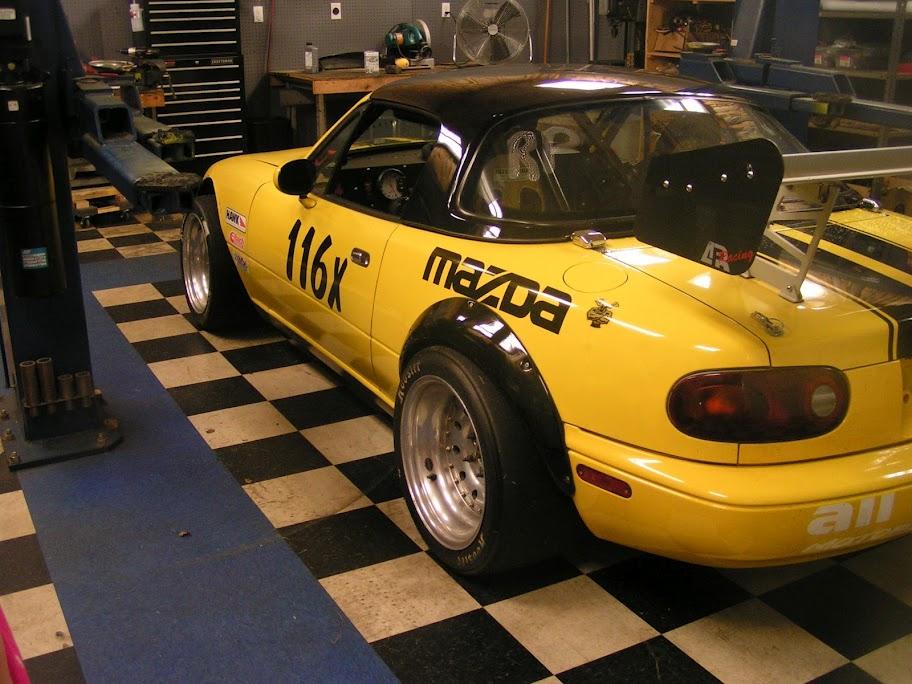
Here's a couple "before" pictures of my car. I have some in-process tear down pictures that I will add later.

I will try and document the progress here: http://picasaweb.google.com/fourwhls/MiataV8#
Hopefully I will keep the camera handy this time. I said I was going to take progress pictures with previous projects and never kept up. I always got the start and finish, but missed quite a few in between.
12/7/09
The tear down begins....
Now you see it...
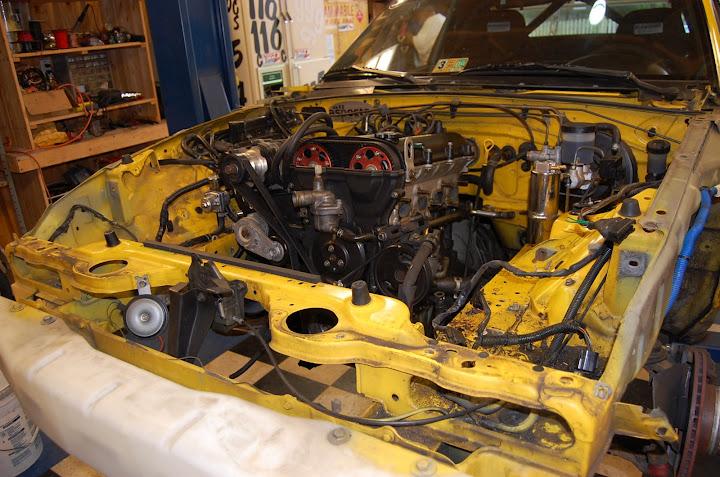
Now you don't...
New engine...
12/7/09
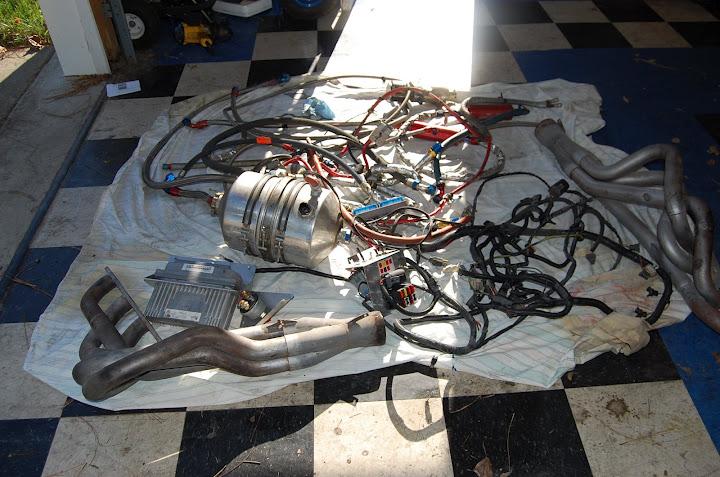
Engine accessories....
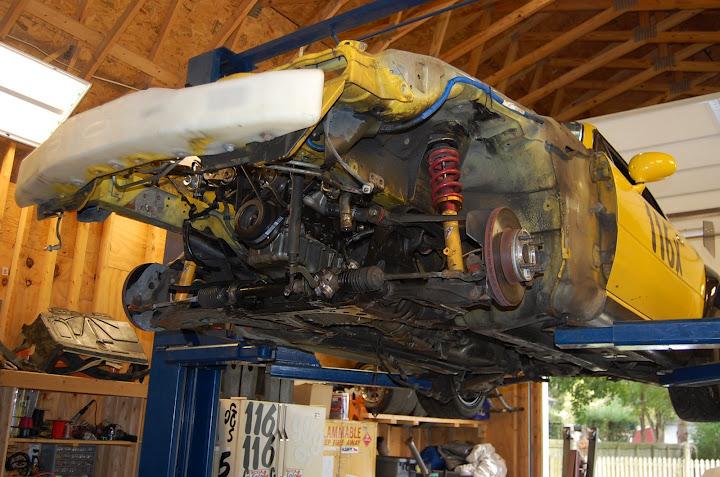
I gutted an ASA Stock Car. Stand alone harness, every hose, switch, wire, gauge, oil tank, etc.
I left an empty chassis.
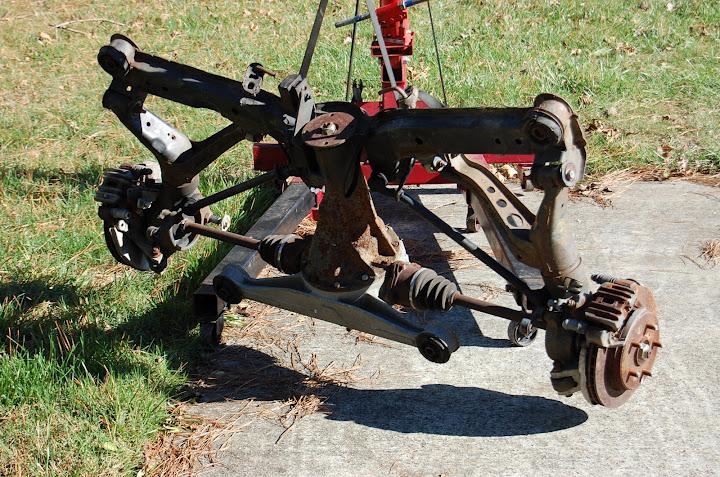
Donor rear end (only housing, limited slip, and half shafts will be used)
12/27/09
I had a few hours to mess with my car this afternoon.
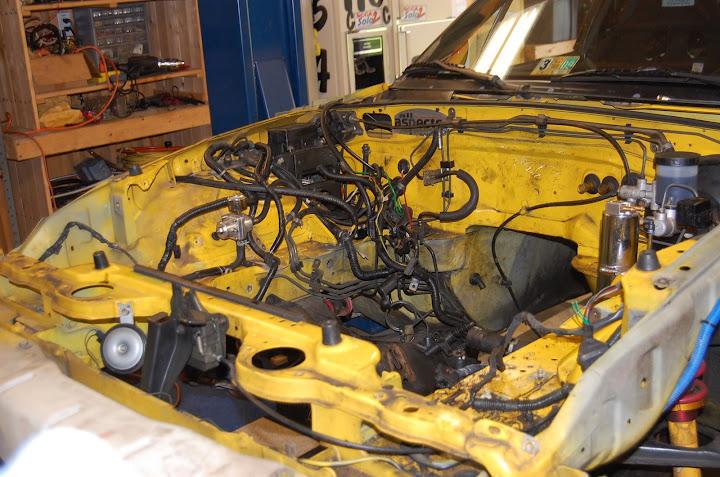
I drained the gas tank, then removed all the fuel lines. I then starting cleaning up the last few items in preparation for starting the tranny tunnel cutting and got completely side tracked.
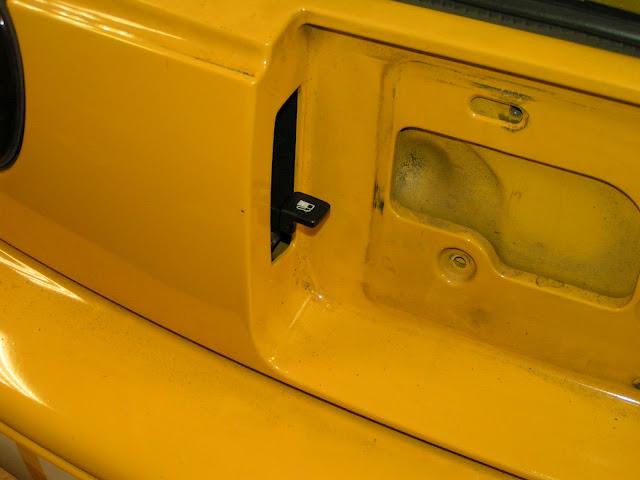
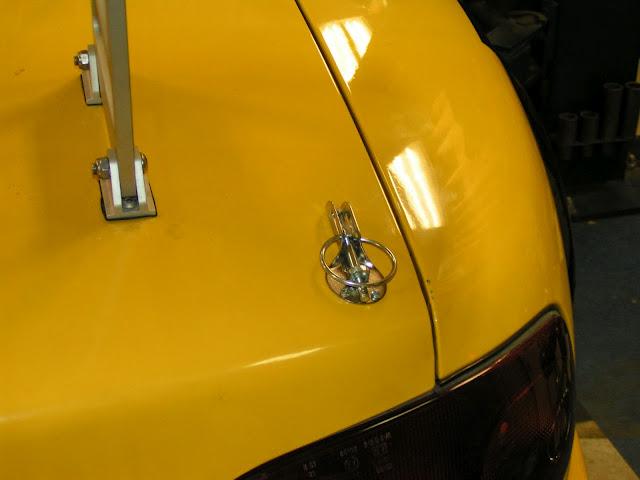
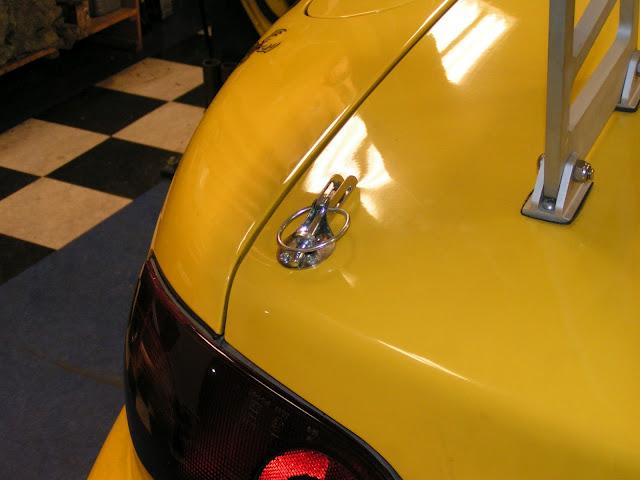
I decided I wanted to get rid of the trunk release and gas cap release from inside the passenger area. I had a set of hood pins sitting in the garage, so I pulled out the drill and went to town. I completely removed the trunk latch as well as the release cable.
I then got a little creative with the gas cap release. My initial intention was to leave the cable in the trunk and open the trunk and pull the cable to release the gas cap. I thought it through and decided to go a different route. I built a custom mount and put the gas tank release where the driver's side license plate lamp would be. I can now release the gas cap from the outside. Kinda overkill, but fun.
Here are a few pics.
1/2/10
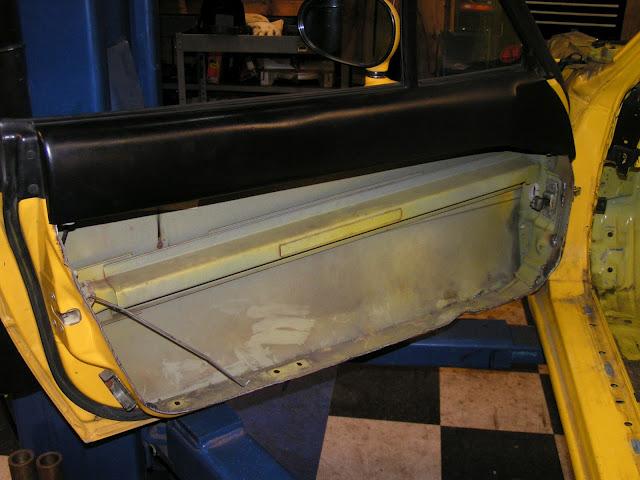
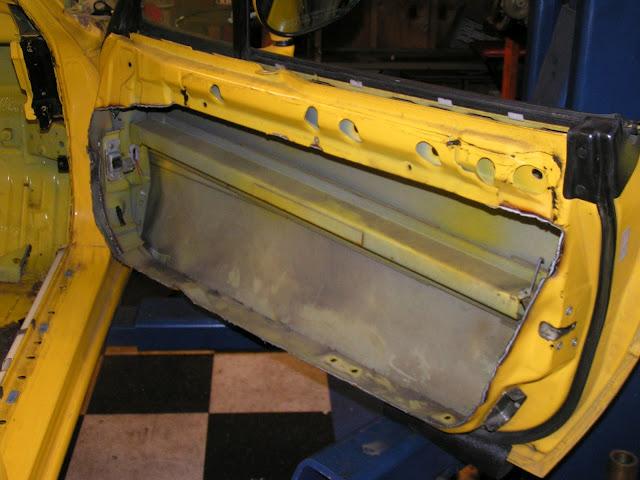
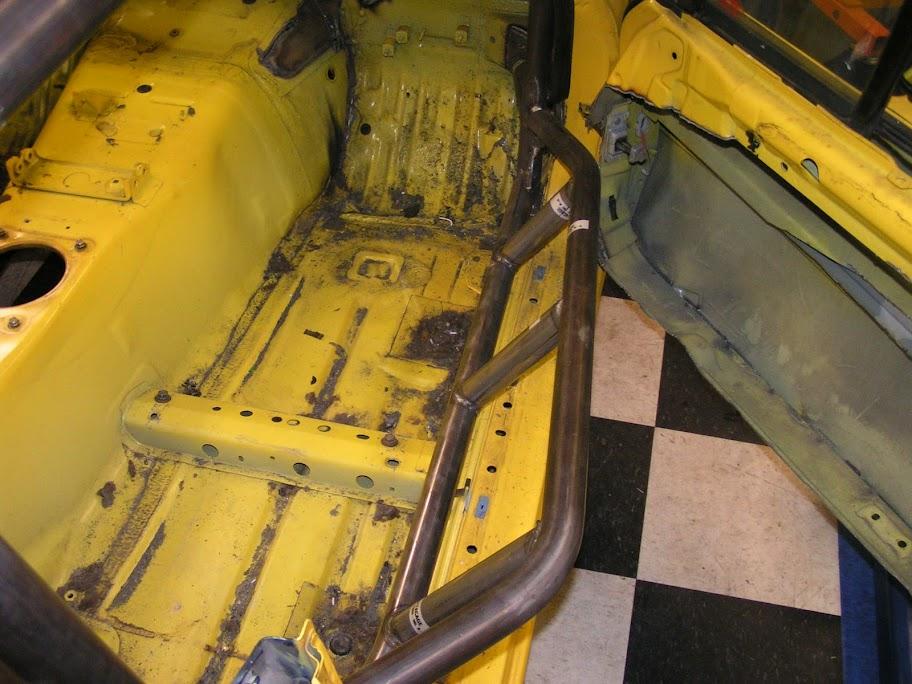
I put the plasma cutter to work today. I gutted the doors in preparation for the cage's nascar bars. I also started the tranny tunnel surgery. I still need to make a few more cuts and then bring out the BFH, but its moving along.
Plasma cutters are too cool. It cuts through the sheet metal like a hot knife through butter.
Here are some pictures from today's progress.

1/3/10
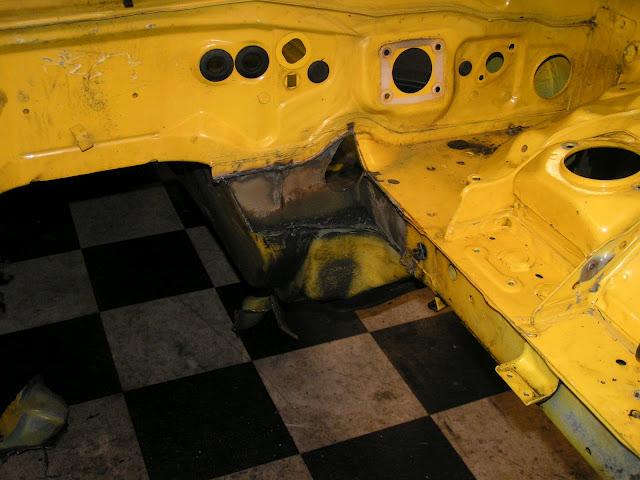
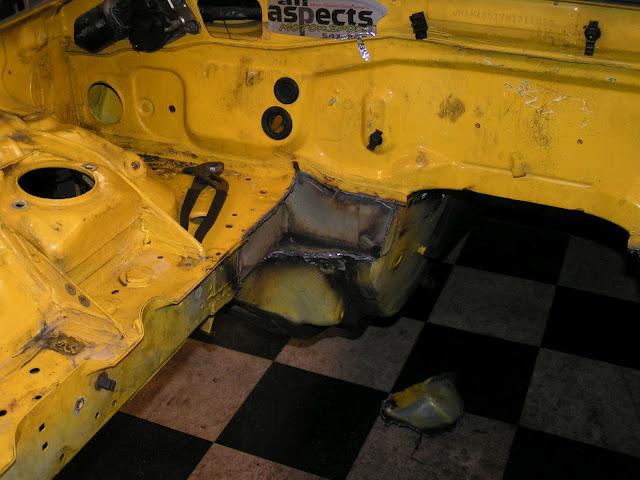
Well today was a productive day. I got the transmission tunnel widened. I took a few shot along the way. It's pretty rough, don't look too hard at my mess. I still need to do a lot of grinding and welding, but I'm not going to do any of that till I test fit the engine.
Lesson learned today: Make the tunnel cuts from the engine side of the firewall. I made the cuts from the interior to try and keep from throwing sparks into the interior. That was a mistake. The cut didn't end up where I would have like it. It took more cutting before I could start widening and folding.
Here's a few shots of my mess. Now I understand why nobody posts these pictures, they look terrible.
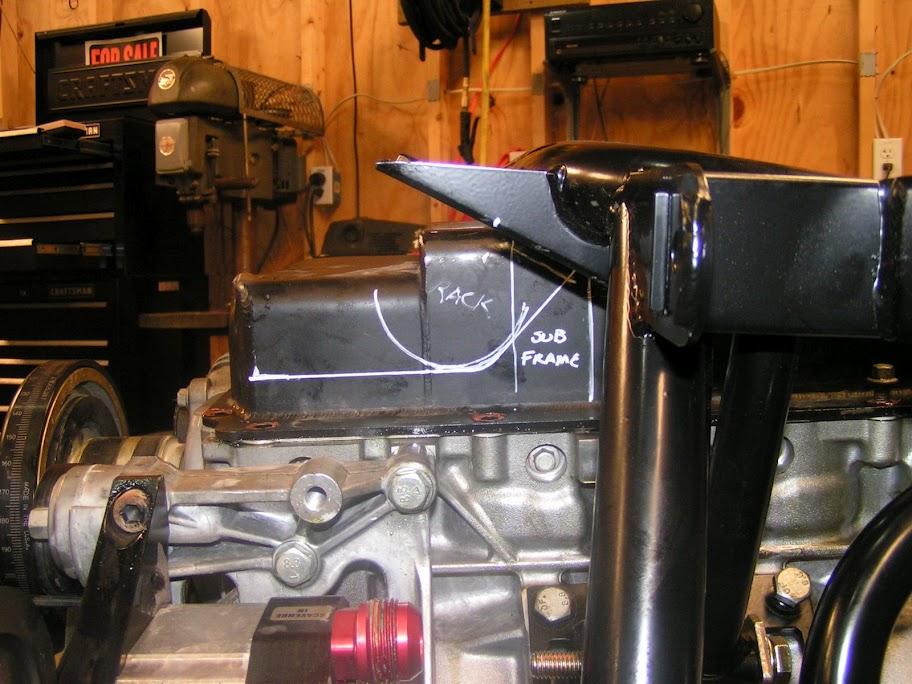
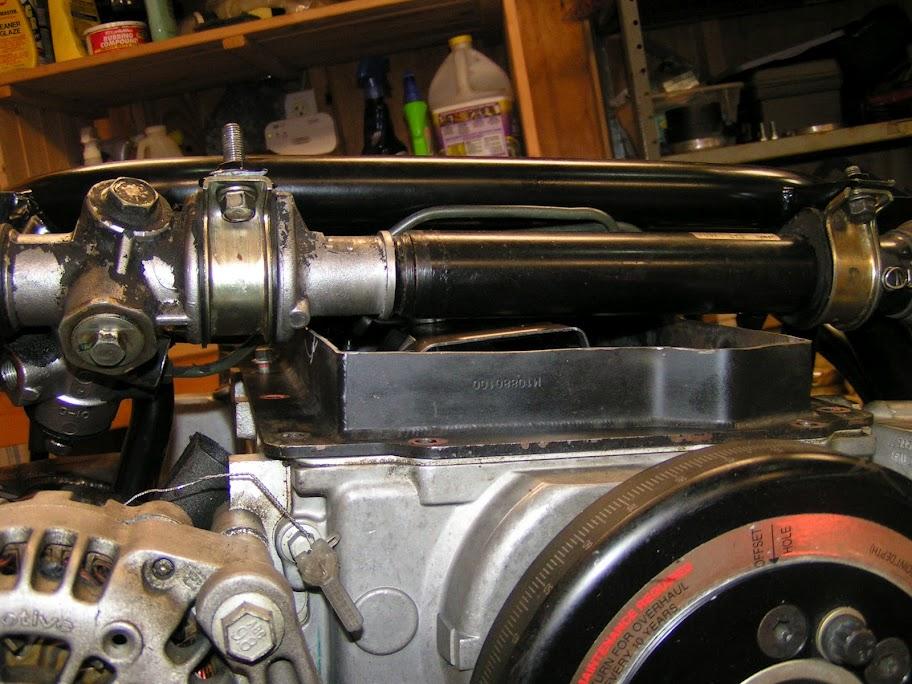
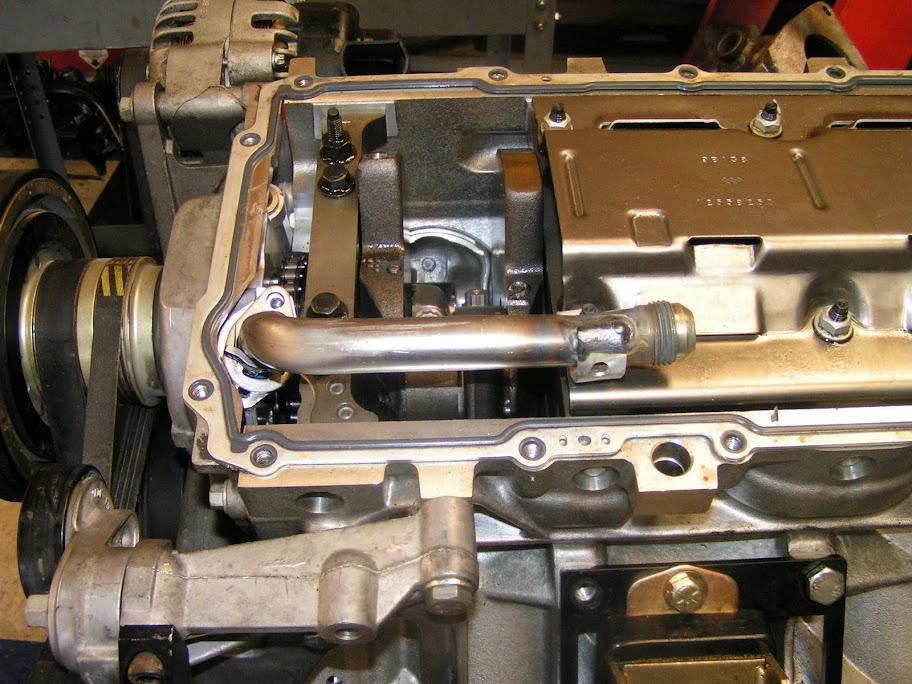
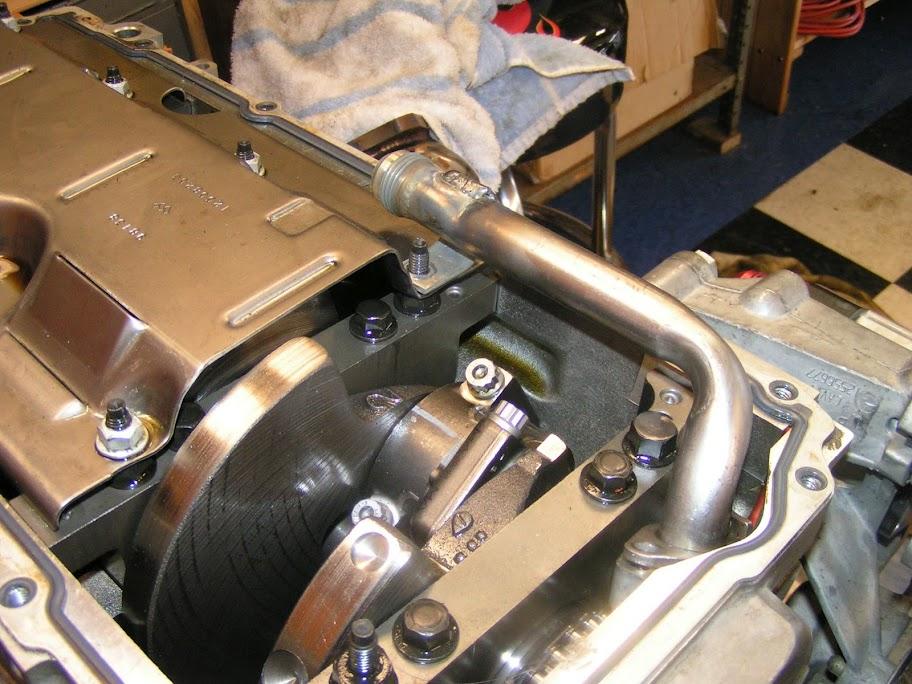
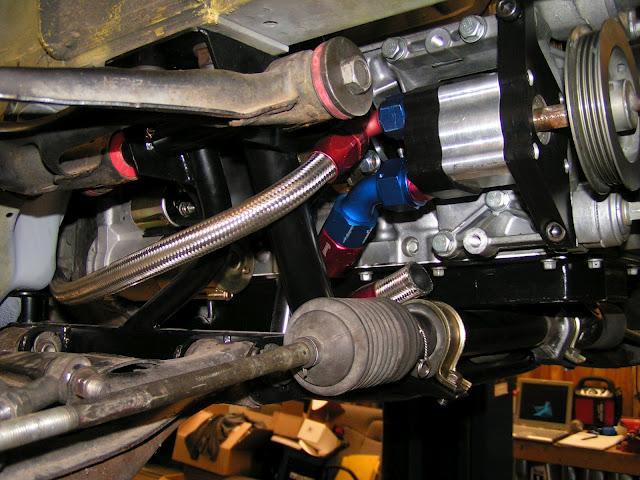
When I finished widening the tunnel, I mounted the subframe to the engine. This is where I ran into my first road block. My oil lines for the dry sump will have to be rerouted, as they interfere with the subframe. That is not a big deal.
The road block is my oil pan. I thought it was low enough, but I was mistaken. The subframe clears the pan, but there is not chance for the steering rack. It looks like I need to pull the pan and get it modified.
1/5/10
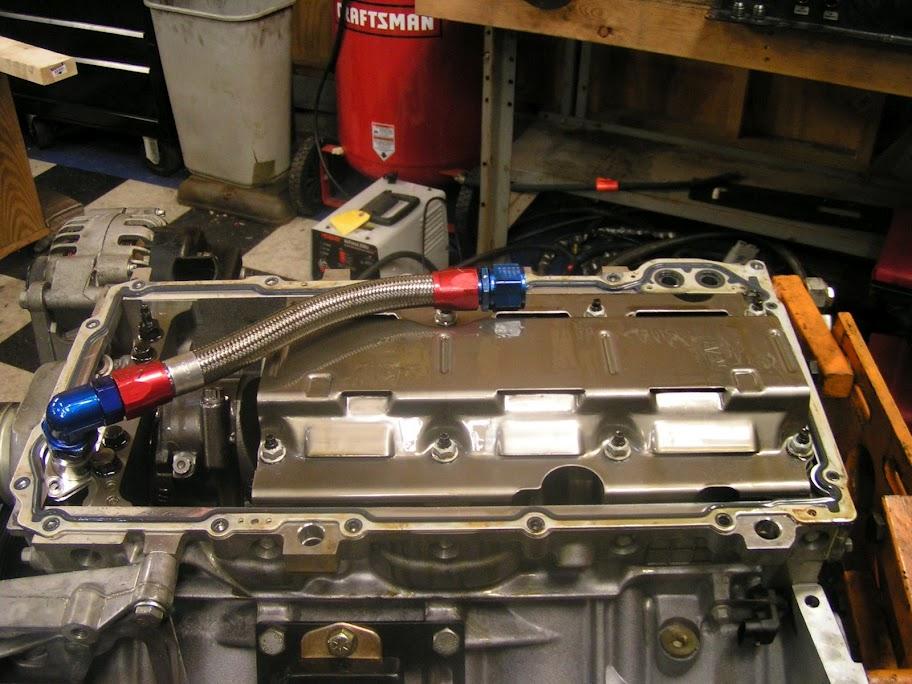
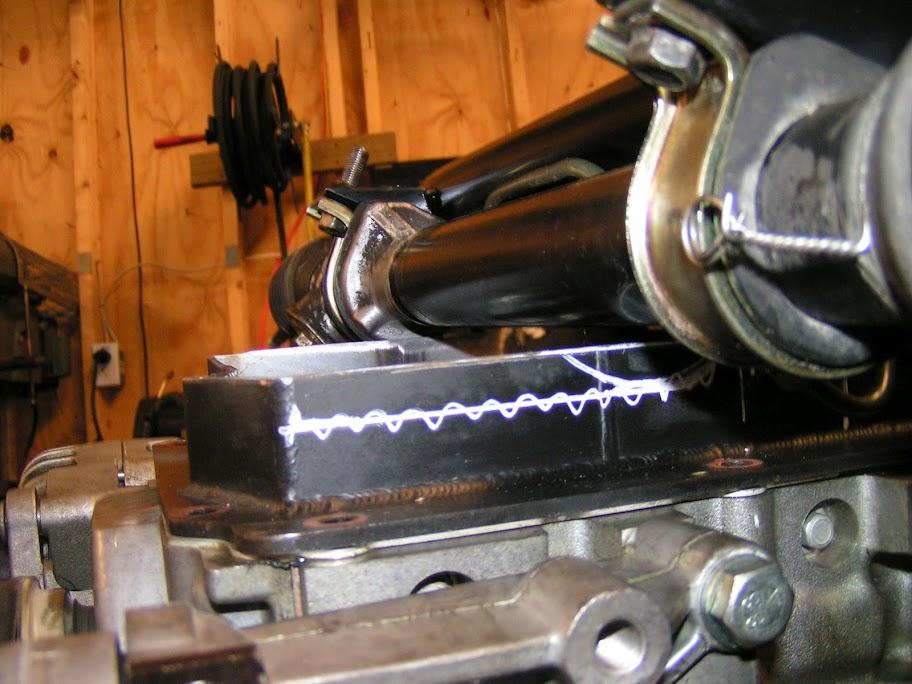
As noted previously, I ran into some issues with my "perfect" oil pan. It's not as perfect as I had hoped.
There is no steering rack clearance, which didn't seem to be too big of an ordeal till I pulled the pan off the engine. Now I have to modify the pan and come up with a alternative routing for the internal plumbing.
1/10/10
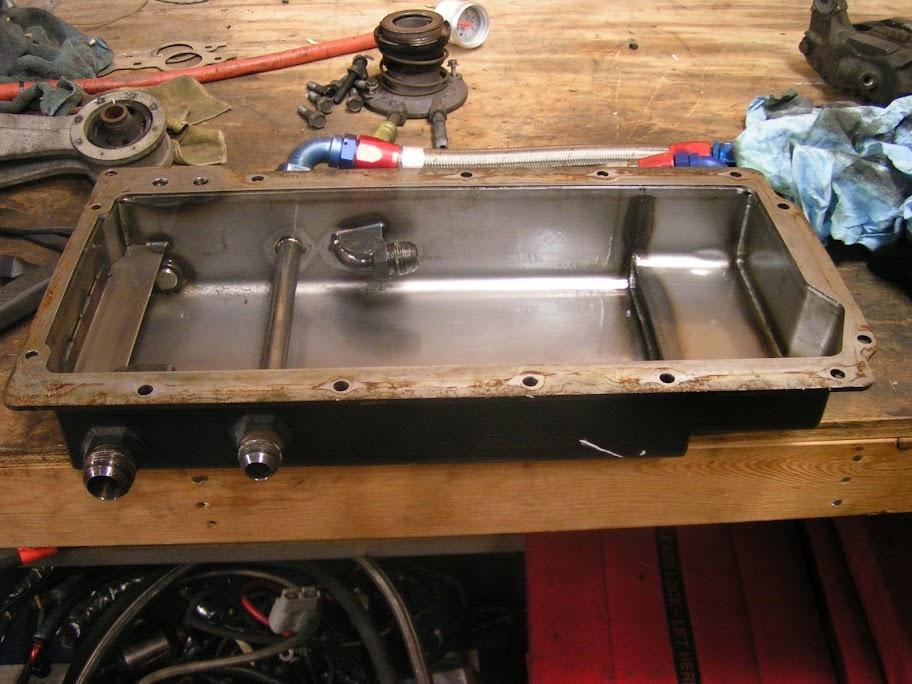
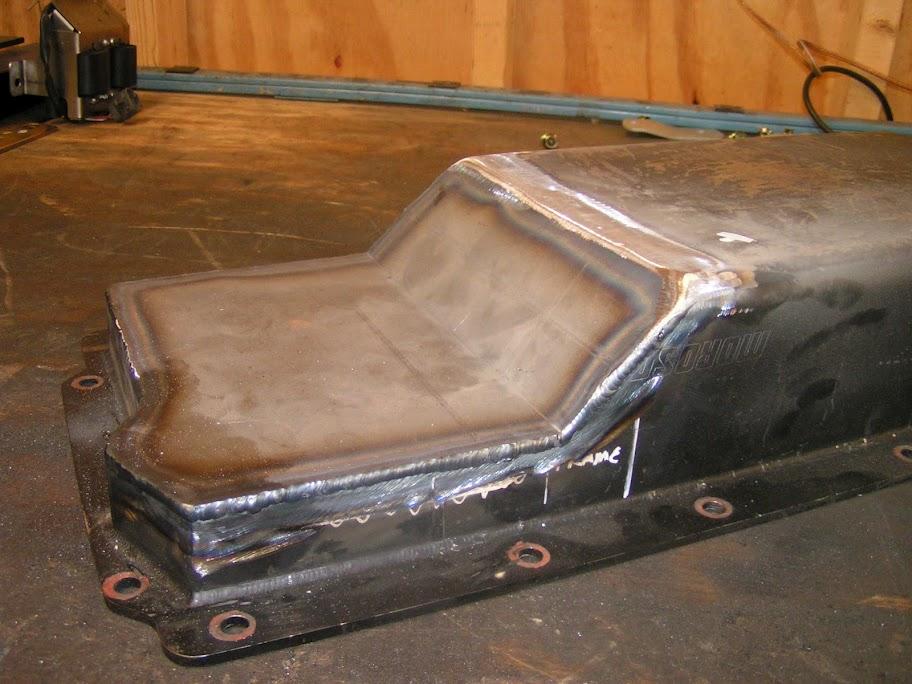
I took the measurements for the 4th time and cranked up the grinder with a cutting wheel.
My initial plan should work, but I am still waiting for the C5 oil pickup tube. It was supposed to be here yesterday, but never showed up. Hopefully Monday.
Here's some pictures:

1/16/10
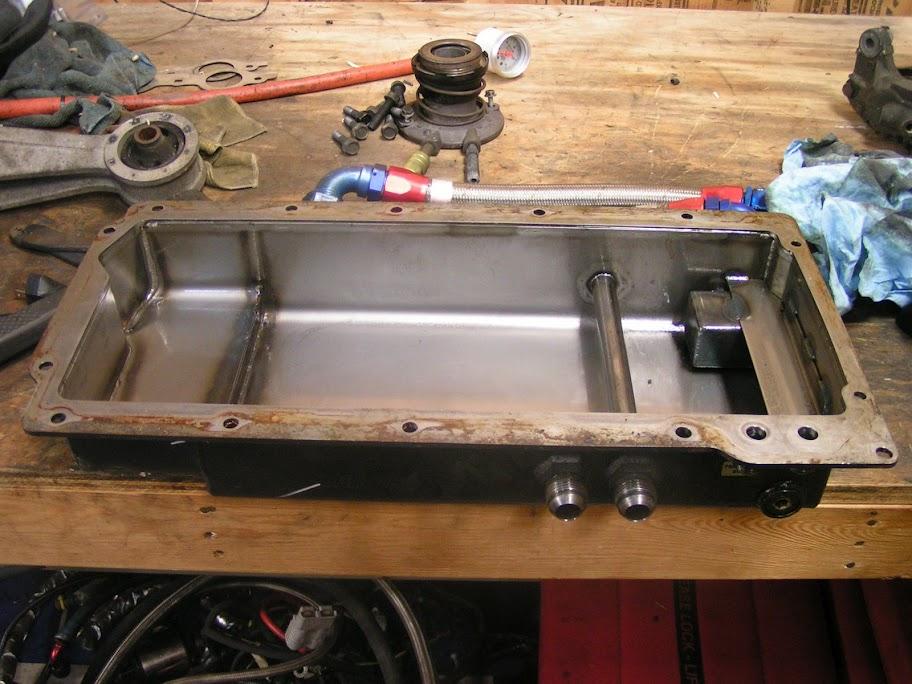
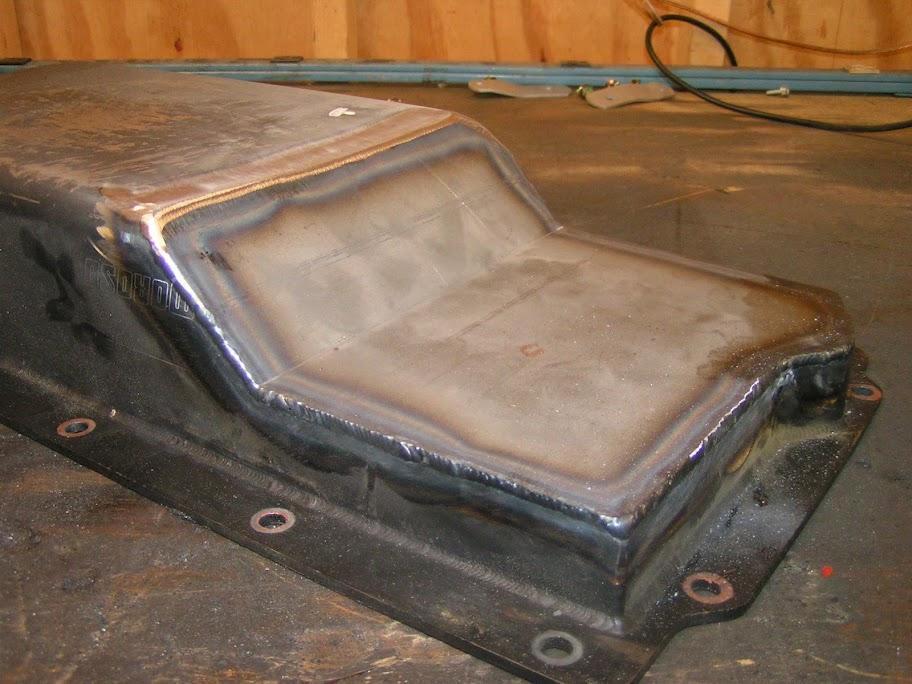
Alright, issue has been resolved. I ended up using a truck pickup tube.
I cut the pickup tube short and welded a -12AN fitting to the end of the tube. A bracket to hold everything in place and I'm good to go.
I need to prep, prime, and paint the oil pan tomorrow and I'm on to the next step.
1/13/10 (Yes, a little out of order)
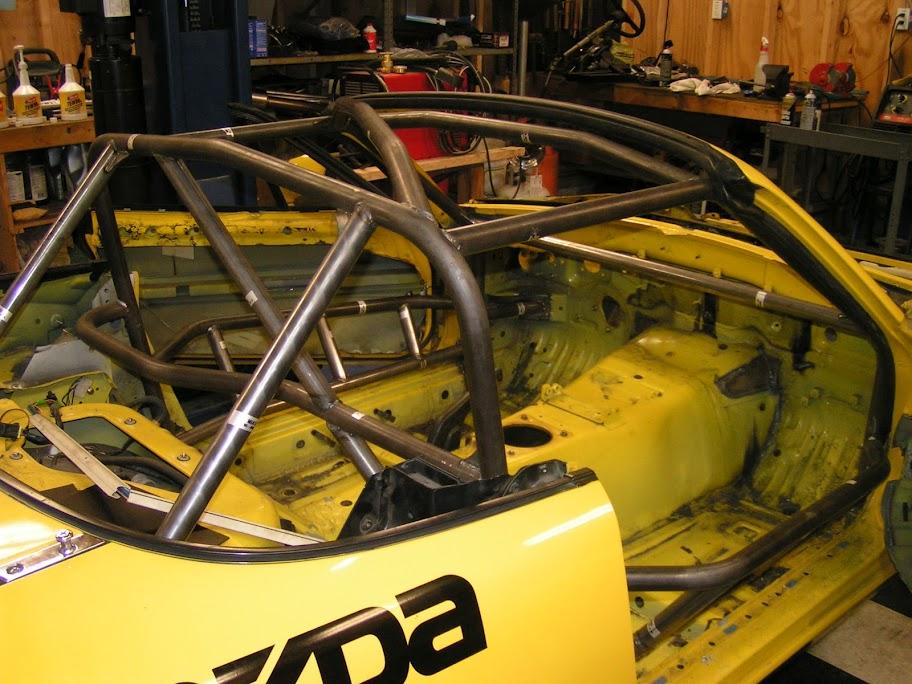
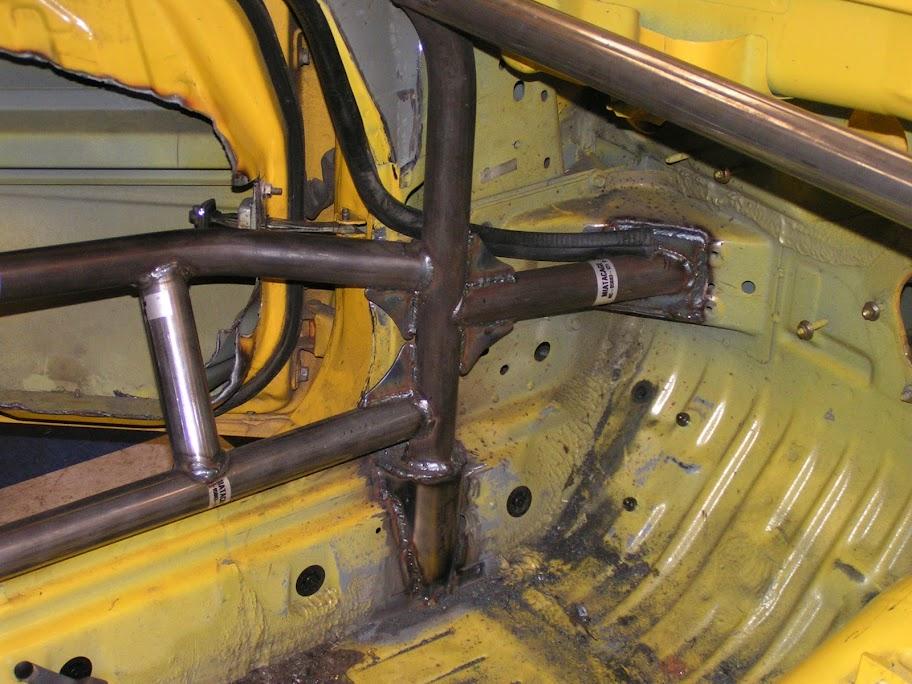
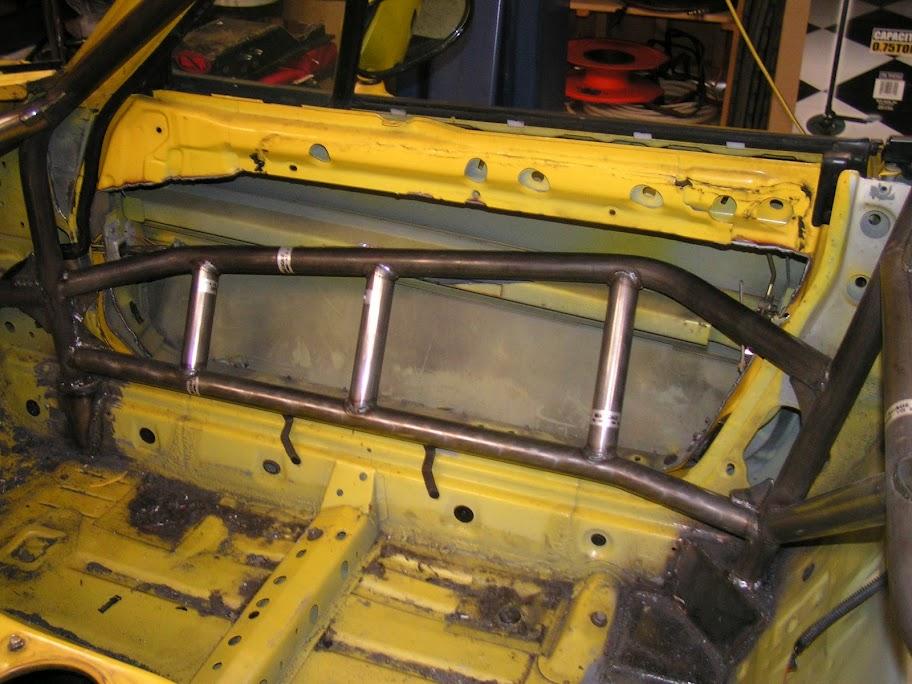
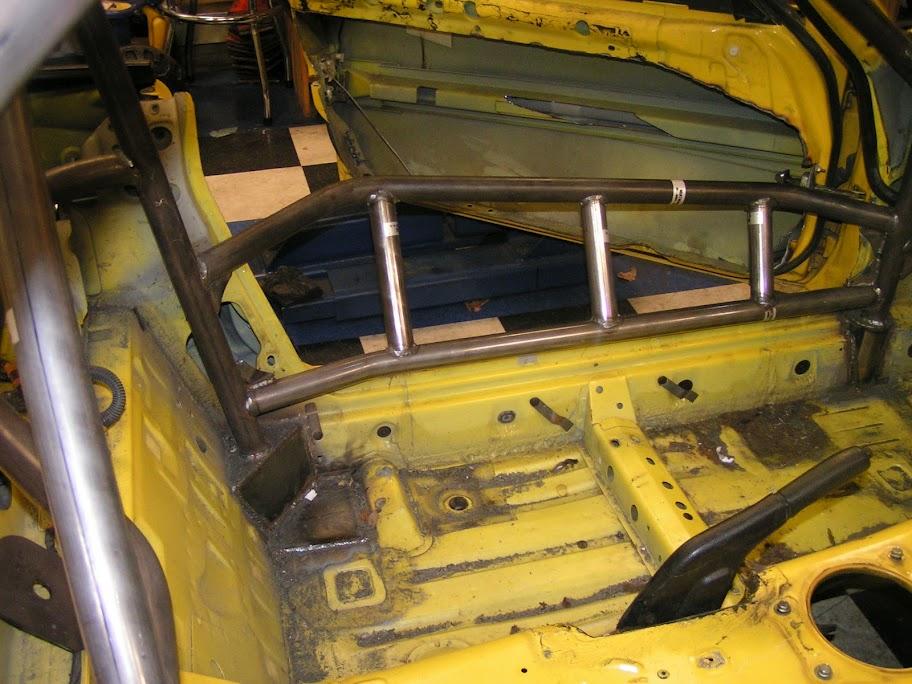
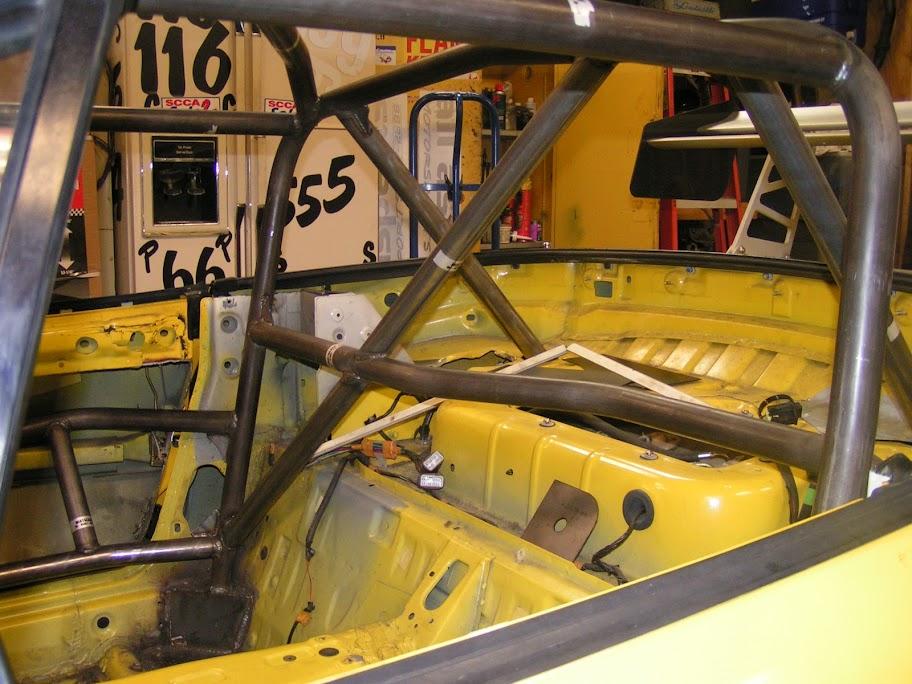
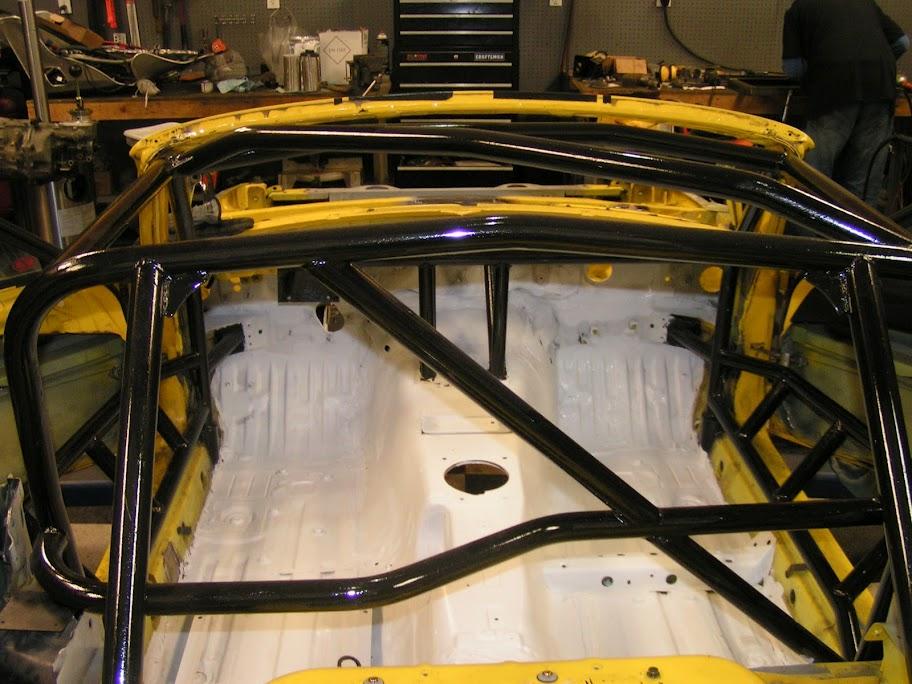
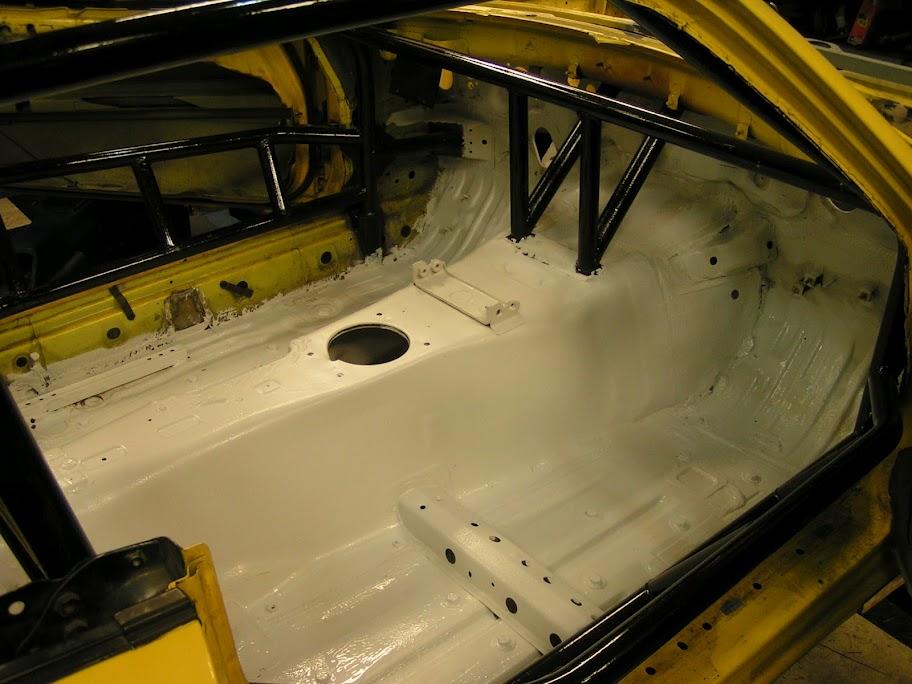
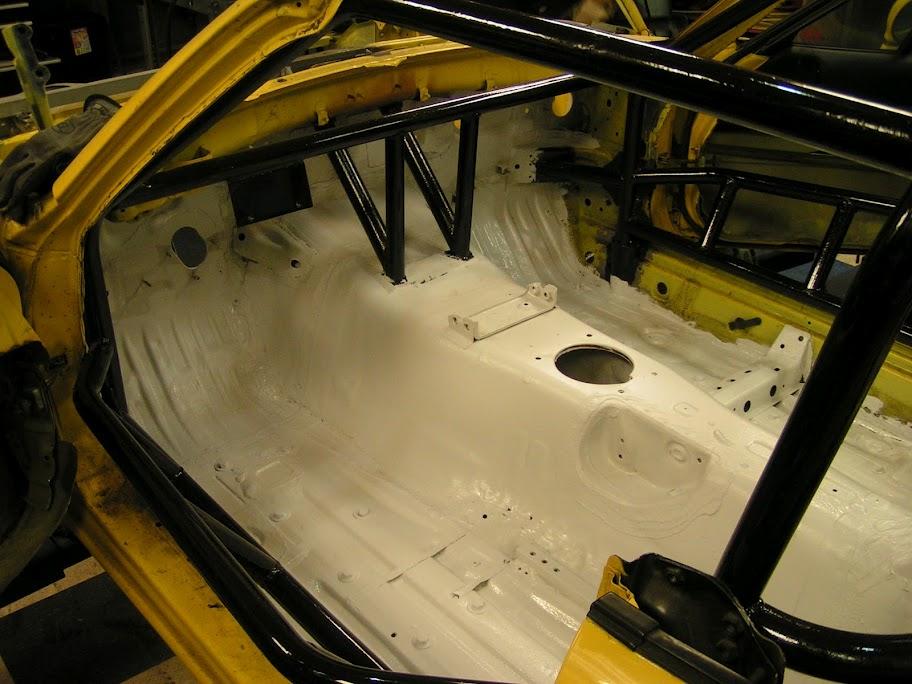
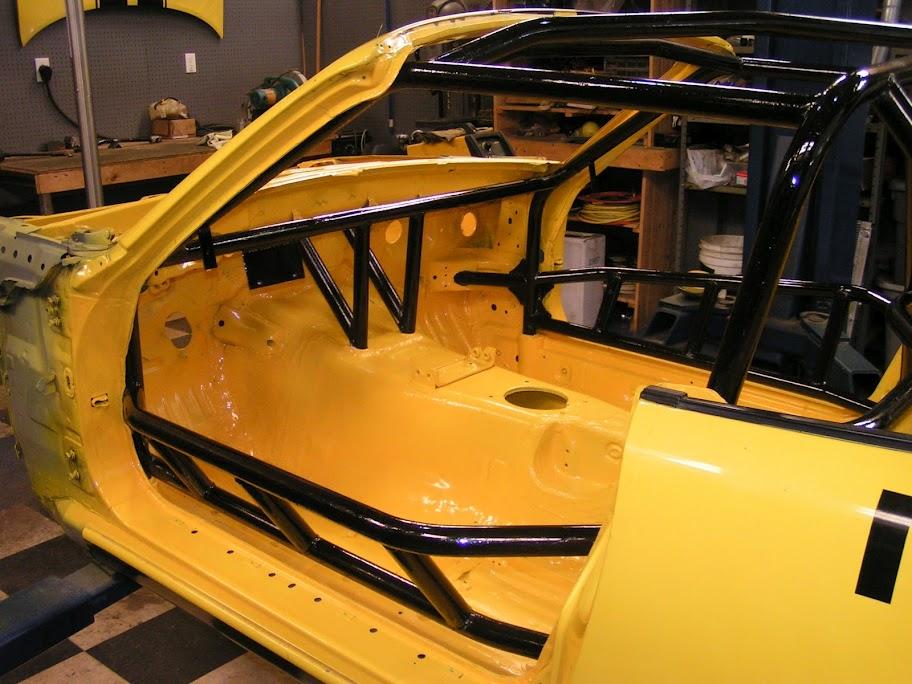
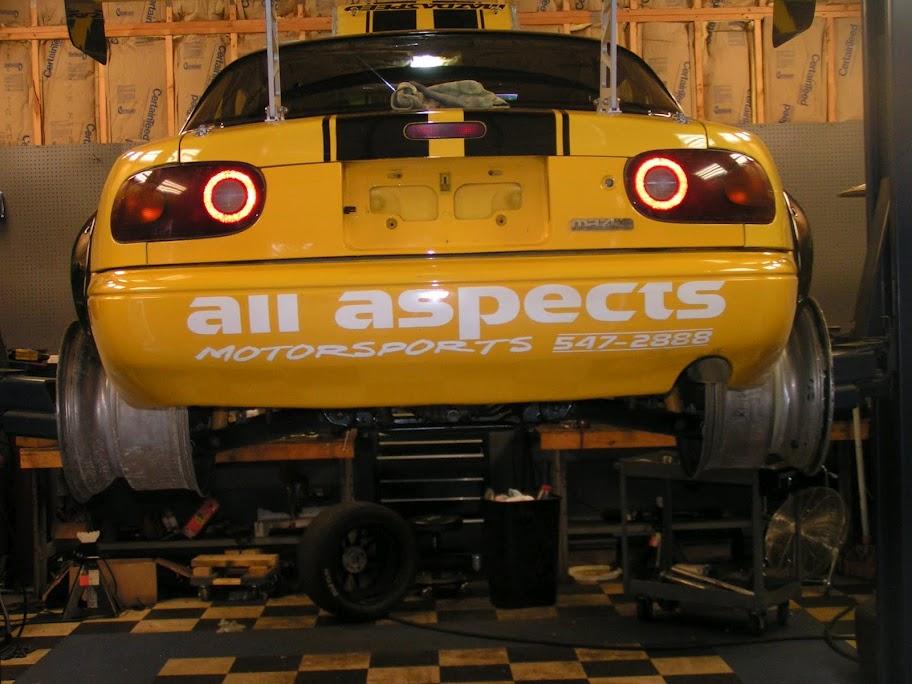
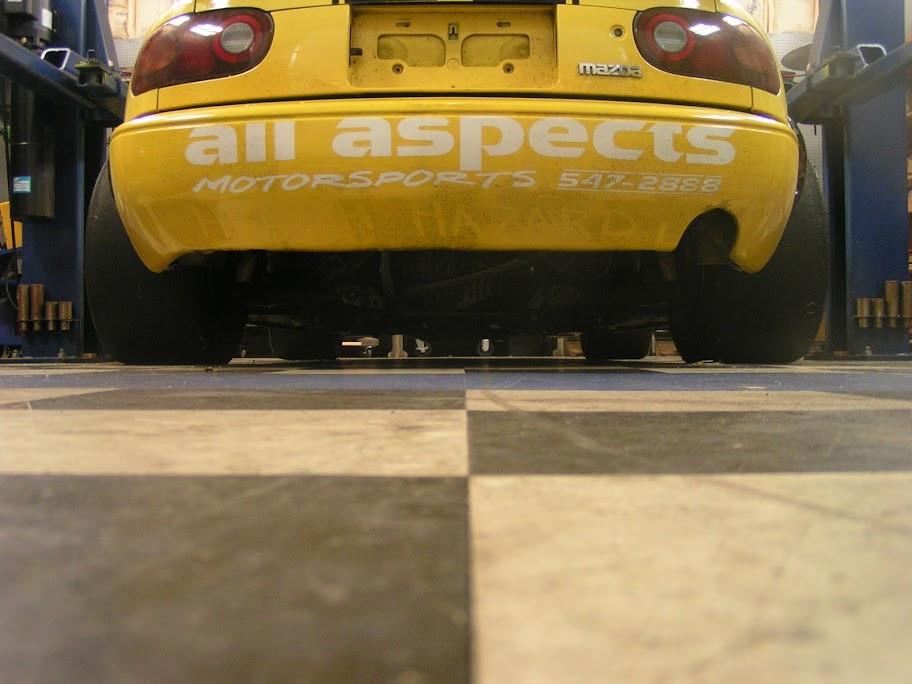
I picked up the car from the shop that put my cage in. I bought a cage kit from Miatacage.com and had a local shop install it for me. I am really happy with the outcome. The local shop, All Aspects Motorsports, which is owned and run by some really good friends of mine, did the work for me. They pushed everything out as far as possible to give me every inch of interior room possible.
I wanted to put the cage in myself, but it would have added a month or so to my project. I dropped it off on Thursday and it was ready to be picked up Monday.
Here are some pictures:
1/17/10
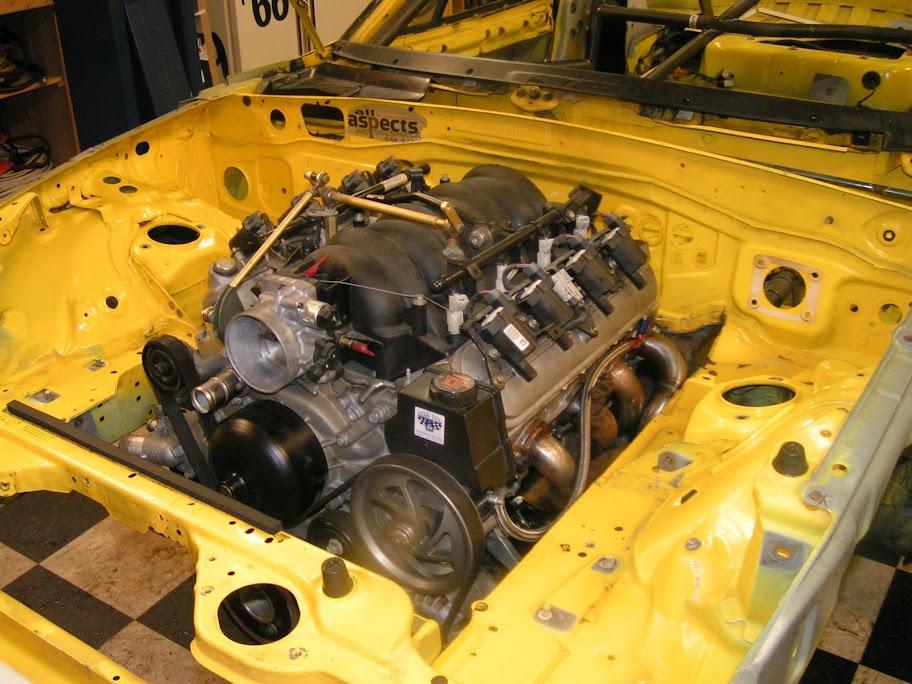
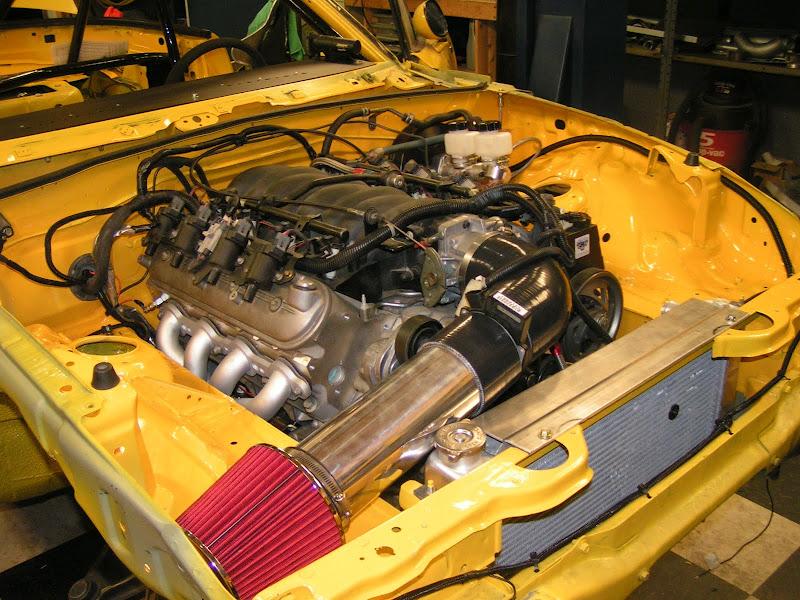
Engine went in for the 1st test fit today. Other than header issues, it fits like a glove.
I don't have much room for the radiator, but I have some alternative plans in mind.

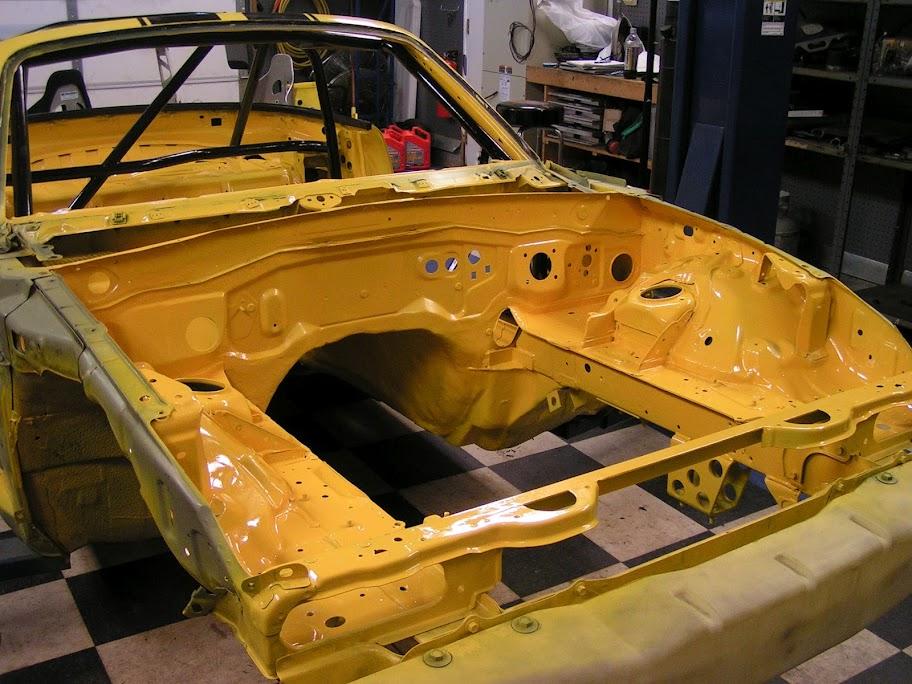
2/6/10
It's been a little while since I updated this thread. I haven't gotten a lot done, but I have been tinkering.
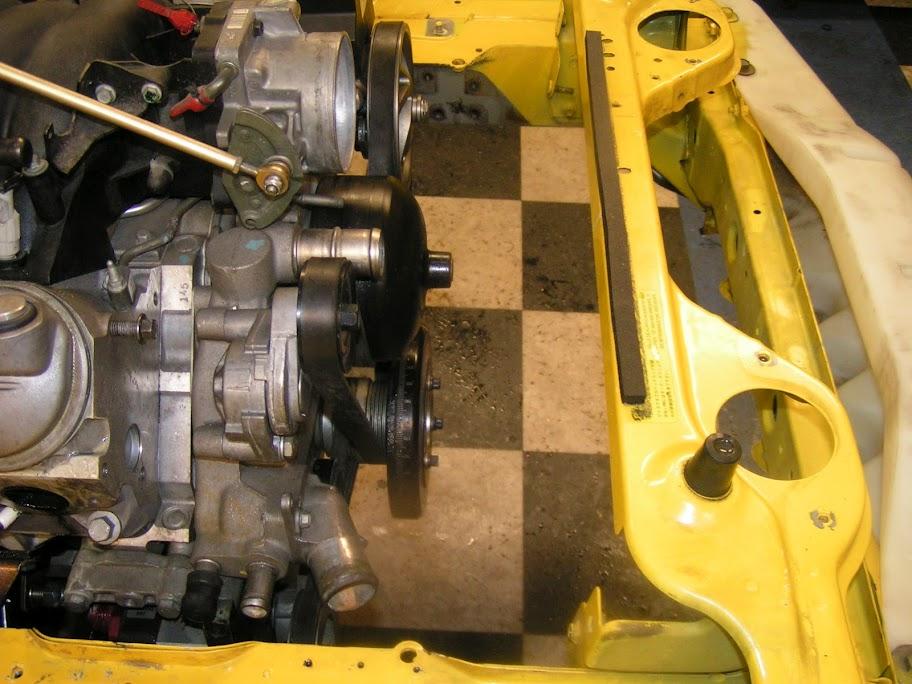
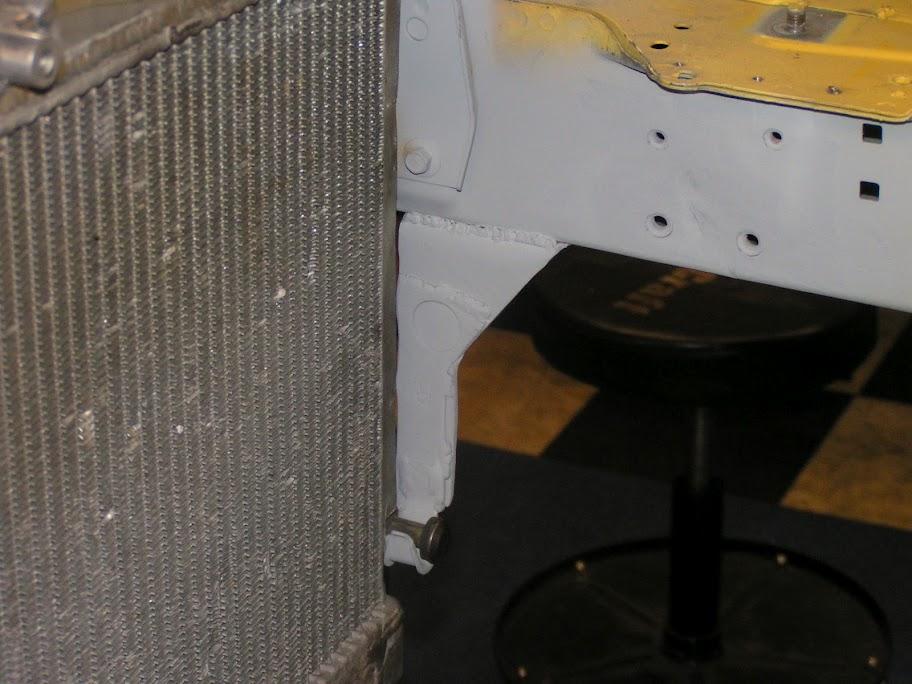
I cut out the original radiator support and built a new one. I moved the radiator forward 3 inches. Take a look at the picture a couple posts up and you can see what I cut out. I will not be using the factory hood latch. I will be using hood pins.
I built some new upper mounts and modified the lower mounts to use the factory mounts. I put some rubber under the top mounts to keep the radiator isolated as much as possible.
I also started welding the tranny tunnel. It's still a mess, but it's getting there. I welded some 3/8 angle iron into the corners. It's not much, but I felt I needed to do something.
Here are some pictures....
2/14/10
I wasn't able to do much this weekend, but I was able to clean up the tunnel and get some primer on it.
I still have a few spots I would like to clean up better, but overall it turned out OK.
2/28/10
This week/weekend was somewhat productive....
I was able to get the engine and transmission mounted and installed together for the first time. Then I was able to mount, drill, and bolt in the frame rails and transmission cross member.
I mounted the RX7/929 differential for the first time. This gave me the chance to get a measurement for the drive shaft and measurements for the front differential mount. I still need to pull it all back down and install the LSD, but it was nice to see it all in the car.
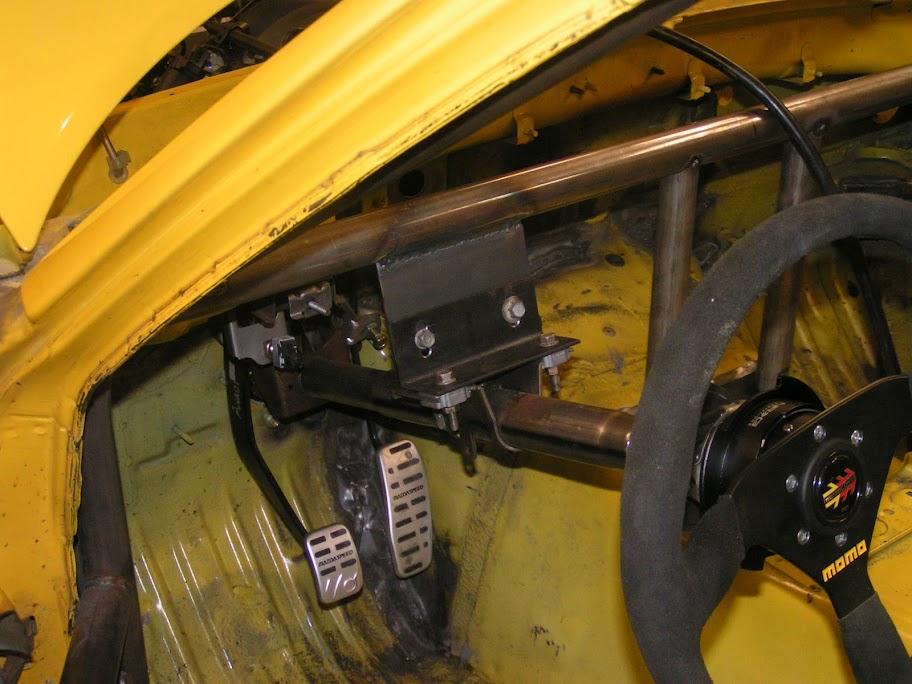
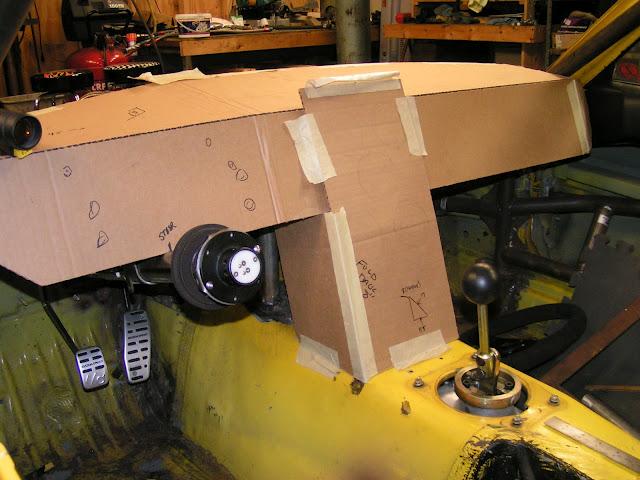
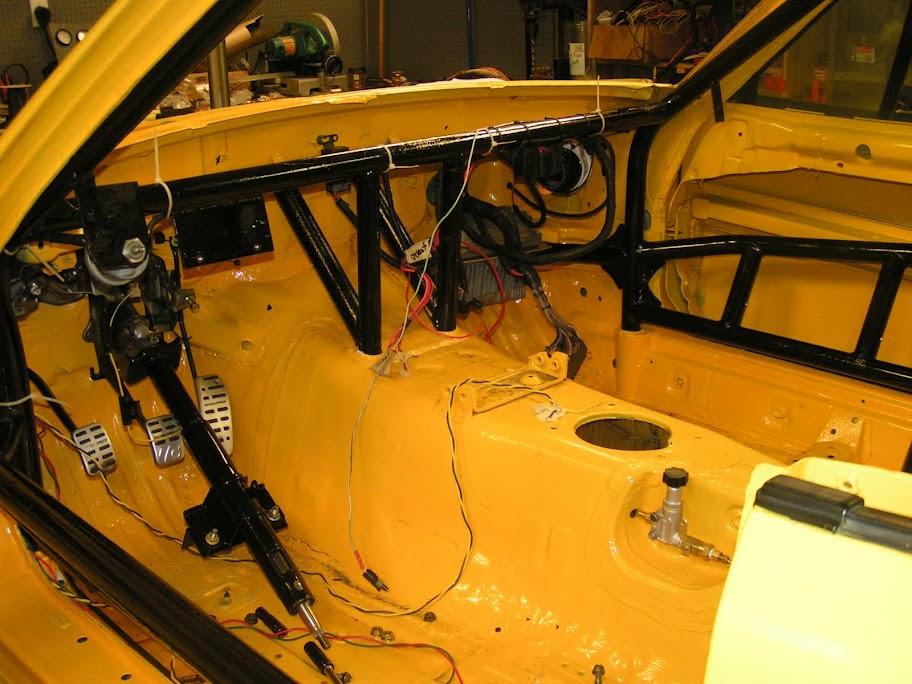
Steering column came next. Being that I am not re-installing the stock dash, I had to come up with a mount for the steering column. Here's a picture of my steering column mounted with adjustable height settings. It's hard to tell what is right when sitting in the garage. The adjustment will allow me to make changes at the track if my initial setting wasn't correct.
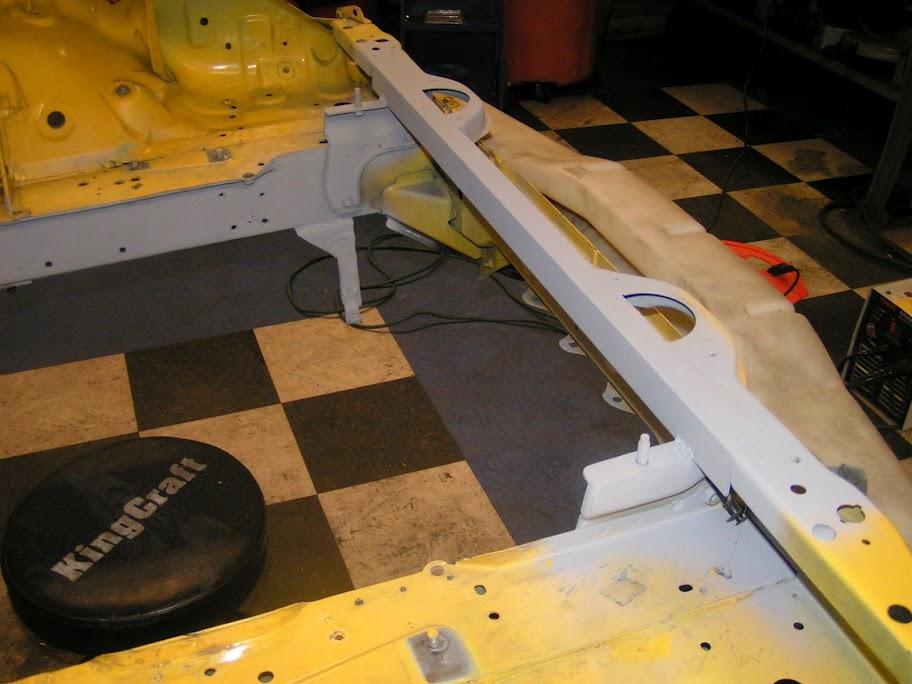
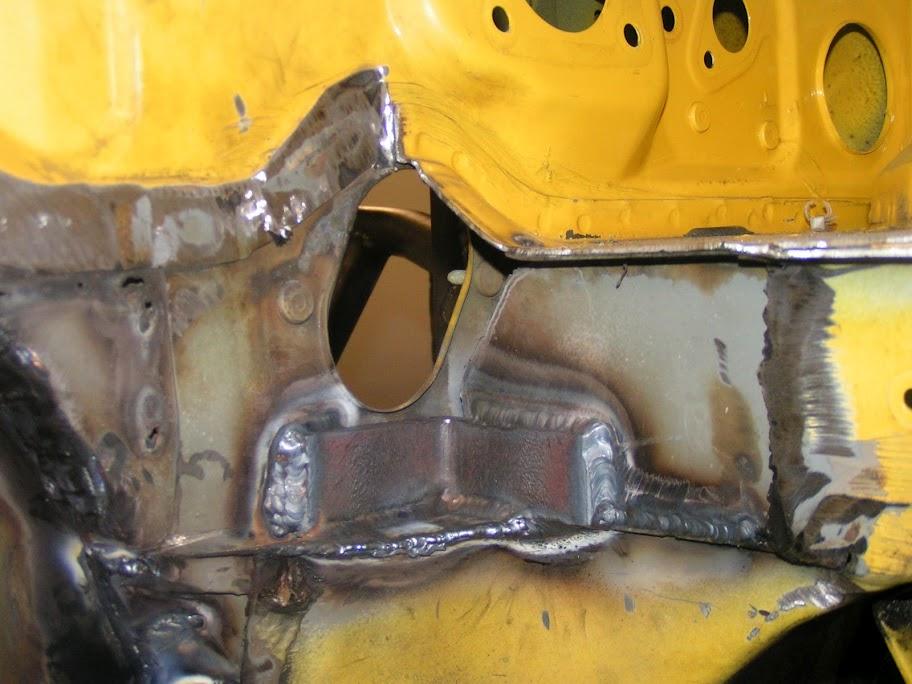
Here's where things got creative/interesting. I have been mulling over ideas to somehow tie the front of the car into the roll cage. After some serious thought and brainstorming with friends, here's what I went with. (Note: everything is just mocked up, no final welding has been done yet)
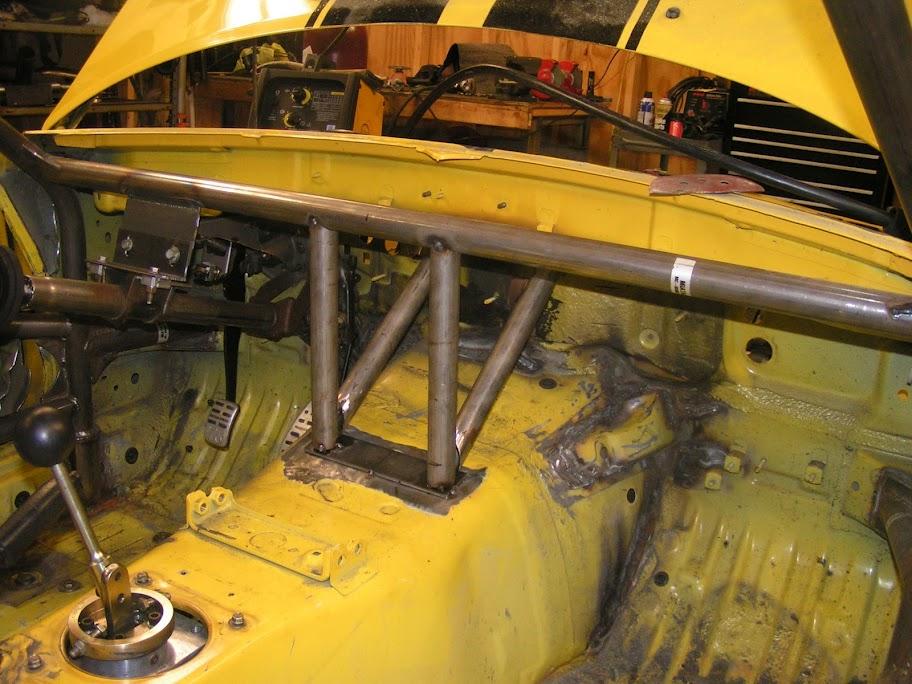
The two 45deg tubes will be welded to the firewall support shown in the next picture.
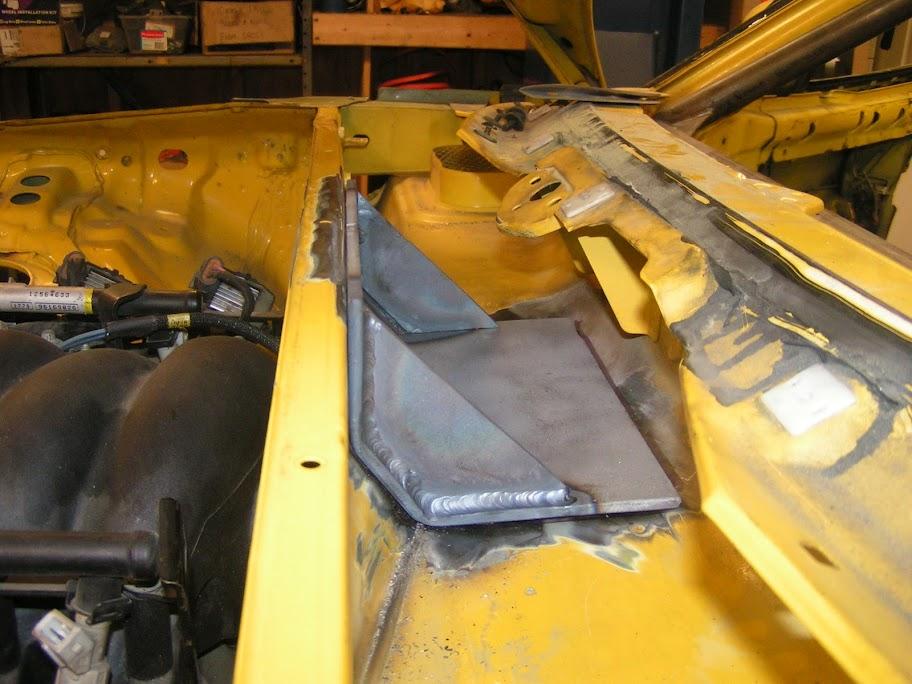
Here's a support plate that I built to reinforce the top of the firewall. The area of the cowl under the plate was cut out so the supporting tubes are welded directly to the plate. This is all designed to support the triangulated strut tower bracing that I will build later. (Yes, there is clearance for the wiper arms. Mere thousandths of an inch, but clearance nonetheless.)
I plan to build a brace that is bolted to both the firewall and strut towers. I may even continue forward of the strut towers to the frame rails, if space allows. That's a task for another weekend.
3/27/10
I was able to spend a few hours out in the garage today. I wasn't super productive, but I was able to get a few things accomplished.
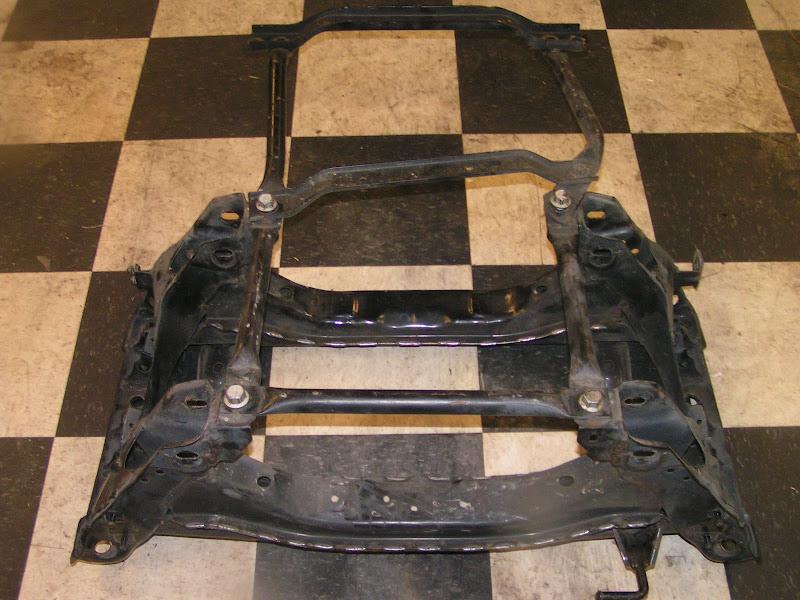
I bought a wrecked '04 MSM a while back and parted it out. I decided to keep the rear sub frame and bracing for my car. It is quite beefy.
I went ahead and stitch welded the sub frame while I had it out. I primed and painted it this afternoon, and hope to install it tomorrow.
I also worked on mounting my seat a little lower. I cut out the stock mounting humps and welded in some angle with some adjustment for my race seat. I'm pretty happy with the outcome.
I finished up the day adding the AN fittings to the fuel tank and fuel filter. Still lots of work to do, but it's a start.
3/27/10
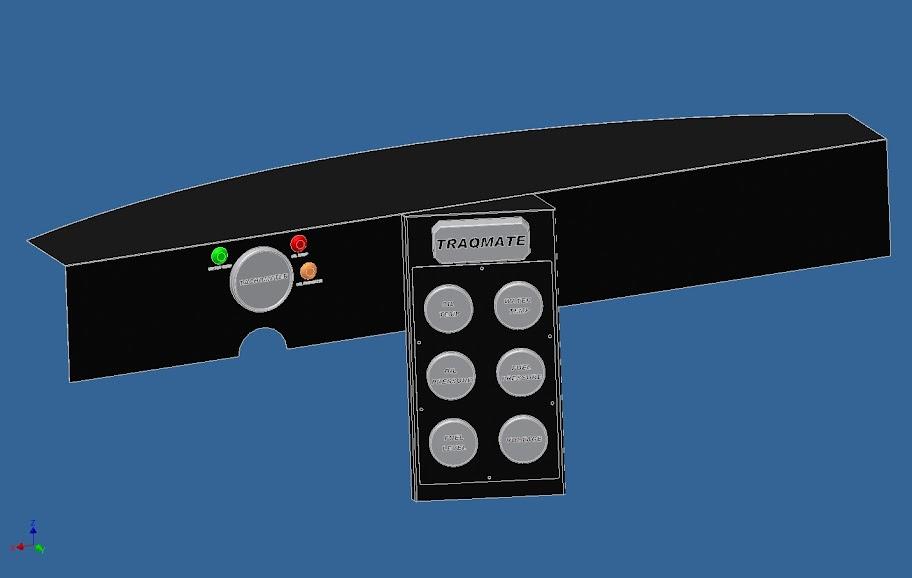
I took some measurements earlier this week and modeled up my custom dash concept. I will mock it up out of cardboard and check my design before I cut any metal.
I would like to hear from those of you that track your car. Can you suggest any changes or additions?
All my switches will be mounted at the top of the window frame in a custom switch panel, so they are not going to be anywhere on the dash.
I do plan on installing my brake bias adjuster and fire system release somewhere on the dash, but I'm not sure where right now.
9/27/10
Finally got back out to the garage this past weekend and got some work done.
I fabricated and welded in the mounting points for the front of the differential. I'm sandwiching the diff ears between two poly bushings. I test fit everything, but pulled it all back out before taking a picture (Doh!)
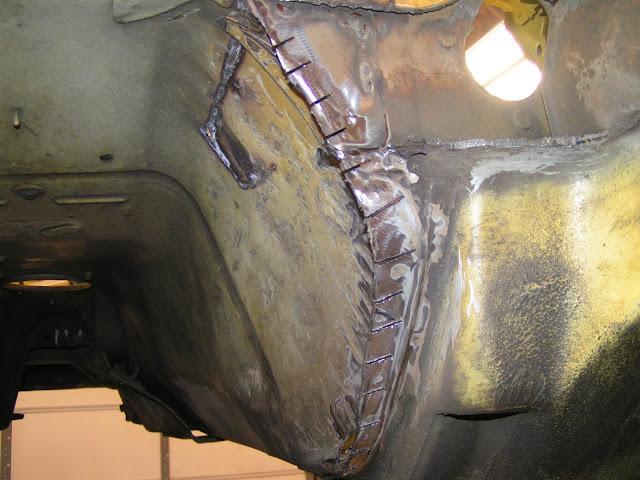
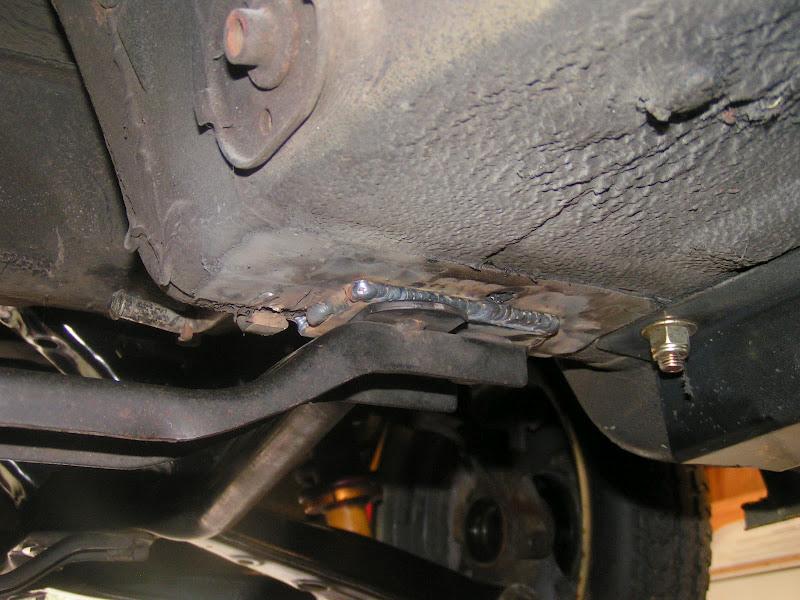
You can see where I stitch welded all the seams on the subframe. Everything should be pretty solid.

I rebuilt the RX7 LSD and installed it in the 929 differential. I didn't bring the tools home to set the backlash and bearing preload, so I wasn't able to button everything up. I will bring the tools home from work one day this week and finish it up. I ended up with right around 70ft-lbs of static lock up, should be close. It's amazing how much difference a 0.5mm shim makes.
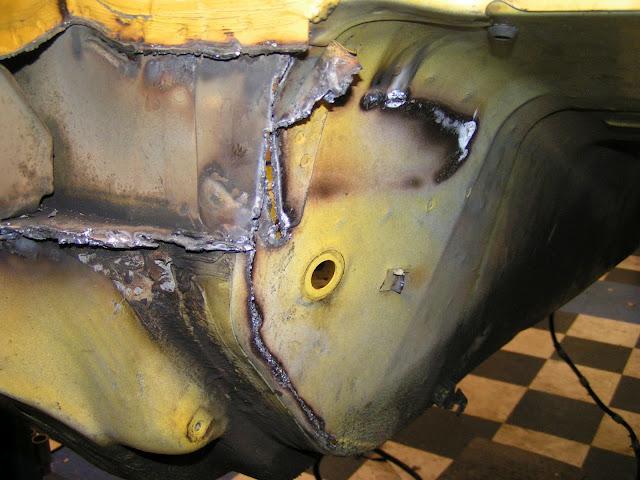
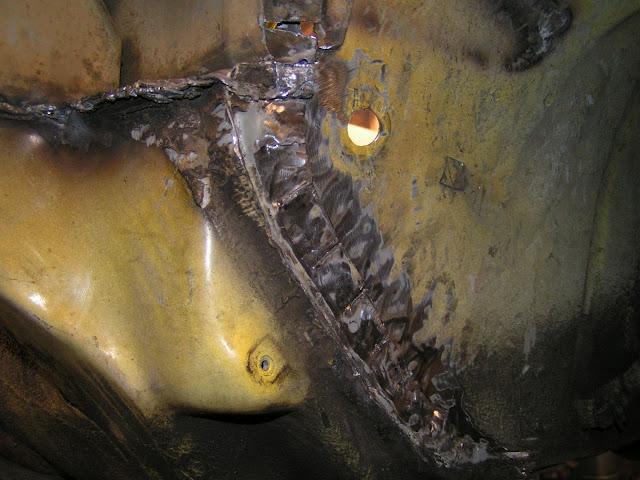
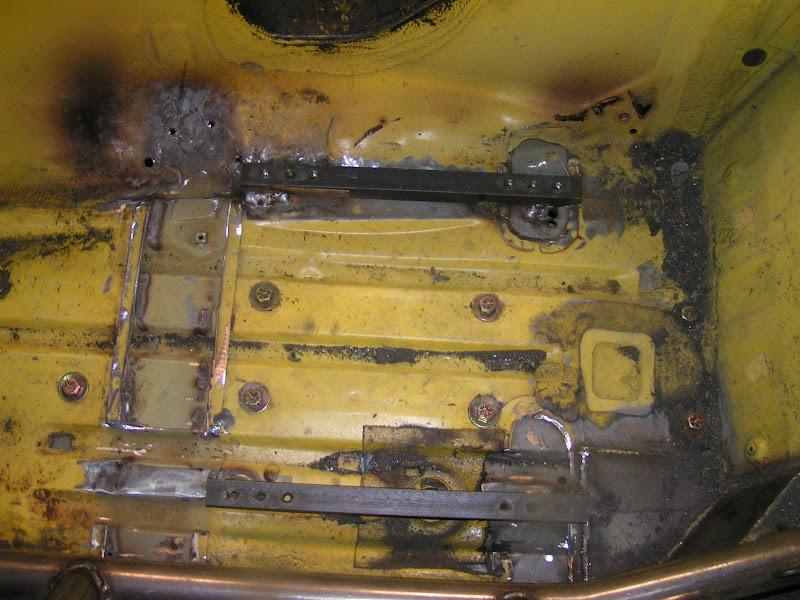
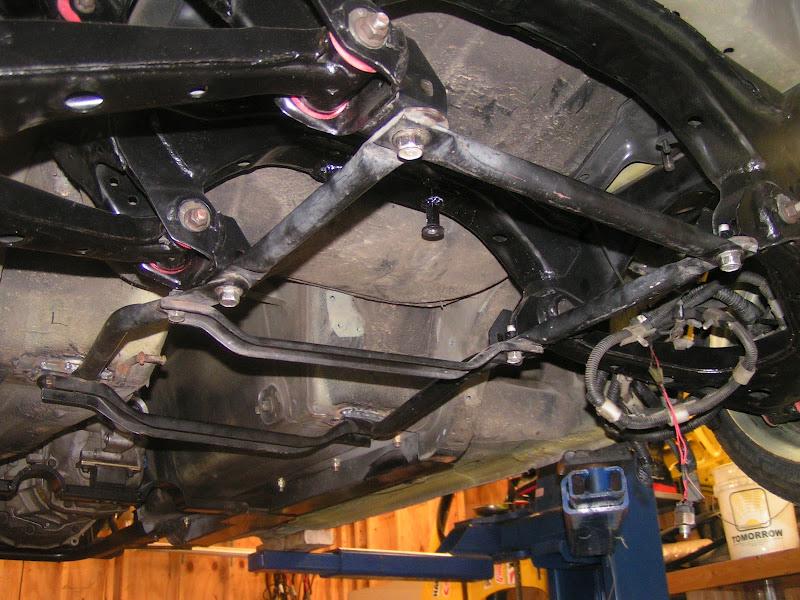
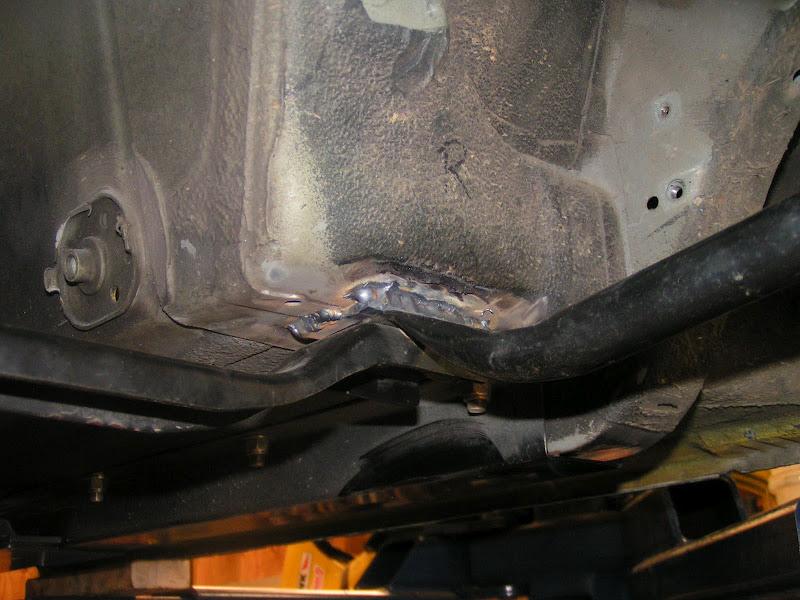
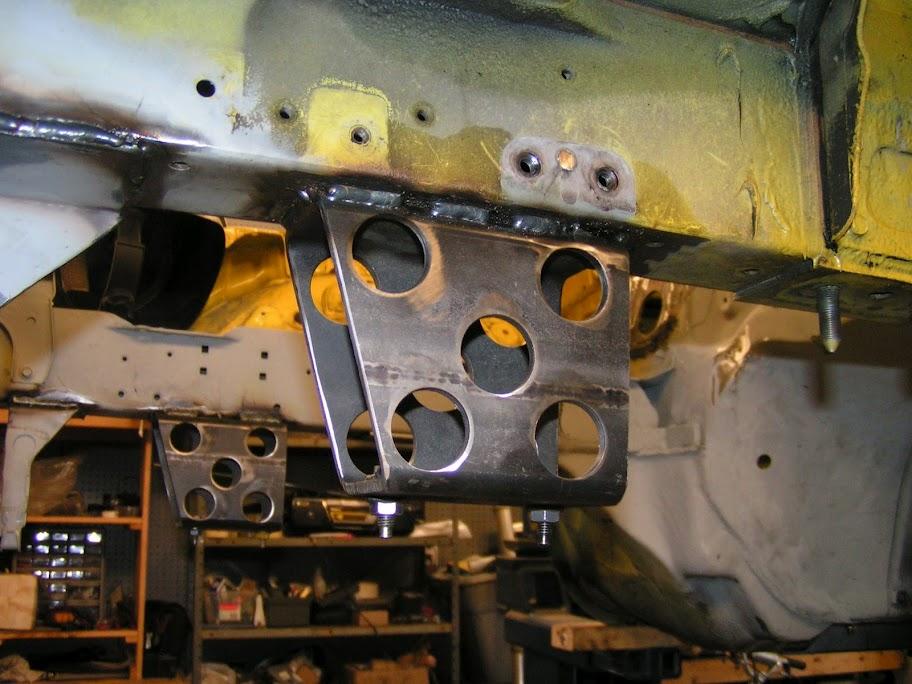
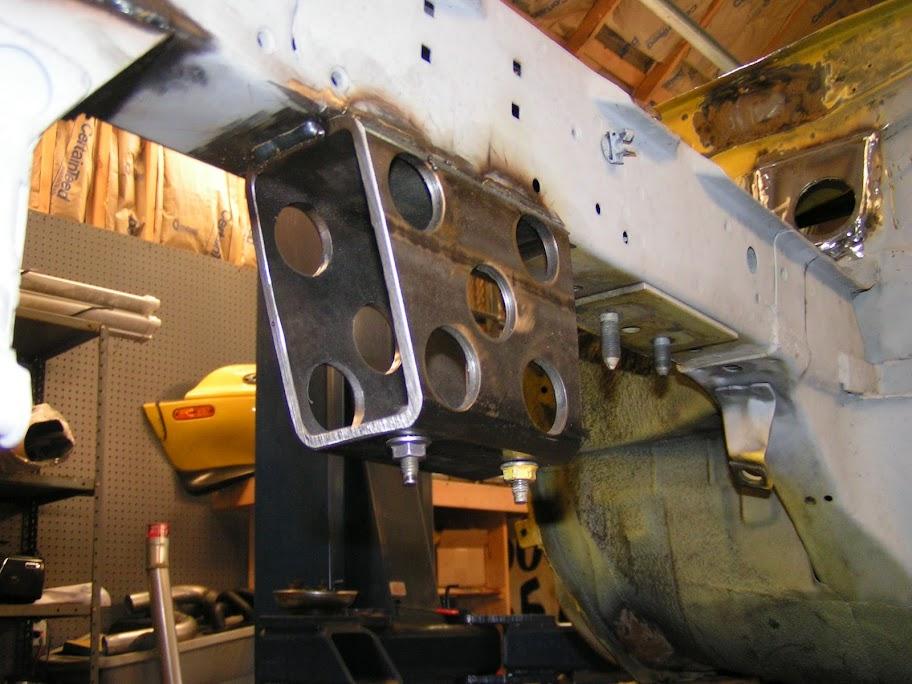
Then I jumped into making the MSM rear subframe and bracing fit my NA. This was highly recommended by a friend of mine, Tim, which built Jim's LS6 NA. Tim had a lot of trouble with wheel hop that was all but eliminated with a brace similar to what comes stock on the MSM.
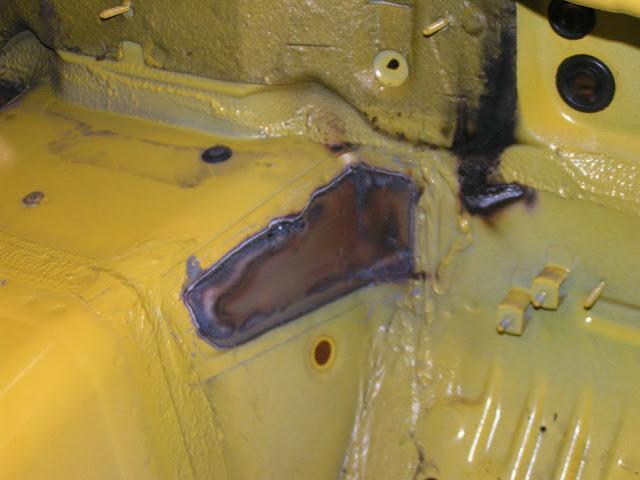
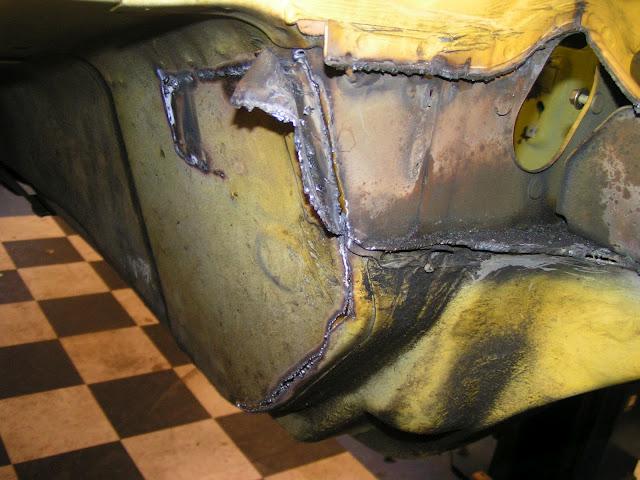
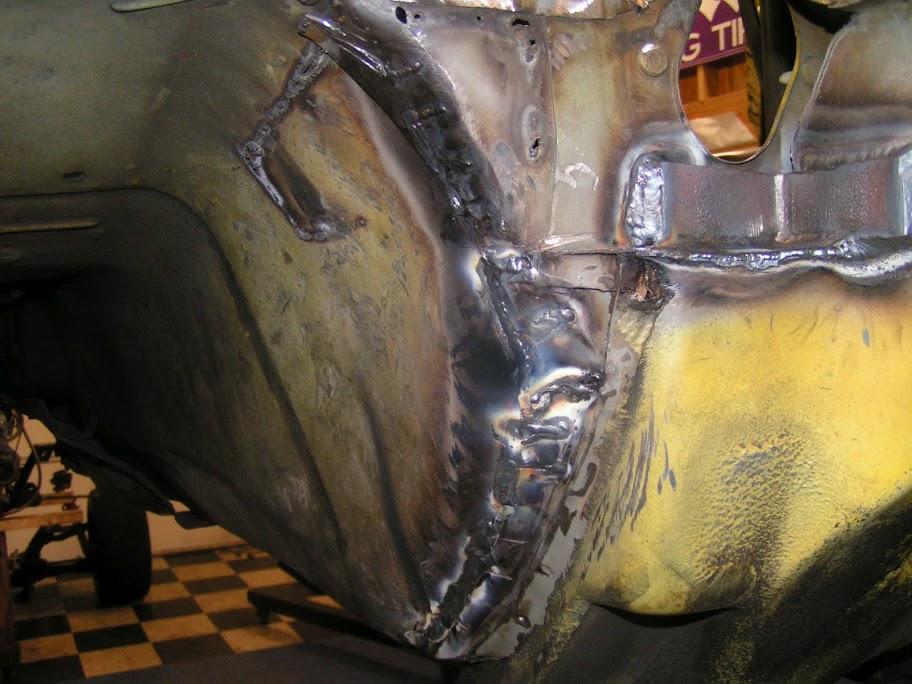
The subframe bolted right in, but the bracing was another story. The NA doesn't have provisions to bolt the bracing into the body tub. My initial thought was to drill through and bolt it from inside the car. That's when an easy situation became difficult. When I drilled through, it didn't go into the cab. It went into a void between the cab and fuel tank which is not accessible. So my fix was to weld some nuts to a plate, drill clearance holes for the nuts, then weld the plate to the tub. It worked out pretty well. A lot more work than anticipated, but I'm happy with the final product.
I was also able to build a bracket to use the stock Miata throttle cable with the LS1 throttle body. I finished this late last night, so no pictures. It was a little tough to get the throttle pedal linkage to fully open the throttle body, but after some massaging of the floorboard with a BFH and some bending of linkage here and there, it all works.
I hope to finish up the diff one night this week, then jump into building the dash and putting together the interior. I did install the seat, steering wheels, and shifter to feel out the ergonomics and gauge/switch locations, but I still have ton of work to do.
10/24/10
I was able to spend the day out in the garage today and did get a little bit done.
I started out with the easy stuff and finished up the diff. The rear end is pretty much done. Drive shaft and brakes are the only things left back there.
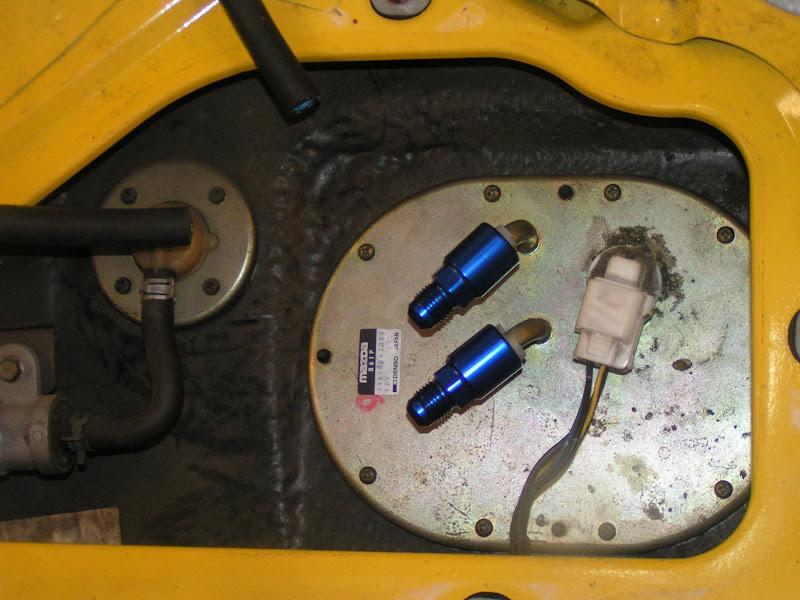
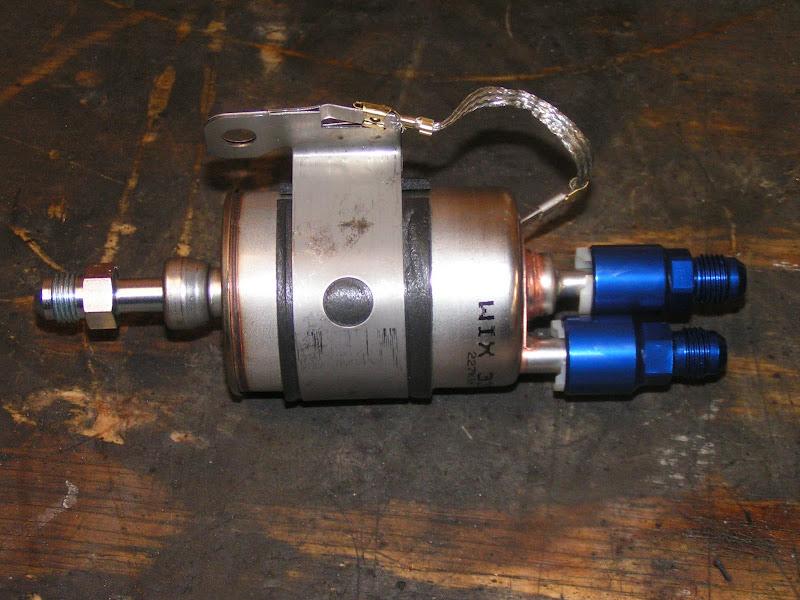
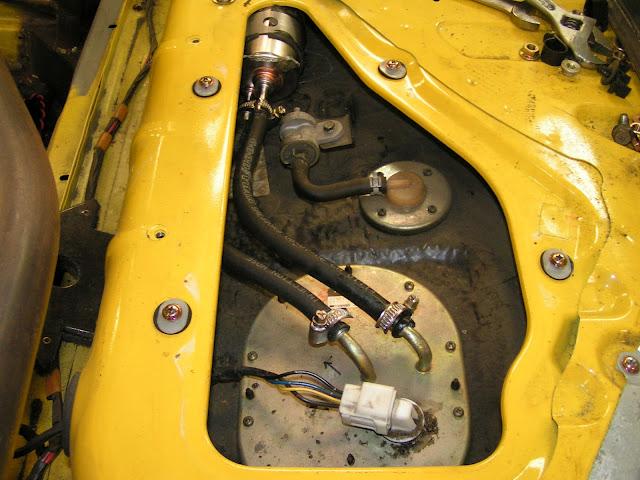
Fuel Tank / Fuel Filter
I planned on using -6an fitting at the tank, but didn't order enough hose connections, so I took the cheap route for the time being. FI hose clamps will be purchased to replace the ones shown in the picture.
You can see that I mounted the Corvette fuel filter next to the gas tank. It fits nice and snug in there. I weld a nut to the fuel filter bracket and bolted through the sheet metal. I plan on dumping my exhaust before the diff, so I wanted as much space as possible under the car.
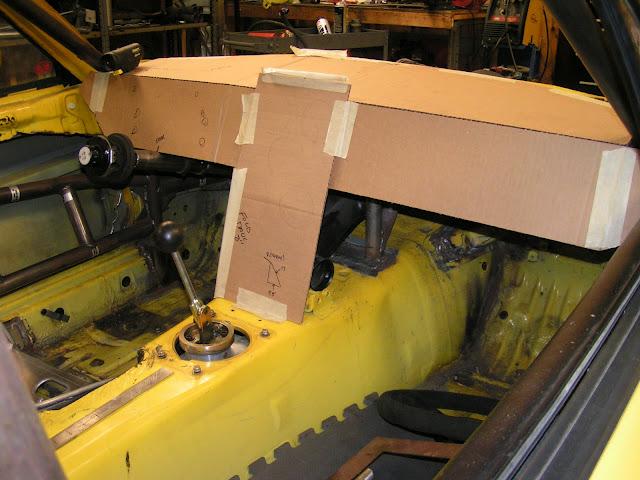
Dash
I mocked up my dash using cardboard. I think everything is where I want it. I modeled everything up in 3D tonight and will send the drawings out to the fab shop in the morning.
It will end up being 4 different pieces bolted together using PEM nuts. I wanted to be able to build the wiring / panels on the bench, then bolt them in.
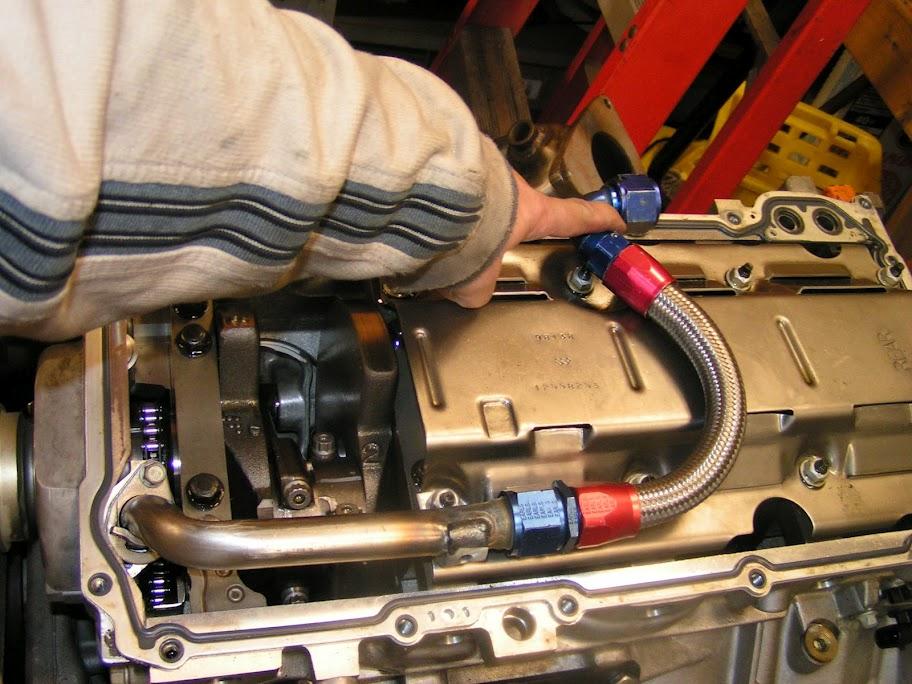
Oil Hoses
This is where I am stuck. Evidently I didn't give myself enough room to run the -16an hose from the oil pan to the dry sump pump. I need to look for some different fittings, possibly even hard lines.
This one kinda stumped me, and was a good breaking point.
10/30/10
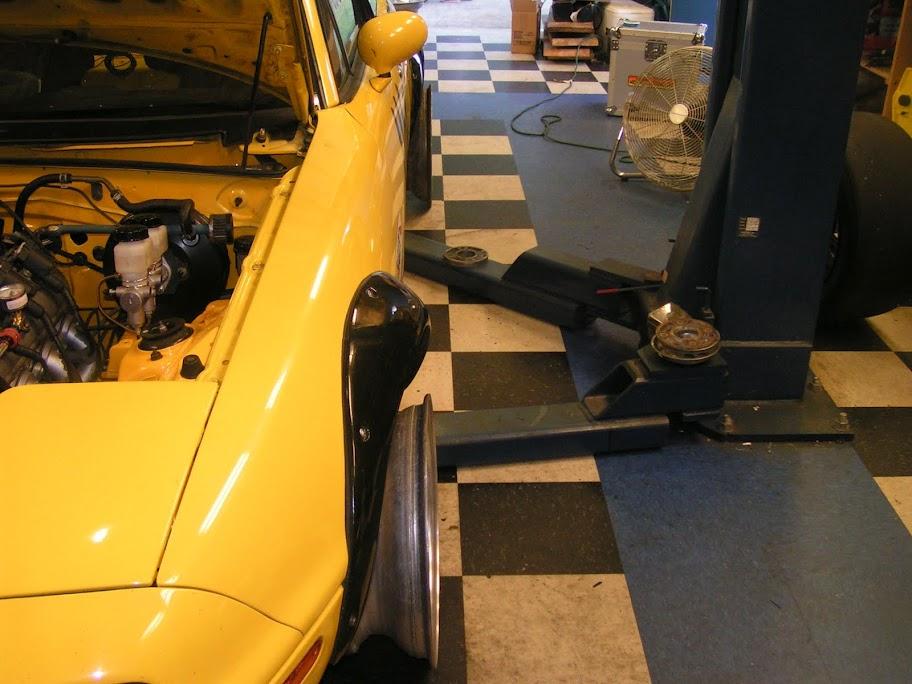
So for chits and giggles, I installed the front suspension and wheels/tires and dropped the car on some scales.
Now I know I am still missing quite a bit of stuff, like driveshaft, windshield, hood, fenders, front bumper, wiring and fluids, but I was shocked by the weight.
Here's what the car looked like when weighed...
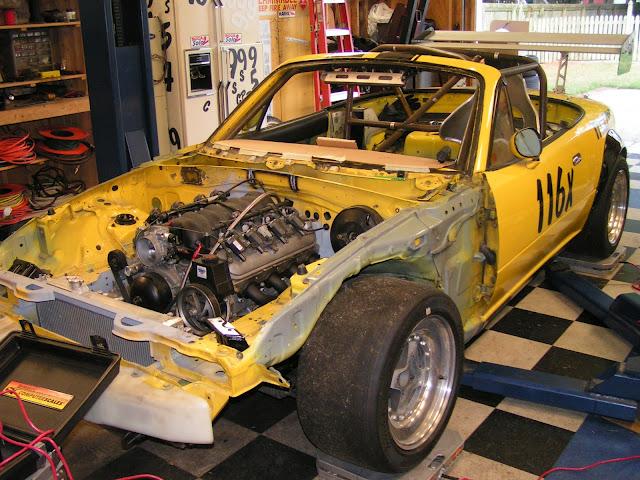
and the weight....

11/28/10
I was able to get out in the garage today and get something done.
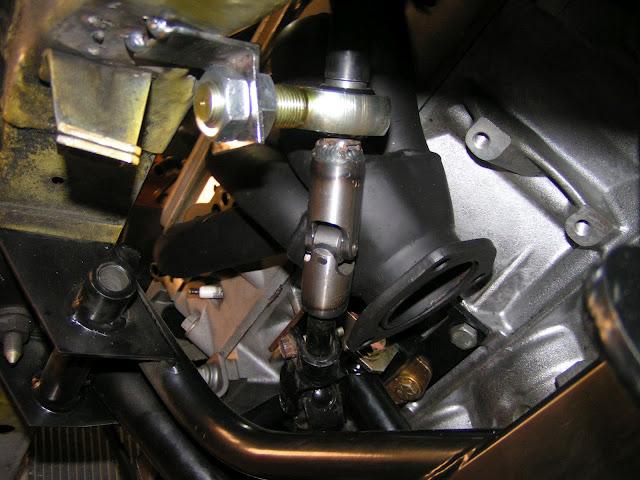
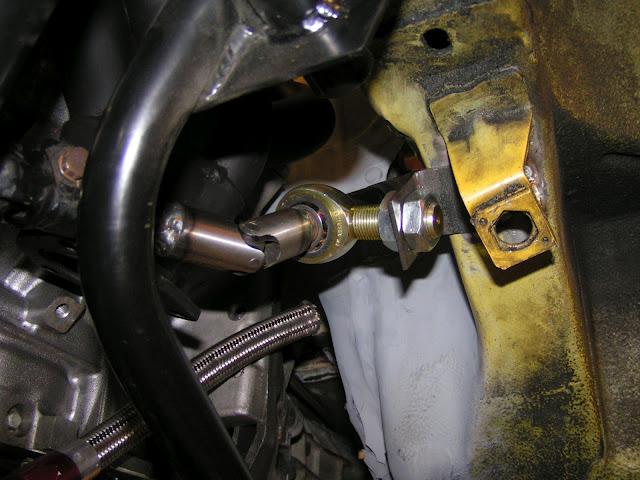
I added an additional universal joint to my steering shaft. This allows me to use off the shelf block hugger headers.
I bought a solid 1" universal and bored it to .575" for a slip fit onto the steering column. I also bought a .75" rod end to support the shaft. In order to use the rod end, I had to build a .75" OD, .575" ID sleeve.
I cut the smaller steering shaft and welded in the universal. I welded the sleeve onto the shaft and slipped the rod end into place. I then build a bracket to mount the rod end.
I still have to finish up the welding, but I think this is the final product.
This was a lot more tedious than I thought it would be. It took several iterations to get everything to line up.
Here's a couple pics...
12/25/10
I'm ready to get back out in the garage this week and get some work done. I have done quite a bit, but there is still a ton of stuff to do.
I will eventually build a triangulated strut tower brace that ties into the firewall where it is reinforced and then to the strut tower mounts that I saved from the MSM. The strut brace may extend forward and tie into the chassis also, but that is yet to be determined.
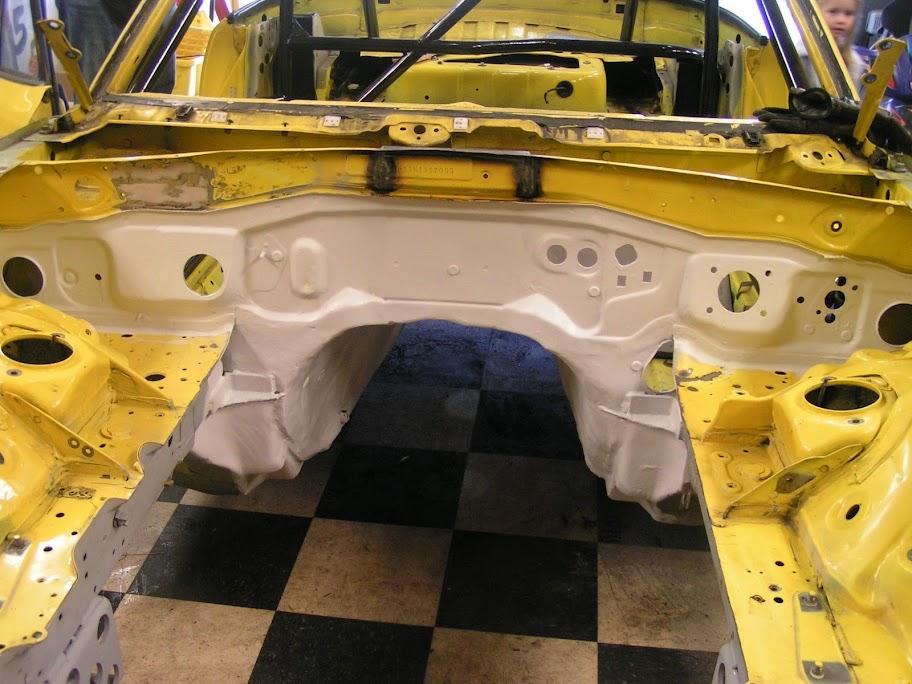
I wanted to tie the front of the car into the cage. I had to cut out the radius-ed supports at the rear of the engine bay to fit the engine. My thoughts were that without the supports I have created a shear point. With the added torque of the V8 twisting the car, I wanted every bit of stiffening I could get.
Will it work? I dunno? It will all be bolt in pieces, so I will be able to test it with and without the brace to see if it makes any difference.
12.27.10
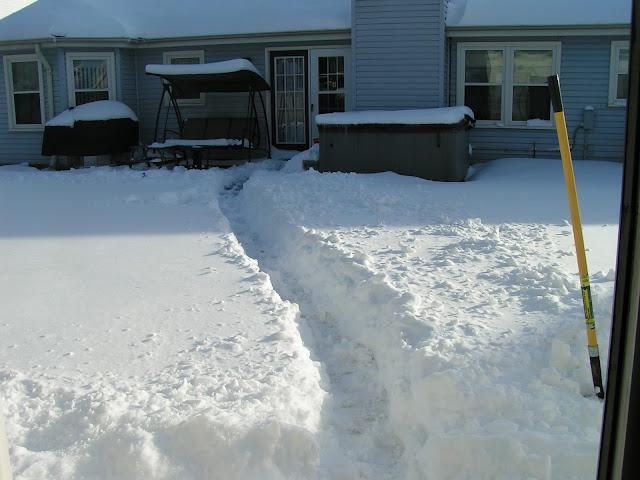
Day 1 of "Get this project done" week.
I had to start the day off digging out a trail to get to my garage. Here's a picture from the side door of my detached garage looking back at my house.
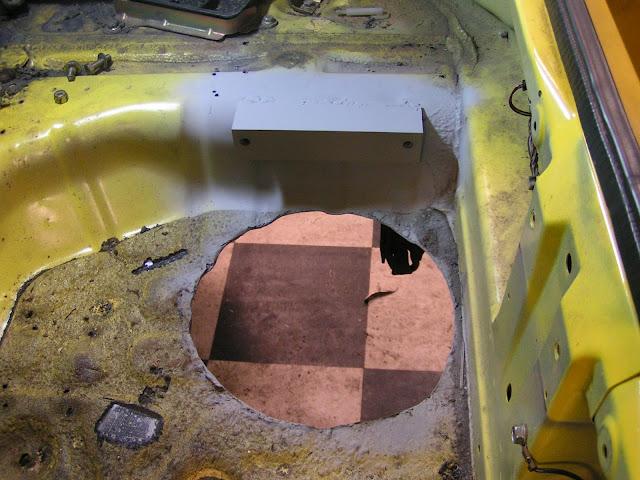
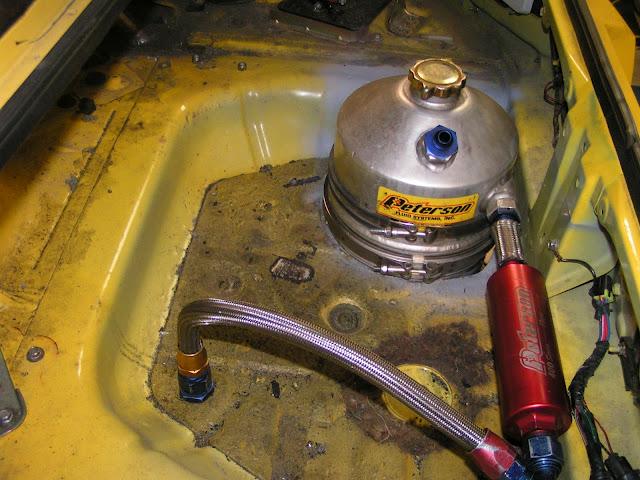
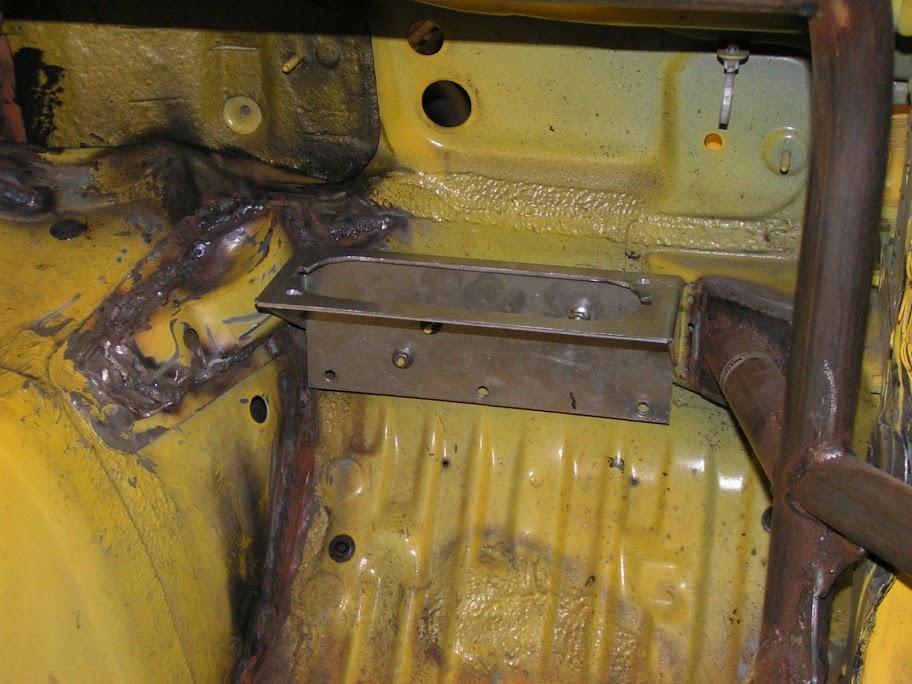
So I jumped into mounting the dry sump tank today. I wanted to get the tank as low as possible in the car so I decided to cut a hole in the trunk floor and mount the tank a little lower. This will also make accessing the drain plug much easier.
I welded some nuts to the back of a piece of angle, then welded the angle into the trunk.
Here's a couple shots from under the car. The cord is for the immersion heater for the oil. It's going to be nice to plug the car in overnight at cold track events.
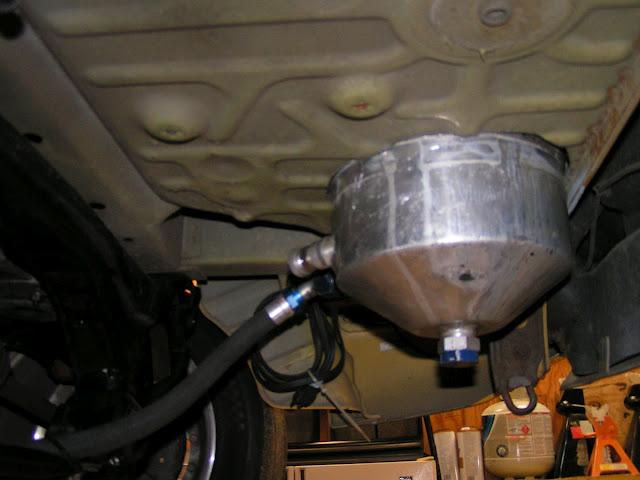
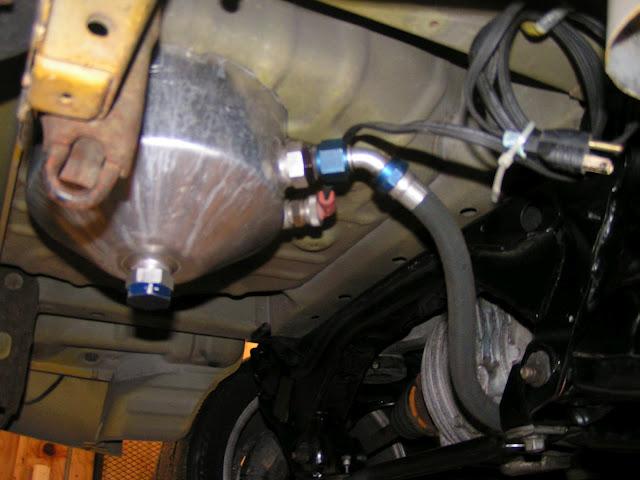
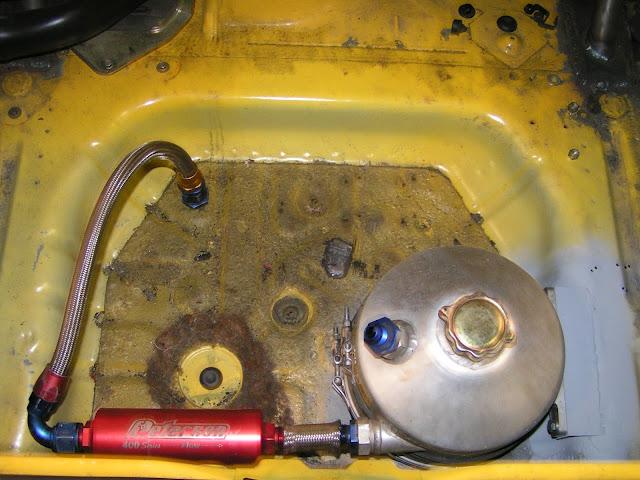
Here's a couple shots from above with the oil lines temporarily laid out. The red tube is a Peterson's 100 micron oil filter.
I had a -12AN bulkhead fitting laying around and decided to use that rather than just running the line through the trunk floor.
The line between the tank and the filter is just a place holder till I can get a female/female coupler.
More tomorrow....
12/28/10
Day 2 of "Get this project done" week does not have much to show in pictures.
Well maybe one:

I started off the day by taking the measurements for my drive shaft. I picked up a Camaro drive shaft a while back and finally got around to taking the measurements to have it modified.
I drew up some detailed sketches then headed off to the local drive shaft/machine shop to drop it off.
I also took them my aluminum flywheel and clutch pressure plate to have them balanced as an assembly.
I had to do some other running to do, but ended my day on a high note.
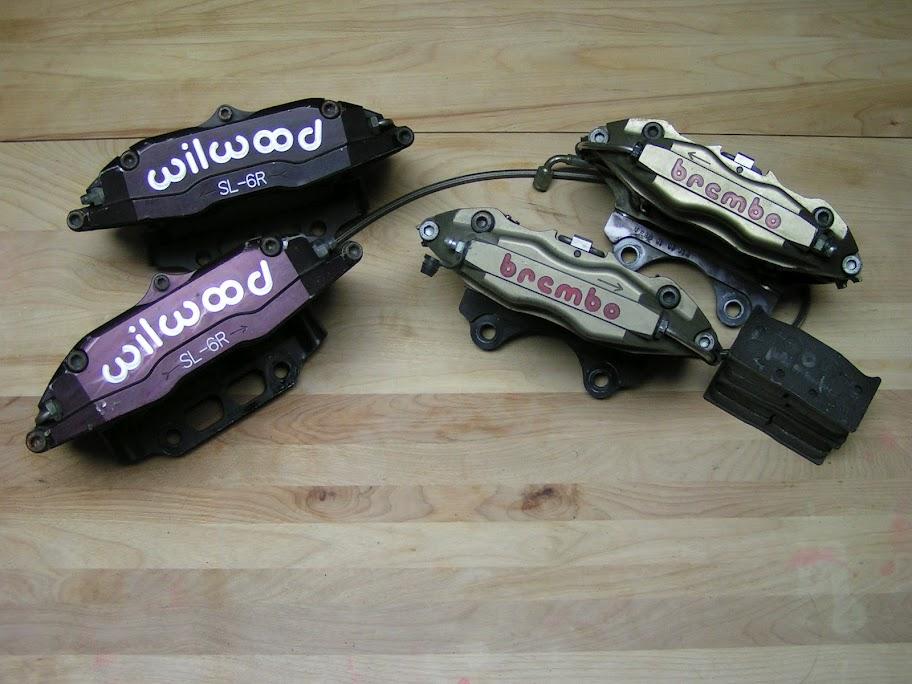
I stopped by and picked up my front and rear calipers. They came off the same car that I got my engine out of. I worked out the deal several months ago, I just never got over there to pick them up. Today I stopped by and handed over the cash and took them home.
The fronts are 6 Piston Wilwood SL-6Rs. The rears are 4-Piston Brembos.
They came with a fresh set of Performance Friction 03(F) and 01 (R) compound pads. Not sure if that's what I'll stay with, but it's a start.
I plan on running 11.75 x 1.25 rotors front and rear with custom rotor hats and caliper mounts. Probably overkill, but o'well.
12/30/10
Day 3 of "Get this project done" week did not happen. My relatives visiting for the holidays were kind enough to pass on stomach bug. I spent all day yesterday either sleeping or puking. Good Fun!
Day 4 of "Get this project done" was a good, but frustrating.
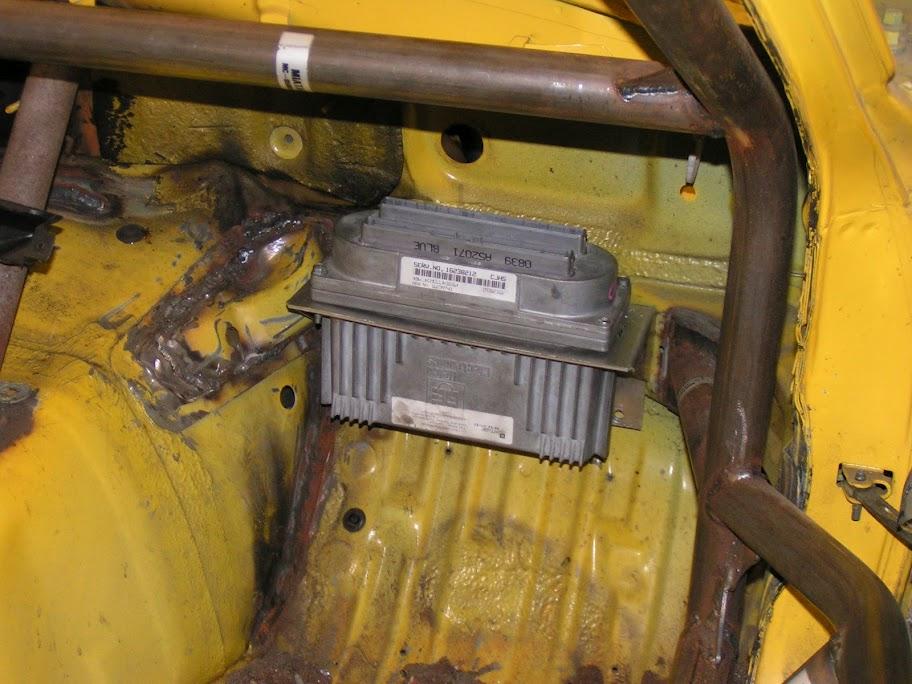
I started the day building a mount for my ECU. I bent up some aluminum, welded in some gussets and hacked out a hole for the ECU. It didn't turn out as nice as I had hoped, but it will do. It will be hidden by the dash anyway.
I drilled out 2 of the 4 ECU case screws and installed longer screws and nuts to mount the ECU to the mount. I intended on mounting the bracket from the bottom after the ECU was mounted, but that ended up being a less than ideal idea.
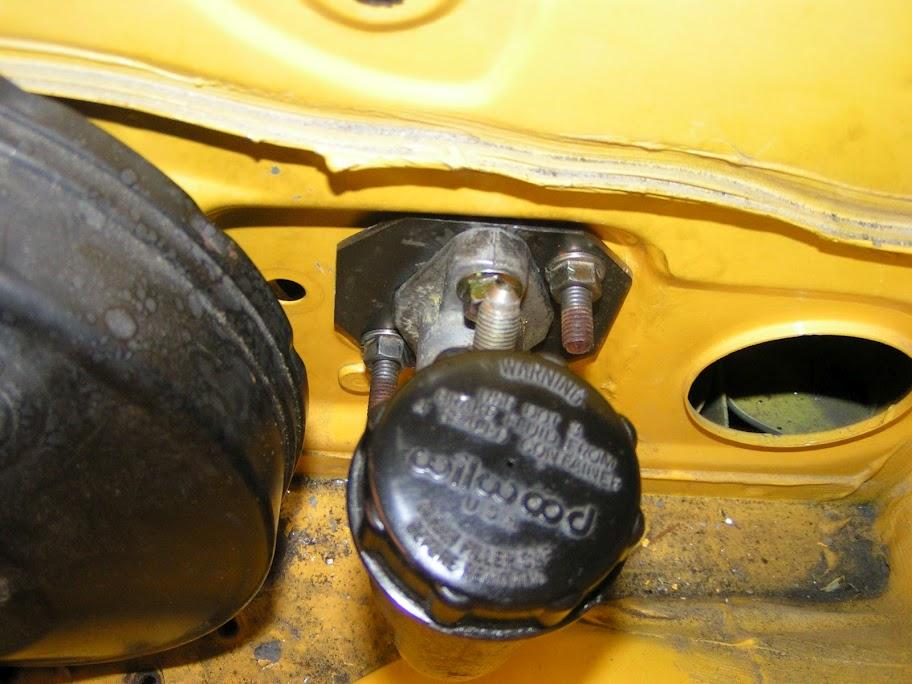
Then I jumped into building an adapter plate for the Wilwood clutch master cylinder. This is where the day got frustrating.
Note to anyone planning on building your own adapter plate: BUY THE ONE FROM V8 ROADSTERS!
I spent 3 if not 4 hours building this plate. It took me 3 different tries before I got it right. I started with aluminum, then realized there was no way for me to get to the nuts on the backside to mount the Wilwood CMC.
I then built it out of steel and thought it would be cool to weld in studs to mount the Wilwood CMC. Great concept, terrible execution. I ended up with the stud all out of wack, too far apart and less than perpendicular. I tried to remove the studs and ended up destroying the plate in the process.
Round 3.... I built it out of steel again and welded nuts to the back side of the plate. I then had to drill clearance holes in the firewall to give the nuts some room.
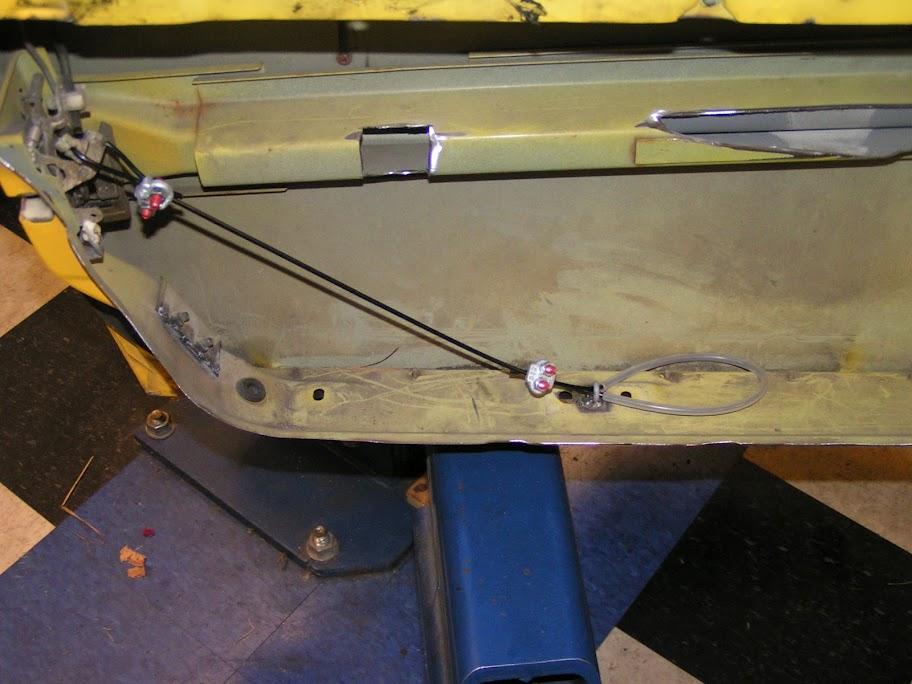
I couldn't end the day being frustrated, so I decided to build the inside door releases. Simple, functional, and perfectly placed when sitting in the car.
I may buy some crimp sleeves for the wire rope and bring home a crimper from work. This would eliminate the bulky wire rope clips.

02.20.11
Finally an Update!!!
I've gotten quite a bit of tedious stuff done in the last few weeks, but nothing of pictorial significance.
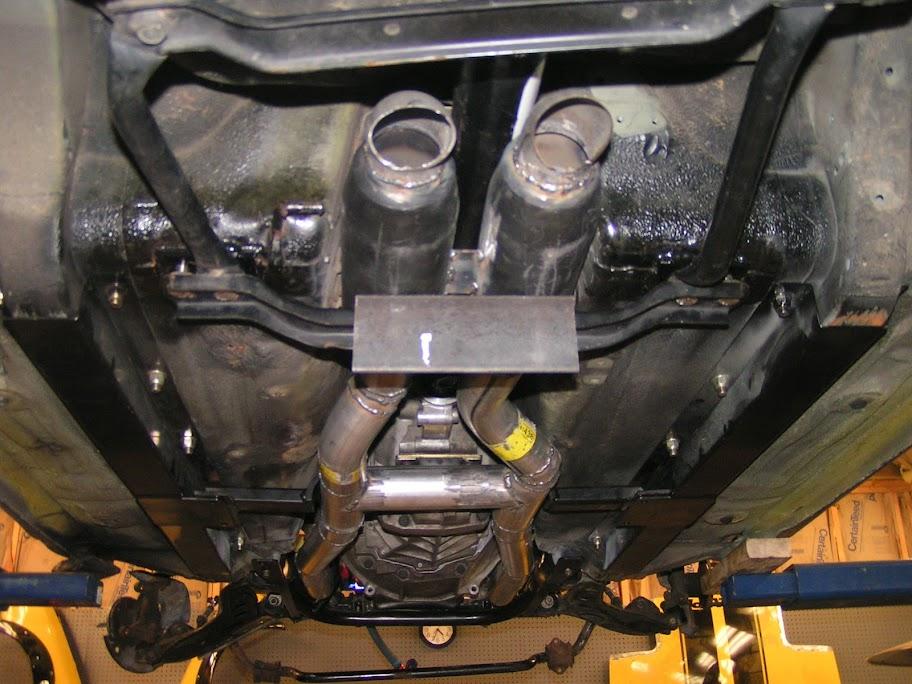
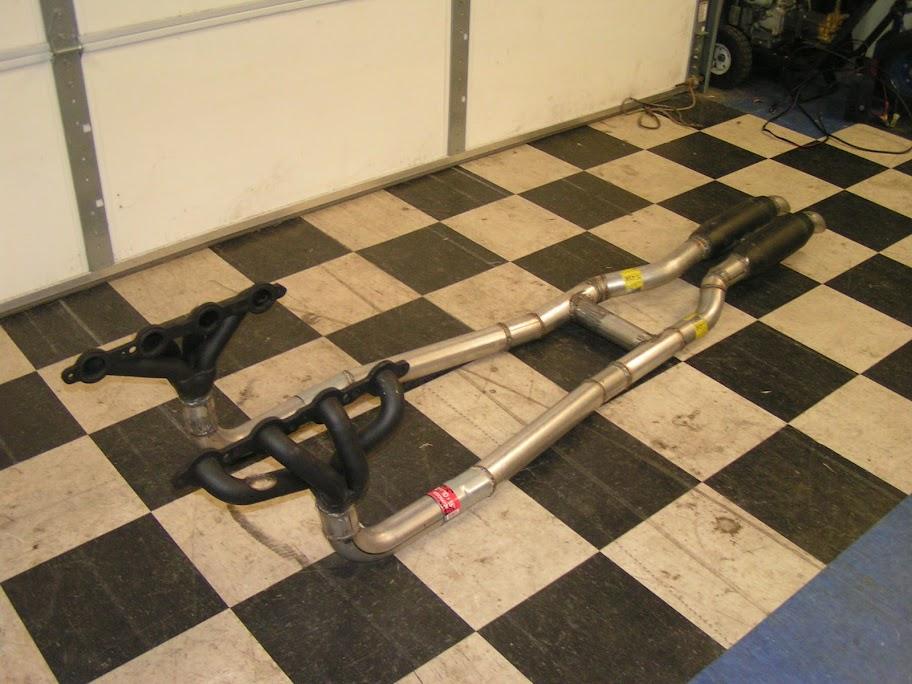
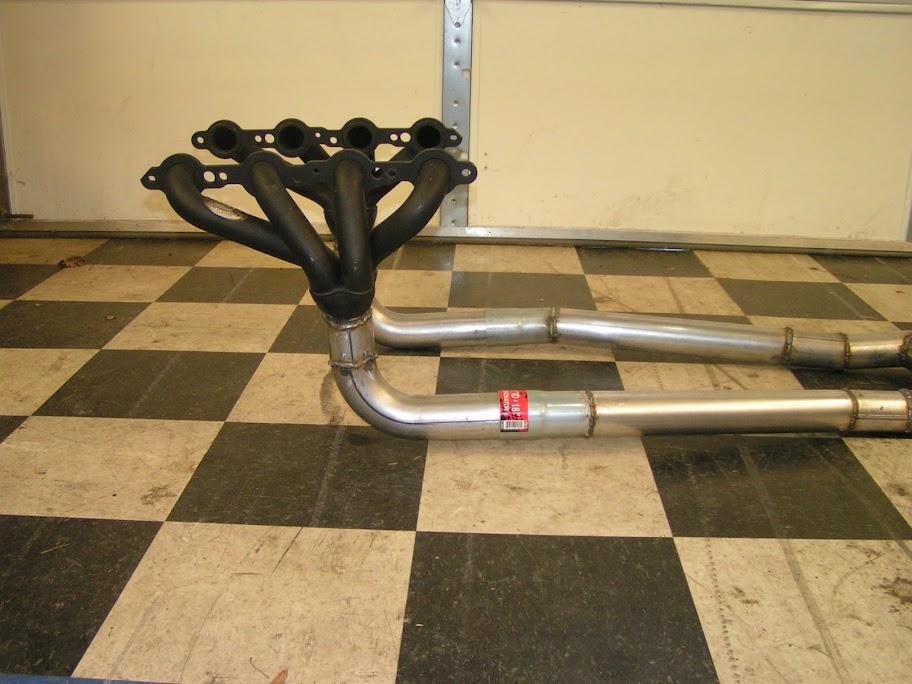
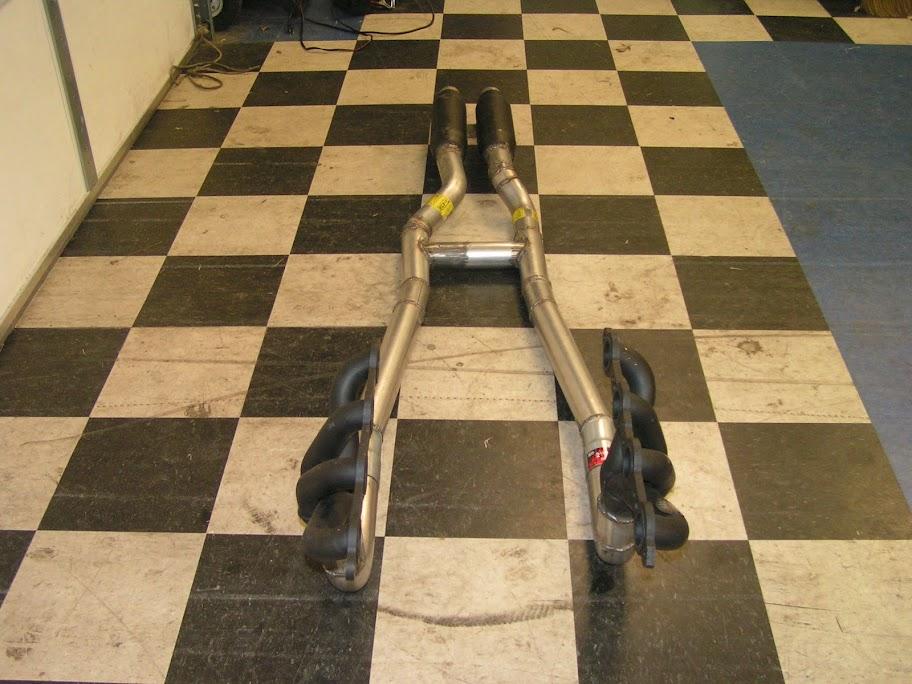
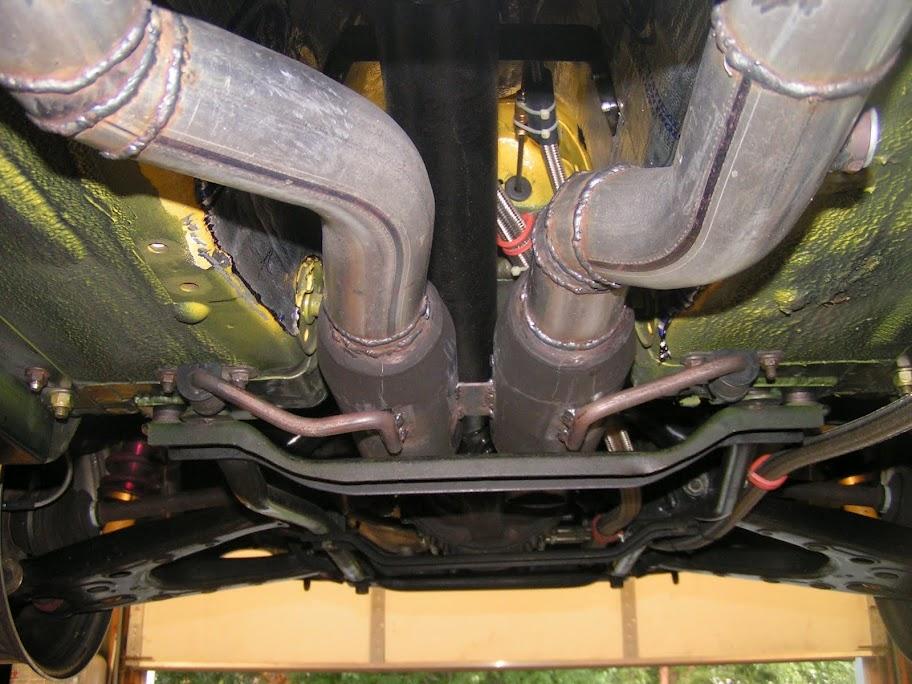
This weekend was exhaust time. I built the entire exhaust system for the car. I ended up going with Mororso spiral flow racing mufflers and a H pipe design. I purchase the pieces to build a X-pipe, but could not get it to fit, so H-pipe it was.
I extended the headers to the point where the engine and transmission meet. This gave me more room for my steering shaft by eliminating the 3 bolt flange and made it very easy to install/uninstall. I will be using stainless steel band clamps to attach the exhaust to the headers. (not shown in pictures)
I still have to buy some hanger rod stock and build some hangers, but that can be done another day.
I'm pretty happy with the outcome, but admit that it took longer to do than I ever anticipated. That is almost two full days of work. Now I know why people just buy a pre-built system.
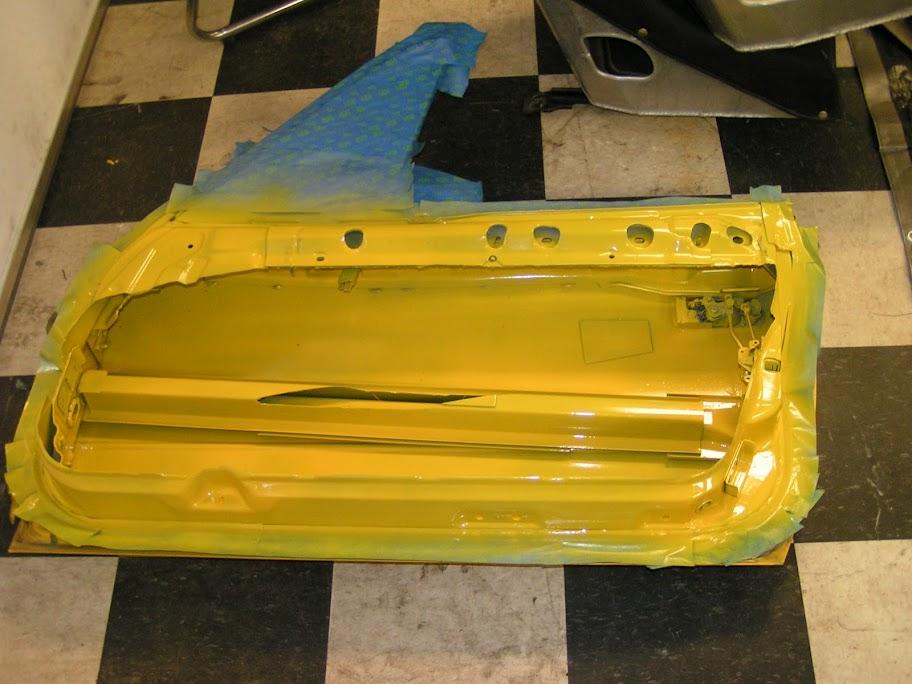
I started painting my cage this weekend also. It was a great task when I got frustrated trying to get the exhaust together. There were many times when I needed to get away from the exhaust, and painting took zero thought and filled the void.
Cage pictures when I finish.

Angle iron used as a spacer.
3/6/11
Time for my bi-weekly update. I've been working, just been slack with the picture taking.
To add to the madness of getting this project done, I decided to take on another project and added insulation and pegboard to my garage. I'm really pleased with the results, just wished I would have done this a lot sooner. Do you realize how much stuff one accumulates in 6 years? Everything had to come out of the garage to put the insulation up.
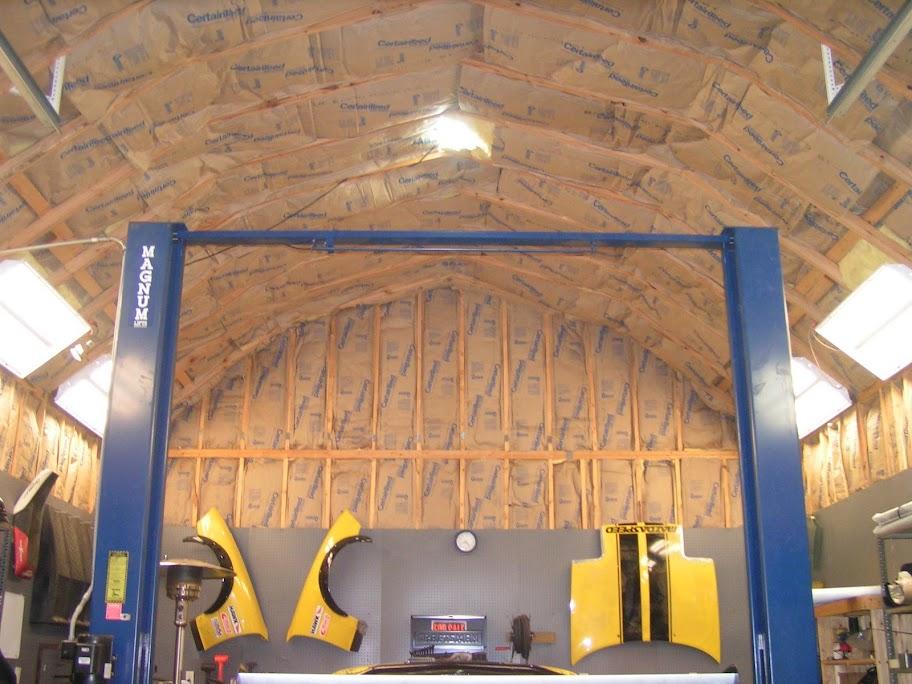
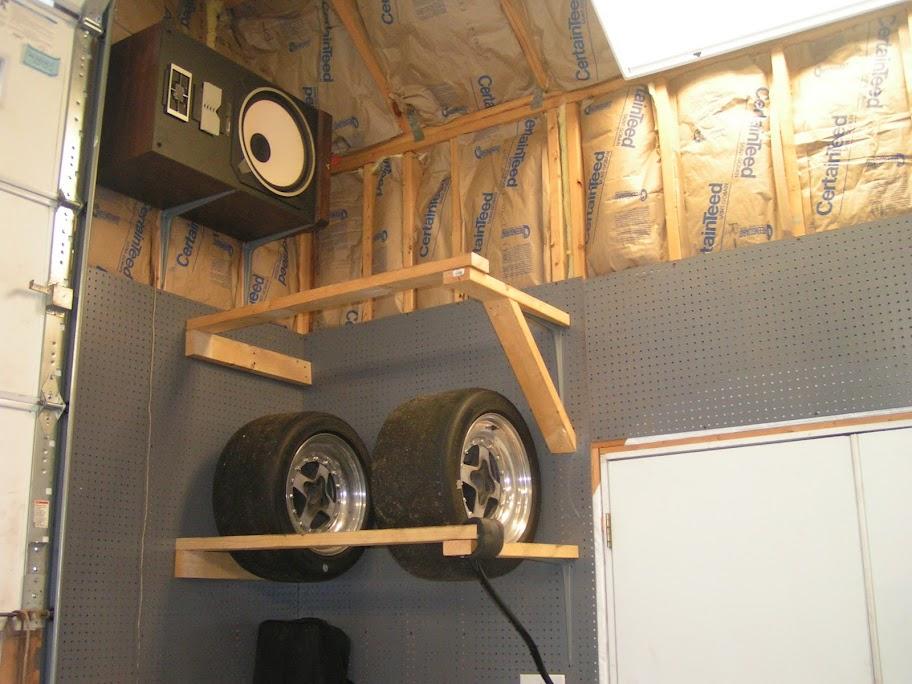
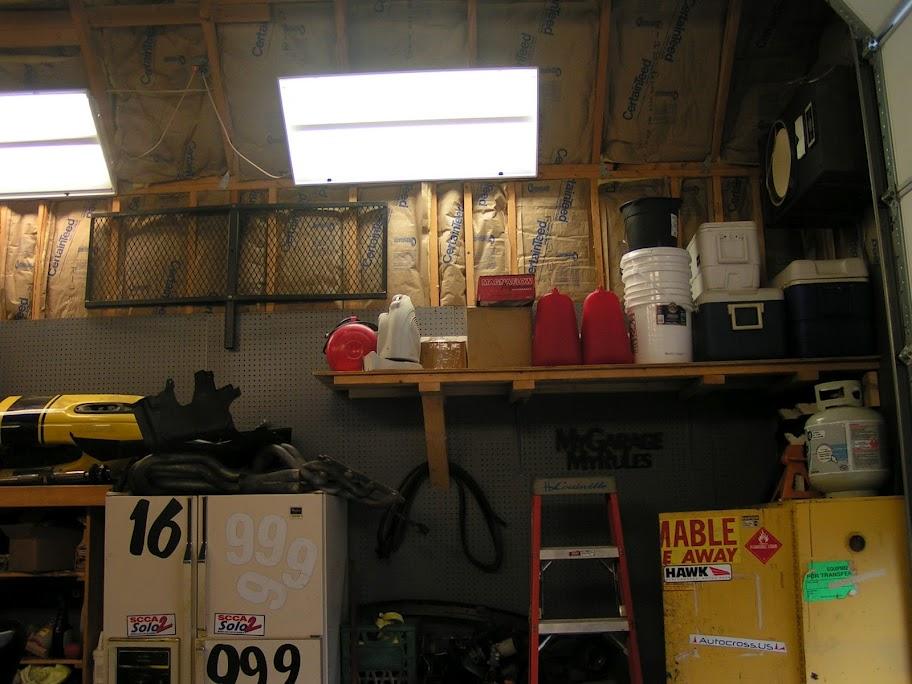
Now onto the car.....
Cage painted with POR15 <<<-----Highly recommended. Brushes on and looks like it was sprayed with it dries.
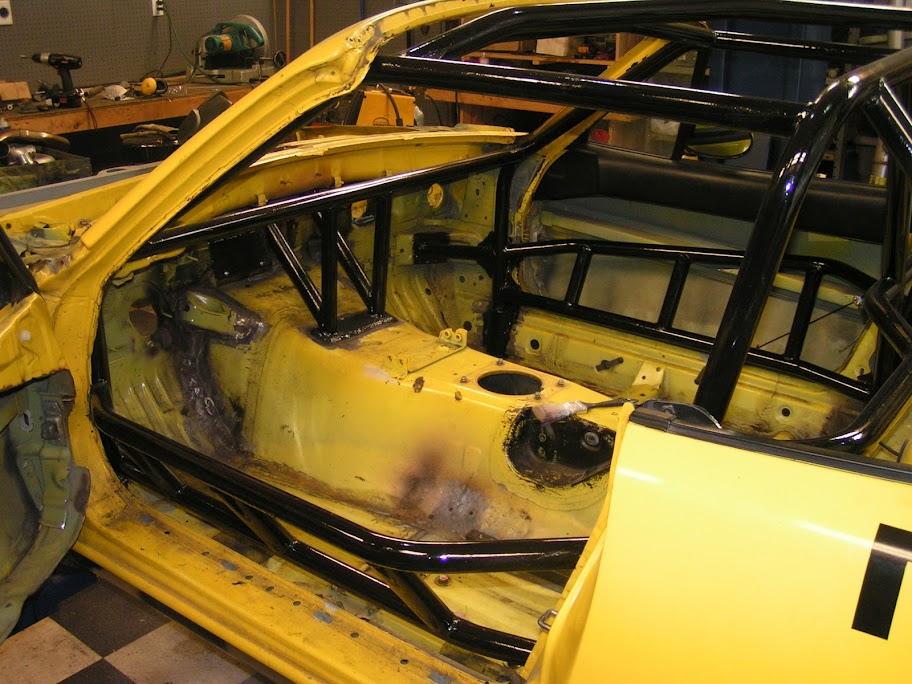

Next up....
New sway bar mounts. Yes, overkill, but it was tubing that was available. At least I cut some holes to lighten them up a little bit.
I forgot to take pictures when it was all together. I will do that when everything is put back in. I can guarantee you that the swaybar mount will not break / bend.
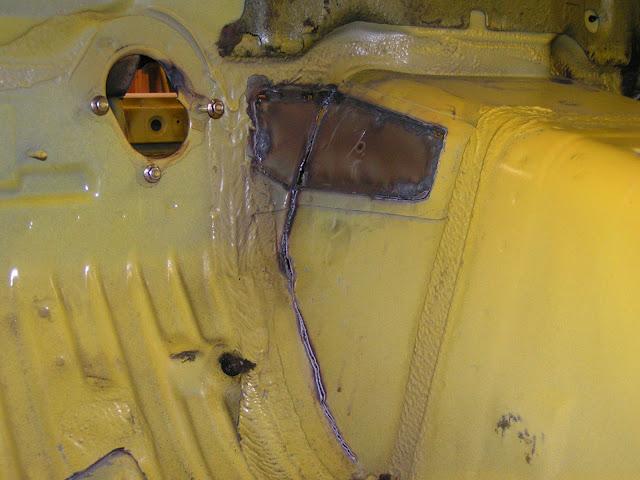
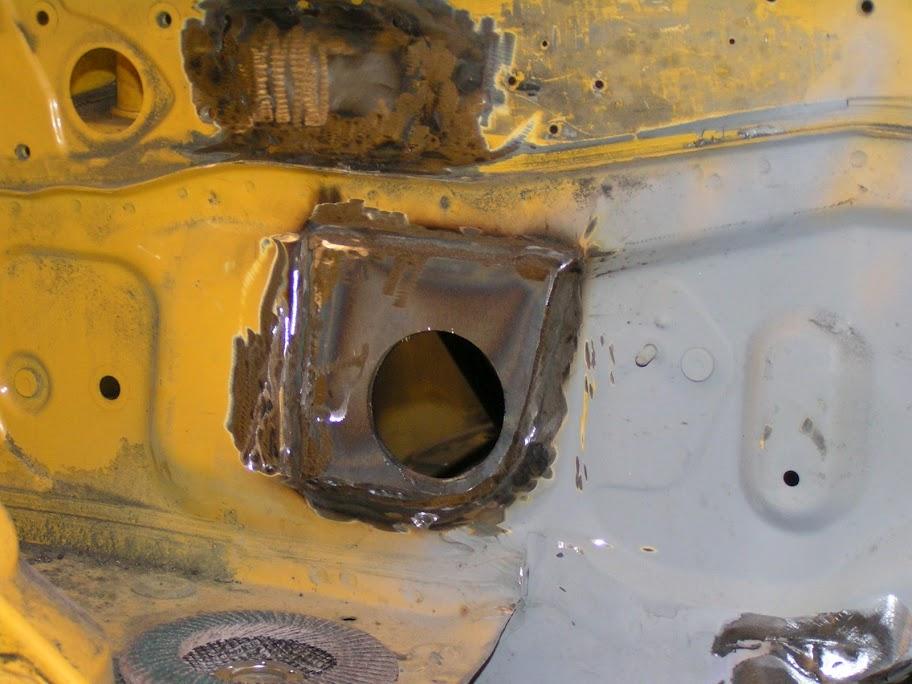
I test fit my harness last week and found that I didn't have enough slack to run it though the factory harness hole and make it back to the ECU. I had two options, extend the cables or make another hole for the harness to go through. I opted for the latter.
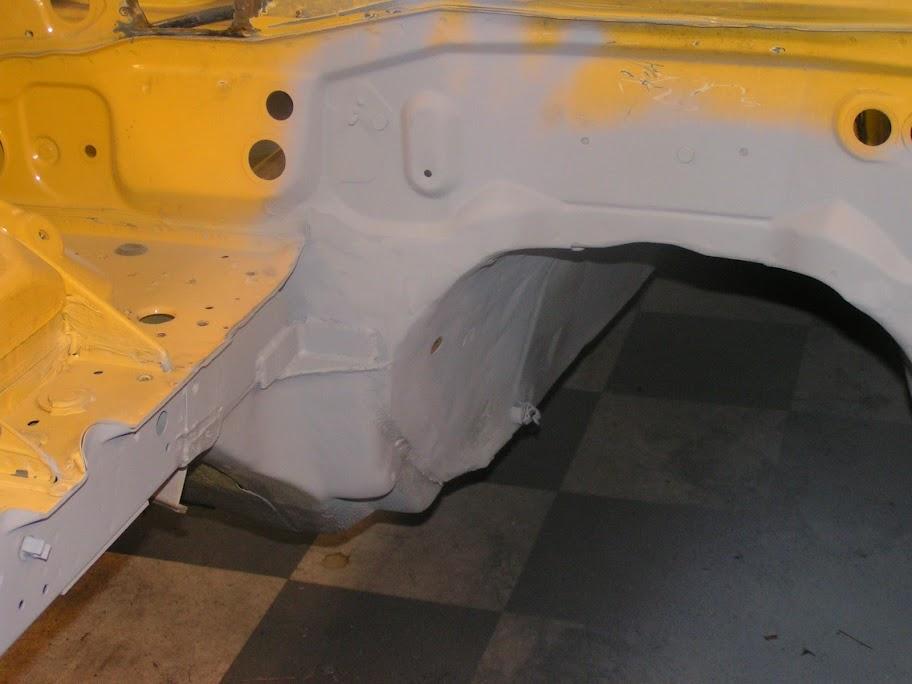
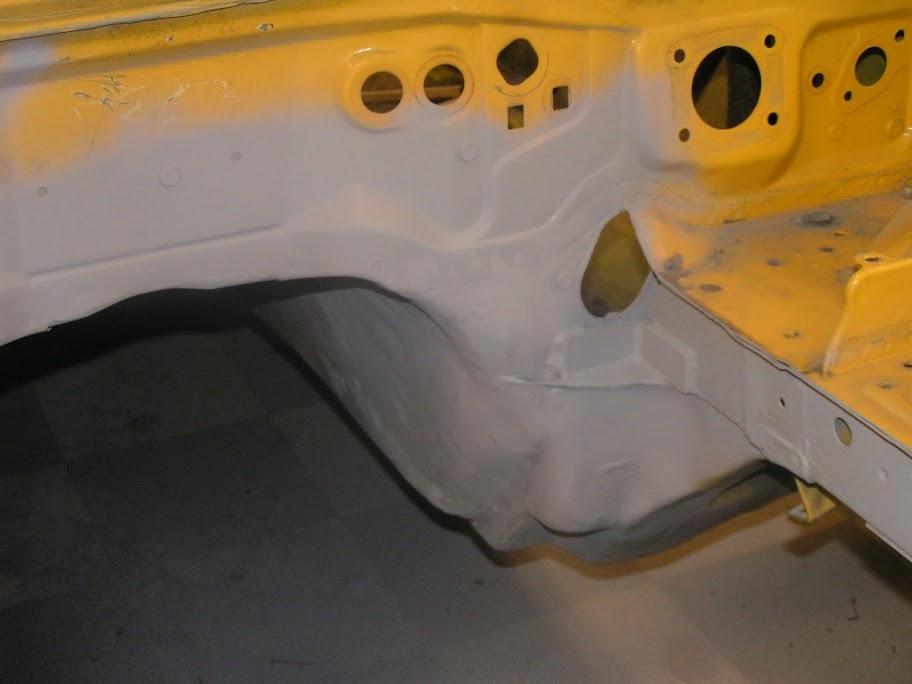
I welded in a piece of 10awg plate with a hole for the harness. I then used the hole in the plate as a guide to cut a hole out of the firewall. Notice the hole is right where the AC lines used to be. As you can see in the primed picture below, I added a little body filler and smoothed everything out to where it almost looks like it came that way.
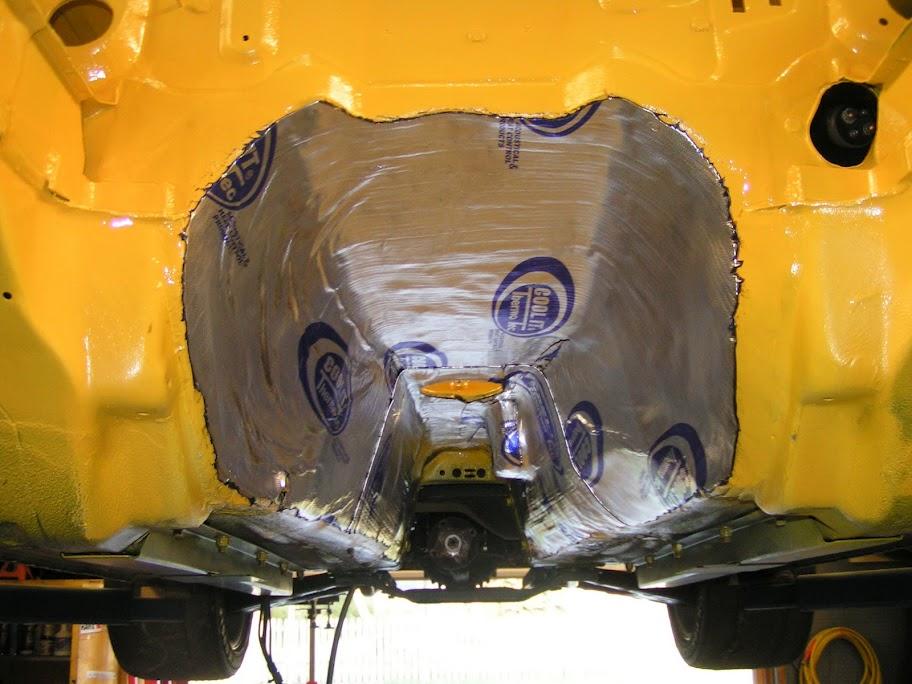
I plugged up the hole in the firewall where my intake ran on my SC'd setup, fixed the tranny tunnel where I got rambunctious with a sledge making room for the throttle pedal, scuffed, cleaned, and started laying down the insulation paint.
I ended up using an epoxy primer with a ceramic additive. (Hy-Tech Insulating Paint) The additive mixed in rather well, but left a little bit rough of a finish. I'm not going for the show car look, so function over form and all is good. I brushed on the tight spots and used a 3in roller for anything flat.
Both sides of the firewall.
Both sides of the tranny tunnel
Driver and Passenger footwell / seat areas.
Overall, it's been a rather productive two weeks. It's really nice to be at the point where I'm adding paint and ready to put everything back together. It finally feels like I'm on the downward slope and can see light at the end of the tunnel.
Of to the Dixie tour next weekend, then back to work. Must finish soon!
3/18/11
As much as I hated to do it, I hit the "EASY" button earlier this week. Hopefully the sale of the calipers I have will offset some of my cost.
I really want to finish this car up and make it out to the track in the next month or two. Designing a custom brake setup in addition to finishing up the swap in that time frame was going to be tough, if not impossible.
Another item off the list.
3/19/11
Today was rather productive....
I planned on prepping and spraying the interior and engine bay today, but a phone call last night change that plan.
My buddy, who helps me out with the parts that need to be machined / fabricated, called last night and said he was going to be in the shop today and wanted to know if I wanted to stop by and finish up my dash parts.
I jumped at the opportunity to finally get my dash done. (I gave him the drawings in November) I met him at his shop at 7am and by 11 I was headed back home.
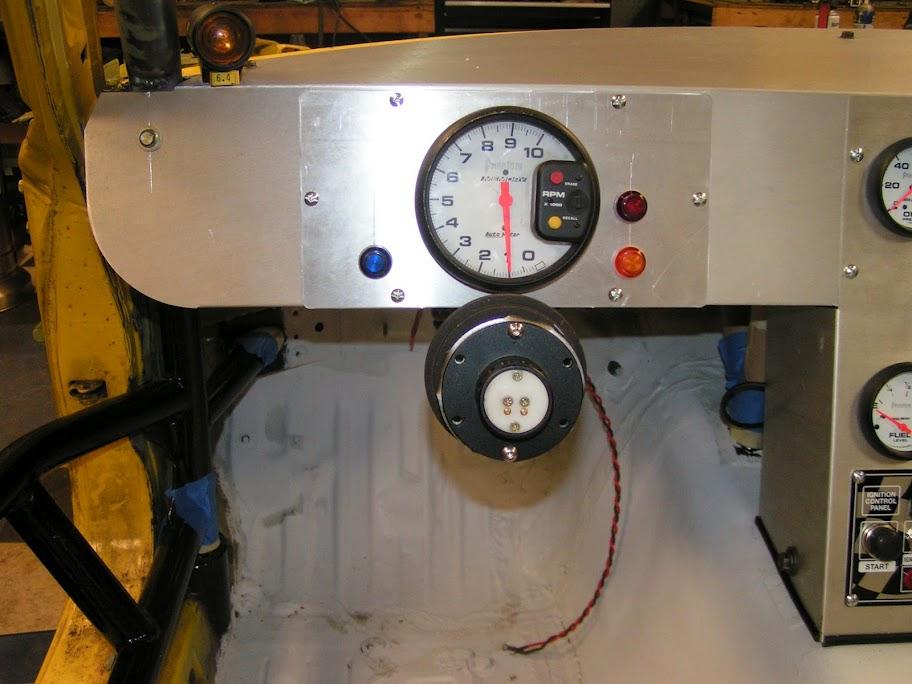
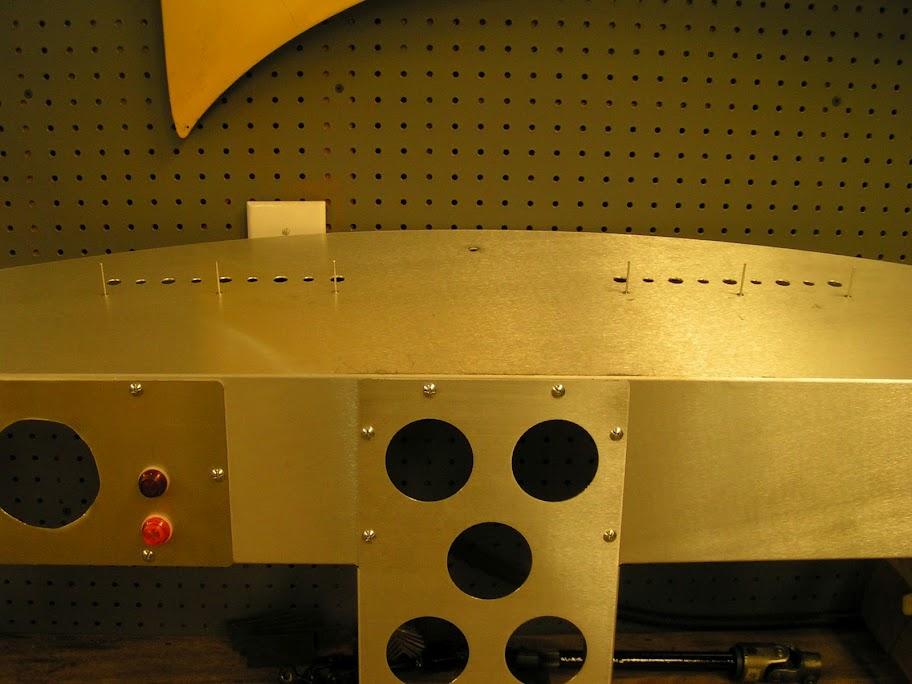
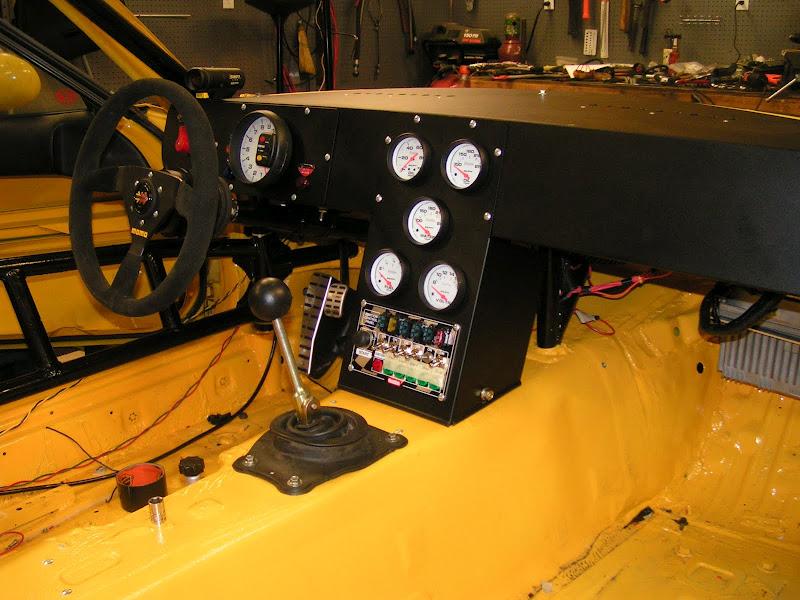
I still had quite a bit of work to do get it looking like it does below. I had to weld in some mounting tabs, drill, trim, and fineness everything into fitting like I wanted. This took most of the afternoon to knock out.
Overall, I am extremely happy with the outcome. I didn't weigh it, but it doesn't weigh much. Everything is 0.0625in aluminum.
I will pull it all back out and get it powder coated before final assembly.


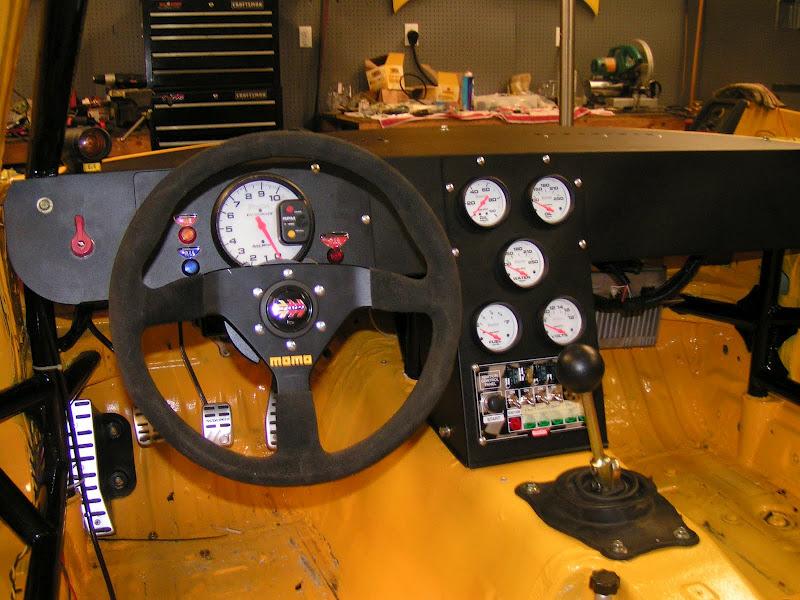
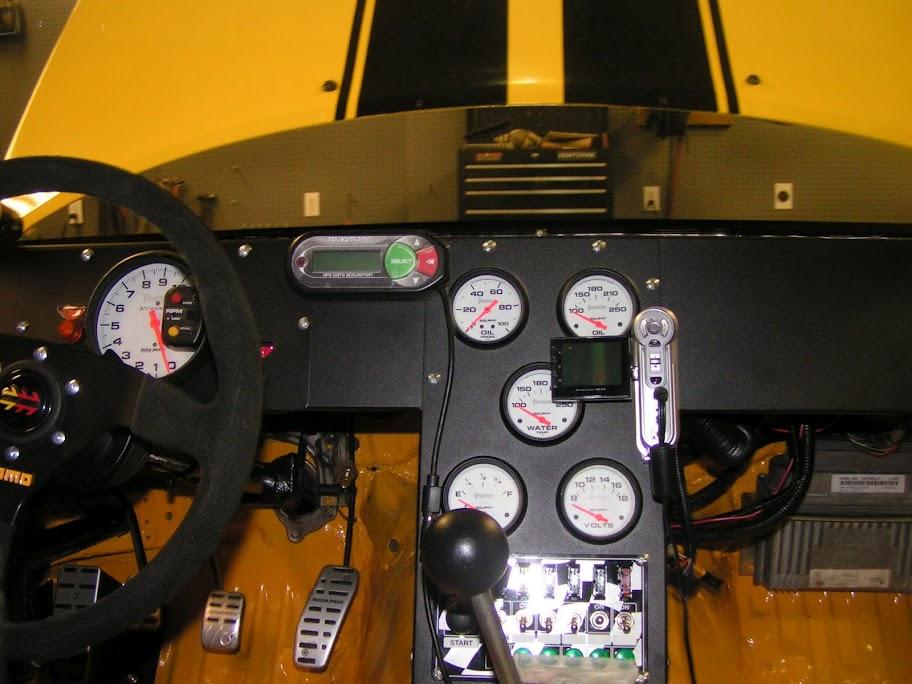
RED- Oil Pressure
ORANGE - Oil Temp
BLUE - Water Temp
3/27/11
I have officially crested the hill and am on the downward slope. Everything has a fresh coat of paint and it's time to start final reassembly.
I spent several hours this week after work tapping up my cage and prepping the interior and engine bay for paint. I never would have imagined that it would have taken as many hours as it did to prep.
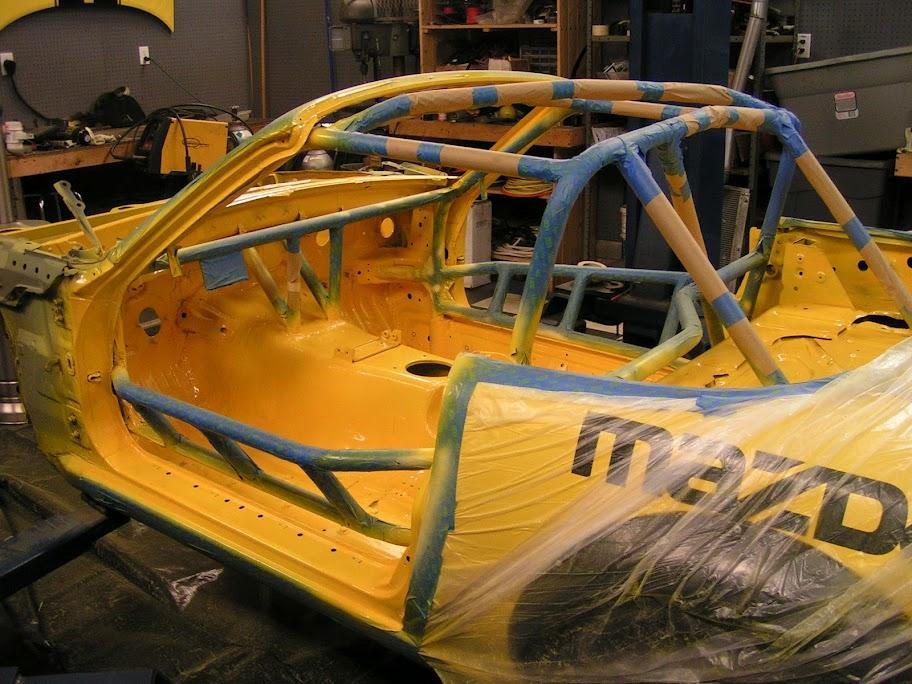
After a few coats of paint, it was time to undo all that hard work. Luckily my wife and kids came out to the garage and join in the fun.
It was a lot of work. 2-3 evenings after work prepping, then pretty much all weekend painting, but the final product was worth it. I'm really happy with the way it turned out.
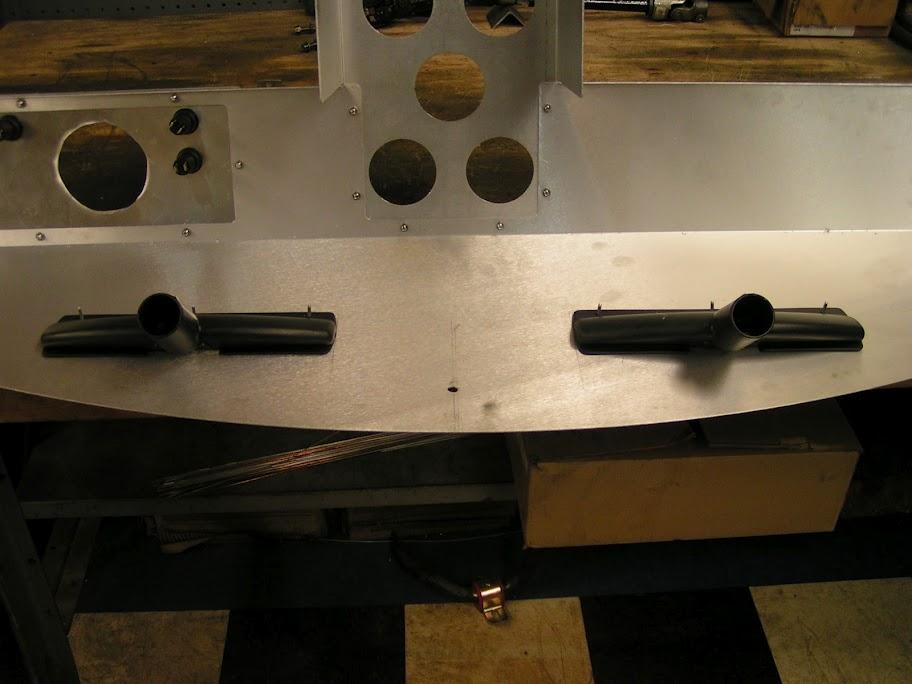
3/27/11
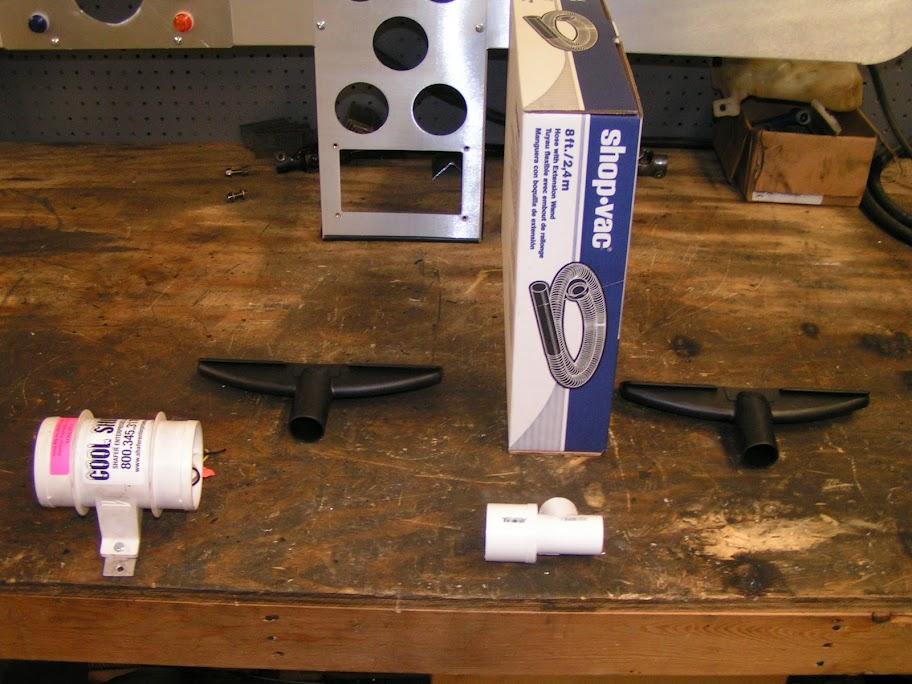
Next up was the defrost ducts for my custom dash. A quick trip to Lowes got me 90% the way there.
2- 1.25in Shop Vac floor attachments
1- 3/4 PVC "T"
1- 1.25 to 3/4 PVC Reducer Bushing (2in OD)
1- 8ft Shop Vac hose
1- 3in 12v inline fan (Cool Shirt fan, but easily found a local boat supply store)
1- 3in to 2in silicone reducer (On order)
Some 1/8in rivets, double face tape, and several strategically place holes in the dash, and my defrost system is done.
4/4/11
I got quite a bit of work done this weekend, but I'm at the point where it's hard to show pictures of what I have done.
I started off yanking down the rear end. For some reason, I thought the backlash seemed too loose. I know I set it per the RX7 factory manual, but I was second guessing myself.
I pulled in down from the car, broke it apart on the bench and took the measurements and it still set exactly where I thought. 10.5 micron backlash when the specs are 9-11 microns. Doh! A lot of work for nothing. At least I don't have to think about it any more. I even reset the backlash closer to 9, just because.
Next up I installed the emergency cut off switch. I planned on just installing it in the aluminum dash, but once installed I realized the dash was too flimsy. So I broke out the grinder and the welder and welded another tab onto the cage. Nothing better than grinding away a freshly painted cage. :bang: I'm sure it wont be the last time I do that before this build is complete.
I then added some paint to my headers. I ended up using POR20. It went on smooth and looks good. I guess time will tell to see if it holds up.
I ended the day installing some Cool-it insulation mat in the tranny tunnel. Added a little weight, but hopefully it will make up for that in the cooling it provides.

4/16/11
I'm officially at the stage in my build where I can work for dozens of hours and have literally nothing to show for it.
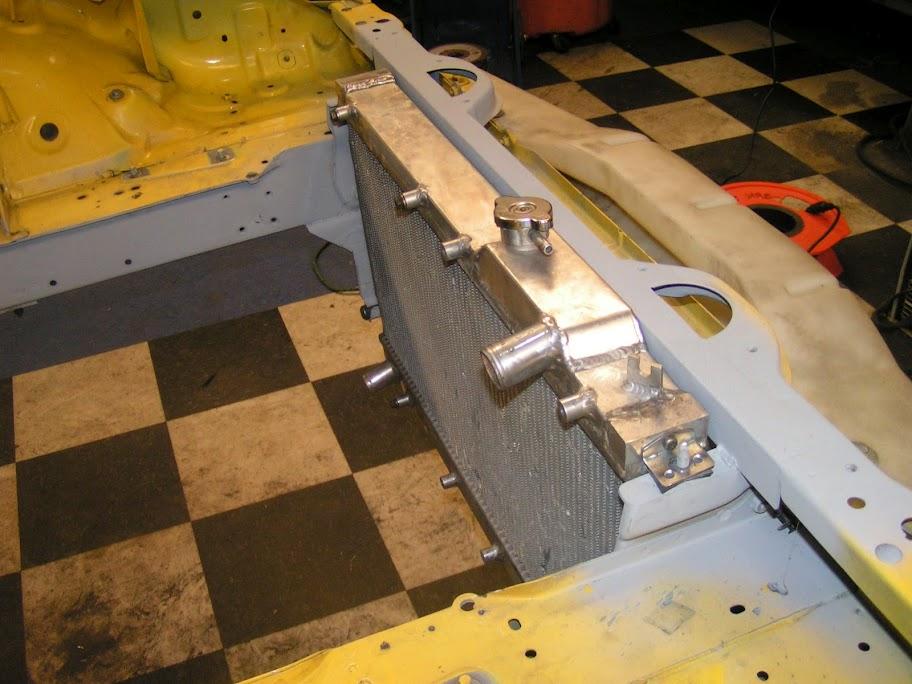
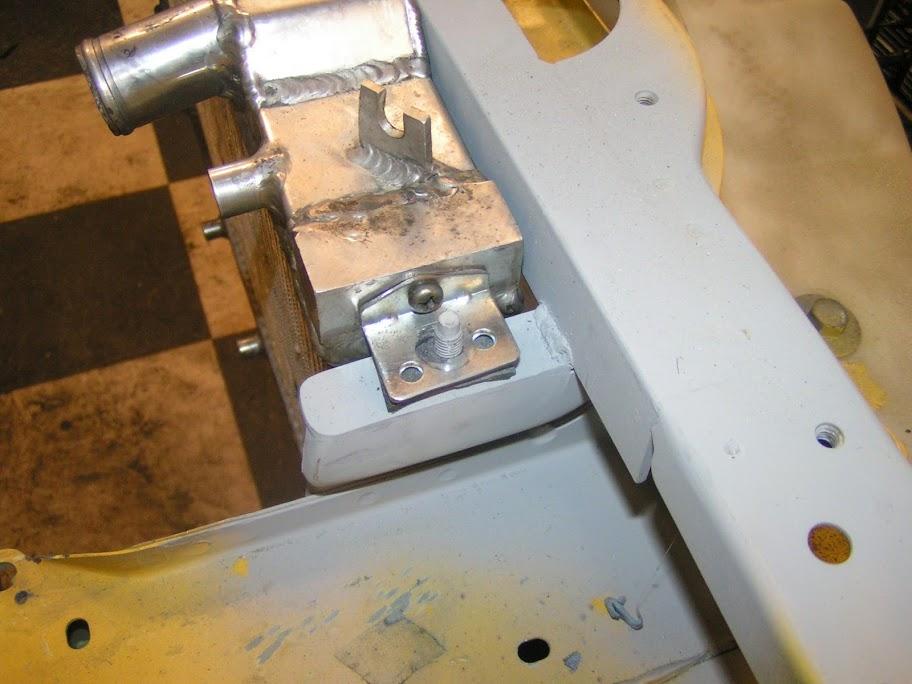
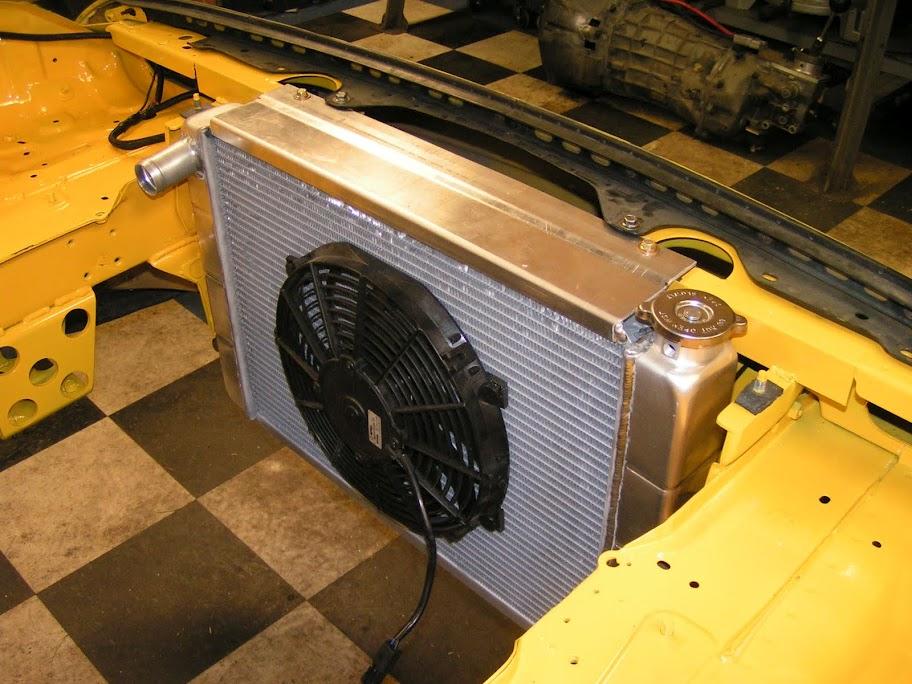
I did finally finish up my new radiator. I went with a generic GM race radiator and welded on mounts. The bottom mounts worked out first try. The top mount took my three times before I got it right. I'm fortunate the fab shop that helps me out is very understanding.
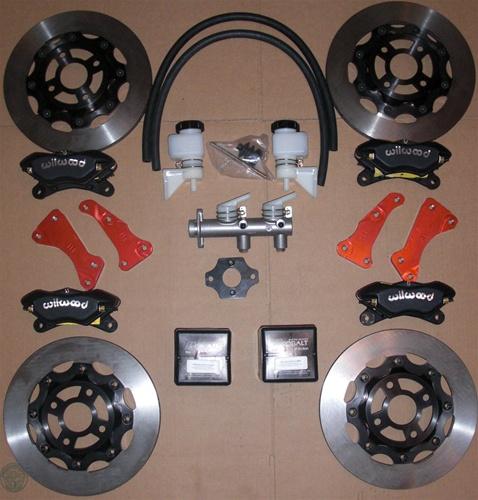
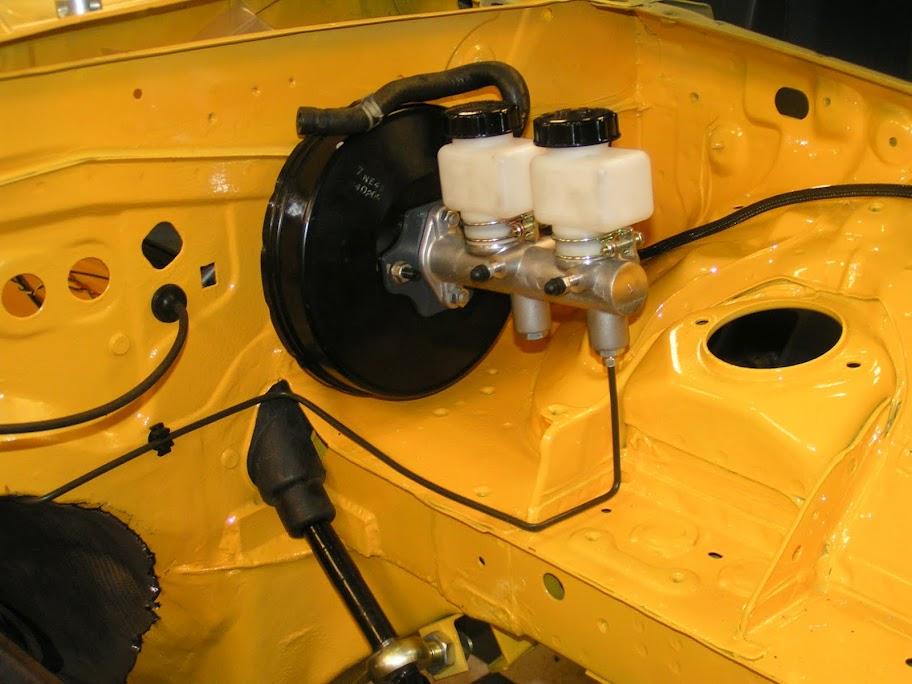
My V8R Brake Kit showed up this week, so I was finally able to get some work done with the brake lines. I finished up the rears and have the fronts about 95% done (I went back out the garage after I took the pictures below).
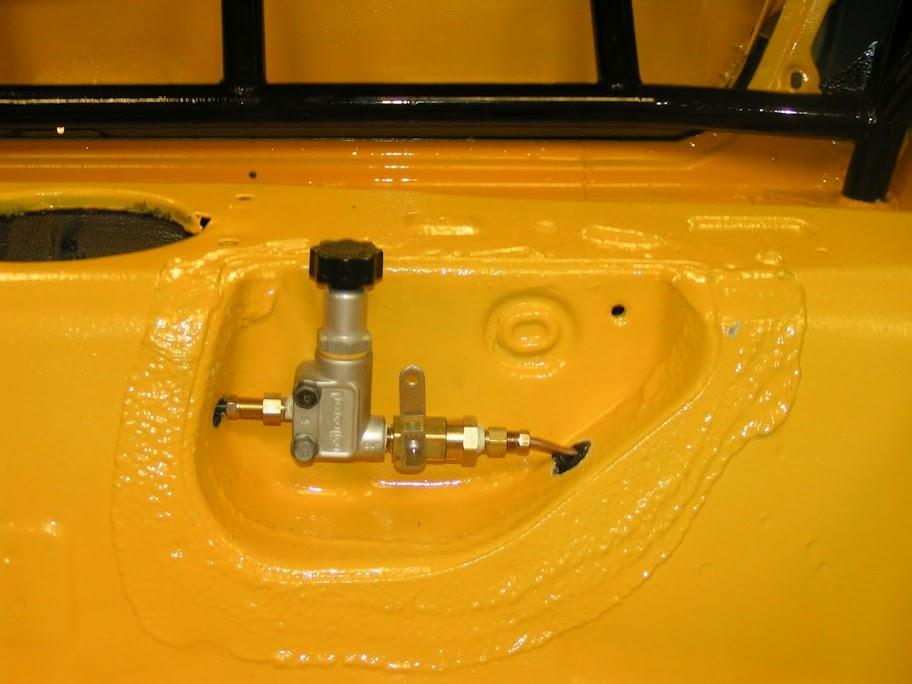
I reused a little bit of the original hard lines, but most is new. I plumbed in my proportioning valve where e-brake used to be, and added my new e-brake (ball valve). Not really an e-brake, but a parking brake. I really like having a parking brake when loading the car on the trailer, and this was the simplest way possible with the new brake system.

I've got the wiring about 75% done. I still have a lot of detail work, but the grunt of it is done. I'll throw some pictures of the completed dash later this week. Right now everything is a mess.
4/28/11
I've been slacking on updating this thread, but I have not been slacking off when it comes to getting this done.
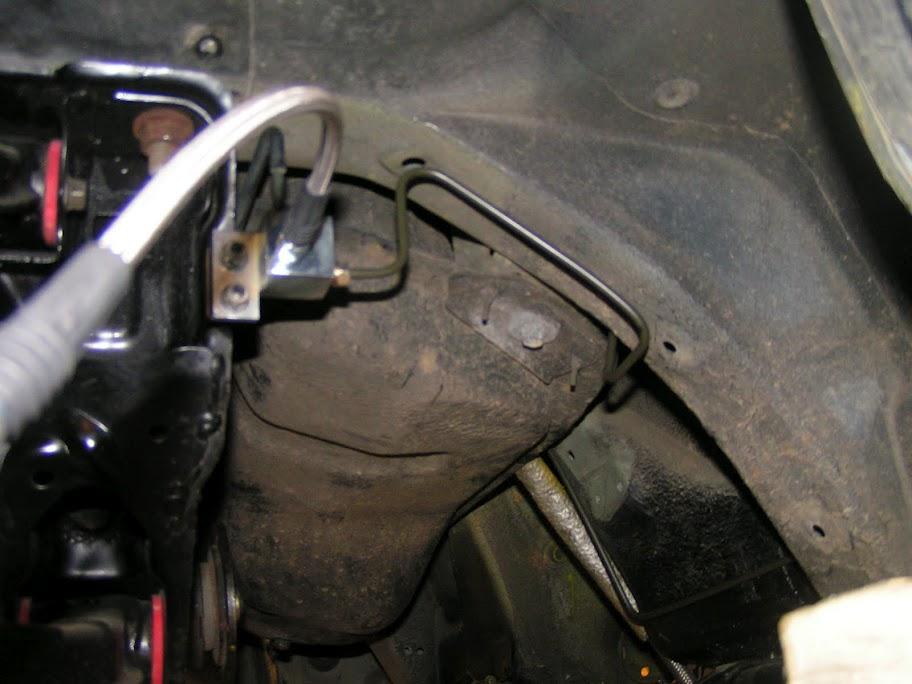
If you didn't like the routing of my brake likes, you're going to hate the routing of my oil lines to my dry sump tank and my fuel lines. I'm quite happy with the outcome, but I will be working on some sort of drive shaft loop / shield to for the CYA factor.

Driveline is in for the final time. Wiring is 99.6% done. Still have to finish up the fuel sending unit, loom some wires, and trouble shoot the radiator fan (manual switch) and wiper switch.
Intake is mocked up, just need some 4in hose clamps.
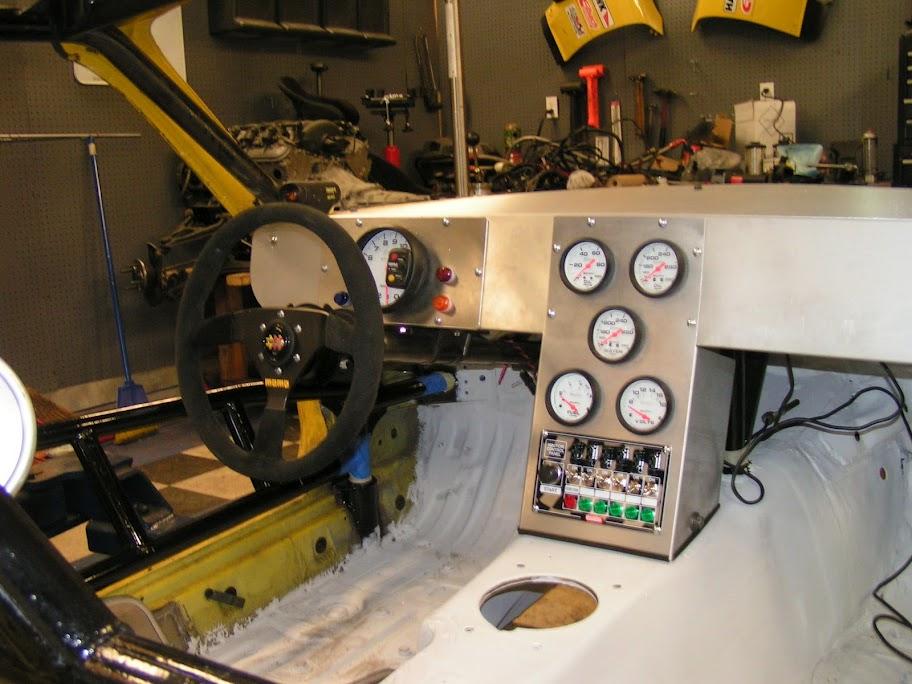
Dash is in for the final time. Everything was tested as it was installed.
This is my favorite part of the project so far. The dash turned out better than I expected. I'm stoked.
I have to finish plumbing the remote oil filter, get some fluids in everything and I will be ready to see if it will fire this weekend.
5/2/11
Spent all day Saturday tying up loose ends and finishing up the remote filter plumbing.
I was ready to begin the start up sequence late Saturday night. It had already been a long day, so I decided to sleep on it and start in the morning with a rested clear head.
Sunday morning, I checked everything one last time and started the initial start process.
Power on, ignition on....No fuel pump.....Shit!
Chased fuel pump issue, manually tested and everything was good.
So...PCM?
After several hours of trouble shooting, I found that my 12v constant power to the PCM was missing. Wire was there, just no voltage. Feed wire went into the harness, but I'll be damned if I could figure out where it came out. I check everything I could think of.
Trouble shooting by myself sucks. Alligator clips and 10ft of wire with a meter inline to check continuity. I was at a point where I just need to walk away and call it a day.
Slept on it and headed back out to the garage again after work today.
I finally gave in and cut the wire going into the harness and ran it to a constant 12v source.
Power on, ignition on, fuel pump running, but no pressure....Shit!
Simple fix, tank line were backwards. Swap lines. Pressure.
Next up....Oil pressure.
Remember this is a dry sump system, which I have never run. Filled everything up. 3qts in the engine 8 qts in the tank.
Pulled the plugs.
Cranked over the engine to build pressure, but no pressure. System needs to be primed. Problem is: I don't know how to prime this system, being that it uses both the factory oil pump and the sump pump.
This is where I am tonight. Time to do some homework on dry sump systems. I will call the pump manufacturer tomorrow and get some tips.
Close....very close...yet still far away.
5/26/11
Another milestone for the BEE!
I'm sure this will be really insignificant when I look back on it, but it definitely put a smile on my face today.
I was finally able to move the car out of the garage under it's own power. I still have few things to buckle up before I can take it for it's inaugural test drive, but nonetheless it was a milestone.
The last time I sat in the driver's seat and let the clutch out was Nov, 2009.
Two weeks from now will be the first local autocross. Not anywhere to really stretch it's legs, but close to home and good for a shakedown.
5/30/11
Goals for today:
Bleed brakes, install new PS pump, corner weight, test drive
Goals accomplished:
25%
Not that I didn't work, just that nothing worked for me.
BRAKES:
Couldn't get them bled. Tried every option I could and nothing worked.
Ended up being a mechanical issue. Shaft on MSM brake booster is too short for Wilwood master cylinder. I was only getting about 3/16in travel. Enough to make me think it was working, but not enough to actually work.
Easy fix, just need to find a shaft off NA booster.
CORNER WEIGHT and TEST DRIVE:
Never made it that far.
POWER STEERING PUMP:
I did accomplish something. I put in a new GM power steering pump which was pretty straight forward. Everything went really well till I tested it.
The pump worked great, but it showed me that the extra universal joint that I added to my steering column was not going to work. I was not able to smooth out the steering regardless of how many adjustments I made. I could never get the rid of the feel of the u-joint. smooth-stiff-smooth-stiff...Not horrible, but not something I want to deal with.
Options:
Rework / build a new driver's side header or buy a set of Flyin Miata or Sanderson headers.
I'll have to sleep on this one.
1. Rework / Build new : Time****, Cost*, (1.625 primary)
2. New : Time**, Cost*** to ****, (1.5 primary)
One step forward...two steps back. I think that is the theme of this build.
6/18/11
Update....
Steering issue: RESOLVED
After several iterations, I finally figured out something that works. I ended up building a new mount for the rod end which moved the location of the shaft a little. The original design had the shaft running beside the header (9 O'clock). The new shaft is located a little higher up (10:30) and it works. This is a much straighter shot which reduced the angle on the universals.
Brakes: DONE
Made a new shaft for the brake booster and re-bled everything. 15 mins of bleeding and everything is good to go.
Test drive: DONE
Was finally able to take it out for a run around the neighborhood. I ran without a hood, bumper, or fenders. I don't have windshield in the car yet, so it was truly an open wheeled Miata. Stick Hoosiers threw rocks into the interior during each turn.
First impression: WOW!
This thing is NASTY. I was only able to cruise around the block , but I did punch it a time or two to see what it had. Needless to say, I am very impressed.
Spent the rest of the afternoon and evening putting the rest of the car back together.
Hood, fender, bumpers installed.
New hood pins installed.
Harnesses installed.
Seats installed.
Foam installed on the cage in the crucial spots.
Garage alignment done
Tomorrow: AUTOCROSS
Loading up in the morning and heading to the local autocross. The site is rather small, so I don't know how much I will get to open it up, but it will be a fun shake down.
6/20/11
Autocross: YES
Success: KINDA?
About half way through the first run, the clutch started slipping so I shut it down and loaded it back on the trailer. I think I found the problem, but need to retest to verify.
Pedal linkage had the clutch MC depressed about 1/4in when fully released. Problem is I don't have any more adjustment with the Wilwood MC. I need to make a new turnbuckle to hook to the pedal that is 1/4in shorter.
Should be an easy fix.
Casualty: I broke a front fender flare over the weekend. This is the 2nd flare I've cracked, but what can I expect out of fiberglass flares. It was my own fault for halfass installing my front bumper. If I would have put in the bumper supports, I wouldn't have had any issues. Tire caught the bumper and broke the flare.
I did take a video of the run. I will post something up later.
First impression: Holy chit is this thing is quick. My suspension changes are going to need some tweaking. I had a slight push on corner entry, but I never had a chance to adjust shock settings or tire pressure, and the car hasn't been corner weighted or properly aligned.
6/22/11
A friend (Craig Kimberly) took the video for me and had to add his professional touch to it.
8/7/11
Haven't been out to the garage with the camera in a while. I've been having too much fun driving the car. I was out prepping the car for it's debut track event next weekend and decided to snap a few pictures of things I have done lately.
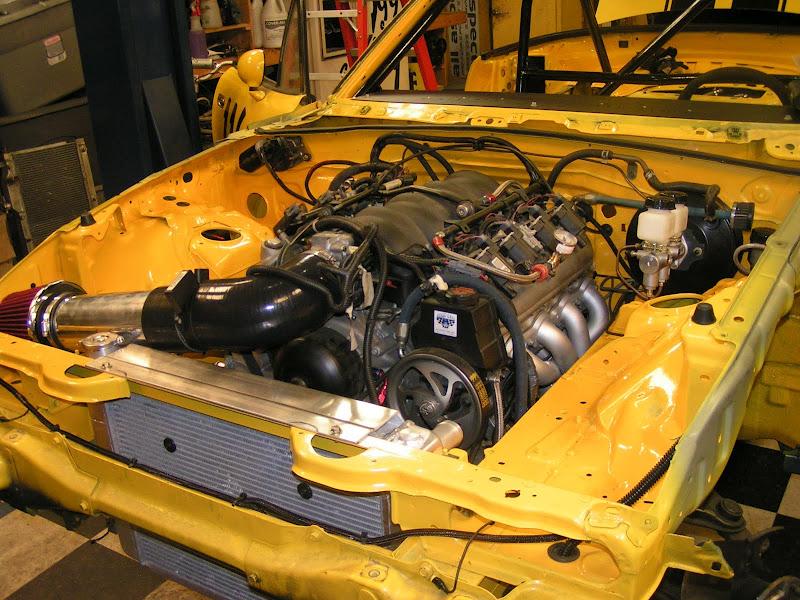
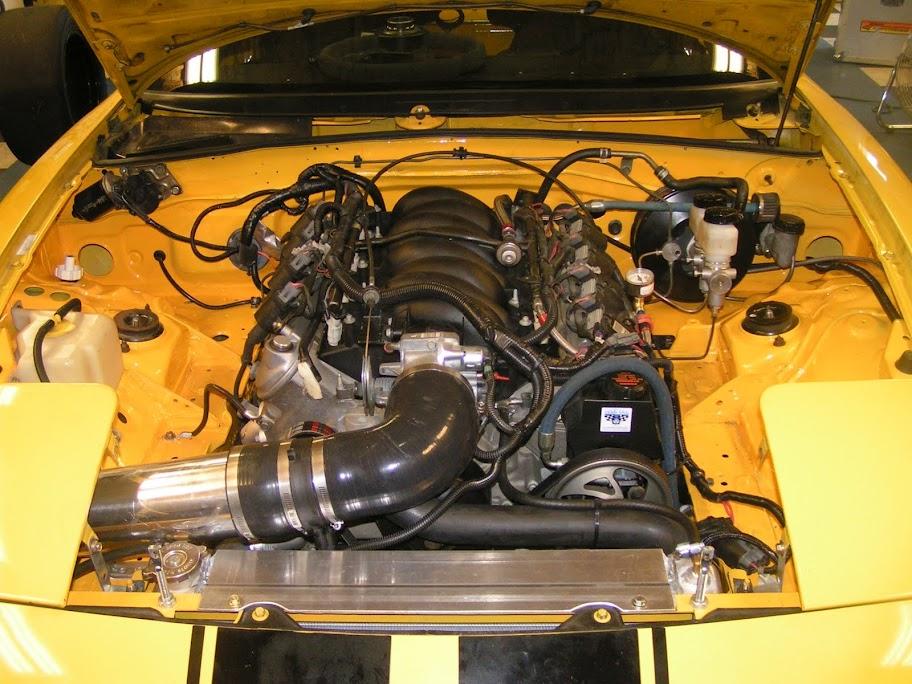
Here's the current state of the engine bay. I installed a LS6 intake manifold today and will get the car back on the dyno this week to ensure a safe tune for the track.
I still plan to build an air box under the passenger headlight cover, but haven't gotten to that just yet.
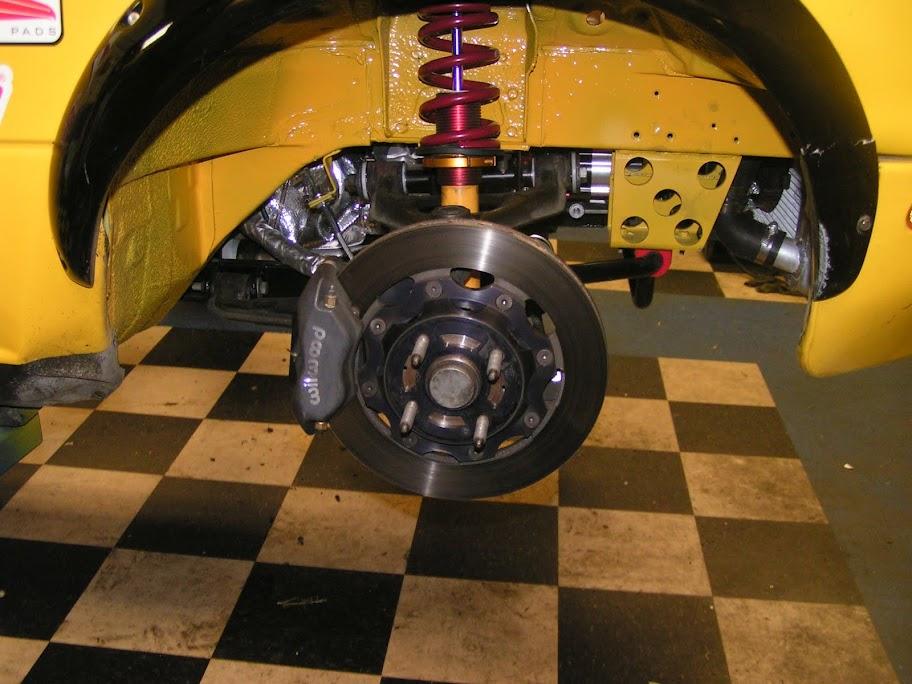
V8R Brake Package mounted on all 4 corners. (11.75 Rotors with 4 piston Wilwoods) You can also see a peek of the E36 BMW sway bar mounted. (Forgot to take more pictures of that)
In car camera and traqmate. I use the camera on the dash to record the video from the roll bar mounted bullet camera. This allows me to easily start and stop the video and I don't have to re-setup the camera angle every time I pull the camera out of the car to view the video. I can also easily watch my autocross video between runs if need be.
[IMG]https://lh6.googleusercontent.com/-_6wMCGLZ_8c/Tj8yHTCJU6I/AAAAAAAADBE/eMP5tscLdS8/s912/PICT5486.JPG[/IMG
 ]
]
My only complaint so far with the car is lack of traction, imagine that
I have only run 10in Avon road race slicks on 15x9 wheels so far. The grip is not bad, but definitely not where it needs to be to be a competitive autocross car.
I bought a set of 16x11 (6in BS) 3 piece Real Wheels a while back, but the bolt pattern was wrong. They were made for a 4 lug Fox body Mustang (4x4.25), so I had my local machine shop redrill the wheels to a 4x100 bolt pattern offset 90 degrees.
I got the wheels back last week and will get the tires (23.5x11x16 Hoosier radial slicks) mounted this week. From the looks of it, I will need to do some more trimming up front to get them to clear, but it shouldn't be too bad.
I'm sure I will still be traction limited, but this should work much better.
8/14/11
First Track Day = BIG FAT FAIL
Clutch
Clutch is still an issue and one that I just don't understand. Grinds between gears and slips
Driving around as if I were driving on the street and everything works fine.
Get on it hard and it acts like I'm not pushing the clutch in far enough and doesn't allow me to upshift or downshift.
So I stick it in 4th gear and let it eat hoping to at least get a little fun out of the event....Then the clutch starts slipping on lap 3
I bled and bled the clutch between sessions. I re-adjusted the pedal to ensure there was no preload and just a slight bit of free play before engagement.
Also noticed that once the clutch started slipping, the pedal was hard. Not hard to depress, just hard as if it were preloaded, no slop at all. Take it easy for a few minutes and clutch starts grabbing again and pedal free play is back.
Any possibility an incorrectly sized master cylinder would cause something like this???
I'm about the point of starting all over and replacing the current setup (Fidanza AL Flywheel, C5 Corvette Z06 clutch, GM slave cylinder, Wilwood Master Cylinder) with matched and proven setup. I just don't know.
Differential Seals
The diff seals were leaking after a local autocross, so I bought some new OEM Mazda seals and swapped them out. I ran the car on the dyno afterward and didn't see any new fluid, so I assumed I had fixed the problem. NOT...
Looked under the car when I got home and gear lube was everywhere. I just hope I didn't loose so much that I damaged the rear end.
Time to pull the rear back out of the car for a thorough inspection of the gears, stub shafts and seals.
Power Steering Pump
Power steering fluid got so hot after 4 laps that I lost power steering all together. Came into the pits and fluid was everywhere.
Time to look into either a cooler, turn one pump again, or both.
Vibration
During the last session, the car started vibrating pretty bad at the top of 4th. Seems like something came apart.
Time to relax....Drink heavily....do some homework....then figure this thing out.
9/24/11
Run #4 at the Autocrossers Inc. event at Blue Crab stadium in Waldorf, Md.
The course was pretty tight, but it was fun. The car is getting faster and faster. I set the FFCTD (Fastest Fendered Car Time of The Day) with a sloppy 43.9. I did get beat by a shifter kart and a FSAE car. I ended up 12th overall out of 100 in PAX (XP PAX is brutal).
It took me 4 runs to get the car to handle half way descent. Right before the event, I went to 900lb springs up front without touching the rear and inevitably, the car was a pushing pig at first. I was able to tame it down with tire pressure and shock settings, but I'm going to need some more rear spring rate to balance the car back out.
I plan to swap out the rear 450lb springs for a set of 550s. With the big slicks and the 450s, I am bottoming out the tires on the top of the wheel wells under hard acceleration, so the 550s will likely work out pretty well.
Speaking of the BIG SLICKS. I finally got the 16x11s with 23.5x11x16 Hoosier slicks mounted last week. It took a little cutting wheel work and some BFH massaging, but they fit.
I did loose my front fender flares. I need to look at some new options for flares. Need moar bigger!
Here's some pictures of the car with the big wheels/tires:
10/5/11
Cosmetic update....
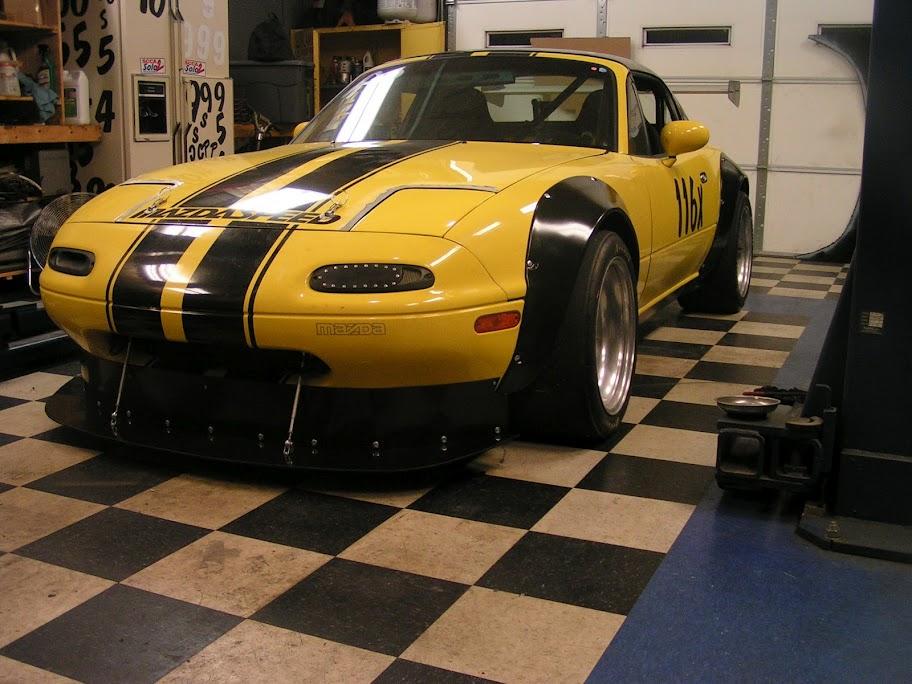
New Flares installed (tuckin the 16x11s)
-They're Tuckin99 knockoffs built by rharris19. Incredible fit and finish. I have installed 4 sets of flares on my and others Miatas and this set is by far the best fit and quality.
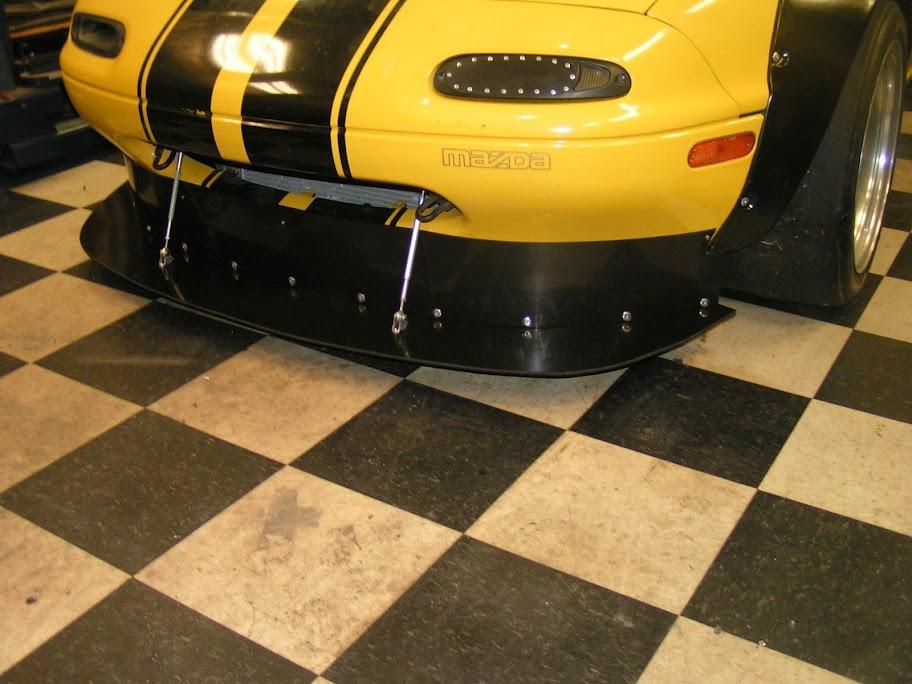
Built a splitter
.25 ABS
I'll have to take some more pictures of the splitter another day. I didn't take any pictures during the build.
Track Wheels and Tires (15x9s with 240/600-15 Avons)
10/10/11
Made it out to VIR this past weekend.
Clutch seems to be fixed and working well. First session was good. I took it easy and made sure everything was OK. I found out that my valve cover vent tube leaked oil during hard right hand turns, but other than that, everything was working well.
Between sessions, I rerouted the vent line and pretty much fixed that issue. 2nd session came around and it was time to see what it had. Needless to say, I was VERY impressed. This thing pulls like a freight train.
I was able to pull pretty much anything and everything I came upon in the instructor group. I came out of oak tree about 20 car lengths behind a C6 Z06 and was able to pass him by the top of the hill. Something I thought I never would have experienced in a Miata.
The look on some of the driver's faces when they had to give a pass to a Miata on a straight were priceless. The people coming to my paddock spot afterwards to ask "what the hell is in that thing" was kinda cool.
The new aero worked really well. The car stayed planted coming over the top of the hill right at 160mph. I was expecting the front end to float, but was pleasantly surprised to have it stick. I found the limit in the uphill esses. I pushed the throttle just a little further each lap, till I was entering right about 135mph. If my timing was on, I likely would not of had an issue, but I got out of the rhythm and ended up going straight across the grass in the 2nd two esses to save it. Oops!
Unfortunately my incar video didn't work either session, so I only have a small teaser of a video. This is a quick video from the top of the concession stand.
I wish I could end this post with nothing but smiles, but unfortunately I can't. About 15mins into the 2nd session, I lost oil pressure going down the back straight. I saw the light pop on at about 6k rpms in 5th gear, then scanned over to the OP gauge reading 0psi. I popped it out of gear but left the car running to ensure that I had brake vacuum to get it stopped at the end of the straight.
Once I got the car down to a speed where I was able to hear the engine, I heard a knocking rattling mess. I shut the car down and coasted all the way to pit entrance and waited for a tow.
I'm not really sure what happened just yet, but hopefully it's not too bad. Nothing came through the block and it was still running when I shut it down, so hopefully it's salvageable.
I'll pull the engine out in the next week or two and tear it down to see what happened. It's got me puzzled, but I don't really have the money to do anything about it, so I'm not in too big of a hurry.
1/15/12
Well I guess it's about time for an update....
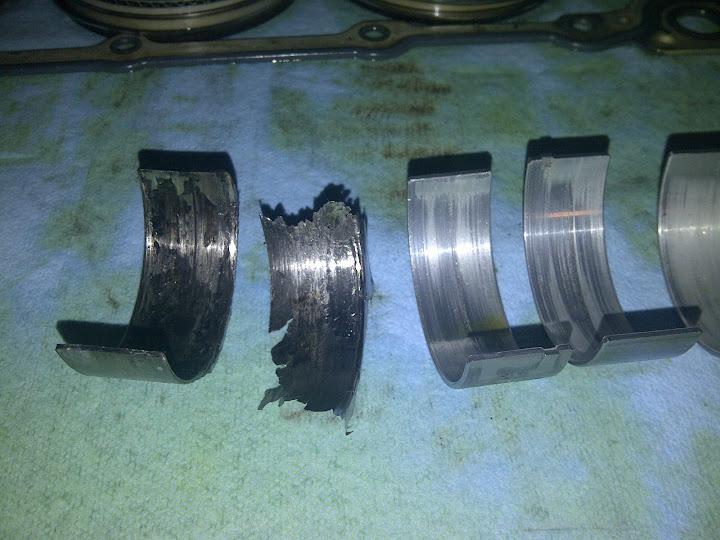
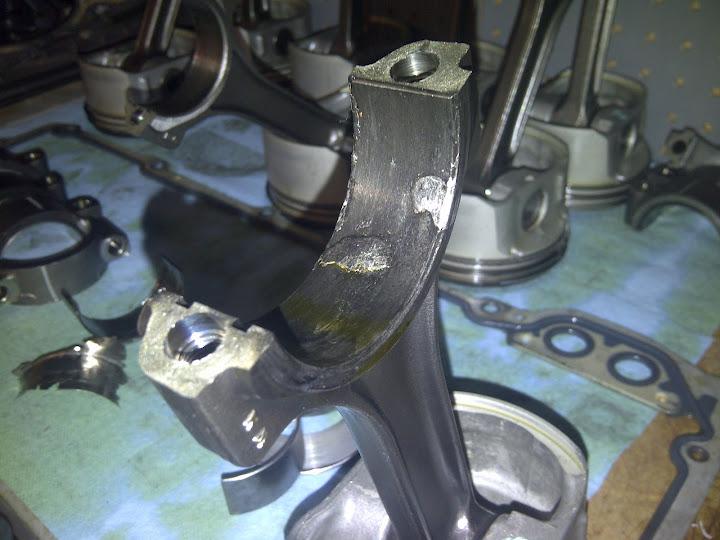
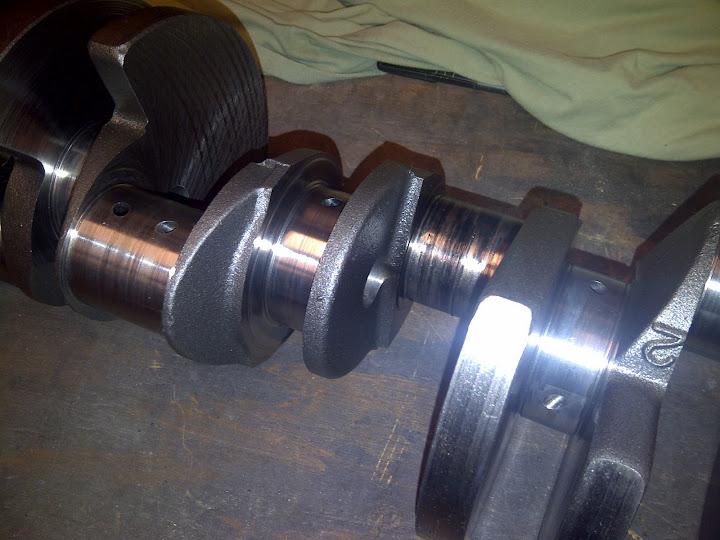
After avoiding the garage for a while, I finally pulled the motor apart right before the holidays and here's what I found.
#3 and #4 rod bearing are toast.
crank is done
#3 and #4 rods are done
The rest of the motor looks good. Pistons and cylinders are still in perfect condition and no damage at all to the top end.
Yes it sucks, but it definitely could have been much worse. I still don't know what caused this issue for sure. I do know that there was only a little over 10qts of oil in the system when there should have been closer to 14. High RPM on the back straight suck all the oil out of the system? Don't know and probably never will.
So how am I to fix this......duh!......add more power
I stumbled across a really good deal on an 18k mile LS6 out of a 2004 Z06 Corvette. He cracked a piston ringland and instead of repairing, he picked up a complete long block and swapped it out.
So I am taking the best of both my LS1 and the new LS6 and putting together a new engine.
Ported, Polished, and shaved 243 heads
ASA Cam
Balanced bottom end
stock bore, stock pistons, new rings and a hone.
Should be north of 400HP to the wheels.
Heads are done, bottom end is at the machine shop and should be done later this week. I am traveling a lot this month for work, but I hope to have it back together in a few weeks.
Oil System:
I am going back to a stock oiling system and adding an accusump. Dry sump is cool, but complex. I'm going back to KISS. I found a company in MN that will build me a road race baffled, 6.5 qt winged pan to my specs for a reasonable price. New pan, oil cooler, accusump, DONE!
This will make maintenance soooo much easier.
I also need to plumb in a catch can, but that is the easy part.
Steering System:
I'm also going back to a stock steering shaft and getting rid of the one that I made. Not that it didn't work, it did, it worked great, but it is a royal PITA when you need to drop the engine. Again, I want to go back to KISS.
I picked up a new driver's side header and will be modifying it to go around the steering shaft.
My goal is to have the car back together and retuned by the end of Feb and back to the track in March. It's only time and money, and money, and money, Oh, did I mention money?