You must be logged in to rate content!
142 minute(s) of a 297 minute read
12-25-2020
1990 Miata Build
Compliments of switched @ www.miata.net
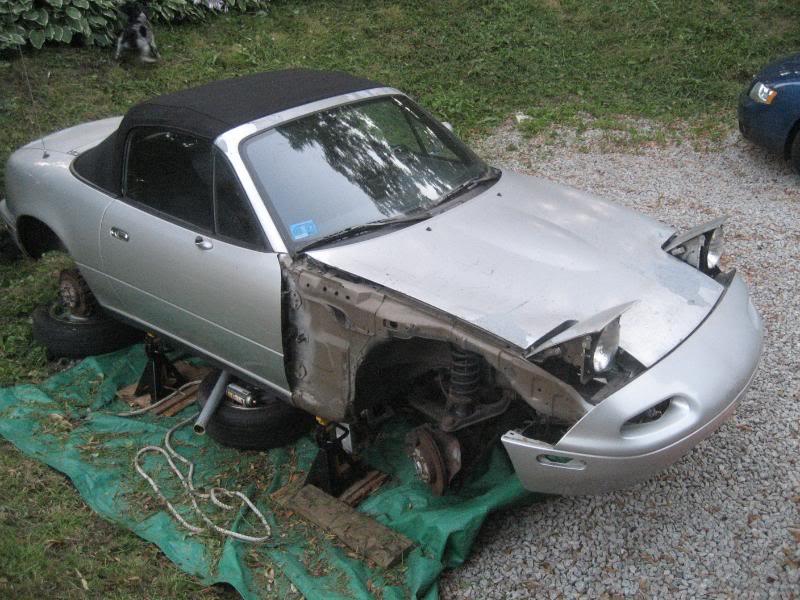
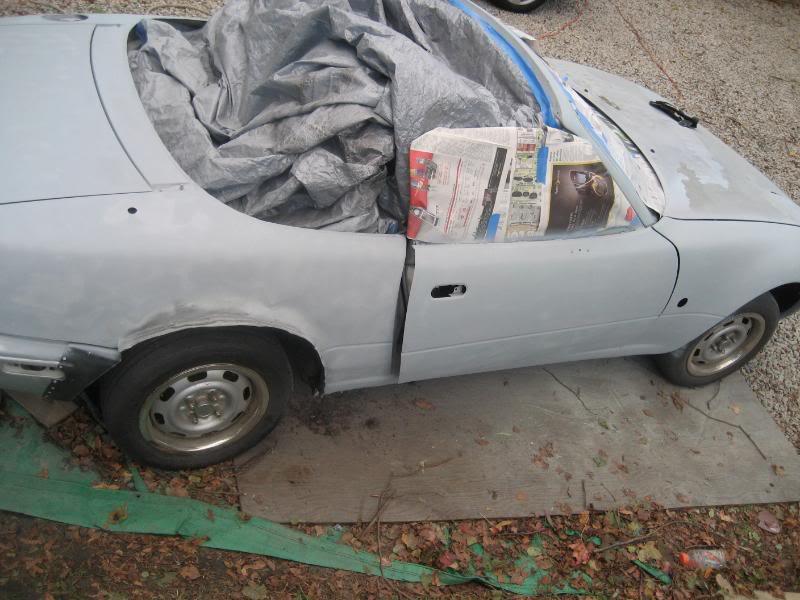
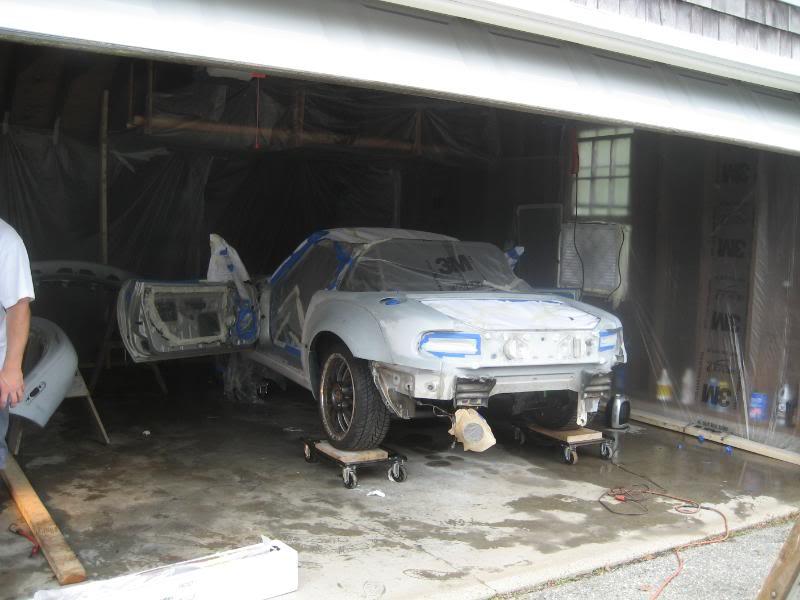
Hello everyone, I picked up a miata in the summer and have been lurking here ever since, but I finally decided to start a thread to share my progress. I picked up Choo Choo Charlie's old miata (thanks again!) and have since started to go to town on it. It is, well...was, a stock 1990 miata in need of a serious makeover. And so it began! I forgot to take pictures of it until after I started ripping into it, but I'm sure you all can picture what a stock miata complete with steelies, dents, rust, and in need of paint.
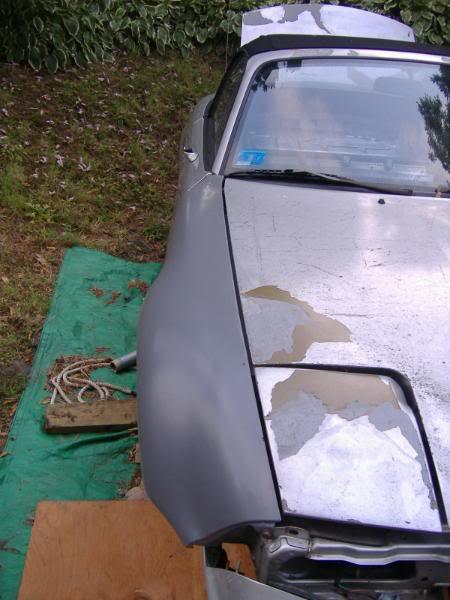
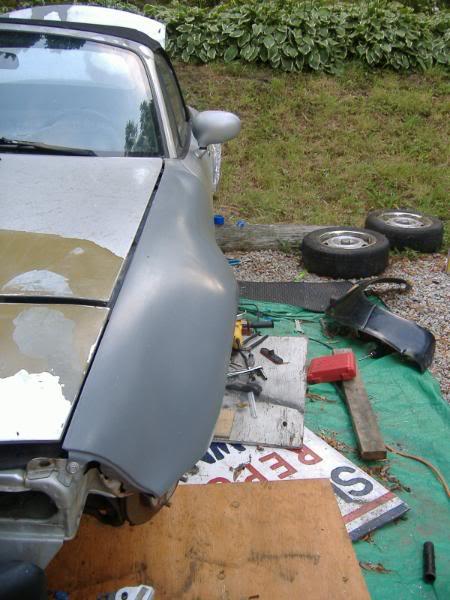
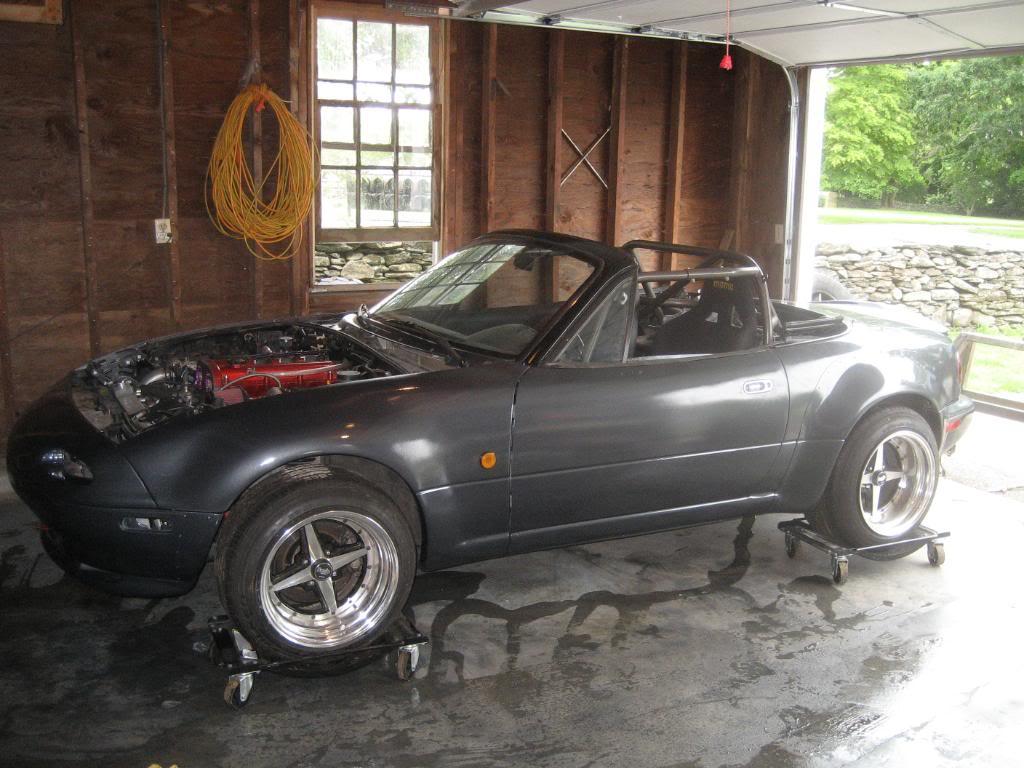
These are the first pics I took; I was pretty deep into the disassembly before I realized I hadn't taken any yet!

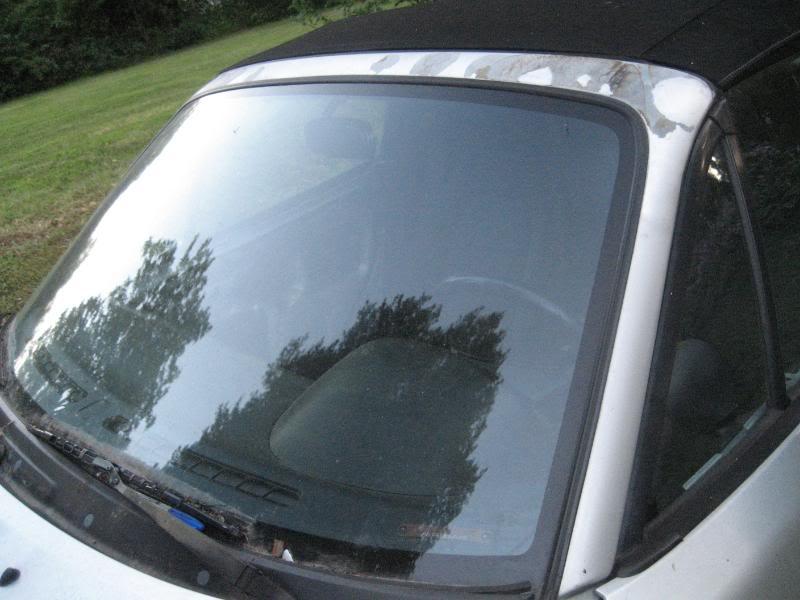
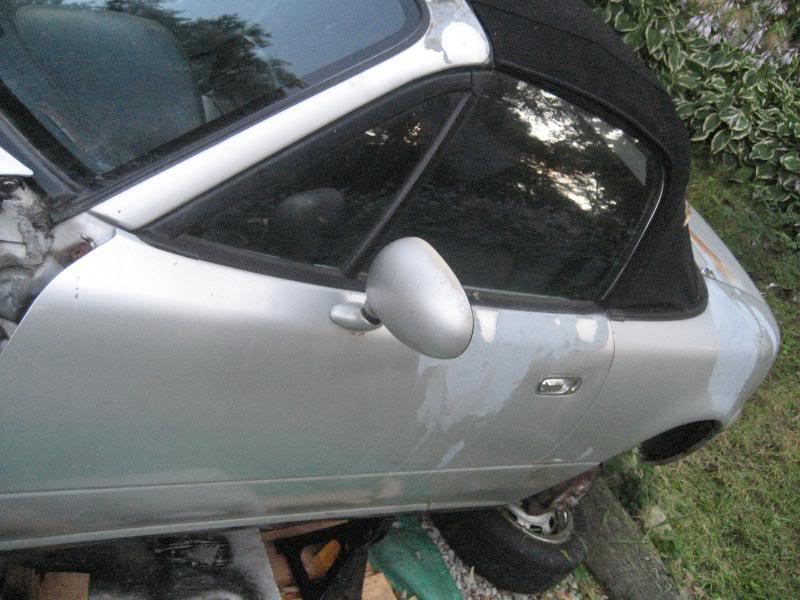
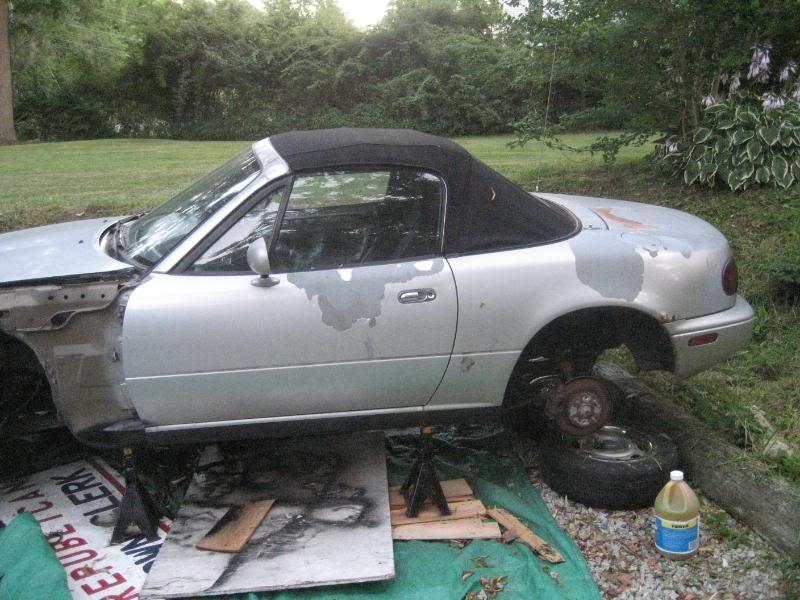

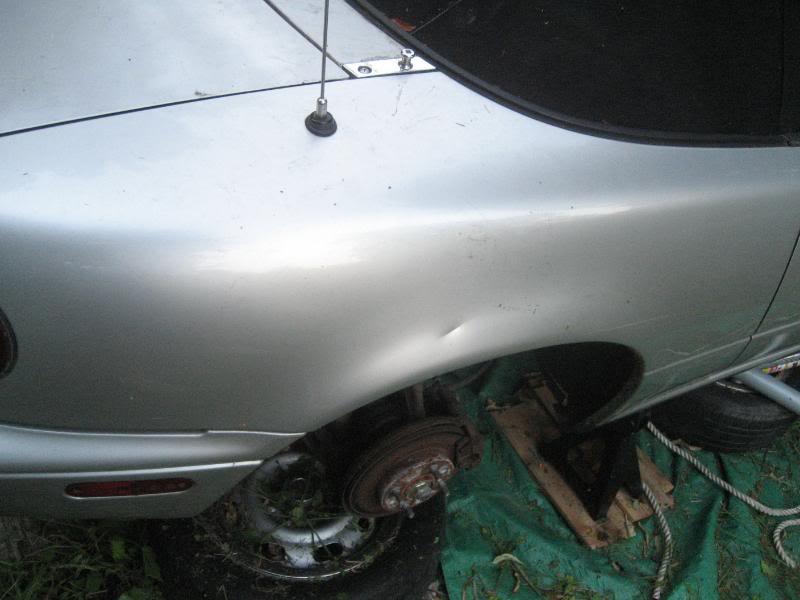
Lovely paint isn't it!
Next the motor came out....
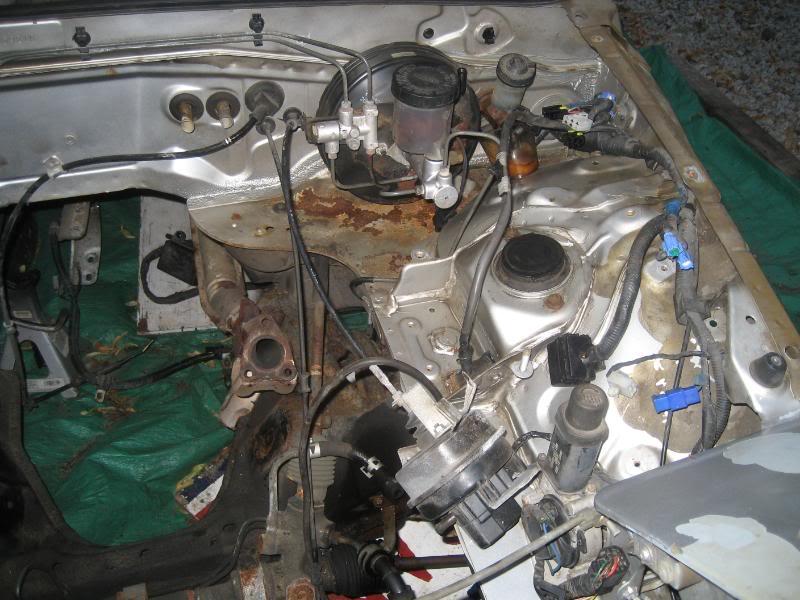
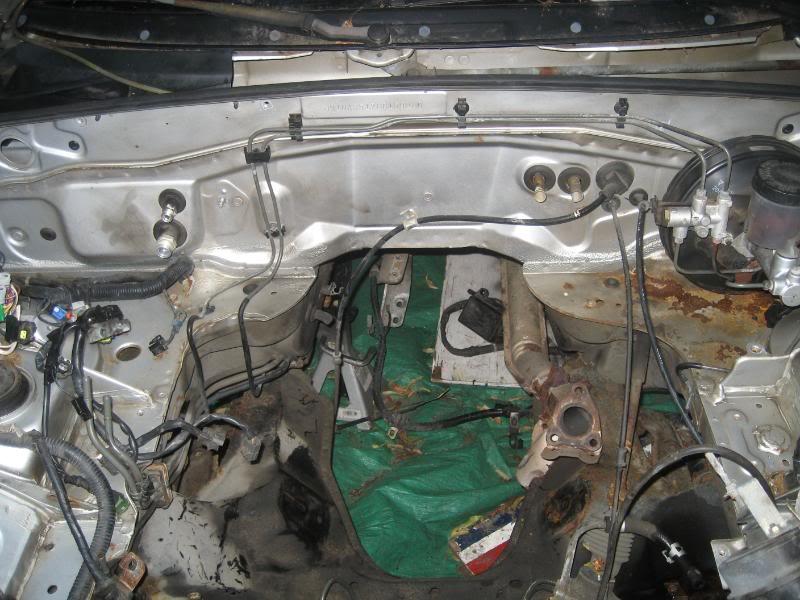
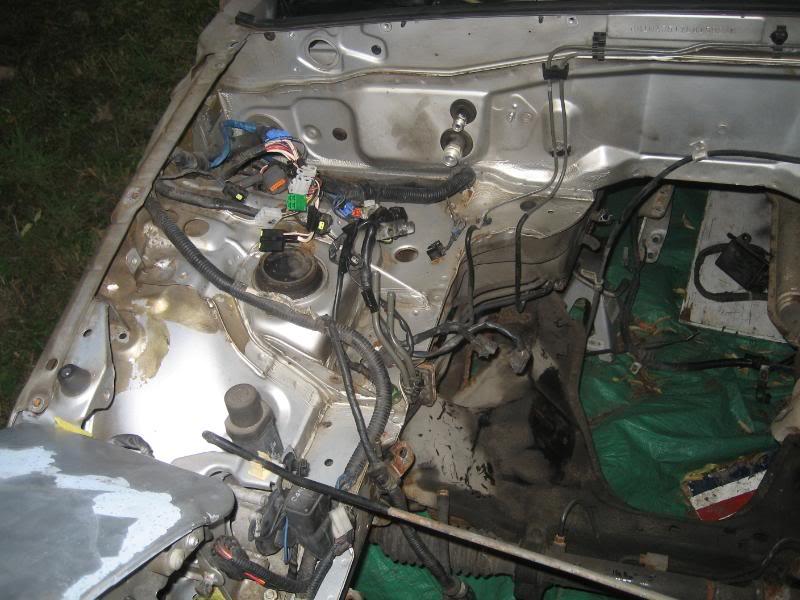
Next up, gut the interior:
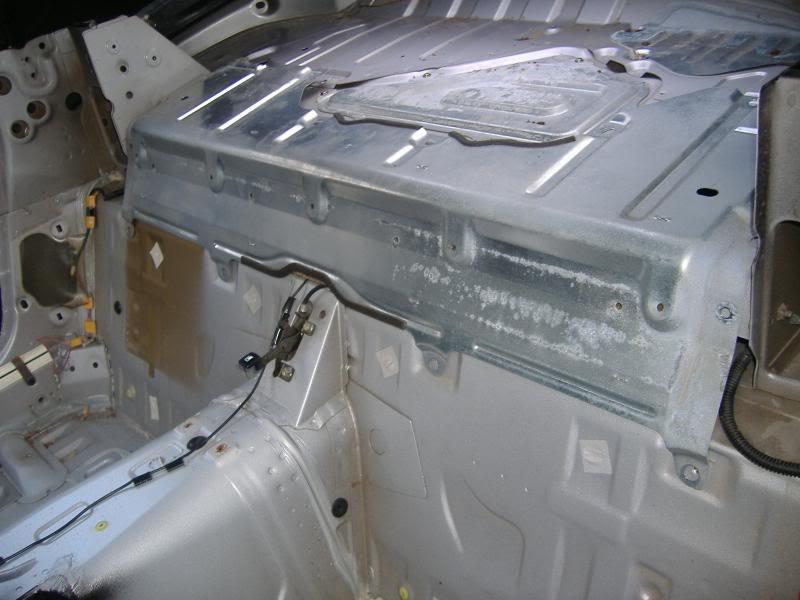
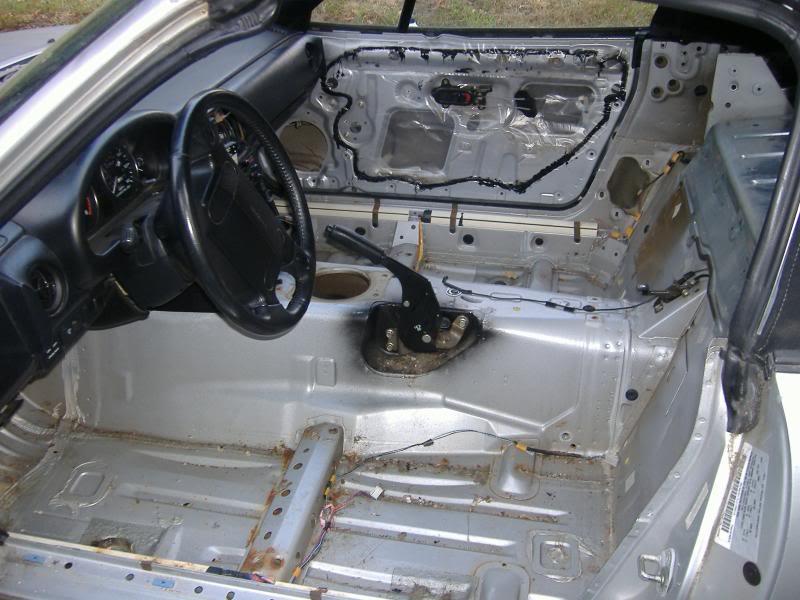
Yep, nothing out of the ordinary just yet...
Oh wait, what do we have here?
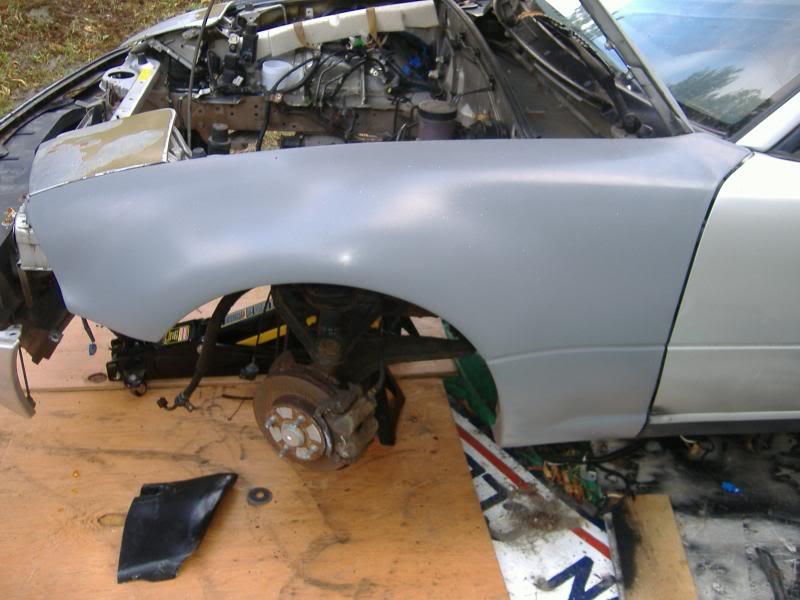
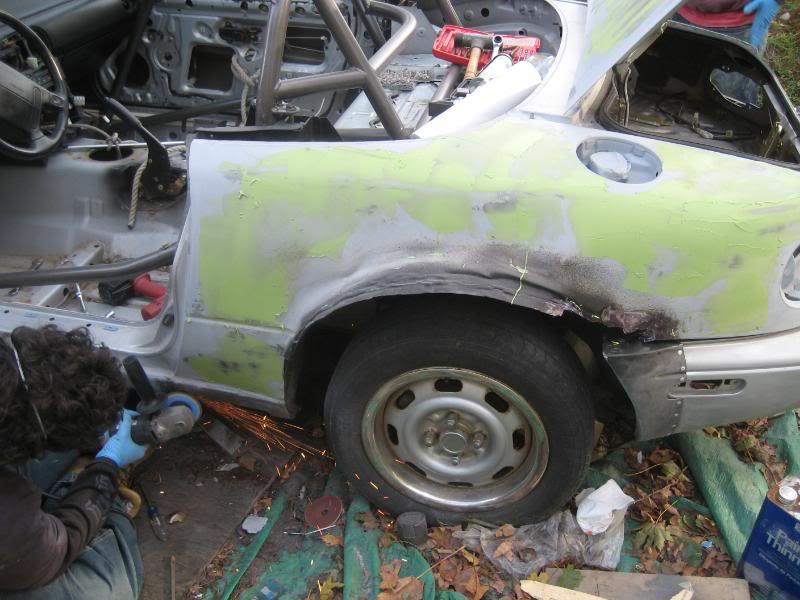
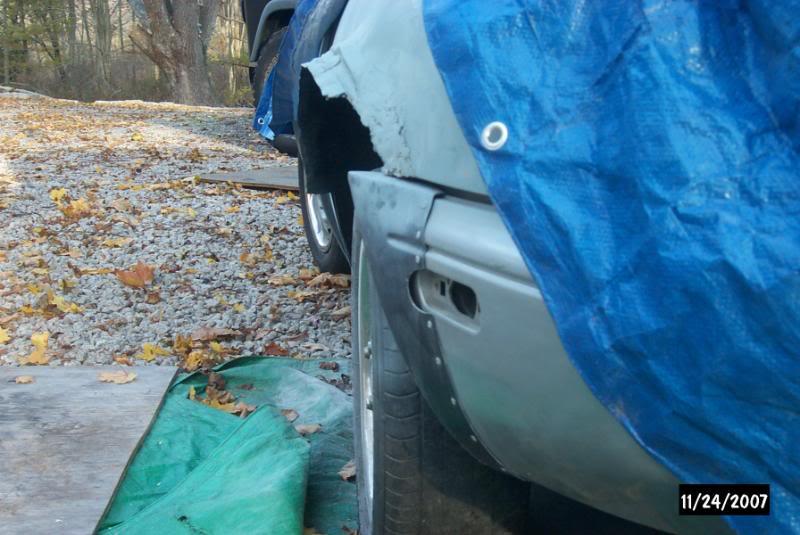
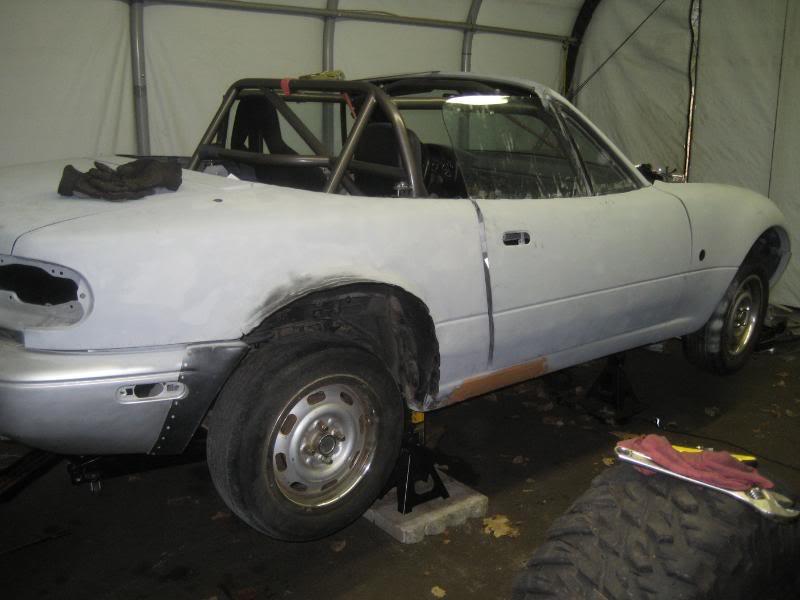
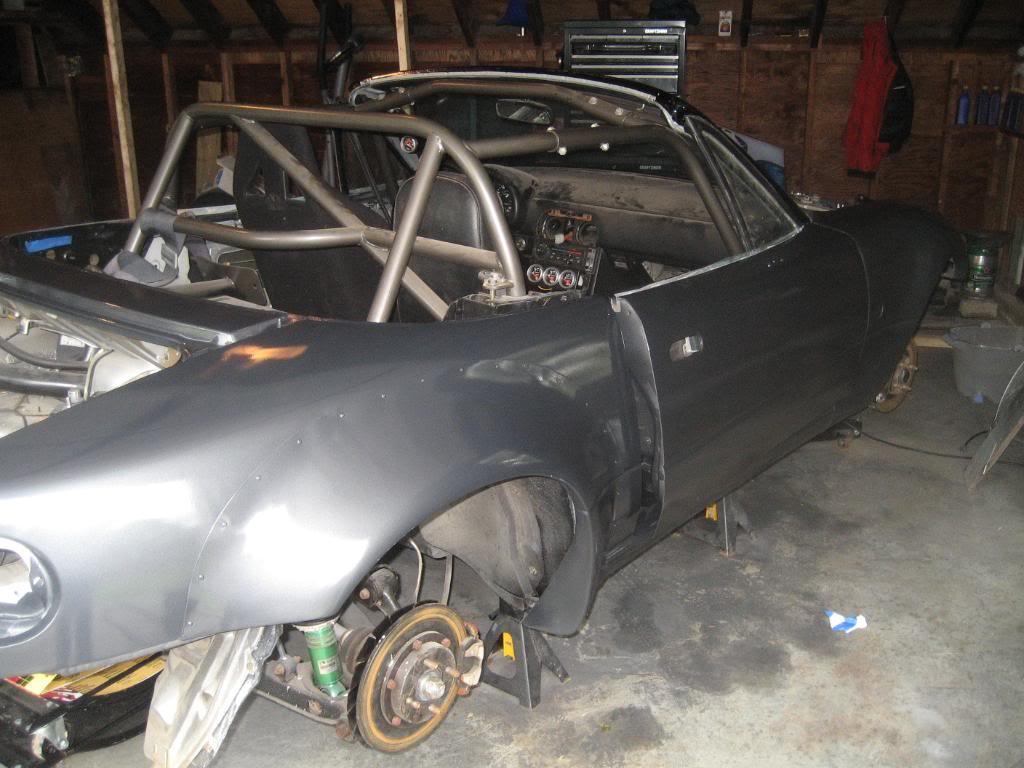
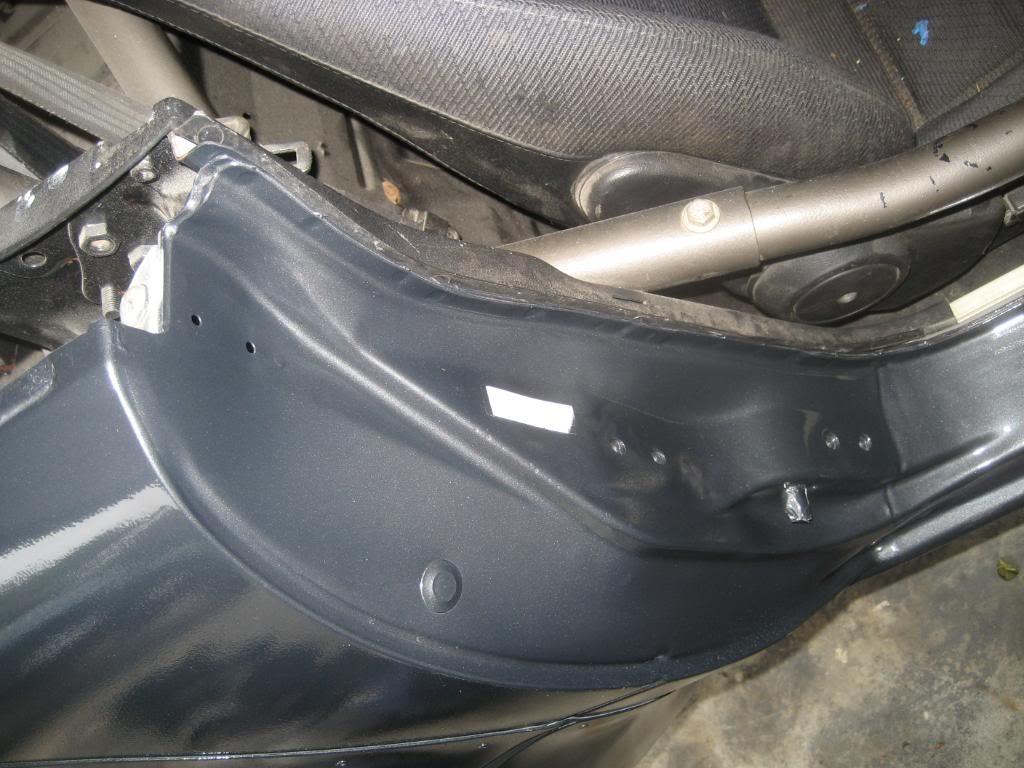
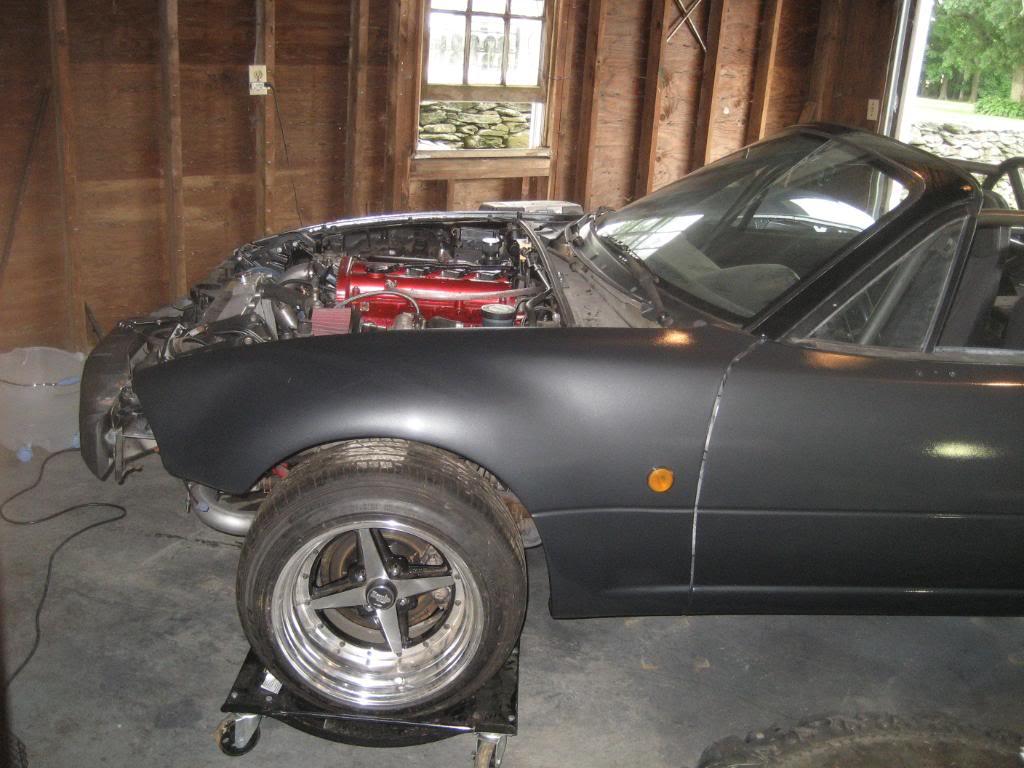
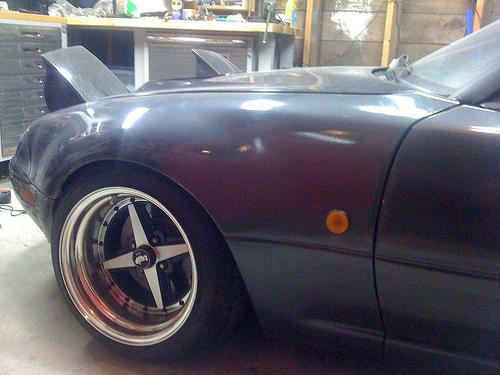
A little AWR action. The full fenders fit pretty well, the pass side went on without a hitch, but the driver's side needed a fair bit of coaxing. For the rears, I pulled the fenders way out and beat on them until they were up and out of the way to form the inner fender for the rear flares:
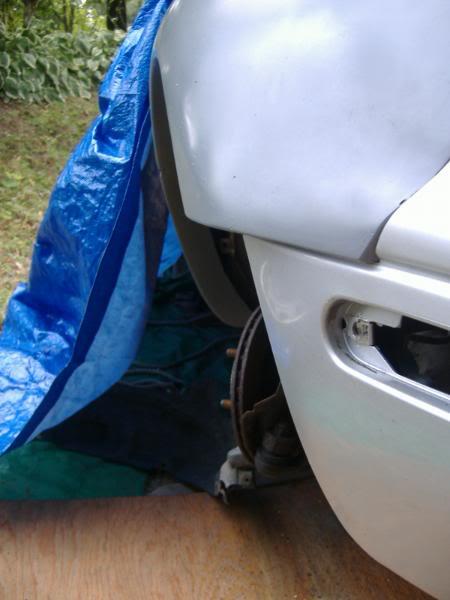
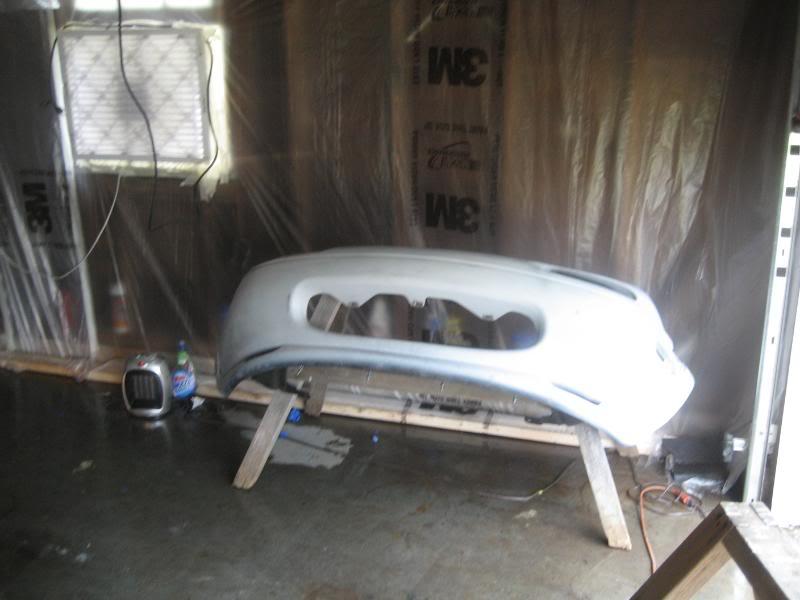
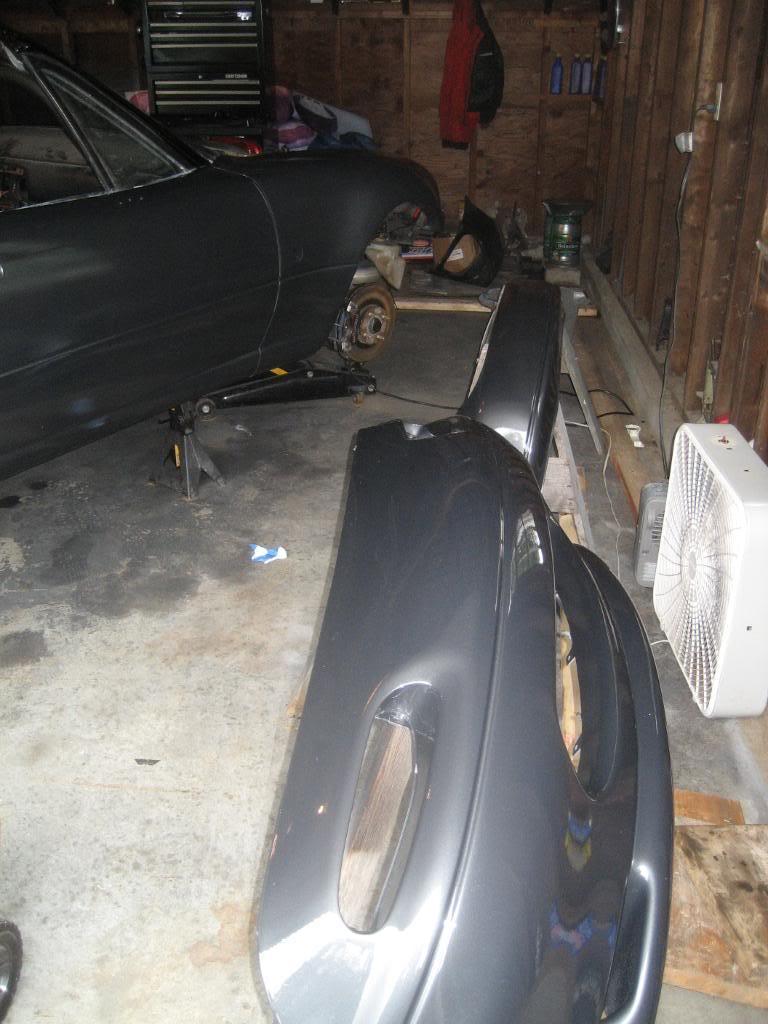
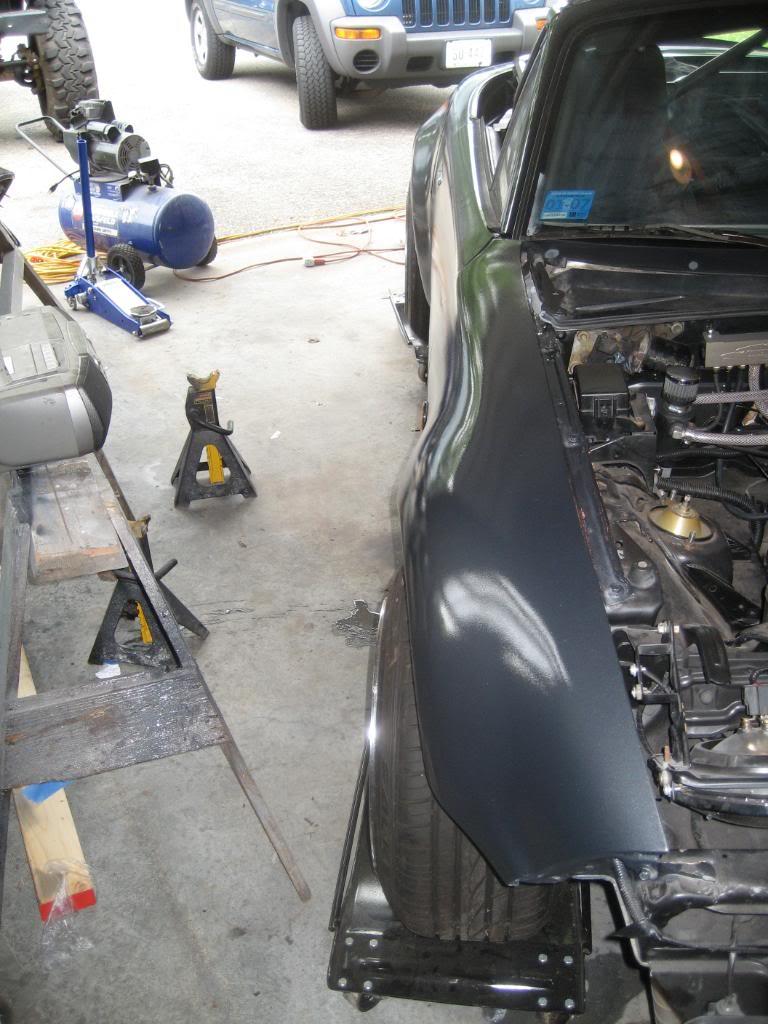
I haven't installed the rear flares yet, as I have some rust in the rocker panels right behind the doors (go figure) which still needs to be fixed, so let's go back to the front of the car and work on the front bumper extensions. Here is the original bumper extension:
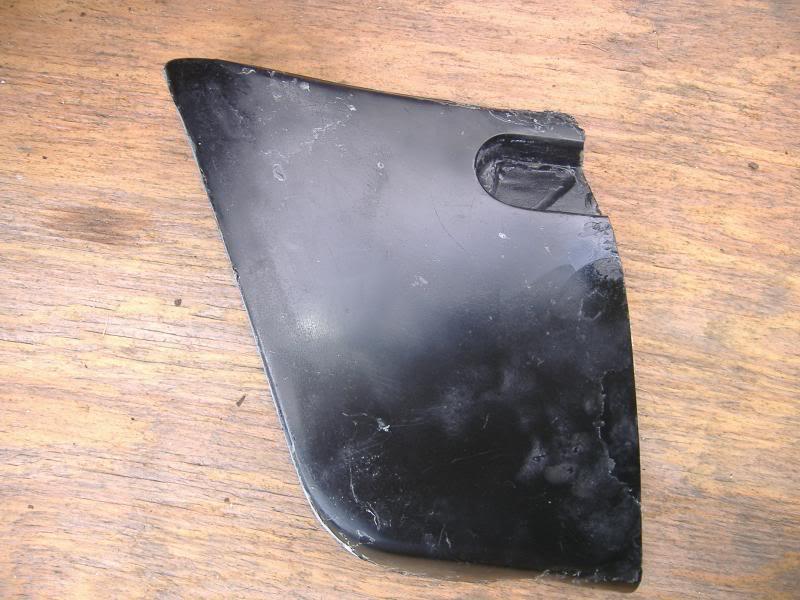
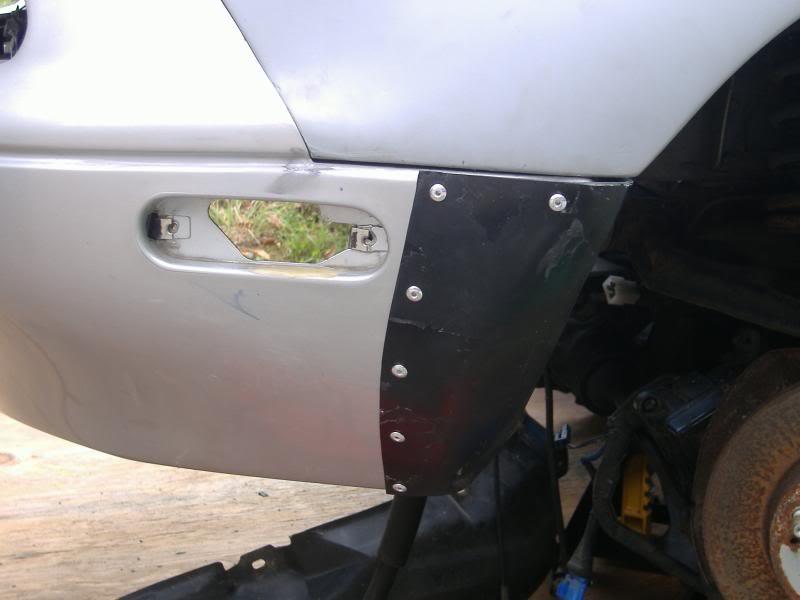
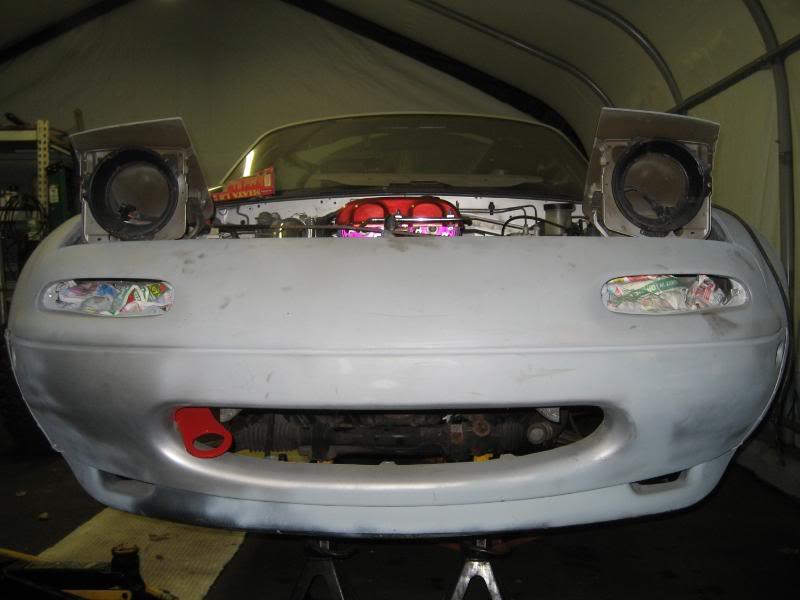
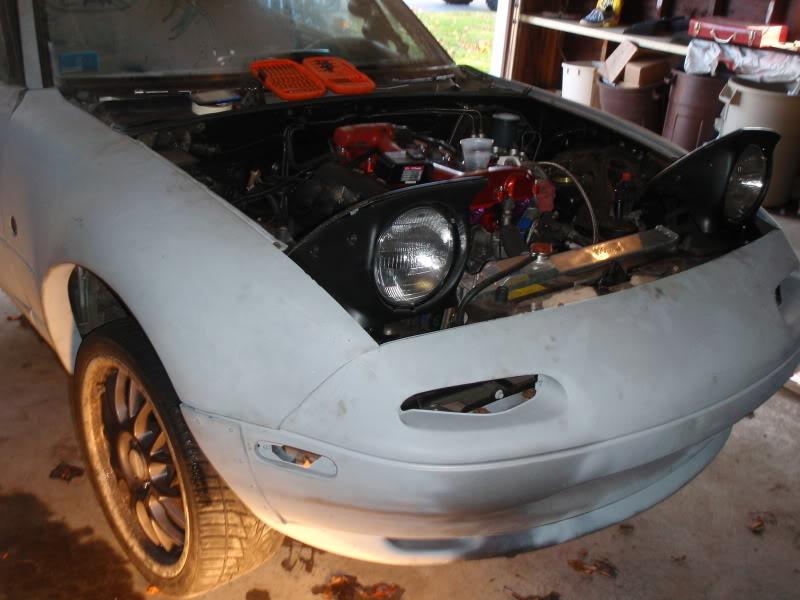
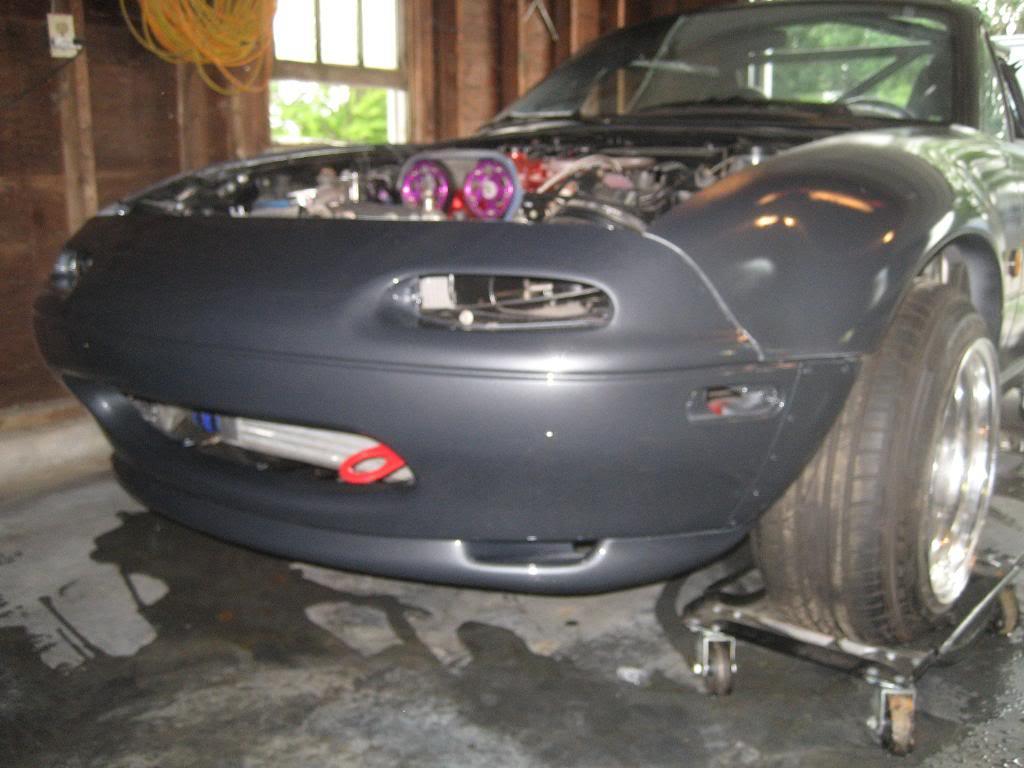
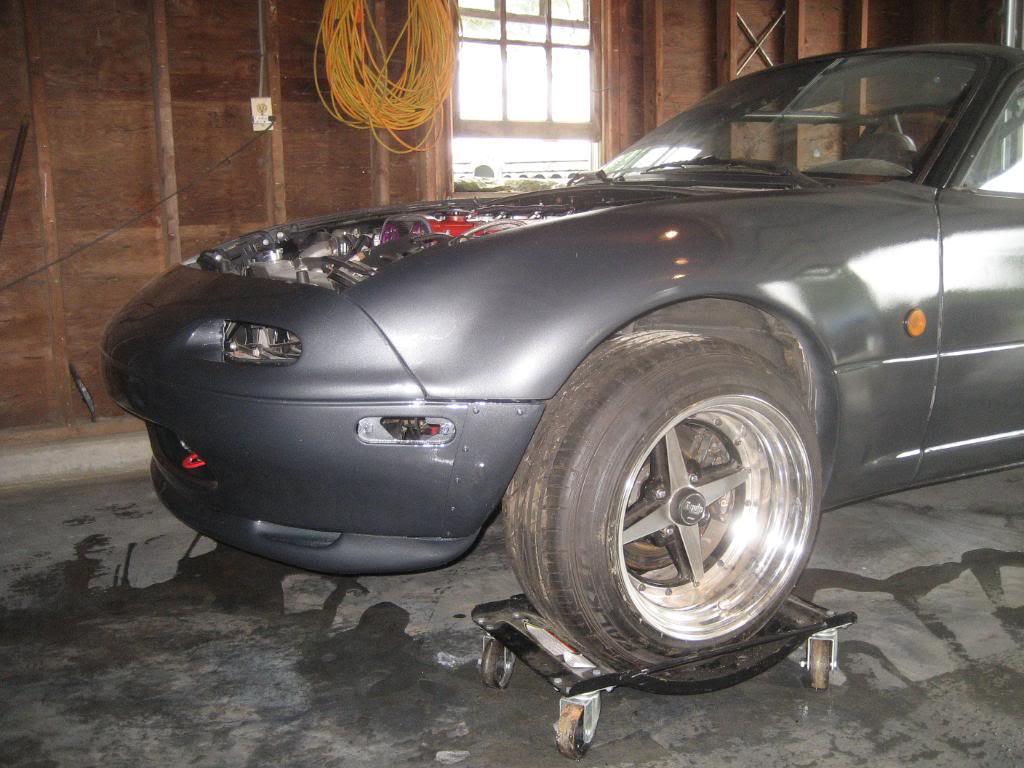
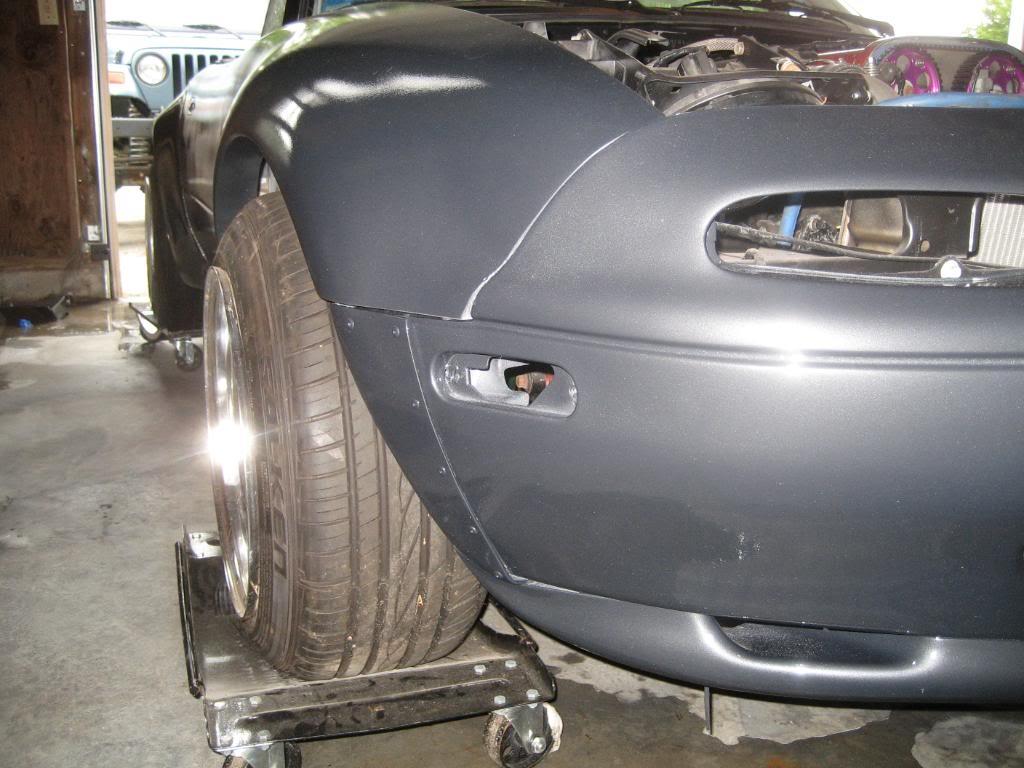
Now the original parts not only cover up the turn signals, but they also force you to make them shorter somehow, which I wasn't a fan of at all. I started to massage them with the dremel tool, and after about 10 trial fits, I realized this was 1. It was taking way too long, 2. I still had to cut down the actual light or find a replacement, and 3. I was starting to get annoyed. Now my current vehicle is a jeep, and when things don't fit there are only 2 tools you need, being a hammer and a saw. Now a hammer won't do much good here, but the saw sure will. So, after some careful thought and head scratching, I decided to just not deal with it at all and trim off enough material so the lights wouldn't be covered by the flare. The front bumper, being made of urethane, is very flexible, so I came up with a new game plan. Here's a pic of how much the bumper as it normally sits with the AWR flares:
I pulled the bumper out to follow the line of the fender, and then attached it to the fender using a few bolts. Lastly, the flare was riveted to the bumper:
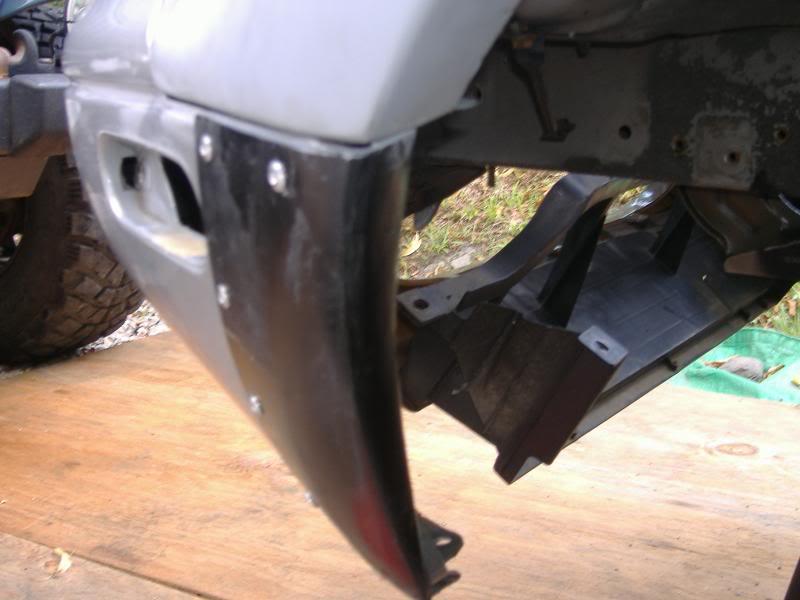
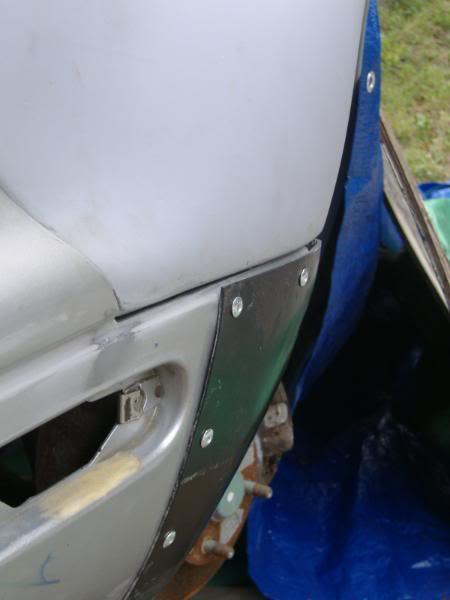

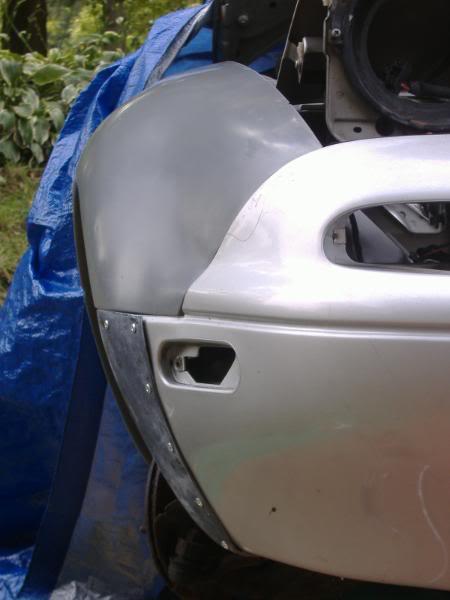
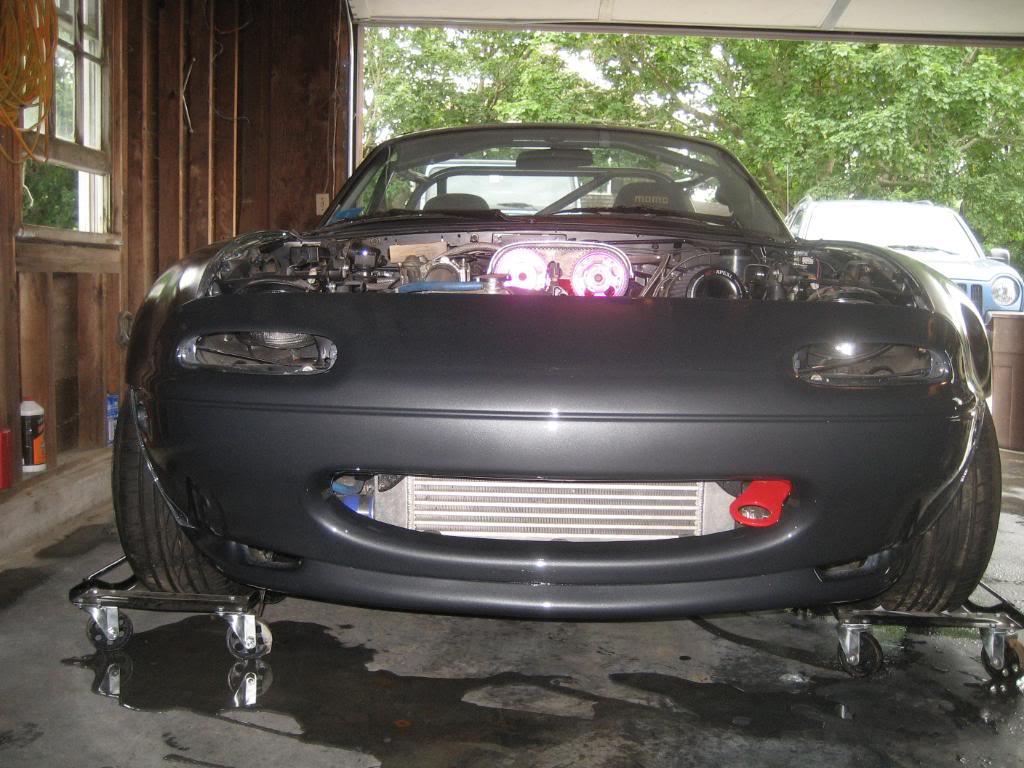
I'm more than pleased with the final result.
Now it was time for to bring the body back to life. I had been picking and poking at it throughout the months, but I spent some quality time with my 2 good buddies and we went over the whole car. I'll let the pics to the explaining, as even I don't want to have to read this 

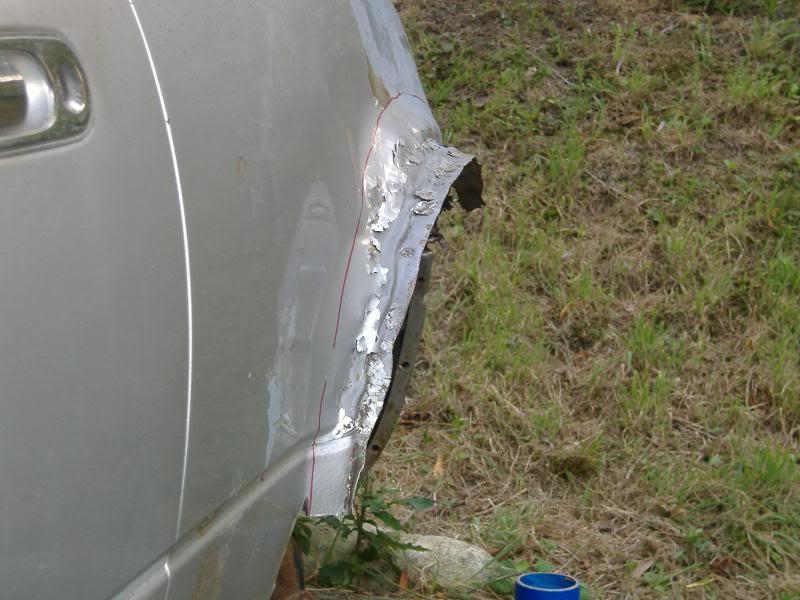
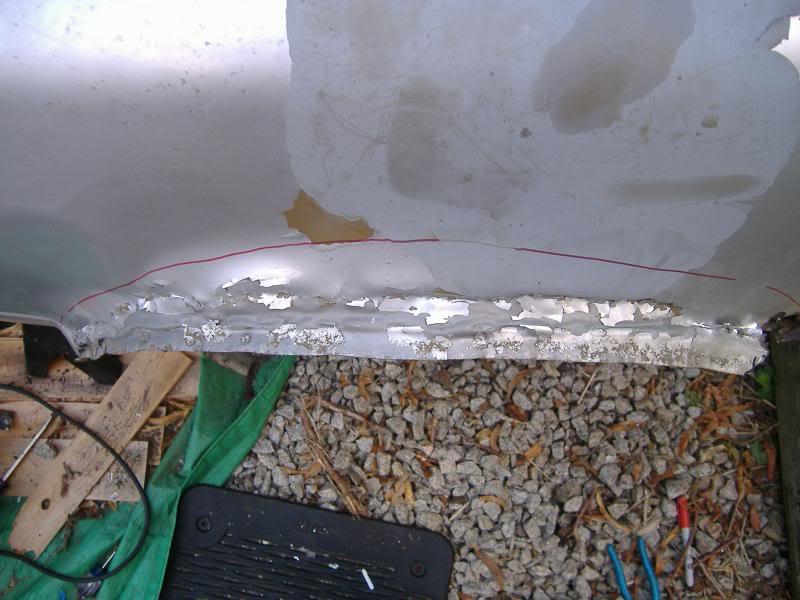
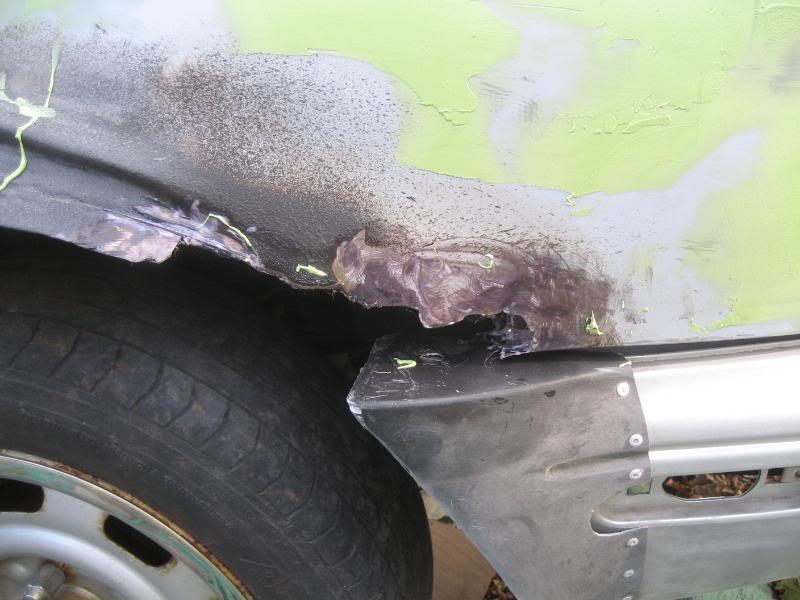
We patched the rear quarter rust spot with some fiberglass filler to seal it. I didn't see the need to take it to get it welded as the flares are going to cover it completely. Here's a pic:
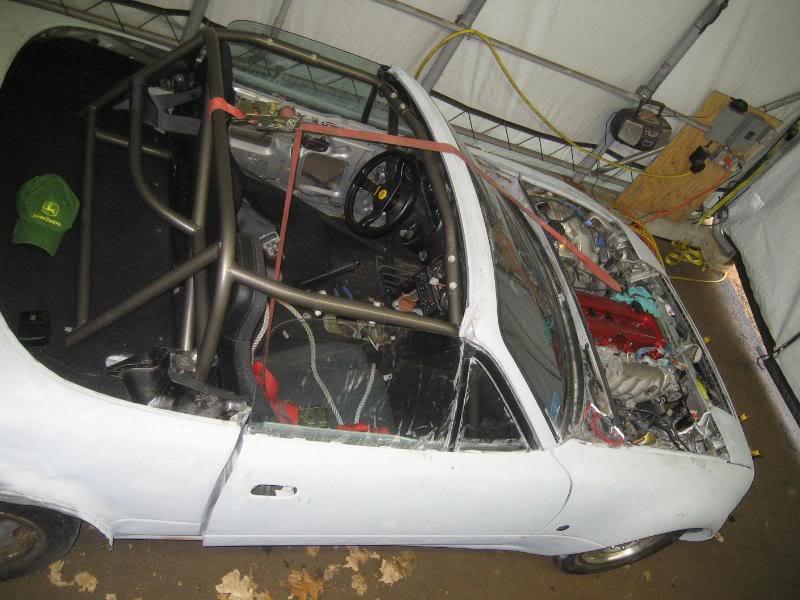
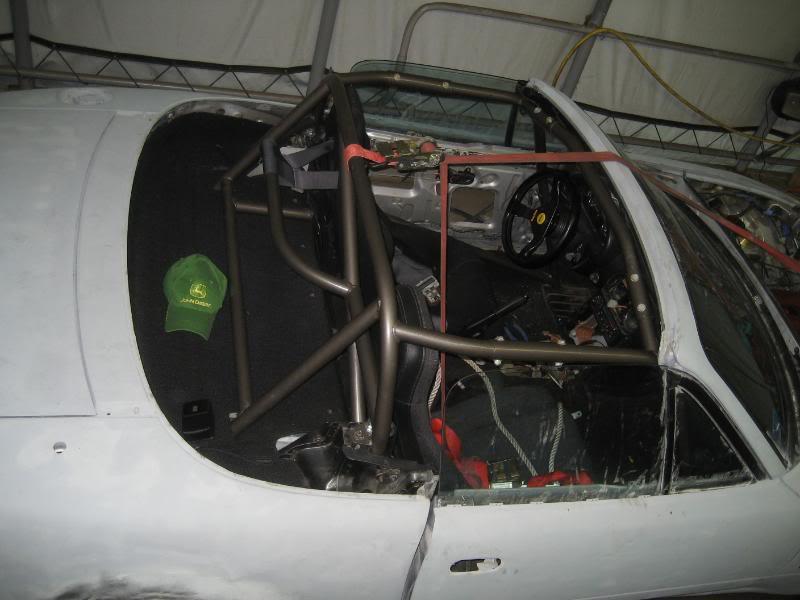
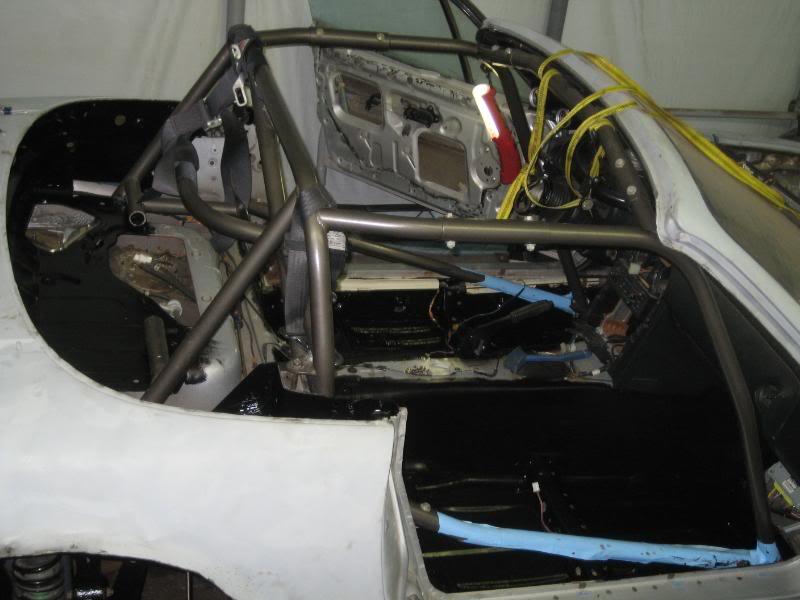
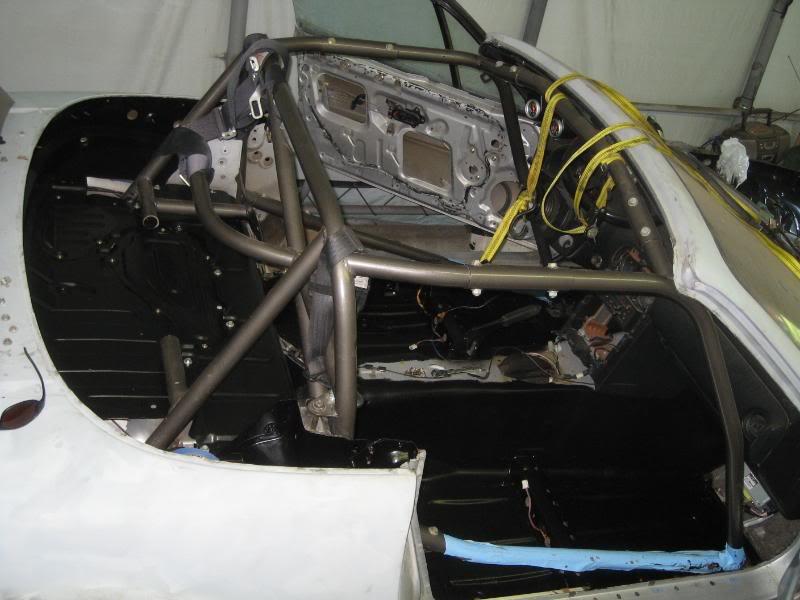
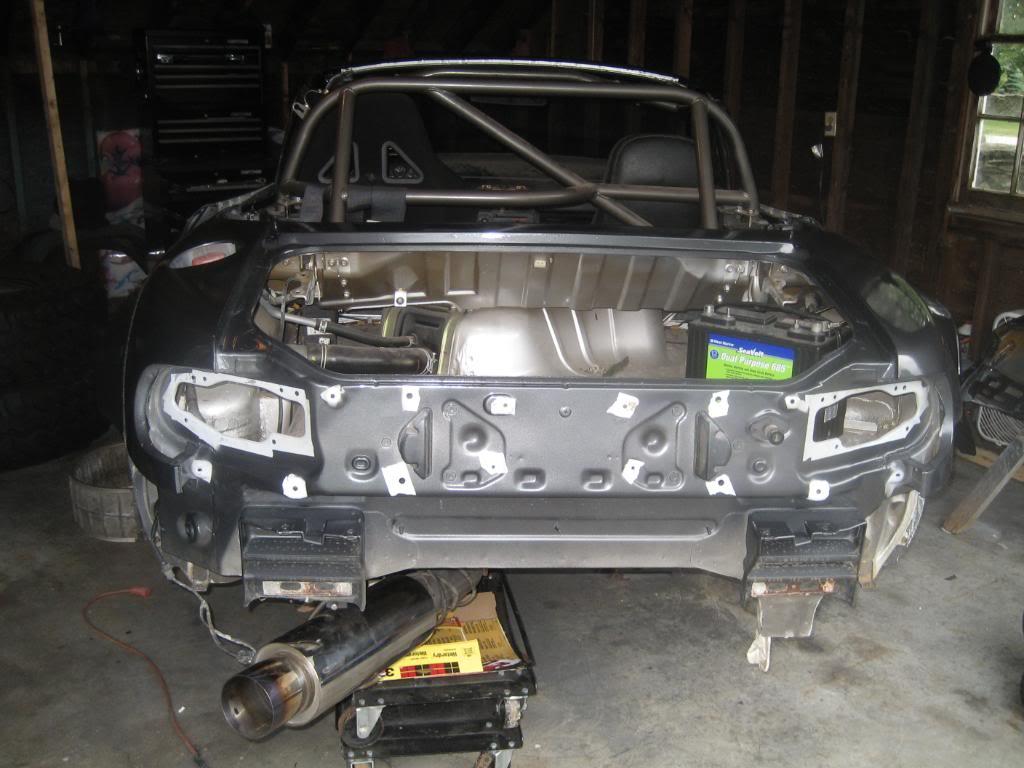
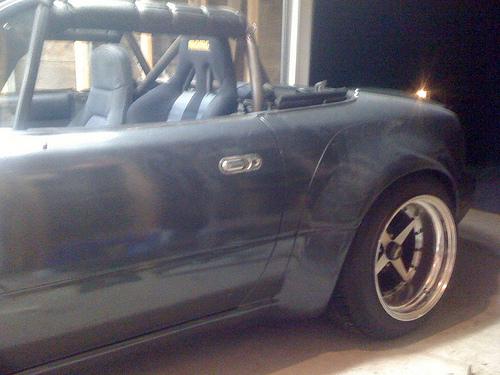
Now for those of you with good eyes, you're probably noticing the roll bar in the previous pics. The only thing is, it's not a roll bar....it's a whole cage!
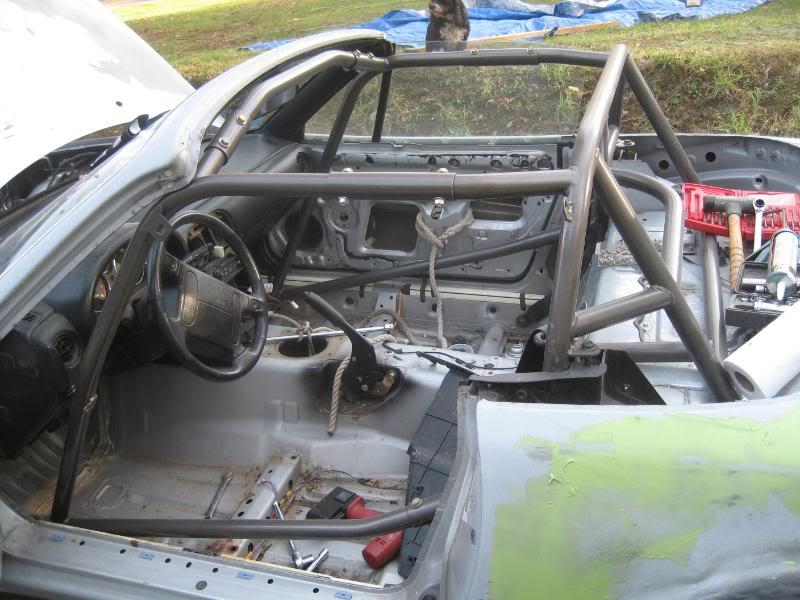
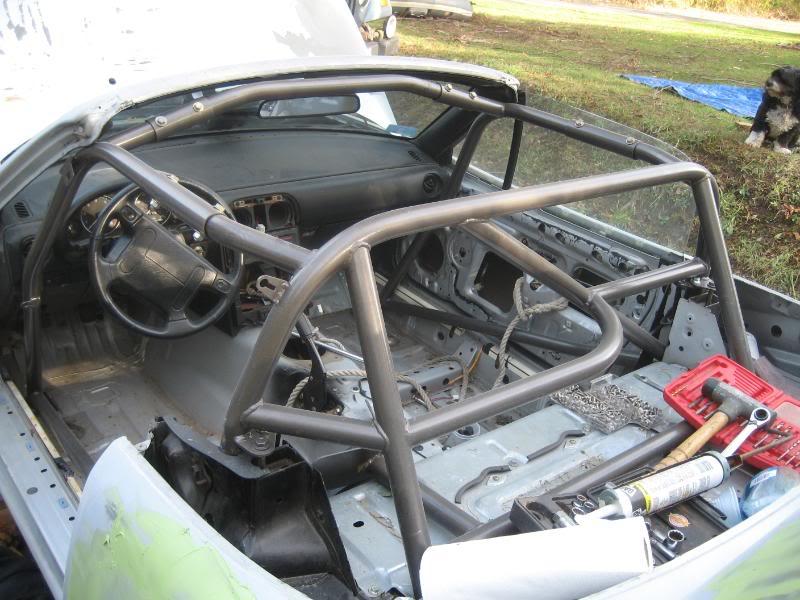
What a bear to install by yourself! I got it in though. It is a hard dog full cage with an extra support bar welded across the rear deck, and has provisions for a window net on the driver's side. (Thanks so much Owen for all your trouble getting this to me). The cage had a plate welded to it over the seat belt towers with 2 holes. I bored both holes out and bolted the plate down with the original seat belt bolt, and got some grade 8 bolts and bolted the upper seat belt mounts to the plate. Again, it came out fantastic.
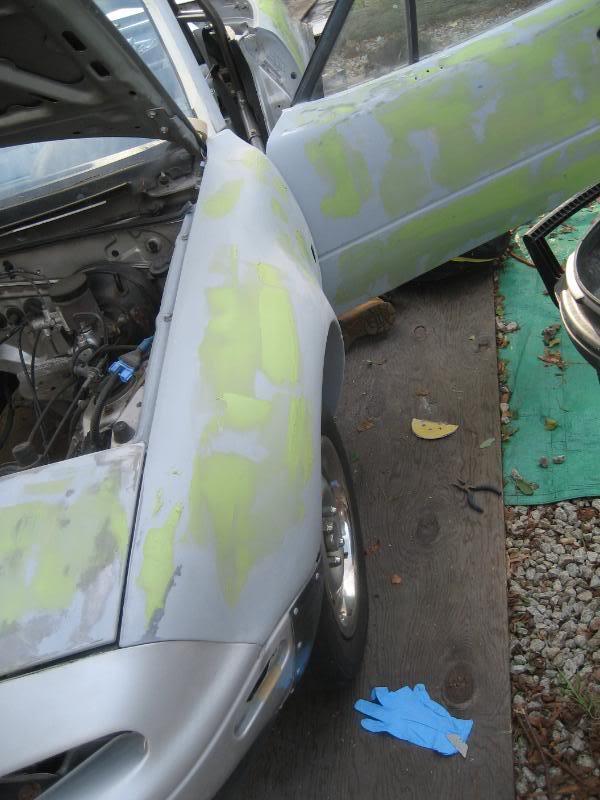
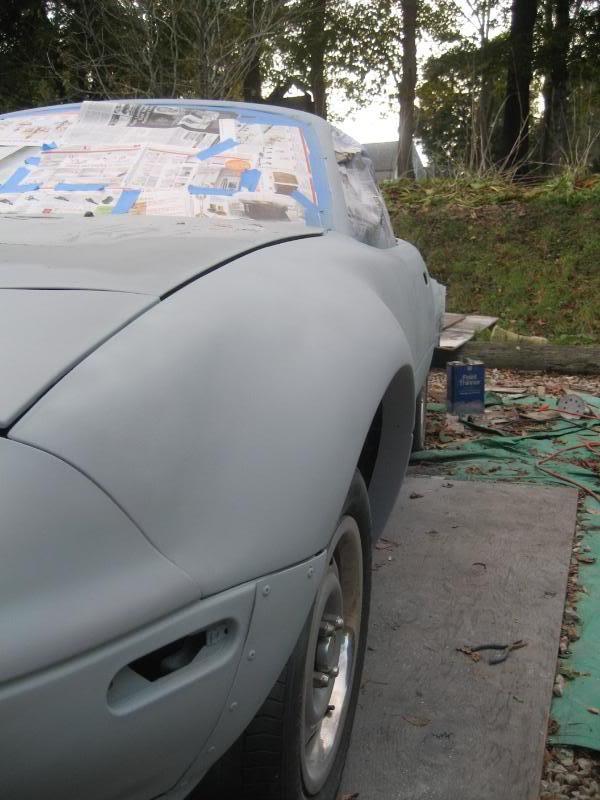
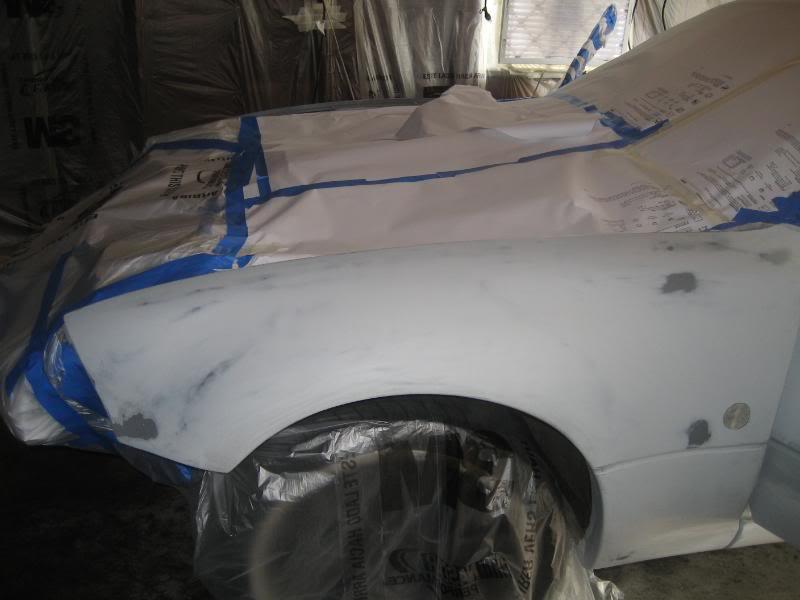
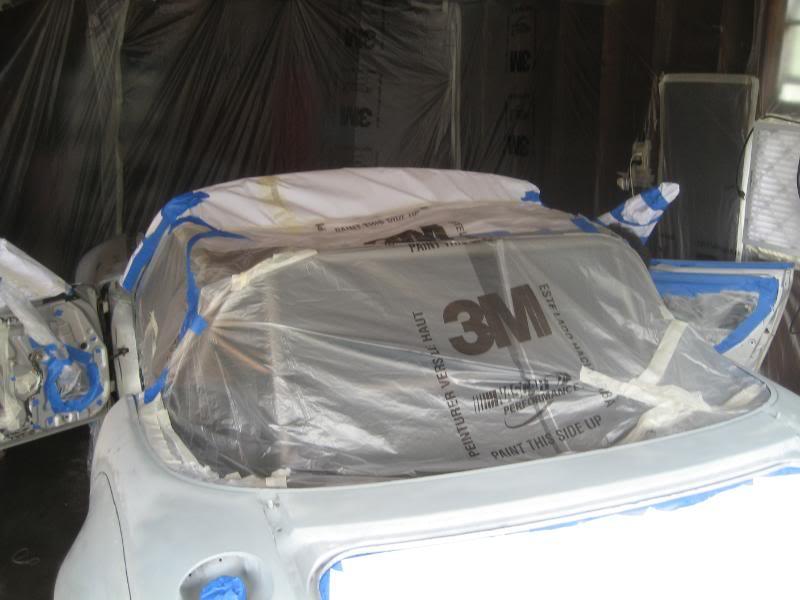
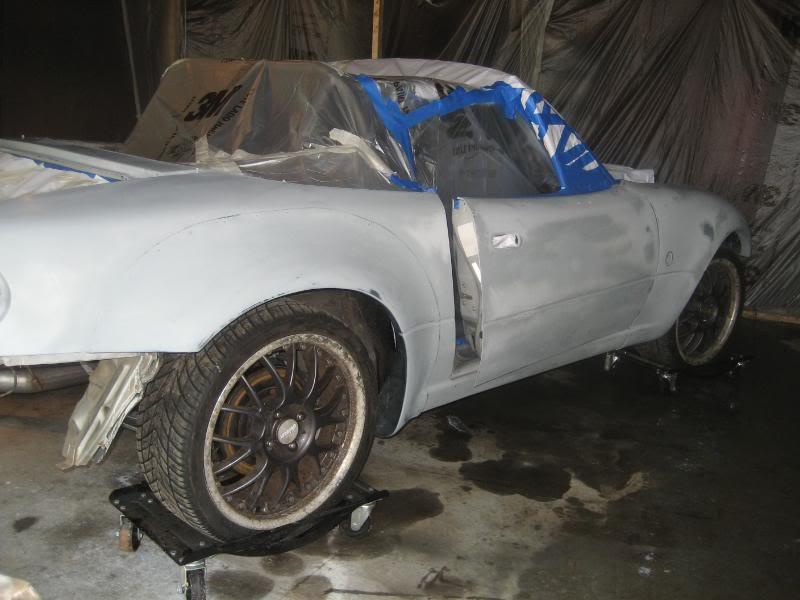
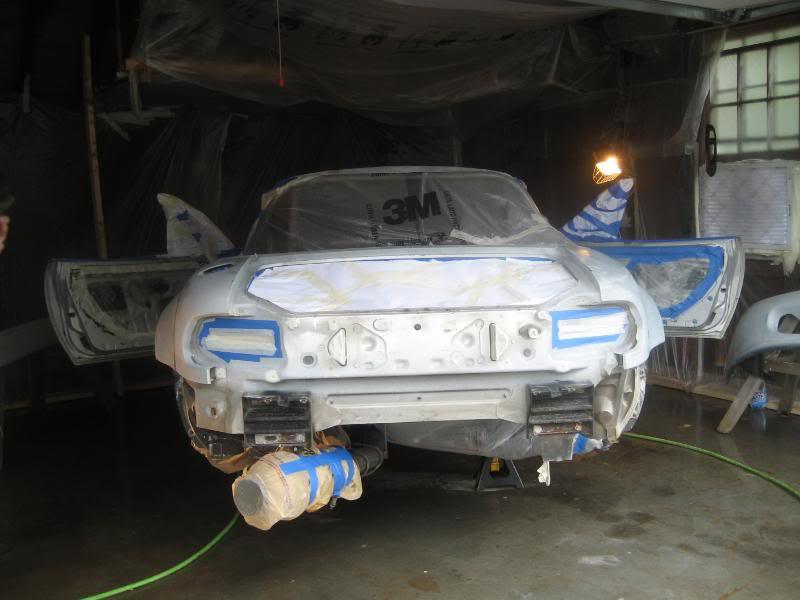
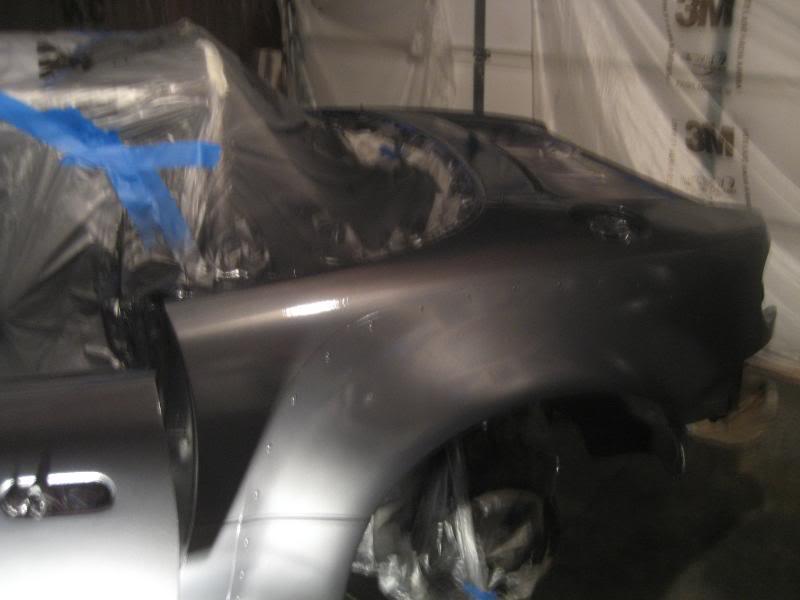
Back to body work! After a lot of sanding and massaging, it was time for primer. I primed the whole car using some duplicolor primer. First stage of body work completed! Hooray!

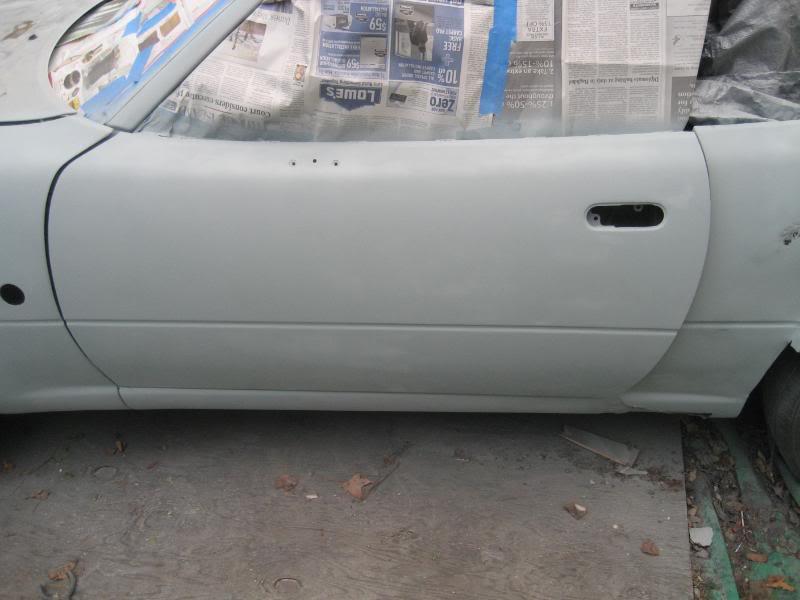
I also cut out a spot in the fenders for a set of jdm side winkers.
Well that's where the car sits right now, and that is all the pics I have of it at the moment. I have been collecting parts since June and have an entire garage/basement/bedroom full just waiting to be installed. Rather than list it all, I will post up pics as I install things, as I'm just like everyone else, and would rather see it than read it. Anyways, I love the site and hope you all like my build so far. There is PLENTY more to keep everyone entertained. Enjoy!
11/10/2007
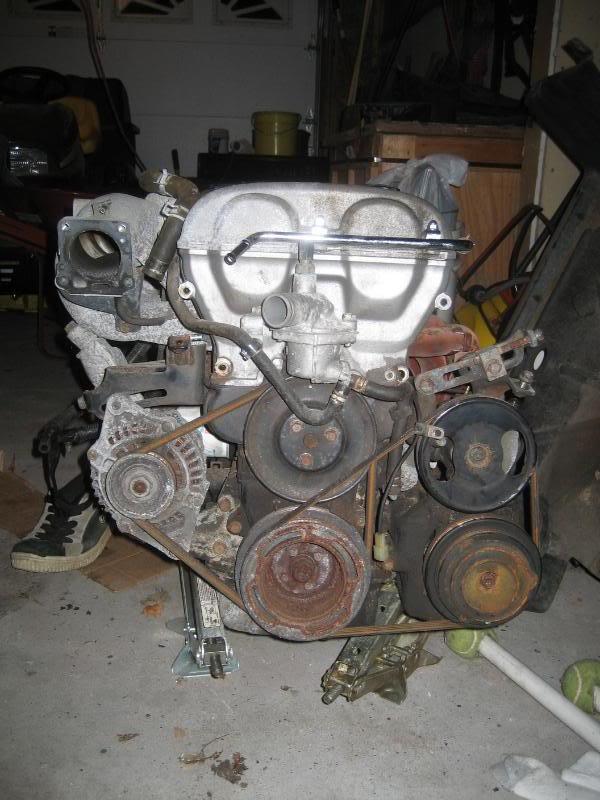
Got a little work done tonight, not as much as I had hoped for, but what are you going to do. Here's the old motor sitting on the floor of my garage, just waiting to donate anything it can to the new motor.
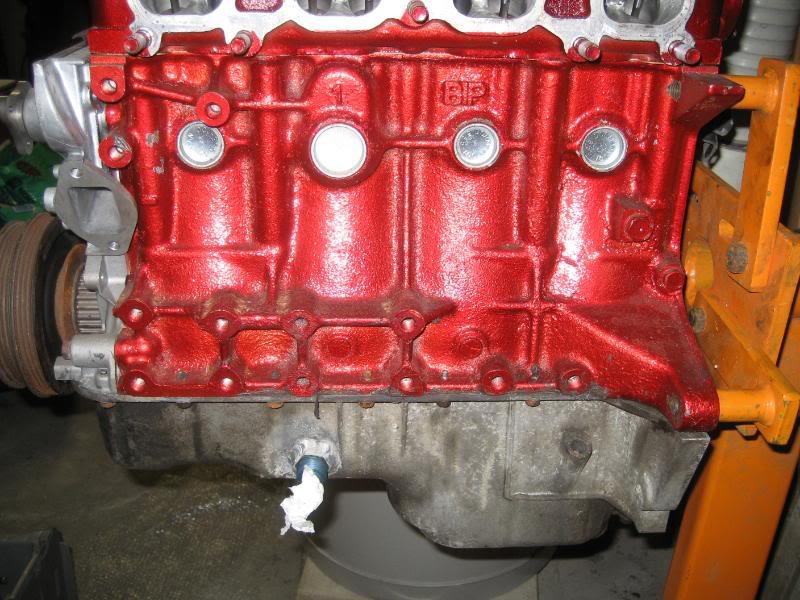
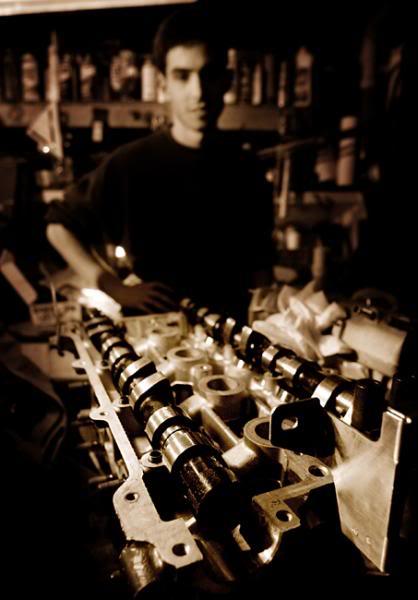
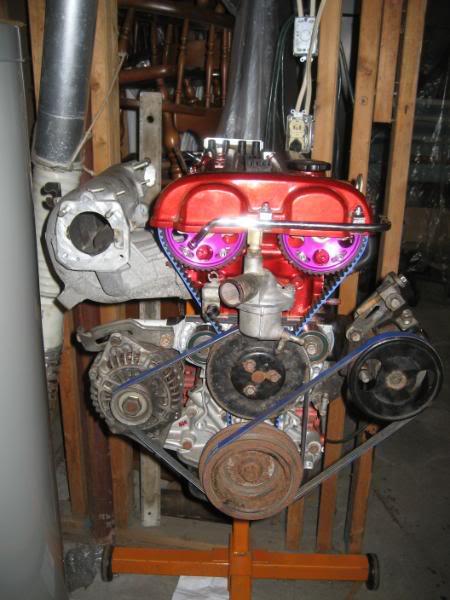
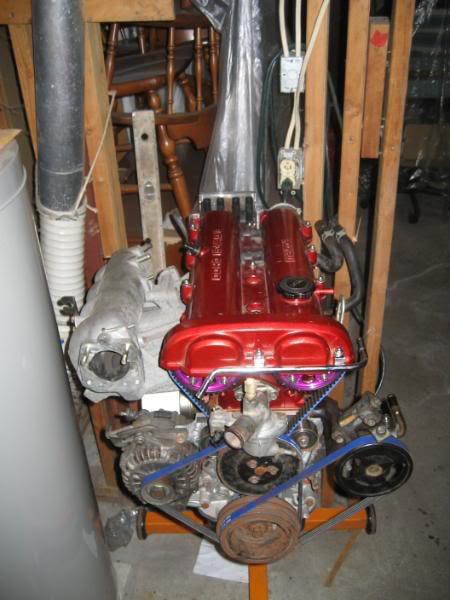
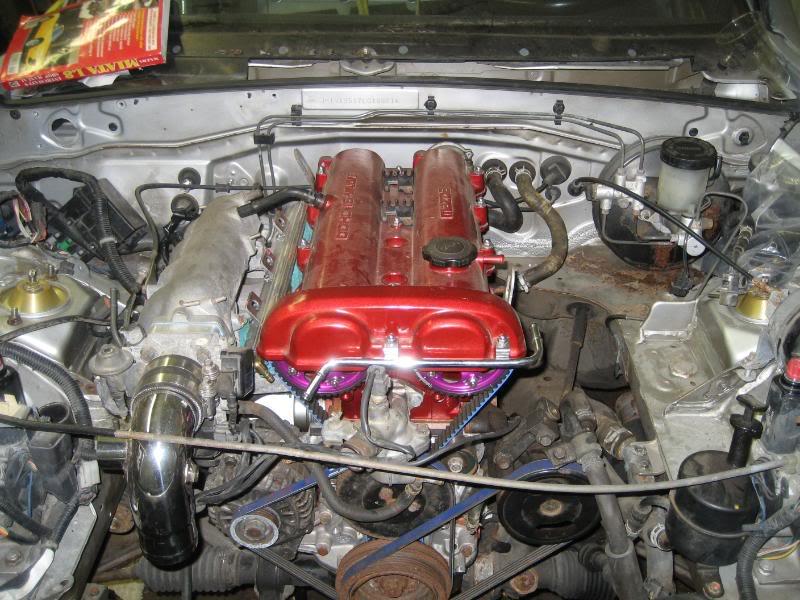
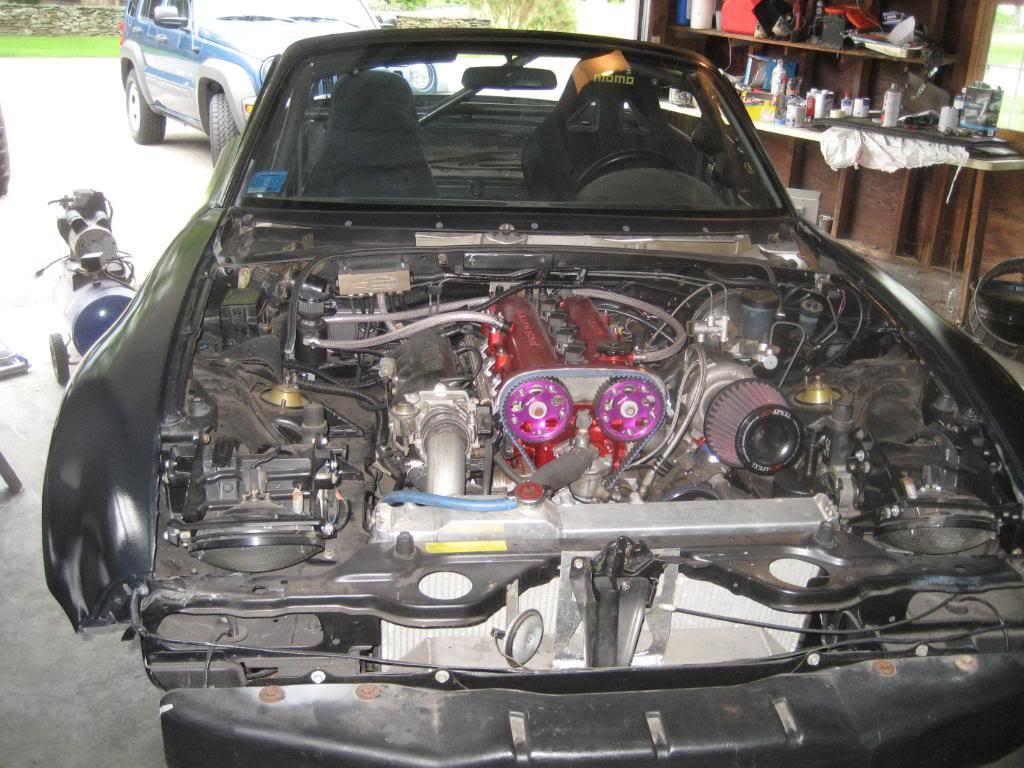
And what we've all been waiting for. The new motor!
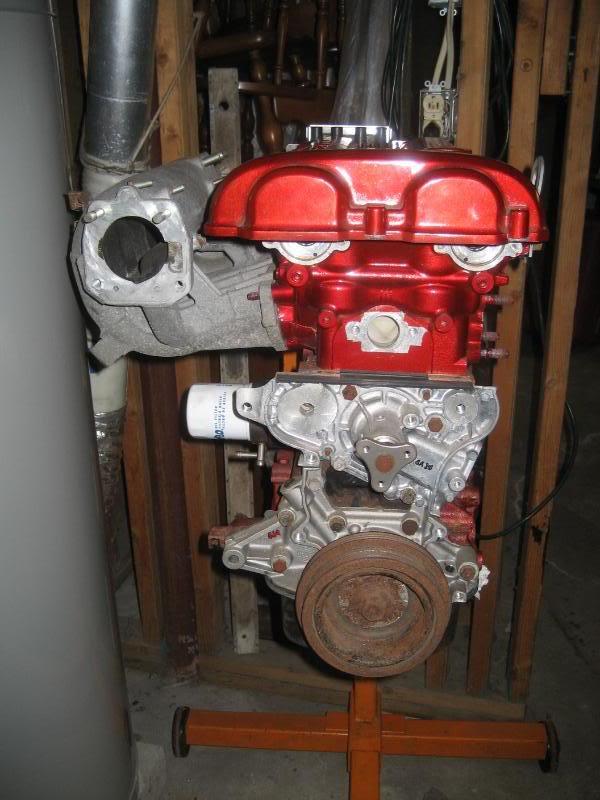
Now isn't that pretty....
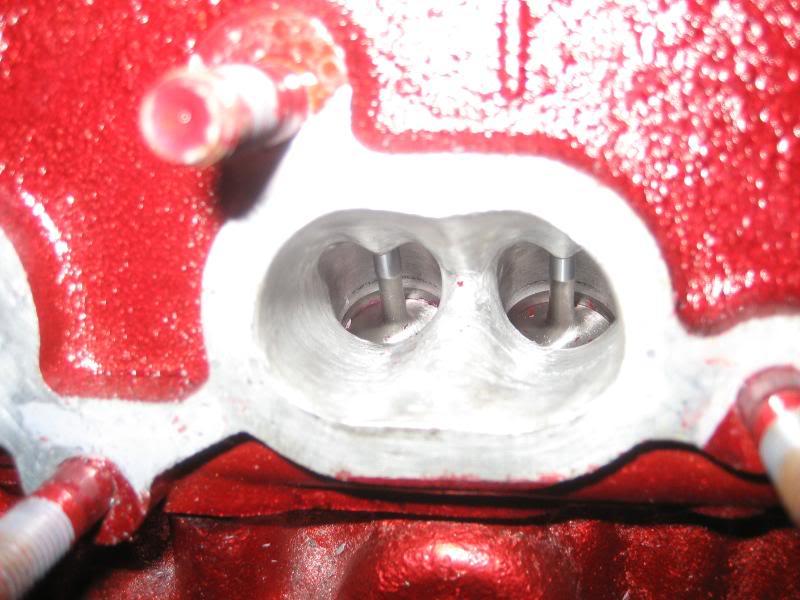
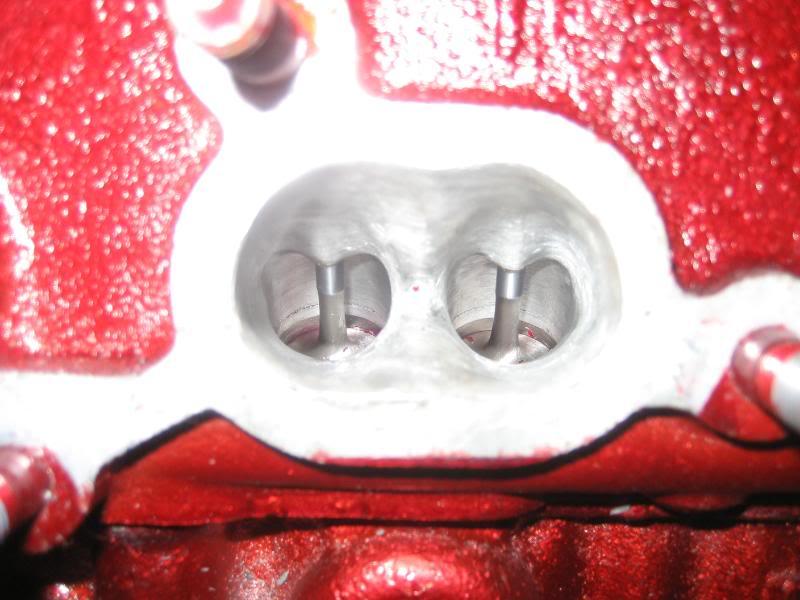
The port work is unreal
Just a few quick shots I snapped tonight. Here are the specs on it:
short block:
bored 40 over with weisco oversized turbo pistons (8.6:1)
pouter rods
ARP main and head studs
All new bearings and gaskets
pistons matched to 0.001 to the cylinder walls
balanced and blueprinted
lightened and balanced crank
mazdaspeed high flow oil pump
ford racing water pump
copper 3 layer head gasket
head
fully ported and polished
checked for flatness
0.5mm oversize intake and exhaust rev valves
stiffer volvo valve springs
ew retainers
new HLAs
stock cams/cam gears
port-matched intake manifold
I still have to install the HLAs and the cams, but I won't be doing that until the motor is ready to go in the car, as it's not good to let it sit without being run with the stiffer valve springs. The block, head, and valve cover were painted with a few coats of high temp engine paint, primed, and then painted red. I cannot wait to start getting this car together. These next few months it's really going to start coming together.
11/24/2007
Here's another shot of the seatbelt attachment to the cage:
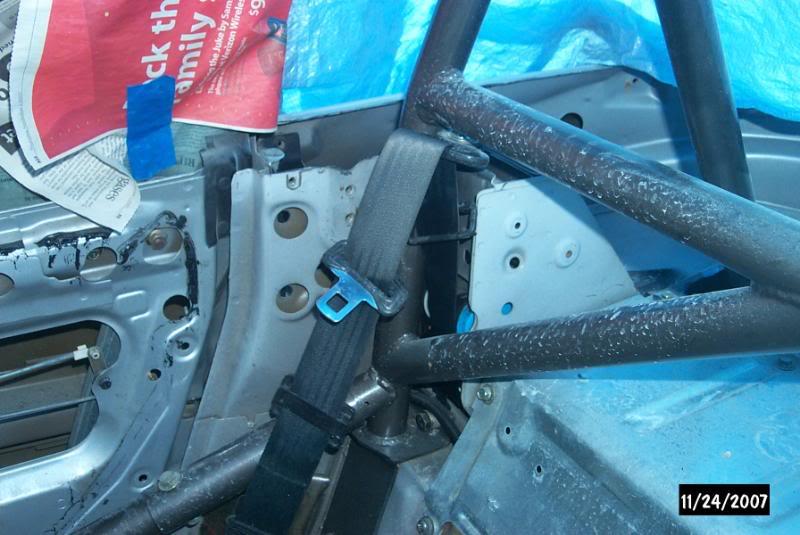
Yes I know it's filthy.
I had to enlarge the holes and get some different bolts. The old seatbelt bolt is bolted through the cage to the existing hole, and I got a new grade 8 bolt and mounted the seatbelt to the plate.
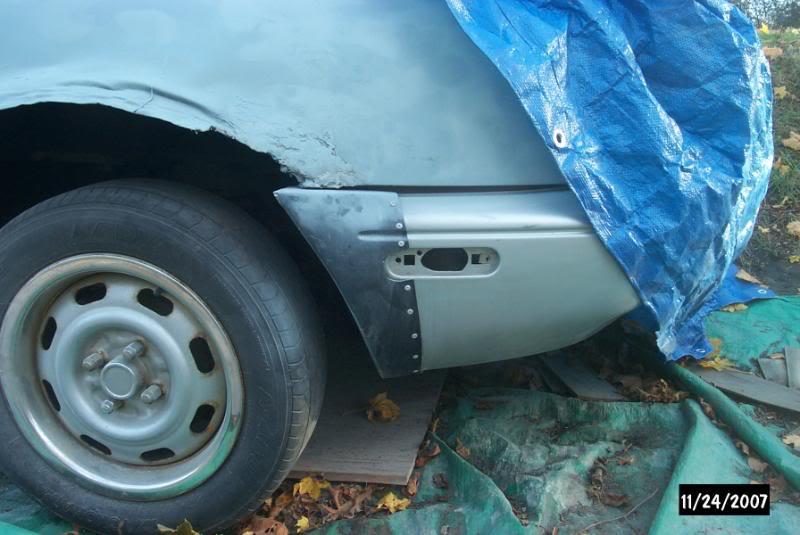
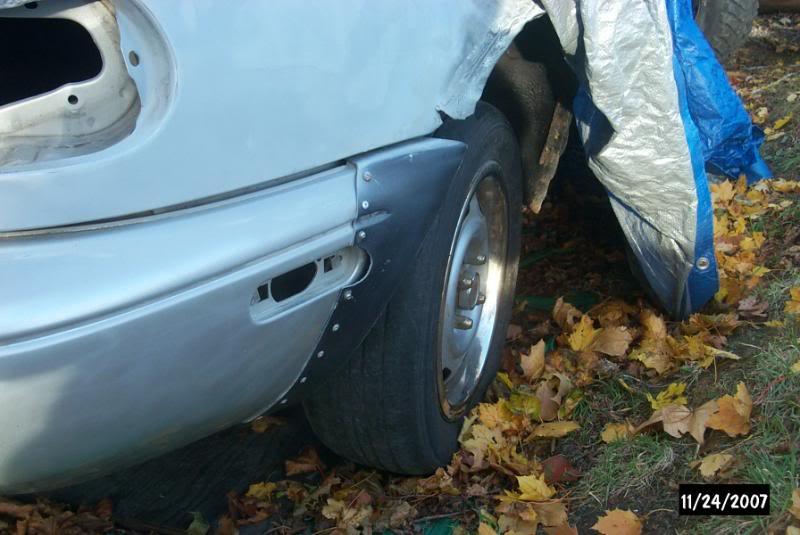
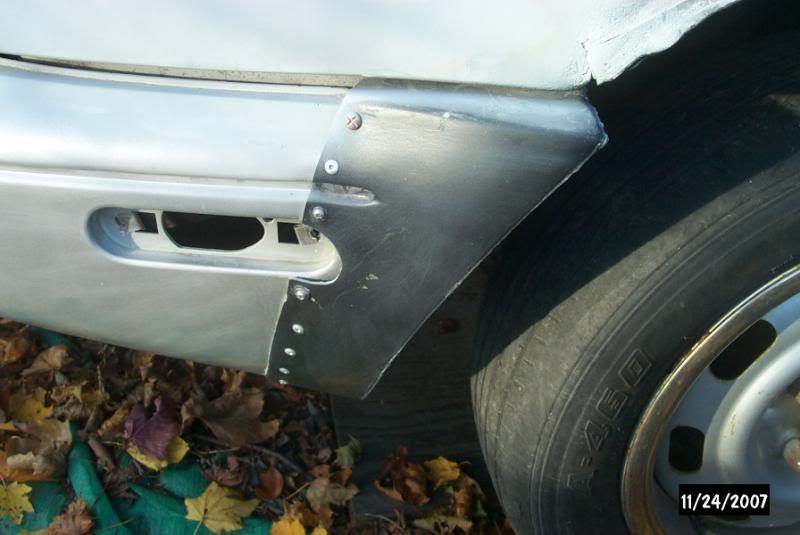
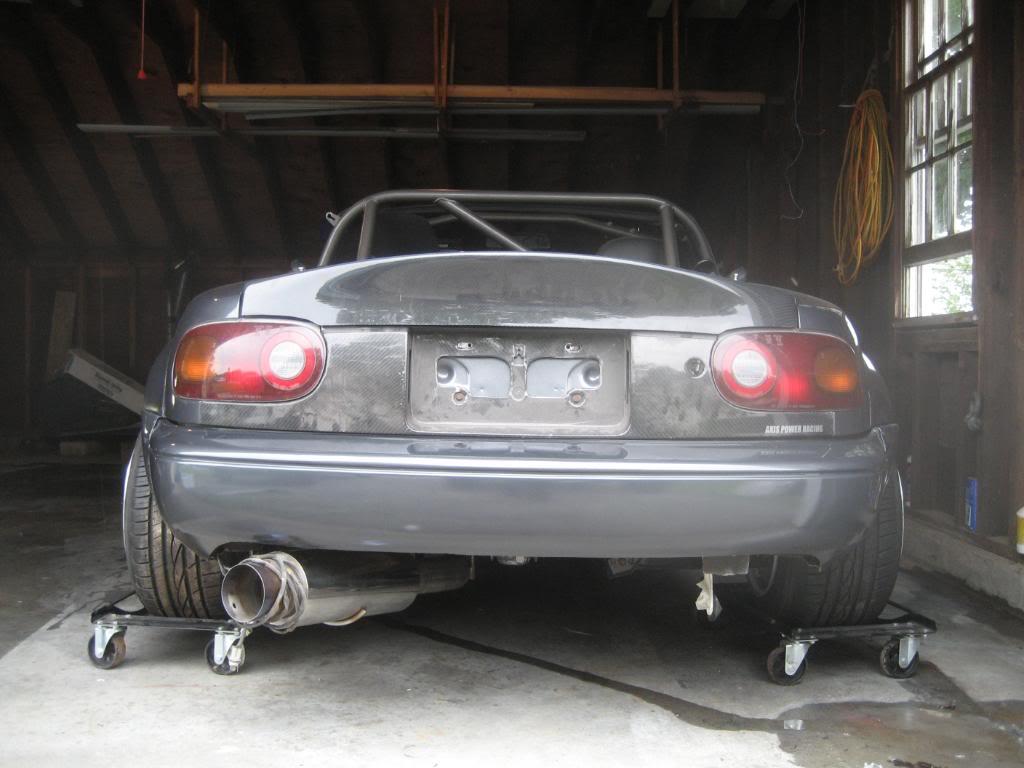
Moving on, took some pics of the finished rear bumper extensions. Again, I cut them down in size so I wouldn't have to deal with the smaller turn signal problem. I couldn't cut them down all the way, as the flare started about 1/2 way through the light, so I had to follow the contour of the signals and cut them to match:
Work has been slowing down because it's getting cold and dark fast. Once all the leaves fall down and the lawnmower is tucked away for the winter, I'll bring the car into the garage.
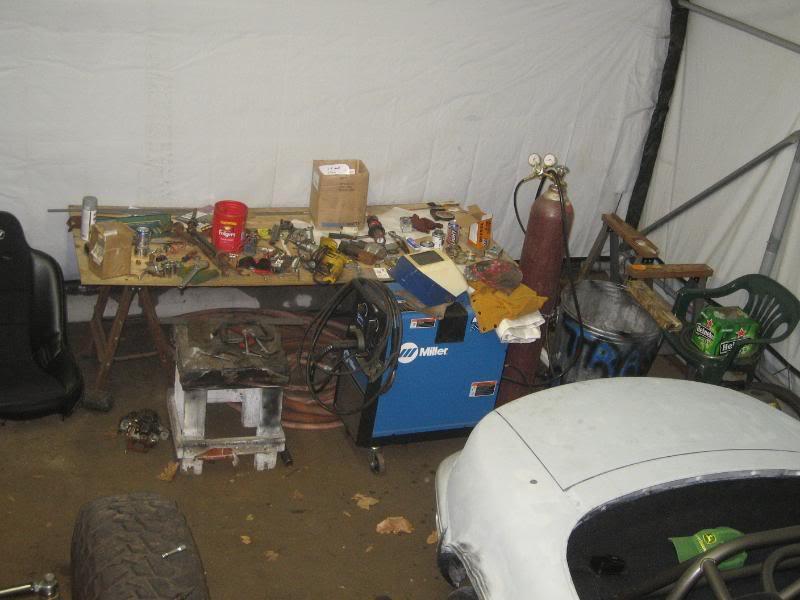
I thought this was a funny picture. Here's where most of the miata lies:

2/1/2008
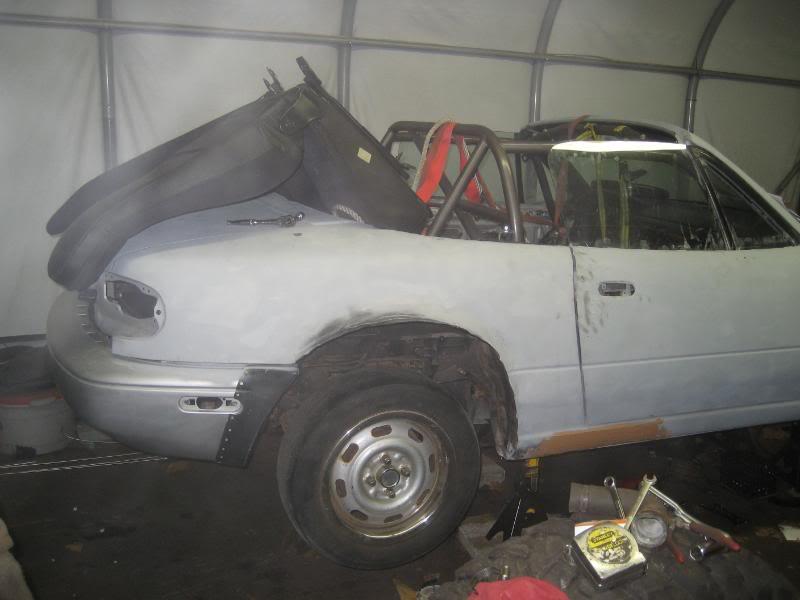
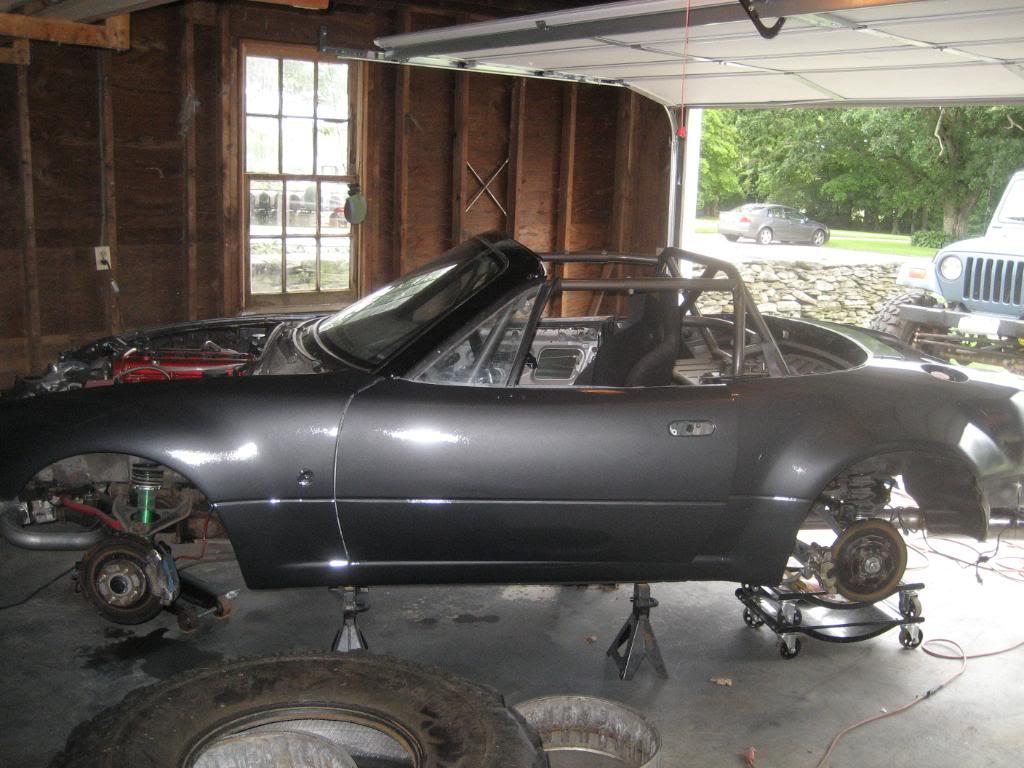
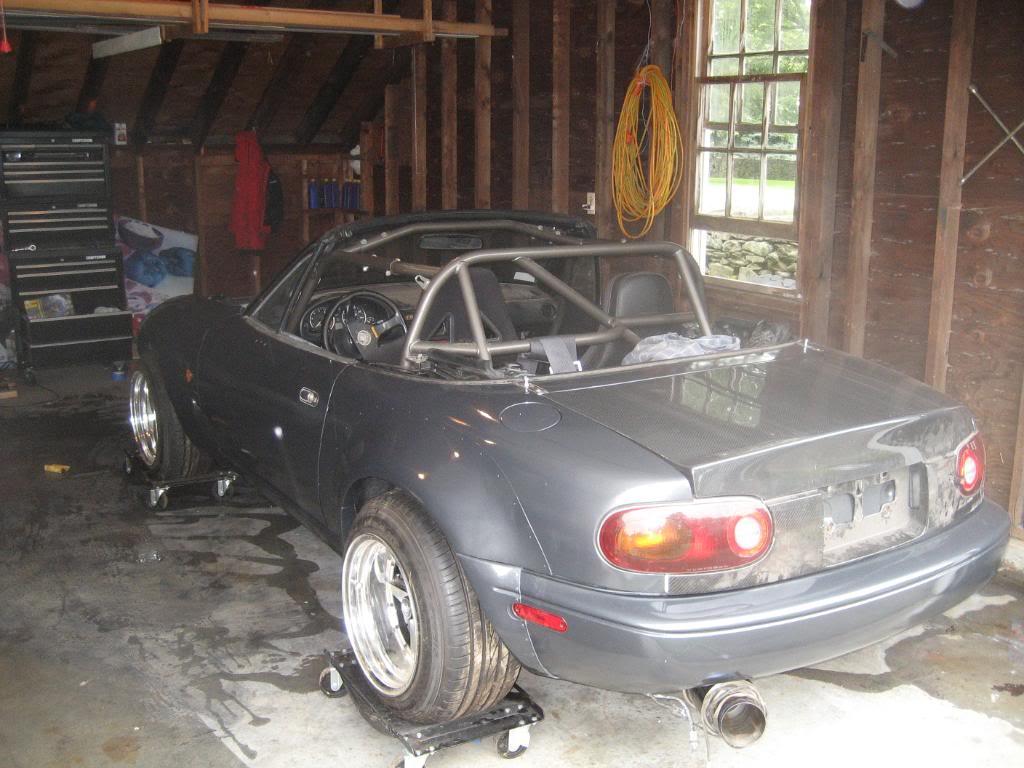
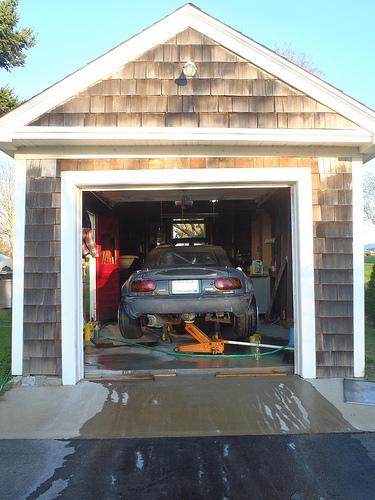
It's been a while since I've updated the thread here, as I haven't really done much. I just finished doing an axle swap on my jeep and now that it is all squared away, I can focus back on the miata. I finally got it inside the garage- here's how it sits:
There's just too much stuff in this little garage. That's the rear seat from my jeep sitting on top of the roll cage. Rolling Eyes
BUT! The pile has gotten a little smaller (although much messier, sigh...)
Decided to get some work done on the interior next. Got the carpets all installed again and cut to fit around the roll cage.
Installed my "new-to-me" Momo start seat and Simpson 3" 5 pt. harness. I haven't put in the submarine belt as I have to cut some brackets to use as backing plates. I'll do that later.
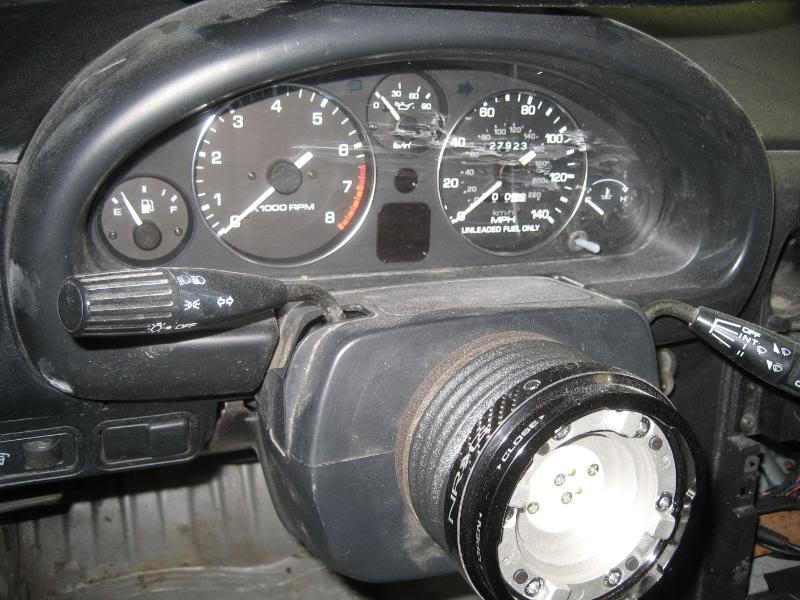
Next up, I ripped off that ugly stock steering wheel and the now useless airbag and bolted on a MOMO hub. Anyone who has installed a hub must know that they don't exactly just bolt right on. I ended up shaving down the connector for the airbag and horn button coming from the steering column, and then drilling out a 1/2" hole in the adaptor where the connector "hit" the hub. This hole allowed it to slide right in, allowing me to bolt the hub up flush- and I didn't have to mess with the turn signal stops this way either. Next up was a carbon fiber NRG Thin quick release hub. After this came my MOMO Competition wheel and a yellow MOMO horn button. MOMO was kind enough to not put the correct connections on the horn, so I got a little creative. A friend of mine came up with a great idea on how to get around this problem. I took the horn button apart, and bent the ground wire up through the "ground" hole, soldered a connector on it, and bent it flat. This allowed me to then hook up the connections for the horn on the quick release, and install the wheel.
After this, I didn't feel like doing anything else in the interior, so I went and grabbed my TSI's. They were a little too smooth for paint to stick too, and had some burrs on them, so I sanded them down smooth.
Since I haven't posted in a while, I will show you what has recently arrived in the mail.
First up, some 258 Mazda regrind cams.
The cams came wrapped in JDM paper too!
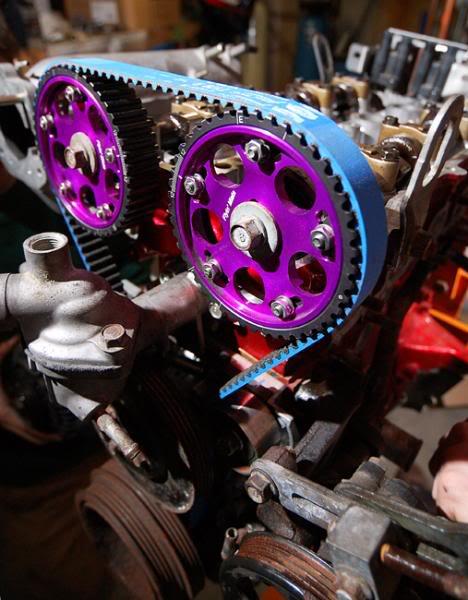
Next, a pair of LOVELY Flyin Miata cam gears
I don't know how well the purple is going to go with the red, but it's a small price to pay I suppose....
And the piece I waited 7 months to get! A Beatrush under tray! This is a work of art! Many thanks to CT Auto for sourcing this for me.
Well that's it for now. Hopefully I can get some more done this weekend.
2/3/2008
Here's a pic of the passenger seat, just a stock one for now. I plan on upgrading it, but since I don't sit over there, it's low on the list.

Well a deal fell into my lap that I just couldn't pass up. Can you say bulletproof miata? I'm certainly on the way!
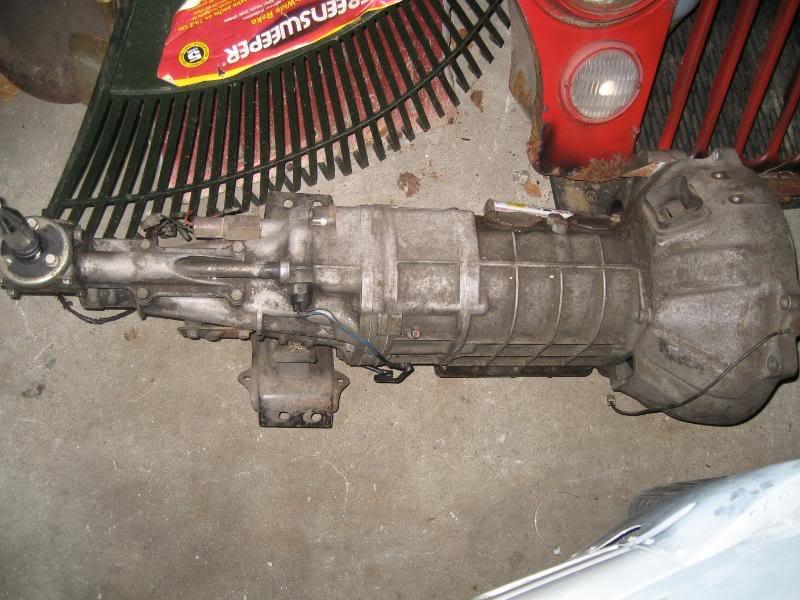
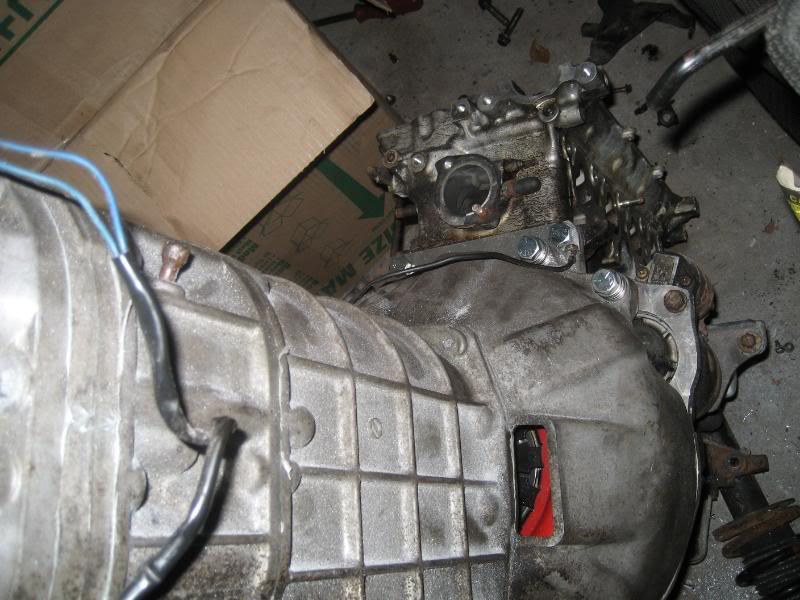
RX-7 TII tranny:
Miata 6 puck clutch with an RX-7 spline:
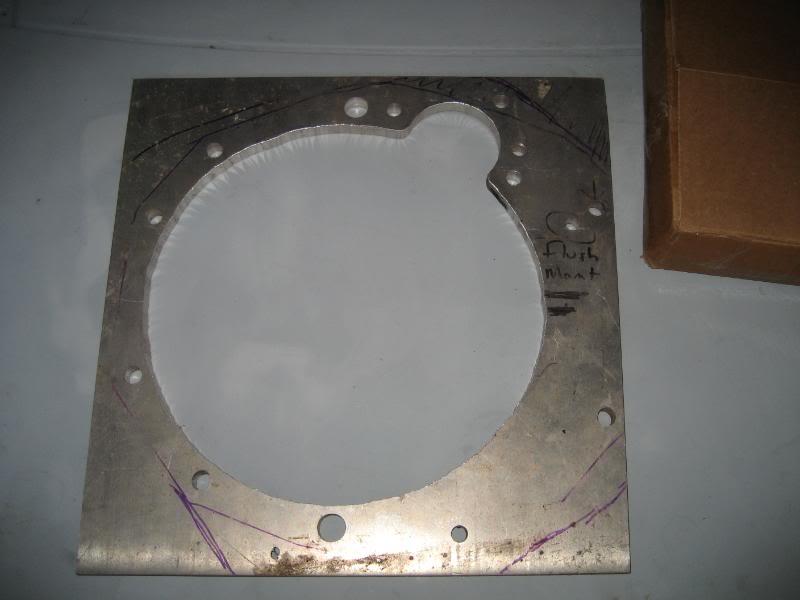
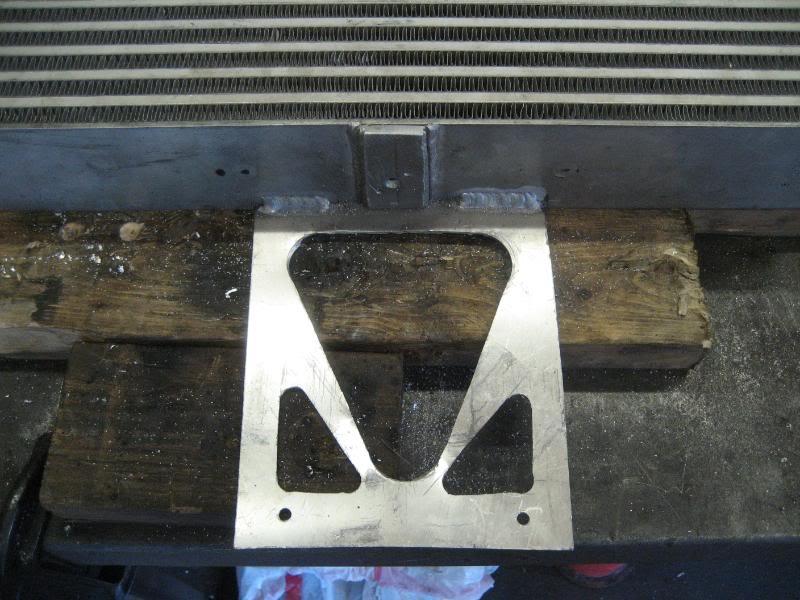
AND, an adaptor plate which I just need to trim to fit. All the holes have been drilled and the inside was cut out.
SOOOOOo excited!!! Anyone who has a lead on a TII rear end w/LSD and a driveshaft please get in touch with me!!!!
2/12/2008
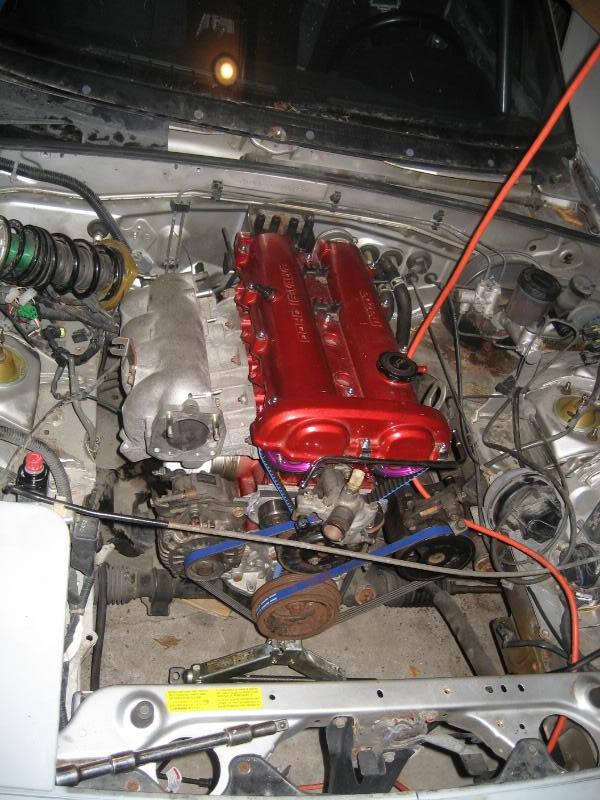
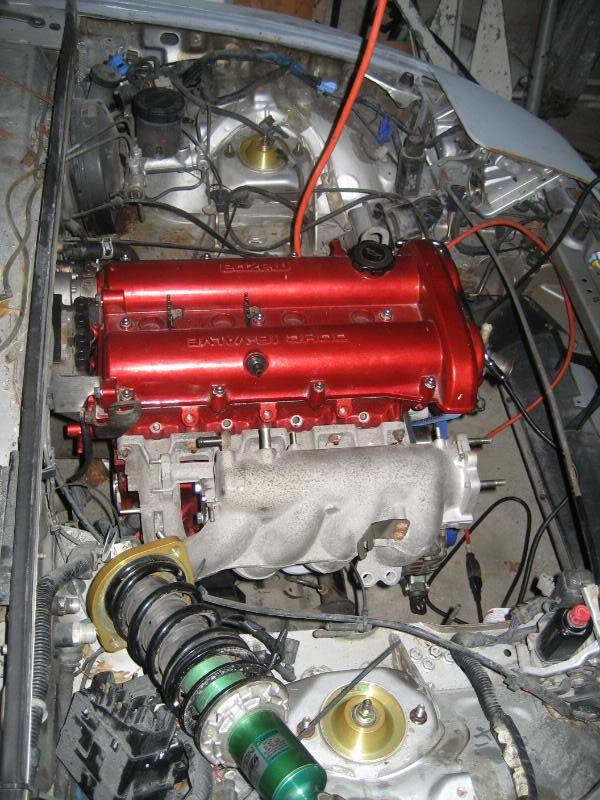
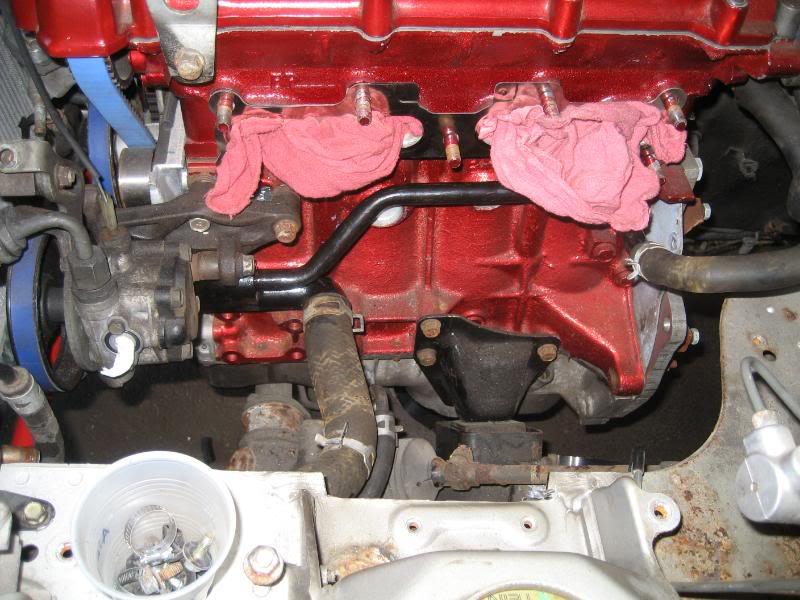
OK Motor pics, as promised! The first couple were taking by a good friend of mine (http://www.danrothfeld.com/). I had a few buddies over and we banged out the re-install. Enjoy!
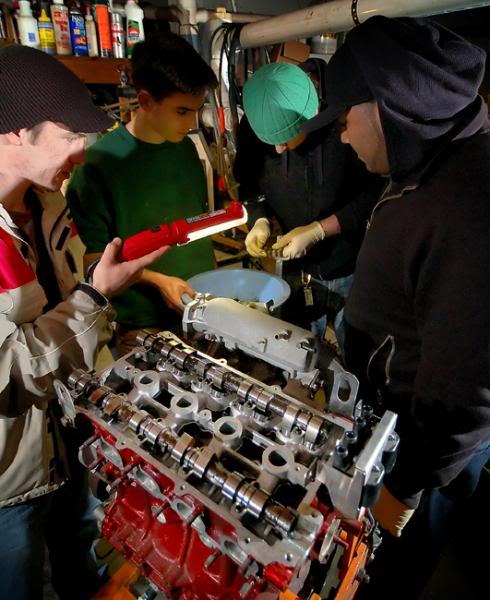
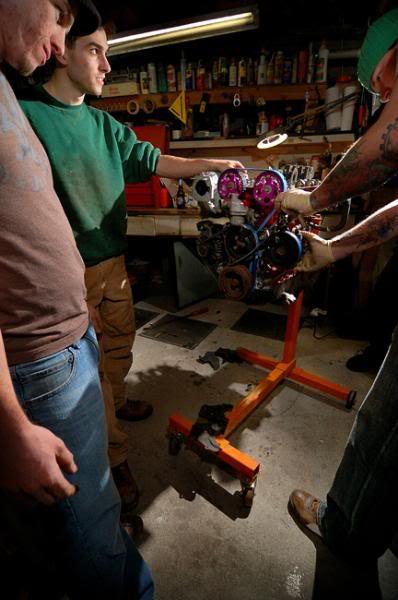
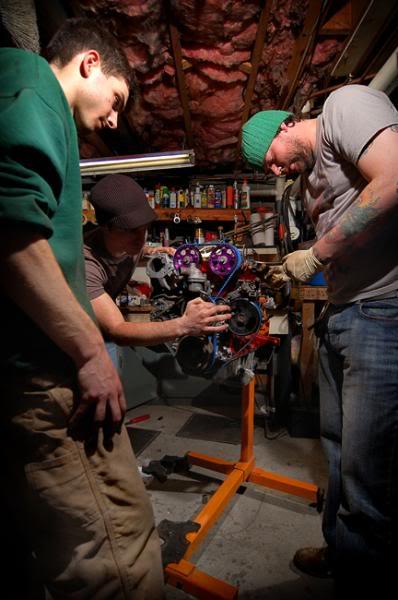
And my personal favorite:
That was all he took, so now it's back to my crappy pics 
and one more:
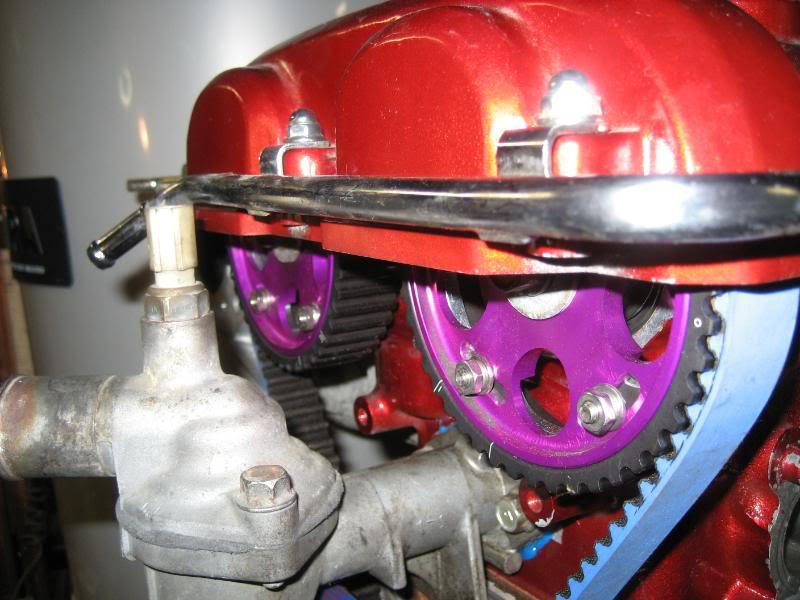
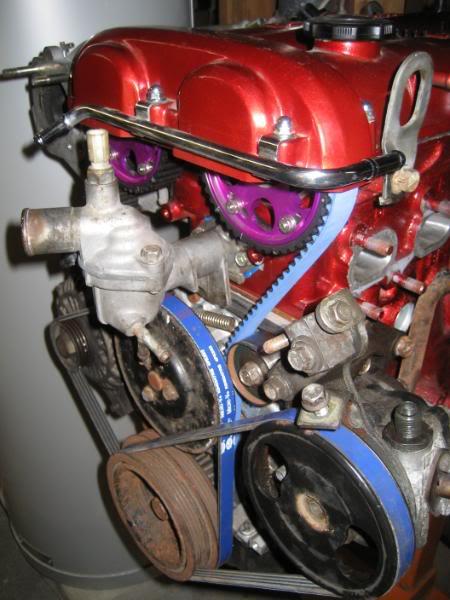
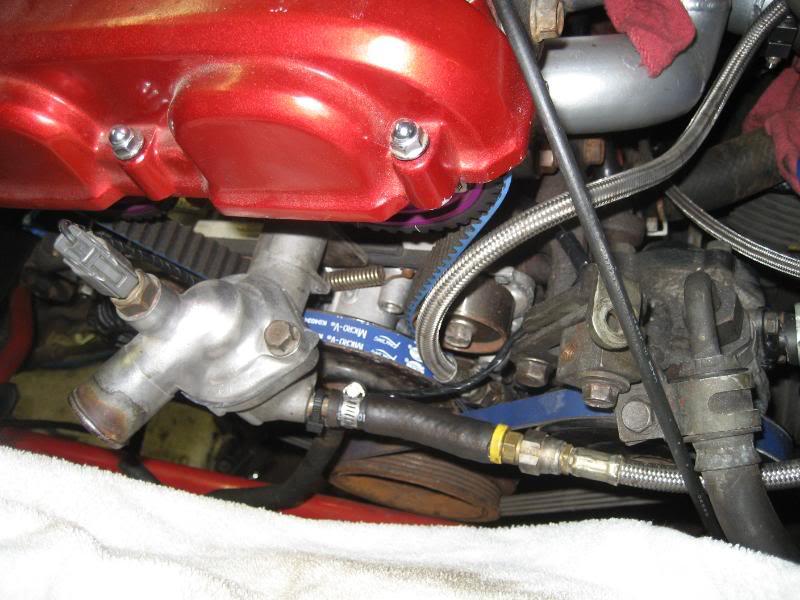
I will be trimming the valve cover so the cam gears are fully exposed. I have a gates racing timing belt, and both gates racing accessory belts (hence the blue color). The motor went together very smoothly.
3/9/2008
OK, ALOT of progress. Here goes.
Had 2 friends come over and help me lift the engine off the stand and carry it on a 2x4 and drop it in- took all of 10 minutes to do, I could not believe how painless it was.
It looks much better in the car than on the stand. Don't mind the rear coilover.
I have a jack under the crank pulley so the engine isn't resting on the oil pain.
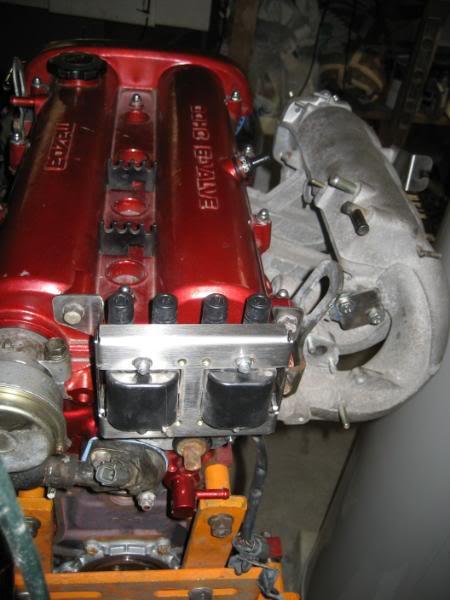
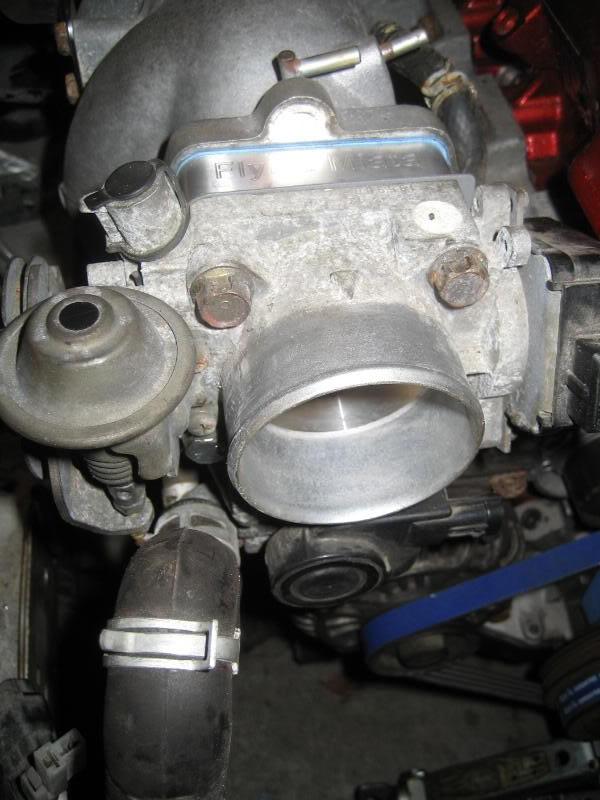
Tapped the 2 holes for the throttle body adapter, made another TB gasket, and bolted on the FM adapter and the 1.6 throttle body.
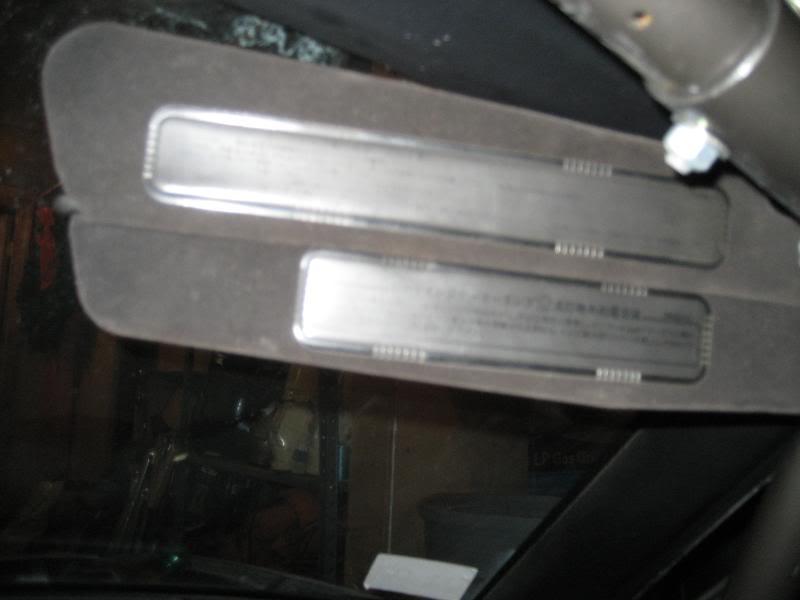
Next, a quick one, very difficult also. JDM visors.
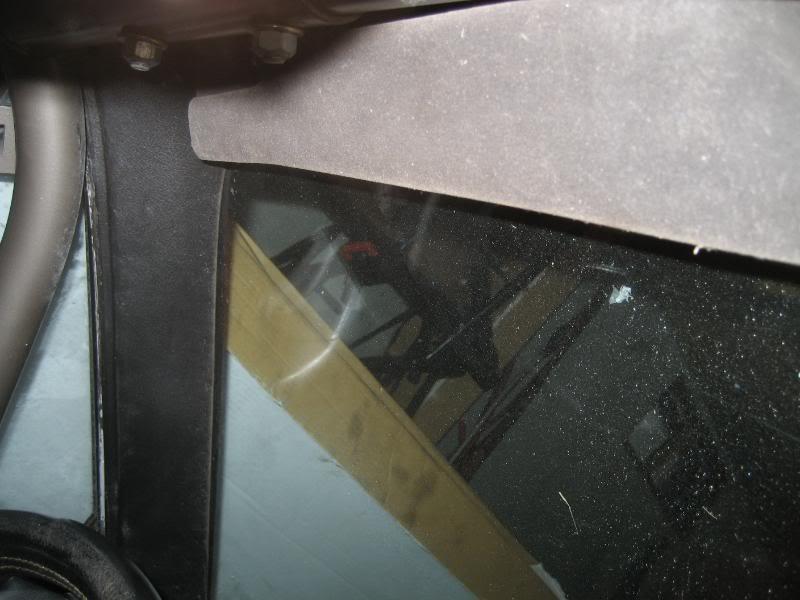
They fold up and tuck nicely behind the cage.
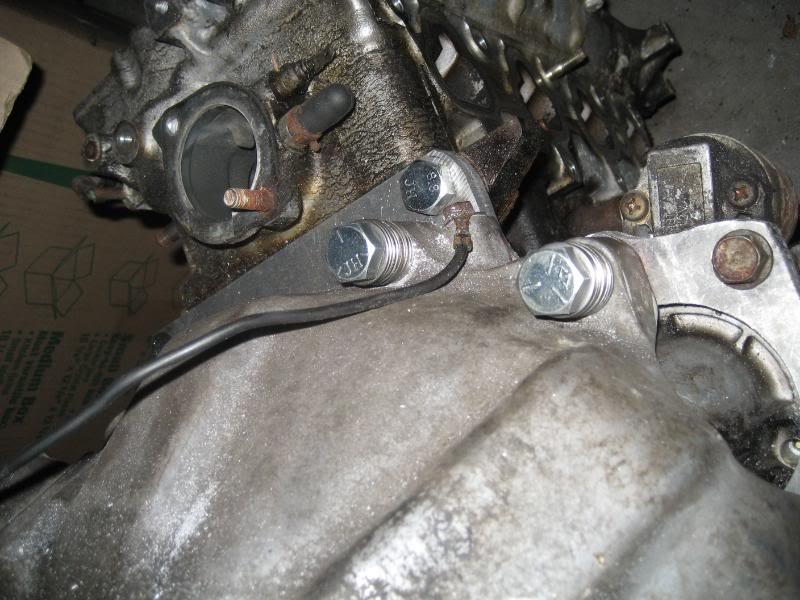
I went back and finished up the work on the adapter plate. It took me forever to find shorter 12x1.5 bolts, I couldn't believe it.
Here's a pick of the plate bolted to the block:
And a close up of the starter added on to the plate
I believe I am only going to use 2 holes for the starter, but I might run a tap through the plate and come up from the opposite side of the starter with the 3rd bolt.
Next up, put the tranny back up on the plate (I've only done this about 300 times :roll .
.
3/9/2008
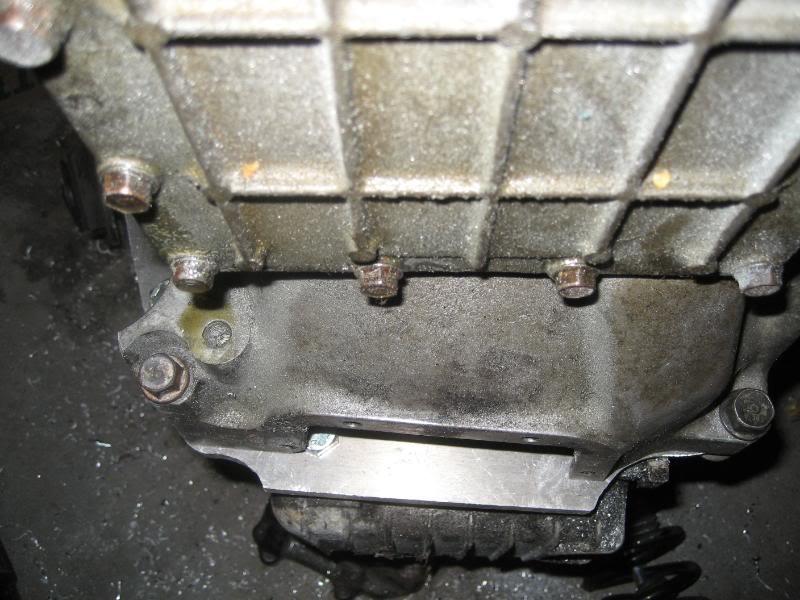
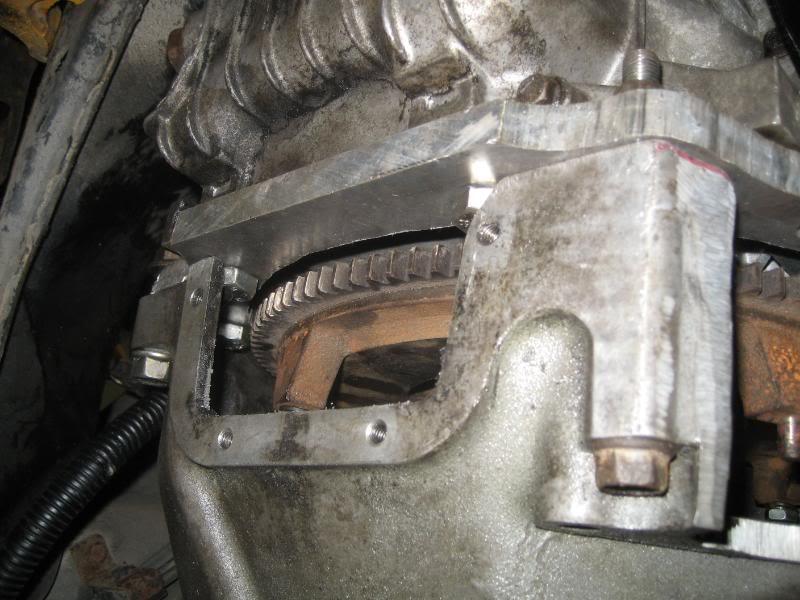
Hmm... seems to be some minor clearance issues. Remove tranny (I'm getting good at this), and then bust out the grinder.
Problem solved!
Here's a closeup of the starter clearance cut
Put the tranny back on plate for the final test fit...and it fits!! I proceeded to bolt it down as I had to drill out 2 more holes in the plate and wanted to make sure they were spot on. I also decided to bore out the rest of the mounting holes for the TII tranny to accept a 12mm bolt, vs the 10mm that it normally had.
For these 2 holes I ran a 1/2x20 tap through, bored out the mounting eyes on the tranny, and bolted them on. The bolts were a little long, so I stepped them up with washers. Yes I will get the correct bolts when install time comes.

The adapter plate is now officially done! WOOHOO!!! Next weekend I'm packing everything up and heading over to my buddies house to weld the rear tranny mounts, and to fabricate/weld on front diff mount for the TII rear that is just waiting to get under there.
3/30/2008
made ALOT of progress over the weekend. I brought the car to my buddy's shop so we could start on the fabrication/welding of the new mounts for the tranny and rear end.
I took a lot of pictures, so enjoy!
My buddy has been working on a tube-frame rock crawling buggy which he is building from scratch. I took a few pics of both cars in the garage- it's the opposite end of the motorsports spectrum 
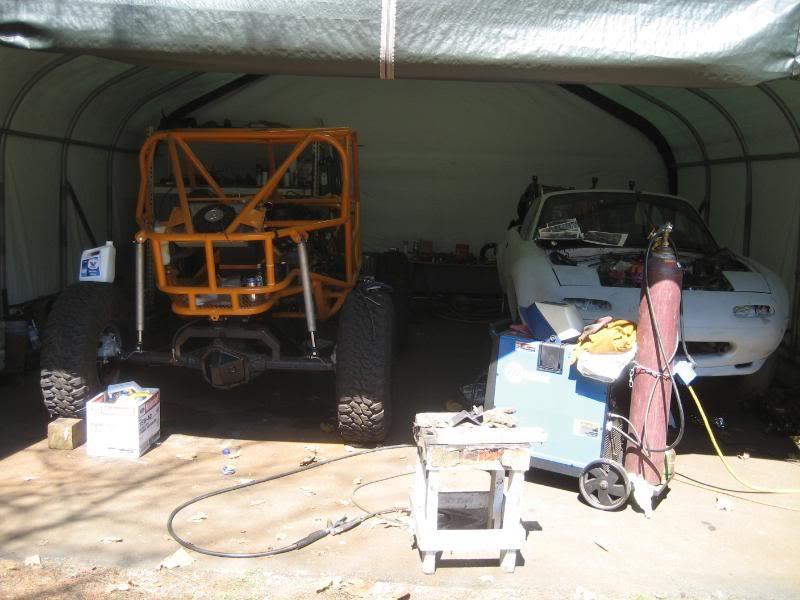
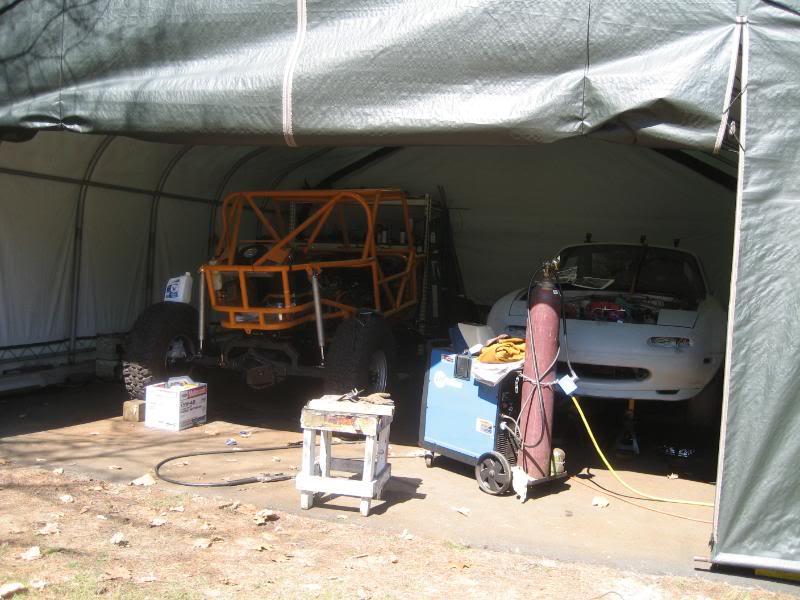
I stood on the buggy's tires (37"), and snapped some overhead shots of the miata
tools of the trade:
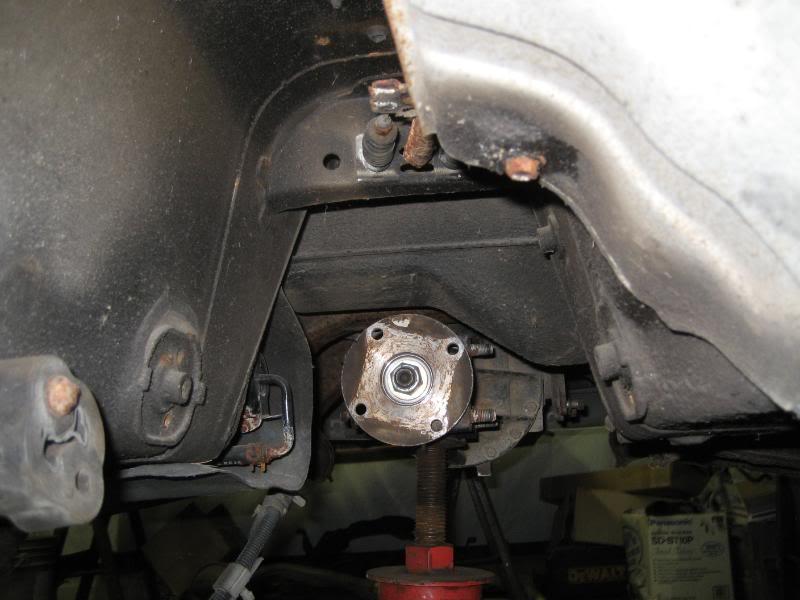
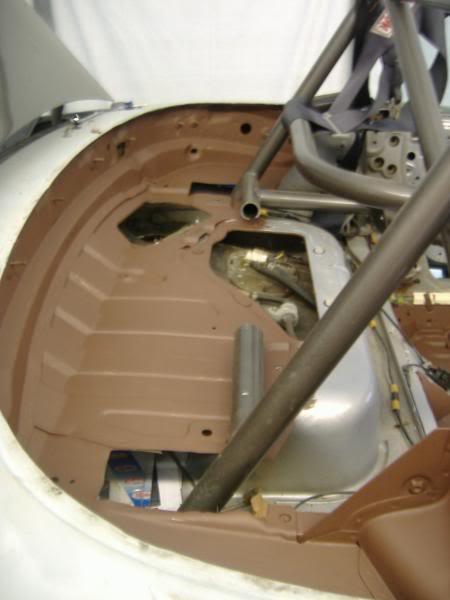
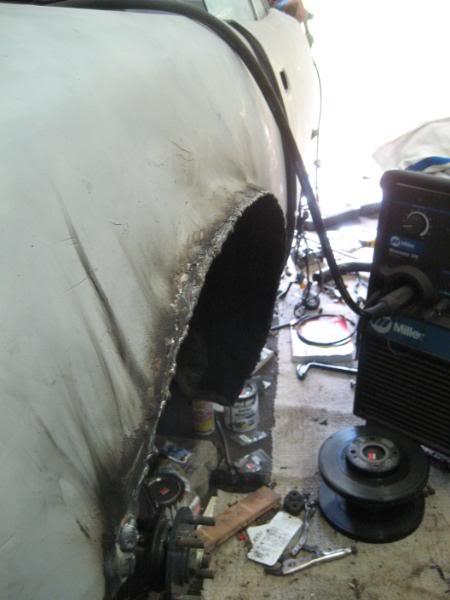
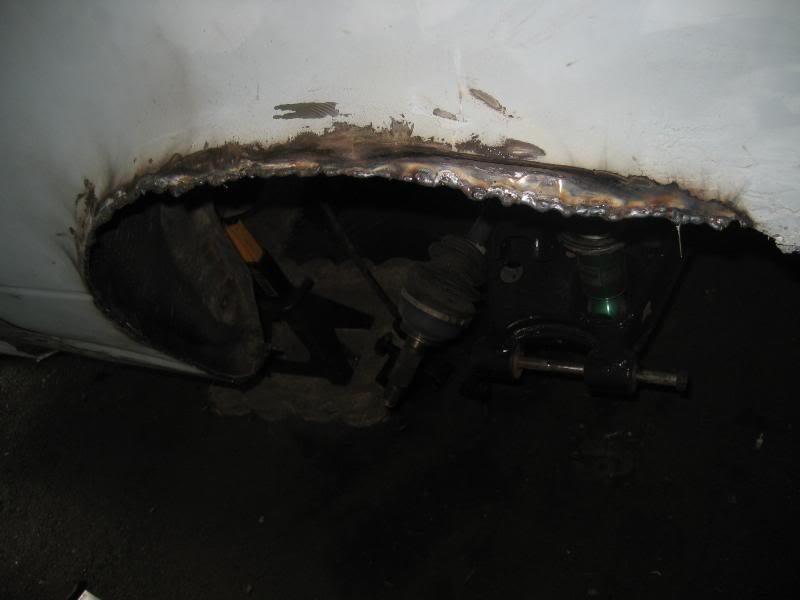
Got the miata up on jackstands so that we could begin work on it
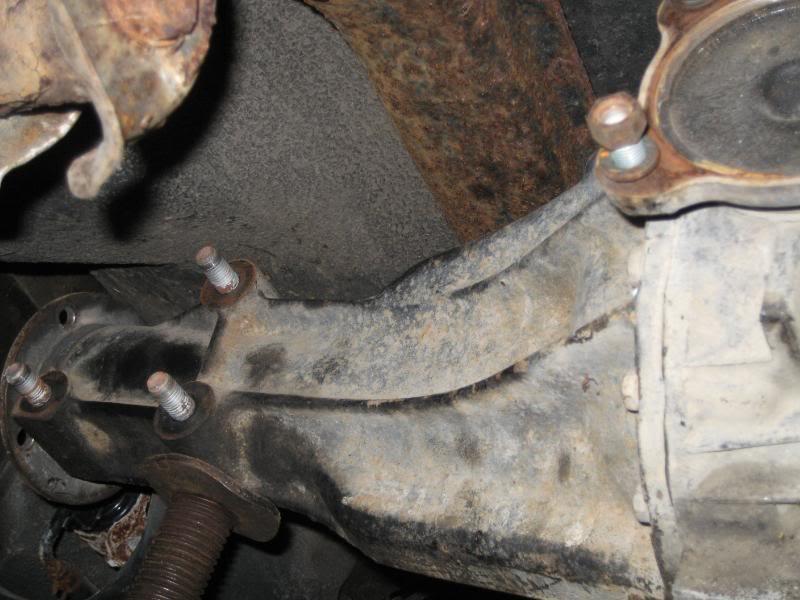
Pulled out the inferior rear end and muffler
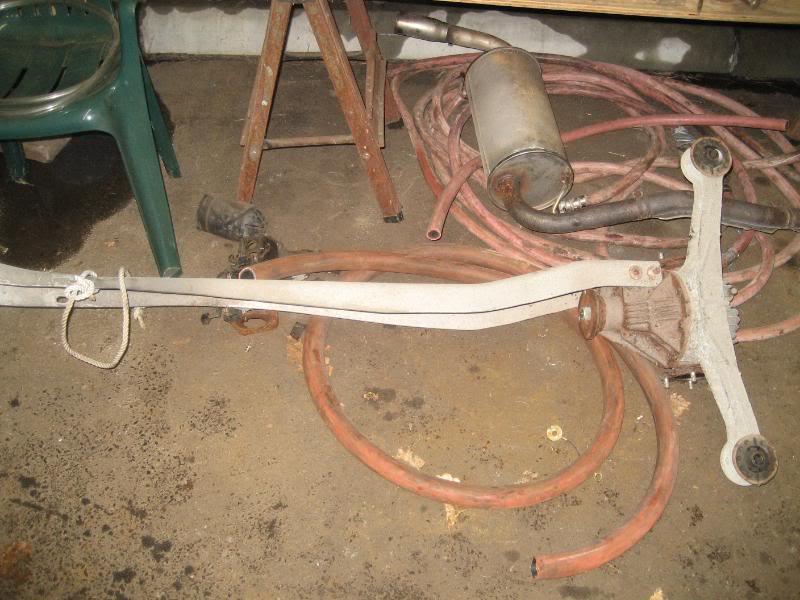
I broke one of the bolts holding the ppf to the diff, so I had to remove it all in one unit...what a pain
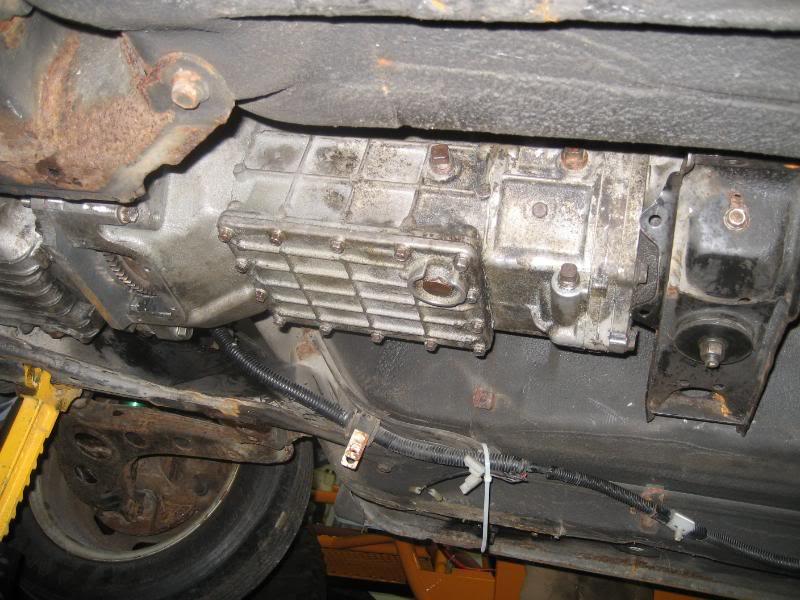
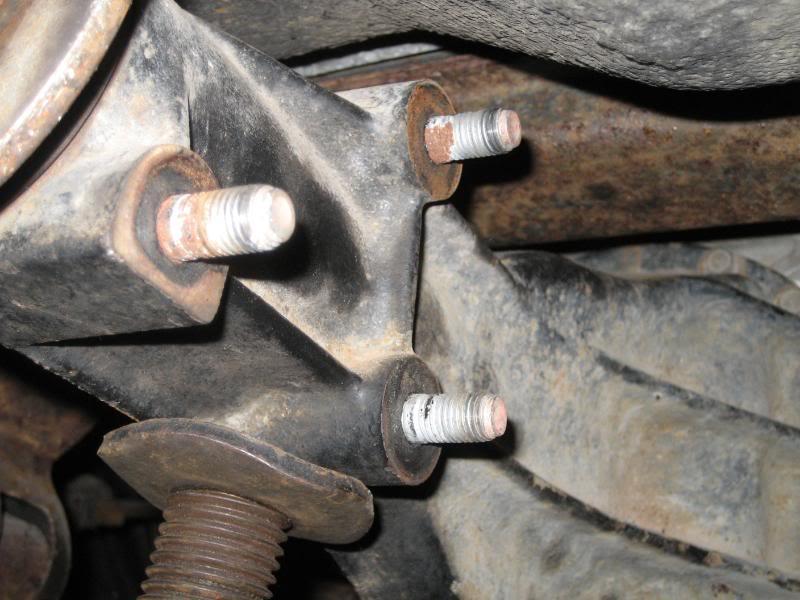
here's a shot looking from the rear down the transmission tunnel
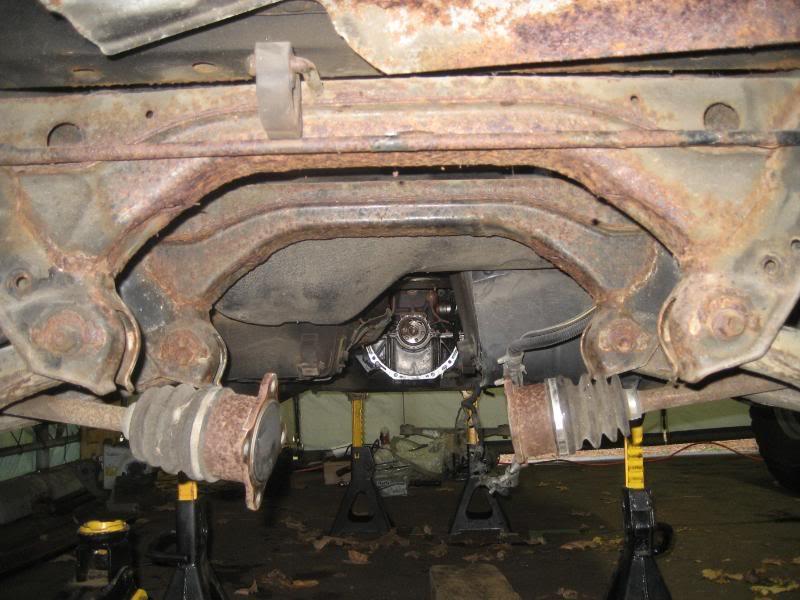
closeup:
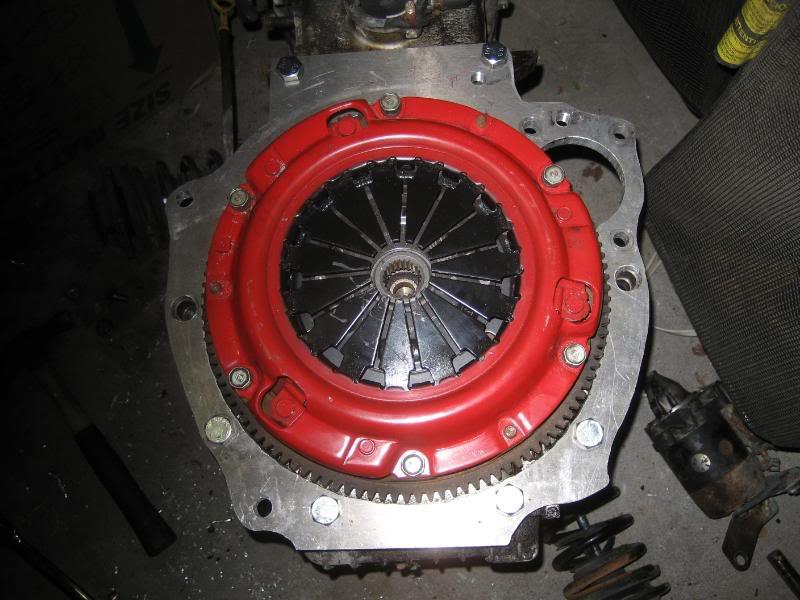
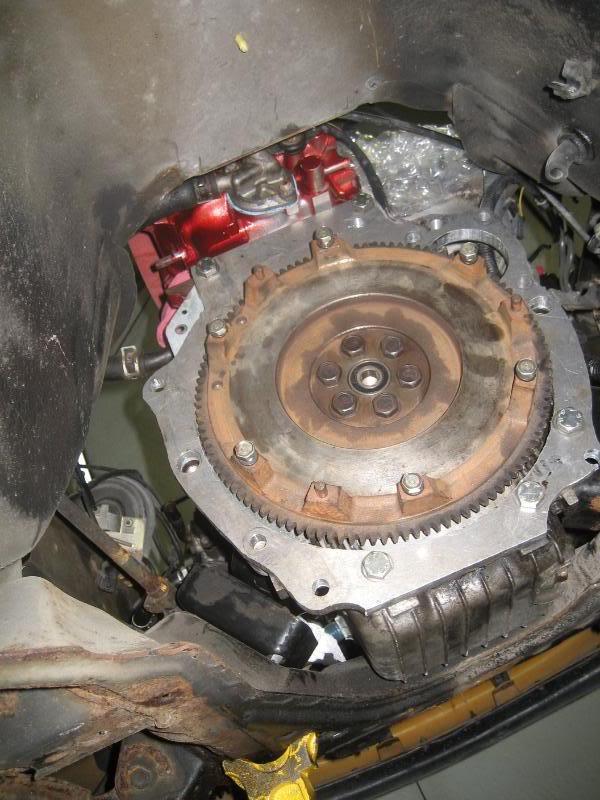
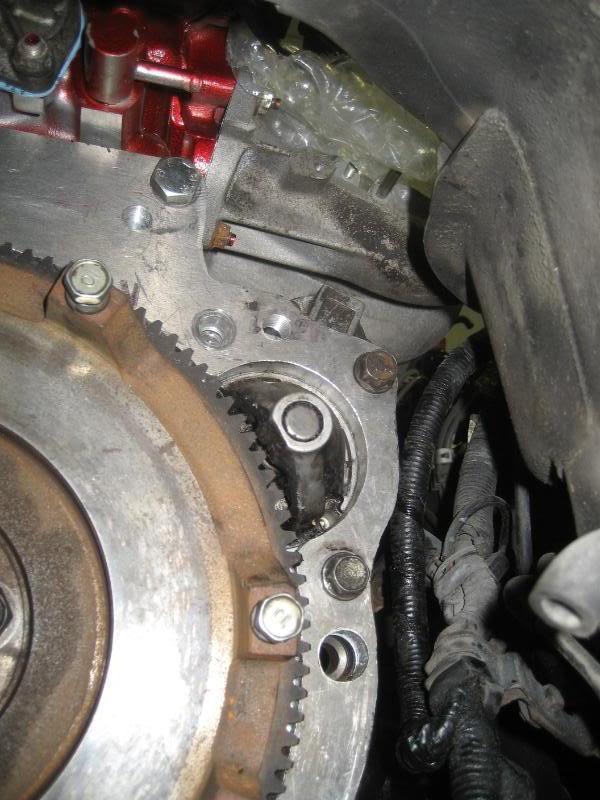
Next, I bolted on the transmission bellhousing gasket, the flywheel and my adapter plate:
3/30/2008
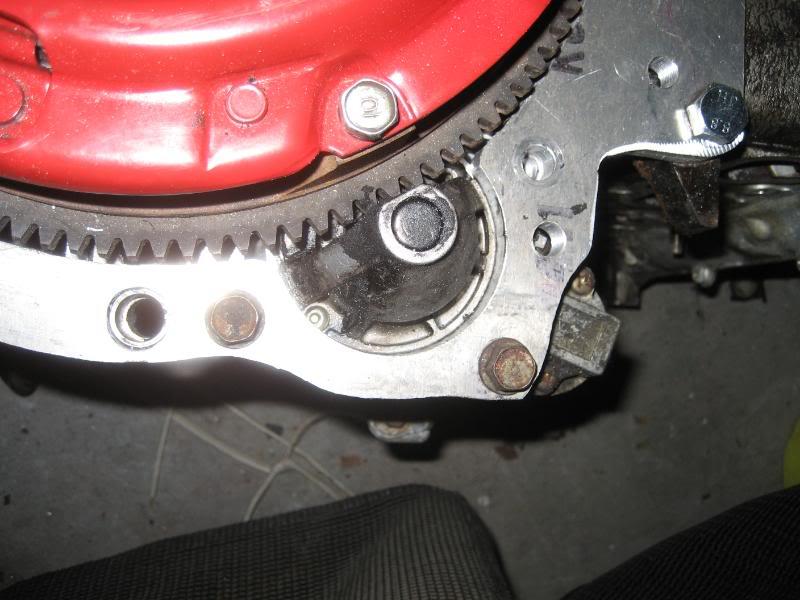
attached the starter to the adapter plate...
Brought the TII trans and got it positioned under the miata so it can get accustomed to it's new home

I ordered a throwout bearing, but it hasn't arrived yet :evil: , so unfortunately the tranny will have to come back out again, that's why the clutch isn't installed either.
Here the tranny is bolted to the adapter plate:
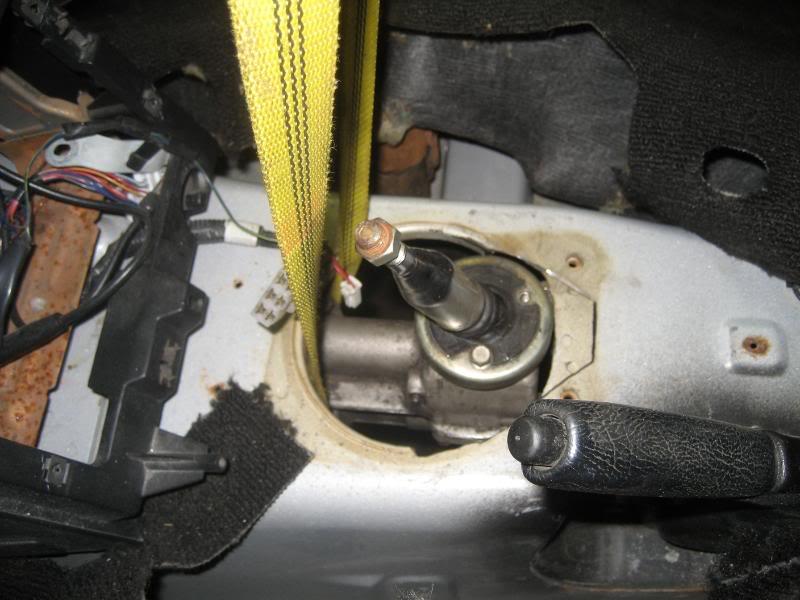
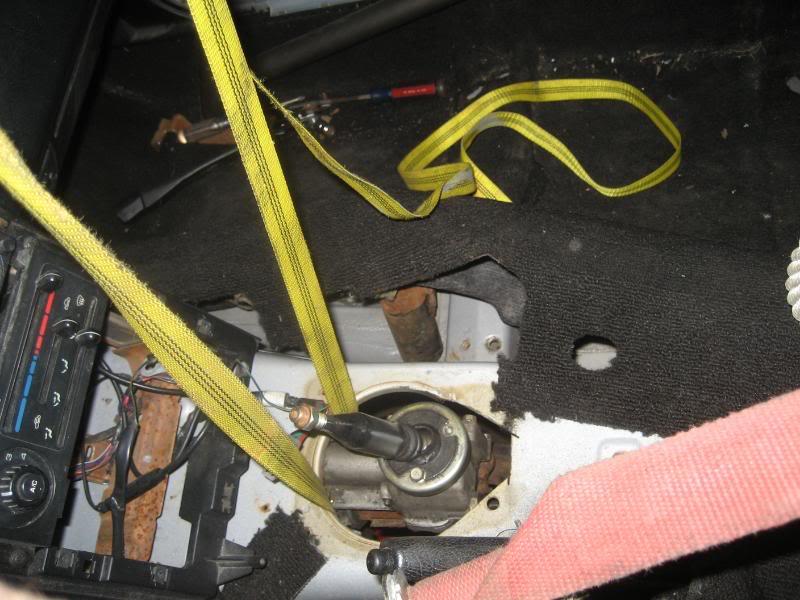
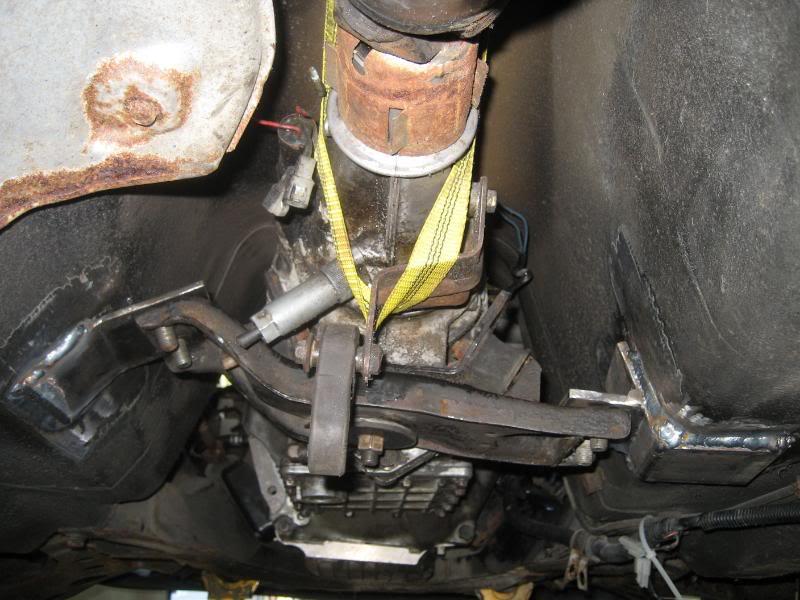
We supported the rear of the tranny with a ratchet strap off the front roll cage bar so we wouldn't have any obstructions in our way under the car. I also trimmed the shifter opening a bit to accommodate for the TII sitting 1/2" farther back than normal.
here is the stock TII transmission mount:
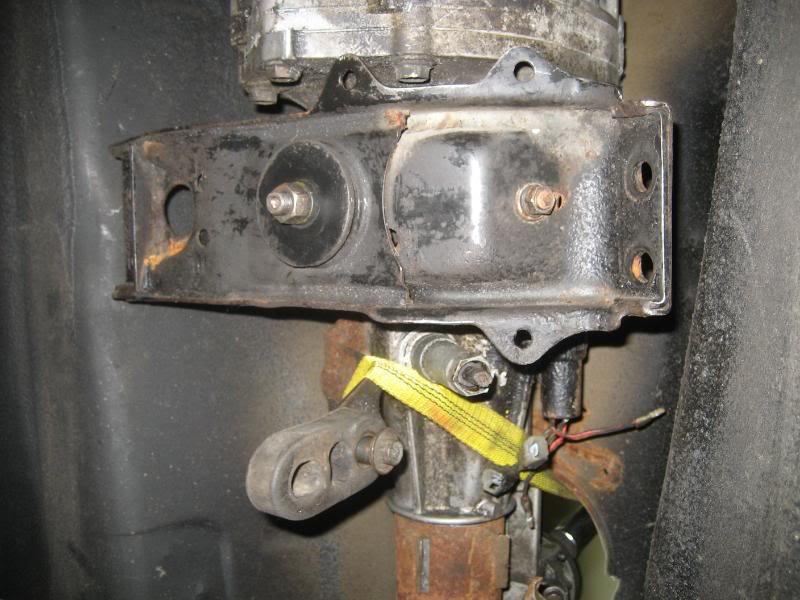
What I ended up doing was taking it off and rotating it 180 degrees so the "bump" to clear the exhaust is now on the driver's side.
Next up, I took the seats and carpet back out:
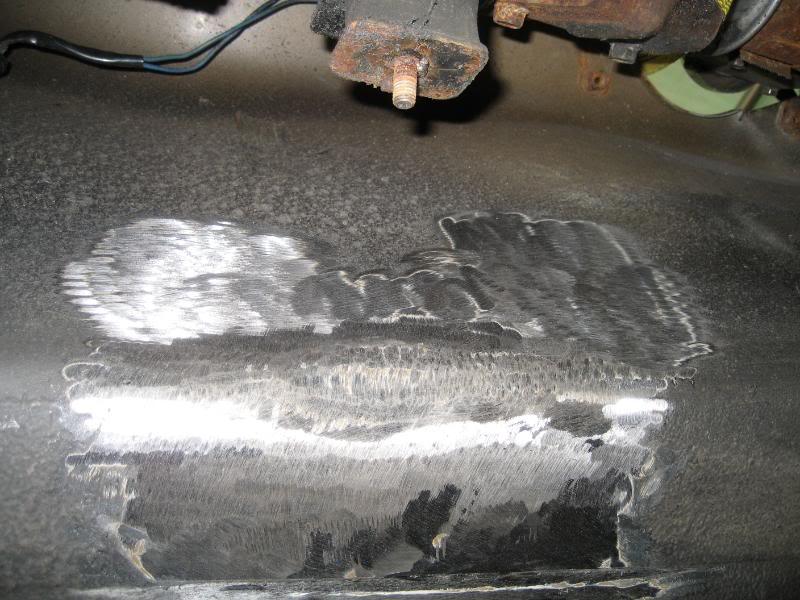
and then ground the undercoat off of the trans. tunnel where we would be welding
driver's side
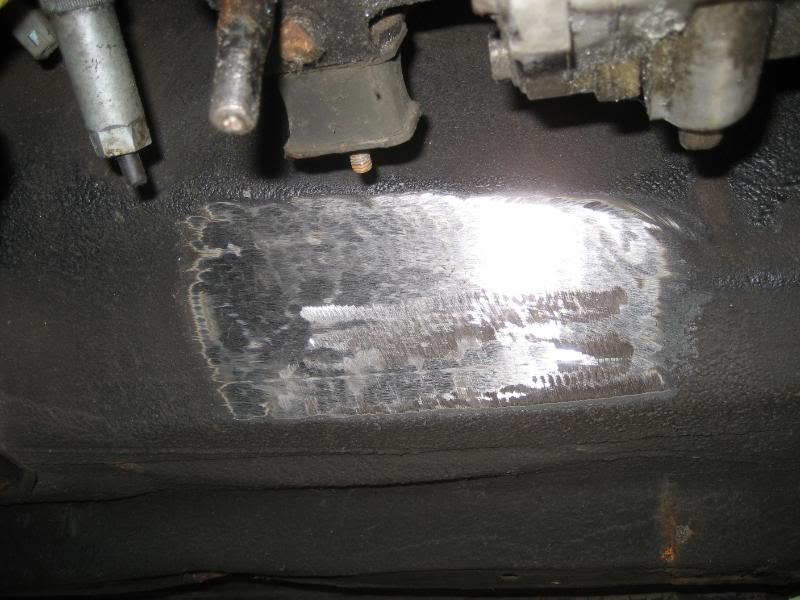
pass. side
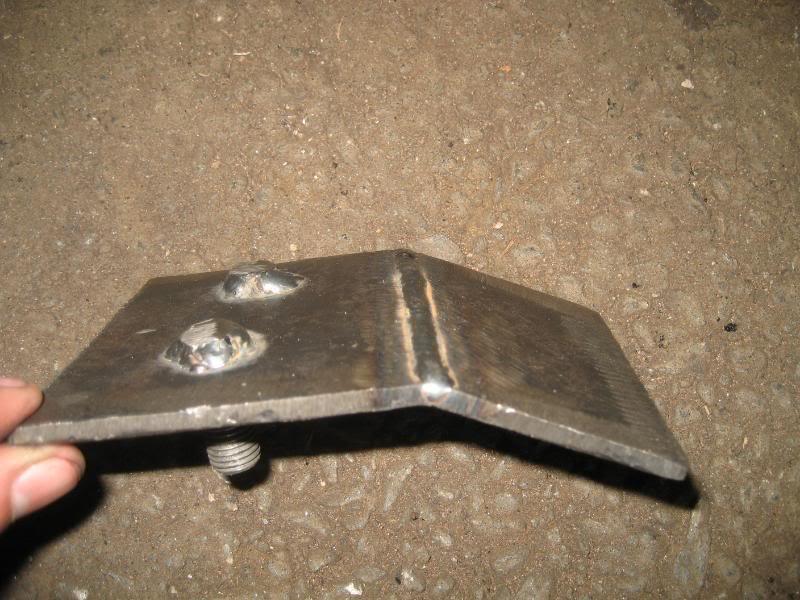
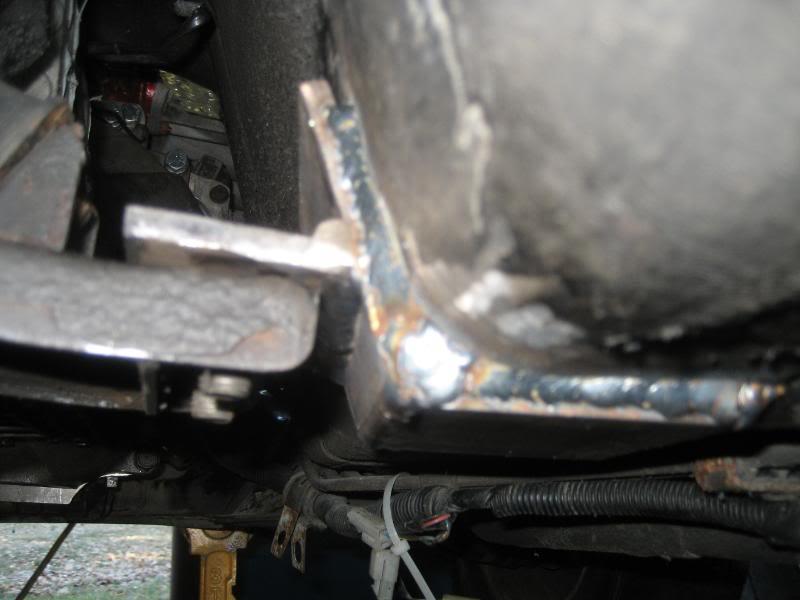
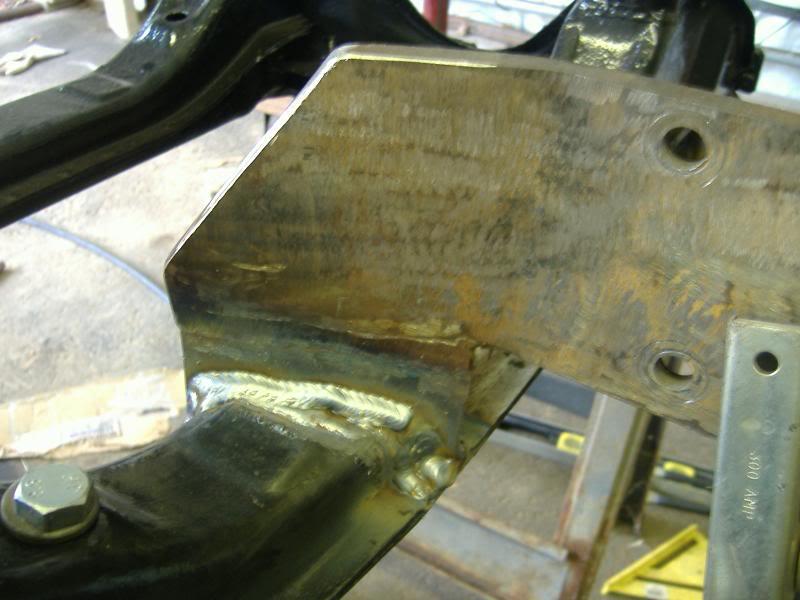
We measured for the brackets and ended up using 1/4" steel that was 4" wide. I wanted the brackets to be above the stock TII mount so that i could easily remove the transmission without having to take the TII mount off, and also so that I don't lose any more clearance for my exhaust, because ground clearance is going to be a precious quantity.
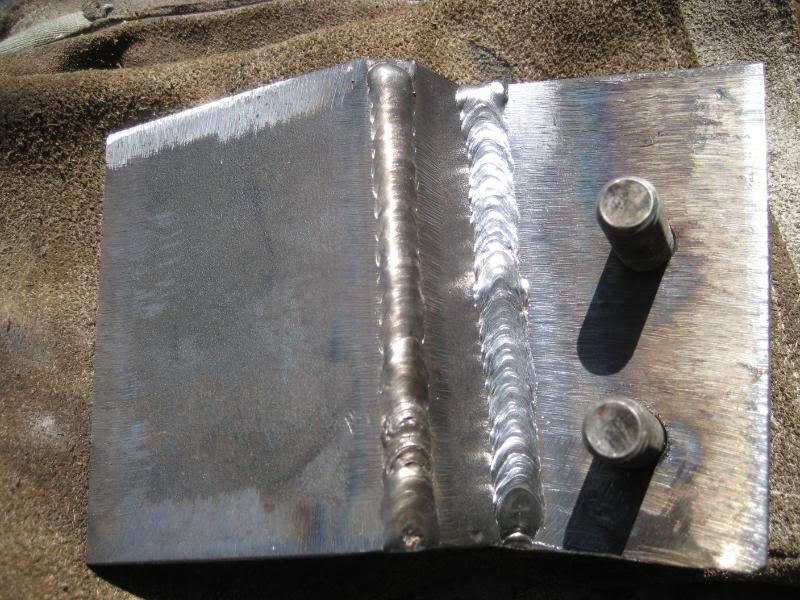
I marked the holes on the TII tranny bracket on the new bracket, and drilled them out with a drill press. next, we welded in 2 12mm bellhousing bolts I had leftover and lopped off the tops so they would clear the tranny tunnel:
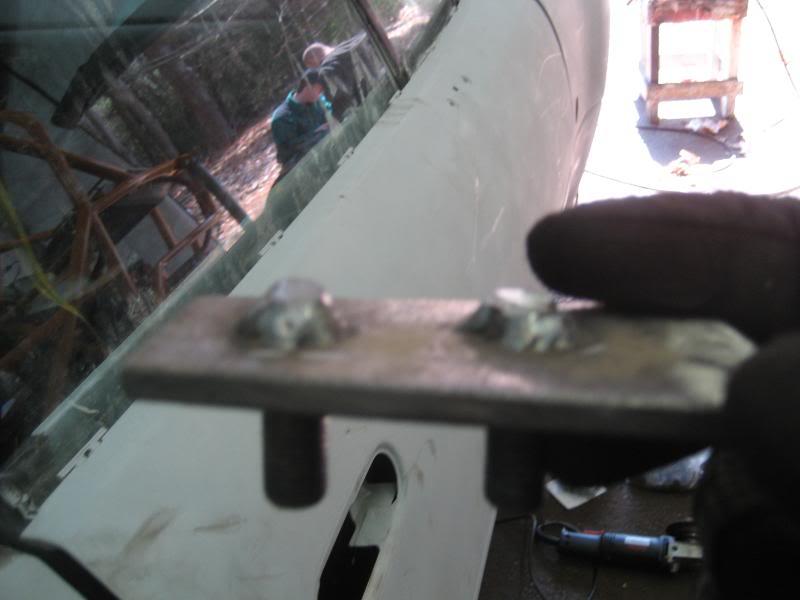
I left enough room to be able to fit a lockwasher with the nut and still have a few threads sticking out past the nut.

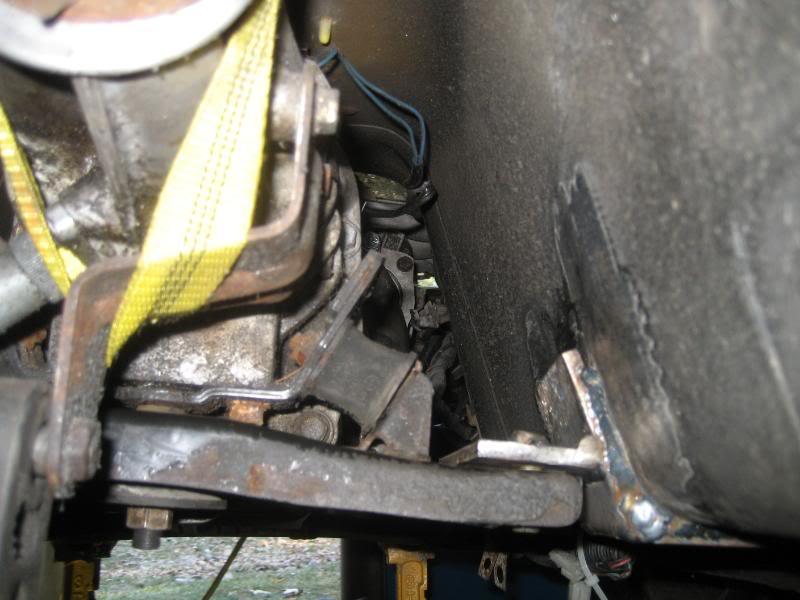
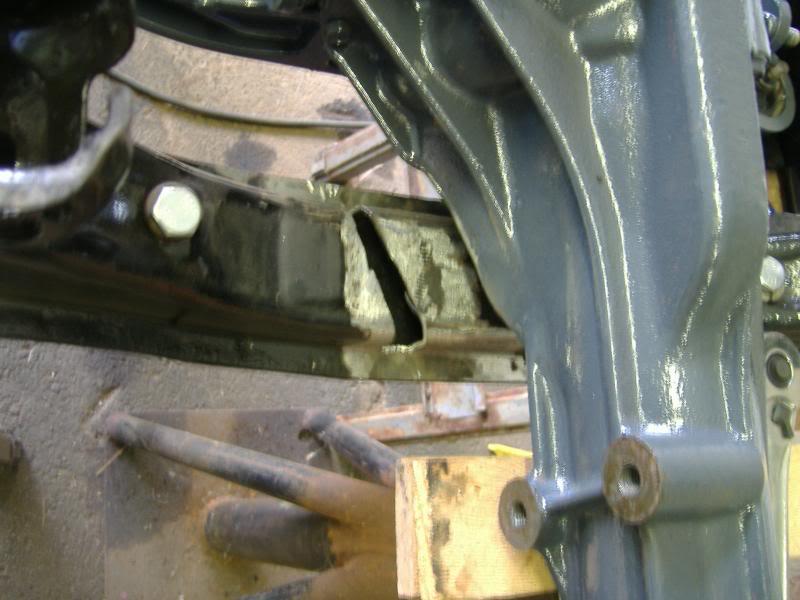
Then we bent another piece of 1/4" metal to the shape of the trans tunnel and tacked the above bracket on

and welded it up:
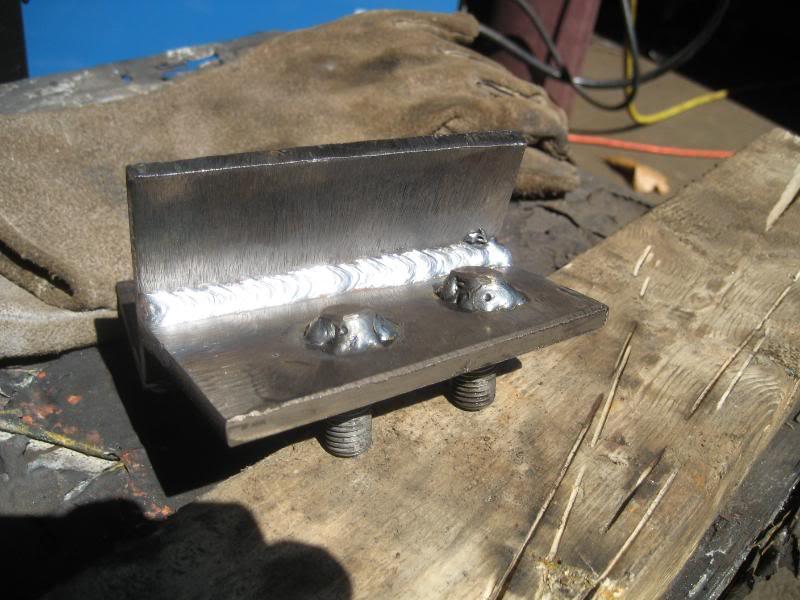
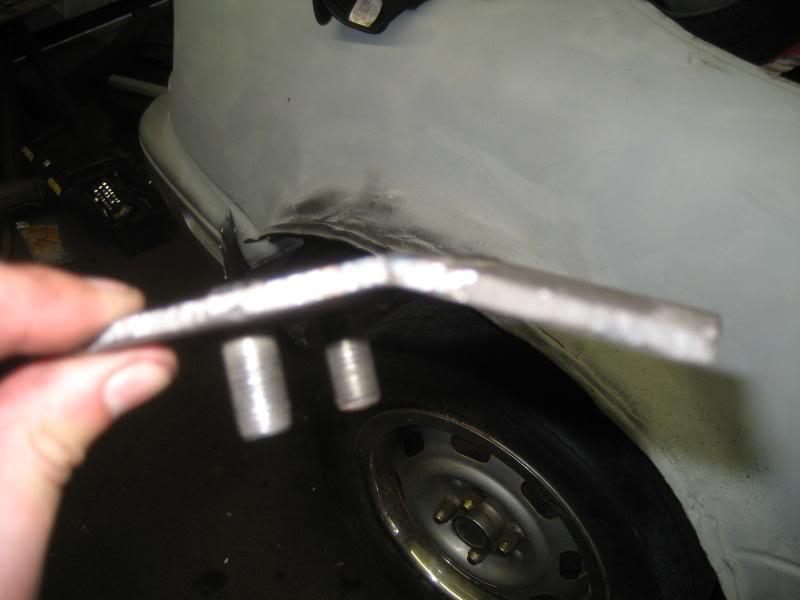
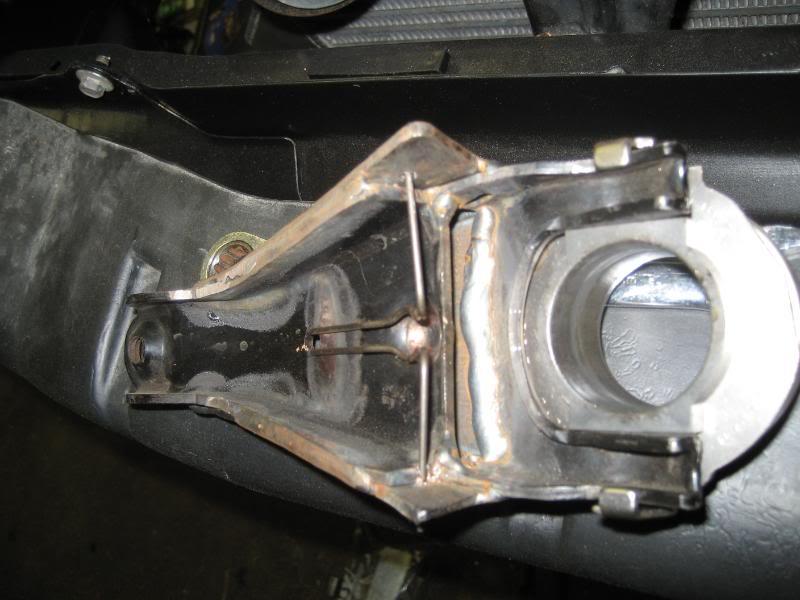
Here's the bracket how it will sit on the car:
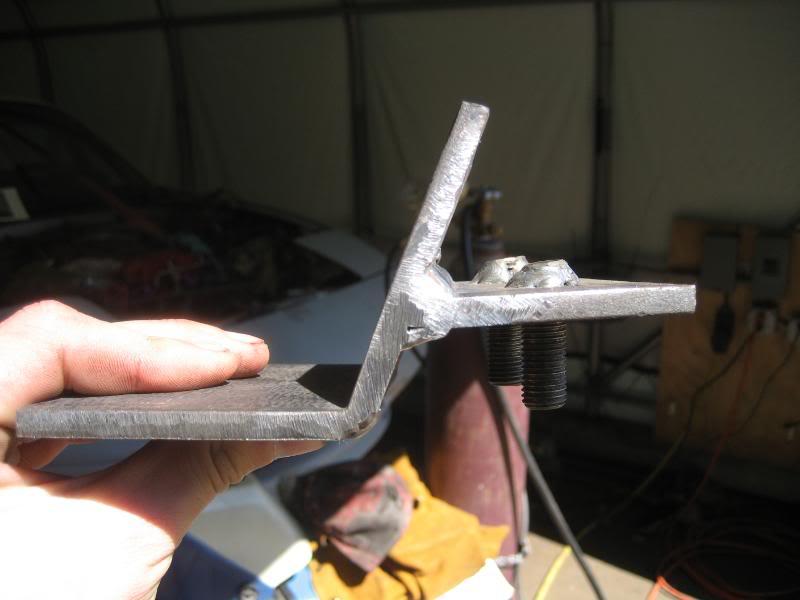
pretty slick it you ask me
Here it is burned in on the car:
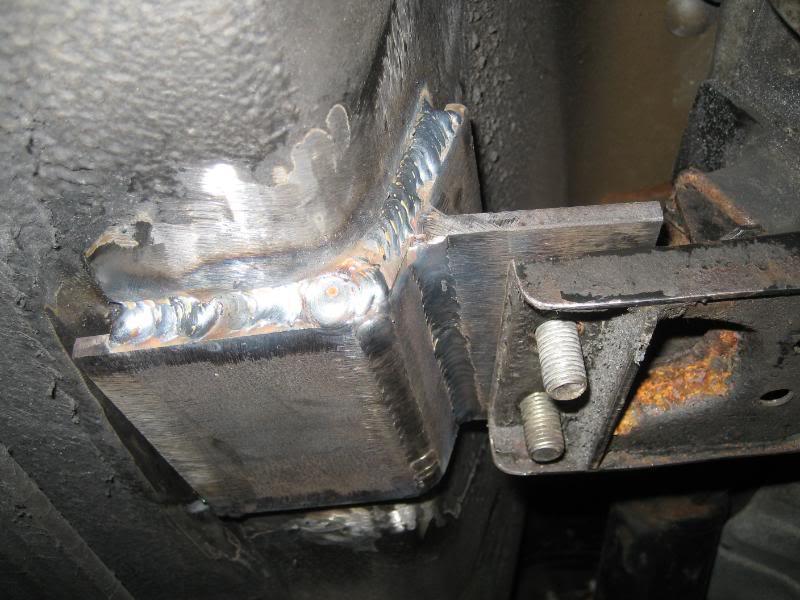
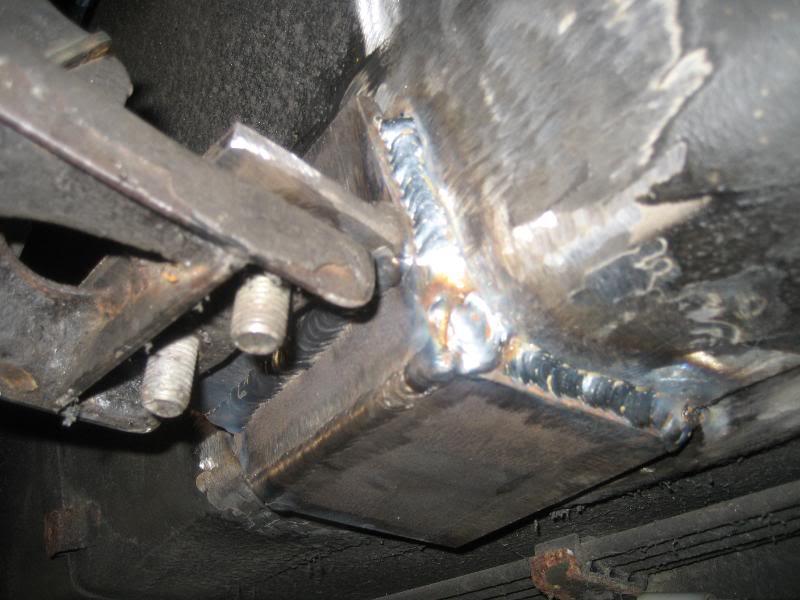
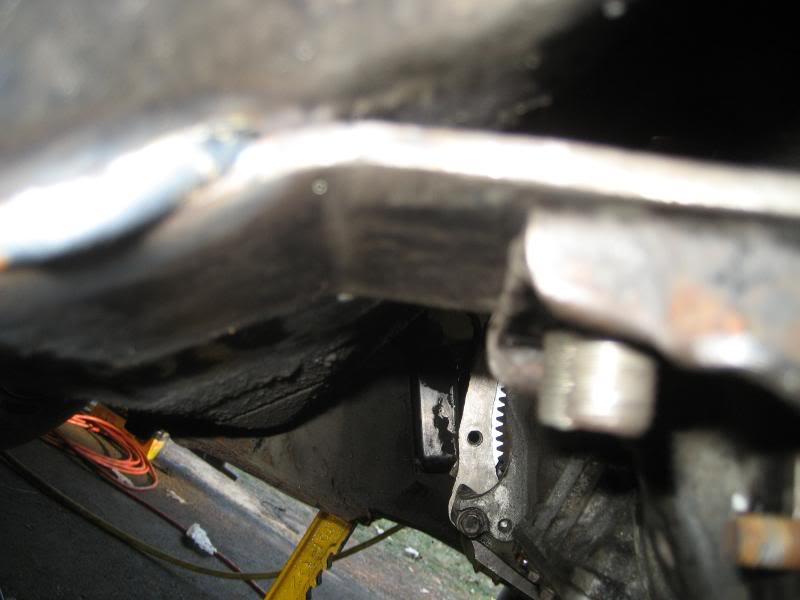
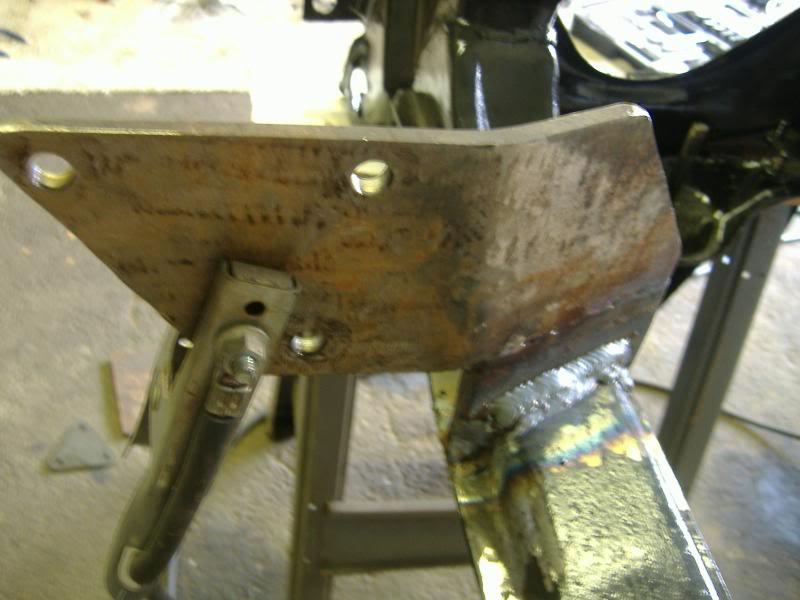
Here's the finished product of the driver's side bracket. I did the same thing as the other side as far as keeping the mount above the TII stock mount, and welding the bolts to it:
and a shot of it burned in....
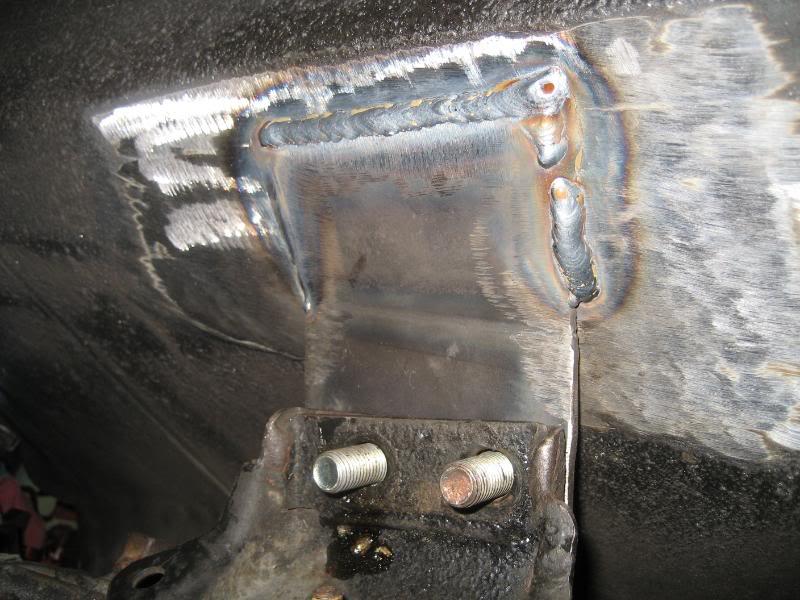
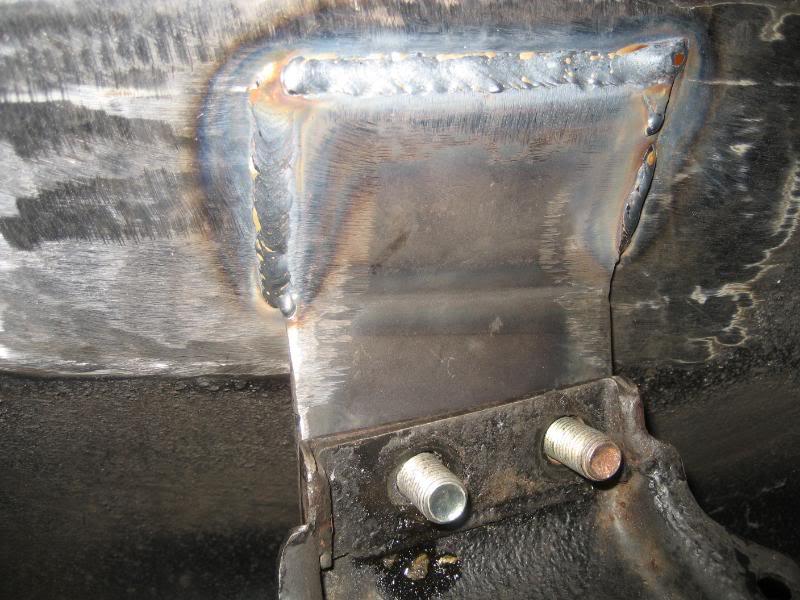
Tranny mounts- DONE
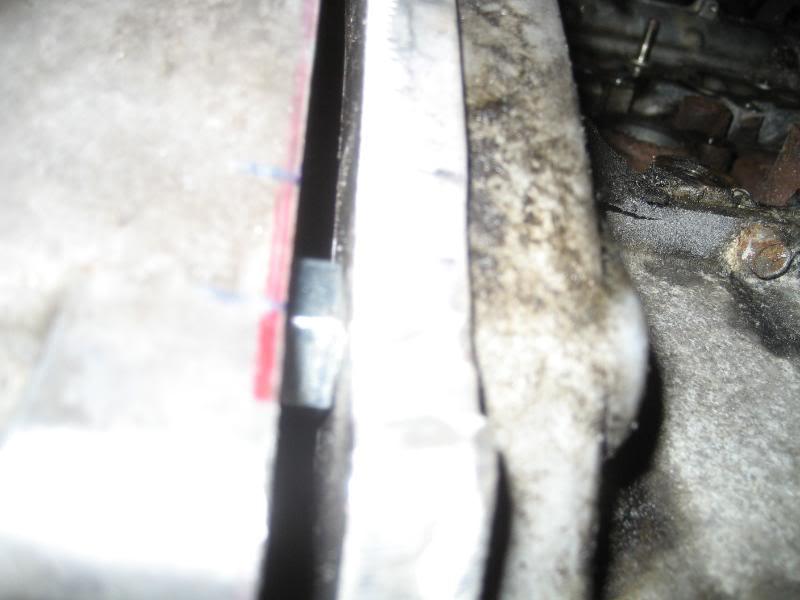
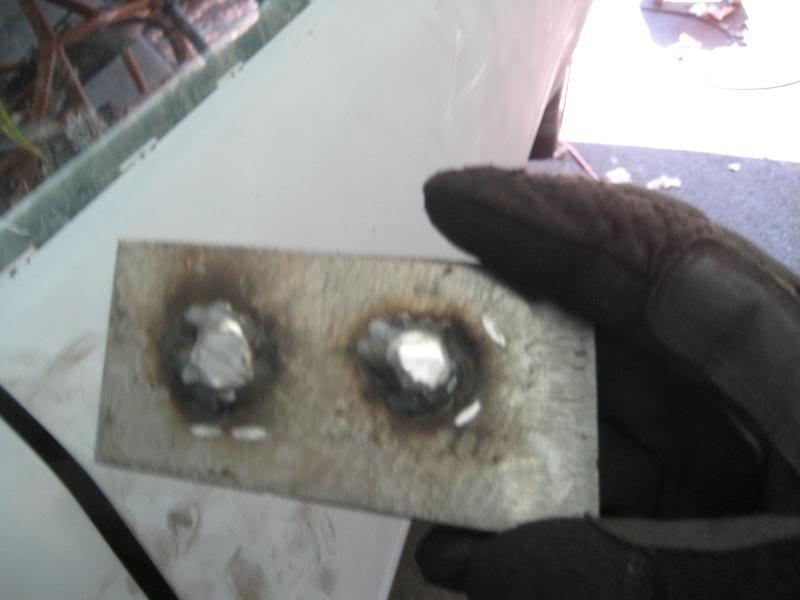
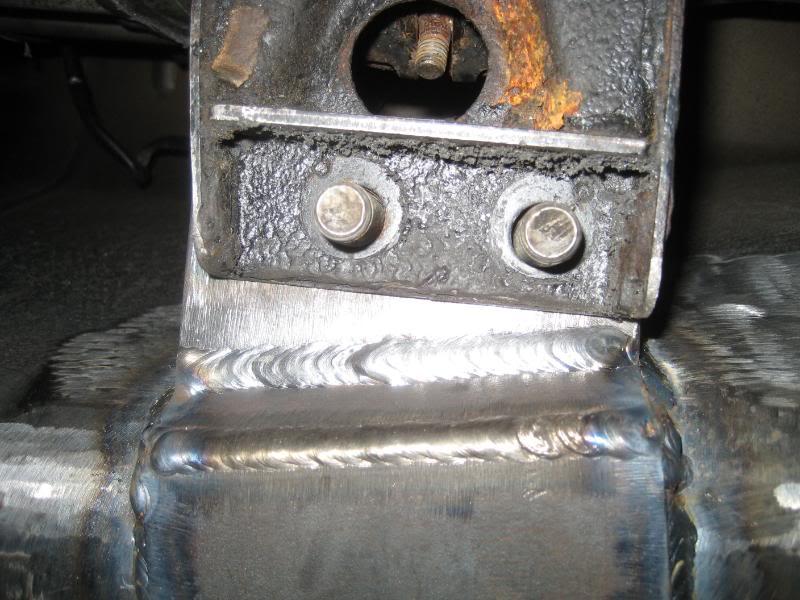
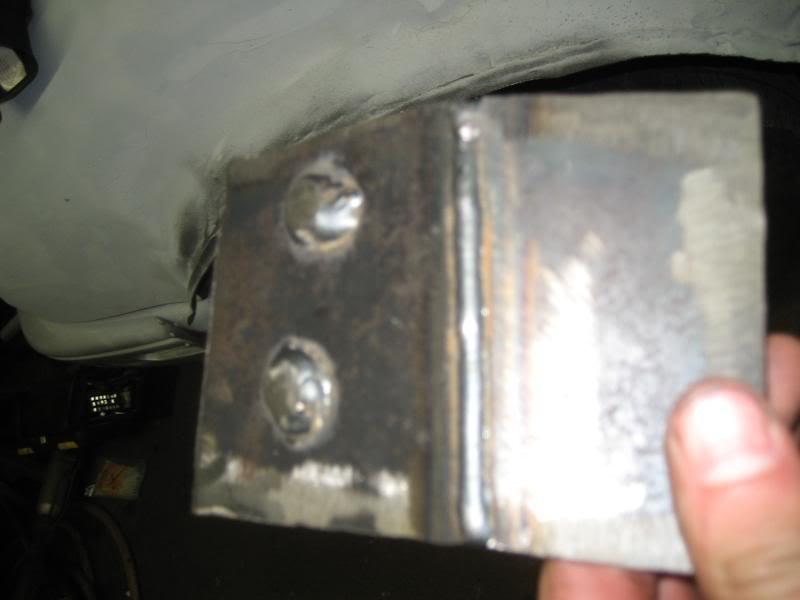
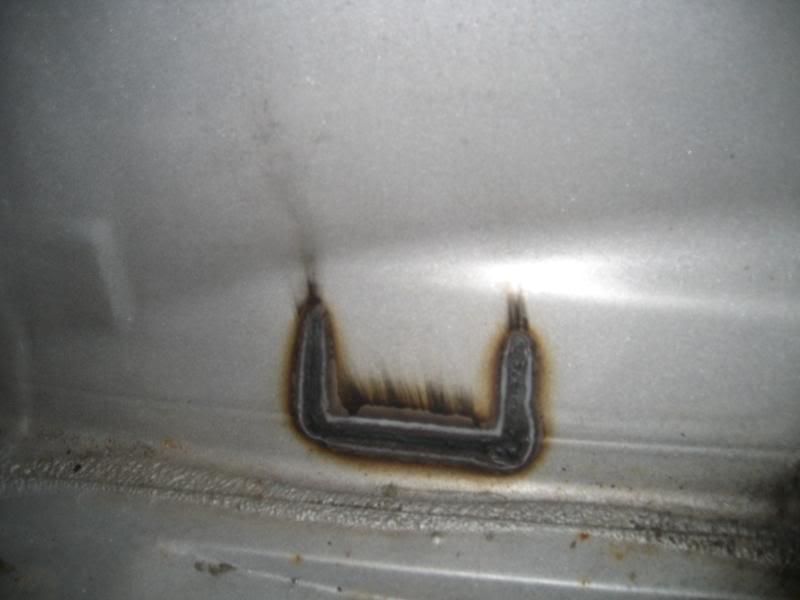
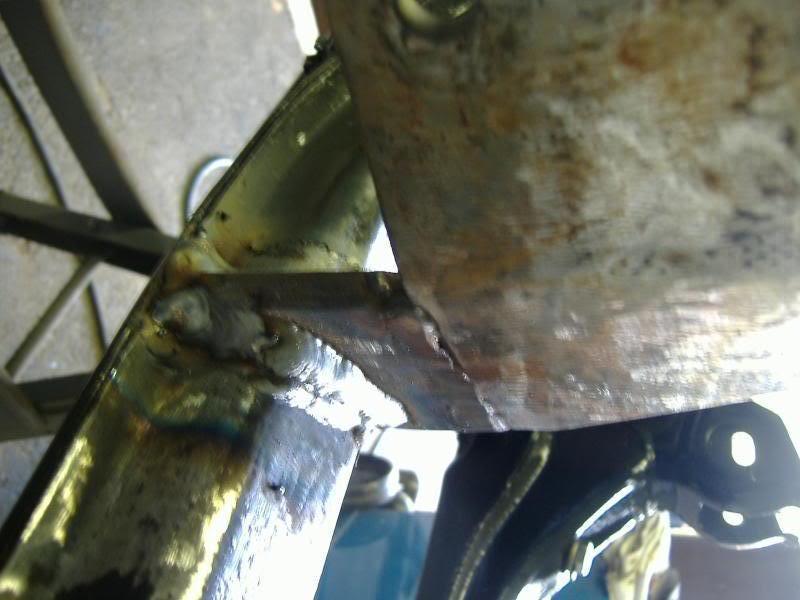
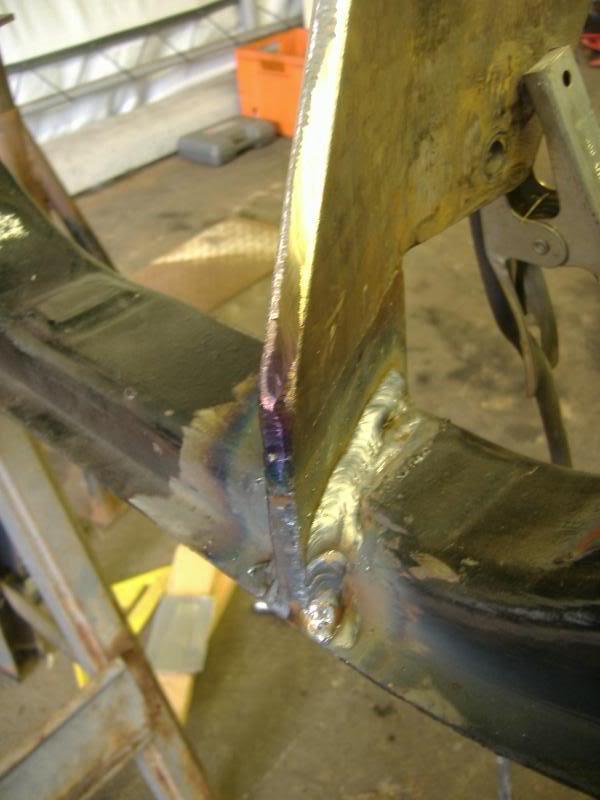
Here's a shot of the welds from the inside...the paint got a little burnt up, oh well
pass side.
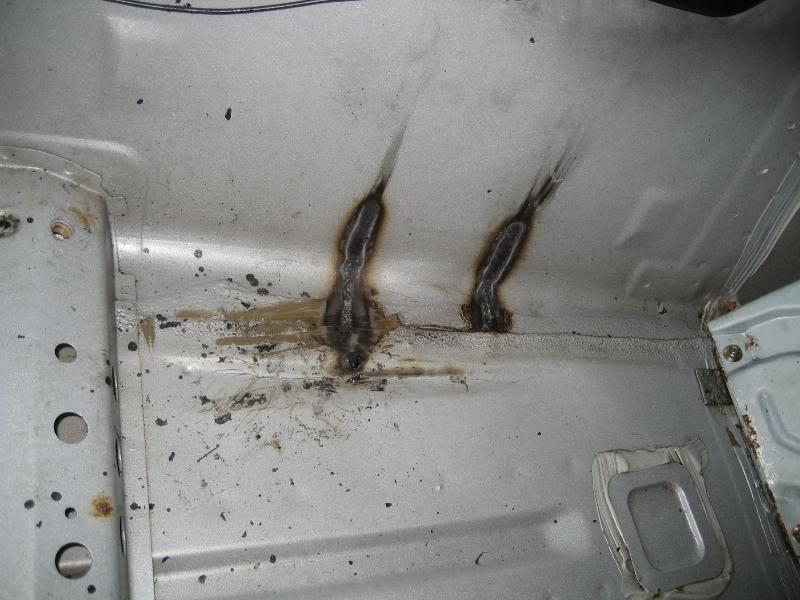
driver's side:
and since i was in there, here's a better shot of my NRG Thin carbon quick release
If my mazdaspeed diff mounts come in this week next weekend we'll start on the rear diff, if not, there is plenty of other things to keep my occupied.
4/7/2008
Not much done to my car this weekend, although we got my buddy Tom's buggy started which was a huge accomplishment. The last time it ran it was a 1989 toyota pickup truck, and it was 2 years ago. We stripped the harness down to bare necessities, and after a pesky grounding issue with the afm/fuel pump, and a bad connection with the starter solenoid, it fired right up! I forgot the camera, so no pictures  . I know, I'm slacking....
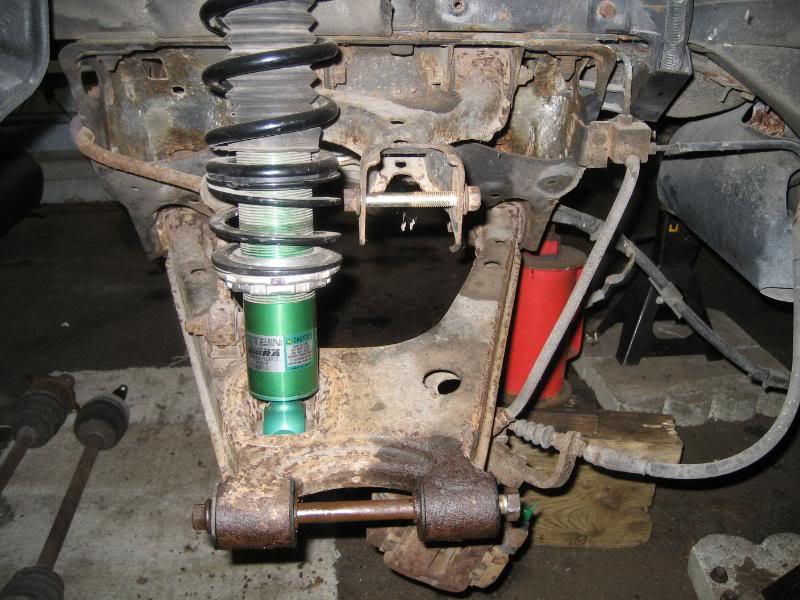
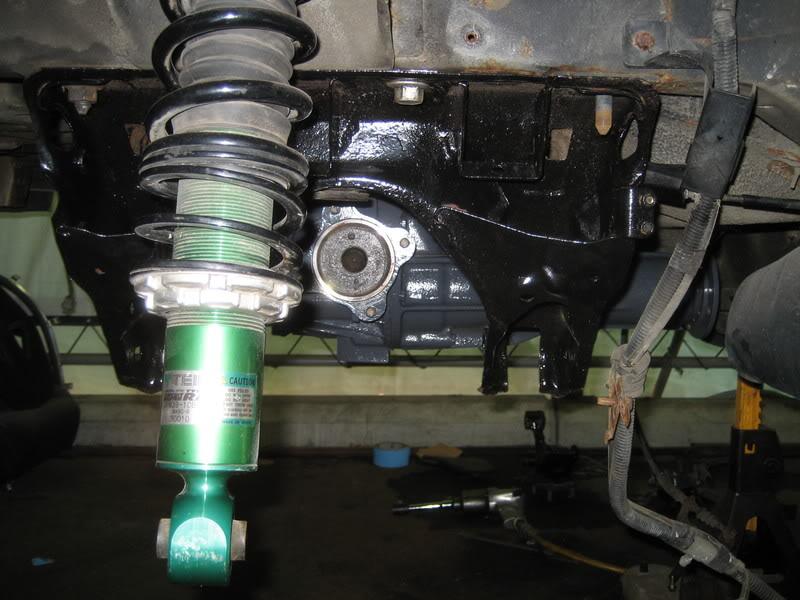
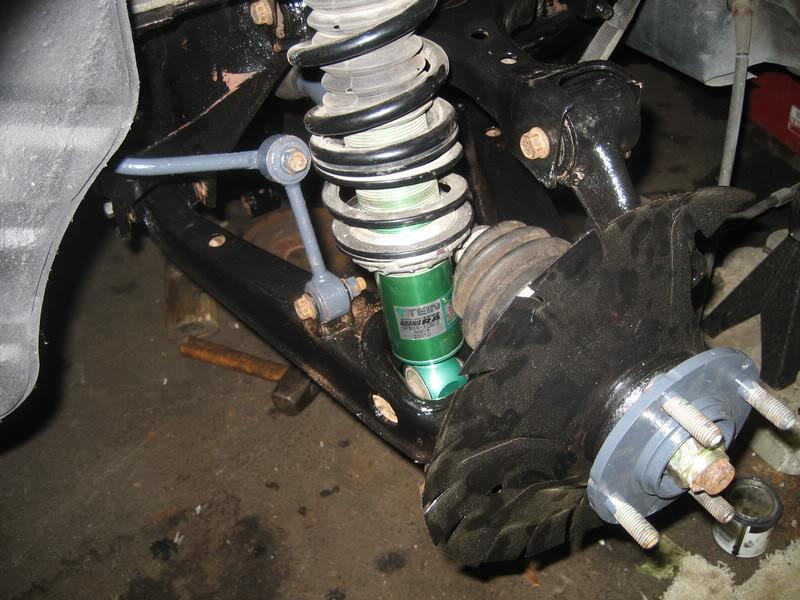
I did manage to install my rear coilovers though. I've been stockpiling parts, so I'll post a few of the recent arrivals .
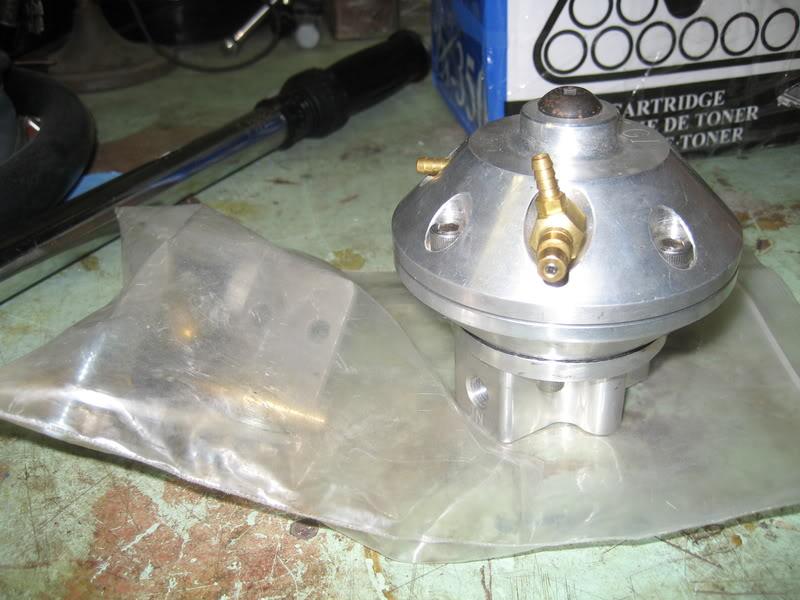
Begi adjustable FPR
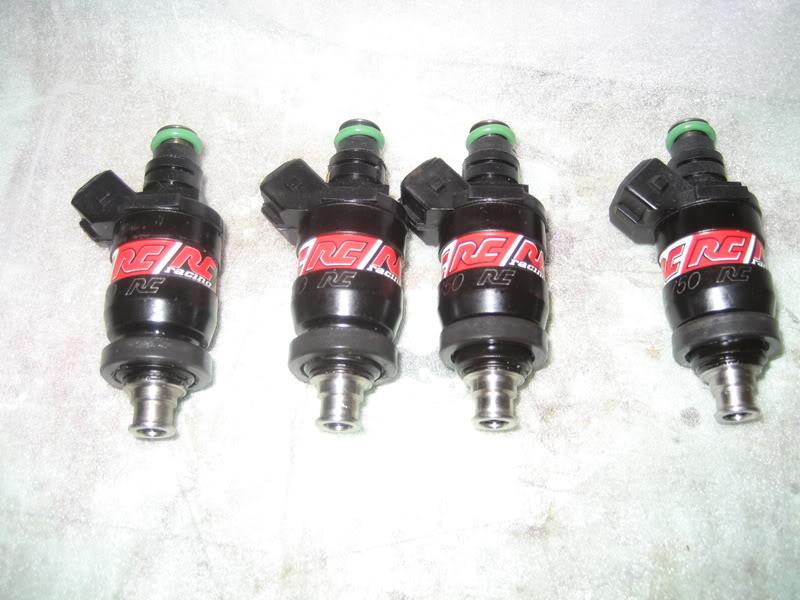
RC 750cc low impedance injectors
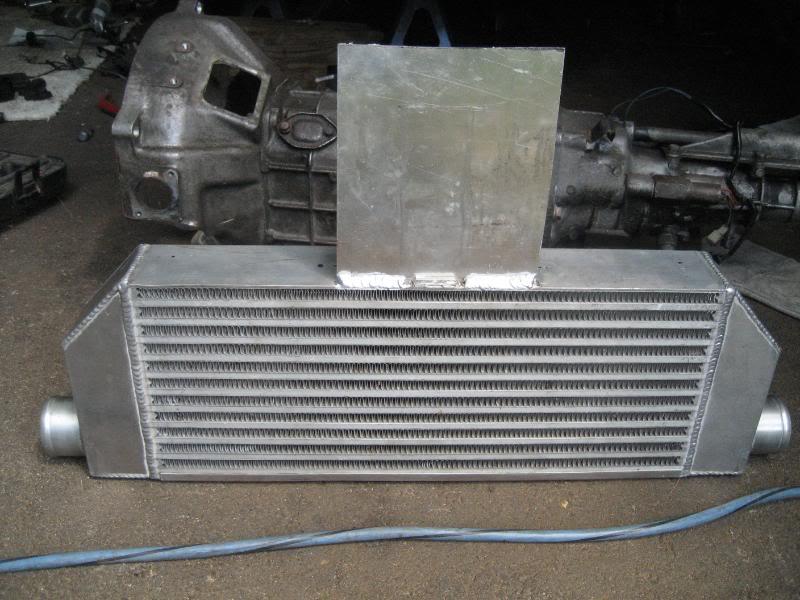
ETS intercooler (22x8x3" core), Apexi BOV, Flyin Miata intake elbow
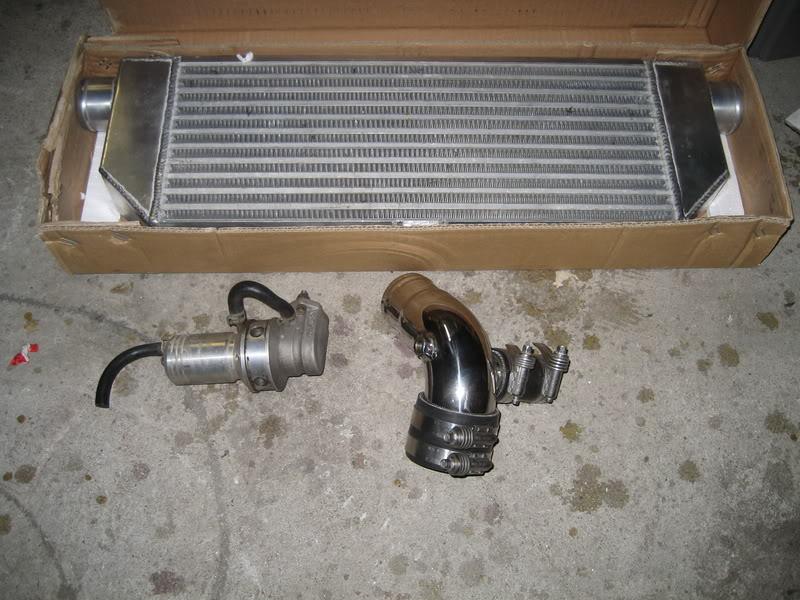
2.5" piping
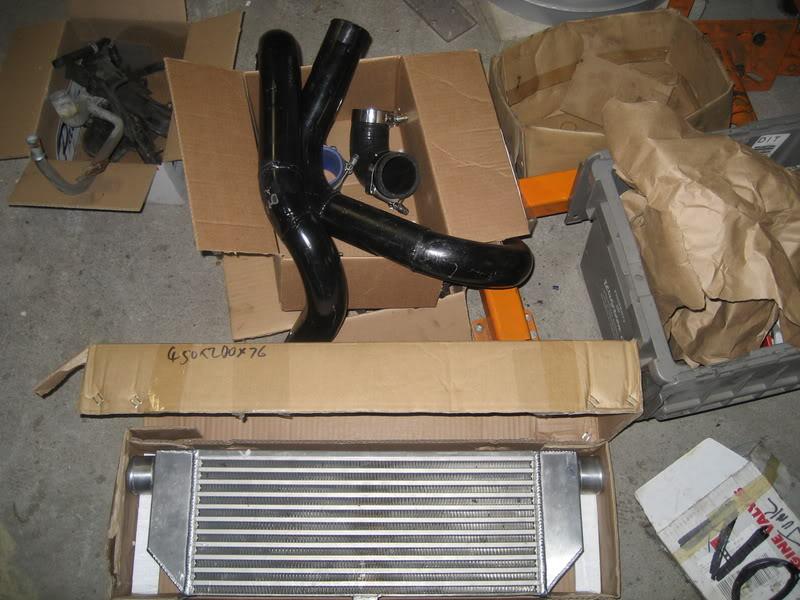
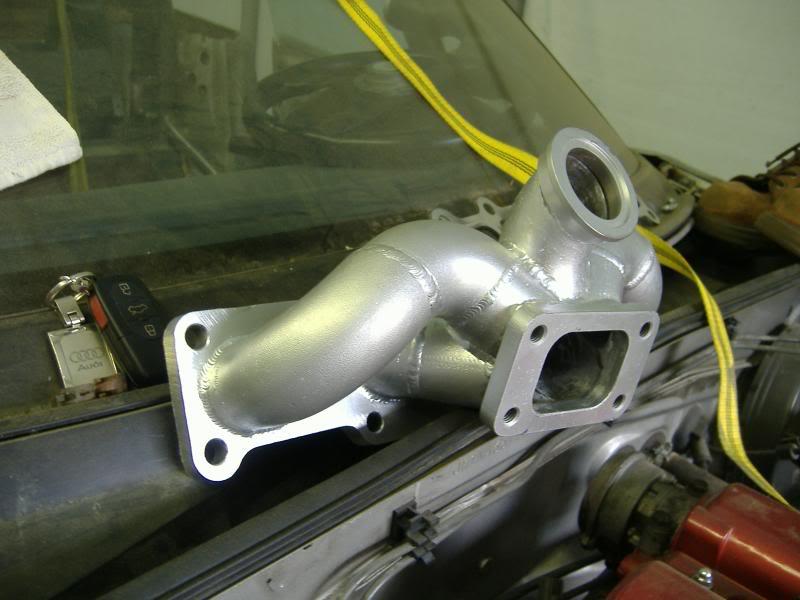
ETD DIY turbo manifold
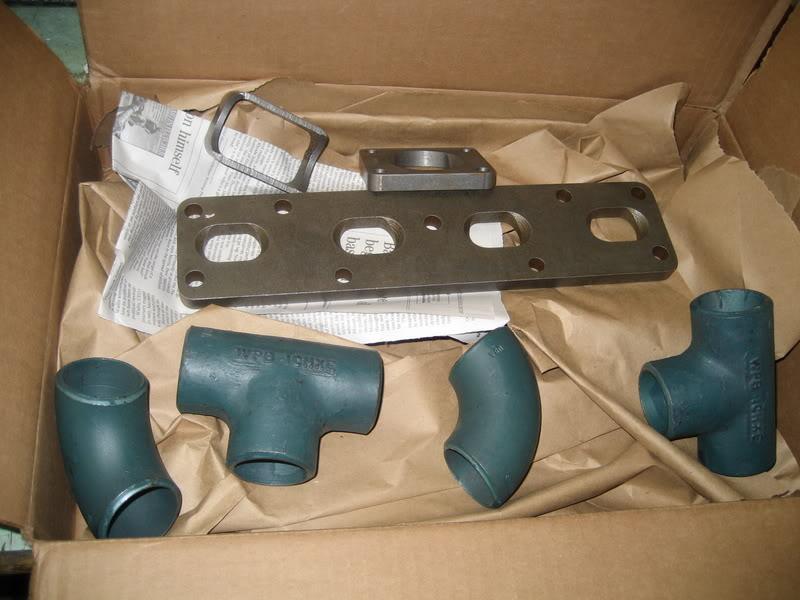
I'm going to have to port the manifold flange to match the ports on the motor- can't have those weenie holes!
4/9/2008
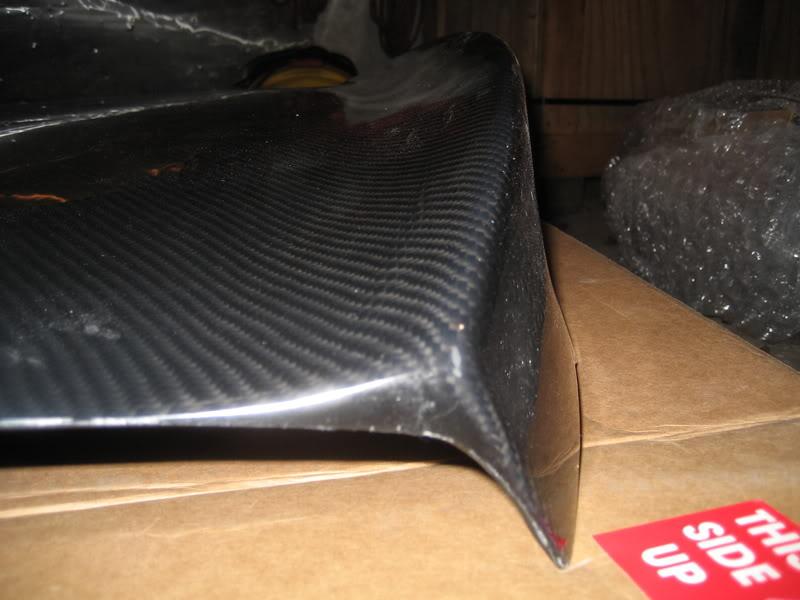
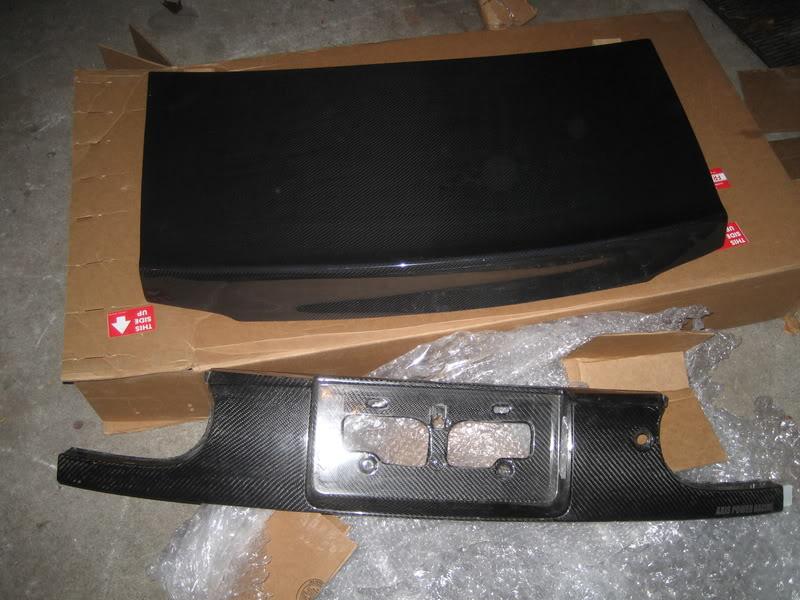
More parts, this time, carbon goods
Autokonexion came through big time for me with a trunk- what a work of art!!!! I'm so impressed with the work that went into it. It is absolutely perfect.

Nice shot of the integrated duckbill wing (oh I'm in love \/ )
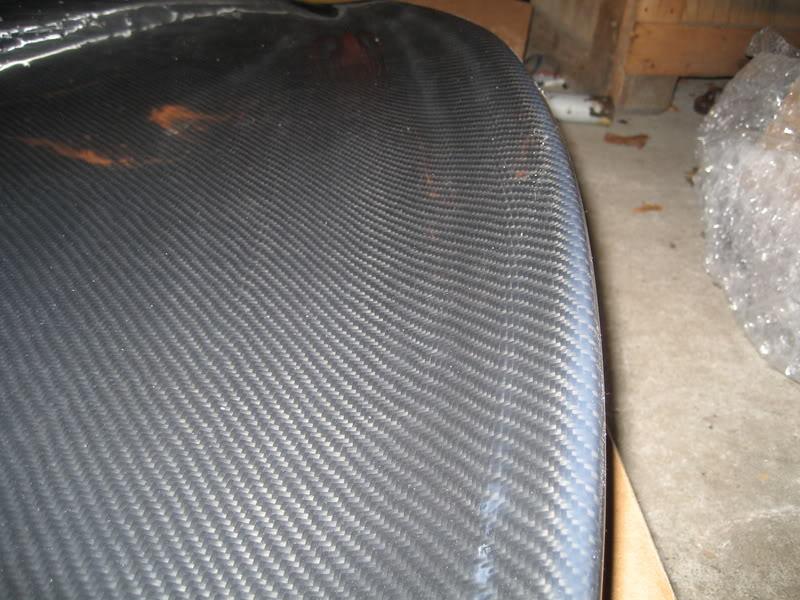
I had this hiding in storage, but I thought I would bust it out, I was in the carbon fiber mood
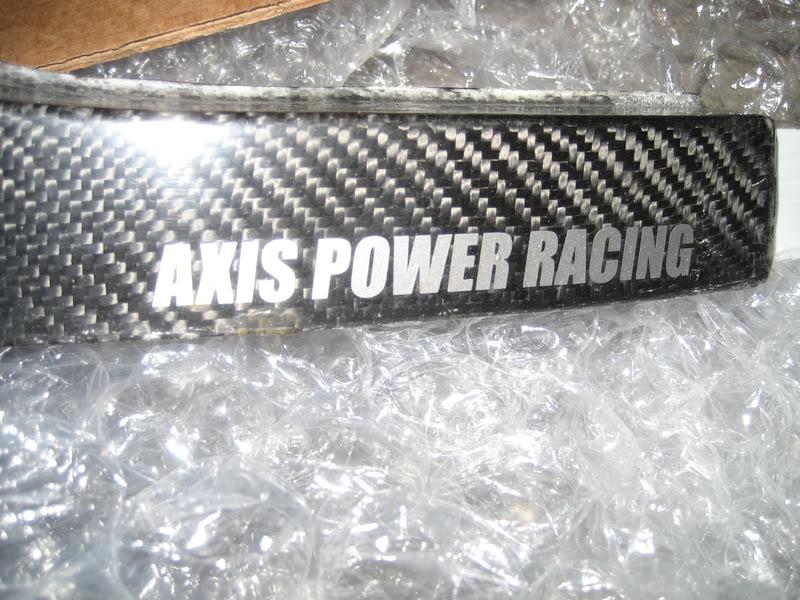
Axis Power Racing license plate trim:
5/16/2008
Got a little bit done, blew up the transfer case in my jeep so that ate up a lot of my time.
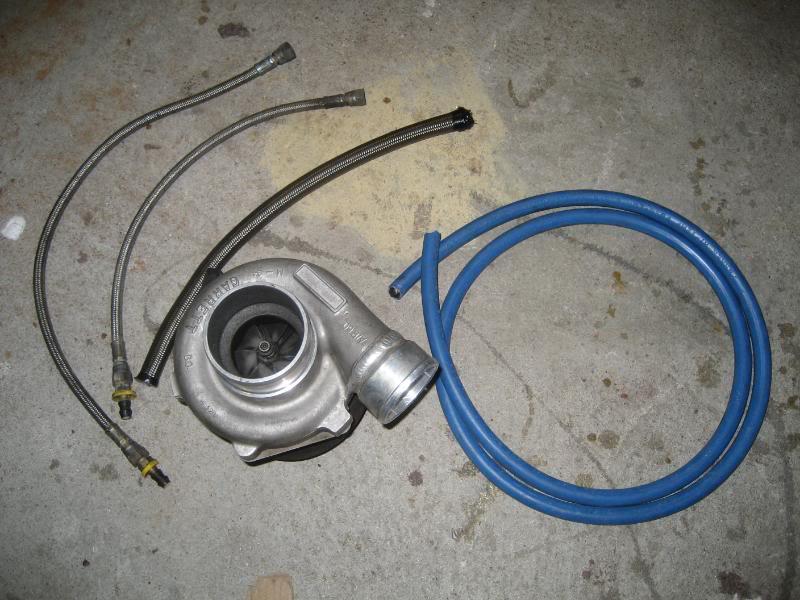
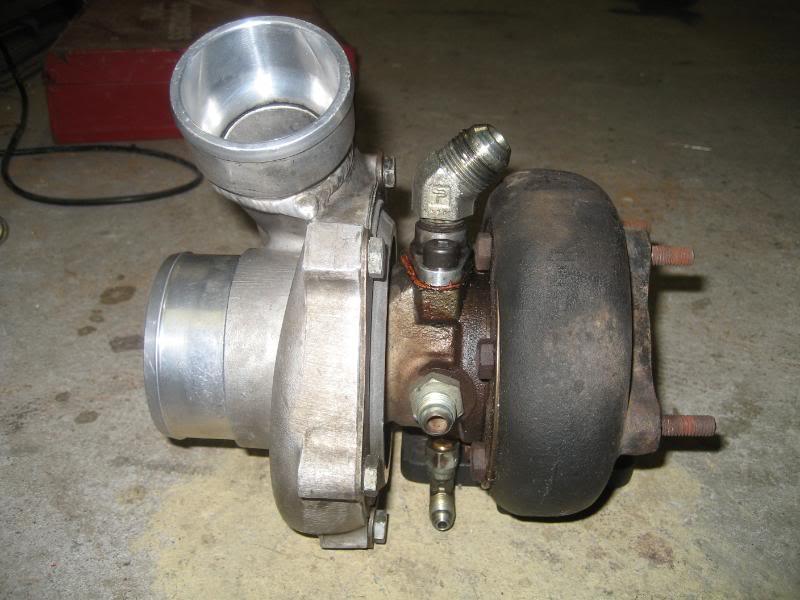
The turbo arrived. GT2871R, .60in, .63 ex
My friend with the buggy also got it all finished, we went for a victory lap in his backyard...here's a pic:

he's been working on that for the past 2 years, this is dope.
Installed my carbon fiber trunk...


and the hood too
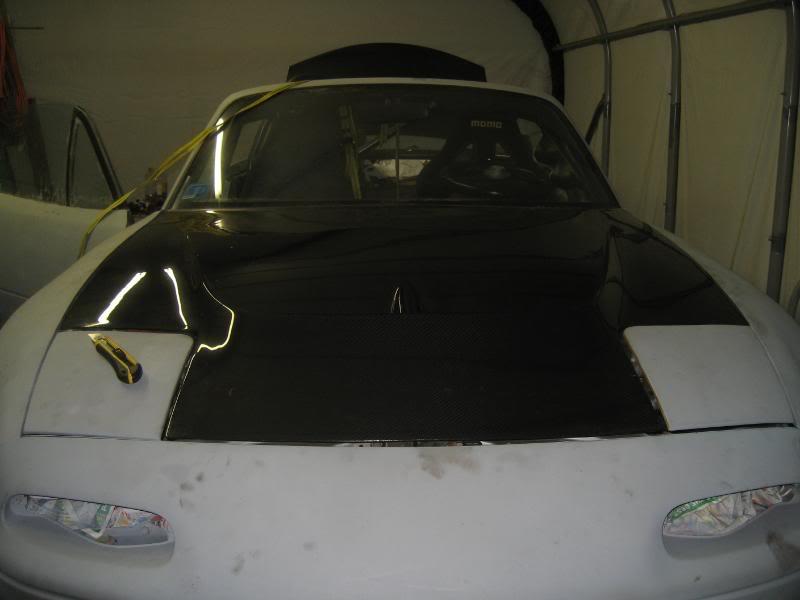

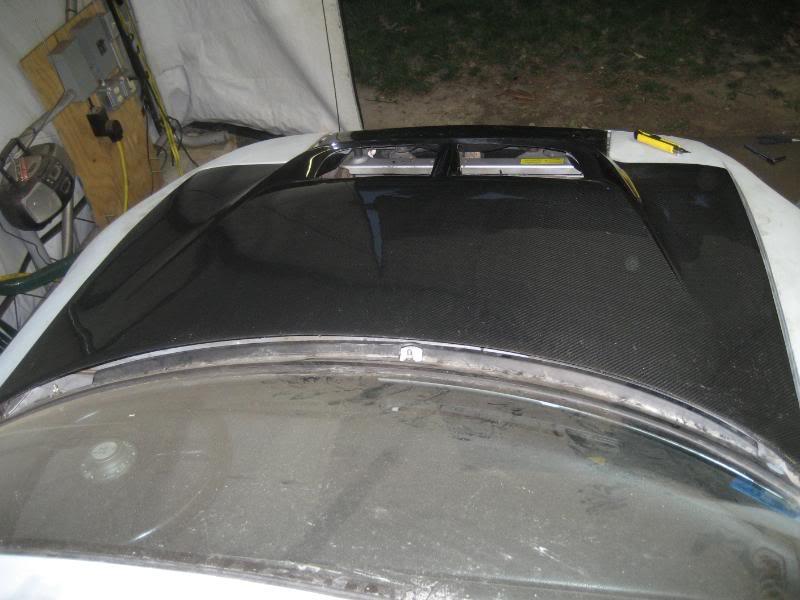
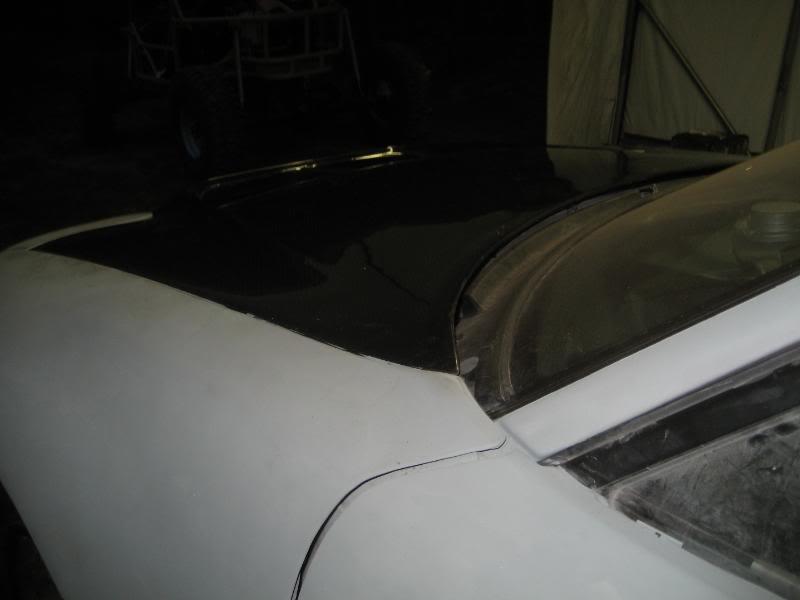
Neither one are bolted down completely, and I will have to tweak the mounts to get them to sit properly, the hood was hitting the bump stops, and I don't think it was latched in the pictures either. I'm very happy with them though, they are great products.
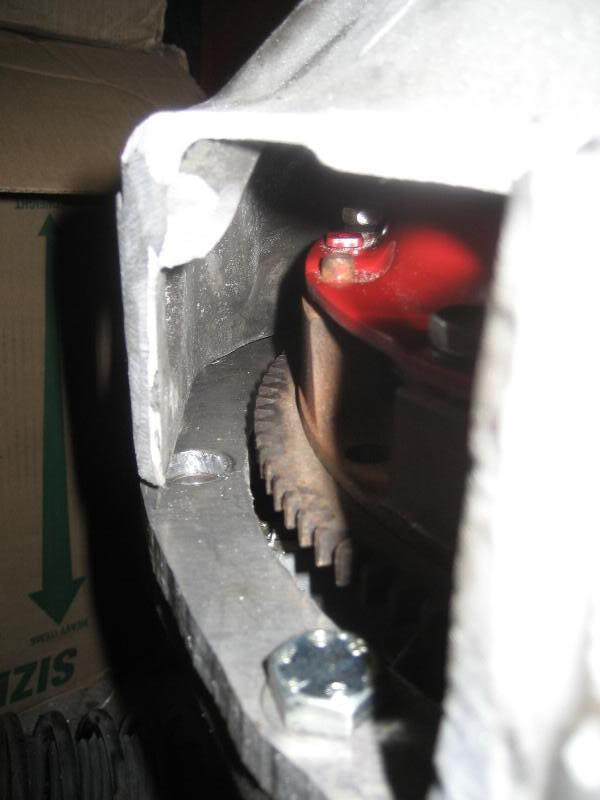
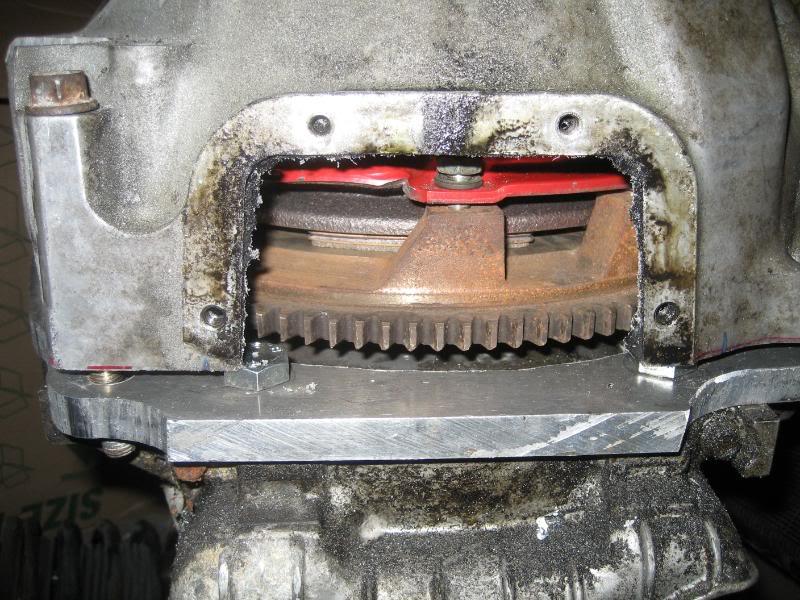
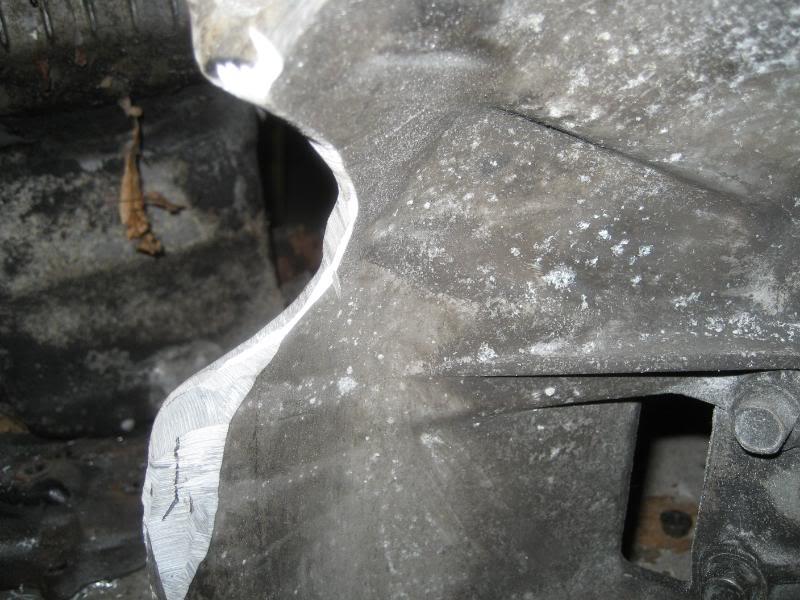
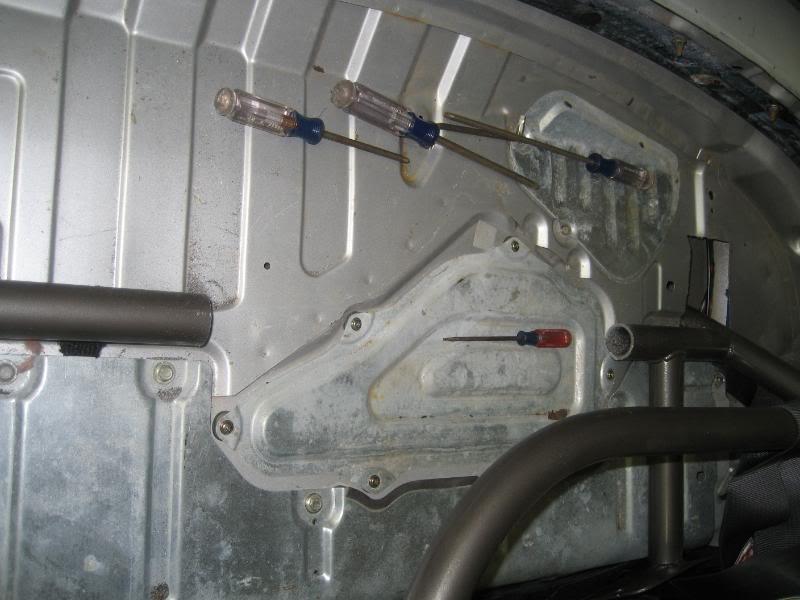
I went to install my new fuel pump (walbro 255) and realized that the lower bar of my cage was in the way. There was no way in hell I was going to take that out again, so I just got the sawzall and cut it. I'm going to make some slip joints and bolt it back in place in case I ever have to get to the fuel pump again. Here's a pic of the cut, I forget to take pics during the fuel pump install, but that's not exciting anyways
That's it for now, it was a very lazy build day, I'll admit it.
7/10/2008
I know it's not much of an update, but I have been getting things done. I haven't remembered the camera the past few weekends I've been working on the car...my apologies. BUT, I do have a few pics for you. My rear wheels just came in today and I am so impressed with them that I just had to share....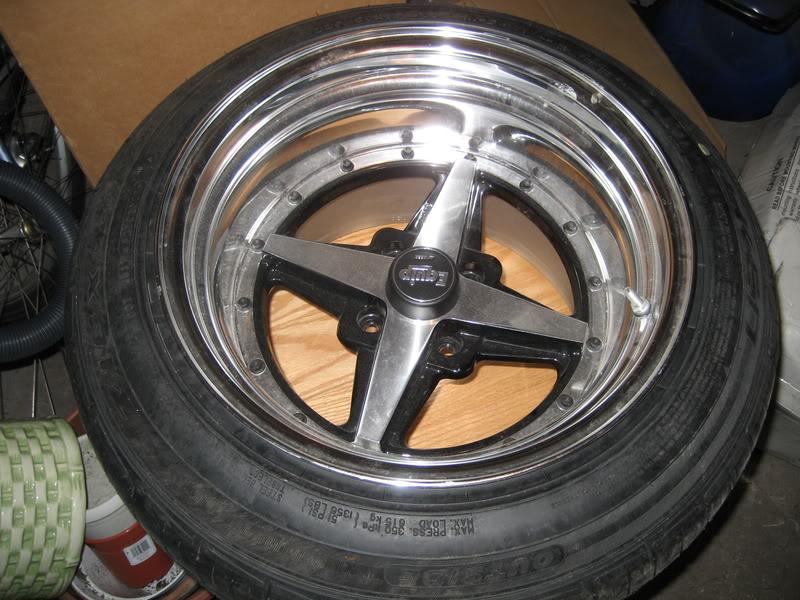
Work Equip 01s! They are 15x11 0 offset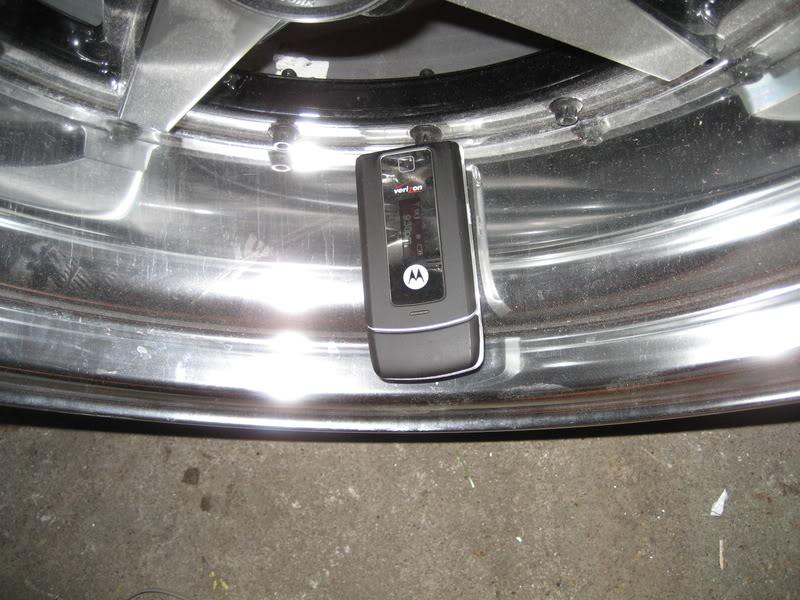
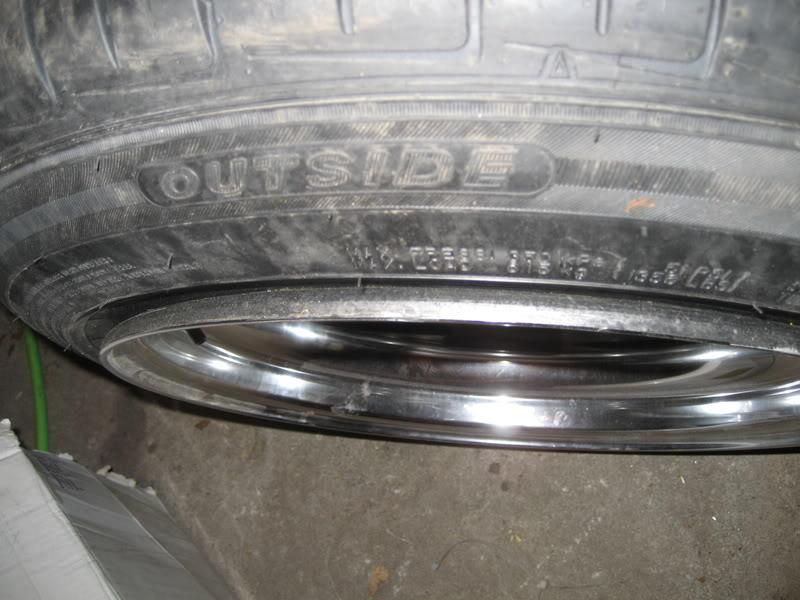
Tires are Falken 225/50/15s- the stretch looks sick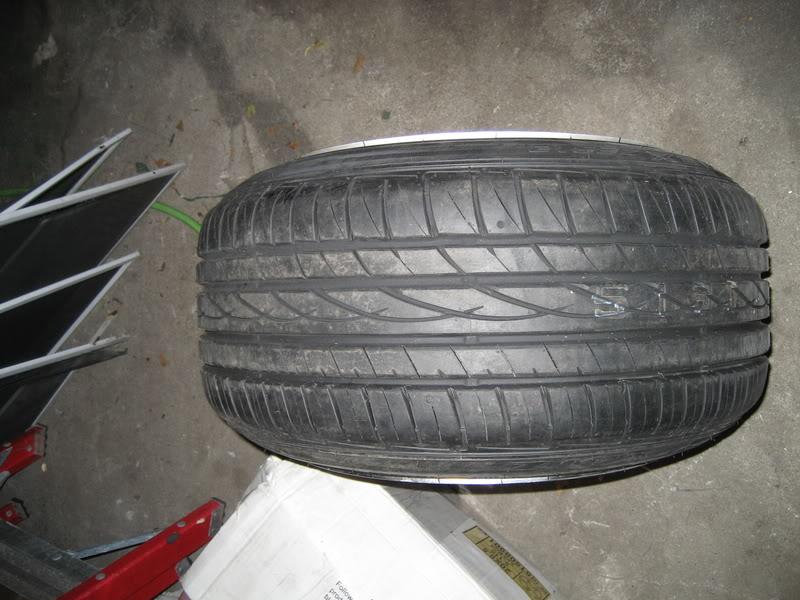
Another big thanks goes out to Autokonexion =D>
7/19/2008
I finally have an update! Got a lot done the past few weekends, even though I haven't had as much time to work on the car as I would have liked.
Installed my new front tow hook so when it's back on all 4s we have something to pull from so we can get it back on the trailer
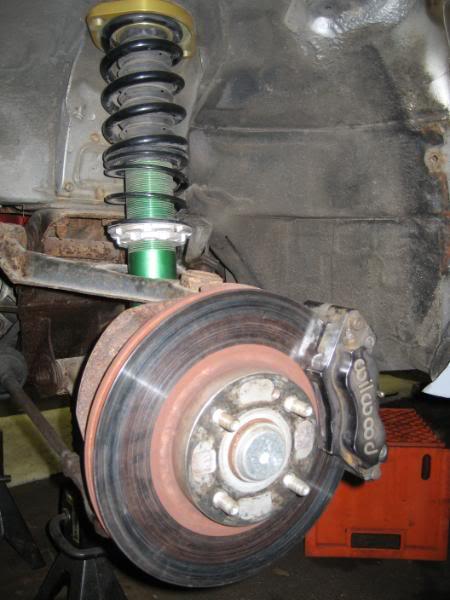
Willwood big brake kit- 11" rotors, Flyin' Miata stainless lines front/rear (not shown in the pic), Porterfield R4S pads front/rear. I didn't take a pic of the rears, as they aren't on at this time...
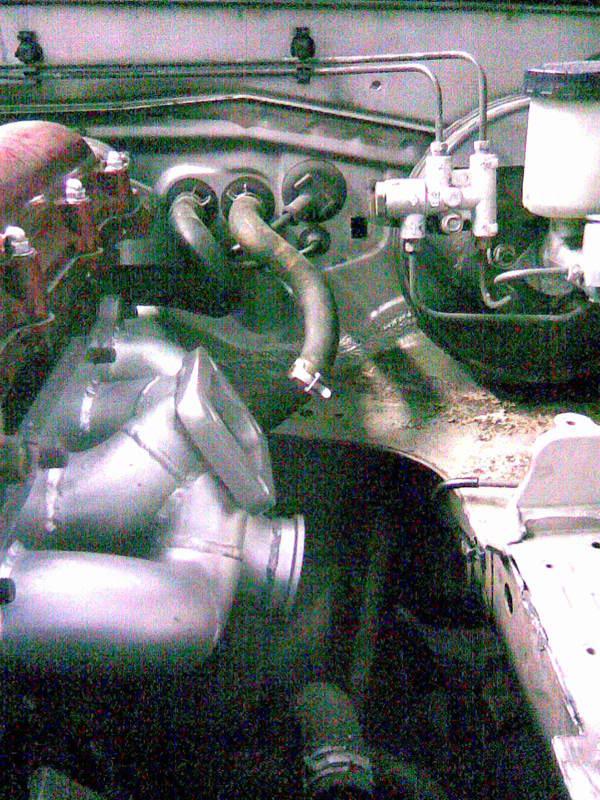
another shot of the motor, it's slowly coming together, although I really haven't spent much time up here...
On to the rear end!
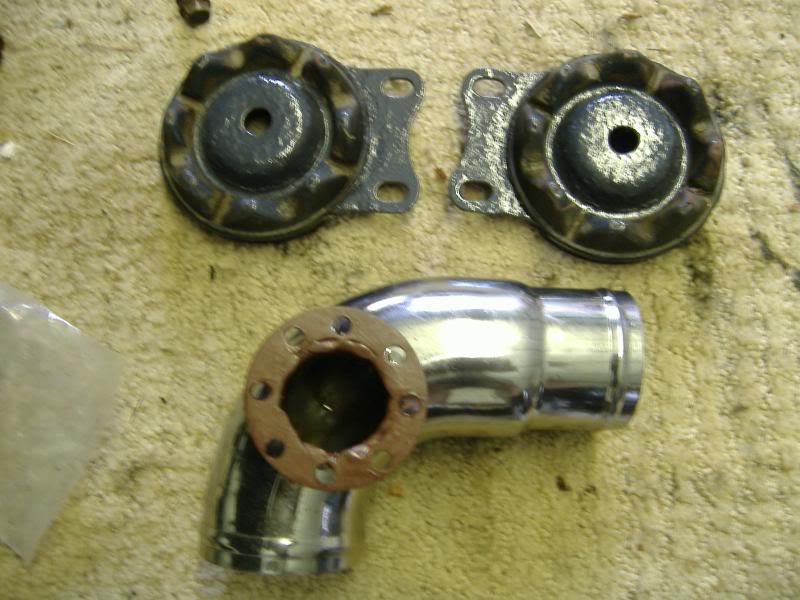
test fitting of the TII diff. I installed Mazdaspeed diff mounts, but didn't take a pic of them (we all know what diff mounts look like )
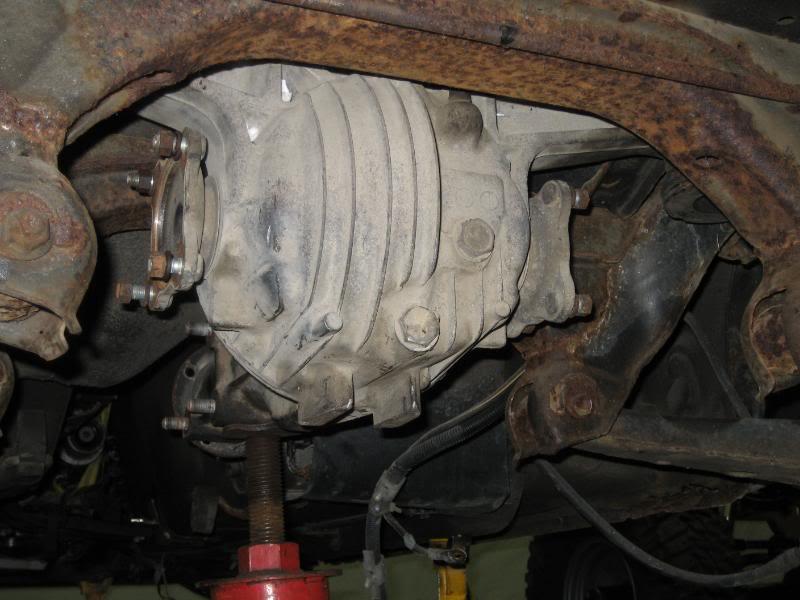
clearances are tight
diff more or less level
shot from under the tranny looking back
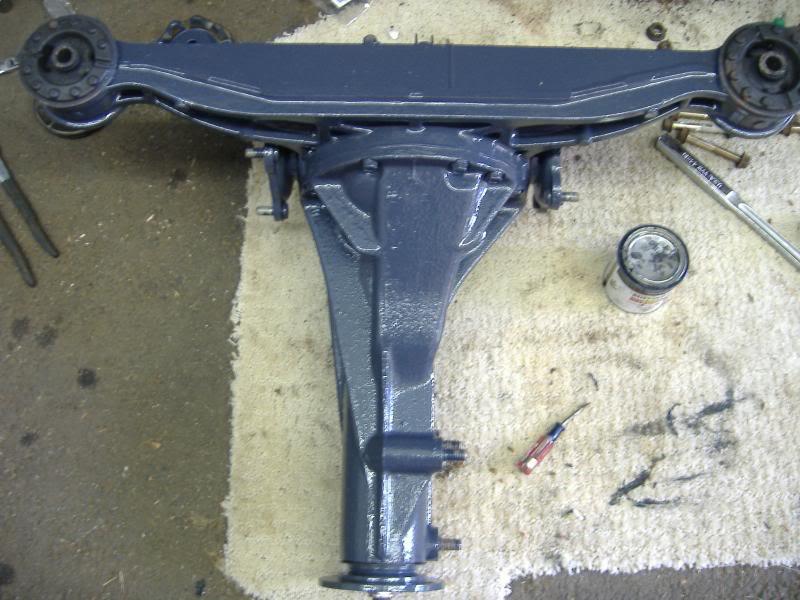
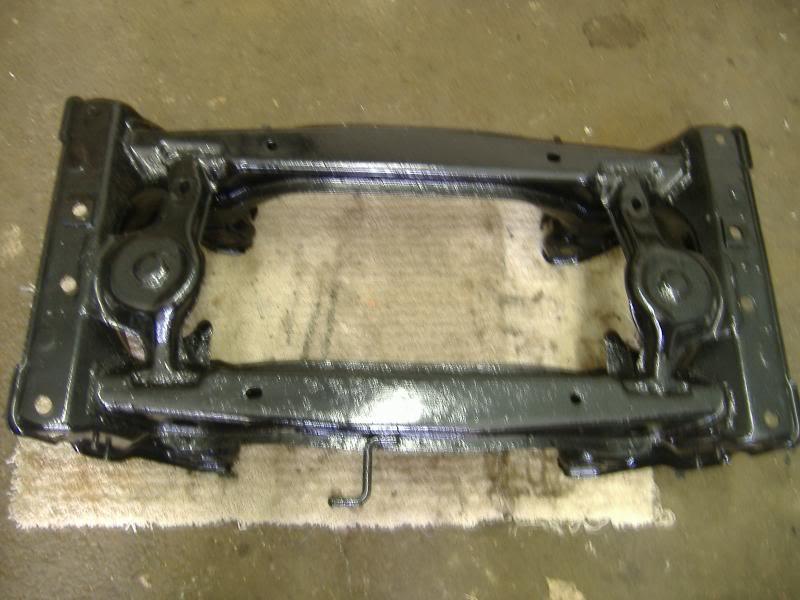
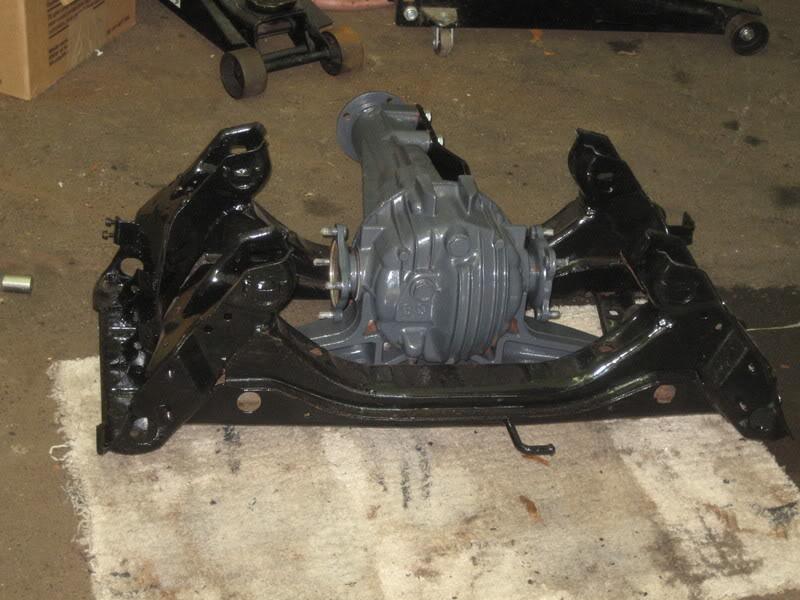
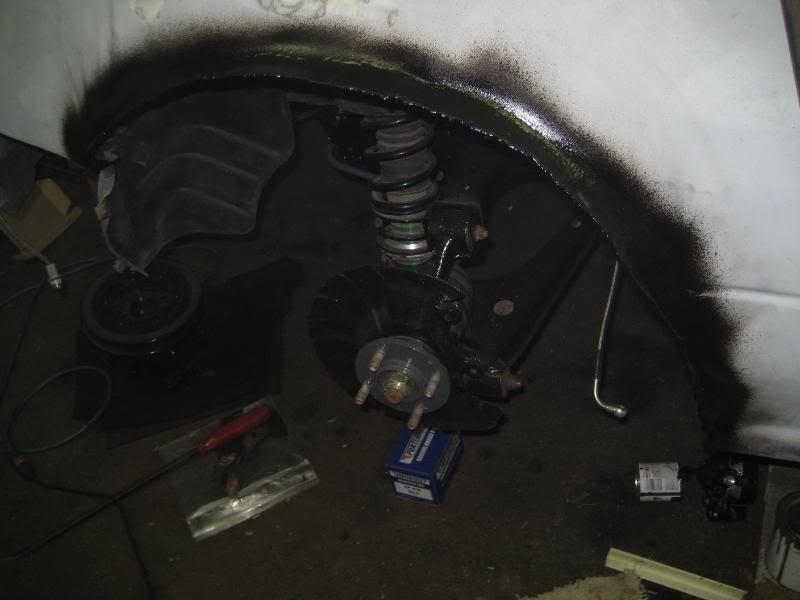
From here, I took the entire rear end out of the car, wire-brushed every piece of it, primed it with rustoleum rusty metal primer, and then hit all the control arms and the sub frame with rustoleum gloss black.
Finished product drying
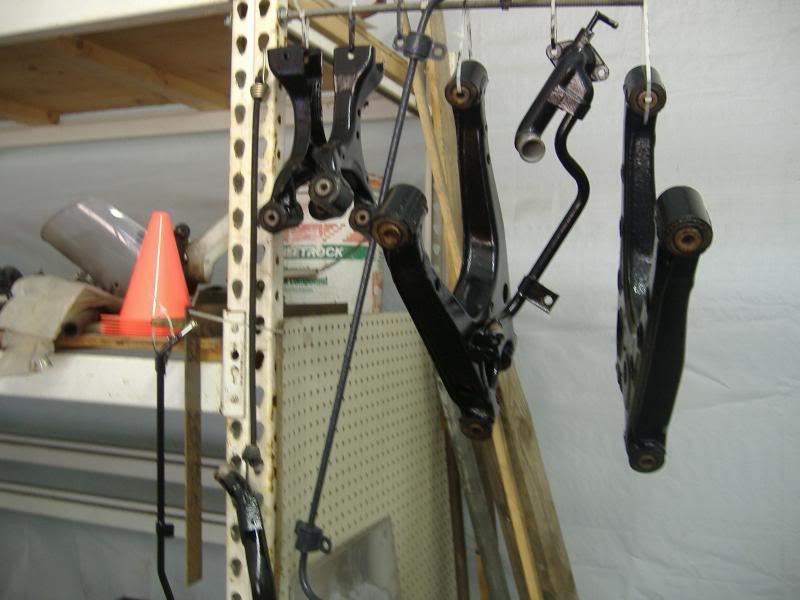
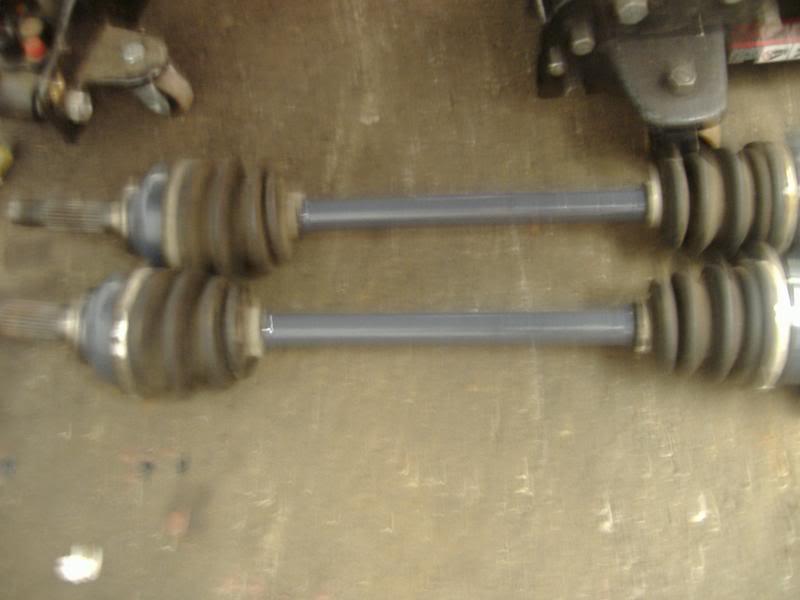
I made a mixture of black and gray to get this nice dark gray color, and I painted the axles, diff, diff mounts, and the rear sway bar and end links gray- finished product came out perfect.
diff
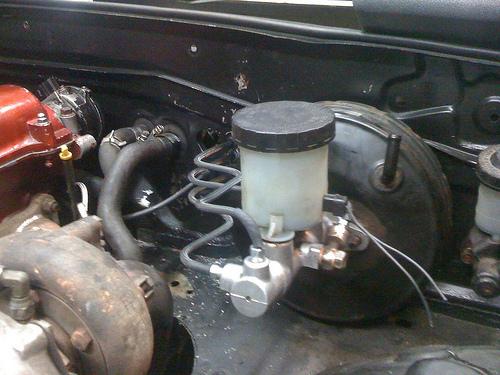
control arms, rear swap bar, the hard coolant lines, and the hard line coming off the brake booster
Here's a shot of the old control arms before paint- they needed it!
shot of the subframe:
rear RX7 axles
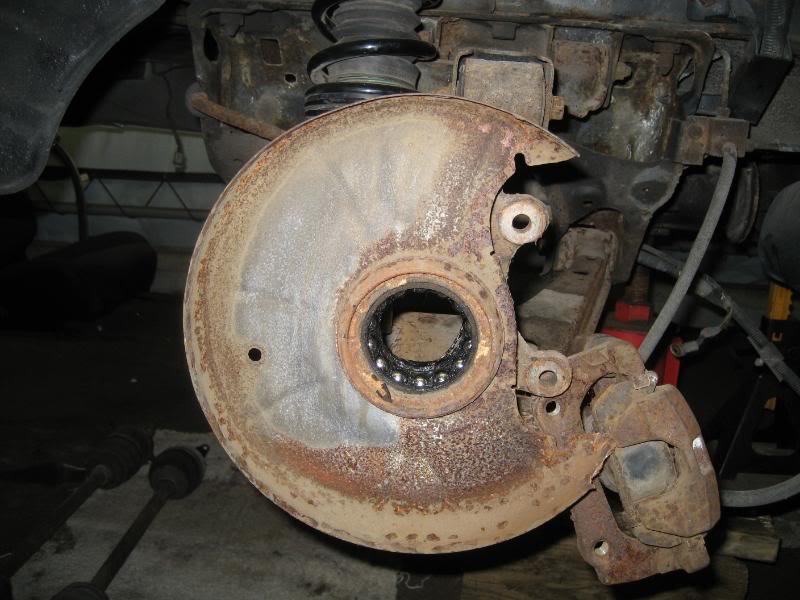
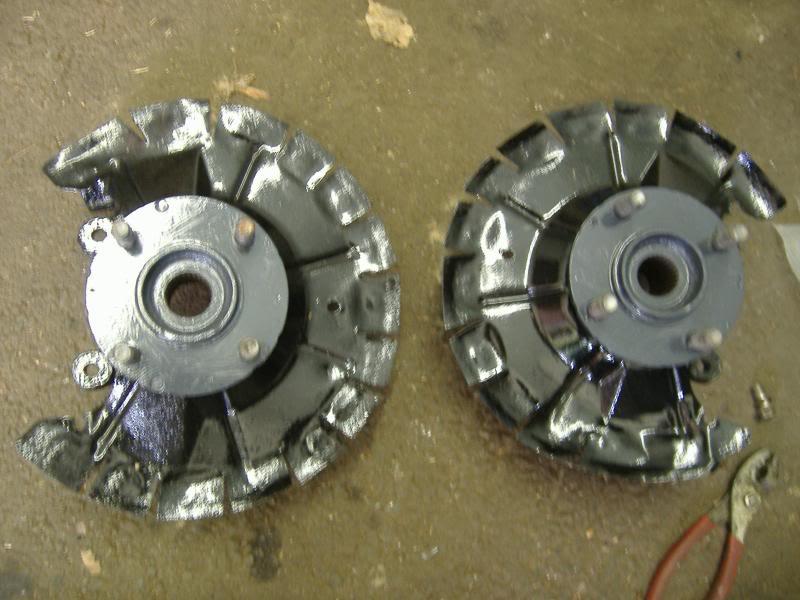
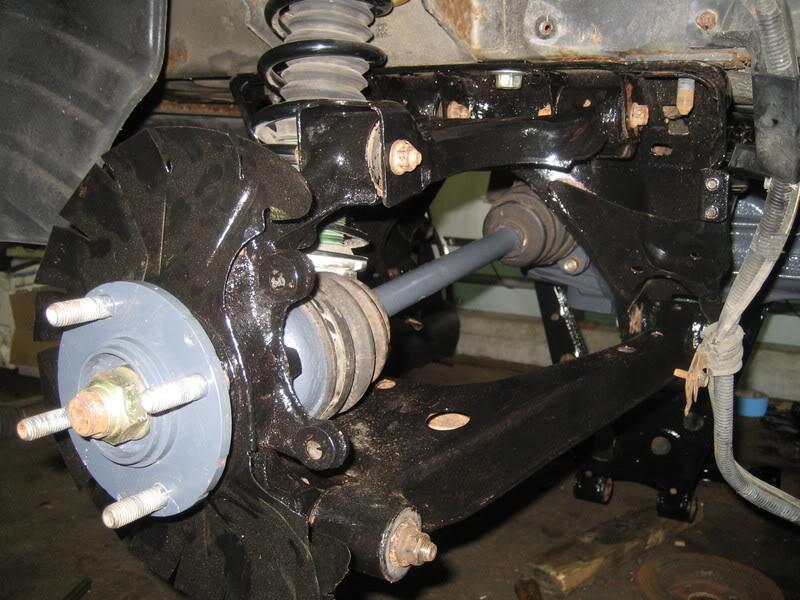
I found a guy over on roadster drift (forum name is Dhaark for those interested- great guy) who was offering his services for custom miata/RX7 hubs, so I took him up on his offer. What he did was machine down RX7 hubs to fit onto a miata spindle, which allows me to use stock RX7 axles.
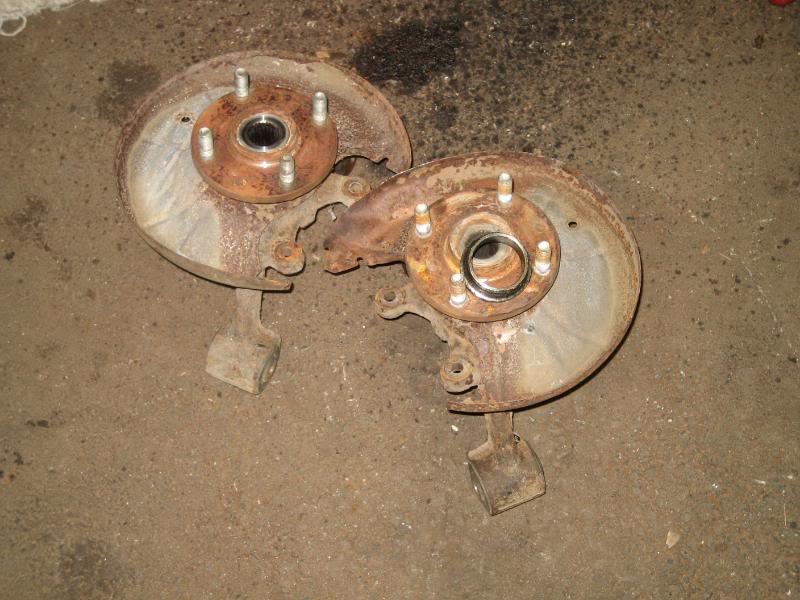
Here's the old crappy, rusty, wimpy miata hubs
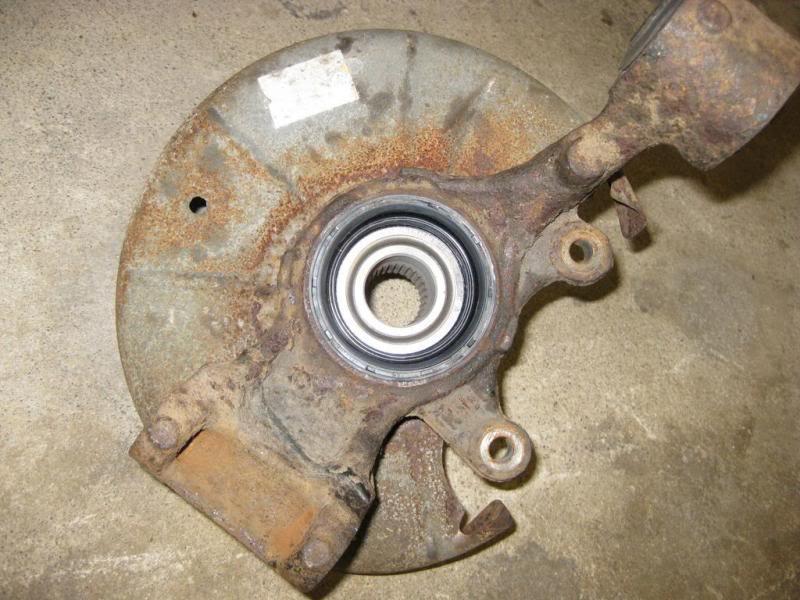
and another off the car:
new hubs as I received them:
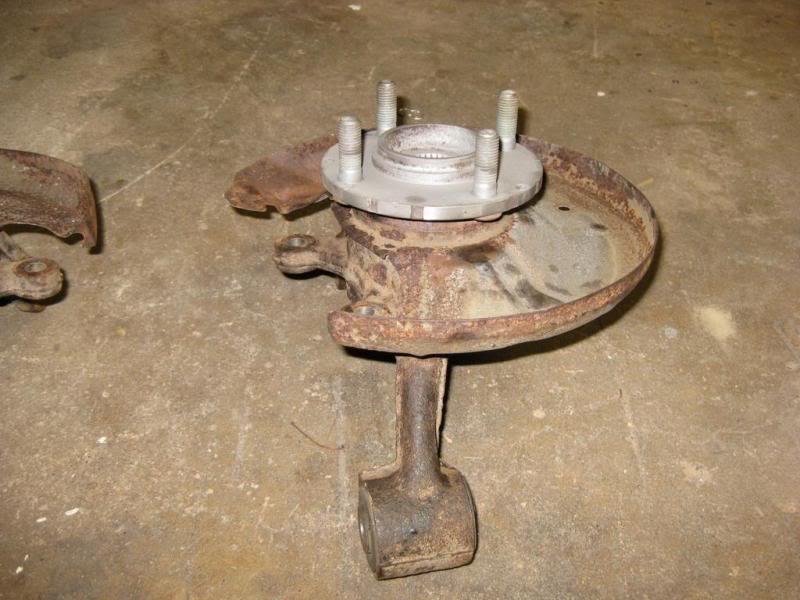
well now I have these awesome hubs, but they look like crap, so I wirebrushed them and painted them with the same black/grey paint scheme. I also cut slots in the curved portion of the dust shield and bent it all out flat so it would clear the 11" rotors out back:
finished product ready for install
Here are the diff mounts all painted up and my Flyin miata intake elbow, with an adapter I made out of some scrap 3/16" steel welded to it. This will serve as a mounting point for my apexi bov. I drilled a bunch of holes in it as I want the option on mounting it, plus I think it looks neat, and it saves oh about 2 ounces 
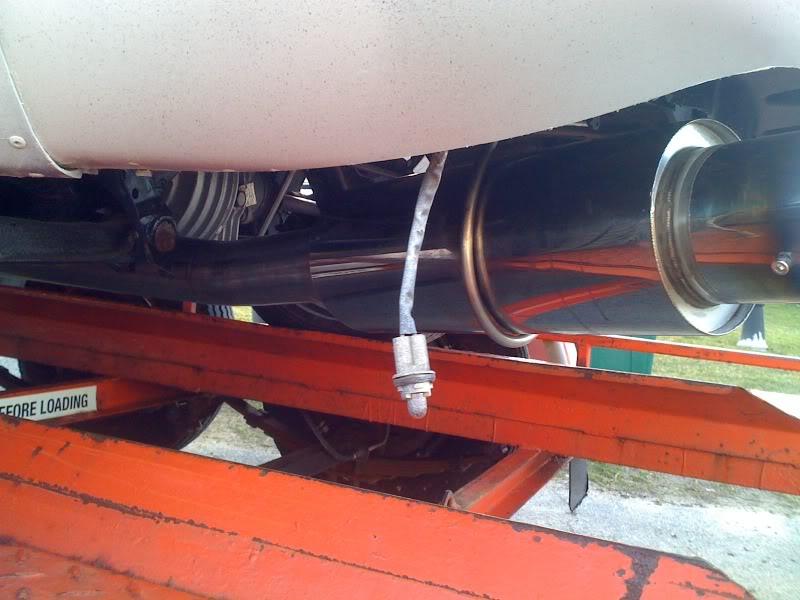
I cut up my rear bumper and the rear bumper support so i can run a left exit exhaust. I followed the contour of the original exhaust cutout and transfered it to the opposite side.
sorry for the crappy pics
rear bumper support
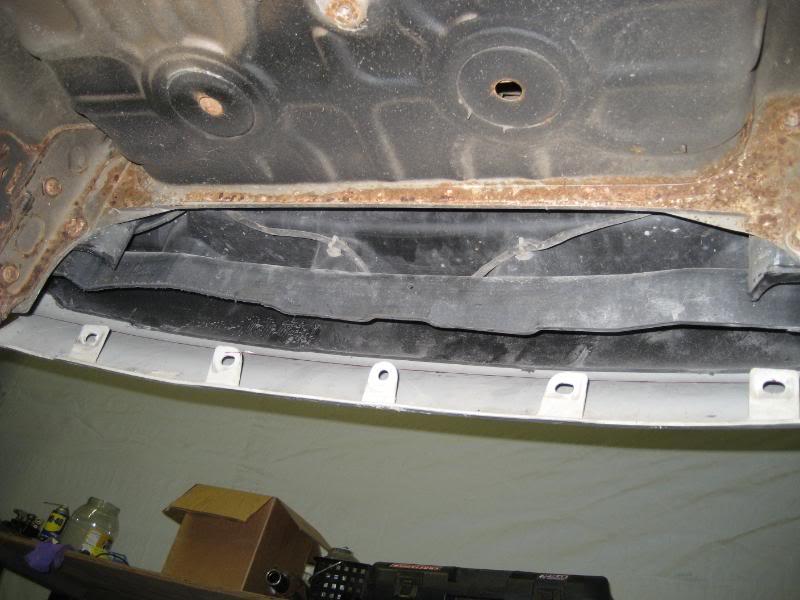
I also lopped off the tow point on the left (driver's) side so that it doesn't interfere with the exhaust at all.
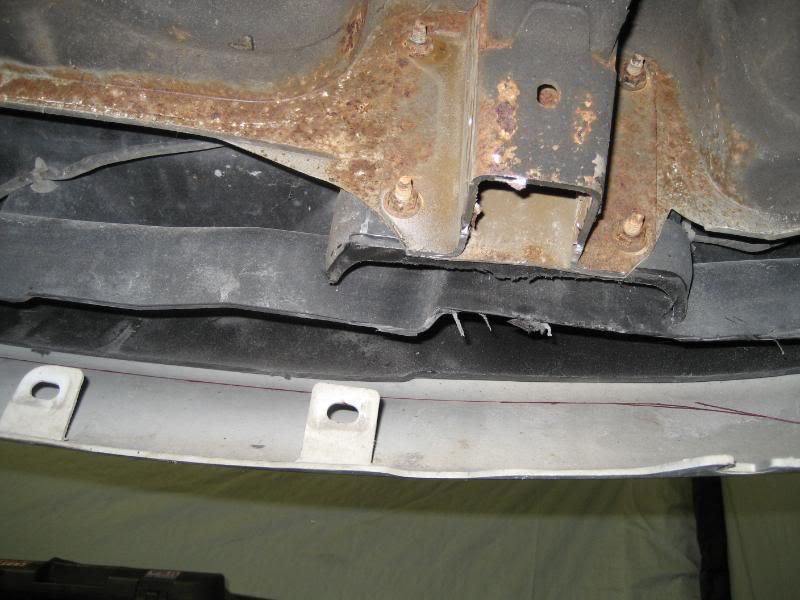
bumper


I also painted the interior with primer and will be hitting it with a coat or 2 of the same black at some point.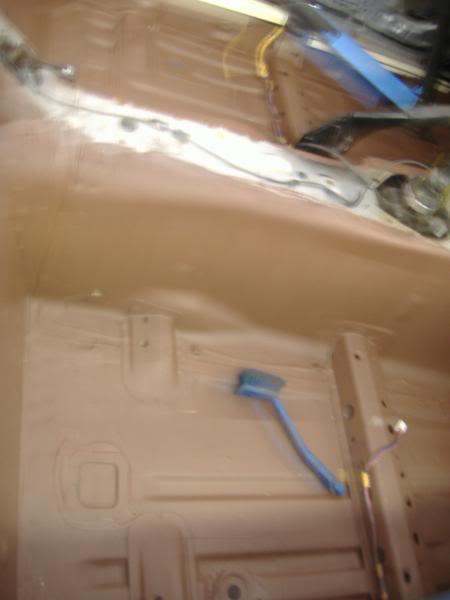
I took out the access panels in the rear deck, and the center console mount and primed and painted them, but never took a pic. Oops.
Sorry for jumping around, but now on to the meat and potatoes of getting the rear end into the miata- making the bracket.
We used a piece of 5/16" steel and bent it to follow the contour of the diff, and then butt-welded another piece of 5/16" to the bottom portion of it and drilled out the 3 holes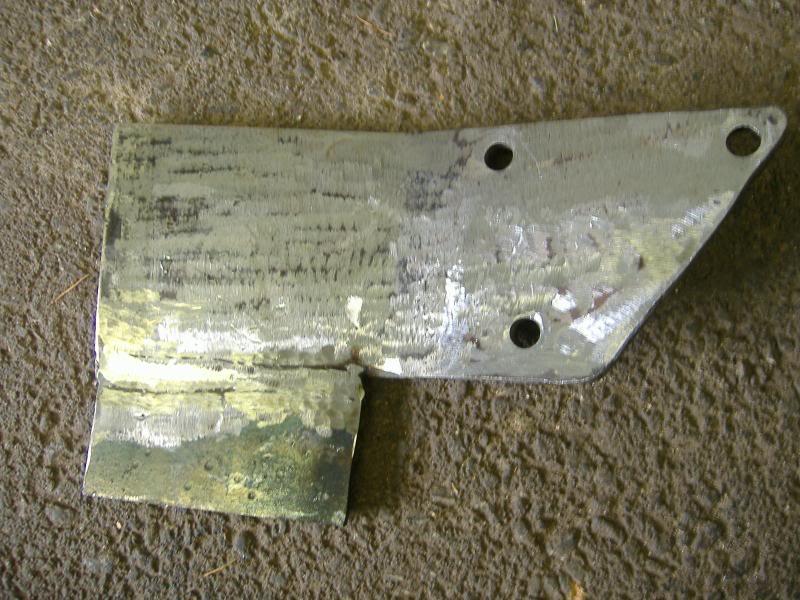
next, I cut out a section of the subframe so that the bracket can sit flush with the top of the subframe, which allowed us to weld the bracket on 3 sides
pic of the cut I made:
here's a shot of the bracket all burned in, waiting for paint. I also cut off the backside edge of the bracket to match the same angle on the front. Not only does it look much better, but it saves some weight. 5/16" sure is heavy, but I'm not taking any chances.
One thing is for sure: This bracket certainly isn't going to break!
Got this in the mail 2 weeks ago too. It's an ETD Racing shorty tubular manifold with a Tial 44mm wastegate.
Pretty soon I'll get around to getting the motor stuff all buttoned up. That's it for now, I'm beat.
7/27/2008
More progress. I got the rear end mounted to the subframe
The black and the gray look great together, I'm very pleased with the result.
mounted under the car (yes I know I'm missing 2 nuts on the subframe)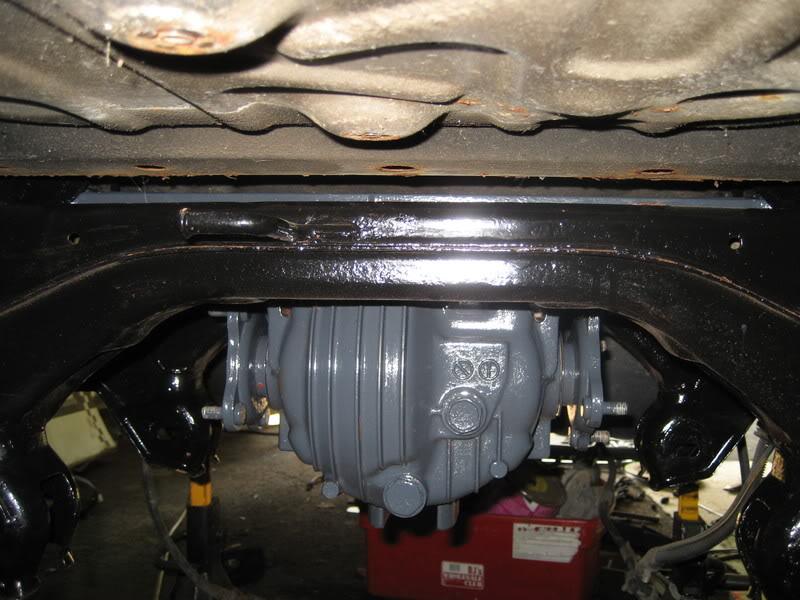
tight tolerances between the mount and the gas tank. However, my front diff mount allows for maximum exhaust clearance, as I plan on running a 3" turboback.

axles, control arms, and hubs installed
rear sway bar installed

I measured for the driveshaft, will be dropping that off Monday to get shortened. I still have to get the center hole in the rotors enlarged to clear the RX7 hubs. Once I get that done I can finally cross off the rear end from the to-do list. I pulled the tranny again so i can start working on getting the slave cylinder modified to fit.
8/11/2008
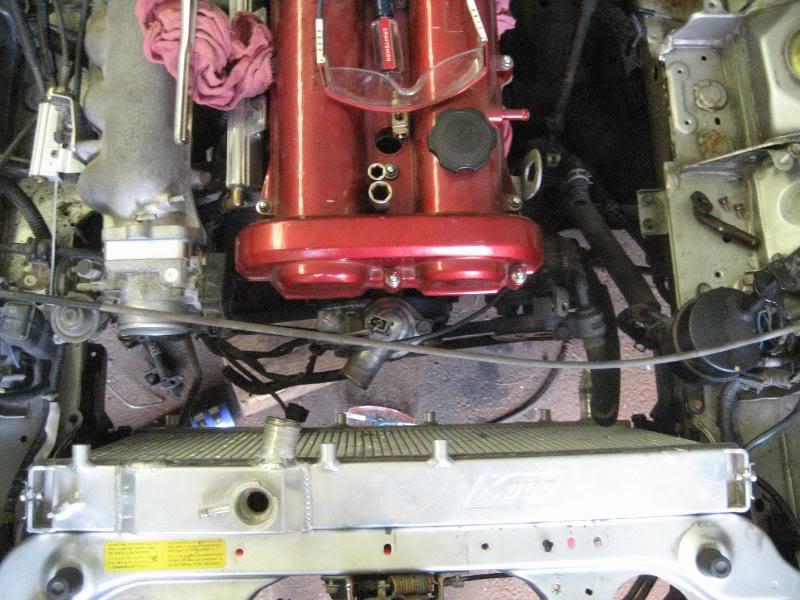
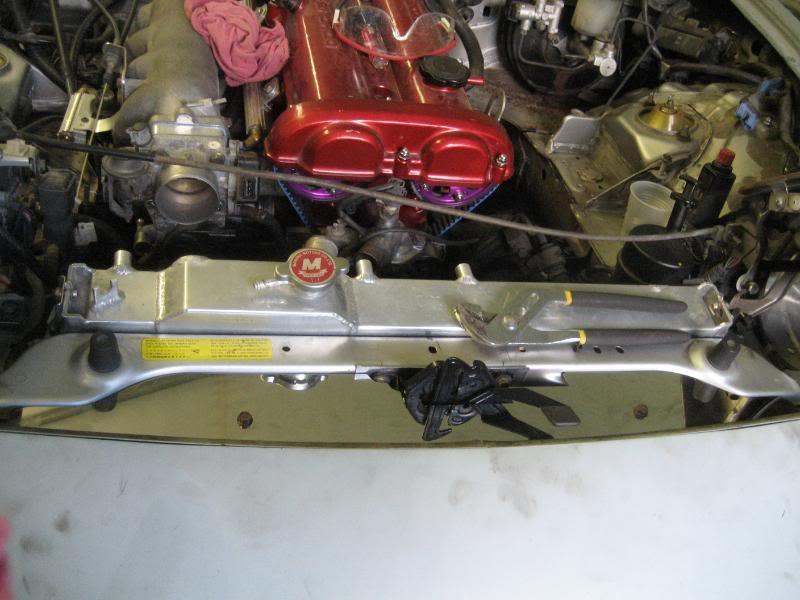
Back at it again. I ran into a couple fairly big hiccups the other day. The first being the radiator. I have a koyo 55mm radiator, and with the 1.8 in my 90 with the fm throttle body adapter, there was about 1" of clearance between the throttle body elbow and the upper radiator outlet, so that needed to be moved over a bit. I tried to see if I could take out the adapter, but no good. The only option was to modify the radiator- no biggie.
I cut off the old mount and cut a hole out as far over to the driver's side as I could manage, and angled the outlet so that it was pointed more or less at the thermostat housing.
Here is a picture of the cut before I cleaned it up with the dremel tool:
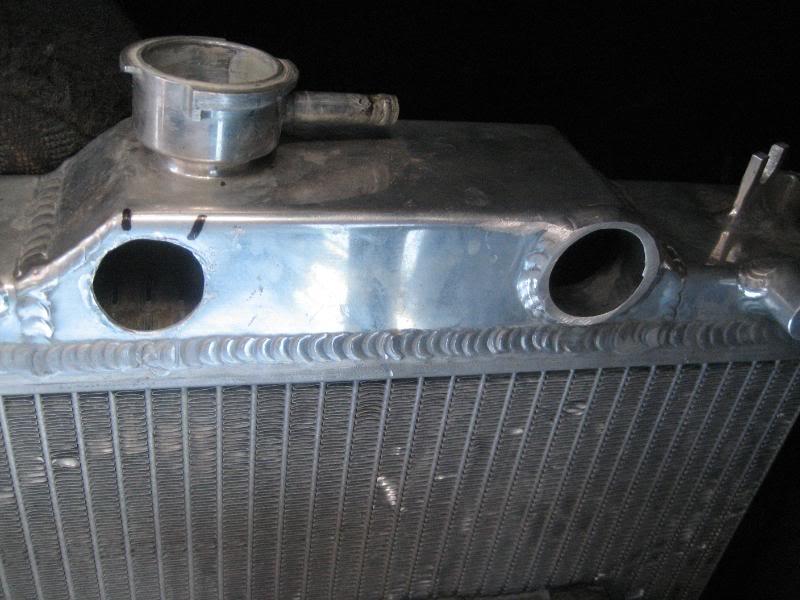
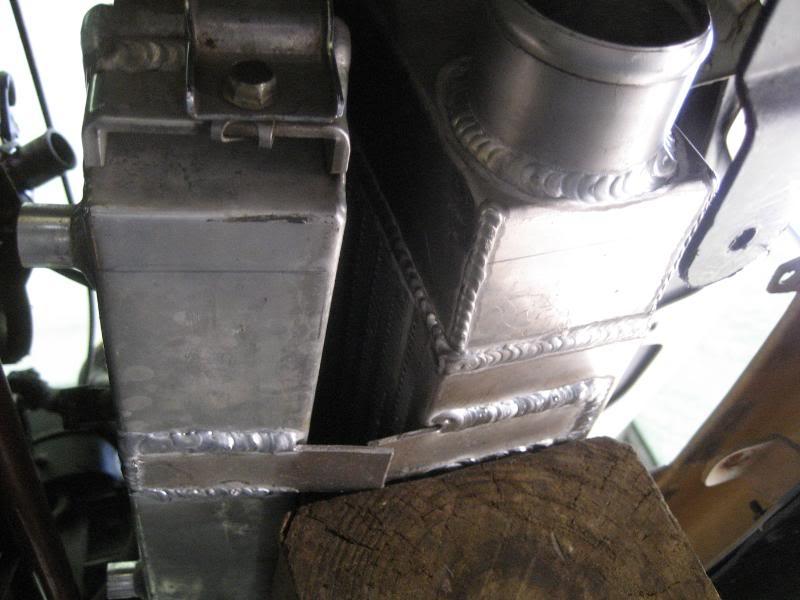
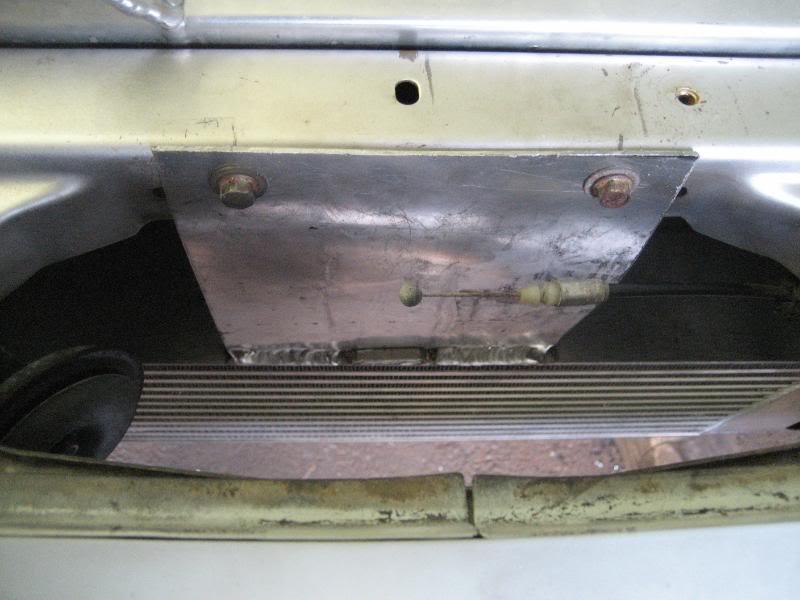
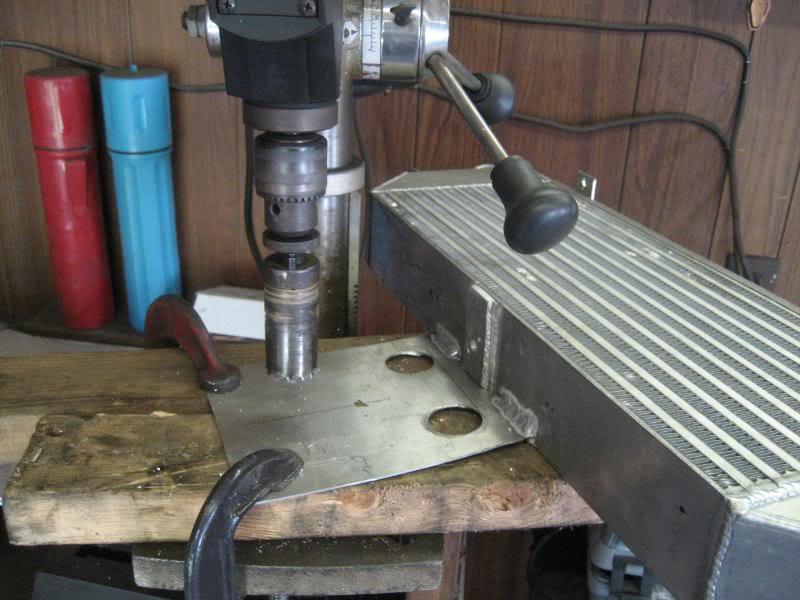
The second problem was the intercooler I bought had the mounting brackets cut off of it for some reason, so I had to design a new mounting system for it. Also, not that big of a deal. What I decided on doing was since my radiator was aluminum, I cut out some 1x2.5" brackets out of some scrap aluminum I had laying around. These will be welded to the bottom of the radiator and the intercooler, and then I would drill out a hole and put a bolt through them. Here is a picture of the 4 tabs, the modified upper radiator outlet, and the block off plate to cover the old inlet hole:
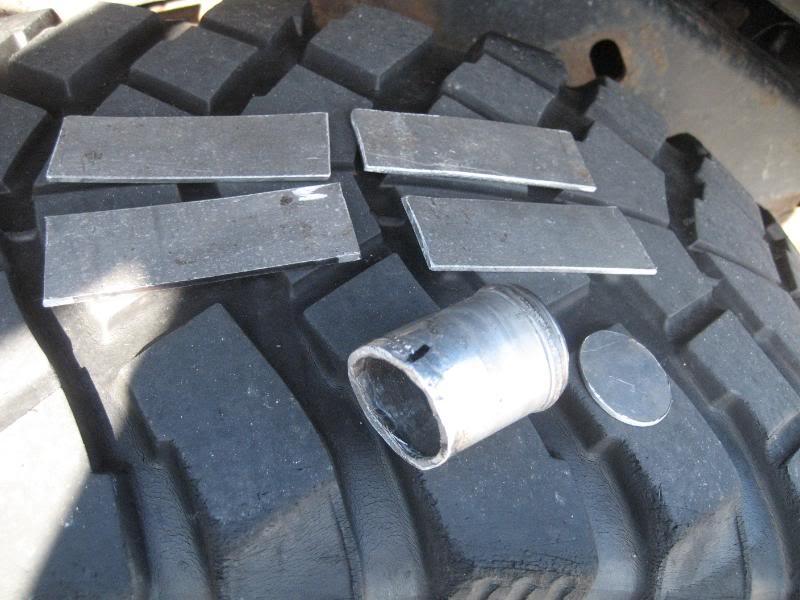
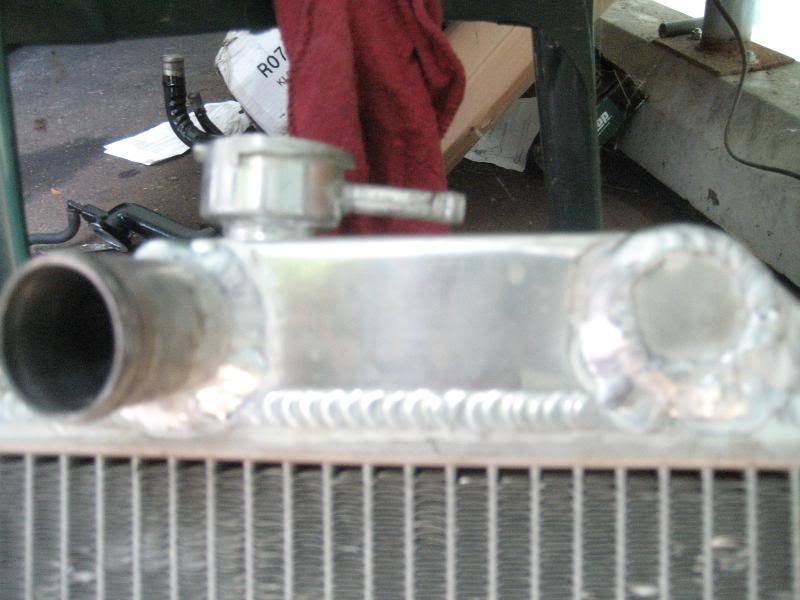
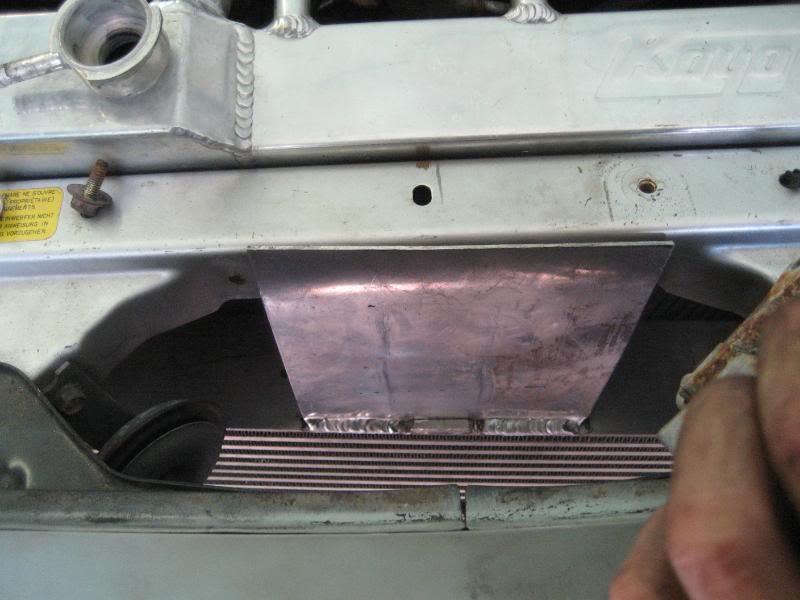
For the upper intercooler mount, I decided to take an idea out of FM and Begi's book, and go up and grab the hood latch mount. I cut out a 7.5x6.5" piece of aluminum and had that welded onto the center of the intercooler, in the front. Then it was off to see the welder...
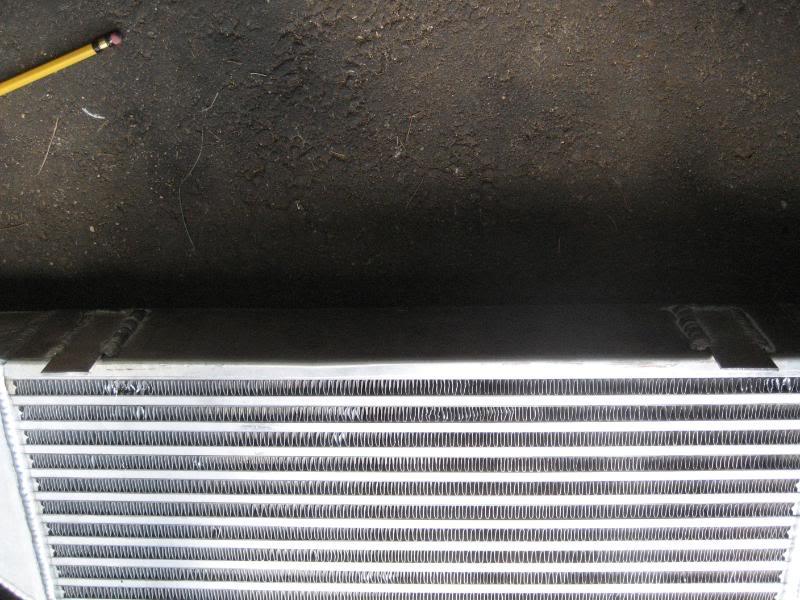
Here are the tabs welded on the intercooler
new radiator inlet and blockoff plate
and the radiator tabs
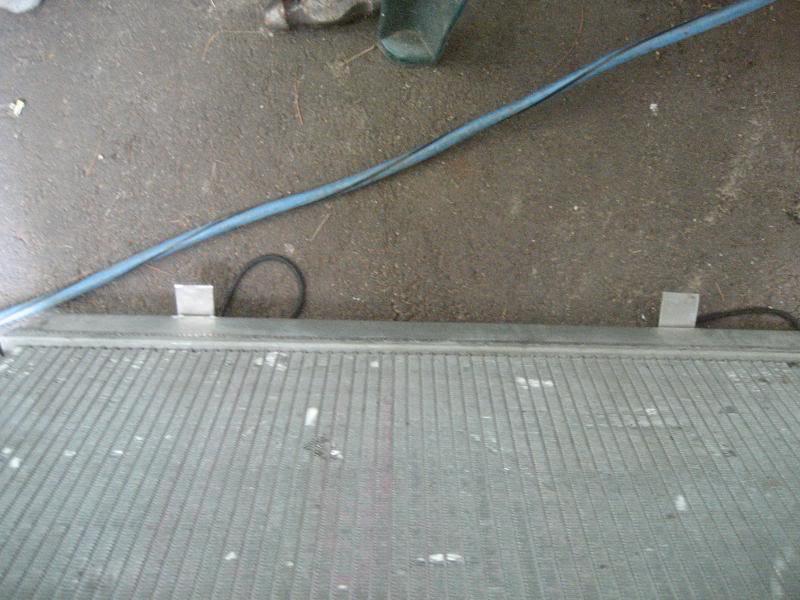
The tabs are placed 4" in from the edges (my intercooler was the exact same width as my radiator- 24.5" which made measuring pretty easy
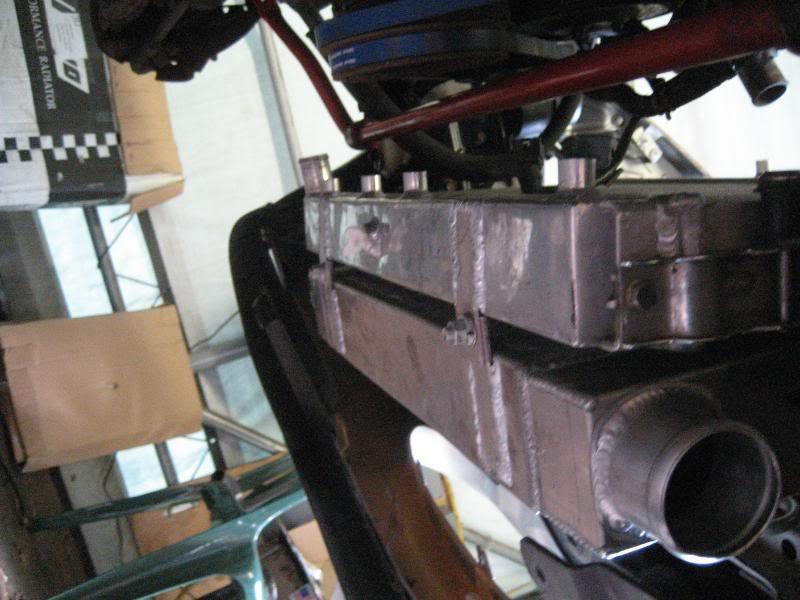
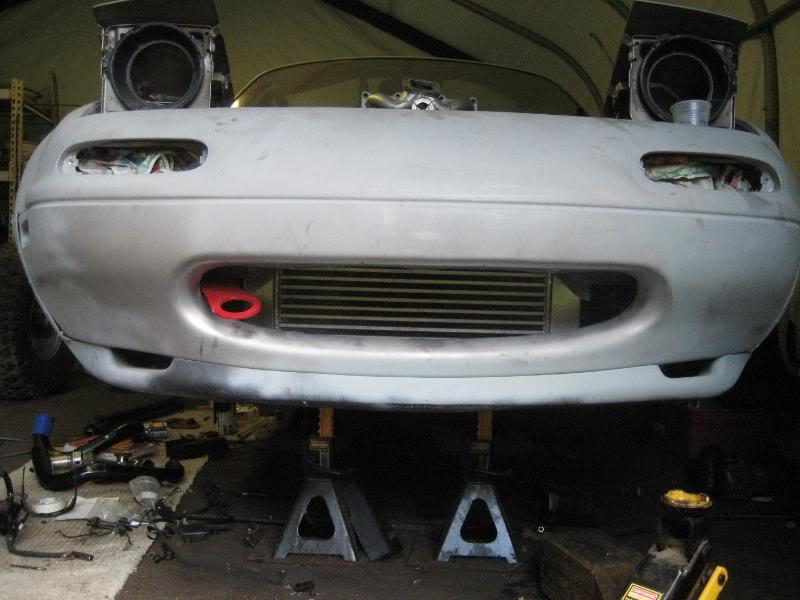
Here is a shot during fitment of the intercooler/radiator
upper intercooler mount
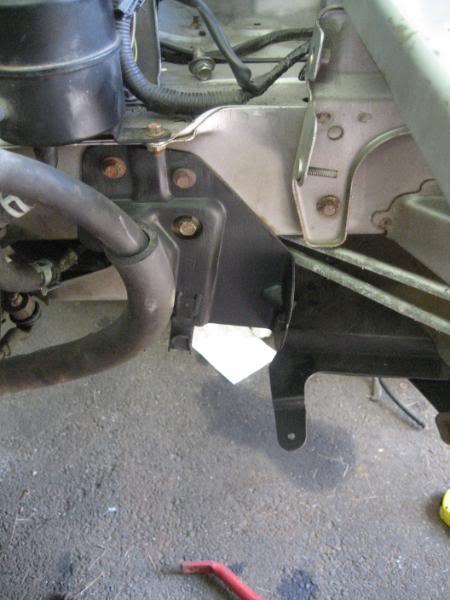
I had to modify the lower radiator mounts slightly as the intercooler wouldn't sit properly. Here is a pic of the cuts I had to make

intercooler/radiator bolted together
Here is a shot of the lower radiator supports installed.
another shot of the radiator from above
Upper mount bolted to the rad. support
Here is a shot from the passenger side. I also installed the sway bar (RB tubular) at this time as well. I painted the end links black this time instead of the gray.
The upper intercooler mount was ugly, and blocked off a ton of airflow to the radiator, so I decided to make some cuts in it. Here's a shot during the process...
and a completed one
Then I reinstalled it back into the car for the final time (hopefully)

one a little farther back
I also installed the radiator block off plate for the top.
Sweet.
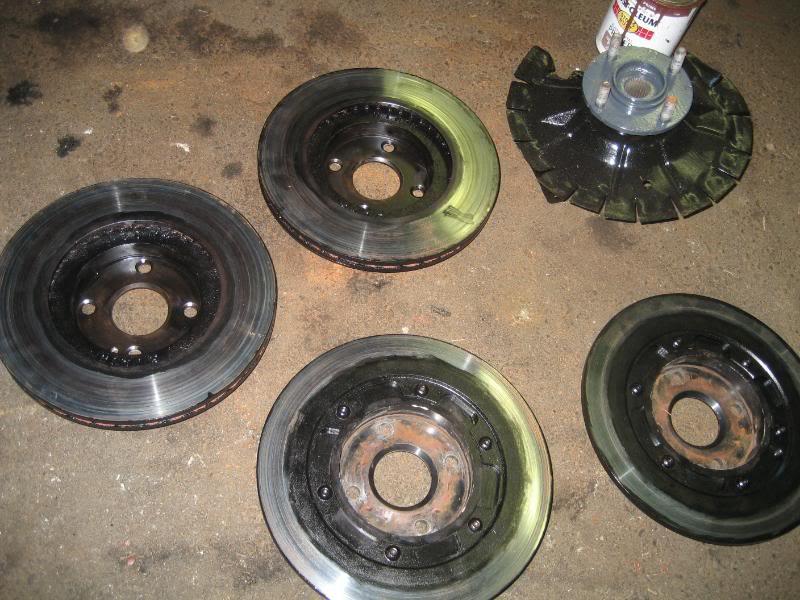
The next thing I did was to paint my rotors and the rear calipers. I used that duplicolor caliper paint and did 2 coats.
Here is a shot of the rotors.
I don't have a shot of the calipers (oops). I also painted the front wheel hubs with 2 coats of the black caliper paint as well. Again, no shot of that either.
Lower radiator hard lines primed, painted, and installed
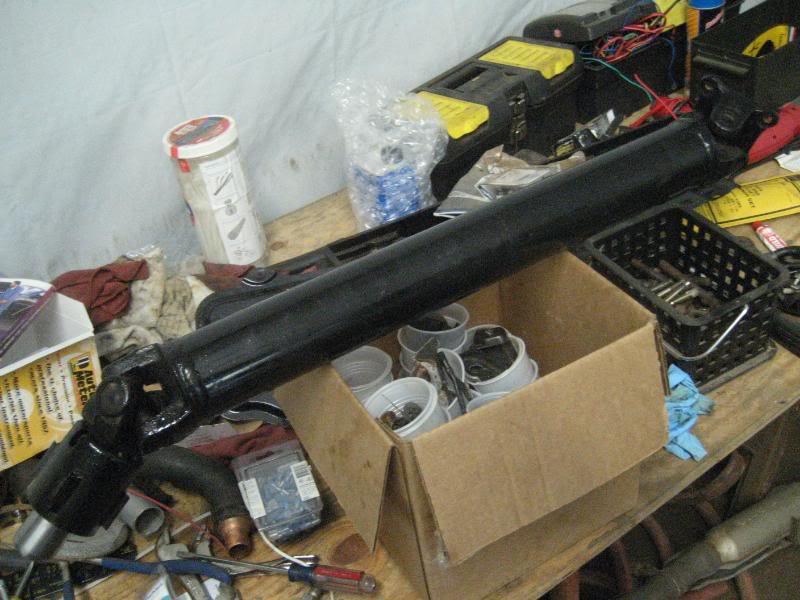
TII driveshaft back from the shop shortened and balanced. I painted it too.
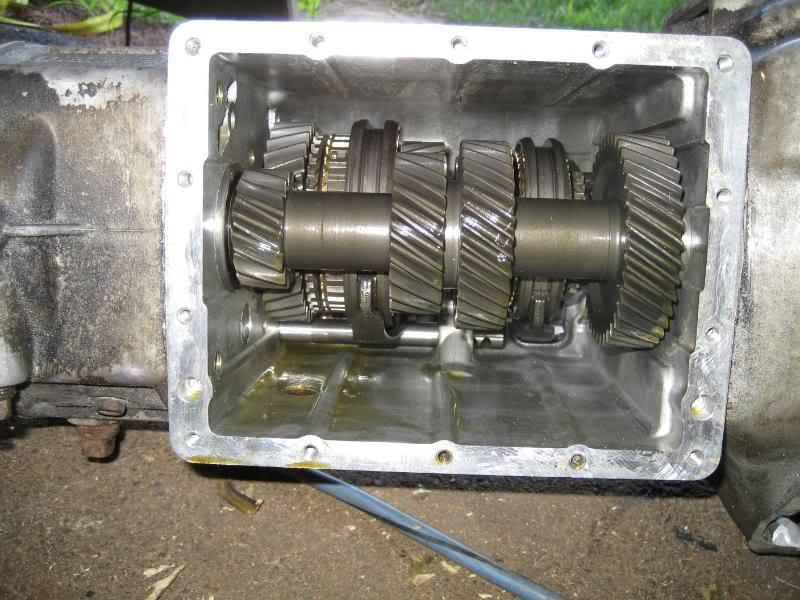
I then went back to the tranny and replaced some of the seals as they had been leaking trans fluid. Here is a shot of some of the guts inside a TII transmission
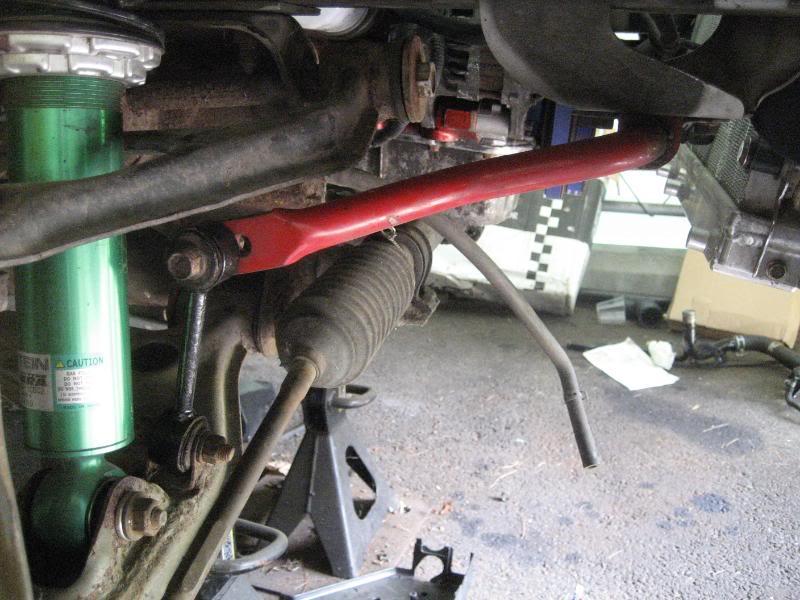
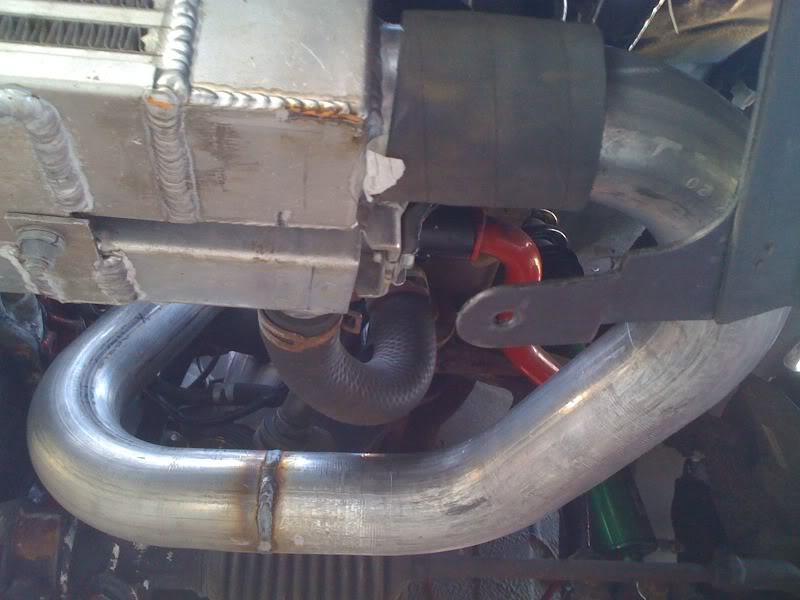
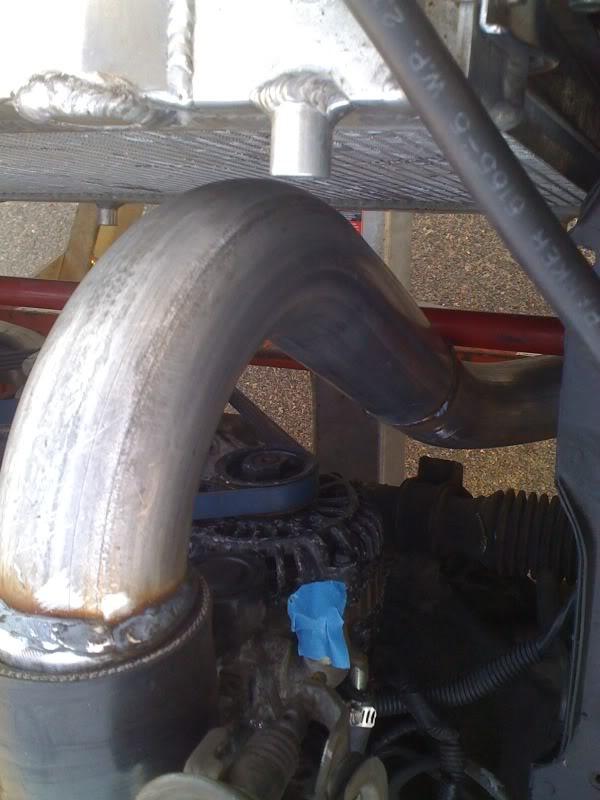
I also cut off the hard 90 elbow on the power steering pump, shortened it some, and ground the flange smooth. I don't like how the line loops back as it did. I plan on running intercooler piping in that space, so I'd like all the room I can get. Here is a shot of the cut and the flange all cleaned up.

I angled it towards the outlet from the reservoir so it's a more direct route now.
The next problem is a major one. The manifold I got is an ETD Racing/M-tuned one. I paid 500 and change for it. I had a tial 44mm wastegate flange put on instead of the 38mm flange. I was unhappy about the fit and finish inside of the runners and especially in the collector, and emailed/called ETD racing about it. They assured me this was how they made manifolds, and as long as the outside was Ok it was going to be fine. To me, it looks terrible....There are big gaps between the joints, excess metal sticking out, and there are jagged edges. The coating is already flaking off from the inside too.
I apologize for the crappy pics as they were taken on a cell phone.

OK, well I'll just run it and if it breaks they said they'll take it back and either fix or replace it. Whatever then. So I go to install the turbo and wastegate and the wastegate doesn't even come close to fitting. I tried cutting out the lip of sheet metal between the shock towers, but it still is off by about an inch. Now I'm pissed.
I emailed Marc from M-tuned about it, and sent him these pictures. He said he would get in contact with John about it for me and get back to me. They get back to me and tell me that they welded the tial 44mm flange in the exact same spot on their jig as the tial 38mm flange, and ask for the dimensions of the 44. John had originally told me they had done a 44mm flange on this manifold for another miata and that it was not a problem at all. I was never told it would fit, just that they had done it in the past and that there was no problem doing so, which I assumed meant it would fit. Here is the email I got from Marc.
"Hi Andy,
I spoke to John this afternoon regarding your situation. John recalls you calling and the conversation you and he had in regards to changing the flange to a Tial 44mm vs. the regular 38mm flange the manifold normally ships with. He mentioned to you that he has welded different flanges to the manifolds in the past, one of which was the 44mm V-Band (never heard back from this customer however) and would be able to do that for you. He is adamant that at no point did he assure it was tried and tested to have a 44mm flange. The only configuration tested is a 38mm flange on all of our Miata Manifolds and therefore sold on our retail site.
* You would be surprised at some of the requests. John makes a ton with no wastegate flange (Just the pipe) and the user will position it themselves.
The 44mm V-Band was welded in the exact same spot (Placed in the JIG) as a 38mm flange would be welded; the fitment issue is due to the size of the Tial Gate in question.
At this point Andy, we have to apologize for the misunderstanding, and offer our apologizes. Your best bet would be to modify the wastegate outlet on the manifold to fit in your car with the Tial 44mm gate. I know this is not optimal, but we don’t have a way of building it and ensuring if would not hit.
In the future if you require any ETD or M-Tuned product I would be happy to hook you up with a deal due to the trouble this may have caused.
I hope you understand our position making a one of manifold on request. Please let me know if I can be of more assistance.
Thanks, Marc"
I feel like they went about this in a pretty sneaky way. By telling me they had done it in the past I assumed that it would fit and they would make the necessary changes to the flange for the size increase of the 2 wastegates. It's pretty obvious the wastagates are larger. I know I should have asked the direct question, but I again assumed that ETD racing was a reputable company in the turbo miata relm. I feel like I was taken advantage of and steered down a path of 1/2 right answers by not being up front with me. They also offered me a discount any any future purchases, but the only things they have for a miata is a manifold. I inquired about a downpipe, and their response was "they don't make them because of all the variations, involved- now how is that different than putting a different flange on a manifold?? I sent them an email back to which I have not gotten a response from. I definitely will not be doing business with them in the future, and wanted to warn any other potential buyer of any of their products. I also can't believe their solution is for me to modify the manifold- that was why I paid the extra cash for them to do it in the first place! I also have a feeling that if I do modify it, and it cracks because of the spaces between the joints on the inside, that they won't honor their warranty with me and blame the modification I did as the cause of the failure.
I am extremely dissatisfied with ETD Racing/ M-tuned.com, John, and Marc. Way to take care of your customers...
I'm still fuming about this, but I will end my rant for now. What I've decided on doing is cutting the frame out and boxing it in to create enough space for the wastegate.
8/23/2008
hmm not much interest on this forum....
Updates!
More progress...Took Thur and Fri off from work and worked on the car.
I notched out the section between the shock tower braces 2 1/8" in by 1 1/8" tall.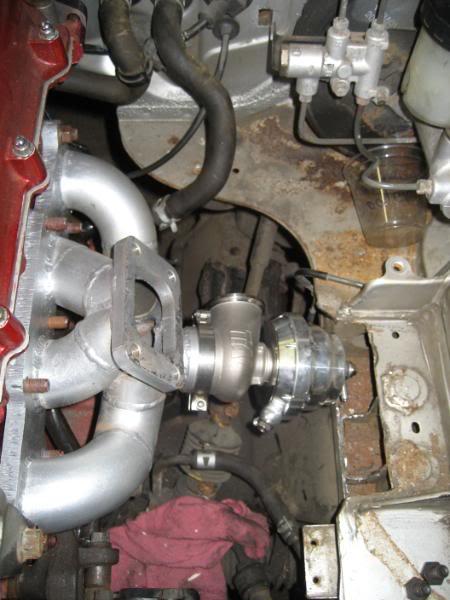
Now the wastegate fits :roll: .
closeup of the cut. There is a little bit more bracing in there, I'm going to have to brace it back up with some gussets as this is a pretty high stress area.
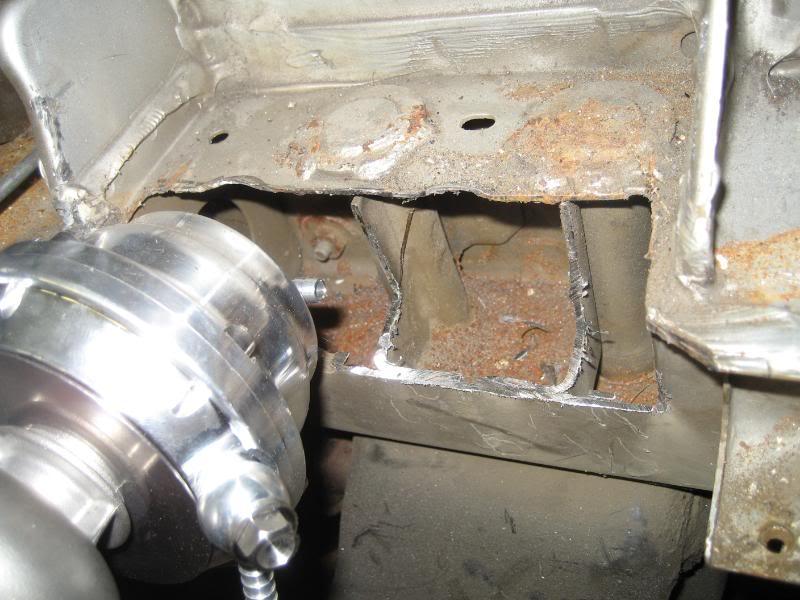
side view
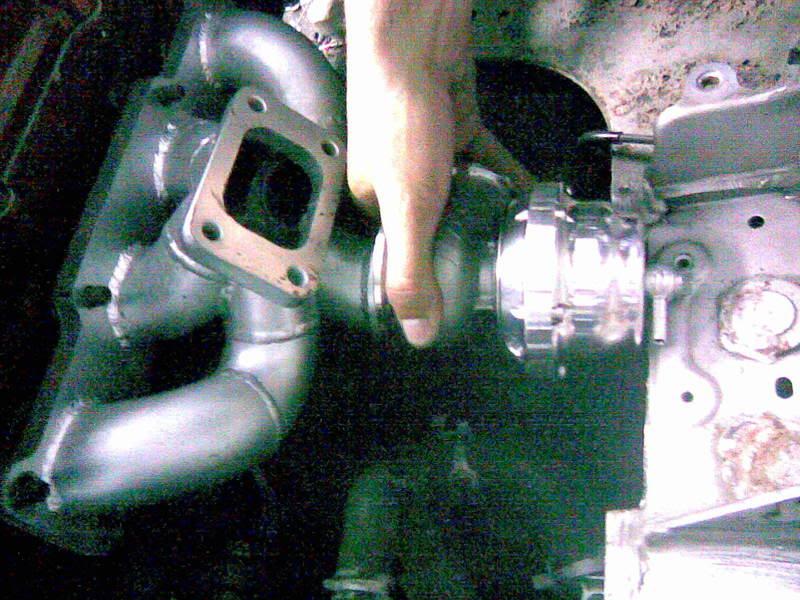
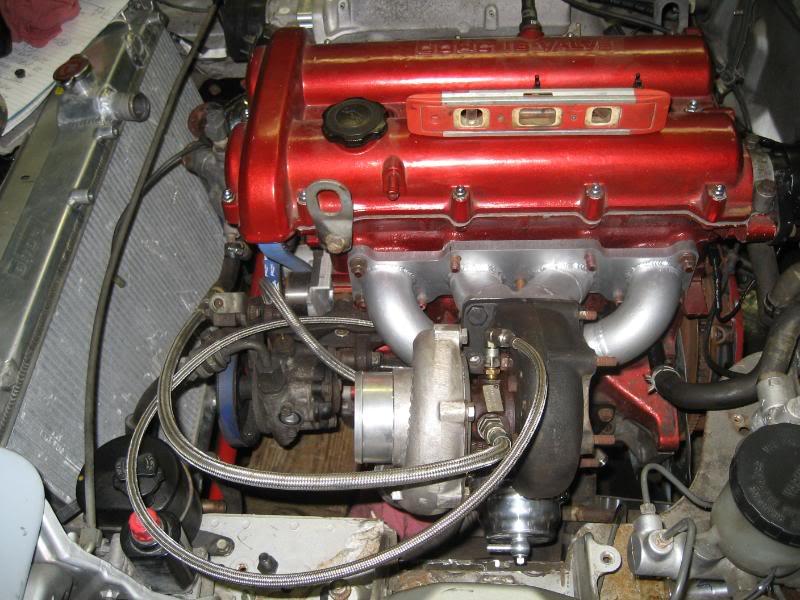
Next, I clocked the turbo so that it was positioned correctly for the manifold. Here it is positioned with the water lines more or less where they will be run. The oil feed is just laying loose, I still need a 10x1.5mm to -4an fitting for the block.
side view
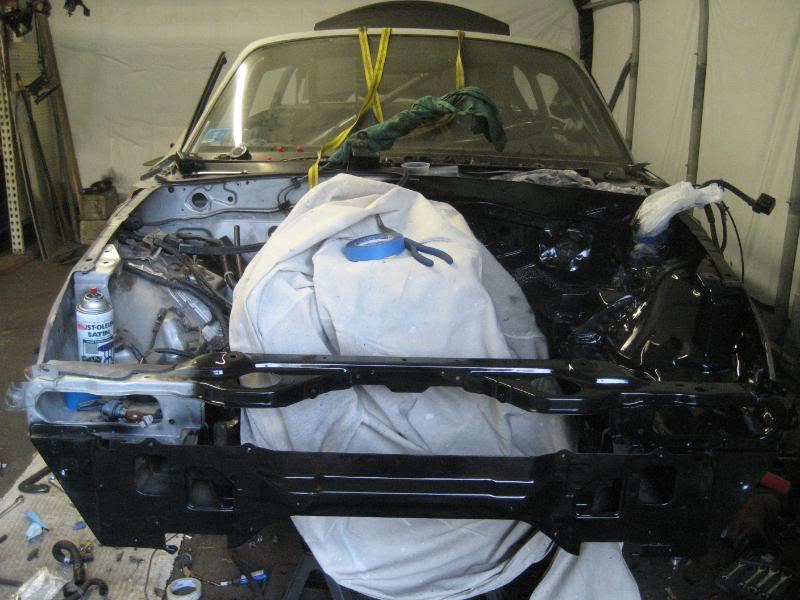
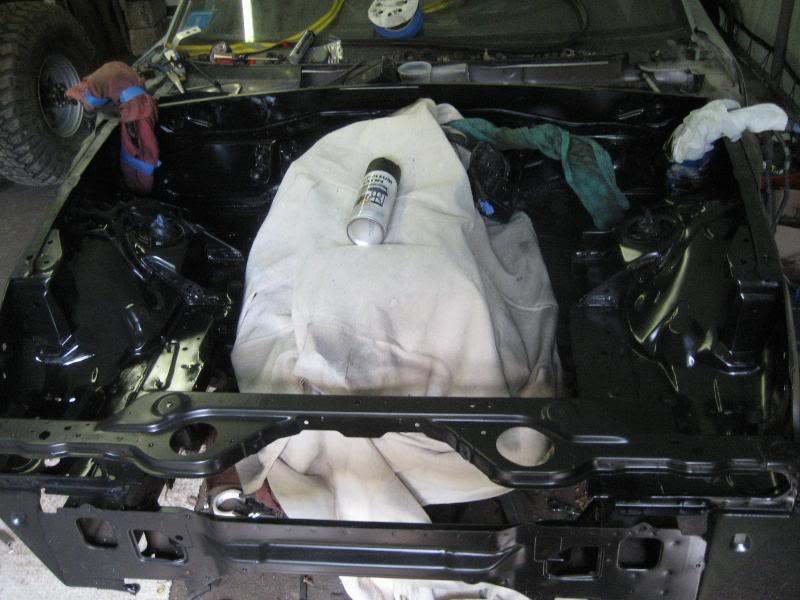
Since I had to cut the frame, I'm going to have to paint the cut section so the new bracket doesn't rust, so I decided to just go ahead and spray the whole bay, something I should have done a long time ago. What a world of a difference.
I started to remove the wiring harness and the headlight bracketry/controls.
I sanded, primed and painted everything.
Priming....
Painted
I also preped/primed/painted the interior access panels and the entire interior. Everything is getting painted satin black.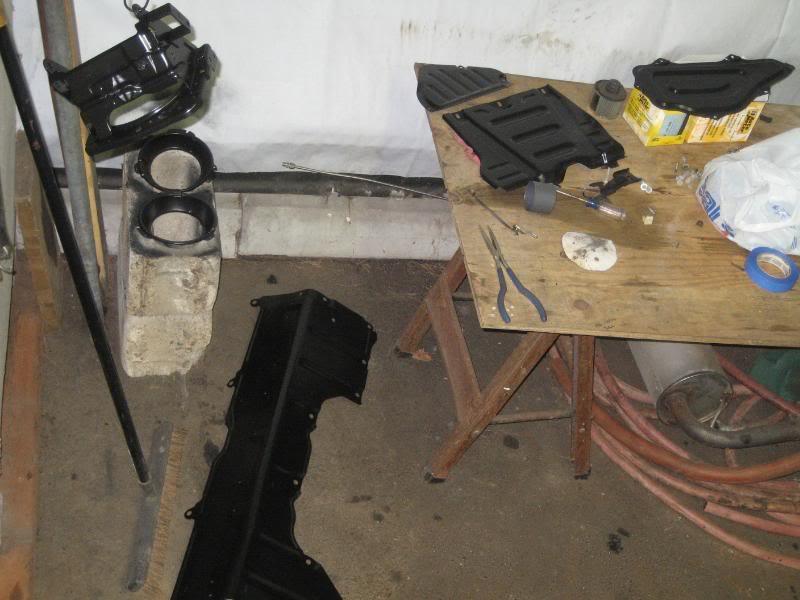
interior shot
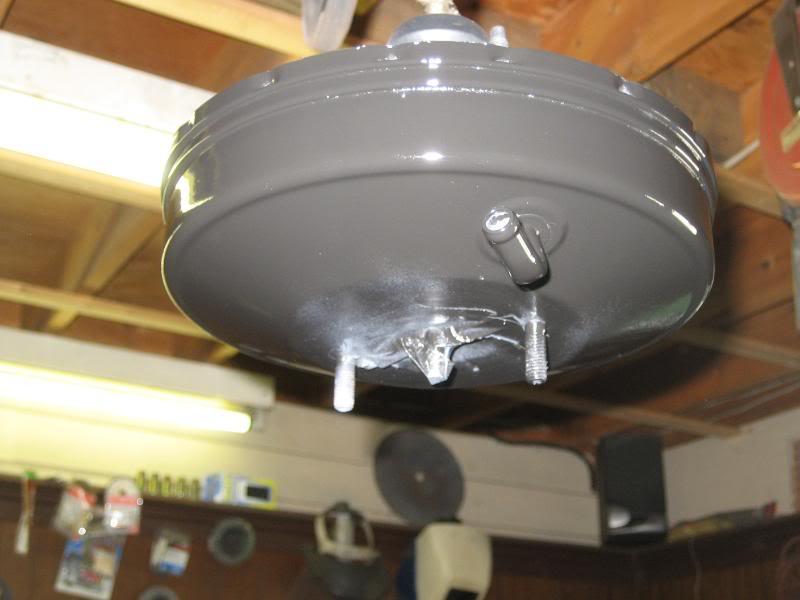
prepped/primed/painted the brake booster.
Took apart the starter, cleaned it up some and painted it as well.
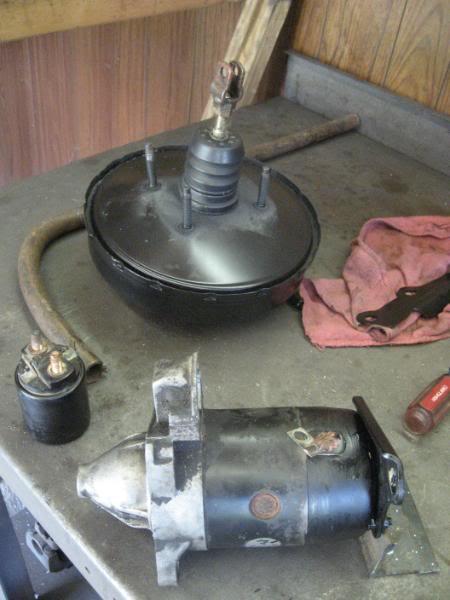
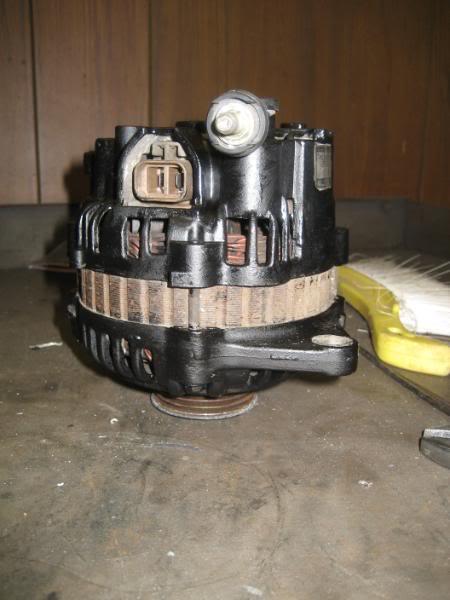
Painted the alternator....For the starter and alternator I used the brake caliper paint again as I figured it would hold up to the heat a bit better
painted the front bumper supports
and installed the access panels back in the car because I kept tripping over them
Here's another shot of the engine bay before tear down
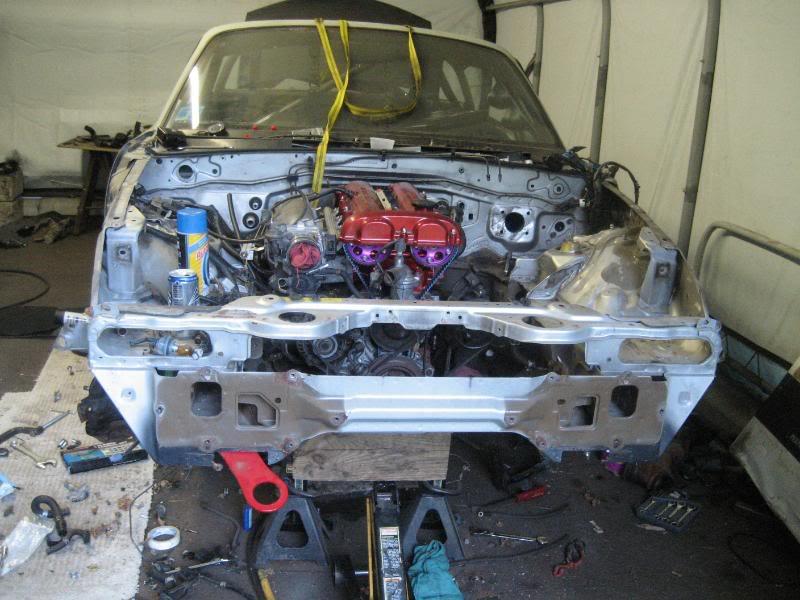
I removed both fenders as well. Took the intercooler and radiator back out and anything else that would interfere with the painting off the engine bay. I started with the driver's side as it's much easier.
it's filthy

during the process of painting
driver's side done
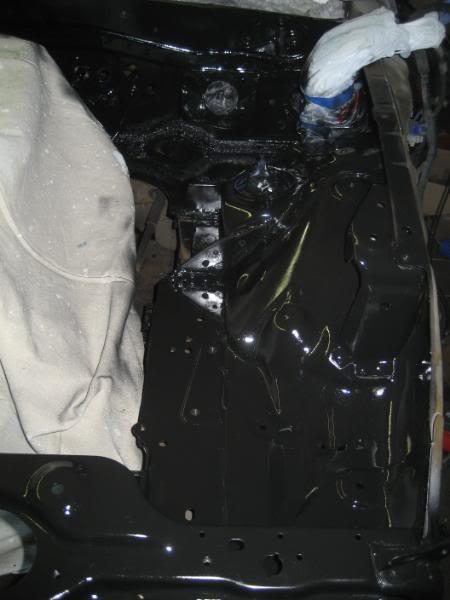
again, the engine bay is being painted in satin black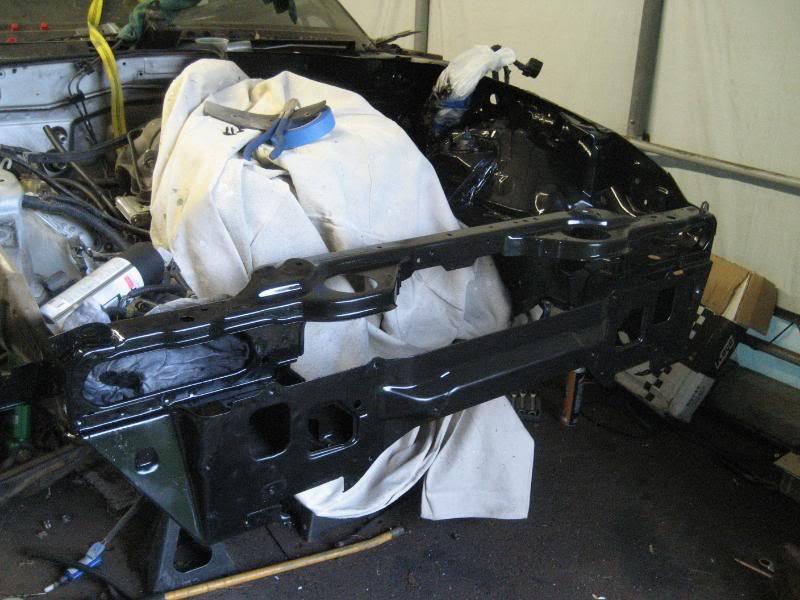
The camera makes the paint look weird for some odd reason, but it came out perfect (just an fyi).
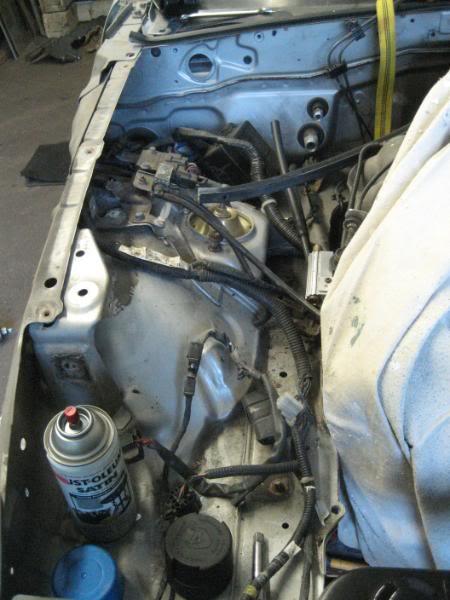
Now the passenger side....sigh, there's significantly more junk over here
All done
close up

What a significant difference. I'm much happier with the engine bay now.
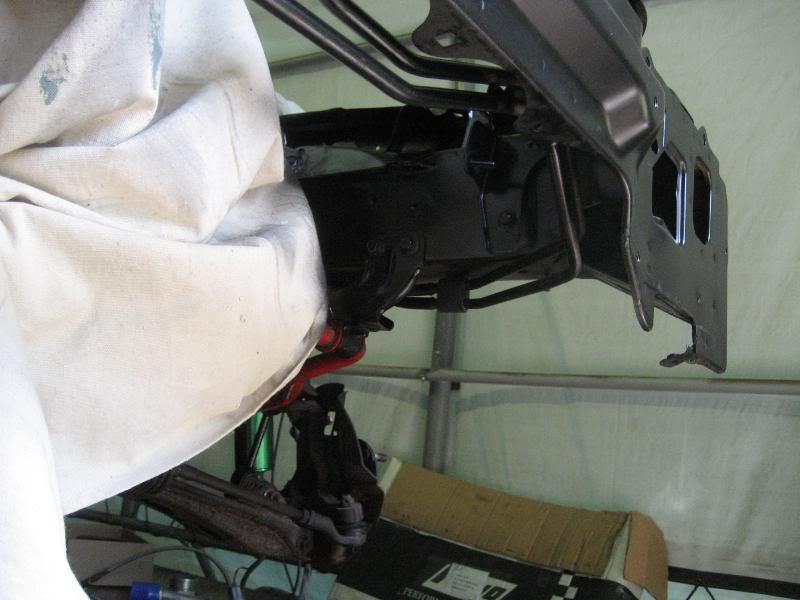
2 more of the underside
driver's side
passenger side

Now to make the bracket so I can box the frame back in. I got a piece of 1/8" C channel and cut it to fit. I also made 2 tabs, one to go between the existing supports, and one to be welded on the forward edge of the bracket. Here they are cut out and cleaned up with the grinder.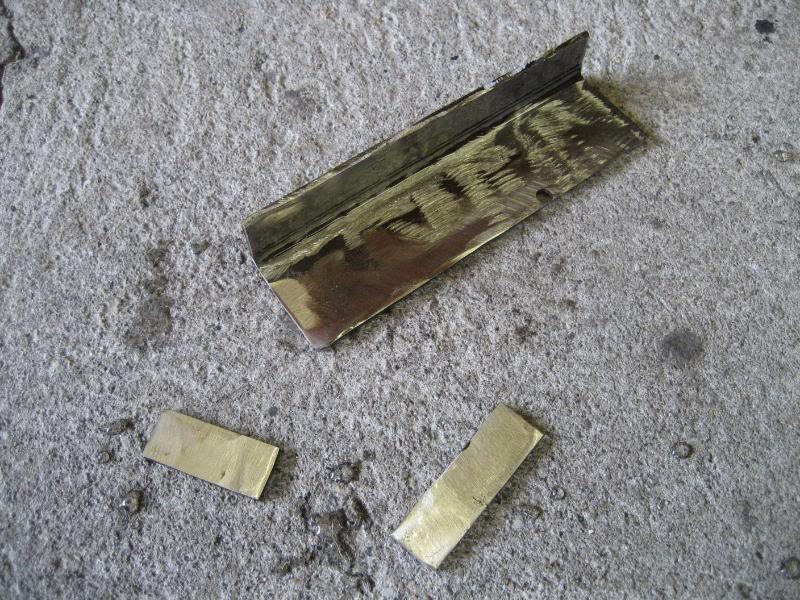
Tomorrow morning we start welding, so I'll have some more exciting updates tomorrow. I found a shop to bore out the center hole in my rotors, so I'm dropping them off Monday. It's starting to come together.
8/27/2008
ok welding time.
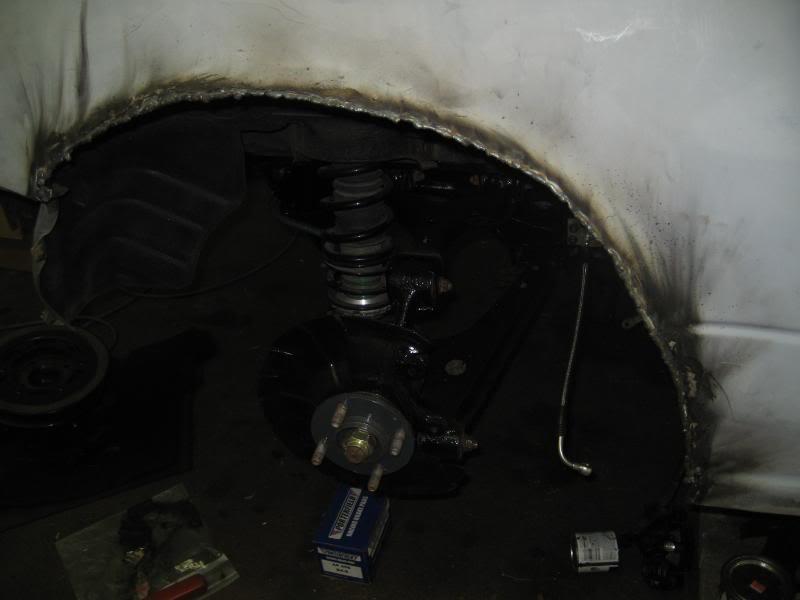
I got just about everything that needs to be welded done minus the clutch fork and exhaust, which must wait until everything is back in the car so I know how/where to route it. We started with the rear fenders. I ran a grinder over them to clean them up and clamped them together as we welded them up.
Here is a shot of both fenders all welded up before I cleaned them up a bit. I didn't go nuts smoothing the welds down as they are going to be covered anyways.
passenger rear fender
body filler burns
This time I ground about an inch back from the weld joint before we started
and with a coat of 3m undercoat
Here are some of the brackets I made for the next steps...
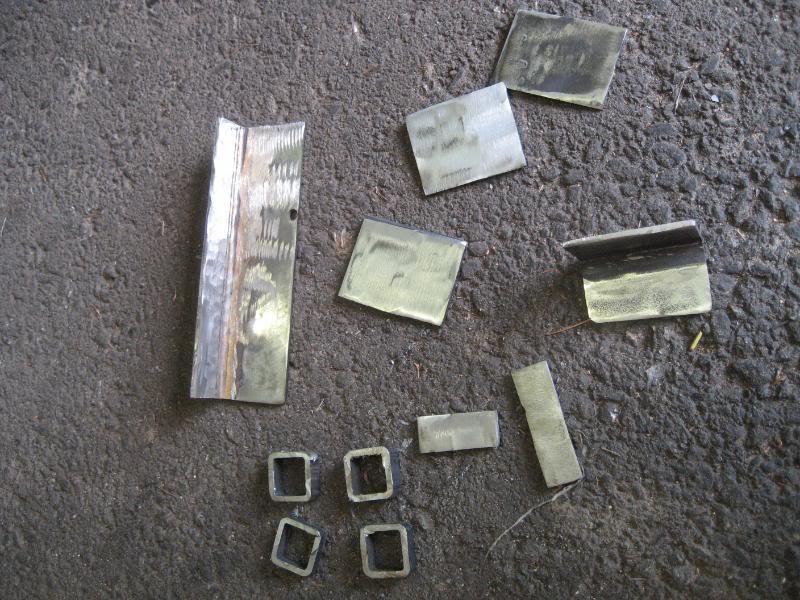
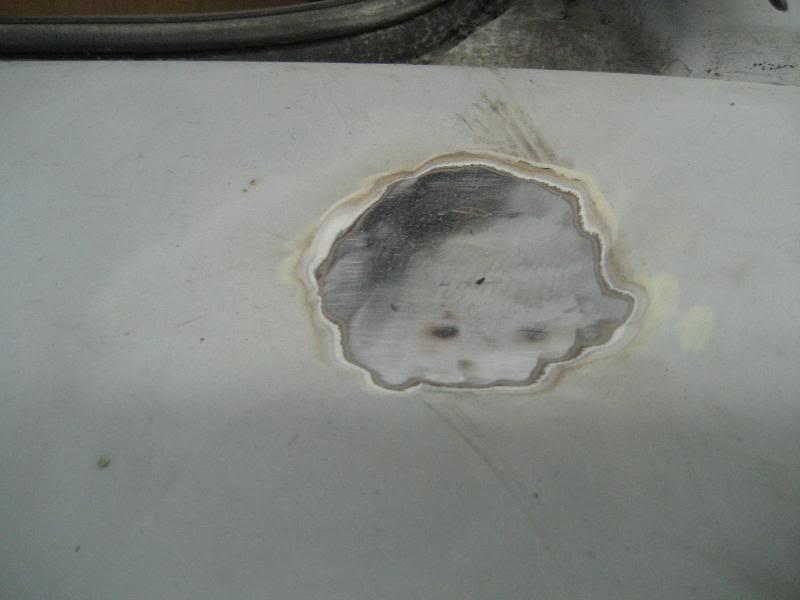
I ditched the original bracket idea for the frame notch as I was thinking and I don't want to have to worry about it breaking, so I cut out another piece of channel to fit in between the bolts for the k member (all the way to the right) 2 of the 3 "squares" are end plates for the big angle bracket, and one is for the rear antenna hole. Here is the antenna hole welded up
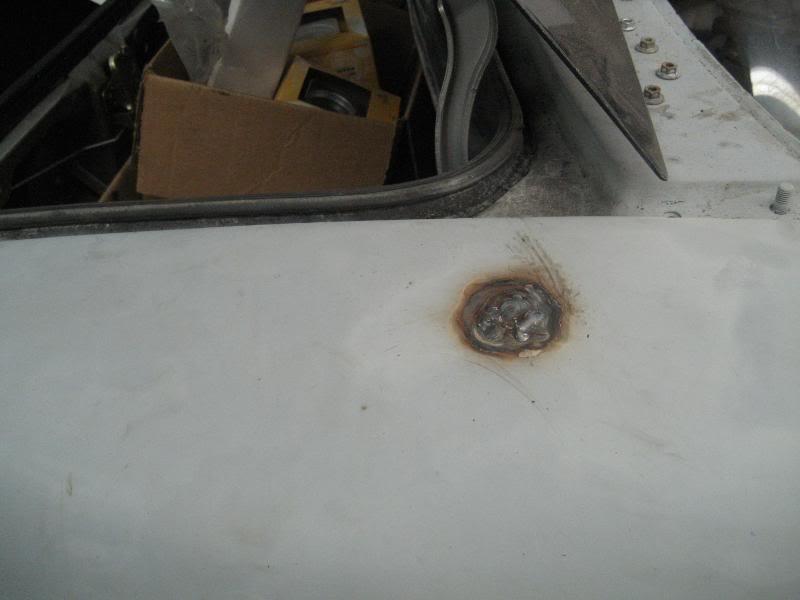
it cleaned up pretty nicely with the grinder
Since I no longer have the PPF, I needed some way to hang the wire bundle that used to mount directly to the PPF. I cut out 4 pieces of square tubing and welded them to the upper inside of the transmission tunnel, like so:
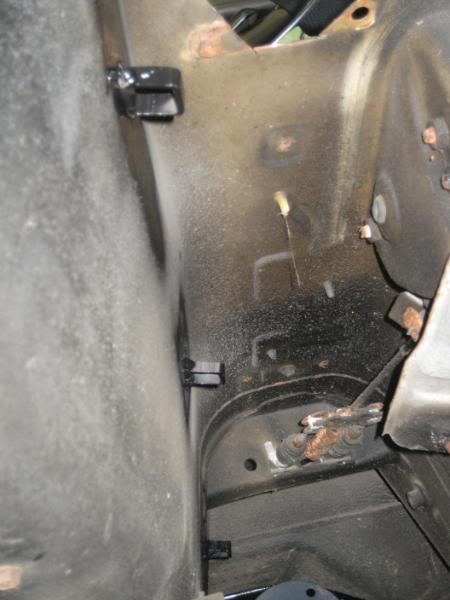
I'll either use a hose clamp or a zip tie to keep the wire tucked up nice and high and out of harm's way.
Now on to the main event. Here is what I am working with. I cut out this section so that I wouldn't have to modify the manifold.
Next I got out the dremel tool and cleaned up all the weld surfaces so there would be a good surface to weld on.
Here is a shot of the support gusset. It is welded on 3 sides. The welder tip was too large to get to the side facing the motor, but it should be plenty strong.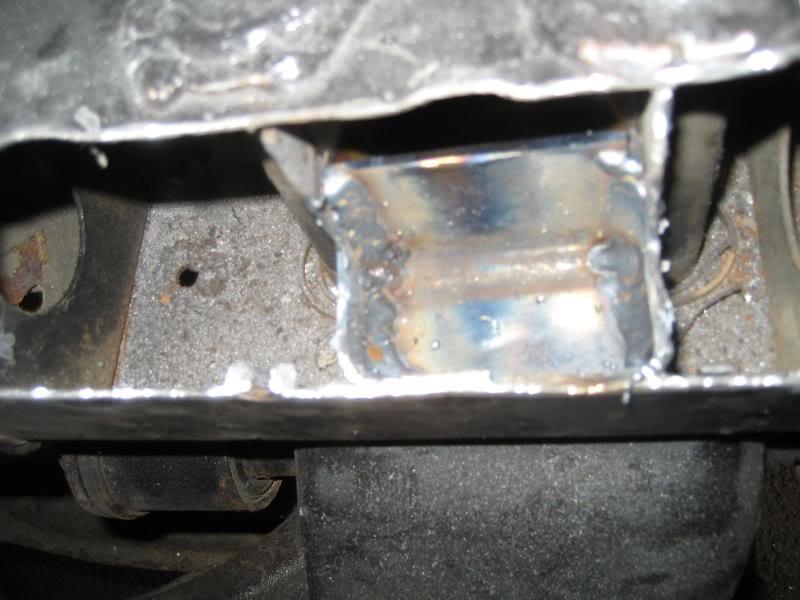
Here are 2 end plates burned in and the big angle bracket tacked in place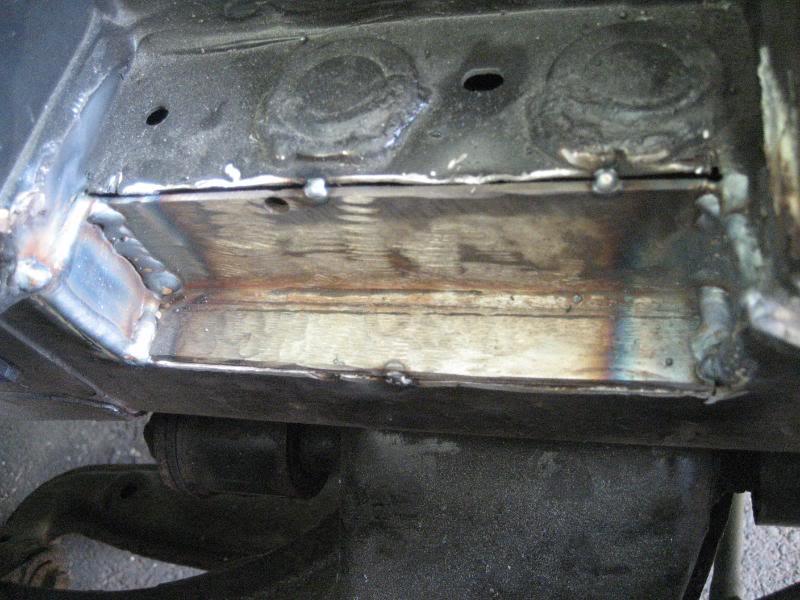
and all burned in...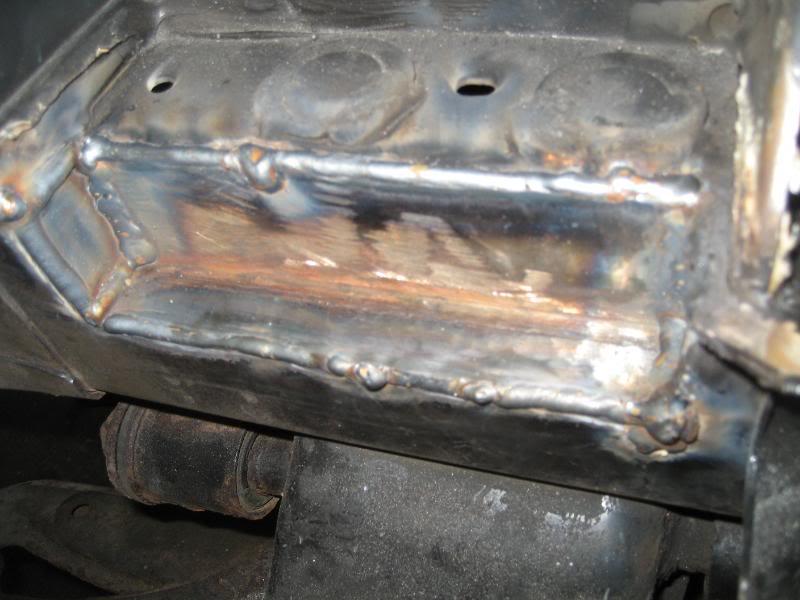
Well a little time with the flap disc on the grinder to smooth the welds out and some paint and I am good to go! I'm planning another big weekend for the car this weekend so I'll have more updates to follow. I'm on the downward slope now!
9/3/2008
swung by the car tonight and picked up the camera. Here are a couple of the pics I took this past weekend.
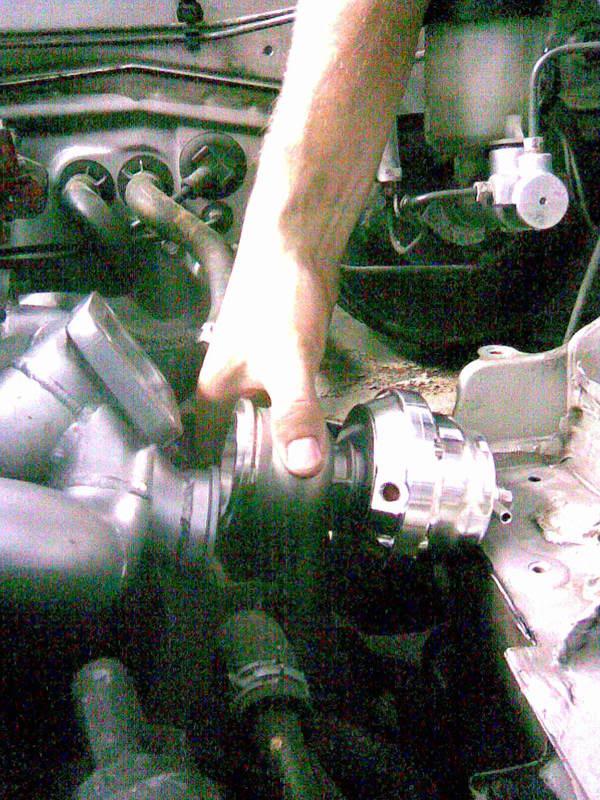
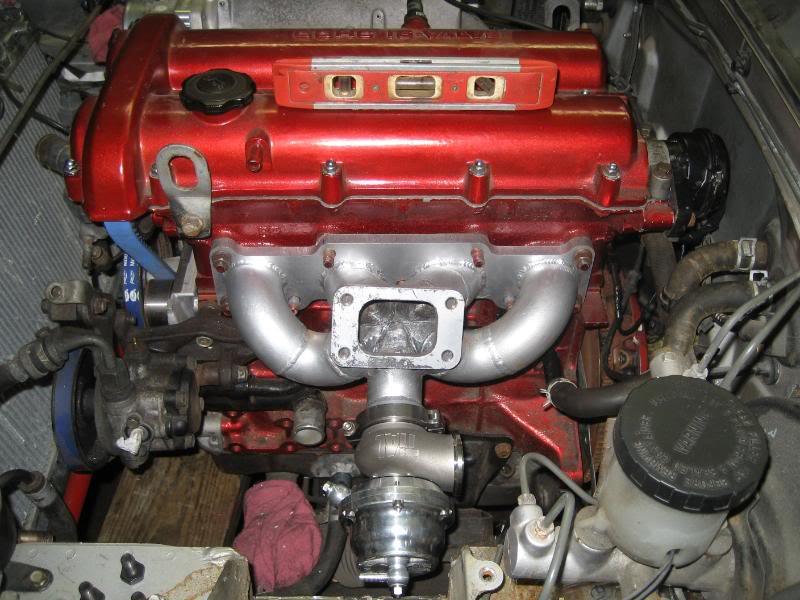
Took the cover off, and started installing components. First up was the manifold, wastegate, and turbo to see if all my hard work actually paid off.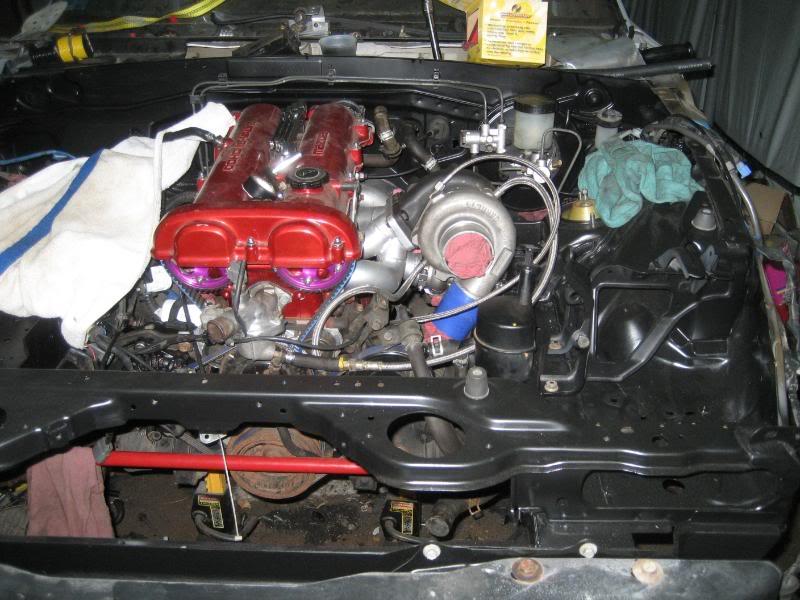
Oh and it sure did! 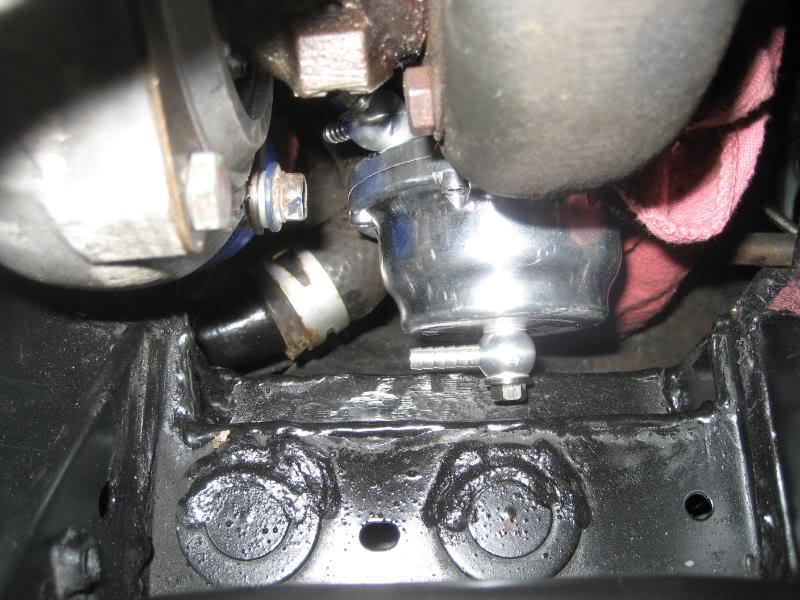
The wastegate will sit about 1" further back as the engine right now is leaning forward a bit. I'm pleased with how it came out though. Here's a shot from up front.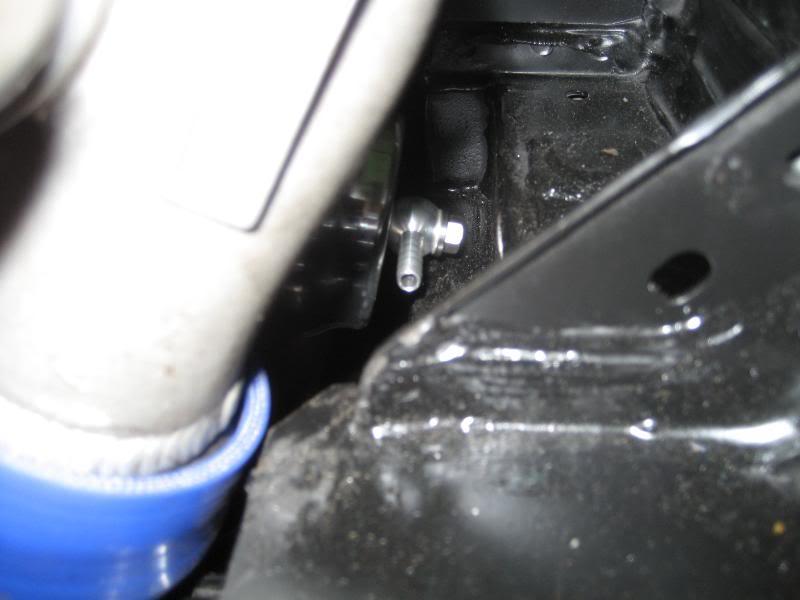
Next up I decided what the hell, I'm going to hide some of these wires and remove the ones I don't need. I'm doing everything else, why stop here?
I started with the passenger side as there is more junk over here. I moved the transistor and the capacitor to outside in the upper fender, drilled new holes for them and extended the wiring harnesses for them. I might go back and change this around some, and incorporate the stock bracket, but I have to think it over some more.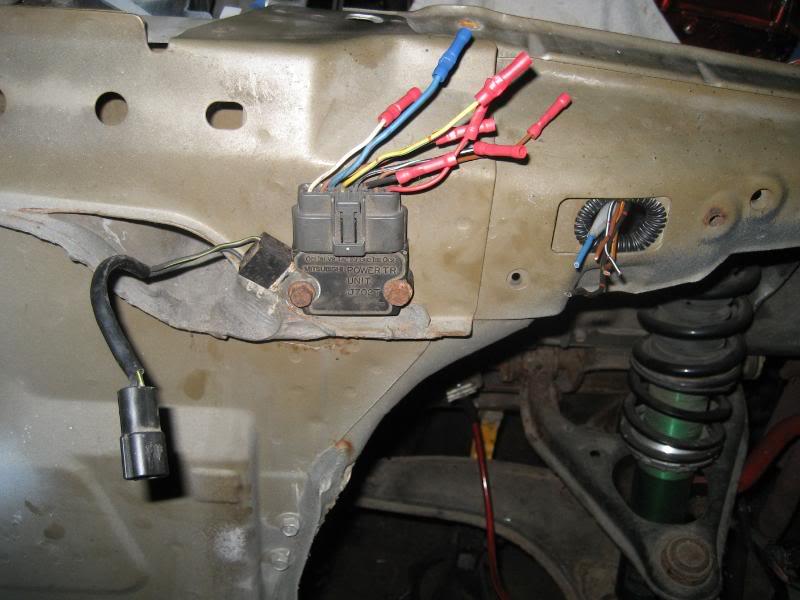
Yes, I cut off the butt connectors and soldered everything in nice and clean. I don't want to have to guess about faulty wiring splices so I figured do it right the first time. Here's a shot of them all buttoned up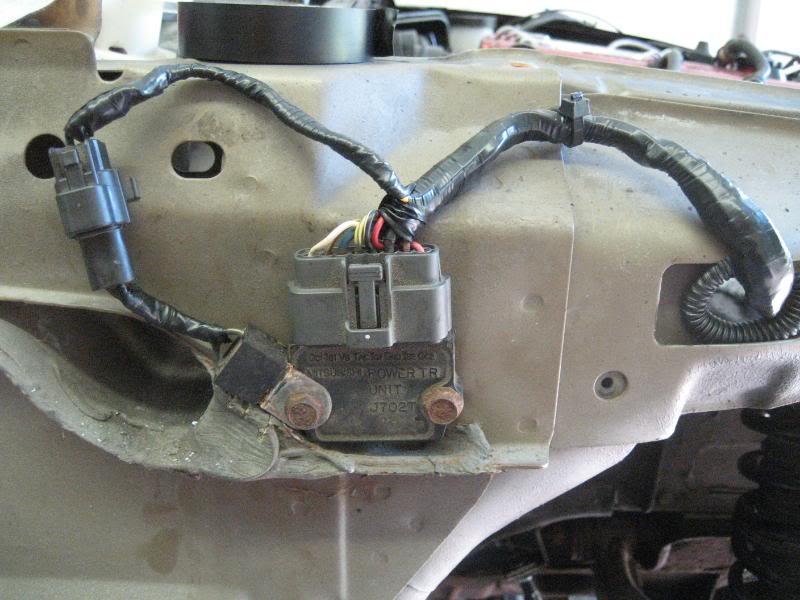
Here's the wiring after I took off the factory tape and plastic covering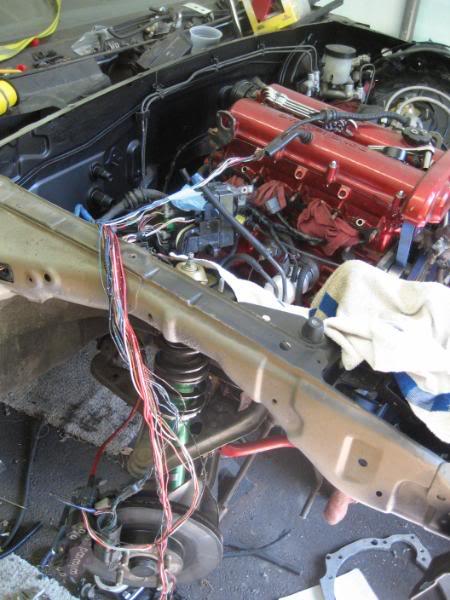
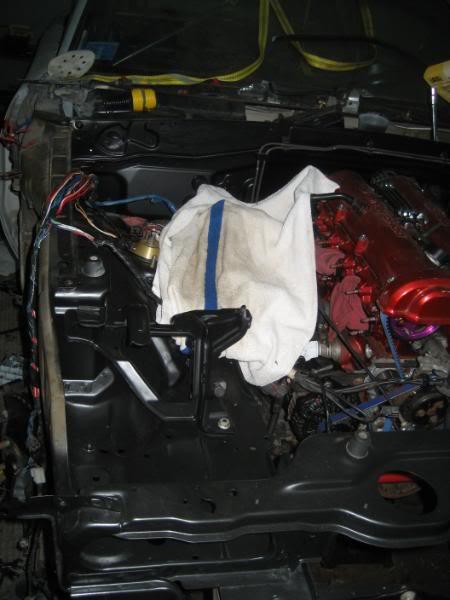
I'm keeping the towel down so I don't scratch the paint while I'm moving things around.
Got a little bored with this and decided to get back to fab work and finally finished the last big hurtle- the clutch fork. Unfortunately I forgot to take pictures during the process- just kind of got in the zone and saw the finish line up ahead. What I did was cut it just below the "line" below where the pivot ball sits, and spaced it out 1/2". I then cut out a piece of 1/8" stock in the shape of a parallelogram and welded it up at an angle, resting it on the pivot ball indent. I then cut out some side plates out of 1/8" stock and welded them to the each side. Here are some pics while I was cleaning up the welds with the grinder a bit.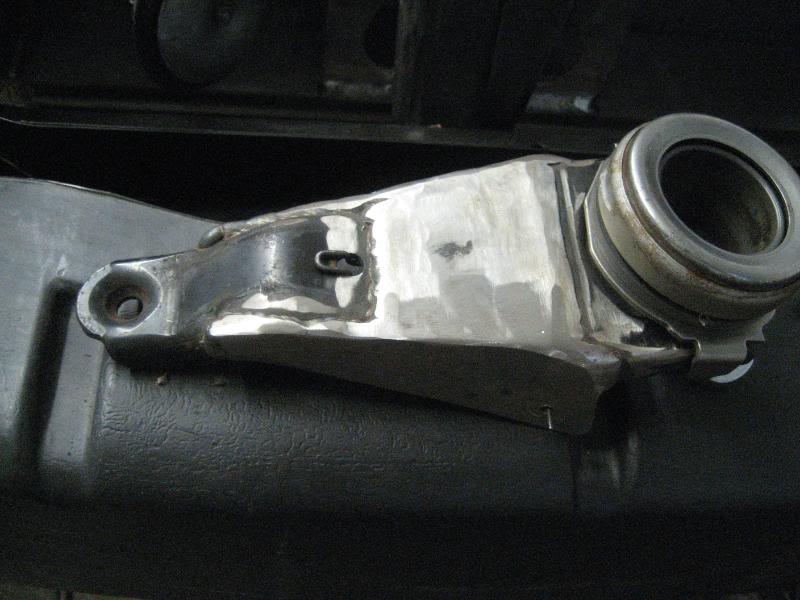

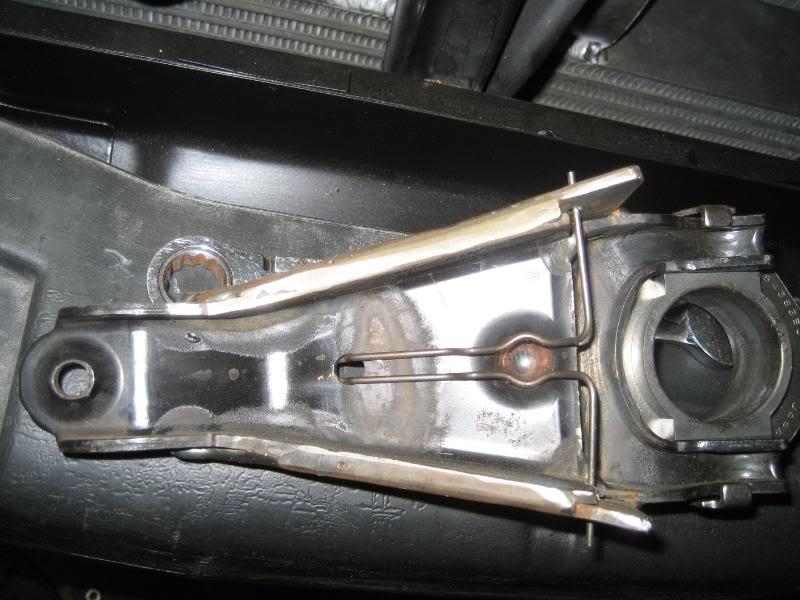
I still have to elongate the 2 holes for the retention spring, clean up the welds a bit more, and of course paint it, but you get the idea. I thought about this for a long time, and I think this is going to work out great- It certainly will be strong enough that's for sure. This weekend I'm going to start really putting things back together now. Right now the last bit of fab work is going to be the exhaust, which i need everything basically back in the car so I know how much room I have to play with. I'm hoping to stuff a 3" turbo-back in there somehow.
9/17/2008
I started a mild wire tuck. I'm not 100% impressed with how it came out, but it'll stay for now. Eventually I'm going to go back and hide everything (hard lines included).
Here's the passenger side: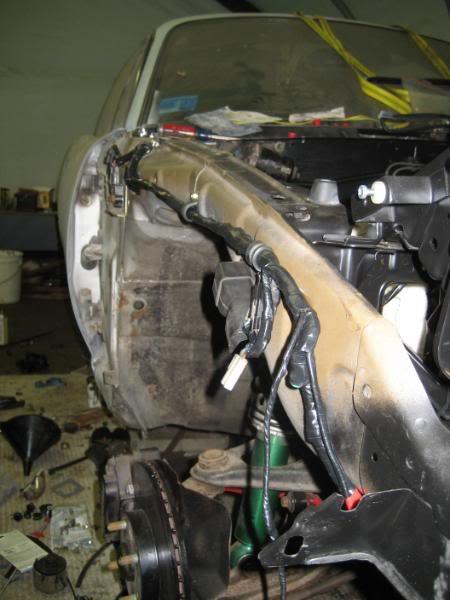
I'm going to run the fan, power steering pump, and t-stat temp sensor wires through here. This is the initial fit.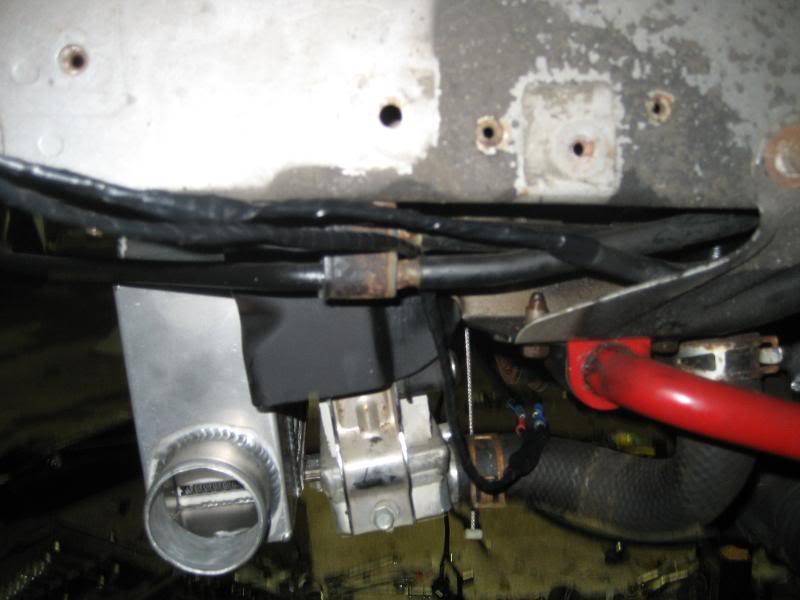
they'll go down here between the block and ps bracket, and follow the lower rad hose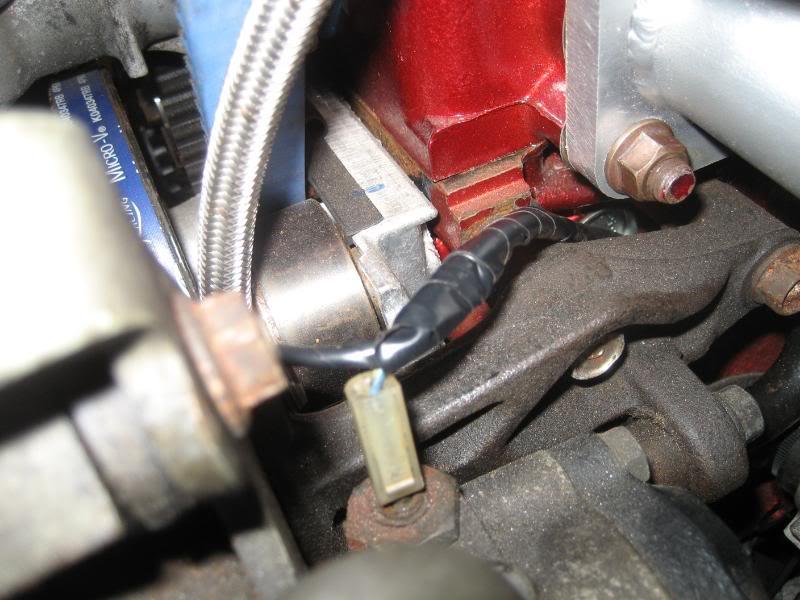
driver's side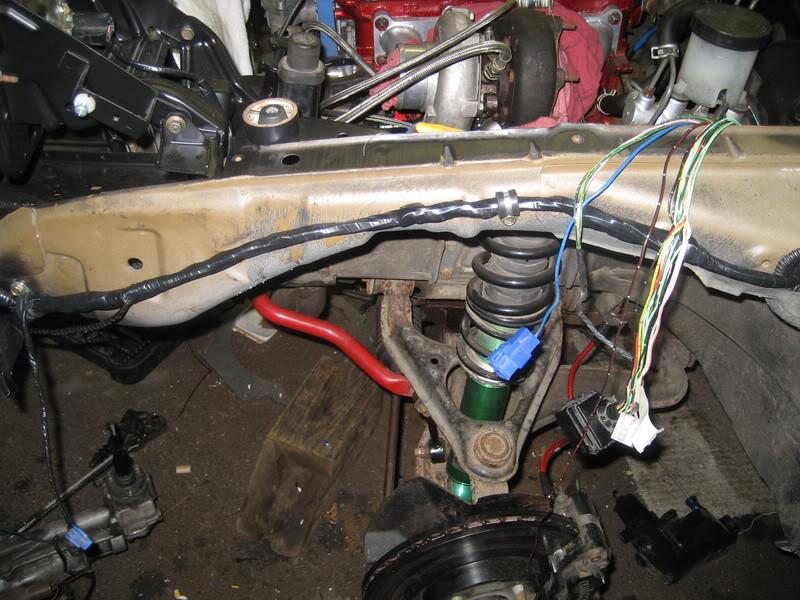
I forgot to take more pics of the wiring, I finished up at 3:30 am so I was a little tired.
Got the rear rotors back from the machine shop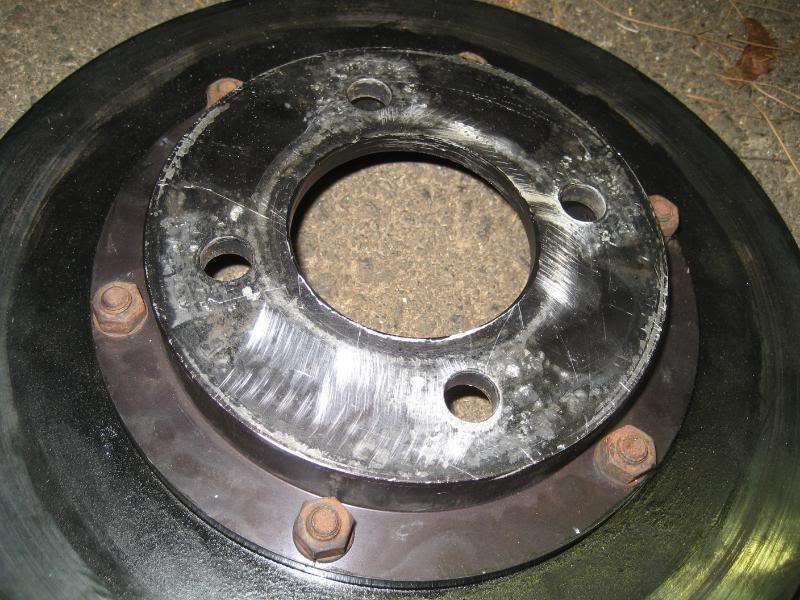
I had to make a cut to the dust shield for the calipers to fit with the new brackets.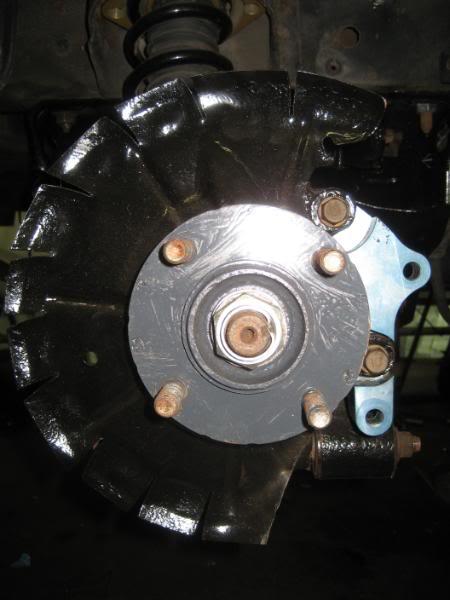
Then I installed my calipers. (old ones were a little iffy so I just got new ones. Better safe than sorry.
pass side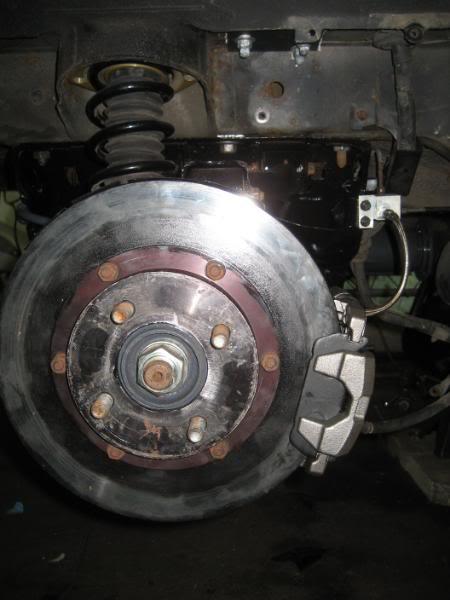
and the bling bling driver's side (no idea why this one is gold)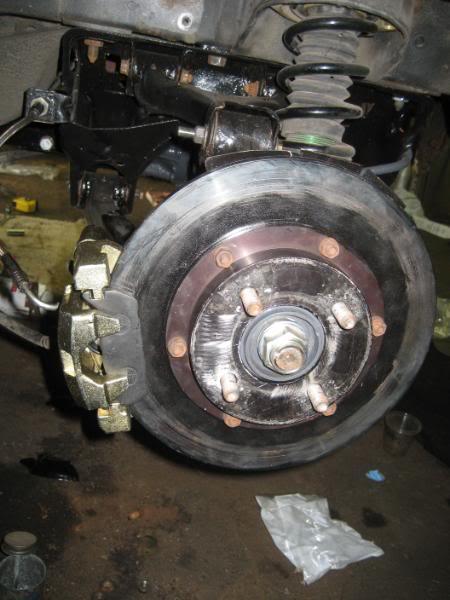
I'm using porterfield r4s pads all around.
Next, I installed the new clutch fork. and slave cylinder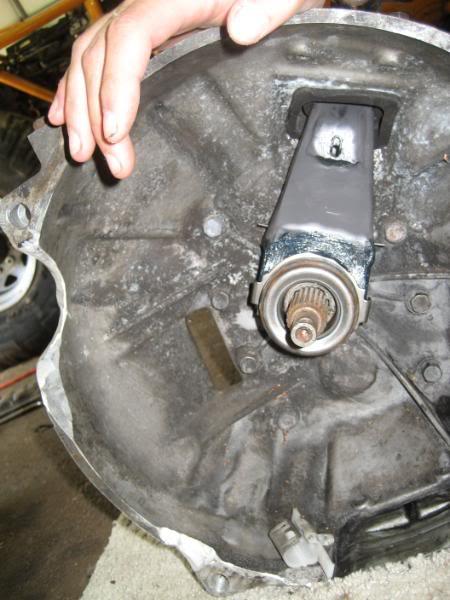
Then I fought with the tranny and finally got it in and bolted down. 
9/17/2008
then I installed the fuel injectors, dual feed fuel rail, fuel lines, injector wiring harness, and intake manifold. I'm not 100% sure where I'm going to mount the section of fuel rail holding the fpr yet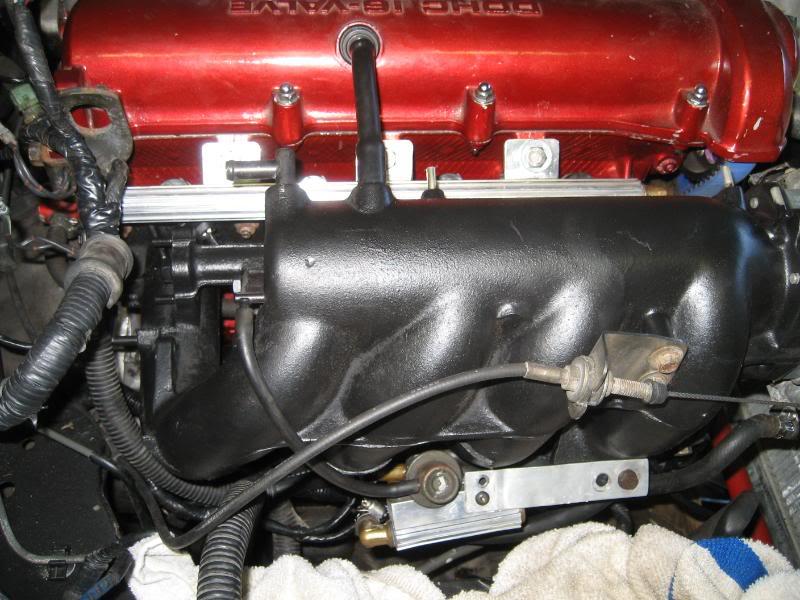
More to come this weekend.
1/14/2009
Nothing new to report on the car just yet, but I thought I'd give an update anyways. I got 2nd and 3rd degree burns on my right hand on New Year's Eve from a big firework exploding accidentially in my hand (long story, no I didn't light it, and no I don't feel like typing it all out ) so I can't do the things I would like to be able to. Ive been taking it easy for a while to let it heal, but I just went last night and picked up the bumpers and fenders and a couple other misc. pieces that I'm going to prep and paint. I'm going nuts from not doing anything productive anymore. I figure I should be able to do this with only 1 hand (i'm left handed so at least I have that going for me). I am planning on starting tongiht after work, so hopefully I will have more to report.
2/2/2009
Very small update:
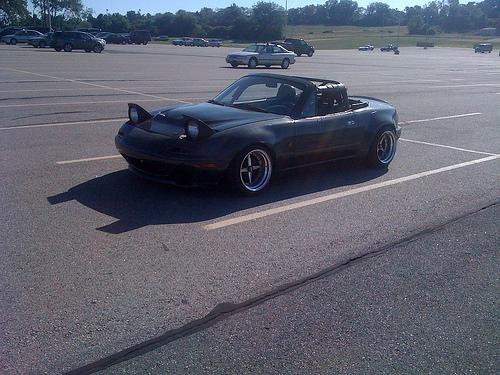
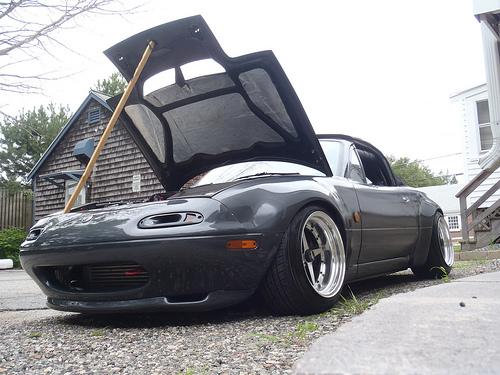
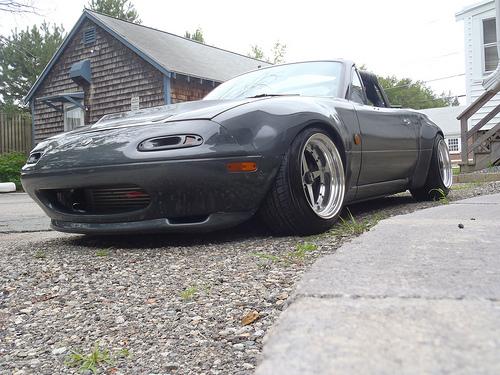
The car is back on the ground, after being on jack stands for over a year! It will be going right back up on them once I am finished with the lift/axles for my jeep though #-o . I had to move it to make room for my jeep in the garage. I did take a few pics though. This will most likely end up being the ride height. It's a little hard to see without fenders, bumpers, etc., but damn does it look good! Please hold all of the "your tires are too small" comments. Yes I know they are too small and they will be replaced, but not for the time being. When my bank account stops getting beaten I'll replace them.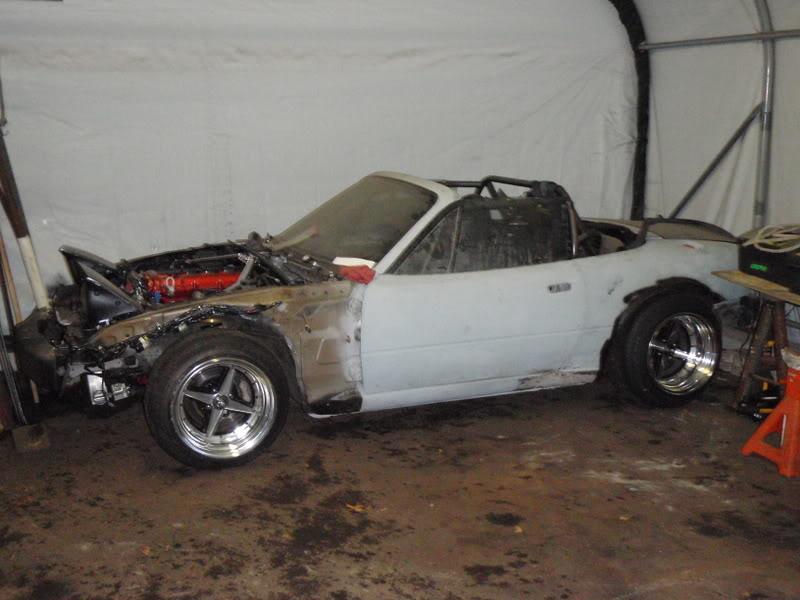
I fell in love with it all over again seeing it for the first time on the ground with the wheels on it.
Here's a shot showing how wide the rims are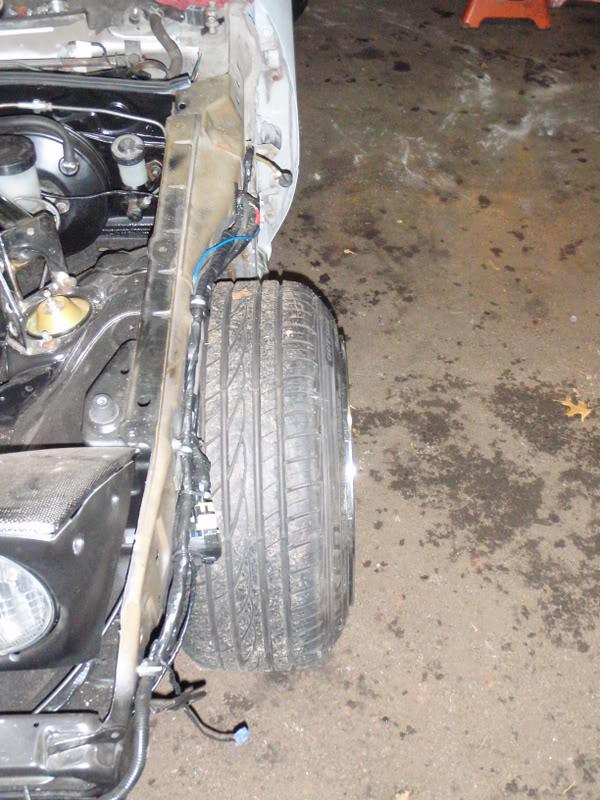
2/17/2009
shot of the engine bay from above...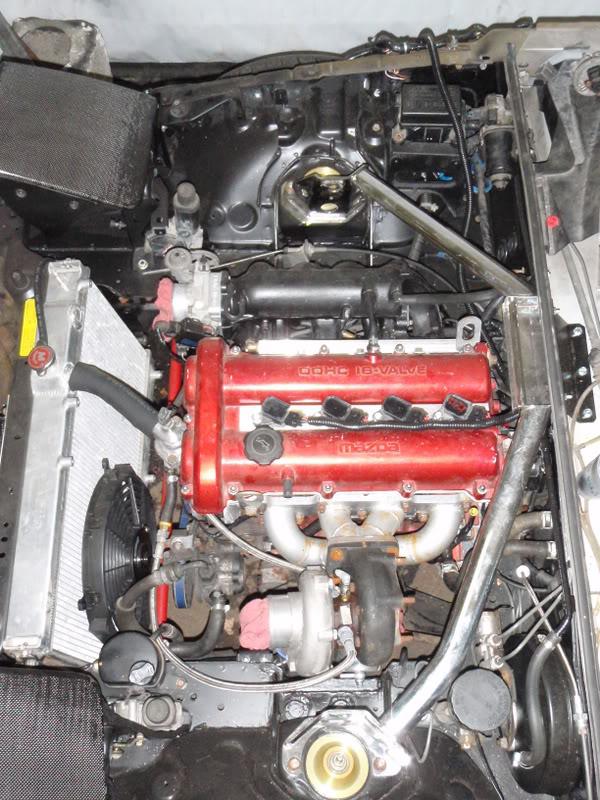
Still a lot more to do. Still working on my jeep, so progress on the car has come to a screeching halt.
7/6/2009
back from the dead. So the jeep is done, I'm a happily married man and I've been to Hawaii. Time to start focusing on the miata again. I'm a little torn about what to do though. Looking for opinions.
What I have remaining:
1. fab up downpipe, exhaust
2. redo intercooler piping (didn't like the way it turned out)
3. order megasquirt
4. paint/bodywork
5. buy battery
6. misc. ods and ends (oil feed line is too long, route vacuum lines, couple wiring issues, etc)
7. fill with fluids
I'm almost there, but am getting worried about engine break in with all the new stuff. I am toying with the idea of buying an OEM, or dare I say it, one of those crappy ebay headers for the sole purpose of breaking in the engine and making sure all my wiring changes actually work, then once the motor is broken in, put the turbo stuff back on and head to the dyno. I still have the 1.6l injectors and ECU, and I'm sure I could rig up something to get me by for an exhaust. Thoughts?
9/5/2009
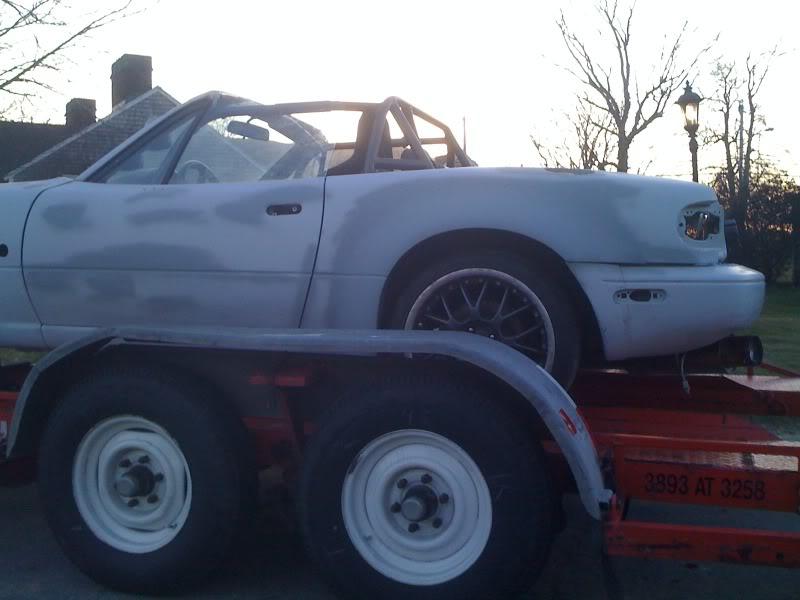
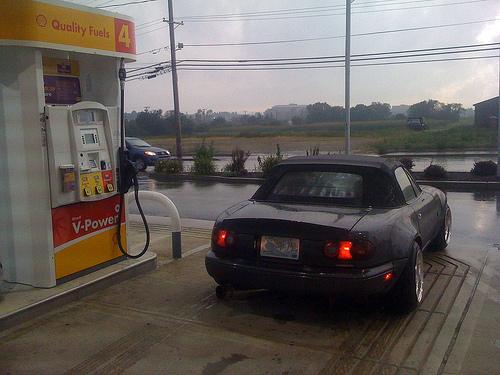
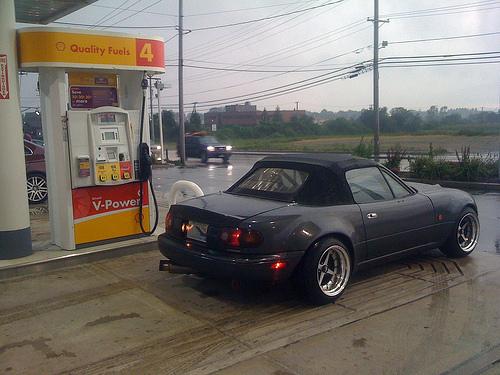
I finally have something worth writing down! I recently towed the car to my house so I can start working on it again. Here's it's new home: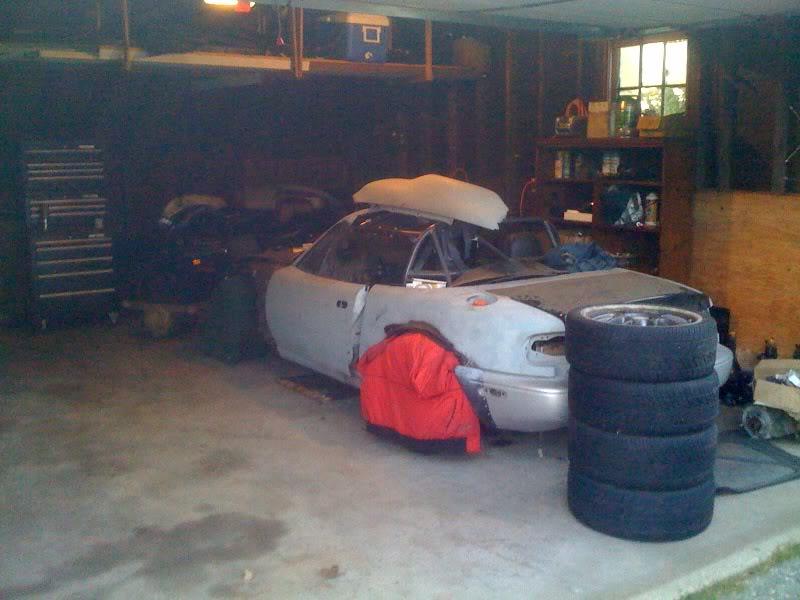
I'm still in the unpacking/organizing stage, so it's a bit of a mess in there. I picked up some 17s to use as rollers so when the cars at the exhaust and body shops I won't have to worry about them being damaged/stolen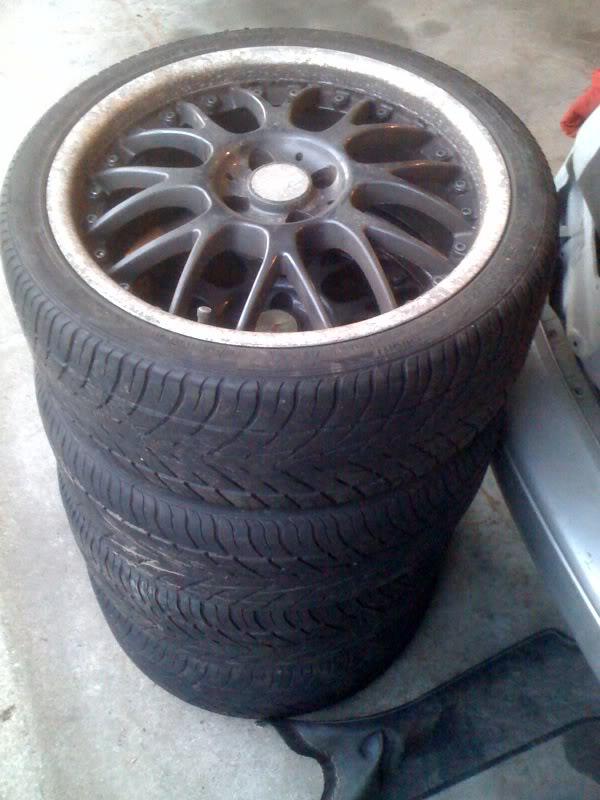
Anyways, I'm excited to get back into it, it's been far too long!
9/9/2009
Just ordered a Megasquirt from Braineack over on miataturbo with:
-standalone harness
-AFM delete
-4 bar map sensor
Gonna do work this weekend, so I'll have more to update then.
9/12/2009
this weekend made some backward progress:
yanked the tranny back out, cleaned it up and painted it.
yanked the motor back out
took off all the crap in the way of the oil pump and installed a set of billet oil pump gears. 8500 rpm better be worth it! Planning to have the motor back in the car by next weekend.
I was in the zone, so I forgot to take pics. Here are a couple:
I scored a low mileage TII tranny, so since I was pulling it anyways, I decided to go ahead and swap it in and use my current one for a spare. I swapped bellhousings between transmissions because I had to modify it so much to fit with the adapter plate
cleaned, and painted: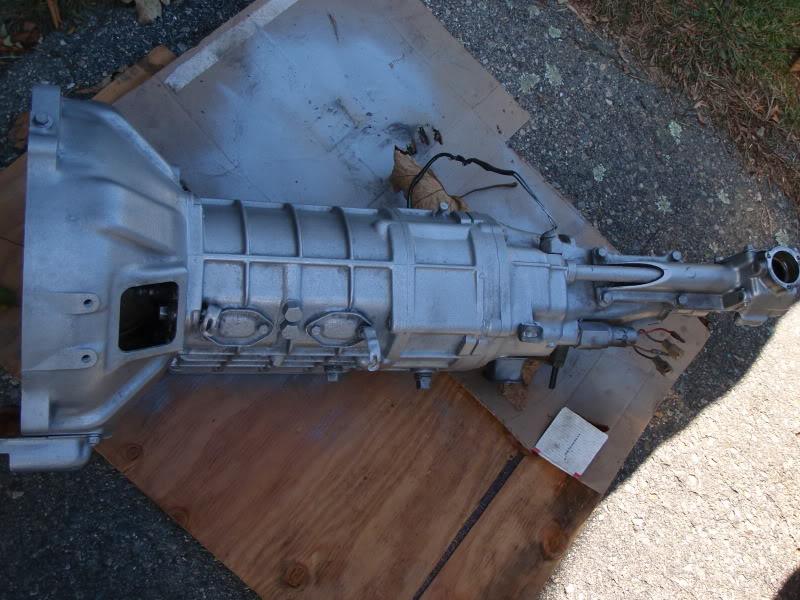
and the reason why I ripped everything out of the car- new billet oil pump gears to go in (stock ones are on the white pad):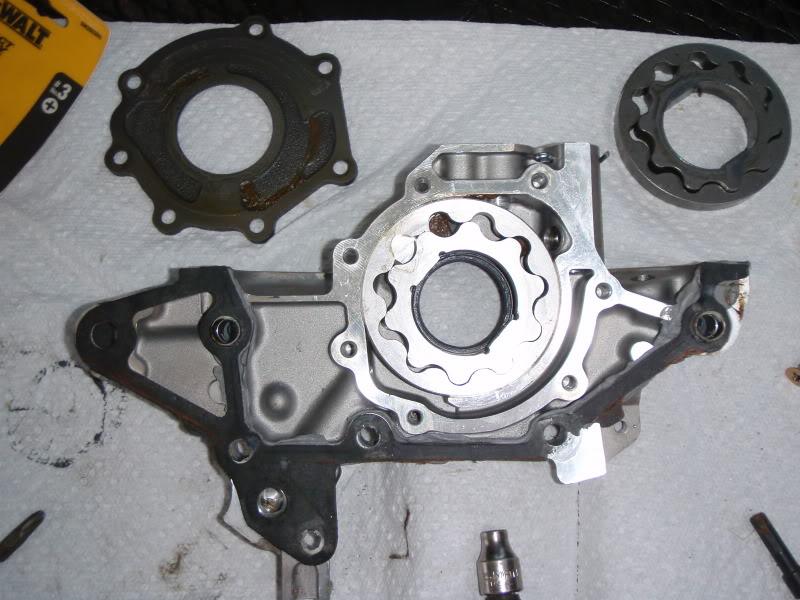
9/21/2009
Got tired of gathering friends and dead-lifting the motor in and out, so I picked up a new 2 ton engine hoist. Great decision.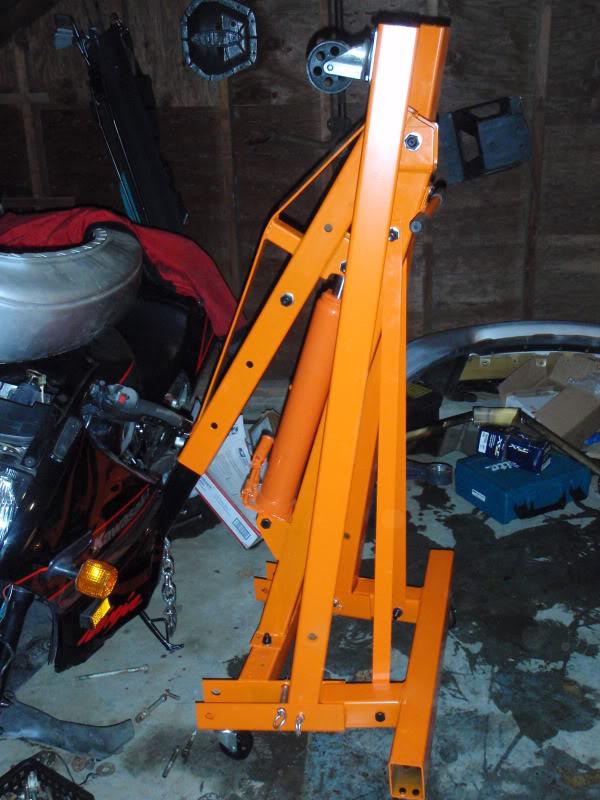
Loaded the motor up on it and started putting it all back together: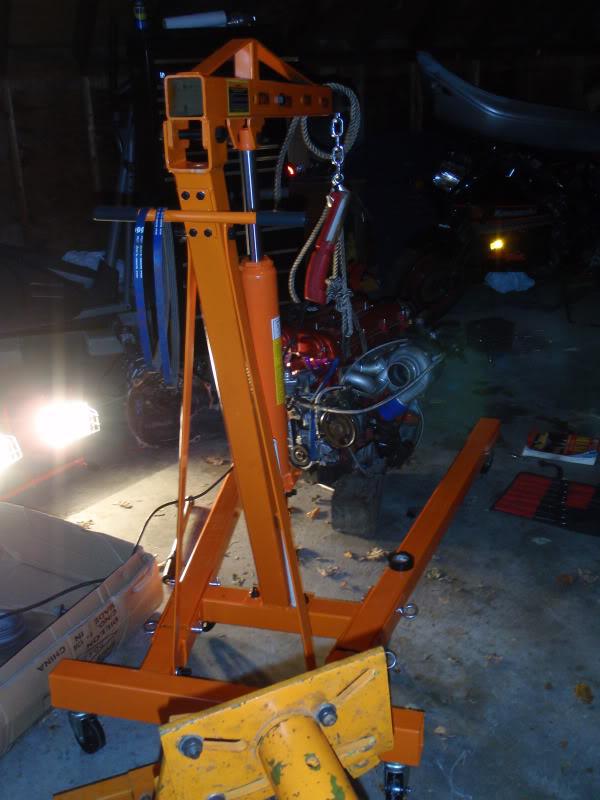
I finally broke down and stripped and painted the water and crank pulleys too. I used that hand hammered paint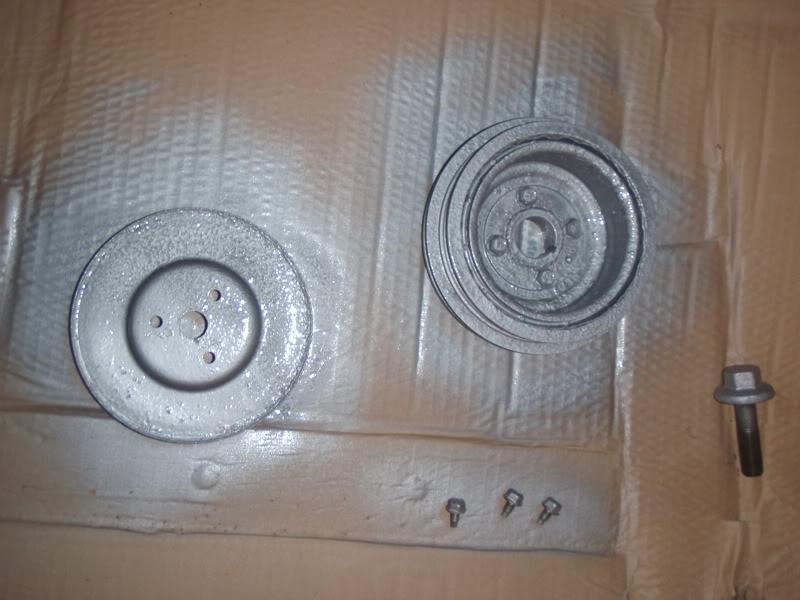
tidied up the injector wiring and fuel lines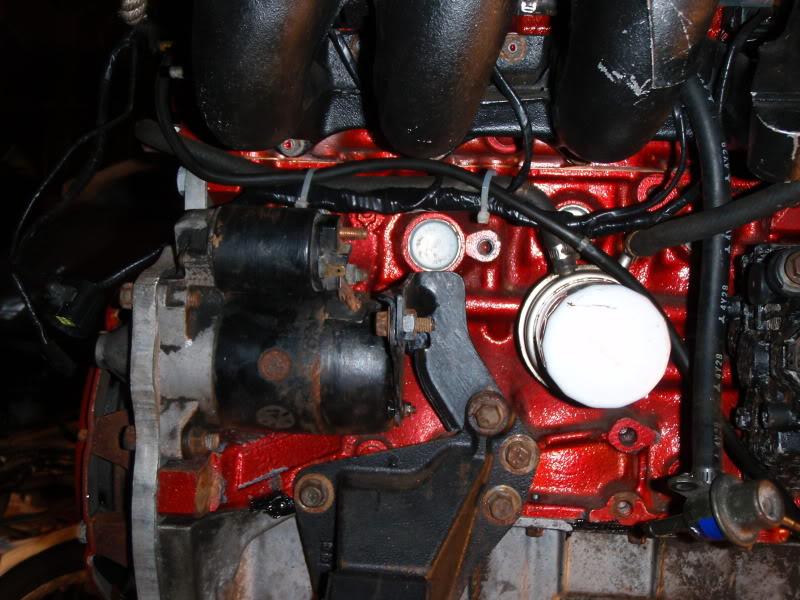
motor back together and ready to go in!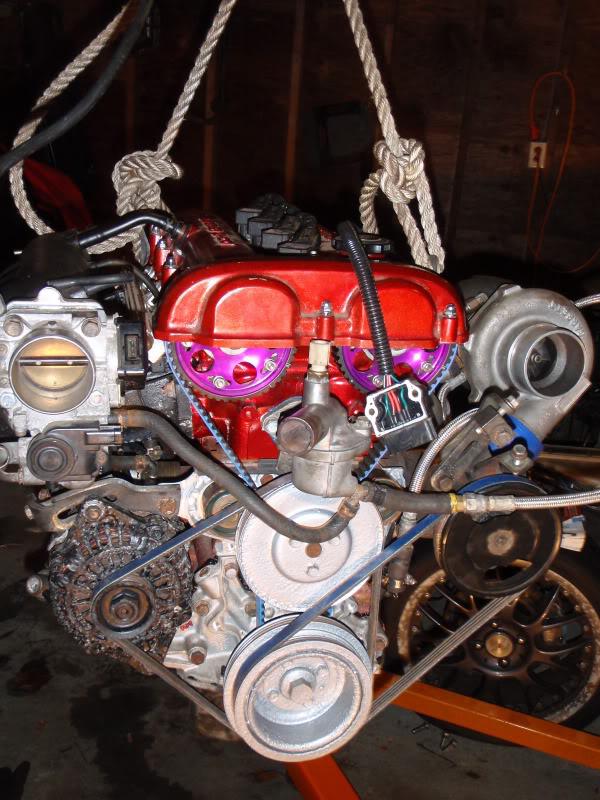
and back in the car:
I had some questions too...
what does this hardline go to (I think this was for the charcoal canister), and what does the hose connected to the subframe go to? Can they be looped together??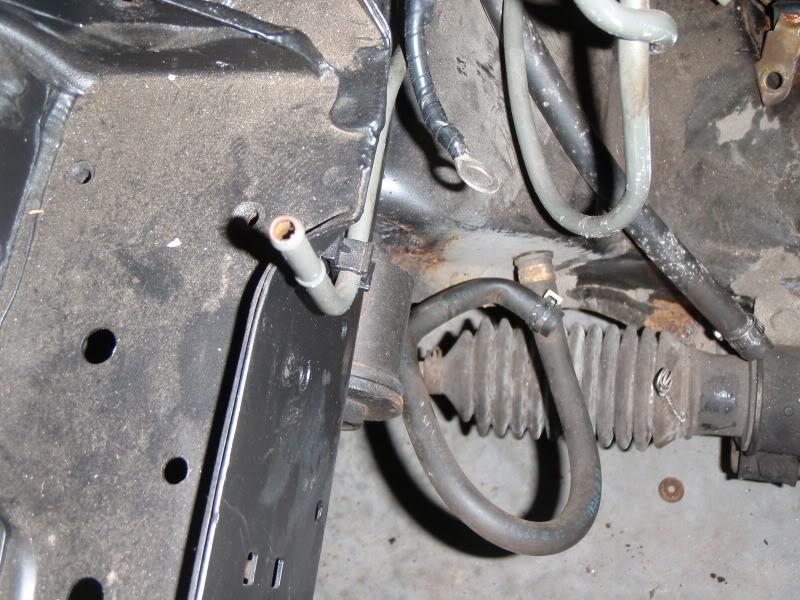
9/25/2009
transmission is back in the car, hopefully for the last time now! I also topped off the fluid in the shifter turret and installed my shortshifter: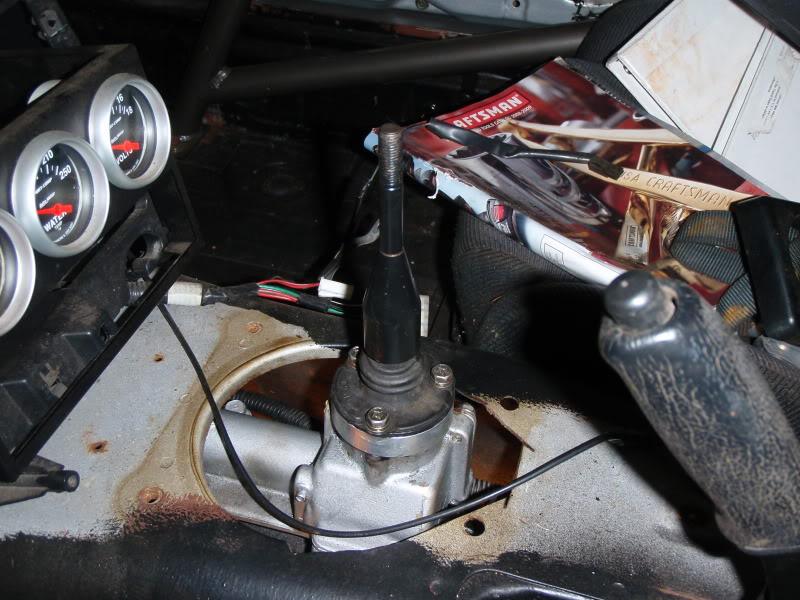
cleaned up the wires, put in the rubber boot and bolted down the center console: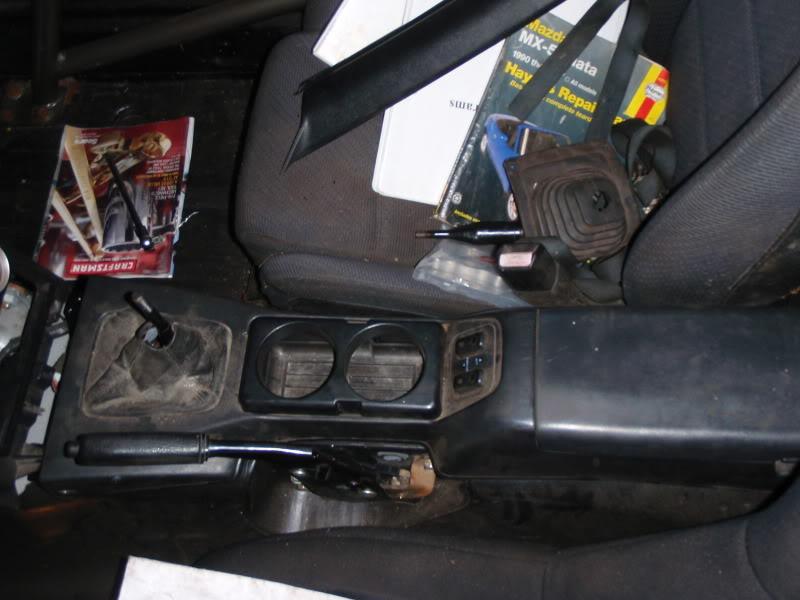
bolted in the new driveshaft: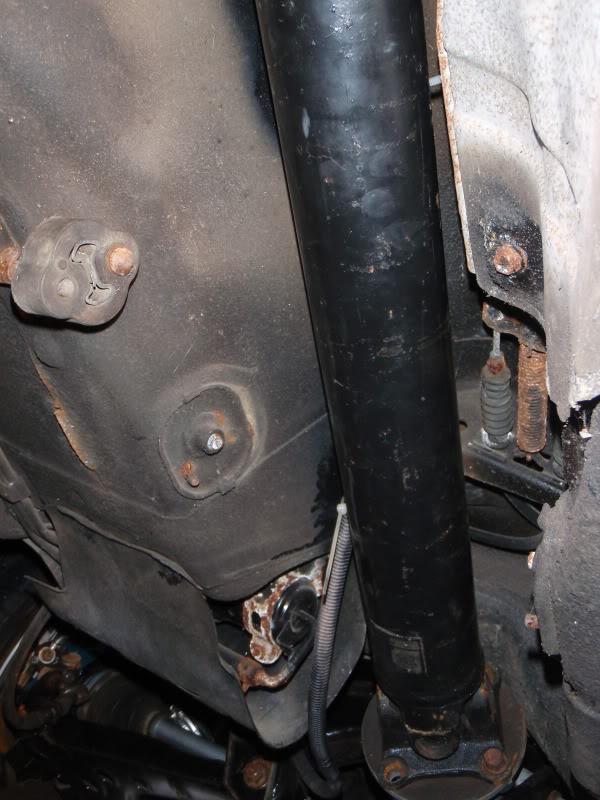
Then I plugged the wiring harness back into all the engine crap, finished up a few loose ends with the harness, and installed the front fenders, front bumper, and also the rear bumper.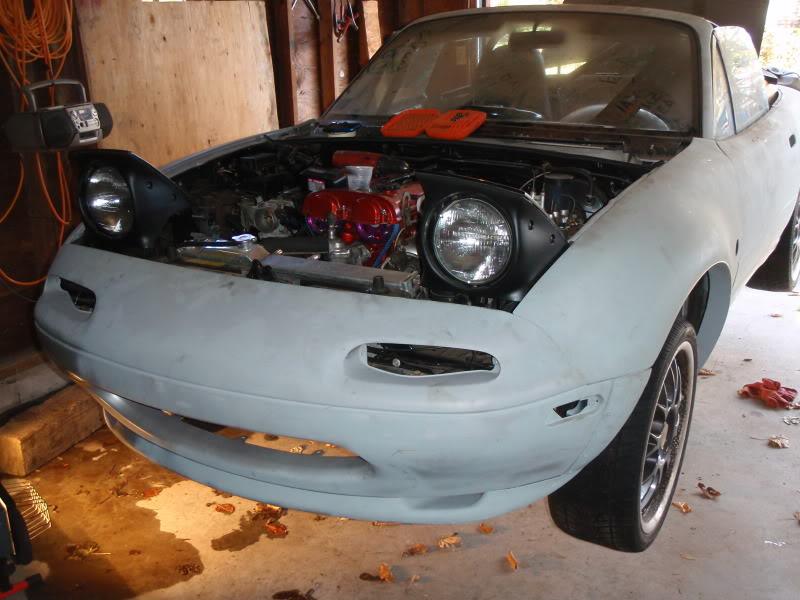
It's finally starting to look like a car! I know I'm getting close because my hardware stash is getting less and less.
11/14/2009
did a little bit today, spent more time running around than actually working on the car.
Installed my beatrush untertray. I had to get creative as from my understanding, these are supposed to be installed with out the r-package lip. Here's what I did. I got some 1/4" threaded rod, cut to fit, and sandwiched the undertray with bolts and washers, as well as the original mounting spot on the bumper. For the rear mounting, it wants you to use the space in the lower control arm bracket that my underbrace bolts to. The tray and the racing beat brace overlapped, so I just bolted the brace over the tray to hold it down in place. 
Now it sits level with the bottom of the lip, and the brake duct holes can still be used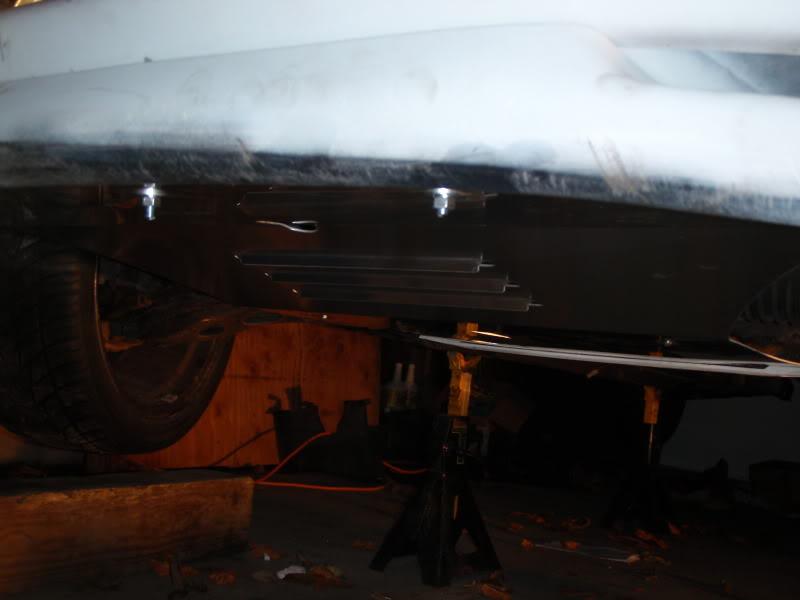
Most likely going to pack the car up tomorrow and get it ready to take to the exhaust shop hopefully this week, but we'll see.
12/4/2009
teaser pic: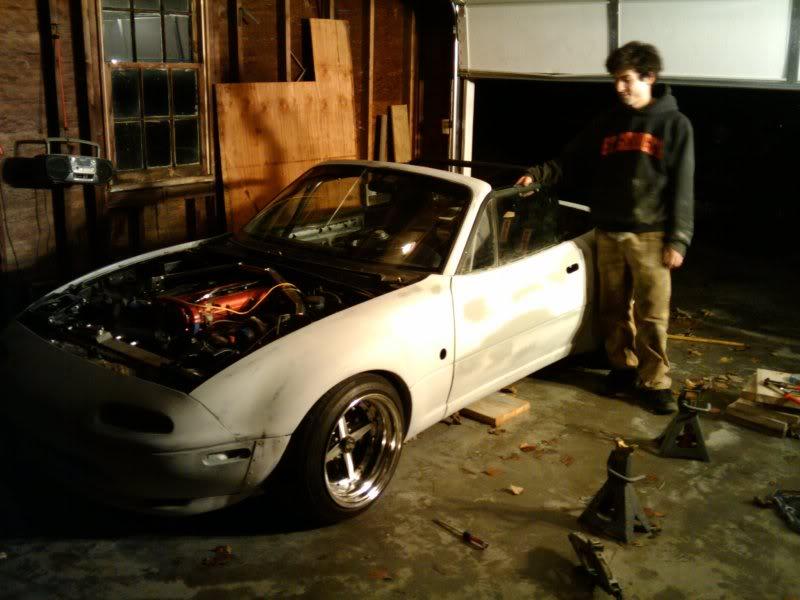
This was after all the bodywork/primer was finished. I measured the ride height, and it's currently at 11.25" from hub center to fender. Def have to raise it up some, I can't even get a screwdriver in between the tire and the fender. I'm also going to trim the lip on the flares for some more clearance too. That's me standing next to it.
3/17/2010
I broke my camera, so I'll have to use crappy iphone pics .
Turbo to downpipe flange ETD racing recommended putting the EGT probe here on the downpipe vs on the manifold itself as they've had problems with them cracking in the past. The temperature difference between the 2 locations should be negligible:
routed the wastegate dumptube back into the exhaust: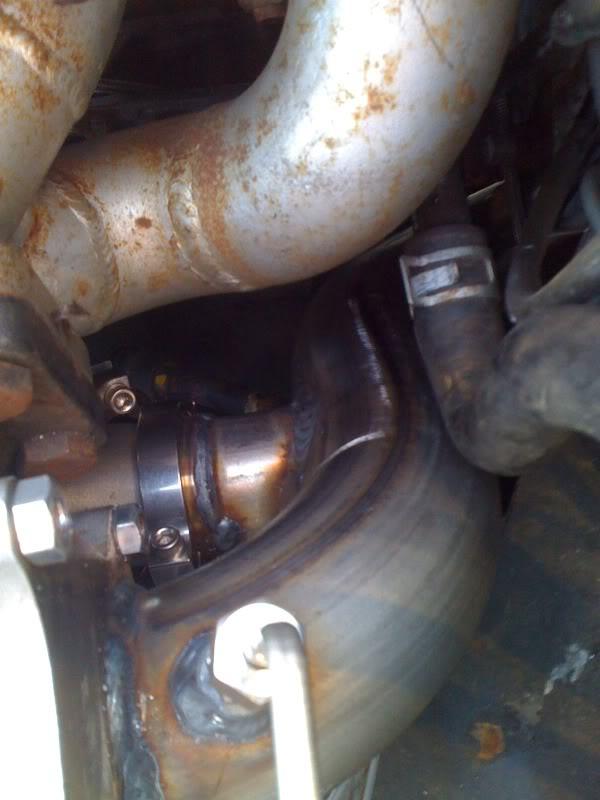
I would have liked a shallower "entry" but space was very limited. The downpipe is 2.5" (couldn't get 3" to clear the TII bellhousing), then it expands to 3" all the way back, all 409 stainless steel. There are very minimal bends, and it's tucked up fairly high for ground clearance. This thing is going to sound mean!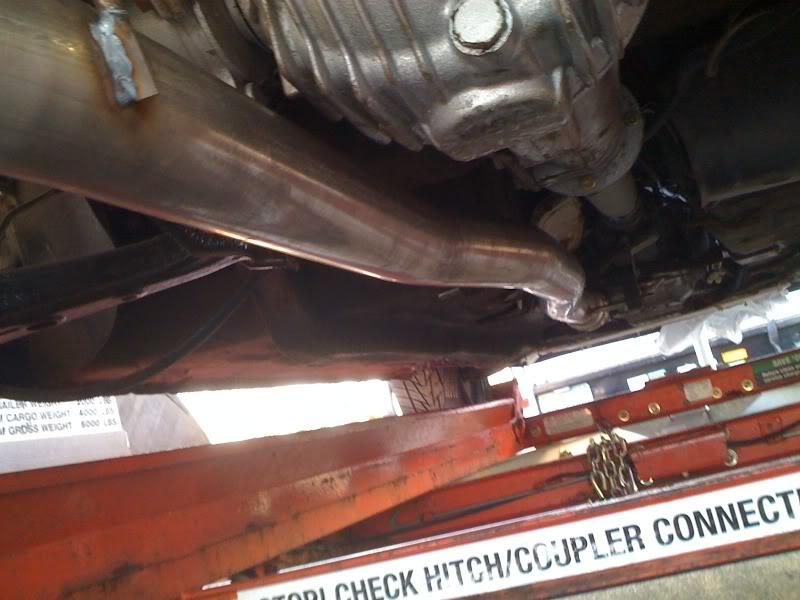
Slight bend at the rear for a left exit: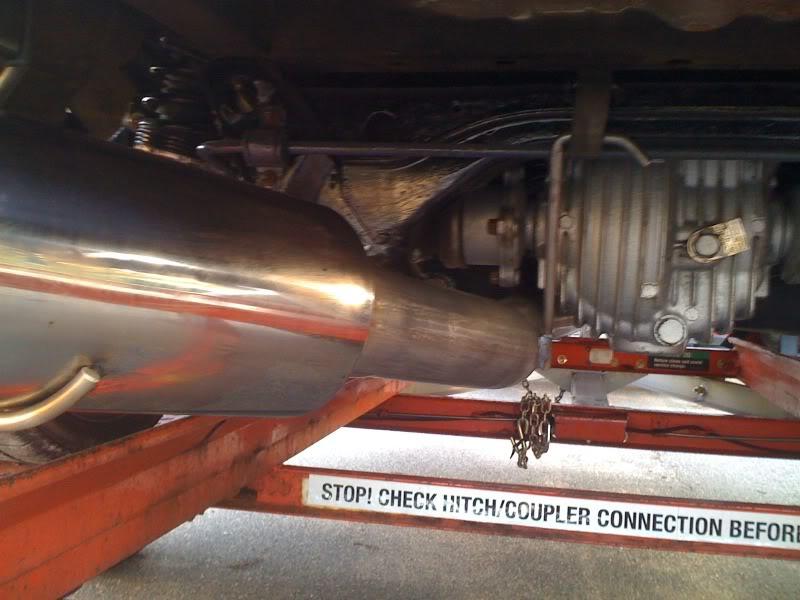
couple more of the exhaust with it still on the trailer: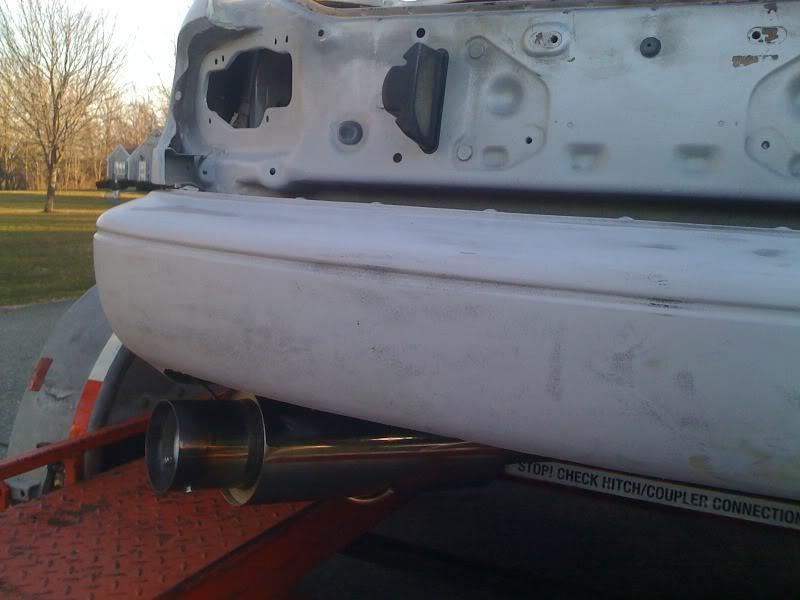
I also had him make my intercooler pipes out of 2.5" mild steel. I'm going to go back and fab up the BOV flange (didn't like how my last one turned out) as well as the IAT bung and the IAC tube.
Hotside: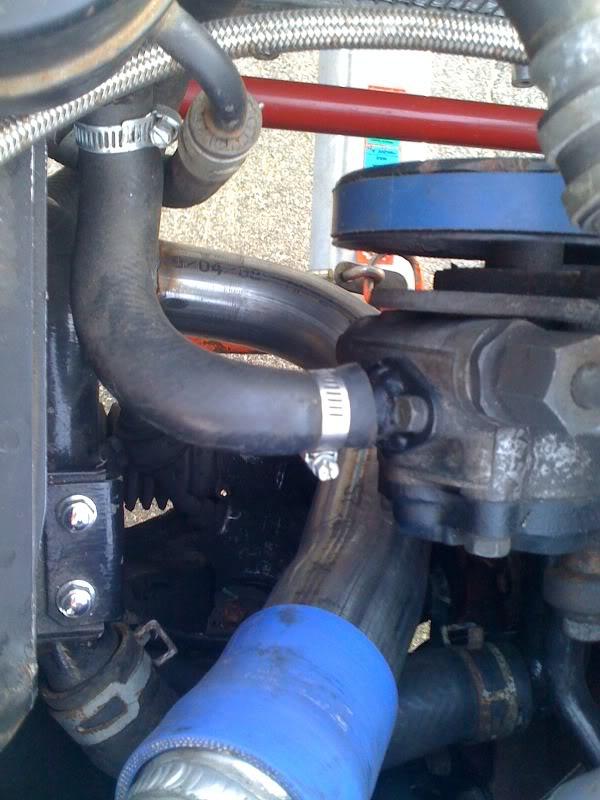
Coldside: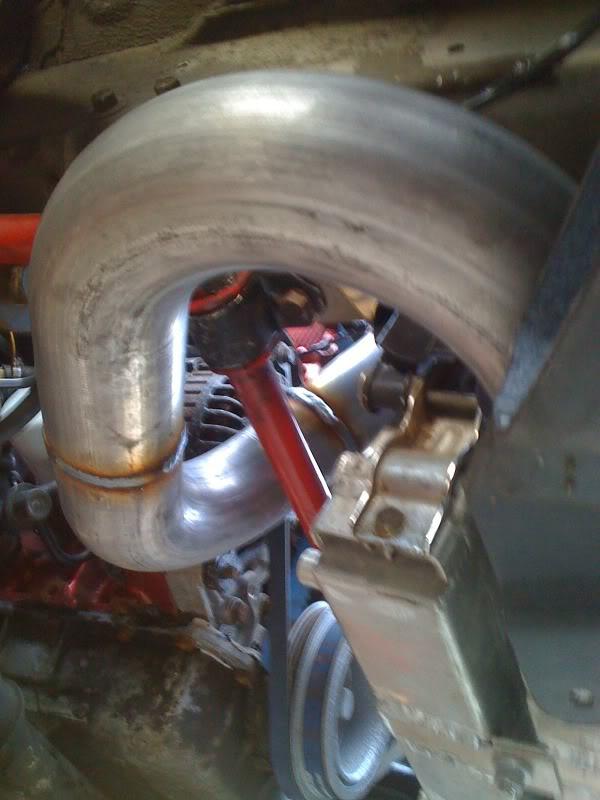
2 more of the engine bay: I stood on top of the truck to take the first shot.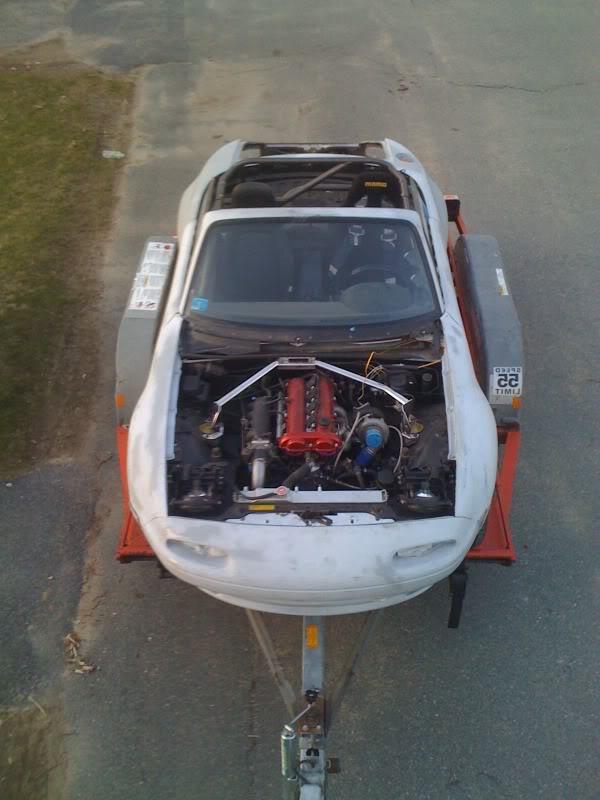

It's coming down to the final stretch!
4/11/2010
More progress this past weekend! Crappy iphone pics too!
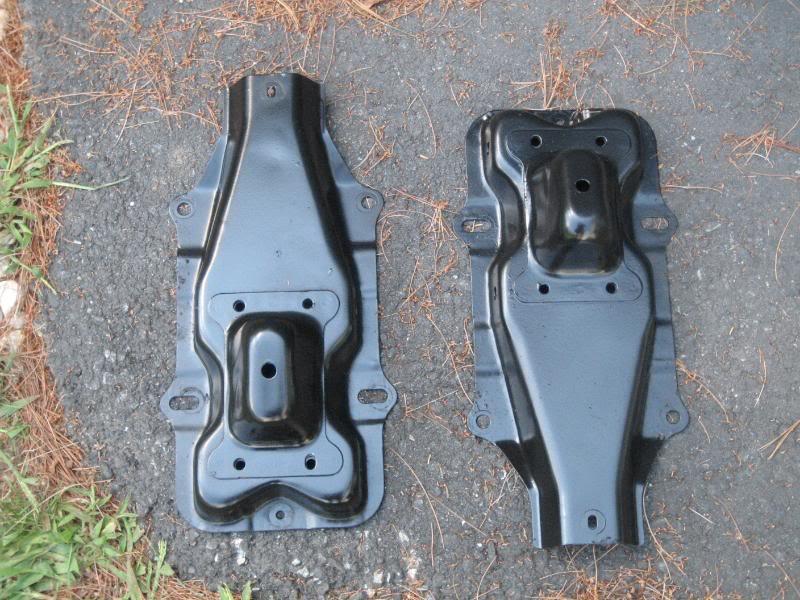
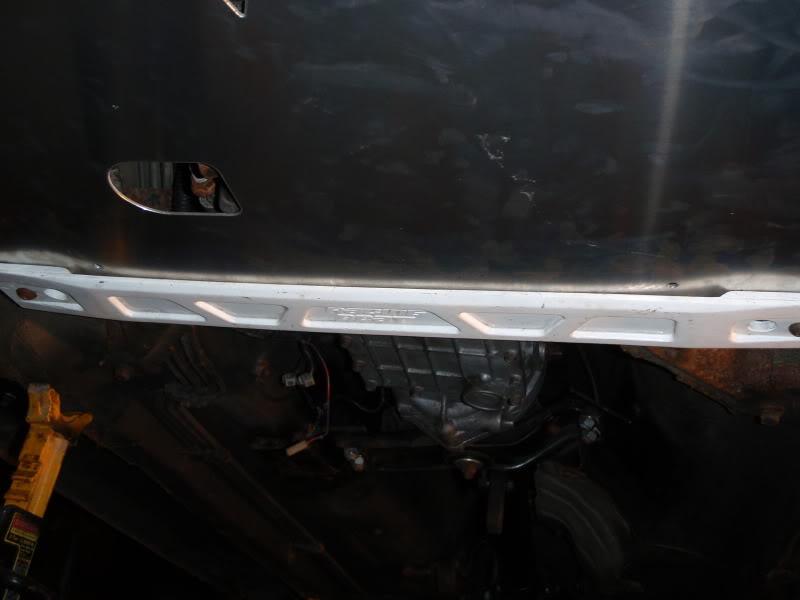
Got my new frame rail stiffeners/skid plates finally installed: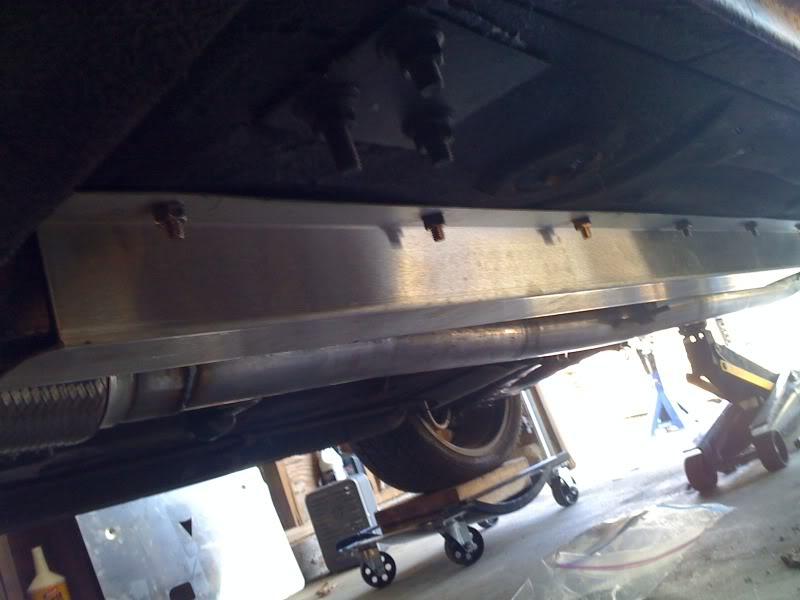
I flipped the hard line bracket around and bent it up so the lines sit below the frame rails, but off the bolts sticking through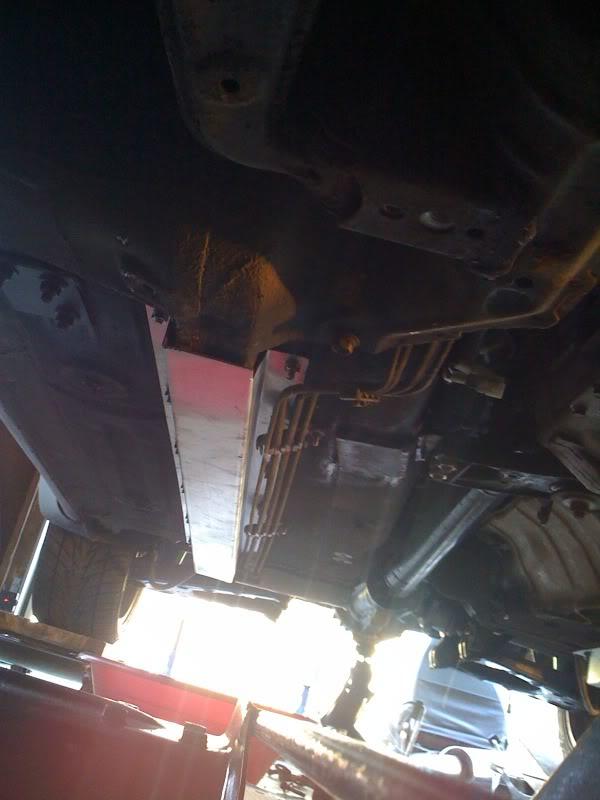
I filled the tranny with fluid, filled the power steering system with fluid- no leaks! I had to remove the back half of the exhaust to get the fluid in the tranny as the fill on the TII is on the same side as the exhaust now. Next I removed the radiator so I can start building a shroud for it Lastly, I installed the wideband o2 sensor. I stuck it in the driver's side air vent. 
I also took a better shot of my exhaust and rear bumper cutout: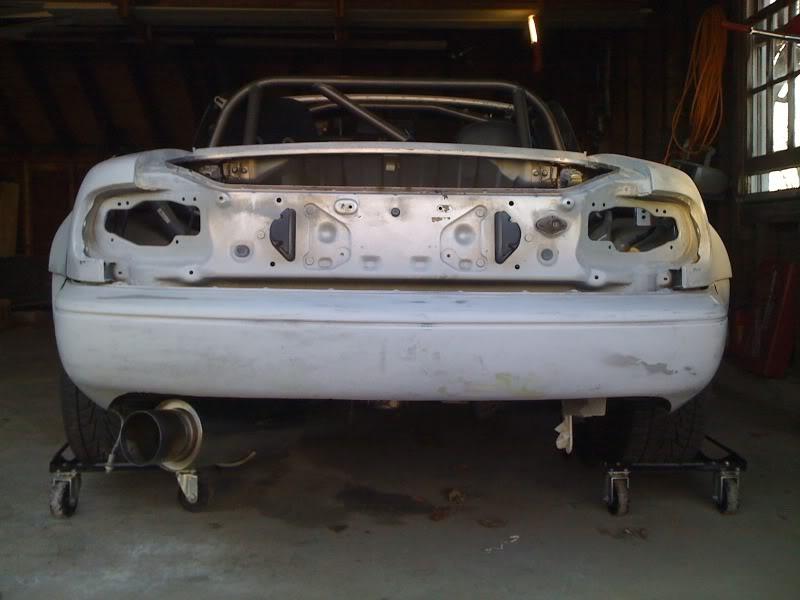
Lastly, a shot of my garage after I cleaned it up and put everything away: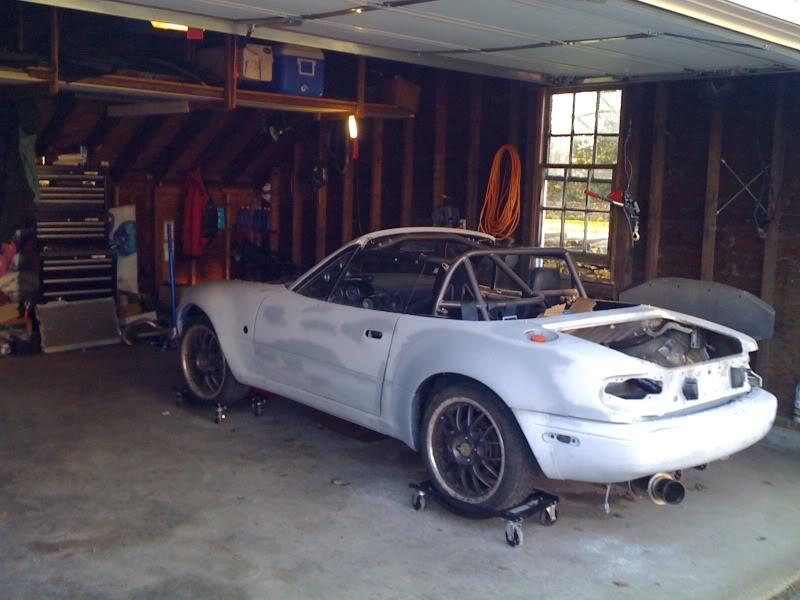
4/19/2010
So one of the hard lines going into my power steering rack is cracked, and thus leaked out all the fluid I just put into the system  . I'm debating on just yanking all the power steering stuff out and dealing with it some other time if I feel like I want/need it back.Thoughts?
5/8/2010
Ordered paint last night. I also fixed the PS leak, mounted the fan, remounted the radiator/intercooler and filled up the PS fluid again- let's hope it doesn't leak this time. Heading out to the garage now, more updates later today.
5/19/2010
I'm going to try and start the car this weekend. Any tips with megasquirt or things to look out for? This will be my first time using megasquirt, and also the first new engine I've fired up. I have one of braineak's megasquirt PnP, and he loaded a basemap on for me. I plan on priming the engine with oil, verifying I can get it started, then bringing it to the dyno for break-in and tuning. Will this be an issue for the break-in process if i get it running and immediately shut it down? I don't want to bring it to the tuner and have to pay to diagnose some silly issue, as I'm sure many will come up.
5/25/2010
Ok I think I figured out the wiring part, so everything is wired up now. I pulled the plugs and the fuel injector wiring, and was able to turn the motor over! This means my math on my adapter plate was correct! I was able to prime the motor with oil as well (pressure gauge went up to almost 30 while I was cranking it). As soon as the serial port-usb adapter comes in it's time to fire it up!
I have a couple more wiring questions/issues to sort out now.
1. When I dim the dash lights, my gauges dim the opposite "direction"- i.e. as the gauge cluster gets brighter, the leds in the gauges get dimmer. I'm using autometer sport comp w/ their LED replacement bulbs- If I swap the wiring around, will this solve the issue?
2. Should the wideband o2 sensor be getting power from the same power line as the ecu power? When I crank the engine over it turns off currently.
3. The LEDs on my A-pillar gauges (boost & EGT) stay illuminated all the time, I think I must have wired them incorrectly, going to sort that out at a later date.
5/29/2010
so it didn't start . I have fuel, and I have 12v at the COP harness. I think some setting with the basemap may be the case, but i'm unsure of where to begin. Any ideas, or things I could check??
5/31/2010
I've decided to just bring the car to the tuner (dentsport) to diagnose the issue, as well as break in the motor and then dyno tune. I'll be calling them tomorrow to set up the appointment.
6/1/2010
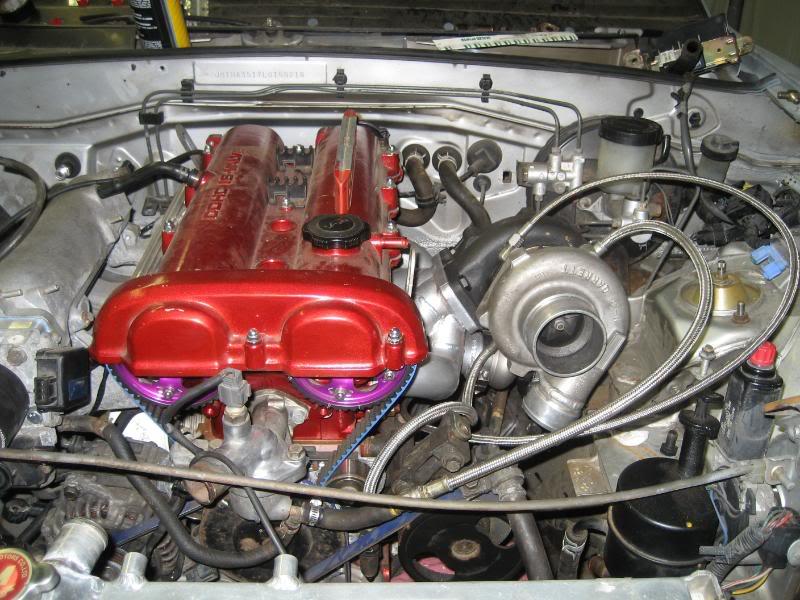
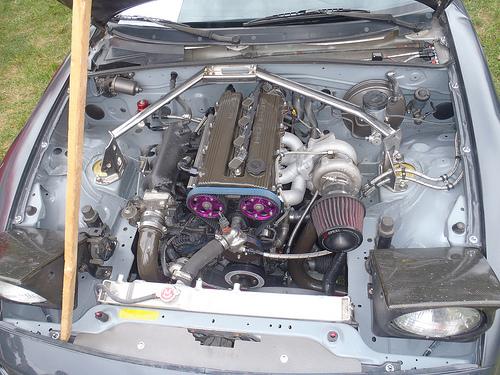
I took a picture of the engine bay (as it's more or less finished) today on my phone for your viewing pleasure: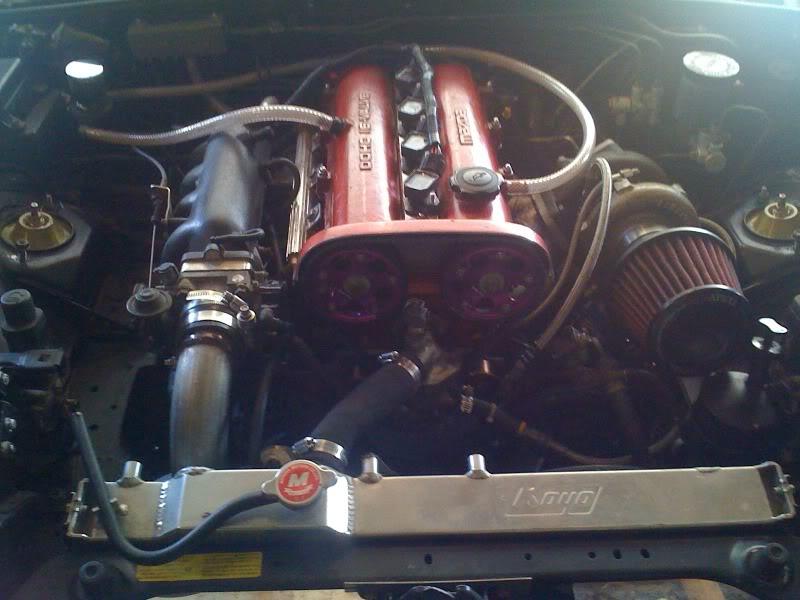
Note the cut valve cover, the vac block mounted on the firewall, the catch can mounted to the fuse box bracket, and the new apexi filter, to hit on the big ticket items.
I have a buddy coming over tomorrow to try a couple things on the no-start situation, so hopefully we can get it sorted!
Went out after work and played around for a little bit. I took the bumpers off the car in preparation for paint and cleaned things up a bit. I also borrowed a real camera and took some good pictures.
Here's a good shot of the engine bay: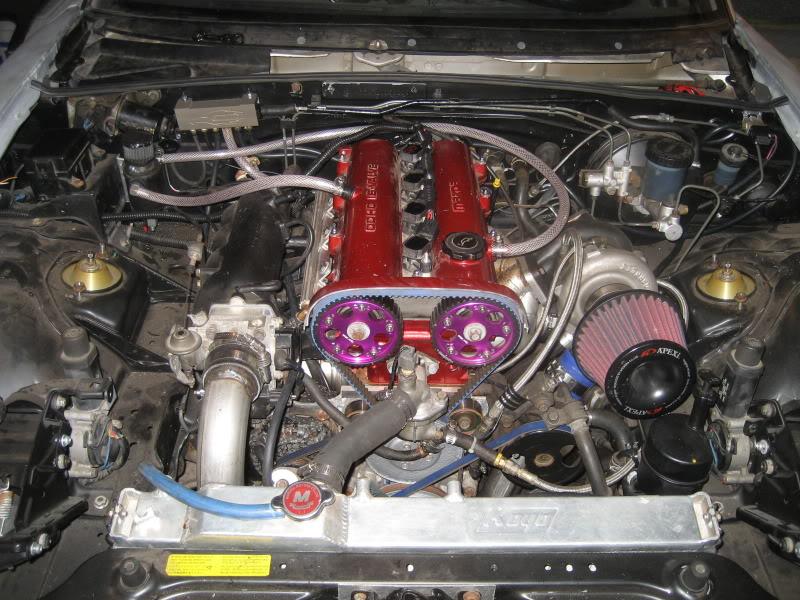
and one of the catch can/vac block:
And one of the garage:
6/9/2010
Pics! Sorry if they are out of order.
Booth constructed, car prepped, taped up, and ready to go:

6/9/2010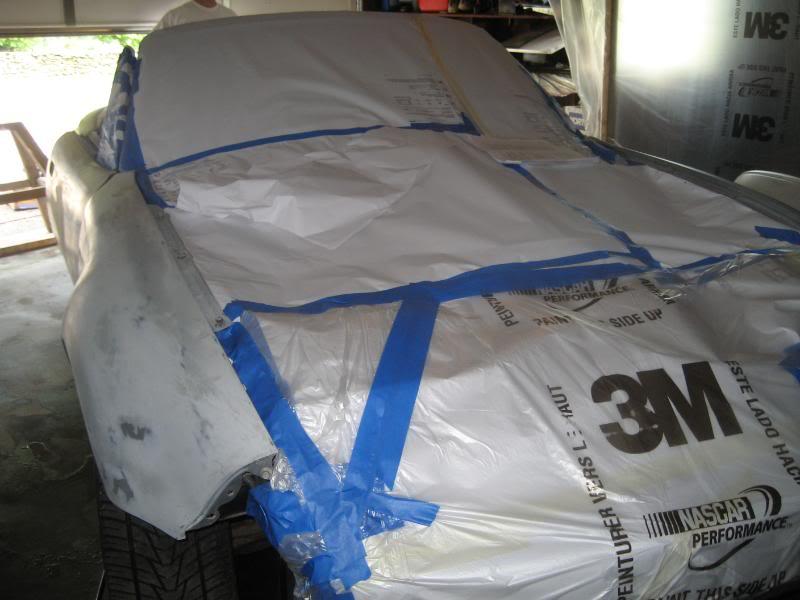
mixing the base coat:
spraying on the color:

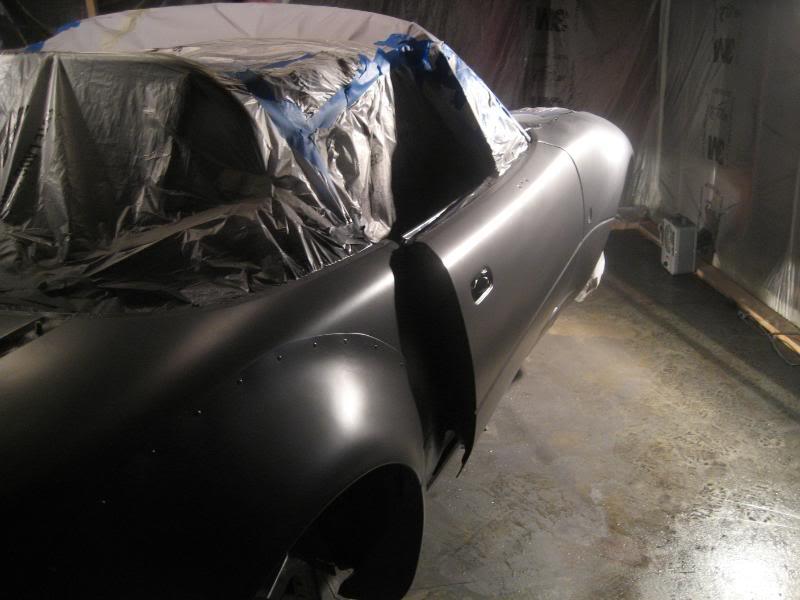
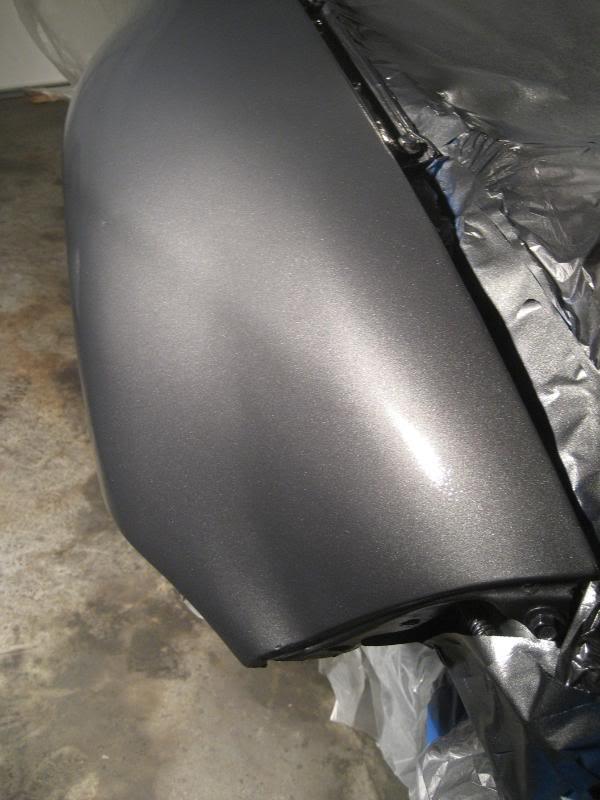
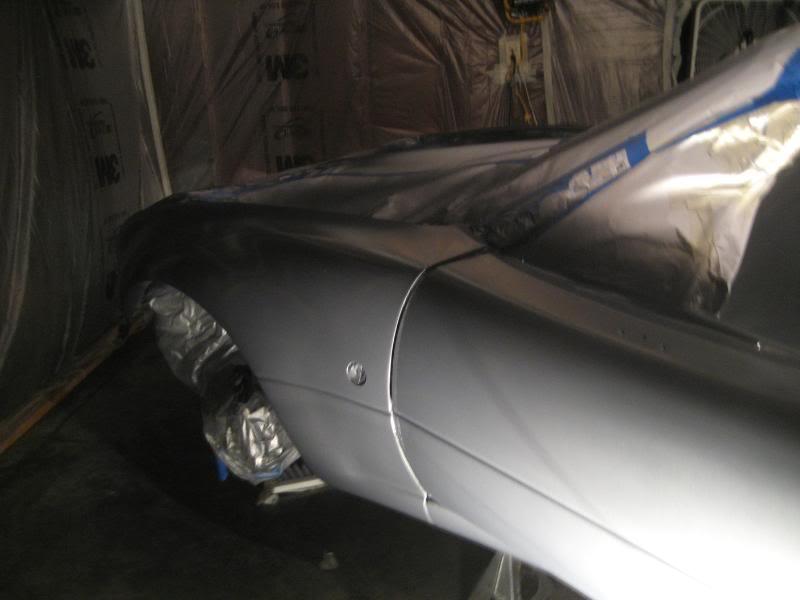

With the clear coat: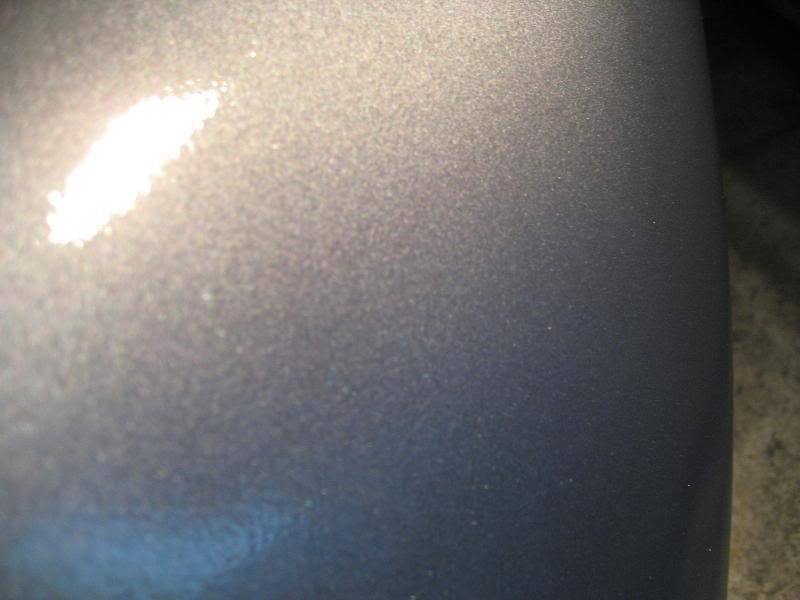
black on the windshield frame...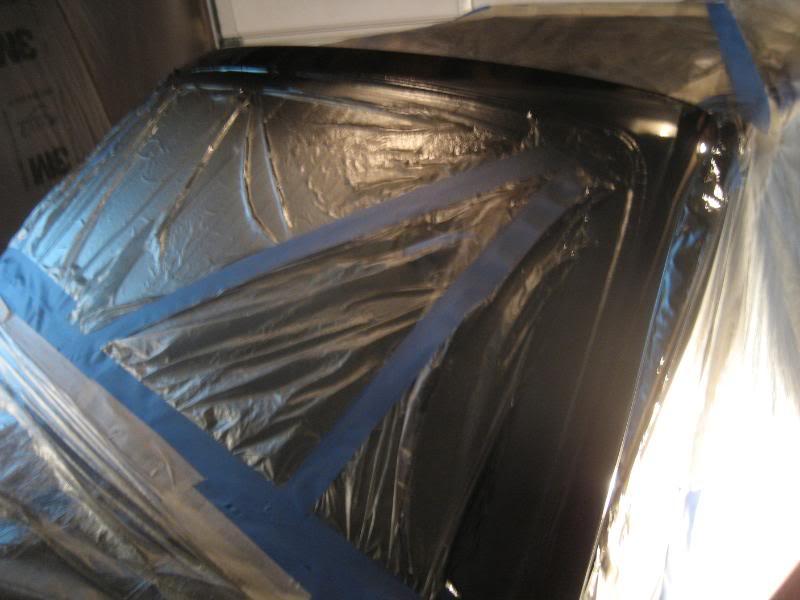

Once I unwrap the car I'll take some full car shots. Overall I'm very pleased with the results- not bad for my first time painting a car! After it's running I'll give it a wetsand/buff/polish to make it really shine.
6/10/2010
Nevermind the mess in the garage. Now on to the pics!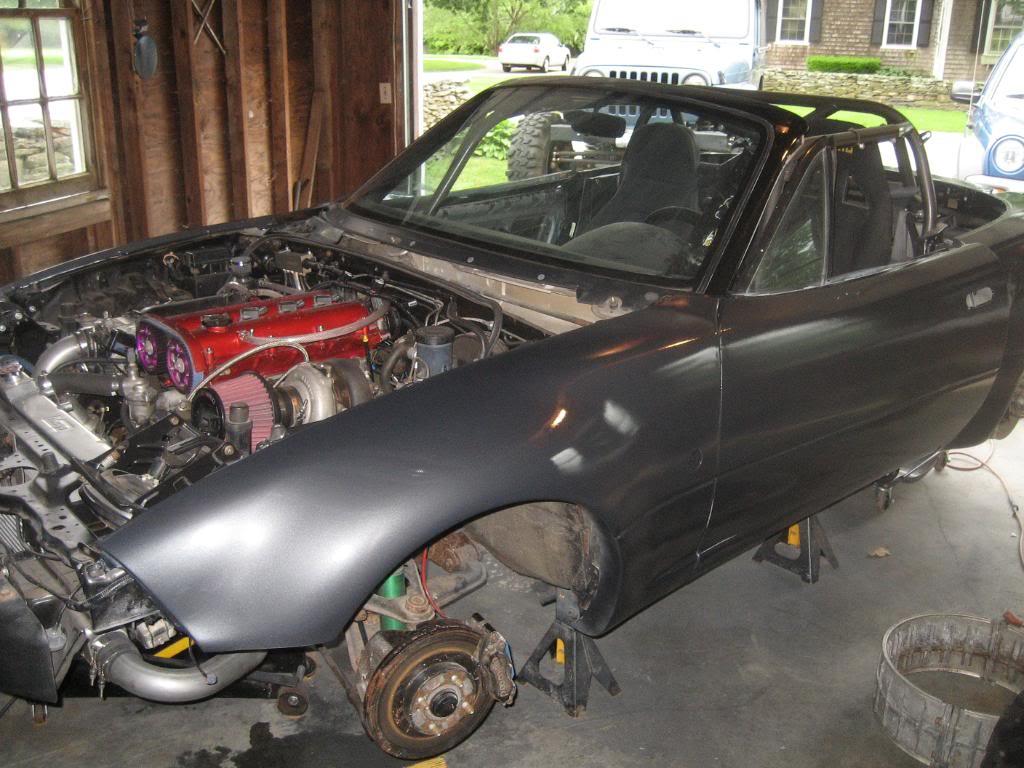
taped off the VIN stickers in the door jams: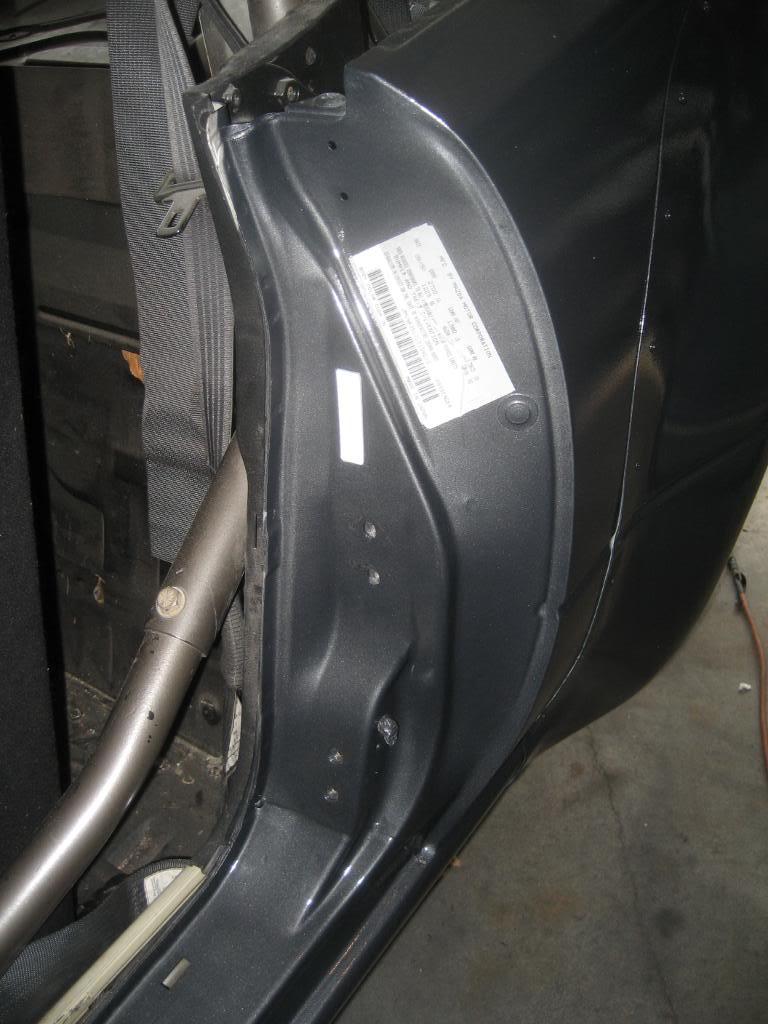
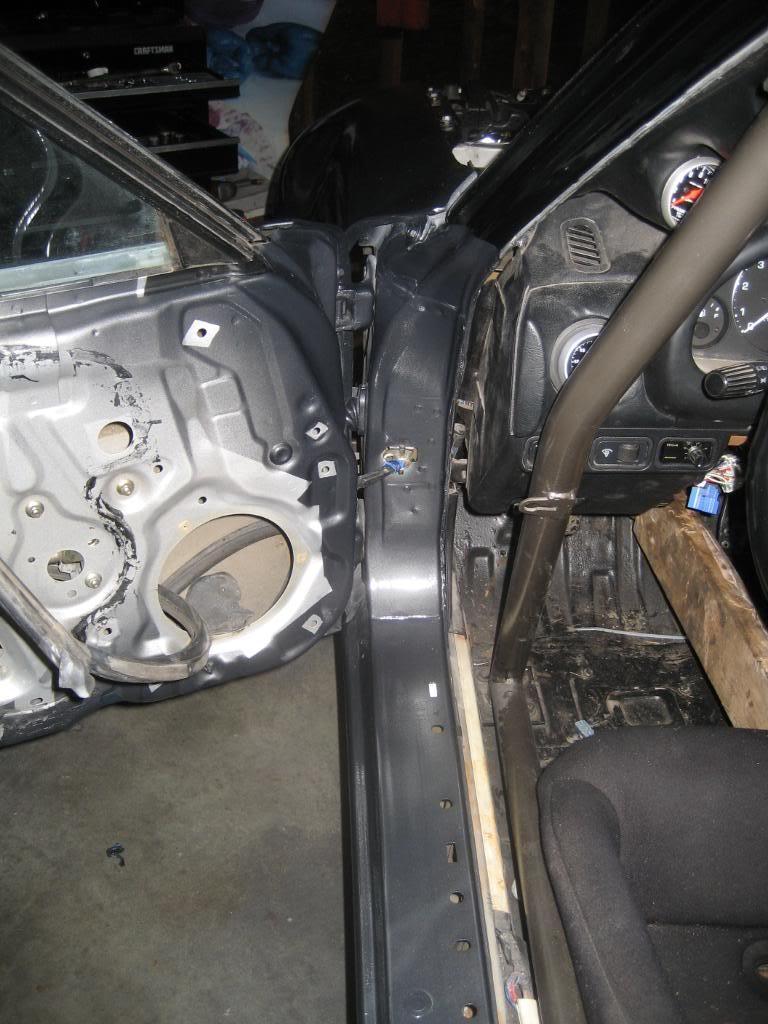
and on the doors: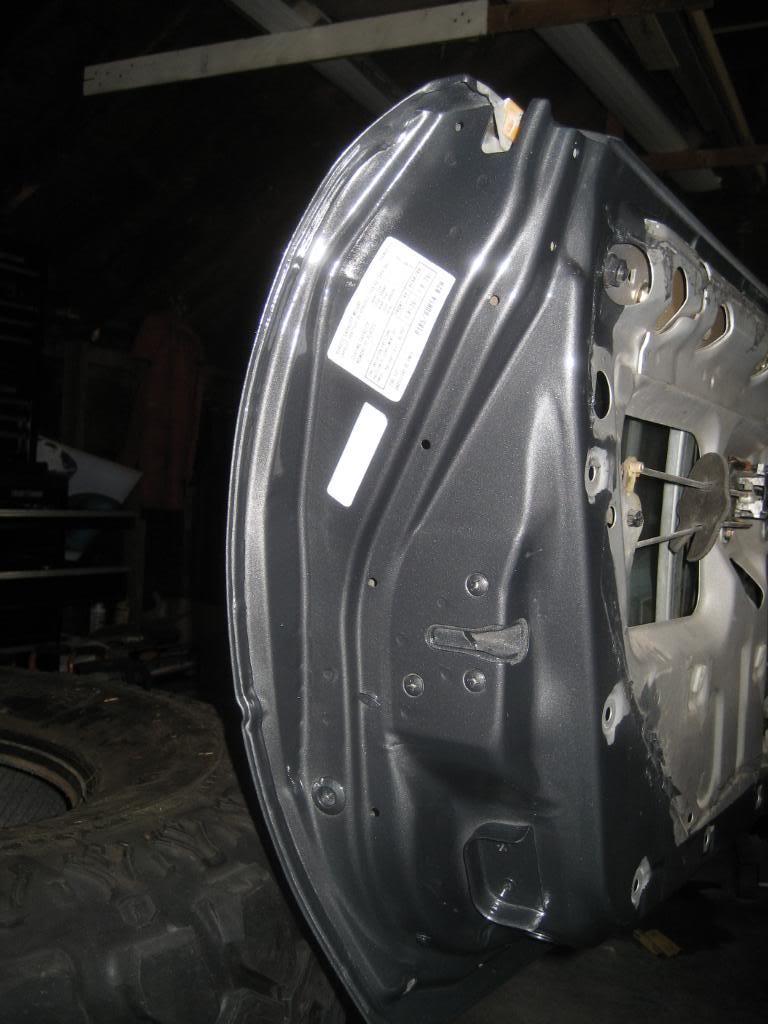
6/24/2010
Sorry I moved to a new house this past week, and packed the camera in a "safe place", which I couldn't find until last night....sigh. Here's a couple pics of the more or less "finished" car. I still haven't been able to wet-sand yet either.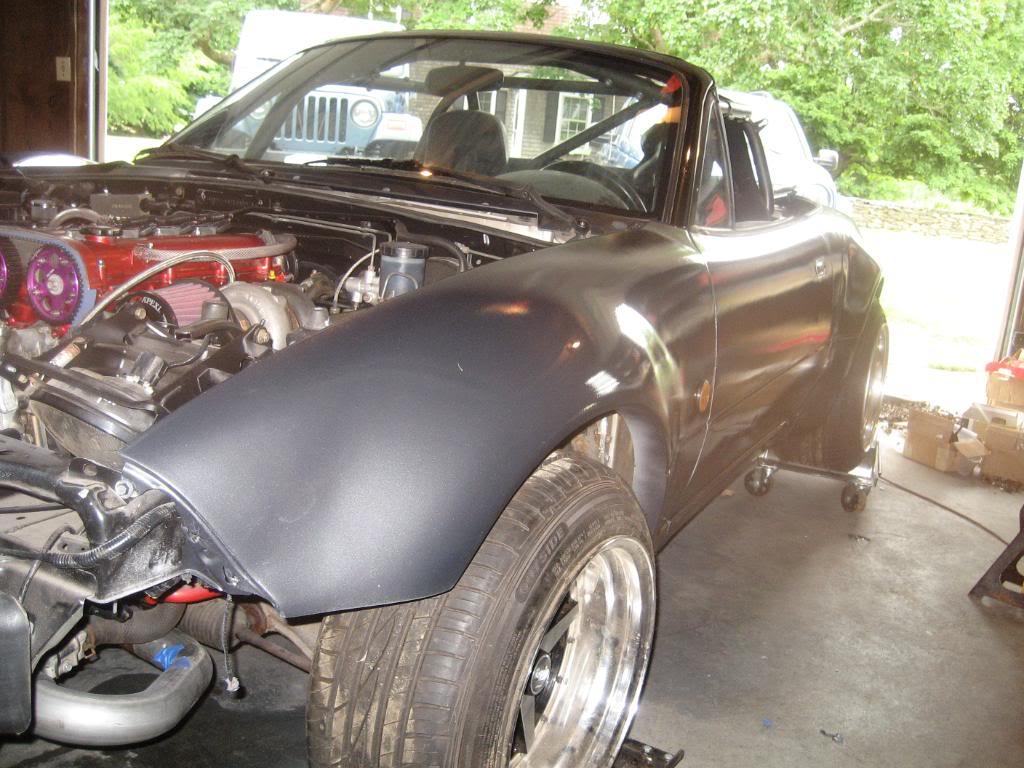
I also painted the lenses on my TSI's amber...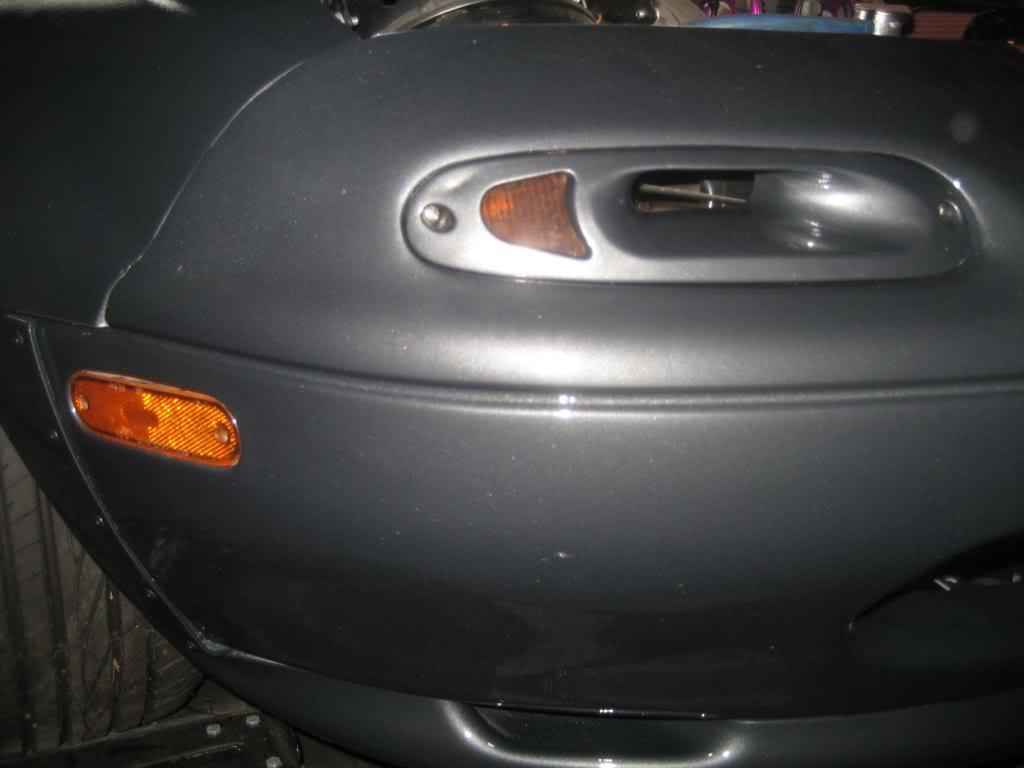
7/23/2010
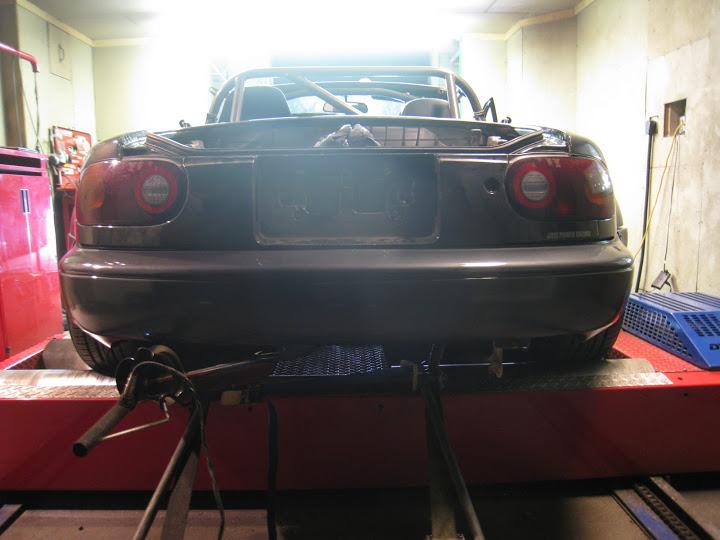
Well things didn't go 100% as I had hoped . We set the base timing, it started right up and then we broke the motor in on the dyno. Ran it for about 30 min, at which time we noticed the coolant bubbling out from the rad cap. Shut it down to cool, and decided to change the oil. When I pulled the oil drain plug, I noticed coolant in the oil. Arg  ! The guys at the shop seem to think it's my copper head gasket, as they haven't had good luck with them sealing properly in the past. I'm going to try and do a leakdown test this weekend and see where that gets me. I did get to drive the car off the dyno and onto the trailer though. Granted it was only 15 feet or so, but it was the first time it's moved under it's own power.
I'm a little bummed at the outcome, but it was still neat to hear it run. Hopefully it's just as simple as the damn gasket and not a cracked block.
7/26/2010
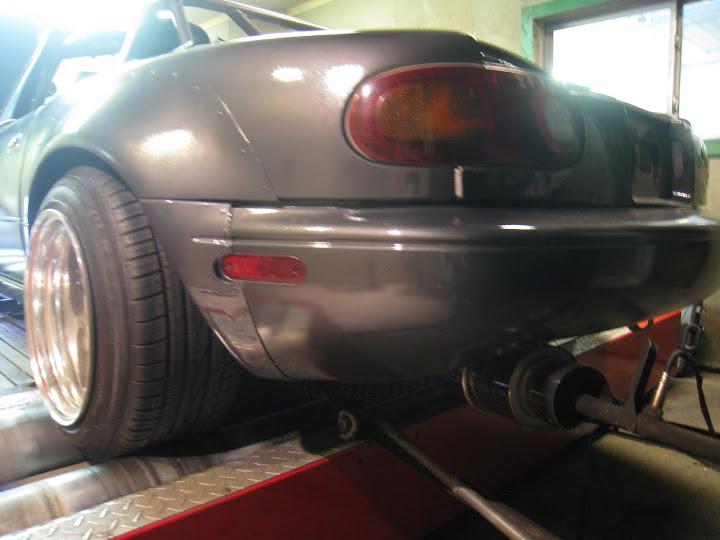
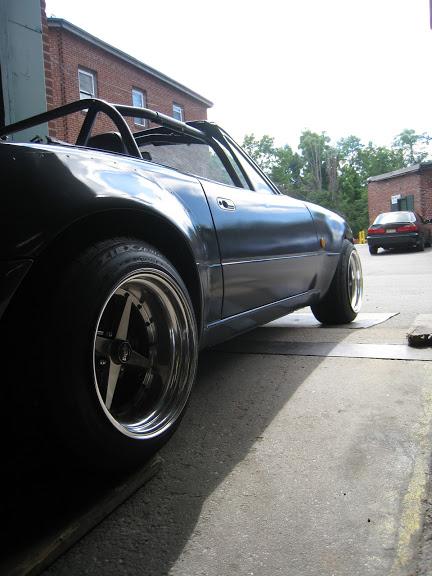
Couple pics the guys at Dent Sport took of my car: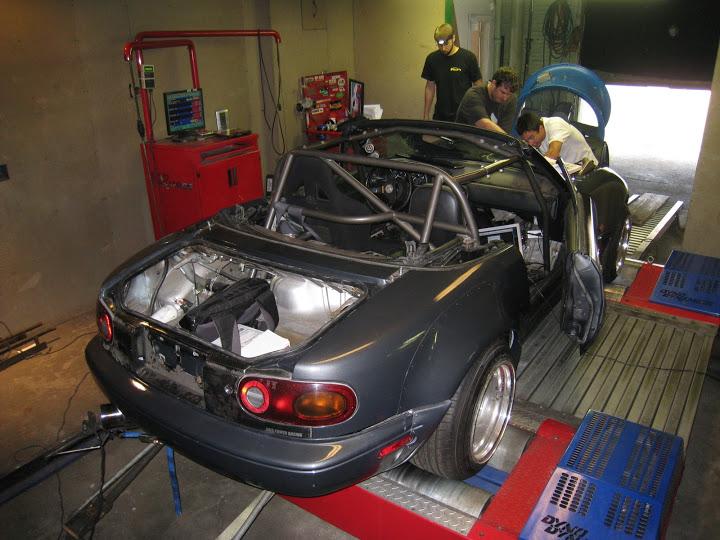

8/9/2010
http://api.viglink.com/api/click?for...13605412930112
8/24/2010
Well, good news and bad news. The bad news is there is still an oil leak- I'm going to yank the engine back out as I believe it's leaking either between the block and the pan, or the block and the oil pump. The other thing that happened was I blew out the diaphragm in the vacuum booster on the last pull we did. The car technically is drivable now, so once I fix the issues I'm going to put some time on the engine before I head back to finish the tuning.
On the last pull, the car made 256whp. I took some videos, I'll post them when I get the chance.
8/30/2010
Well, good news and bad news. The bad news is there is still an oil leak- I'm going to yank the engine back out as I believe it's leaking either between the block and the pan, or the block and the oil pump. The other thing that happened was I blew out the diaphragm in the vacuum booster on the last pull we did. The car technically is drivable now, so once I fix the issues I'm going to put some time on the engine before I head back to finish the tuning.
On the last pull, the car made 256whp. I took some videos, I'll post them when I get the chance.
9/7/2010
Yanked the motor over the weekend to fix the leak I had between the pan and the oil pump (that damn rubber gasket). I ran out of steam yesterday, but I am about 90% done. Hoping to get it back in working order after work today.
9/12/2010
So new problem :vash:. I recently pulled the motor to fix a leaky oil pan gasket. I got everything back together, and when I started it up, the car is idling around 2000, fluctuating sometimes up to 2800 rpm. It's pulling ~17mmHG vacuum at idle (used to be over 20). So OK, must be a vac leak somewhere. I pressurized the system up to around 10-15psi and I am getting some air flowing out of the catch can. The catch can was also about 1/2 full of oil (not sure if this is normal or not). I'm running a PCV valve from a 323 to a catch can. I was able to blow through 1 side of the PCV valve, so I believe it is functioning properly. I also tried removing it from the system entirely, which didn't fix the idle issue.
Here's an old pic of the engine bay showing how I have my catch can routed for reference:
Any ideas? The car ran fine before.
I just did another boost leak test with the valve cover off, and it seems like one or more of the valve seals is leaking. When I pulled the spark plugs out, cylinders 2 and 3 had a little bit of oily residue on them. If it's not one thing it's another..... boy do I have good luck!
9/23/2010
No miata updates yet, but I do have news to report! I just picked this up on Tuesday to replace my jeep as a daily- 09 Mazdaspeed3 GT with 30k on the clock.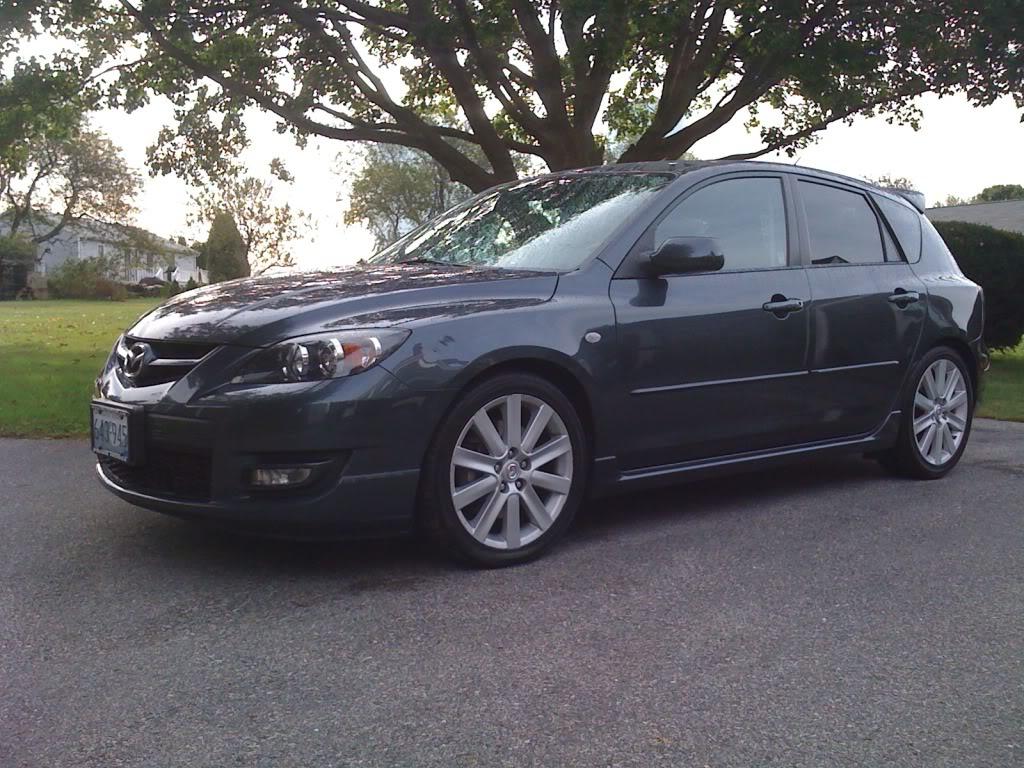
9/20/2010
Got the car back, they fixed the idle issue. There was a 2mm gap around the throttle body mounting holes and the holes in the flyin miata adapter- welded them shut, redrilled them a little lower and my idle issue is back to normal, so 1 problem down.
They didn't look into the oil consumption problem, but did note that it's not good . I'm going to run a compression and leakdown test and go from there. The catch can fills up with oil really quickly. It pulls 21mm of vac at idle, and is making full boost (14psi off the wastegate). It doesn't blow smoke at all. The car has had maybe 2 tanks of fuel run through it.
11/3/2010
update:
I did a compression test after letting the engine get up to operating temp. My results were 218-218-220-220. The plugs looked normal as well. I took the oil cap off while the engine was running and there was a steady stream of air and oil dropplets coming out. I don't have a leakdown tester, but that's next on the list of things to check once I can source one.
11/14/2010
I lowered the car on Friday and took some pics. I want to lower it more, but I need to trim the inner fender lips a bit more in order to do so.
12/6/2010
I've decided to put the car away for the winter, to resolve this oil issue and start on stage 2 of my build. In preparation for that, I have been getting the garage up to spec. I hung up some shop lights, got a new stereo, a kerosene heater, and hung an original Mazda dealer banner from 1990 when the miata was first debuted!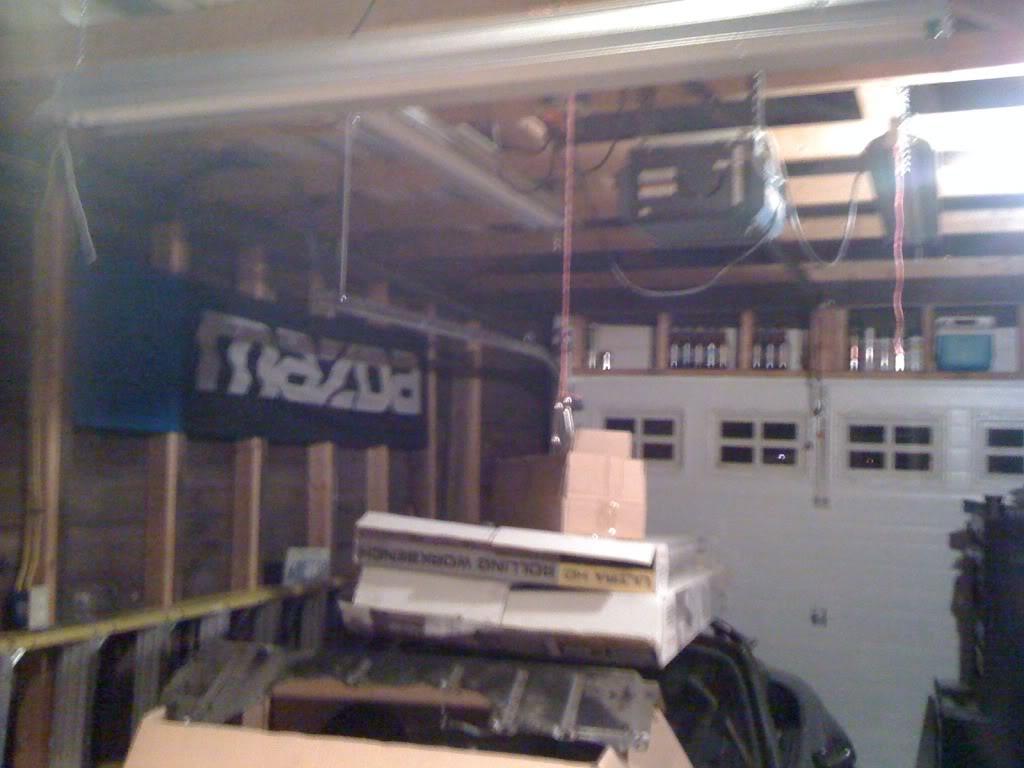
My lovely wife recently surprised me for my birthday with a new rolling workbench/tool chest. It's frigging sweet! Took about 3 hours to assembly and fill with my tools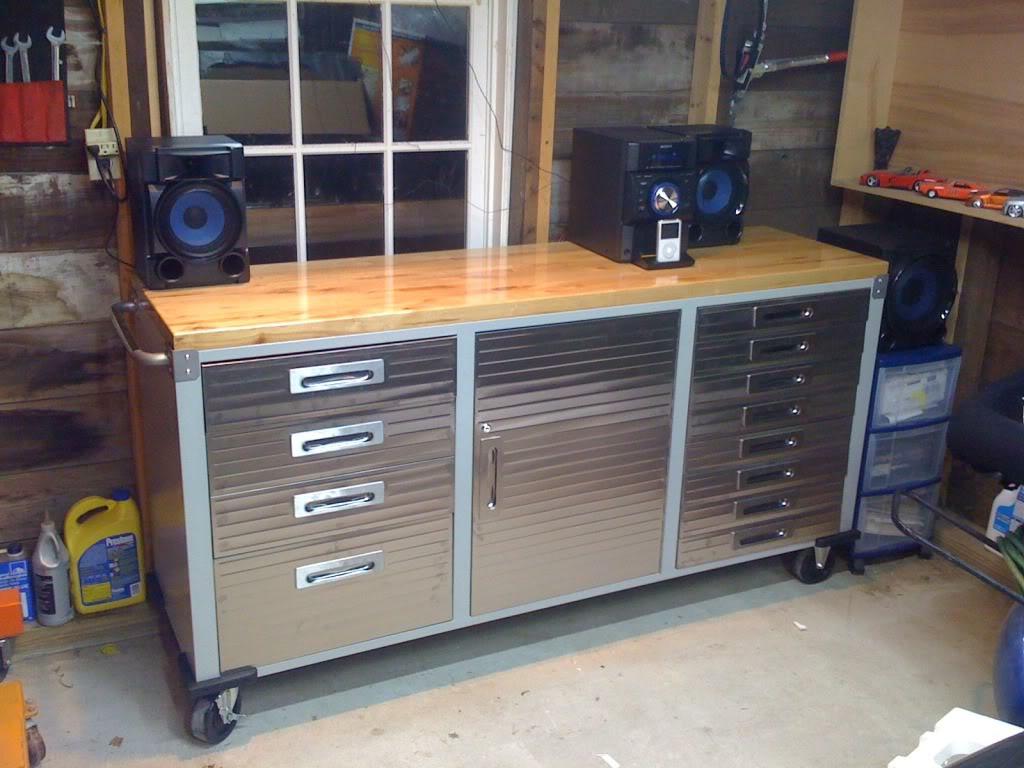
I have a few more additions/changes planned for the garage, but it's essentially ready for work!
12/10/2010
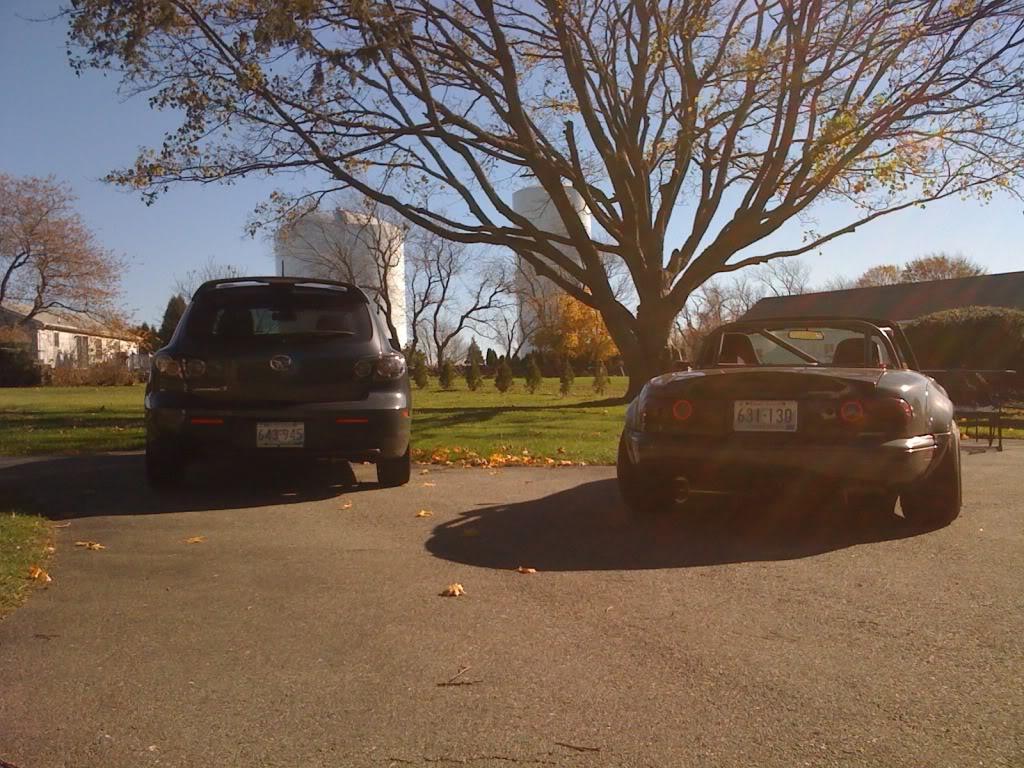
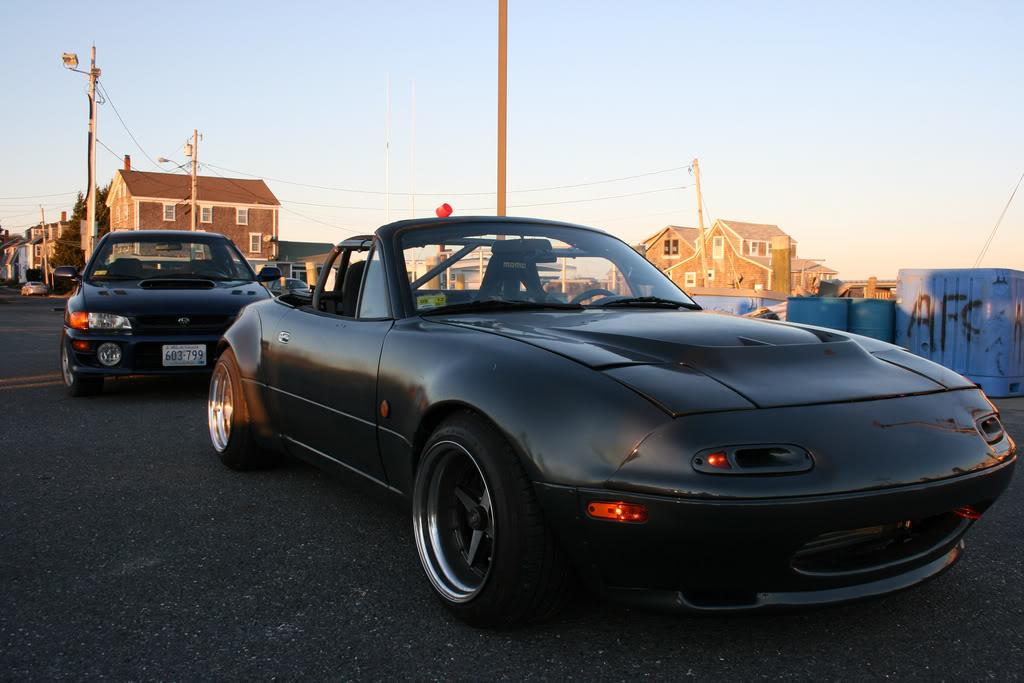
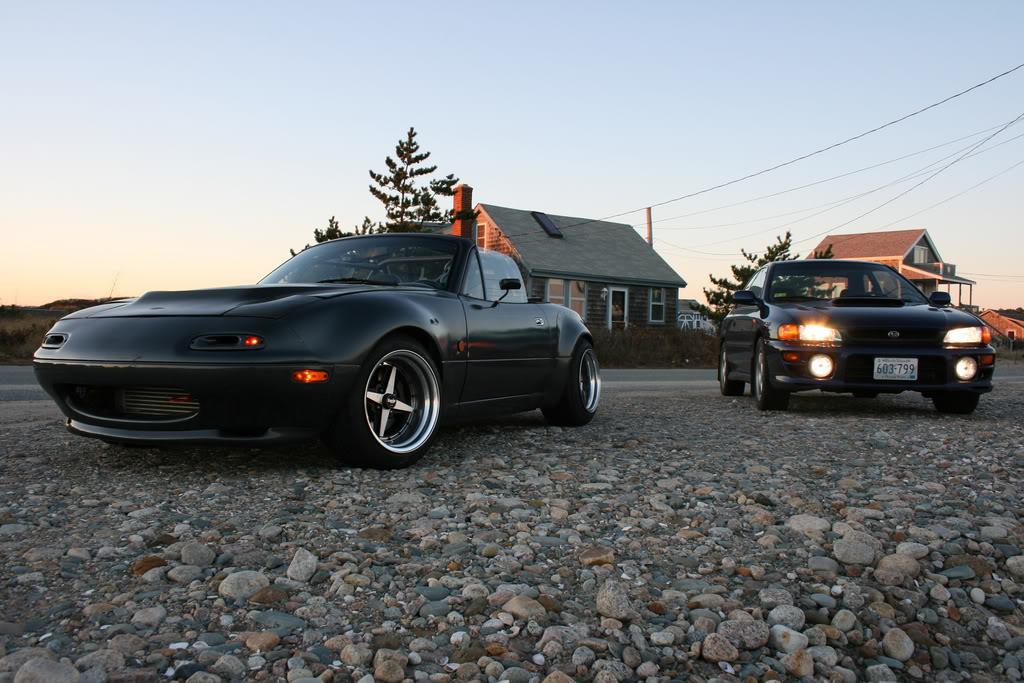
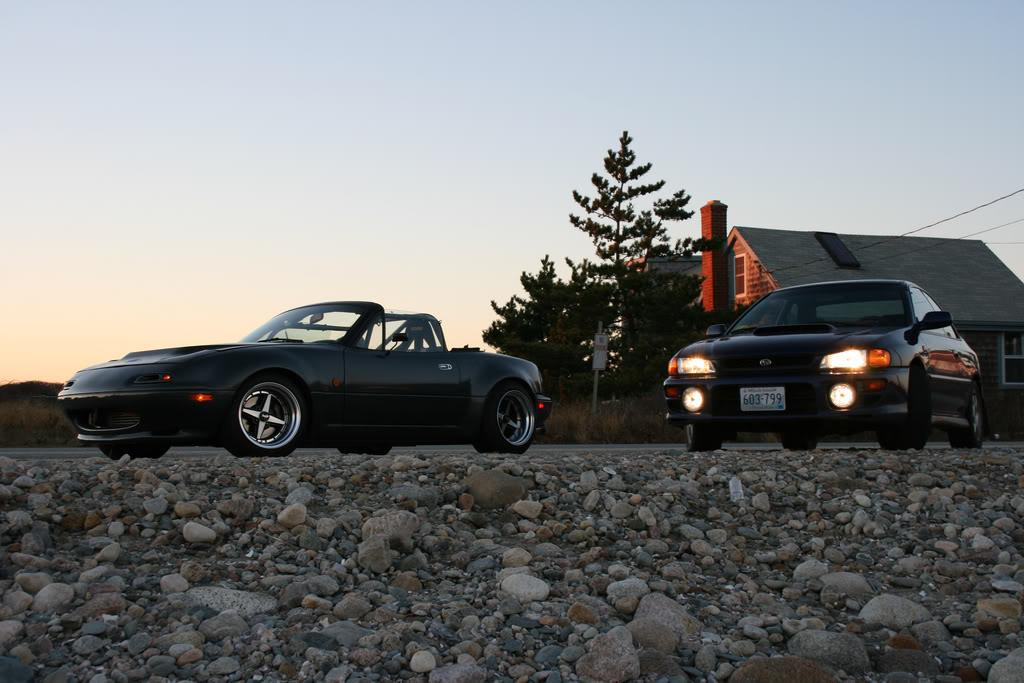
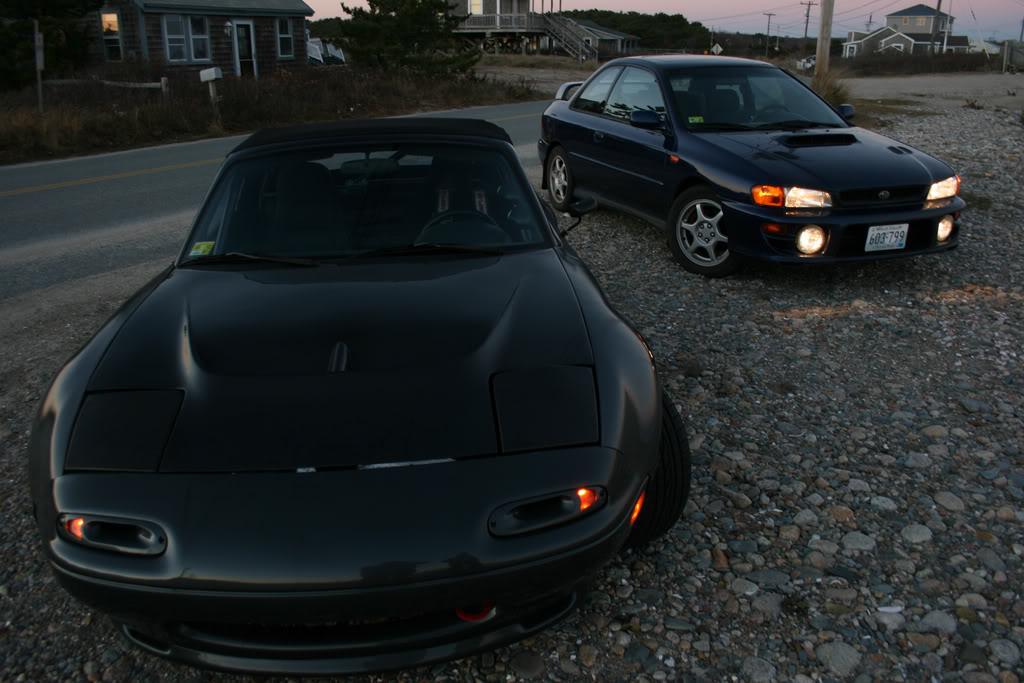
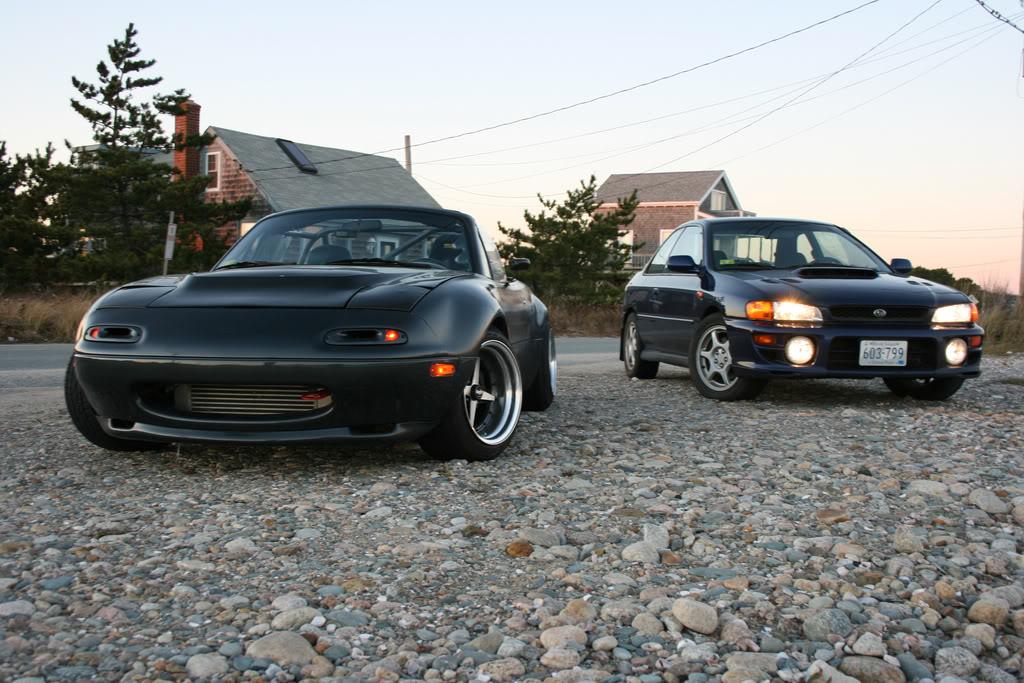
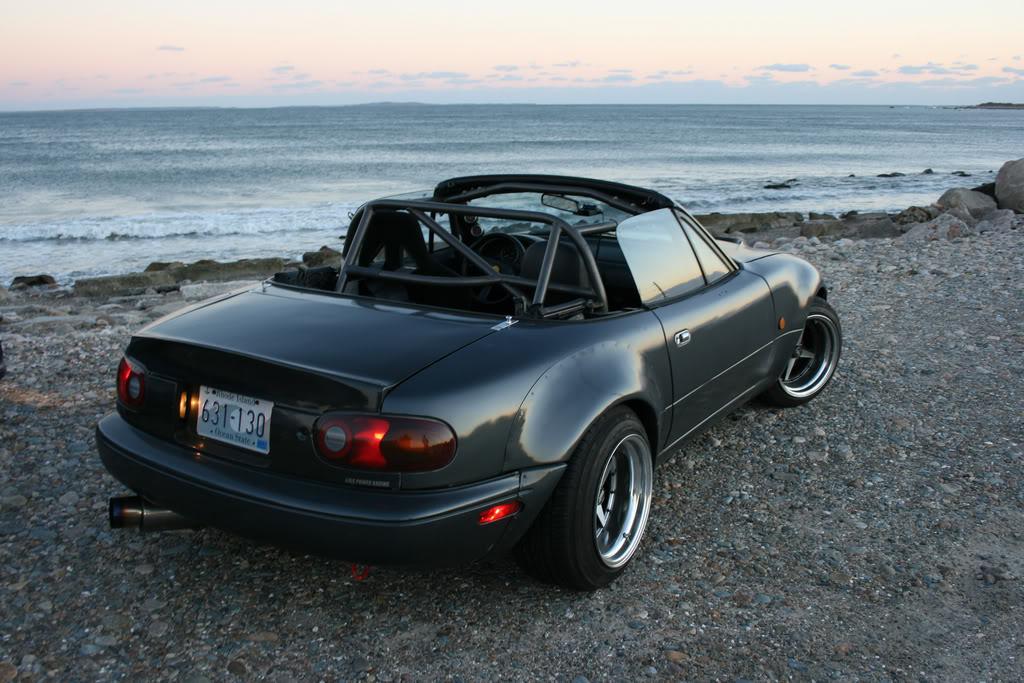
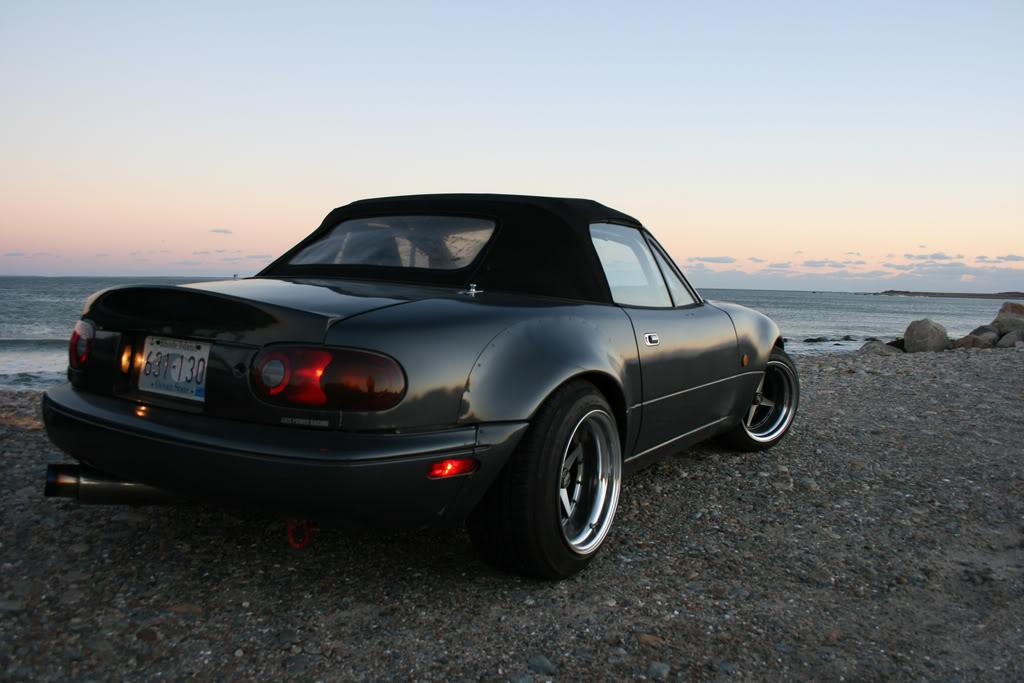
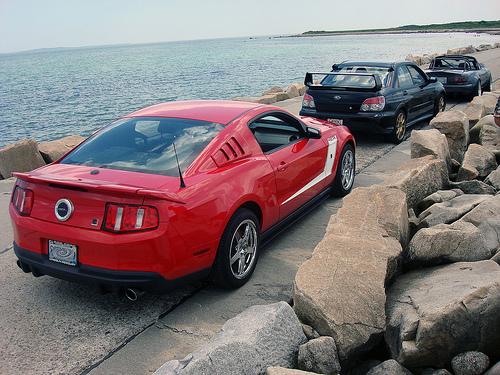
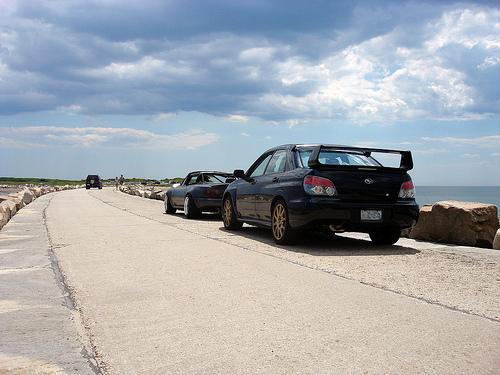
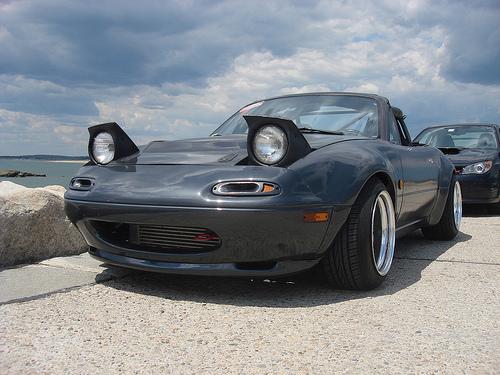
About 2 weeks ago I went for a last ride of the season with a friend and his 99 2.5 RS. He took some really nice photos, thought I would share: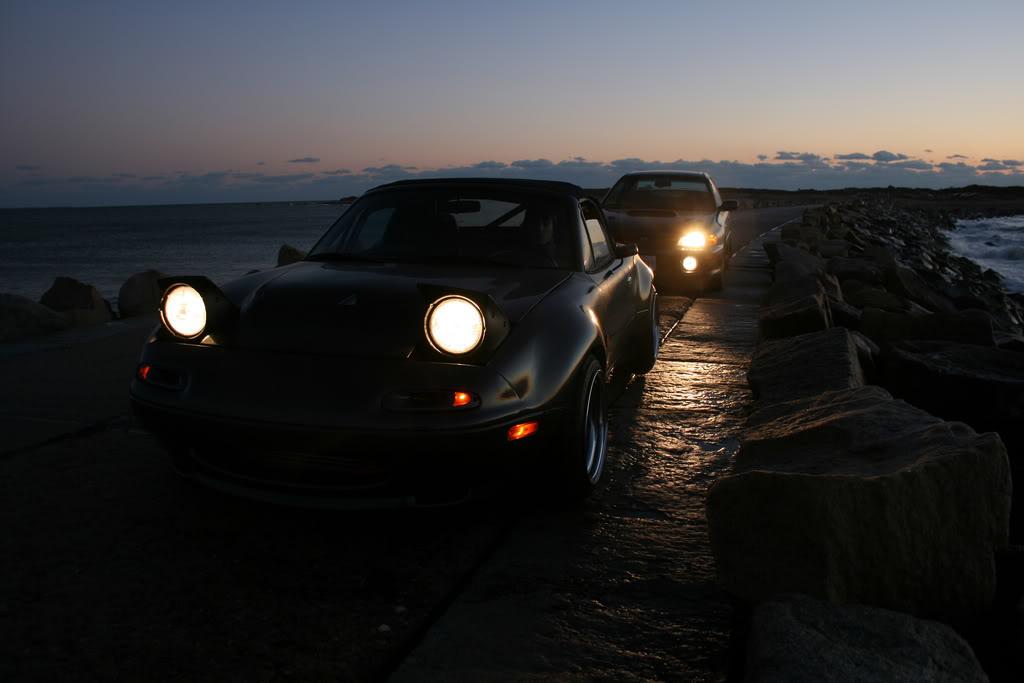

12/15/2010
Took this shot last night of a few of the parts waiting to go on the car:
ATI Super Damper and an Aeromotive FPR: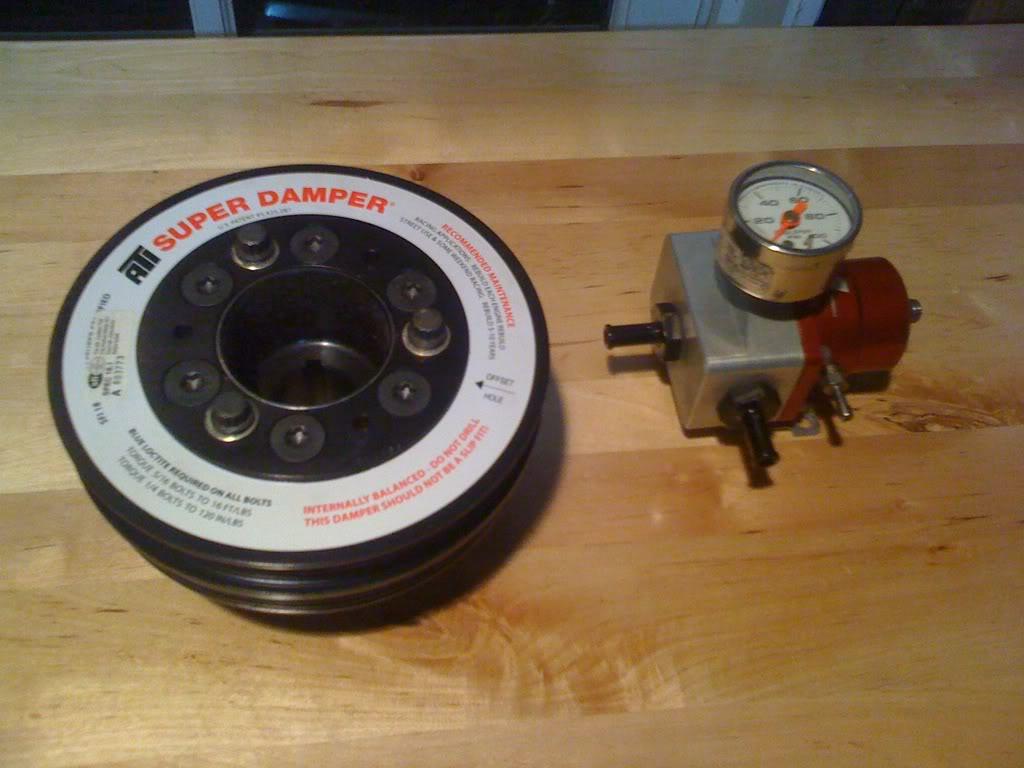
12/17/2010
Got the car back to it's "normal" state today . Started with pulling the dash out (had to pull the front portion of the cage out in order to do so)...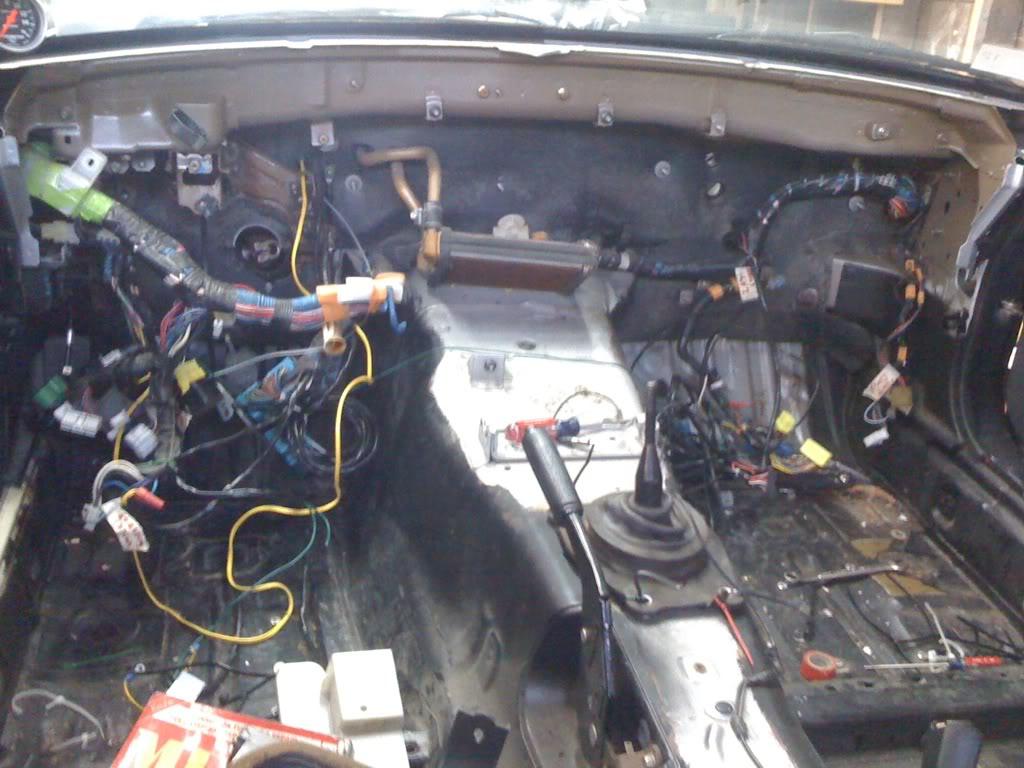
and then I removed the front bumper, and front fenders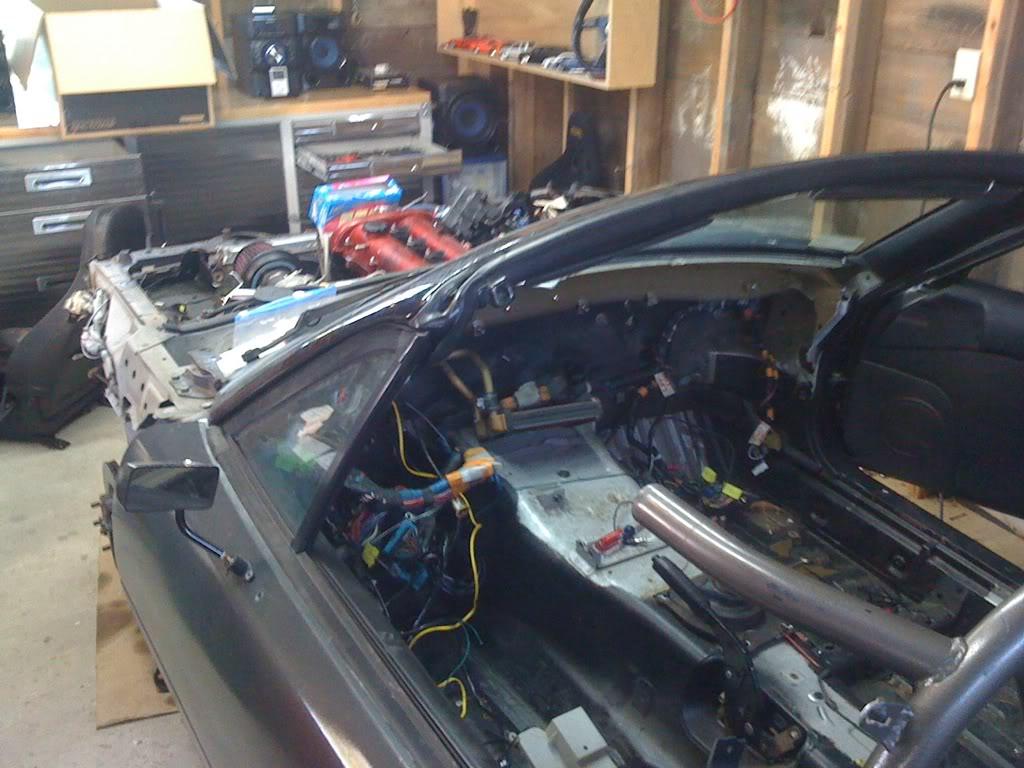
so that I could pull the entire wiring harness through the firewall to begin my "Proper" tuck...
drivers side: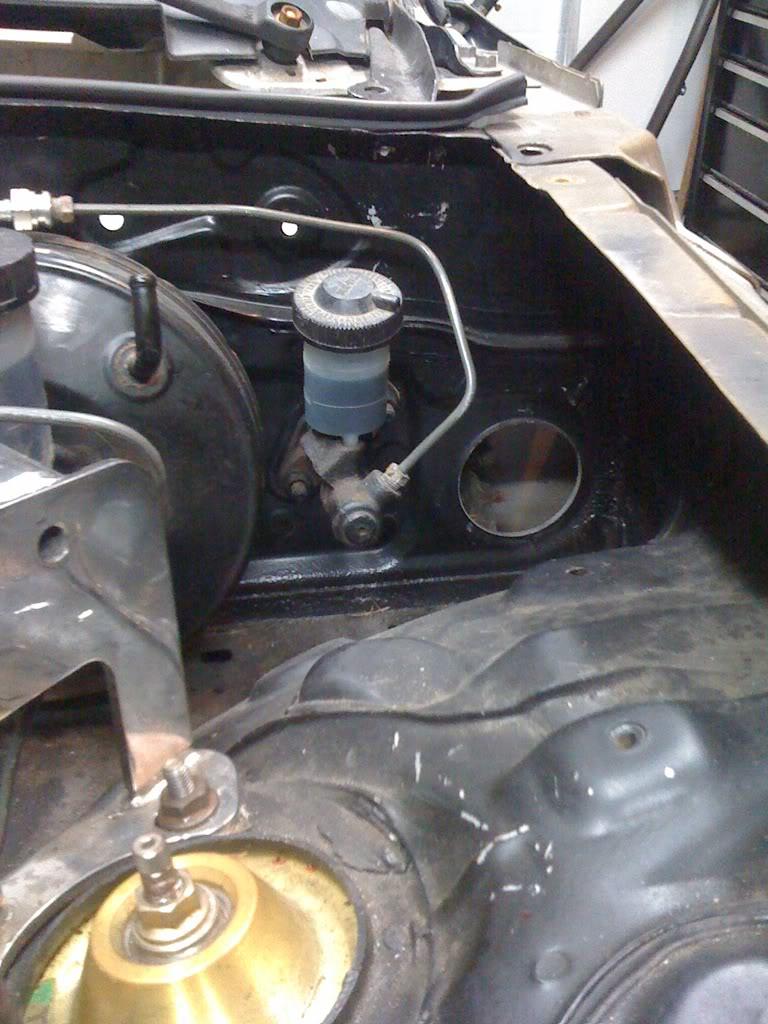
Passenger side: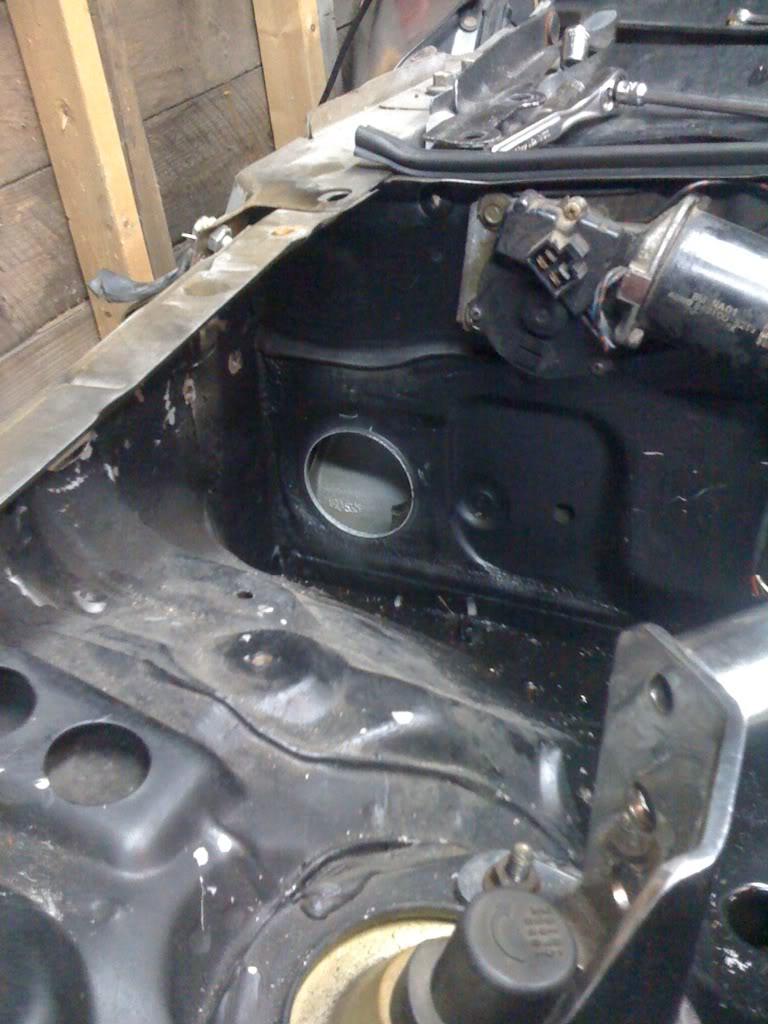
I still have to go through the harness and get rid of everything I don't need, along with tidying things up a bit. My goal is to hide absolutely everything. That's all for now!
12/19/2010
Just finished delooming the harness, and I am officially airbag free- I stripped out all the wiring associated with the airbag, as well as got rid of the air bag module, the air bag capacitor/backup battery thing, and the cruise control module. I brought a few relays inside the firewall too. I still have a little tidying up left to do, but the majority of the big ticket items are taken care of. No pics as it looks like a disaster area
12/26/2010
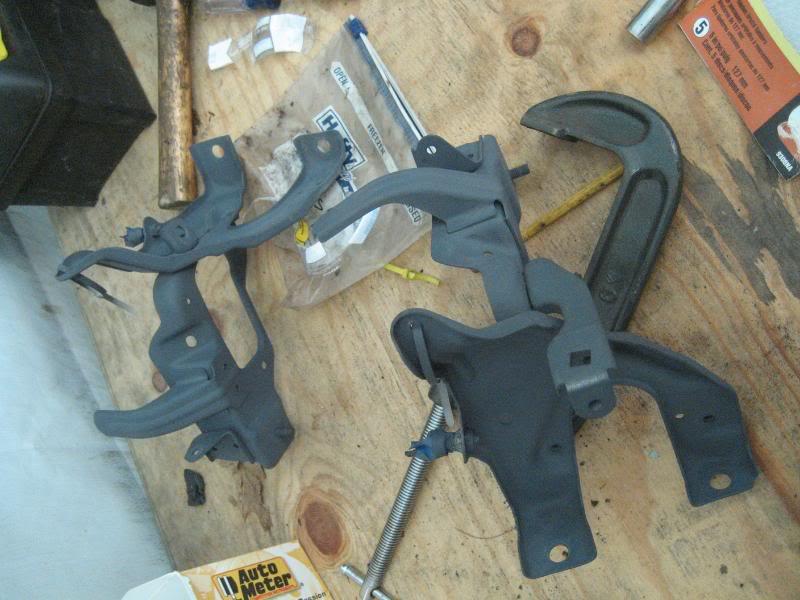
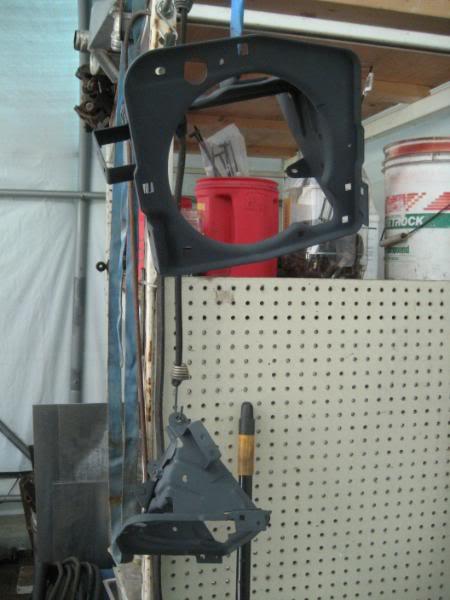
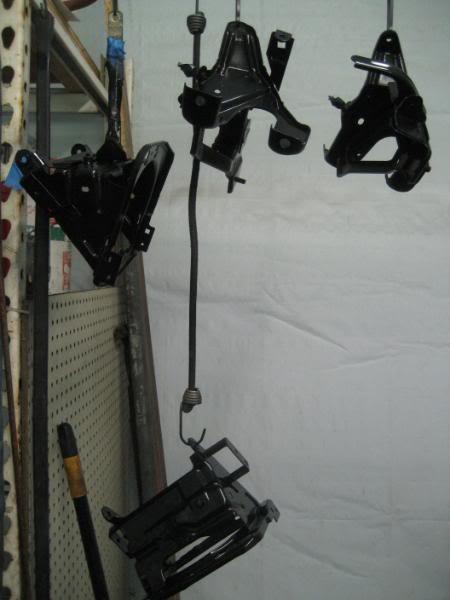
Small update:
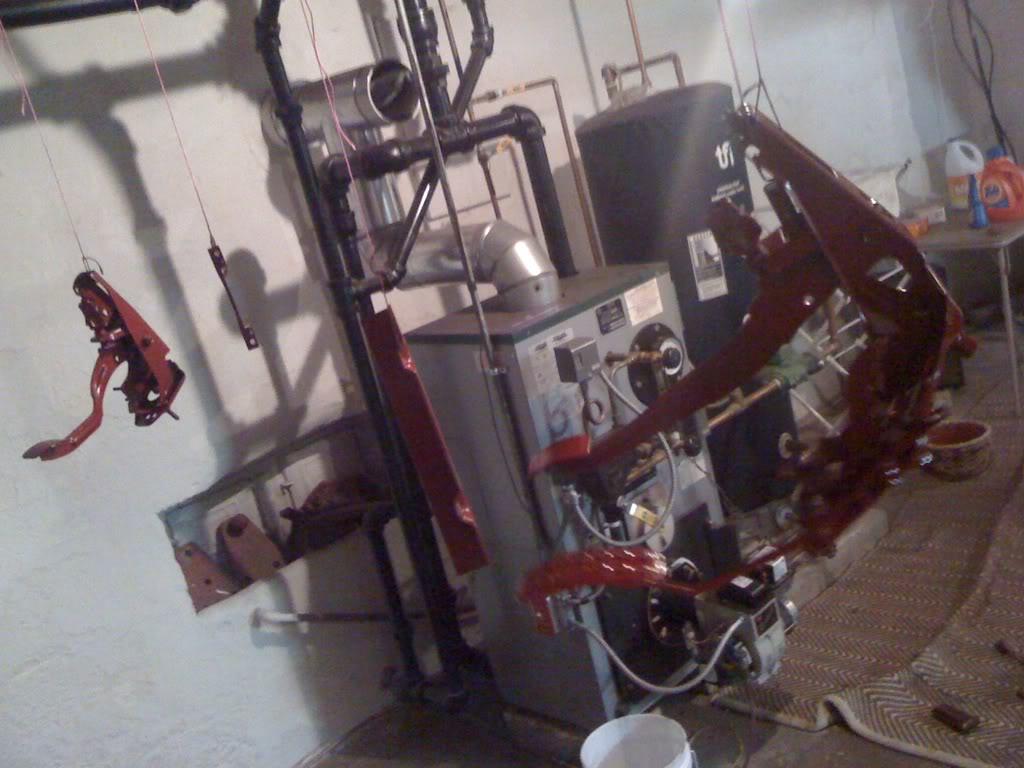
After removing the dash frame and pedal assemblies from the car, I brought them to the basement to clean them up and get the loose surface rust off. I also grabbed the steering column as it was starting to show some small rust spots. Once they had been prepped and the important stuff removed/tapped off, I primed and painted them with some spray paint I had lying around. Since the bracketry won't really be seen, color wasn't all that important... I painted the dash frame and the pedal assemblies fire engine red, and the steering column the same bronze hand-hammered paint I used for the roll cage. I think I'll probably go back and hit the pedals themselves with the hand-hammered paint as well. I figured since I had the car this far apart might as well take the time and get a coat of paint on all the bare metal.
Sorry for the crappy phone pics and the bad lighting in the basement.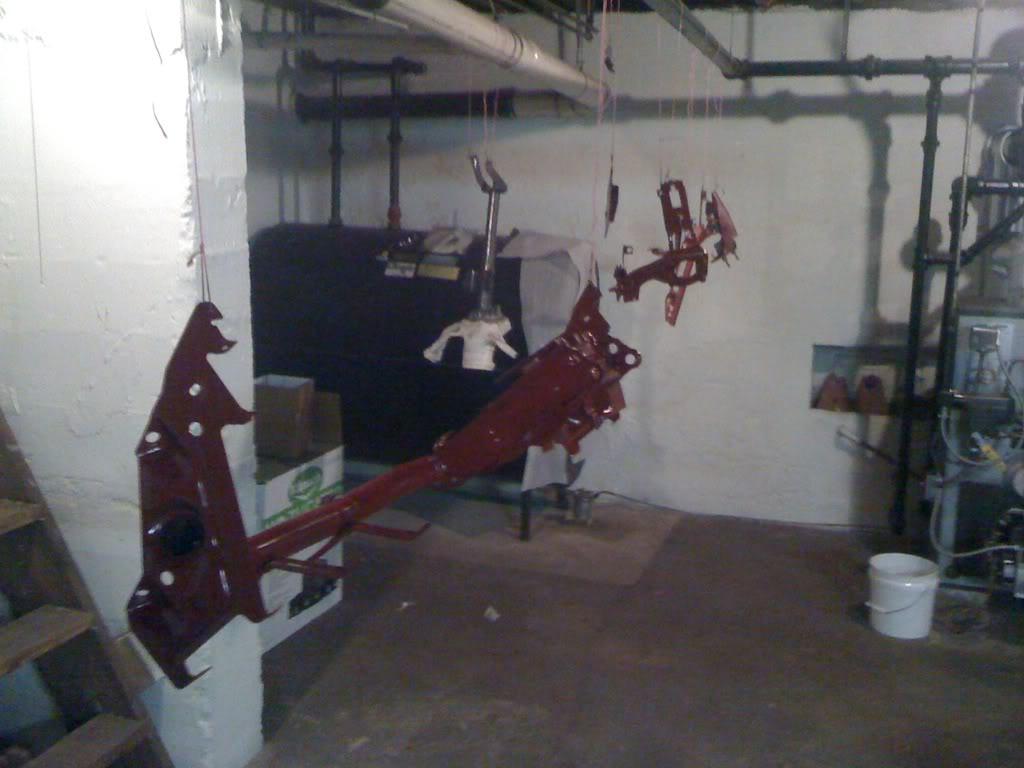
steering column: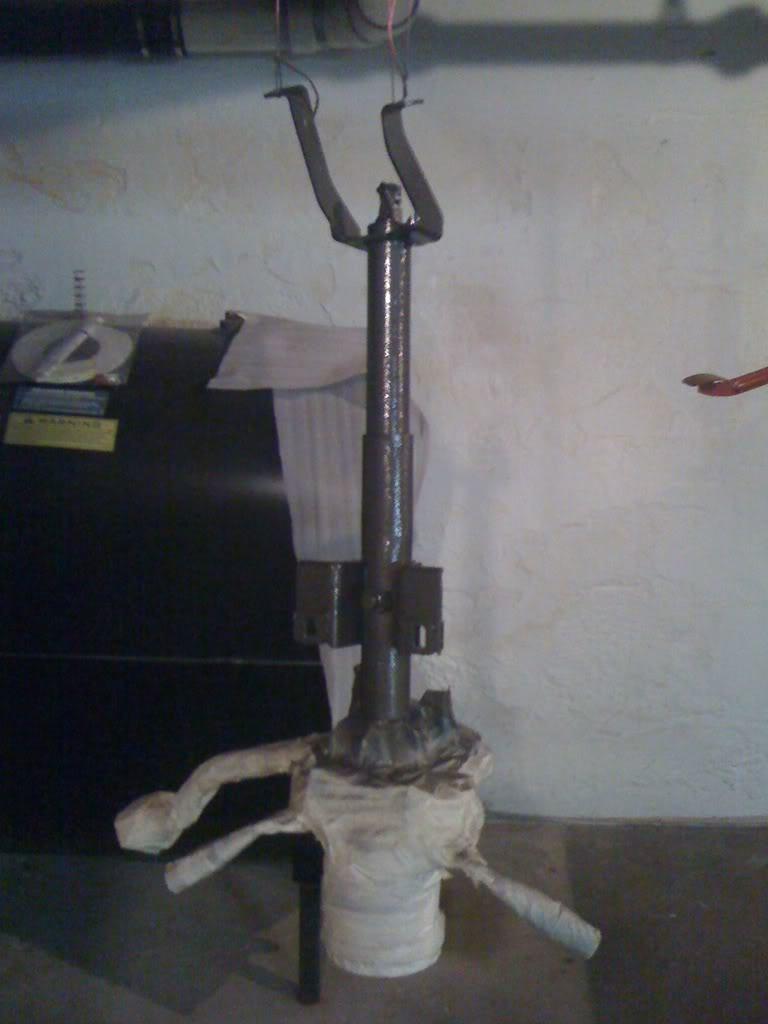
12/28/2010
Spent a little time out in the garage today.
Here's a shot of the engine bay as it sat this morning: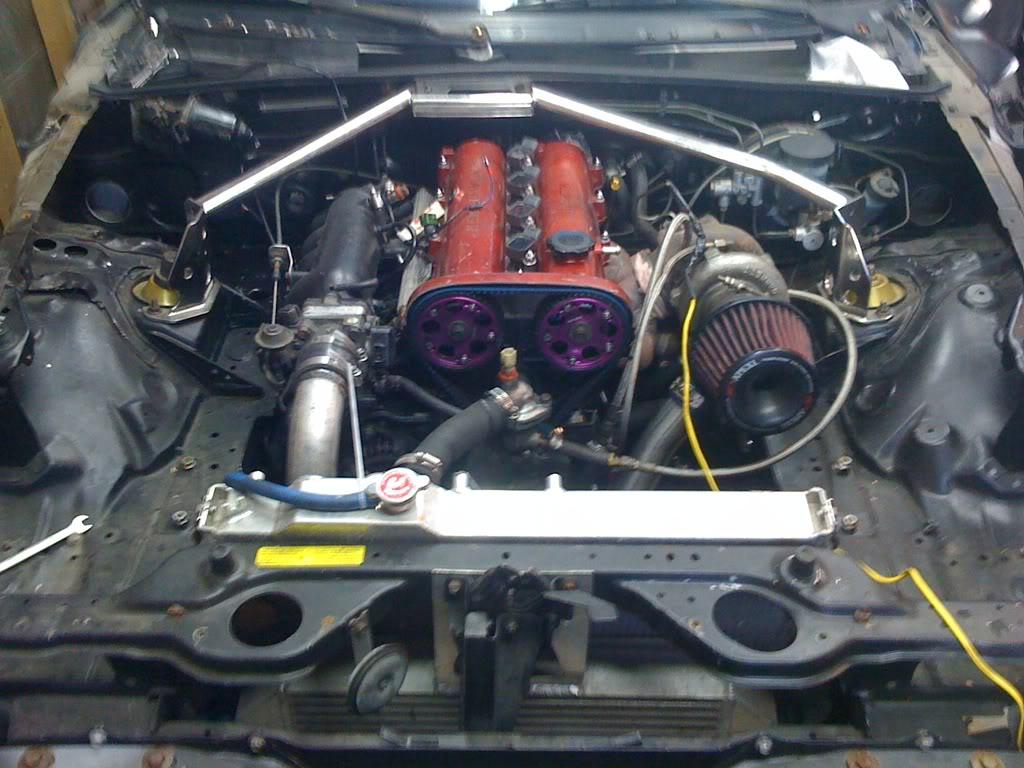
I got the driver's side wiring more or less ready to go. I moved all the relays to inside the cabin, and after some thought, will be moving the diagnostic box to inside the cabin as well. Here's a picture of the new location for the driver's side harness: 
I stripped off the factory loom and electrical tape, split the harnesses, and redid them using techflex and heat-shrink tubing. Here's a closeup of the headlight connections and the fan harness (sorry for the poor quality pics).
I reused the insulated pipe clamps from my last simple tuck again. So much cleaner now!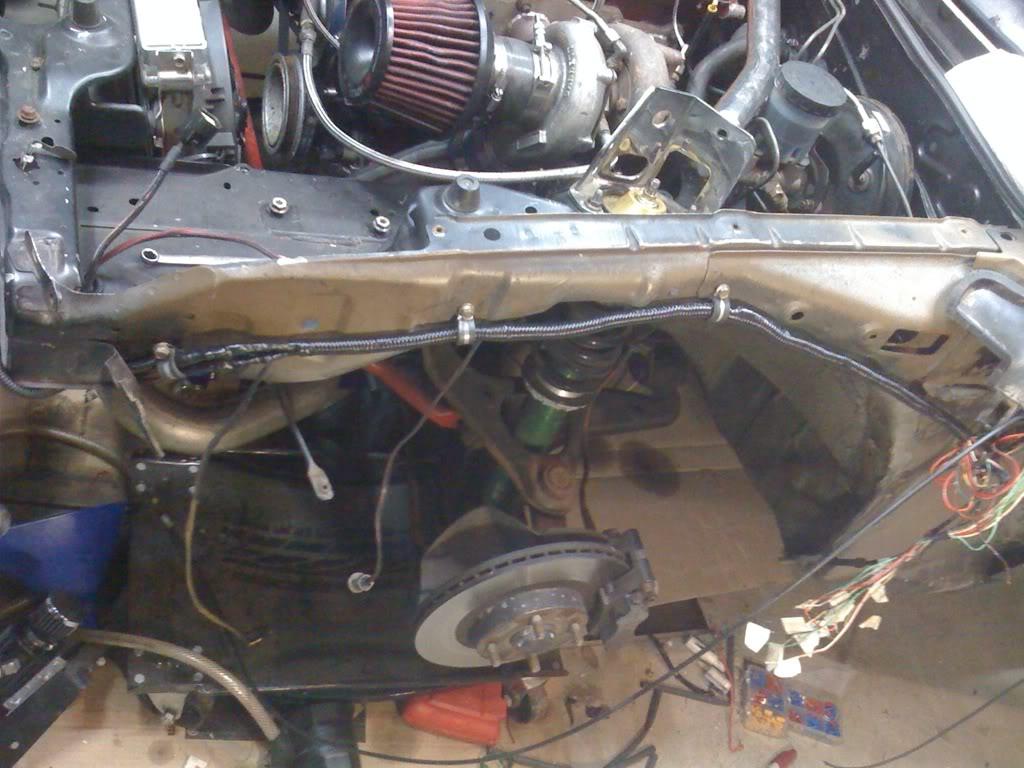
Got the fuse box completely out of the car, which turned out to be easier than I thought. 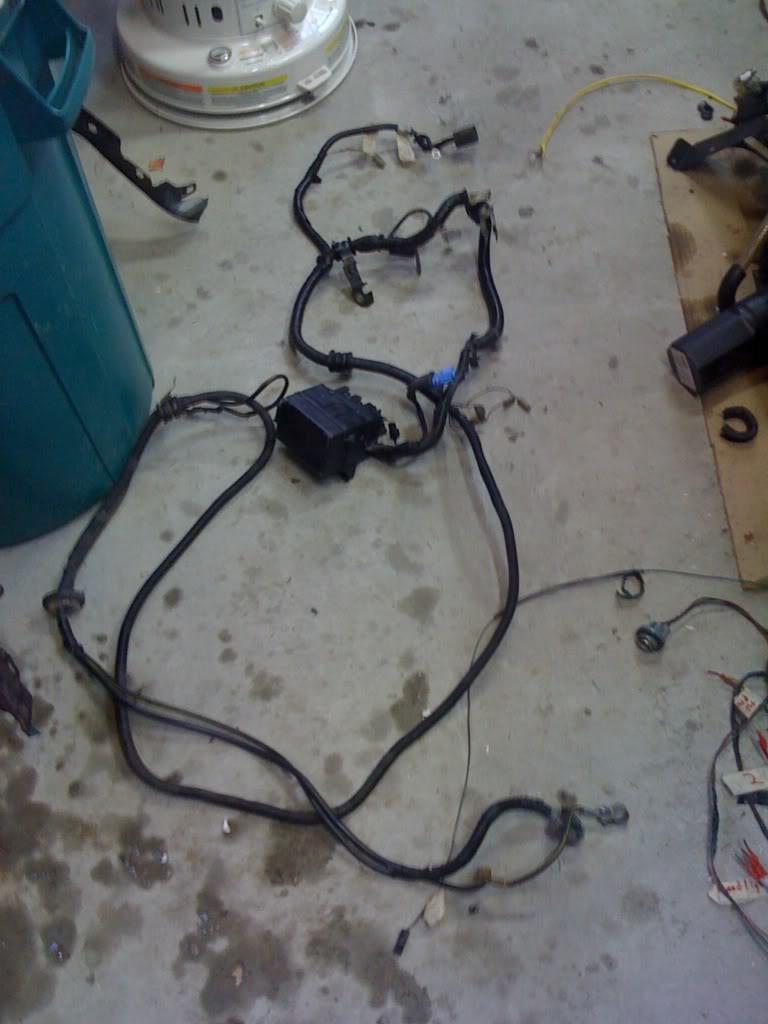
I will be running the fuse box wiring through the grommet in the transmission tunnel on the passenger side. I stripped all the factory loom off the harnesses. I'm going to run them to their respective locations first before I cover them in techflex, just in case any of the wires need to be lengthened/shortened.
12/31/2010
I ordered 25' of 1/8", 25' of 3/8", and 25' of 1/2". Probably more than I'll need, but I didn't want to run out.
Did more work today.
Slowly weeding out the unnecessary wiring in the main harness: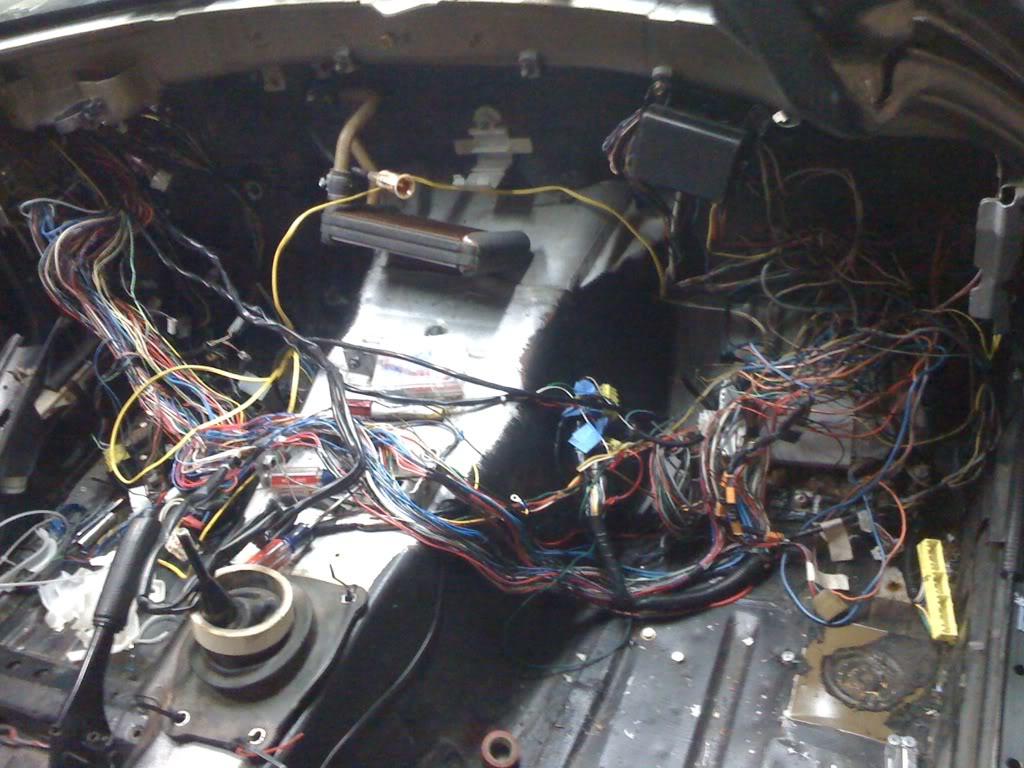
Here's a closeup shot of all the wiring going through the grommet in the firewall.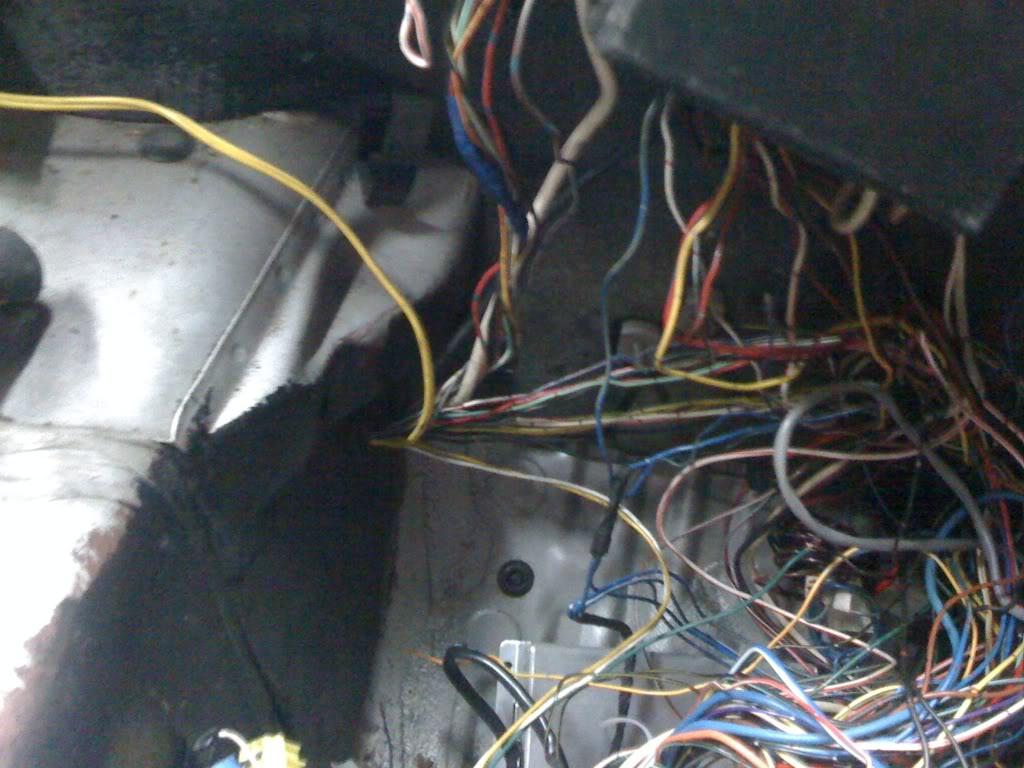
And the new grommet in the pass. side firewall which will hold the wiper motor harness, as well as the wiring for the pass. side lights.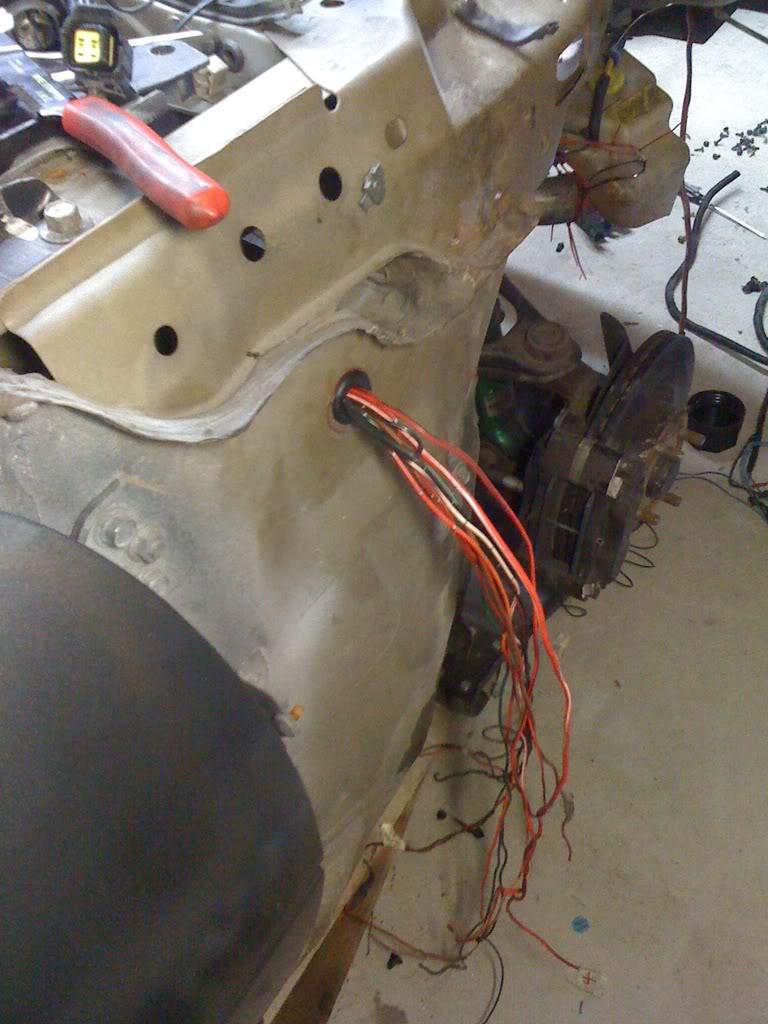
And the completed wiper motor harness- I used the hole in the firewall for the washer fluid nozzle for this new harness to pass through.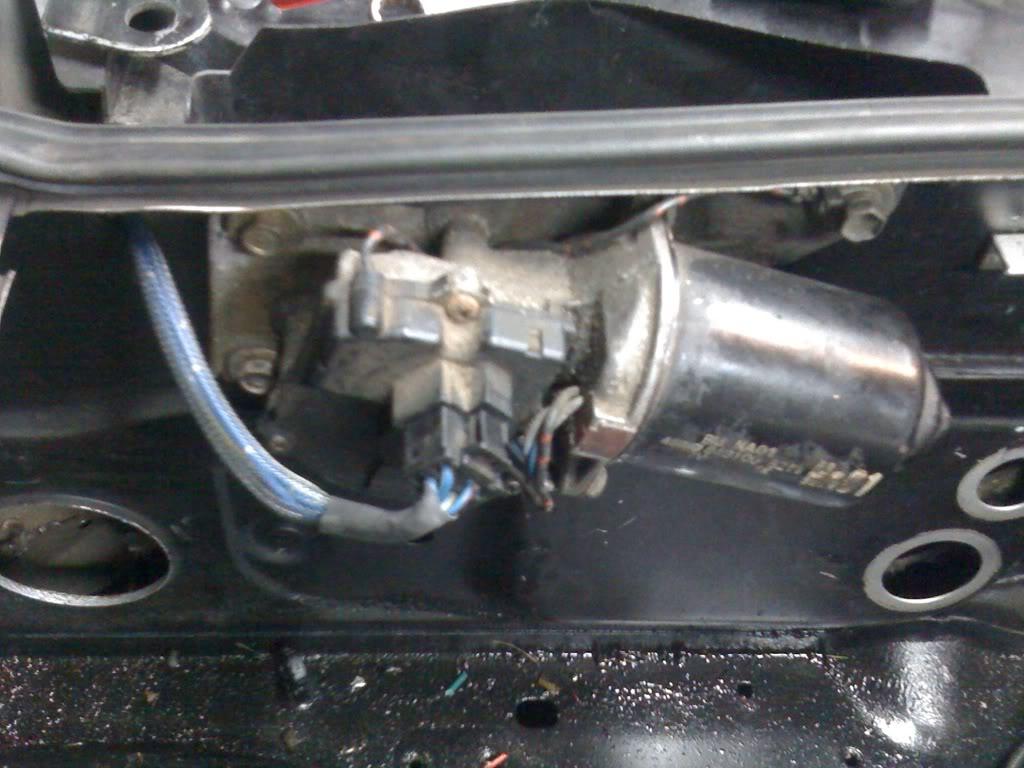
I will be moving the vacuum block and the 2 vacuum components for the Apexi AVCR to the shelf behind the firewall (which will end up being covered). I'm going to wait to mount them until I'm sure this is where they will end up.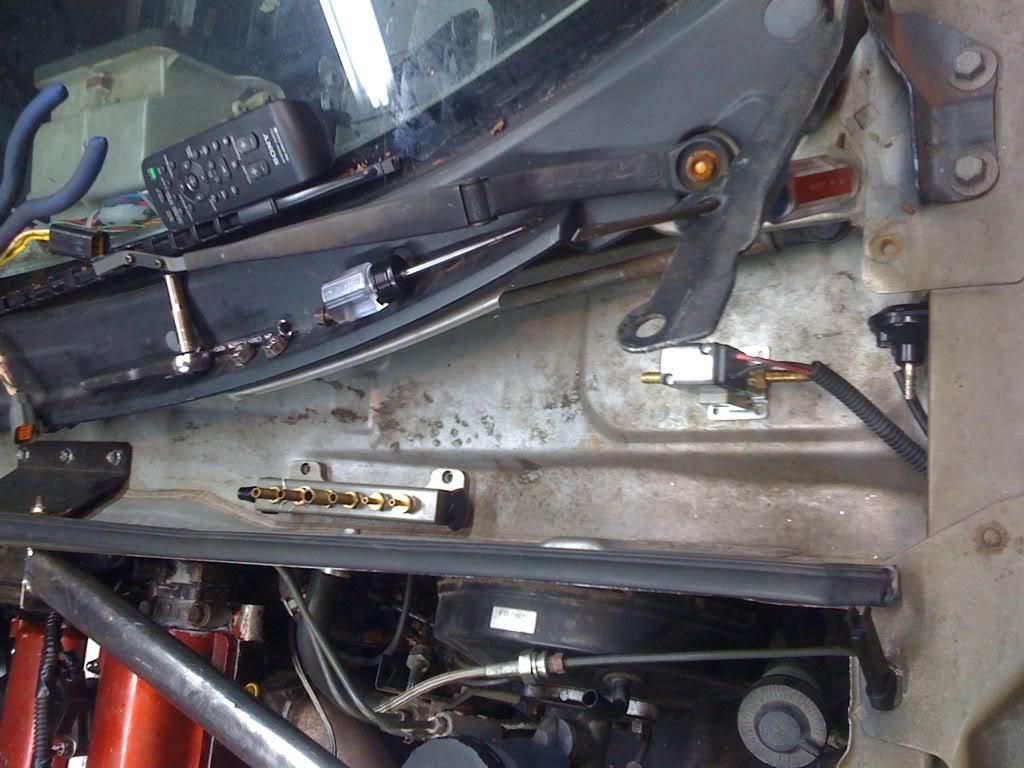
1/14/2011
Took a break from the wiring and started on my brake line tuck today. It's coming along fantastic. I got the clutch line completed, however I think I am going to redo it as I had a better idea. I also mounted the prop valve inside the car and ran 2 of the 3 lines from the master cylinder inside the cabin (haven't mounted them to the prop valve just yet)
1/21/2011
I forgot to upload the pics of the brake tuck work, but this just arrived in the mail: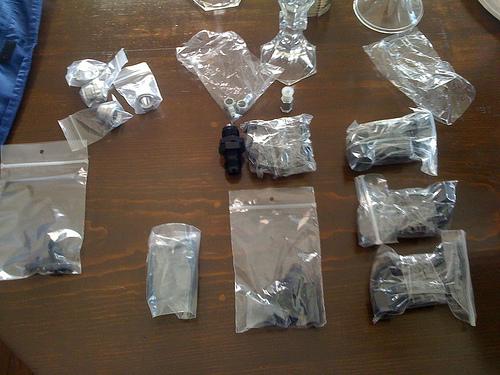
My first batch of AN fittings!
2/10/2011
I just realized that I never posted these pictures from the other weekend. Here is the start of my brake line tuck. The middle line isn't connected to anything in the cabin, hence why it looks out of alignment with the others, plus I haven't done any final tweaking either. I also wrapped each line in techflex as well. The bay will be getting a respray once things warm up, don't worry .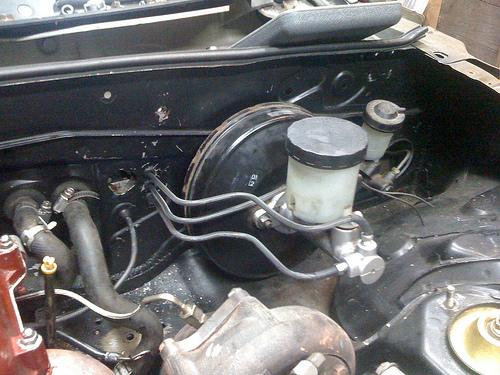
2/17/2011
It was brought to my attention today, that my car was featured on speedhunters! I'm honored it was chosen- here's the link for those that wish to check it out:
http://speedhunters.com/archive/2011...ted-miata.aspx
3/1/2011
I have finished about 99% of the wiring- all that's left is hooking up the gauges on the A pillar, which I have to wait until the dash is in to do. I finished the brake and clutch line tuck, and mounted the Apexi avcr modules and the vacuum block in the parcel shelf. I haven't been taking pictures, as I still don't have a camera- however I did finally order a new one, so I'm hoping it arrives soon.
5/2/2011
Long time, but a few updates. I've been slowly assembling all the an lines for vac and fuel. I decided to respray the bay too, as the black was too difficult to spot leaks/dropped hardware, plus I wasn't all that in love with it. I'd say it's a 100% improvement over the black.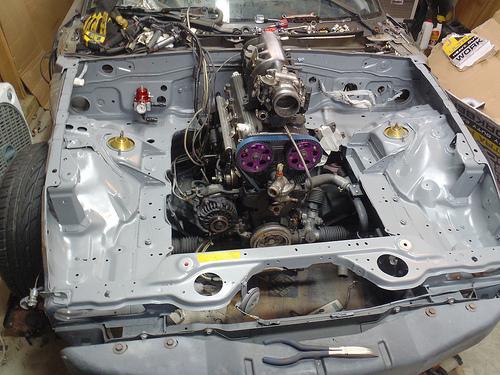
Also stripped, prepped, and painted some of the misc. pieces going back on so everything will be nice and fresh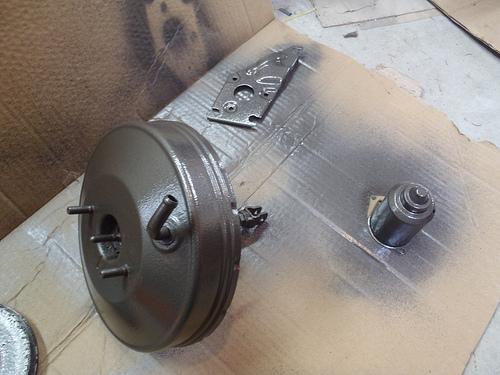
Also gonna try some VHT high temp paint out on the mani and turbo. It's allegedly good up to 2000 degrees, so we'll see: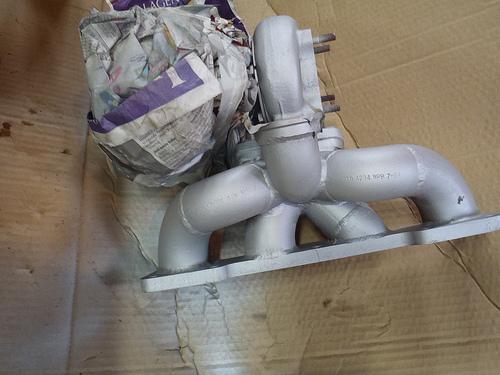
5/9/2011
New part update! After a year 3 search, my quest for the Holy Grail is finally over! I received a tip from fabel that a Mazdaspeed Trap Timer was up on ebay, and I jumped on it! Can't thank you enough fabel for the heads-up! You're alright in my book!
I'm real excited to get this bad boy mounted up!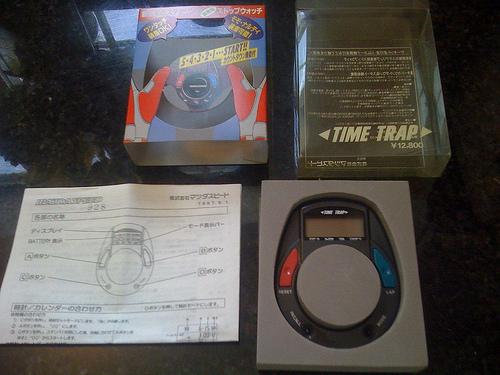
5/16/2011
Update:
I finished assembling all my fuel lines, mounted the catch can, and assembled those lines as well. I also swapped out the factory harmonic damper for an ATI Super Damper.
Breaking news!
Also, after some investigating, I have located a rubber plug that fits in the firewall holes for the engine harness! The plug is for a hole 2 7/8" in diameter, from an unknown Toyota, and can be bought from this vendor on ebay: http://cgi.ebay.com/ebaymotors/ws/eB...IF%3AUS%3A1123
They took close to a month to get here, but they fit perfect and look right at home on the firewall. I'll post some pictures of my work and these firewall plugs tonight.
5/17/2011
Did a little more work on the car last night as well as took some pictures.
ATI Super Damper and Flyin Miata oil cooler setup: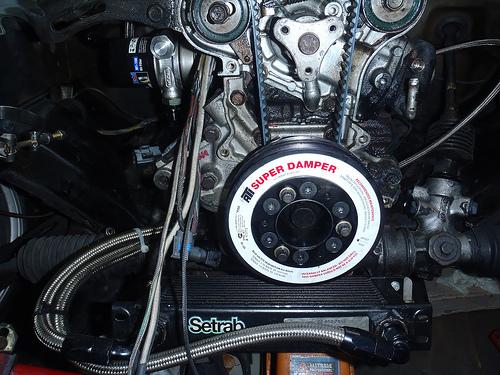
The more or less completed fuel lines and the wiring harness going to the front of the motor: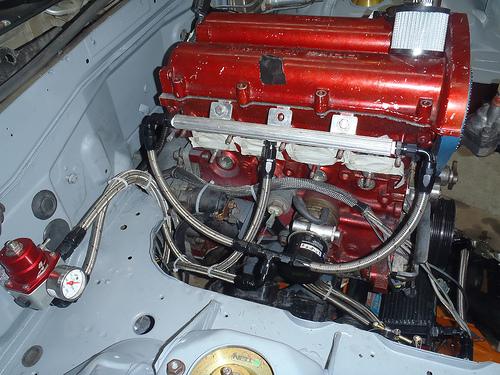
And now for the firewall grommets! I also took about the wiper motor apart and painted it.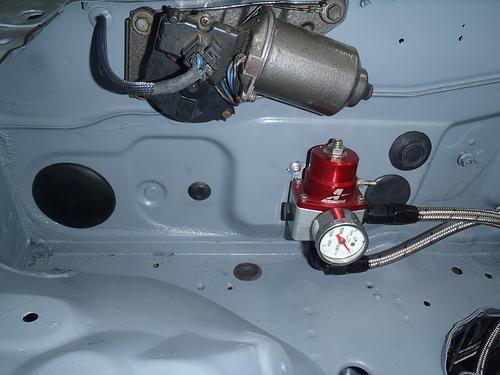
Driver's side grommet: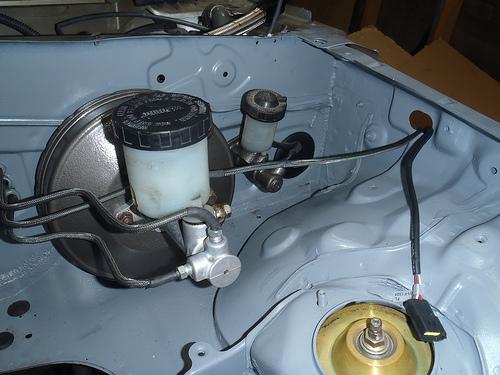
Here's where I will be mounting my catch can: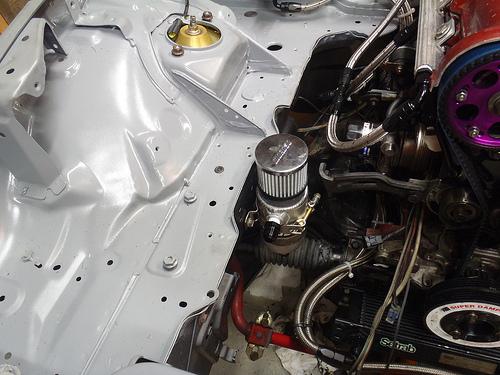
And a pic with the intake, and the fuel system all bolted back together:
I routed all my fuel lines so that they don't come in direct contact with anything. The catch can and it's respective lines clear everything as well. I'm going to be running a drain line to a valve tucked somewhere hidden that I can easily access.
6/1/2011
Couple pics:
I will be wrapping the vac lines in Techflex. The main vac line off the intake runs to a 6an bulkhead fitting, and then over to the brake booster.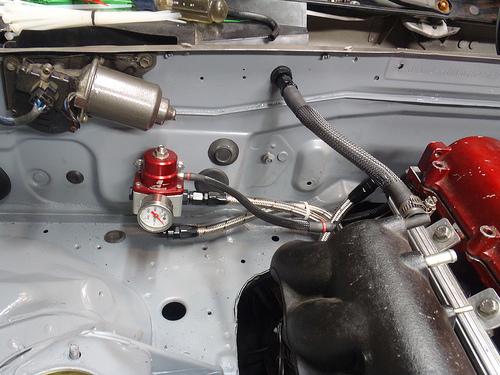
The wiring on the passenger side is complete and all ready to be bolted down for the final time on the pass side. Here's a shot of the routing under the passenger headlight: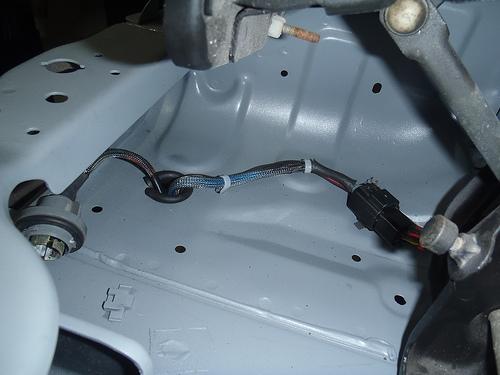
I forgot to take a shot of the harness running up the fender, will do that next time I'm out there.
6/5/2011
Got the exhaust manifold, downpipe, and turbo back on the motor. I also drilled and tapped the mixing manifold and the thermostat neck to accept a 6an fitting to eliminate the need for a short section of hose. Most of the lines are now bolted down, although I took the following pic during the install, so they might not be in their final locations. It's starting to look like a car again!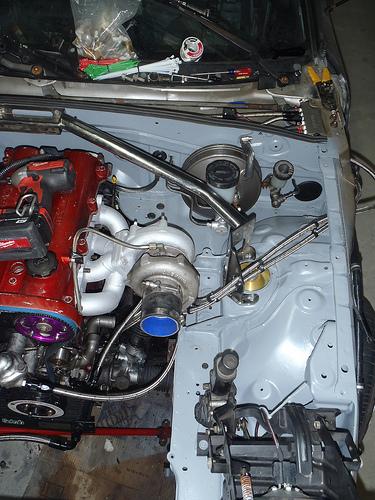
6/13/2011
Dropped a few things off to get powdercoated with a local powdercoater. I had them match the color I painted the roll cage (a dark bronze) with, and then go over it with layer of clear. Excuse the dust.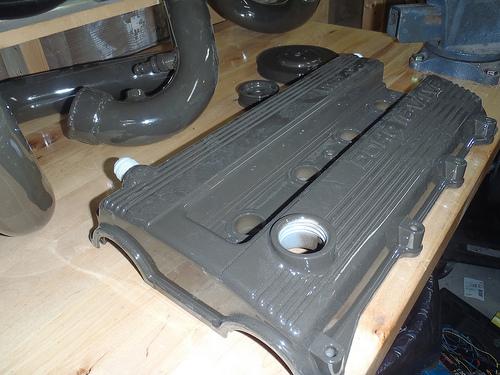
6/15/2011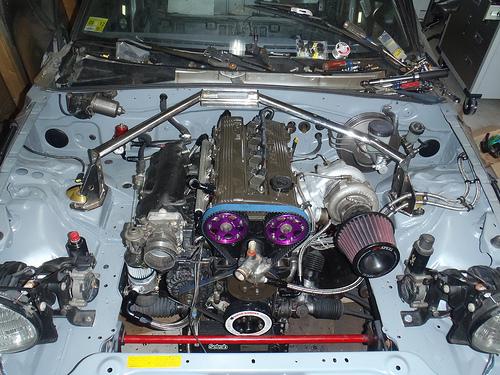
6/25/2011
crappy iPhone pic (I'll take a better one I promise), but the engine bay is all set minus fluids. Couple more terminations with the dash I need to finish, put the interior back in, and I should be back in action. Trying to get it ready for next weekend.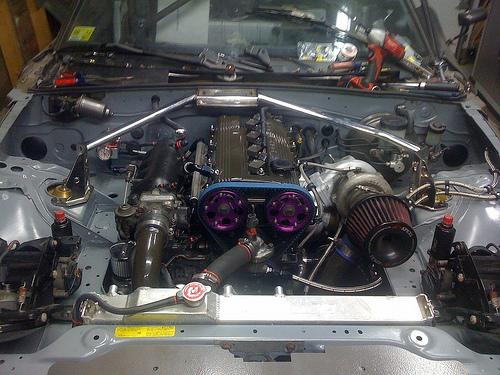
7/2/2011
The car is back in fighting shape! It started up almost immediately. All of my wiring with the exception of the oil temp. gauge is working as well, which was a relief. I'm wondering if I might have disrupted the connection to the gauge when I was putting the dash back in. Ran the car for about 30 minutes to make sure the fan cycled on, and everything was normal, no leaks, etc. Tomorrow I'm going to have a buddy come over to help bleed the brakes and then it's off the jack stands hopefully for a looooong time!
7/5/2011
Took the car out for a test drive yesterday- it's running pretty good! I believe I have a small vac leak at one of the wastegate fittings, but other than that everything seemed happy. I'm going to put some more time on it before checking the catch can to make sure I'm not blowing oil out still, but I'm about 99% positive that was due to a poor seal job on the baffles.
I freaking love this car.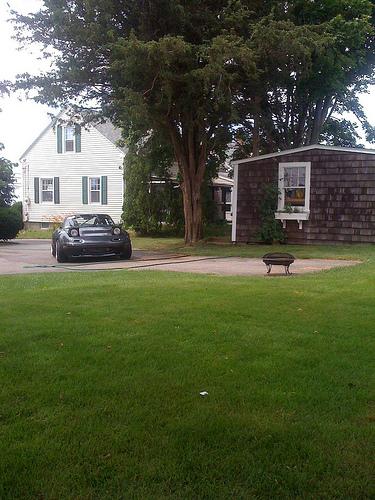
7/6/2011
I finally mustered up the courage and mounted my hood-pins over the weekend.
First cut is always the hardest: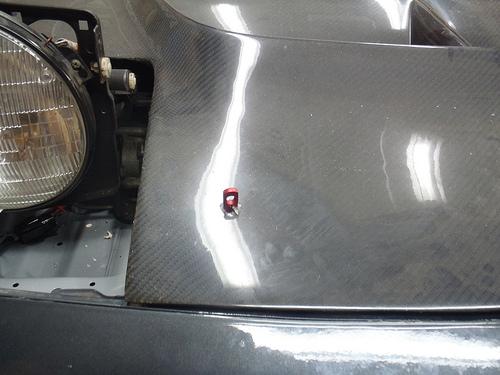
Put down some blue tape and traced out the pattern for the latch: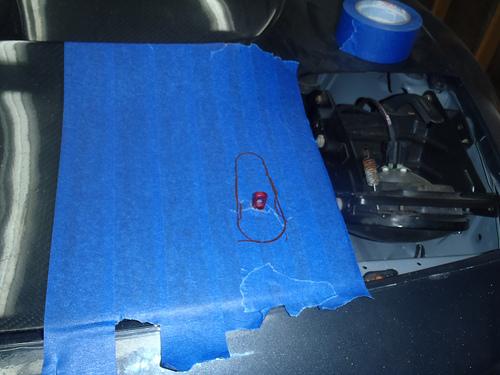
With a combination of a drill, grinder, jigsaw, and a sanding disc I was able to test fit the latch (I know I'm jumping from side to side here, sorry about that):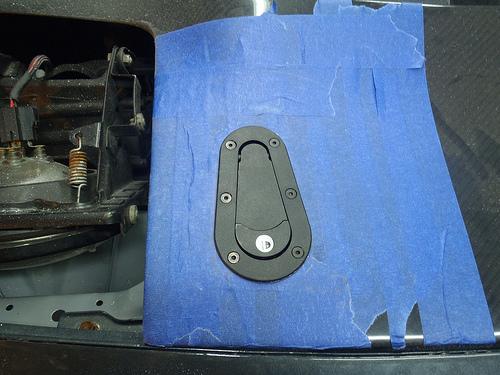
Here I am test fitting both of the latches, and making sure they are able to catch the pins.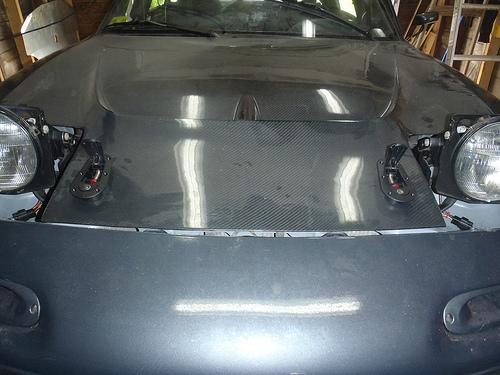
All done! I put some silicone sealant around all the cut edges as well as the perimeter of the latch so water can't get in. Took this pic before cleaning up the excess silicone and dust.
7/14/2011
I went to go and install the Tein EDFC control motors last night, and it turns out they aren't compatible with Tein RA coilovers- ARG! I'm going to call Tein USA today to see if there is someway I could retrofit them on. The issue is the top stud on the coilover where the motor threads on is too short.
7/18/2011
Couple pics a friend took from our little cruise last Friday. I haven't gone through the pics I took yet, but I'll post a few once I upload them.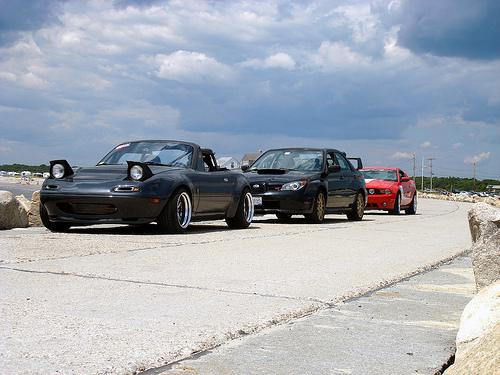
7/26/2011
Put some heat shielding on the underside of the hood, as well as on 2/3s of the brake reservoir (Thanks Revlimiter for the link!!). I left the section facing the fender open so I can still check the fluid level.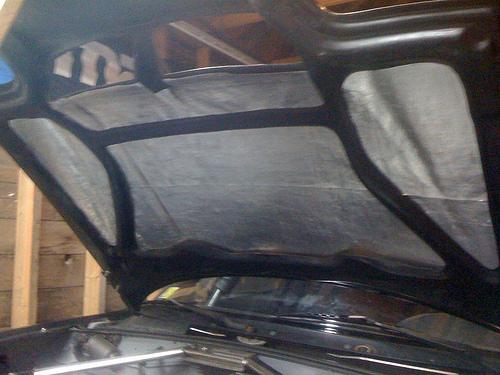
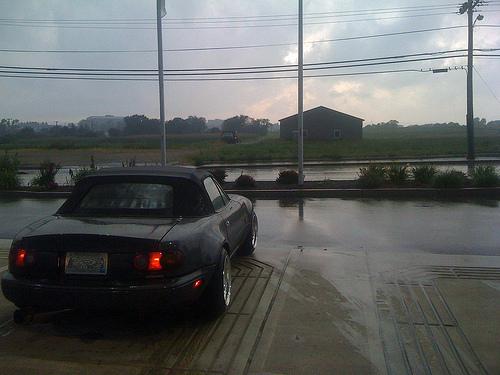
Went for a spin after work and took a few pics with my phone. I'll post one for now...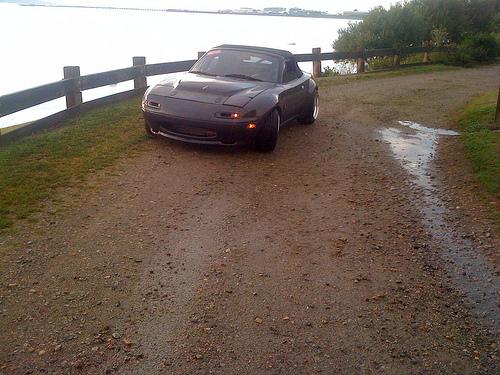
7/27/2011
Few more pics from my drive last night. Sorry for the poor quality, I used my phone.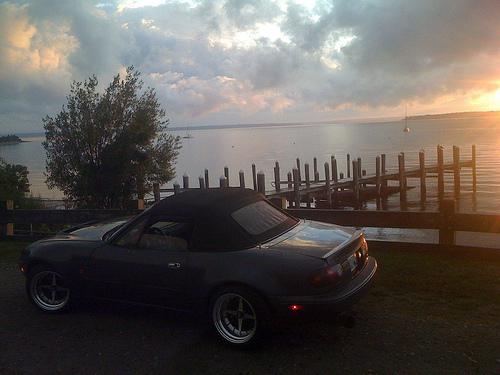
This last one was from a previous day, but still a neat picture: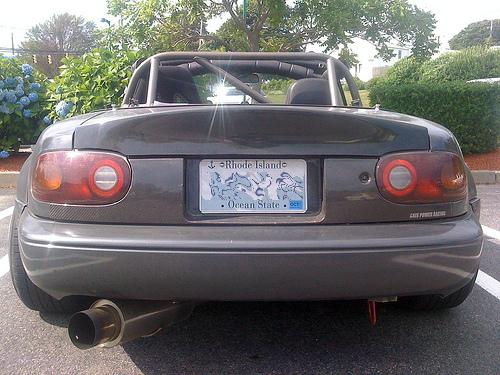
8/2/2011
Did some trimming and lowered the car a bunch. Crappy iphone, poorly lit, garage pics until tomorrow when I can actually have room to take some halfway decent ones. Ignore the dust all over the car, I'm going to wash it tomorrow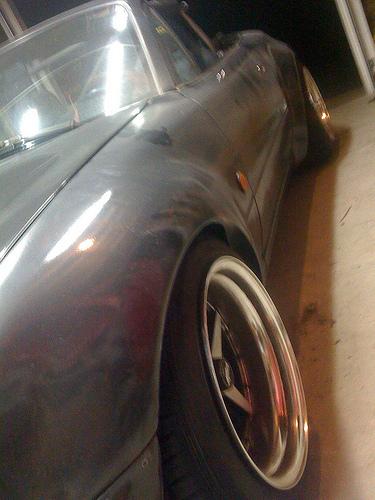
8/3/2011
more crappy shots, but at least I can get the whole car in view 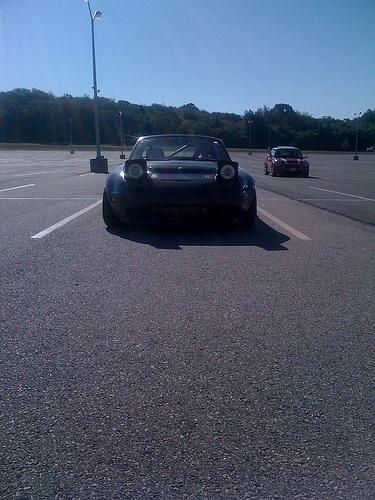
8/4/2011
Couple pics I snapped of my friends MSM and my miata:

8/10/2011
Not a car update, but I did clean the garage out and built a few shelves to ge things off the floor, so I thought I'd snap a quick pic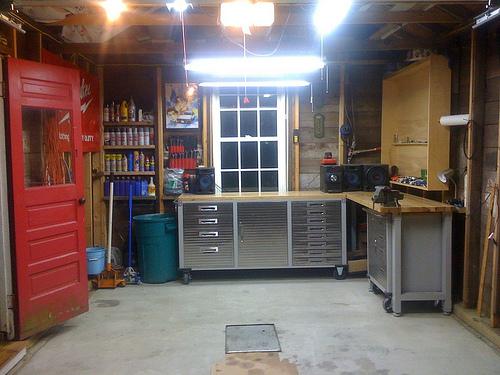
And one at night which I thought came out cool. Wish I used my real camera but i still can't find the battery charger for it....sigh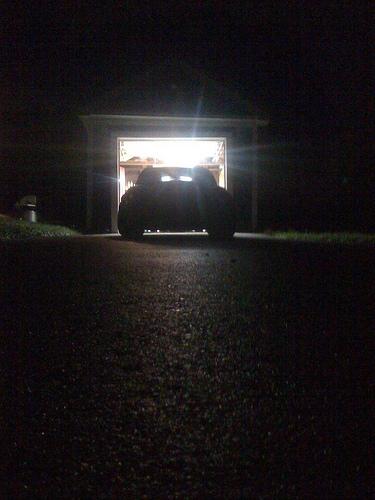
8/16/2011
Couple pic of my buddie's integra and my car.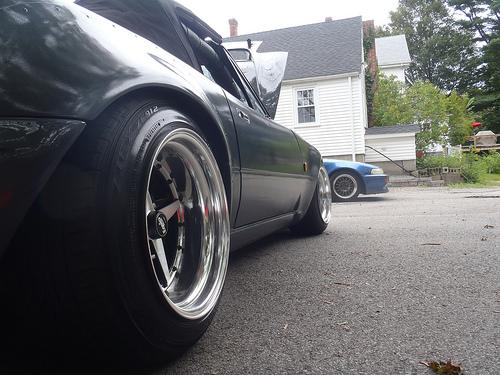
8/17/2011
298.6whp 270ft/lbs tq to the rear wheels @18.2 psi. Peak power was right around 7000 RPMs. Rev limit set at 8500 RPMs.
I took a bunch of video, I'll try and upload it later tonight.
Here is the proof 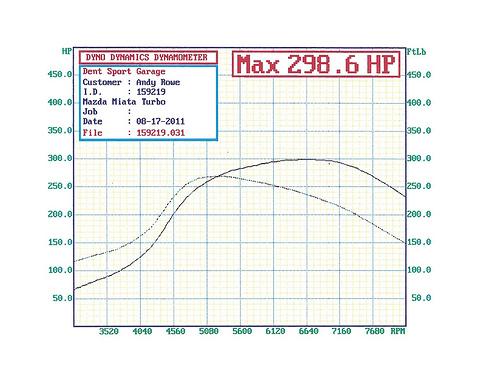
Boost and AFR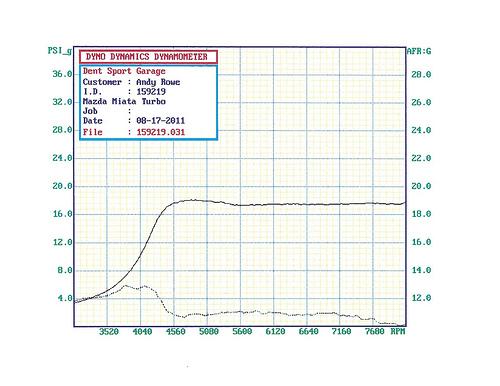
8/18/2011
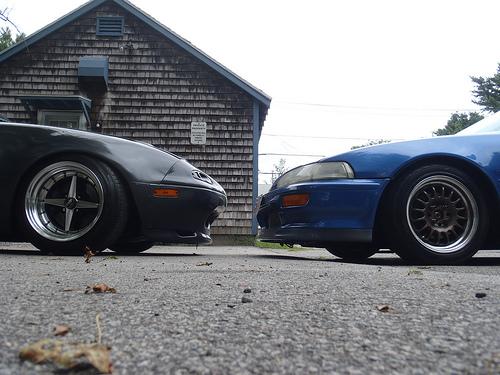
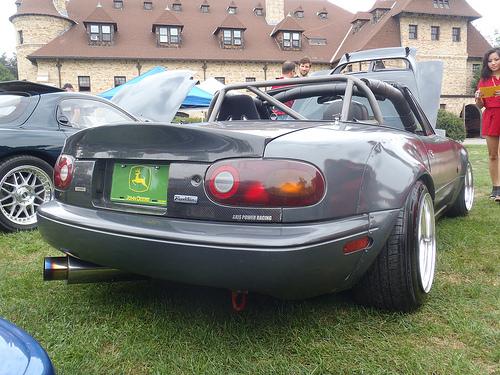
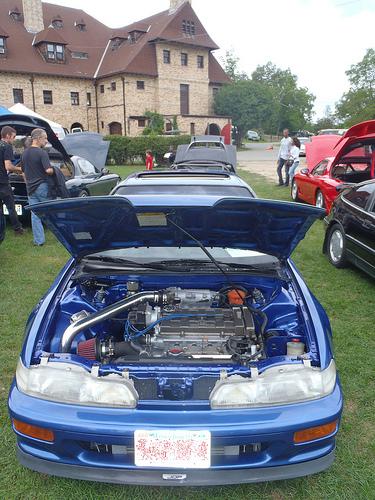
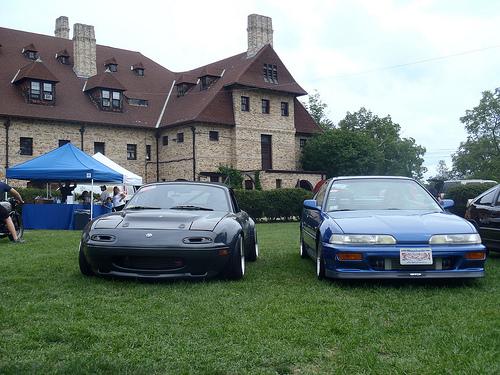
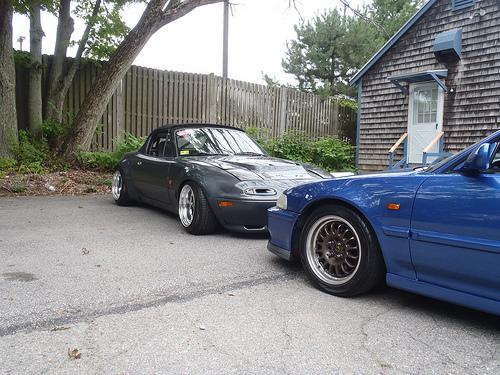
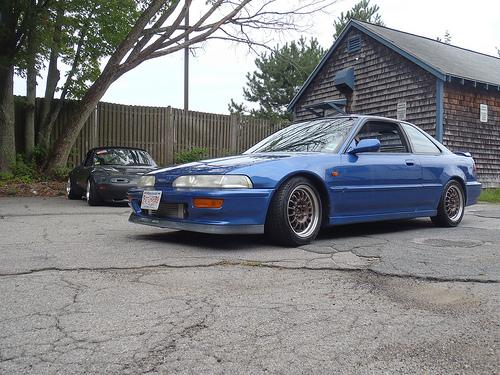
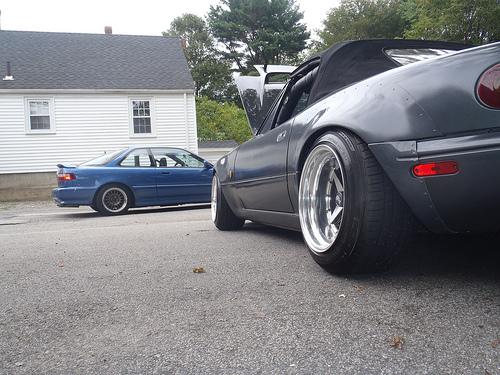
Picture blast, get ready! Got the photos up from the Larz Anderson meet last Sunday! My buddy has the blue DA. Hope you enjoy!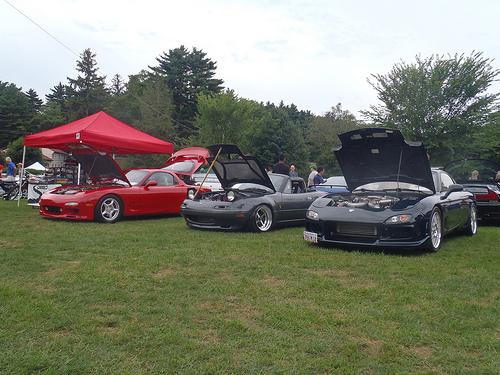


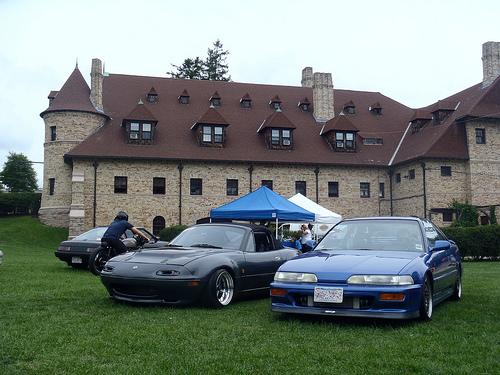
We stopped and did a mini shoot on the way home as well.
That right there is a diff!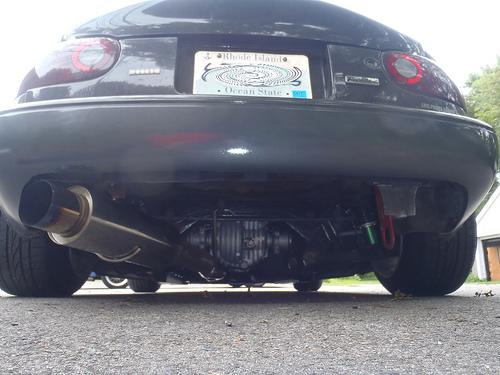
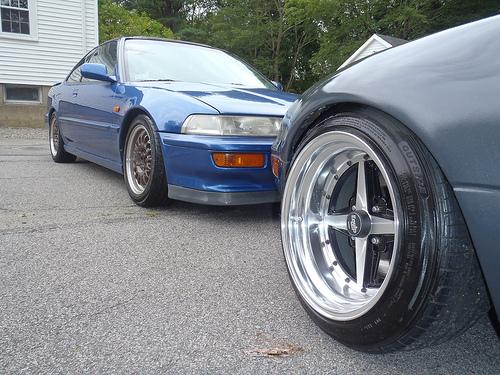
closeup/ground clearance shot: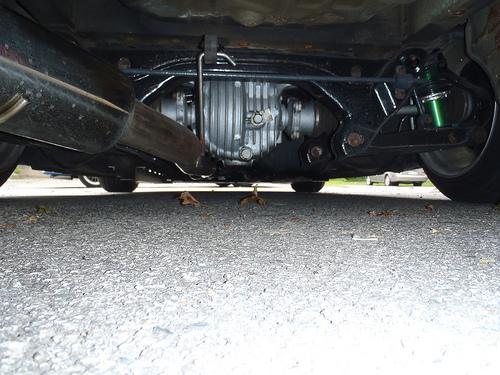
No those aren't Rotas 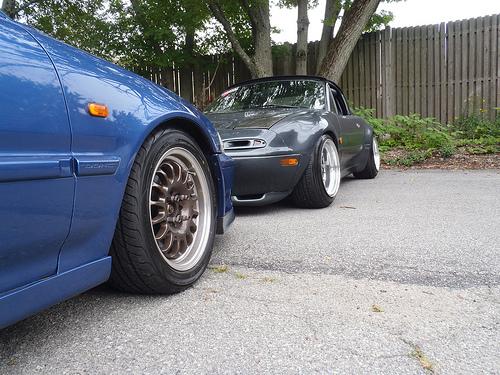


A wet sand is next on the list, I know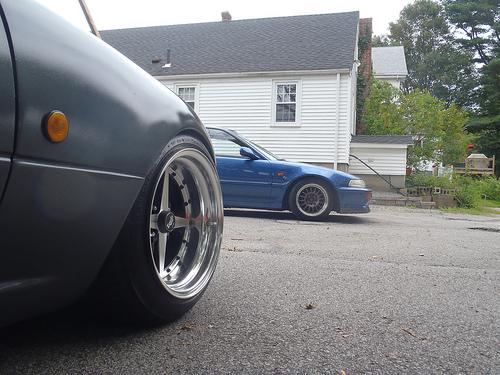
9/2/2011
I never posted a pic of this, but I converted all the interior lights to LEDs. I did the entire cluster, including all the indicator lights, blinkers, high beams, etc, as well as the HVAC and footwell lights.
blinkers on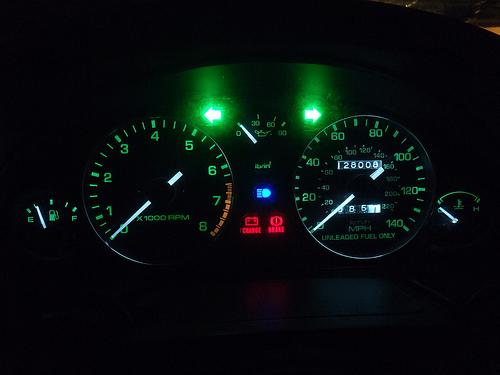
blinkers off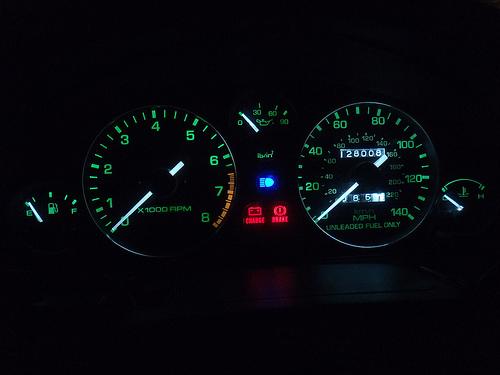
HVAC cluster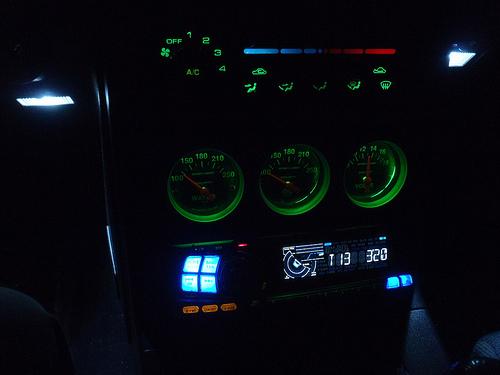
9/15/2011
I ended up ordering a set of custom gauges through Revlimiter. They arrived today, and I installed them right away. I wanted a custom set of gauges that would go up to 9 grand, yet to the average joe, appear completely factory. We bounced ideas back and forth, and the final result ended up like this: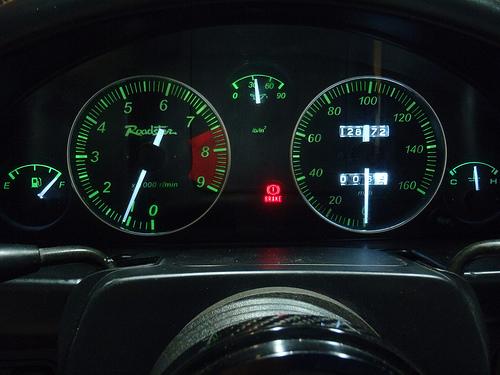
closeup of the tach: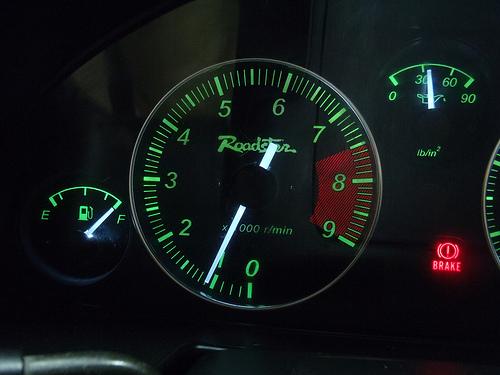
closeup of the speedo: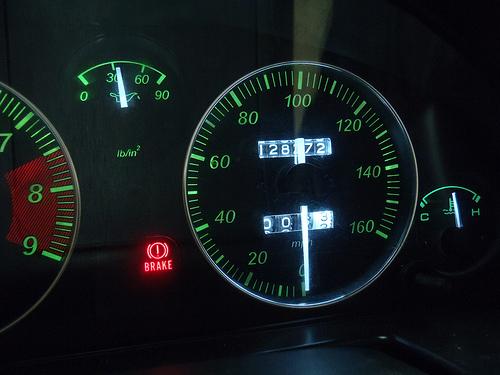
I'm pretty sure the dark spot in the redzone is leftover residue on the clear plastic from the old gauges that I must have missed. I didn't notice until it until after I had reassembled everything, so for now it's going to stay.
I also picked up a new toy from a buddy. It is a 2003 Birel 125cc racing go kart. It will rev up to 14,200 RPMs, has a top speed of 74mph, and capable of pulling 2.5Gs in the corners! I can't wait to get it out on the track.
Quick pic (garage is full at the moment, and thus a complete mess):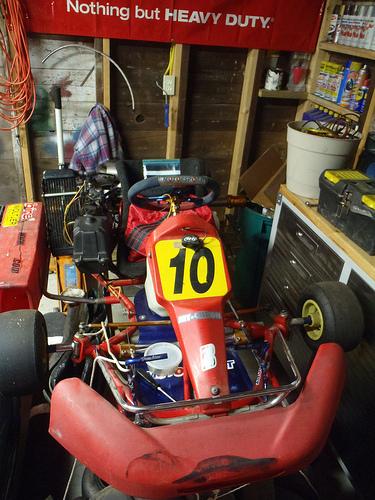
9/19/2011
ha ok 
Took a pic today at work:
I also installed an AEM intake on my friend's MSM. He has a few other upgrades as well (FM little enchilada). I swapped the intake for the AEM one as the FM intake is not CARB approved, while the AEM is (he's moving to San Diego).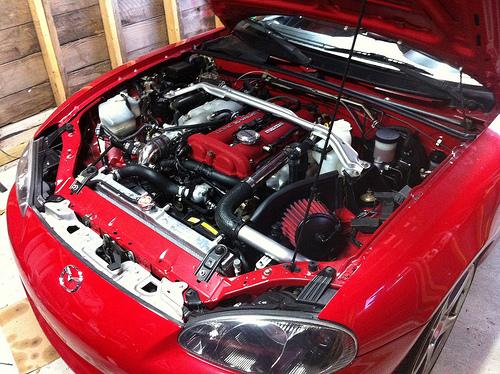
What a difference from driving this car vs mine!
Picture a friend took from a car meet yesterday: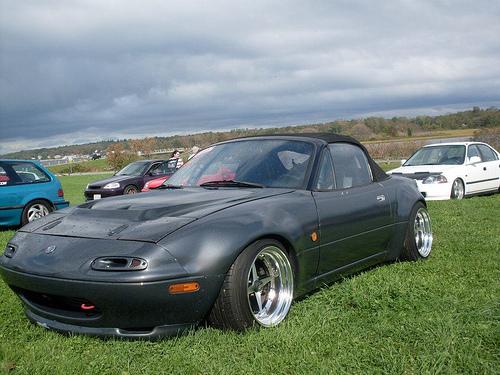
10/12/2011
Took a couple pics during the wetsanding (not very exciting)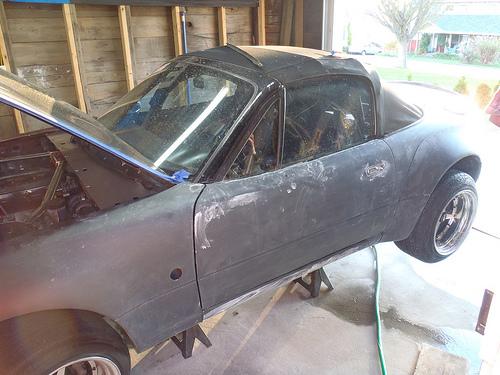
10/17/2011
So I have some time, thought I would update as I did a bit of work for this show. I'll refer to the pics above for the engine stuff.
In the engine bay, I ordered a Garage Star wiper cowl plate in brushed aluminum. I also fabbed up a new rad block-off plate out of an aluminum sheet and deleted the cutout for the stock hood latch as I no longer have it, then hit it with a scotch brite pad to give it that same brushed look as the Garage Star piece. I also replaced every nut in the engine bay with a SS acorn one, and any old nuts where an acorn couldn't be used with some new SS bolts. I wetsanded the engine bay as well with 1000 grit.
On the exterior, obviously I did a ton of wetsanding. Started with 800 on some of the rough spots, then 1000, 1500, 2000, followed up by rubbing compound and polishing compound with a buffer. After that a bit of wax. I ordered touch-up paint to fix the lip and a few small rock chips, but it didn't arrive in time, but yes I will be taking care of that.
Here's a shot I took after I did the rubbing compound with the buffer. I'm standing in the doorway of the garage, hence the tree in the reflection- not too shabby!
I also got a set of NB Zoom carbon fiber side mirrors. The mounting plates are different (bolt spacing is the same), but there is more than enough adjustment in the mirrors for them to work. So for anyone out there wondering, yes you can mount NB Zoom Engineering carbon fiber side mirrors on your NA and have them be functional.
Here's a shot of the mirrors, and also one of a sweet wooden MOMO wheel I recently picked up (reused my old horn button)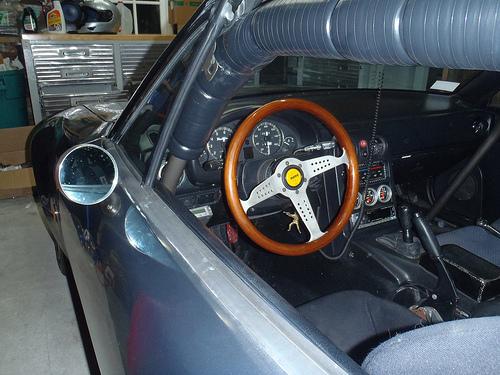
If you look closely in this pic at the HVAC controls, it looks like there is a carbon fiber trim piece. This is actually a piece of aluminum etched to look like carbon fiber. I bought it like 2 years ago, decided not to mount it, put it away somewhere safe and forgot all about it. I rediscovered it looking for something else the other day so I thought, hey why the hell not?
I also wrapped the 2 upper bars with electrical tape. Don't really like it, but it is better than the zip ties I had. Over the winter I'm going to have my wife sew up some canvas covers like what came on Jeeps from the factory.
On the front of the car, I decided to put the stock lights back in as it was supposed to rain Friday, and good thing too as we drove through a downpour pretty much the entire way down to Jersey. I decided to leave them in for the show too.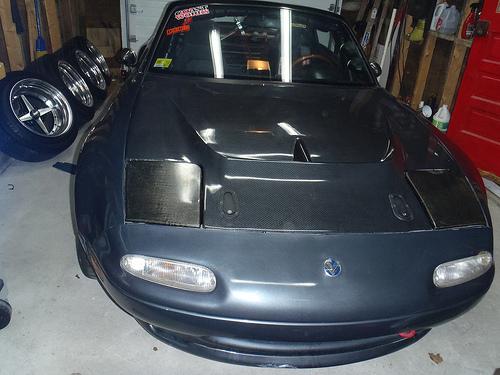
I also picked up a set of crap wheels with some almost new 225/45/15 NT-01s mounted on them. Bolted them up last night and went for a spin and my god do they grip!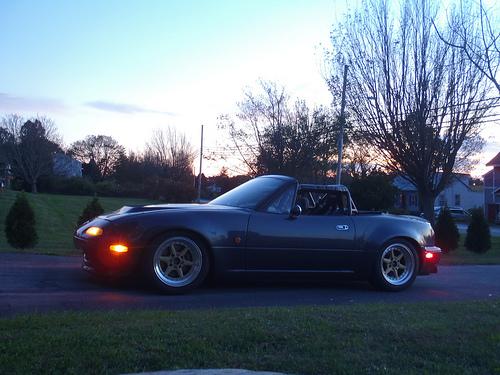
Makes it looks like a complete sunken battleship, but they'll certainly do the trick. I signed up to do my first auto-x on the 30th with this thing; can't freaking wait.
11/2/2011
Cannibeats covereage of First Class Fitment is up! My car is on pg. 1 and 6.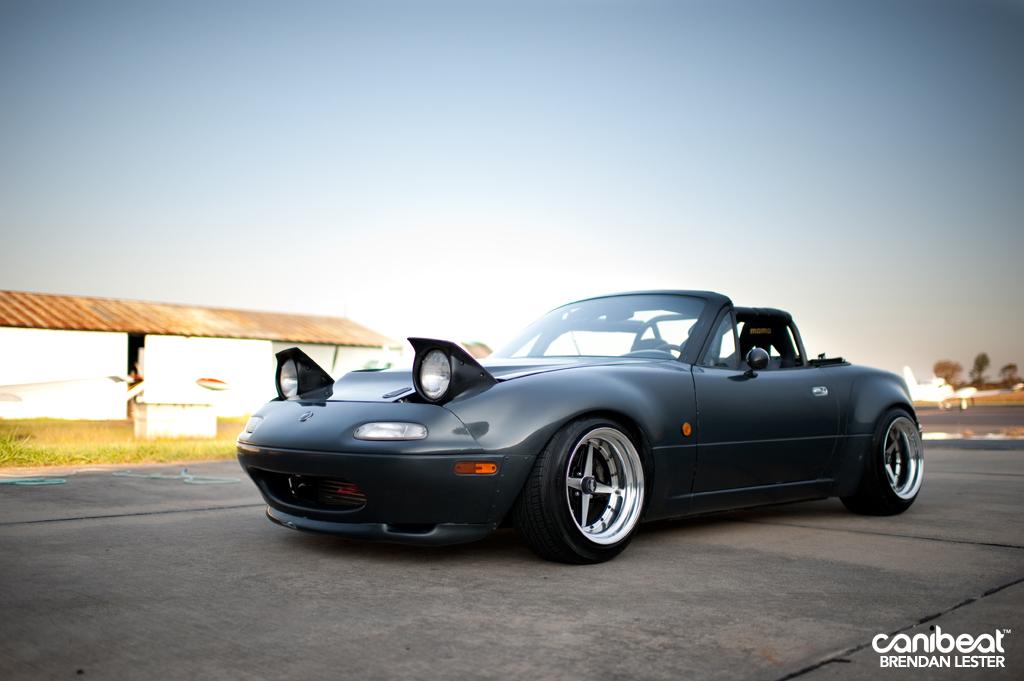
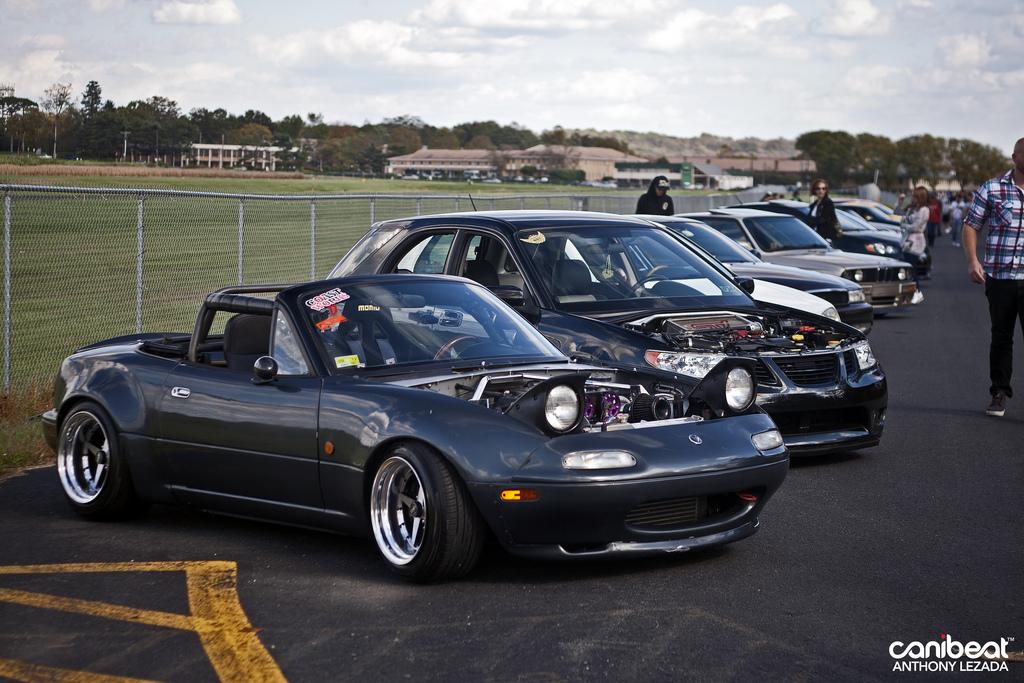
Here's the link to the rest of the photos:
http://www.canibeat.com/2011/11/firs...verage-part-1/
11/3/2011
My car got it's first feature in juststance.com! Here is the link: http://www.juststance.com/exclusive/cloud-9/
11/13/2011
Went for a drive late Friday night with the other members of my car crew, Coast Works. I finally have some video footage of my car, however it's not the most exciting stuff (we were just cruising through the tunnels). This was the first time our cars have been on the road together ever! My buddies both just finished up a 2 year build on each of their cars.
Hope you like it!
11/15/2011
Pics from the cruise: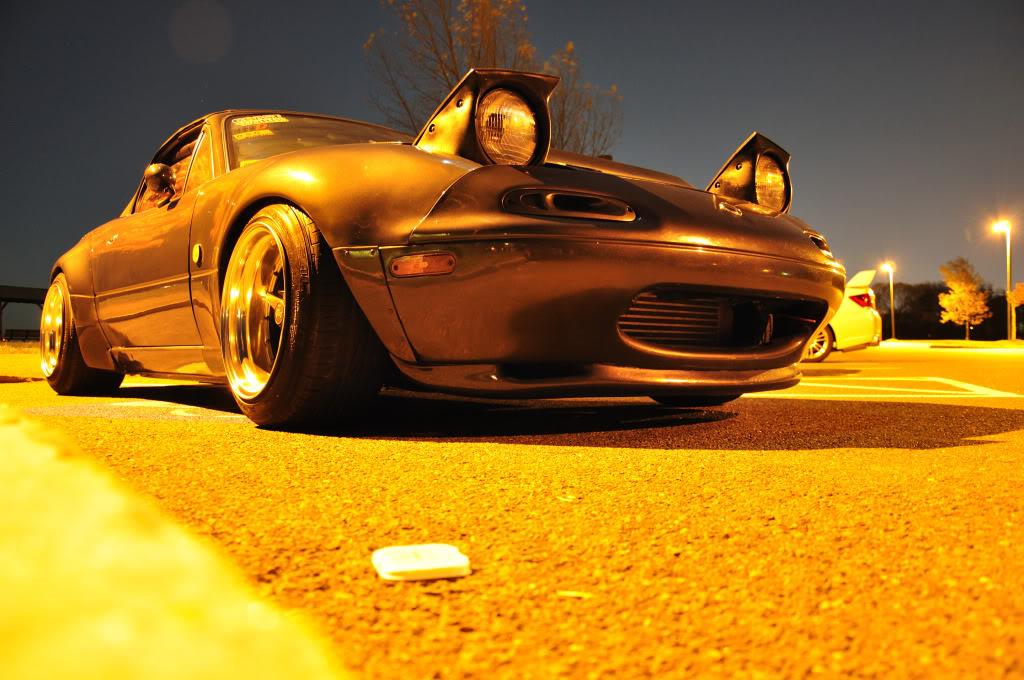
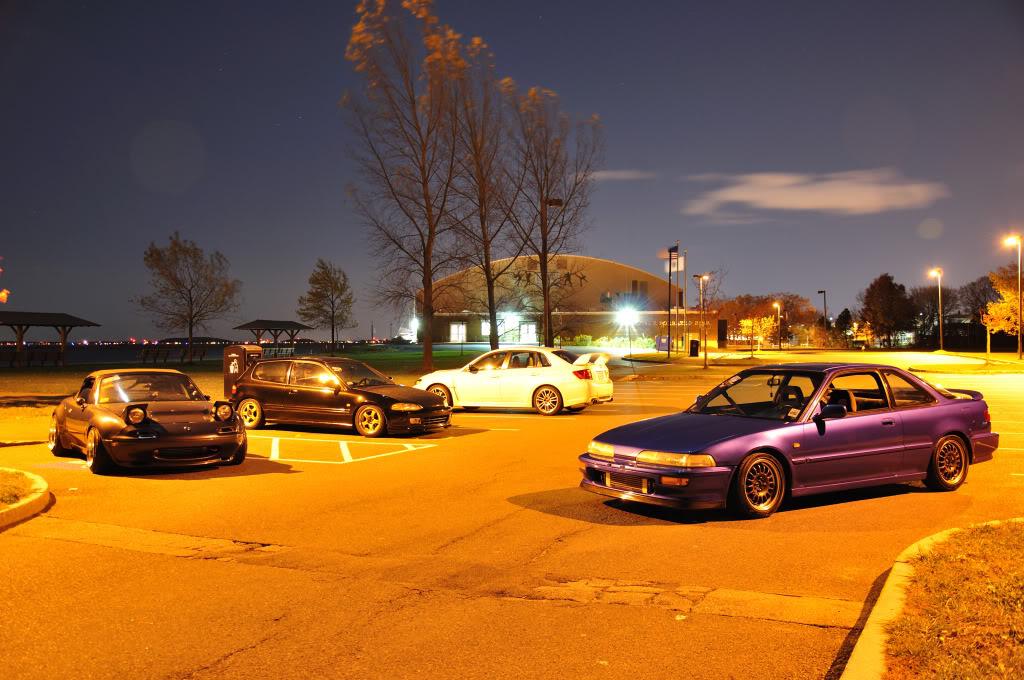
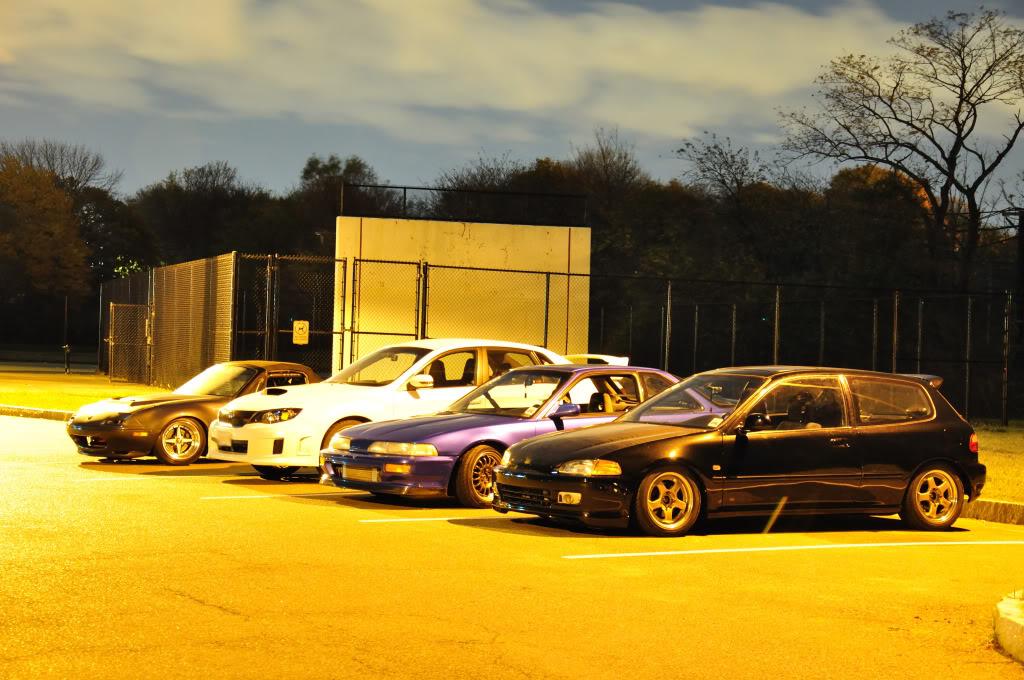
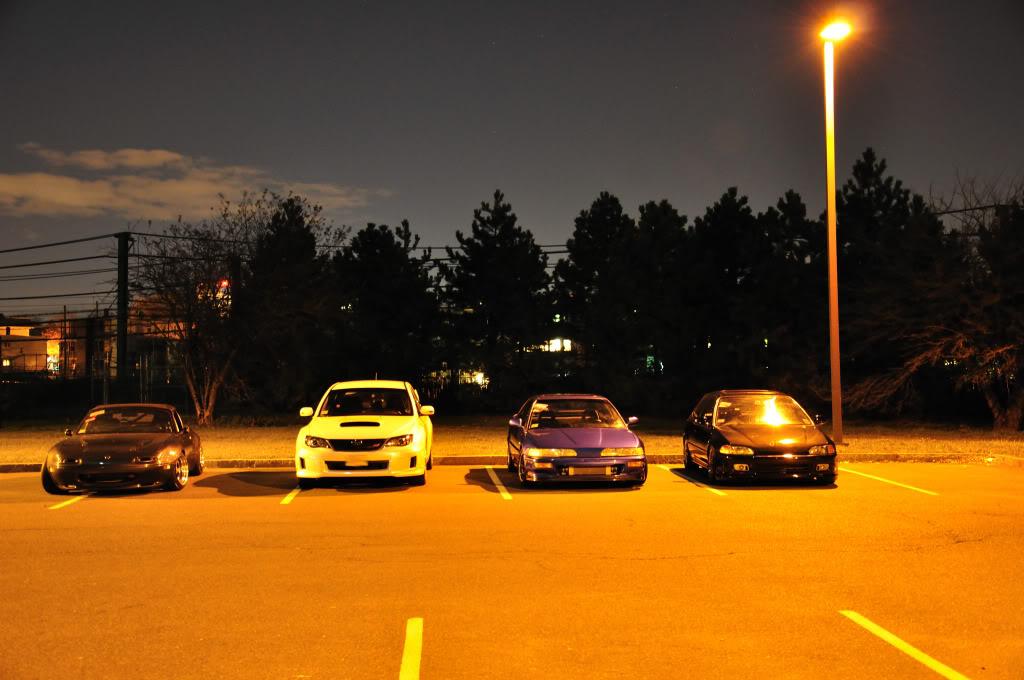
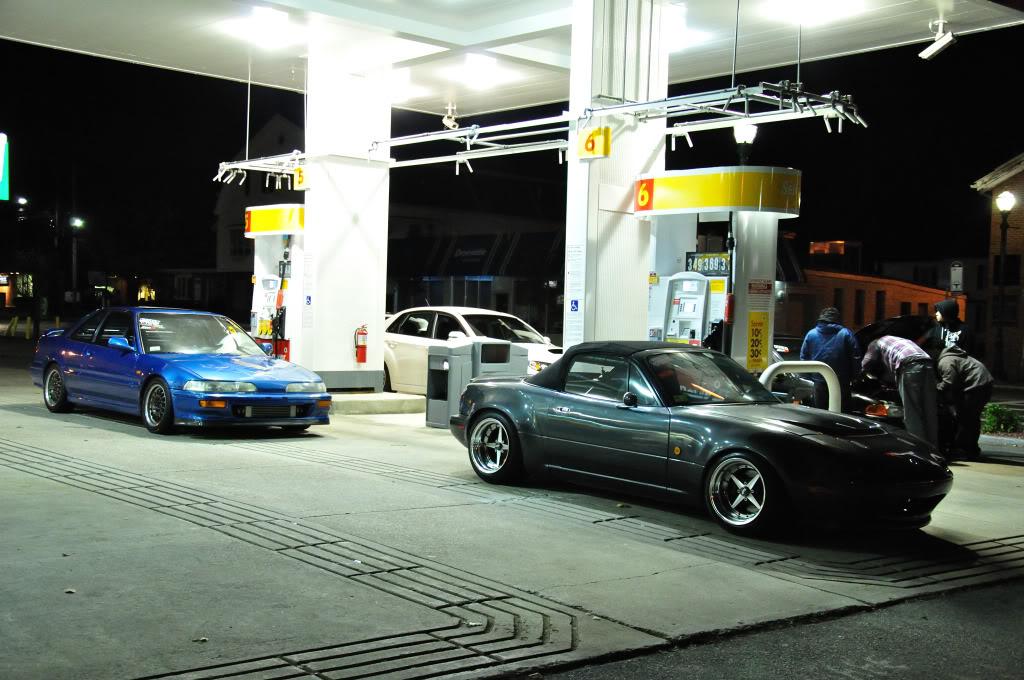
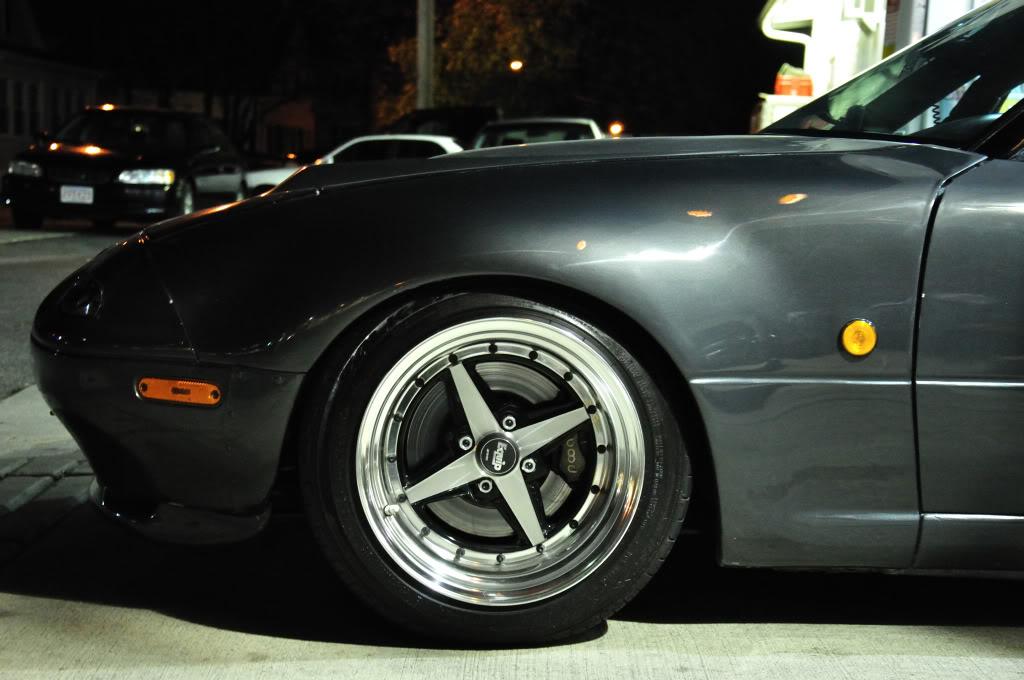
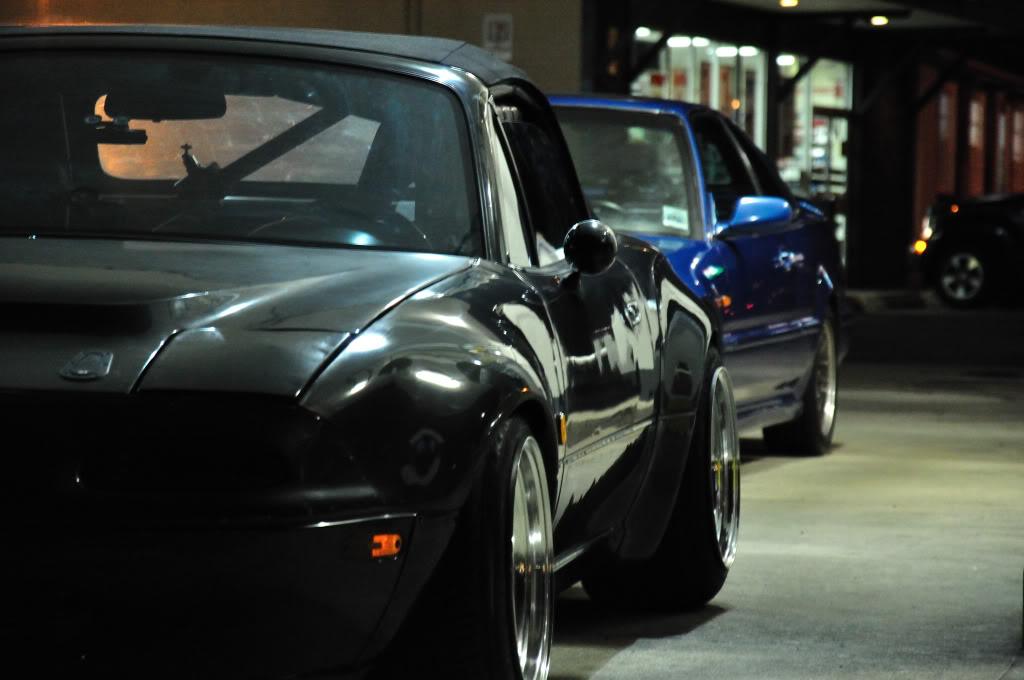
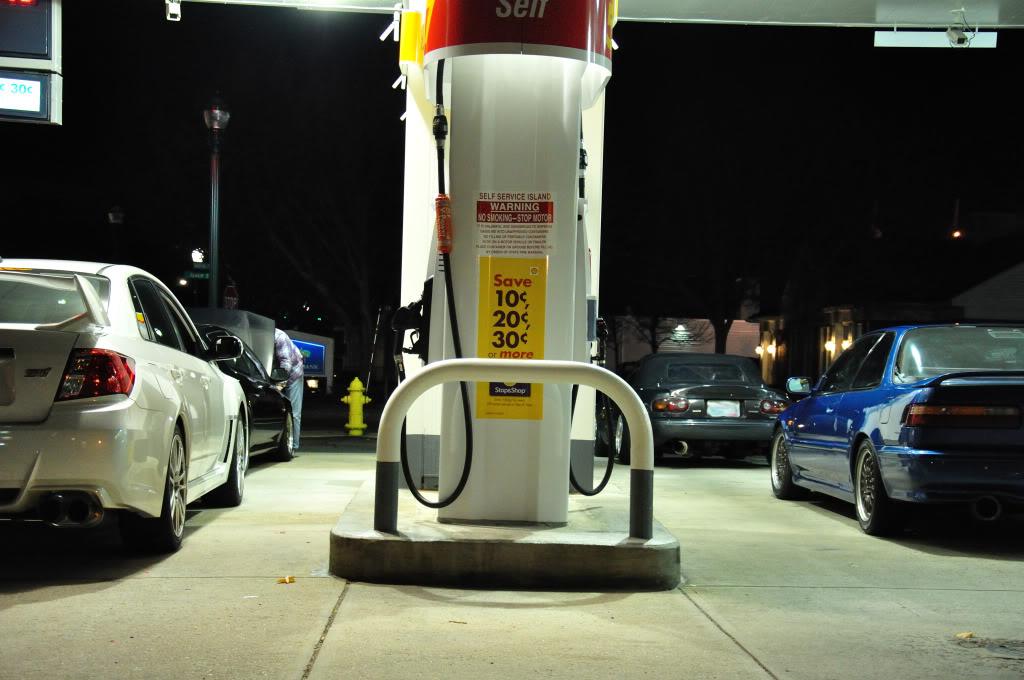
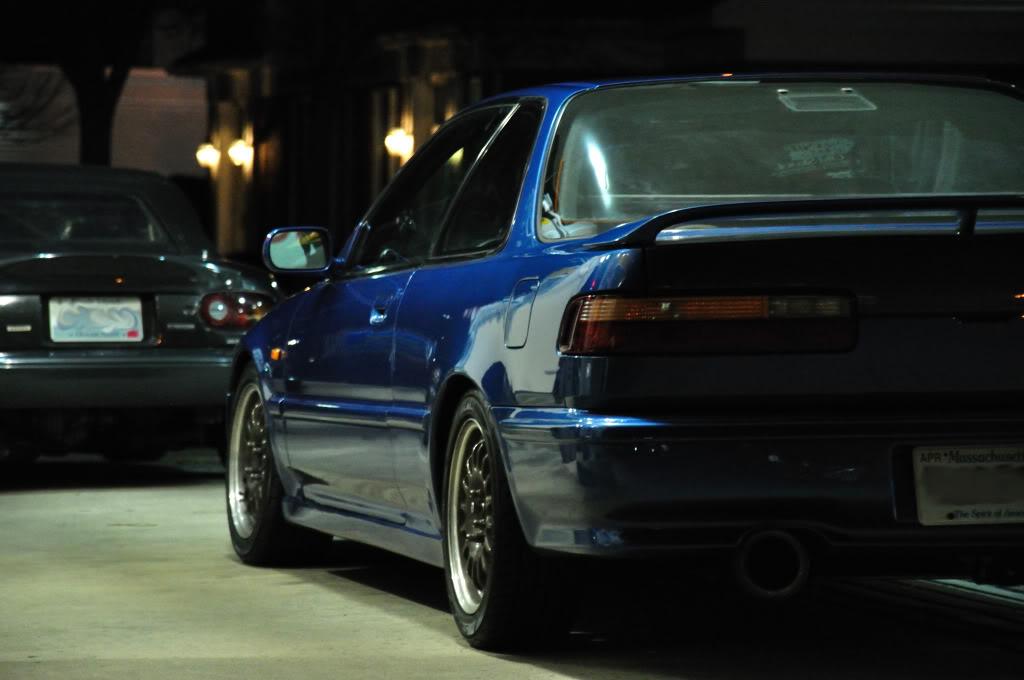
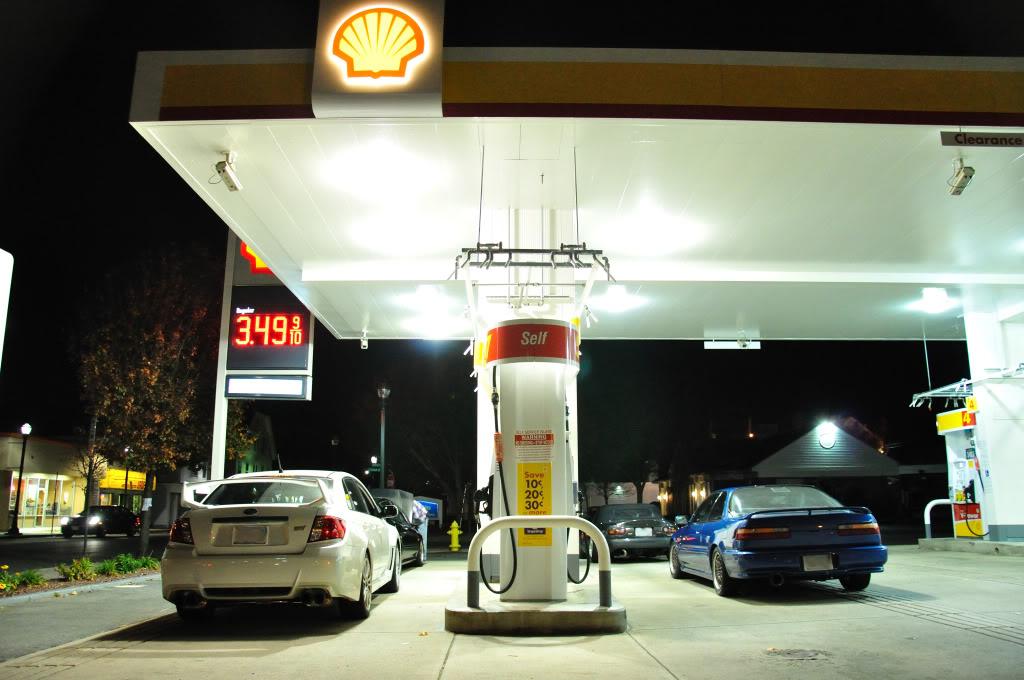
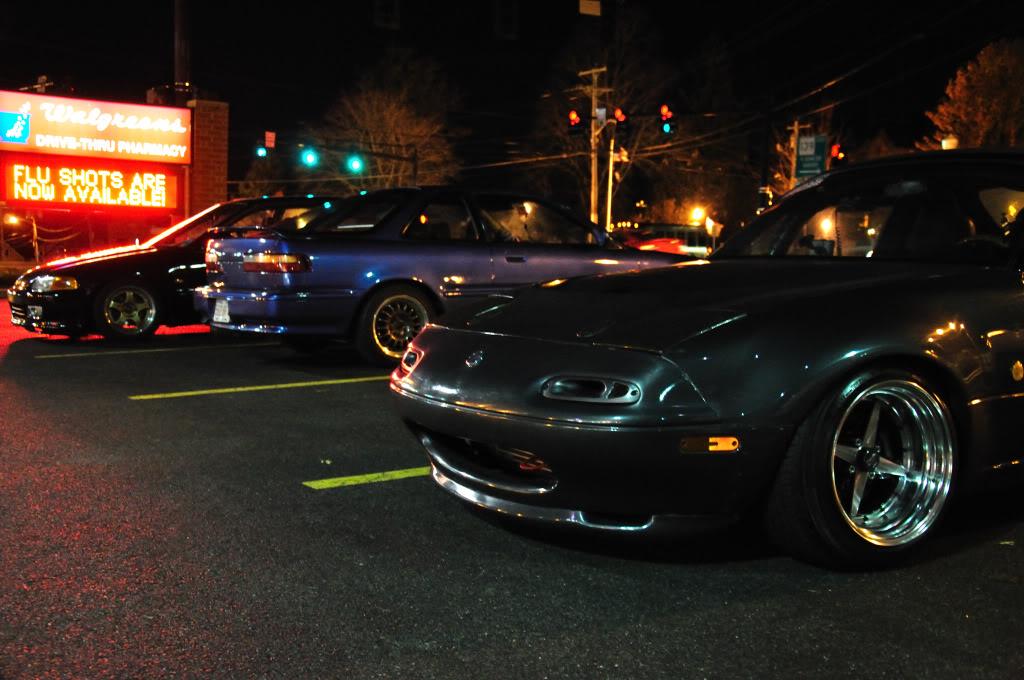
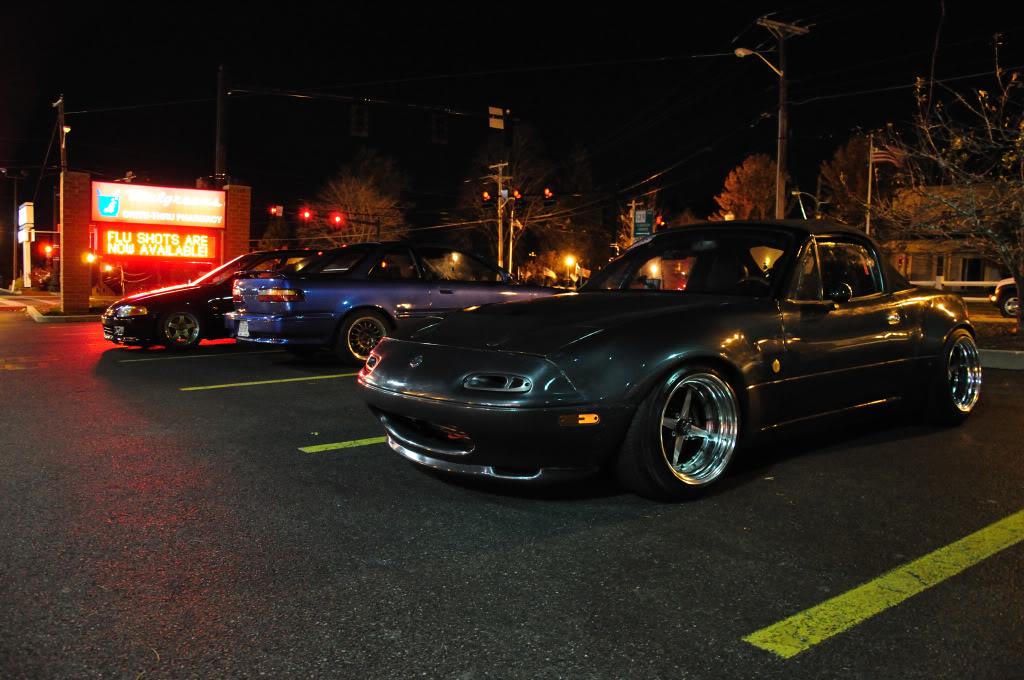
Last one: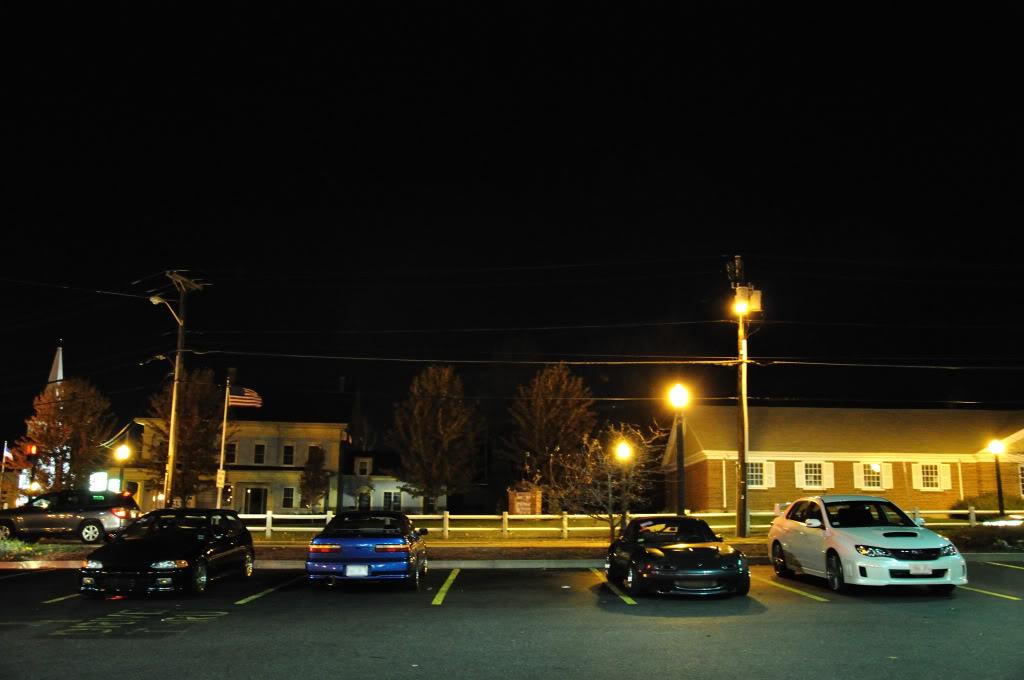
11/21/2011
Went for a drive Sunday with a couple buddies. had to do a bit of off-roading to get out here, but it was worth it for the pics.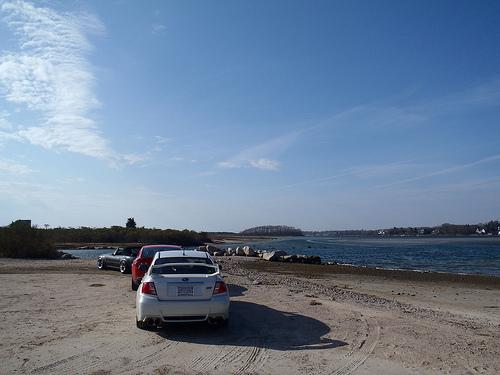
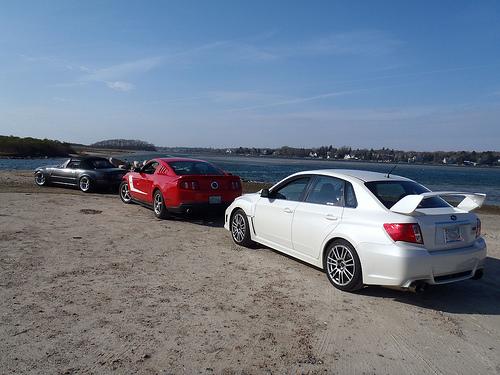
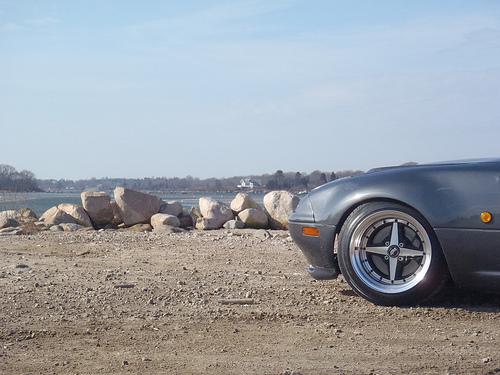
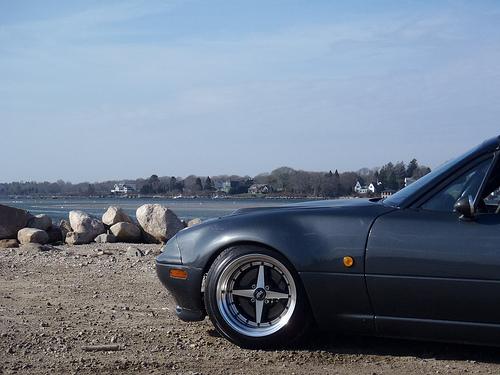
Snow tires on a Roush Mustang, not something you see everyday! (it's his daily)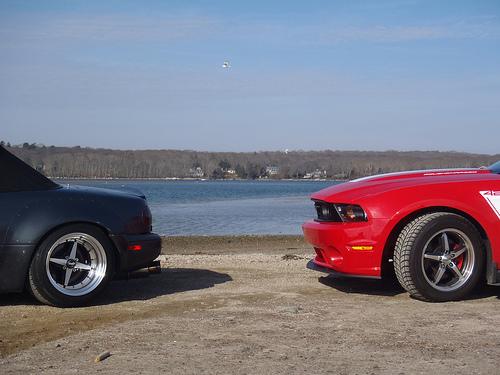
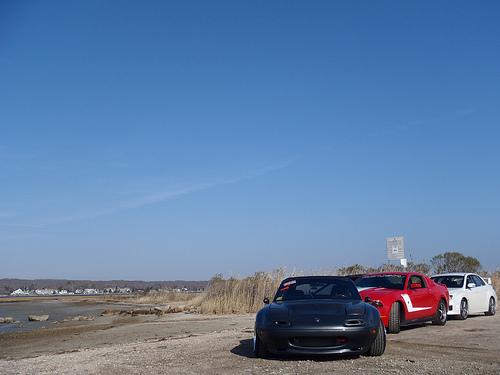
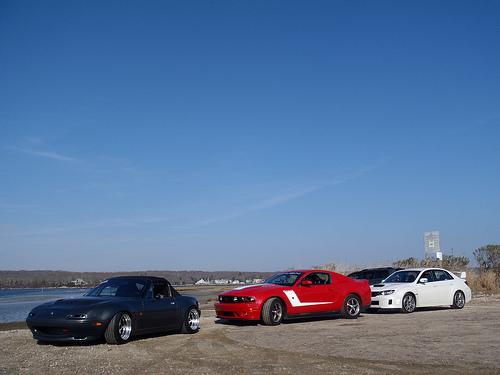
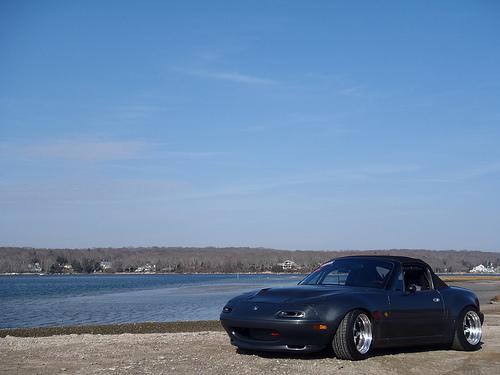
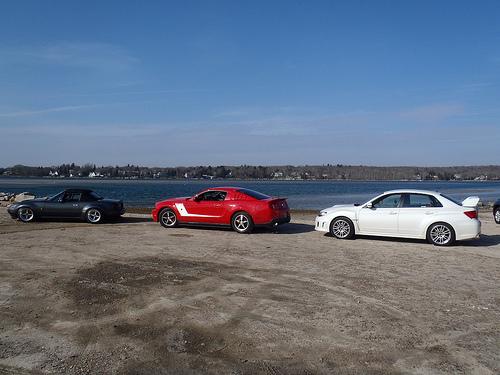
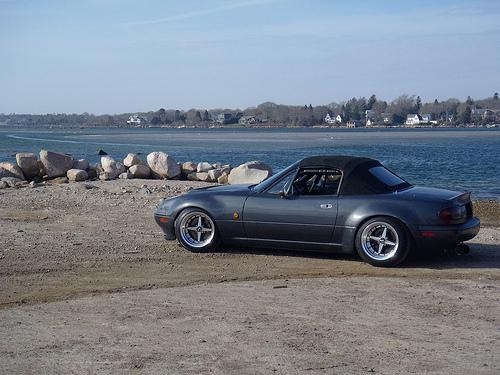
I also raced the mustang (435hp) from about a 50mph roll and completely walked him, which was fun to see. I was a full car length ahead of him before I even shifted into 4th.
12/18/2011
Teaser shots: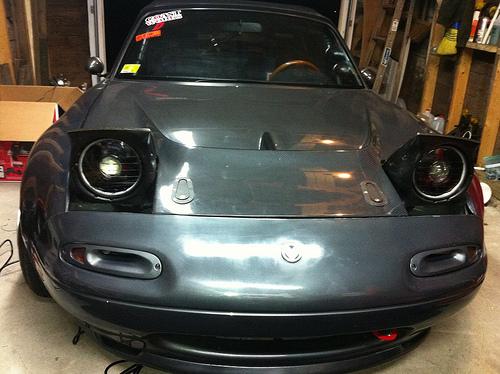
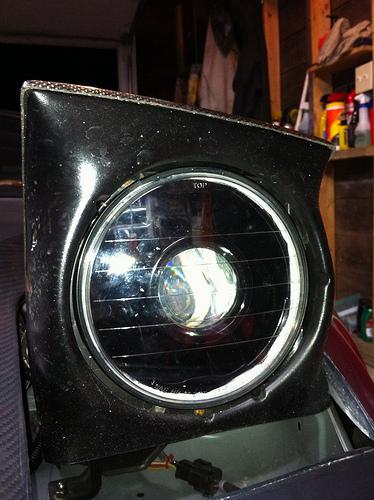
Ignore all the smutz on the lens, as well as the overall state of the car- it's filthy. I really wish I used black sealant instead of the grey as it sticks out like a sore thumb. I might redo that over the winter if I get bored enough.
1/3/2012
Picked up a new daily driver project: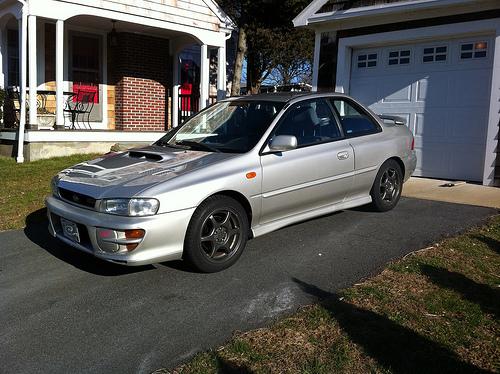
1/9/2012
Yanked all the rear control arms and the rear sway bar in preparation for sandblasting, powdercoating, and then energy suspension bushings and zerk fittings.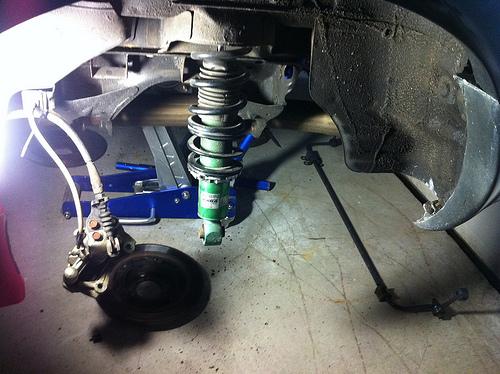
Gonna try and tackle the front tomorrow night.
1/13/2012
Update, but no pics.
Yanked the front control arms, as well as the rear subframe. Heading over to a buddies house tomorrow morning to press out the old bushings, then dropping everything off to get sandblasted. I depowered the rack the FM way tonight as well.
1/18/2012
Couple pics of the front subframe removal. I'm using the engine hoist to hold the engine in place so I don't have to disconnect anything.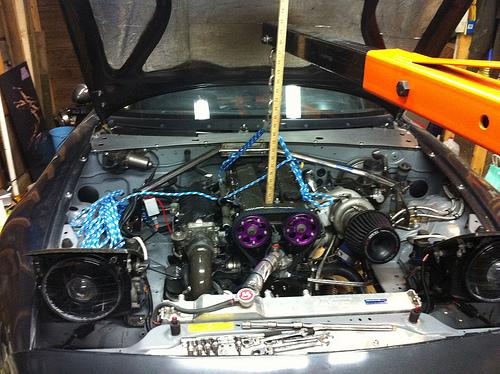
It looks very hovercraft-ish without any subframes or control arms.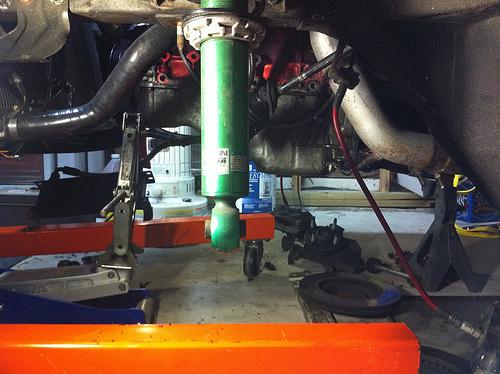
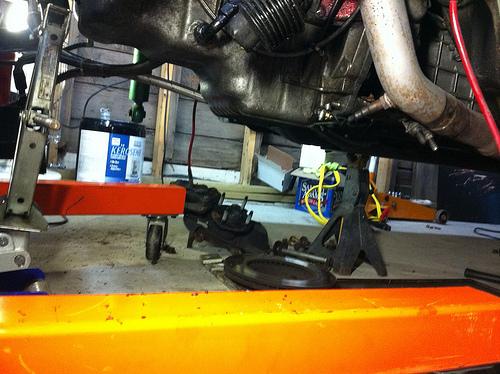
If all goes as planned I should be picking everything up from sandblasting tomorrow and then off to powder coating it all goes!
1/29/2012
Got everything back from blasting on friday, I will be dropping it all off with the powder coater tomorrow
2/7/2012
Pictures!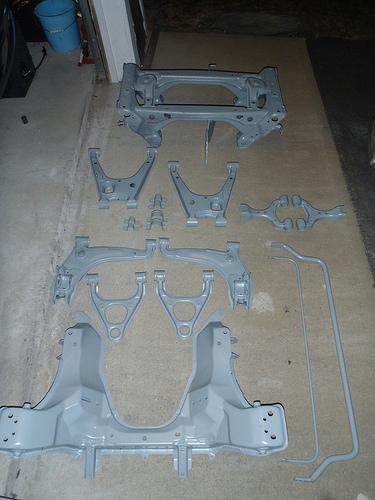
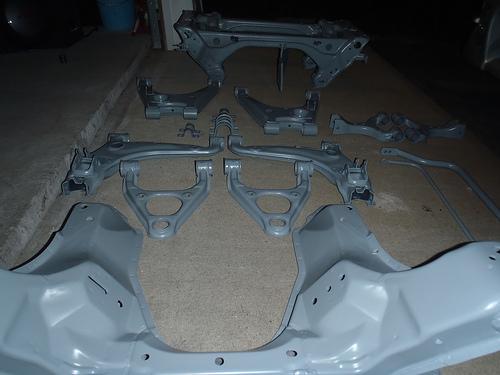
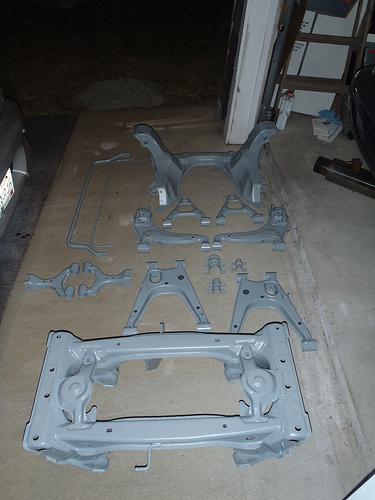
The Powdercoater used an industrial grade oil/fuel resistant, chip resistant powder- Nothing but the best stuff here 
The color is pretty much spot on with my engine bay as well (the fluorescent lighting in the garage is making the color look a bit off)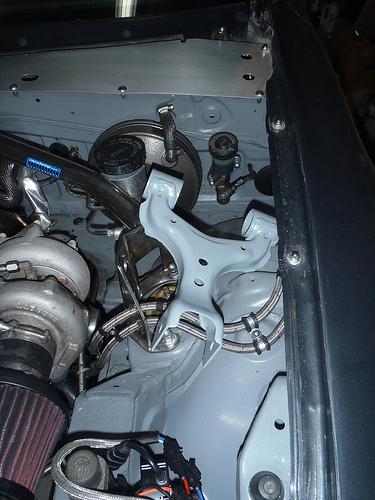
New parts!
-SuperNow FC tie rod ends
-iConcept Tie rods
-black ES poly bushings
-black ES poly ball joint boots
-949 Racing endlinks
-Racing Beat Sway bar brace
-all new OEM eccentric bolts
Once I was done admiring all the new stuff, I got to work. Bolted down the steering rack, bolted up the tie rods and tie rod ends, and put the subframe and front swaybar/RB brace back on the car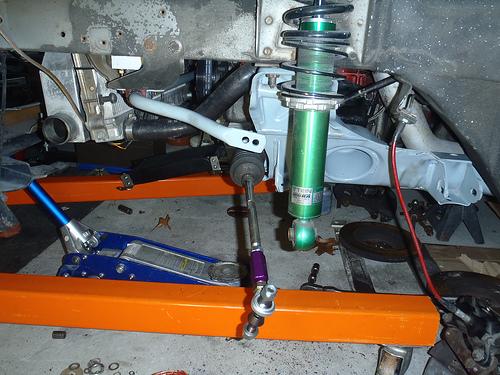
That's it for tonight.
2/10/2012
The cage works as you would imagine. It was a night and day difference in chassis stiffness. I essentially have the "street cage" as seen here:
http://www.bethania-garage.com/cages.htm
The flares are from AWR: http://www.awrracing.com/pages/miata...ody/index.html
The suspension is stiff, but not unbearable. I'm still fine tuning the dampening no it, but I am very happy with it overall.
2/29/2012
I'll just leave this here:
3/5/2012
Thought I'd throw up a pic as the shift knob just came in- going high class with my interior.
M-edition wooden e-brake handle, as well as a Nardi Prestige shift knob.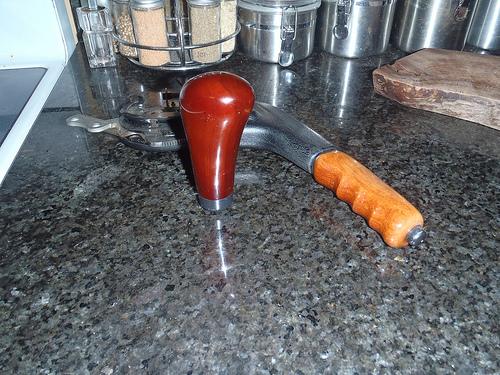
They should compliment my vintage Momo wheel nicely I think.
3/8/2012
Scanned the magazine at work:
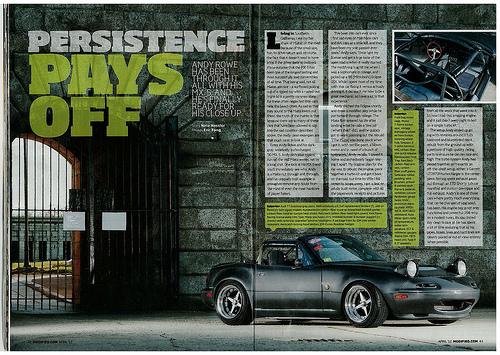
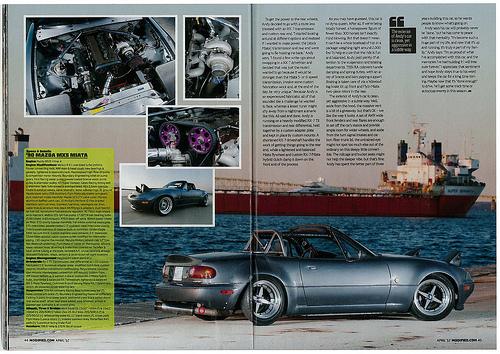
Hopefully it's decent enough to read.
3/10/2012
Made some backwards progress in the form of taking more parts off the car today.
Turns out there was a mix up with the company I ordered the bushings from, and I was only sent the rear portion of the ES bushings. I got it straightened out, but the front kit won't be here until next week sometime. So, since I couldn't finish the control arms, I went another direction with my time today.
I separated the turbo housings and yanked the ex. manifold and downpipe. I'm bringing all the exhaust components to get ceramic coated, and the turbo compressor housing is getting powder coated in the same bronze as the valve cover. That VHT spray paint didn't work out at all.
I also separated the rear diff, and will be getting the diff housing powder coated in a chrome type color. I figured it was the only thing under the car that wasn't powder coated, and since it's a pretty beefy rear end might as well make it shine!
3/13/2012
Here are some pictures from the photoshoot for Modified. All the good shots were taken by Martin Astromowicz (Astroboy), while the crappy shots were taken by me.
We did the photoshoot at Fort Adams, in Newport, RI. I got permission to go out on the grounds for the shoot.
Enjoy!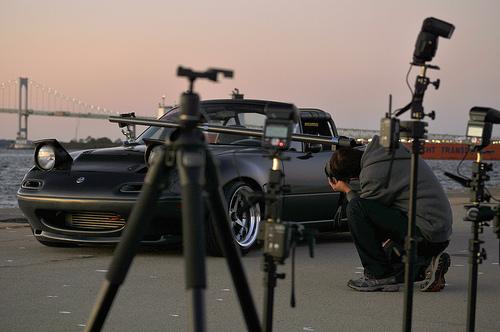
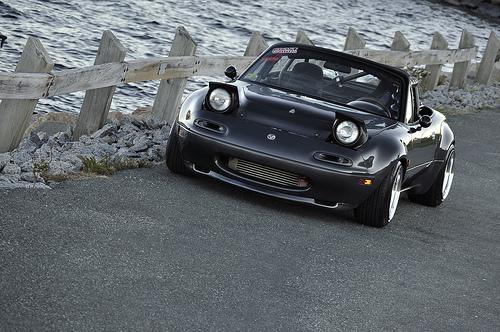

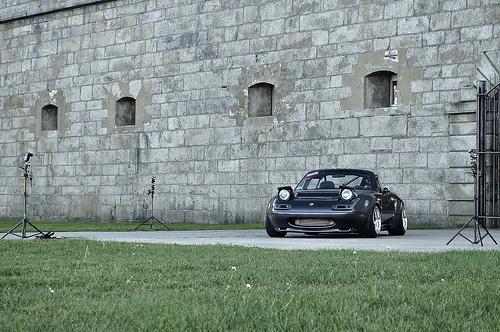

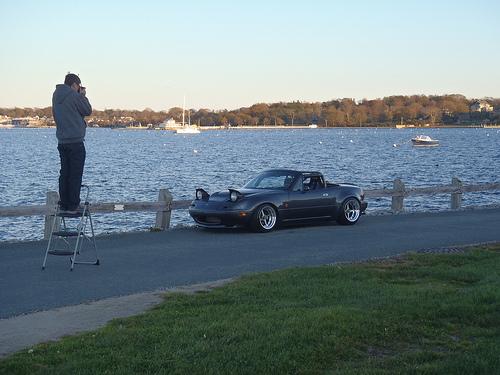
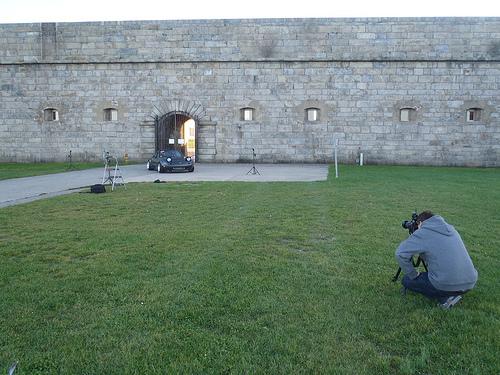
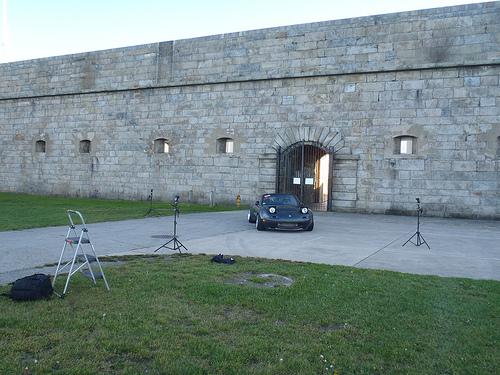
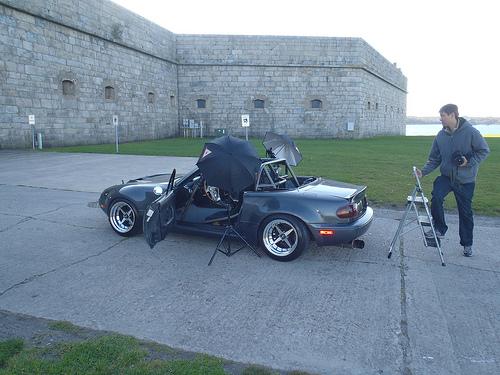
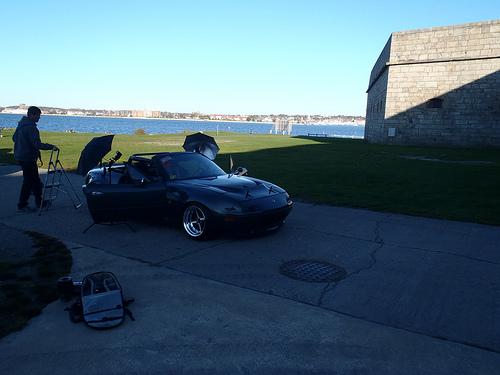
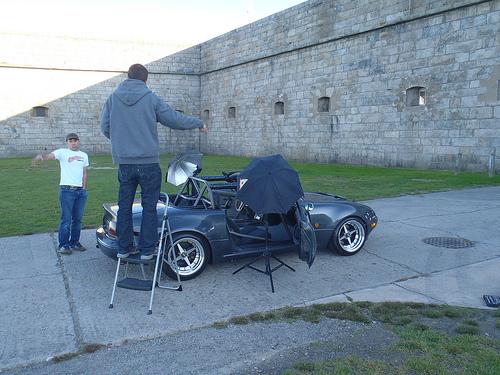
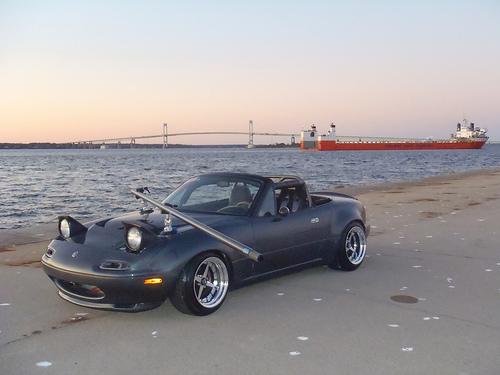
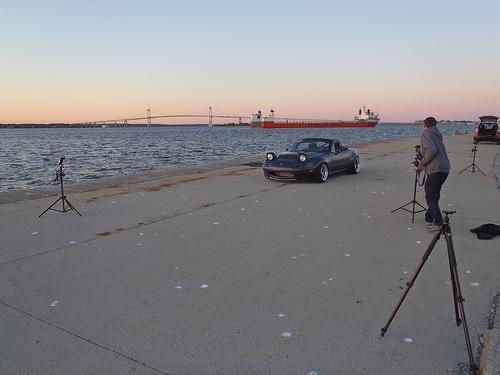
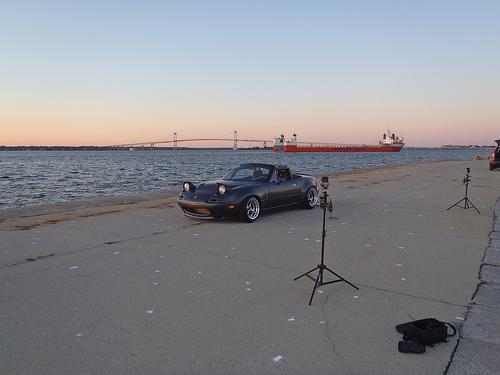
3/16/2012
3/16/2012
Picked these up from powdercoating after work today:
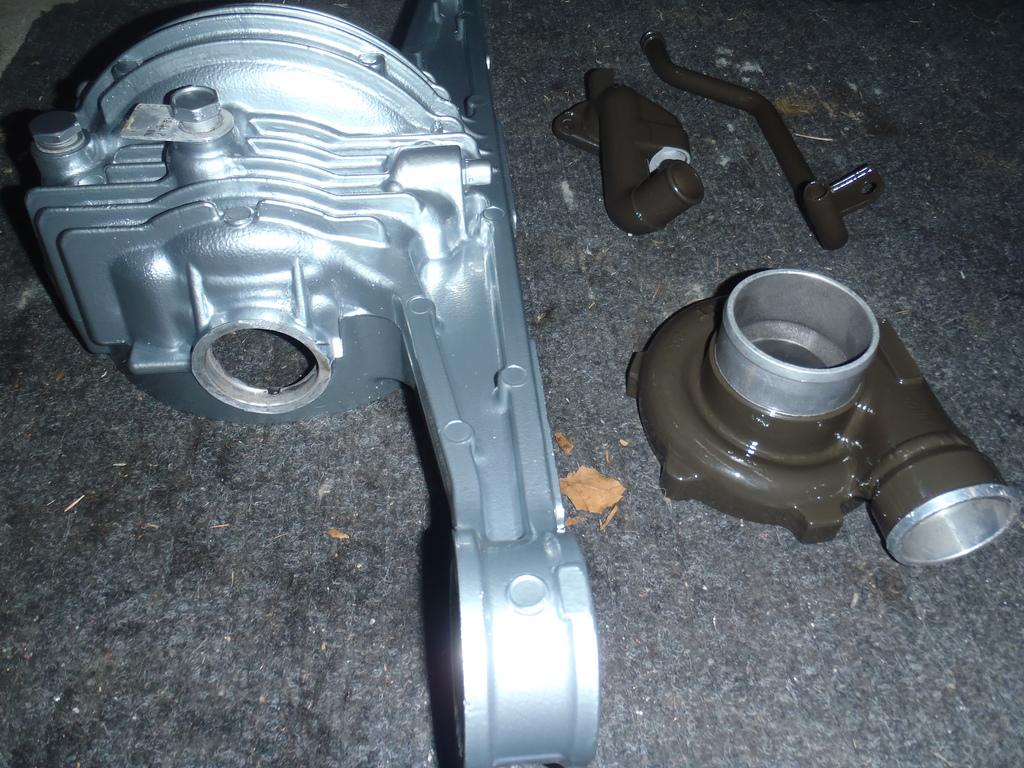
Picking the stuff up from being ceramic coated on Wed.
3/21/2012
Cat approved.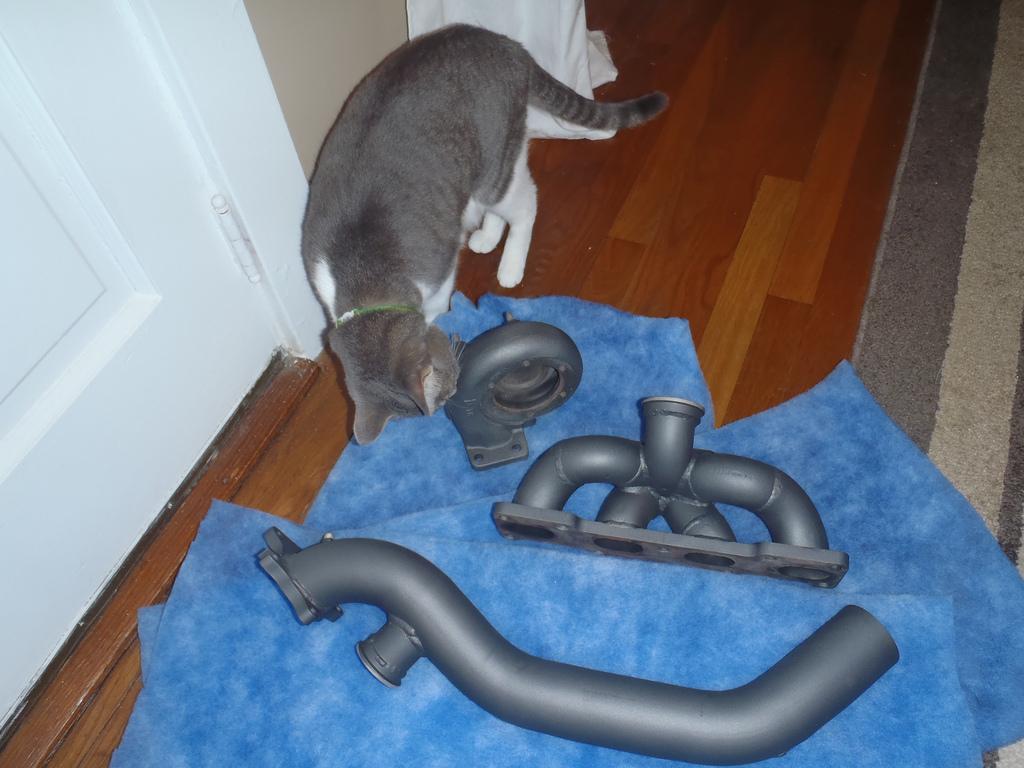
4/4/2012
After a huge headache and 4 weeks of hassle with the front control arm bushings, I ended up cancelling my order with Renown Performance and overnighted a set from JSC Speed, whom I would highly recommend. They are on my porch as we speak, and I'll be taking the day off work tomorrow to go mental on the car. Cornerweighting it Saturday morning, so if all goes according to plan I'll be out on the prowl very soon!
4/9/2012
So after 14 hours on Thursday, 7 Friday night, and another 7 on Saturday, the car is back in fighting shape. We were able to get a perfect 50.0% cross weight distribution, and the car weighs 2424 lbs with me in it- not bad at all.
4/16/2012
Picture blast: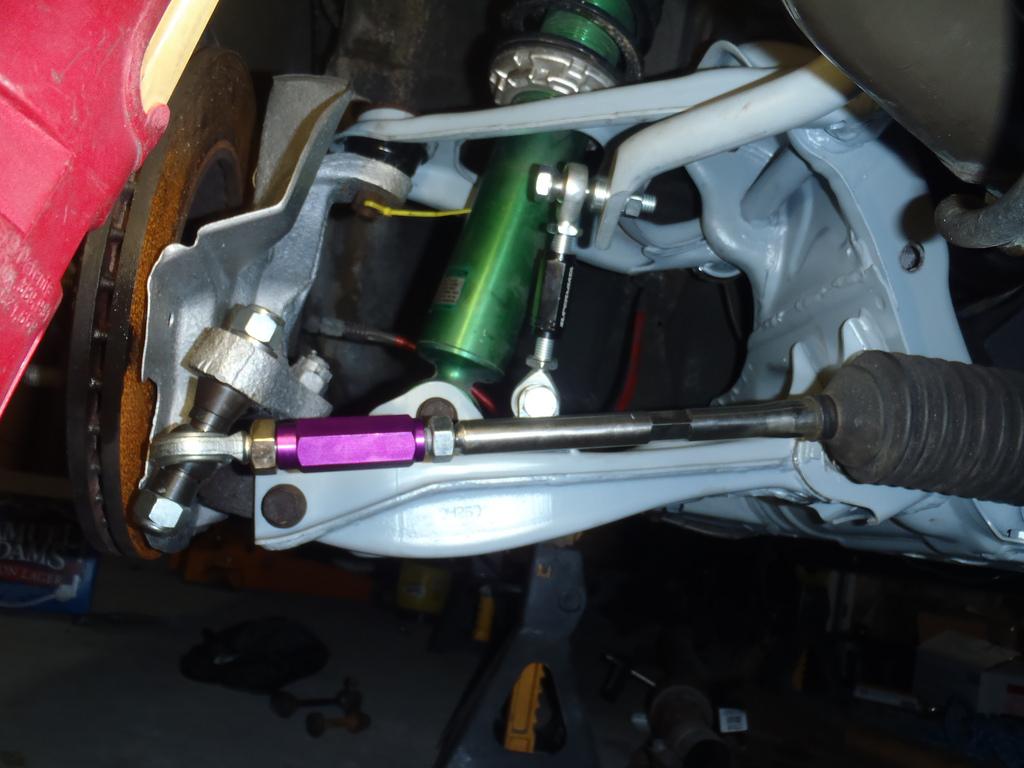
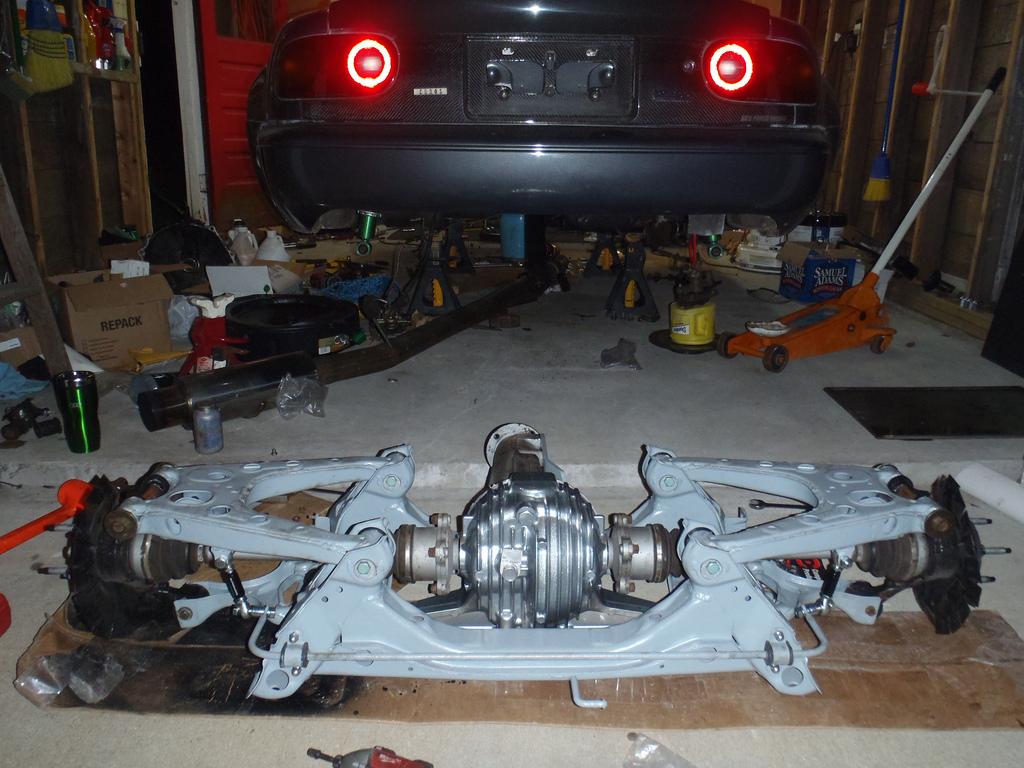
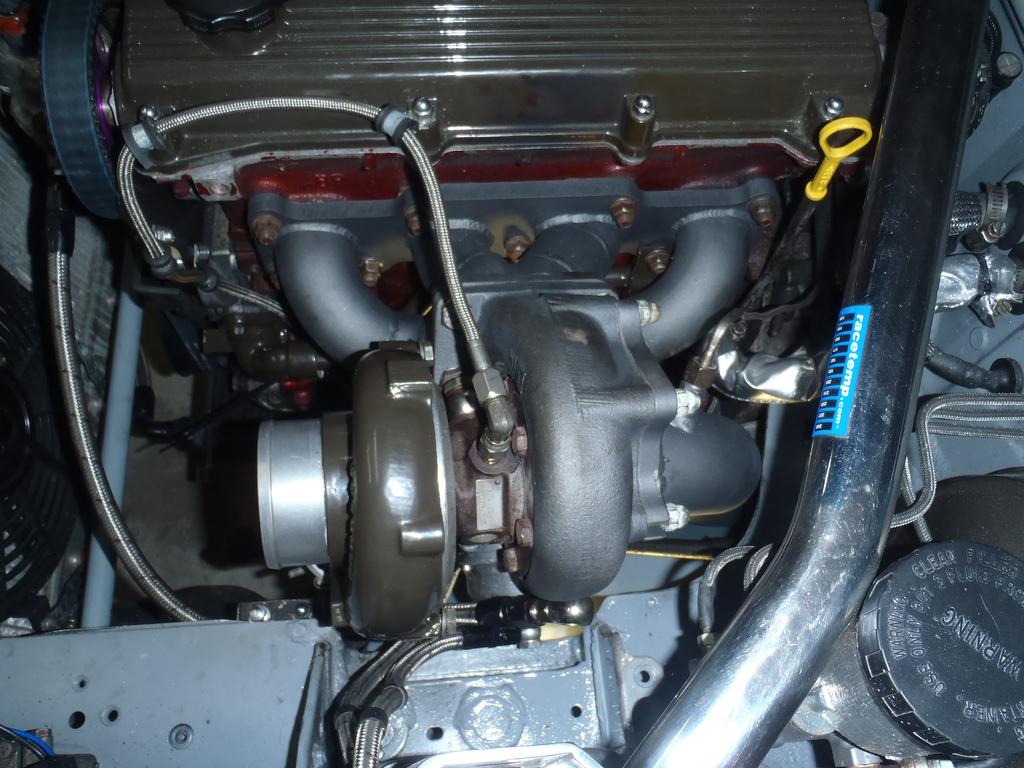
All back together and warming up the morning before heading up to corner weight: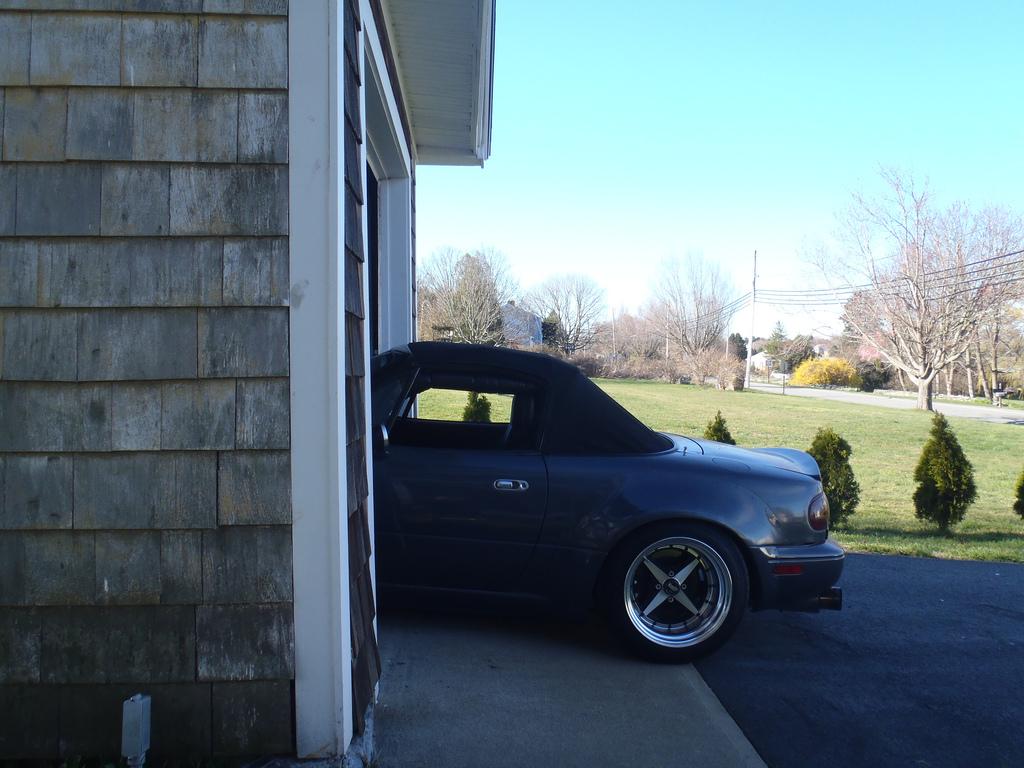
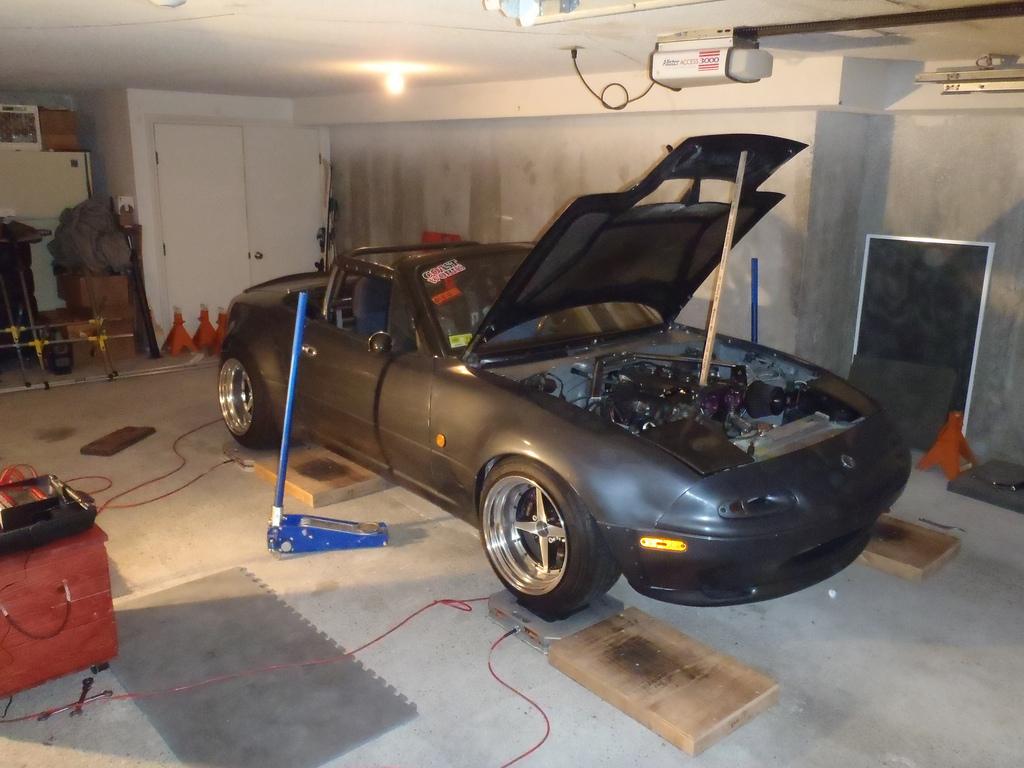
Shot of the final weights: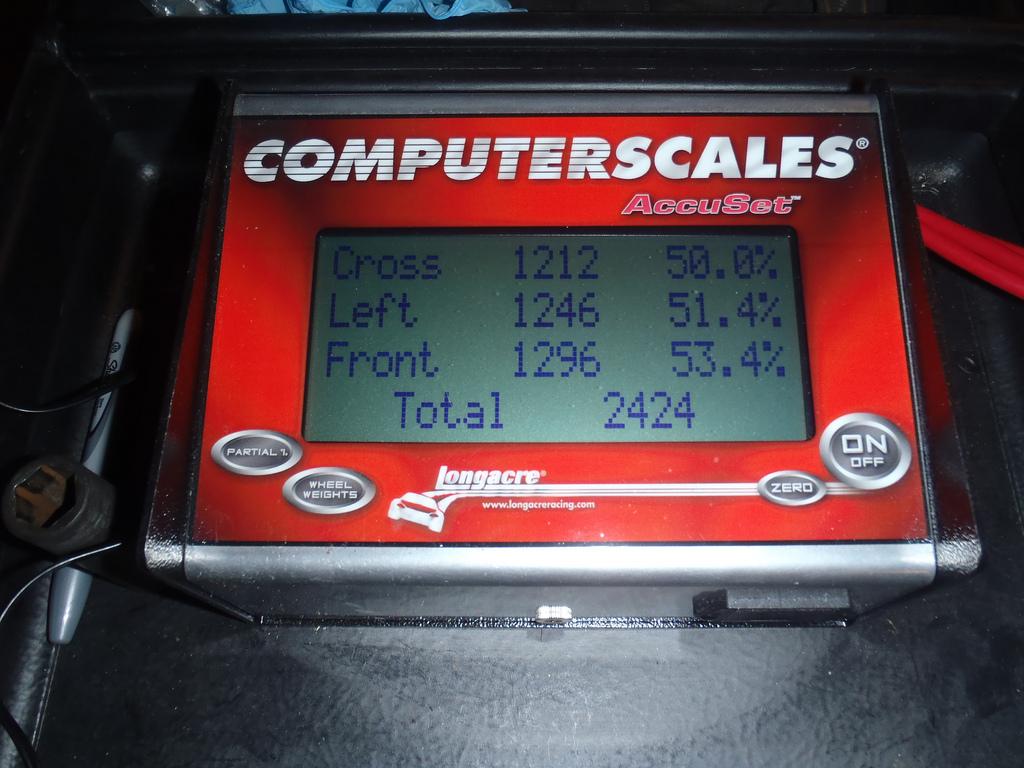
Seeing this really makes me appreciate all the sub 2000lb miatas out there.
4/20/2012
The auto-x was canceled for this sunday due to expected heavy rain
5/22/2012
Finally got new tires put on my rear wheels!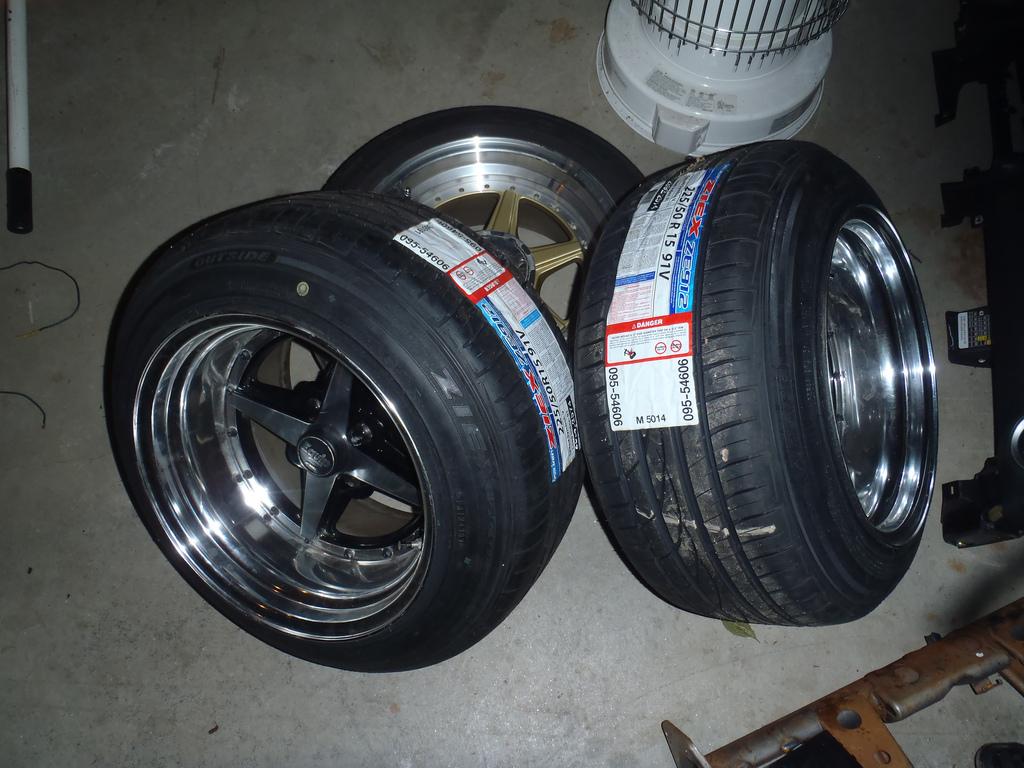
I decided to go with the same crappy Falkens as I know they are able to stretch this much...haha These are just play wheels anyways so it doesn't really matter.
5/31/2012
So last Sat I drove down to RI and did the ADSI auto-x event held at the airport at Quonset Point. I even managed to get FTD (the instructors were all faster than me, but their times aren't listed)!
I had an absolute blast out there. I think I manged to get in 15 runs total (I burned a little over a 1/2 tank of fuel).
some of the competition: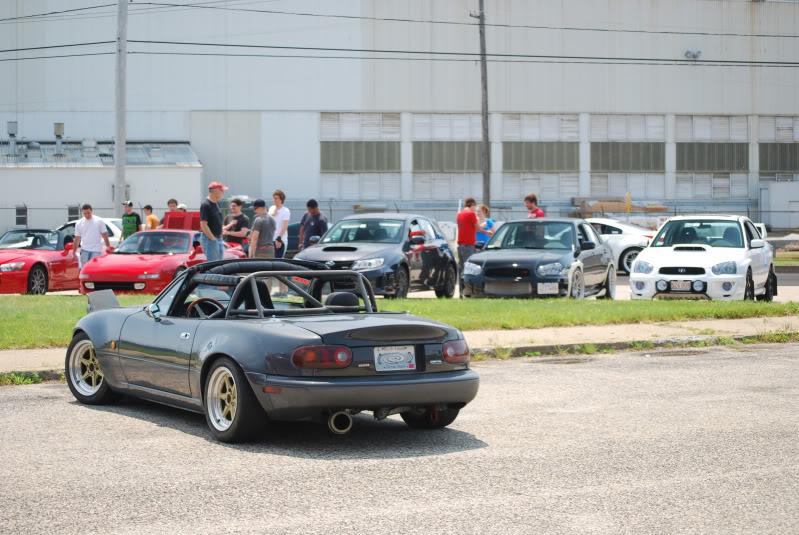
waiting at the gate: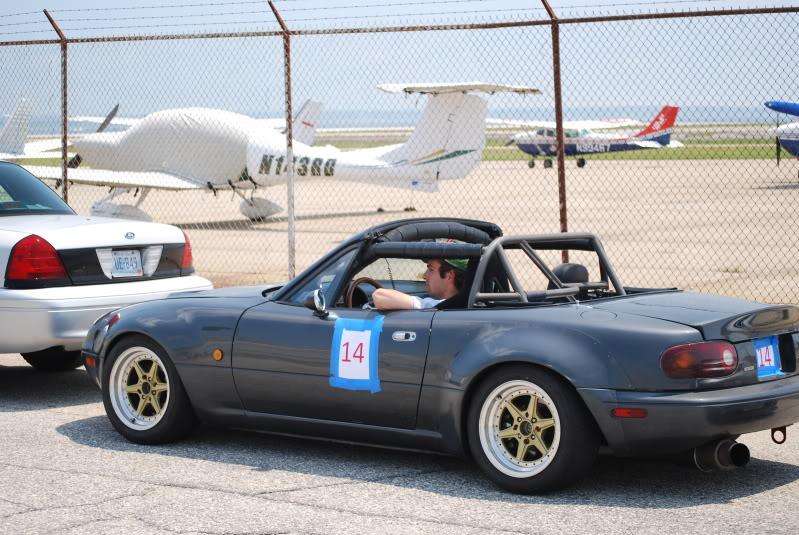
Heading down the runway to get to the course: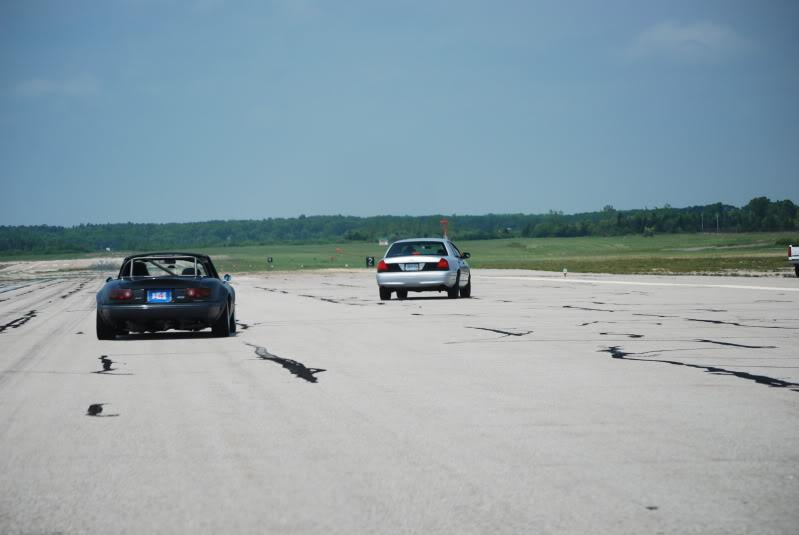
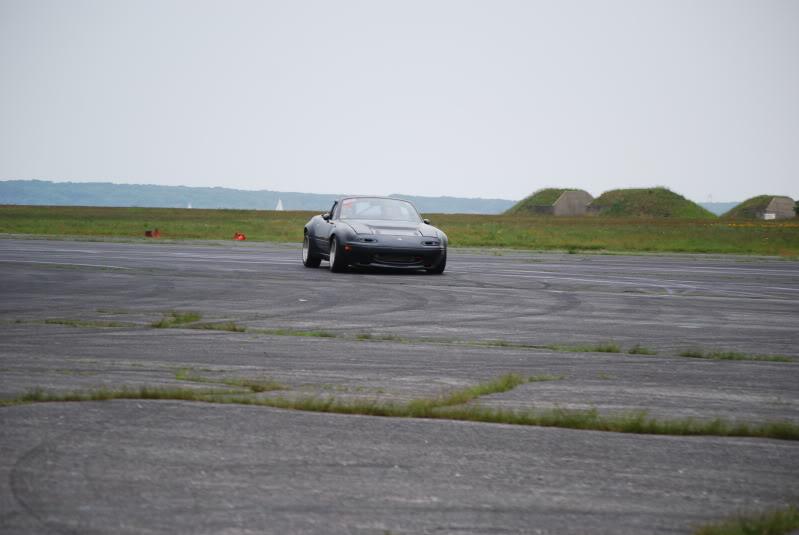
The camera seemed to have this odd effect which made the gas pedal just want to stick to the floor 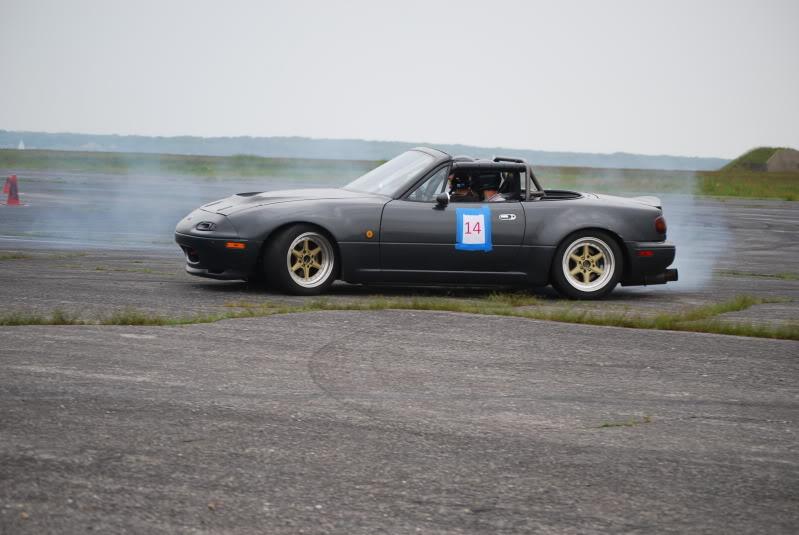

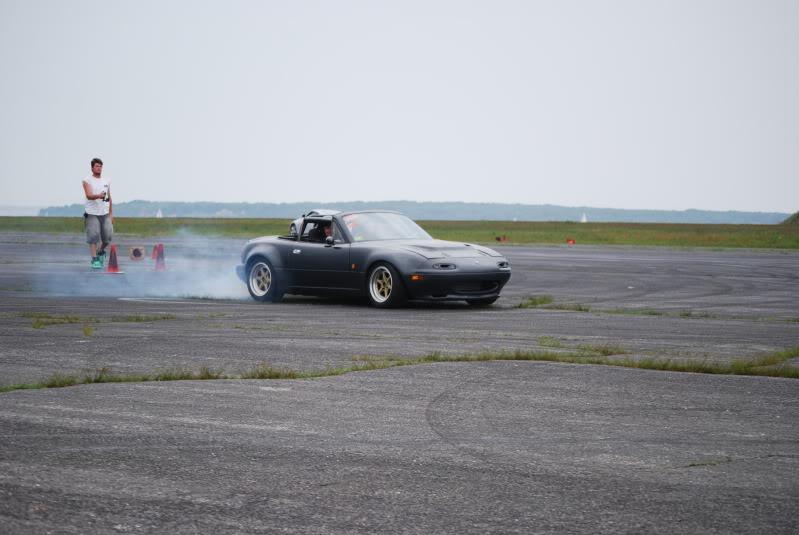
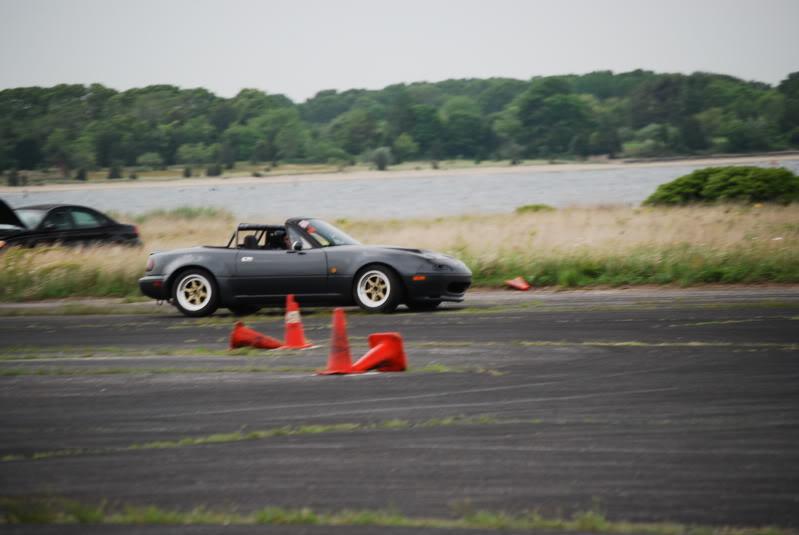

Thumbs up to the camera guy :-)
Hanging it out to dry...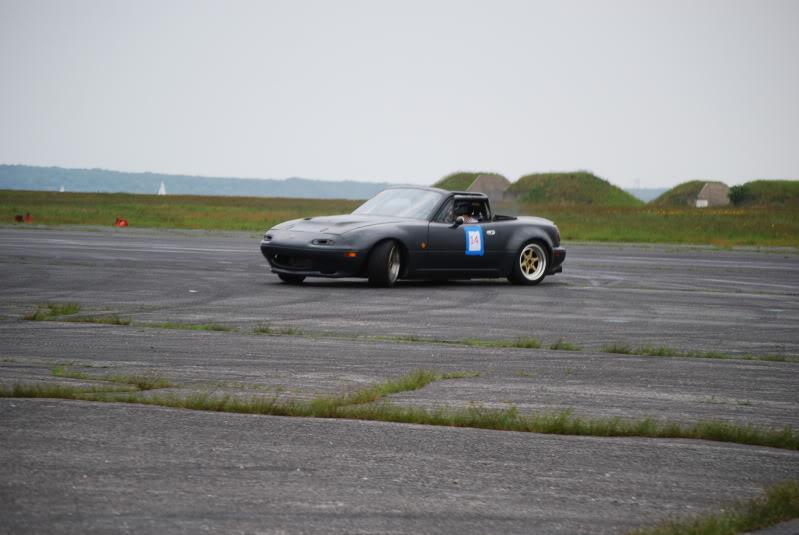
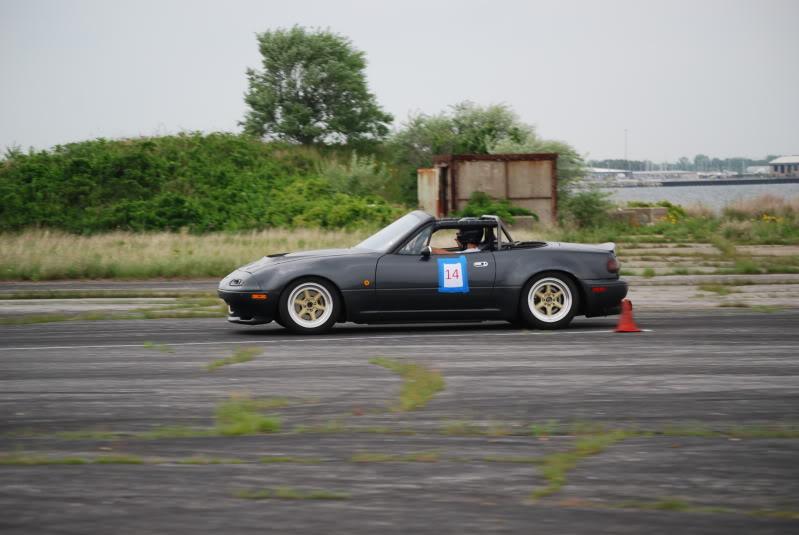
and the 3 fastest laps from everyone for the day: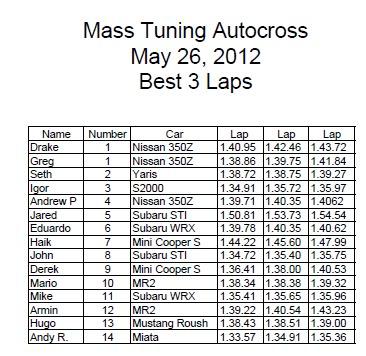
6/9/2012
Ported out the inside and shaved the outside of the intake manifold over the past few days.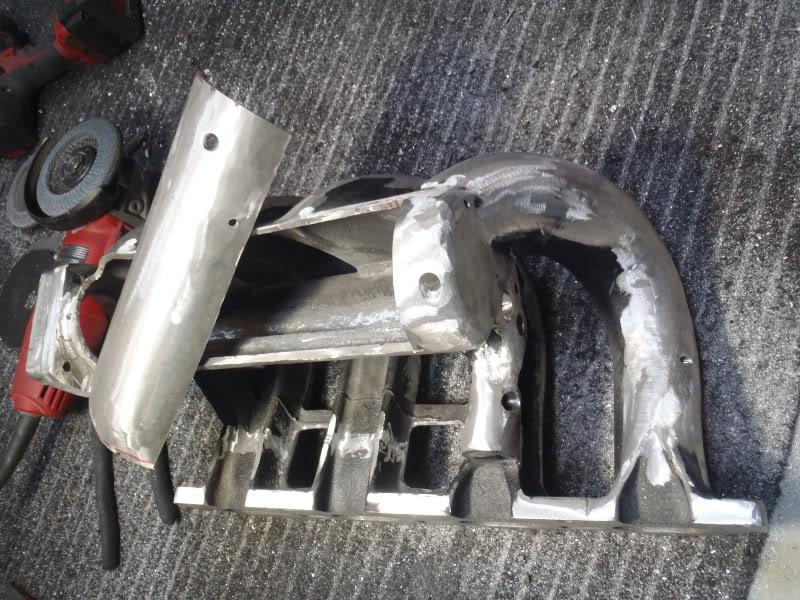
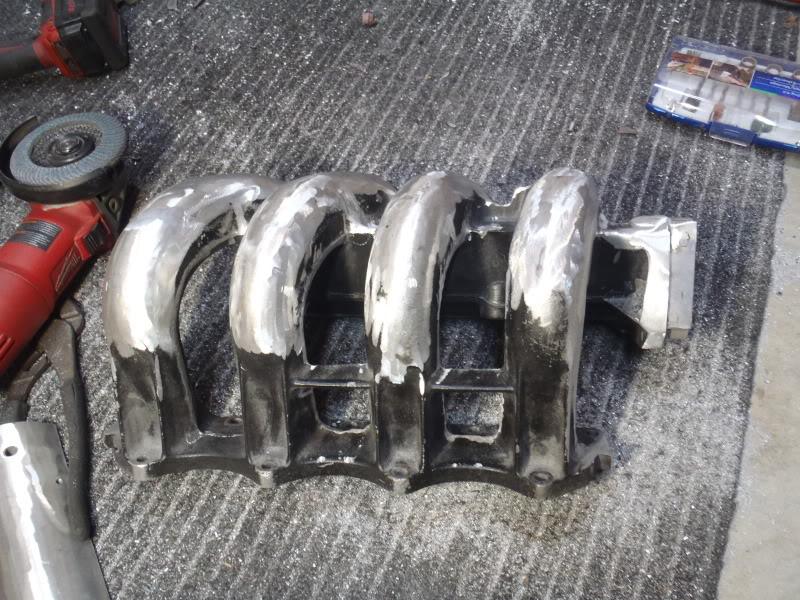
I'm real curious to see how much of a difference the porting makes on my torque curve. Sometime this summer (when I have time) I'm going to head back to the dyno to see the difference, as well as mess with the cam gears a bit. I'll be sure to post the dyno results.
6/12/2012
I just realized I never posted the photos from the Modified Mag. photoshoot, so here they are! Eric Tong was the the photographer. There were some really nice shots that didn't make it into print- Enjoy!
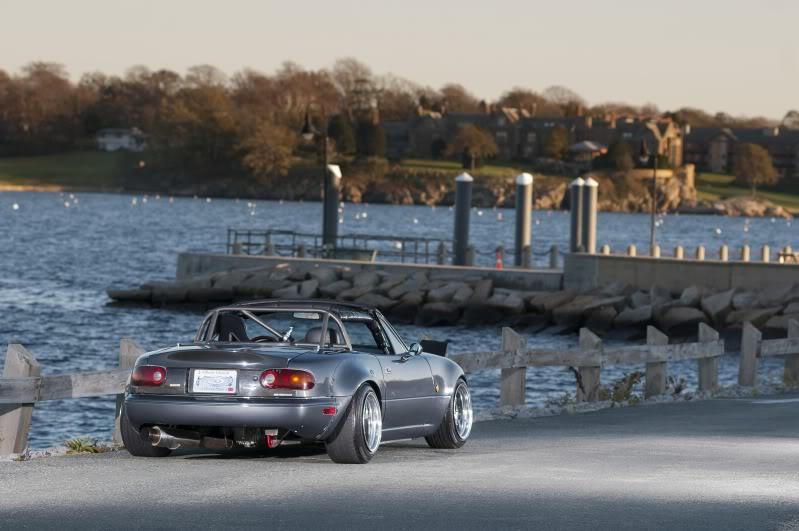

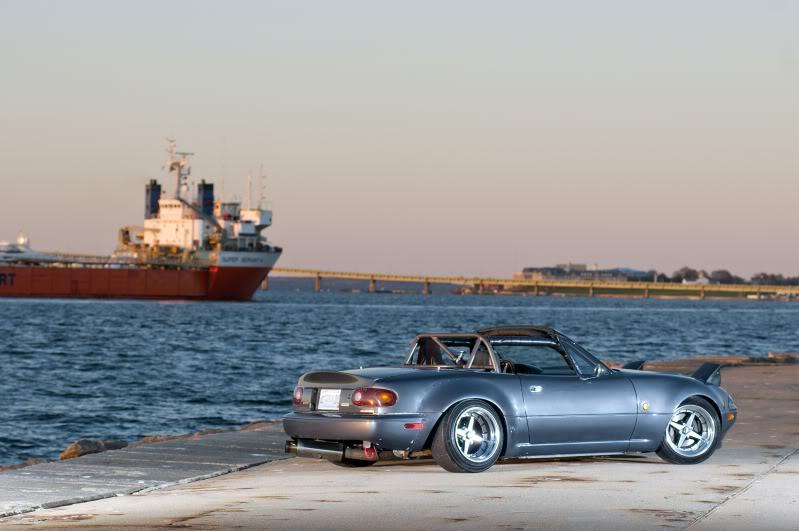
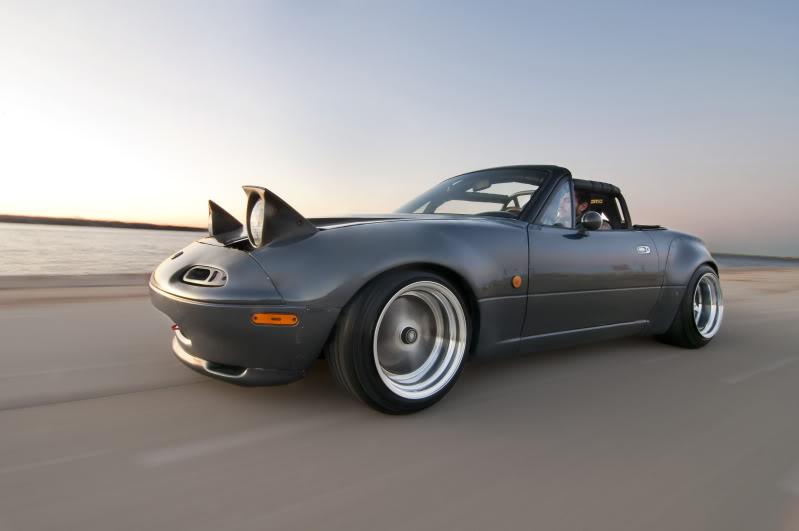
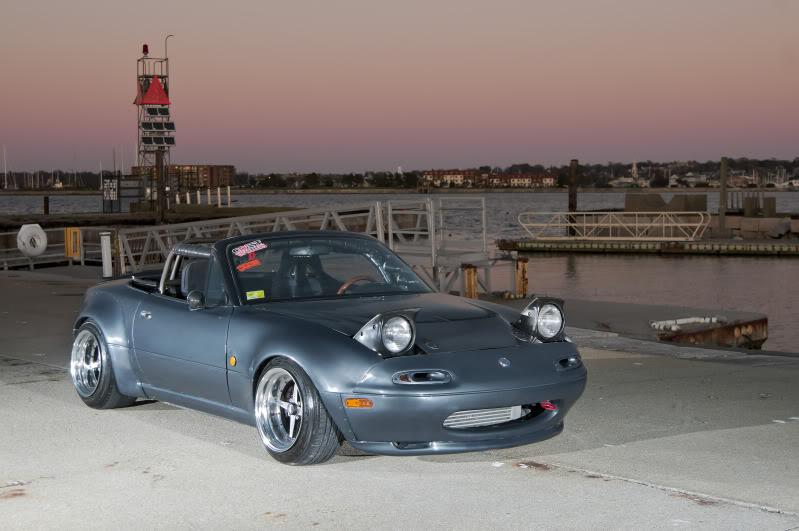
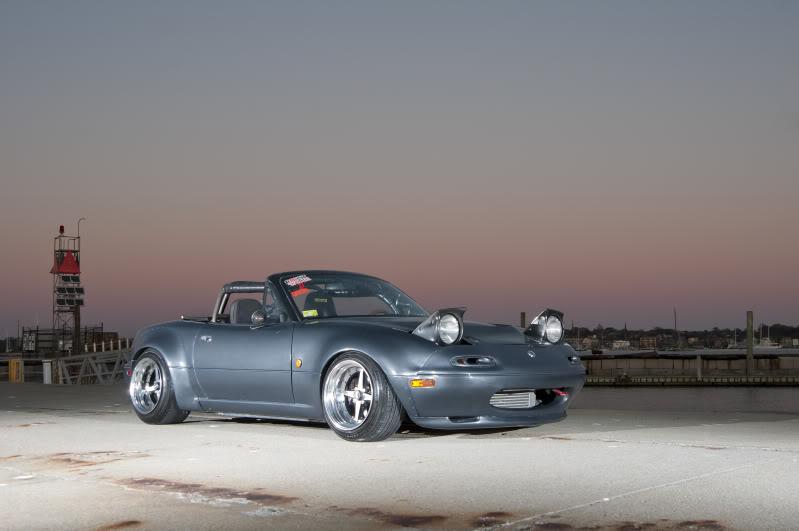
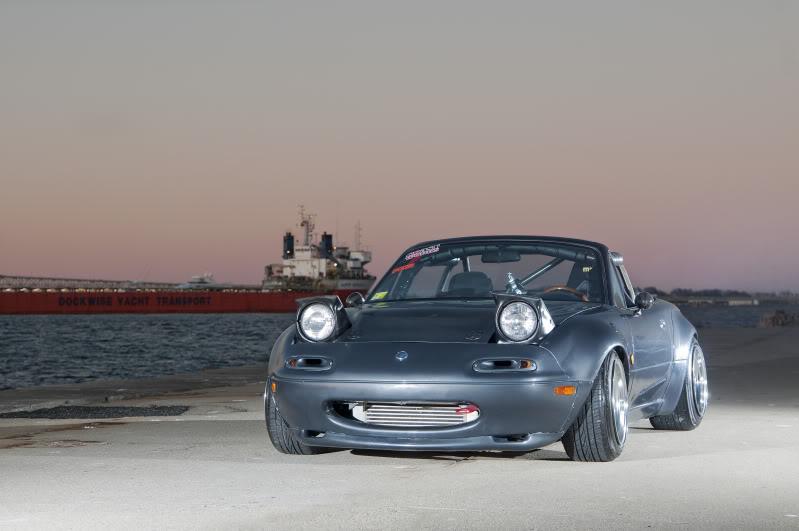
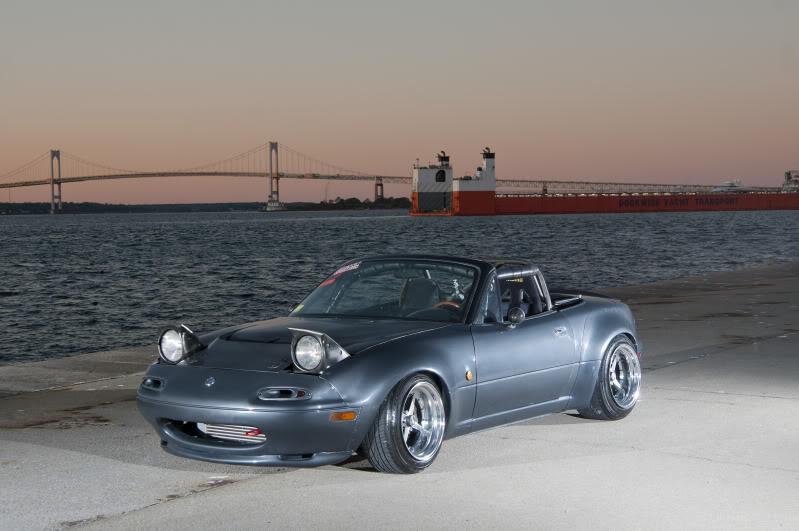
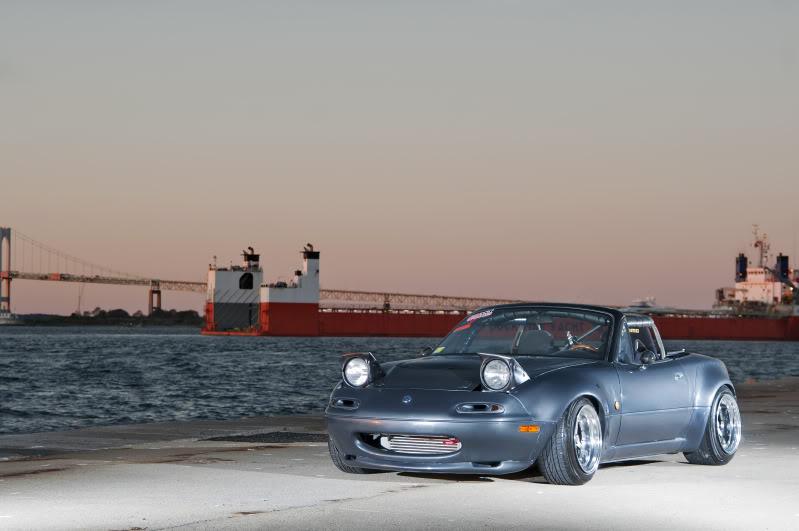
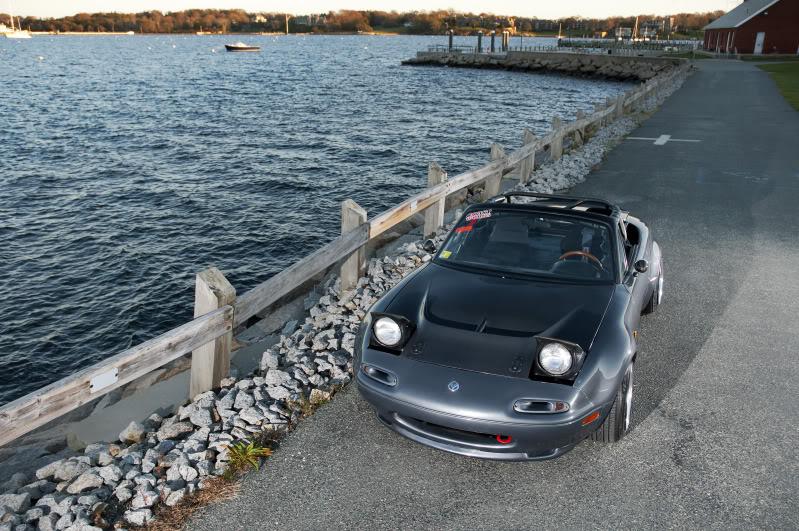
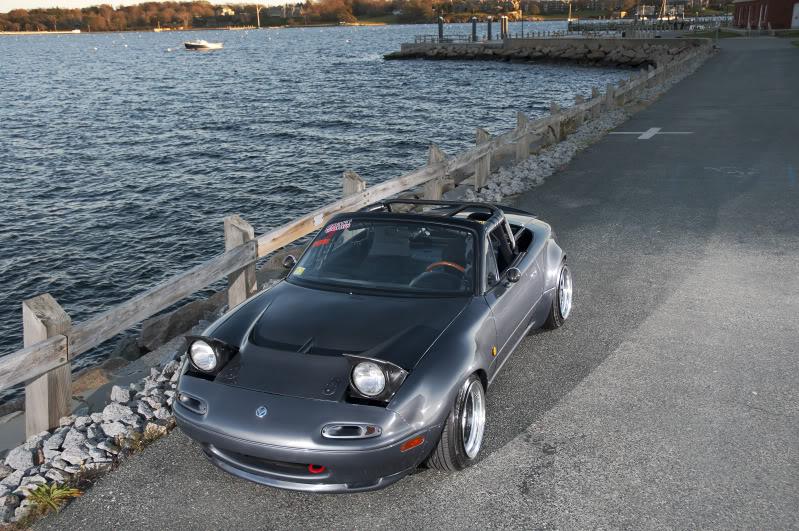
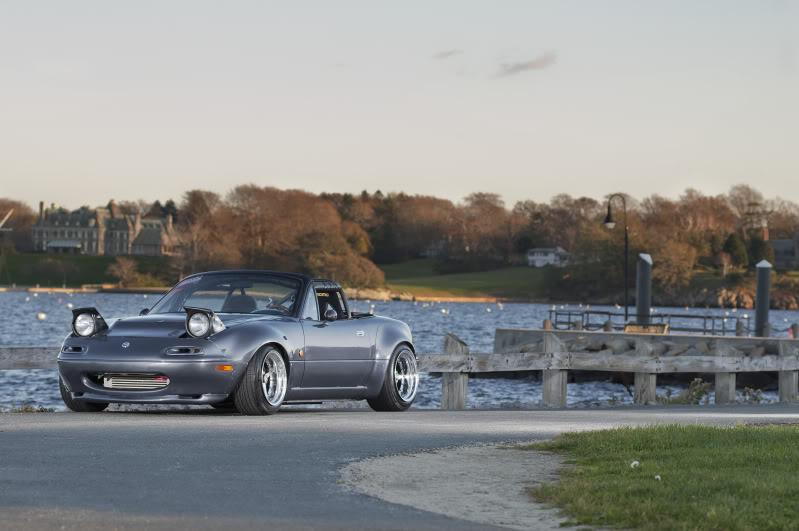

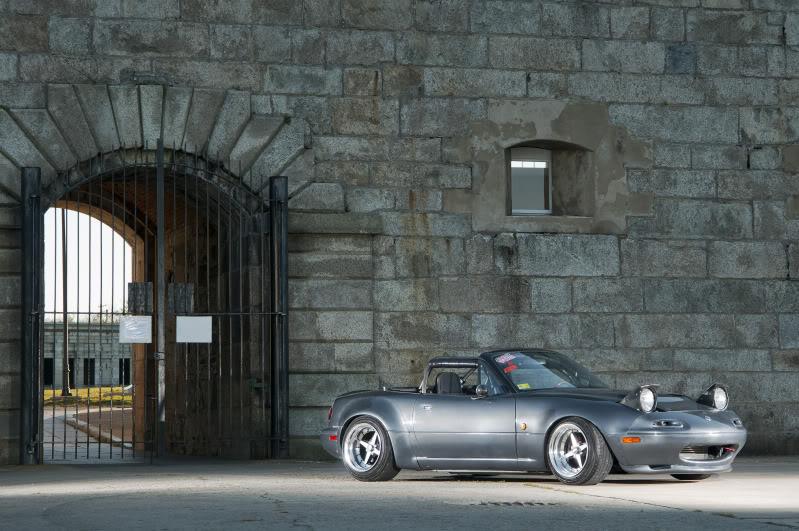
8/13/2012
Haven't updated this in a while, but the car is back up and running. This will be another post without pictures, so I apologize for that. On to the car...
I finished porting the intake manifold out, and had it welded back up here at work. I also had him weld the FM TB adapter directly to the manifold to eliminate a failure point.
I also did a coolant reroute, using the Begi spacer, Kia waterneck, and that big SUV hose everyone uses. I'm seeing 170 deg temps at cruise and sitting in 90 deg traffic, and under boost it creeps up to 190 (t-stat is a 190). I pounded a 30mm freeze plug into the head, and also fabbed a blockoff plate to bolt over that so it can't pop out. I had to also build a new waterline for the turbo as I got rid of the waterneck.
Got a couple of interior goodies for the car as well, which I'll take pictures of later.
The big news is I also have a new set of wheels for the car, which I've been purposefully keeping under wraps. I rebuilt them this spring, got new tires, and have had them waiting, ready to go.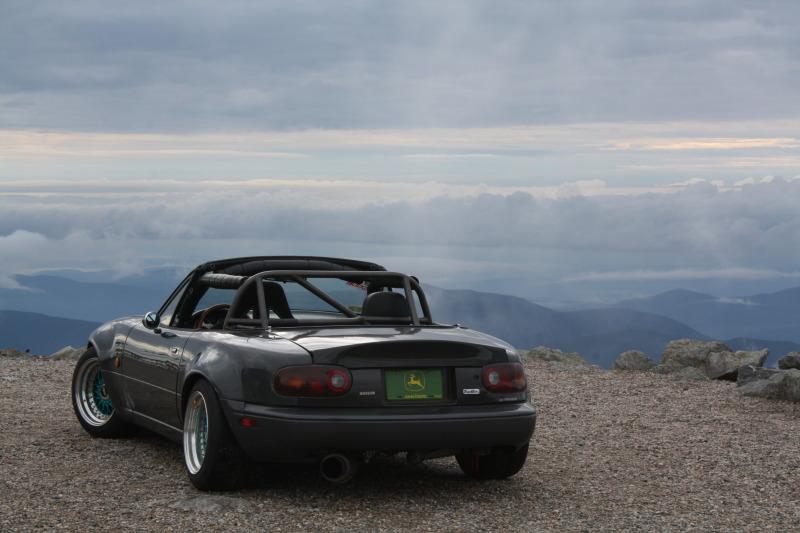
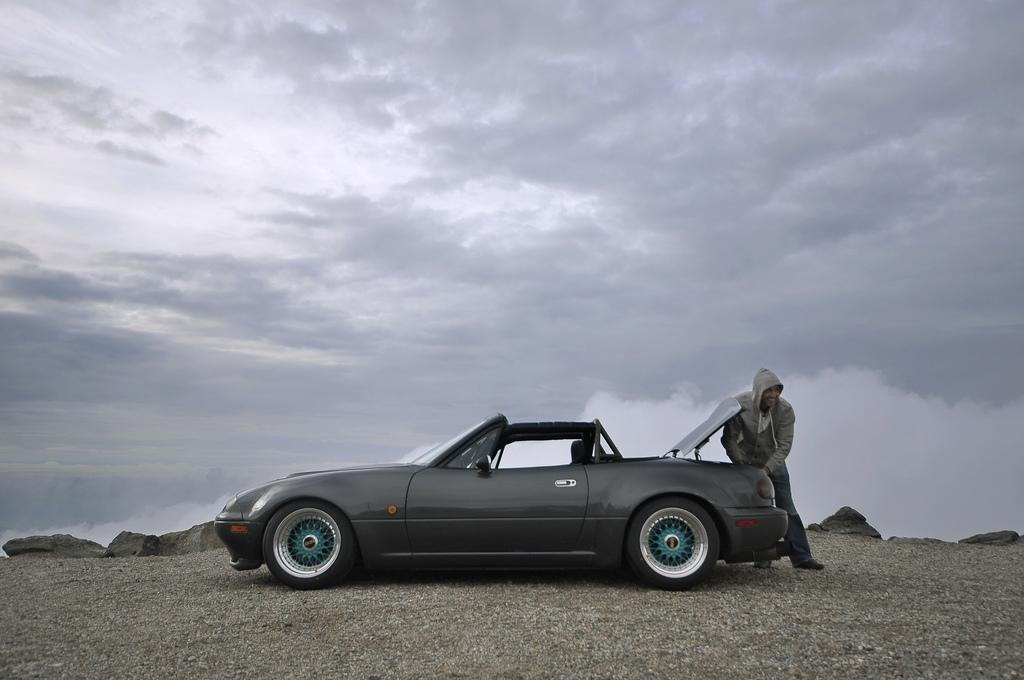
Great build!
Posted by Diggymart on 1/29/20 @ 11:22:34 PM