You must be logged in to rate content!
8 minute(s) of a 484 minute read
5-6-2017
Almost unbelievably I am still having trouble when starting the Rapier from cold. I have tried three different heat range spark plugs and as many different gap settings. I am now back to the same NGK BP7ES that I have been using for years, with a 30 thou gap. I started of using 25 thou gap and have now opened then up slightly. (5 thou)
I have also decided to close the tappet clearance down from 14 thou exhaust and 10 thou inlet to 8 thou on both the exhaust and inlet (cold) but that involves ordering some new valve stem "thimbles". Tappet adjustment is done by using different thickness thimbles (what you may call "lash-caps"). Using some very clever engineering the cam followers can be moved side ways to permit the thimbles to be changed quickly and easily without all the bother of lifting the camshaft. some people are happy to use shims placed inside the thimble but I don't really like doing this as the shims tend to hammer out over time and it is possible for small fragments to drop down, eventually ending up in the sump. The engine does have a "Full-flow" filter but I still do not like the idea of little pieces of hardened steel floating around in the oil.
All this is my own fault, this engine has during my ownership, over the last thirty or forty years, has been run on various stages of tune from "Touring" to "Full-race" and now could be best described as "Fast touring" or perhaps "Super-Sports". Perhaps not what an eighty year old should be driving but then "Eighty is the new Fifty". That is years old not MPH!
5-13-2017
Just a little more progress on the Rapier, I have spent the last two days closing down the tappet clearance to .007 in on the inlet side and .009 in for the exhaust. While this may sound like a long time to adjust the tappets "it ain't that simple". As I was wanting to close the gap down and I really would sooner not use shims, I had to go through my small stock of valve thimbles and sort out eight thicker ones, measuring each one with my one inch micrometer. Then came the fun part, to grind each of these to the required thickness using an oil stone, removing a minute amount of metal at a time rechecking its thickness after a few minute's grinding, then finally trial fitting the thimble back on it's valve stem to check the clearance between the thimble and the cam follower with a feeler gauge of the required thickness having brought the cam to the point of maximum clearance. (ie the back of the cam). This process had to be repeated, turning the engine over for each valve. Pushing the car back and forward with top gear engaged.
It is now running much more quietly and idling nicely. Just as well as when I took the car for a quick run down the street, the first time in almost five months, I very nearly ran out of petrol. I had to switch over to the "reserve" to start it and drive into the car-port. At least I know that I will have finally got rid of the last of the dud petrol that was the cause of all the problems. Having drained out as much as possible I had put 10 Litres of 98 octane into the tank. I can now fill the tank with 98 and be fairly sure that it is not being contaminated.
For all the people unused to basic measuring tools I have added the photographs below. The oil-stone (carborundum) is held in my bench vice, This is more usually used for sharpening knive-blades and chisels. With care you can remove very small amounts of metal. The short piece of knurled rod is used to hold the thimble against the oil-stone while grinding the face.
Bernie J


5-30-2017
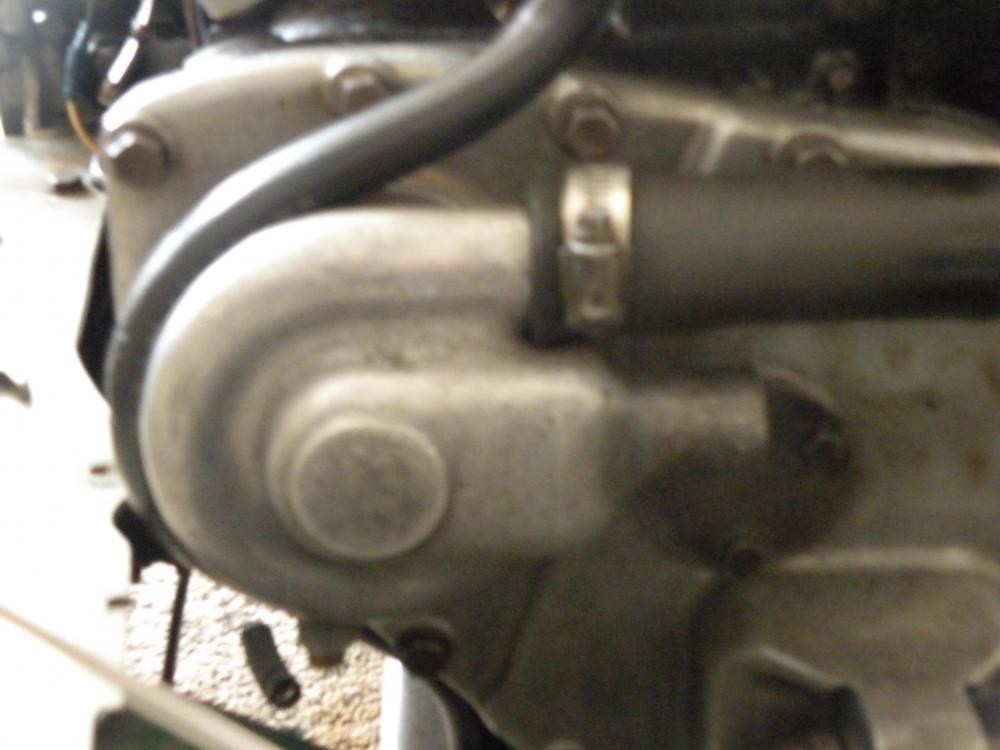
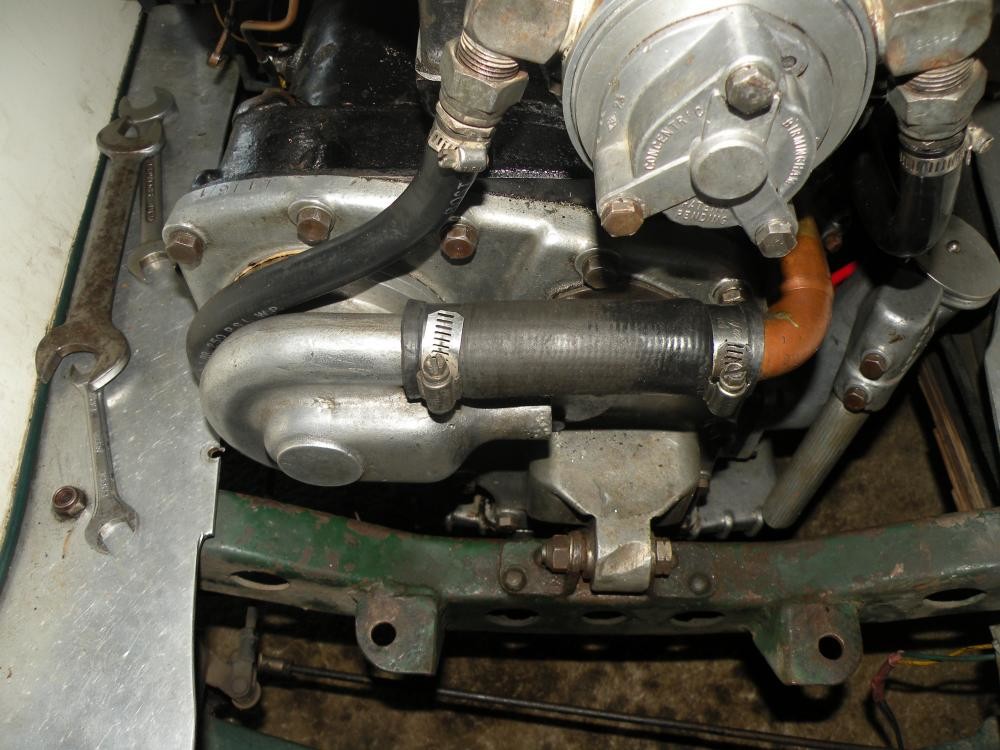
With the Rapier engine all back together and running I was concerned about a little noise that I have tracked down to the water pump ( I think) like all the things on a Rapier engine rather than having crude rubber belts and pulleys to drive them, the water pump is driven directly off the front of the gear that in turn drives the dynamo (generator ) and then the distributor which is driven by another pair of gears at the rear of the dynamo. The water pump drive is a straight forward dog engagement. I now have the water pump dismantled and having inspected it can see no possible source of this noise but I will repack the two (one ball and the other roller) bearings with high temperature grease replace the "O" ring and cut a new gasket for the joint where it bolts onto the timing case. While I am doing this I will put a light smear of grease onto the dog coupling. Hopefully when I restart the engine the noise will have gone away, and the pump will not start to leak. To date it has been completely free from leaks ever since I last put it together almost 40 years ago. The ceramic/rubber seal looks as good as it did when new. I only hope that it does not mind being disturbed. Taking the water pump off requires the radiator and bonnet (hood) to be removed. The two photographs show the front of the engine showing the oil pump which is driven from the front of the "triple sprocket" which carries the timing chains to the camshafts. It has the inlet pipe bringing oil from the sump disconnected to make access to the four nuts that retain the water pump. The second photograph is looking in through the timing case to reveal the water pump drive "dog". The round cover plate gives access to the oil pressure releif valve while the diamond shaped plate gives access to the tensioner for the botton timing chain. The drawing shows the entire timing gear/chain arrangement. Rather that one long chain "flapping around" the three gears and three chains keep everything nice and compact. The sprockets on the front of each camshaft have a vernirer adjustment to allow very precise valve timing, With every thing well thought out and precise makes working one the engine a real pleasure. My admiration for the Rapier's designer the late Tim Ashcroft never ceases.
The close up photograph of the front of the engine shows it as it was just after the water-pump has been removed. This still has to be cleaned up prior to re-assembly. Anyone with even limited engineering experience/knowledge cannot fail to be impressed. I have owned and worked on these cars for over 50 years and still enjoy every minute whether it be working on them or driving them.
Bernie j,


5-31-2017
As winter is just around the corner here in Australia officially starting tomorrow it means an extra layer of clothes when I am working on the Rapier in our rather windswept carport. Yesterday all I managed was to finish re-assembling the water pump and fitting it back onto the motor. Much of the morning was spent loading the 1912 Humber for its first part of it's long journey back to England. The later part of the afternoon was spent removing the shell from the radiator. Somehow this had ben knocked over somehow while shunting the Humber into place for loading it onto the tilt-tray truck. To my horror when I lifted it up I saw that it had come down heavily pushing the badge back and making a nasty looking dent. With the shell removed I have been able to carefully, aided by a small rubber hamer, restore it back into shape but doing this took up an hour and a half out of the afternoon, Fortunately there is only very minor damage to the enamel in the badge. With a polish it will be almost impossible to tell.
Great detail!
Posted by Diggymart on 6/20/19 @ 2:41:04 PM