You must be logged in to rate content!
11 minute(s) of a 484 minute read
2-8-2017
Hello Mike
I think you mis-read my comments regarding the future (post rebuild) compression ratio. At one stage my Rapier's engine was on 14:1which was completely impractical for a road car, it was subsequently lowered to 12 :1 and then 10:1.Each change involved stripping the engine and maching material off the crown of the pistons.
I will not know what the "new" Compression Ratio will be until I collect the new pistons this afternoon. Increasing the bore by 10mm made a huge difference to the compression ratio.
You may be interested to learn that I took the Rapier's Distributor to my "man" on Tuesday and had a talk with them about the pros and cons of Electronic Ignition. The Jury is still out.
The problem originall arose while we were away in Northern New South Wales when the new fibre "nose" on the points wore at an alarming rate. As the points gap is reduced the ignition is advanced. Wear on the fibre "nose" as it runs against the centre cam in the distributor causes the points "gap" to slowly close up and in the process advances the ignition. Fitting "electronic ignition"does away with the reliance on the distributor points and is said to give a more reliable and stronger spark.
Bj
It is always difficult when contributing to a "Forum' as diverse at this one. It is impossible to know the level of knowledge and "activity" of your fellow contributors. It would be interesting to take a census asking those who read all this, how much they understand. How many actually do any work on their cars and at what level.?
2-13-2017
At last I was able to drive down to Special Pistons, on the other side of town, and collect the four new pistons. I have deposited these with my friends at Crankshaft Rebuilders. As currently all my spare space is overflowing with Humber "stuff" I have asked then to assemble the pistons into the block and to refit the crankshaft. It is not that I have not done this myself before (dozens of times) but I did not want to be chasing parts around on the carport floor, which fills up with leaves everytime the wind blows, along with "buckets of dust and dirt". This is going to add considerably to the cost of the rebuild but I cannot see any other alternative. It will add a couple of weeks to the already too long down time but right now I cannot see a sensible alternative.
Bj.
So why am I doing this engine rebuild?
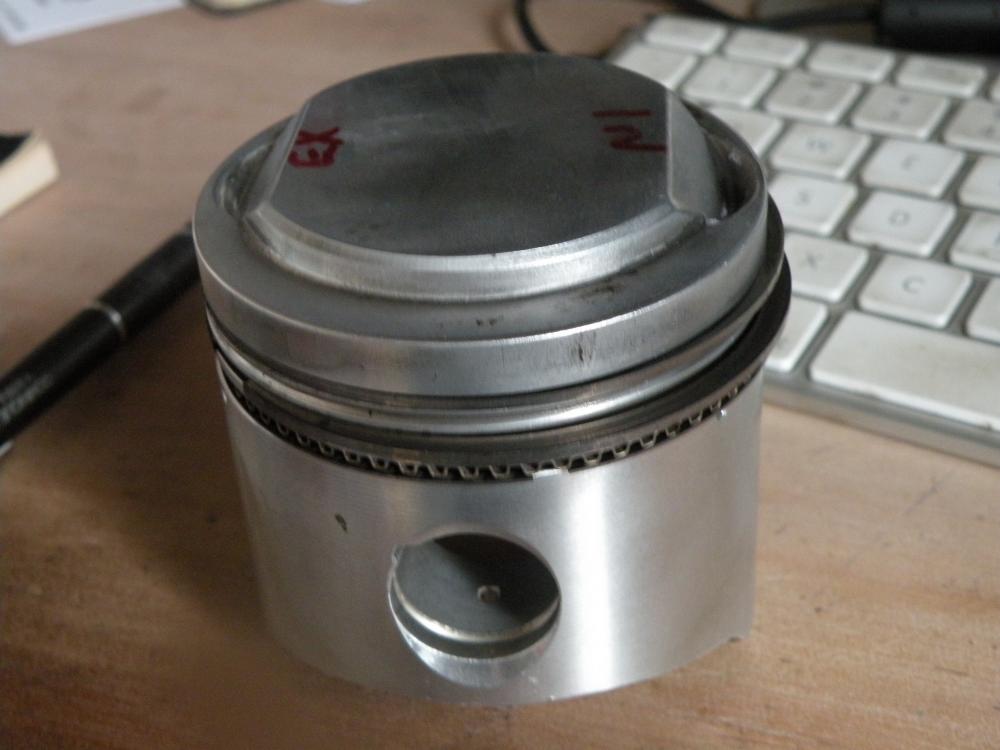
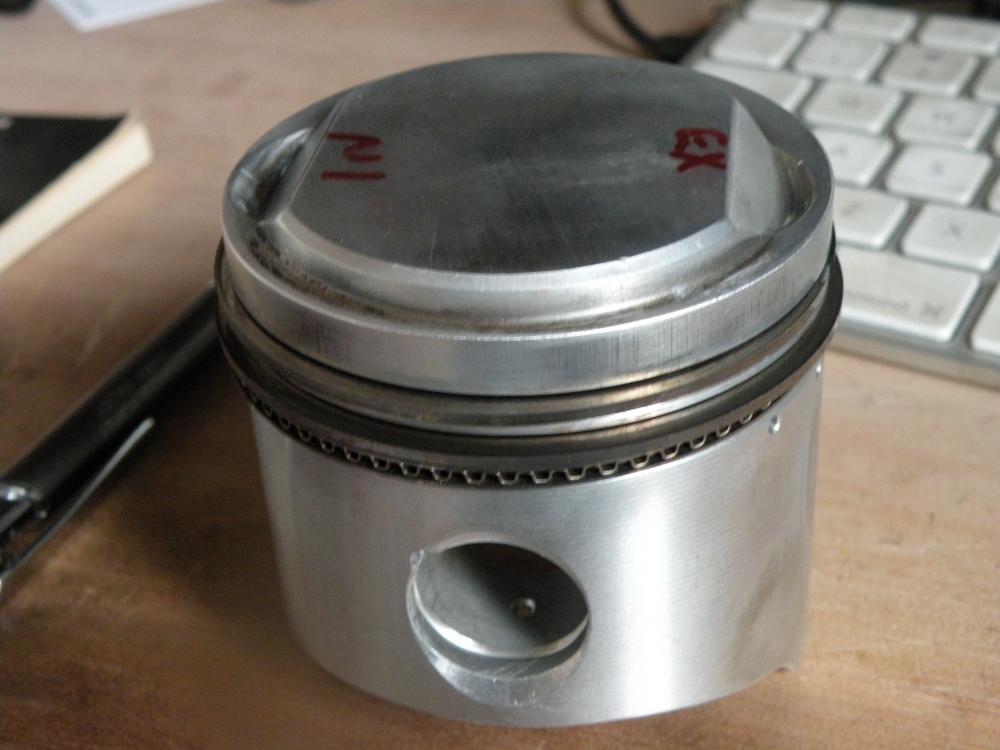
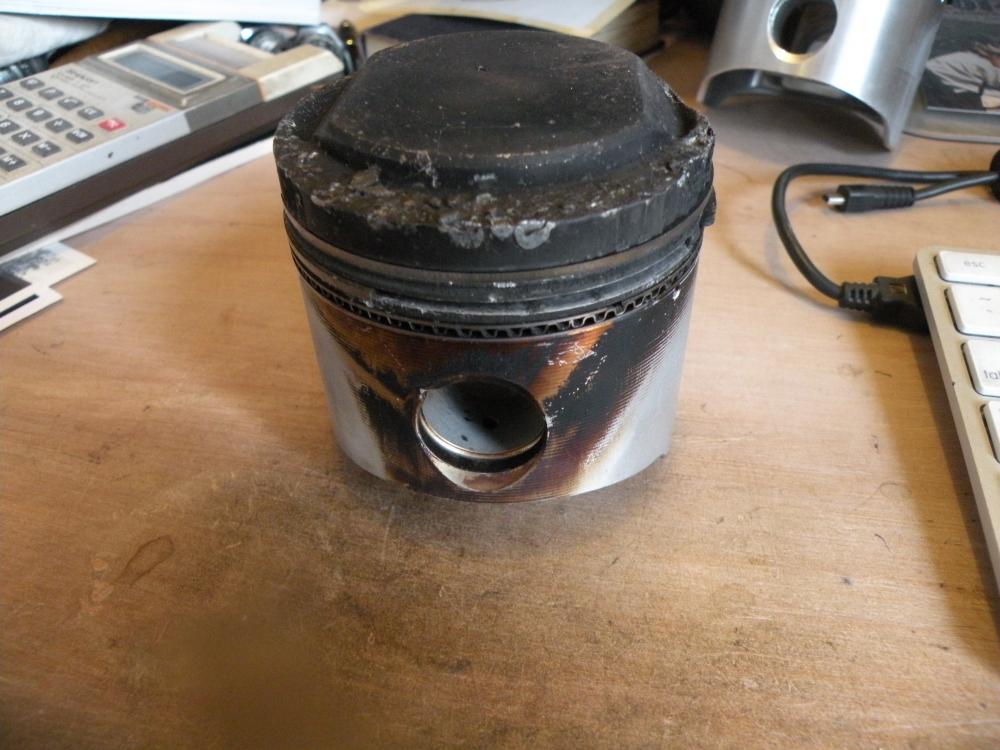
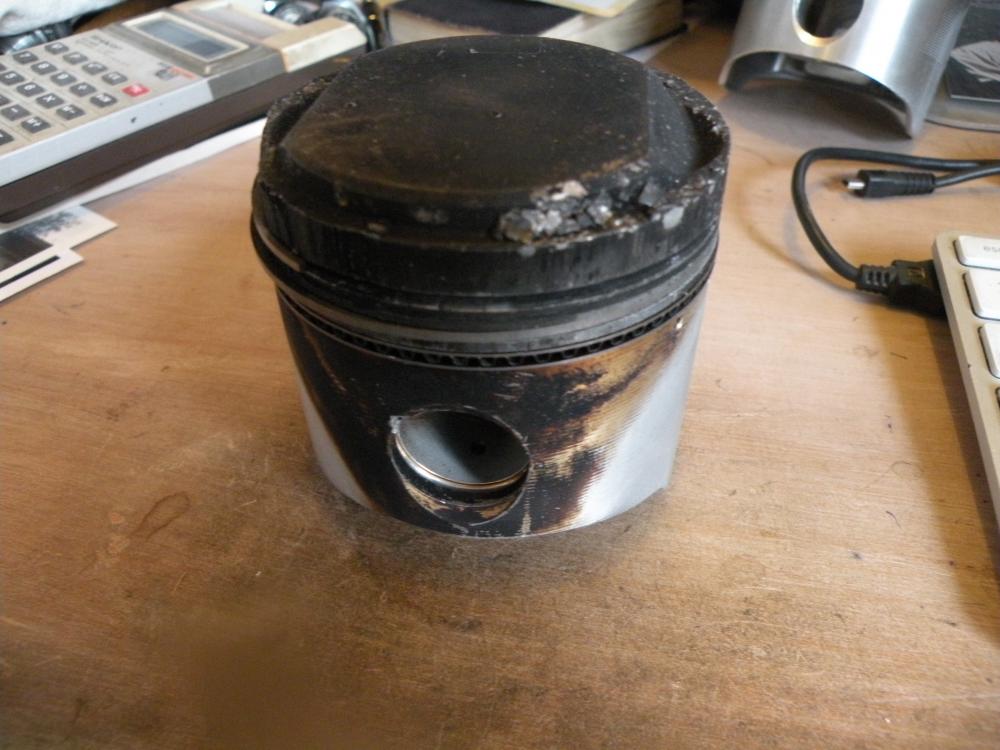
I am attaching photographs of two of the pistons out of the Rapier's engine. the first two show a piston with detonation damage at an early stage. The second piston shows significant damage due to detonation. What causes detonation, generally a combination of poor fuel and over advanced ignition. In the second photograph you can see light etching around the side of the piston between crown and the top ring.
In the third and fourth photographs you see the result of this etching continued, along with broken top and second rings. A tank full of suspect fuel combined with slightly over advanced ignition and it could happen to you.
That is of course if like me you enjoy driving your car.
Bj
2-14-2017
Now for something of interest for everyone.
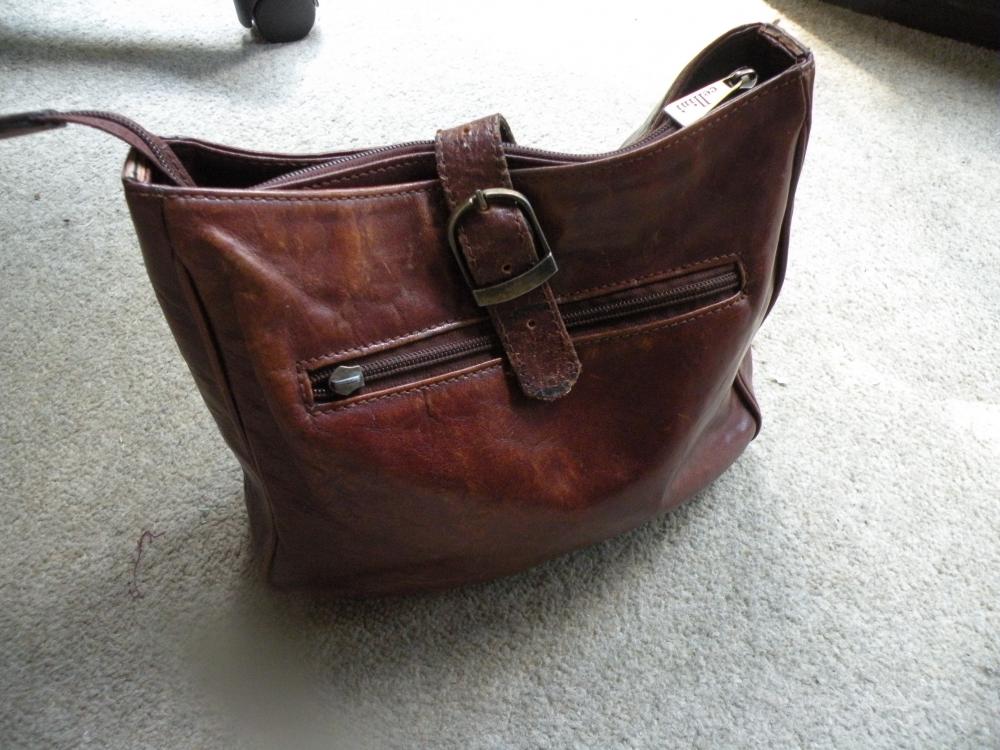
Every so often I make a detour through our local Charity Shop looking for a new tool bag. This time I struck gold, a neat little bag with good sized compartments made in wonderfully soft Italian Leather. easy to stow away in an odd corner in the rear compartment of the car.
This one was a bargain at just $5.oo And It will not rattle, scratch the paint work or mark the upholstery and trim. As a bonus the money go towards a good cause.
2-15-2017
Oh dear! is my face red? After all that work of puting the larger diam balance tube together I have discovered that there is no way that I can use it. One way up, as I had expected it fouls on the underside of the cam box. Turn it over and it looks ok until you try the mount the carburettors, No matter how you approach this task it is impossible to bolt the carbs onto the manifold. There simply is not room to get a spanner onto the nuts or bolt heads.
The quickest part of this job has been to remove the balance pipe. I have now decided that for the time being the only thing to do is to go all the way back to square one! To use the inlet stubs without any balance pipe. This is how they were originally intended when they were first designed in the 1960/70s. By doing this I can proceed with assembling the engine and get the car back on the road. By now I should have learnt not to allow these distractions to interfere with the work in hand. I have decided to assemble the bottom half of the engine at my friends Crankshaft Rebuilders workshop. With the Humber taking up far more than is it's fair share; there is just not the room in my "garage" and assembling it out in the open is not to my way of thinking an option, What is the point of spending several thousand dollars on having all the special work done then assemble it with dust and leaves etc blowing over everything every time the wind blows.
Ok it adds a week to the time the engine is out but that is better than having to pull it all down again in six to eight months time.
Bj.
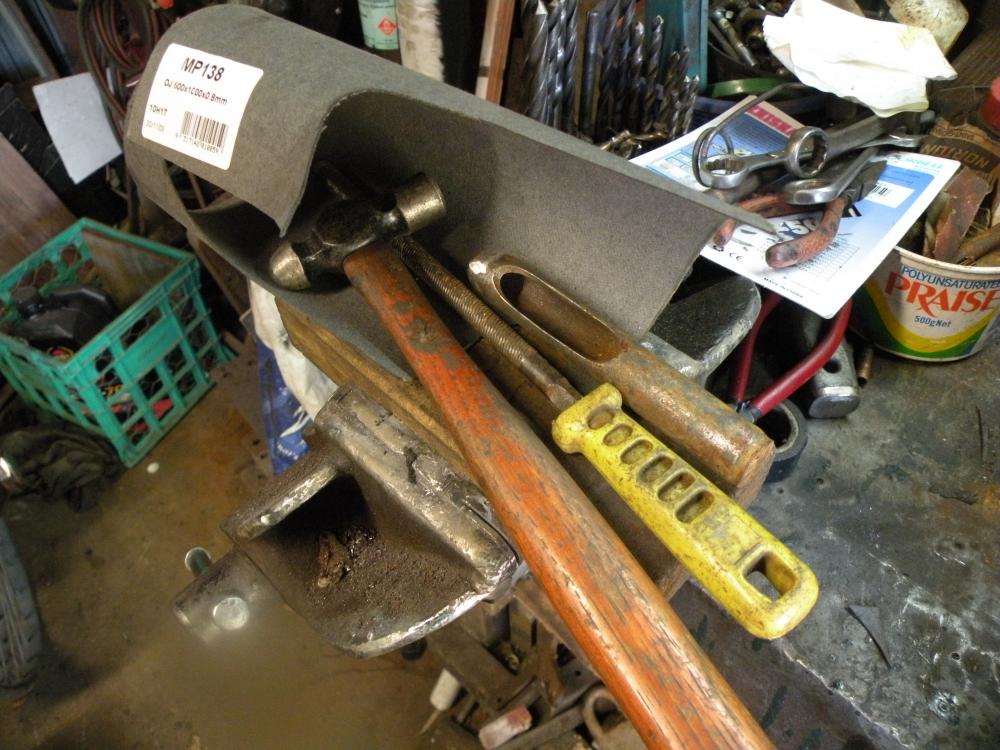
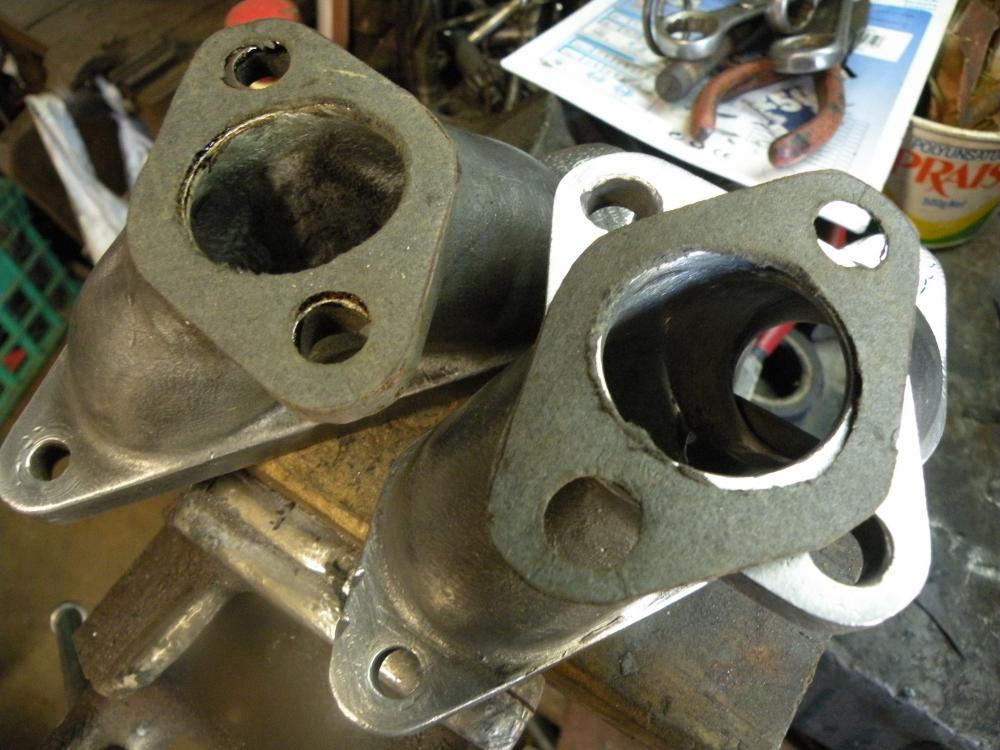
In much less time than it takes to drive to the shops I have started the task of re assembling the carbs onto the inlet stubs. First task was to cut the gaskets to go between the two flanges. All that was needed was some gasket card that I had "in stock" under the bench, a pair of scissors
A small ball-peen hamer and a suitable punch. Less than 15minutes later I had the two new gaskets ready to be used. The little "rat tail file is used to clean up any over lapping material. I am sorry that my bench is in less than pristine condition but it is where I have been working for the past 40 years. It has seen a lot of use.
Bernie j.
2-21-2017
Anyone who is becoming impatient you are not half as impatient as me. Why is nothing simple, 99.9% of the required work is done and yet I am waiting and waiting to collect the Rapier engine so I can asemble it and put it back in the car. Even then having left the distributor for a two day check It is now I am told they are waiting for a part to come from America, FOR A BOSCH DISTRIBUTOR, It is coming I believe via a Indian in a canoe or perhaps even by a specially trained seal.
Woof Woof
Bj
2-25-2017
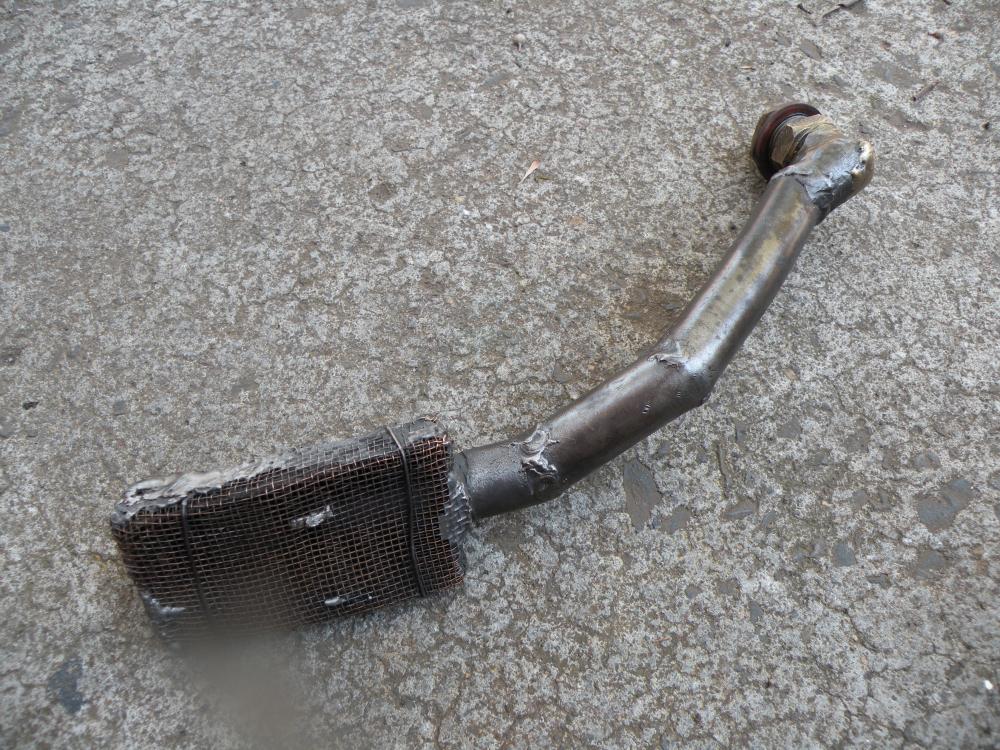
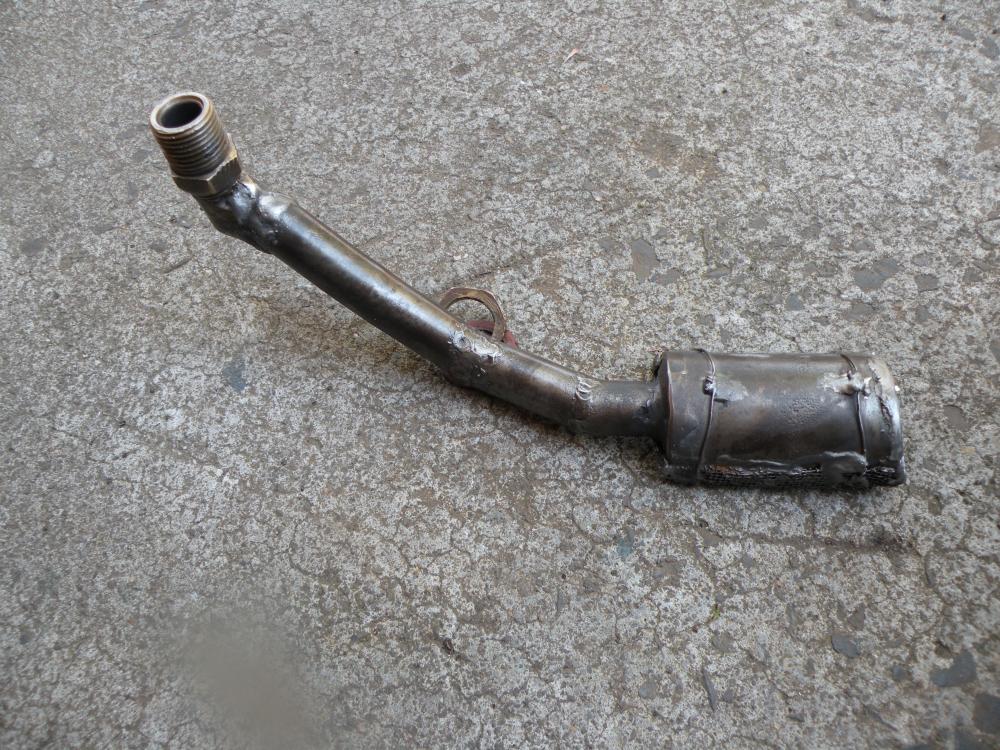
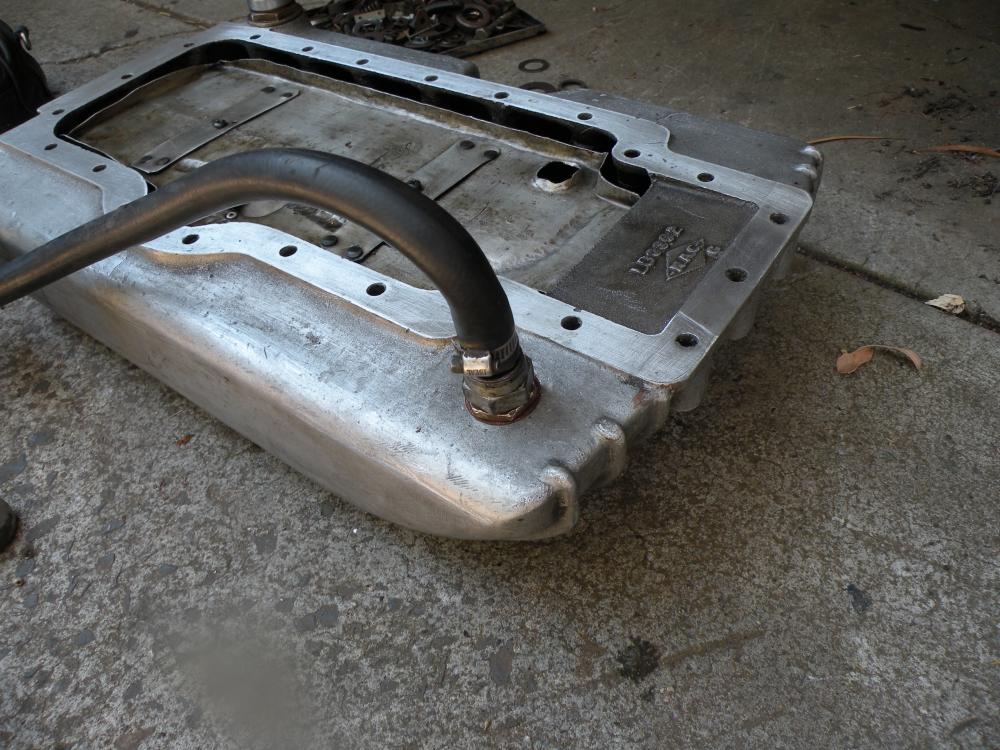
Many of you by now will have come to realise our Lagonda Rapier is far from "standard" this of course extends to the oiling system in the motor. The heart of this is a British Concentric oil pump original fitted to the quicker Mini Cooper S.
This mounted externally on the front of the cylinder head where it is driven off the front of the triple sprocket for the timing chains.
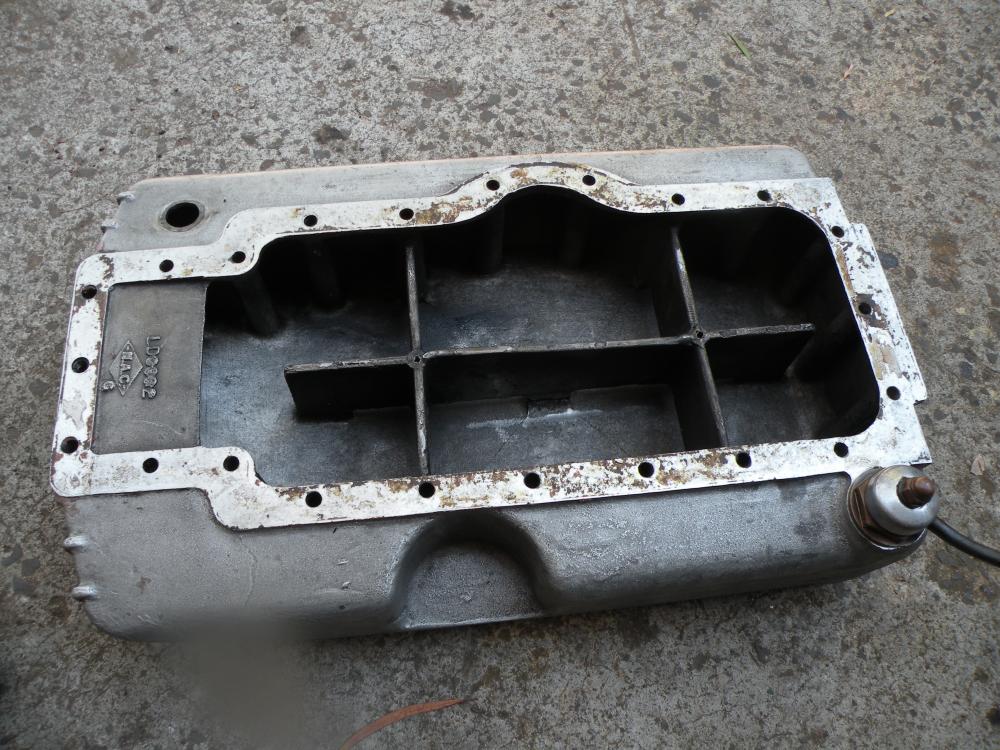
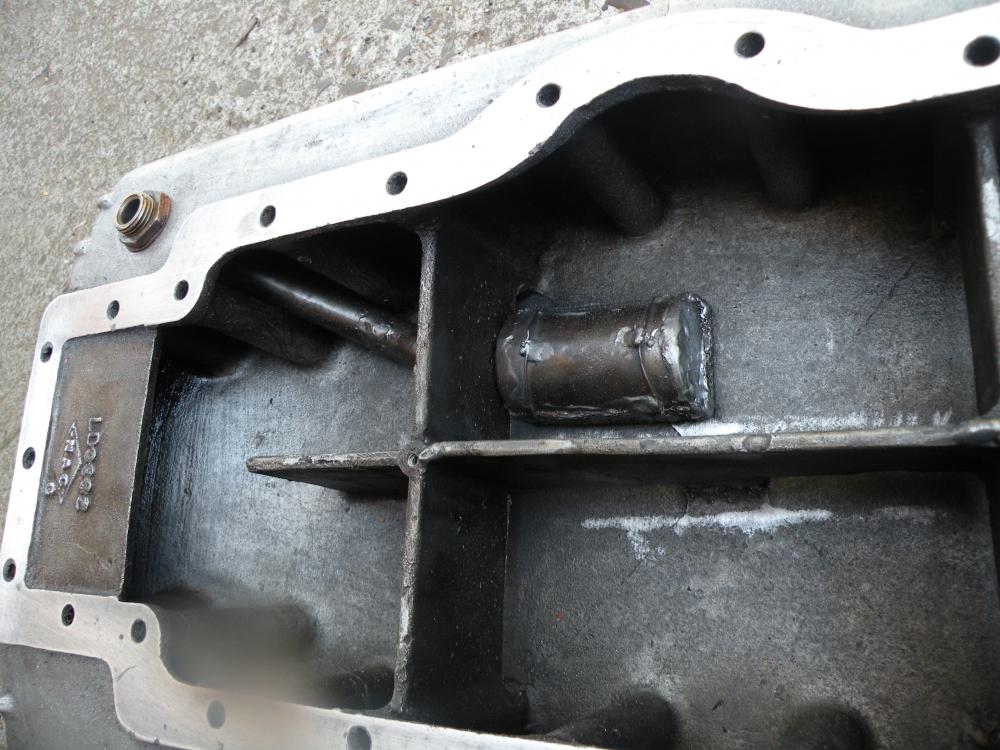
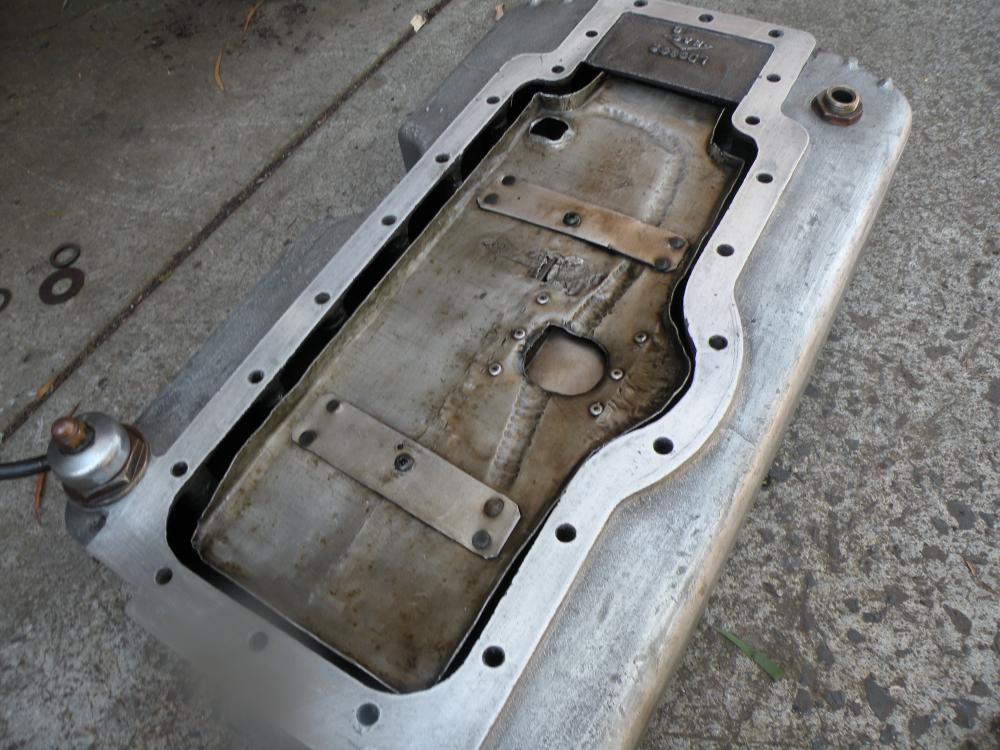
The Oil is picked up from as near to the centre of the sump as possible and taken to the pump by a high pressure hose. From the pump another high pressure hose delivers the oil to a modern "spin-on" full flow oil filter mounted on the original oil filter fitting. Like everything on the Rapier engine even mundane things like the oil sump have been given a great deal of attention. It is for a start a very generous size for what was originally a 1100cc engine. It holds almost 2 Imperial Gallons. In side the sump a series of cast in "fences" keep the oil from sloshing about. In my engine this is capped by a sheet aluminium "Windage tray". Inside all this the oil "pick-up" is of generous proportions and this routes to oil to the outside at a convenient sport at the right hane front corner. Looking at todays photographs you may be able to understand all this a little better. With this set up even with the engine at operating temperature The oil pressure seldom falls below 40psi at a 800-1,000 rpm idle and runs all day at the relief valve blow off pressure of 60psi.
Some of the more observant will have noticed the strange fitting with a domed cover and a handle or lever projecting out of one side situated in the top, left hand, corner of the sump.
This of course is the drain valve, yes a real valve, that when the handle is turned toward the front the valve is lifted allowing the used oil to drain out. Being built to suit the requirements of a "Better class of owner" , this could be done without the need to clamber under the car. When the last of the oil has drained you simply move the handle towards the rear and the valve is closed. You can then add the new oil. The underside of the sump has a generous number of "fins"to assist with cooling and to add strength to what otherwise would be a rather large flat slab of aluminium.
Bernie j
Great detail!
Posted by Diggymart on 6/20/19 @ 2:41:04 PM