You must be logged in to rate content!
11 minute(s) of a 548 minute read
11-18-2011
Hello again,
After exhaustive (and exhausting) enquiries regarding the possible colour combinations for the various electrical circuits, it seems that there was no recognised system of colours used by American Automobile manufacturers in the early 1920s. From the information David McC sent me and after looking at a number of web sites I have decided to work on a system of my own devising similar to the one I used when wiring the Dixie Flyer. At least I will know the intended destination of each wire as it disappears into the flexible conduit.
The gauge or value of the various wires will be determined in conjunction with the specialist firm supplying the wires. As a rule of thumb cable used in a 6 volt system needs to be approximately 25% heavier than for 12 volts. All wires will be correct 1920s style cotton covered insulated cable.
This is not intended to be a definitive listing but is simply a colour coding system of my own invention for my own use. "Bulkhead" refers to the double sided junction box mounted on the bulkhead (fire-wall) between the engine compartment and the driver/passenger footwell.
Bernie J
1923 PACKARD SINGLE SIX Electrical Cables (wiring)
Switch Terminal 5 to Bulkhead Black/blue trace
Bulkhead to Head-lamps (main) Black /blue trace
Black/Blue Trace Total 4.5 metres
Switch Terminal 6 to Bulkhead Black/Green trace
Bulkhead to Head-lamps (aux) Black/green trace
Total 4.5 metres
Generator ( cut out) to Bulkhead Yellow red/black trace
Bulkhead to Amp-meter (+) Yellow red/black trace
Amp meter + to Switch Terminal 1. Yellow
Total 3 metres
Starter switch ( Battery) to Bulkhead Yellow/Red trace
Bulkhead to Amp-meter (-) Yellow/Red
Total 3 metres
Battery to Starter switch (1.38 m)
Starter switch to starter motor (20 cm)
Battery to earth (26 cm)
Switch Terminal 3 to Coil, Red/Black trace
1.5 metres
Coil to Distributor Black/red trace
Total1.5 metres.
Switch Terminal 3 to bulkhead Red
Bulkhead to Stop light switch Red
Total 4.5 metres
Stop light switch to Lamp yellow/red trace
Total 4 metres
Switch Terminal 4 to Bulkhead Black
Bulkhead to tail lamp Black
Switch Terminal 9 to Dash lamp Black
Total 10 metres
Bulkhead to Horn Brown/Red trace
4.5 metres
Horn to steering wheel button Brown
5.metres
11-19-2011
Hi All
Anyone watching the Presidents Cup Golf from Royal Melbourne on television will be able to tell you that today was not a day to be outside working in an open carport. This is typical Melbourne Spring weather warm sunshine 28-30 degrees C. one day, cold wet and windy 18-20 degrees C, the next! We are hoping that it improves again for the VSCC Day Navigation Trial tomorrow. I have finished checking over the 1934 Lagonda Rapier, cleaning the spark plugs and checking the gaps, checking the distributor points gap, checking the oil level (the oil pan/sump holds two Imp Gallons) and filling the petrol tank with Premium (98) ULP. Checked the water level in the radiator, checked the tire pressures so all should be OK for an early morning start. We have to be at the start across town, about 35 miles, for a 9.00 a.m. check in. This is not just a Sunday drive but a very competitive event over about 250-300 miles at quite high average speeds, tricky navigation and all on secondary (country) roads.
Sorry, no work on the Packard again tomorrow.
11-22-2011
Hello
I have just returned from buying the electrical cable, flexible conduit and terminal ends etc so will be able to make a start on putting together the basics for the wiring loom.
I have just received the provisional results from the weekend. I must say that we were a little disappointed that we were one of just two cars, the other an 8 cylinder Type 44 Bugatti, handicapped into the "Fast" class with an average speed to maintain of 65kph while lesser cars such as a 4 Litre Bentley, a 1953 MG TD and a Straight Eight De Soto CF8 could slouch along at 55kph. Even so we managed 1st in the "Fast" Class and 7th outright out of a field of 15 cars.
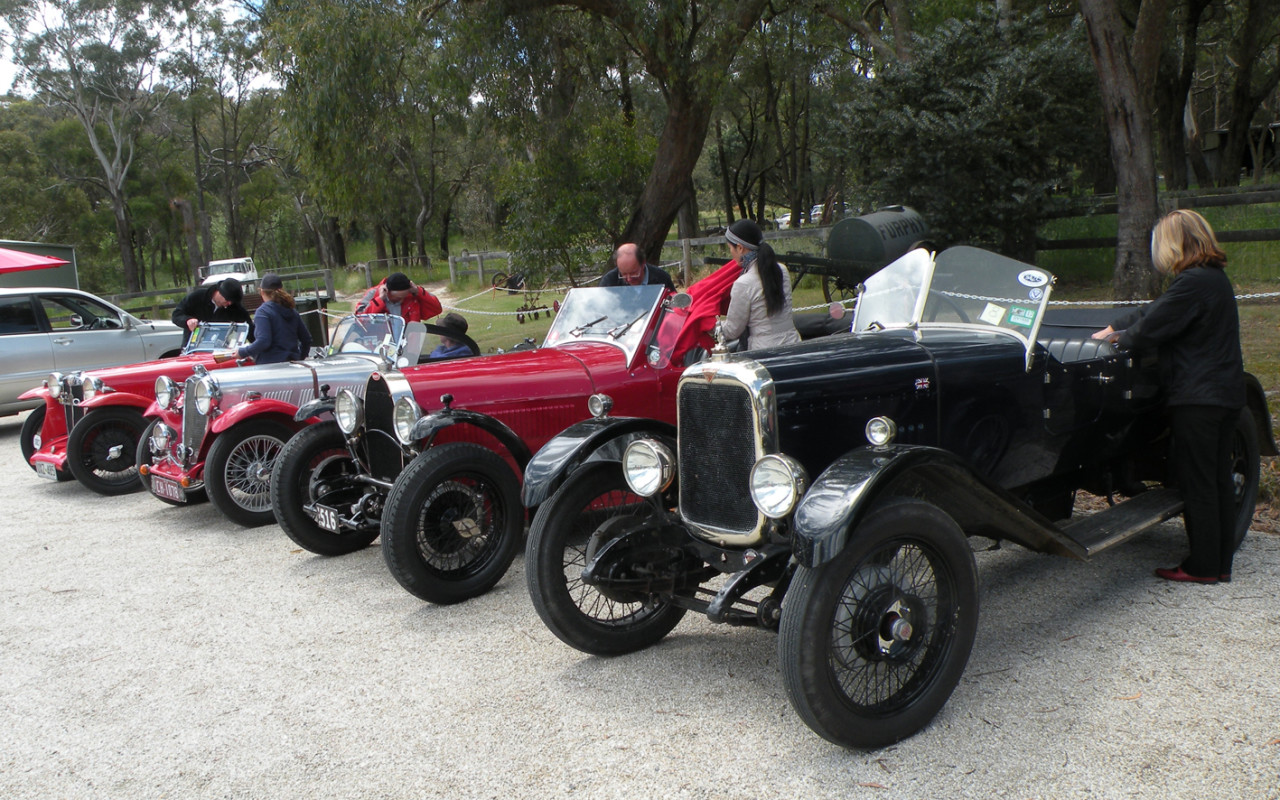
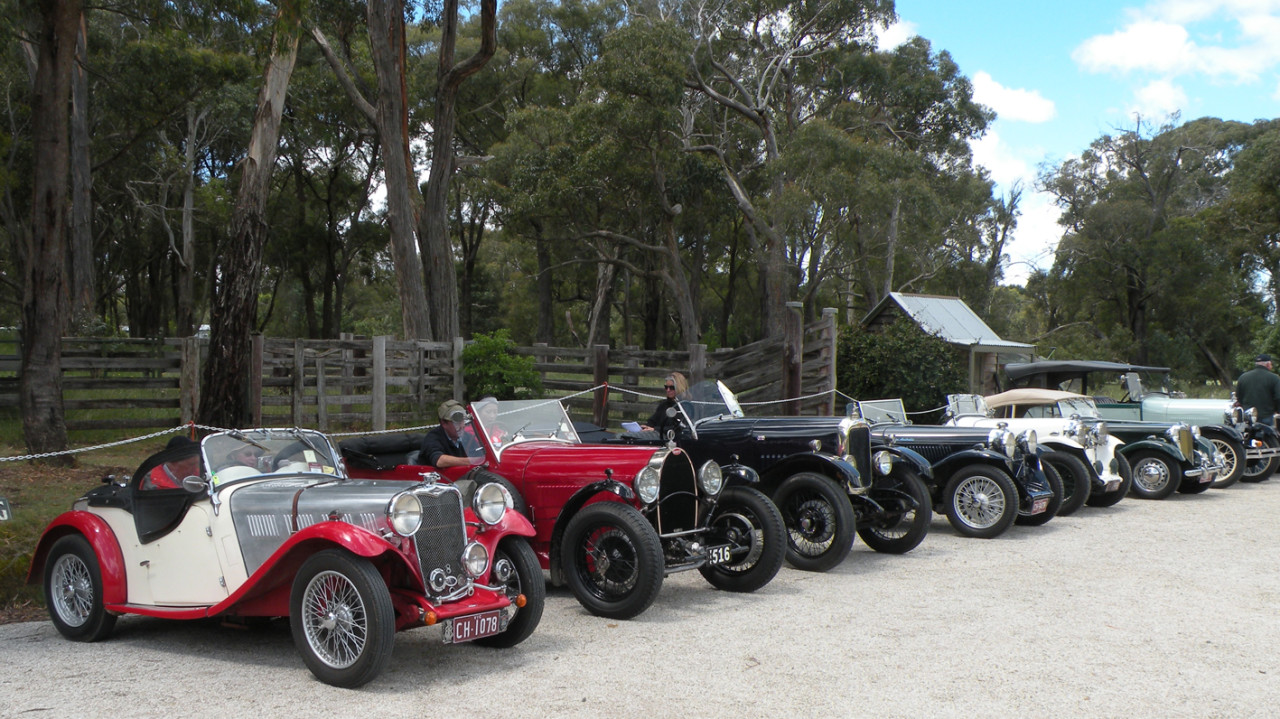
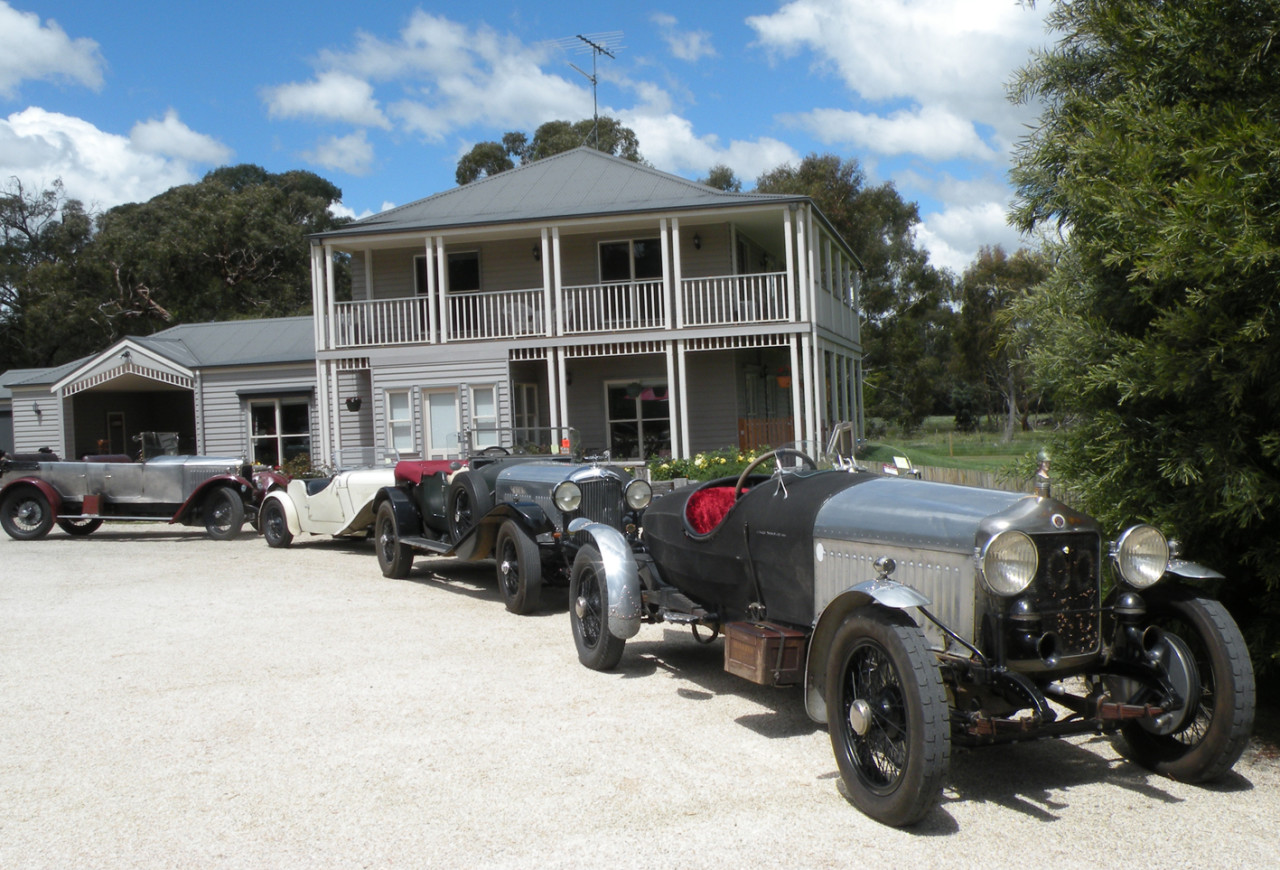
Thought that you may like to see the sort of cars we Aussies rush around country roads in. We left home a few minutes after 8.00 a.m. and arrived back a few minutes before 8.00 p.m. Almost 240 miles later. Sunday Driving?
Officially the first two cars in the third photograph are "SLOW" a Six Litre Sleeve Valve Minerva Speedster and a Four Litre Bentley.
11-23-2011
Hi y'all
It is difficult to get too excited about soldering terminals onto lengths of electrical cable even if it is cotton covered. Like-wise this is not the subject for riveting photographs so I won't bore you with the details.
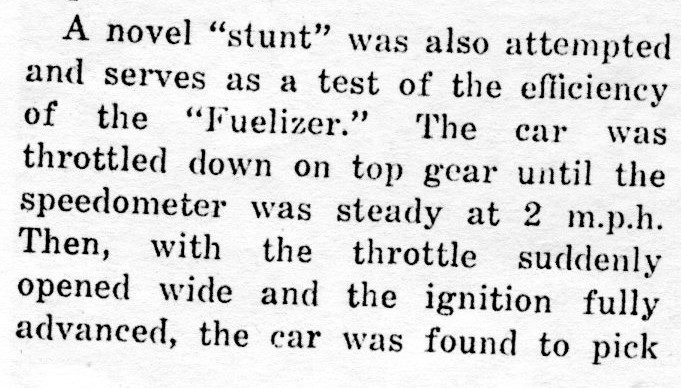
Much more interesting was the contents of a letter received from David McC this afternoon. He had noted my comments regarding the 1922 Autocar (England) road test of a Single Six. He has sent me a copy of the April 1923 Motor Life's impressions of a seven passenger touring Single Six. This magazine was printed in Sydney (Australia) and the author was most impressed with both the Fuelizer which he describes at great length and the cars ability in climbing several of Sydney's steeper hills in top gear. It is also claimed that the test car achieved over 20 miles to a single (Imperial) gallon of petrol, something that David is rather doubtful about.
The attached extract makes interesting reading.
11-25-2011
Hello
Going back to the question of correct gauges for the various wires in an auto elec loom Travis from Rhode Island Wiring Service has been most helpful. He has sent me the attached chart with his suggestions. Unfortunately the cost of postage to Australia makes buying one of their looms prohibitive but for anyone living in the US I would suggest looking at their service. Meanwhile I have been also talking to Paul at Vintage Wiring Harness just a few miles from our home at Ringwood (Vic) He has an amazing range of cotton covered wire and can make up looms to suit most cars. Unfortunately his library of wiring diagrams etc did not include a 1923 Packard Single Six but he has supplied me with all the wire, cable ends etc that is needed, so I should be busy for a day or two. Next week I am to be "grounded" for a few days as I am due to have a small operation on my right eye on Tuesday morning.
Bernie J.
Rhode Island Wiring Service
Rewire Help guide by gauge.
Battery Functions:
Starter Switch (battery) to Ammeter
12-10 gauge
Ammeter to Generator Relay (early cars)
12-10 gauge
Ammeter to Voltage Regulator (late cars)
10 gauge
Voltage Regulator to Generator (A)
10 gauge
Voltage Regulator to Generator (F)
16 gauge
Ignition Functions:
Ammeter to Ignition
14-12 gauge
Ignition to Gauges
16-14 gauge
Ignition to Coil
16-14 gauge
Coil to Distributor (low tension)
16-14 gauge
Coil to Distributor (hi-tension)
7 mm Spark Plug Wire
Lighting Functions:
Ammeter to Headlight Switch
12-10 gauge
Headlight Switch to Dimmer
12-14 gauge
Headlight Switch to Park Light
16-14 gauge
Lighting Switch to Stop Light Switch
16-14 gauge
Stop Light Switch to Stop Light
16-14 gauge
Headlight Switch to Taillight
16-14 gauge
Dimmer to hi-beam
14-12 gauge
Dimmer to lo-beam
16-14 gauge
Headlight (ground)
14 gauge
Fog and Tripp Lights
14 gauge
Turn Signal System
16-14 gauge
General Lighting (dash, interior, courtesy, etc.)
16 gauge
Accessory Functions:
Horn / Horn Relay (feed)
12-10 gauge
Horn Button
16-14 gauge
Accessory / Heater / Defroster
14 gauge
Radio
16-14 gauge
Clock
18-16 gauge
Cigar Lighter
14-12 gauge
N.B. These gauge suggestions are just rough estimates.
They are generally acceptable for Autos from 1920's and into the 1960's
If you are not sure about the gauge of a function, you should use the larger gauge.
For the most part the smaller gauges should work for 12-volt systems, whereas 6-volt systems would more likely use the larger gauges.
Again, any given car may use different gauges for any of these functions; it is always best to size the core of your original wire to be sure you use the correct gauge for your functions.
11-26-2011
Hello David
You really should not bothered sending all that rain down to us in Melbourne. It has barely stopped all day. Last time Helen looked at the gauge it had about 45mm in it and that was a couple of hours ago! I took some time off to drive out to see Dave my friendly painter to discuss some of the details on the Packard body. He is scheduled to start "prep-ing" it next week.
One question: Should the engine side of the bulkhead be the body colour or black? Chassis frame and splash trays are black. Not very much of the original paint remained and it would be a brave man to guess what colour it may have been apart from "dark"
My main task over the last day or so has been feeding wires into flexible conduit. From the lack of suitable fixing holes in the frame and the absence of retaining clips it almost seems as though both the petrol feed pipe from the rear tank and the electrical conduit were simply "loose laid" along the bottom flange of the frame. Could this be right?
I intend to fix both with suitable clips but will have to drill new holes to secure them.
The only alternative I can think of would be that that were screwed to the underside of the wooden body frame. I had intended to have as much as possible installed onto the chassis frame before I refitted the body to the frame. It is much simpler to do most of this from the top rather than working under the car once the body is in place.
11-28-2011
That things that they don't tell you! My eye surgery went well this morning but now I learn that I should not go near the garage for at least two or three WEEKS! The dressing comes off tomorrow but I have to have drops in the effected eye four times every day for the next three weeks when I see the doctor again.
11-30-2011
Hello
While I am "grounded" I thought that I may at least do some more detective work on trying to solve the mystery of how and when the Packard first arrived in Australia.
The one clue that I have is that the tyres appear to have been fitted new before the car was shipped from the US.
These are 600 x 23 white-walls manufactured by the Lincoln Tire Co. the batch/id number stamped into the side wall is IFS 11083.
Perhaps there is someone who can identify the date of manufacture from this. Armed with at least a year, I hope to be able institute a search of the Australian Customs Service archives.
12-1-2011
I am told that the Lincoln Tire Co ceased production during the 1960s If I could narrow that down to an actual year it would give me a starting point. One way or an other I am determined to discover something of my Packards history. Meanwhile my eye seems to be healing nicely. I may even get to a point where I can read without spec's. I can see road signs and read number plates without them.
12-2-2011
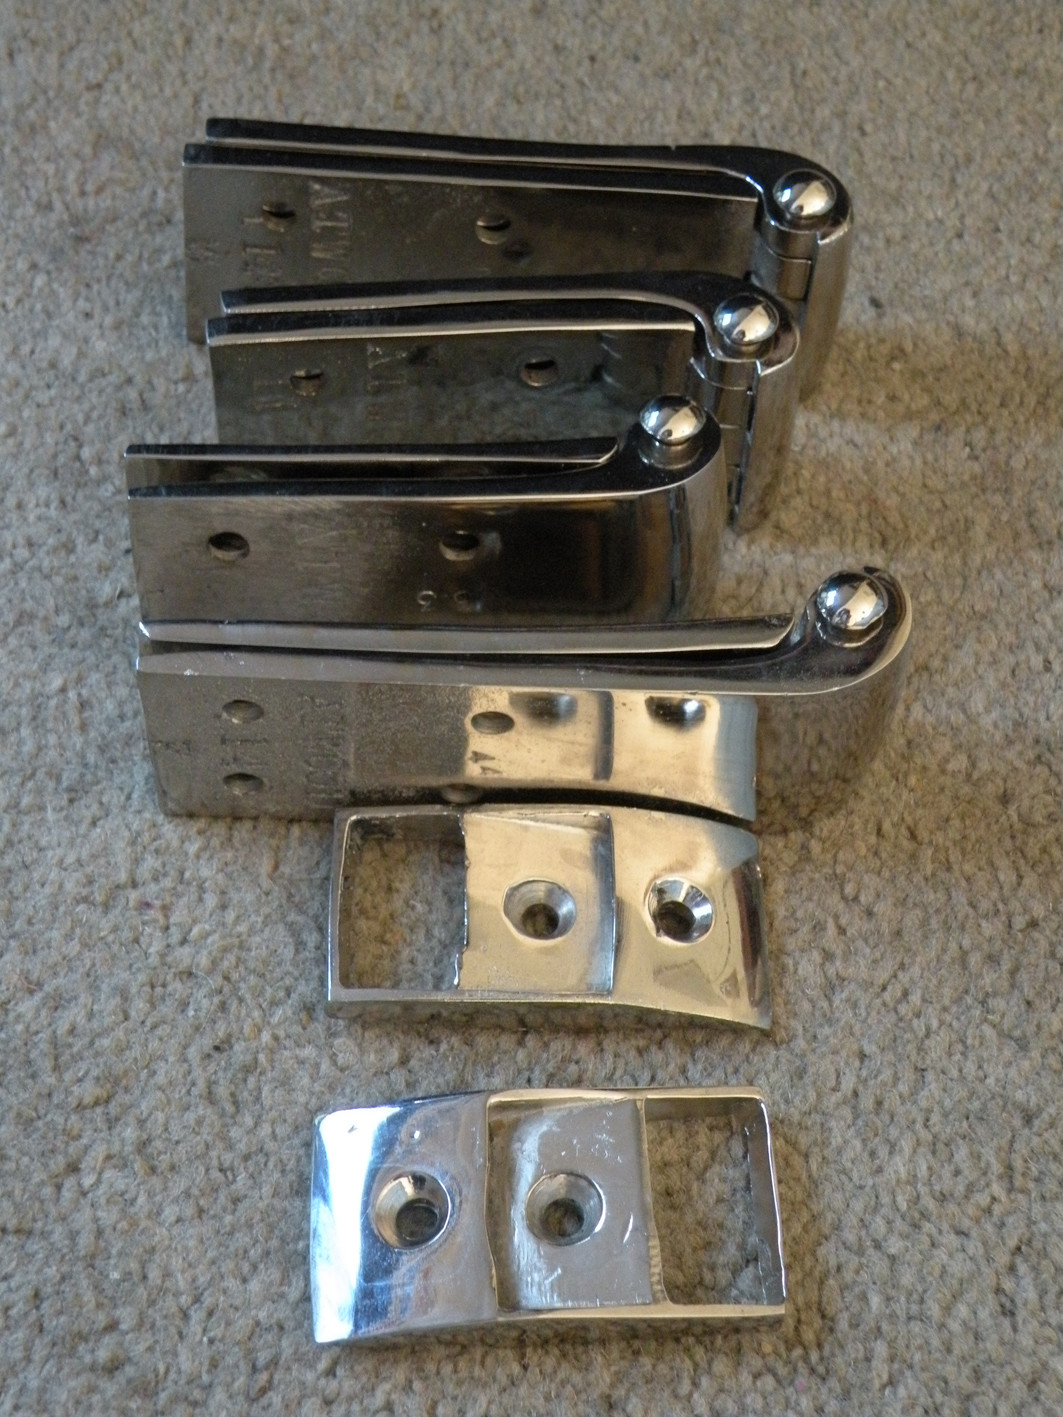
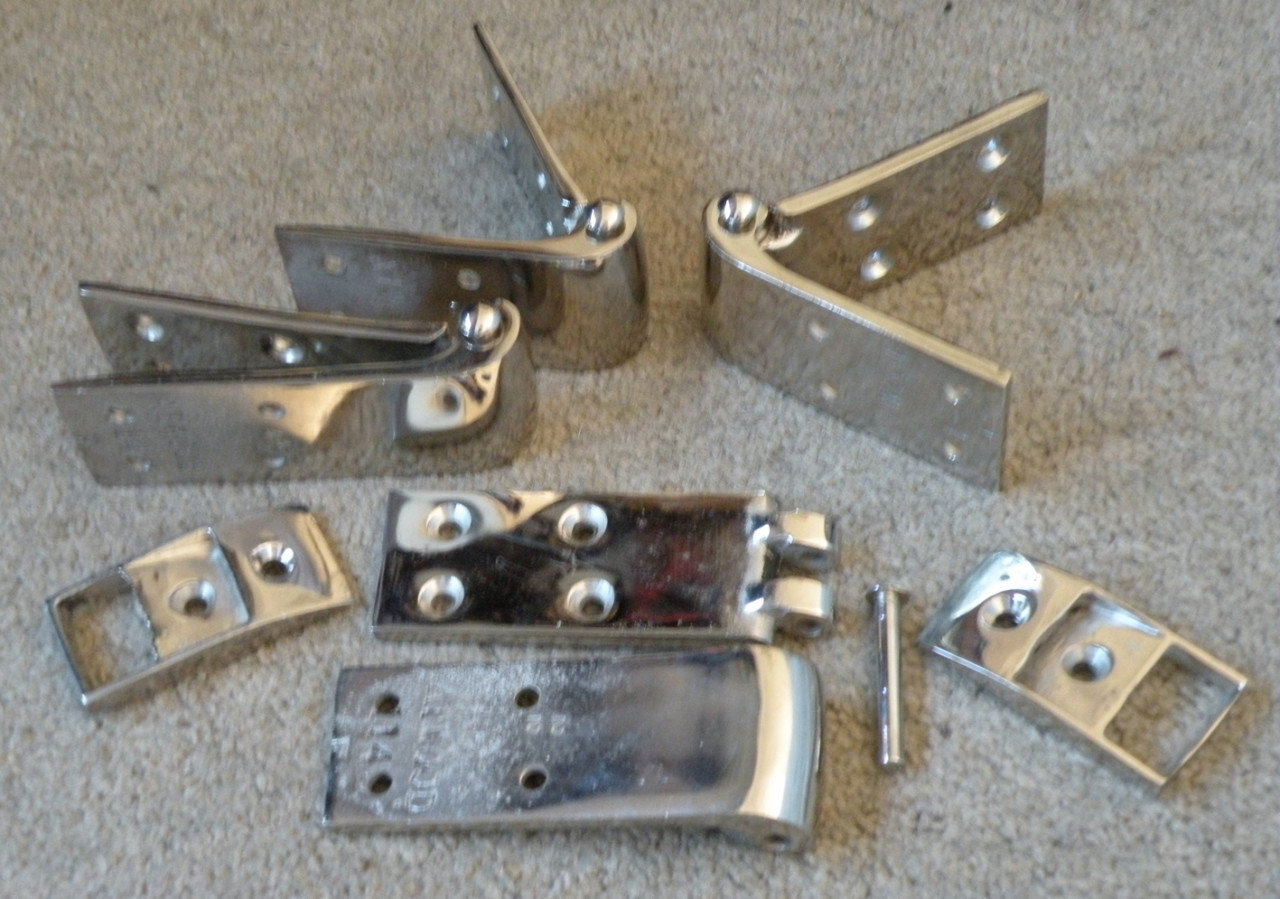
Now the purists will hate me. Originally the door hinges and striker plates on the coupe appear to have been painted. In the past no matter how carefully I prepared and painted hinges, once in service it seemed no time before the paint got chipped. The only solution was to have them plated. Nickel of course.
My friendly plater calls me Mr Nickel. I have just picked them up yesterday. Again these have confirmed my belief that despite its condition when purchased my Packard had done very little work during its 88 years. I am re-using all four original brass hinge pins. None of them showed any wear! I had to 'ease" the holes to allow for the thickness of the plating. Like wise the condition of the brass striker plates tell me that the doors have remained shut for most of the cars long life.

bravo!
Posted by CCmyVW on 1/26/20 @ 5:30:36 PM