You must be logged in to rate content!
14 minute(s) of a 548 minute read
10-15-2011
Thanks Matthew
As an AACA Judge I value your opinion and input.
The rear axle assembly is now complete and once I manage to move some things (such as the body) to organise my space (or lack of) a little better I can start towards getting the chassis frame back on four wheels. Perhaps over the next two or three days. The next step will be getting a roll of webbing so that I can finally put the snubbers back together and set up on the chassis again.
Back to work!
10-17-2011
Hi all
Today as predicted has been full on, Unfortunately my help had a problem with his Land Rover and was unable to come so as they say in all the best books "When the going gets tough, the tough get going!"
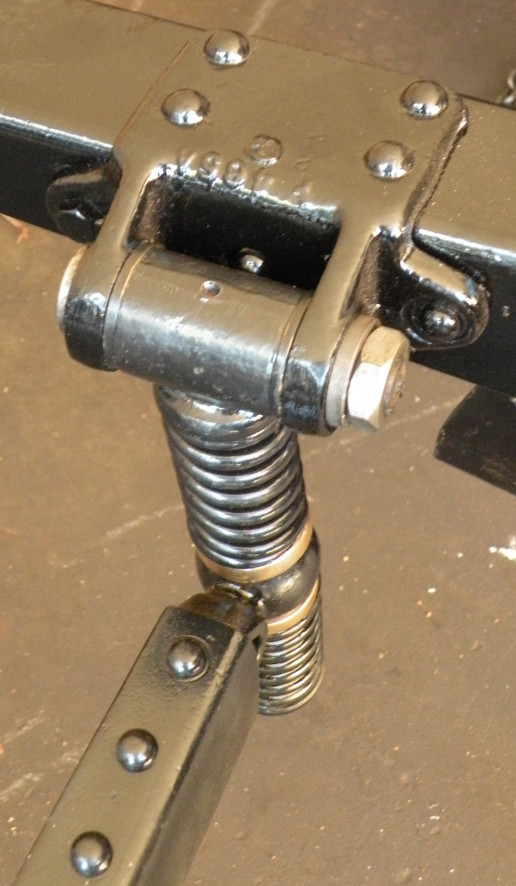
Starting after lunch,(Monday morning is reserved for Petanque then coffee) first job was to move the body out of the way. The chassis could be moved from its resting place, standing one side, up against the wall. Then the front axle etc could be moved into place and the shackle pins fitted. This involved slackening the "U" bolts so the ends of the springs could be lined up.
With the front end fitted next step was to turn the chassis around, using one man power a trolley jack and a make shift hand truck. That achieved the next step was to move the completed rear end out of the garage and into place under the chassis. The rear of the chassis had to be lifted high enough to allow the rear axle to be wheeled into place. Problem my lifting point for the chassis was directly in the middle so so weight had to be added to the front. Simple just lift the four wheels complete with 600 x 23 inch tires up onto the chassis.
That done the rear end could be slid into place and the shackle pins pushed in. with jack stands in place I could call it a day. It is now just after 6.00pm (Eastern Australian Summer Time) which means just one thing."Drinks time" and the "Boss Lady" will be becoming impatient!!!!
Cheers
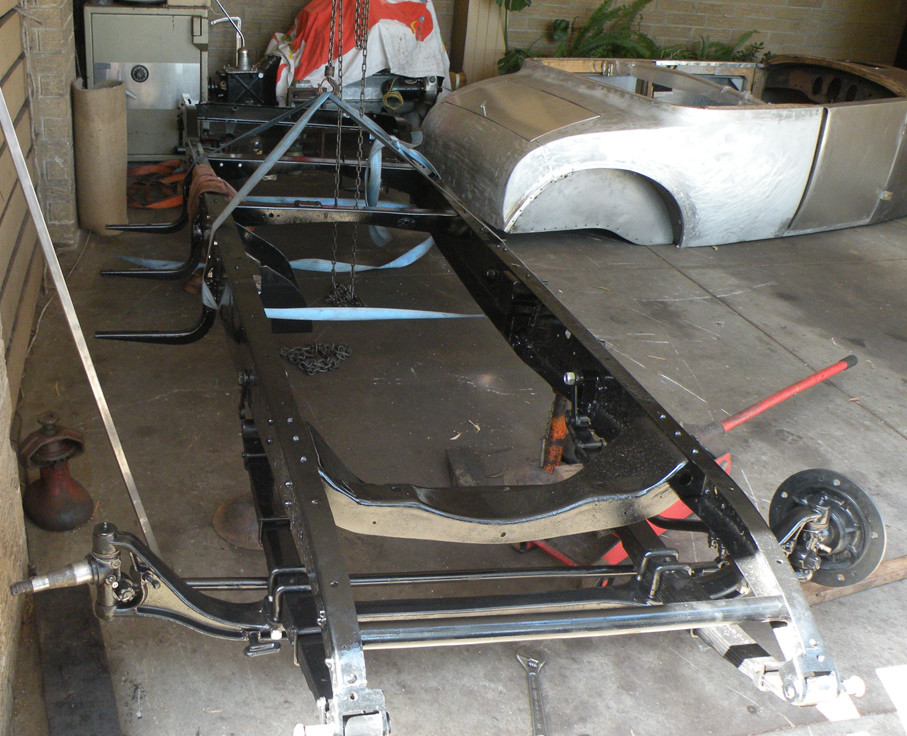
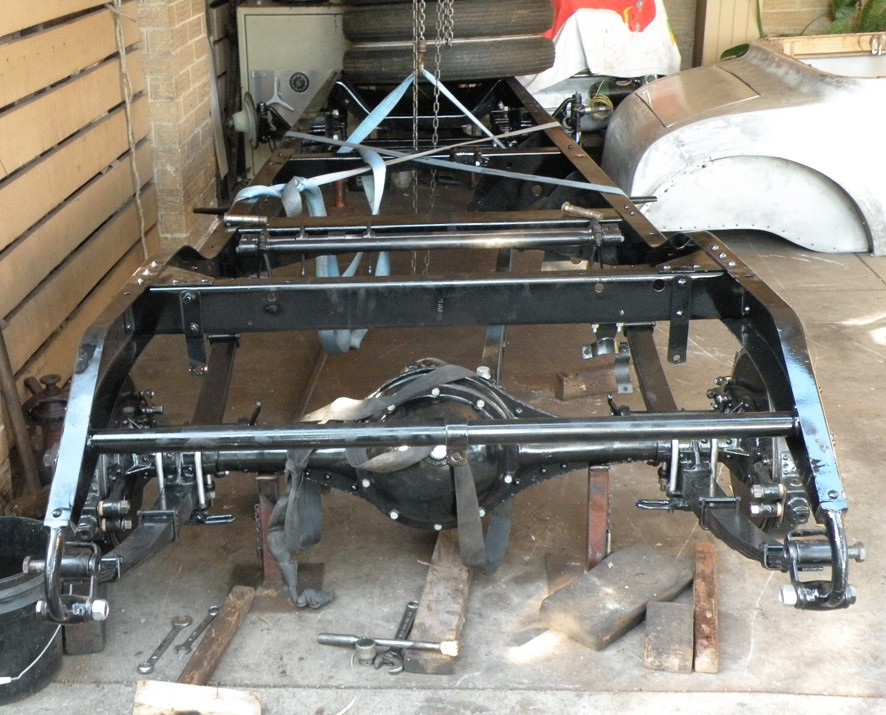
For all those who do not understand "Petanque". It is the "Bowls" game originally invented by and played by the French using steel balls, not unlike Lawn Bowls except that it is played on any available gravel area. If you need to know more try feeding the word Petanque into your search engine otherwise known as "Google"...
10-18-2011
Another day...
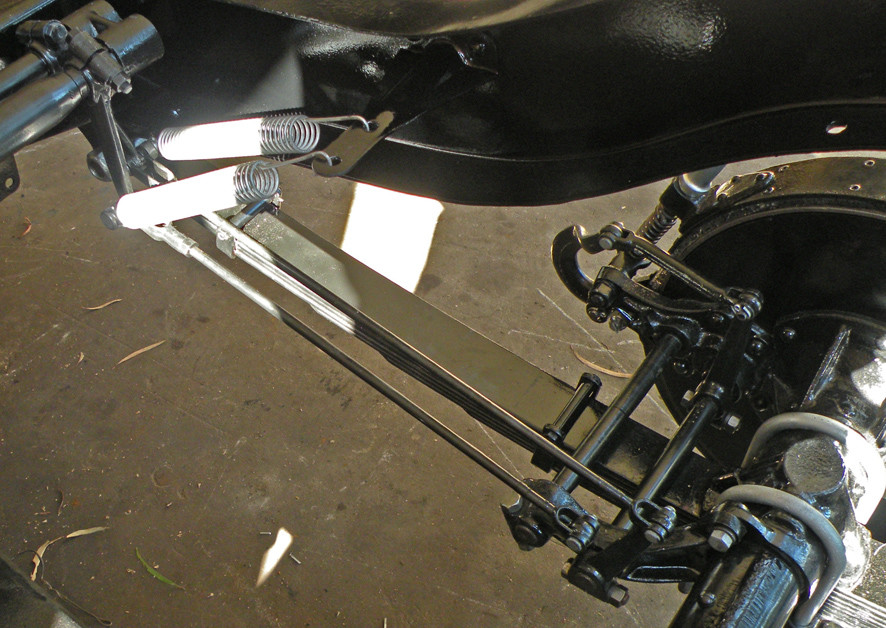
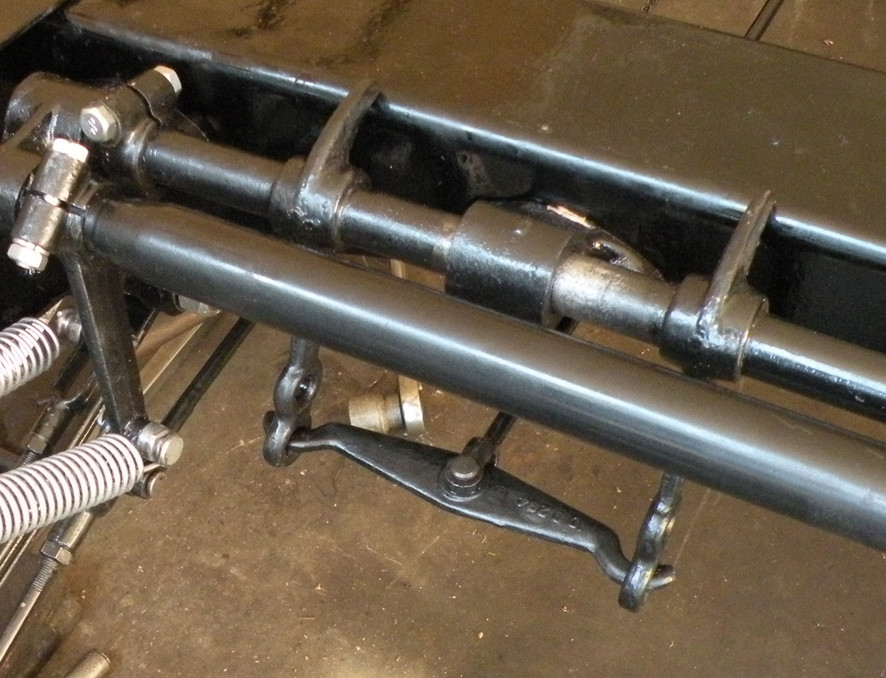
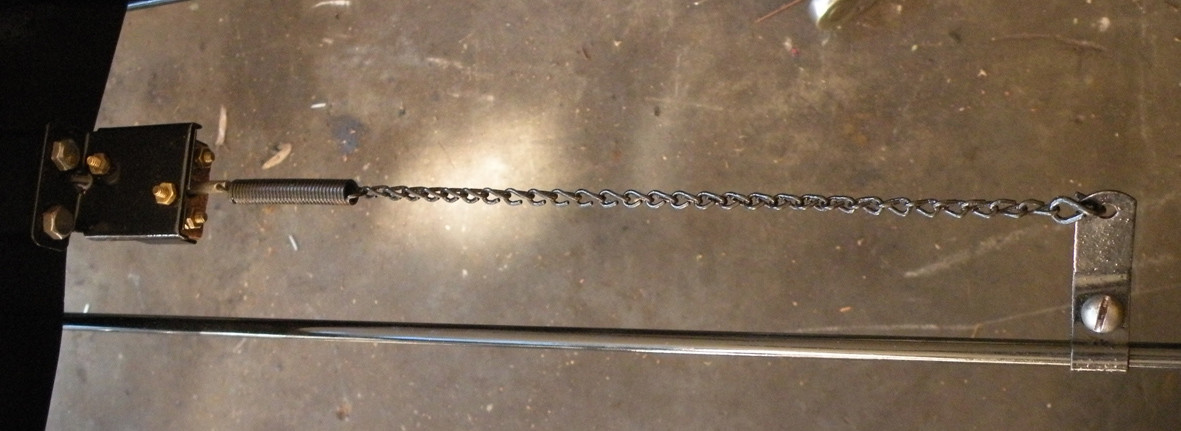
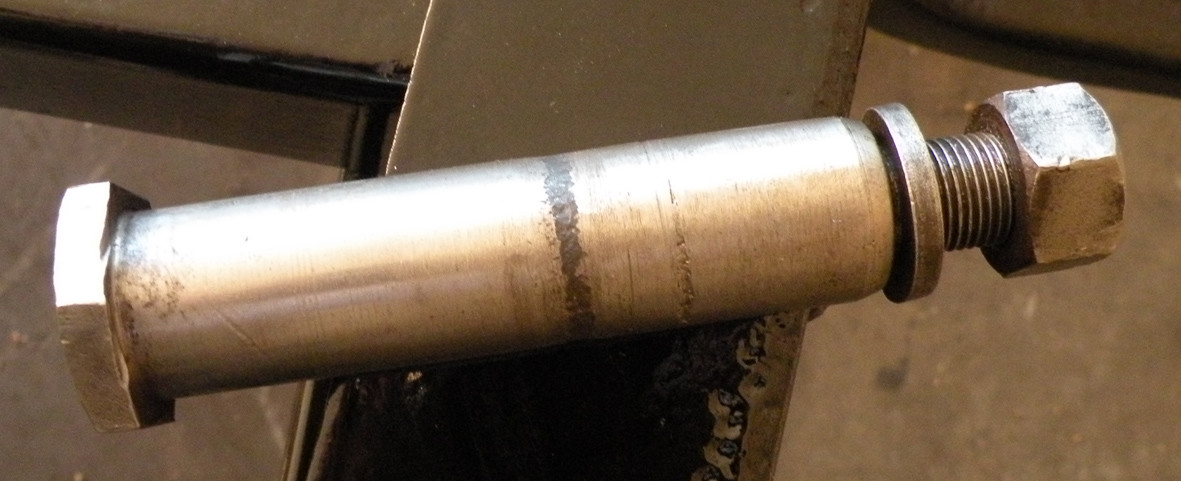
Today after finishing installing the shackle pins and tightening the lock nuts. For anyone who has not worked on an early 1920s Packard the spring shackle pins screw into the inside shackle plate and are then secured with a lock nut. Following this I have been assembling the brake rods and setting them up. In doing this it again reinforces my theory that this Packard had a short and probably hard life. One thing that bears this out is the fact that the yoke ends on the brake rods and their associated clevis pins show remarkably little wear. Added to this it is really nice to work on the car as virtually all the original small components are still existing. I am able to re-use all four brake return springs and the special clevis pins designed to be used in conjunction with them. Earlier I talked about restoring the original brake light switch. Today I refitted it using the original (bath-plug) chain and spring to operate it. One thing that was causing some concern was my inability to find the pivot bolt used to mount the handbrake lever. I literally have a dozen or so containers all holding an assortment of nuts bolts and small fittings removed during the original dismantling. Finally this afternoon I emptied out one of the last containers and there it was, the missing hand brake pivot. While I cannot fit the lever until after the body is back securely bolted down onto the chassis it is good to know that it does still actually exist.The only things that I am not re-using the originals are the split pins securing all those clevis pins. I think that I can honestly say that EVERY nut and bolt on the car has been apart. Now they are going together again. However I am replacing those with rounded heads, have stripped threads or that are rusty beyond recovery. Those with slight surface rust are wire brushed totally clean before being evaluated as being re-usable or not.
All new bolts are (Grade 8) Hi-tensile, UNF.
10-19-2011
Hi Pat
The only reason most of us punish ourselves doing this work is because of the satisfaction of doing a job to the best of ones ability. Sometimes it is more successful that others. It can certainly stack up any number of frustrations but then look at the compensations.
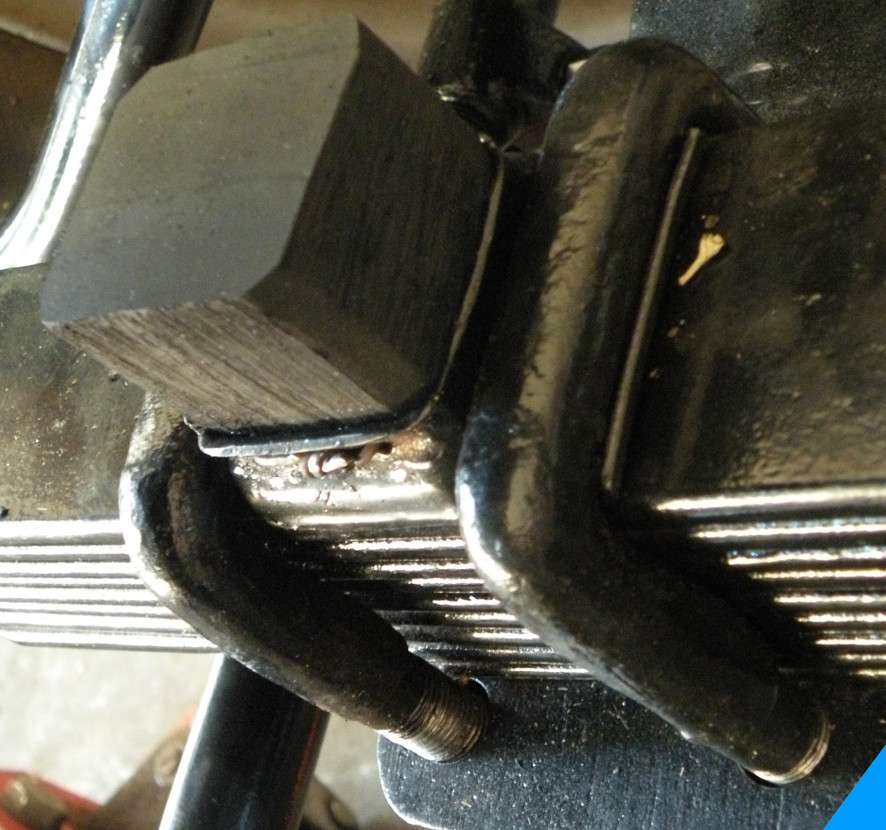
Today, attention moved to the front end. While I could buy the correct bump stop rubber buffers for the rear axle, the ones to suit the original mounting plates that were still on the front axle when I first dismantled the Packard were unavailable. I had been given some cast off samples of black hard rubber from a local rubber manufacturer and today was officially "National Bump Stop Rubber Buffer Day". This being so I got out my mounting plates and the rather large lump of black hard rubber. In a perfect world I would have simply cut out the required pieces on my band saw. Just one problem, a band saw is just one more essential tool that I don't have!
First attempt at cutting I used a cut-off disk in my angle grinder. All this produced was clouds of evil smelling smoke and a totally unsatisfactory cut. Next I tried a hacksaw but it quickly clogged up and jammed in a rather ragged cut. Finally I tried a carpenters wood saw treated with ample lubricant on both sides of the blade. While perhaps not perfect, the two rubber blocks that I cut were a snug fit into the original plates. In a perfect example of "belt and braces" I drilled two 1/8 holes through the plate and rubber block from side to side and threaded a length of tie-wire through to make doubly sure that they were not going to come adrift. In practice any any severe bump should put the rubber buffer into compression rather than dislodging it....
By a strange co-incidence It is also International Alemite Grease Connector Day so quite a bit of time has been spent sorting out the "connectors" that both Joe Puleo and David McC had sent to me. These are cleaning up nicely and one by one finding suitable homes around the various grease points. Together with the ones that I already had I now should have enough to cover all the grease points on the chassis. A big thank you to both.
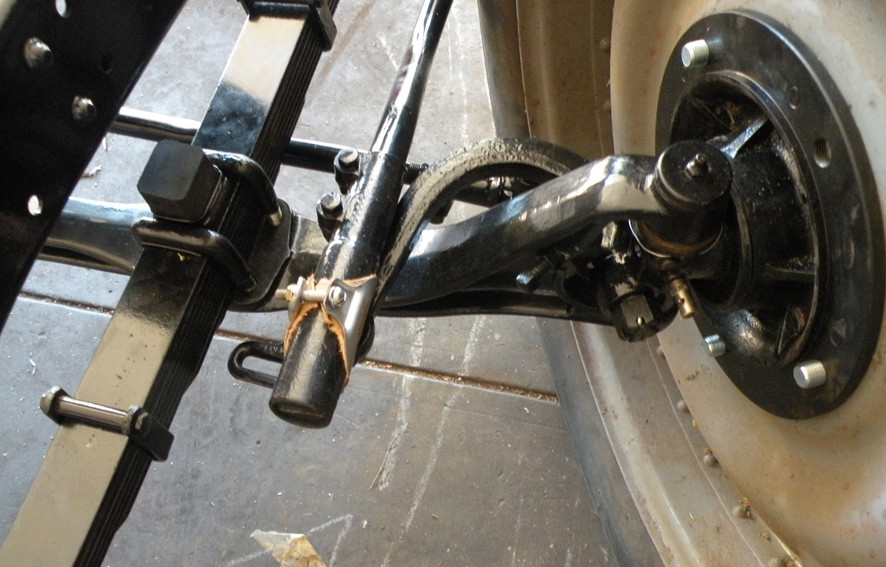
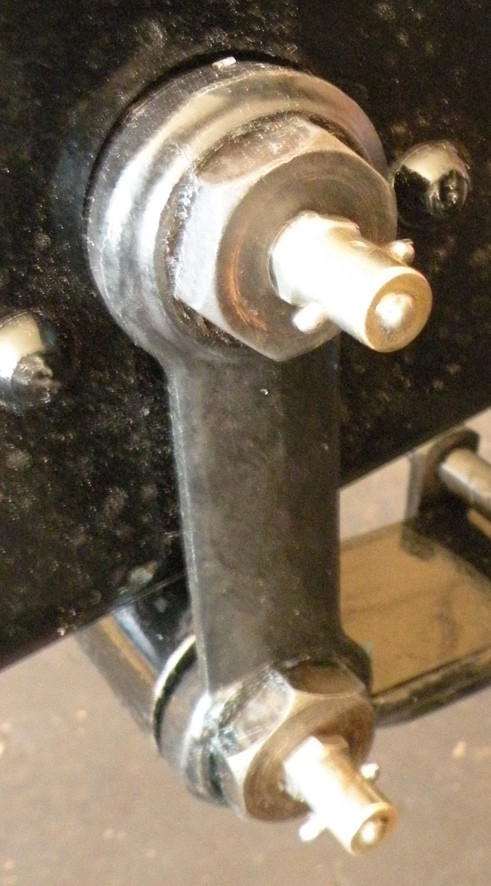
Watch out the "Gabrielle Snubber Day" is just around the corner........
Hi John
It has all four wheels on and is rolling. At present the wheels are secured by temporary bolts while the original bolts and "rings" are at the platers. You may have to wait a day or two until I have the engine & gearbox in the chassis for the "rolling chassis" photograph. I am currently waiting on the delivery of a 50 metre roll of webbing so I can complete the snubbers. That should come by courier today. I need to get the motor etc off its "transport" so that, that can be modified to go under the body before it is moved out to be painted. My extremely fussy painter says that he cannot achieve the sort of finish that he likes to work to with the body on the chassis.
Life does get complicated....
10-20-2011
Sorry! I hate to let all you folks down but there has been no work on the Packard today.
We have another driving event in the 1934 Lagonda Rapier on Sunday. As it has not been touched since parking it following the 437 mile Two-day Rally last month it was time that I gave it a good clean and check over. Not that I expect to find any problems. It was idling 50 to 100 rpm too fast so I wanted to adjust that. Check the oil and water levels etc. By running a program of regular maintenance any potential problems are "cut off at the pass". It is such an interesting (2ohc) engine it is a pleasure to work on it, Like any 77 year old it needs a little "TLC" from time to time.
As I have already explained to David in an e-mail, I have the remains of the original snubber straps complete with the brass interleaf. The webbing strap I have on order is a locally (Melbourne Australia) manufactured polyester material, mainly for Ratchet tie downs, used to secure loads on trucks and trailers. It has a far higher tensile strength than the original cotton, flax or hemp webbing and a much lower coefficient of friction so may not require the interleaf. The one I am getting is cost effective at about $1.00 per metre. RSC do offer a snubber belt that is the same width, 1.5 inch and thickness, 3/16 inch. They don't say what material theirs is made of but at $12.50+p&p per ft I can afford to do some trial and error. Theirs is brown, the one I intend to use is black. As with all their products RSC say repeatedly their's is "The Right Stuff".
They do not include the brass interleaf with their snubber belt.
10-21-2011
Hi All
Unimog John this one is for you.
Friday morning in the Jacobson household is set aside for shopping for our weeks provisions. After lunch while Helen went to her weekly Yoga Class I set about some exercise of a different kind. The main result of my labour is obvious, what you probably cannot see are the two rubber bump stops now mounted onto the frame over the rear axle or the two little umbrella shaped pressings that form part of the splash pans and cover the shackles at the rear of the front springs.(You can just see the left hand side one in the front view photograph.) These are the original factory parts. I have the right hand side splash pan but this still requires an hour or two's work before painting and fitting. Now the engine is back in the chassis I can cut a template for the left side pan and make, paint and fit it.
Having just taken delivery of a 8 metre length of 2" square tube, tomorrow I can start to cut out and weld the temporary frame to transport the body on.
By the time I change out of my "dirties" it will be time to go and pour our pre dinner drinks.
Cheers!
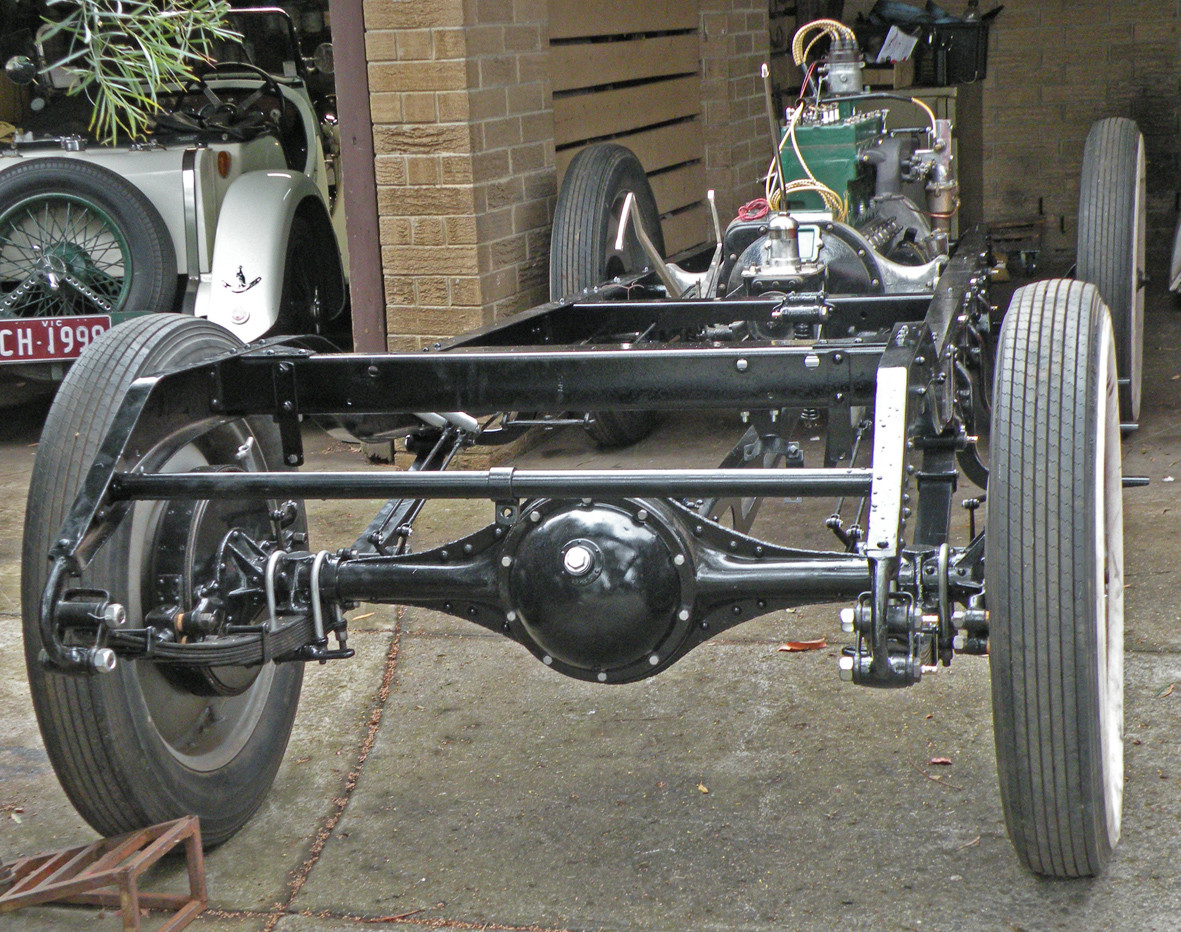
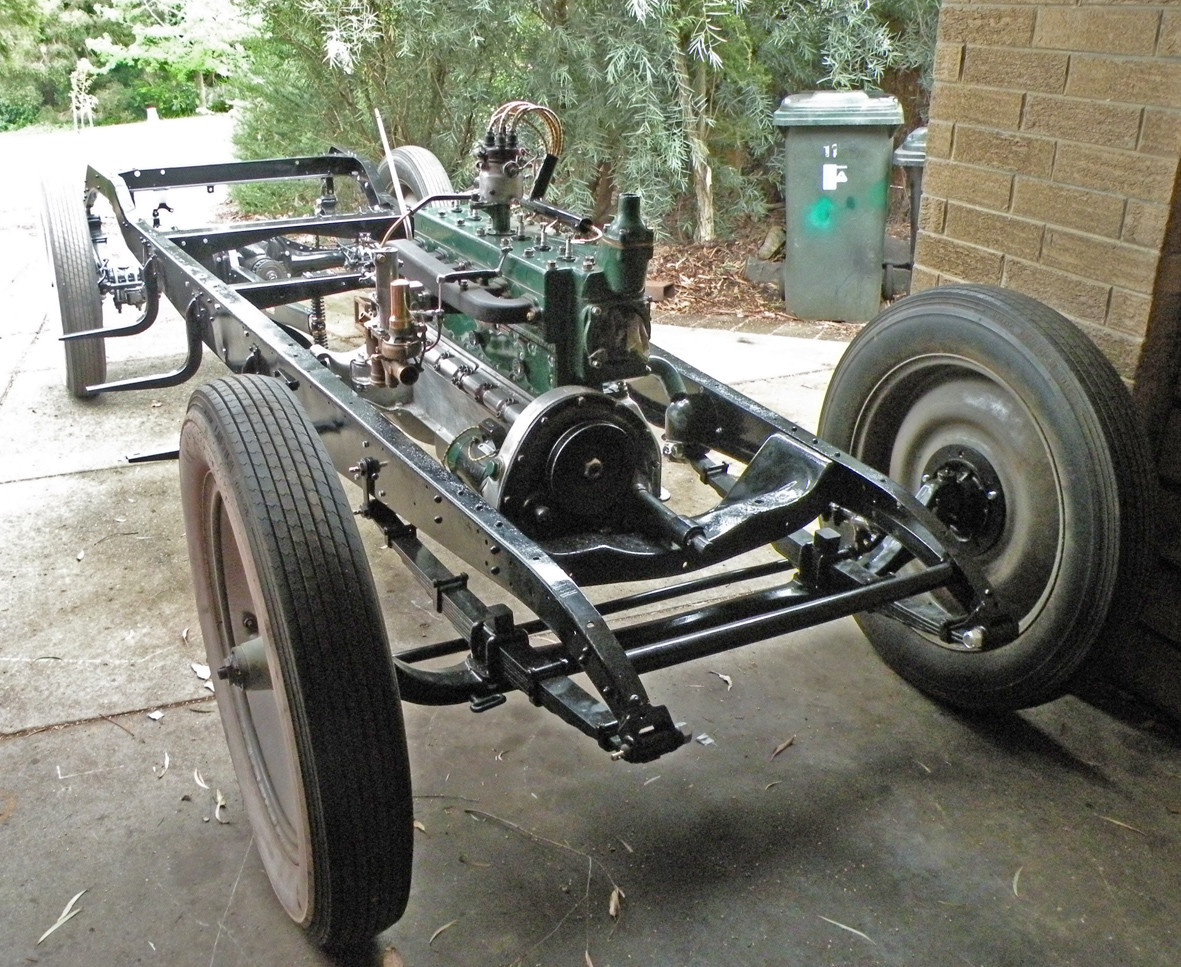
Hi Howard
Welcome to my thread. In reply to your question regarding leaf springs. Like you I totally dismantle each spring and wire brush them clean. I use a twisted wire rope 4 inch cup brush in my angle grinder. I find that this is much more aggressive than the wheel on my bench grinder. That is fine for cleaning threads on bolts and cleaning small parts. I give each individual leaf a coat of primer then fully assemble each spring before giving it a final coat of paint. I do not use any lubricant on the leaves.
10-23-2011
As Ben states it is possible lubricate springs but that doing so tends to make the ride too soft hence the need for shock absorbers in good condition. Springs rely on the friction between the leaves to control the movement of the axle. In the past on two or three occasions I have had springs repaired (new leaves inserted to replace broken ones)professionally. They were certainly not lubricated before delivery or any suggestion made that they should be greased or oiled either at the time of installation or during service. Almost without exception these were painted after assembly.
During the 1920s many racing cars had springs bound with cord to restrict movement. Ben Is also correct in saying many pre WW2 luxury cars particularly English makes used leather boots or "Gaiters" to enclose springs, mainly to exclude dust and mud. Some of these gaiters do have provision for greasing. Most of these expensive English cars also have double shock absorbers to help control excessive spring movement. In Howard's case to fully paint each spring leaf may be self defeating as unless the individual spring leaves were either baked or left for up to perhaps as much as two weeks for the paint to fully harden before assembly the paint may tend to cling to the leaves either side making the springs too stiff. In only giving each leaf a light coat of primer the sole purpose is to prevent the springs from rusting prior to assembly. I am neither an Automobile engineer nor a professional restorer but simply an enthusiast doing what experience has taught me. Squeaking is more likely to come from dry shackle bolts especially if fitted in conjunction with metal (bronze) bushes. Sometimes rubber or synthetic shackle bushes will squeak due to the presence of dust. This is more likely to occur with worn bushes.
Hello All
I am more than satisfied with the work that I have already carried out on my Packard's springs. They are now fully assembled and back on the car. I have no intention of taking them apart again or to change what has been my policy regarding the restoration of springs either now or into the future. Should anyone wish to continue this discussion may I respectfully suggest that there is possibly a more suitable location within the Forum to do so. As far as I am concerned I will be moving on with my restoration work on the Packard. Those who wish to follow its progress are welcome to do so and their comments are always welcome. I cannot see anything to be gained in pursuing what has become a rather abstract subject. What may be relevant to a 1941 Dodge, a 1935 Rolls Royce or some other vastly more sophisticated vehicle probably has very little to do with what I should have done or not done with my 1923 Packard. I am sure that there are any number of wild geese out there waiting to be pursued but I for one am to busy to be wasting time chasing them.
Thank you to all concerned for their interest and possibly helpful comments.

bravo!
Posted by CCmyVW on 1/26/20 @ 5:30:36 PM