You must be logged in to rate content!
4 minute read
Front Differential Removal
Compliments of BrandonS @ https://landroverforums.com
11-18-2012
Step #1: Place a drain pan under differential and remove the lower drain plug using a 1/2" wratchet or breaker bar. While waiting for it to drain remove your lugnuts and remove the wheel.
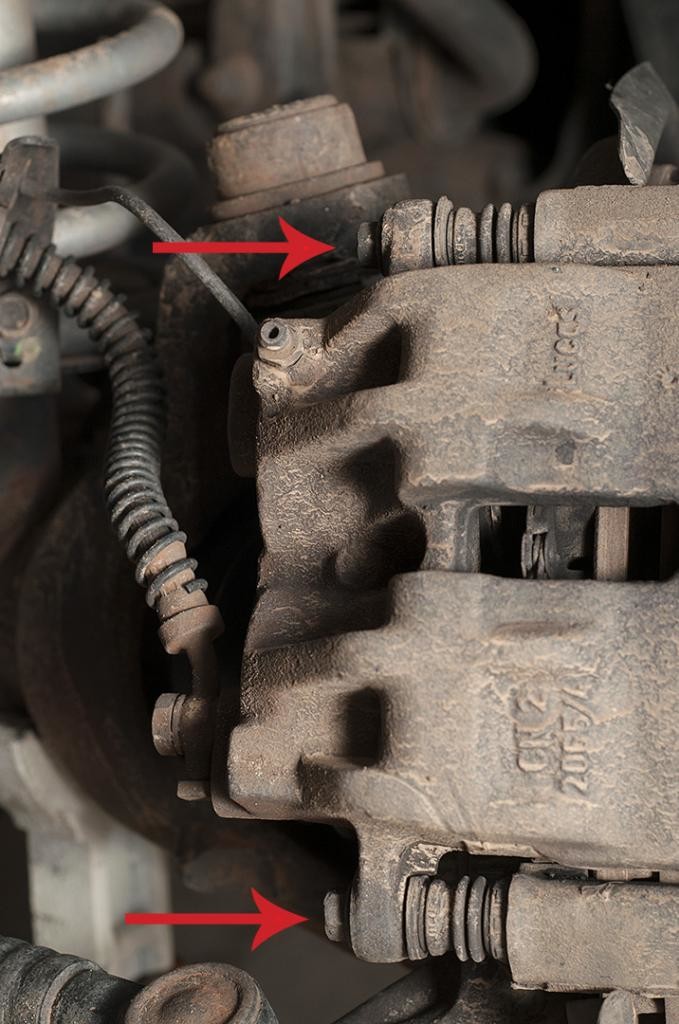
Step #2: Remove two bolts holding caliper onto bracket. Pull caliper back from bracket and once free hang out of the way. I hung mine on the suspension beam that runs from the rear of the vehicle forward. Remove brake pads from caliper bracket and set aside.
Step #3: Remove two 12-point bolts holding caliper bracket onto hub. Remove caliper bracket and set aside.
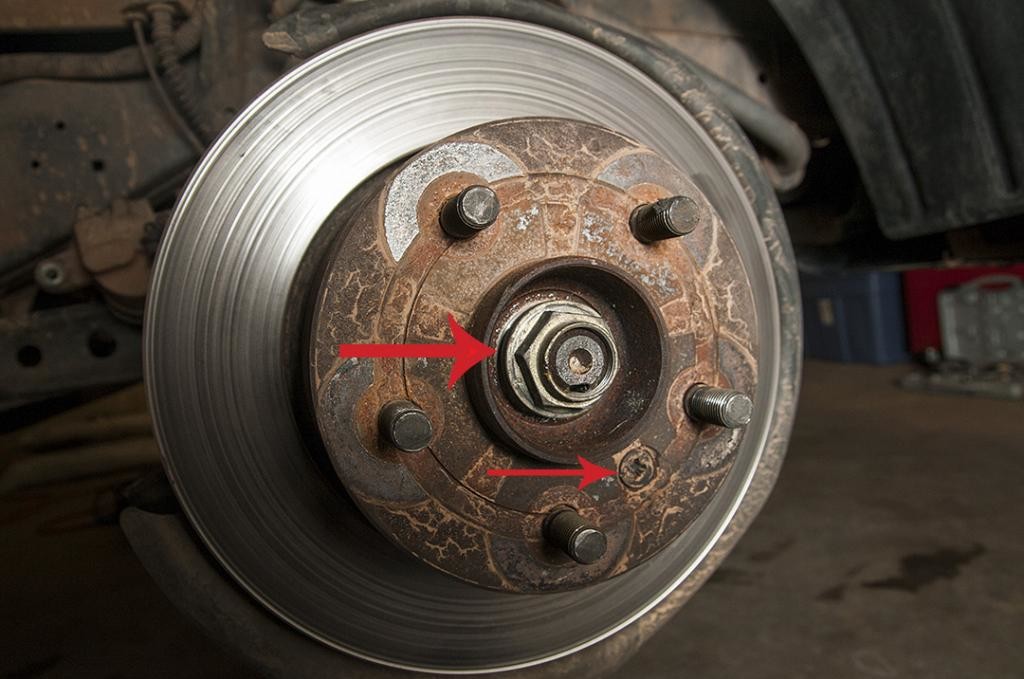
Step #4: Remove your rotor retaining screw. I ended up drilling this out on 3 out of 4 rotors on my vehicle. If your rotor looks like this you should get a new one. My caliper is frozen up a bit I believe. Leave the axle retaining nut (the big one) on unless you need to seperate your axle from the hub.
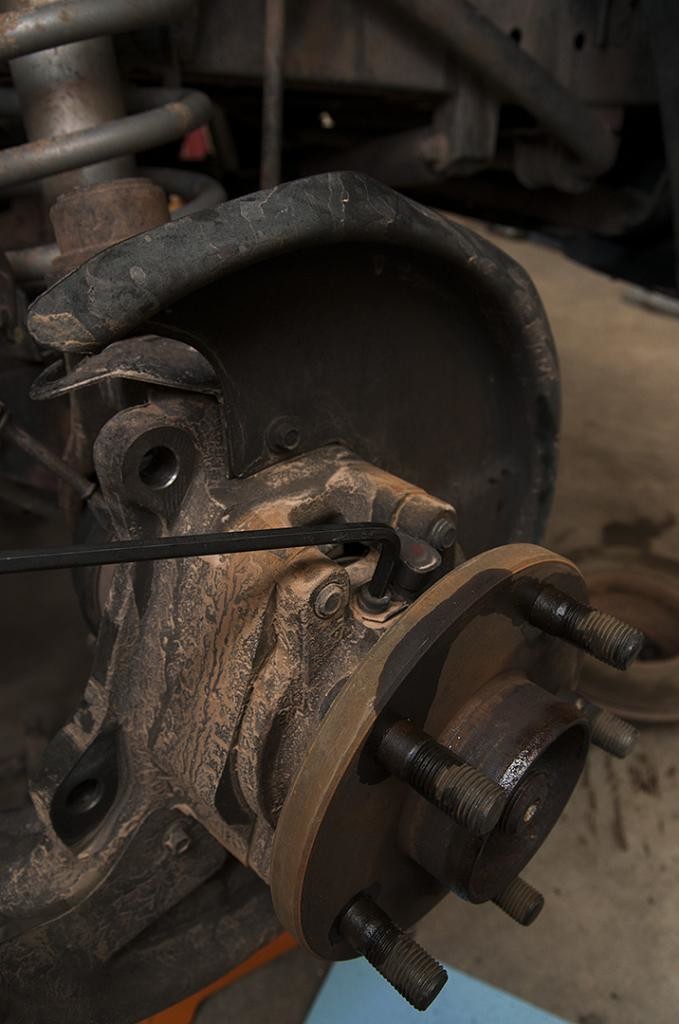
Step #5: Remove your wheel speed sensor retaining bolt with an allen wrench. Set the screw aside and remove the sensor from the hub and leave hang for now.
Step #6: Remove four bolts securing hub to axle. There are two front and two back. To create more room to work with use the steering wheel.
Step #7: Pull the sensor up and out of the way for the cv boot to clear it when removing the axle. Pull on the hub and the axle will come with it. It will be a tight fit, but the boot will clear your sensor and make it through the large hole.
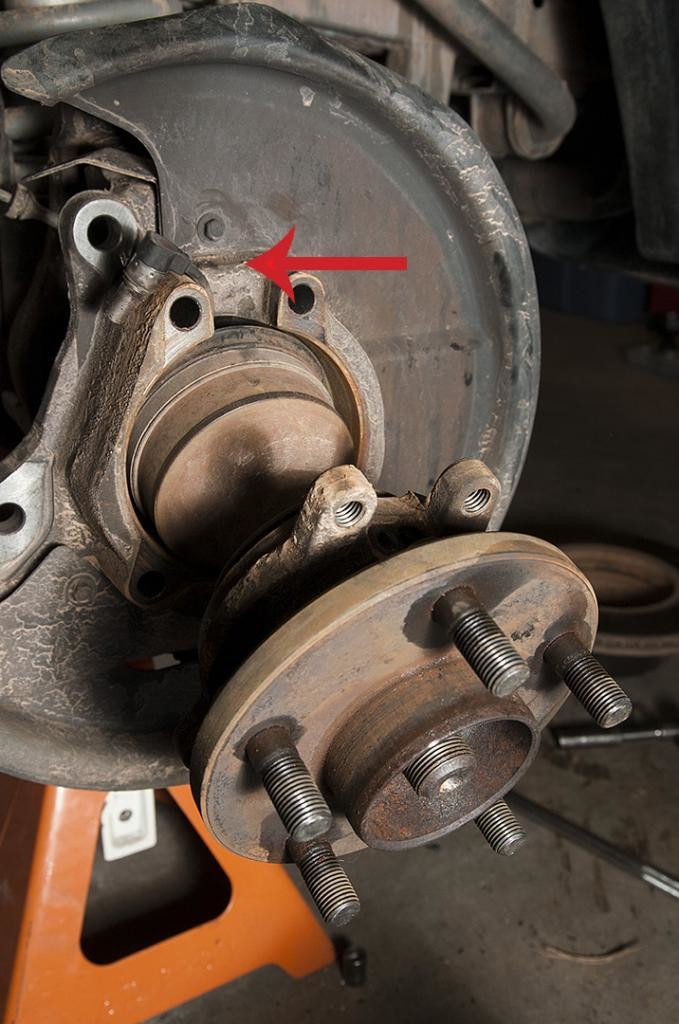
Step #8: Inspect the inside for signs of leakage. If your seal is leaking it will puddle up or create a stain where the arrow in the picture is pointing. If you have signs of a leak, before reassembly replace the axle seal.
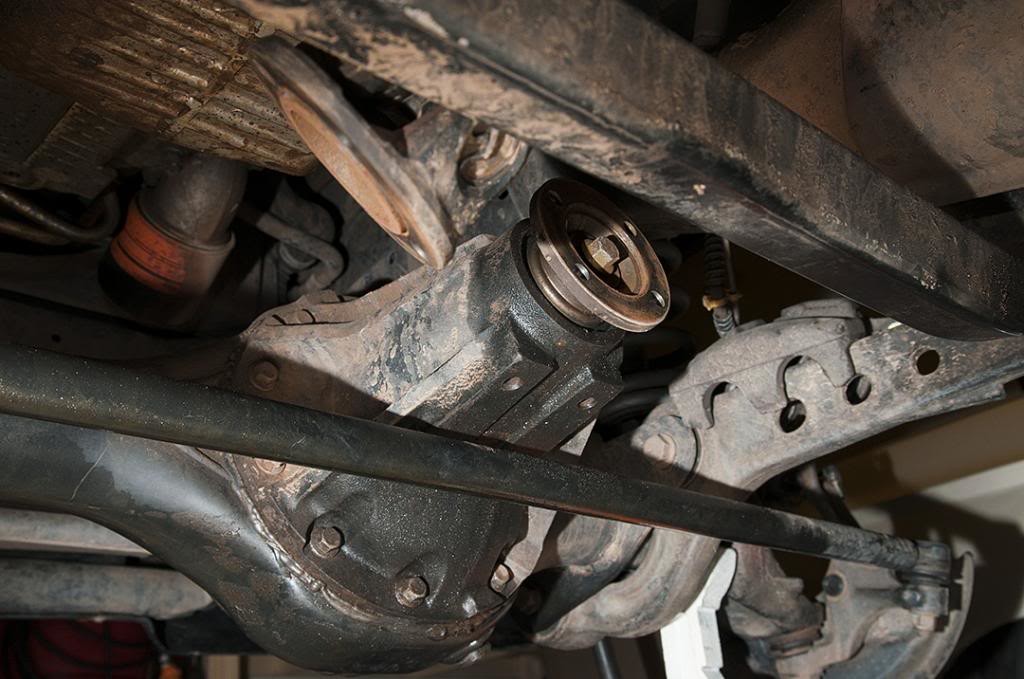
Step #9: Climb underneath the vehicle and remove 4 bolts securing your propshaft to the input of your differential. Once removed you can simply swing your propshaft towards the center of the vehicle out of the way. Inspect your differential input area for a leak. In the picture you below you can see mine is leaking from that area.
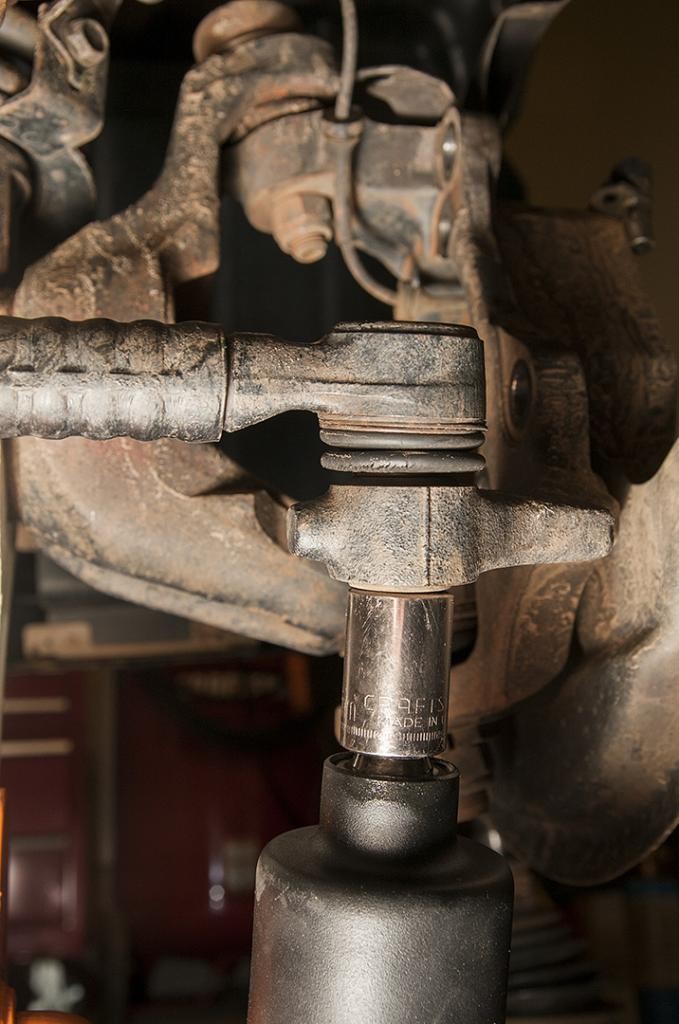
Step #11: Remove the passenger side nut for the long tie rod bar going from the driver's side to this side. Once removed pop the tie rod out and swing the entire bar over to the driver's side. This needs removed because the differential won't clear it when you go to remove it.
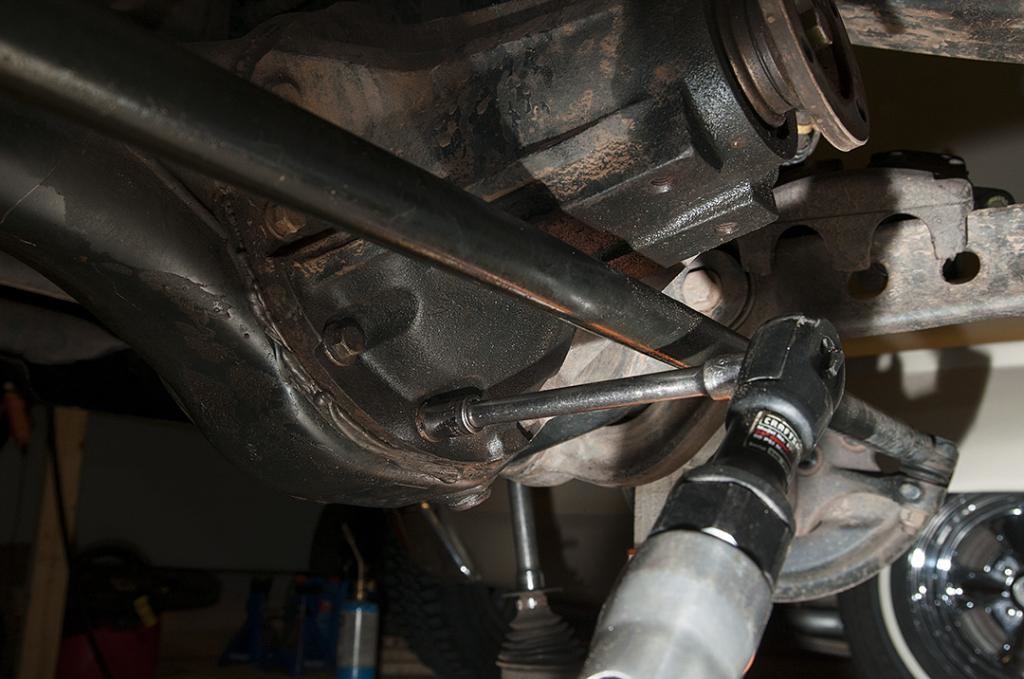
Step #12: Remove all the bolts securing the differential assembly to the axle housing. If you did step #11 before me, you will have the convenience of the bar not being in the way. Once all bolts are removed, break the sealant bond and pull straight out. Be careful as it's slightly heavy.


Great DIY!
Posted by Diggymart on 1/23/20 @ 8:08:53 PM