You must be logged in to rate content!
7 minute(s) of a 94 minute read
8-5-2014
Isabel's West Coast Sister
Compliments of relentless @ http://classiccougarcommunity.com
8-5-2014
Ever since I saw 1969XR7Vert's Isabel I have been wanting a similar car. As luck would have it, one appeared locally and I jumped on it. I posted a few pictures of it in another thread a week or so ago. In anticipation of the car's arrival, I ordered a set of Foose 105 rims and tires the same size as Robert has on Isabel. I also opened up my wallet and ordered miscellaneous parts that I knew were missing, like the air cleaner, Cougar badges, window winders, and the list goes on and on.
I took delivery of the car last Friday as the mechanic who went through it brought it out on his car hauler. I spoke with the mechanic and he told me that the 625cfm Barry Grant Demon carburetor was badly gummed up and he wasn't able to get the inner passageways clear enough for the car to run, so the seller decided to put a brand new 625BG carb on the engine. The mechanic said he started the car, but that the gas was really bad. I decided that rather than start the car I would do a complete gas cleanout.
So I towed the car into my yard and proceeded to wash it, as it had been sitting outside and the paint was dirty. I was careful with the water as the windows were down and pretty much unattached. I noticed when washing the car that the bumpers were loose and barely on, the rear backup lights were just set in place, and other parts had just been stuck on without fasteners to make the car look more or less complete. The front hood scoop had been removed for the transport to my house, and it only had two holes in the hood to mount it. In other words, this wouldn't be a quick turnaround to get the car finished.
The next day I towed the car into my big shop and gave the paint a good wax job. I have always been partial to Turtle's One Step Color Back, so that is what I applied. I took note of where several paint chips were located. The seller had given me the paint cans from the paint job and I am hoping that the paint might still be OK to fill in the chipped areas. We shall see.
I then jacked the rear tires up and drained the gas, which smelled like turpentine. I shook my head thinking that the mechanic had started the car with this junk gas. I flushed a quart of fresh gas in the tank and let it drain out with the old. I blew out the lines running from the tank to the fuel pump, the lines from the pump to the carb, and also drained the float chambers. I sprayed some carb cleaner in the lines and blew them out again until the fluid looked clear coming out of the carb drains for the floats. I checked the radiator and found it to be a half gallon low, so I topped it up. I also checked the oil and saw it was overfilled, but the oil was clean as a whistle.
After buttoning everything up, I poured three gallons of ethenol-free gas into the tank. Then I took the float needle out and carefully poured fresh gas into the float bowl. Since the engine was basically brand new I didn't want to grind away on the starter while the engine pulled gas from the tank to the carb. I sprayed a little ether into the carb and the engine fired right up. The engine really sounded beefy and it was a pleasure to hear that 408 run! It died after 30 seconds, so I again filled the float chambers with fresh gas. It started right up and this time I ran the engine for 10-15 minutes. I let the engine cool down and tried starting it again. It would start with some ether but would quickly die, so I have to troubleshoot to see why the engine isn't getting gas.
While I wait for a set of manuals to arrive, I am trying to figure out where some of the parts I still have to install go. The seller gave me three boxes of parts and cautioned me that some of the parts could very well have come off another vintage muscle car. So let's have a pop quiz and see who can identify these parts!
A. What is this and where does it go? 
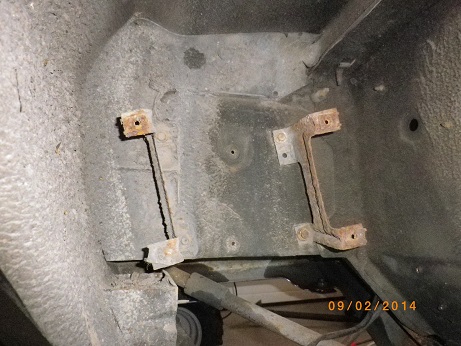
B. What are these brackets and where do they go?
C. What is this used for and where does it go?
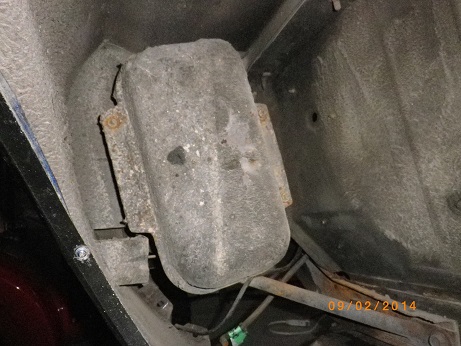
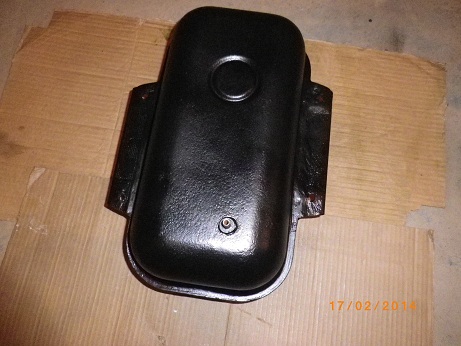
D. Is this the vacuum cannister for the headlights? Does it mount in the engine bay on the passenger side by the hood hinge?
E. Are these front disc brake guards?
Here are some parts that were in the trunk.
Here are a few pictures of the car after I did some cleaning.


The front bumper turned out nice after polishing it with Turtle Chrome Polish and Rust Remover. 

I was disappointed that the PO didn't put some rubber stripping between the hood scoop and the hood. You can see the scratches that resulted.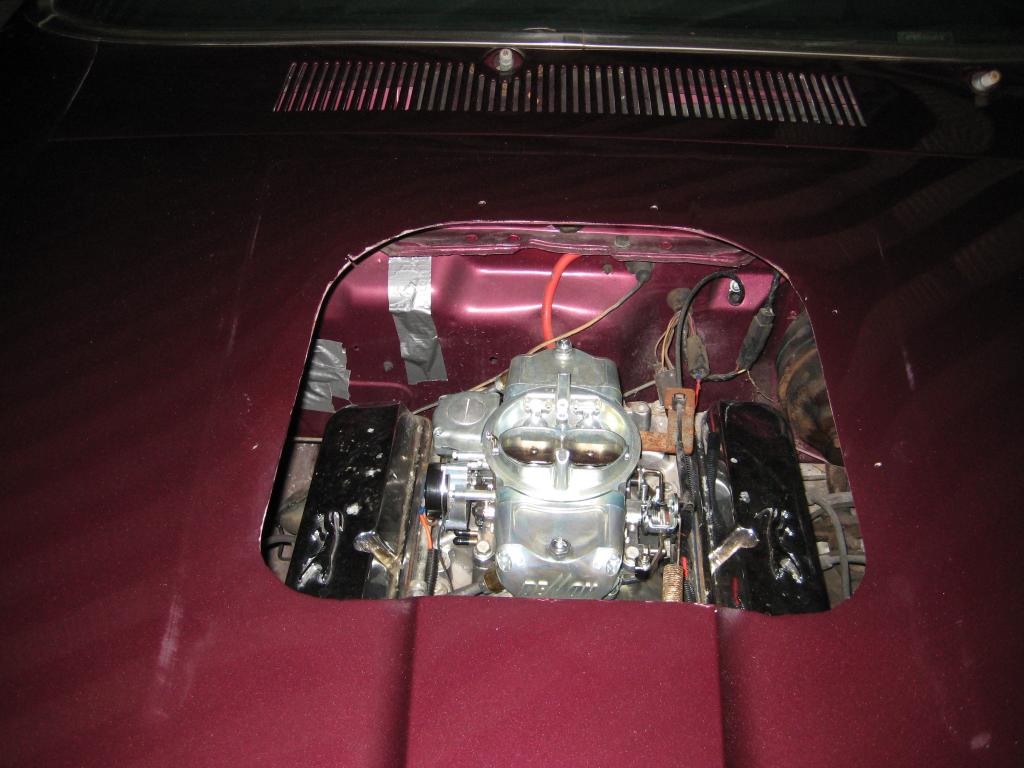
D. Is this the vacuum cannister for the headlights? Does it mount in the engine bay on the passenger side by the hood hinge?
Congrats and have fun!
That sure is the vac cannister. On 1970, it mounts under the driver side fender, behing headlights.
See pics that were taken before I removed it to repaint.

Nice!
Posted by Diggymart on 3/30/20 @ 5:44:33 PM